bitbox - Electronic musical instrument 1010music - Free user manual and instructions
Find the device manual for free bitbox 1010music in PDF.


| Product type | Sampler module for Eurorack modular system |
| Brand | 1010music |
| Model | Bitbox |
| Category | Electronic musical instrument |
| Main functions | Sample playback and capture, recording, MIDI and CV synchronization, export to Ableton Live |
| Screen | Touch screen for selecting cells and navigating |
| Storage | MicroSD card (not included) for clips and settings |
| Inputs | Audio inputs IN1 and IN2, CV/gate and MIDI inputs |
| Outputs | Audio outputs OUT1 and OUT2, CV/gate and MIDI outputs |
| Synchronization | Internal clock, CLOCK input/output, MIDI synchronization |
| Controls | INFO, HOME buttons, 4 contextual control buttons and encoders |
| Effects | Integrated FX1 and FX2 processors |
| Clip management | Clip tracks, presets and cellular modulation |
| Export | Export of a set to Ableton Live via MicroSD card |
| Power supply | Standard Eurorack power supply +12V / -12V via ribbon cable |
| Power consumption | +12V: 200 mA; -12V: 50 mA (estimated) |
| Dimensions | Width: 20 HP (101.6 mm); Depth: approx. 25 mm |
| Weight | Approx. 150 g (estimated) |
| Maintenance and cleaning | Wipe the screen and housing with a soft, dry cloth. Do not use solvents. |
| Safety | Use only with a compliant Eurorack power supply. Do not expose to moisture. Disconnect before any maintenance. |
| Spare parts and repairability | Removable MicroSD card. For any repair, contact 1010music technical support. |
| General information | User manual available online on the manufacturer's website. Firmware update via MicroSD card. |
| Included accessories | MicroSD card preloaded with demo clips |
Frequently Asked Questions - bitbox 1010music
User questions about bitbox 1010music
0 question about this device. Answer the ones you know or ask your own.
Ask a new question about this device
Download the instructions for your Electronic musical instrument in PDF format for free! Find your manual bitbox - 1010music and take your electronic device back in hand. On this page are published all the documents necessary for the use of your device. bitbox by 1010music.
USER MANUAL bitbox 1010music
Bitbox User's Manual

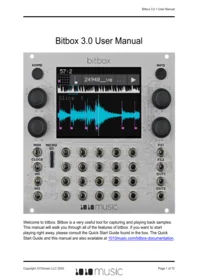
Welcome to bitbox. Bitbox is a very useful tool for capturing and playing back samples. This manual will walk you through all of the features of bitbox. If you want to start playing right away, please consult the Quick Start Guide found in the box. The Quick Start Guide and this manual are also available on the 1010music.com Support page.
Table of Contents
Overview 2
The MicroSD Card 3
Working with Clips 3
Playing a Clip 3
Clip Information 3
Clip Actions 4
More Clip Information 5
Load clip files from a microSD card 6
Record a clip 6
Synchronize Clips with CLOCKS or MIDI Inputs 7
Modulating Cells 7
Working with Presets and Saving Your Work 8
Working with Tracks 8
Export a Set to Ableton Live 9
Switch to a New MicroSD Card While Operating Bitbox 10
Demonstration Videos and Latest Docs 10
Contact Us 10
Overview
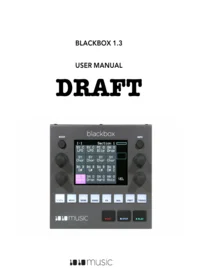
The diagram below identifies the components of bitbox. This manual will refer to the controls and inputs of the module using the labels shown.

Bitbox is equipped with a touchscreen. You can touch cells in the grid on the screen to select them, and touch on-screen buttons to take an action.
The INFO and HOME buttons at the top of the front panel of bitbox are used to navigate the screens. Press INFO to view the information screen for the current selection. In some cases, you can press INFO more than once to get to deeper information. The HOME button generally takes you back a screen. If you get lost, you can press HOME until you get back to the Main screen.
The Control Knobs are used to cycle through options on the screen. When there are several parameters on the screen, use the Control Knob closest to a parameter to set its value.
The MicroSD Card
Bitbox uses a MicroSD card to store clips and clip parameter information. A MicroSD card must be inserted into the MicroSD slot on the front panel of the bitbox during operation of the module. A MicroSD card loaded with some sample clips is included with bitbox. Insert the MicroSD card with the notched edge down.
Working with Clips
When you first start bitbox, you will see the Main screen. Each square or cell represents a clip that can be played back. Clips can be loaded from the MicroSD Card or recorded from inputs. The MicroSD card provided with the module has several Preset banks of clips to get you started.
The pink square indicates which cell is selected. You can change the selection two ways: by touching the cell or by turning any of the
Control Knobs.
| 105:1 | ||||
| TOML1.wa | TOMF1.wa | Cowb1.wa | Tamb1.wa | |
| Cras1.wa | Ride1.wa | TOMH1.wa | TOMM1.wa | |
| Kick1.wa | Snar1.wa | HHC1.wa | HHO1.wa | |
Playing a Clip
There are three ways to trigger playback of a clip:
- Touch a cell to play the corresponding clip. The light grey colored cells in the grid hold clips. The name of the clip appears in the cell after it is loaded. Blank cells are empty.
- Plug a trigger source into one of the CV Trigger jacks. The CV Trigger jacks are mapped to the clip cells on the touchscreen. The clip that corresponds to the used CV Trigger jack will now be triggered by the CV Trigger input.
- Plug a MIDI controller source into the MIDI input jack.
Note:
- The MIDI input uses a TRS connection compatible with the Arturia BeatStep Pro. Be sure to use a TRS cable.
- Bitbox responds to MIDI inputs on MIDI Channel 10, which is the default channel for the drum part on the BeatStep Pro.
- MIDI inputs for notes 36 to 51 are mapped to the clips in the grid as shown in the diagram to the right. The modulators are assigned notes 52 to 55.
| 48 | 49 | 50 | 51 | 55 |
| 44 | 45 | 46 | 47 | 54 |
| 40 | 41 | 42 | 43 | 53 |
| 36 | 37 | 38 | 39 | 52 |
Clip Information
To adjust the selected clip's parameters, press the INFO button. Cells with text in them already have a clip loaded. When you press INFO with a loaded cell selected, you will see the Clip Info screen shown to the right.
| 24:1 | |||
| Del | More | Play | |
| Start:0.00% | Mode:Trigger | ||
| Length:100.00% | Level:+6.72 dB | ||
On this screen you can adjust each of the four parameters by turning the Control Knob closest to the parameter on the screen:
Start Together with Length, controls what portion of the sample will play. Start is expressed as a percentage of the entire sample length and designates the position in the clip where playback will begin.
Length Together with Start, controls what portion of the sample will play. Length is expressed in percentage of the entire sample length and designates what percentage of the clip after the Start position will be played. The Length parameter also controls the loop length. See the Loop parameter on the More Clip Info screen.
Mode This parameter determines how the sample will playback with four different settings:
Trigger Activate the clip by touching the cell, through a CV Trigger, or through MIDI note on. Bitbox will start playback of the clip according to the Quant Size (see More Clip Information below) and play through to completion. The release has no effect.
Gate Begin the clip playback in the same manner as Trigger mode. But in Gate mode, playback will stop when you release the touch, the CV Trigger gate goes low, or the MIDI note is released.
Toggle Begin the clip playback in the same manner as Trigger mode. When these events happen again, the playback will stop.
Repeat Begin the cell playback in the same manner as Trigger mode. The playback will restart at the Quant Size interval while the cell is held down or activated. Releasing or deactivating the cell allows playback to continue to completion of the clip.
Level This parameter sets the gain for the cell and ranges from -96dB to +12dB. At the default value of 0dB the volume remains unchanged.
Clip Actions
The Clip Info screen has several action buttons across the top. Touching these on-screen buttons will do the following:
Del Delete this sample from this cell. The file on the MicroSD card remains. This particular cell will now be empty. Pressing this button will return you to the Main screen
More View additional parameters for this clip on the More Clip Info screen. Pressing INFO will do the same thing.
Play Trigger the clip playback just like touching the cell on the Main screen does.
More Clip Information
To see additional parameters from the Clip Info screen, touch the on-screen More button or press the INFO button. You will then see the More Clip Info screen shown on the right.
On the More Clip Info screen you can adjust each of the four parameters by turning the Control Knob closest to the parameter on the screen:
| 27:1 | |||
| Play | |||
| Loop Mode: OFF | Quant Size: None | ||
| Pitch: +0.000 sem | Slice Size: None | ||
Loop Mode With Loop Mode ON, playback will continue to repeat the portion of the sample specified by the Start and Length parameters on the Clip Info screen.
Pitch This parameter adjusts the tone and the playback speed of the sample--unless you are using slicing. It is expressed in semitones and ranges from -24 semitones (down two octaves) to +24 semitones (up two octaves).
Quant Size This parameter enables you to quantize when the playback starts and stops. It has the following values available:
• None - always start and stop immediately
• 1/16 - quantize to the next sixteenth note time
• 1/8 - eighth note
• 1/4 - quarter note
• 1/2 - half note
• 1 bar - a whole note assuming 4/4 time
- 2 bars
4 bars
- 8 bars
Example: With the quant time set to 1 bar, samples will start and stop when the next bar or measure begins. You can see the current bar and beat in the upper left of most screens.
Slice Size When this parameter is enabled, bitbox will subdivide the sample into pieces that will play in sync with the clock. The available values are the same units as the Quant Size. For drum samples, small values like 1/8 or 1/16 work best. For drones or pads, larger numbers like 1 bar may sound best. This parameter is only valid when Quant Size is something besides None.
Load clip files from a microSD card
You can use the microSD card to load clips into bitbox from other sources.
- Use your laptop or other device to load clips in WAV format into the root folder of a microSD card.
- Insert the microSD card into the MICRO SD slot, notched edge down.
- Press HOME until you get to the Main screen.
- Touch an empty, light colored cell in the grid on the touchscreen to select it.
- Press the INFO button to display the Clip Info screen and then touch the on-screen Load button. A list of clips on the MicroSD card will be displayed, similar to the screen on the right.
- Use any of the Control Knobs to select a WAV file from the list that appears on the touchscreen. To cancel, press the HOME button.
- Touch Load again. You will see the Main screen with the selected clip loaded into the selected cell.

Record a clip
You can use the IN1 and IN2 input jacks to record in mono or stereo.
- Press HOME until you get to the Main screen.
- Touch an empty, light colored cell in the grid on the touchscreen to select it. You can delete a clip (see
Clip Actions above) to create an empty cell if needed.
- Press the INFO button to display the Record screen shown to the right.
- Plug the recording source into the IN1 or IN2 jack.
- The source will play through the corresponding output jack, OUT1 or OUT2.
- Turn the Control Knob closest to each of the following parameters to select a value:

Input This parameter lets you select stereo or mono recording. The available values are as follows:
• In 1/2 Record in Stereo from input jacks IN1 and IN2.
• In 1 Record mono from input jack IN1.
• In 2 Record mono from input jack IN2.
Rec Quant This parameter lets you quantize the recording starting and stopping for making loops. The available values are:
• None - always start and stop immediately
• 1/16 - quantize to the next sixteenth note time
• 1/8 - eighth note
• 1/4 - quarter note
• 1/2 - half note
• 1 bar - a whole note assuming 4/4 time
- 2 bars
- 4 bars
- 8 bars
The In1 and In2 values display the levels of each of the input signals. For best results leave some room (a few dB) between your loudest level and the max allowed, which is 0dB.
- Touch the on-screen Rec button. Bitbox will start recording. The timing of the recording can be synchronized with other modules by using the Rec Quant parameter setting with a MIDI or CLOCK input. (See Synchronize Clips with CLOCKS or MIDI Inputs below.)
- Touch the on-screen Stop button. The recording will end.
- Press the HOME button to return to the Main screen.
Synchronize Clips with CLOCKS or MIDI Inputs
To synchronize the playback of clips with a clock signal, a MIDI clock source or the internal clock, follow these steps:
- Use the Clip Info and More Clip Info screens to set the Trigger and other parameters for the cell. Bitbox synchronizes clips when Quant Size is set to something other than None, such as Quant Size: 1 bar.
- Plug a clock source into the CLOCK jack or a MIDI clock source into the MIDI jack. You should hear all clips play synchronized with the CLOCK input or MIDI signal, according to the parameters set up for each clip.
Note:
■ The Clock input must use 4 pulses per quarter (PPQs), or a pulse per 16 th note.
- If MIDI and CLOCK inputs are used together, Bitbox will select the highest priority clock based on the following order of priority: 1.) CLOCK Input; 2.) MIDI Input; 3.) Internal Clock.
Modulating Cells
The dark gray cells on the rightmost column of the Main screen work differently from the other 16 cells. These cells are used to control modulation of the row of cells to the right of the modulation cell. These modulation cells work with the CV Modulator input jacks below the screen. To adjust modulation, select a dark gray cell and press INFO to display the Mod Cell screen shown to the right.
Use the Control Knobs to adjust the three parameters on the Mod Cell screen:
| Mod:Scene Trig | Dest:1,1 | ||
| Amount:100.00% | |||
Mod This selects the type of modulation for the corresponding row of cells. The values include:
Scene Trig Triggering this modulation with the CV Modulator input will trigger the entire row of cells at once. This is similar to the Scene Triggers in Ableton Live.
Pitch Use the CV Modulator input to modulate the pitch of the Destination cell specified in the Dest parameter.
Start Modulate the initial play position in the sample for the Destination cell.
Length Modulate the playback length for the Destination cell.
Dest This parameter specifies the destination cell that is the target of the Pitch, Start, and Length modulation. It is expressed in Row, Column format as shown to the right. Note that 1,1 is in the lower left corner, and 4,4 is in the upper right.
| 4,1 | 4,2 | 4,3 | 4,4 | |
| 3,1 | 3,2 | 3,3 | 3,4 | |
| 2,1 | 2,2 | 2,3 | 2,4 | |
| 1,1 | 1,2 | 1,3 | 1,4 |
Working with Presets and Saving Your Work
Bitbox allows you to store multiple configurations of clips and parameter settings as Presets. You can save up to 12 different banks of Presets. When you first start using bitbox, you are using Preset 1. The MicroSD card that comes with bitbox has 7 Presets pre-loaded.
To switch to using a different Preset, press the HOME button repeatedly until you get to the Menu screen shown on the right.

To load a Preset, touch the Presets button. This will lead to the Presets screen shown below.
| Bank 1 | |||
| 9 | 10 | 11 | 12 |
| 5 | 6 | 7 | 8 |
| 1 | 2 | 3 | 4 |
To load a Preset, press the number of the Preset you would like to load. You will then be taken to the Main screen. This will load the following information that was previously saved for this Preset:
For each clip cell For each modulation cell For each track
the sample assignment and all parameters the parameters and destination cell all track parameters
Presets are automatically saved on the microSD card as you work. If you change to a different card, you will have a different set of Presets. When you switch to a different Preset, all previous settings will be replaced with the settings of the newly selected Preset, which may be blank.
NOTE
- Presets are saved automatically in the background. You don't need to worry about saving your changes whenever you adjust something.
- It can take up to 10 seconds for the most current state to be written to the microSD card.
Working with Tracks
To access the Track Properties screen, press the HOME button repeatedly to return to the Menu screen and press Tracks. You will see the Track Selection screen shown to the right.

Select the active Track by touching the column on the screen. The pink column indicates the selected Track. A Track is a vertical column of clip cells on the Main screen. The cells in each Track share certain parameters. To adjust these parameters, press the INFO button to see the Track Info screen for the selected track:
| Exclusive: OFF | Level: +0.00 dB | ||
| Output: Out 1/2 | |||
Turn the Control Knob next to each of the following Track parameters to select a setting:
Exclusive This mode ensures that only one cell in a Track can play back at the same time. If this is set to ON, when you start a second cell on a track, the first one will stop. When this mode is ON, tracks behave like they do in Ableton Live.
Level This gain control affects the entire Track.
Output This parameter determines which output the Track will play through. The available options are:
Out 1/2 Plays to output jacks OUT1 and OUT2
FX 1 Plays to output jack FX1
FX 2 Plays to output jack FX2
NOTE
The FX outputs are a convenient way to apply different effects to different Tracks.
Export a Set to Ableton Live
Bitbox files are compatible with Ableton Live. Follow these steps to export them:
- Press HOME until you see the Menu screen containing three buttons: Main, Presets and Tracks.
- Touch the on-screen Preset button. You will see a 4x3 grid of numbers 1 through 12 representing the presets.
- Touch one of the on-screen Preset number buttons to load the Preset. You will now see the Main screen with the selected preset loaded. This will ensure that your files are saved to the MicroSD card.
-
Remove the microSD card and connect it to your computer.
-
Double click or open the SE000001.als and similar files to open your set in Ableton Live.
- For best results, use the Save As option as well as the Collect and Save menu item to migrate the relevant WAV files onto your machine and into the customary Ableton directory structure.
Switch to a New MicroSD Card While Operating Bitbox
You can switch to a different microSD card while operating bitbox. Simply remove the current card and new one, then follow the steps in
Working with Presets above to select a Preset bank from the new card.
Demonstration Videos and Latest Docs
You can find video demonstrations of bitbox on our website at http://1010music.com/support. You can also look there for updated versions of this user manual.
Contact Us
Are you loving bitbox? Have questions? You can contact us through our website at http://1010music.com/contact-us.
- BITBOX USER'S MANUAL
- TABLE OF CONTENTS
- OVERVIEW
- THE MICROSD CARD
- WORKING WITH CLIPS
- WORKING WITH PRESETS AND SAVING YOUR WORK
- WORKING WITH TRACKS
- EXPORT A SET TO ABLETON LIVE
- SWITCH TO A NEW MICROSD CARD WHILE OPERATING BITBOX
- DEMONSTRATION VIDEOS AND LATEST DOCS
- CONTACT US
- CONTROL KNOBS
- PLAYING A CLIP
- CLIP INFORMATION
- CLIP ACTIONS
- MORE CLIP INFORMATION
- LOAD CLIP FILES FROM A MICROSD CARD
- RECORD A CLIP
- SYNCHRONIZE CLIPS WITH CLOCKS OR MIDI INPUTS
- MODULATING CELLS
- NOTE
Brand : 1010music
Model : bitbox
Category : Electronic musical instrument