GENESYS G3D - Audio Mixer AMS Neve - Free user manual and instructions
Find the device manual for free GENESYS G3D AMS Neve in PDF.


| Product Type | Professional Digital Mixing Console with Dolby Atmos integration |
| Brand | AMS Neve |
| Model | GENESYS G3D |
| Category | Audio Mixer |
| Main Features | Remote control of up to 118 audio objects in Dolby Atmos; 3D object panning; integrated loudspeaker control; dedicated renderer controls |
| Dolby Atmos Integration | Works as a remote client for the Dolby Atmos Renderer; supports object metadata control |
| Object Control Modes | Mono and stereo object acquisition; acquire/release all objects; 118 objects on the network |
| 3D Panning Controls | Touchscreen, encoder control, combination control, and manual coordinate entry for LCR, Front/Back, Height, and Size |
| Elevation Shapes | AutoMan, AutoWedge, AutoSphere, AutoCeiling for automatic/manual height control |
| Stereo Mirroring | Mirror X, Mirror Y, Mirror X/Y, or None for stereo object panning |
| Loudspeaker Control | Cut, Solo, custom group selection, fixed groups (LCR, Surrounds, Heights), momentary solo |
| Loudspeaker Layouts | 7.1.4, 9.1.4, and 9.1.6 surround layouts |
| Digital-to-Analog Conversion | Via external StarNet ADA16 with 16 analog output channels |
| Connectivity | LAN network, HUI/DAW control protocol, IP address setup (e.g., 10.10.251.001) |
| Dedicated Renderer Controls | 3D, LS, I/P, MAST, REC, DIM, MUTE, BED, OBJ soft switches |
| Monitoring | New 3D monitor level option for remote renderer attenuation; lock monitor level function |
| Plugin Integration | Genesys Control Plugin (v2.1+) with Object Automation; supports channel/object mapping |
| Power Supply | Universal mains input (100–240V AC, 50/60Hz) – typical professional standard |
| Dimensions (Approx.) | Main console: 1600 mm width × 700 mm depth × 350 mm height (varies with configuration) |
| Weight (Approx.) | 65 kg (main console unit, depending on installed modules) |
| Maintenance | Clean with a soft dry cloth; avoid abrasive cleaners or solvents |
| Safety | Install in a well-ventilated area; only certified personnel should service internal components |
| Spare Parts & Repairability | Contact AMS Neve authorized service centers for genuine replacement parts and repairs |
| Manual Languages | English (EN), 19 pages; available for free download |
Frequently Asked Questions - GENESYS G3D AMS Neve
User questions about GENESYS G3D AMS Neve
0 question about this device. Answer the ones you know or ask your own.
Ask a new question about this device
Download the instructions for your Audio Mixer in PDF format for free! Find your manual GENESYS G3D - AMS Neve and take your electronic device back in hand. On this page are published all the documents necessary for the use of your device. GENESYS G3D by AMS Neve.
USER MANUAL GENESYS G3D AMS Neve
NNeve

GENESYS G3D
User Manual
Issue 1
Table of Contents
Genesys 3D Application .... 3
IP Address Setup - Console 3
Connecting to the Renderer .... 3
Auto Connect to Previous Renderer .... 3
Dolby Atmos Renderer Remote Clients 4
Object Selection....4
Mono Object Selection .... 4
Stereo Object Selection....4
Acquire/Release All Objects....4
Selecting Acquired Objects for Metadata Control....5
3D Object Pan Control .... 5
Touchscreen Control....5
Encoder Control 6
Combination Control....7
Manual Coordinate Entry....7
Elevation Shapes 8
3D Stereo Object Pan Control 8
Stereo Object X/Y Mirroring 9
3D Monitoring....10
Dolby Atmos Renderer Controls 11
Dolby Atmos Renderer Dim & Mute Controls 12
Loudspeaker Control....13
IP Address Setup – Console....13
IP Address Setup – Starnet ADA16 13
Connecting to the ADA16....14
Loudspeaker Output Channel Assignment 15
Loudspeaker Layout 15
Loudspeaker Cut 16
Single Loudspeaker Cut....16
Custom Loudspeaker Group Cut....16
Fixed Loudspeaker Group Cut....16
Loudspeaker Solo 17
Single Loudspeaker Solo 17
Custom Loudspeaker Group Solo....17
Fixed Loudspeaker Group Solo 17
Momentary Solo 18
Exit....18
Genesys Control Plugin Object Automation 19
118 Object Automation....19
Channel/Object Mapping....19

Confidential unpublished works. Copyright 2024
Dolby Laboratories. All rights reserved.
Dolby, Dolby Atmos, and the double-D symbol are registered trademarks of Dolby Laboratories Licensing Corporation.
AMS Neve
AMS Technology Park
Billington Road
Burnley
Lancashire
England
BB11 5UB
Phone: +44 (0) 1282 457 011
Email: info@ams-neve.com
Web: www.ams-neve.com
© 2005 - 2024 AMS Neve Ltd own the copyright of all information and figures contained in this manual which are not to be copied or reproduced by any means or disclosed in part or whole to any third party without written permission.
Disclaimer: The information in this manual has been carefully checked and is believed to be accurate at the time of publication. However, no responsibility is taken by AMS-Neve for inaccuracies, errors or omissions nor any liability assumed for any loss or damage resulting either directly or indirectly from use of the information contained within.
Trademarks: Neve ® , 1073 ® and Marinair ® are registered trademarks. AMS Neve Limited pursues a policy of continual improvement therefore all specifications are subject to change without notice. All trademarks are property of their respective owners E & O E ©2020 AMS Neve Ltd.

The Genesys 3D application is an integrated app included in Genesys Version 3.5, Build 54 and above. The app's primary function is to establish communication with the Dolby® Atmos Renderer application and to enable remote control of Dolby Atmos® object metadata from the console surface.
IP Address Setup – Genesys G3D Console
The Dolby Atmos Renderer application must be active and running on a computer that is connected to the same LAN as the Genesys console. The communications protocol and setup are identical to HUI/DAW control. If the Genesys console is not already set up for DAW control, please reference the Genesys user manual for IP address setup information.
Connecting to the Renderer
When first opening the Genesys Atmos application, a manual scan of the LAN must be activated to establish two-way communication.
After first initialisation, the renderer dropdown menu will display as - None
▶ Click Scan to search the LAN for an active Dolby Atmos Renderer
▶ Select the active renderer from the dropdown menu
Once selected, the red ✗ will change to a green √, indicating successful two-way communication.
Auto Connect to Previous Renderer
After initial setup, the Atmos application can automatically scan and connect to the renderer via a Settings option, accessed via the button.
If Auto Connect To Previous Renderer is ticked, each time the Atmos app is initialised, communication is established without user interaction.

√ Auto Connect To Previous Renderer
Dolby Atmos Renderer Remote Clients


The Genesys Atmos application functions as a remote client for the Dolby Atmos Renderer and will appear as - Neve Dolby Atmos Client in the remote clients window.
There can be multiple remote clients connected to the same renderer. For example, Genesys Atmos Client, Dolby Music Panner, Pro Tools etc. However, multiple clients cannot control metadata for the same object.
Object Selection
The left-hand side of the Atmos application displays all 118 objects on the network. Once communication is established, objects can be selected for metadata control.
Available objects are shown as ☐. Objects are available to control if no other remote metadata client are defined to control this object's metadata.
If an object is unavailable to control it will display as 📄. This usually means that another remote client on the network is already defined to control this object's metadata.
Mono Object Selection
Left-clicking an object via the mouse/trackpad or a fast-touch on the Genesys touchscreen will acquire a mono object.
Mono acquired objects appear as
Once a mono object is acquired, it can be selected from the object dropdown menu and controlled via the Genesys encoders or touchscreen.
Stereo Object Selection
Right-clicking an object via the mouse/trackpad or a slow touch on the Genesys touchscreen will begin the process to acquire a stereo object.
When acquiring a stereo object, the first object clicked becomes the primary object within the object pair and will flash until another object is acquired as the secondary object within the object pair.
A second click on another available object will define both objects as a stereo object pair.
Stereo acquired objects will appear as a solid

Once defined, stereo objects can be selected from the object dropdown menu and can be controlled via the Genesys encoders or touchscreen.
Stereo object pairs can be non-adjacent and formed of any two available objects.
Acquire/Release All Objects
The settings screen includes Acquire All and Release All Objects options.
These options are accessed via the button.
Acquire All – Selects all available objects as mono objects.
Release All – Releases all acquired objects.


Selecting Acquired Objects for Metadata Control
Once objects are acquired, they can be selected for metadata control via the Genesys 3D application object dropdown menu.
Once the dropdown menu is opened, a mouse click can select the object for metadata control.
Alternatively, objects can be selected for metadata control via the Genesys </> arrow keys in the Encoder Control section of the console.
The > key will cycle through the acquired objects sequentially.
The < key will cycle through the acquired objects sequentially, in reverse order.
3D Object Pan Control
Once an acquired object is selected for metadata control, the panning window at the right-hand-side of the Genesys 3D application will become active and panning metadata can be sent to the Dolby Renderer for the acquired object.
Upon first acquisition, objects pan to a central position on the X/Y axis, with a minimum height on the Z axis and minimum size applied.
From this default position, objects can be panned in three dimensions via multiple methods, detailed below.
Touchscreen Control
The green object icon can be positioned anywhere in the X/Y axis by using the Genesys touchscreen.
By touching the screen, you can place the selected object from any location in the panning window, to any other location instantly. Touching and dragging will move the object as your finger moves across the screen.
To adjust the height parameter from the touchscreen, touch the height bar positioned to the left of the 3D panning window.
By touching the height bar at any position, you can place the selected object from any height in the panning window, to any other height instantly.
Touching and dragging the height bar will adjust the object height as your finger moves up and down on the screen.
Note: height can only be manually adjusted if AutoMan is selected.

Encoder Control
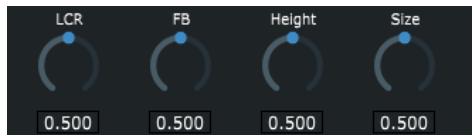
The four available panning parameters – LCR, FB, Height, & Size are displayed at the bottom of the Genesys Atmos application panning window. When the Atmos application is open, these controls are automatically mapped across the four Genesys digital encoders.
Each encoder is set to follow the currently displayed coordinates within the Genesys 3D panning window.


The LCR parameter is mapped to encoder 1 on the console surface. Rotating the encoder clockwise or anticlockwise will adjust the LCR coordinates, panning the selected object to the left or right of the listening position on the X axis.
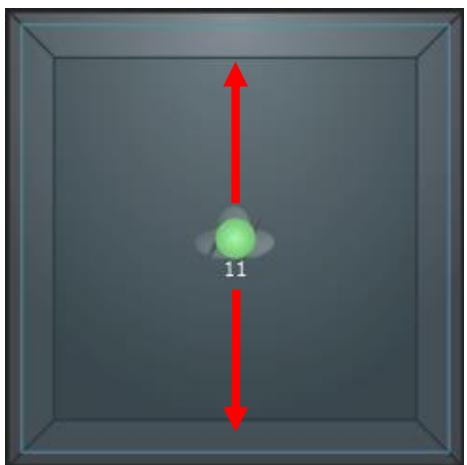

The FB parameter is mapped to encoder 2 on the console surface. Rotating the encoder clockwise or anticlockwise will adjust the LCR coordinates, panning the selected object in front or behind the listening position on the Y axis.


The Height parameter is mapped to encoder 3 on the console surface. Rotating the encoder clockwise or anticlockwise will adjust the height coordinates upwards, or downwards, across the Z axis.
Height is represented by both the blue square shape surrounding the 3D panning window, and by the height bar to the left of the 3D panning window.

Encoder LED's
Genesys G3D Encoders feature a halo of 28 green LEDs, used to indicate the current coordinate value of the selected object. The LEDs will update if the encoder is manually turned, if adjusted from software or via automation.
Each encoder is touch-sensitive, two red LEDs will illuminate to register touch for each encoder.


The Size parameter is mapped to encoder 4 on the console surface. Rotating the encoder clockwise or anticlockwise will increase or decrease the size amount of the object.



Combination Control
By using two-handed operation, users can pan in the X/Y and Z axis simultaneously. The right hand (RH) can adjust X/Y (LCR/FB) positions on the touchscreen, and the left hand (LH) can adjust the Z (Height) axis. Alternatively, the left hand can adjust the Size amount of the selected object
Manual Coordinate Entry
Coordinates and amounts can be manually entered into the LCR, FB, Height, & Size parameters. Coordinates/amounts use values ranging from 0.000 to 1.000. Values beyond this range are invalid and can not be entered.
LCR – A value of 0.000 represents the maximum pan to the left of the 3D panning window, 0.500 represents a centre position, and a value of 1.000 represents maximum pan to the right of the panning window.
FB – A value of 0.000 represents the maximum pan to the front of the 3D panning window, 0.500 represents a centre position, and a value of 1.000 represents maximum pan to the rear of the 3D panning window.
Height - A value of 0.000 represents the minimum height level (head height) to the front of the 3D panning window, and a value of 1.000 represents maximum pan to the rear of the 3D panning window.
Size - A value of 0.000 represents the minimum size amount applied to an object, and a value of 1.000 represents the maximum size amount applied to an object.

To enter manual coordinates/amounts –
▶ Use the Genesys trackpad or touchscreen to select the coordinate value box.
▶ Use the Genesys alphanumeric keypad to enter a value between 0.000 and 1.000
▶ Click Enter to apply the coordinate/amount change


Elevation Shapes
The Genesys Atmos application provides four elevation shapes (Auto-Z).
AutoMan – Allows for manual height settings to be allied from the Genesys encoder.
AutoWedge – Performs automatic height settings, linking the Z elevation to the Y coordinate to form a peaked ceiling shape in the 3D environment.
AutoSphere – Performs automatic height settings, linking the Z elevation to the X & Y coordinates to form a hemispheric shape in the 3D environment.
AutoCeiling – Performs automatic height settings, linking the Z elevation to the Y coordinate to form a flat ceiling in the 3D environment that curves from 20% of the room to the front wall.


3D Stereo Object Pan Control
When a stereo object is selected from the object dropdown menu, the two mono objects icons will appear in the panning window.
Stereo objects are controlled in the same way as mono objects, via the touchscreen, encoders, or combination control.
Stereo objects copy the controls of the primary object over to the secondary object.
By default, the first object selected when creating the stereo pair, becomes the primary object of the object pair.
Stereo Object Height coordinates and size amount are permanently linked. Any height coordinate or size amount applied to the primary object, is also applied to the secondary object.
Stereo Object X/Y Mirroring
There are four possible X/Y mirroring options for stereo objects. Once a stereo object is selected from the object dropdown menu, the X/Y mirroring options will become available.


Mirror X – Objects are mirrored on the X axis and linked on the Y axis. This option is activated by default when stereo objects are selected. Any FB action is copied from the primary object to the secondary object when panning. Any LCR action for the primary object places its mirror image in the secondary object. For example, panning from centre to left in the primary channel, produces a pan from centre to right in the secondary channel.


Mirror Y – Objects are mirrored on the Y axis and linked on the X axis. Any LCR action is copied from the primary object to the secondary object when panning. Any FB action for the primary object places its mirror image in the secondary object. For example, panning from front to back in the primary channel, produces a pan from back to front in the secondary channel.
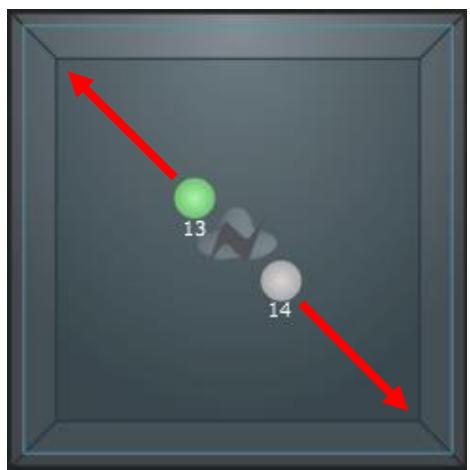

Mirror X/Y – Objects are mirrored on the X and Y axis. Any LCR action from the primary object places its mirror image in the secondary object and any FB action for the primary object places its mirror image in the secondary object. For example, panning from centre to the left-front corner in the primary channel, produces a pan from centre to the back-right corner in the secondary channel.

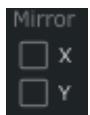
None – Objects are linked but not mirrored. Any action from the primary object is copied to the secondary object. This option places both objects in the same position when panning LCR and FB. For example, panning from the centre to the left of the primary channel, produces a pan from centre to the left of the secondary channel.
Note: When no mirror options are selected, only the primary object number is displayed.


3D monitor control
The Genesys 3D monitor Level control includes a new option labelled 3D.
This option allows for remote control of the Dolby Renderer's attenuation controls from the console surface.
3D is activated whenever the Genesys 3D application is opened, focusing the Genesys Monitor level control onto the Dolby Atmos system, rather than the local stereo monitoring system.
3D is also accessible directly from the Monitor Level control. Users can access the five local monitoring options and the Atmos 3D option by toggling through the available monitor options – stereo (all LEDs off) 3D, DIM, AFL, PFL, SIF
When in 3D mode, the 4-digit display shows the Dolby Atmos Renderer attenuation level.
If Lock Monitor Level is selected in the Settings screen, only the stereo (all LEDs off) and 3D monitoring options can be toggled.
At the top of the Genesys 3D application, the attenuation level of the Dolby Atmos Renderer is displayed. This soft control can also be used to attenuate the Dolby Atmos Renderer output level via touchscreen or trackpad control.
Any changes made from the Genesys 3D monitor level control, are mirrored in the Atmos application and Dolby Atmos Renderer when in 3D monitoring mode.

Dolby Atmos Renderer Controls
The Genesys G3D panel includes a new row of dedicated Dolby Atmos Renderer soft switches. These nine controls are used to remotely access specific functions within the Dolby Atmos Renderer.

3D – Opens the Genesys Atmos application window.

LS – Opens the Loudspeaker Control tab within the Genesys Atmos application.

I/P – Selects the Input source tab within the Dolby Atmos Renderer.


MAST – Selects the Master source tab within the Dolby Atmos Renderer.


REC – Activates the Dolby Atmos Renderer's Record Arm function.


Dolby Atmos Renderer Dim & Mute Controls
In addition to the Dolby Atmos Renderer attenuation controls. The Genesys 3D encoder panel includes four dedicated switches used to control the renderer's Dim, Main Mute, Object Mute, and Bed Mute controls.
These four, dedicated buttons are used to solely control the Dolby Atmos Renderer and will function even if the 3D Atmos application is hidden.
Any changes made via the Genesys 3D controls, are mirrored in the Atmos application and Dolby Atmos Renderer.

DIM – activates the Dolby Atmos Renderer Dim control. Attenuating the renderer's output by -20dB


MUTE – Activates the Dolby Atmos Renderer Main Mute control. Main Mute is an output mute (post meters) and cuts the output from the Dolby Atmos Renderer.


BED – activates the Dolby Atmos Renderer Bed Mute control. Bed Mute mutes only the output of any beds assigned in the Dolby Atmos Renderer.

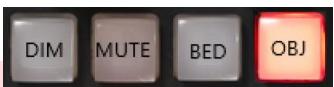
OBJ – Activates the Dolby Atmos Renderer Object Mute control. Object Mute mutes only the output of any objects assigned in the Dolby Atmos Renderer.


Loudspeaker Control
The Genesys console is paired with the Neve StarNet ADA16 which is used as the digital to analogue converter, connected directly to the studio loudspeakers. The Genesys G3D system includes a comprehensive loudspeaker control window, providing Cut & Solo control over individual loudspeaker outputs.
The loudspeaker control window is accessed in one of two ways-

- Pressing the LS button within the Genesys 3D application.

- Pressing the LS button on the console surface.
When opened, the object selection window is hidden, and the loudspeaker control window appears in its place.
IP Address Setup – Genesys G3D Console
The ADA16 must be powered on and connected to the same LAN as the Genesys console. The communications protocol and setup are identical to HUI/DAW control. If the Genesys console is not already set up for DAW control, please reference the Genesys console user manual for IP address setup information.
IP Address Setup - StarNet ADA16
If connecting through a valid DHCP network, then the StarNet can be set using DHCP:Yes
If connecting directly with an Ethernet cable from the computer to StarNet ADA16, a manual IP address must be set using the front panel controls.
▶ Select Net [Set]
The Static IP window will appear.
Use the arrow keys to select each [triple-digit] section of the IP address.
▶ Press ← to toggle up one number at a time
▶ Press and hold ← and press ▶ to toggle up 10 numbers at a time
▶ Press and hold ← and press ◀ to toggle down 10 numbers at a time
Enter an IP address of:
10.10.251.001
▶ Select [OK] when complete
▶ Press ← to confirm the Manual IP address and leave the Static IP window
▶ Select [Cancel] at any time to leave the Static IP window without entering an IP address
▶ Current IP will be displayed at the bottom of the screen
Connecting to the ADA16
When first opening the Loudspeaker Control window, a manual scan must be performed to establish two-way communication between the Genesys console and the ADA16.
Click Scan to establish communication.

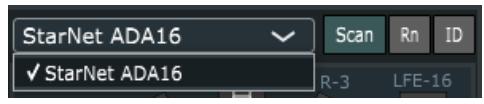


When the ADA16 is discovered, the unit will be automatically selected in the dropdown menu. If multiple units are connected to the network, manually select the ADA16 that you wish to use for loudspeaker output and control.
Discovered units can be renamed via the ☐ button. When pressed, a pop out window will appear, allowing for manual renaming of the selected hardware unit.
The ID button can be used to identify the hardware units. When pressed, the Home button on the ADA16 will flash indicating that the selected unit in the dropdown menu matches the desired hardware unit.
The Config button accesses the configuration and setup page of the Loudspeaker Control window.
Set IPs is used to reduce the time taken to scan for ADA16 units.
If using manual IP addresses, the Set IP option can be used to focus the only scanning process onto the specific, manually-set ADA16 IP address, rather than scanning through the entire available range. The pop-up window allows manual IP addresses to be entered for each device on the network.
Click 'Use Manual IPs for ADA16 Scan addresses' to confirm.
Default enters default IP addresses of 10.10.251.001, 10.10.251.002, 10.10.251.003, & 10.10.251.004 for each device.
Click OK to close the window and apply the settings or Cancel to close window without applying the settings.


Loudspeaker Output Channel Assignment
From the config window, ADA16 channel outputs 1-16 can be assigned to loudspeaker positions.
The default view shows a 9.1.6 loudspeaker layout which utilizes all 16 ADA16 analogue outputs.
Channels will display as 1 if a valid output channel is assigned to the loudspeaker position.
To change an output channel, click a loudspeaker icon 1 and select an output channel 1-16 from the dropdown menu.
Each loudspeaker position should have a dedicated, independent, ADA16 channel output, however it is possible to configure many loudspeaker positions as the same ADA16 channel output.
Channels will display as 1 if more than one loudspeaker position is assigned to the same output channel.
The Default button will assign a default ADA16 output channel assignment to the 16 available loudspeaker positions.
If using a 7.1.4, or 9.1.4 speaker layout in your studio, assign the four or two unused ADA16 channel output numbers to the unused loudspeaker positions.
Loudspeaker Layout
The loudspeaker Control window shows three possible studio loudspeaker layouts – 7.1.4, 9.1.4, & 9.1.6. Layouts are selected from the buttons at the bottom of the Loudspeaker Control window.




Loudspeaker Cut
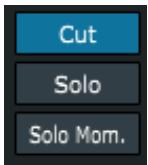
When Cut is active, any of the loudspeaker outputs in the array can be cut by using the touchscreen or by clicking the position with the Genesys trackpad.
Single Loudspeaker Cut
To cut a single loudspeaker output, touch a loudspeaker position on the touchscreen, or click the position with the Genesys trackpad.
Cut is latching, meaning that subsequent touches/clicks to other loudspeaker outputs will also be cut as well as the first loudspeaker output.
Multiple loudspeakers can be manually cut one-by-one by using this method.
Custom Loudspeaker Group Cut
To cut a custom group of loudspeaker outputs, touch/click and drag a region on the touchscreen.
A temporary blue box will appear while touching/clicking. Any loudspeaker output within the box will cut once the blue box touches it's icon.
Only one custom group can be applied at a time, drawing a second cut box will void the previous cuts applied.
Additional loudspeaker outputs can be added to the cut group by single touch/clicking, once the cut group is applied.
Fixed Loudspeaker Group Cut
There are three fixed groups of loudspeaker outputs provided - LCR, Surrounds, Heights.
Pressing each of these groups while Cut is engaged will cut loudspeaker outputs associated with the fixed loudspeaker output group.


Loudspeaker Solo
When Solo is active, any of the loudspeaker outputs in the array can be Soloed by using the touchscreen or by clicking the position with the Genesys trackpad. Solo behaviour as solo-in-place style, meaning that all non-soloed channels are cut in order to solo the selected channel.
Single Loudspeaker Solo
To solo a single loudspeaker output, touch a loudspeaker position on the touchscreen, or click the position with the Genesys trackpad.
By default, Solo is latching, meaning that subsequent touches/clicks to other loudspeaker outputs will also be soloed as well as the first loudspeaker output.
Multiple loudspeaker outputs can be manually soloed one by one by using this method.
Custom Loudspeaker Group Solo
To solo a custom group of loudspeaker outputs, touch/click and drag a region on the touchscreen.
A temporary blue box will appear while touching/clicking. Any loudspeaker output within the box will soloed once the blue box touches it's icon.
Only one custom group can be applied at a time, drawing a second solo box will void the previous solos applied.
Additional loudspeaker outputs can be added to the solo group by single touch/clicking, once the solo group is applied.
Fixed Loudspeaker Group Solo
There are three fixed groups of loudspeaker outputs provided – LCR, Surrounds, Heights.
Pressing each of these groups while Solo is engaged will solo loudspeaker outputs associated with the fixed loudspeaker output group.


Momentary Solo
Solo Mom. Activates momentary solo mode. Monetary solo functions in the same way as latching solo, but only allows for single, custom groups or fixed groups of loudspeaker outputs to be soloed for the duration of a touch/click. As soon as the touch/click is released, solo states are cancelled.
Exit

Click Exit to close the loudspeaker Control window and return to the object selection window.


Genesys Control Version 2.1+ includes a new object control and automation tab accessed via the 3D Tab.

Once opened the object window provides control over a single object selected from the dropdown menu.
Only objects that are selected for control via the Genesys G3D application are available to select from the plugin dropdown menu.
Once selected, objects can be controlled from the plugin or from the Genesys 3D application. Object movements controlled from the G3D application are mirrored in the plugin 3D tab, or vice versa.
Object LCR, FB, Height, & Size parameters can be automated from the plugin by selecting the parameter from the Auto Window.

118 Object Automation

The Object Automation tab can be accessed by channels above the available console analogue channel strip count. This allows the Genesys G3D to automate all 118 objects on the network from the console surface.
When plugins are applied to DAW channels above the available analogue channel strip count, the toolbar at the bottom of the plugin will display as below.

Channels are set to – and the minimised plugin window will display.
Objects can be selected in the same way via the object dropdown menu.
Channel/Object Mapping
| ID | Track Name | Channel | Object |
| 1 | Audio 1 | 1 | 11 |
| 2 | Audio 2 | 2 | 12 |
| 3 | Audio 3 | 3 | 13 |
| 4 | Audio 4 | 4 | 14 |
| 5 | Audio 5 | 5 | 15 |
| 6 | Audio 6 | 6 | 16 |
| 7 | Audio 7 | 7 | 17 |
| 8 | Audio 8 | 8 | 18 |
| 9 | Audio 9 | 9 | 19 |
| 10 | Audio 10 | 10 | 20 |
| 11 | Audio 11 | 11 | 21 |
| 12 | Audio 12 | 12 | 22 |
| 13 | Audio 13 | 13 | 23 |
| 14 | Audio 14 | 14 | 24 |
| 15 | Audio 15 | 15 | 25 |
| 16 | Audio 16 | 16 | 26 |
The channel/object mapping page can be accessed by pressing

This page displays the current DAW channel plugin assignment, DAW channel Name, Genesys Control plugin channel number, and object assignment.
This page is useful for keeping track of all DAW/Console/Renderer mapping.

- NNEVE
- GENESYS G3D
- TABLE OF CONTENTS
- IP ADDRESS SETUP – GENESYS G3D CONSOLE
- CONNECTING TO THE RENDERER
- AUTO CONNECT TO PREVIOUS RENDERER
- DOLBY ATMOS RENDERER REMOTE CLIENTS
- OBJECT SELECTION
- MONO OBJECT SELECTION
- STEREO OBJECT SELECTION
- ACQUIRE/RELEASE ALL OBJECTS
- SELECTING ACQUIRED OBJECTS FOR METADATA CONTROL
- D OBJECT PAN CONTROL
- TOUCHSCREEN CONTROL
- ENCODER CONTROL
- ENCODER LED'S
- COMBINATION CONTROL
- MANUAL COORDINATE ENTRY
- ELEVATION SHAPES
- D STEREO OBJECT PAN CONTROL
- STEREO OBJECT X/Y MIRRORING
- D MONITOR CONTROL
- DOLBY ATMOS RENDERER CONTROLS
- DOLBY ATMOS RENDERER DIM & MUTE CONTROLS
- LOUDSPEAKER CONTROL
- IP ADDRESS SETUP - STARNET ADA
- CONNECTING TO THE ADA
- LOUDSPEAKER OUTPUT CHANNEL ASSIGNMENT
- LOUDSPEAKER LAYOUT
- LOUDSPEAKER CUT
- SINGLE LOUDSPEAKER CUT
- CUSTOM LOUDSPEAKER GROUP CUT
- FIXED LOUDSPEAKER GROUP CUT
- LOUDSPEAKER SOLO
- SINGLE LOUDSPEAKER SOLO
- CUSTOM LOUDSPEAKER GROUP SOLO
- FIXED LOUDSPEAKER GROUP SOLO
- MOMENTARY SOLO
- EXIT
- OBJECT AUTOMATION
- CHANNEL/OBJECT MAPPING
Brand : AMS Neve
Model : GENESYS G3D
Category : Audio Mixer