
WPG-150 - Projection accessory VIEWSONIC - Free user manual and instructions
Find the device manual for free WPG-150 VIEWSONIC in PDF.

| Product Type | Projection Accessory |
| Brand | VIEWSONIC |
| Model | WPG-150 |
| Dimensions (L x W x H) | Approximately 12 x 8 x 2 cm |
| Weight | Approximately 150 g |
| Power Supply | USB 5V / 1A (power adapter included) |
| Connectivity | Wi-Fi 802.11 b/g/n, HDMI out |
| Supported Video Formats | Up to 1080p |
| Main Function | Wireless streaming from a mobile device or computer |
| Compatibility | iOS, Android, Windows, Mac |
| Required Operating System | iOS 9.0+, Android 5.0+, Windows 7+, macOS 10.10+ |
| Wi-Fi Range | Up to 30 meters indoors |
| Display Modes | Mirroring, extended |
| Care and Cleaning | Clean with a soft, dry cloth. Avoid liquids. |
| Safety | Do not expose to moisture or extreme temperatures. |
| Spare Parts | HDMI cable, USB adapter, quick start guide |
| Repairability | No user-serviceable parts. Contact customer support. |
| General Information | Compliant with ICES-003 Class B standard |
Frequently Asked Questions - WPG-150 VIEWSONIC
User questions about WPG-150 VIEWSONIC
0 question about this device. Answer the ones you know or ask your own.
Ask a new question about this device
Download the instructions for your Projection accessory in PDF format for free! Find your manual WPG-150 - VIEWSONIC and take your electronic device back in hand. On this page are published all the documents necessary for the use of your device. WPG-150 by VIEWSONIC.
USER MANUAL WPG-150 VIEWSONIC
Wireless G Presentation Gateway
Copyright © ViewSonic Corporation, 2007. All rights reserved.
ViewSonic and the three birds logo are registered trademarks of ViewSonic Corporation.
PowerPoint, Office Excel, Office Word, and Microsoft are registered trademarks of Microsoft Corporation.
Corporate names and trademarks are the property of their respective companies.
Disclaimer: ViewSonic Corporation shall not be liable for technical or editorial errors or omissions contained herein; nor for incidental or consequential damages resulting from furnishing this material, or the performance or use of this product.
In the interest of continuing product improvement, ViewSonic Corporation reserves the right to change product specifications without notice. Information in this document may change without notice.
No part of this document may be copied, reproduced, or transmitted by any means, for any purpose without prior written permission from ViewSonic Corporation.
Product Registration
To meet your future needs, and to receive any additional product information as it becomes available, please register your product on the internet at:
www.viewsonic.com. The ViewSonic product also comes with a CD-ROM that has a registration form that you can print and mail or fax to ViewSonic Corporation.
For Your Records
Model Name:
Model Number:
WPG-150 Wireless G Presentation Gateway
Document Number:
VS11692
Serial Number:
WPG-150_UG_ENG_Rev.1F 10-16-07
Purchase Date:
Product disposal at end of product life
ViewSonic is concerned about the preservation of our environment. Please dispose of this product properly at the end of its useful life. Your local waste disposal company may provide information about proper disposal.
Contents
Introduction
Package Contents 1
Features 1
Glossary 2
System Requirements 2
Front View 3
Back View 3
Initial Setup
Connect the WPG 4
Access a Wireless Network 5
Install the WPG Application On Your PC 6
Run the WPG Application
Wireless Display List 7
Connection Failed 11
Normal Mode 11
Advanced Configuration
Advanced Settings 14
Configure Display 17
Display Access Number Security 18
Enable Wireless Encryption 19
Password Setup 26
Upgrade Firmware 27
Network Settings 28
Using the WPG
Play Video 29
Show Graphic Presentations 30
Troubleshooting & Maintenance
Reset the WPG 32
Hard Reset 32
Soft Reset 32
About 32
Customer Support 33
Wireless Products Disclaimer 33
Appendix
Compliance and Safety Notices 34
Specifications 37
Limited Warranty 37
INTRODUCTION
IMPORTANT! The WPG-100 and the WPG-150 are not Wireless Access Points (APs).
Thank you for buying the ViewSonic® Wireless G Presentation Gateway WPG-150. The WPG-150 connects to a projector or display through the VGA or DVI ports and enables you to control projectors and displays wirelessly. Additional product information such as FAQ, specifications, data sheets, etc. may be found on the ViewSonic website. This section introduces you to the WPG-150 (referred to as the WPG in this user guide).
PACKAGE CONTENTS
These items vary depending on the model.
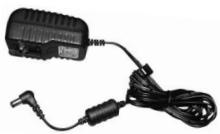
AC Power Adapter with regional plugs


Quick Start Guide
WPG-150

Ethernet Cable
ViewSonic CD
FEATURES
- Deliver your presentations wirelessly – bridges wireless PCs to displays/monitors
- Allows any member of the group to take instant control of the display with no cable-swapping hassle
- Allows impromptu display - control switching between clients for interactive meetings
Real time display of video, PowerPoint presentations, JPEG images, and applications - Powerful, high-performance processor for fast and responsive display
- Fast animations and slide transitions for smooth and professional presentation
- Works with virtually any display or projector with VGA or DVI connector
- Application independent - use with all your favorite programs
802.11b/g
Up to 1024x768 resolution - Versatile, light weight and portable
- Play video or graphics presentations
Additional Ethernet port so you remain connected to the Internet
GLOSSARY
| Acronym | Meaning |
| DHCP Server | Dynamic Host Configuration Protocol |
| DNS | Domain Name System |
| DVI | Digital Visual Interface |
| SSID | Service Set Identifier |
| TCP/IP | Transmission Control Protocol/ internet Protocol |
| VGA | Video Graphics Array |
| WPA | WiFi Protected Access |
| WPG | A converter that enables you to wirelessly connect your PC or Laptop computer to a second display |
SYSTEM REQUIREMENTS
| PC CPU speed | Pentium 4 or M >1.5 GHz |
| Memory | 512 MB of RAM |
| Operating Systems | Windows XP Home / Professional Edition SP2 (32-bit); Windows 2000 Professional, SP 4; Windows Vista (32-bit) |
| Wireless Protocol | 802.11 b or g (g is preferable for full motion video) |
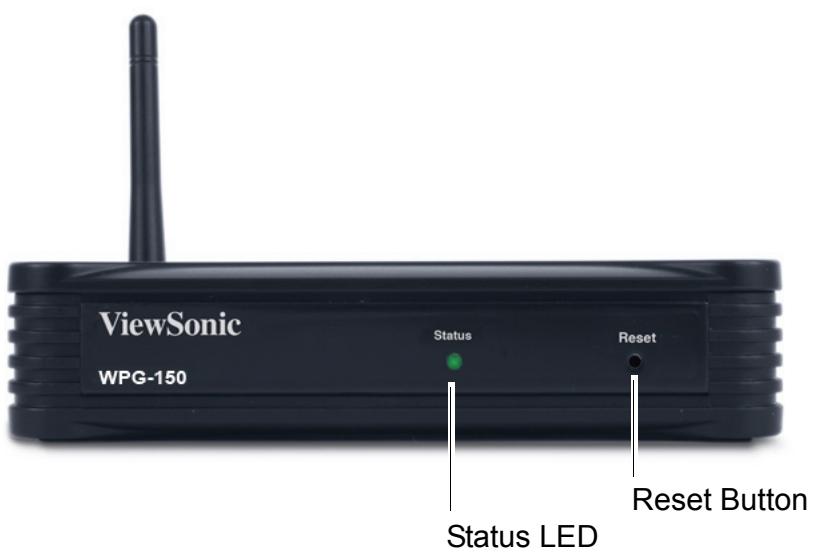
FRONT VIEW
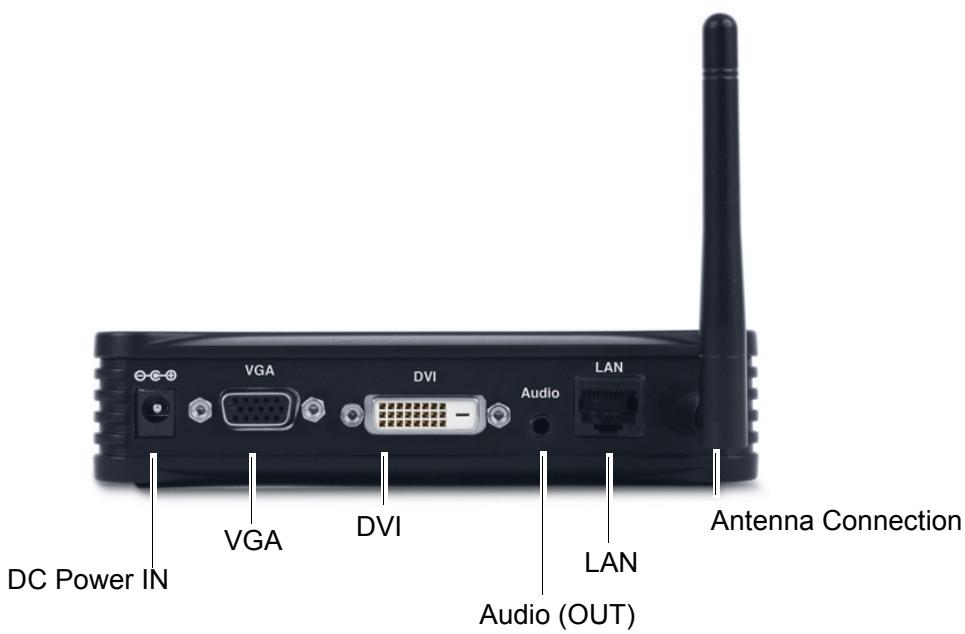
BACK VIEW
INITIAL SETUP
1. CONNECT THE WPG
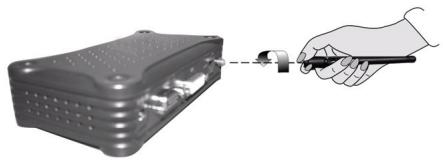
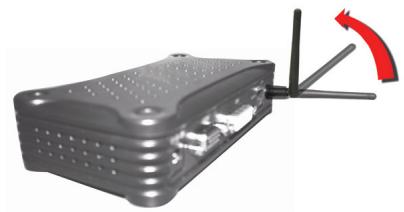
A. Attach the antenna to the back of the WPG.
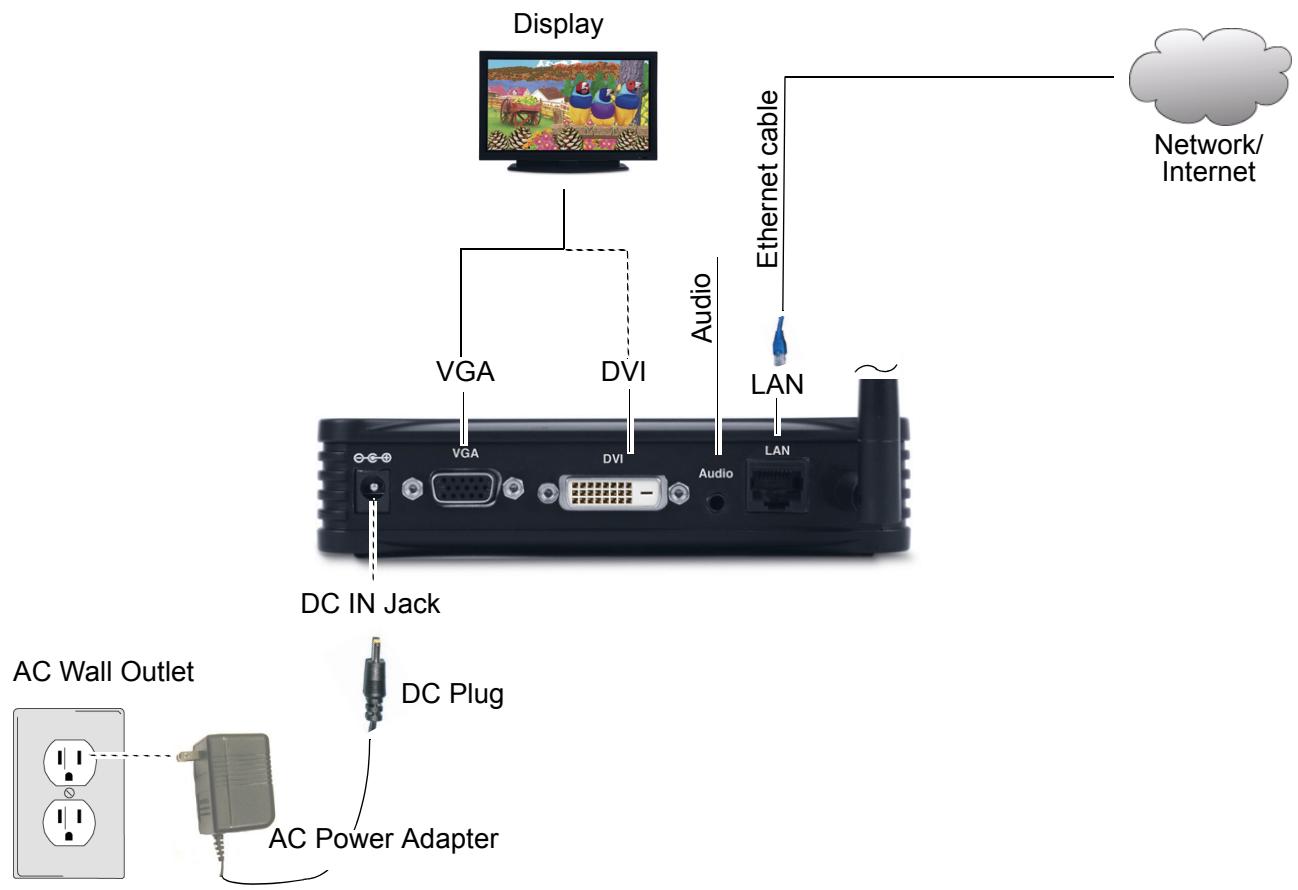
B. For an alternate access to the Internet, connect an Ethernet cable from the LAN port to the LAN/WAN/xDSL/Cable Modem connection to the Internet.
C. Connect a VGA cable from the VGA port (or DVI cable if using the DVI port) to your display (plasma, LCD, monitor, projector, etc).
D. Connect an audio cable from the Audio port to your audio speakers.
E. Connect the DC Plug to the DC IN Jack of the WPG. Connect the supplied AC Power Adapter to an AC Outlet such as an AC wall outlet.
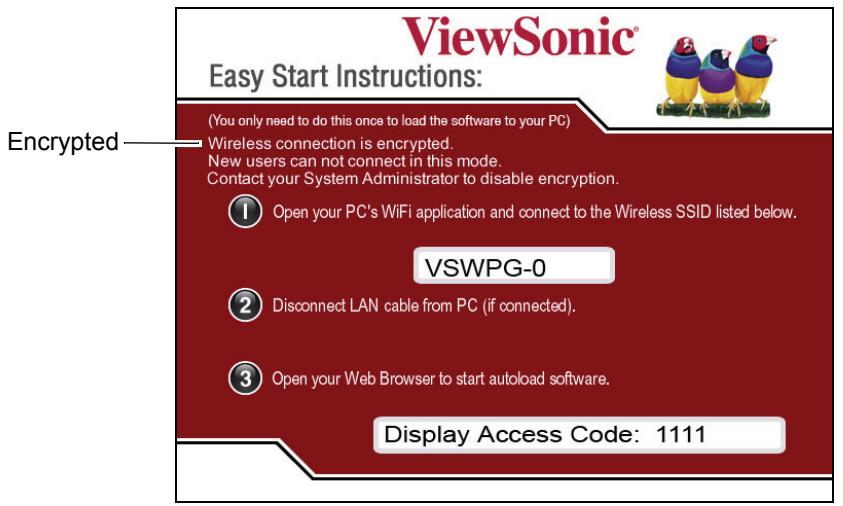
After the WPG is connected, the screen shown below appears on your display. Follow the on-screen instructions.
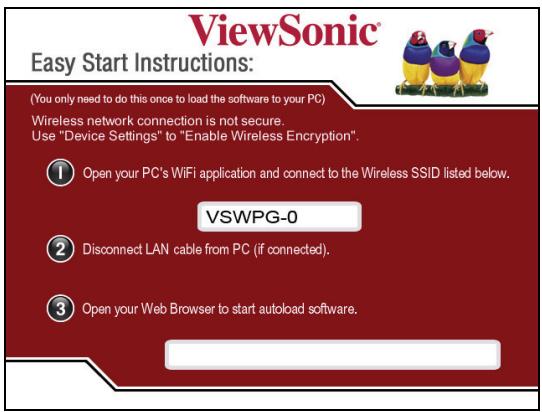
2. ACCESS A WIRELESS NETWORK
Use your computer's Wireless Network Connection window to access an available wireless network. Select the WPG from the list. Click Connect. The default SSID is WPG150-0.


NOTE: If using a wireless client other than Windows, the screen above may look differently. For more details, see your PC user guide.
3. INSTALL THE WPG APPLICATION ON YOUR PC
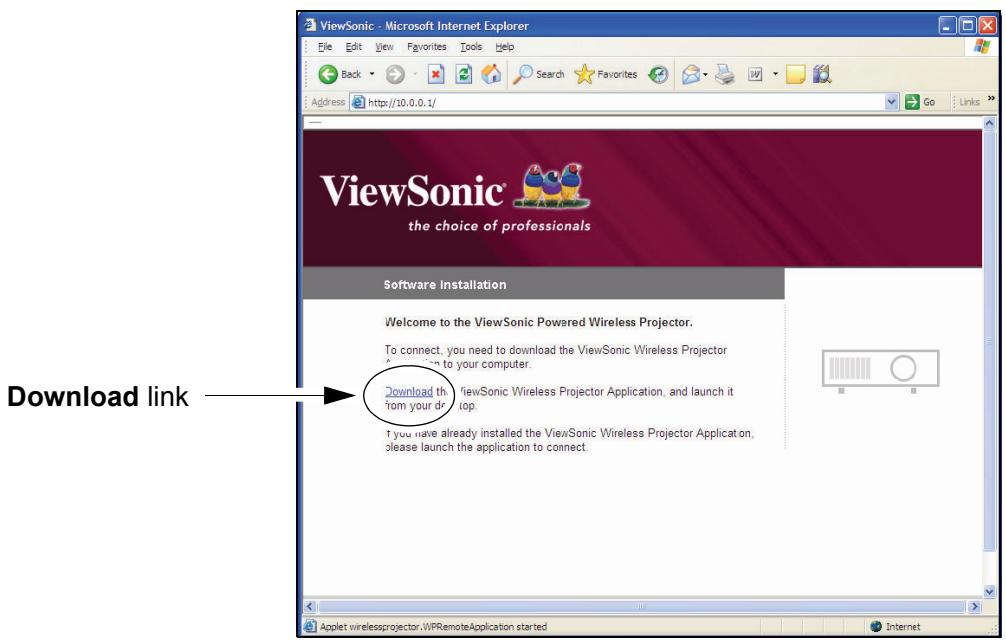
Open Internet Explorer. The web page appears as shown below. If not, type http://10.0.0.1 in the URL field. Click the Download link.
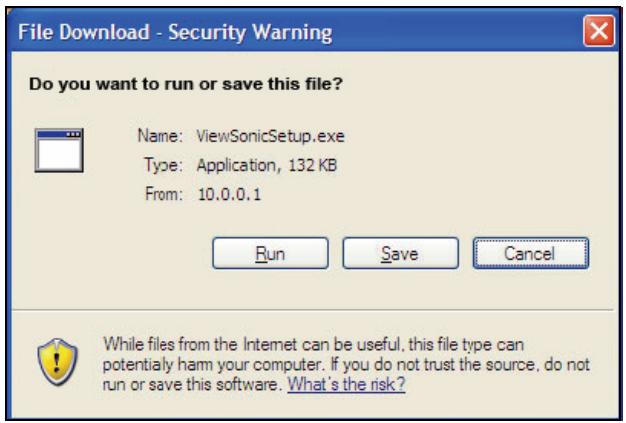
The File Download screen shown below appears. Click Run. Follow the on-screen instructions. The application runs automatically and connects to the WPG after installation is done. The ViewSonic WPG window appears on your PC in Normal Mode. For more details, see the Normal Mode section under Initial Setup.
RUN THE WPG APPLICATION
WIRELESS DISPLAY LIST
On your PC desktop, double-click the application icon. If there is only one WPG running in the vicinity, the application automatically connects to that device. If there are multiple WPG's detected, the Wireless Display List appears as shown below. Select the desired WPG > click Connect.
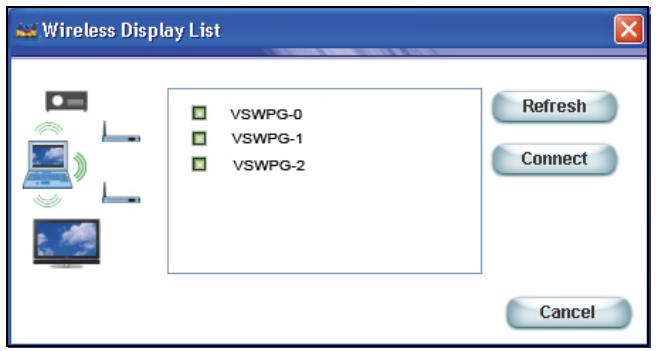
| Feature | Description |
| Display List | Displays the SSIDs of all currently visible ViewSonic WPG's |
| Refresh button | Updates the displayed list |
| Connect button | Connects to the selected WPG |
| Cancel | Closes the List window |
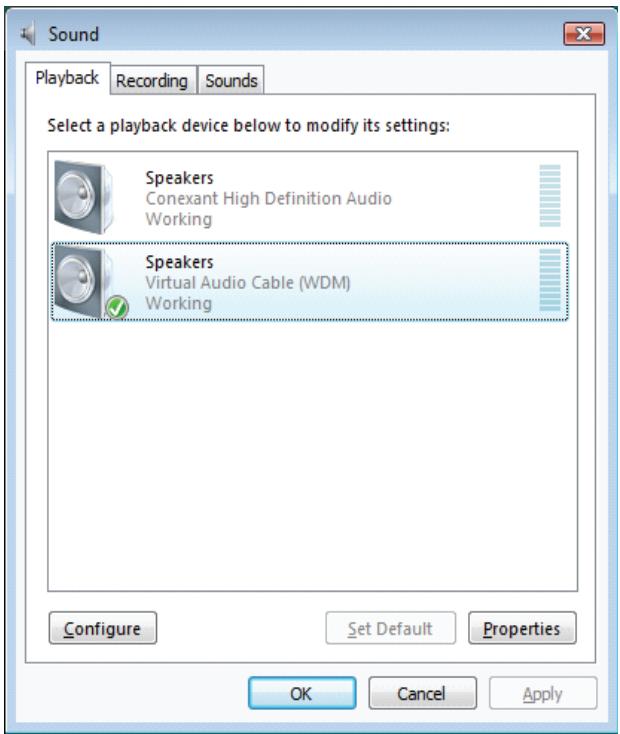
For Windows Vista users:
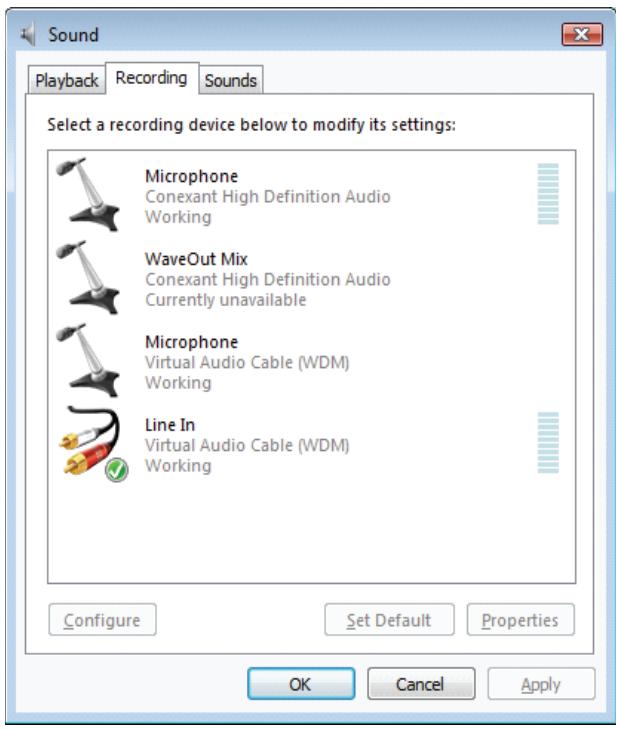
When running WPG Application, the default Playback (Speakers)/Recoding (Line In) devices will be set to Virtual Audio Cable (WDM) automatically. Press OK to continue.
Note: Set the Playback (Speakers)/Recoding (Line In) devices to Virtual Audio Cable (WDM) manually if the default devices are not Virtual Audio Cable (WDM).
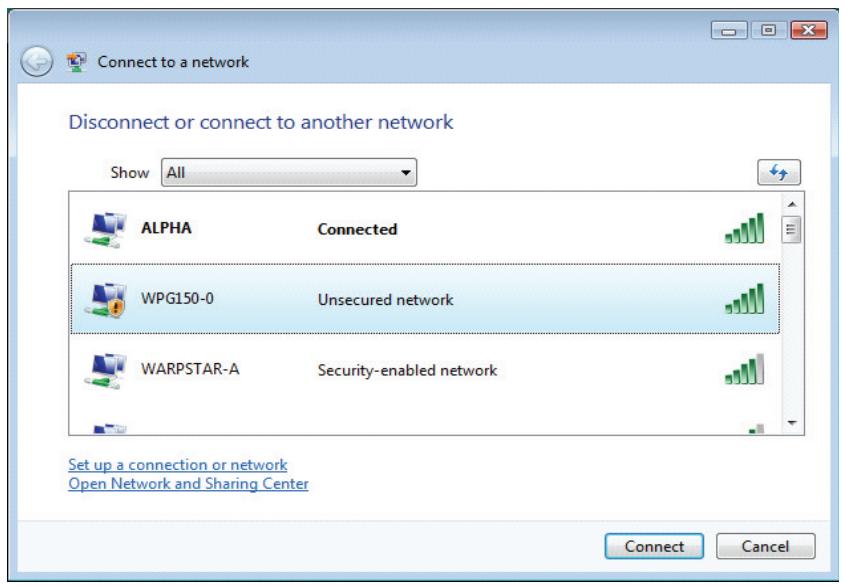
Pop-up window
Use your computer's "Connect to a network" window to access an available WPG from the list. Click Connect. The default SSID is WPG150-0.
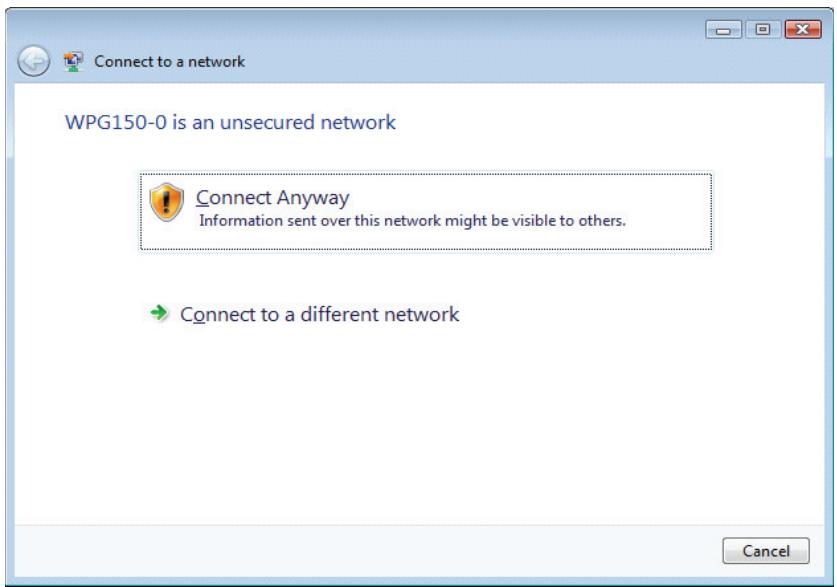
If security settings are not in place, the SSID is an unsecured network. Click the Connect Anyway option.
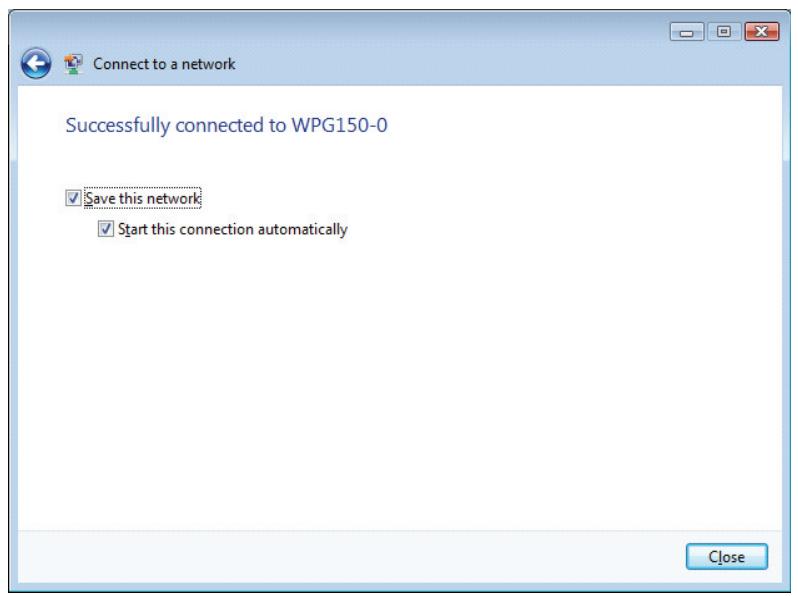
A message confirms the WPG150 is connected to the network.
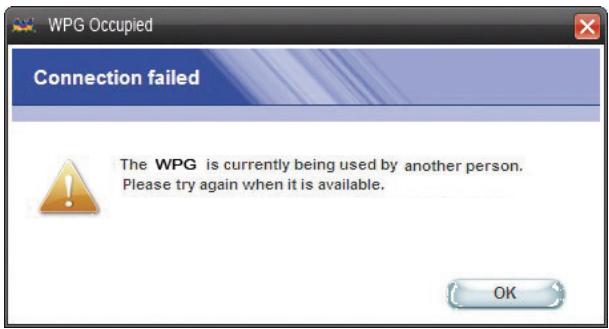
CONNECTION Failed
If you select a display that is not available, the screen shown below appears. Click OK and make another selection.
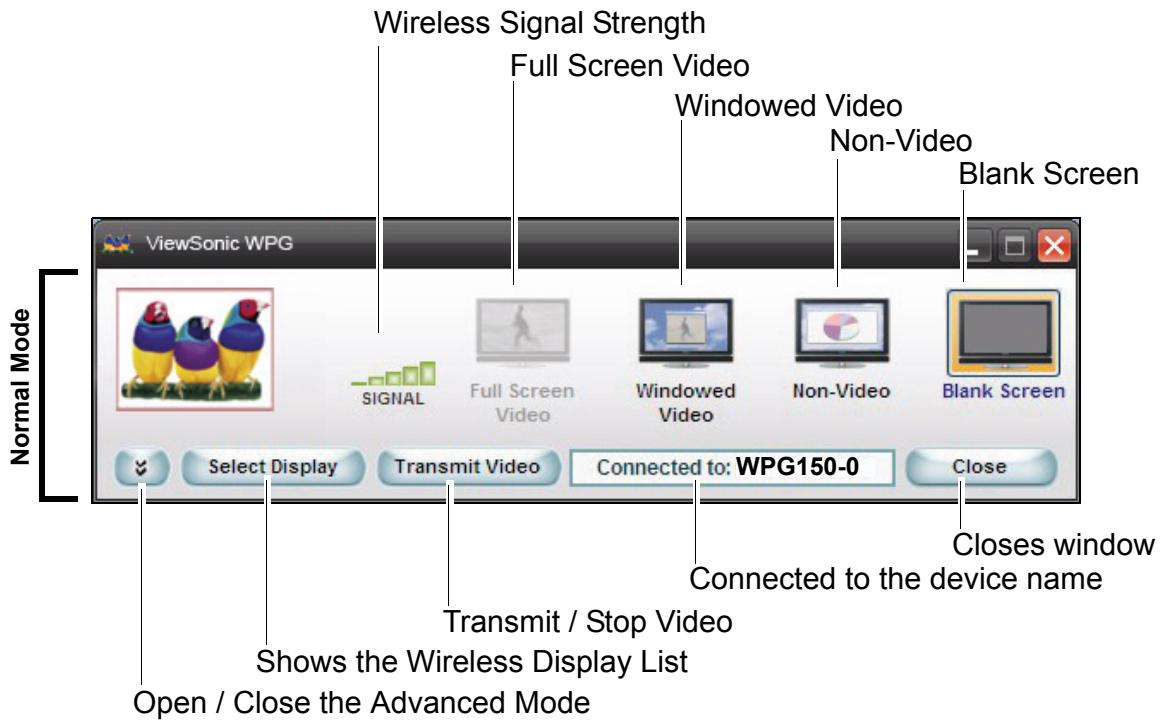
NORMAL MODE
Once connected, the main application screen for the ViewSonic WPG appears in normal mode as shown below. Your PC desktop starts projecting automatically on your display or through your projector.
| Feature | Description |
| Wireless Signal Strength | It is the current wireless signal strength in graphical form. |
| Full Screen Video | Displays the selected media player in full screen mode. Participates in a radio button group with "Windowed Video," "Non-Video" and "Blank Screen". When selected, causes live video to be displayed full screen within the display device using the settings on this window. The button is only enabled when video is playing in Extended Mode. |
| Windowed Video | Displays the selected media player in Windowed mode. Participates in a radio button group with "Full Screen Video," "Non-Video" and "Blank Screen." When selected causes live video to be displayed within a window within the display device using the settings on this window. |
| Non-Video | Used to display graphics and presentations. Participates in a radio button group with "Full Screen Video", "Windowed Video" and "Blank Screen". When selected causes the video to be stopped within the display device using the settings on this window. |
| Blank Screen | Stops displaying the users presentation or video, including audio, without closing the connection between the PC and the WPG. Participates in a radio button group with "Full Screen Video", "Windowed Video" and "Non-Video". When selected causes a blank screen to be shown on the ViewSonic display. |
| Open / Close Advanced Options | This button opens and closes the Advanced Mode for Advanced Configuration. |
| Select Display | Generates the "Wireless Display List" dialog box, comprising of the list of SSDs. For more information, see the section on the "Wireless Display List under Initial Setup. |
| Transmit Video / Stop Display | To Start/ Stop transmission of video. |
| Connected to: | The SSID of the device of the current connection. It is a Read-only field. Changes whenever new device is selected |
| Close | Closes the application. |
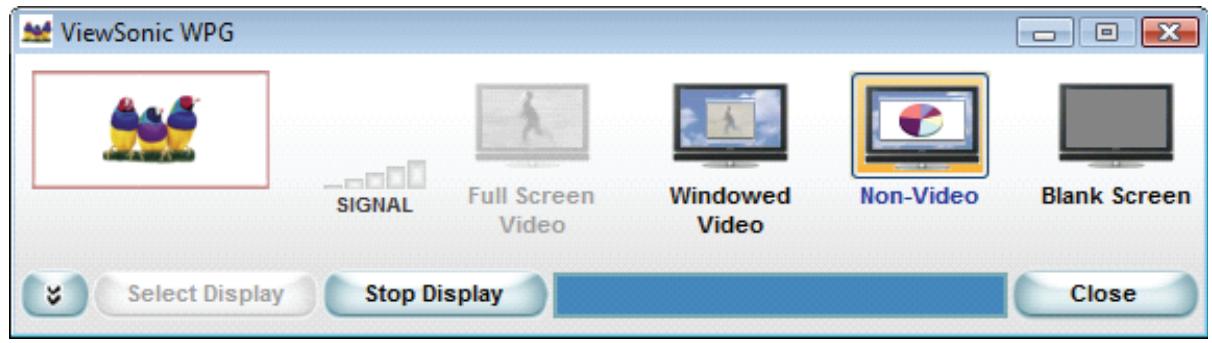
For Windows Vista Users
Once connected, the main application screen for the ViewSonic WPG appears in normal mode as shown below. Your PC desktop starts projecting automatically on your display or through your projector.
Note: SIGNAL and Select Display functions were disabled in Windows Vista OS.
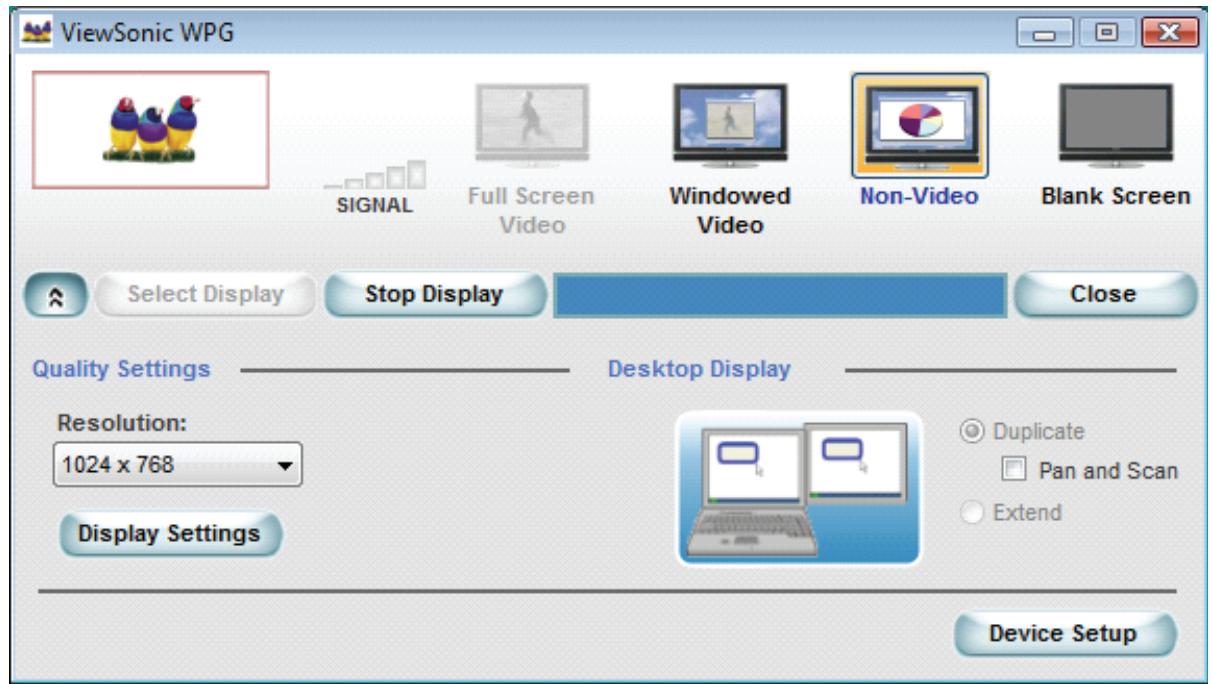
For the Advanced Settings, click the down arrow on the main screen shown below.

For Windows Vista User
The Desktop Display function was disabled in Windows Vista OS, the user can mirror the current desktop screen to the WPG display screen only.
| Feature | Description |
| Advanced Mode | To change Advanced Settings. |
| Resolution | Current resolution setting. Drop down list of all supported resolutions up to the maximum resolution of the device. The field will auto update when the video transmission slider is selected or moved. |
| Display Settings | Allows you to change the display settings of your computer and display device. Brings up the Microsoft® Display Properties window including Color quality settings. |
| Device Setup | Brings up the Wireless Display Configuration Settings window |
| Desktop Display | This group of settings controls how the PC desktop interacts with the WPG device.Duplicate: This mode mirrors the current desktop screen.Pan and Scan: If checked, the WPG display uses pan and scan method if the PC and WPG display resolutions are different. Disabling Pan and Scan will default the WPG display resolution to the previous setting.Expend: This mode extends the PC desktop to the WPG display screen. This setting is recommended when playing videos or working with two different screens at the same time. |
| Close | Closes the window. |
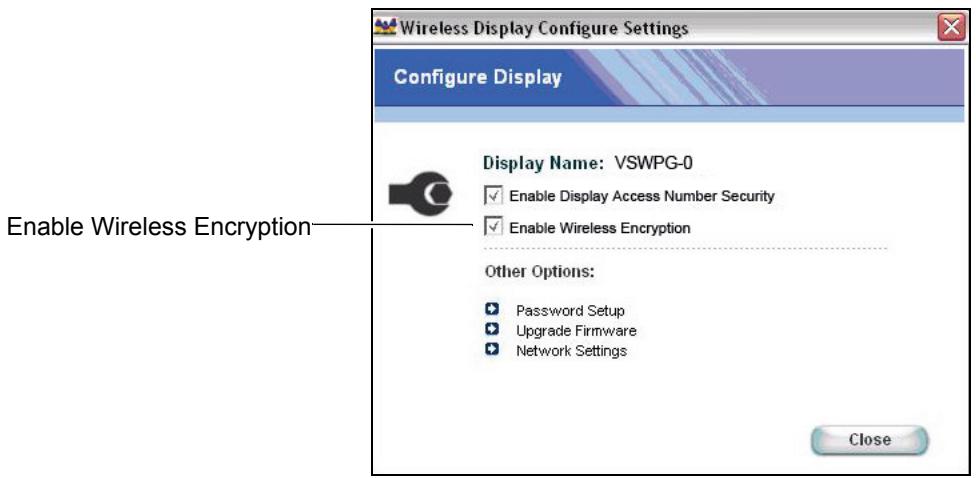
CONFIGURE DISPLAY
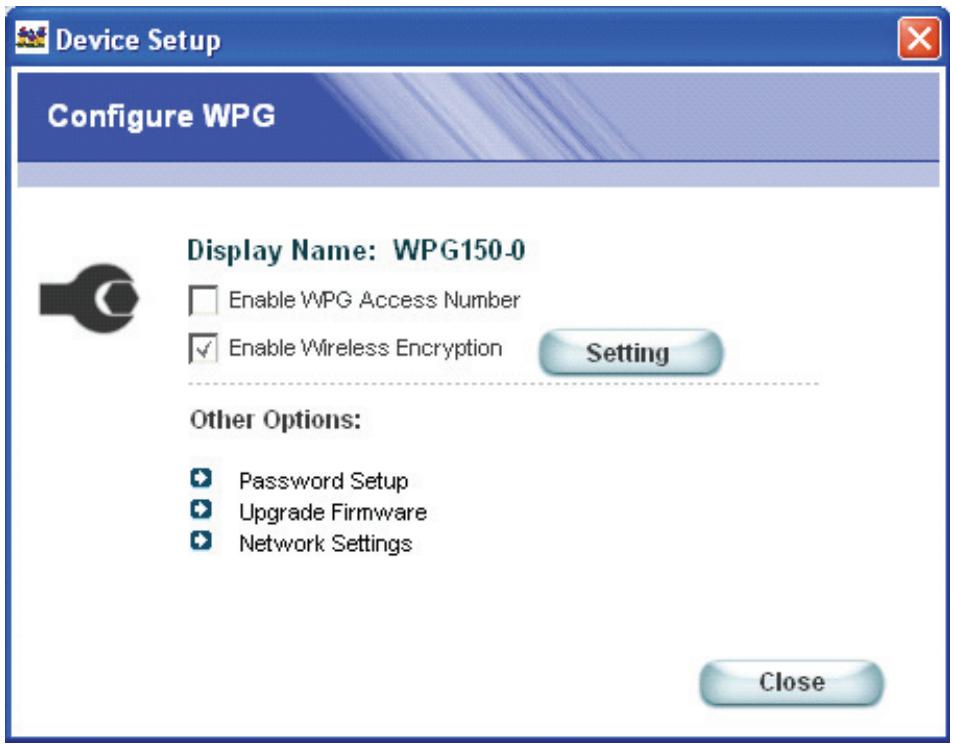
The screen appears as shown below.

| Feature | Description |
| Display Name | Name of the device you are connected to. |
| Enable Display Access Number Security | Allows for a randomly generated 4 digit number to be added to the displays splash screen that has to be entered in order to connect and project to that display. |
| Enable Wireless Encryption | Check this box to enable WPA-PSK TKIP key encryption between the PC and the WPG. |
| Password Setup | User will have to enter a password in order to access the "Settings" window. This means that only the person with the password can modify the settings. |
| Upgrade Firmware | If the WPG is connected to the Internet then this button will check for new software releases and if found will install them for you. If you do upgrade the firmware, first the WPG is upgraded, then to upgrade the software on your computer you have to uninstall the application and following the steps outlined in Software Installation to install the new software version onto your PC. |
| Network Settings | You can change the SSID wireless channel and LAN settings. |
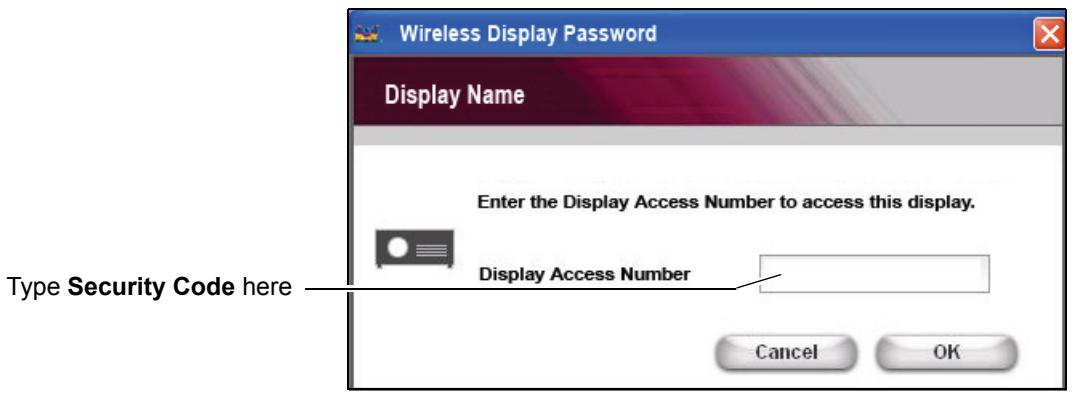
DISPLAY ACCESS NUMBER SECURITY
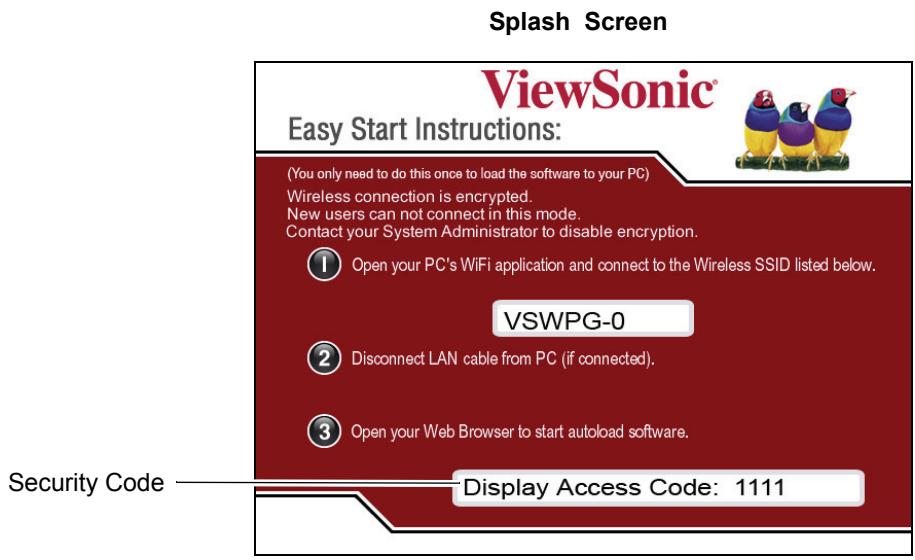
Check the box labeled Enable Display Access Number Security to activate the randomly generated code. This feature is highly recommended and prevents anyone who does not have visual access to the Splash Screen (i.e. People outside of conference rooms) from connecting to the WPG device. When the application runs, the Pop-up window shown below asks for the security code that appears on the bottom portion of the Splash Screen shown below. In the Display Access Number field, type the code > click OK.
Pop-up window
ENABLE WIRELESS ENCRYPTION
Check the Enable Wireless Encryption box shown below if you want to enable WPA-PSK TKIP key encryption between your PC and the WPG.
NOTE: When encryption is enabled, a new user will not be able to download the application unless the System Administrator provides the WPA-PSK TKIP key to the new user.
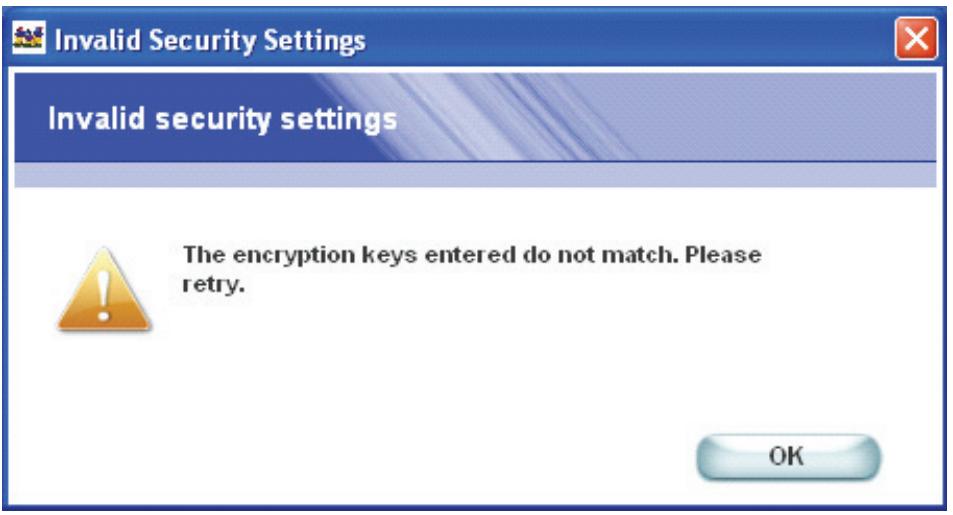
Type 8 to 63 ASCII characters as the key for WPA-PSK TKIP encryption. Enter the Key > Confirm Key > Click OK.
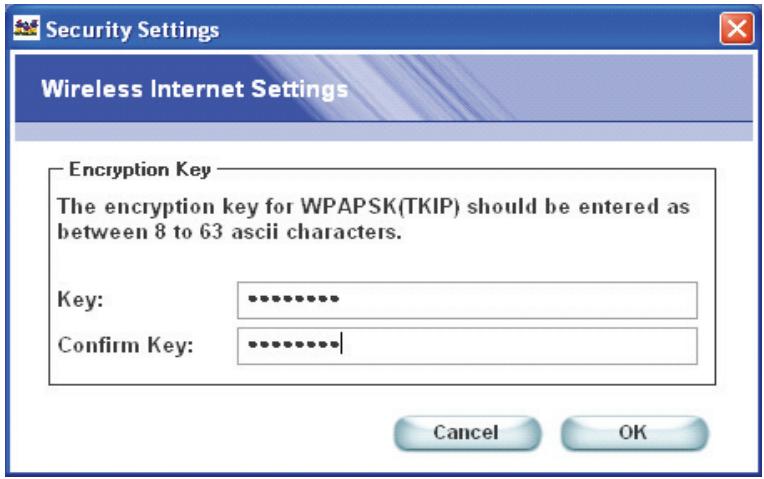
If the encryption keys entered do not match, the screen shown below appears.
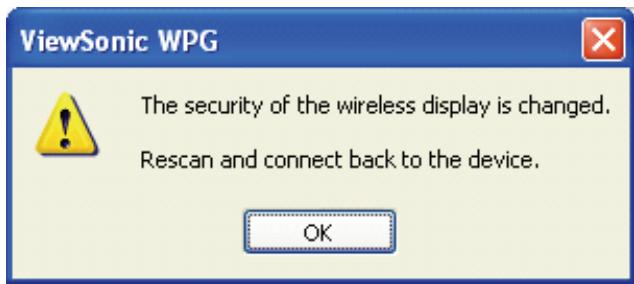
After enabling Wireless Encryption, the wireless connection will be disconnects, user must Select Display and Connect back to the WPG.
Pop-up window
For Windows Vista User
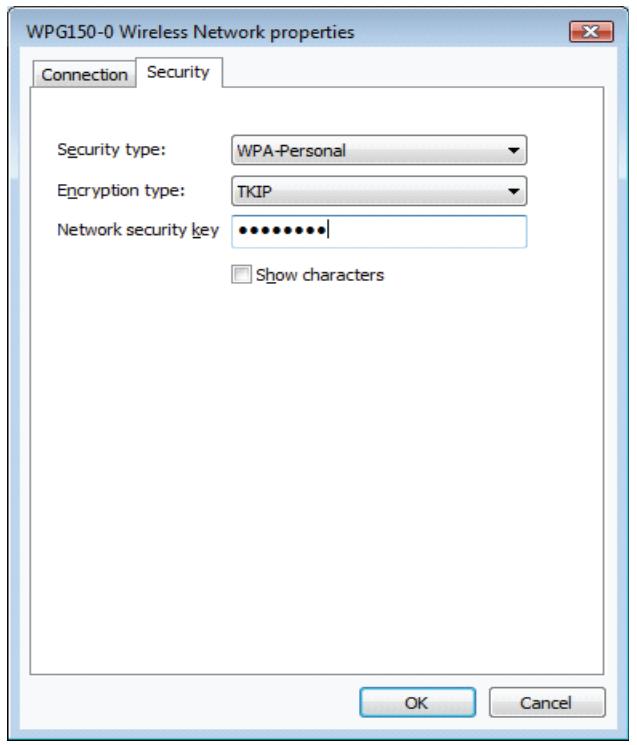
After enabling Wireless Encryption, the wireless connection will be disconnected, user must change WPG Wireless Network Properties:
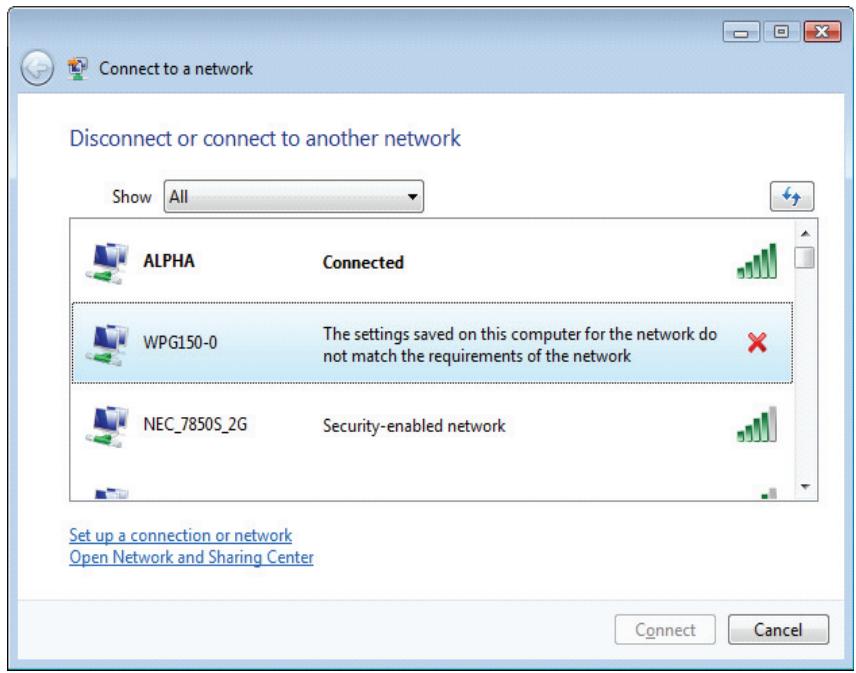
Select Properties from the menu.
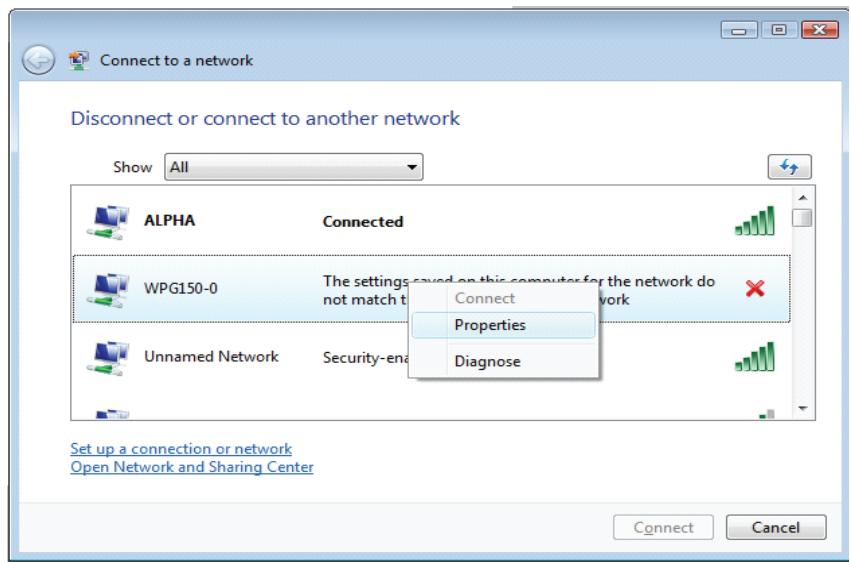
Set Security Type to "WPA-Personal", select "TKIP" for the Encryption Type and type the Network Security Key > Click OK
The Splash screen below indicates a secured WPG.
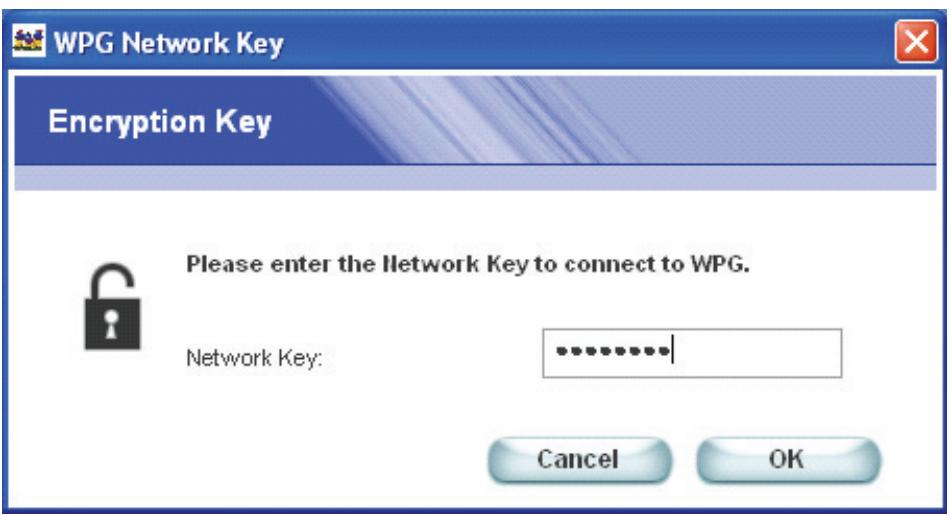
The next time a user connects to WPG, type the WPA-PSK TKIP key > Click OK.
Pop-up window
For Windows Vista Users
Security Key assigned by the System Administrator when connecting to a secured WPG for the first time. Type the Security key and click on Connect.
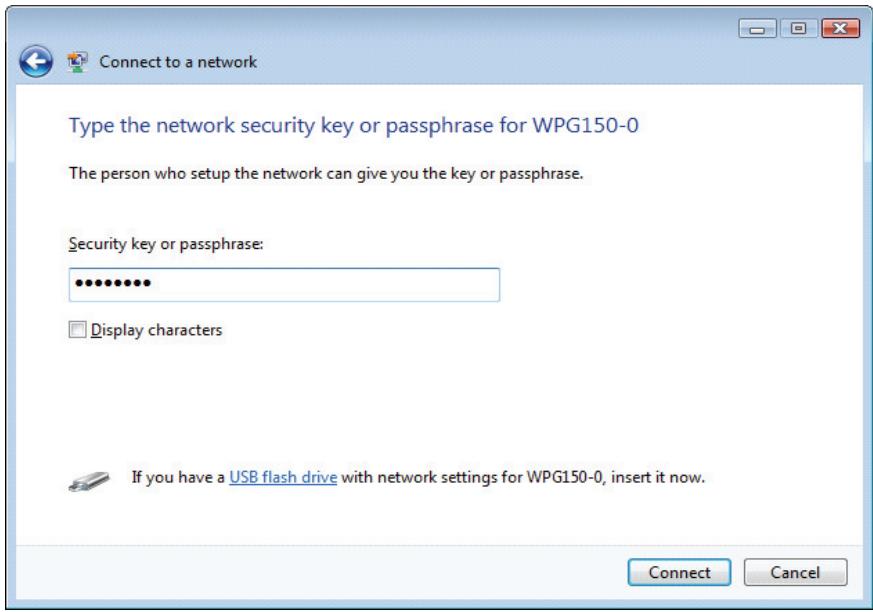
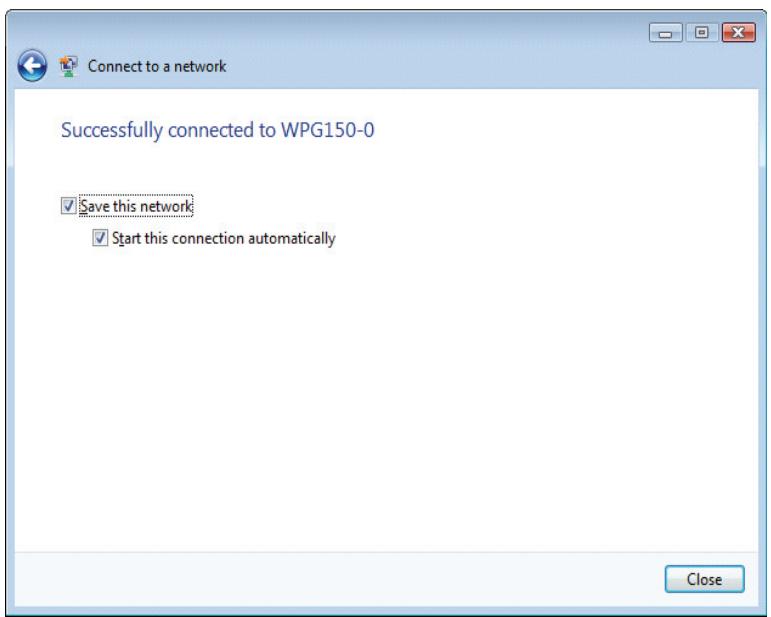
A successful connection is indicated by a new message.
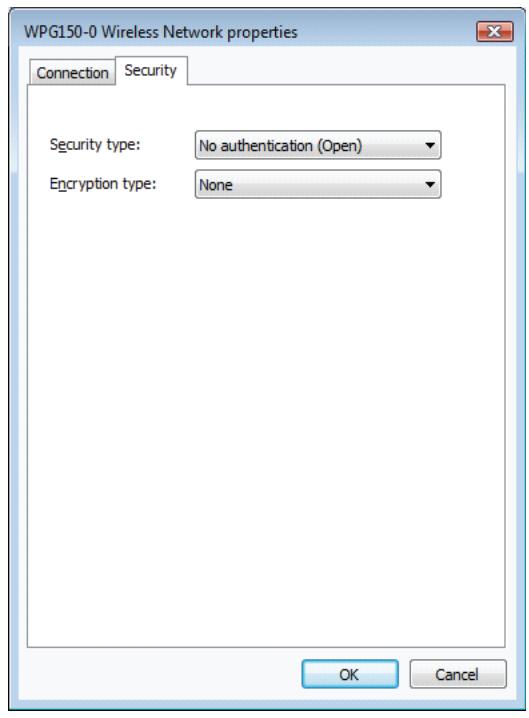
Note: For unsecured WPG, the default settings of WPG Wireless Network Properties are: Security Type: "No Authentication (Open)"; Encryption Type: "None".
The System Administrator can Change the Wireless Encryption Key by pressing "Setting" button.
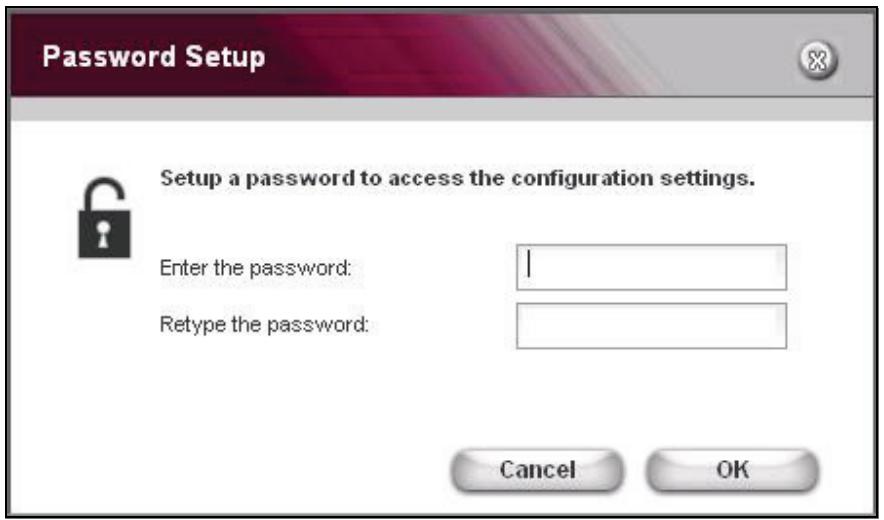
password setup
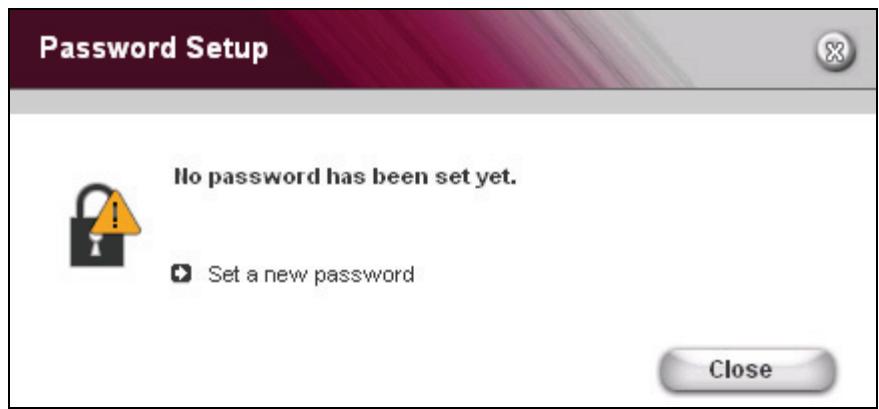
Set up a password to prevent unauthorized access to your display settings as follows:
From the Wireless Display Configure Settings screen, select Password Setup. The Password Setup screen appears as shown below. Enter a password > retype the password > OK.
If a password has not been setup, the screen shown below appears.
UPGRADE FIRMWARE
IMPORTANT! After upgrading the firmware, you need to uninstall the software from your PC. To uninstall the software from your PC, click the Windows® Start button > click Programs > ViewSonic WPG > Uninstall.
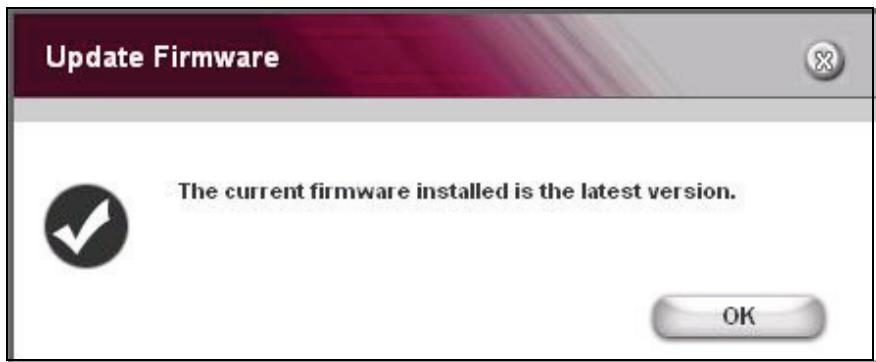
IMPORTANT NOTE! Your WPG LAN port must be connected to the Internet in order for the device to check for an updated firmware.
From the Configure WPG screen, click Upgrade Firmware. If your firmware is the latest version, the screen below appears.
NETWORK SETTINGS
In the Network Name field, enter your desired SSID > Select a Channel from the pull-down menu > click OK.

If you are having performance issues with your WPG, try selecting a different channel.
| Feature | Description |
| Network Name | You can change the SSID by entering a new one and choosing OK. |
| Select a Channel | By default, the wireless channel is automatically chosen for you during boot up. You can change the channel if needed by choosing a different one on the drop down menu then clicking OK. |
| Network Settings | This is for your LAN Connection. By default, it is set to automatically obtain an IP Address. If you wish to use a Static Address, click Use the following address, enter the parameters, and then click OK. |
USING THE WPG
This section shows how you can use the WPG to do the following: play video files or other graphic files such as Power Point®, Word documents, spreadsheets, etc.
PLAYVIDEO
- To play video, put your display in Extended Mode and select 640 x 480 Resolution.
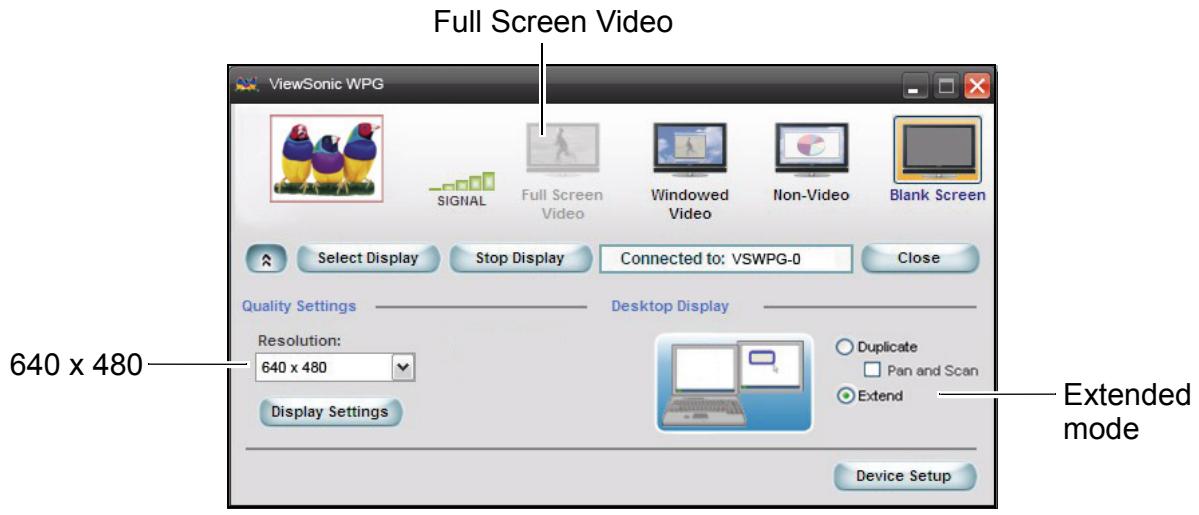
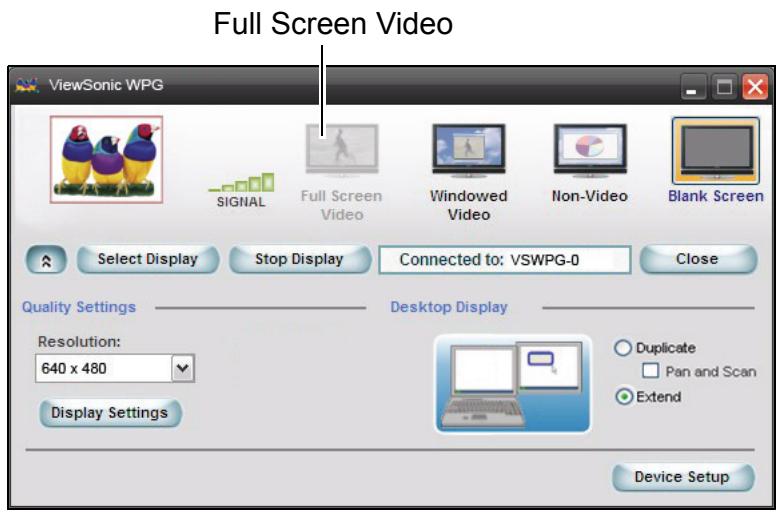
- Play a video file using your PC's Media Player. As the video is playing, right click on the Media Player task tray, click Move to Display. You should now see the video any projector or monitor connected to the WPG. IMPORTANT! To play the video smoothly, click Full Screen Video on the screen shown below on your PC.
SHOW GRAPHIC PRESENTATIONS
- To show a graphic presentation such as a Power Point presentation, a Word document, or an Excel® spreadsheet, select Duplicate mode as shown below > select Non-Video, and change the resolution as desired: for faster PCs (2 GB and above) you can select up to 1024 x 768. Otherwise, 800 x 600 and below is recommended.
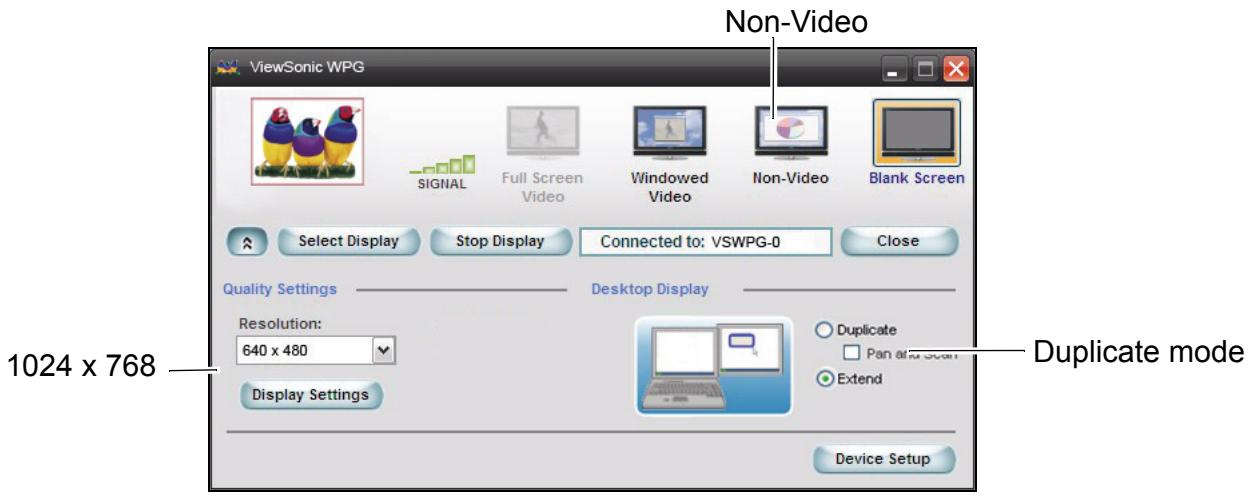
- Open your graphic presentation (not a video). Now you should see your graphic presentation on your display.
Blanking the Screen
When delivering presentations, sometimes it is necessary to turn the screen off first when doing something you do not want others to see. To blank the screen, click the "Blank Screen" button shown above. The WPG displays a blank screen while still connected wirelessly.
KNOWN ISSUE:
Wireless LAN Connection Disconnects
Symptom(s):
Some wireless LAN client connections are intermittently dropped from some networks followed by a new client association to either the same Access Point or another Access Point. Some applications may lose their connections.
Wireless LAN protocol analyzer traces will reflect a high number of retransmissions to the client. Access Point logs may reflect affected clients not authenticated because of too many retries.
This topic applies only to the following adapters:
Intel® PRO/Wireless 2915ABG Network Connection
Intel® PRO/Wireless 2200BG Network Connection
This topic applies only to adapters using driver version 9.0.4.8 or earlier.
This issue does not occur on all computers or on all networks.
Cause:
A timing issue in the driver causes clients to sometimes drop frames for a long enough period to cause disconnects in some environments.
Solution:
This issue is resolved by upgrading the driver software to version 9.0.4.13.
The new driver is included with Intel® PROSet/Wireless software version 10.1.1. For information on software availability and downloads see Download Windows* Software for Intel® PRO Wireless Network Connection.
Work Around:
One of the following work arounds can be implemented as a temporary solution.
- Configure the access points to use long preamble.
- If the 1 Mbps data rate is disabled, then enable 1 Mbps data rate on the access points.
This applies to: Intel® PRO/Wireless 2200BG Network Connection
Intel® PRO/Wireless 2915ABG Network Connection
Solution ID: CS-022509
Date Created: 03-Apr-2006
Last Modified: 20-Jul-2006
http://www.intel.com/support/wireless/wlan/sb/cs-022509.htm
TROUBLESHOOTING & MAINTENANCE
This section gives solutions to common WPG problems you may encounter when using the device and guidelines for taking care of your WPG. If you encounter a problem that you cannot solve, contact your reseller or ViewSonic Customer Support. See the "Customer Support" section for contact information. Additional product information such as FAQ, specifications, data sheets, etc. may be found on the ViewSonic website.
RESET THE WPG
HARD RESET
NOTE: If for any reason you forget the password or the encryption key that has been set, you can use the Hard Reset default back to factory settings. To Hard Reset, press the Reset button on the back of the device for five (5) seconds or more.
SOFT RESET
To Soft Reset, press the Reset button momentarily for about one (1) second. The LED turns off for two (2) seconds. The system reboots with all the user set parameters intact.
ABOUT
The About window shows the ViewSonic version of the WPG software application.
CUSTOMER SUPPORT
For Customer Support, you will need the product serial number. Before sending the WPG-150 out for service, be sure to back up all data and remove all third party software.
| Country/Region | Website (may have email address also) | Phone Fax |
| United States | viewsonic.com | Phone: 800-688-6688 Fax: 909-468-1202 |
| Canada | viewsonic.com | Phone: 866-463-4775 Fax: 909-468-5814 |
| United Kingdom | viewsoniceurope.com | Phone: 0800-833-648 Fax: 0179-450-0801 |
| Europe, Middle East, Baltic countries, and North Africa | viewsoniceurope.com | Contact your reseller |
| Australia and New Zealand | viewsonic.com.au | Phone: 61-2-9929-3955 Fax: 61-2-9929-8393 |
| Singapore/India and Southeast Asia | viewsonic.com.sg | Phone: 65-273-4018 Fax: 65-273-1566 |
| Taiwan | viewsonic.com.tw | Phone: 866-2-2246-3456 Fax: 866-2-8242-3733 |
| Other Asia Pacific countries | Contact your reseller | |
| South Africa | viewsonic.com/asia | Phone: 886-2-2246-3456 Fax: 886-2-8242-3668 |
WIRELESS PRODUCTS DISCLAIMER
The actual data throughput rate may vary depending on several factors including but not limited to the following: (1) network conditions (volume of network traffic, network overhead, etc.) and (2) environmental factors (power surge, building materials, and construction, etc.).
APPENDIX
COMPLIANCE AND SAFETY NOTICES
Radio Frequency Interference (RFI) compliance
United States compliance notice
This equipment has been tested and found to comply with the limits for a Class B digital device, pursuant to Part 15 of the Federal Communications Commission (FCC) Rules. These limits are designed to provide reasonable protection against harmful interference in a residential installation. This equipment generates, uses, and can radiate radio frequency energy and, if not installed and used in accordance with the instructions, may cause harmful interference to radio communications. However, there is no guarantee that interference will not occur in a particular installation. If this equipment does cause harmful interference to radio or television reception, which can be determined by turning the equipment off and on, the user is encouraged to try to correct the interference by one or more of the following measures:
- Reorient [move] or relocate the receiving antenna.
- Increase the separation [distance] between the equipment and the receiver.
- Connect the equipment to an outlet on a different circuit than what the receiver is connected to.
- Consult the dealer or an experienced radio or television technician for help.
CAUTION: The Part 15 radio device operates on a non-interference basis with other devices operating at its frequency. Any changes or modification to said product not expressly approved could void the user's authority to operate this device.
FCC Caution: Any changes or modifications not expressly approved by the party responsible for compliance could void the user's authority to operate this equipment.
This device complies with Part 15 of the FCC Rules. Operation is subject to the following two conditions: (1) This device may not cause harmful interference, and (2) this device must accept any interference received, including interference that may cause undesired operation.
The antenna(s) used for this transmitter must not be co-located or operating in conjunction with any other antenna or transmitter.
Power supply safety notice
The power supply provided with this device is for use with this device only. Replace only with the same or equivalent type power supply as recommended by the manufacturer.
IMPORTANT NOTE: FCC Radiation Exposure Statement:
This equipment complies with FCC radiation exposure limits set forth for an uncontrolled environment. This equipment should be installed and operated with minimum distance of 2.5cm between the radiator (equipment) and your body.
Proper operation of this radio according to the instructions found in this user's guide will result in user exposure that is substantially below the FCC recommended limits.
- Do not touch or move antenna while the unit is transmitting or receiving.
- Do not hold any component containing the radio such that the antenna is very close or touching any exposed parts of the body, especially the face or eyes, while transmitting.
- Do not operate a portable transmitter near unshielded blasting caps or in an explosive environment unless it is a type especially qualified for such use.
- Do not operate the radio or attempt to transmit data unless the antenna is connected: if not, the radio may be damaged.
Canadian compliance notice
English: This digital apparatus does not exceed the Canada ICES-003 Class B limits for radio noise emissions from digital apparatus as set out in the radio interference regulations of the Canadian Department of Communications.
European compliance notice
Products with the CE Marking comply with both the EMC Directive (89/336/EEC) and the Low Voltage Directive (73/23/EEC) issued by the Commission of the European Community. Compliance with these directives implies conformity to the following European Norms:

EN55022 (CISPR 22) Radio Frequency Interference
EN55024 (IEC61000-4-2, -4-4, -4-5, -4-6, -4-11)
EN60950 (IEC950) Product Safety
Declaration of RoHS Compliance
This product has been designed and manufactured in compliance with Directive 2002/95/EC of the European Parliament and the Council on restriction of the use of certain hazardous substances in electrical and electronic equipment (RoHS Directive) and is deemed to comply with the maximum concentration values issued by the European Technical Adaptation Committee (TAC) as shown below:

| Substance | Proposed Maximum Concentration | Actual Concentration |
| Lead (Pb) | 0.1% | <0.1% |
| Mercury (Hg) | 0.1% | <0.1% |
| Cadmium (Cd) | 0.01% | <0.01% |
| Hexavalent Chromium (Cr6+) | 0.1% | <0.1% |
| Polybrominated biphenyls (PBB) | 0.1% | <0.1% |
| Polybrominated diphenyl ethers (PBDE) | 0.1% | <0.1% |
Certain components of products as stated above are exempted under the Annex of the RoHS Directives as noted below. Examples of exempted components are:
- Mercury in compact fluorescent lamps not exceeding 5mg per lamp and in other lamps not specifically mentioned in the Annex of RoHS Directive
- Lead in glass of cathode ray tubes, electronic components, fluorescent tubes, and electronic ceramic parts (e.g. piezoelectronic devices)
- Lead in high temperature type solders (i.e. lead-based alloys containing 85% by weight or more lead)
- Lead as an allotting element in steel containing up to 0.35% lead by weight, aluminium containing up to 0.4% lead by weight and as a cooper alloy containing up to 4% lead by weight.
For EU-member states only as follows
The mark shown to the right is in compliance with the Waste Electrical and Electronic Equipment Directive 2002/96/EC (WEEE). The mark indicates the requirement NOT to dispose the equipment as unsorted municipal waste, but use the return and collection systems according to local law.

SPECIFICATIONS
| Dimensions | 5.98" (L) x 3.24" (W) x 1.40" (H) | ||
| 152.0 mm (L) x 82.4 mm (W) x 35.5 mm (H) | |||
| Weight | Net Wt. 1/2 lb. | Gross Wt. 1.25 lbs. | |
| Connectivity | Network connectivity | 802.11 Wireless | Reverse SMA antenna jack 2dB antenna IEEE 802.11 b+g |
| 10/100 Ethernet | IEEE 802.3/802.3u compliant Supports Full Duplex operations IEEE 802.3x flow control support for Full duplex mode Crosslink cable support | ||
| Audio output | Stereo 3.5 mm mini-jack output for the display's audio IN or external amplified speakers | ||
| Video output | DVI | Hot plug detection Up to XGA resolution Up to 16-bit color depth Up to 75 Hz refresh rate | |
| VGA | Up to XGA resolution Up to 16-bit color depth Up to 75 Hz refresh rate | ||
| Power | 5 VDC Wall-type Power Adapter | ||
| Environment | Temperature | Operation | 0° to 40°C (32° to 104°F) |
| Storage | -25° to 55°C (13° to 131°F) | ||
| Humidity | Operation | 20 to 95% RH (no cond.) | |
| Storage | 50 to 95% RH (no cond.) | ||
| Software | Wireless G Presentation Gateway software application | ||
| Regulatory Approvals | FCC-15B, FCC-15C, IC-ES003B, IC-RSS210, ETL, BSMI, NCC DGT, KTL, MIC, RRL, IDA, CB, CE, C-Tick, CCC, SRRC, NOM | ||
LIMITED WARRANTY
Please go to the Customer Support table in this guide for the ViewSonic website in your region to get warranty information.
ViewSonic®
See the difference

- Wireless G Presentation Gateway
- Product Registration
- For Your Records
- Product disposal at end of product life
- Contents
- Introduction
- Initial Setup
- Run the WPG Application
- Advanced Configuration
- Using the WPG
- Troubleshooting & Maintenance
- Appendix
- PACKAGE CONTENTS
- FEATURES
- GLOSSARY
- SYSTEM REQUIREMENTS
- CONNECT THE WPG
- ACCESS A WIRELESS NETWORK
- INSTALL THE WPG APPLICATION ON YOUR PC
- WIRELESS DISPLAY LIST
- For Windows Vista users:
- Pop-up window
- CONNECTION Failed
- NORMAL MODE
- For Windows Vista Users
- For Windows Vista User
- CONFIGURE DISPLAY
- DISPLAY ACCESS NUMBER SECURITY
- ENABLE WIRELESS ENCRYPTION
- Set Security Type to "WPA-Personal", select "TKIP" for the Encryption Type and type the Network Security Key > Click OK
- password setup
- UPGRADE FIRMWARE
- NETWORK SETTINGS
- PLAYVIDEO
- SHOW GRAPHIC PRESENTATIONS
- Blanking the Screen
- KNOWN ISSUE:
- Wireless LAN Connection Disconnects
- Symptom(s):
- Cause:
- Solution:
- Work Around:
- RESET THE WPG
- HARD RESET
- SOFT RESET
- ABOUT
- CUSTOMER SUPPORT
- WIRELESS PRODUCTS DISCLAIMER
- COMPLIANCE AND SAFETY NOTICES
- Radio Frequency Interference (RFI) compliance
- United States compliance notice
- Power supply safety notice
- IMPORTANT NOTE: FCC Radiation Exposure Statement:
- Canadian compliance notice
- European compliance notice
- Declaration of RoHS Compliance
- For EU-member states only as follows
- SPECIFICATIONS
- LIMITED WARRANTY
- ViewSonic®
Brand : VIEWSONIC
Model : WPG-150
Category : Projection accessory