
SS-R1 - Digital recorder TASCAM - Free user manual and instructions
Find the device manual for free SS-R1 TASCAM in PDF.
| Product type | Digital recorder |
| Brand | TASCAM |
| Model | SS-R1 |
| Category | Digital recorder |
| Dimensions (W x D x H) | 482 x 200 x 44 mm (1U rack format) |
| Weight | 2.5 kg |
| Power supply | 100-240 V AC, 50/60 Hz |
| Power consumption | 15 W |
| Recording media | SD/SDHC card, USB hard drive |
| Compatible audio formats | WAV (BWF), MP3 |
| Sampling frequencies | 44.1 / 48 / 96 kHz |
| Audio resolution | 16 / 24 bits |
| Audio inputs | 2 x XLR balanced, 2 x RCA unbalanced |
| Audio outputs | 2 x XLR balanced, 2 x RCA unbalanced, headphone jack |
| Main features | Recording, playback, loop playback, track marking |
| Connectivity | USB 2.0 (device/host), Ethernet |
| Display | Backlit LCD screen |
| Remote control | Input for wired remote control (RC-SS1) |
| Care and cleaning | Clean with a soft, dry cloth. Do not use solvents. |
| Safety | Do not expose to moisture, shocks, or extreme temperatures. Disconnect before cleaning. |
| Spare parts and repairability | Contact TASCAM customer service for any spare parts or repairs. |
| General information | 68-page user manual included. Class A product (may cause radio interference in a domestic environment). |
Frequently Asked Questions - SS-R1 TASCAM
User questions about SS-R1 TASCAM
0 question about this device. Answer the ones you know or ask your own.
Ask a new question about this device
Download the instructions for your Digital recorder in PDF format for free! Find your manual SS-R1 - TASCAM and take your electronic device back in hand. On this page are published all the documents necessary for the use of your device. SS-R1 by TASCAM.
USER MANUAL SS-R1 TASCAM
TEAC Professional Division
SS-R1
Solid State Stereo Audio Recorder
OWNER'S MANUAL

| CAUTION: TO REDUCE THE RISK OF ELECTRIC SHOCK, DO NOT REMOVE COVER (OR BACK). NO USER-SERVICEABLE PARTS INSIDE. REFER SERVICING TO QUALIFIED SERVICE PERSONNEL. | |
 | The lightning flash with arrowhead symbol, within equilateral triangle, is intended to alert the user to the presence of uninsulated “dangerous voltage” within the product’s enclosure that may be of sufficient magnitude to constitute a risk of electric shock to persons. |
 | The exclamation point within an equilateral triangle is intended to alert the user to the presence of important operating and maintenance (servicing) instructions in the literature accompanying the appliance. |
This appliance has a serial number located on the rear panel. Please record the model number and serial number and retain them for your records. Model number ____ Serial number ____
WARNING: TO PREVENT FIRE OR SHOCK HAZARD, DO NOT EXPOSE THIS APPLIANCE TO RAIN OR MOISTURE.
For U.S.A.
TO THE USER
This equipment has been tested and found to comply with the limits for a Class A digital device, pursuant to Part 15 of the FCC Rules. These limits are designed to provide reasonable protection against harmful interference when the equipment is operated in a commercial environment. This equipment generates, uses, and can radiate radio frequency energy and, if not installed and used in accordance with the instruction manual, may cause harmful interference to radio communications.
Operation of this equipment in a residential area is likely to cause harmful interference in which case the user will be required to correct the interference at his own expense.
CAUTION
Changes or modifications to this equipment not expressly approved by TEAC CORPORATION for compliance could void the user's authority to operate this equipment.
CE Marking Information
a) Applicable electromagnetic environment: E4
b) Peak inrush current: 17 A
In North America use only on 120V supply.
For the customers in Europe
WARNING
This is a Class A product. In a domestic environment, this product may cause radio interference in which case the user may be required to take adequate measures.
1 Read these instructions.
2 Keep these instructions.
3 Heed all warnings.
4 Follow all instructions.
5 Do not use this apparatus near water.
6 Clean only with dry cloth.
7 Do not block any ventilation openings. Install in accordance with the manufacturer's instructions.
8 Do not install near any heat sources such as radiators, heat registers, stoves, or other apparatus (including amplifiers) that produce heat.
9 Do not defeat the safety purpose of the polarized or grounding-type plug. A polarized plug has two blades with one wider than the other. A grounding type plug has two blades and a third grounding prong. The wide blade or the third prong are provided for your safety. If the provided plug does not fit into your outlet, consult an electrician for replacement of the obsolete outlet.
10 Protect the power cord from being walked on or pinched particularly at plugs, convenience receptacles, and the point where they exit from the apparatus.
11 Only use attachments/accessories specified by the manufacturer.
12 Use only with the cart, stand, tripod, bracket, or table specified by the manufacturer, or sold with the apparatus. When a cart is used, use caution when moving the cart/apparatus combination to avoid injury from tip-over.

natural_image
Symbolic illustration of a person using a large tool inside a circle (no text or symbols)13 Unplug this apparatus during lightning storms or when unused for long periods of time.
14 Refer all servicing to qualified service personnel. Servicing is required when the apparatus has been damaged in any way, such as power-supply cord or plug is damaged, liquid has been spilled or objects have fallen into the apparatus, the apparatus has been exposed to rain or moisture, does not operate normally, or has been dropped.
- Do not expose this apparatus to drips or splashes.
- Do not place any objects filled with liquids, such as vases, on the apparatus.
- Do not install this apparatus in a confined space such as a book case or similar unit.
- The apparatus should be located close enough to the AC outlet so that you can easily grasp the power cord plug at any time.
- An apparatus with Class I construction shall be connected to an AC outlet with a protective grounding connection.
- Batteries (battery pack or batteries installed) should not be exposed to excessive heat such as sunshine, fire or the like.
- Excessive sound pressure from earphones and headphones can cause hearing loss.
- The apparatus draws nominal non-operating power from the AC outlet with its STANDBY/ON in the Standby position.
1 - Introduction
Features of the SS-R1 6
Supplied accessories 6
Rack-mounting the unit....6
About this manual 6
Media considerations ...... 7
Environmental considerations ...... 7
Beware of condensation....7
Connections....7
2 – Controls and connectors
Front panel 9
Rear panel....10
Remote control unit (RC-SS1) 11
The home screen 13
Various indicators....14
3 - Menu screens
Operations in the menu screens.... 16
4 – Preparations
Connections...... 17
Turning the power on.... 18
Setting the date and time 18
Adjusting the display.... 19
Adjusting the contrast 19
Adjusting the brightness 19
Inserting a CompactFlash card....20
About the door lock....20
Removing the card 20
5 – Playback
Files that can be played....21
Tracks and files 21
Play area 21
Selecting the type of play area....21
Selecting the current folder or current playlist....22
Basic playback operations....22
Playback 22
Playback....22
Skipping to the previous or next track.....22
Specifying a track number....23
Fast-forward/rewind search....23
Time search....23
Time searching from an incomplete entry..23
Time skip....24
Playback modes....24
Specifying the playback mode....24
Program playback 25
Switching the playback time display mode 25
Power-on play 25
Repeat playback....26
Conventional repeat playback 26
A-B Repeat playback 26
Pitch Control playback....26
Specifying the Pitch Step....27
Key Control playback....27
Using the remote's dedicated key to turn Key Control on/off....28
Auto Cue function....28
Using the remote's dedicated key to turn Auto Cue on/off....29
Auto Ready function....29
Turning the Auto Ready function on/off from the front panel 29
Call function 30
Incremental Playback....30
Using the remote's dedicated key ....30
Using the menu to make settings....31
Playing back in monaural 31
Resume Playback.... 32
Flash Start function.... 32
End of disc/track message (EOM) 33
Specifying an EOM tally output trigger .....33
Example of actual use....33
6 – Recording
Selecting the input source....34
Using the dedicated remote key to select the source 34
Using the menu to select the source .....34
Input source indicator....35
Specifying the recording file format ...... 35
Using the sampling rate converter 36
Monitoring the input signal 36
Adjusting the input signal level and balance 37
Basic recording operation 37
Switching the recording time display mode 38
Sync recording....39
Making settings....39
Sync Record operation....40
Auto Track function 41
Using the menu 41
Using the remote's dedicated key to switch modes 42
Assigning a new track number manually ... 42
Applying the compressor while recording .. 43
Specifying the name of the recorded file ... 44
7 – Using the folder finder
Overview 45
Opening the folder finder screen 45
Navigating in the folder finder screen...... 45
Operations when a folder is highlighted ...45
Operations when a file is highlighted......46
Operations in the folder menu screen ..... 47
Renaming a folder....47
Deleting a folder 47
Undeleting a deleted folder (UNDO)......48
Making a folder the current folder......48
Creating a new folder....48
Adding an entire folder to a playlist ......49
Undoing a folder menu operation (UNDO) 49
Operations in the file menu screen .... 50
Editing the file name....50
Deleting a file ....50
Adding files to a playlist....51
Dividing a file (DIVIDE) 51
Combining files (COMBINE)....52
Undoing a file menu operation (UNDO).....53
Moving or copying a file 53
Moving a file within a folder....53
Moving or copying a file between folders 54
8 – Using the playlist finder
Overview 55
Opening the playlist finder screen .... 55
Navigating in the playlist finder screen ..... 55
Operations in the playlist menu screen ..... 56
Adding a file/folder to a playlist....57
Deleting all files from a playlist....57
Deleting a file from a playlist....57
Moving a file....58
9 – Other settings
Restoring the factory settings 59
Formatting a CompactFlash card....59
Checking the capacity of the card .... 59
10 – Operation using a computer keyboard
Specifying the keyboard type....60
Using the keyboard to enter names...... 60
List of keyboard operations 61
Keyboard operations....61
11 – Using the RS-232C connector ......63
12 – Messages ......64
13 – Troubleshooting......65
14 – Specifications
Dimensional diagram......67
1 - Introduction
Thank you for your purchase of the TASCAM SS-R1 Solid State Stereo Audio Recorder.
Before connecting and using the unit, please take time to read this manual thoroughly to ensure you understand how to properly set up and connect the SS-R1, as well as the operation of its many useful and convenient functions. After you have finished reading this manual, please keep it in a safe place for future reference.
NOTE
This product is designed to help you record and reproduce sound works to which you own the copyright,
or where you have obtained permission from the copyright holder or the rightful licensor. Unless you own the copyright, or have obtained the appropriate permission from the copyright holder or the rightful licensor, your unauthorized recording, reproduction or distribution thereof may result in severe criminal penalties under copyright laws and international copyright treaties. If you are uncertain about your rights, contact your legal advisor. Under no circumstances will TEAC Corporation be responsible for the consequences of any illegal copying performed using the SS-R1.
Features of the SS-R1
- A two-channel audio recorder that uses CompactFlash cards.
- Can be mounted in a single rack space.
- Allows recording and playback of 16-bit linear PCM audio or MP3 audio, at sampling frequencies of 44.1 kHz or 48 kHz.
- Provides parallel and serial control ports to allow control from outside.
- Flash Start function allows playback to begin instantly.
-
Playback control functionality such as Pitch Control and Key Control.
-
Play lists and folders can be used to freely specify the range of playback.
- Track editing functionality is provided (for linear PCM audio only).
- An internal clock is provided for time stamping.
- Balanced and unbalanced analog audio inputs and outputs as well as coaxial digital audio input and output are provided.
- Wired remote control for reliable operation is provided.
- A PS/2 keyboard can be connected to control the unit or to enter text.
Supplied accessories
In addition to this manual, the SS-R1 has been packed with the following:
- RC-SS1 remote control unit (with 5m cable) ....1
- AC power cable....1
- A rack-mounting screw kit (screws and washers)......1
- Security Screw....2
- A warranty card....1
Contact your TASCAM supplier if any of these items are missing.
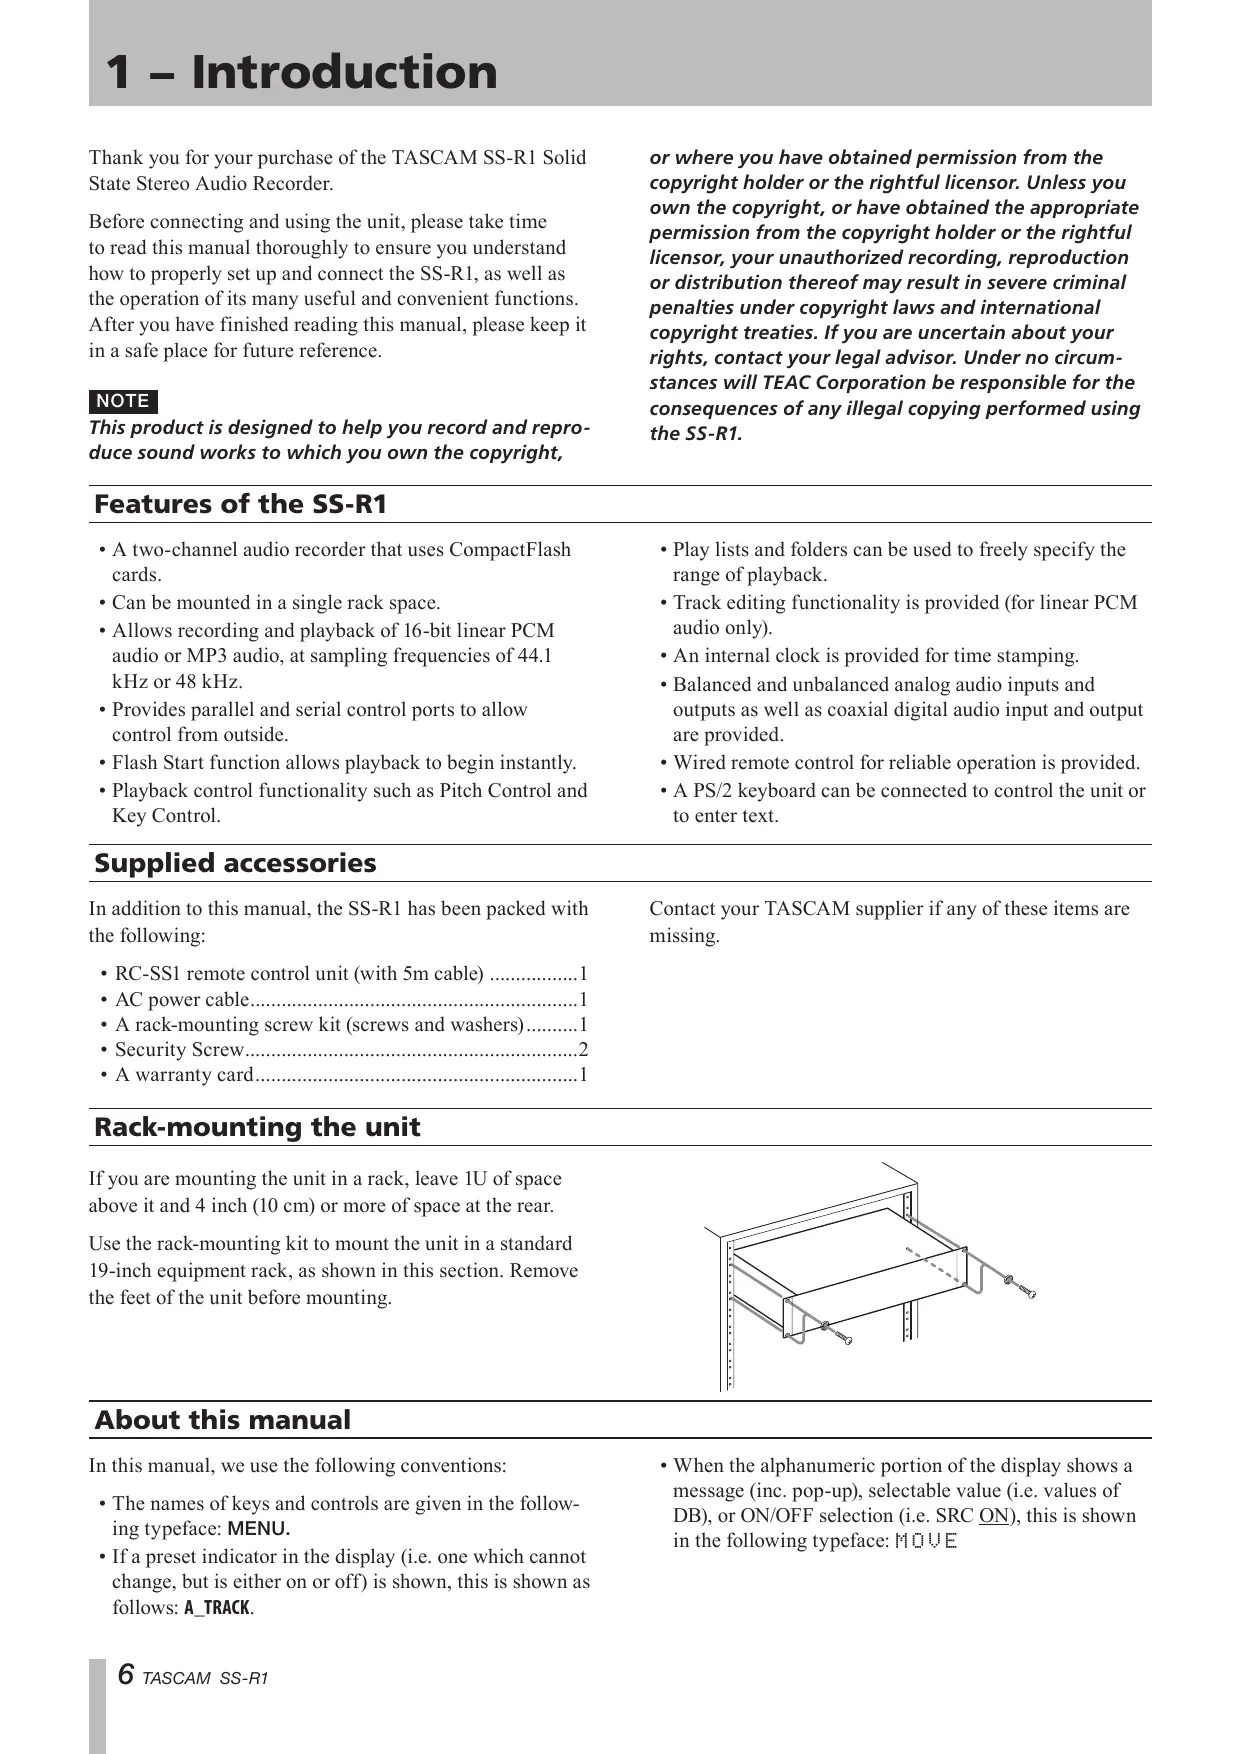
Rack-mounting the unit
If you are mounting the unit in a rack, leave 1U of space above it and 4 inch (10 cm) or more of space at the rear.
Use the rack-mounting kit to mount the unit in a standard 19-inch equipment rack, as shown in this section. Remove the feet of the unit before mounting.

natural_image
Technical line drawing of a mechanical assembly with bolts and brackets (no text or symbols)About this manual
In this manual, we use the following conventions:
- The names of keys and controls are given in the following typeface: MENU.
- If a preset indicator in the display (i.e. one which cannot change, but is either on or off) is shown, this is shown as follows: A_TRACK.
- When the alphanumeric portion of the display shows a message (inc. pop-up), selectable value (i.e. values of DB), or ON/OFF selection (i.e. SRC ON), this is shown in the following typeface: MOVE
Media considerations
The capacities and performance of your SS-R1 will vary based on the speed and abilities of the Compact Flash (CF) media used. Older and some cheaper Compact Flash (CF) cards use slower memory components and little internal buffering which results in poor recording performance. Newer CF cards, not only perform reading and writing faster, but also come in larger storage size.
NOTE
A card more than 512 MB should be used on the SS-R1.
The SS-R1 supports only Type I Compact Flash media. Type I cards are typically FLASH-ROM based and provide higher performance and durability than hard disk cards.
A current list of stated CF cards and their capacities is maintain and available for viewing on the TASCAM website at www.tascam.com
CompactFlash cards are precision devices. To prevent damage to the card or the slot, please observe the following cautions.
- Do not leave a CF card in an extremely hot or cold location.
- Do not leave a CF card in an extremely damp location.
- Do not allow a CF card to become wet.
- Do not place any object on top of a CF card, or twist or bend it.
- Do not subject a CF card to strong impact.
Environmental considerations
The SS-R1 may be used in most areas, but to maintain top performance, and prolong operating life, observe the following environmental conditions:
- The nominal temperature should be between 5^ and 35^ (41°F and 95°F).
- Relative humidity should be 30 to 90 percent.
- As the unit may become hot during operation, always leave sufficient space above the unit for ventilation. Do not install this unit in a confined space such as a bookcase, and do not put anything on top of the unit.
-
Avoid installing this unit on top of any heat-generating electrical device such as a power amplifier.
-
Make sure that the unit is mounted in a level position for correct operation.
- Do not use any benzene, paint thinner, ethyl alcohol or other chemical agents to clean the unit as it could damage the surface. To clean the unit, wipe gently with a soft dry cloth.
NOTE
The voltage supplied to the unit should match the voltage as printed on the rear panel. If you are in any doubt regarding this matter, consult an electrician.
Beware of condensation
If the unit is moved from a cold to a warm place, or used after a sudden temperature change, there is a danger of condensation; vapor in the air could condense on the internal mechanism, making correct operation impossible.
To prevent this, or if this occurs, let the player sit for one or two hours at the new room temperature before using.
Connections
The following should be noted when you connect the unit to other equipment.
It is possible to connect the unit's DIGITAL COAXIAL IN, and balanced or unbalanced ANALOG INs (L, R) to other equipment at the same time. However, the unit can receive signals from only one digital input at a time. Currently selected input jack is shown on the display.
Audio signals output from the unit are output from the balanced or unbalanced ANALOG OUT jacks, as well as from the DIGITAL COAXIAL OUT connector simultaneously (but not from the digital outputs in stop mode).
Control connections
The pinouts of the CONTROL I/O (PARALLEL) terminal on the rear panel (see “Rear panel” on page 10) are:
| Pin | Function | IN/OUT |
| 1 | GND | — |
| 2 | Play/Flash 1 | In |
| 3 | Stop/Flash 2 | In |
| 4 | Record/Flash 3 | In |
| 5 | ▶▶ (Next)/Flash 4 | In |
| 6 | ◀◀ (Previous)/Flash 5 | In |
| 7 | Flash Load | In |
| 8 | Fader Start | In |
| 9 | Flash Tally | Out |
| 10 | Ready Tally | Out |
| 11 | Record Tally | Out |
| 12 | Stop Tally | Out |
| 13 | Play Tally | Out |
| 14 | Remote Select*2 | In |
| 15 | Ready/Flash 6 | In |
| 16 | Call/Flash 7 | In |
| 17 | Auto Cue/Flash 8 | In |
| 18 | Auto Ready/Flash 9 | In |
| 19 | Pitch/Flash 10 | In |
| 20 | Flash Page*3 | In |
| 21 | EOM Tally | Out |
| 22 | CF Tally | Out |
| 23 | — | — |
| 24 | — | — |
| 25 | +5V*1 | — |
(operates at 30 ms or longer of ground)
Out: transport status by open collector
Indication signal (maximum voltage 15 V, maximum current 50 mA)
*1 Maximum supplied current is 50 mA.
*2 Pin 14 (Remote Select)
When this pin is high, the input pins for which the above table lists two commands separated by a “/” (pins 2–6 and 15–19) will perform the first-listed function, and can be used as conventional parallel controllers.
When this pin is low, the above-listed input pins will function as flash start keys.
*3 Pin 20 (Flash Page)
When pin 14 (Remote Select) is low, the assigned tracks will be as follows according to the high/low state of pin 20.
| #14 | #20 | Flash-start status |
| Low | High | 1–10 |
| Low | Low | 11–20 |
Tall signals are open collector, with a maximum current of 50 mA. Input signals are active when low (ground) for ≥ 30 ms.
A fader start/stop control should be wired according to the following schematic:

Front panel

① POWER switch Turns the power on/off.
② POWER ON PLAY switch Turns the Power-on Play function (which causes playback to start when the unit is powered-on) on or off (see “Power-on Play” on page 25).
③ CompactFlash card slot Insert a CompactFlash card here (see “Inserting a CompactFlash card” on page 20).
④ LCD display This shows the home screen, various menu screens, the finder screen, and warning messages.
⑤ CF indicator This will blink while data is being written to the CompactFlash card. At other times it will remain lit.
⑥ MULTI JOG dial You can use this dial both by turning it as a wheel and by pressing it as a key.
[Wheel functions]
When the home screen is displayed, use the wheel to select tracks.
When entering a program, use the wheel to select a track to register.
When in menu mode, use the wheel to select a menu item or to select a value.
When editing a name, use the wheel to select characters.
By holding down the DISPLAY (INFO) key and turning the MULTI JOG dial, you can adjust the display contrast.
[Key functions]
Press to select or finalize a setting (ENTER key function). While the finder screen is displayed, hold down this key to move/copy the highlighted file (see “Moving or copying a file” on page 53).
⑦ MENU key While the home screen is displayed, pressing this key will enter menu mode. The MENU screen will appear.
By holding down this key while stopped or paused, you can access the folder finder screen or the play list finder screen, according to the play area setting.
⑧ ◀◀ (◀) key While playing or paused, holding down this key will rewind while outputting audio (Review function).
While playing or paused, momentarily pressing this key will perform the Time Skip function (see “Time skip” on page 24).
In menu mode, this key returns to the previous level. If the play area is FOLDER, you can select the current folder by pressing this key while stopped.
If the play area is PLAYLIST, you can select the current playlist by pressing this key while stopped.
When entering a name, this key moves the cursor toward the beginning.
⑨ ▶▶ (▶) key While playing or paused, holding down this key will fast-forward while outputting audio (Cue function).
While playing or paused, momentarily pressing this key will perform the Time Skip function (see “Time skip” on page 24).
In menu mode, this key proceeds to the next level.
In folder mode while stopped, this key selects a folder. In play list mode while stopped, this key selects a play list.
When editing a name, this key moves the cursor toward the end (see “Editing the file name” on page 50).
⑩ TIME (ESC) key When in a menu, the folder finder, or play list finder, pressing this key will return the display to the home screen.
When in the home screen, pressing this key will switch the time display mode of the recorder (see “Switching the playback time display mode” on page 25,
“Switching the recording time display mode” on page 38).
⑪ DISPLAY (INFO) key When in the home screen, pressing this key will cycle the indication in the lower left of the screen between “file name → folder/playlist name → file information”.
When the finder menu is displayed, pressing this key will display property information for the selected folder or track.
When editing a name, this key switches the type of character (uppercase/lowercase).
You can adjust the display contrast by holding down this key and turning the MULTI JOG dial.
2 - Controls and connectors
⑫ CALL key When you press this key, the SS-R1 will search for the call point (the point at which playback was most recently started from the pause condition), and will enter pause mode (see “Call function” on page 30).
When editing a name, this key inserts a space.
⑬ STOP key When you press this key while playing back or recording, playback or recording will stop.
Pressing this key while stopped or while selecting a track will cancel the track selection.
Pressing this key while stopped in program mode will clear all programs.
Pressing this key while editing will cancel the editing operation.
⑭ PLAY key While stopped or paused, press this key to start playback.
While in the record-ready condition, press this key to start recording.
The key will light during playback or recording.
⑮ READY key While stopped or paused, press this key to enter the pause condition.
While recording, press this key to enter record-ready mode.
⑯ RECORD (TRACK INC) key While stopped, press this key to enter record-ready mode.
While recording, press this key to increment the track number.
The key will light when in recording mode.
If you press this key when a CompactFlash card is not inserted, the input monitor will be activated, and the selected input signal will be output. The key will blink while input monitor is active.
⑰ KEYBOARD connector You can connect a PS/2 keyboard here.
Set the UTILITY menu KEYBOARD setting appropriately for the type of keyboard you've connected (see "Specifying the keyboard type" on page 60).
⑱ PITCH knob Turn this knob to adjust the pitch (play-back speed).
You can press this knob to turn pitch control on/off. By holding down this knob you can access pitch step switch mode (see “Pitch control play” on page 26).
⑲ PHONES knob, PHONES jack You can connect stereo headphones to the PHONES jack.
Use the PHONES knob to adjust the headphone volume.
Rear panel

⑳ ANALOG INPUTS L/R (BALANCED) jacks These are analog input jacks (XLR balanced).
The nominal input level is +4 dBu.
Pin wiring: pin 1 = ground, pin 2 = hot, pin 3 = cold.
②1 ANALOG INPUTS L/R (UNBALANCED) jacks
These are analog input jacks (RCA pin jacks).
The nominal input level is -10 dBV.
②2 ANALOG OUTPUTS L/R (UNBALANCED) jacks
These are analog output jacks (RCA pin jacks).
The nominal output level is -10 dBV.
②3 ANALOG OUTPUTS L/R (BALANCED) plugs
These are analog output plugs (XLR balanced).
The nominal output level is +4 dBu.
Pin wiring: pin 1 = ground, pin 2 = hot, pin 3 = cold.
②4 DIGITAL IN/OUT (COAXIAL) jacks These are digital input/output jacks compatible with IEC-60958 (S/PDIF).
25 CONTROL I/O (RS-232C) connector This is a D-sub 9-pin RS-232C connector for control I/O. You can connect it to an external computer or other device (see “Using the RS-232C connector” on page 63).
②6 CONTROL I/O (PARALLEL) connector This is a D-sub 25-pin parallel connector for control I/O. You can connect it to an external controller. For the pin wiring, refer to “Control connection” on page 8.
⑳ REMOTE IN connector Connect the RC-SS1 dedicated remote here.
⑳ AC IN connector Connect the included power cable here.
Remote control unit (RC-SS1)

① FLASH LOAD key This loads the registered tracks in preparation for Flash Start. When the tracks have been loaded, the display will indicate FLASH (see “Flash Start function” on page 32).
② DEVICE SELECT key This key is not used for this unit.
③ DISPLAY key This has the same function as the front panel DISPLAY (INFO) key.
④ TIME key If you press this key while in a menu setting screen, you will return to the MENU screen. If you press this key while in a MENU screen, you will exit menu mode and return to the home screen. If you press this key while in the home screen, the time display mode of the recorder will change (see “Switching the playback time display mode” on page 25, “Switching the recording time display mode” on page 38).
⑤ P.MODE key This switches the playback mode between CONTINUE (normal consecutive playback),
SINGLE (play one song), PROGRAM (program playback), and RANDOM (random playback) (see “Play modes” on page 24).
⑥ A. CUE key This turns the Auto Cue function on/off (see “Auto Cue function” on page 28).
⑦ A. READY key This turns the Auto Ready function on/off (see “Auto Ready function” on page 29).
⑧ INC PLAY key This turns the Incremental Play function on/off (see “Incremental Playback” on page 30).
⑨ KEY key This turns the Key Control Play function on/off (see “Key Control play” on page 27).
⑩ SYNC key This turns Sync Recording on/off (see “Sync recording” on page 39).
⑪ A. TRACK key This switches the Auto Track mode between OFF, LEVEL, DD, and TIME (see “Auto Track function” on page 41).
2 - Controls and connectors
⑫ FINDER key This accesses the folder finder screen or the play list finder screen, according to the play area setting (see “Opening the folder finder screen” on page 45, “Opening the playlist finder screen” on page 55).
⑬ MENU key This has the same function as the front panel MENU key. However, holding down this key will not access the folder finder screen or playlist finder screen.
⑭ SEARCH (◀◀, ▶▶) keys These have the same function as the front panel ◀◀, ▶▶ keys. However, they will not operate in menu mode.
⑮ SKIP (I◄◄, ►►l) keys These have the same function as turning the front panel MULTI JOG dial.
⑯ STOP key This has the same function as the front panel STOP key.
⑰ LCD-, LCD+ keys These adjust the contrast of the LCD display (see “Adjusting the contrast” on page 19).
⑱ REPEAT key This turns the Repeat Play function on/off (see “Conventional repeat play” on page 26).
⑲ A-B key Use this key for A-B Repeat playback operations (see “A-B Repeat play” on page 26).
⑳ PITCH key This has the same function as pressing the front panel PITCH knob (see “Pitch Control play” on page 26).
+ , - keys These have the same function as turning the front panel PITCH knob (see “Pitch Control play” on page 26).
② INPUT SEL key This selects the recording input source. You can choose ANALOG (RCA), ANALOG (XLR), or COAXIAL (see “Selecting the input source” on page 34).
② Numeric keys (0–9) Use these to select tracks (see “Specifying a track number” on page 23).
②3 CLR/ESC key If you press this while entering a track number, the track number entry will return to the initial condition.
If you press this while entering a program or while registering a track number, the track number will be cancelled. Otherwise, the last-registered program will be deleted (see “Program play” on page 25).
If you press this while performing a menu operation, a folder finder operation, or a playlist finder operation, the display will return to the home screen.
②4 CURSOR (▲,▼,◀,▶) keys Use these keys for menu operations. Use the ▲, ▼ keys to select items or values vertically. Use the ◀ key to return upward through a menu structure, and use the ▶ key to proceed into a menu structure.
⑲ ENTER key This has the same function as pressing the front panel MULTI JOG dial.
26 RECORD key This has the same function as the front panel RECORD key.
⑳ CALL key This has the same function as the front panel CALL key (see “Call function” on page 30).
⑳ READY key This has the same function as the front panel READY key.
⑲ PLAY key This has the same function as the front panel PLAY key.
The home screen
The basic screen shown in the display is called the “home screen”.
If any screen other than the home screen is shown, pressing the TIME (ESC) key (or the remote CLR/ESC key) will take you back to the home screen.

The home screen shows the following information.
① Play area This shows the currently specified play area.
② Playback mode This shows the currently specified playback mode.
③ Input source indicator This shows the currently selected input.
④ Level meter During playback this shows the play-back level, and during recording or in record-ready mode it shows the recording level.
⑤ Time display mode indicator This shows the selected time display mode.
⑥ Counter This shows the track number and time. The time is shown as the currently selected time mode.
⑦ Information This shows information such as the file name.
Various indicators
The content shown here will depend on whether the unit is in playback/stop, or recording/record-ready modes.

While playing or stopped
① REPEAT
This will be lit in Repeat Mode.
② A-B
This will be lit in A-B Repeat mode.
③ PITCH
This will be lit if the Pitch Control function is active.
④ KEY
This will be lit if the Key Control function is active.
⑤ A_CUE
This will be lit if the Auto Cue function is active.
⑥ A_READY
This will be lit if the Auto Ready function is active.
⑦ INC_PLAY
This will be lit if the Incremental Play function is active.
⑧ FLASH
This will be lit if Flash Load has been completed.

While recording or record-ready
⑨ FILE
This indicates whether the recording file format is WAV or MP3.
⑩ FS
This indicates the sampling rate of the recording file.
⑪ BIT
This indicates the bit rate of the recording file.
⑫ A_TRACK
This will be lit if the Auto Track function is on.
⑬ SYNC
This will be lit if Sync Recording is on.
⑭ SRC
This will light if the Sampling Rate Converter function is on.
⑮ COMP
This will be lit if the compressor is on.
⑯ VOLUME
This indicates the recording volume.
The SS-R1 has a menu system with various settings.
When you press the MENU key, the main menu list screen will appear.

Menu structure
There are three main menus, as follows.
PLAY menu: Contains playback-related menu items.
REC menu: Contains recording-related menu items.
UTILITY menu: Contains system settings for the SS-R1.
The following table summarizes the items in each menu.
| Menu option | Sub-Menu option | Function | Reference page |
| PLAY | PLAY AREA | Play area setting | Page 21 |
| PLAY MODE | Play mode setting | Page 24 | |
| AUTO CUE | Auto Cue on/off and setting | Page 28 | |
| AUTO READY | Auto Ready on/off | Page 29 | |
| REPEAT | Repeat Play on/off | Page 26 | |
| KEY | Key Control on/of and setting | Page 27 | |
| PREFERENCE | Various playback preferences | Page 31 | |
| REC | INPUT SELECT | Input source selection | Page 34 |
| INPUT VOLUME | Input volume setting | Page 37 | |
| REC FORMAT | Recording file format setting | Page 35 | |
| SYNC | Sync Recording setting | Page 39 | |
| AUTO TRACK | Auto Track Increment setting | Page 41 | |
| PREFERENCE | Various recording preferences | Page 43 | |
| UTILTIY | MEMORY FORMAT | Format a CompactFlash card | Page 59 |
| LCD BRIGHTNESS | Display brightness setting | Page 19 | |
| KEYBOARD | PS/2 keyboard type setting | Page 60 | |
| CLOCK ADJUST | Internal clock time setting | Page 18 | |
| RS-232C | RS-232C communication setting | Page 63 | |
| INFORMATION | View the media information | Page 59 | |
| FACTORY PRESET | Restore the factory settings | Page 59 |
Operations in the menu screens
You can perform operations in the menu screens as follows.
- To select an item (vertically in the screen): Turn the MULTI JOG dial of the SS-R1. Use the CURSOR ▲, ▼ keys of the remote.
- To confirm the highlighted item: Press the MULTI JOG dial of the SS-R1. Press the ENTER key of the remote.
- To move the cursor left/right: Use the ◀◀, ▶▶ keys of the SS-R1. Use the CURSOR ◀, ▶ keys of the remote.
- To select a sub-screen not currently shown in the screen (a ▶ is shown at the right): Press the ▶ key of the SS-R1. Press the CURSOR ▶ key of the remote.
- To return to the previous menu level: Press the ◀◀ key of the SS-R1. Press the CURSOR ◀ key of the remote.
- To return directly to the home screen from menu mode: Press the TIME (ESC) key of the SS-R1. Press the CLR/ESC key of the remote.
NOTE
- If there is an item above (or below) the currently displayed list, a ▲ or ▼ symbol will be shown at the top or bottom of the list.
- As a specific example, we'll explain how to turn the PLAY menu item AUTO CUE "on", and then change the auto cue level.
1 Press the MENU key to access the main menu list screen.
2 Select the desired menu.
From the SS-R1:
Turn the MULTI JOG dial to highlight PLAY, and then press the MULTI JOG dial.
From the remote:
Use the CURSOR ▲, ▼ keys to highlight PLAY, and press the ENTER key.

3 Select the AUTO CUE item.
From the SS-R1:
Turn the MULTI JOG dial to highlight AUTO CUE, and then press the MULTI JOG dial (or the ▶▶ key).
From the remote:
Use the CURSOR ▲, ▼ keys to highlight AUTO CUE, and then press the ENTER key (or the CURSOR ▶ key).

4 Turn the AUTO CUE item ON.
From the SS-R1:
Turn the MULTI JOG dial to highlight ON.
From the remote:
Use the CURSOR ▲, ▼ keys to highlight AUTO CUE.

5 Proceed to the AUTO CUE sub-screen.
From the SS-R1:
Press the ▶▶ key.
From the remote:
Press the CURSOR ▶ key.

6 Set AUTO CUE LEVEL to the desired level.
From the SS-R1:
Turn the MULTI JOG dial to select a value.
From the remote:
Use the CURSOR ▲, ▼ keys to select a value.
7 To return to the home screen.
From the SS-R1:
Press the TIME (ESC) key.
From the remote:
Press the CLR/ESC key.
Connections

Connecting headphones
Connect your stereo headphones to the PHONES jack. Use the PHONES knob located above the PHONES jack to adjust the volume.
Connecting a PS/2 keyboard
You can use a keyboard to enter file (track) names and folder names, and also use it to control the SS-R1 (see “Operation using a computer keyboard” on page 60).
Connecting audio devices (inputs)
Connect an external audio source (e.g., CD player, mixer) to the SS-R1's ANALOG INPUTS (BALANCED) jacks, ANALOG INPUTS (UNBALANCED) jacks, or DIGITAL IN jack. To select the input source, use the REC menu item INPUT SELECT. To adjust the input volume, use the REC menu item INPUT VOLUME.
Connecting audio devices (outputs)
Connect an external monitor system or mixer to the SS-R1's ANALOG OUTPUTS (BALANCED) plugs, ANALOG OUTPUTS (UNBALANCED) jacks, or DIGITAL OUT jack.
Computer
If you connect the SS-R1's RS-232C connector to your computer's RS-232C connector, you'll be able to control the SS-R1 from your computer via a serial connection. After making connections, you'll need to make the correct settings on your computer (see “Using the RS-232C connector” on page 63).
Control via a parallel connection
If you want to control the SS-R1 via a parallel connection from an external controller, use the PARALLEL connector (25-pin D-sub connector). For details on the pin configuration of the PARALLEL connector, refer to “Control connections” (page 8).
Turning the power on
Press the POWER switch to turn the power on.

The SS-R1 will start up, and the startup screen will appear.
If no CompactFlash card is inserted, the display will indicate NO MEDIUM.
If a CompactFlash card is inserted, the display will indicate MEDIUM READING, and the card will be read. When reading is completed, the home screen will appear.
To turn the power off:
No special shutdown operation is required. Simply press the POWER switch to turn the power off.
CAUTION
Do not turn the power off while the CF indicator is blinking (indicating that data is being written).
Setting the date and time
Here's how to set the date and time of the internal clock. When you record, the date and time are recorded in the audio file.
1 Press the MENU key to access the menu list screen.

2 Turn the front panel MULTI JOG dial (or use the remote's CURSOR ▲, ▼ keys) to highlight UTILITY, and press the MULTI JOG dial (or the remote's ENTER key).
The UTILITY menu selection screen will appear.

3 Turn the front panel MULTI JOG dial (or use the remote's CURSOR ▲, ▼ keys) to highlight CLOCK ADJUST, and press the front panel ▶▶ key (or the remote's CURSOR ▶ key).
The clock setting screen will appear.

4 Press and hold the front panel MULTI JOG dial (or the remote's ENTER key). 07 will be highlighted.
5 Set the date and time as follows.
- Use the front panel ◀◀, ▶▶ keys (or the remote's CURSOR ◀, ▶ keys) to move the highlighted area to edit.
- Turn the front panel MULTI JOG dial (or use the remote's CURSOR ▲, ▼ keys) to change the value highlighted.
6 When you've finished making settings, press the front panel MULTI JOG dial (or the remote's ENTER key) to finalize the date and time settings.
Adjusting the display
If necessary, you can adjust the display contrast and brightness.
Adjusting the contrast
While holding down the DISPLAY (INFO) key, turn the MULTI JOG dial (or use the remote's LCD +/- keys) to adjust the contrast of the SS-R1's display.


Adjusting the brightness
You can use the UTILITY menu item LCD BRIGHTNESS to adjust the brightness of the backlight.
1 Press the MENU key to access the main menu list.
2 Turn the front panel MULTI JOG dial (or use the remote's CURSOR ▲, ▼ keys) to highlight UTILITY, and press the front panel MULTI JOG dial or ▶ key (or the remote's ENTER key or CURSOR ▶ key).

3 Turn the front panel MULTI JOG dial (or use the remote's CURSOR ▲, ▼ keys) to highlight LCD BRIGHTNESS, and press the front panel MULTI JOG dial or ▶ key (or the remote's ENTER key or CURSOR ▶ key).

4 Turn the front panel MULTI JOG dial (or use the remote's CURSOR ▲, ▼ keys) to adjust the brightness.
Inserting a CompactFlash card
In order to record or play back on the SS-R1, a CompactFlash card must be inserted in the front panel CompactFlash card slot.
TIP
You can insert a card whether the power is on or off.
1 Open the door of the CompactFlash card slot.

natural_image
Technical line drawing of a rack-mounted electronic device with ports and connectors (no text or symbols)2 Insert a CompactFlash card in the correct orientation.
Insert the card with its label facing up and its contacts facing in.

3 Close the door.
NOTE
If the slot door will not close, remove the card, press the square button located at the right of the slot, and then insert the card once again.
If you insert a card while the power is on, the display will indicate MEDIUM READING.
If you insert a card while the power is off, and then turn the power on, the startup screen will appear and then the display will indicate MEDIUM READING.
About the door lock
You can use the included Security Screw to lock the CompactFlash card slot door.
Use a screwdriver to install or remove the Security Screw.

natural_image
Technical line drawing of a computer drive or rack with an attached component (no text or symbols)Removing the card
Before you remove the card, turn the power off or stop the SS-R1's operation. Never remove the card while recording is in progress (while the CF indicator is blinking).
1 If the door is locked, use a screwdriver to remove the door lock screw.
2 Open the CompactFlash card slot door.
3 Press the square button located at the right of the card slot; the button will protrude.

4 Push the protruding square button, and the card will be partially ejected.
5 Grasp the card and pull it out.
This chapter explains how to play back audio files (WAV or MP3) stored on a CompactFlash card.
The explanations that follow will assume that a CompactFlash card containing audio files is inserted in the SS-R1, and that the SS-R1 is powered-on.
Files that can be played
The SS-R1 is able to play files of the following format.
- WAV files
Stereo or monaural WAV files at a sampling rate of 44.1 kHz or 48 kHz can be played.
- MP3 files
Stereo or monaural MP3 files at a sampling rate of 44.1 kHz or 48 kHz and a bit rate of 64 kbps–320 kbps can be played.
TIP
As long as they meet the above requirements, the SS-R1 can play files that were recorded on another device. For example you can use your computer or other audio device to write files complying with the
above requirements to a CompactFlash card, and then insert this card into the SS-R1 and play the files. This allows you to work efficiently when preparing playback material for the SS-R1.
NOTE
Because of the nature of their format, VBR (Variable Bit Rate) MP3 files do not allow a precise location to be found. Thus, when performing functions that require a point to be specified within the track, such as Time Skip, Call, or the point A setting for A-B Repeat, there may be a slight discrepancy between the point you specified and the point at which playback actually begins.
Tracks and files
The audio data on a CompactFlash card is saved as “audio files”. These files are handled as “tracks” by the SS-R1’s recorder.
For this reason, this manual will refer to audio files as “tracks” (or in some cases, as “songs”) in the context of
explaining the SS-R1's recorder functionality, while using the term “files” in the context of explaining card data management. Please be aware that these different terms refer to the same thing.
Play area
You can specify the range of playback tracks that can be selected in the home screen; this range is called the “play area”.
If numerous files are stored on the card, limiting the range of selection in this way will make it easier for you to select the desired tracks.
You can specify the type of play area; it can be all files on the card (the default setting), a folder, or a playlist.
Selecting the type of play area
You can use the menu to specify the desired type of play area (for details on how to perform menu operations, refer to “Operations in menu screens” on page 16).
1 While stopped, or with no CompactFlash card inserted, press the MENU key to access the main menu list screen.
2 Select the PLAY menu.
3 Select PLAY AREA.

4 Specify the desired type of play area.
Choose ALL, FOLDER, or PLAYLIST.
5 When you've made your choice, press the front panel TIME (ESC) key (or the remote's CLR/ESC key) to return to the home screen.
The play area type is shown in the upper left of the home screen.
NOTE
The play area setting is preserved even when the power is turned off.
Selecting the current folder or current playlist
If you've specified that the play area will be a folder or playlist, you can select the applicable folder or play list by using the front panel ◀◀, ▶▶ keys (or the remote's SEARCH ◀◀, ▶▶ keys) while the home screen is displayed and the recorder is stopped. This folder or playlist will be called the “current folder” or “current playlist”.
NOTE
- You can also select the "current folder" or "current playlist" from the folder finder screen or playlist finder screen (see "Using the folder finder" on page 45, "Using the playlist finder" on page 50).
- A maximum of 999 tracks can be played back by the SS-R1. Even if a CompactFlash card containing more than 999 tracks is inserted in the SS-R1, only the 999 tracks selected according to the SS-R1 system's rules can be played back. Other tracks cannot be played back or edited.
Basic playback operations
Here we'll explain basic operations such as play, pause, and stop.
The following explanations assume that you've completed the necessary connections, that the SS-R1 is powered-on,
that a CompactFlash card containing audio files is inserted, and that the display is showing the home screen.
Playback
Press the PLAY key to begin playback.
NOTE
If the CompactFlash card does not contain any audio files that the SS-R1 is able to play, the counter display area (track number and time display) will show all zeros.
• To stop playback Press the STOP key.
• To pause playback Press the READY key.
In this manual, we'll assume that the play mode is set to CONTINUE (continuous playback mode) unless otherwise specified.
Selecting a track
Here's how to select the track for playback if more than one track exists in the play area. You can select a track either by moving to the previous or next track ("skip"), or by specifying a track number directly.
Skipping to the previous or next track
Turn the front panel MULTI JOG dial (or use the remote's SKIP keys) to skip to the previous or next track.
- If using the MULTI JOG dial, turn it to the right to skip to the next track, or to the left to skip to the previous track.
- If using the SKIP keys, press the ▶▶I key to skip to the next track, or the ◀◀◀ key to skip to the previous track.
After selecting a track, press PLAY key on the front panel or the remote to begin playing the track.
Alternatively, you can press the READY key of the front panel or the remote to pause at the beginning of the selected track.
Specifying a track number
You can use the remote's numeric keys (0–9) to directly specify the number of the track you want to play.
1 Use the remote's numeric keys (0–9) to enter a track number (maximum of three digits).
Enter the track number starting with the highest digit.
- To specify track 1
Press the 1 key once.
• To specify track 12
Press the 1 key → 2 key.
• To specify track 103
Press the 1 key → 0 key → 3 key.
2 Press the PLAY key.
The selected track will begin playing.
Alternatively, you can use this procedure but press the remote's READY key instead of the PLAY key to pause at the beginning of the selected track.
NOTE
- As an alternative to press the PLAY key, you can use the MULTI JOG dial to playback the file selected (or the remote's ENTER key).
- You can't use the numeric keys to specify the track while in program or random mode.
Fast-forward/rewind search
You can rapidly search forward or backward while listening to the audio of a track.
1 Play or pause the desired track.
2 Hold down the ▶▶ or ◀◀ key.
Fast-forward or rewind search will begin.
3 To stop searching, release the key you were holding.
You will return to the state (either playing or paused) in which you were prior to searching.
Time search
While the unit is stopped, playing, or paused, you can locate to a specified time in the specified track.
NOTE
You can't use time search when the play mode is program mode or random mode.
1 Use the remote's numeric keys (0–9) to enter nine digits in the following order.
- Track number: three digits
- Elapsed time from the beginning of the track (hours / minutes / seconds): two digits each
For example if you want to locate to 1 minute 30 seconds from the beginning of track 2, you would press the keys in the following order.
$$ 0 \rightarrow 0 \rightarrow 2 \rightarrow 0 \rightarrow 0 \rightarrow 0 \rightarrow 1 \rightarrow 3 \rightarrow 0 $$
When you finish entering the nine digits, the SS-R1 will automatically locate to the specified position.
If the unit is stopped or playing back prior to the locate operation, playback will begin after the locate operation. If the unit is paused prior to the locate operation, it will pause after the locate operation.
NOTE
If you specify a track number that does not exist in the current play area, or a time that does not exist in the track, the operation will be cancelled at that point.
Time searching from an incomplete entry
If you press the remote's ENTER key (or the PLAY or READY key) before you finish entering all nine digits (to the seconds place), the unit will locate to the position you've specified so far. For example if you enter “0 → 0 → 2 → 0 → 0 → 1 → 2” and press the ENTER key, the recorder will locate to a position 12 minutes from the beginning of track 2.
After the locate operation, the unit will either play or pause, depending on the status prior to pressing the ENTER key. If you press the PLAY key, playback will begin. If you press the READY key, the recorder will pause.
NOTE
- This method allows you to omit the leading 0 of the last place you enter (track, hour, minute), even the leading 00 of the track number. For example if you want to locate to minute 2 of track 2, press "0 → 0 → 2 → 0 → 0 → 2" and press the ENTER key.
- If you enter only the track number and press the ENTER key (or the PLAY key or READY key), the result is the same as "Specifying the track number" (page 23).
Time skip
While playing or paused, you can skip backward or forward in one-minute steps.
1 While playing or paused, press the ◀◀ or ▶▶ keys.
You will locate to a position one minute before or after the current location. Following the locate, the playback or pause condition will continue as it had been prior to the operation.
NOTE
- If you press the ◀◀ key at a point less than one minute after the beginning of the track, you will locate to the beginning of the current track.
- If you press the ◀◀ key at a point less than one second after the beginning of the track, you will
locate to a point one minute before the end of the preceding track. However if the track is the first track in the card or the program, you will pause at the beginning of the current track. (Even when using random play, pressing the ◀◀ key at a point less than one second from the beginning of the track will locate to the beginning of the track).
- If you press the ▶▶ key at a point that is less than one minute from the end of the track, you will locate to the beginning of the next track. However if the track is the last track in the card or the program, you will pause at the end of the current track.
Playback modes
The tracks in the play area can be played using one of the following four types (modes) of playback.
Continuous playback (default setting)
The tracks in the play area will play back in order of their track numbers.
Single playback
Only the currently selected track will play back, and then playback will stop.
Program playback
The tracks will be played back in the order you programmed (see “Program playback” on page 25).
Random playback
All tracks in the play area will play back in a random order without regard to their track number. When all tracks have been played back, playback will stop.
Specifying the playback mode
You can easily select the playback mode by using a dedicated on the remote. To select the playback mode from the SS-R1 itself, use menu mode.
Using the dedicated key of the remote
1 While stopped, or when no CompactFlash card is inserted, press the remote's P.MODE key to cycle through the playback modes. The home screen shows the currently selected mode as follows.
| Display | Playback mode |
| CONTINUE | Continuous playback |
| SINGLE | Single playback |
| PROGRAM | Program playback |
| RANDOM | Random playback |
NOTE
In this owner's manual, we will assume that continuous playback is selected as the playback mode unless otherwise specified.
Using the menu
(For details on how to perform menu operations, refer to “Operations in the menu screens” on page 16).
1 While stopped, press the MENU key to enter menu mode.
2 Turn the MULTI JOG dial to highlight the PLAY menu item, and then press the MULTI JOG dial.
3 Select the PLAY MODE item.
4 Turn the MULTI JOG dial to select the desired play mode.
5 Press the TIME (ESC) key to return to the home screen.
NOTE
The play mode you select is remembered even when the power is turned off.
Program playback
Here is how to play back tracks in the order of the program you specify. You can specify a program of up to 99 tracks.
1 While stopped, set the play mode to program play mode (see “Specifying the playback mode” on page 24).
2 Use the remote's numeric keys (0–9) to enter the desired track number for the program, and press the ENTER key to confirm it.
The track will be registered in the program.
NOTE
Alternatively, you can use the front panel MULTI JOG dial to select a track and then press the MULTI JOG dial.
3 Repeat step 2 to register each of the desired tracks in the program.
NOTE
- You can program the same track repeatedly.
- Pressing the remote's CLR/ESC key will delete the last-programmed track from the program.
- If you attempt to program the 100th track, an error message of PROGRAM FULL will appear. A maximum of 99 tracks can be programmed.
- If the total playback time of the programmed tracks exceeds 99 hours 59 minutes 59 seconds, the display will indicate --H--M--S.
4 Press the PLAY key to begin program playback.
NOTE
- In program play mode, you won't be able to play unless at least one track has been registered in the program.
- If you press the STOP key while stopped, all program data will be cleared.
- The program data will be cleared when you switch the play mode.
- The program data will be cleared when you power-off the SS-R1.
Switching the playback time display mode
You can select the way in which the playback time is shown in the home screen.
1 Press the front panel TIME (ESC) key (or the remote's TIME key).
Each time you press this key, you will cycle through four types of time display. The currently selected display mode is shown above the time display area.
No indicator
The elapsed time of the current track is shown.
REMAIN is lit
The remaining time of the current track is shown.
TOTAL is lit
The elapsed time from the beginning of the play area is shown.
TOTAL and REMAIN are lit
The remaining time in the play area is shown.
NOTE
- While stopped, the total playback time of the play area is always shown, regardless of whether TOTAL and REMAIN are lit.
- In Program mode, the display area shows the elapsed time and remaining time of the entire program; not of the entire play area.
- The time display mode setting is remembered even when the power is turned off.
- For details on the time display during recording or in the record-ready condition, refer to "Switching the recording time display mode" on page 38.
Power-on play
The Power-on Play function starts playback automatically when the SS-R1 is powered-on.
If this function is on and the POWER switch is pressed inward, you can use a commercially-available timer to power-on the SS-R1, and playback will begin automatically.
1 Connect the SS-R1 to a timer so that its power will be supplied from the timer.
2 Make preparations for playback.
Insert a CompactFlash card, and make the desired settings for the play area and the playback mode, etc.
3 Set the front panel POWER ON PLAY switch to the PLAY position.
4 Set your timer to the desired time.
When the specified time arrives, the SS-R1 will be powered-on, and playback will begin automatically.
Repeat playback
You can repeatedly play back all tracks in the play area, or repeatedly play back a specified region within a track (A-B Repeat playback).
Conventional repeat playback
If you press the remote's REPEAT key to turn Repeat playback on, all tracks in the play area will play repeatedly (to do this on the SS-R1 itself, use menu mode).
NOTE
You can use the PLAY menu item REPEAT to turn on Repeat playback from the SS-R1 itself.
REPEAT will light in the display.
In this state, all tracks in the play area can be played back repeatedly.
If you turn on Repeat playback during playback, playback will continue, and when it reaches the end of the play area, it will return to the beginning and continue playing. If you
A-B Repeat playback
This lets you specify a desired region (A-B) within a track that will be played back repeatedly.
1 While playing or stopped, press the remote's A-B key at the starting point (A) of the region that you want to repeat. In the home screen, the REPEAT and A- indicators will blink.
NOTE
If you press the REPEAT key, the repeat play starting point (A) will be cancelled, and REPEAT and A- will go dark.
2 Once again, press the remote's A-B key at the ending point (B) of the region that you want to repeat. If you cancel during playback, playback will continue past the point specified as the ending point of A-B repeat playback.
turn on repeat playback while stopped, repeat playback will begin when you press the PLAY key.
To turn off repeat playback, press the remote's REPEAT key once again (or turn the PLAY menu item REPEAT to the OFF setting).
The REPEAT indicator in the display will go dark.
NOTE
- By using repeat playback in conjunction with Single playback, Program playback, or Random playback, you can repeat a single song, repeat a program, or repeat random playback.
- The repeat function on/off setting is remembered even when the power is off.
NOTE
- If you press the STOP key to stop playback, the specified region (A-B) will be cleared.
- You can't specify A-B repeat playback across tracks.
In the home screen, A-B will light (in addition to REPEAT). The region (A-B) has now been specified, and A-B repeat playback will begin.
• To turn off A-B Repeat playback:
Press the remote's A-B key or the REPEAT key.
In the home screen, the REPEAT indicator and the A-B indicator will go dark, and A-B repeat playback will be cancelled.
Pitch Control playback
The SS-R1 can modify the pitch (the pitch and playback speed) of the playback (Pitch Control playback).
Here is how to use Pitch Control playback.
1 Press the front panel PITCH knob (or the remote's PITCH key) to turn on Pitch Control playback.
When this is on, the PITCH indicator in the display will light in the home screen.
2 Turn the PITCH knob (or use the remote's PITCH +/- keys) to specify the pitch.
While you're making this setting, the display's pitch control value is shown as PITCH LVL XXX#.
You can specify the pitch in a range of -16.0–+16.0.
• To turn off Pitch Control playback:
Press the front panel PITCH knob (or the remote's PITCH key).
The PITCH indicator in the display will go dark, and Pitch Control playback will turn off. Even if Pitch Control playback is off, the pitch you specified in step 2 above is remembered, and will be valid if you turn Pitch Control on once again.
TIP
By using the Key Control function in conjunction with the Pitch Control function, you can change only the speed without affecting the pitch (see "Key Control play" on page 27).
Specifying the Pitch Step
You can change the pitch step.
Pitch steps are the amount of pitch change produced by turning the PITCH knob one step or by pressing the remote's PITCH +/- key once.
You must make the Pitch Step setting from the SS-R1 itself (this setting cannot be made from the remote).
1 Hold down the front panel PITCH knob. The pitch step setting screen will appear.

NOTE
When you turn Pitch Control playback on/off during playback, the playback sound may be momentarily interrupted.
2 While this screen is displayed, you can turn the MULTI JOG dial to specify the pitch step in a range of 0.1%–1.0%.
3 When you've finished making the setting, press the front panel TIME (ESC) key (or the remote's CLR/ESC key) to return to the home screen.
NOTE
The pitch control setting is remembered even when you turn off the power.
Key Control playback
You can use the Key Control function to change the key (pitch) of playback.
Here is how to use menu mode to turn Key Control on/off and adjust the key level setting (for details on menu operations, refer to “Operations in the menu screen” on page 16).
1 Press the MENU key to access the main menu list screen.
2 Select the PLAY menu.
3 Select the KEY item.

In this state you can turn Key Control on/off.
4 Turn the KEY item ON.
5 Press the front panel ▶▶ key (or the remote's CURSOR ▶ key) to proceed to the level setting screen.

6 Turn the front panel MULTI JOG dial (or use the remote's CURSOR ▲, ▼ keys) to select the desired key level, and press the front panel ▶ key (or the remote's CURSOR ▶ key).
You can select the key level from a range of b 6-b 1, 0 (no pitch change), #1-#6.
7 When you've finished making the setting, press the front panel TIME (ESC) key (or the remote's CLR/ESC key) to return to the home screen.
The Key Control function will be on, and the home screen will indicate KEY.
NOTE
- The Key Control setting is remembered even when the power is turned off.
- When using the Key Control function, the playback sound may appear to quaver. This is due to the processing being applied to the playback, and is not a malfunction.
TIP
If you turn on both the Key Control function and the Pitch Control function, the key (pitch) will be specified by the Key Control function and the speed will be determined by the Pitch Control function. (In other words, using Pitch Control to change the speed will not affect the pitch of the sound). Thus, if you set KEY LEVEL to ☐ and turn the Key Control function on, you can use Pitch Control to change the playback speed by itself without affecting the pitch.
Using the remote's dedicated key to turn Key Control on/off
You can use the remote's KEY key to turn Key Control on/off.

NOTE
You can't adjust the key level from the remote.
Auto Cue function
If the Auto Cue function is on, and you select a track to play and then enter pause mode, any “silent” portion at the beginning of the track will be skipped, and the SS-R1 will pause at the location where the actual “signal” of the track begins to rise. This means that sound will be heard immediately when you start playback.
You can specify the threshold level (= auto cue level) used to detect the audio signal when the Auto Cue function is active. In other words, any signal higher than the auto cue level will be treated by the SS-R1 as “signal”, and any signal lower than this level will be treated as “silence”.
The following procedure describes how you can use the menu to turn the Auto Cue function on/off and adjust the Auto Cue Level setting (for details on operations in the menu screen, refer to “Operations in the menu screens” on page 16).
1 Press the MENU key to access the main menu list screen.
2 Select the PLAY menu.
3 Select the AUTO CUE item.

In this state, you can turn the Auto Cue function on/off.
4 Turn the AUTO CUE item ON.
5 Press the front panel ▶▶ key (or the remote's CURSOR ▶ key).

In this screen you can adjust the auto cue level.
6 Turn the front panel MULTI JOG dial (or use the remote's CURSOR ▲, ▼ keys) to select the desired Auto Cue Level, and then press the front panel ▶ key (or the remote's CURSOR ▶ key).
You can select an auto cue level in the range of -24 dB – -72 dB (6 dB steps).
7 When you've finished making the setting, press the front panel TIME (ESC) key (or the remote's CLR/ESC key) to return to the home screen.
If the Auto Cue function is on, A_CUE will be lit in the home screen.
NOTE
The Auto Cue setting is remembered even if the power is off.

Using the remote's dedicated key to turn Auto Cue on/off
You can turn the Auto Cue function on/off by pressing the remote's A.CUE key.

NOTE
You can't adjust the auto cue level from the remote.
Auto Ready function
If the Auto Ready function is on, playback will pause at the beginning of the next track when a track has finished playing.
You can switch the Auto Ready function on/off by pressing the remote's A. READY key.

flowchart
graph TD
    A["DEVICE SELECT"] --> B["FLASH LOAD"]
    B --> C["DISPLAY TIME"]
    C --> D["LCD- LCD+"]
    D --> E["P.MODE A.CUE"]
    E --> F["A. READY"]
    F --> G["REPEAT A-B"]
    G --> H["INC PLAY KEY"]
    H --> I["PITCH - +"]
    I --> J["SYNC A.TRACK INPUT SEL"]
    style A fill:#f9f,stroke:#333
    style J fill:#ccf,stroke:#333
    note right of A.A.READY key
If the Auto Ready function is on, A_READY will be lit in the home screen.

Turning the Auto Ready function on/off from the front panel
You can also turn the Auto Ready function on/off from the front panel via the menu (for details on operations in the menu screen, refer to “Operations in the menu screens” on page 16).
1 Press the MENU key to access the main menu screen.
2 Select the PLAY menu.
3 Select the AUTO READY item.

4 Turn the MULTI JOG dial to turn the setting on/off.
5 When you've finished making the setting, press the TIME (ESC) key to return to the home screen.
NOTE
The Auto Ready setting is remembered even if the power is off.
Call function
The Call function returns to the point at which you most recently initiated playback from the pause condition (the “Call point”), and pauses there.
To execute the Call function, press the front panel or remote's CALL key during playback or while stopped.

The Call point will be erased when you perform the following operations.
- Turn off the power.
- Remove the CompactFlash card.
- Switch the play mode.
- Switch the play area.
- Change the contents of the CompactFlash card (by recording, editing, deleting, etc.).
NOTE
- If you press the CALL key when a Call point has not been specified, the display will indicate NoCall-Point.
- You can't use the Call function in program play mode or random play mode.
Incremental Playback
If the Incremental Playback mode is on, pressing the PLAY key while stopped will begin playback from the beginning of the next track, and pressing the STOP key while playing will pause at the beginning of the next track.
Using the remote's dedicated key
You can switch the Incremental Playback mode on/off by pressing the remote's INC PLAY key.

NOTE
- When the Incremental Playback mode is on, pressing the PLAY key while paused will begin playback from that point. Pressing the STOP key while paused will cause playback to stop.
- If you press the PLAY key at the last track, playback will begin from the first track in the play area. Pressing the STOP key will pause at the first track in the play area.
When the Incremental Playback mode is on, INC_PLAY will light in the home screen.

Using the menu to make settings
(For details on menu operations, refer to “Operations in the menu screens” on page 16.)
1 Press the MENU key to access the main menu list screen.
2 Select the PLAY menu.
3 Highlight the PREFERENCE item.
4 Press the front panel ▶▶ key (or the remote's CURSOR ▶ key) to proceed to the PLAY PREFERENCE screen.
5 Select INC.PLAY.

6 Turn the MULTI JOG dial (or use the remote's CURSOR ▲, ▼ keys) to turn the setting ON/OFF.
7 When you've finished making settings, press the front panel TIME (ESC) key (or the remote's CLR/ESC key) to return to the home screen.
NOTE
The Incremental Play setting is remembered even when the power is turned off.
Playing back in monaural
You can play back a stereo audio file in monaural. In this case, the L/R channels of the track will be mixed and output from the L/R output channels.
Use the menu to make this setting (for details on menu operations, refer to “Operations in the menu screens” on page 16).
1 Press the MENU key to access the main menu list screen.
2 Select the PLAY menu.
3 Highlight the PREFERENCE item.
4 Press the front panel ▶▶ key (or the remote's CURSOR ▶ key) to proceed to the PLAY PREFERENCE screen.
5 Select MONO MIX.

6 Turn the MULTI JOG dial (or use the remote's CURSOR ▲, ▼ keys) to turn the setting ON/OFF.
7 When you've finished making settings, press the front panel TIME (ESC) key (or the remote's CLR/ESC key) to return to the home screen.
NOTE
This setting is remembered even when the power is turned off.
Resume Playback
If the Resume Playback mode is on, playback will begin from the location at which playback was last stopped (the “resume point”).
The Resume point will be erased when you perform the following operations.
- Remove the CompactFlash card.
- Switch the play area.
- Switch the play mode.
- Change the contents of the CompactFlash card (by recording, editing, deleting, etc.).
Use the menu to turn the Resume function on/off (for details on menu operations, refer to “Operations in the menu screens” on page 16).
1 Press the MENU key to access the main menu list screen.
2 Select the PLAY menu.
3 Highlight the PREFERENCE item.
4 Press the front panel ▶ key (or the remote's CURSOR ▶ key) to proceed to the PLAY PREFERENCE screen.
5 Select RESUME.

6 Turn the MULTI JOG dial (or use the remote's CURSOR ▲, ▼ keys) to turn the setting ON/OFF.
7 When you've finished making settings, press the front panel TIME (ESC) key (or the remote's CLR/ESC key) to return to the home screen.
NOTE
- This setting is remembered even when the power is turned off.
- If no playable track exists (e.g., if not even one track has been registered in program mode), playback will stop.
- If the resume point does not exist (i.e., if the time registered as the resume point does not exist), the beginning of the track in the play area will be the resume point.
Flash Start function
The Flash Start function lets you instantly start playback of a track you've registered.
The beginning of up to twenty tracks can be pre-loaded into memory, so that playback can be triggered instantly from a PS/2 keyboard connected to the front panel, or from an external device connected to the SS-R1's parallel connector.
1 Specify the play area (see “Play area” on page 21).
Specify the play area as the play list or folder that contains the tracks you want to flash-start. Make sure that there are no more than twenty tracks.
2 Set the play mode to CONTINUE or PROGRAM (see “Playback Modes” on page 24).
NOTE
You can't use Flash Load if the play mode is set to RANDOM.
3 While stopped, press the remote's FLASH LOAD key.
The SS-R1 will successively read the beginning of each track in the play area.
The tracks will be read in the order of playback. In other words if the play mode is CONTINUE, the tracks
will be read consecutively, starting with the first. If the play mode is PROGRAM, the tracks will be read in the order of the program.
While the tracks are being read, the lower right of the home screen will indicate FLASH blinking.
NOTE
- If you press the FLASH LOAD key when the play mode is RANDOM, the display will indicate CAN'T SELECT, and the data will not be loaded.
- If you press the FLASH LOAD key when the play mode is SINGLE, the tracks in the play area will be read successively in the same way as for the CONTINUE setting.
- If twenty-one or more tracks are registered, data for the first twenty tracks from the beginning will be loaded.
When the data has been loaded, the lower right of the home screen will indicate FLASH.

4 When FLASH is lit, you can trigger flash-start playback from a PS/2 keyboard connected to the front panel or from an external device connected to the SS-R1's parallel connector.
If you're using a PS/2 keyboard, the CTRL+function keys (F1–F12) will flash-start tracks 1–12 (see "Keyboard operations" on page 61).
If you're using the external parallel connector, you'll be able to flash-start tracks 1–20 (see “Control connections” on page 8).
NOTE
Tracks used with flash start must have the same sampling frequency. If a track with a different sampling frequency is detected while loading the tracks, the display will indicate FLASH LOAD.
TIP
You can make flash start settings for the desired tracks in an efficient way by specifying the play area as PLAYLIST and then selecting a playlist containing only the tracks you want to flash-start. (See "Using the playlist finder" on page 55, "Play area" on page 21.)
End of disc/track message (EOM)
If the EOM function is on, an EOM tally signal will be output from the CONTROL I/O (PARALLEL) connector when the time remaining in the track or the play area falls below the specified duration.
Specifying an EOM tally output trigger
Use menu mode to specify the remaining track time or playlist time that will trigger the output of an EOM tally signal (for details on menu operations, refer to “Operations in the menu screens” on page 16).
1 Press the MENU key to access the main menu list screen.
2 Select the PLAY menu.
3 Highlight PREFERENCE.
4 Press the front panel ▶▶ key (or the remote's CURSOR ▶) key to proceed to the PLAY PREFERENCE screen.
5 Select EOM TRACK if you want to use the track remaining time as the trigger, or EOM MEDIUM if you want to use the remaining time in the play area as the trigger.

6 Turn the MULTI JOG dial (or use the remote's CURSOR ▲, ▼ keys) to specify the remaining time that will trigger the tally output.
You can choose from the range of OFF or 1-99 (seconds).
7 When you've finished making settings, press the TIME (ESC) key to return to the home screen.
NOTE
This setting is remembered even when the power is off.
Example of actual use
1 To the CONTROL I/O (PARALLEL) connector, connect the device that will receive the EOM tally signal.
2 Power-on the SS-R1 and the receiving device.
3 Begin playback on the SS-R1.
When the remaining time of the current track or the play area falls below the specified time duration, the EOM indicator in the home screen will blink, and an EOM tally signal will be output from the CONTROL I/O (PARALLEL) connector.
If the remaining time of both the track and the play area have been specified as triggers, an EOM tally signal will be transmitted when either condition is satisfied.
The SS-R1 can record MP3 or WAV format (44.1/48 kHz) audio to a CompactFlash card.
The following explanations assume that a recordable CompactFlash card has been inserted, that the necessary connections have been completed, and that the SS-R1 is powered-on.
Selecting the input source
You can select the input source (recording source) from three types of input: analog balanced, analog unbalanced, and digital.
To select an input source you can use the menu or the remote's INPUT SEL key.
NOTE
You can't change the input source during recording.
Using the dedicated remote key to select the source
Each time you press the INPUT SEL key you will cycle through the three input source.

Using the menu to select the source
(For details on menu operations, refer to “Operations in the menu screens” on page 16).
1 Press the MENU key to access the main menu list screen.

2 Select the REC menu.

3 Select the INPUT SELECT item.
4 Turn the MULTI JOG dial (or use the remote's CURSOR ▲, ▼ keys) to select one of the following.

A.UNBAL. (analog unbalanced input),
A.BAL. (analog balanced input),
D.COAX. (digital input)
5 When you've made your selection, press the front panel TIME (ESC) key (or the remote's CLR/ESC key) to return to the home screen.
NOTE
The input source selection is remembered even when the power is turned off.
Input source indicator
The currently selected input source is shown in the upper right of the home screen.

If A.UNBAL. is lit
The input signals from the ANALOG INPUTS (UNBALANCED) L/R jacks are selected.
If A.BAL. is lit
The input signals from the ANALOG INPUTS (BALANCED) L/R jacks are selected.
If D.COAX. is lit
The input signal from the DIGITAL IN (COAXIAL) jack is selected.
NOTE
- If the INPUT SELECT item is set to D.COAX., you won't be able to initiate recording from the record-ready state if the input source is in any of the following states.
- When the SS-R1 is not digitally locked to the input source. (The display will indicate DIN UNLOCK).
- When the input source is not audio. (The display will indicate DIN NotAudio).
- When the sampling rate specified by the REC menu item REC FORMAT differs from the input source. (The display will indicate FS UNMATCH).
However if you have enabled the sampling rate converter, recording can take place even if the sampling rate does not match (see "Using the sampling rate converter" on page 36).
Specifying the recording file format
The SS-R1 can record in MP3 or WAV format.
The file format setting is made via the menu while stopped or while in the record-ready condition (for details on menu operations, refer to “Operations in the menu screens” on page 16).
1 Press the MENU key to access the main menu list screen.
2 Select the REC menu.
3 Select the REC FORMAT item.
4 Turn the MULTI JOG dial (or use the remote's CURSOR ▲, ▼ keys) to select “.mp3” or “.wav”.

5 Press the front panel ▶▶ key (or the remote's CURSOR ▶ key) to proceed to the detailed settings.

6 Make settings for the following items.
STEREO/MONO
Specify whether a stereo file or a monaural file will be recorded.
SAMPLING
Specify whether the sampling rate will be 44.1 kHz or 48 kHz.
BITRATE (selectable only if "mp3" is selected)
Specify the bit rate. You can choose from 64 kbps, 128 kbps, 192 kbps, 256 kbps, and 320 kbps.
7 When you've finished making settings, press the front panel TIME (ESC) key (or the remote's CLR/ESC key) to return to the home screen.
NOTE
The recording format setting is remembered even when the power is turned off.
Using the sampling rate converter
The SS-R1 contains a built-in sampling rate converter, allowing you to record at a sampling rate that is different than the sampling rate of the digital input source.
Use the menu to turn the sampling rate converter (SRC) on/off (for details on menu operations, refer to “Operations in the menu screens” on page 16).
1 Press the MENU key to access the main menu list screen.
2 Select the REC menu.
3 Highlight the PREFERENCE item.
4 Press the front panel ▶▶ key (or the remote's CURSOR ▶ key) to proceed to the REC PREFERENCE screen.
5 Select SRC.

6 Turn the MULTI JOG dial (or use the remote's CURSOR ▲, ▼ keys) to turn the SRC setting ON/OFF.
7 When you've finished making the setting, press the front panel TIME (ESC) key (or the remote's CLR/ESC key) to return to the home screen.
NOTE
- If a digital signal whose sampling rate differs from the sampling rate specified in the REC FORMAT item is being received at the DIGITAL IN jack, and you attempt to record with SRC off, an error message (FS UNMATCH) will appear.
- The sampling rate setting is remembered even when the power is turned off.
Monitoring the input signal
When you press the READY key to enter the record-ready condition, the front panel RECORD key and READY key will light, and the input signal will be output from the SS-R1's various output jacks (headphone, analog balanced, analog unbalanced, and digital). The meter in the home screen will indicate the input level.

To cancel the record-ready condition, press the STOP key.
TIP
- If you simply want to monitor the input signal without intending to record anything, press the RECORD key without a CompactFlash card inserted. The display will indicate MONITOR, and the RECORD key will blink red.
- To stop monitoring the input signal, press the STOP key.
Adjusting the input signal level and balance
Use the menu to adjust the level and balance of the input signal.
As described above in “Monitoring the input signal”, put the SS-R1 in a condition where you can monitor the input signal, and then proceed with the following steps (for details on menu operations, refer to “Operations in the menu screens” on page 16).
1 Press the MENU key to access the main menu list screen.
2 Select the REC menu.
3 Highlight the INPUT VOLUME item.

4 Press the front panel ▶▶ key (or the remote's CURSOR ▶ key) to access the INPUT VOLUME SETTING popup window.

5 Turn the MULTI JOG dial (or use the remote's CURSOR ▲, ▼ keys) to highlight the INPUT
LEVEL item, and then press the front panel ▶▶ key (or the remote's CURSOR ▶ key) to highlight the level value.
6 Turn the MULTI JOG dial (or use the remote's CURSOR ▲, ▼ keys) to adjust the volume. You can adjust the volume in a range of -∞ to +18 dB.
The upper part of the display shows the level meter of the home screen, allowing you to watch the level while you make adjustments.
Set the level as high as possible without allowing the OVER indicator at the right edge of the meter to light.
NOTE
OVER will light at -0.2 dB or higher.
7 Press the front panel ◀◀ key (or the remote's CURSOR ◀ key) to highlight LEVEL.
8 Turn the MULTI JOG dial (or use the remote's CURSOR ▲, ▼ keys) to highlight BALANCE, and then press the front panel ▶ key (or the remote's CURSOR ▶ key) to highlight the balance value.
9 Select the REC menu. Turn the MULTI JOG dial (or use the remote's CURSOR ▲, ▼ keys) to adjust the balance.
You can adjust this in a range of L50–C (center)–R50.
10 When you've finished making settings, press the front panel TIME (ESC) key (or the remote's CLR/ESC key) to return to the home screen.
Basic recording operation
When you've finished making the above settings (input source selection, recording file format setting, sampling rate converter on/off, input level adjustment), you can begin recording.
To start recording from the stopped condition:
Press the RECORD key to enter the record-ready condition (the front panel RECORD key and READY key will light).

To start recording from the record-ready (pause) condition: Press the PLAY key.

To pause recording: Press the READY key.
To stop recording: Press the STOP key. When you stop recording, the recorded data will be written, and an audio file will be created.
NOTE
- You can use the PREFERENCE menu item WORD CLIP to specify the audio file name that is automatically added to the created file (see "Specifying a name of the recorded file" on page 44).
- The maximum size of each track is 2 GB.
- The recorded track will be created in the current folder (see "Making a folder the current folder" on page 48).
NOTE
While the recorded content is being stored to the card, the display will indicate INFORMATION WRITING. While this message is shown, do not move the SS-R1, turn off the power, or remove the card. The content will not be recorded correctly if you do so.
WAVE
Stereo
| Label on media | 44.1 kHz | 48 kHz |
| 512 MByte | 48 minutes | 44 minutes |
| 1 GByte | 1 hour 36 minutes | 1 hour 28 minutes |
| 2 GB | 3 hours 12 minutes | 2 hours 56 minutes |
| 4 GB | 6 hours 24 minutes | 5 hours 52 minutes |
| 8 GB | 12 hours 48 minutes | 11 hours 44 minutes |
Mono
| Label on media | 44.1 kHz | 48 kHz |
| 512 MByte | 1 hour 36 minutes | 1 hour 28 minutes |
| 1 GByte | 3 hours 12 minutes | 2 hours 56 minutes |
| 2 GB | 6 hours 24 minutes | 5 hours 52 minutes |
| 4 GB | 12 hours 48 minutes | 11 hours 44 minutes |
| 8 GB | 25 hours 36 minutes | 23 hours 28 minutes |
MP3
Stereo/Mono, 44.1kHz/48kHz
| Label on media | 64 kbps | 128 kbps | 192 kbps | 256 kbps | 320 kbps |
| 512 MByte | 17 hours 40 minutes | 8 hours 50 minutes | 5 hours 50 minutes | 4 hours 25 minutes | 3 hours 30 minutes |
| 1 GByte | 35 hours 20 minutes | 17 hours 40 minutes | 11 hours 40 minutes | 8 hours 50 minutes | 7 hours 00 minutes |
| 2 GB | 70 hours 40 minutes | 35 hours 20 minutes | 23 hours 20 minutes | 17 hours 40 minutes | 14 hours 00 minutes |
| 4 GB | 141 hours 20 minutes | 70 hours 40 minutes | 46 hours 40 minutes | 35 hours 20 minutes | 28 hours 00 minutes |
| 8 GB | 282 hours 40 minutes | 141 hours 20 minutes | 93 hours 20 minutes | 70 hours 40 minutes | 56 hours 00 minutes |
NOTE
The number of bytes listed on the media will not match the actual capacity.
Example: 4.0 GB media ≈ 4,096,000,000 bytes ≈ 3.8 Gbytes
The numbers in the table are estimates, and may contain somediscrepancies.
Switching the recording time display mode
During recording (or in the record-ready condition), you can use the front panel or remote's TIME key to switch the time display mode between the following four types. The selected time display mode will be lit above the time display in the home screen.

Nothing lit
The recorded time of the current track is shown.
REMAIN is lit
The remaining recordable time of the current track at the current recording format is shown. The remaining time is limited by the free space on the card or by the maximum track size (2 GB).
TOTAL is lit
The total recorded time of the entire card is shown.
TOTAL and REMAIN are lit
The remaining recordable time of the entire card at the current recording format is shown.
NOTE
- The remaining time will depend on the recording format (the REC menu item REC FORMAT).
- During recording, if the recordable time of the card is shorter than the recordable time for a single track, the time counter shows the same remaining time when only REMAIN is lit or TOTAL and REMAIN are lit.
- The recording time display mode is remembered even when the power is turned off.
- For details on the time display during playback, refer to "Switching the playback time display mode" on page 25.
- The SS-R1 is able to record a maximum of 999 tracks.
Sync recording
If the Sync Record function is on, recording will begin automatically when the input signal exceeds the level you specify (the sync level). After recording has begun, recording will end automatically when the input signal stays
Making settings
Use the menu to turn the Sync Recording function on/off and to make detailed settings. However, you can also use the remote's SYNC key to turn this function on/off (but not make settings).
If the Sync Record function is on, SYNC will light in the home screen.
Using the menu
(For details on menu operations, refer to “Operations in the menu screens” on page 16).
1 Press the MENU key to access the main menu list screen.
2 Select the REC menu.
3 Select the SYNC item.

4 Turn the MULTI JOG dial (or use the remote's CURSOR ▲, ▼ keys) to turn the setting on/off.
5 Press the front panel ▶▶ key (or the remote's CURSOR ▶ key) to proceed to the screen for detailed settings.

6 Set the following items.
LEVEL
Specify the sync level.
You can set this in a range of -72 dB – -24 dB (6 dB steps). (The default setting is -54 dB).
DELAY
Specify the time (in steps of one frame) from when a signal exceeding the sync level is detected until recording will begin. (One frame is 1/75th of a second).
You can set this in a range of -75 frames – +75 frames (the default setting is 0). If you specify a negative value, the corresponding length of audio prior to triggering will also be captured.
below the sync level for a specified length of time (the stop time), and will switch to the record-ready state.
NOTE
When this range is converted to seconds, it is equivalent to -1.00 seconds – +1.00 seconds.
STOP TIME
Specify the length of time after which recording will automatically end when the input signal stays below the sync level.
You can specify a value of 5–30 seconds (one-second steps) or INF. By default, this will be five seconds. If you don't want recording to end automatically, choose INF.
7 When you've finished making settings, press the front panel TIME (ESC) key (or the remote's CLR/ESC key) to return to the home screen.
NOTE
This setting is remembered even when you turn off the power.
Using the remote's dedicated key to turn the function on/off
Each time you press the SYNC key, the Sync Record function will turn on/off.

Sync Record operation
When you put the SS-R1 in record-ready condition with the Sync Record function on, recording will automatically start or stop according to the level of the input source.
- When a signal higher than the sync level is input, recording will begin automatically.
However, recording will not begin even if input is detected unless there has been at least one second in which the signal was below the sync level after entering the record-ready state.

line
| Time Segment | Level | | --------------------- | ----- | | Start of recording | SYNC LEVEL | | End | >SYNC LEVEL |NOTE
The above explanation is for the case when the DELAY setting is "0" (the default setting). By changing the DELAY setting, you can change the "record start" point.
- While recording, if the input signal stays below the sync level for the duration specified by STOP TIME (default: 5 seconds), the SS-R1 will automatically switch to the record-ready condition.

line
| Time | Level | |------|-------| | Start | High | | Stop | Low | | End | Stable |NOTE
If you set the STOP TIME to INF, the record-pause state will not be entered even though the input signal falls below the sync level.
- To defeat Sync Record, press the remote's SYNC REC key.
- When the sync level is too high:
If the sync level setting is too high, you may have problems such as failing to capture the beginning of a song that begins with a low volume.

line
| Time | Level | |------|-------| | 0 | 0 | | >1 | Increasing from SYNC LEVEL to This part of the track may not be recorded |- If the sync level is too low:
Sync recording will not begin if the source you're recording has a high noise level, so that the sync level is exceeded immediately when you enter the record-ready state.

line
| Time | Level | |------|-------| | 0 | SYNC LEVEL | | >SYNC LEVEL | Start of track is not registered |Auto Track function
Auto Track recording is a function that automatically assigns a new track number when the specified condition is satisfied during recording. A new audio file is created each time a new track number is assigned.
You'll use the menu to select Auto Track mode and make detailed settings. However, the Auto Track mode setting itself can be made using the A.TRACK key of the remote.
If the Auto Track function is on, A_TRACK will light in the home screen.
Auto track settings can be made at any time, and you can change the settings after you start recording.
NOTE
If you've recorded in WAV format, you'll be able to use editing functions to divide or join tracks after recording (see "Operations in the file menu screen" on page 50).
Using the menu
(For details on menu operations, refer to “Operations in the menu screens” on page 16).
1 Press the MENU key to access the main menu list screen.
2 Select the REC menu.
3 Select the AUTO TRACK item.

4 Turn the MULTI JOG dial (or use the remote's CURSOR ▲, ▼ keys) to select the Auto Track mode from the following choices.
OFF:
New track numbers will not be assigned automatically.
LEVEL:
A new track number will be assigned when the signal exceeds the auto track level (specified in the screen for detailed settings described below) after having stayed below it for two seconds or longer.

line
| Time Segment | Level Level | Annotation | | --------------------- | ----------- | --------------------- | | At least 2 sec | Low | A_TRACK LEVEL | | Post-Track increment | High | Track increment |DD:
When recording a digital source (CD, DAT, MD) via the DIGITAL IN jack, a new track number will be assigned when a track division is detected in the source.
However when recording an analog source or a digital source other than those listed above, this will operate as LEVEL mode, and a new track number will be assigned according to the input level.
TIME:
A new track number will be assigned at a fixed interval of time (specified in the screen for detailed settings described below).
5 If you selected a choice other than OFF, press the front panel ▶▶ key (or the remote's CURSOR ▶key) to proceed to the screen for detailed settings.
6 Make detailed settings for the function.
- If LEVEL is selected

Use the LEVEL item to specify the level at which Auto Track will operate.
You can set this in a range of -72 dB – -24 dB (6 dB steps). (The default setting is -54 dB).
Use the DELAY item to specify the time (in units of one frame) from when a signal exceeding the auto track level is detected until the new track number is assigned (one frame is 1/75th of a minute).
You can set this in a range of -75 frame – +75 frame (the default setting is 0). Negative values will cause a portion of the signal prior to the detection point to be captured.
NOTE
If this range is converted into time, the adjustable range is equivalent from -1.00 minutes to +1.00 minutes.
- If DD is selected
As when LEVEL is selected, use the DELAY item to specify the time from when a signal exceeding the auto track level is detected until the new track number is assigned, in steps of one frame (one frame is 1/75 of a second).

- If TIME is selected
Use the INTERVAL item to specify the time interval at which the track number is assigned, in a range of 1–10 seconds (one-second steps).

7 When you've finished making settings, press the front panel TIME (ESC) key (or the remote's CLR/ESC key) to return to the home screen.
NOTE
This setting is remembered even when you turn off the power.
Using the remote's dedicated key to switch modes
Each time you press the remote's A.TRACK key, the Auto Track function mode will cycle in the order of OFF → LEVEL → DD → TIME.
Assigning a new track number manually
You can assign a new track number manually by pressing the RECORD key during recording.
However, you cannot create a track that is shorter than four seconds.
NOTE
If you recorded in WAV format, you can use the editing functions to divide or join tracks after they have been recorded (see "Operations in the file menu screen" on page 50).
Applying the compressor while recording
You can apply the SS-R1's built-in compressor to the recording source while you record.
A compressor is an effect that holds down peaks in the audio, making the overall level more consistent and more listenable.
You'll use the menu to turn the compressor on/off (for details on menu operations, refer to “Operations in the menu screens” on page 16).
1 Press the MENU key to access the main menu list screen.
2 Select the REC menu.
3 Highlight the PREFERENCE item.
4 Press the front panel ▶▶ key (or the remote's CURSOR ▶ key) to proceed to the REC PREFERENCE screen.
5 Select COMP.

6 Turn the MULTI JOG dial (or use the remote's CURSOR ▲, ▼ keys) to select one of the following as the compressor mode.
OFF: The compressor will not be used when recording.
SOFT: Light compression will be applied. This setting is suitable when recording music.
HARD: Strong compression will be applied. This setting is suitable when the audio source you're recording has a low volume. Since the recording volume will be boosted, it is also suitable when recording a meeting or conference.
7 When you've finished making settings, press the front panel TIME (ESC) key (or the remote's CLR/ESC key) to return to the home screen.
NOTE
This setting is remembered even when you turn off the power.
Specifying the name of the recorded file
You can specify the file name that is automatically assigned during recording.
You'll use the menu to make this setting (for details on menu operations, refer to “Operations in the menu screens” on page 16).
1 Press the MENU key to access the main menu list screen.
2 Select the REC menu.
3 Highlight the PREFERENCE item.
4 Press the front panel ▶▶ key (or the remote's CURSOR ▶ key) to proceed to the REC PREFERENCE screen.
5 Select WORD CLIP.

6 Turn the MULTI JOG dial (or use the remote's CURSOR ▲, ▼ keys) to select one of the following choices.
DATE: (default setting)
The date and time of the SS-R1's clock will be the file name.
USER01-USER03:
The user-specified text string (eight characters) will be the file name.
To edit and store a text string, proceed as follows.
1 With one of the choices USER01-USER03 selected, press the ▶ key.
The editing screen will appear.
2 Edit the text string as follows.
- To change the editing location (cursor position): Use the front panel ◀◀, ▶▶ keys (or the remote's CURSOR ◀, ▶ keys).
- To change the character at the cursor position: Turn the front panel MULTI JOG dial (or use the remote's CURSOR ▲, ▼ keys).
- To delete a character: Press the front panel TIME (ESC) key (or the remote's CLR/ESC key).
- To delete all characters following the cursor position:
Press and hold down the front panel TIME (ESC) key (or the remote's CLR/ESC key).
- To switch between uppercase and lowercase: Press the front panel DISPLAY (INFO) key (or the remote's DISPLAY key).
- To insert a space:
Press the CALL key.
• To cancel your editing:
Press the STOP key.
3 When you've finished editing, press the MULTI JOG dial.
The edited text string will be finalized, and you will return to the PREFERENCE menu.
Overview
The SS-R1 can use a folder structure to manage audio files on a CompactFlash card.
The folder finder screen shows the folders and files in a tree structure. In this screen, you can select the folder or file that you want to use, and then enter the folder menu screen or file menu screen. From these screens, you can create folders, rename or delete a folder or file, register a file in a playlist, or edit files by dividing or joining them. You can also use operations directly from the folder finder screen to move or copy files between folders.
TIP
If you use a card reader to load files from your computer into a CompactFlash card, you'll be able to use your computer to modify the folder structure, edit the folder name or file name, or delete files or folders. If you perform this type of editing from your computer, please be aware that the playback order of the files on the SS-R1 may differ after editing on your computer.
Opening the folder finder screen
When the play area (“Play area” on page 21) is ALL or FOLDER, and the SS-R1 is stopped, playing, or paused, you can hold down the front panel MENU key (or press the remote’s FINDER key) to access the folder finder screen.

- If the play area is ALL and the SS-R1 was stopped, the finder screen for the root folder will appear.
- If the play area is FOLDER and the SS-R1 was stopped, the finder screen for the current folder will appear.
- While paused, the finder screen for the folder of the current file (regardless of the play area) will appear. At this time, the current file will be highlighted.
Navigating in the folder finder screen
When the folder finder screen is displayed, you can use the front panel MULTI JOG dial (or the remote CURSOR ▲, ▼ keys) to select (highlight) the desired folder or file.
Operations when a folder is highlighted and when a file is highlighted are explained below.
Operations when a folder is highlighted
- To see the folder menu for the highlighted folder: Press the MENU key (“Operations in the folder menu screen” on page 47).

- To open a higher-level folder: Press the front panel ◀◀ key (or the remote's CURSOR ◀ key).
- To open the highlighted folder: Press the front panel ▶▶ key (or the remote's CURSOR ▶ key).
-
To return to the home screen: Press the front panel TIME (ESC) key (or the remote's CLR/ESC key).
-
To start playback from the first file of the highlighted folder: Press the PLAY key. Playback will start, and you will return to the home screen. If the play area is FOLDER, the highlighted folder will be the current folder.
- To pause at the first file of the highlighted folder: Press the READY key. The SS-R1 will pause, and you will return to the home screen. If the play area is FOLDER, the currently selected folder will be the current folder.
- To view the properties of the currently selected folder: Press the front panel DISPLAY (INFO) key (or the remote's DISPLAY key).
7 - Using the folder finder

When you once again press the front panel DISPLAY (INFO) key (or the remote's DISPLAY key), the property display will disappear, and you will return to the folder finder screen.
Operations when a file is highlighted
- To see the file menu for the highlighted file: Press the MENU key (“Operations in the file menu screen” on page 50).

- To open a higher-level folder: Press the front panel ◀◀ key (or the remote's CURSOR ◀ key).
- To return to the home screen: Press the front panel TIME (ESC) key (or the remote's CLR/ESC key).
- To start playback from the beginning of the highlighted file:
Press the PLAY key. Playback will start, and you will return to the home screen. If the play area is FOLDER, the folder that contains the highlighted file will be the current folder.
- To pause at the beginning of the highlighted file: Press the READY key. The SS-R1 will pause, and you will return to the home screen.
If the play area is FOLDER, the folder that contains the highlighted file will be the current folder.
- To view the properties of the highlighted file: Press the front panel DISPLAY (INFO) key (or the remote's DISPLAY key).

When you once again press the front panel DISPLAY (INFO) key (or the remote's DISPLAY key), the property display will disappear and you will return to the folder finder screen.
• To move the highlighted file:
Press and hold the front panel MULTI JOG dial (or the remote's ENTER key) to enter File Move mode. For details, refer to “Moving and copying a file” on page 53.
Operations in the folder menu screen
The following explanations assume that the folder on which you wish to perform the operation is shown in the folder menu screen.
To access the folder menu screen, highlight the desired folder in the folder finder screen, and press the MENU key (“Navigating in the folder finder screen” on page 45).

Renaming a folder
1 With the folder menu screen shown, turn the front panel MULTI JOG dial (or use the remote's CURSOR ▲, ▼ keys) to highlight RENAME.
2 Press the front panel MULTI JOG dial (or the remote's ENTER key).
The RENAME screen will appear.

3 Edit the name as follows.
- To move the editing position (cursor position): Use the front panel ◀◀, ▶▶ keys (or the remote's CURSOR ◀, ▶) keys.
- To change the character at the cursor position: Turn the front panel MULTI JOG dial (or use the remote's CURSOR ▲, ▼ keys).
- To delete a character: Press the front panel TIME (ESC) key (or the remote's CLR/ESC key).
Deleting a folder
Here's how to delete a folder. Deleting a folder will also delete the files that are in that folder.
1 With the folder menu screen displayed, use the front panel MULTI JOG dial (or the remote's CURSOR ▲, ▼ keys) to highlight DELETE.
2 Press the front panel MULTI JOG dial (or the remote's ENTER key).
A screen will ask you to confirm the deletion.

- To delete all characters following the cursor position: Press and hold the front panel TIME (ESC) key (or the remote's CLR/ESC key).
- To switch the type of character (uppercase/lower-case):
Press the front panel DISPLAY (INFO) key (or the remote's DISPLAY key).
• To insert a space: Press the CALL key.
• To cancel editing: Press the STOP key.
4 When you've finished editing, press the front panel MULTI JOG dial (or the remote's ENTER key) to finalize your edits.
The display will return to the folder finder screen.
NOTE
You cannot edit names that include characters other than alphabet, numeral, or symbol characters. (If even one such character is included, the registered name will not be displayed at all.)
3 Once again press the front panel MULTI JOG dial (or the remote's ENTER key).
The folder will be deleted.
The display will return to the folder finder screen.
If you decide not to delete the folder, press the TIME (ESC) key (or the remote's CLR/ESC key).
NOTE
Immediately after deleting a folder, you will still be able to undo the deletion ("Undeleting a deleted folder", on page 48).
Undeleting a deleted folder (UNDO)
Immediately after deleting a folder, you can recover the folder by undoing the operation.
This is possible only if the play mode is set to continuous playback (CONTINUE).
NOTE
When performing the Undo operation, it does not matter which folder is selected in the folder finder screen when you open the folder menu screen.
1 Turn the front panel MULTI JOG dial (or use the remote's CURSOR ▲, ▼ keys) to highlight UNDO.
2 Press the front panel MULTI JOG dial (or the remote's ENTER key.)
A confirmation screen will appear.

3 Press the front panel MULTI JOG dial (or the remote's ENTER key).
The folder will be recovered, and you will return to the folder finder screen. At this time the recovered folder will be highlighted.
NOTE
If you decide not to perform this undelete operation (UNDO), press the front panel TIME (ESC) key (or the remote's CLR/ESC key).
NOTE
If there is no file deletion operation that can be undone, the display will indicate CAN'T UNDO.
Making a folder the current folder
Here's how to make the folder in which you're working the current folder.
1 With the folder menu screen displayed, turn the front panel MULTI JOG dial (or use the remote's CURSOR ▲, ▼ keys) to highlight CURRENT.
2 Press the front panel MULTI JOG dial (or the remote's ENTER key.)
The following popup (CHANGE CURRENT FOLDER) will appear.

The display will return to the folder finder screen.
NOTE
Audio files created by recording will be created in the current folder. If you create a new folder in which to store recorded files, you can use the above procedure to make that new folder the current folder.
Creating a new folder
Here's how to create a new folder inside the working folder.
1 With the folder menu displayed, turn the front panel MULTI JOG dial (or use the remote's CURSOR ▲, ▼ keys) to highlight NEW FOLDER.
2 Press the front panel MULTI JOG dial (or the remote's ENTER key.)
3 The RENAME screen will appear. If you want to edit the name that was automatically created by the system, you can edit it here. (You are also free to edit it later.)
For details on editing a name, refer to “Renaming a folder” on page 47.
4 When you've finished editing the name, press the front panel MULTI JOG dial (or the remote's EN-TER key) to finalize the changes.
A popup CREATE NEW FOLDER will appear, and the new folder will be created.
When the folder has been created, the display will return to the folder finder screen.
NOTE
A maximum of 255 folders can be created on a CompactFlash card.
Adding an entire folder to a playlist
You can add all the files in a folder to the desired playlist.
However, files in a sub-folder will not be added.
1 With the folder menu screen displayed, turn the front panel MULTI JOG dial (or use the remote's CURSOR ▲, ▼ keys) to highlight ADD PLAYLIST.

2 Press the front panel MULTI JOG dial (or the remote's ENTER key).
The playlist select screen will appear.

3 Turn the front panel MULTI JOG dial (or use the remote's CURSOR ▲, ▼ keys) to highlight the playlist in which you want to register the files.
4 Press the front panel MULTI JOG dial or ▶▶ key (or the remote's ENTER key or CURSOR ▶ key). The selected playlist will be displayed.

5 Turn the front panel MULTI JOG dial (or use the remote's CURSOR ▲, ▼ keys) to select the position within the playlist at which you want to add the files.
The files will be added following the highlighted file.
6 Press and hold the front panel MULTI JOG dial (or the remote's ENTER key).
The folder will be added to the playlist.
Undoing a folder menu operation (UNDO)
Some of the operations in the folder menu (folder name editing, adding a new folder, deleting a folder) can be undone immediately after they are executed.
This is possible only if the play mode is set to consecutive playback (CONTINUE).
NOTE
When executing an Undo, it does not matter which folder in the folder finder screen was selected before opening the folder menu screen.
1 Turn the front panel MULTI JOG dial (or use the remote's CURSOR ▲, ▼ keys) to highlight UNDO.
A confirmation screen will appear.

In the example screen shown above, the folder delete operation (DELETE) can be undone.
2 Press the front panel MULTI JOG dial (or the remote's ENTER key).
The Undo operation will be executed, and you will return to the folder finder screen. At this time, the file to which Undo applied will be highlighted.
NOTE
If you decide to cancel the Undo operation, press the front panel TIME (ESC) key (or the remote's CLR/ESC key).
NOTE
If there is no file to which the Undo operation can be applied, the display will indicate CAN'T UNDO.
Operations in the file menu screen
The following explanations assume that the screen is showing the file menu screen for the file you want to operate.
To access the file menu screen, highlight the desired file in the folder finder screen, and press the MENU key (“Navigating in the folder finder screen” on page 45).

Editing the file name
1 With the file menu screen displayed, turn the front panel MULTI JOG dial (or use the remote's CURSOR ▲, ▼ keys) to highlight RENAME.
2 Turn the front panel MULTI JOG dial (or the remote's ENTER key).
The RENAME screen will appear.

3 Edit the name as follows.
- To change the editing location (cursor position): Use the front panel ◀◀, ▶▶ keys (or the remote's CURSOR ◀, ▶ keys).
- To change the character at the cursor position: Turn the front panel MULTI JOG dial (or use the remote's CURSOR ▲, ▼ keys).
- To delete a character: Press the front panel TIME (ESC) key (or the remote's CLR/ESC key).
Deleting a file
Here's how to delete a file from a CompactFlash card.
1 With the file menu screen displayed, turn the front panel MULTI JOG dial (or use the remote's CURSOR ▲, ▼ keys) to highlight DELETE.
2 Press the front panel MULTI JOG dial (or the remote's ENTER key).
The delete confirmation screen will appear.

- To delete all characters following the cursor position: Press and hold down the front panel TIME (ESC) key (or the remote's CLR/ESC key).
- To switch between uppercase and lowercase: Press the front panel DISPLAY (INFO) key (or the remote's DISPLAY key).
• To insert a space: Press the CALL key.
• To cancel your editing: Press the STOP key.
4 When you've finished editing, press the front panel MULTI JOG dial (or the remote's ENTER key) to finalize the changes.
The display will return to the folder finder screen. If you decide to cancel your editing, press the TIME (ESC) key (or the remote's CLR/ESC key).
NOTE
You can connect a CompactFlash card directly to your computer and edit the file name from the computer, but if you do so, please be aware that this may affect the order in which the files play back on the SS-R1.
3 Once again, press the front panel MULTI JOG dial (or the remote's ENTER key).
The file will be deleted from the CompactFlash card.
The display will return to the folder finder screen. If you decide not to execute the Delete operation, press the TIME (ESC) key (or the remote's CLR/ESC key) at the confirmation screen.
NOTE
Files can be deleted only if the play mode is set to consecutive playback (CONTINUE).
Adding files to a playlist
Here's how to add files to the desired playlist.
1 With the file menu screen displayed, turn the tab page MULTI JOG dial (or use the remote's CURSOR ▲, ▼ keys) to highlight ADD PLAYLIST.

2 Press the front panel MULTI JOG dial (or the remote's ENTER key).
The playlist select screen will appear.

3 Turn the front panel MULTI JOG dial (or use the remote's CURSOR ▲, ▼ keys) to highlight the playlist in which you want to register the file.
4 Press the front panel MULTI JOG dial or ▶▶ key (or the remote's ENTER key or CURSOR ▶ key). The selected playlist will appear.

5 Turn the front panel MULTI JOG dial (or use the remote's CURSOR ▲, ▼ keys) to select the position within the playlist at which you want to add the file. The file will be added after the highlighted file.
6 Press and hold the front panel MULTI JOG dial (or the remote's ENTER key).
The file will be added to the playlist.
Dividing a file (DIVIDE)
Here's how to divide a WAV file into two files.
This is possible only if the play mode is set to consecutive playback (CONTINUE).
NOTE
- You can undo the Divide operation after executing it ("Undoing a file menu operation (UNDO)" on page 53).
- You can't divide an MP3 file.
1 Use the PLAY key, ◀◀, ▶▶ keys, time search function, and time skip function etc. to locate to the point in the WAV at which you want to divide it, and pause at that point.
Since you can make fine adjustments later, the approximately location is sufficient.
2 Press and hold the front panel MENU key (or the remote's FINDER key) to access the folder finder screen.
The screen will show the folder finder screen for the current file you operated in step 1, and the current file will be highlighted.
3 Press the MENU key to access the file menu screen for the current file.

4 Turn the front panel MULTI JOG dial (or use the remote's CURSOR ▲, ▼ keys) to highlight DIVIDE.
5 Press the front panel MULTI JOG dial (or the remote's ENTER key).
The home screen will appear.
The SS-R1 will enter Scrub Play mode, and the PLAY key and READY key will blink.
6 Use the Scrub Play function to find the precise point at which you want to divide the file.
Turn the front panel MULTI JOG dial (or use the remote's SKIP keys) to move the point using scrub playback.
7 When you've specified the dividing point, press the front panel MULTI JOG dial (or the remote's ENTER key).
The display will ask EXECUTE?

7 - Using the folder finder
If you want to change the dividing point, press the front panel TIME (ESC) key (or the remote's CLR/ESC key). You will return to scrub play mode, and can repeat the procedure from step 6.
If you're ready to execute the Divide operation, proceed to step 8.
NOTE
- If the file has been registered in a playlist, the P.LIST ENTRY popup will appear.
- If the file you're editing was registered in a playlist, it will no longer be possible to play that playlist. You'll need to re-edit that playlist in the playlist finder.
8 Press the front panel MULTI JOG dial (or the remote's ENTER key).
The Divide operation will be executed, and you will return to the folder finder screen.
Combining files (COMBINE)
Here's how to join two WAV files, combining them into a single file.
This is possible only if the play mode is set to consecutive playback (CONTINUE).
NOTE
- You can't combine MP3 files.
- You can't combine two WAV files that have different sampling rates or a different number of channels.
- You can undo the Combine operation after executing it ("Undoing a file menu operation (UNDO)" on page 53).
1 Open the file menu screen for one of the files you want to combine.
2 Turn the front panel MULTI JOG dial (or use the remote's CURSOR ▲, ▼ keys) to highlight COMBINE.
3 Press the front panel MULTI JOG dial (or the remote's ENTER key).
The file list will appear.
The file you had selected before opening the file menu will have a check mark.

4 Turn the front panel MULTI JOG dial (or use the remote's CURSOR ▲, ▼ keys) to highlight the file that you want to combine with the file that
has the check mark.
5 Press the front panel MULTI JOG dial (or the remote's ENTER key).
The display will ask EXECUTE?, and the four seconds preceding and following the connection point will play repeatedly.
NOTE
- If the file has been registered in a playlist, the P.LIST ENTRY popup will appear.
- If a file you're editing was registered in a playlist, it will no longer be possible to play that playlist. You'll need to re-edit that playlist in the playlist finder.

6 To execute the Combine operation, press the front panel MULTI JOG dial (or the remote's ENTER key).
The two files will be combined, and you will return to the folder finder screen.
If you decide not to execute the Combine operation, press the front panel TIME (ESC) key (or the remote's CLR/ESC key). You will return to the file list, and can repeat the procedure from step 1.
Undoing a file menu operation (UNDO)
Of the file menu operations, Divide, Combine, and Delete operations can be undone immediately after you've executed the operation.
This is possible only if the play mode is set to consecutive playback (CONTINUE).
NOTE
When performing the Undo operation, it does not matter which file is selected in the folder finder screen when you open the file menu screen.
1 Turn the front panel MULTI JOG dial (or use the remote's CURSOR ▲, ▼ keys) to highlight UNDO.
A confirmation screen will appear.

The example screen above is when the DIVIDE operation will be undone.
2 Press the front panel MULTI JOG dial (or the remote's ENTER key).
The Undo operation (UNDO) will be executed, and you will return to the folder finder screen. At this time, the folder/file to which the Undo operation applied will be highlighted.
NOTE
If you decide not to perform the Undo operation (UNDO), press the front panel TIME (ESC) key (or the remote's CLR/ESC key).
NOTE
If there is no file operation that can be undone, the display will indicate CAN'T UNDO.
Moving or copying a file
You can move a file within a folder, or move or copy a file to another folder. These operations are performed in the folder finder screen. (There is no need for you to enter the file menu screen).
Moving a file within a folder
1 In the folder finder screen, use the front panel ◀◀, ▶▶ keys (or the remote's CURSOR ◀, ▶ keys) to access the finder screen for the folder that contains the file you want to move.
2 Turn the front panel MULTI JOG dial (or use the remote's CURSOR ▲, ▼ keys) to highlight the file that you want to move.
3 Press and hold the front panel MULTI JOG dial (or the remote's ENTER key).
The file to be moved will blink.

4 Turn the front panel MULTI JOG dial (or use the remote's CURSOR ▲, ▼ keys) to move the file to the desired location.

5 Press the front panel MULTI JOG dial (or the remote's ENTER key).
The MOVE popup will appear, and the Move operation will be confirmed.

Moving or copying a file between folders
1 In the folder finder screen, use the front panel ◀◀, ▶▶ keys (or the remote's CURSOR ◀, ▶ keys) to access the finder screen for the folder that contains the file you want to move.
2 Turn the front panel MULTI JOG dial (or use the remote's CURSOR ▲, ▼ keys) to highlight the file that you want to move.
3 Press and hold the front panel MULTI JOG dial (or the remote's ENTER key).
The file to be moved will blink.

When you move the blinking file to where a folder name is shown, the blinking file name will disappear, and the folder name will be highlighted.
4 Use the front panel MULTI JOG dial and ◀◀, ▶▶keys (or the remote's CURSOR ▲, ▼, ◀, ▶ keys) to navigate within the folder finder to open the move-destination folder.
When you move the cursor to where the file name is displayed, the blinking file to be moved will appear.
5 Turn the front panel MULTI JOG dial (or use the remote's CURSOR ▲, ▼ keys) to move the blinking file to the desired location.
Press the MULTI JOG dial (or the remote's ENTER key). The following popup will appear.

6 Highlight MOVE if you simply want to move the file from its former location, or highlight COPY if you want to copy the file. Then press the front panel MULTI JOG dial (or the remote's ENTER key).
The operation will be executed, and a popup will appear during execution.

NOTE
If you choose COPY, the original file will remain where it was. If you choose MOVE, the original file will not remain.
Overview
When you first insert a CompactFlash card into the SS-R1, three empty playlists (01–03) will automatically be created on the card. You can register audio files from the card into these playlists, and then select the desired playlist (the current playlist) so that its files will be played when you specify Playlist as the play area.
To perform playlist-related operations, start by opening the “playlist finder screen”. From this screen, proceed to the “playlist menu screen” where you can add files to a playlist or delete the entire contents of a playlist. From the playlist finder screen, you can also proceed to the “playlist screen” (which shows the files in the playlist), select a file for operations, and then move to the “file menu screen” where you can add a file to the playlist, delete a file from the playlist, or move a file within the playlist.


Opening the playlist finder screen
If the play area (“Play area” on page 21) is PLAYLIST, make sure that the SS-R1 is stopped, playing, or paused, and hold down the front panel MENU key (or the remote’s FINDER key) to access the playlist finder screen.

Navigating in the playlist finder screen
The playlist finder screen will show three playlists (PLAYLIST_01-PLAYLIST_03).
At the right is shown the number of files (tracks) registered in each playlist.
With the playlist finder screen displayed, turn the front panel MULTI JOG dial (or use the remote's CURSOR ▲, ▼ keys) to select (highlight) the playlist that you want to operate.
In this state you can perform the following operations:
- To start playback from the beginning of the playlist Press the PLAY key. Playback will begin, and you will return to the home screen.
The playlist you selected will be specified as the current playlist.
• To pause at the beginning of the playlist
Press the READY key. The SS-R1 will pause, and return to the home screen.
The playlist you selected will be specified as the current playlist.
• To open the playlist screen
Press the front panel MULTI JOG dial or ▶▶ key (or the remote's ENTER key or CURSOR ▶ key. The display goes as follow.

8 – Using the playlist finder
- Opening the playlist menu screen
Press the MENU key.
For details on each item in the playlist menu, refer to “Operations in the playlist menu screen” on page 56.

• Viewing the properties of a playlist
Press the front panel DISPLAY (INFO) key (or the remote's DISPLAY key).

The number of tracks in the playlist and the size of the playlist will be displayed.
Press the front panel DISPLAY (INFO) key (or the remote's DISPLAY key) once again; the property display will disappear, and you will return to the playlist finder screen.
Operations in the playlist menu screen
In the playlist menu you can delete files from the playlist or add files to the playlist.
The following explanations assume that the display is showing the playlist menu screen for the playlist you're operating.
To access the playlist menu screen, highlight the desired playlist in the playlist finder screen, and press the MENU key (“Navigating in the playlist finder screen” on page 55).

Adding a file/folder to a playlist
Here is how to add a file/folder to the playlist. By adding a folder, you can add all the files of the folder in a single action.
NOTE
Files in sub-folders will not be added.
1 Turn the front panel MULTI JOG dial (or use the remote's CURSOR ▲, ▼ keys) to highlight ADD PLAYLIST.
2 Press the front panel MULTI JOG dial (or the remote's ENTER key).
The folder finder screen will appear.

3 Select (highlight) the file or folder that you want to add.
For details on navigation in the folder finder screen, refer to “Navigating in the folder finder screen” on page 45.
4 Press and hold the front panel MULTI JOG dial (or the remote's ENTER key).
The file (or all files in the folder) will be added to the playlist.
NOTE
- A maximum of 99 tracks can be registered in a playlist.
- If you attempt to register more than 99 tracks, an indicator of P.LIST FULL will appear, and the track(s) will not be registered.
- You cannot register the same track more than once in a playlist.
Deleting all files from a playlist
Here is how to delete all files from the playlist.
Deleting files from a playlist will not delete the files from the card.
1 Turn the front panel MULTI JOG dial (or use the remote's CURSOR ▲, ▼ keys) to highlight DELETE.
2 Press the front panel MULTI JOG dial (or the remote's ENTER key).
A confirmation popup screen will appear.
3 Press the front panel MULTI JOG dial (or the remote's ENTER key).
If you decide not to delete, press the TIME (ESC) key (or the remote's CLR/ESC key).
NOTE
You can also delete just a specific file from the playlist ("Deleting a file from a playlist" on page 57).
Deleting a file from a playlist
Here is how to delete a file from the playlist.
Deleting a file from a playlist will not delete the file from the card.
1 Turn the front panel MULTI JOG dial (or use the remote's CURSOR ▲, ▼ keys) to highlight DELETE.
2 Press the front panel MULTI JOG dial (or the remote's ENTER key).
A confirmation popup screen will appear.
3 Press the front panel MULTI JOG dial (or the remote's ENTER key).
If you decide not to delete the file, press the TIME (ESC) key (or the remote's CLR/ESC key).
NOTE
You can also delete all files from the playlist ("Deleting all files from a playlist" on page 57).
Moving a file
Here's how to move the position of a file within the playlist.
1 Highlight the file that you want to move.
2 Press and hold the front panel MULTI JOG dial (or the remote's ENTER key).
The playlist screen will appear. In the screen, the file to be moved will be blinking.

3 Turn the front panel MULTI JOG dial (or use the remote's CURSOR ▲, ▼ keys) to move the file to the desired position in the playlist.

4 Press the front panel MULTI JOG dial (or the remote's ENTER key).
The move will be finalized.
Restoring the factory settings
You can restore the menu settings and other settings to their factory-set condition.
You cannot restore these settings if a CompactFlash card is inserted.
Remove the CompactFlash card before you perform the following menu operation. (For details on menu operations, refer to “Operations in the menu screens” on page 16.)
1 Press the MENU key to access the main menu list screen.
2 Select the UTILITY menu.
3 Select the FACTORY PRESET item.
A confirmation popup will appear.

NOTE
If you select the FACTORY PRESET item when a CompactFlash card is inserted, a popup of CAN'T SELECT will appear, and your selection will not be accepted. Remove the card and perform the operation once again.
4 Once again press the front panel MULTI JOG dial (or the remote's ENTER key).
The settings will be reset.
5 Press the TIME (ESC) key (or the remote's CLR/ESC key) to return to the home screen.
Formatting a CompactFlash card
When the SS-R1 is stopped, you can format the entire CompactFlash card to FAT format.
Before a CompactFlash card used by another device can be used with the SS-R1, you must format it on the SS-R1.
NOTE
When you format a card, all folders and files stored on that card will be deleted.
Perform the following menu operations. (For details on menu operations, refer to “Operations in the menu screens” on page 16.)
1 Press the MENU key to access the main menu list screen.
2 Select the UTILITY menu.
3 Select the MEMORY FORMAT item.
A confirmation popup will appear.

4 Once again press the front panel MULTI JOG dial (or the remote's ENTER key).
The card will be formatted.
During execution, the display will indicate Format.
5 Press the TIME (ESC) key (or the remote's CLR/ESC key) to return to the home screen.
Checking the capacity of the card
Here's how to check the capacity of the currently-inserted CompactFlash card.
Perform the following menu operations. (For details on menu operations, refer to “Operations in the menu screens” on page 16.)
1 Press the MENU key to access the main menu list screen.
2 Select the UTILITY menu.
3 Select the INFORMATION item.
The capacity of the card will be displayed.

4 Press the TIME (ESC) key (or the remote's CLR/ESC key) to return to the home screen.
10 – Operation using a computer keyboard
If you connect an IBM PC compatible PS/2 interface keyboard to the SS-R1's front panel, you'll be able to use your keyboard to control the SS-R1. The keyboard can be used for various types of control, but is particularly convenient when entering names.
Specifying the keyboard type
Select the keyboard type as appropriate for the keyboard you've connected (for details on menu operations, refer to "Operations in the menu screens" on page 16).
1 Press the MENU key to access the main menu list screen.
2 Select the UTILITY menu.
3 Select the KEYBOARD item.

4 According to the keyboard you've connected, choose JPN (Japanese keyboard) or US (English keyboard).
5 Press the TIME (ESC) key (or the remote's CLR/ESC key) to return to the home screen.
Using the keyboard to enter names
You can edit or enter a card name, folder name, or track name just as when typing text into a computer.
To access the name editing screen (RENAME screen), move from the folder finder menu to the folder menu or file menu, and then select the RENAME item. Alternatively, move from the playlist finder menu to the playlist menu or the file menu, and select the RENAME item.

To select the type of character to enter
CAPS key: Selects/de-selects uppercase alphabetical characters.
When de-selected: Lowercase alphabetical characters will be entered.
To enter text
Use the numeric keys and alphabetical keys for direct entry.
To move the cursor
Use the ←/→ keys.
To delete a character:
Delete key: Deletes the character at the cursor location.
Backspace key: Deletes the character preceding the cursor location.
To insert a character:
Press the Insert key at the desired location.
To edit a character:
Move the cursor and overwrite the character.
List of keyboard operations
You can use the keyboard not only to enter names, but also for other operations such as controlling the transport and editing. The keyboard operations are listed below.
Keyboard operations
F1 key
The same function as turning the front panel MULTI JOG dial toward the left (same as the remote's SKIP ◀◀ key)
F2 key
The same function as turning the front panel MULTI JOG dial toward the right (same as the remote's SKIP ▶▶I key)
F3 key
The same as the remote's KEY key
F4 key
The same as the STOP key
F5 key
The same as the PLAY key
F6 key
The same as the READY key
F7 key
The same as the remote's AUTO CUE key
F8 key
The same as the RECORD key
F9 key
The same as the remote's AUTO READY key
F10 key
The same as the remote's REPEAT key
F11 key
The same as the remote's P.MODE key
F12 key
The same as pressing the front panel PITCH dial (same as the remote's PITCH key)
SHIFT + F1 key
To "ERASE TRACK" of edit mode
SHIFT + F2 key
No assignment
SHIFT + F3 key
To “FORMAT” of edit mode
SHIFT + F4 key
To "MOVE" of edit mode
SHIFT + F5 key
To “DIVIDE” of edit mode
SHIFT + F6 key
To “COMBINE” of edit mode
SHIFT + F7 key
The same as the remote's FINDER key
SHIFT + F8 key
To "RENAME" of edit mode
SHIFT + F9 key
No assignment
SHIFT + F10 key
The same as the remote's FLASH LOAD key
SHIFT + F11 key
No assignment
SHIFT + F12 key
No assignment
CTRL + F1
After FLASH LOAD is completed, flash-start track 1 playback
CTRL + F2
After FLASH LOAD is completed, flash-start track 2 play-back
CTRL + F3
After FLASH LOAD is completed, flash-start track 3 play-back
CTRL + F4
After FLASH LOAD is completed, flash-start track 4 play-back
CTRL + F5
After FLASH LOAD is completed, flash-start track 5 play-back
CTRL + F6
After FLASH LOAD is completed, flash-start track 6 play-back
CTRL + F7
After FLASH LOAD is completed, flash-start track 7 play-back
CTRL + F8
After FLASH LOAD is completed, flash-start track 8 play-back
CTRL + F9
After FLASH LOAD is completed, flash-start track 9 play-back
(Continue)
10 – Operation using a computer keyboard
CTRL + F10
After FLASH LOAD is completed, flash-start track 10 playback
CTRL + F11
After FLASH LOAD is completed, flash-start track 11 playback
CTRL + F12
After FLASH LOAD is completed, flash-start track 12 playback
CAPS key
Select/de-select uppercase alphabetical characters
Numeric keys
Enter numerals
←/→ keys
Move the cursor
Delete key
Delete the character at the cursor location
Backspace key
Delete the character preceding the cursor location
Insert key
Inserts a character at the cursor location
ESC key
Cancels editing or title editing, and exits menu mode
Enter key
The same as the ENTER key
NOTE
When using the keyboard for editing, press the desired execution key when the finder screen is displayed.
Example: To execute ERASE TRK
Press SHIFT + F7 (FINDER key) to access the finder screen. Use the cursor keys to highlight the file or folder that you want to delete.
Press SHIFT + F1 key.
The display will ask EXECUTE?, so press the ENTER key.
When the deletion is completed, you will return to the finder screen.
If you connect the SS-R1's CONTROL I/O (RS-232C) connector to the RS-232C connector of your computer, you'll be able to control the SS-R1 from your computer.
You'll use the menu to make communication-related settings (for details on menu operations, refer to “Operations in the menu screens” on page 16).
1 Press the MENU key to access the main menu list screen.
2 Select the UTILITY menu.
3 Highlight the RS-232C item, and press the front panel ▶▶ key (or the remote's CURSOR ▶ key).
The RS-232C setting screen will appear.

4 Make the appropriate setting for each item.
BAUD RATE
Specify the baud rate (communication speed).
Choose from 4800, 9600, 19200, and 38440 bps (default: 19200).
PARITY BIT
Specify the communication parity bit setting.
Choose from NON, EVEN, and ODD (default: NON).
STOP BIT
Specify the communication stop bit setting.
Choose 1 or 2 (bit) (default: 1).
DATA LENGTH
Choose the communication data length.
Choose 7 or 8 (bit) (default: 8).
5 When you've finished making settings, press the TIME (ESC) key (or the remote's CLR/ESC key) to return to the home screen.
NOTE
- RS-232C settings are saved even when the power is turned off.
- For details on the SS-R1's RS-232C command protocol, please contact TEAC Corporation's Tascam customer support.
Errors: Press the STOP key or ESCAPE key to close the popup.
| 1st line | 2nd line | Meaning | |
| 1 | -- error -- | DECODE | Failed to play MP3/WAV file. |
| 2 | -- error -- | REC STAND BY | Failed to prepare to begin recording. |
| 3 | -- error -- | CAPACITY | Recording stopped because of insufficient storage area on the media. |
| 4 | -- error -- | RECORD | Error occurred while recording. |
| 5 | -- error -- | INFO WRITING | An error occurred while writing data. |
| 6 | -- error -- | OVER FLOW | Recording buffer was insufficient while recording an MP3/WAV track. |
| 7 | -- error -- | NotMatchDMA | Cannot record because the media does not meet the system requirements. |
| 8 | -- error -- | FLASH LOAD | Error occurred while loading flash start data. |
| 9 | -- error -- | DIN UNLOCK | Digital input is not locked. |
| 10 | -- error -- | DIN NotAudio | The incoming digital data is not audio. |
| 11 | -- error -- | FS UNMATCH | The digital signal being input differs from the currently selected sampling rate. |
Cautions: The popup will close automatically (after approximately two seconds)
| 1st line | 2nd line | Meaning | |
| 1 | --caution-- | CAN'T UNDO | Undo is not possible because no undoable edit exists. |
| 2 | --caution-- | MEDIUM FULL | Recording cannot be started because there is insufficient space on the media. |
| 3 | --caution-- | TRACK FULL | Recording is not possible because you have reached the maximum number of tracks. |
| 4 | --caution-- | NoCallPoint | A call request was made when no call point existed. |
| 5 | --caution-- | CAN'T REC | Recording is not possible due to system limitations. |
| 6 | --caution-- | WriteProtect | The media is write-protected. |
| 7 | --caution-- | NOT EXECUTE | Failed to execute the editing operation. |
| 8 | --caution-- | CAN'T EDIT | Editing was not possible due to system limitations. |
| 9 | --caution-- | CAN'T SELECT | Selection/execution was not possible due to system limitations. |
| 10 | --caution-- | TRK PROTECT | Editing was not possible because the track was protected. |
| 11 | --caution-- | NAME FULL | The name has reached the maximum number of characters. |
| 12 | --caution-- | PROGRAMFULL | Registration is not possible because you have reached the maximum number of tracks in a program. |
| 13 | --caution-- | PGM EMPTY | Play or pause is not possible because no program has been registered. |
| 14 | --caution-- | NoSearchTime | Search was not possible because the specified search time (search track) does not exist. |
| 15 | --caution-- | UnmatchMedia | Recording is not possible because the media does not meet the system requirements. |
| 16 | --caution-- | Dif Playlist | There is a discrepancy between the specified playlist and the media information. |
| 17 | --caution-- | P.LIST FULL | Registration was not possible because the number of entries in the playlist has exceeded the allowable number. |
| 18 | --caution-- | P.LIST EMPTY | Play or pause is not possible because no playlist has been registered. |
| 19 | --caution-- | P.LIST ENTRY | You attempted to edit a track that is registered in a playlist. |
Operation messages: Displays in place of the counter
| 1st line | Meaning | |
| 1 | POWER ON | The system is starting up and initializing. |
| 2 | DEVICE ERROR | Could not detect the CompactFlash card device. Please contact service. |
| 3 | NO MEDIUM | Media is not inserted in the CompactFlash card slot. |
| 4 | MONITOR | Now monitoring the input. |
| 5 | MEDIUM READING | Now reading from media. |
| 6 | MEDIUM ERROR | Failed to read media. |
| 7 | UNKNOWN | The media is formatted with other than FAT32. Please format the media if you want to use it with the SS-R1. |
| 8 | INITIALIZING MEDIUM | Creating data in order to use this media with the SS-R1. |
| 9 | RECORD STAND BY | Now in record-ready condition. |
| 10 | INFORMATION WRITING | Now writing the recorded data. |
| 11 | FLASH | Now loading flash-start data. |
| 12 | Fs CHANGING | The system's sampling frequency is being changed because the track's sampling frequency differs from that of the current track. |
■ Power does not turn on
Make sure that the power plug is firmly inserted.
■ Media is not detected
Make sure that the CompactFlash card is firmly inserted.
- Can’t play back
In the case of a WAV file, make sure that the file is of a sampling frequency (44.1 kHz or 48 kHz) and bit depth (16-bit) supported by the SS-R1. In the case of an MP3 file, make sure that the file is of a bit rate supported by the SS-R1.
No sound
Check the SS-R1's connections to your monitor system. Also check the volume of your amp.
- Can’t record
- Check the connections once again.
- Adjust the recording level.
■ A setting you changed is not remembered
The SS-R1 backs-up the settings when you change them. This backup may fail if you turn off the power at an inappropriate time, so do not turn off the power immediately after changing a setting.
■ Noise is heard
Check whether a connection cable might have a bad connection.
■ When editing a name, the display indicates Name Full
Due to limitations of the system, the number of characters in a file name and folder name is limited to 255 characters (single-byte). Since the full path within the folder finder is limited to 255 characters, the maximum name length for a file or folder that is inside a sub-folder will be reduced by the number of characters used by any folders above it and any separator characters.
14 – Specifications
| Storage disk | CompactFlash card |
| Recording/playback formats | MP3: Sampling frequencies: 44.1 kHz, 48 kHzBit depth: 16-bitData rate: 64, 128, 192, 256, 320 kbpsWAV: Sampling frequencies: 44.1 kHz, 48kHzBit depth: 16-bit |
| Number of channels | 2 channels (stereo) |
| Analog inputs | Balanced XLR-3-31 equivalentNominal input level: +4 dBuMaximum input level: +20 dBu (*1)Minimum input level: -6 dBu or greaterInput impedance: 22 kΩ |
| Unbalanced RCA pin jackNominal input level: -10 dBVMaximum input level: +6 dBVMinimum input level: -20 dBV or greaterInput impedance: 22 kΩ | |
| Analog Outputs | Balanced XLR-3-32 equivalentNominal output level: +4 dBuMaximum output level: +20 dBu (*1)Output impedance: 100Ω |
| Unbalanced RCA pin jackNominal output level: -10 dBVMaximum output level +6 dBVOutput impedance: 200Ω | |
| Phones output | Stereo phone jack (1/4")45 mW + 45 mW or greater (THD+N: 0.1% or less, at 32Ω load) |
| Digital input (COAXIAL) | Connector: RCA pin jack (IEC- 60958-3 Consumer (S/PDIF))Input sampling frequencies supported: 32 kHz – 48 kHzInput impedance: 75Ω (unbalanced)Variable gain amount: -∞ – +10 dBFS |
| Digital output (COAXIAL) | Connector: RCA pin jackSupported signal format: IEC- 60958-3 Consumer (S/PDIF)Output impedance: 75Ω (unbalanced) |
| CONTROL I/O | (RS-232C) connectorCommunication protocol: Complies with RS-232C protocol specification 1.00Connector: D-sub 9-pin connector |
| (PARALLEL) connectorParallel control input/outputConnector: D-sub 25-pin connectorMaximum input voltage: +5.5 VMinimum high level input voltage: +3.75 VMaximum low level input voltage: +1.25 VOutput format: Open drain (voltage resistance 50 V, maximum current 50 mA)Maximum low level output voltage: 0.5 V | |
| REMOTE IN connector | For connecting dedicated RC-SS1 remote controller: Stereo mini jack |
| For connecting a PS/2 keyboard: Mini-DIN connector | |
| Frequency response | 20 Hz – 20 kHz, ±0.5 dB (for recording) |
| Distortion | 0.005% or less (AES-17 20 kHz) (for recording) |
| S/N ratio | 95 dB (AES-17 20 kHz, A-weighted, typical) (for recording) |
| Dynamic range | 95 dB (AES-17 20 kHz, A-weighted, typical) (for recording) |
| Crosstalk between channels | 95 dB |
| Power | U.S.A./Canada 120 VAC, 60HzU.K./Europe 230 VAC, 50HzAustralia 240 VAC, 50Hz |
| Power consumption | 13 W (U.S.A./Canada)13 W (U.K./Europe/Australia) |
| Dimensions (d x w x h) | 482.6 x 44.5 x 301 (mm) / 19 x 1.8 x 11.9 (in) |
| Weight | 3.3 kg (7.3 lb) |
*1: If you would like to change the maximum balanced output level, please contact the service department.
* Specifications and appearance are subject to change without notice for improvement.
* Please be aware that due to improvements in this product, illustrations in this owner's manual may differ from the product in some respects.
* CompactFlash ^ is a registered trademark of SanDisk Corporation, USA.
Dimensional diagram

TASCAM
TEAC Professional Division
SS-R1
TEAC CORPORATION
Phone: +81-42-356-9143
1-47 Ochiai, Tama-shi, Tokyo 206-8530, Japan
www.tascam.com
TEAC AMERICA, INC.
Phone: +1-323-726-0303
7733 Telegraph Road, Montebello, California 90640
www.tascam.com
TEAC CANADA LTD.
Phone: +1905-890-8008 Facsimile: +1905-890-9888
5939 Wallace Street, Mississauga, Ontario L4Z 1Z8, Canada
www.tascam.com
TEAC MEXICO, S.A. De C.V
Phone: +52-555-581-5500
Campesinos No. 184, Colonia Granjes Esmeralda, Delegacion Iztapalapa CP 09810, Mexico DF
www.tascam.com
TEAC UK LIMITED
Phone: +44-8451-302511
Unit 19 & 20, The Courtyards Hatters Lane, Watford, Hertfordshire. WD18 8TE, U.K.
www.tascam.co.uk
TEAC EUROPE GmbH
Phone: +49-611-71580
- TEAC Professional Division
- SS-R1
- Solid State Stereo Audio Recorder
- OWNER'S MANUAL
- WARNING: TO PREVENT FIRE OR SHOCK HAZARD, DO NOT EXPOSE THIS APPLIANCE TO RAIN OR MOISTURE.
- For U.S.A.
- TO THE USER
- CAUTION
- For the customers in Europe
- WARNING
- - Introduction
- – Controls and connectors
- - Menu screens
- – Preparations
- – Playback
- – Recording
- – Using the folder finder
- – Using the playlist finder
- – Other settings
- – Operation using a computer keyboard
- NOTE
- Features of the SS-R1
- Supplied accessories
- Rack-mounting the unit
- About this manual
- Media considerations
- A card more than 512 MB should be used on the SS-R1.
- Environmental considerations
- Beware of condensation
- Connections
- Control connections
- Front panel
- [Wheel functions]
- [Key functions]
- - Controls and connectors
- Rear panel
- Remote control unit (RC-SS1)
- The home screen
- Various indicators
- While playing or stopped
- While recording or record-ready
- Menu structure
- Operations in the menu screens
- Connecting headphones
- Connecting a PS/2 keyboard
- Connecting audio devices (inputs)
- Connecting audio devices (outputs)
- Computer
- Control via a parallel connection
- Turning the power on
- Setting the date and time
- Adjusting the display
- Adjusting the contrast
- Adjusting the brightness
- Inserting a CompactFlash card
- TIP
- About the door lock
- Removing the card
- Files that can be played
- - WAV files
- - MP3 files
- Tracks and files
- Play area
- Selecting the type of play area
- Selecting the current folder or current playlist
- Basic playback operations
- Playback
- Selecting a track
- Skipping to the previous or next track
- Specifying a track number
- Use the remote's numeric keys (0–9) to enter a track number (maximum of three digits).
- Press the PLAY key.
- Fast-forward/rewind search
- Time search
- Time searching from an incomplete entry
- Time skip
- While playing or paused, press the ◀◀ or ▶▶ keys.
- Playback modes
- Continuous playback (default setting)
- Single playback
- Program playback
- Random playback
- Specifying the playback mode
- Using the dedicated key of the remote
- Using the menu
- Switching the playback time display mode
- Power-on play
- Repeat playback
- Conventional repeat playback
- A-B Repeat playback
- Pitch Control playback
- Specifying the Pitch Step
- Key Control playback
- Using the remote's dedicated key to turn Key Control on/off
- Auto Cue function
- Using the remote's dedicated key to turn Auto Cue on/off
- Auto Ready function
- Turning the Auto Ready function on/off from the front panel
- Call function
- Incremental Playback
- Using the remote's dedicated key
- Using the menu to make settings
- Playing back in monaural
- Resume Playback
- Flash Start function
- End of disc/track message (EOM)
- Specifying an EOM tally output trigger
- Example of actual use
- Selecting the input source
- Using the dedicated remote key to select the source
- Using the menu to select the source
- Input source indicator
- If A.UNBAL. is lit
- If A.BAL. is lit
- If D.COAX. is lit
- Specifying the recording file format
- STEREO/MONO
- SAMPLING
- Using the sampling rate converter
- Monitoring the input signal
- Adjusting the input signal level and balance
- Basic recording operation
- WAVE
- MP3
- Switching the recording time display mode
- Nothing lit
- REMAIN is lit
- TOTAL is lit
- TOTAL and REMAIN are lit
- Sync recording
- Making settings
- LEVEL
- DELAY
- STOP TIME
- Using the remote's dedicated key to turn the function on/off
- Sync Record operation
- Auto Track function
- - If DD is selected
- - If TIME is selected
- Using the remote's dedicated key to switch modes
- Assigning a new track number manually
- Applying the compressor while recording
- Specifying the name of the recorded file
- Overview
- Opening the folder finder screen
- Navigating in the folder finder screen
- Operations when a folder is highlighted
- - Using the folder finder
- Operations when a file is highlighted
- Operations in the folder menu screen
- Renaming a folder
- Deleting a folder
- Undeleting a deleted folder (UNDO)
- Press the front panel MULTI JOG dial (or the remote's ENTER key).
- Making a folder the current folder
- Creating a new folder
- When you've finished editing the name, press the front panel MULTI JOG dial (or the remote's EN-TER key) to finalize the changes.
- Adding an entire folder to a playlist
- Playlist 01 0track
- Playlist 02 0track
- Playlist 03 0track
- Undoing a folder menu operation (UNDO)
- Operations in the file menu screen
- Editing the file name
- Deleting a file
- Adding files to a playlist
- Playlist 01 Otrack
- Playlist 02 Otrack
- Playlist 03 Otrack
- Dividing a file (DIVIDE)
- Combining files (COMBINE)
- Undoing a file menu operation (UNDO)
- Moving or copying a file
- Moving a file within a folder
- Moving or copying a file between folders
- Playlist 01 0tracks
- Playlist 02 0tracks
- Playlist 03 0tracks
- Opening the playlist finder screen
- USER PLAYLIST
- Playlist 01 0tracks
- Playlist 02 0tracks
- Playlist 03 0tracks
- Navigating in the playlist finder screen
- - Opening the playlist menu screen
- • Viewing the properties of a playlist
- Operations in the playlist menu screen
- Adding a file/folder to a playlist
- Deleting all files from a playlist
- Deleting a file from a playlist
- Moving a file
- Restoring the factory settings
- Formatting a CompactFlash card
- Checking the capacity of the card
- Specifying the keyboard type
- Using the keyboard to enter names
- To select the type of character to enter
- To enter text
- To move the cursor
- To delete a character:
- To insert a character:
- To edit a character:
- List of keyboard operations
- Keyboard operations
- F1 key
- F2 key
- F3 key
- F4 key
- F5 key
- F6 key
- F7 key
- F8 key
- F9 key
- F10 key
- F11 key
- F12 key
- SHIFT + F1 key
- SHIFT + F2 key
- SHIFT + F3 key
- SHIFT + F4 key
- SHIFT + F5 key
- SHIFT + F6 key
- SHIFT + F7 key
- SHIFT + F8 key
- SHIFT + F9 key
- SHIFT + F10 key
- SHIFT + F11 key
- SHIFT + F12 key
- CTRL + F1
- CTRL + F2
- CTRL + F3
- CTRL + F4
- CTRL + F5
- CTRL + F6
- CTRL + F7
- CTRL + F8
- CTRL + F9
- CTRL + F10
- CTRL + F11
- CTRL + F12
- CAPS key
- Numeric keys
- Delete key
- Backspace key
- Insert key
- ESC key
- Enter key
- Make the appropriate setting for each item.
- BAUD RATE
- PARITY BIT
- STOP BIT
- DATA LENGTH
- ■ Power does not turn on
- ■ Media is not detected
- - Can’t play back
- No sound
- - Can’t record
- ■ A setting you changed is not remembered
- ■ Noise is heard
- ■ When editing a name, the display indicates Name Full
- Dimensional diagram
- TASCAM
- TEAC CORPORATION
Brand : TASCAM
Model : SS-R1
Category : Digital recorder