SLOW COOKER - Cooking appliance BREVILLE - Free user manual and instructions
Find the device manual for free SLOW COOKER BREVILLE in PDF.
| Product Type | Slow Cooker |
| Brand | Breville |
| Model | BSC560XL (Slow Cooker) |
| Capacity | 6.5 litres (approx.) |
| Power Supply | 110-120 V ~, 60 Hz |
| Power | 240 W (estimated) |
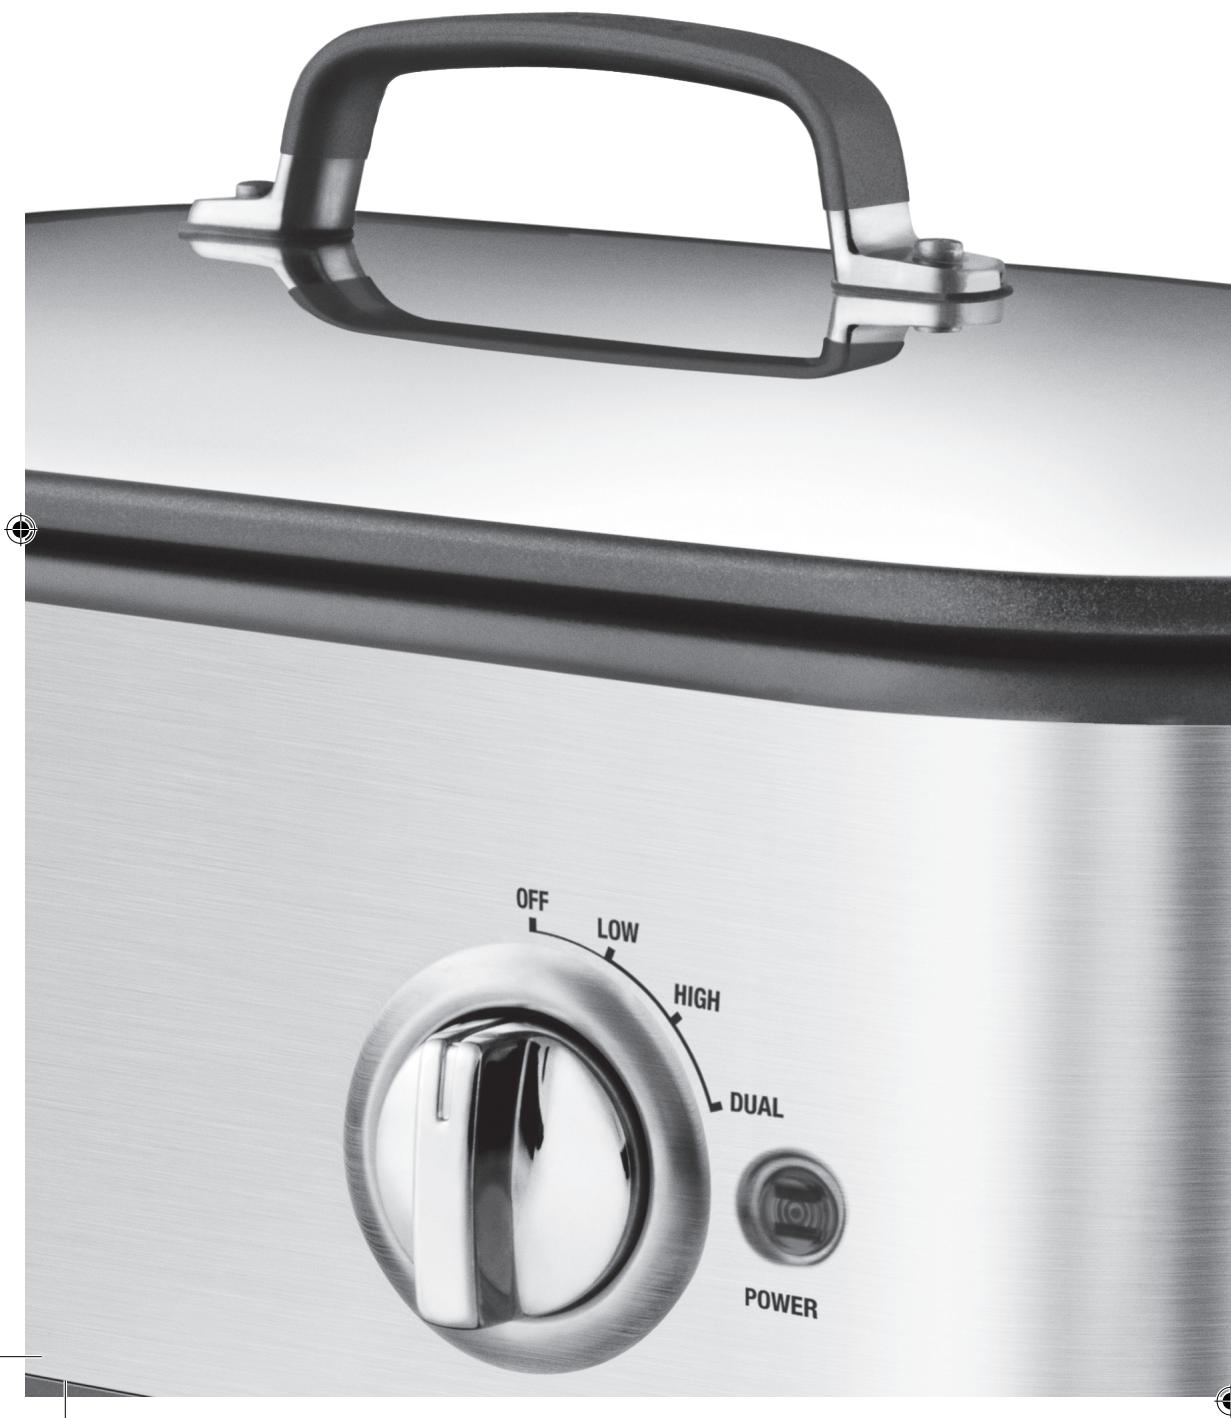
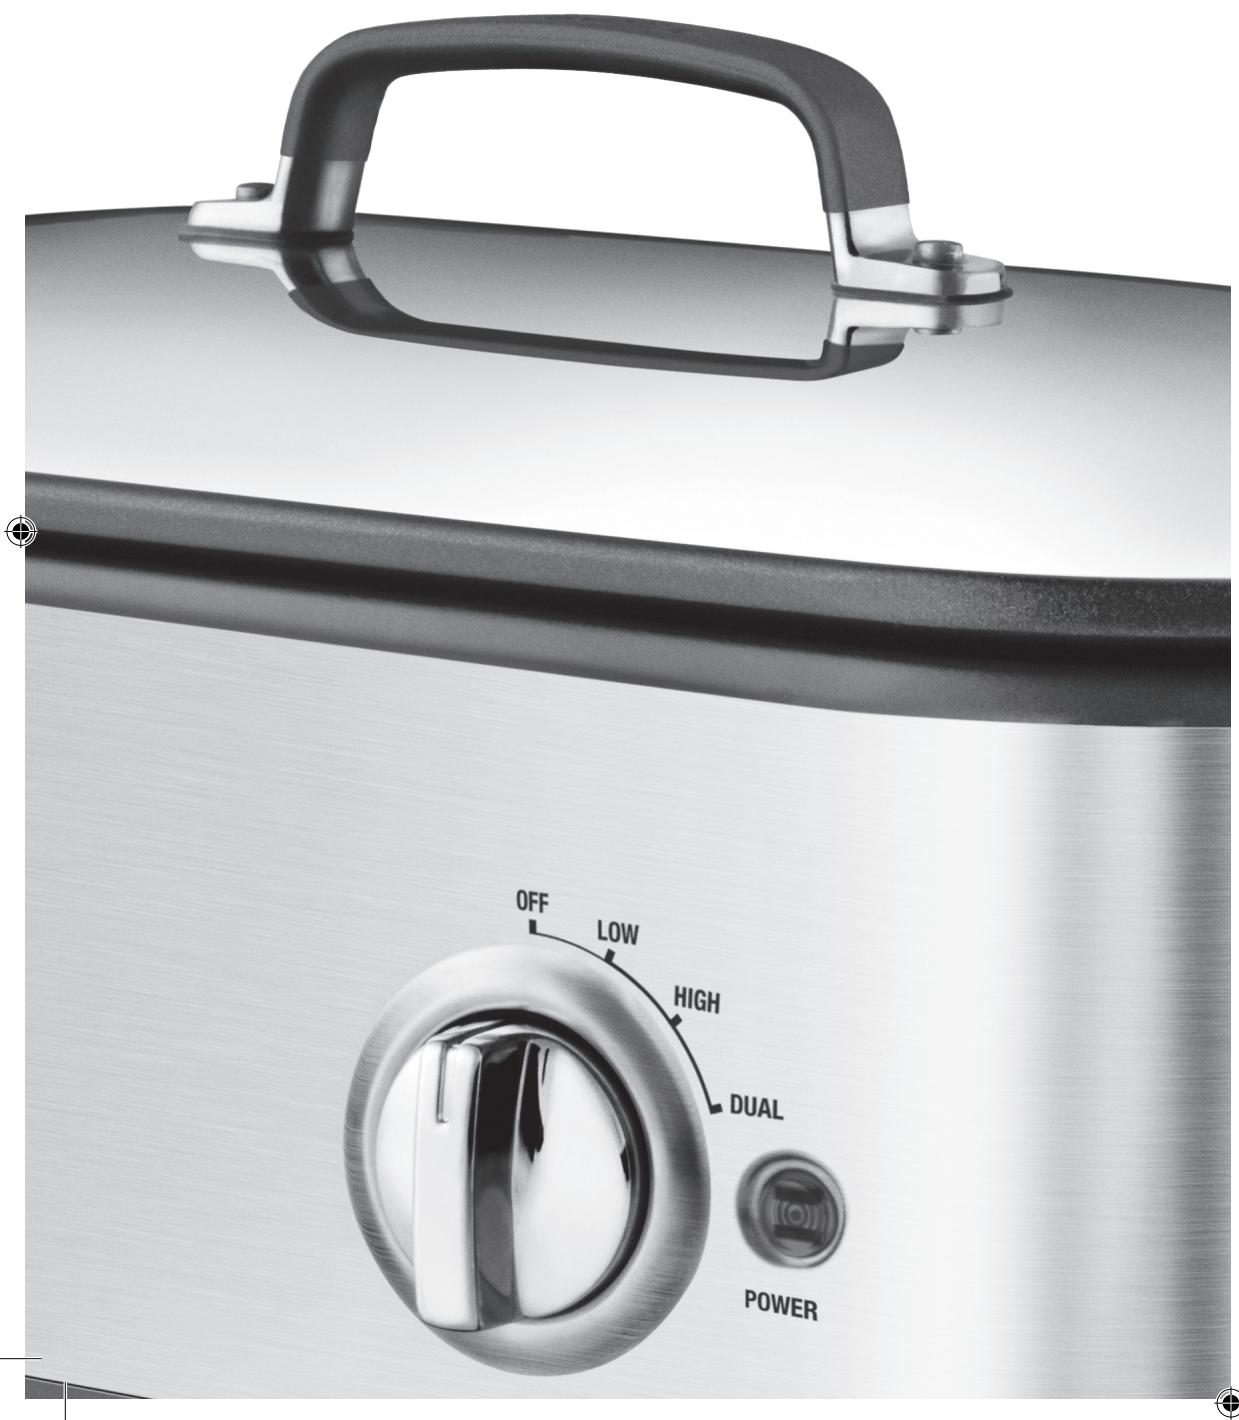
| Temperature Settings | Low (Low), High (High), Dual (Combined) |
| Pot Material | Nonstick die-cast metal (EasySear™) |
| Lid Material | Stainless steel |
| Searing Function | Yes, on stovetop (gas, electric, ceramic) |
| Oven Use | Pot up to 250°C (480°F) |
| Care of Pot and Lid | Dishwasher or hand washing (recommended) |
| Care of Housing | Wipe with a damp cloth |
| Safety | Do not immerse; use oven mitts; do not operate empty |
| Warranty | 1 year limited |
| Customer Service | 1 (866) BREVILLE |
Frequently Asked Questions - SLOW COOKER BREVILLE
User questions about SLOW COOKER BREVILLE
0 question about this device. Answer the ones you know or ask your own.
Ask a new question about this device
Download the instructions for your Cooking appliance in PDF format for free! Find your manual SLOW COOKER - BREVILLE and take your electronic device back in hand. On this page are published all the documents necessary for the use of your device. SLOW COOKER by BREVILLE.
USER MANUAL SLOW COOKER BREVILLE
Breville Customer Service Center
US Customers
Mail: Breville USA
19400 S.Western Ave
Torrance CA
CA 90501-1119
Canada Customers
Mail: Breville Canada
Phone: Customer Service
1 (866) BREVILLE
Phone: Customer Service:
1 (866) BREVILLE
Email: Customer Service:
askus@brevilleusa.com
Email: Customer Service:
askus@breville.ca
www.breville.com
Breville is a registered trademark of Breville Pty Ltd. A.B.N. 98 000 092 928.
USA: 19400 S.Western Ave, Torrance, CA90501-1119, Tel: 1 866 BREVILLE.
CANADA: 2555, Avenue de l'Aviation, Pointe-Claire (Montreal) Quebec, H9P2Z2. Tel: 1 866 BREVILLE
Copyright Breville Pty Ltd 2009. Due to continued product improvement, the products illustrated/photographed in this brochure may vary slightly from the actual product.
Model BSC560XL Issue NA-2/09
Slow Cooker -Mijoteuse
On the purchase of your new Breville Slow Cooker
CONTENTS
4 Breville Recommends Safety First
8 Know Your Breville Slow Cooker
10 Operating Your Breville Slow Cooker
14 A Beginner's Guide to Slow Cooking
19 Hints and Tips
20 Care and Cleaning
22 One year limited warranty
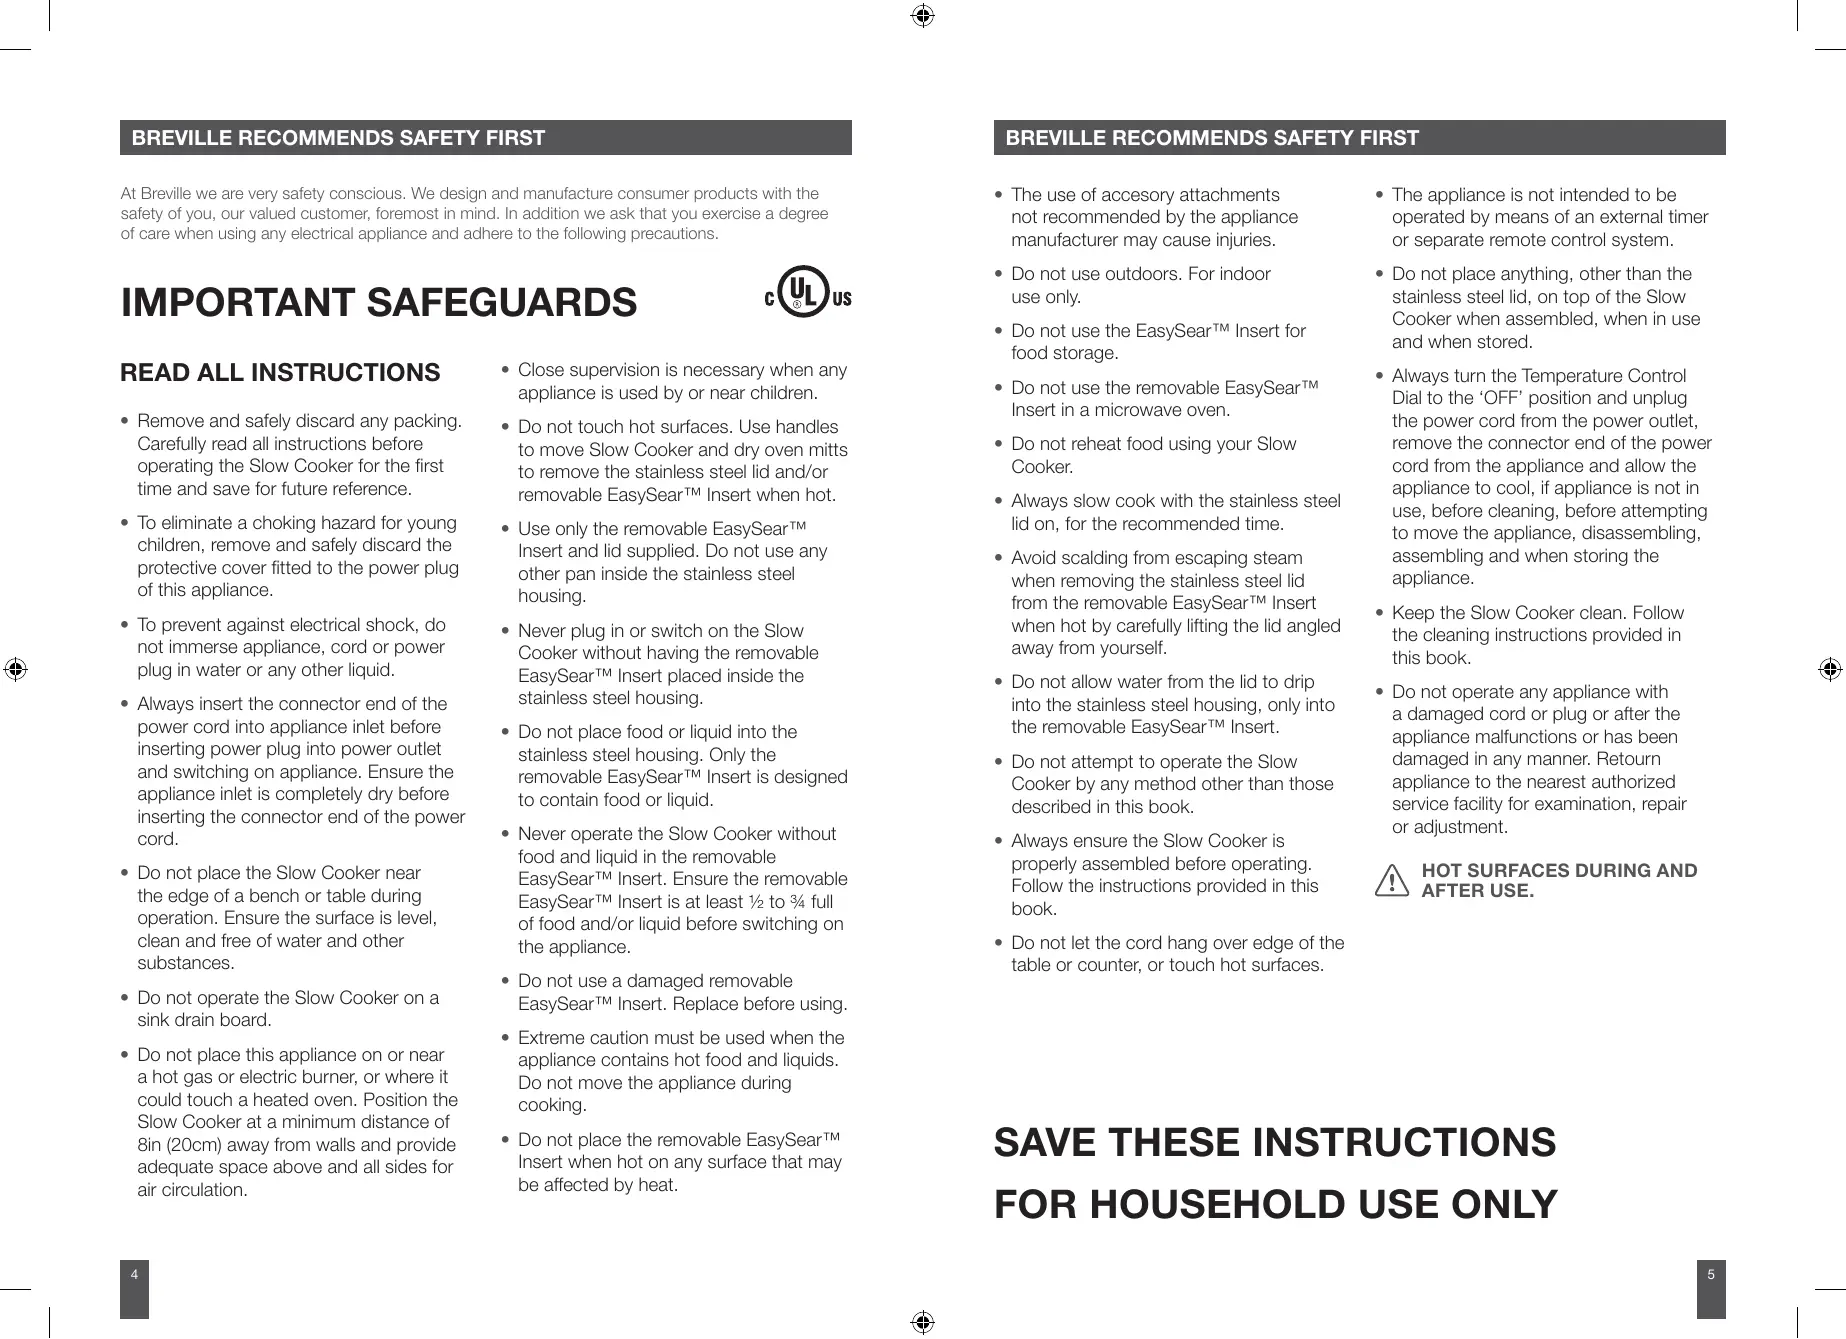
BREVILLE RECOMMENDS SAFETY FIRST
At Breville we are very safety conscious. We design and manufacture consumer products with the safety of you, our valued customer, foremost in mind. In addition we ask that you exercise a degree of care when using any electrical appliance and adhere to the following precautions.
IMPORTANT SAFEGUARDS

READ ALL INSTRUCTIONS
- Remove and safely discard any packing. Carefully read all instructions before operating the Slow Cooker for the first time and save for future reference.
- To eliminate a choking hazard for young children, remove and safely discard the protective cover fitted to the power plug of this appliance.
- To prevent against electrical shock, do not immerse appliance, cord or power plug in water or any other liquid.
- Always insert the connector end of the power cord into appliance inlet before inserting power plug into power outlet and switching on appliance. Ensure the appliance inlet is completely dry before inserting the connector end of the power cord.
- Do not place the Slow Cooker near the edge of a bench or table during operation. Ensure the surface is level, clean and free of water and other substances.
- Do not operate the Slow Cooker on a sink drain board.
-
Do not place this appliance on or near a hot gas or electric burner, or where it could touch a heated oven. Position the Slow Cooker at a minimum distance of 8in (20cm) away from walls and provide adequate space above and all sides for air circulation.
-
Close supervision is necessary when any appliance is used by or near children.
- Do not touch hot surfaces. Use handles to move Slow Cooker and dry oven mitts to remove the stainless steel lid and/or removable EasySear™ Insert when hot.
- Use only the removable EasySear™ Insert and lid supplied. Do not use any other pan inside the stainless steel housing.
- Never plug in or switch on the Slow Cooker without having the removable EasySear™ Insert placed inside the stainless steel housing.
- Do not place food or liquid into the stainless steel housing. Only the removable EasySear™ Insert is designed to contain food or liquid.
- Never operate the Slow Cooker without food and liquid in the removable EasySear™ Insert. Ensure the removable EasySear™ Insert is at least 12 to 34 full of food and/or liquid before switching on the appliance.
- Do not use a damaged removable EasySear™ Insert. Replace before using.
- Extreme caution must be used when the appliance contains hot food and liquids. Do not move the appliance during cooking.
- Do not place the removable EasySear™ Insert when hot on any surface that may be affected by heat.
BREVILLE RECOMMENDS SAFETY FIRST
- The use of accessory attachments not recommended by the appliance manufacturer may cause injuries.
- Do not use outdoors. For indoor use only.
- Do not use the EasySear™ Insert for food storage.
- Do not use the removable EasySear™ Insert in a microwave oven.
- Do not reheat food using your Slow Cooker.
- Always slow cook with the stainless steel lid on, for the recommended time.
- Avoid scalding from escaping steam when removing the stainless steel lid from the removable EasySear™ Insert when hot by carefully lifting the lid angled away from yourself.
- Do not allow water from the lid to drip into the stainless steel housing, only into the removable EasySear™ Insert.
- Do not attempt to operate the Slow Cooker by any method other than those described in this book.
- Always ensure the Slow Cooker is properly assembled before operating. Follow the instructions provided in this book.
-
Do not let the cord hang over edge of the table or counter, or touch hot surfaces.
-
The appliance is not intended to be operated by means of an external timer or separate remote control system.
- Do not place anything, other than the stainless steel lid, on top of the Slow Cooker when assembled, when in use and when stored.
- Always turn the Temperature Control Dial to the 'OFF' position and unplug the power cord from the power outlet, remove the connector end of the power cord from the appliance and allow the appliance to cool, if appliance is not in use, before cleaning, before attempting to move the appliance, disassembling, assembling and when storing the appliance.
- Keep the Slow Cooker clean. Follow the cleaning instructions provided in this book.
- Do not operate any appliance with a damaged cord or plug or after the appliance malfunctions or has been damaged in any manner. Return appliance to the nearest authorized service facility for examination, repair or adjustment.
! HOT SURFACES DURING AND AFTER USE.
SAVE THESE INSTRUCTIONS
Your Breville appliance is fitted with a short power supply cord as a safety precaution to prevent personal injury or property damage resulting from pulling, tripping or becoming entangled with a longer cord. Do not allow children to use or be near this appliance without close adult supervision. Extension cords may be used if care is exercised in their use. If an extension cord is used, (1) the marked electrical rating of the cord set or extension cord should be at least as great as the electrical rating of the appliance, (2) the cord should be arranged so that it will not drape over the countertop or tabletop where it can be pulled on by children or tripped over unintentionally and (3) the extension cord must include a 3-prong grounding plug.
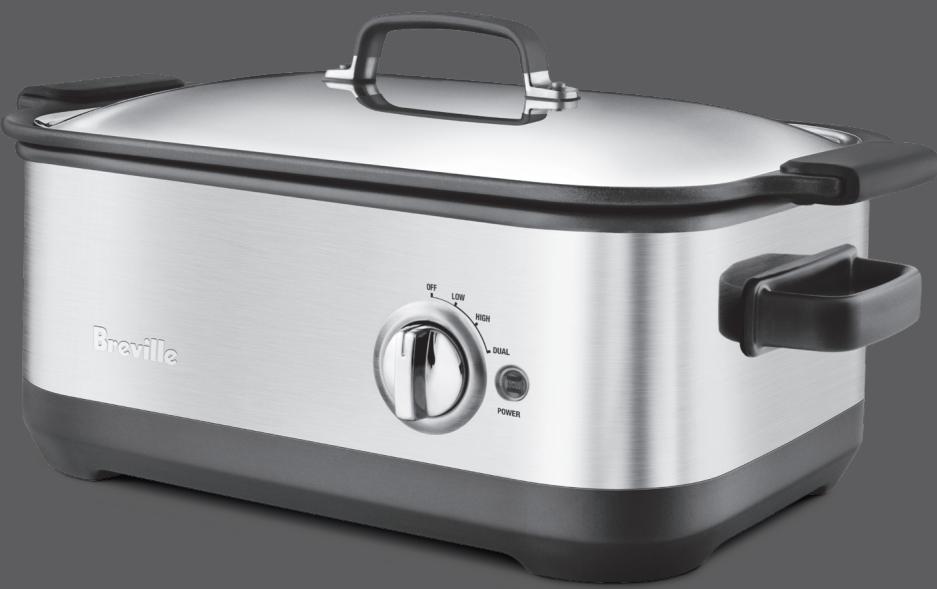
KNOW
your new Breville Slow Cooker
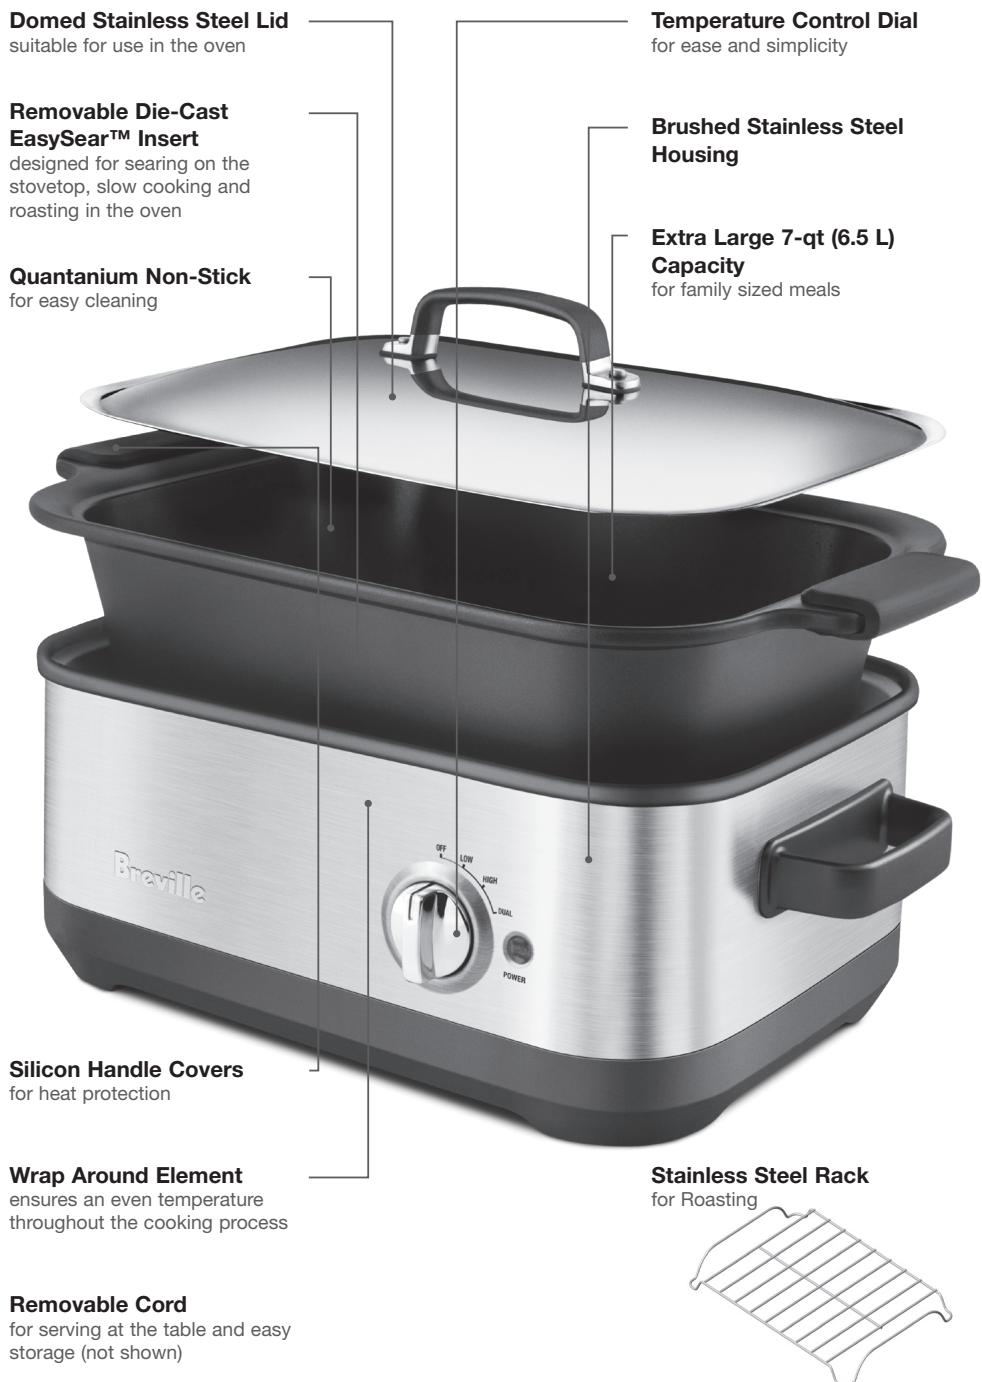
KNOW YOUR BREVILLE SLOW COOKER
OPERATING
your new Breville Slow Cooker
Before first use, remove all promotional labels and packing materials. Wash the removable EasySear™ Insert and stainless steel lid in hot, soapy water, rinse and dry thoroughly. Wipe the inside and the outside of the stainless steel housing with a soft, damp cloth, then dry thoroughly.
HOW TO SEAR BEFORE SLOW COOKING
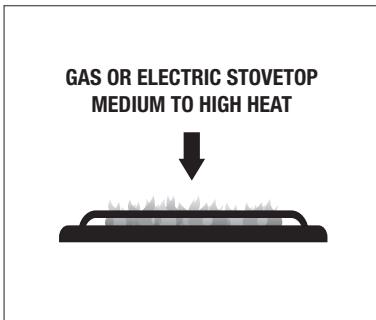
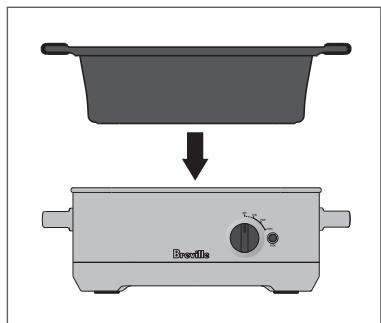
- Remove the EasySear™ Insert from the stainless steel Slow Cooker housing and place onto a large burner or hotplate on the gas, electric or ceramic stovetop.
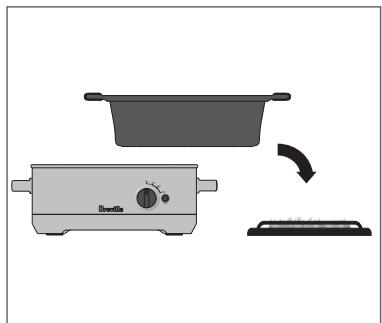
- Coat the inside of the EasySear™ Insert with oil or butter.
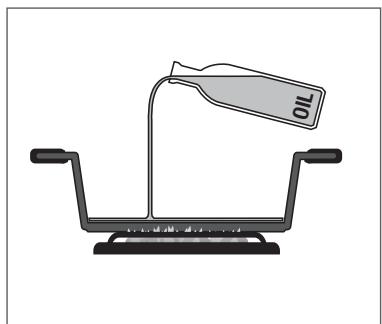
- Heat the EasySear™ Insert on a stovetop over medium to high heat.
- Place food to be seared into the EasySear™ Insert in batches.
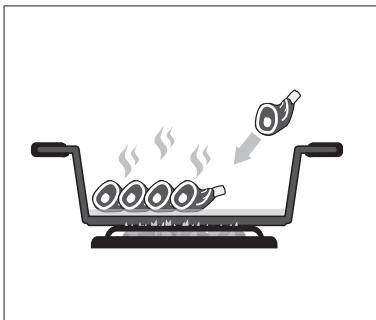
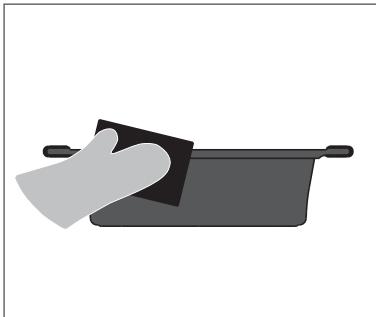
- When finished searing, use oven mitts and carefully place the EasySear™ Insert back into the stainless steel Slow Cooker housing. Proceed to 'How to Slow Cook' section (Page 12).
- The EasySear™ Insert is suitable for use on most electric, gas and ceramic stovetops, however it is not suitable for use on induction stovetops.
- The base of the EasySear™ Insert may cause scratching on glass/ceramic or halogen cooktops.
- Stir food in the EasySear™ Insert often, when cooking on the stovetop.
- Do not use metal utensils because they will scratch the non-stick coating on the EasySear™ Insert.
- Do not heat the EasySear™ Insert when empty for prolonged periods of time as it may damage the cooking surface.
- Do not place EasySear™ Insert in an oven that is hotter than 480^ F ( 250^ C ).
While silicone handles are heat resistant to 480^ (250^) it is not recommended to use for extended periods above 390^ (200^) .
HOW TO SLOW COOK
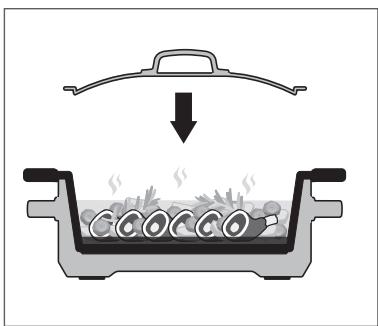
- With the EasySear™ Insert inserted into the stainless steel housing, add ingredients into EasySear™ Insert, ensuring denser foods are spread evenly across the bottom of the pan and not heaped to one side.
- Place the stainless steel lid into position.
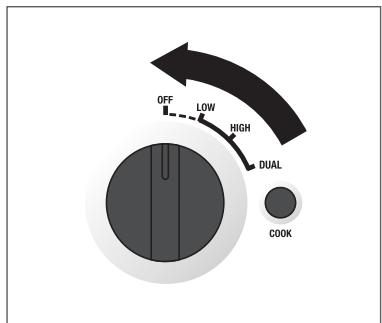
- With the Temperature Control Dial turned to the 'OFF' position, insert the connector end of the power cord into the appliance inlet and plug the power cord into a 110/120V power outlet.
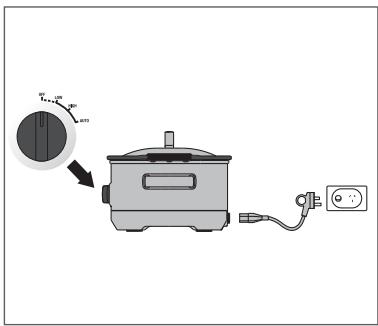
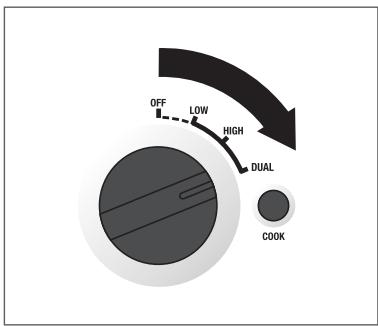
- Turn the Temperature Control Dial to the desired setting.
- When cooking is complete, turn the Temperature Control Dial to the 'OFF' position, remove the power plug from the power outlet and then remove the connector end from the appliance inlet.
IMPORTANT
Always use the Slow Cooker insert on a dry, level surface.
- Never operate the Slow Cooker without the removable EasySear™ Insert positioned in the stainless steel housing.
- Never operate the Slow Cooker without food and liquids in the removable EasySear™ Insert.
Always have the stainless steel lid firmly in position on the removable EasySear™ Insert throughout the operation of the Slow Cooker unless it is stated in a recipe to have it removed.
Always use dry pot holders or oven mitts to remove the EasySear™ Insert or stainless steel lid when hot.
- Do not place the removable EasySear™ Insert or stainless steel lid when hot on any surface that may be affected by heat.

ALWAYS LIFT AND REMOVE THE STAINLESS STEEL LID CAREFULLY USING AN OVEN MITT AND ANGLED AWAY FROM YOURSELF TO AVOID SCALDING FROM ESCAPING STEAM.

ALWAYS USE DRY POT HOLDERS OR OVEN MITTS TO REMOVE THE EASYSEARTM INSERT OR STAINLESS STEEL LID.
NOTE: Use of the stainless steel lid in a conventional oven may cause discoloration. This is normal and will not affect the cooking performance.
BEGGINERS GUIDE
to Slow Cooking

A BEGGINERS GUIDE TO SLOW COOKING
The Breville Slow Cooker with EasySear™ Insert is designed specifically for flavor layering. A technique professional chefs use to enhance and deepen the taste of meals by using the same pan for browning onions, searing meats and creating casseroles, curries, soup, stock and bolognaise.
For this reason, Breville has now developed a Slow Cooker with EasySear™ Insert. Simply remove the EasySear™ Insert from the Slow Cooker and use on the gas, electric or ceramic stovetop to caramelized vegetables and sear meats before placing back into the appliance and commencing the Slow Cooker function.
The following is a guide to help simplify the process of slow cooking, allowing you to obtain optimum results from your Slow Cooker.
We have also included helpful hints and recipes for successful slow cooking.
PREPARING MEAT AND POULTRY
Select the leanest cuts when purchasing meat. Trim the meat or poultry of any visible fat. If possible, purchase chicken portions without the skin. Otherwise, the slow cooking process will result in extra liquid being formed from the fat as it melts.
For casserole type recipes, cut the meat into cubes, approximately 1in - 1.5in (2.5cm - 3 cm). Slow cooking allows less tender cuts of meat to be used. The bones can be left on meat or poultry if liked and will help to keep meat tender during cooking.
SUITABLE MEAT CUTS FOR SLOW COOKING
| Beef | Beef chuck, skirt, round steak, boneless shin (Gravy) beef, bone-in-shin (Osso Bucco). |
| Lamb | Lamb shanks, drumsticks (frenched shanks), neck chops, boned out forequarter or shoulder. |
| Veal | Veal diced leg, shoulder/ forequarter chops and steaks, neck chops, knuckle (osso bucco) |
| Pork | Pork leg steaks, diced belly, Diced shoulder, Boneless loin chops |
PREPARING VEGETABLES
Vegetables should be cut into even-sized pieces to ensure more even cooking. Frozen vegetables must be thawed before adding to other foods cooking in the Slow Cooker.
PREPARED DRIED BEANS AND PULSES
If time permits, overnight soaking of dried beans and pulses is preferable. After soaking, drain and place in the Slow Cooker and cover with sufficient water to reach double their volume. Cook beans on the HIGH setting for 2 to 4 hours or until tender. Pre-soaked beans and pulses will cook a little faster.
A BEGGINERS GUIDE TO SLOW COOKING
SEARING AND BROWNING BEFORE SLOW COOKING
Searing and browning in the EasySear™ Insert on the stovetop may take a little extra time and whilst not strictly necessary, the rewards are evident in the end result.
The EasySear™ Insert keeps the heat stable and uniform allowing the meat to brown and form an even crust. Plus searing and browning seals in the moisture, intensifies the flavor and provides more tender results.
Once searing and browning is complete, return the EasySear™ Insert to the stainless steel housing with all the tasty caramelized ingredients inside.
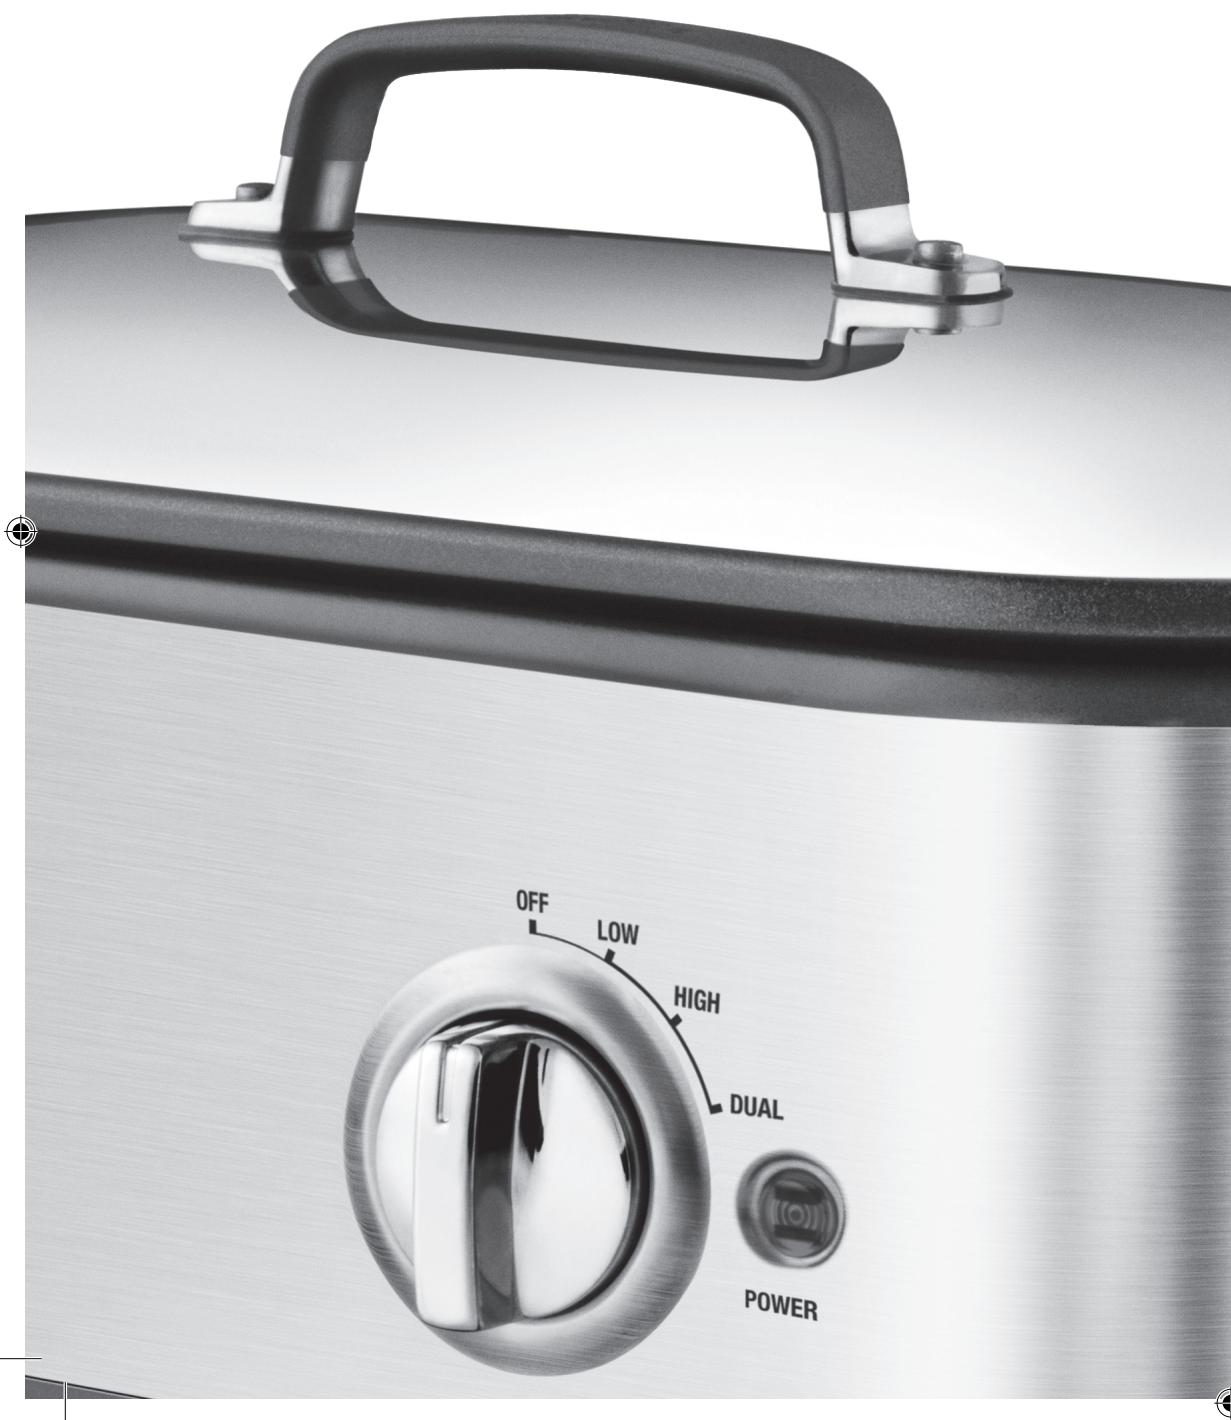
USING THE TEMPERATURE CONTROL SETTINGS
This Slow Cooker has three settings: LOW, HIGH and DUAL. Use the recommended guidelines offered in the recipe to determine cooking time and heat setting. Dishes can be prepared well in advance of mealtime and cooking time regulated so that food is ready to serve at a convenient time.
It is almost impossible to overcook in the Slow Cooker particularly when using the LOW setting. A general rule of thumb for most slow cooked meat and vegetable recipes is:
| SETTING COOKING TIME | |
| LOW | 6 to 10 hours |
| HIGH | 3 to 4 hours |
| DUAL | 4 to 6 hours |
Your favorite traditional recipes can also be easily adapted to this Slow Cooker. Simply halve the amount of liquid and increase the cooking time. The following is a guide to adjusting your favorite recipes:
| TRADITIONAL COOKING TIME | SLOW COOKER COOKING TIME | ||
| LOW | HIGH | DUAL | |
| 35-60 minutes | 6-10 hours | 3-4 hours | 4-6 hours |
| 1-3 hours | 8-10 hours | 4-6 hours | 6-8 hours |
NOTE:
These times are approximate. Times can vary depending on ingredients and quantities in recipes.
NOTE:
High humidity, altitude, cold tap water and ingredients may slightly affect the cooking times in the Slow Cooker.
A BEGGINERS GUIDE TO SLOW COOKING
LOW SETTING
The LOW setting gently simmers food for an extended period of time without overcooking or burning. No stirring is required when using this setting.
HIGH SETTING
The HIGH setting is used when cooking dried beans or pulses and will cook food in half the time required for the LOW setting. Some foods may boil when cooked on the high setting, so it may be necessary to add extra liquid. This will depend on the recipe and the amount of time in which it is cooked. Occasional stirring of stews and casseroles will improve flavor distribution.
The HIGH setting in this Slow Cooker cooks considerably faster than the DUAL or LOW settings and can be used if time is a constraint. Simply place your favorite meal on HIGH for 3 to 4 hours and you will have a slow cooked meal in a fraction of the time.
DUAL SETTING
The DUAL setting will begin cooking on HIGH and then will shift to LOW after approximately 2 hours of cooking time for added ease and simplicity.
Roasting meats in the Slow Cooker creates tender, flavorsome results. The long, slow, covered cooking process breaks down and softens the connective and muscle tissue within the meat, making it easier to slice. Cheaper cuts of meat can be used to provide perfect results cooked by this method.
Meat will not brown during the Slow Cooking process, so for browner results sear in the EasySear™ Insert on the stovetop first before placing back into the stainless steel housing for cooking.
The addition of liquid is not required for roasting. Elevate the meat to be cooked on the provided stainless steel rack. This will assist in keeping the surface of the meat dry and free from any fat released throughout the cooking process.
| SUITABLE MEAT CUTS FOR ROASTING | |
| Beef | Beef Blade, Rump, Rib Roast, Sirloin, Fresh Silverside, Chuck, Topside. |
| Lamb | Lamb Leg, Mid Loin, Rack, Crown Roast, Shank, Shoulder, Mini Roasts. |
| Veal | Veal Leg, Loin, Rack, Shoulder/Forequarter. |
| Pork | Pork Loin, Neck, Leg, Racks (remove skin & fat). |
A BEGGINERS GUIDE TO SLOW COOKING
The addition of liquid is required for pot roasting. Place sufficient liquid into the removable EasySear™ Insert to cover up to a third of the meat. Meat will not brown during the pot roasting process, so for browner results sear in the EasySear™ Insert on the stovetop first before placing back into the stainless steel housing for cooking.
SUITABLE MEAT CUTS FOR POT ROASTING
| Beef | Topside, Blade, Silverside Roasts, Chuck, Rolled Brisket. |
| Lamb | Forequarter, Shank, Shoulder. |
| Veal | Shoulder/Forequarter. |
| Pork | Loin, Neck. |
USING THE EASYSEARTM INSERT AND STAINLESS STEEL LID AS STAND ALONE COOKWARE
This Slow Cooker is equipped with a diecast removable EasySear™ Insert and Stainless Steel Lid to withstand temperature extremes. It can be used for browning and searing on a gas, electric or ceramic stovetop or as a traditional roasting pan for use in the oven.
The removable EasySear™ Insert and lid are safe for use on stovetops and in conventional ovens up to 480^ (250^) .
With proper use and maintenance, these products will give many years of service and help to make this Slow Cooker a convenient, reliable and versatile meal maker.
NOTE:
Use of the stainless steel lid in a conventional oven may cause discoloration. This is normal and will not affect the cooking performance.
HINTS AND TIPS
- Trim all visible fat from meat or poultry.
- If a recipe calls for browning the meat, it may be browned in the EasySear™ Insert on the gas, electric or ceramic stovetop.
- Meat and poultry require at least 6 to 7 hours of cooking on LOW setting or 3 to 4 hours on HIGH setting.
- Ensure that the food or liquid to be cooked fills half to 3 / 4 of the EasySear™ Insert.
- If after cooking the liquid quantity is excessive, remove the lid and operate the Slow Cooker on the HIGH setting for 30 to 45 minutes or until the liquid reduces by the desired amount. Alternatively, the liquid can be thickened by adding a mixture of cornflour and water and cooking on HIGH setting without the lid until sauce has thickened.
DO'S
Always thaw frozen meat and poultry before cooking.
- Use dry oven mitts when lifting the stainless steel lid or removable EasySear™ Insert after searing or slow cooking.
- Place the EasySear™ Insert onto a heat proof mat if serving from the EasySear™ Insert at the table.
- To keep foods warm for serving, turn the Temperature Control dial to the LOW setting until ready to serve.
DONT'S
- Do not operate the Slow Cooker without the EasySear™ Insert in position.
- Do not cook with frozen meats or poultry.
- Do not remove the stainless steel lid from the Slow Cooker unnecessarily as this will result in major heat loss.
- Stirring is not necessary when Slow Cooking. However, if cooking on the HIGH setting, stirring occasionally will help to distribute flavors throughout the recipe.
- Do not use HIGH setting if you intend on being away from home for more than 3 hours.
NEVER
- Place water or other liquids into the stainless steel housing of the Slow Cooker.
- Immerse the base, cord, or plug of the Slow Cooker in water or any other liquid.
- Touch hot surfaces with bare hands.
- Deep fry in the EasySear™ Insert.
NOTE:
For more hints, tips and recipe inspirations, please visit www.breville.com
CARE & CLEANING
your new Breville Slow Cooker

CARE AND CLEANING
- Before cleaning the Slow Cooker, switch the Temperature Control Dial to 'OFF', remove the power plug from the power outlet and remove the connector end of the power cord from the appliance inlet.
- Remove the the EasySear™ Insert and allow to cool completely.
- To remove stubborn, cooked-on foods in the removable the EasySear™ Insert, soften by filling 3/4 with water, bring to a slow boil on medium heat on the stove top, add detergent and simmer for 15 minutes. Remove by lightly scrubbing with a soft nylon kitchen brush.
- To extend the life of your EasySear™ Insert, we do not recommend that it be placed in the dishwasher. To help maintain the non-stick coating, it is recommended to wash the EasySear™ Insert in hot, soapy water using mild household detergent. Rinse and dry thoroughly.
- Do not use abrasive cleaners, steel wool, or scouring pads as these can damage the surfaces and non-stick coating.
- The brushed stainless steel housing can be wiped over with a soft, damp cloth and then dried thoroughly.
DO NOT USE ABRASIVE CLEANERS, STEEL WOOL OR SCOURING PADS.
DO NOT IMMERSE STAINLESS STEEL HOUSING OR POWER CORD IN WATER OR ANY OTHER LIQUID AS THEY MAY CAUSE ELECTROCUTION.
EENSURE REMOVABLE EASYSEARTM INSERT IS CORRECTLY POSITIONED IN THE HOUSING BEFORE YOU COMMENCE COOKING.
ONE YEAR LIMITED WARRANTY
Breville®* warrants this Breville® appliance against defects that are due to faulty material or workmanship for a period of one (1) year from the date of original consumer purchase. This warranty does not cover damage from abuse, neglect, use for commercial purposes, or any other use not found in the printed "Instructions for use" booklet. There is no warranty for glass parts, glass containers, filter basket, blades and agitators. HWI Breville® expressly disclaim all responsibility for consequential damages for incidental losses caused by use of this appliance. Some states or provinces do not allow this exclusion or limitation for incidental or consequential losses, so the foregoing disclaimer may not apply to you.
ANY WARRANTY OF MERCHANTABILITY OR FITNESS WITH RESPECT TO THIS PRODUCT IS ALSO LIMITED TO THE ONE YEAR LIMITED WARRANTY PERIOD.
Some states or provinces do not allow disclaimer of the implied warranty with respect to consumer goods, so the foregoing disclaimer may not apply to you.
This warranty gives you specific legal rights and you may also have other legal rights which vary from state to state or province to province.
If the appliance should become defective within the warranty period, do not return the appliance to the store. Please contact our Customer Service Center.
US Customers
Mail: Breville USA 19400 S. Western Ave Torrance CA 90501-1119
Phone: Customer Service: 1(866) BREVILLE
Email: Customer Service: askus@brevilleusa.com
Canadian Customers
Mail: Breville Canada 2555, Avenue de l'aviation Pointe-Claire (Montreal) Quebec H9P 2Z2
Phone: Customer Service: 1(866) BREVILLE
Email: Customer Service: askus@breville.ca