
FREEDOM ZOOM 130 - Film camera MINOLTA - Free user manual and instructions
Find the device manual for free FREEDOM ZOOM 130 MINOLTA in PDF.

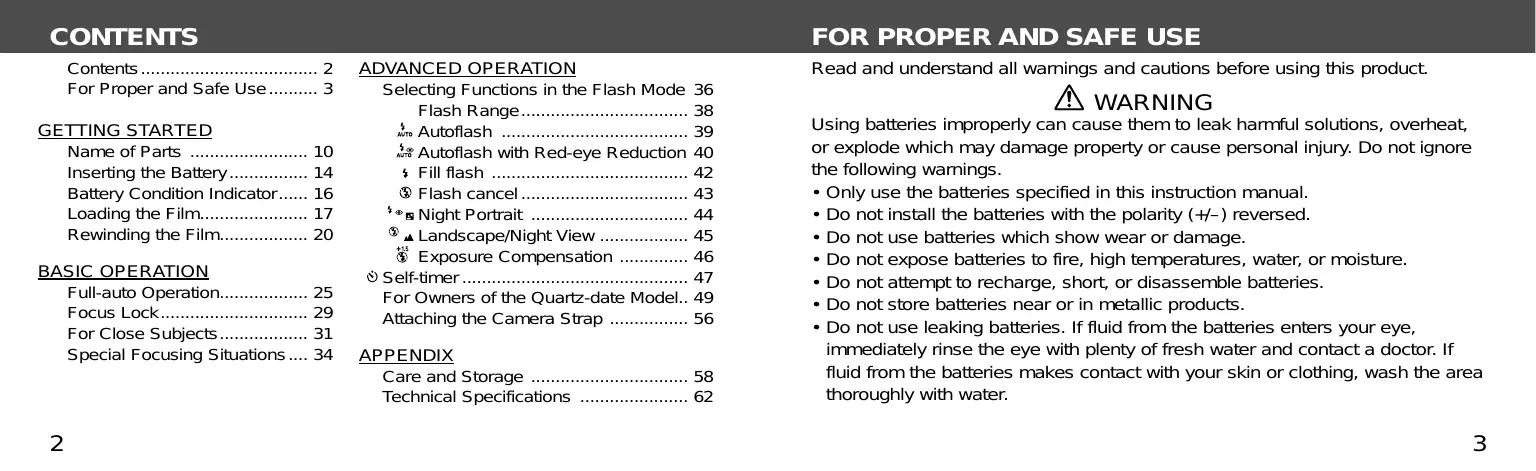

| Product type | Compact film camera |
| Brand | MINOLTA |
| Model | FREEDOM ZOOM 130 |
| Film format | 35 mm (135) |
| Zoom | 38-130 mm f/4.5-9.9 zoom lens |
| Focus | Phase detection autofocus |
| Built-in flash | Yes, auto, red-eye reduction, forced, off modes |
| Power source | 2 AA batteries (1.5 V) |
| Dimensions (W × H × D) | Approximately 135 × 78 × 63 mm |
| Weight (without batteries) | Approximately 290 g |
| Main features | Motorized zoom, autofocus, automatic flash, self-timer, through-the-viewfinder view |
| Care and cleaning | Clean the exterior with a soft, dry cloth. Avoid contact with water and solvents. |
| Safety | Do not disassemble the camera. Use only recommended batteries. Avoid shocks and exposure to extreme temperatures. |
| Spare parts and repairability | Contact an authorized Minolta repair center. Spare parts are generally no longer available. |
| General information | Compact film camera with motorized zoom. Suitable for beginners and enthusiasts. |
Frequently Asked Questions - FREEDOM ZOOM 130 MINOLTA
User questions about FREEDOM ZOOM 130 MINOLTA
0 question about this device. Answer the ones you know or ask your own.
Ask a new question about this device
Download the instructions for your Film camera in PDF format for free! Find your manual FREEDOM ZOOM 130 - MINOLTA and take your electronic device back in hand. On this page are published all the documents necessary for the use of your device. FREEDOM ZOOM 130 by MINOLTA.
USER MANUAL FREEDOM ZOOM 130 MINOLTA
The essentials of imaging
www.minolta.com
FREEDOM 130 ZOOM
RIVA ZOOM |30
CONTENTS
Contents 2
For Proper and Safe Use...... 3
GETTING STARTED
Name of Parts 10
Inserting the Battery 14
Battery Condition Indicator..... 16
Loading the Film.... 17
Rewinding the Film...... 20
BASIC OPERATION
Full-auto Operation.... 25
Focus Lock.... 29
For Close Subjects...... 31
Special Focusing Situations .... 34
ADVANCED OPERATION
Selecting Functions in the Flash Mode 36
Flash Range 38
^4 AUTO Autoflash 39
^4 AUTO Autoflash with Red-eye Reduction 40
4 Fill flash 42
⑤ Flash cancel 43
Night Portrait 44
③▲ Landscape/Night View 45
^+1,5 Exposure Compensation ..... 46
Self-timer 47
For Owners of the Quartz-date Model.. 49
Attaching the Camera Strap 56
APPENDIX
Care and Storage 58
Technical Specifications 62
FOR PROPER AND SAFE USE
Read and understand all warnings and cautions before using this product.
WARNING
Using batteries improperly can cause them to leak harmful solutions, overheat, or explode which may damage property or cause personal injury. Do not ignore the following warnings.
- Only use the batteries specified in this instruction manual.
- Do not install the batteries with the polarity (+/−) reversed.
- Do not use batteries which show wear or damage.
- Do not expose batteries to fire, high temperatures, water, or moisture.
- Do not attempt to recharge, short, or disassemble batteries.
- Do not store batteries near or in metallic products.
- Do not use leaking batteries. If fluid from the batteries enters your eye, immediately rinse the eye with plenty of fresh water and contact a doctor. If fluid from the batteries makes contact with your skin or clothing, wash the area thoroughly with water.
FOR PROPER AND SAFE USE
- Tape over lithium battery contacts to avoid short-circuiting during disposal; always follow local regulations for battery disposal.
- Do not disassemble this product. Electric shock may cause injury if a high voltage circuit inside the product is touched. Take the product to a Minolta Service Facility when repairs are required.
- Immediately remove the batteries and discontinue use if the camera is dropped or subjected to an impact in which the interior, especially the flash unit, is exposed. The flash has a high voltage circuit which may cause an electric shock resulting in injury. The continued use of a damaged product or part may cause injuries.
- Keep batteries or small parts that could be swallowed away from infants. Contact a doctor immediately if an object is swallowed.
- Store this product out of reach of children. Be careful when around children, not to harm them with the product or parts.
-
Do not fire the flash directly into the eyes. It may damage eyesight.
-
Do not fire the flash at vehicle operators. It may cause a distraction or temporary blindness which may lead to an accident.
- Do not look directly at the sun or strong light sources through the viewfinder. It may damage your eyesight or cause blindness.
- Do not expose this product to liquids or operate this product with wet hands. If liquid enters the product, immediately remove the batteries and discontinue use. The continued use of a product exposed to liquids may cause damage or injury through fire or electric shock.
- Do not use the product near inflammable gases or liquids such as gasoline, benzine, or paint thinner. Do not use inflammable products such as alcohol, benzine, or paint thinner to clean the product. The use of inflammable cleaners and solvents may cause an explosion or fire.
- If the product emits a strange odor, heat, or smoke, discontinue use. Immediately remove the batteries taking care not to burn yourself. The continued use of a damaged product or part may cause injuries.
• Take the product to a Minolta Service Facility when repairs are required.
CAUTION
- Do not use or store the product in a hot or humid environment such as the glove compartment or trunk of a car. It may damage the product and batteries which may result in burns or injuries caused by heat, fire, explosion, or leaking battery fluid.
- If batteries are leaking, discontinue use of the product.
- The lens retracts when the camera is turned off or the auto-power-off function is activated. Touching the lens barrel while it is retracting may cause injury.
- Do not fire the flash while it is in contact with people or objects. The flash unit discharges a large amount of energy which may cause burns.
This device complies with Part 15 of the FCC Rules. Operation is subject to the following two conditions: (1) This device may not cause harmful interference, and (2) this device must accept any interference received, including interference that may cause undesired operation. Changes or modifications not approved by the party responsible for compliance could void the user's authority to operate the equipment. This equipment has been tested and found to comply with the limits for a Class B digital device, pursuant to Part 15 of the FCC Rules. These limits are designed to provide reasonable protection against harmful interference in a residential installation. This equipment generates, uses and can radiate radio frequency energy and, if not installed and used in accordance with the instructions, may cause harmful interference to radio communications. However, there is no guarantee that interference will not occur in a particular installation.
FOR PROPER AND SAFE USE
If this equipment does cause harmful interference to radio or television reception, which can be determined by turning the equipment off and on, the user is encouraged to try to correct the interference by one or more of the following measures:
- Reorient or relocate the receiving antenna.
- Increase the separation between the equipment and the receiver.
- Connect the equipment to an outlet on a circuit different from that to which the receiver is connected.
- Consult the dealer or an experienced radio/TV technician for help.
This Class B digital apparatus complies with Canadian ICES-003.

This mark on your camera certifies that this camera meets the requirements of the EU (European Union) concerning interference causing equipment regulations. CE stands for Conformité Européenne (European Conformity).
GETTING STARTED
Thank you for purchasing this Minolta camera. Your new camera is with functions which will suit your every photographic need. Before using your new camera, please take the time to read through this instruction manual for important information on the use and care of your camera.
ICONS USED IN THIS MANUAL

important user notices

supplementary user information
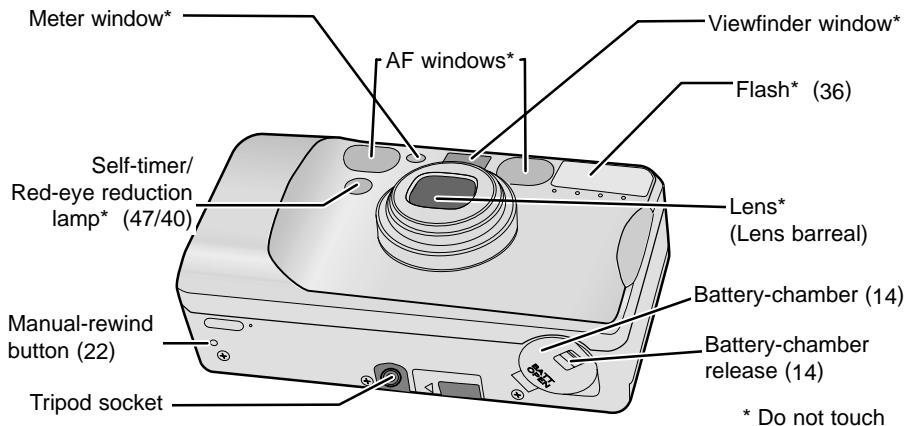
BODY
For information on specific parts, refer to the page numbers shown in parenthesis.
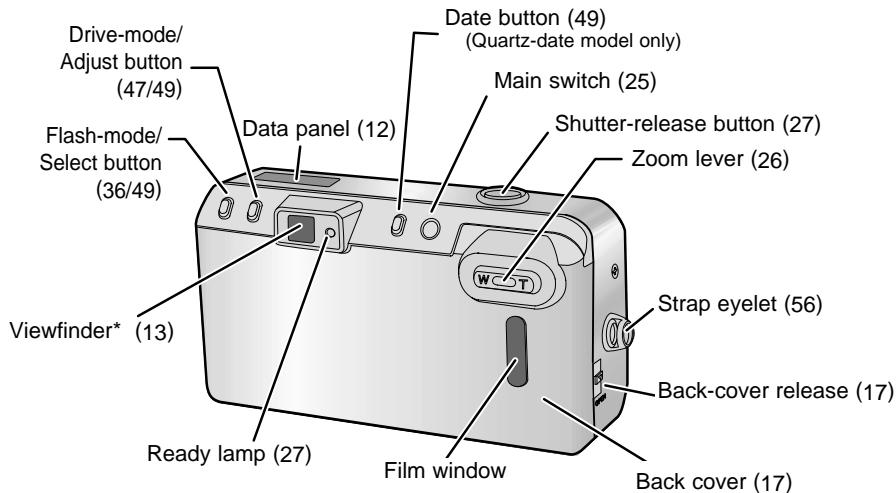
DATA PANEL) Only the necessary indicators will appear on the data panel.
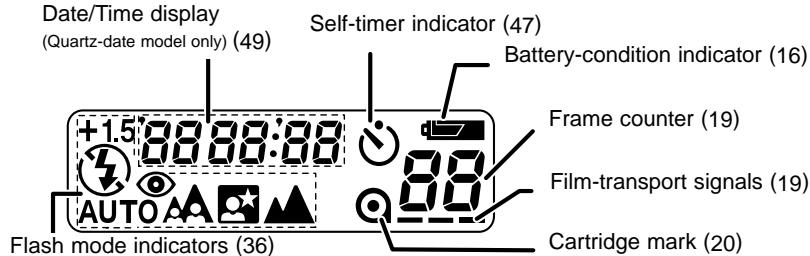
AUTO Autoflash
^4 AUTO Autoflash with red-eye reduction
4 Fill flash
④ Flash cancel
^4 Night Portrait (with red-eye reduction)
^⑧ Landscape/Night view
Exposure Compensation
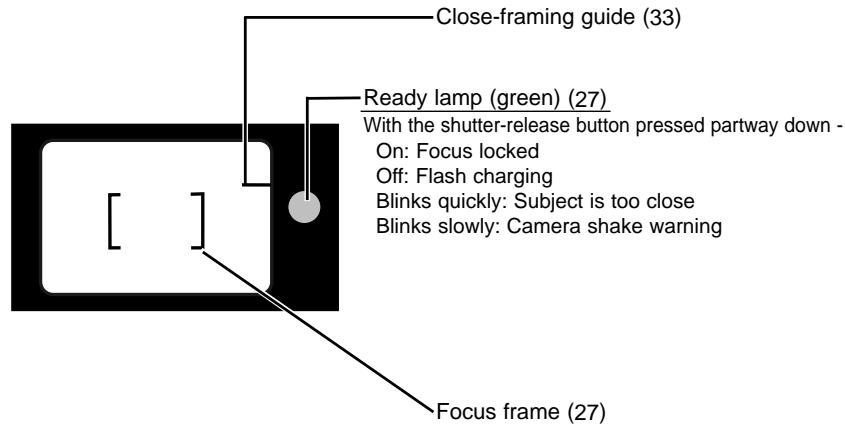
VIEWFINDER
Your camera uses one 3-volt CR123A or DL123A lithium battery.
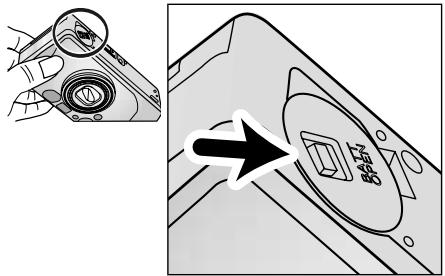
- Open the battery-chamber door by sliding the battery-chamber release in the direction indicated.

Quartz-date model: The date and time must be reset (p.50). When changing batteries, make sure the main switch is off.
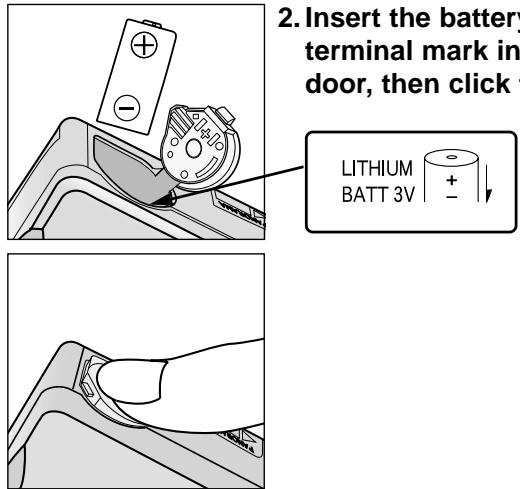
- Insert the battery matching the positive terminal mark inside the battery chamber-door, then click the door closed.
BATTERY CONDITION INDICATOR
Each time the camera is turned on, a symbol will appear on the data panel to indicate the power status of the battery.
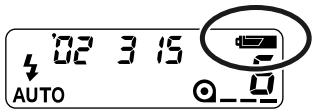
Briefly appears. Power is sufficient for all camera operations.
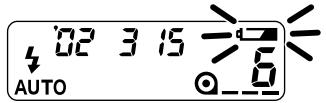
Power is sufficient, but the battery must be replaced soon.
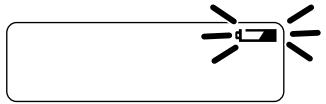
natural_image
Simple line drawing of a rectangular object with a battery icon and radiating lines, no text or symbols present.Replace the battery. The shutter will lock until the battery is replaced.
LOADING THE FILM
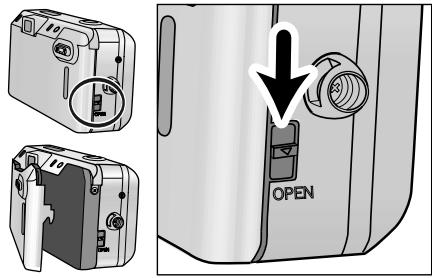
- Slide the back-cover release down to open the back cover.
If the back cover does not open when the film is not loaded, turn the main switch off and on to release the film chamber lock.

- This camera has a safety-lock feature that prevents the camera from being opened accidentally when film is loaded. The film-chamber lock should automatically release when the film is rewound.
- Use only 35mm, DX-coded film rated between ISO 25 and 3200.
- Do not use Polaroid instant 35mm film. Winding problems may occur.
• ISO 400 film is recommended for best results. - Always load and unload film in subdued light.
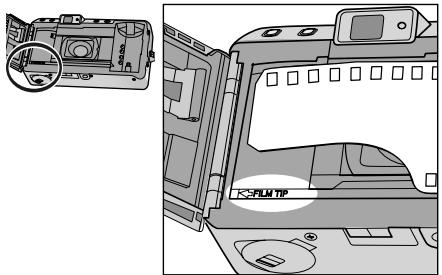
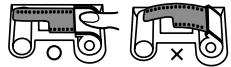
- Place the film cartridge into the film chamber. Extend the film leader to the "FILM TIP" mark, making sure it lays flat.
natural_image
Two mechanical diagrams showing a cam mechanism with a cross mark, no text or symbols present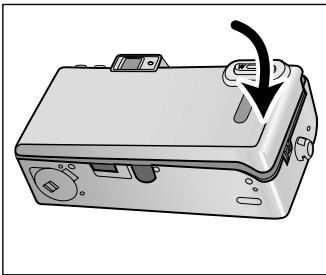
natural_image
Illustration of a device with a scroll wheel and a black arrow indicating rotation or movement (no text or symbols)3. Close the back cover.
- The film automatically advances to the first frame and _-- appears on the data panel.
- If the film has been loaded improperly, _ 0 will blink on the data panel and the shutter will remain locked. Open the back cover and repeat the loading procedure.

If the film tip extends beyond the index mark, push the excess film back into the cartridge.

- Once the film is loaded, the back cover will lock preventing accidental opening until the film is rewound (film chamber lock).
REWINDING THE FILM
Your camera automatically rewinds the film after the last exposure is taken.
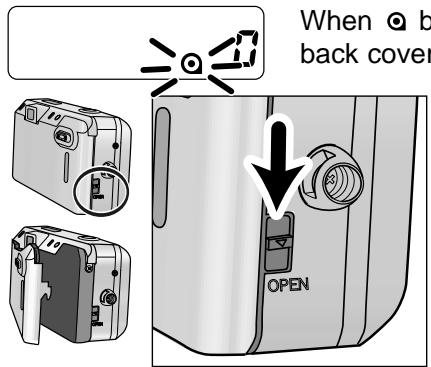
When ◦ blinks on the data panel, open the back cover and remove the film.

When you want to rewind quietly (silent rewind), push the manual-rewind button while the film is rewinding (p.23).

- Do not open the back cover until the rewind motor stops. Never use force.

- If the rewind motor stops before the film has been completely rewound, all the indicators will blink. Remove and insert the battery or press the manual-rewind button.
- If the back cover does not open, turn the main switch off and on to release the film chamber lock.
- Although more pictures than specified on the roll may be taken, the film processor may not print more than the number specified on the film cassette.
MANUAL REWIND
natural_image
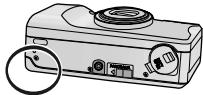
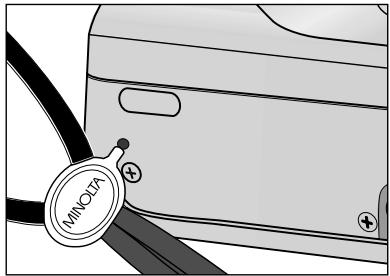
Illustration of a portable electronic device with a circular button and control panel (no text or symbols)To rewind before the end of the roll, turn the camera on and gently press the manual rewind bottun using the button key on the strap.
natural_image
Close-up of a car seatbelt with a 'MINOTA' tag and plus signs, no readable text or symbols beyond the label.SILENT REWIND
This camera has a silent-rewind function to minimize the noise of film rewinding. Use the silent-rewind mode when the rewinding noise would be distracting such as during a wedding ceremony.
SILENC

Press the manual-rewind button while the film is rewinding. Press the button again to return to normal winding speed.
- SILEnt appears on the data panel to indicate the silent-rewind mode.
- The mode will remain selected for rewinding the next time.
- Rewinding in this mode takes longer than normal rewinding.
BASIC OPERATION
FULL-AUTO OPERATION
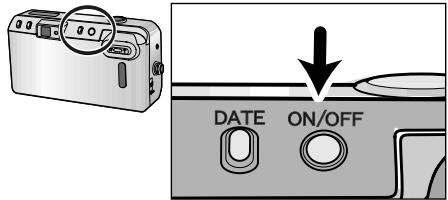
- Press the main switch to turn the camera on.
- Auto Power Off: To conserve power, the camera automatically turns off if it is not operated for more than 8 minutes.
- Do not obstruct or hold the lens barrel.
natural_image
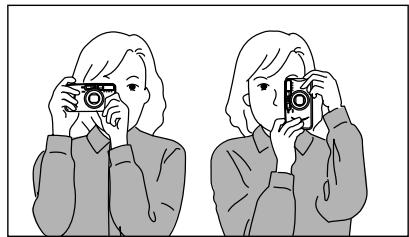
Illustration of two people taking a photo with cameras (no text or symbols)- Hold the camera steady, making sure your fingers do not cover the flash, lens, or AF windows.
- As shown, for vertically framed pictures, turn the camera so the flash is on top.
FULL-AUTO OPERATION
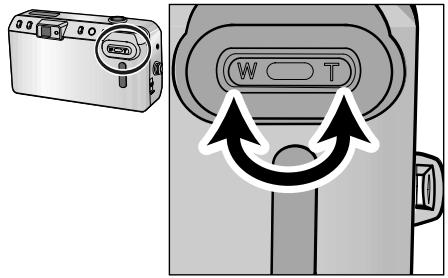
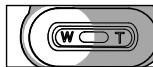
- Look through the viewfinder and push the zoom lever (T) to zoom in or (W) to zoom out.
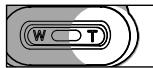
T(elephoto) : zoom in
natural_image
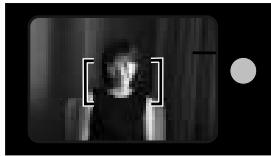
Black-and-white photo of a person in a dimly lit room with no visible text or symbols- Place the focus frame on the subject and press the shutter-release button
partway down.

Ready Lamp
The ready lamp will light to indicate the status of the camera.
natural_image
Black-and-white photo of a person in a dimly lit room, framed by a rectangular border and a small circular light at the bottom right (no visible text or symbols)On: Focus locked
Off: Flash charging
Blinks quickly: Subject is too close
Blinks slowly: Camera shake warning
FULL-AUTO OPERATION
-
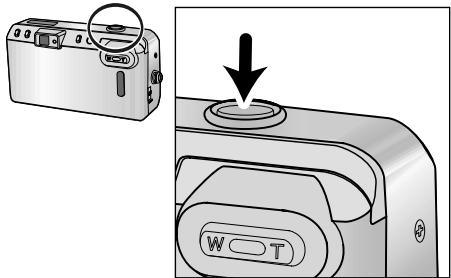
When the green ready lamp glows, press the shutter-release button all the way down to take the picture.
-
Press the shutter-release button with slow, steady pressure.
- The film automatically advances to the next frame.
- After use, press the main switch to turn the camera off.
FOCUS LOCK
natural_image
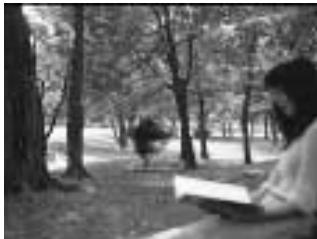
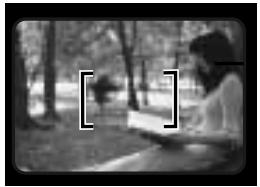
Black-and-white photo of a person reading a book in a wooded area (no visible text or symbols)Subjects outside the focus frame may not be in focus. Use focus lock to ensure accurate focusing.
natural_image
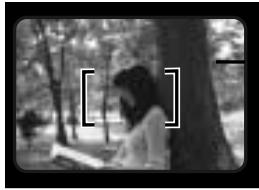
Black-and-white photo of a person reading under a tree in a park (no visible text or symbols)- Place the focus frame on your subject.

- The flash will fire automatically in low-light (p. 39).
FOCUS LOCK
natural_image
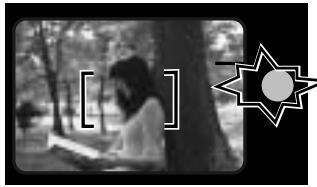
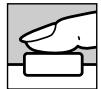
Black-and-white photo of a person reading under a tree, with a decorative starburst graphic in the corner (no text or symbols)- Press and hold the shutter-release button partway down until the green ready lamp glows indicating focus lock.

natural_image
Black-and-white photo of a person reading a book in a park setting with trees (no visible text or symbols)- Without lifting your finger, recompose the picture and press the shutter-release button all the way down to take the picture.
- The focus lock is canceled when your finger release the shutter button.

FOR CLOSE SUBJECTS
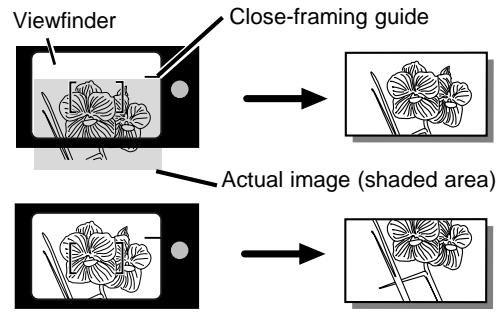
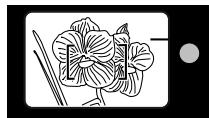
When taking a picture with the subject closer than 1.6m (5.1ft.), the viewfinder image and the actual film image will be different. The difference increases as the subject becomes closer, or especially when using the telephoto setting. At the closest range at the telephoto settings, the top of the actual film image is located below the close framing guide.
![[ ]](/content/2025/01/165692/images/6533f0d84f76c21fdd736690e1ab13fd802dd368962bdf6c50692e0897188580.jpg)
- If the green ready lamp blinks rapidly and the shutter locks, the subject is too close. Be sure your camera-to-subject distance is at least 60cm (2.0 ft.) in the wide-angle setting or 65 cm (2.1 ft.) in the telephoto setting.
- When taking pictures at extremely close distances, the green ready lamp may blink slowly, but the focus may not be accurate.
CLOSE FRAMING GUIDE
If the subject is closer than 1.6m(5.1ft.), take the following steps:
natural_image
Line drawing of a flower with leaves and stem, no text or symbols present- Place the focus frame on the subject and press the shutter-release button partway down.
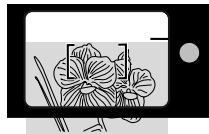
natural_image
Black-and-white illustration of a flower with leaves and stems, partially obscured by a smartphone screen (no text or symbols)- While pressing the shutter-release button partway down, aim the camera upward to recompose the subject under the close-framing guide and take the picture.
SPECIAL FOCUSING SITUATIONS
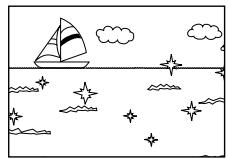
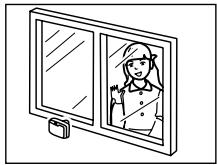
Some scenes or subjects are difficult for the autofocus system to lock on to. When the focus will not lock, focus lock (p. 29) on another object the same distance from you as the main subject, recompose, then take the picture.
natural_image
Simple line drawing of a sailboat on water with starry sky and clouds (no text or symbols)The autofocus may not lock on the following;
- Bright light sources such as the sun or neon lights.
- Highly reflective surfaces such as water or mirrors.
- Flames or fireworks.
- Dark objects and surfaces with low reflectances.
- Objects behind glass, bars, or other such partitions.
natural_image
Line drawing of a girl peeking through a window (no text or symbols)ADVANCED OPERATION
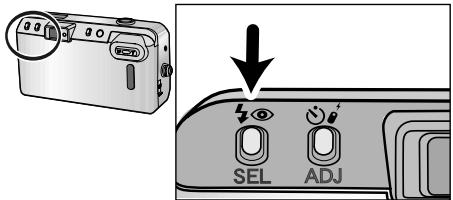
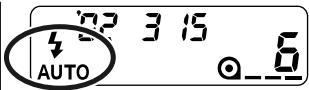
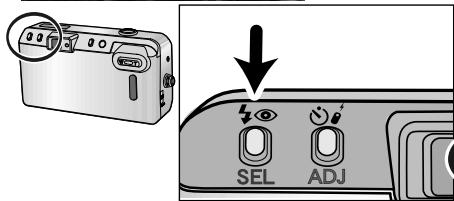
Press the flash-mode button until the desired indicator appears on the data panel.
The following mode can be selected:
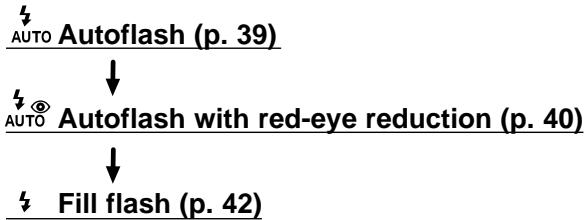
flowchart
graph TD
    A["AUTO"] --> B["Autoflash (p. 39)"]
    B --> C["↓"]
    C --> D["Auto® Autoflash with red-eye reduction (p. 40)"]
    D --> E["↓"]
    E --> F["Fill flash (p. 42)"]
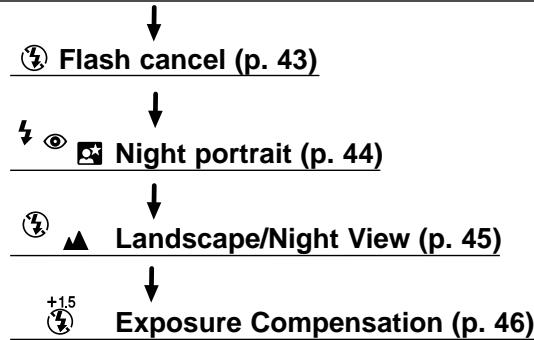
flowchart
graph TD
    A["Flash cancel (p. 43)"] --> B["Night portrait (p. 44)"]
    B --> C["Landscape/Night View (p. 45)"]
    C --> D["Exposure Compensation (p. 46)"]

- The autoflash and the autoflash with red-eye reduction will remain selected after you turn the camera off.
- When you turn the camera off, the fill flash / the flash cancel / the night portrait / the landscape/the night view /exposure compensation will be reset to the autoflash or the autoflash with red-eye reduction, whichever was used last.
FLASH RANGE
The range of the built-in flash depends on the film speed and focal length you are using. To ensure proper exposure, make sure your subject is positioned within the flash range.
| Focal length Film speed | 37.5mm W(ide-angle) W(ide-angle) | 130mm T(elephoto) T(elephoto) |
| ISO100 | 0.6-4.3m2.0-13.7ft. | 0.65-2.1m2.1-6.9ft. |
| ISO400 | 0.6-8.6m2.0-27.5ft. | 0.65-4.3m2.1-14.1ft. |
These distances are recommended with color negative film.
The flash will fire automatically in low-light.
natural_image
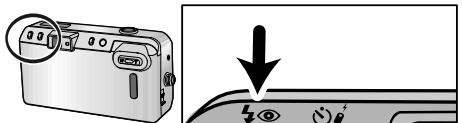
Diagram showing a camera module being adjusted to display a screen with control buttons (no text or symbols present)Press the flash-mode button until 12 Auto appears on the data panel, then take the picture.
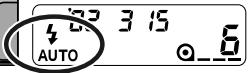

- The flash will not fire in back-lit situations. Use of the fill flash is recommended.
- When the green ready lamp is off, the flash is charging. Wait until it glows, then take the picture.
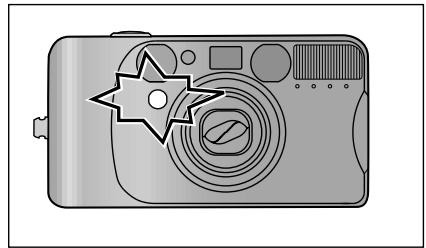
Use the reduction mode to reduce the red-eye effect when photographing people or animals in low-light situations. The red-eye reduction lamp will blink three times before the main flash will fire.
natural_image
Illustration of a digital camera with a star badge (no text or symbols)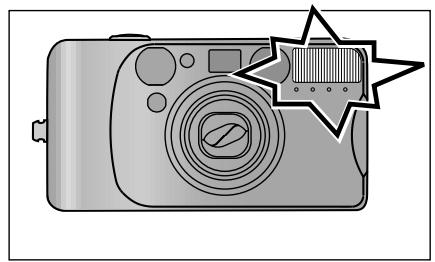
natural_image
Illustration of a digital camera with a star badge highlighting the lens (no text or symbols present)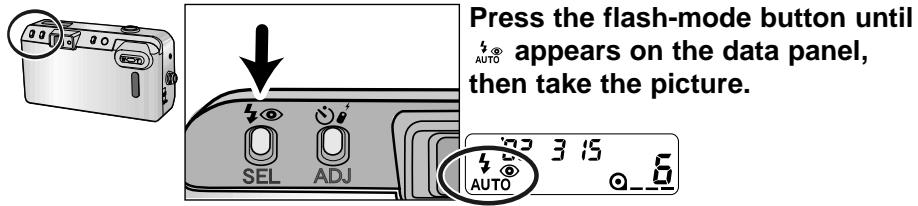

- Warn your subject not to move while the lamp is blinking just before the picture is taken.
natural_image
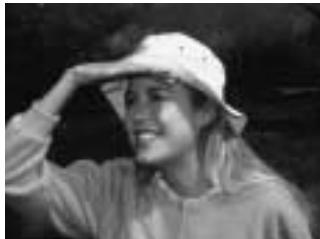
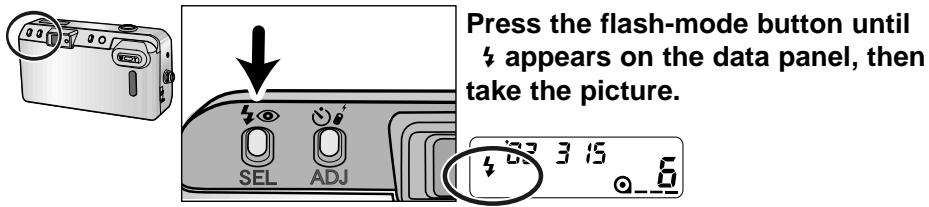
Black-and-white photo of a smiling person wearing a hat, no visible text or symbolsThe flash will fire when the shutter is released regardless of lighting. Use the fill flash to reduce harsh shadows on your subject's face. Also the use in back-lit situations is recommended.
The flash will not fire in this mode. Use the flash cancel when you want to photograph subjects that are beyond the flash range or to capture the ambiance of the existing light.

- Shutter speed may be slow and the use of a tripod is recommended.
natural_image
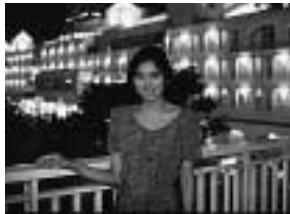
Black-and-white photo of a woman standing in front of illuminated hotel buildings at night (no visible text or signage)In the night portrait mode, the camera balances the flash and existing light exposures so you can take beautiful pictures of people at sunset or at night.
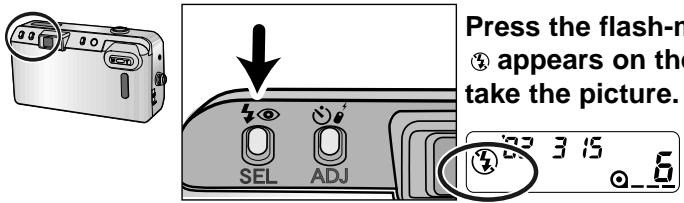
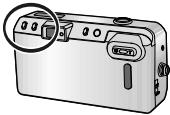
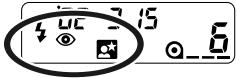
Press the flash-mode button until
natural_image
Illustration of a digital camera with an attached port and indicator lights (no text or symbols)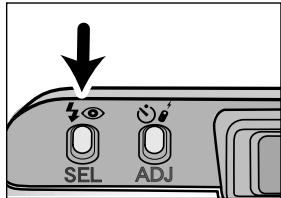
^4 appears on the data panel, then take the picture.
- The fill flash with red-eye reduction will be set.

Shutter speed will be slow. Use of a tripod is recommended and warn your subjects not to move.
natural_image
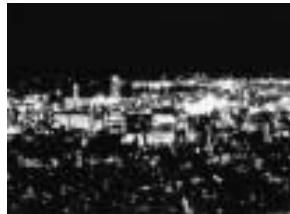
Black-and-white cityscape at night with illuminated buildings and roads (no visible text or symbols)The flash will not fire in this mode and the focus is set to infinity. It can be used to photograph landscapes, night scenery and other distant subjects.
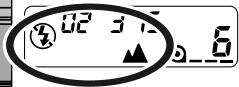
Press the flash-mode button until ③▲ appears on the data panel, then take the picture.

- Shutter speed will be slow. Use of the tripod is recommended.
- Use this mode especially when photographing landscapes through windows.
natural_image
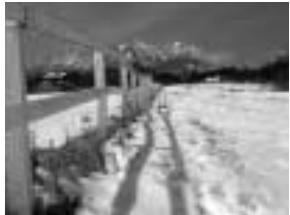
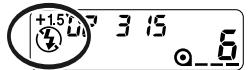
Black-and-white photo of a rural road with snow-covered ground and distant mountains (no visible text or symbols)Exposure Compensation is recommended when you are photographing snow scenes, beach scenes, backlit or spot-lit subjects, or scene with a large amount of sky. Exposure compensation will increase the exposure by 1.5 EV (stops).
- Flash will not fire.
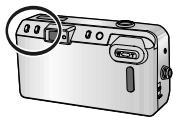
Press the flash-mode button until

appears on the data panel.
- When the shutter speed is slow, the ready lamp beside the viewfinder will blink slowly, warning you about camera shake.
natural_image
Illustration of a digital camera with an attached port and cable (no text or symbols)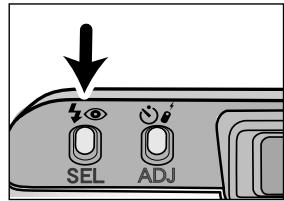
The self-timer delays release of the shutter for approximately 10 seconds after the shutter-release button is pressed.
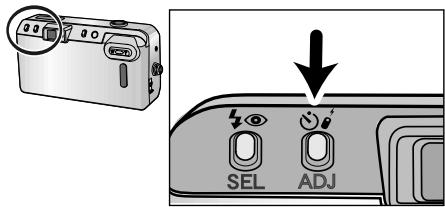
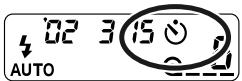
- Place the camera on a tripod, then press the drive-mode button until the self-timer symbol 🔗 appears on the data panel.
natural_image
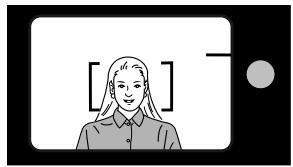
Illustration of a person with long hair and collared shirt, framed within a rectangular frame (no text or symbols)- Place the focus frame on your subject.
- Use focus lock for off-center subjects (p 29).
natural_image
Illustration of a digital camera with a star-shaped lens and circular buttons (no text or symbols)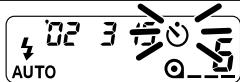
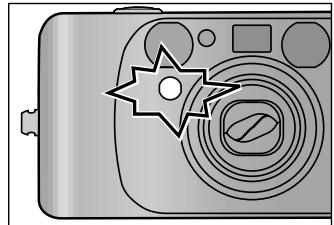
- Press the shutter-release button all the way down; the self-timer delays release for 10 seconds.
- ⚙ will blink on the data panel. The self-timer lamp on the front of the camera will blink slowly during the countdown, then rapidly just before the shutter is released.
- The autofocus and exposure is locked when the shutter-release button is pressed. Do not stand in front of the camera when using the shutter-release button.
- To cancel the self-timer, press the self-timer button or turn the camera off.
- The self-timer is automatically canceled after the shutter releases.
IMPRINTING THE DATE OR TIME
The imprinting feature enables the date or time to be printed onto the lower-right portion of the picture. The calendar is programmed through the year 2099.
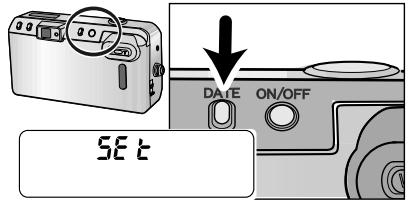
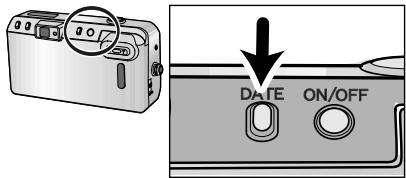
Buttons for date function
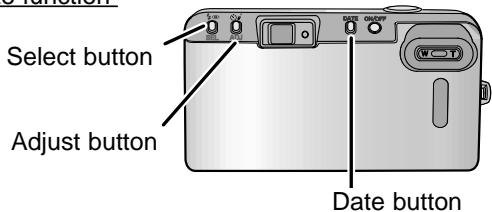
- Since the date is recorded when the film is advanced to the next frame, sometimes the last frame of the roll will not have a data print.
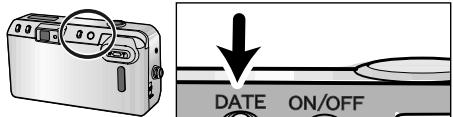
Turn the camera on, then press the date button to choose the data imprinting format.
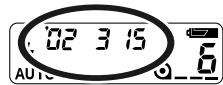
The display will change as follows :

flowchart
graph LR
    A["02/12/24\nDate imprinting"] --> B["24/11:38\nDay/Time Imprinting"]
    B --> C["...... (No imprinting)"]
    C --> D["SET\nSet mode"]

When the date-time display is blinking or -- -- -- is displayed on the data panel, date/time information will not be imprinted. The date/time information needs to be entered (p.51).
- The cycle will be only “no imprinting” and “set mode” when the data and time are not entered.
SETTING THE DATE OR TIME
The data and time must be reset each time the battery is replaced.
-
Turn the camera on. Press the date button until "SEt" appears on the data panel.
-
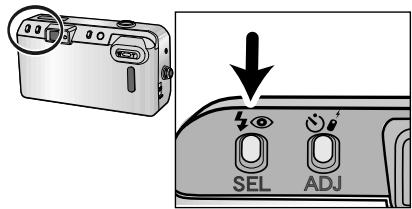
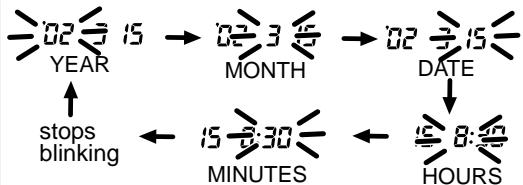
Press the select button until the item to be adjusted blinks.
- The next item will blink each time the select button is pressed.
flowchart
graph TD
    A["YEAR"] --> B["MONTH"]
    B --> C["DATE"]
    C --> D["HOURS"]
    A --> E["stops blinking"]
    B --> F["15分钟"]
    C --> G["15分钟"]
    D --> H["15分钟"]
-
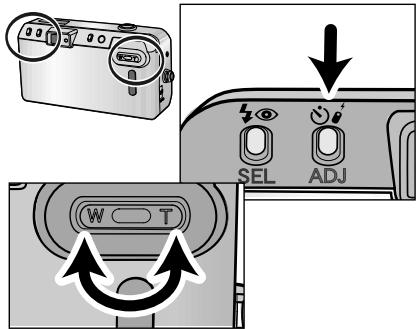
Press the adjust button or zoom lever to change the blinking item.
-
The numerals continues to change as long as the button is held down.
-
Pressing W side of the zoom lever counts down, the T side counts up.
-
Repeat steps 2 and 3 until all items on the date and time display are correct.
-
Press the date button until all items stop blinking to set the updated information.
-
The camera will return to the shooting mode automatically after five seconds. Pressing the select button again or pressing the shutter-release button partway down will also return the camera to the shooting mode.
- Pressing the select button until the date/time display stops blinking can also set the calendar and clock.
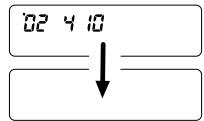
CHANGING THE DATE FORMAT
The order of year/month/day can be changed.
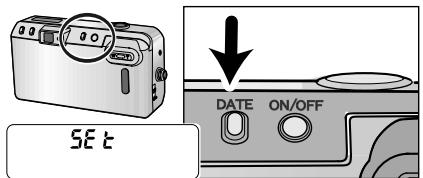
- Turn the camera on.
- Press the date button until "SEt" appears on the data panel.
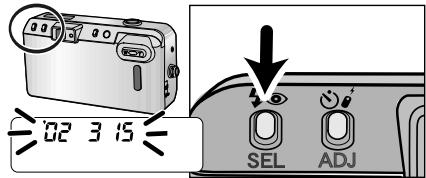
- Press and hold the select button for more than 2 seconds until all items on the date display blink.
natural_image
Illustration of a digital camera with an attached port and cable (no text or symbols)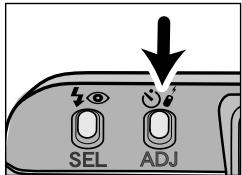
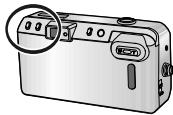
- Press the adjust button or zoom lever to change the display format.
The format sequences as follows:
`Y M D → M D`Y → D M`Y
-
Press the date button to set the updated information.
-
The camera will return to the shooting mode automatically after five seconds. Pressing the date button again or pressing the shutter-release button partway down will also return the camera to the shooting mode.
- Pressing the select button until the date/time display stops blinking can also set the date format.
ATTACHING THE CAMERA STRAP
natural_image
Diagram of a device with a screwdriver and control panel, no visible text or symbols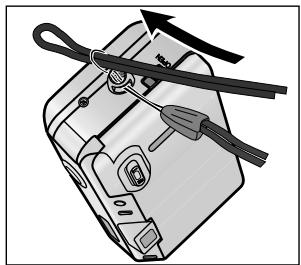
natural_image
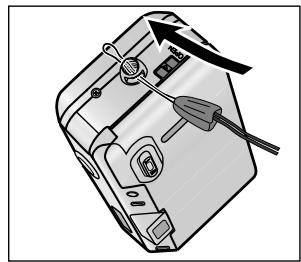
Diagram of a device with attached cable and switch, no text or symbols presentAttach the strap as shown.
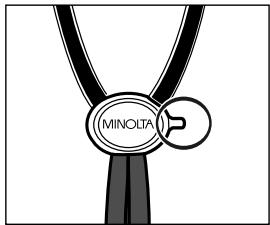
BUTTON KEY
- The button key is included on the strap. Use the key to push the manual-rewind button (p.22).
APPENDIX
OPERATING TEMPERATURE AND CONDITIONS
- This camera is designed for use from -10 to 40 °C (14 to 104 °F).
- Never leave your camera where it may be subjected to extreme temperatures such as in the glove compartment of a car.
- At colder temperatures, the data panel response time will be slow. At higher temperatures, the display will temporarily darken, but will be restored when the temperature normalizes.
- Never subject the camera to extreme humidity.
- To prevent condensation from forming, place the camera in a sealed plastic bag when bringing it from a cold environment into a warm environment. Allow it to come to room temperature before removing it from the bag.
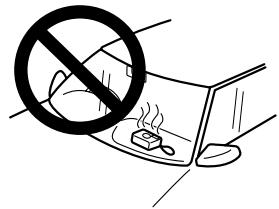
- When photographing in cold weather, it is recommend that you keep the camera and spare batteries inside your coat to keep them warm when you are not shooting. Cold batteries will regain some of their charge when they warm up.
- This camera is not waterproof, dustproof, or sand-proof. If you use this camera near water or the beach, water, dust, or sand damage may occur. Protect it at all times from moisture or splashes, especially saltwater spray, and be extremely careful to keep sand from both the interior and exterior of the camera and its accessories.
CLEANING
- Keep the AF window clean or the focus may not be accurate.
- If the camera body is dirty, gently wipe it clean with a soft, clean, dry cloth.
-
To clean the lens surface, first brush away any dust or sand then, if necessary, moisten a lens tissue with lens cleaning fluid and gently wipe the lens in a circular motion, starting from the center.
-
Never place lens fluid directly on the lens.
- Never touch the lens surface with your fingers.
- Never use alcohol or solvents to clean the camera.
STORAGE
When storing the camera for extended periods, please follow these guidelines:
- Store the camera in a cool, dry, well-ventilated area away from dust and chemicals. For very long periods, place the camera in an airtight container with a silica gel drying agent.
- Before using after prolonged storage, always check the camera's operation to make sure it is functioning properly.
BEFORE IMPORTANT EVENTS
- Check camera operation carefully or take test photographs.
- Minolta is not responsible for any loss which may occur due to an equipment malfunction.
QUESTIONS AND SERVICE
- If you have questions about your camera, contact your local camera dealer or write to the Minolta distributor in your area.
- Before shipping your camera for repair, please contact an authorized Minolta Service Facility for details.
CAMERA ERROR
If all the indicators on the data panel blink, or the data panel is blank and the camera will not function with a fresh battery, remove and reinsert the battery. If normal operation does not resume, or the camera malfunctions repeatedly, contact an authorized Minolta Service Facility.
TECHNICAL SPECIFICATIONS
Camera Type: 35mm lens-shutter camera
Lens: 37.5-130mm f/5.4 - 10.5 lens
6 element/6 group construction
Film Speed: Settings Automatic for DX-coded film.
Non-DX coded film seto to ISO100.
Range ISO 25 to 3200
Metering Range
(ISO 100): Wide: Ev 3 - 17
Tele: Ev 3.6 - 17
Shutter Speed: 10 - 1/380 sec.
Flash Range
(ISO 100): Wide: 0.6 - 4.3m (2.0 - 13.8 ft.)
Tele: 0.65 - 2.1m (2.1 - 6.9 ft.)
Battery: One 3-volt CR123A lithium battery
Battery-condition indication: 3-stage indication
Battery performance: approx. 12 rolls based on Minolta's standard test method using 24 exposure rolls with flash for 50% of the exposures.
Viewfinder: Magnification: 0.4X - 1.23X
Field of View : 86% (subject at 3m)
Eye-relief: 17.4mm from the viewfinder frame
Dimensions: 112 x 60 x 44mm
5.1x2.7x1.8 in
Weight: 210g (7.4oz.) without battery
Specifications are based on the latest information available at the time of printing and are subject to change without notice.
Minolta Co., Ltd.
Minolta Europe GmbH Reparatur/Repair
Minolta France S.A.S.
Minolta (UK) Limited
Minolta Austria Ges. m.b.H.
Minolta Camera Benelux B.V. Belgian Branch
Minolta Svenska AB Finnish Branch
Minolta Portugal Limitada
Minolta Corporation
Minolta Canada Inc.
Minolta Hong Kong Limited
Minolta Singapore (Pte) Ltd.
Shanghai Minolta Optical
Products Co., Ltd.
3-13, 2-Chome, Azuchi-Machi, Chuo-Ku, Osaka 541-8556, Japan
Minoltaring 11, D-30855 Langenhagen, Germany
Senator-Helmken-Strasse 1, D-28197 Bremen, Germany
365 Route de Saint-Germain, F-78420 Carrieres-Sur-Seine, France
7 Tanners Drive, Blakelands, Milton Keynes, MK14 5BU, England
Amalienstrasse 59-61, A-1131 Wien, Austria
Zonnebaan 39, P.O. Box 6000, NL-3600 HA Maarssen, The Netherlands
Prins Boudewijnlaan 1, B-2550 Kontich, Belgium
Riedstrasse 6, CH-8953 Dietikon, Switzerland
Albygatan 114, S-171 54 Solna, Sweden
Niittykatu 6 PL 37, SF-02201 Espoo, Finland
101 Williams Drive, Ramsey, New Jersey 07446, U.S.A.
369 Britannia Road East, Mississauga, Ontario L4Z 2H5, Canada
Room 208, 2/F, Eastern Center, 1065 King's Road, Quarry Bay, Hong Kong
10, Teban Gardens Crescent, Singapore 608923
368 Minolta Road, Songjiang, Shanghai, China
©2002 Minolta Co., Ltd. under the Berne Convention and
Universal Copyright Convention
- The essentials of imaging
- CONTENTS
- GETTING STARTED
- BASIC OPERATION
- ADVANCED OPERATION
- APPENDIX
- FOR PROPER AND SAFE USE
- WARNING
- CAUTION
- DATA PANEL) Only the necessary indicators will appear on the data panel.
- VIEWFINDER
- BATTERY CONDITION INDICATOR
- LOADING THE FILM
- Close the back cover.
- REWINDING THE FILM
- MANUAL REWIND
- SILENT REWIND
- FULL-AUTO OPERATION
- Ready Lamp
- FOCUS LOCK
- FOR CLOSE SUBJECTS
- CLOSE FRAMING GUIDE
- SPECIAL FOCUSING SITUATIONS
- FLASH RANGE
- Press the flash-mode button until
- appears on the data panel.
- IMPRINTING THE DATE OR TIME
- SETTING THE DATE OR TIME
- CHANGING THE DATE FORMAT
- ATTACHING THE CAMERA STRAP
- BUTTON KEY
- OPERATING TEMPERATURE AND CONDITIONS
- CLEANING
- STORAGE
- BEFORE IMPORTANT EVENTS
- QUESTIONS AND SERVICE
- CAMERA ERROR
- TECHNICAL SPECIFICATIONS
Brand : MINOLTA
Model : FREEDOM ZOOM 130
Category : Film camera