DE21-4K PRO - Uncategorized AVMATRIX - Free user manual and instructions
Find the device manual for free DE21-4K PRO AVMATRIX in PDF.
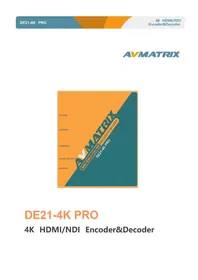


| Product Type | 4K Video Switcher |
| Brand | AVMATRIX |
| Model | DE21-4K PRO |
| Dimensions | 225 x 130 x 35 mm (approx.) |
| Weight | 0.8 kg (approx.) |
| Power Supply | DC 12V, 1.5A |
| Video Inputs | 4x HDMI 2.0 supporting up to 4K@60 |
| Video Outputs | 2x HDMI, 1x USB-C |
| Switching | Seamless live switching with transition effects |
| Multi-View | Integrated multi-view monitor output |
| Picture-in-Picture | PiP and split-screen modes |
| Audio | HDMI embedded audio, 3.5mm mic/line input |
| Streaming | USB-C plug-and-play for live streaming |
| Control | Front panel buttons, optional app control |
| Maintenance | Clean with a soft, dry cloth |
| Safety | Keep away from moisture, unplug before cleaning |
| Repairability | No user-serviceable parts; contact AVMATRIX support |
Frequently Asked Questions - DE21-4K PRO AVMATRIX
User questions about DE21-4K PRO AVMATRIX
0 question about this device. Answer the ones you know or ask your own.
Ask a new question about this device
Download the instructions for your Uncategorized in PDF format for free! Find your manual DE21-4K PRO - AVMATRIX and take your electronic device back in hand. On this page are published all the documents necessary for the use of your device. DE21-4K PRO by AVMATRIX.
USER MANUAL DE21-4K PRO AVMATRIX
USING THE UNIT SAFELY
Before using this unit, please read below warning and precautions which provide important information concerning the proper operation of the unit. Besides, to assure that you have gained a good grasp of every feature of your new unit, read below manual. This manual should be saved and kept on hand further convenient reference.

Warning and Cautions
※ To avoid falling or damage, please do not place this unit on an unstable cart, stand, or table.
※ Operate unit only on the specified supply voltage.
※ Disconnect power cord by connector only. Do not pull on cable portion.
※ Do not place or drop heavy or sharp-edged objects on power cord. A damaged cord can cause fire or electrical shock hazards. Regularly check power cord for excessive wear or damage to avoid possible / electrical hazards.
※ Ensure unit is always properly grounded to prevent electrical shock hazard.
※ Do not operate unit in hazardous or potentially explosive atmospheres. Doing so could result in fire, explosion, or other dangerous results.
※ Do not use this unit in or near water.
※ Do not allow liquids, metal pieces, or other foreign materials to enter the unit.
※ Handle with care to avoid shocks in transit. Shocks may cause malfunction. When you need to transport the unit, use the original packing materials, or alternate adequate packing.
※ Do not remove covers, panels, casing, or access circuitry with power applied to the unit! Turn power off and disconnect power cord prior to removal. Internal servicing / adjustment of unit should only be performed by qualified personnel.
※ Turn off the unit if an abnormality or malfunction occurs. Disconnect everything before moving the unit.
Note: due to constant effort to improve products and product features, specifications may change without notice.
Content
- Introduction....1
- Main Features....1
- Specification....2
- Interface....3
- Device Installation....3
- Logging into Device Management Interface 4
- NDI Software Compatibility....5
- NDI Encoding....6
- NDI Decoding....7
- System Settings....9
1. Introduction
DE21-4K PRO is a broadcast-grade professional 4K HDMI and NDI bi-directional codec featuring both NDI encoding and decoding. It supports 4Kp60 HDMI to NDI conversion and NDI to HDMI output. Equipped with HDMI input/output, the HDMI output can be used as loop-through during encoding or as video output during decoding (not simultaneously). The device supports plug-and-play operation, built-in Tally light, an LCD status configuration screen, and Web-based configuration. It supports both DC and PoE power, features 3.5mm audio embedding/de-embedding and a detachable mounting bracket for easy installation. It is ideal for live streaming, gaming, broadcast workflows, and professional AV applications.

2. Main Features
● 4K HDMI/ NDI bi-directional conversion
● Supports 4K@60Hz full-bandwidth NDI encoding and decoding
● YCbCr 4:2:2 8-bit high-quality NDI encoding
● Supports PoE and 5-18V USB-C power supply
● 3.5mm audio embedding & de-embedding
- LCD screen with Tally and status indicators for on-site control
- Plug-and-play with Web configuration
- Detachable mounting bracket
3. Specification
| Interfaces | |
| Video | 1×HDMI 2.0 Input1×HDMI 2.0 Loop Output |
| Audio | 1×3.5mm stereo (analog audio input/output) |
| Network | NDI/PoE ×1 |
| Power | DC 5-18V USB-C×1 |
| Format Support | |
| HDMI 2.0Input Resolution | (4K) 4096x2160p 60/59.94/50/30/29.97/25/24/23.98(4K) 3840x2160p 60/59.94/50/30/29.97/25/24/23.98(2K) 2560x1080 60/59.94/50/30/29.97/25/24/23.98(3G) 1920x1080p 60/59.94/50(HD)1920*1080p 30/29.97/25/24/23.98(HD) 1920x1080i 60/59.94/50(HD) 1280x720p 60/59.94/50/30/29.97/25/24/23.98 |
| HDMI 2.0Output Resolution | (4K)4096x2160p60/59.94/50/30/29.97/25/24/23.98(4K)3840x2160p60/59.94/50/30/29.97/25/24/23.98(2K) 2560x1080 60/59.94/50/30/29.97/25/24/23.98(3G)1920x1080p60/59.94/50(HD) 1920*1080p 30/29.97/25/24/23.98(HD) 1920x1080i 60/59.94/50(HD) 1280x720p 60/59.94/50 |
| NDI Codec | Encoding/Decoding: 1× NDI encode or 1× NDI decodeFormat: YCbCr 4:2:2 8-bit high-qualityTypical Bitrate: 250Mbps@4Kp60, 125Mbps@1080p60 |
| Other | |
| Power | Voltage: 5 - 18V, Power: 5W (12V 0.4A) |
| Dimensions | 104×125.5×24.5mm |
| Weight | Net: 501g Gross:750g |
| Power consumption | 5W ±10% |
| Operating temperature | -20~60°C |
| Storage temperature | -30~70°C |
| Relative humidity | 20~90% RH (non-condensing) |
| Accessories | |
| Accessories | 1× USB 2.0 Type-A to Type-C cable, 1×5V 2A Power Adapter |
| Warranty | 3 years |
4. Interface

5. Device Installation
- Connecting Signal Sources
Use HDMI cable to connect the source (e.g., camera) to HDMI Input.
Connect HDMI Output to a display device.(e.g., monitor).
Note: HDMI Output works as loop-through in encoding mode, and as output in decoding mode. available simultaneously.
- Connecting to Network
Plug one end of the network cable into the device's Ethernet port, and connect the other end network switch or directly to the computer's network port.
- Connecting Audio
Use a 3.5mm headphone with microphone function and insert it into the device's audio interface
● Powering the Device
Use power adapter (DC 5V-18V) to power the device. The device will start up, taking approximate 30-40 seconds.
Note: If the network switch supports PoE power supply, there is no need to connect a separat power adapter.
6. Logging into Device Management Interface
● Management Address
Device default management IP: 192.168.1.168
Subnet mask: 255.255.255.0
- Web Login Interface
For first-time login, use the default management IP address. First, connect your computer to the same network as the device. If your computer's IP is not in the 192.168.1.* subnet, you need manually set your computer's network port IP to the 192.168.1.* subnet.
How to Configure Your Computer to the Same Subnet as the Device
Start Menu → Settings → Network & Internet → Network and Sharing Center → Ethernet → Properties → Internet Protocol Version 4 (TCP/IPv4).
Select "Use the following IP address" and manually set:
IP address: 192.168.1.* (* is any number between 1-255 except 168)
Subnet mask: 255.255.255.0, then click OK to complete the configuration.
IPv4

开
IP 地址
192.168.1.100
×
子网掩码
255.255.255.0
After configuration, enter http://192.168.1.168 in a web browser to access the site.
Default login credentials: Username: admin, Password: admin.
● Device IP Address Configuration
After logging in, you can configure the IP settings for the wired Ethernet connection. Options include "DHCP Dynamic" or "Manual Assignment" (default is DHCP Dynamic).

● Maintenance Address
The device factory default maintenance address is: 192.168.1.168.
The maintenance address is a dedicated management IP address configured on the Ethernet interface (i.e., the default management IP).
If users forgets the Ethernet IP settings or cannot know the currently assigned address due to enabled DHCP, you can still access the device via this dedicated address.
7. NDI Software Compatibility
The device has NDI streaming service enabled by default and can automatically detect and conwith NDI protocol-supported software (such as NewTek Studio Monitor, OBS, vMix, etc.) on the same network segment. Users only need to select the corresponding device and channel in the software to play the NDI video stream output by the device.
7.1 Installing NDI Tools
Please download and install the NDI Tools package from the NewTek official website https://www.newtek.com/ndi/tools/#.
7.2 Using NDI Streams in Different Software
● NewTek Studio Monitor
Open the Studio Monitor software and click the icon in the upper left corner (or right-click) to the list of discovered devices and channels. Select the desired device from the list to play its video stream. After playing the NDI video, click the gear button in the lower right corner to dir open the device's web management page for remote management.
vMix
Open vMix and click "Add Input." In the pop-up window, select NDI / Desktop Capture. vMix w automatically list the NDI devices discovered on the current network. After selecting the desired device and channel, you can load the video stream into vMix input channels for switching, mixir and streaming.
8. NDI Encoding

Resolution: Displays the resolution of the current input signal.
Frame Rate: Displays the frame rate of the current input signal.
Bitrate: Displays real-time encoding bitrate changes.
Audio Format: Displays the sample rate and channels of the encoded audio.

Group:
Group names can contain English letters and numbers. Multiple group names are supported, separated by commas ";". The default group is the public group. If you do not want the device arbitrarily discovered by all devices on the network, you can set it to a specific group name. C devices under the same group name can be searched and discovered.
Device Name:
The device name used to identify the NDI source.
NDI Channel Name:
When multiple NDI sources exist on the same network, you can distinguish them by modifying a channel name for correct device identification.
Encoding Quality
The device's encoding resolution is the source output resolution and cannot be configured for sc encoding. Adjusting the encoding quality can appropriately reduce or increase the encoding bitrate
Adjusting encoding quality simultaneously affects both video quality and bitrate: bitrate decreases when quality is lowered, and bitrate increases when quality is raised.

Audio Source: Select either HDMI embedded audio or analog audio input. HDMI embedded audio is used by default.
Volume: Allows gain adjustment for HDMI embedded audio or analog audio input.
Number of Channels: Allows selecting either automatic channel number selection based on input signal or manual selection of the desired number of channels.
Audio Reference Level: Allows selection of reference level standards based on requirements.
9. NDI Decoding
Access the web interface and select the Decoder page to switch to decoding function.
Before enabling the decoding function, please confirm the device's Ethernet IP address and use address to log in to the WEB management page, then enter the decoding function page for se

Within the same local network, NDI sources will be automatically discovered and displayed in the

Click the refresh icon to update NDI sources on the network in real time.
Click the add icon to add the selected NDI source to the decoding preset box.
Click the decode icon to directly decode and output this video source.
- Switching Output NDI Sources
The decoding preset bar can store up to 9 preset decoding sources. Click the corresponding N1 source to start decoding.
Quickly switch decoding output by clicking different NDI sources. Click the × in the upper right of the NDI source in the preset box to delete the added source.
The decoding preset bar retains one blank output box. When switching to the "No Decoding Out source, the device will output the color set in this box.
This function can also be used for output testing. Users can select different color areas to output corresponding color to the monitor.

- Setting Decoding Output Parameters
The decoding area displays information about the current decoding source including resolution, audio parameters, source IP address, and real-time bitrate. Click the settings icon in the upper
corner to set the decoding output resolution and frame rate. On this page, you can also adjust gain and set the NDI transmission mode. If the current decoding source disconnects, a warning prompt will appear in the upper right corner indicating the device is offline.

Note: The device's encoding and decoding functions cannot run simultaneously. When switching to decoding mode, the encoding function will automatically stop.
10. System Settings
In system settings, users can perform user management settings, time settings, image management quick device reconnection, factory reset, and firmware upgrades.
- User Settings
Allows adding and deleting users, modifying user passwords, etc.

- Time Settings

- Image Management

- Quick Reconnect
Quickly reconnects the device.
- Factory Reset
Restores the device to factory settings, returning all configurations to factory defaults.
- Firmware Upgrade
Supports online firmware upgrades for updating the device software. Through the "System Setting Firmware Upgrade" function in the WEB management interface, you can upload the firmware upgrade file provided by the manufacturer for online firmware upgrade. After the firmware upgrade file is successfully uploaded, the device will automatically restart and begin the upgrade. Please patiently.


- USING THE UNIT SAFELY
- WARNING AND CAUTIONS
- CONTENT
- INTRODUCTION
- MAIN FEATURES
- SPECIFICATION
- INTERFACE
- DEVICE INSTALLATION
- CONNECTING SIGNAL SOURCES
- CONNECTING TO NETWORK
- CONNECTING AUDIO
- ● POWERING THE DEVICE
- LOGGING INTO DEVICE MANAGEMENT INTERFACE
- ● MANAGEMENT ADDRESS
- WEB LOGIN INTERFACE
- HOW TO CONFIGURE YOUR COMPUTER TO THE SAME SUBNET AS THE DEVICE
- IPV
- 子网掩码
- ● DEVICE IP ADDRESS CONFIGURATION
- ● MAINTENANCE ADDRESS
- NDI SOFTWARE COMPATIBILITY
- INSTALLING NDI TOOLS
- USING NDI STREAMS IN DIFFERENT SOFTWARE
- ● NEWTEK STUDIO MONITOR
- VMIX
- NDI ENCODING
- GROUP
- DEVICE NAME
- NDI CHANNEL NAME
- ENCODING QUALITY
- NDI DECODING
- SWITCHING OUTPUT NDI SOURCES
- SETTING DECODING OUTPUT PARAMETERS
- SYSTEM SETTINGS
- USER SETTINGS
- TIME SETTINGS
- IMAGE MANAGEMENT
- QUICK RECONNECT
- FACTORY RESET
- FIRMWARE UPGRADE
Brand : AVMATRIX
Model : DE21-4K PRO
Category : Uncategorized