
imageFORMULA DR-C350 - Scanner CANON - Free user manual and instructions
Find the device manual for free imageFORMULA DR-C350 CANON in PDF.


| Product Type | Desktop Document Scanner |
| Brand | Canon |
| Model | imageFORMULA DR-C350 |
| Scan Speed | Up to 60 ppm (black & white, color at 300 dpi) |
| Duplex Scanning | Yes, automatic duplex scanning up to 120 ipm |
| Optical Resolution | 600 x 600 dpi |
| Automatic Document Feeder (ADF) | 100 sheets |
| Supported Paper Sizes | Minimum: 50.8 x 70 mm; Maximum: 216 x 356 mm |
| Long Document Scanning | Up to 3,000 mm |
| Sensor Type | CMOS image sensor (CIS) |
| Light Source | LED |
| Interface | USB 3.2 Gen 1 (Type-B) |
| Dimensions (W x D x H) | 330 x 350 x 125 mm |
| Weight | Approximately 3.9 kg |
| Power Source | 100-240 V AC, 50/60 Hz |
| Power Consumption | Maximum 36 W; Sleep mode 1.8 W; Off 0.3 W |
| Recommended Daily Duty Cycle | 7,500 pages |
| Double Feed Detection | Ultrasonic sensor |
| Included Software | CaptureOnTouch, Scan-to-Owner, TWAIN driver |
| Noise Level | Less than 55 dB (scanning) |
| Consumables and Maintenance | Replaceable feed and retard rollers; easy access for cleaning |
| Safety Certifications | Energy Star, EPEAT (where applicable) |
Frequently Asked Questions - imageFORMULA DR-C350 CANON
User questions about imageFORMULA DR-C350 CANON
0 question about this device. Answer the ones you know or ask your own.
Ask a new question about this device
Download the instructions for your Scanner in PDF format for free! Find your manual imageFORMULA DR-C350 - CANON and take your electronic device back in hand. On this page are published all the documents necessary for the use of your device. imageFORMULA DR-C350 by CANON.
USER MANUAL imageFORMULA DR-C350 CANON
- Please read this manual before operating this scanner.
• After you finish reading this manual, store it in a safe place for future reference.

Table of Contents
Introduction 3
Symbols Used in This Manual.... 4
Before Using the Scanner.... 5
System Requirements of Software.... 5
Important Safety Instructions....6
Installation Location 6
AC Adapter....6
Moving the Scanner 7
Handling....7
Disposal 8
When sending the scanner for repairs 8
Features of the Scanner.... 9
Names and Functions of Parts 12
Operation Panel 15
Basic Operation 17
Power Supply 17
Turning the Power ON 17
Turning the Power OFF.... 18
Documents 19
How to Place Documents.... 21
Scanning multiple documents 21
When scanning a document one page at a time
(Bypass mode).... 23
Placing Cards.... 24
Placing Folded Documents 25
Scanning with Carrier Sheets.... 26
Loading passports.... 28
Scanning.... 31
Scanning with CaptureOnTouch 31
What Is CaptureOnTouch? 31
Scanning by Selecting a CaptureOnTouch Job
from the Scanner 32
Scanning with More Detailed Settings.... 33
Setting the Long Document Mode.... 33
Detecting a document double feed 33
Maintenance 35
Daily Maintenance.... 35
Cleaning the Scanner.... 35
Cleaning the Display 35
Cleaning the Inside of the Scanner 35
Cleaning the paper detection sensors.... 35
Cleaning the Sensor Glass and the Rollers 37
Replacing Consumable Parts.... 39
Setting Auto Power Off 49
Removing the Document Feed Tray 51
About the Canon imageFORMULA Driver Setting Tool ..... 51
Troubleshooting 52
When in Trouble 52
Problems with the Scanner 52
Problems with Scanning.... 53
Frequently Asked Questions.... 65
Questions about CaptureOnTouch.... 65
Questions about the scanner driver 66
Clearing a Paper Jam.... 68
Uninstalling the Software 70
Appendix 73
Specifications.... 73
Replacement parts 74
Option....74
About the Flatbed Scanner Unit 75
Dimensions....75
Regulations.... 76
Index....79
Introduction
Thank you for purchasing the Canon imageFORMULA Document Scanner.
Please read the following manuals carefully and familiarize yourself with the functions of the scanner before use to ensure you sufficiently understand the functions and make the most of the scanner's capabilities. After reading the manuals, store them in a safe place for future reference.
Manuals for the Scanner
Documentation for this scanner consists of the following manuals.
● Product Safety Guide
Before using the scanner, be sure to read and follow these instructions.
- Setup Guide
This describes setup procedures for the scanner. Read this manual when you first use the scanner.
● User Manual (this manual)
This manual contains the operating procedures of the scanner.
Windows
If you are using Windows, the User Manual (electronic manual) will be registered to the following location when the software is installed.

Mac
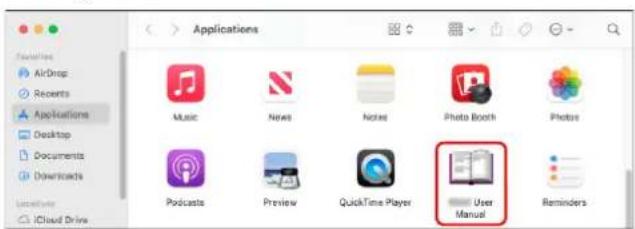
The User Manual (electronic manual) will be registered to the following location.
Symbols Used in This Manual
The following section explains the symbols and indications used in the manual for this scanner. Before you start reading the manual, take a moment to glance through it and familiarize yourself with their meanings.

WARNING
Indicates a warning concerning operations that may lead to death or injury to persons if not performed correctly. To use the scanner safely, always pay attention to these warnings.

CAUTION
Indicates a caution concerning operations that may lead to injury to persons, or damage to property if not performed correctly. To use the scanner safely, always pay attention to these cautions.

IMPORTANT
Indicates operational requirements and restrictions. Be sure to read these items carefully to operate the scanner correctly, and avoid damaging the scanner.

Hint
Indicates a clarification of an operation, or contains additional explanations for a procedure. Reading these notes is highly recommended.
Before Using the Scanner
System Requirements of Software
To use the scanner, your computer must satisfy the following system requirements.
Computer
CPU: 13th Generation Intel Core i3, 1.20 GHz or
faster Windows
M2 Chip or later Mac
Memory: 8 GB or more
16 GB or more
Windows
Mac
Hard disk: 10 GB or more available space required for installation of all software
Supported interfaces: USB 3.2/USB 3.1/USB 3.0/USB 2.0
(connector type: Type-C)
Monitor: Resolution of 1024 × 768 (XGA) or better
recommended.
Operating system
• Microsoft Windows 10 (64-bit edition)
- Microsoft Windows 11
• Microsoft Windows Server 2022
• Microsoft Windows Server 2025
- macOS 13
- macOS 14
- macOS 15
This is the environment as of September 2025.
For the latest software support information, go to the Products page on the Canon website.
Other requirements
- An ISIS-compatible application or a TWAIN-compatible application that is compatible with the above operating systems.
• .NET Framework 4.8 or later
IMPORTANT
- Use the USB interface provided as standard with your computer. However, normal operation is not guaranteed with all USB interfaces, even if present as standard equipment on the computer. For details, consult your local authorized Canon dealer.
- The USB cable you are using should be the one originally included with the scanner.
- If the CPU, memory, interface card, and other specifications do not satisfy the installation requirements, the scanning speed may be greatly reduced and transmission may take a long time.
- Even if the computer satisfies the system requirements, the scanning speed may vary, depending on the specification of the computer and the environment.
- The scanner drivers provided with the scanner do not necessarily operate on all ISIS or TWAIN-compatible applications. For details, contact your application software retailer.
- In Windows 10 tablet mode, the software may disrupt the display.
Precautions for Use on Windows
- The ISIS driver supplied with this product supports scanning with 32bit applications only.
Important Safety Instructions
To ensure the safe operation of this scanner, be sure to read the safety warnings and precautions described below.
Installation Location
The performance of this scanner is affected by the environment in which it is installed. Make sure that the location where the scanner is installed meets the following environmental requirements.
● Use the scanner indoors.
● Provide adequate space around the scanner for operation, maintenance, and ventilation.

- Provide adequate space in front of the scanner for documents output after being scanned.
- Avoid installing the machine in direct sunlight. If this is unavoidable, use curtains to shade the scanner.
● Avoid locations where a considerable amount of dust accumulates as dust may adversely affect the inside of the scanner. - Avoid warm or humid locations, such as in the vicinity of a water faucet, water heater, or humidifier. Avoid locations where ammonia gas is emitted. Avoid locations near volatile or flammable materials, such as alcohol or paint thinner.
● Avoid locations that are subject to vibration.
- Avoid exposing the scanner to rapid changes in temperature. If the room in which the scanner is installed is cold but rapidly heated, water droplets (condensation) may form inside the scanner. This may result in a noticeable degradation in scanning quality. The following conditions are recommended for optimal scanning quality: Room temperature: 10 °C to 35 °C (50 °F to 95 °F)
Humidity: 20% to 80% RH
● Avoid installing the scanner near equipment that generates a magnetic field (e.g. speakers, televisions, or radios.)
- Do not block the ventilation holes. Doing so could cause the scanner to overheat, creating a fire hazard.
AC Adapter
- Connect only to a power outlet of the rated voltage and power supply frequency (120 V, 60 Hz or 220-240 V, 50/60 Hz depending on your region).
- Do not connect other electrical equipment to the same power outlet to which the scanner is connected. Also, when using an extension cord, make sure that the extension cord is rated for the current requirements of the scanner.
- Never try to take the AC adapter apart or modify it in any way, as this is dangerous.
● The power cord may become damaged if it is often stepped on or if heavy objects are placed on it. - Do not use the power cord while it is coiled.
- Do not pull directly on the power cord. When disconnecting the power cord, grasp the plug and remove it from the outlet.
- Keep the area around the power cord clear of objects so that the power cord can be disconnected easily in an emergency.
- Do not use an AC adapter other than the one provided with the scanner. Do not use the AC adapter provided with the scanner with other products.
- If you have any questions regarding the power supply, contact your local authorized Canon dealer or service representative for further information.
Moving the Scanner
- When moving the scanner, always hold it with both hands to avoid dropping it.
● Make sure to disconnect the interface cable and AC adapter before moving the scanner. If the scanner is transported with these items connected, the plugs and connectors may be damaged.

Handling
WARNING
Note the following precautions whenever using the scanner. Failure to do so may result in a fire or electric shock.
● Never use alcohol, benzene, paint thinner, aerosol sprays, or any other highly flammable substance near the scanner.
- Do not cut, damage, or modify the power cord. Do not place heavy objects on the power cord, and do not pull or excessively bend the power cord.
● Never connect the power cord when your hands are wet.
● Do not connect the scanner to a multi plug power strip.
- Do not knot or coil the power cord as this may result in a fire or electric shock. When connecting the power cord, make sure that the power plug is securely and completely inserted into the power outlet.
● The supplied power cord set is intended for use with this scanner only. Do not use it with other electronic equipment. In addition, do not use power cord sets other than the one supplied with the scanner. Doing so may result in fire or electric shock.
● Do not take the scanner apart or modify it.
● Never try to take the AC adapter apart or modify it in any way, as this is dangerous.
● Do not use flammable spray near the scanner.
- When cleaning the scanner, turn OFF the power and disconnect the power cord from the power supply.
- Clean the scanner using a slightly dampened cloth which has been well wrung out. Never use alcohol, benzene, paint thinner, or any other flammable substances.
- If the scanner makes strange noises, or gives off smoke, heat, or strange odors, or the scanner does not function or other abnormalities occur when you use the machine, immediately turn OFF the power, and disconnect the power plug from the power outlet. Then, contact your local authorized Canon dealer or service representative to have the unit serviced.
- Do not drop the scanner, or subject it to impact or strong shock. Should the scanner ever become damaged, immediately turn OFF the power, and disconnect the power plug from the power outlet. Then, contact your local authorized Canon dealer or service representative to have the unit serviced.
● Before moving the scanner, be sure to turn OFF the power, and disconnect the power plug from the power outlet
CAUTION
- Do not install the scanner on a surface that is unstable or tilted, or in an area subject to excessive vibrations, as this may cause the scanner to fall, resulting in personal injury or damage to the scanner.
- Never place small metal objects such as staples, paper clips, or jewelry on the scanner. These items may fall into the scanner, and cause a fire or electric shock. Should such objects ever fall inside the scanner, immediately turn OFF the power, and disconnect the power plug from the power outlet. Then, contact your local authorized Canon dealer or service representative to have the unit serviced.
-
Do not install the scanner in a humid or dusty location. Doing so might cause a fire or electric shock.
-
Do not place objects on top of the scanner. Such objects may tip or fall over, resulting in personal injury.
- Connect only to a power outlet of the rated voltage and power supply frequency (120 V, 60 Hz or 220-240 V, 50/60 Hz depending on your region). Doing so might cause a fire or electric shock.
- When unplugging the power cord, grasp it firmly by its plug. Do not pull directly on the power cord, as this may damage or expose the cord's internal wiring, resulting in a fire or electric shock.
- Leave sufficient space around the power plug so that it can be unplugged easily. If objects are placed around the power plug, you will be unable to unplug it in an emergency.
- Do not allow water or flammable substances (alcohol, paint thinner, benzene, etc.) to spill into the scanner, as this may result in a fire or electric shock. Doing so might cause a fire or electric shock.
● Turn OFF the power for safety when not using the scanner for a long period of time, such as overnight. Also, turn OFF the power and disconnect the power cord from the power outlet for safety when the machine will not be used for an extended period of time, such as during consecutive holidays. - Do not wear loose clothing or jewelry that may get caught in the scanner while you are using it, as this may result in personal injury. Be extra careful of neckties and long hair. If anything becomes caught in the scanner, immediately disconnect the power cord to stop the scanner.
- Be careful when loading paper into the scanner and when removing jammed paper, as it is possible to cut your hand on the edge of a sheet of paper.
Disposal
When disposing of this scanner, be sure to follow all local ordinances and laws or consult with the retailer who sold you the scanner.
When sending the scanner for repairs
When a request is made for repairs, the scanner needs to be sent to the specified address. When sending the scanner, use the packing box in which it came. Firmly secure the scanner with packaging material when you place it in the packing box.
Features of the Scanner
The main features of the scanner are described below.
Scanner Features
- Compact Design
When the paper tray is stored, it has a compact size of 283 mm (11.2")(W) × 223 mm (8.8")(D) × 218 mm (8.6")(H).
- USB Type-C interface
The interface is Type-C compatible, and a Type-C to Type-C USB cable is included. Since the connectors on both ends have the same shape, they can be easily connected without worrying about orientation.
● High-capacity paper feeding
A maximum of 100 sheets can be loaded in the document feed tray, allowing large numbers of documents to be scanned efficiently without having to split them into batches.
● Monochrome LCD
You can select from a list of registered frequently used scan settings to scan with easy operations, and if an error occurs, the cause is displayed with an icon, allowing intuitive operations.
- Scan Passports without Carrier Sheet
You can scan passports without having to place them in a special carrier sheet.
● Support of a Variety of Documents
You can scan a wide range of document types, from small sizes like business cards and receipts to A4-sized documents, passports, long documents, and cards. In addition, when using "Folio mode", you can scan documents up to a maximum size of A2. It also supports long documents, allowing you to scan documents up to a maximum of 6,096 mm (240").
● Full Auto Mode
A Full Auto Mode is provided in CaptureOnTouch and the scanner driver to allow scanning under automatically determined conditions. Scanning conditions such as the color mode and page size are set automatically based on the document being scanned.
- Presets
Settings suitable for passports and documents with photos are prepared in advance as presets. In addition, users can also register their preferred settings.
● Environmentally Friendly Energy-Saving Design
The design is energy-saving, consuming up to 15.6 W during operation and 0.6 W in sleep mode.
Detection Functions
● Auto Resolution Detection
When enabled in the CaptureOnTouch or scanner driver settings, this function detects the content of documents and determines the scanning resolution automatically. It can optimize the file size.
● Auto Color Detection
Automatically detects whether scanned documents are color, grayscale, or black and white.
● Paper Size Detection
Detects the size of the scanned document and creates an image without margins.
● Content Skew Correction
Even if the print on the document is skewed, it is corrected to be straight.
● Character Emphasis
You can adjust the thickness of characters and lines, improving the OCR processing accuracy for characters with thin lines.
● Ultrasonic Double Feed Detection
The scanner stops feeding when the ultrasonic sensor detects that two or more document pages are feeding at the same time.
● Text Orientation Detection
The text orientation on each page is detected, and the scanned image is rotated in 90-degree increments as necessary for normalization.
● Text Enhancement Modes
The scanner is equipped with three functions to improve the visibility and OCR processing accuracy of documents with low character visibility.
- Advanced Text Enhancement mode Makews documents with a dark background or uneven background easier to read.
- Advanced Text Enhancement II mode: Makes it easier to read characters on documents with a uniform background and faint characters and background.
- Active Threshold mode: Can batch process various types of documents, such as documents with faint characters or stains, at once.
* These modes may not work, depending on the type of document.
Image Processing Functions
● Color Emphasis Function
Creates a black and white or grayscale image that emphasizes a specific color (red, blue, or green) or a chromatic color. This is useful when you want to emphasize notes written with a marker or a faint imprint. You can specify only one color when specifying a specific color, but if you select a chromatic color, it can handle multiple colors in the document or different colors in each document.
● Color Drop-Out Function
Creates a black and white or grayscale image that removes a specific color (red, blue, or green) or a chromatic color. This is convenient when you want to scan ledgers or other documents with colored ruled lines.
● Document with Photo Mode
When you scan a document with both photos and characters, this mode can maintain high reproduction of both characters and photos. It can beautifully scan application forms with a face photo attached, for example.
● Folio Scan and Front/Back Combination Function
Documents that are too large to fit in the feeder inlet can be folded and scanned on both sides, with the images then combined into a single image.
The method for combining images can also be set, so that you can also combine the front and back of the document. You can combine the front and back of a card or postcard placed horizontally to create a single easy-to-view image.
● Color unevenness reduction
Reduces the color unevenness in images, making them easier to view and also allowing you to output images with a restrained file size.
● MultiStream Windows
With applications that support the scanner's MultiStream capability, three images with different scanning conditions are created from a single scan pass. However, this function is only available when using software that supports MultiStream.
- Barcode Detection Windows
Can detect barcodes within the document. Also, by using CaptureOnTouch, you can detect barcodes/2D codes included in the document and split the file.
● Patchcode Detection Windows
Patchcode sheets can be inserted in the document stack to perform batch separation.
● 1200 dpi Support
Supports output up to 1200 dpi.
* 1200 dpi images are generated from 600 dpi ones.
Other requirements
● Auto Start
The scanner is equipped with an auto start function, which enables scanning to be automatically started when a document placed in the feeder is detected.
- Sleep Mode
The scanner is designed to save energy by automatically entering the sleep mode if 10 minutes elapse without scanning or another operation being performed.
● A4/LEGAL Carrier Sheet Support
Use the separately sold carrier sheet (A4 or LEGAL), you can scan without damaging the original.
● Passport/Booklet Support
Use the separately sold carrier sheet (for passports) so you can scan passports and booklets more safely without damaging them.
- Canon DR Scanner Management Tool (Management Tool) Windows
This is a server application that can be used for centralized management of scanners. You can manage consumables, error status, firmware versions, etc. collectively.
Names and Functions of Parts
Front View (With the Document Eject Tray Closed)

(1) OPEN Lever
Pull this toward you to open the front unit.
(2) Document Feed Tray
Place the document.
(3) Document Guides
Align the document guides with both edges of the document to ensure that the document feeds straightly.
(4) Power button
Press this to turn on the scanner. When pressed, the power indicator is lit.
To turn off the scanner, long press this button (for two seconds or longer).
The power button lights or flashes as follows depending on the scanner status.
| Power Button Indication | Description |
| Lit Power is on | |
| Flashing (slowly) Sleep mode | |
| Flashing (quickly) | An error (paper jam, front unit is open, double feed, etc.) has occurred |
Front View (With the Document Eject Tray Open)

(1) Feed Extension Support
Open this when placing long paper in the scanner.
(2) Feed Support
Pull this out to support loaded documents.
(3) Feed Selection Lever
Use this lever to change the way documents are fed.
Push it down to feed scan documents one at a time (Normal mode).
(See p. 21)
Push it up to feed scan documents that are fastened together, such as invoices, without separating them (Bypass mode). (See p. 23)
(4) Operation Panel (See p. 15)
(5) Front Unit
Open this when cleaning the inside of the scanner or replacing rollers.
(6) Document Eject Tray
Pull this out to scan documents. Scanned documents are output here.
When scanning multiple documents of varying sizes at one time, pulling out and lifting up this tray locks the angle of the tray, so the documents ejected onto the tray are aligned.
(7) Document Eject Stopper
This prevents the ejected document coming out of the document eject tray and aligns the leading edge of the document. It can be moved to any position to match the length of the document.
Back View

(1) Theft Prevention Hole (Security Slot)
Connect an anti-theft key chain or the like.
(2) Power Connector
Connect the supplied AC adapter to this connector.
(3) USB Type-C connector
Connect the supplied USB cable to this connector.
Operation Panel

(1) Display
Displays the job number and status of the scanner, etc.
(2) ▲▼ buttons
Select a job number.
(3) Stop button
Stops the scan under execution.
(4) DFR (Double Feed Release) button
Lights when a double feed is detected. By pressing this button, you can cancel double feed detection and continue scanning.
(5) Start button
Executes the job shown on the display.
Indication Examples on the Display
Data that appears on the display differs depending on the state of the scanner.
A typical example of a screen is shown below.

(1) Feed Method Display Area
Displays the document feed method. Switch the feed method with the feed switching lever of the scanner. (See p. 21, p. 23)
| Indication Description | |
| No indication Normal feed | |
| Bypass mode | |
(2) Job number
Displays the currently selected job number (job registered with CaptureOnTouch).
(3) Hardware error
Lights when a hardware error occurs.
(4) Cover open
Lights when the front unit is open.
(5) Jam
Lights when a paper jam occurs while scanning.
(6) Double feed
Lights when a double feed occurs while scanning.
(7) USB connection status
Displays the method of connecting the scanner to the computer.
| Connection status | Connected Not connected | |
| USB | [DAYS] |  |
Basic Operation
Power Supply
Turning the Power ON
The power of the scanner can be turned ON and OFF with the power button on the front of the scanner.
1 Make sure that the scanner and computer are connected properly.
2 Press the power button (A).

The power button lights white when the power turns ON.
Windows
When the scanner is properly connected to the computer, the (CaptureOnTouch) icon appears on the taskbar as follows.

If the taskbar icon appears as the scanner is not properly connected to the computer. Check the status of the power supply and USB cable.
Mac
When the scanner is properly connected to the computer, the (CaptureOnTouch) icon appears on the taskbar as follows.

If the taskbar icon appears as the scanner is not properly connected to the computer. Check the status of the power supply and USB cable.
Turning the Power OFF
When you press and hold the power button (two seconds or longer), the power button goes out and the scanner turns off.
IMPORTANT
- Except for emergencies, do not disconnect the power cord to turn the power off.
- When turning on the scanner after it turns off, wait at least 10 seconds before turning it back on.
- If you will not be using the scanner for an extended period, turn off the power and disconnect the power cord from the AC outlet for safety.
Hint
The scanner's auto power off setting is enabled by default, and the scanner will turn off automatically if it is not operated for 4 hours. For information on disabling this setting, refer to "Setting Auto Power Off" (See p. 49).
Regardless of this setting, if 20 minutes elapse without the scanner and computer being connected by USB cable, the power will automatically turn off. If the computer is turned off, it will also be recognized as being disconnected.
Windows
Hint
When the product is shipped from the factory, the setting to automatically turn off the power when the computer is shut down or the USB cable is disconnected is turned on.
To disable this setting, turn on [Disable USB-linked power switch] with the Canon imageFORMULA Driver Setting Tool. For details, see the Canon imageFORMULA Driver Setting Tool Help.
Documents
The scanner can scan documents ranging in size from business cards to LTR/A4. The document sizes that this scanner can scan are shown below.
Plain Paper
Size
Width: 50 mm to 216 mm (2" to 8.5")
Length: 54 mm to 356 mm (2.1" to 14") (You can scan documents up to 6,096 mm (240") long by setting the scanner to the Long Document Mode.)
Paper thickness
Normal feed: 27 to 413 g/m 2 (7.2 to 110 lb bond) 0.04 mm to 0.49 mm (0.00157" to 0.01929")
Bypass mode: 27 to 413 g/m 2 (7.2 to 110 lb bond) 0.04 mm to 0.49 mm (0.00157" to 0.01929")
Loading capacity
A4 size or smaller: 100 sheets (80 g/m 2 (21.3 lb bond))
Larger than A4 size: 80 sheets (80 g/m² (21.3 lb bond))
Make sure stacks do not exceed 11 mm in height for either of the above.
IMPORTANT
The documents to be scanned must satisfy certain criteria. Read the following items carefully.
- When scanning multiple documents of different sizes, place the documents so that they cover the entire span of the feed rollers (A) by aligning the centers (C) and leading edges (B) of the documents.

- It is recommended that documents exceeding 356 mm (14") size are fed one sheet at a time.
- Scanning documents before the ink is dry can cause problems with the scanner. Always make sure that the ink on a document is dry before scanning it.
- Scanning documents that are written in pencil or similar material may make the rollers and scanning glass dirty, which can lead to smudges on the scanned image and transfer the dirt to subsequent documents. Always clean the internal parts of the scanner after scanning such documents.
- When scanning a two-sided document that is printed on thin paper, the image on the opposite side of each page may show through. In this case, adjust the scanning intensity in the application software before scanning the document.
- Laminated documents may not be scanned correctly, depending on the document.
- Scanning the following types of documents can cause a paper jam or malfunction. To scan such a document, use a carrier sheet, sold separately, to scan the document; or make a photocopy of the document and then scan the photocopy.

There are creases or fold lines.

Carbon paper

There are curls. The sur

coated.

There are tears.

Extremely thin document such as semi-transparent thin paper.

There are clips or staples.

Documents with excessive paper dust particles.
Others
- Not uniformly thick paper (things are attached to it).
- Tracing paper.
- Photosensitive paper.
- Vertically perforated paper.
- Non-square paper.
- If the document has clips or staples, remove them before placing it in the carrier sheet.
Business Card
Size
Width: 50 mm to 55 mm (2" to 2.2")
Length: 85 mm to 91 mm (3.3" to 3.6")
Paper thickness 128 to 255 g/m 2 (34.1 to 68 lb bond) 0.15 mm to 0.3 mm (0.0059" to 0.0118")
Orientation Vertical feeding only

IMPORTANT
If a stack of business cards cannot be fed properly, reduce the number of cards in the stack.
Card (plastic)
Size 86 mm × 54 mm (3.38" × 2.12") (ISO/JIS standard)
Card thickness 1.4 mm (0.055") or less
Orientation Horizontal feeding only
Embossed cards can be scanned.
Loading capacity 3 cards (non-embossed), 1 card (embossed)

CAUTION
- When scanning cards, place them to be fed horizontally. If you place cards to be fed vertically, they may not be ejected properly because load is applied to them. In addition, cards that get jammed may be damaged when you remove them.
- Embossed cards may not be able to be scanned correctly, depending on the type of embossment.
- When scanning cards, make the following setting on the scanner driver settings screen.
- For Windows: Uncheck [Detect by Ultrasonic] on the [Error Detection] tab.
- For macOS: Uncheck [Double Feed Detection] or set the detection method to [Detect by Length].
For details, refer to the Help of the scanner driver.
Passport
Size 88 mm × 125 mm (3.464" × 4.921") (ISO standard)
Paper thickness 6 mm (0.236") or less (including carrier sheet) 4 mm (0.157") or less (without carrier sheet)
If a passport is difficult to feed because it has been damaged, or something, or if you want to scan it at a high resolution of 400 dpi or more, then open the passport and insert it in the separately sold carrier sheet (for passports) before feeding it
How to Place Documents
Scanning multiple documents
Standard paper feeding should be used when scanning multiple documents of a standard size at one time. Standard paper feeding enables multiple documents to be fed while separating each page.
1 Pull out the document eject tray.

The document eject tray can be adjusted to 3 lengths. Pull out the document eject tray according to the length of the document. Also, erect the document eject stopper on the front edge if necessary.

IMPORTANT
Pull the document eject tray forward according to the various lengths.
Hint
When scanning multiple documents of varying sizes at one time, pulling out and lifting up the document eject tray locks the angle of the tray, so the documents ejected onto the tray are aligned.

2 Pull out the feed support.
Open the feed extension support when placing long documents.

3 Set the feed selection lever to Normal mode.


Hint
Confirm that the icon indicating bypass mode is not displayed in the upper left of the main unit's display.
4 Open the document guides wider than the width of the document you are going to scan.

5 Place the document.

6 Align the document guides with both edges of the document.

IMPORTANT
- Handle the document carefully when placing it. Take care not to cut your hand on the edges of the paper.
-
Before you place a document, check to make sure it does not contain paper clips, staples, or other small metal objects. These items may cause a fire or electrical shock, damage the document, or cause a paper jam or scanner malfunction.
-
Do not wear loose clothing or jewelry that may get caught in the scanner while you are using it, as this may result in personal injury. Be extra careful of neckties and long hair. If anything gets caught in the scanner, immediately turn OFF the power, and disconnect the power cord from the power outlet to stop scanning.
- Always smooth out any folds or curls in your documents before placing them into the feeder. If the leading edge of a document is curled, it may cause a paper jam.
- If feeding stops due to a system error or paper jam while the scanner is scanning, resolve the problem, make sure that the scanned image of the last page that was successfully fed has been stored, and then resume scanning the remaining document pages.
- After you finish scanning, close the document eject tray and the feed support to prevent damage to the scanner while it is not being used.
When scanning a document one page at a time (Bypass mode)
When scanning a thick document one page at a time or scanning a document that has multiple pages fastened together, set the feed selection lever to Bypass mode. This enables the placed document to be scanned without the pages being separated, regardless of the number of pages.
1 Set the feed selection lever to Bypass mode.


Confirm that the icon indicating bypass mode is displayed in the upper left of the main unit's display.
2 Place the document as described in the “Scanning multiple documents” (See p. 21).
IMPORTANT
- When scanning multiple page documents that are fastened together, such as invoices, place the documents so that the edge that is fastened together is facing down.
- When a double feed occurs, refer to "A document double feed occurs." (See p. 55) and "A plastic card, envelope, or booklet is detected erroneously as a double feed." (See p. 55) in "When in Trouble".
Placing Cards
Depending on whether the cards have a bumpy surface, the way to place the cards may differ.

CAUTION
When scanning cards, place them to be fed horizontally. If you place cards to be fed vertically, they may not be ejected properly because load is applied to them. In addition, cards that get jammed may be damaged when you remove them.

In the case of cards with a bumpy surface (that have been embossed)
When scanning cards that have been embossed, set the feed selection lever to Bypass mode and then place one card at a time in the scanner horizontally.

Set the feed selection lever to Bypass mode.


Hint
Confirm that the icon indicating bypass mode is displayed in the upper left of the main unit's display.

Adjust the document guides to fit the width of the card to be scanned.
3 Place the card horizontally, with the reverse side facing you, and the top of the card facing down.


CAUTION
Place the cards one at a time.
In the case of cards without a bumpy surface (that have not been embossed)
When scanning cards that have not been embossed, place the cards horizontally in the scanner.
1 Adjust the document guides to fit the width of the card to be scanned.
2 Place the card horizontally, with the reverse side facing you, and the top of the card facing down.


Hint
Up to 3 cards can be placed in the scanner at the same time if they are not embossed.
Placing Folded Documents
"Folio Scan" enables you to scan documents that are larger than A4 and therefore do not fit in the feeder. To use the function, fold the document in half lengthwise and place it into the feeder. The scanner will scan both sides and combine the scanned images into a single image.
1 Set the feed selection lever to Bypass mode.


Hint
Confirm that the icon indicating bypass mode is displayed in the upper left of the main unit's display.
2 Fold the document in half.
Crease the document firmly down its center to fold the document in half. Fold the document so that its edges are neatly aligned. If the document is not folded properly, paper jams may occur or distortions may appear in the combined scanned image.

IMPORTANT
A portion of the scanned image will be missing at the fold line.
3 Place the document with the folded edge facing right and the top edge facing downward.


IMPORTANT
Adjust the document guides to fit the width of the document. Otherwise, the image may scan as skewed or shifted.

Hint
- You can set how to combine the front and the back according to how the document is folded. For details, refer to the Help of the scanner driver.
- The maximum size for the combined image is A2. Use this method to scan A2-sized documents.
- Set [Page Size] to half the size of the paper you are actually going to scan on the scanner driver settings screen. When scanning a folded document of a size other than the standard format, set [Page Size] to [Match original size] (Windows)/[Detect automatically] (macOS). For details, refer to the Help of the scanner driver.
Scanning with Carrier Sheets
To prevent damage to a document while scanning it, insert it into an optional carrier sheet before loading it in the scanner.

Set the feed selection lever to Bypass mode.


CAUTION
When scanning with a carrier sheet, make sure to set the Feed Selection Lever to Bypass Mode.

Hint
Confirm that the icon indicating bypass mode is displayed in the upper left of the main unit's display.
2
Insert the document into the carrier sheet.


CAUTION
If the document has clips or staples, remove them before placing it in the carrier sheet.
3
Load the document with the sealed end of the carrier sheet as the leading edge.

After placing the document, align the document guides with both edges of the document.

CAUTION
If the document is not placed properly inside the carrier sheet, you may get a document jam or not get a scan image as intended.

IMPORTANT
- Insert documents straight into the center of the carrier sheet. Proper scanning will not be possible if the document is too close to either side, tilted, or protruding from the carrier sheet.

- When using a carrier sheet (LEGAL), set the long document mode of the scanner driver to [Long Document Mode (1000 mm)]. (See p. 33)
- The maximum thickness that can be scanned is 127g / m2 . If the thickness exceeds 127g / m2 , the scanner may break down due to problems such as paper jam.
- As a rough guide, replace the carrier sheet after 1,000 scanning operations with a single 80g / m2 (21.3 lb bond) sheet inserted. Carrier sheet is a consumable item. Replace it with a new one when necessary, if there is visible damage or smudging or if a paper jam occurs.
Loading passports
You can also open a passport and just scan it.
1 Set the feed selection lever to Bypass mode.


CAUTION
When scanning passports, make sure to set the Feed Selection Lever to Bypass Mode.

Hint
Confirm that the icon indicating bypass mode is displayed in the upper left of the main unit's display.
2 Load the thicker side as the leading edge and the page of the passport you want to scan facing down.

After placing the document, align the document guides with both edges of the document.
CAUTION
If the passport is not loaded properly, you may get a document jam or not get a clear scanned image.
IMPORTANT
- On the [Feeding] tab on the scanner driver settings screen, set [Document type] to [Passport], then scan. For details, refer to the Help of the scanner driver.
- Depending on the condition of the passport, the image may not be scanned completely or the scanner's image correction may not function properly. If this is the case, set [Page Size] to a larger paper size (A4, for example) on the scanner driver settings screen, and then scan again. For details, refer to the Help of the scanner driver.
- When scanning passports without using a carrier sheet, set [Dots per inch] to 300 dpi or less on the scanner driver settings screen. For details, refer to the Help of the scanner driver.
- The maximum thickness that can be scanned is 4 mm. If the thickness exceeds 4 mm, the scanner may break down due to problems such as paper jam.
When using a carrier sheet (for passports)
If feeding is difficult due to damage or other reasons, insert the passport into the separately sold carrier sheet (for passports) and then place it onto the scanner.
1 Set the feed selection lever to Bypass mode.

CAUTION
When scanning passports, make sure to set the Feed Selection Lever to Bypass Mode.
Hint
Confirm that the icon indicating bypass mode is displayed in the upper left of the main unit's display.
2 Open the page of the passport that you want to scan. Insert the passport into the carrier sheet so that the thicker side is positioned as close as possible to the sealed end.

3 Load the document with the sealed end of the carrier sheet as the leading edge and the page you want to scan facing down.

After placing the document, align the document guides with both edges of the document.
CAUTION
If the carrier sheet or passport is not loaded properly, you may get a document jam or not get a scan image as intended.
IMPORTANT
- On the [Feeding] tab on the scanner driver settings screen, set [Document type] to [Passport] and [Carrier sheet] to [Carrier sheet (for passports)], and then scan. For details, refer to the Help of the scanner driver.
- Depending on the condition of the carrier sheet or passport, the image may not be scanned completely or the scanner's image correction may not function properly. If this is the case, set [Page Size] to a larger paper size (A4, for example) on the scanner driver settings screen, and then scan again. For details, refer to the Help of the scanner driver.
- If the size of the passport differs greatly from the size of the carrier sheet, a document jam may occur or the scanner's image correction may not function properly.
- The maximum thickness that can be scanned is 6mm with the passport inserted inside the carrier sheet. If the thickness exceeds 6mm , the scanner may break down due to problems such as a paper jam.
- Depending on the thickness and condition of the passport or booklet you put in the carrier sheet, the image may become distorted.
- Carrier sheet is a consumable item. Replace it with a new one when necessary, if there is visible damage or smudging.
Scanning
Scanning with CaptureOnTouch
What Is CaptureOnTouch?
CaptureOnTouch is a scanning application that enables you to scan a document with a simple operation merely by selecting the screen panel. Multiple scanning methods, which can be selected according to the purpose and application, are available.

For details on operations and functions, refer to the Help of CaptureOnTouch.
Scanning by Selecting a CaptureOnTouch Job from the Scanner
By registering a frequently-used scanning method as a scanning shortcut in CaptureOnTouch and assign a job number, you can scan by selecting the job number from the operation panel of the scanner. For details, refer to the Help of CaptureOnTouch.

Hint
If [Do not display the main screen when the scan is started with the scanner button] is checked in the CaptureOnTouch Environmental settings, the CaptureOnTouch main screen will not be displayed when a scan is started from the operation panel. Only dialog boxes and error messages during scanning, and completion popup windows are displayed. In addition, [Edit after scanning] and [Enable additional scan] in the Edit Scanning Shortcut Panel dialog box are disabled.
Scanning with More Detailed Settings
If you want to scan with the advanced settings dialog box of CaptureOnTouch or with software other than the bundled software, refer to the Help of the scanner driver.
Setting the Long Document Mode
The length of documents that can be scanned with the scanner is normally 356 mm (14"), but you can scan documents up to 6,096 mm (240") long by setting the scanner to the Long Document Mode.
IMPORTANT
By selecting the Long Document Mode and setting the [Page Size] on the scanner driver settings screen to Auto-detection, documents of up to 6,096 mm (240") in length can be scanned. Note the following when using the Long Document mode:
- When scanning in the Long Document mode, if the document is placed on the scanner in a skewed position, it may hit the edges of the feeding area and be damaged. Be careful to place the document so that it is not skewed.
- When scanning with the Long Document mode, paper jam detection may react slowly, resulting in damage to the document. Be careful to avoid paper jams.
- When scanning long documents, make sure to set the feed selection lever to Bypass mode, and scan the documents one at a time.
- When scanning large-sized documents with the Long Document mode, scanning may be slower. Errors also occur due to memory shortage, and scanning may be disabled.
- When scanning documents with [Long Document Mode (3000 mm)] or [Long Document Mode (6096 mm)] selected on the [Long Document Mode] tab, the image may not be scanned completely if 300/400/600 dpi is selected. If this happens, lower the resolution and scan again.
Detecting a document double feed
This scanner includes a function to detect document double feeds. By using this function, the scanner will automatically stop when it detects that multiple documents have been fed at the same time. You can also specify whether to save the scanned image after scanning has finished and continue scanning the document (Rapid recovery system).
For details, refer to the Help of the scanner driver.
What to do when a double feed is detected
When not using the rapid recovery system
If a document double feed is detected during scanning, document feeding stops when the double fed documents are ejected. When this happens, the icon indicating double feed appears on the display.

Also, a message screen is displayed to notify you that a double feed has been detected.

When this happens, stop the scanning in the application and then scan the documents again.
When using the rapid recovery system
If a document double feed is detected during scanning, document feeding stops when the double fed documents are ejected. When this happens, the icon indicating double feed appears on the display and the DFR button lights.

Also, the [Rapid Recovery System] screen appears to enable you to specify whether to continue scanning.


| Buttons of [Rapid Recovery System] Screen | Description |
| [SAVE & CONTINUE] | Saves the preview image as a scanned image and scans the rest of the document. |
| [STOP] | Discards the preview image and stops scanning. |
| [DISCARD & CONTINUE] | Discards the preview image and continues scanning. Place the double fed document again before clicking this button. |
Maintenance
Daily Maintenance
Clean the scanner on a regular basis, as described below, to maintain peak scanning quality.

CAUTION
- When cleaning the scanner and the inside of the scanner, turn OFF the power and disconnect the power cord from the power outlet.
- Do not use spray cleaners to clean the scanner. Precision mechanisms, such as the light source, may get wet, and cause a malfunction.
- Never use paint thinner, alcohol, or other organic solvents to clean the scanner. The exterior of the scanner may become deformed, discolored, or melted. It may also cause a fire or electric shock.
Cleaning the Scanner
To clean the outside of the scanner, wipe off any dirt with a cloth that has been dampened with water and thoroughly wrung out, and then wipe the scanner dry with a clean dry cloth.

Cleaning the Display
To clean the display, use a soft dry cloth to lightly wipe the surface of the panel, without applying any pressure.
Cleaning the Inside of the Scanner
Dust or paper particles inside the scanner may cause lines or smudges to appear on scanned images. Use compressed air to periodically clean dust and paper particles from the document feed opening and the inside of the scanner. After finishing a large scanning job, turn OFF the scanner and then clean out any paper particles remaining inside the scanner.
Cleaning the paper detection sensors
Dust and dirt that collect on the sensors can cause false detections. Use a blower to periodically clean dust, etc., from the sensor areas.

Pull the OPEN lever and pull open the front unit toward you.

2
Use a blower to remove dust and dirt from the sensors (A).
When cleaning with a damp, tightly wrung out cloth, press in on the scanning unit (B) as you clean.

Inside of the Scanner
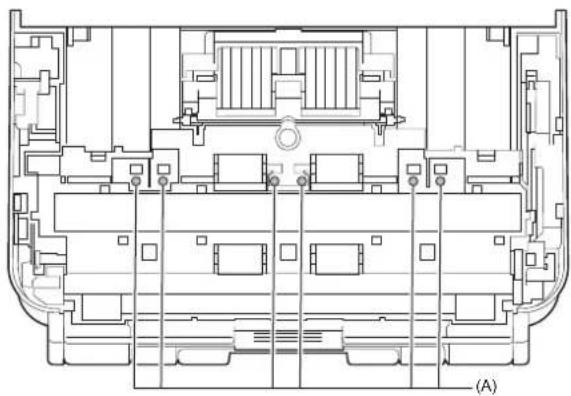
Inside of the Scanner (Front Unit)

3
Close the front unit by gently pushing it up on both sides until it clicks into place. Make sure that the front unit is completely closed by pushing until you hear a click.

Cleaning the Sensor Glass and the Rollers
If scanned images contain streaks, or if the scanned documents become dirty, the sensor glass or rollers inside the scanner may be dirty. Clean them periodically.
1 Pull the OPEN lever and pull open the front unit toward you.

2 Use compressed air to remove dust and paper particles from the inside of the scanner.
3 Wipe any dirt off the scanning glass (A).
Wipe any dirt off the scanning glass with a cloth that has been dampened with water and thoroughly wrung out, and then wipe the glass dry with a clean, dry and soft cloth.

CAUTION
Do not spray water or neutral detergent directly on the scanner. Precision mechanisms, such as the light source, may get wet, and cause a malfunction.
IMPORTANT
- Scratches on the sensor glass may cause marks on the images, as well as feeding errors. If there are scratches on the sensor glass, contact your local authorized Canon dealer or service representative.
• Take care to ensure the anti-static brush (B) in the front unit does not become deformed.

4 Clean the rollers (C).
Clean the rollers while turning them.
Wipe the rollers with a cloth that has been dampened with water and thoroughly wrung out, and then use a clean, dry and soft cloth to wipe away any moisture.

5 Remove the retard roller and feed roller. (See p. 46, p. 47)
IMPORTANT
Remove the retard roller and feed roller from the scanner to clean them, and be sure to reattach them to the scanner when cleaning is finished.
6 Wipe the removed rollers with a cloth that has been dampened with water and thoroughly wrung out.

7 Reattach the retard roller and feeding roller. (See p. 46, p. 47)
8
Close the front unit by gently pushing it up on both sides until it clicks into place. Make sure that the front unit is completely closed by pushing until you hear a click.

Replacing Consumable Parts
The two rollers (feed roller and retard roller) installed in the scanner are consumable parts. The feed roller and retard roller wear with scanning. If the feed roller and retard roller are worn, documents may not feed correctly and paper jams and double feeds may occur. When the total number of pages fed by the scanner exceeds the number of pages for the service life of the rollers, a message prompting you to replace the rollers is displayed when the computer is started.
Message that appears on the computer
Windows

Mac

If this message begins to be displayed at startup, purchase an replacement roller kit and replace the worn parts with the consumable parts included in the kit (feed roller and retard roller). See p. 74 for details about the replacement roller kit.
Furthermore, the counter in the scanner that records the number of pages fed also needs to be reset when you replace the rollers. (See p. 48)

Hint
Even before it becomes time to replace the rollers, scanned images may become stretched in the vertical direction due to wear of the rollers. If this happens, adjust the reduction ratio. (See p. 51)
Opening and Closing the Front Unit
1
Pull the OPEN lever and pull open the front unit toward you.


Hint
The location of each of the consumable parts is shown below.
(A) Feed Roller
(B) Retard roller (inside the front unit)

2
When closing the front unit, make sure that it is completely closed by gently pressing the left and right until you hear a click.

About Replacement Parts
Replacement methods vary depending on the type of replacement part you purchased.
Refill replacement rollers: "Replacement using refill replacement rollers" (See p. 41)
Replacement roller kit: "Replacement using a replacement roller kit" (See p. 46)
Replacement using refill replacement rollers
Replacing the Feed Roller
Reset the roller count after replacement of the roller. "Resetting the Counters" (See p. 48)
For details about the replacement procedure, see the video.

https://soft.canon-elec.co.jp/ims/c300/en/movie/
1 Open the roller cover.

2 Remove the feed roller.

3 Remove the blue fixing component on the right side.

4 Hold the knob (A) on the left and remove the roller on the right, the blue shaft, and the roller on the left in that order.
IMPORTANT
Do not touch the metal shaft (B).

5
Prepare a new feed roller. Hold the knob (A) and install the roller, the blue shaft, and the roller on the left in that order.
Mount the rollers so that the (C) sides face (A).

IMPORTANT
Do not touch the metal shaft (B).

Hint
The rollers are easier to mount if you rotate them toward you while inserting.

6
Firmly insert the blue fixing component all the way in.
Make sure that the end of the metal shaft and the fixing component are aligned.

7
Install the feed roller.

8
Close the roller cover.


IMPORTANT
If you are unable to install it properly, please check the following.
- Are the rollers mounted in the correct orientation?
- Is the blue shaft installed between the rollers?
• Is the blue fixing component firmly inserted?
Replacing the Retard Roller
Reset the roller count after replacement of the roller. "Resetting the Counters" (See p. 48)
For details about the replacement procedure, see the video.

https://soft.canon-elec.co.jp/ims/c300/en/movie/
1
Open the roller cover.

2
Remove the retard roller.

3 Remove the blue fixing component on the left side.
IMPORTANT
Hold the entire fixing member securely and remove it.

4 Hold the knob (A) on the right and remove the roller.
IMPORTANT
Do not touch the metal shaft (B).

5 Hold the knob (A) on the right side as you insert the shaft into the new roller firmly all the way in with the side (D) facing (A).
Make sure that the end of the black shaft and the roller are aligned.
IMPORTANT
Do not touch the metal shaft (B).
Hint
The rollers are easier to mount if you rotate them while inserting.
(C) (D)

6
Align the orientation of the hole in the blue fixing component with the metal shaft and firmly insert it all the way into the blue fixing component.
Make sure that the end of the metal shaft and the fixing component are aligned.

7
Starting from the bottom of part (E), mount the right side of the new retard roller to the scanner first.

8
Push the left side of the retard roller to secure it to the scanner.

9
Close the roller cover.

!
IMPORTANT
If you are unable to install it properly, please check the following.
- Are the rollers mounted in the correct orientation?
- Are the blue fixing components mounted in the correct orientation?
- Are the roller and the blue fixing components firmly inserted?

Replacement using a replacement roller kit
Replacing the Feed Roller
Reset the roller count after replacement of the roller. "Resetting the Counters" (See p. 48)
1 Open the roller cover.
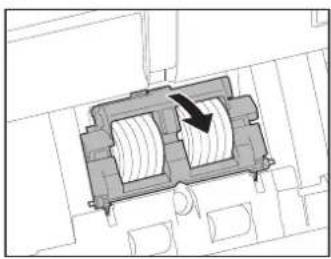
2 Remove the feed roller.

3 Install the feed roller.

4 Close the roller cover.

Replacing the Retard Roller
Reset the roller count after replacement of the roller. "Resetting the Counters" (See p. 48)
1 Open the roller cover.

2 Remove the retard roller.

3 Starting from the bottom of part (A), mount the right side of the new retard roller to the scanner first.
(A)

4 Push the left side of the retard roller to secure it to the scanner.

5 Close the roller cover.

Resetting the Counters
Windows
IMPORTANT
Log on using an account with Administrator privileges.
1 Click the [Start] button, then click [All apps] – [Canon DR-C300 Series] – [Canon imageFORMULA Driver Setting Tool] in that order.

Canon imageFORMULA Driver Setting Tool will start.
2 Click the [Maintenance] tab, and then click [Reset].

The counter resets.
3 Click [Close] to close Canon imageFORMULA Driver Setting Tool.
Mac
1 Open the scanner driver setting screen.
2 Click (Information button). The [Scanner Information] dialog box opens.

3 Click [Maintenance]. The [Maintenance] dialog box opens.
4 Click [Reset].

5 Click to close the dialog box.
Setting Auto Power Off
The product turns off automatically if it is not operated for 4 hours, such as when there are no scanning or other operations. To disable this setting, follow the procedure below.
Windows
IMPORTANT
Log on using an account with Administrator privileges.
1 Click the [Start] button, then click [All apps] – [Canon DR-C300 Series] – [Canon imageFORMULA Driver Setting Tool] in that order.
Canon imageFORMULA Driver Setting Tool will start.

2 Click the [Control] tab.
3 Click the [Setting] button under [Hardware].

4 Uncheck [Turn off automatically after 4 hours].

5 Click [OK].
6 Click [Close] to close Canon imageFORMULA Driver Setting Tool.
Removing the Document Feed Tray
When you will store or otherwise not use the scanner for a long period of time, remove the document feed tray.

About the Canon imageFORMULA Driver Setting Tool Windows
The Canon imageFORMULA Driver Setting Tool can be used to check the information of the scanner, or to configure the maintenance settings.
For details, refer to the Help of this tool.
Configuration of the Canon imageFORMULA Driver Setting Tool
Canon imageFORMULA Driver Setting Tool consists of the following tabs.
[Information] tab
You can check the firmware's version information and scanner information.
[Maintenance] tab
You can reset the counter of the roller, or carry out the shrinkage rate control.
[Control] tab
You can carry out the control settings of hardware and drivers, and perform the read or write of the control settings.
From the [Hardware] settings, you can set the automatic power-off function.
[Diagnostic] tab
You can output or delete the log file.
Start-up of the Canon imageFORMULA Driver Setting Tool
Click the [Start] button, then click [All apps] – [Canon DR-C300 Series] – [Canon imageFORMULA Driver Setting Tool] in that order. Canon imageFORMULA Driver Setting Tool will start.
Troubleshooting
When in Trouble
This section provides recommended solutions to common problems.
Problems with the scanner: See p. 52
Problems with scanning: See p. 53
Refer also to the Help supplied with the scanner driver and CaptureOnTouch.
Read also "Frequently Asked Questions" (See p. 65), which contains frequently asked questions and answers.
If you have a problem that is not solved by the following, contact your local authorized Canon dealer or service representative.
Problems with the Scanner
■ The scanner will not turn on.
| The power plug is not connected to a power outlet. | Confirm that the AC adapter is plugged firmly into a power outlet. |
| The power outlet is not functioning. | Confirm that the power outlet used is functioning. Connect another device to the power outlet and confirm that the power is on. |
■ The scanner turns off automatically.
| The auto power off function of the scanner is enabled. | When the scanner's auto power off function is enabled, the scanner's power is automatically turned off after 4 hours, regardless of whether a connection is active.Turn the scanner back on, and as necessary, disable the Auto Power Off. (See p. 49) |
| [Disable USB-linked power switch] in Canon imageFORMULA Driver Setting Tool is disabled. | If [Disable USB-linked power switch] is disabled, the scanner will automatically turn off when the computer is shut down or the USB cable is disconnected.If necessary, check [Disable USB-linked power switch] in Canon imageFORMULA Driver Setting Tool. |
| The USB connection is not recognized. | If 20 minutes elapse without the scanner and computer being connected by USB cable, the power will automatically turn off. If the computer is turned off, it will also be recognized as being disconnected.Connect the scanner to the computer with a USB cable. Also, confirm that the computer is turned on. |
■ The scanner is not recognized.
| The power to the scanner is not on. | Confirm that the scanner is turned on. (See p. 17) |
| The scanner is not properly connected to the computer with a USB cable. | • Firmly plug in the USB cable connecting the scanner and the computer.• Try using a different USB cable port. If that does not resolve the problem, try using a different USB cable. |
| The computer's USB interface does not support the scanner. | The scanner cannot be guaranteed to work with all USB interfaces. |
| A cable other than the supplied USB cable is used. | Confirm that the supplied USB cable is used to connect the scanner to the computer. The scanner cannot be guaranteed to work with all available USB cables. |
| The scanner is connected to the computer via a USB hub. | Remove the USB hub and connect the scanner directly to the computer. |
| The scanner driver is not installed. | Refer to the Setup Guide to install the scanner driver. |
■ Internal scanner error
| The hardware error icon is lit. | Turn the power off and then on again. If the error appears even after you turn the power off and then on again, contact the person in charge of the system. |
Problems with Scanning
Problems with feeding
■ Feeding does not start.
| The document is not fully inserted. | Insert the document all the way in. (See p. 21) |
| The scanner has not been able to communicate with the computer. | (1) Check whether the USB cable is connected properly.(2) If the situation does not improve, unplug and plug back in the USB cable.(3) If the situation still does not improve, restart the scanner and the computer. |
| The document is not placed in the document feed tray properly. | If the leading edge of the document is curled, straighten it before placing the document.For thin documents, push them in until the leading edge hits the stopper. |
| Windows lock errors occur frequently. | WindowsWindows may have failed in controlling USB communication. In Canon imageFORMULA Driver Setting Tool, select [Do not use USB connection control of operating system]. |
■ Documents feed askew (scanned images are slanted).
| There is a gap between the document and the document guides. | Align the document guides to fit the documents as closely as possible, and load the documents so that they feed straightly. |
| The document feed extension support is not opened. | Open the document feed extension support and place the document. |
| The rollers are dirty. Clean the rollers. (See p. 37) | |
| The rollers are worn out. Replace the rollers. (See p. 39) | |
| The inside of the scanner is dirty. | If there are foreign objects such as trash inside the scanner, the documents will not be correctly transported. Clean the inside of the scanner. |
| If the document stack contains mixed sizes, the leading edges of the document are not aligned. | Align the leading edges of the document.√ |
| The function to automatically straightens skewed images is not enabled. | For [Automatically straightens skewed images] in [Document], set [Straightens with angle of fed documents] or [Straightens with angle contents of fed documents]. |
| The function to automatically straighten skewed images is not enabled. | WindowsTurn on [Automatically straightens skewed] on the [Basic] tab on the scanner driver settings screen.MacTurn on [Deskew] on the scanner driver settings screen. |
■ Documents jam.
| The rollers are not mounted properly. | Mount the rollers properly. (See p. 39) |
| The rollers are dirty. Clean the rollers. (See p. 37) | |
| Document pages stick together. | Proper scanning may not be possible when document pages stick together due to static electricity. Fan the documents before you load them. |
| Dust and dirt have collected on the paper detection sensor. | Clean the paper detection sensor. (See p. 35) |
| The error code “P042-001” has appeared on the computer. | In Canon imageFORMULA Driver Setting Tool, select [Prioritize prevention of paper jam]. |
| If the problem is not solved even after the above measures | Set the feed selection lever to Bypass mode, and manually feed the scanner one page at a time. |
■ A document double feed occurs.
| The rollers are not mounted properly. | Mount the rollers properly. (See p. 39) |
| The rollers are dirty. Clean the rollers. (See p. 37) | |
| Document pages stick together. | Proper scanning may not be possible when document pages stick together due to static electricity. Fan the documents before you load them. |
| If the problem is not solved even after the above measures | Set the feed selection lever to Bypass mode, and manually feed the scanner one page at a time. |
| The leading edges of the document are not aligned. | If the leading edges of the document are not aligned, a double feed may occur. Align the leading edges of the document. |
■ A plastic card, envelope, or booklet is detected erroneously as a double feed.
| Ultrasonic double feed detection is enabled. | WindowsCheck [Detect by Ultrasonic] on the [Error Detection] tab in the advanced settings dialog box.Check [Rapid recovery system] on the [Others] tab in the advanced settings dialog box.MacCheck [Double Feed Detection] in the advanced settings dialog box or set the detection method to [Detect by Length].Check [Rapid recovery system] in the advanced settings dialog box. |
| Ultrasonic double feed detection is enabled. | WindowsCheck [Detect by Ultrasonic] on the [Error Detection] tab on the scanner driver settings screen.Check [Rapid recovery system] on the [Others] tab on the scanner driver settings screen.MacCheck [Double Feed Detection] on the scanner driver settings screen or set the detection method to [Detect by Length].Check [Rapid recovery system] in the [More] dialog box on the scanner driver settings screen. |
■ Paper jams occur when passports are scanned.
| Passport mode is not set. | On the [Feeding] tab on the scanner driver settings screen, set [Document type] to [Passport], then scan. For details, refer to the Help of the scanner driver. |
| The document is too thick to feed without a carrier sheet. | Put the passport into the optional carrier sheet (for passports), and on the [Feeding] tab on the scanner driver settings screen, set [Carrier sheet] to [Carrier sheet (for passports)], then scan. For details, refer to the Help of the scanner driver. |
■ When scanning a passport, the error "Passports that are not inserted in the carrier sheet can be damaged in separate mode. Please set the feed selection lever to bypass mode." occurs.
| The feed selection lever is set to separate mode. | Set the feed selection lever to bypass mode. |
| The document is too thick to feed without a carrier sheet. | Put the passport into the optional carrier sheet (for passports), and on the [Feeding] tab on the scanner driver settings screen, set [Carrier sheet] to [Carrier sheet (for passports)], then scan. For details, refer to the Help of the scanner driver. |
Problems with the software/scanner driver
■ Pages are missing.
| A document double feed occurs. | Refer to “A document double feed occurs.” (See p. 55). |
| The skip blank page function is enabled. | If [Scanning Side] is set to [Skip Blank Page] in the advanced settings dialog box, a document with few black portions may be unintentionally deleted (skipped). Decrease the Set the likelihood of skipping blank page value. For details, refer to the Help of the scanner driver. Alternatively, set [Scanning Side] to an option other than [Skip Blank Page] in the advanced settings dialog box. |
| The skip blank page function is enabled. | When [Scanning Side] is set to [Skip Blank Page] on the scanner driver settings screen, a document with few black portions may be unintentionally deleted (skipped). Decrease the Set the likelihood of skipping blank page value. For details, refer to the Help of the scanner driver. Alternatively, set [Scanning Side] to an option other than [Skip Blank Page] on the scanner driver settings screen. |
■ All of the placed documents have been scanned, but the scanned image does not appear on the application.
| The skip blank page function is enabled. | If [Scanning Side] is set to [Skip Blank Page] in the advanced settings dialog box, a document with few black portions may be unintentionally deleted (skipped). Decrease the Set the likelihood of skipping blank page value. For details, refer to the Help of the scanner driver. Alternatively, set [Scanning Side] to an option other than [Skip Blank Page] in the advanced settings dialog box. |
| The separation paper for batch separation is discarded. | If [Separation paper] is set to [Discard paper] in the [Batch separation setting] of CaptureOnTouch, set it to [Include in the current document] or [Include in a new document]. |
| The scanner is waiting for additional documents. | When [Feeding Option] is set to [Panel-Feeding] or [Automatic Feeding] on the scanner driver settings screen, the scanned image may not be displayed until the Stop button on the scanner is pressed to end the scanning operation depending on the application. |
| The skip blank page function is enabled. | When [Scanning Side] is set to [Skip Blank Page] on the scanner driver settings screen, and all scanned documents are determined to be blank, no scanned image is output.Decrease the Set the likelihood of skipping blank page value or set [Scanning Side] to an option other than [Skip Blank Page]. |
■ Memory becomes insufficient and scanning stops.
| The computer memory is insufficient. | If you configure scanning conditions that use a large amount of the computer's memory, scanning may stop because of insufficient memory. Although this depends on the computer's memory size, the possibility of insufficient memory increases if any of the following scanning conditions overlap.[Color Mode] is set to [24-bit Color]A large page size (e.g. Legal) is specified as the [Page Size]. Alternatively, the page size is set to [Scanner's Maximum]A high resolution (600dpi etc.) is specified for [Dots per inch]If an error message appears due to insufficient memory while scanning is in progress, exit the application, change the scanning conditions (e.g. reduce the resolution or page size) and then try scanning again. In addition, the amount of memory used can be contained by turning off [Moire Reduction] and [Prevent Bleed Through/Remove Background] if they are set to on. |
| The memory is insufficient due to scanned image data. | Review the settings of the scanner driver or refer to the Help of applications. |
■ Documents are not scanned according to the settings configured in the scanner driver.
| The CaptureOnTouch settings take precedence. | Refer to “Common Problems and Solutions” in the Help of CaptureOnTouch.When you scan using Select document panel registered with CaptureOnTouch, the CaptureOnTouch settings have priority over the scanner driver settings. Edit settings in the Select document panel, or create a new Select document panel using the desired scanning conditions. |
| There are settings that take precedence over the scanner driver settings. | WindowsIf [Prevent changing default settings] is enabled in the Canon imageFORMULA Driver Setting Tool, scanning is always performed at the default values. Confirm the settings of the Driver Setting Tool.Depending on the application, scanning may be performed by changing the settings made in the scanner driver. Refer to the Help of applications. |
■ Scan is too slow.
| There is a conflict of resources between other application software and the computer. | If the system memory is insufficient due to other application software or if the access to storage increases, the scan speed may slow down. Close such software before scanning. |
| Antivirus software is monitoring. | If access to temporary files or memory is being monitored by antivirus software, the scan speed may slow down. In this case, either quit the antivirus software or remove scanning from the monitoring targets. |
| There is not enough free space on the computer's storage. | If there is not enough free space in the computer's storage, the scanner may be unable to create the necessary temporary files for scanned data. Organize the data on the storage and secure free space. |
| Scanning is performed in long document mode. | If you are scanning in Long Document Mode, then disable Long Document Mode. (See p. 33) |
Refer to "Common Problems and Solutions" in the Help of CaptureOnTouch.
Refer to the Help of applications.
■ The scanned image files cannot be opened in an application.
| The application does not support compressed TIFF files. | Depending on the application, if TIFF files are compressed, they cannot be opened. Select “None” as the image file compression format before scanning. |
| The application does not support compressed TIFF files. | Refer to “Setting TIFF files” in the Help of CaptureOnTouch. |
| The application does not support multi-page TIFF files. | Scanned images saved as multi-page TIFF files can be opened only by programs that support this file format. |
■ Multiple pages of scanned images cannot be saved to a single file.
| An attempt is made to save multiple pages of scanned images to a single file in a format that does not enable such saving. | Refer to “Common Problems and Solutions” in the Help of CaptureOnTouch.Depending on the file format, multiple scanned image pages cannot be saved as a single file with CaptureOnTouch.Format that enables such saving: TIFF, PDFFormat that does not enable such saving] JPEG, PNG, BMP |
Refer to the Help of applications.
■ There is a display glitch on the UI screen of CaptureOnTouch.
| There are too many Scan mode panels,Select output panels, or Scanning Shortcut panels. | Depending on the computer that you are using, a display glich may occur on the UI screen when there are too many Scan mode panels, Select output panels, or Scanning Shortcut panels. Delete any panel that you will not use. |
Problems with scanning quality
■ The size detection and deskew functions fail.
| The edges of the document are not straight. | Documents with jagged edges from perforations, edges cut diagonally, or curved edges can cause failures in size detection and deskew functions.Set the [Page Size] in [Document] to a standard size such as A4 or Letter. Alternatively, turn [Automatically straightens skewed images] OFF. |
| The edges of the document are black. | Documents with black edges can cause failures in size detection and deskew functions, or edges of the document may be cut off.Set the [Page Size] in [Document] to a standard size such as A4 or Letter. Alternatively, turn [Automatically straightens skewed images] OFF. |
| You are scanning a document with black edges without inserting it in a carrier sheet while [Document type] is set to [Carrier sheet] in the advanced settings dialog box. | If [Document type] is set to [Carrier sheet] in the advanced settings dialog box, placing a document with black edges without inserting it in a carrier sheet and scanning it may result in failures in size detection and deskew functions.Set [Page Size] to a standard size such as A4 or Letter or to a custom page size in the advanced settings dialog box. Alternatively, uncheck [Automatically straightens skewed] (Windows)/[Deskew] (macOS). Alternatively, set [Document type] to [Plain paper]. |
| The edges of the document are not straight. | Documents with jagged edges from perforations, edges cut diagonally, or curved edges can cause failures in size detection and deskew functions.Set [Page Size] to a standard size such as A4 or Letter or to a custom page size on the scanner driver settings screen. Alternatively, uncheck [Automatically straightens skewed] (Windows)/[Deskew] (macOS). |
| The edges of the document are black. | Documents with black edges can cause failures in size detection and deskew functions, or edges of the document may be cut off.Set [Page Size] to a standard size such as A4 or Letter or to a custom page size on the scanner driver settings screen. Alternatively, uncheck [Automatically straightens skewed] (Windows)/[Deskew] (macOS). |
| You are scanning a document with black edges without inserting it in a carrier sheet while the [Document type] for the scanner driver is set to [Carrier sheet]. | When [Document type] is set to [Carrier sheet] on the scanner driver settings screen and you scan a document with black edges without inserting it in a carrier sheet, the size detection and deskew functions may fail.Set [Page Size] to a standard size such as A4 or Letter or to a custom page size on the scanner driver settings screen. Alternatively, uncheck [Automatically straightens skewed] (Windows)/[Deskew] (macOS) or set [Document type] to [Plain paper]. |
■ Part of the scanned image is cut off.
| Dust and dirt have collected on the paper detection sensor. | Clean the paper detection sensor. (See p. 35) |
| There is a gap between the document and the document guides. | Align the document guides to fit the documents as closely as possible, and load the documents so that they feed straightly. |
| The resolution is high for scanning in Long Document Mode. | When scanning documents with [Long Document Mode (3000 mm)] or [Long Document Mode (6096 mm)] selected on the [Long Document Mode] tab, the image may not be scanned completely if 300/400/600 dpi is selected. If this happens, lower the resolution and scan again. |
| The edges of the document are black. | The edges of documents with black edges may be cut off. Set the [Page Size] in [Document] in CaptureOnTouch to a standard size such as A4 or Letter. Alternatively, turn [Automatically straightens skewed images] OFF. |
| The rollers are worn out. | Scanned images may become stretched in the vertical direction due to wear of the rollers. Adjust the reduction ratio in the [Maintenance] tab of the Canon imageFORMULA Driver Setting Tool (Windows) or the scanner driver (Mac). |
| The passport or carrier sheet is not in the correct condition when the passport is scanned. | Depending on the condition of the passport or carrier sheet, the image may be cut off. If this is the case, set [Page Size] to a larger paper size (A4, for example) on the scanner driver settings screen, and then scan again. |
■ If white lines or streaks appear in scanned images.
| The scanner glass and the rollers are dirty. | Clean both sides of the scanner glass, and the rollers. If a sticky substance such as glue or correction fluid is found, carefully wipe with just enough pressure to clean the area where the lines appear. If the problem cannot be solved by cleaning, the internal glass may be scratched. Contact your local authorized Canon dealer or service representative. |
■ The scanned characters and images are blurred.
| The compression rate is set high. | From the JPEG and PDF settings, select a setting for prioritizing image quality. |
| The scanning resolution is low. Increase [Dots per inch]. | |
| The color unevenness reduction function is too strong, or the edge emphasis function is too soft. | Uncheck [Color unevenness reduction] or reduce the reduction level on the scanner driver settings screen.Alternatively, set [Edge emphasis] towards [Sharp]. Alternatively, increase [Dots per inch]. |
■ The scanned image has uneven shades.
| Dot printing (halftone) results in moire patterns (grid-shaped shading). | See “Moire patterns (grid-shaped shading) appear.” (p. 63) |
| Unevenness in paper or printing appears in the scanned image. | Enable [Color unevenness reduction] or increase the reduction level in the advanced settings dialog box. Alternatively, enable [Background smoothing]. |
| Dot printing (halftone) results in moire patterns (grid-shaped shading). | See “Moire patterns (grid-shaped shading) appear.” (p. 63) |
| Unevenness in paper or printing appears in the scanned image. | Enable [Color unevenness reduction] or increase the reduction level on the scanner driver settings screen. Alternatively, enable [Background smoothing]. |
■ The back of the document is reflected.
Enable [Prevent Bleed Through / Remove Background] in the advanced settings dialog box.
Alternatively, change the settings for [Brightness] or [Contrast].
When [Active Threshold], [Advanced Text Enhancement] (Windows only), or [Advanced Text Enhancement II] is selected for [Color mode] in the advanced settings dialog box, faint bleed-through might be emphasized. In such cases, change the color mode.
Enable [Prevent Bleed Through / Remove Background] on the scanner driver settings screen. Alternatively, change the settings for [Brightness] or [Contrast].
When [Active Threshold], [Advanced Text Enhancement] (Windows only), or [Advanced Text Enhancement II] is selected for [Color mode] on the scanner driver settings screen, faint bleed-through might be emphasized. In this case, change the color mode.
■ Moire patterns (grid-shaped shading) appear.
Select either [High Speed Moire Reduction] or [High Quality Moire Reduction] for [Moire Reduction] in the advanced settings dialog box. Changing the resolution setting can sometimes improve moire patterns. Change the resolution to another value.
Select either [High Speed Moire Reduction] or [High Quality Moire Reduction] for [Moire Reduction] on the scanner driver settings screen. Changing the resolution setting can sometimes improve moire patterns. Change the resolution to another value.
■ Characters are not recognized properly.
| The characters on the document are faint, or the color of the characters is close to that of the background. | Select [Active Threshold], [Advanced Text Enhancement] (Windows only), or [Advanced Text Enhancement II] for [Color mode] in the advanced settings dialog box. Alternatively, to make the characters stand out, change the settings for brightness and contrast. |
| There are ruled lines near the characters. | Change the [Color drop-out] setting in the advanced settings dialog box to drop out the ruled lines. |
| The line of characters is thin. | Change [Character Emphasis] in the advanced settings dialog box to make it thicker. |
| The line of characters is blurry. | Turn off [Color unevenness reduction] or reduce the reduction level in the advanced settings dialog box. Alternatively, set [Edge emphasis] towards [Sharp]. |
| The characters are too large or too small. | If the characters are too large, reduce [Dots per inch]. If they are too small, increase [Dots per inch]. |
Refer to the Help of applications.
■ The barcode or QR code is not recognized properly.
| The printing of the barcode or QR code is faint. | WindowsEnable [Set the barcode detecting image to contrast enhanced] with the Canon imageFORMULA Driver Setting Tool. |
| The resolution of the scanned image is low, or the printing of the barcode or QR code is small. | WindowsEnable [Set the barcode detecting image to 300 dpi or higher] with the Canon imageFORMULA Driver Setting Tool. |
Frequently Asked Questions
This section provides frequently asked questions and answers.
Questions about CaptureOnTouch
Here are questions and answers about CaptureOnTouch.
For details, refer to the Help of CaptureOnTouch.
Problem 1. Where are scanned images saved? Can the save destination be changed?
Solutions 1. In the case of Standard Scanning, they are saved to the output destination set in the Select output panel, and in the case of Scanning Shortcut, they are saved to the output destination set in the [Output] tab of the Scanning Shortcut Panel Edit dialog box. All destination locations can be changed to other folders.
Problem 2. How are the scan settings configured?
Solutions 2. By clicking the Edit button in the Select document panel, you can edit the scan settings when the Select document edit screen dialog box opens.
Problem 3. How do I save multiple pages in one file, or save one file per page?
Solutions 3. When scanned images are saved in BMP, JPEG or PNG format, each image is always saved in a separate file. When scanned images are saved in PDF or TIFF format, you can specify multi- or single-page files. Refer also to "Multiple pages of scanned images cannot be saved to a single file." (See p. 60).
Problem 4. Can I copy or back up scanner setting configurations?
Solutions 4. The setting configurations can be backed up and restored using [Back Up/Restore] on the [Maintenance] tab on the [Environmental settings] dialog box.
Problem 5. What rules apply to scanned image file names?
Solutions 5. In the case of Standard Scanning, it depends on the settings in the Select output panel, and in the case of Scanning Shortcut, it depends on the settings in the [Output] tab of the Scanning Shortcut Panel Edit dialog box. The file name of the scanned image is determined by entering it in [File name / folder name] in the [Output] tab. Click the [Detail Settings] button to set the rules for generating file names.
Problem 6. How do I print scanned data?
Solutions 6. For both Standard Scanning and Scanning Shortcut, select [Print] for [Output method selection] in the [Output] tab. To use this function, you need to install a plug-in. The plug-in can be installed by selecting its checkbox when installing CaptureOnTouch.
Problem 7. I want to save to other folders
Solutions 7. In CaptureOnTouch, destinations other than [Save to folder] are provided as a plug-in. By installing the plug-in, the scanned image can be printed, attached in an e-mail, or shared using various cloud services. The plug-in can be installed by selecting its checkbox when installing CaptureOnTouch. The available output destinations vary depending on the installed plug-in.
Problem 8. How can I attach scanned data to an e-mail (or send it as e-mail)?
Solutions 8. For both Standard Scanning and Scanning Shortcut, select [Attach to E-mail] for [Output method selection] in the [Output] tab.
To use this function, you need to install a plug-in. The plug-in can be installed by selecting its checkbox when installing CaptureOnTouch.
Questions about the scanner driver
Here are questions and answers about the scanner driver. For details, refer to the Help of the scanner driver.
Problem 1. How do I scan a document larger than A4 (Letter)?
Solutions 1. (1) Set the feed selection lever to Bypass mode.
(2) Crease the document firmly down its center to fold the document in half. Fold the document so that its edges are neatly aligned.
(3) Place the document in the scanner with the folded edge facing right and the top edge facing downward.
(4) Set [Page Size] to half the size of the paper you are actually going to scan on the scanner driver settings screen. Select [Folio] for [Scanning Side], then scan.
Problem 2. How do I combine both sides of a document and output into one image?
Solutions 2. Set [Scanning Side] to [Folio] on the scanner driver setting screen, then scan. To change the position and direction of combination, change the [Folio] settings.
Problem 3. How can I skip blank pages, and scan only non-blank pages?
Solutions 3. Set [Scanning Side] to [Skip Blank Page] on the scanner driver setting screen, then scan.
Problem 4. How do I scan cards?
Solutions 4. Set a card in landscape orientation in the scanner. If the card is embossed, set the feed selection lever to Bypass mode.
Set [Page Size] to the same size as the card or to [Match original size] on the scanner driver settings screen.
Windows
Disable [Detect by Ultrasonic] on the [Error Detection] tab on the scanner driver settings screen, then scan.
Mac
Uncheck [Double Feed Detection] on the scanner driver settings screen or set the detection method to [Detect by Length], then scan.
Problem 5. How do I load and scan documents with mixed sizes?
Solutions 5. Pull out the document eject tray at an angle. Set [Page Size] to [Match original size] on the scanner driver setting screen, then scan.
Problem 6. How do I scan a document whose size is not found in the page size list?
Solutions 6. Set [Page Size] to [Match original size] on the scanner driver setting screen, then scan. Alternatively, register the same size as that of the document to scan in [Page Size], then scan.
Problem 7. How do I scan cards?
Solutions 7. Set the cards vertically in the scanner. Set [Page Size] to the same size as that of the card or to [Match original size] on the scanner driver settings screen. Set [Document Orientation] according to the print orientation of the card, and scan.
Problem 8. How do I scan a document that includes both photos and characters?
Solutions 8. Select [Document with photo] for [User Preference] (Windows)/[Favorite Settings] (macOS) on the scanner driver settings screen or select [Document with photo] for [Document type], then scan.
Problem 9. How do I scan passports?
Solutions 9. (1) Set the feed selection lever to Bypass mode.
(2) Load the thicker side as the leading edge and the page of the passport you want to scan facing down. If a passport is difficult to feed because it has been damaged, or something, or if you want to scan it at a high resolution of 400 dpi or more, then put the passport in a carrier sheet (for passports) and put it on the scanner with the binding as the leading edge and the side to be scanned facing down.
(3) Select [Passport] for [Document type] on the scanner driver settings screen, and then select [None] or [Carrier sheet (for Passport)] in [Carrier Sheet], and then scan it.
Depending on the condition of the carrier sheet or passport, a paper jam may occur or the scanner's image correction may not function properly. Configure the settings as shown below.
(1) Set [Page Size] to a larger paper size (A4, for example) on the scanner driver settings screen, and then scan again.
(2) Set [Dots per inch] to 300 dpi or less on the scanner driver settings screen.
(3) Clean the roller.
Clearing a Paper Jam
When paper jams are detected during scanning, the icon indicating a paper jam appears in the display and scanning is interrupted.
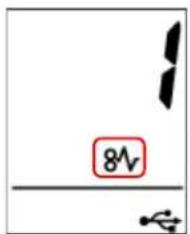
When a paper jam or double feed occurs during scanning, use the following procedures to clear them.

CAUTION
Be careful when removing jammed paper. Take care not to cut your hand on the edges of the paper.
1 Remove any documents that have been left in the feed Tray.

2 Pull the OPEN lever and pull open the front unit toward you.

3 Remove the jammed document.


IMPORTANT
Make sure to pull the document out carefully, without applying too much force. If the jammed paper tears while you are pulling it out, make sure to remove any remaining pieces from inside the scanner.
4
Close the front unit by gently pushing it up on both sides until it clicks into place. Make sure that the front unit is completely closed by pushing until you hear a click.

After removing the jammed paper, check to see if the last page was scanned correctly, and then continue scanning.

Hint
- When the [Rapid recovery system] check box is enabled in the scanner driver settings screen, you can resume a scanning operation even if it is interrupted by a paper jam by removing the document and resuming from the document that was being fed when the interruption occurred.
As the image of the document that was being fed at the time of the interruption may not be saved in such cases, be sure to verify the last scanned image before resuming the operation.
- If the computer displays the error code "P042-001", then select [Prioritize prevention of paper jam] in Canon imageFORMULA Driver Setting Tool.
Uninstalling the Software
Some scanner malfunctions can be resolved by reinstalling the software. Before reinstalling the software, make sure to completely uninstall any previous installation first. The following procedure uses the scanner driver as an example. When following the procedure, read the ISIS/TWAIN driver as the driver used.
Windows
IMPORTANT
As always when uninstalling software, log on using an account with Administrator privileges.
1 Click the [Start] button, and then click [All apps].

2 Click [Windows Tools].

3 Click [Control Panel].

The Control Panel appears.
4 Click [Uninstall a program].

5 From the program list, select the application to be removed and click [Uninstall].

The file-deletion confirmation screen appears.
![CANON imageFORMULA DR-C350 - From the program list, select the application to be removed and click [Uninstall]. - 2](/content/2026/08/1630015/images/9556c1801302a7f880156a46e5f53ab16684f6aac062d6e9ff2e1182c008d8da.jpg)
6 Click [Yes] to proceed with uninstallation.
Mac
No uninstaller is provided for macOS drivers. To uninstall, use Finder to delete the following files.
/Library/Image Capture/TWAIN Data Sources/DRC350
Or
/Library/Image Capture/TWAIN Data Sources/DRC340
Appendix
Specifications
Main Unit
Type Desktop sheetfed scanner
Scanning Document Size
Plain Paper
Size Width: 50 mm to 216 mm (2" to 8.5")
Length: 54 mm to 356 mm (2.1" to 14") (You can
scan documents up to 6,096 mm (240") long by
setting the scanner to the Long Document Mode.)
Paper thickness
Normal feed: 27 to 413g / m2 (7.2 to 110 lb bond)
0.04 mm to 0.49 mm (0.00157" to 0.01929")
Bypass mode: 27 to 413g / m2 (7.2 to 110 lb bond)
0.04 mm to 0.49 mm (0.00157" to 0.01929")
Loading capacity
A4 size or smaller: 100 sheets (80 g/m 2 (21.3 lb bond))
Larger than A4 size: 80 sheets (80 g/m² (21.3 lb bond))
Make sure stacks do not exceed 11 mm in height for either of the above.
Business Card
Size Width: 50 mm to 55 mm (2" to 2.2")
Length: 85 mm to 91 mm (3.3" to 3.6")
Paper thickness
128 to 255 g/m 2 (34.1 to 68 lb bond) 0.15 mm to 0.3 mm (0.0059" to 0.0118")
Orientation Vertical feeding only
Card
Size 86 mm × 54 mm (3.38" × 2.12") (ISO/JIS standard)
Card thickness 1.4 mm (0.055") or less
Orientation Horizontal feeding only
Embossed cards can be scanned.
Loading capacity
3 cards (non-embossed), 1 card (embossed)
Passport
Size 88 mm × 125 mm (3.464" × 4.921") (ISO standard)
If a passport is difficult to feed because it has been damaged, or something, or if you want to scan it at a high resolution of 400 dpi or more, then open the passport and insert it in the separately sold carrier sheet (for passports) before feeding it
Paper thickness
6 mm (0.236") or less (including carrier sheet)
4 mm (0.157") or less (without carrier sheet)
Scanning Sensor CIS
Light source LED
Scanning Side Simplex/Duplex
Scanning modes Black and White, Error Diffusion, Grayscale, Advanced Text Enhancement, Advanced Text Enhancement II, Active Threshold, Color
Optical resolution Up to 600 dpi
Output resolution 100dpi/150dpi/200dpi/240dpi/300dpi/400dpi/600dpi/1200dpi
Scanning Speed
(Conditions: Core i7 3.0 GHz CPU, 16 GB memory, A4 document size)
DR-C350
| Grayscale | Simplex | 200dpi | 50 | pages/min |
| 300dpi | 50 pages/min | |||
| Duplex | 200dpi | 100 | images/min | |
| 300dpi | 100 images/min | |||
| Color | Simplex | 200dpi | 50 pages/min | |
| 300dpi | 40 pages/min | |||
| Duplex | 200dpi | 100 | images/min | |
| 300dpi | 80 images/min |
DR-C340
| Grayscale | Simplex | 200dpi | 40 | pages/min |
| 300dpi | 40 pages/min | |||
| Duplex | 200dpi | 80 | images/min | |
| 300dpi | 80 images/min | |||
| Color | Simplex | 200dpi | 40 | |
| 300dpi | 40 pages/min | |||
| Duplex | 200dpi | 80 | images/min | |
| 300dpi | 80 images/min | |||
Supported interfaces
| USB 3.2/USB 3.1/USB 3.0/USB 2.0 (connector type: Type-C) |
| Other functions Folio scan, double feed detection ignore |
| External Dimensions |
| 283 mm (11.2")(W) × 223 mm (8.8")(D) × 218 mm (8.6")(H)(With the document feed tray attached and the document eject tray closed) |
| 283 mm (11.2")(W) × 551 mm (21.7")(D) × 366 mm (14.4")(H)(With the document feed tray attached and the document eject tray open) |
Weight (without AC adapter)
| Approximately 3.2 kg (7.05 lb) | |
| Power Supply (using AC adapter) | |
| DC 24 V 0.7 A | |
Power Consumption
| Scanning: 15.6 W or less |
| Sleep Mode: 0.6 W |
| When power OFF: 0.1 W or less |
Operating Environment
| Temperature: 10 °C to 35 °C (50 °F to 95 °F) |
| Humidity: 20% to 80% RH |
AC Adapter (100 to 240 V type)
Model Number 6G3-0411 (24V)
Input AC 100 to 240 V, 50/60 Hz, 1.2 to 0.7 A
Output DC 24 V 2.0 A
Weight Approximately 0.3 kg (0.66 lb)
Specifications are subject to change without notice due to product improvements.
Replacement parts
Refill replacement rollers (product code: 7550C001)
This refill replacement part minimizes the elements that need to be replaced on the transport roller (feed roller, retard roller). pages/min
Replacement roller kit (product code: 7549C001)
Kit to replace the rollers (feed roller, retard roller).
- For the replacement procedure, "Replacing Consumable Parts" (See p. 39).
- Contact your local authorized Canon dealer or service representative for detailed information about the replacement parts.
Option
Carrier sheet (for passports) (product code: 0697C002)
This is a carrier sheet for scanning passports.
Carrier sheet (A4) (product code: 0697C001)
Carrier sheet (LEGAL) (product code: 0697C005)
Flatbed scanner unit 102 (product code: 2152Cxxx)
Flatbed scanner unit 202 (product code: 5031Cxxx)
Flatbed scanner unit that can be used in combination with a DR scanner. By connecting the scanner and a flatbed scanner unit to a computer, you can use the scanner as a flatbed scanner with an automatic document feeder.
About the Flatbed Scanner Unit
Windows
The optional flatbed scanner unit can be used in combination with the scanner.
System requirements
The computer must comply with the necessary system requirements of Flatbed Scanner Unit.
The scanner driver of Flatbed Scanner Unit needs to be installed to use the unit.
About Use with CaptureOnTouch
About Assigning Function to Start Button
When you connect a flatbed scanner unit, you can assign the "Scanning Shortcut" from CaptureOnTouch to the Start button of the flatbed scanner unit.
Limitation of Restarting with Start Button
When CaptureOnTouch is set not to be resident in memory, CaptureOnTouch cannot be restarted by pressing the start button on Flatbed Scanner Unit after you end CaptureOnTouch.
About Setting up the Scanner Driver
When functions of this scanner cannot be selected with the Flatbed Scanner Unit settings dialog box, click [Option] in the dialog box to open the scanner driver and make the required settings.
Dimensions

Regulations
FCC REGULATIONS (For 120 V model)
Document Scanner, Model 6130310 / 6130320
AC Adapter, Model 6G3-0411
Note: This equipment has been tested and found to comply with the limits for a Class B digital device, pursuant to Part 15 of the FCC Rules. These limits are designed to provide reasonable protection against harmful interference in a residential installation. This equipment generates, uses, and can radiate radio frequency energy and, if not installed and used in accordance with the instructions, may cause harmful interference to radio communications. However, there is no guarantee that interference will not occur in a particular installation. If this equipment does cause harmful interference to radio or television reception, which can be determined by turning the equipment OFF and ON, the user is encouraged to try to correct the interference by one or more of the following measures:
– Reorient or relocate the receiving antenna.
– Increase the separation between the equipment and receiver.
- Connect the equipment into an outlet on a circuit different from that to which the receiver is connected.
- Consult the dealer or an experienced radio/TV technician for help. Use of shielded cable is required to comply with Class B limits in Subpart B of Part 15 of FCC Rules.
Do not make any changes or modifications to the equipment unless otherwise specified in the manual. If such changes or modifications should be made, you could be required to stop operation of the equipment.
Canon U.S.A. Inc.
One Canon Park, Melville, NY 11747, U.S.A.
Tel. No. (800)652-2666
RADIO INTERFERENCE REGULATIONS (For 120 V models)
This digital apparatus does not exceed the Class B limits for radio noise emissions from digital apparatus as set out in the interference-causing equipment standard entitled “Digital Apparatus”, ICES-003 of the Industry Canada.
ENERGY STAR® Office Equipment Program

This program is for U.S.A and Canada.
As an ENERGY STAR® Partner, CANON
ELECTRONICS INC. has determined that this machine meets the ENERGY STAR® Program guidelines for energy efficiency.
The ENERGY STAR ® Office Equipment Program is
an international program that promotes energy saving through the use of computers and other office equipment. The program backs the development and dissemination of products with functions that effectively reduce energy consumption. It is an open system in which business proprietors can participate voluntarily. The targeted products are office equipment, such as computers, monitors, printers, fax, machine, copiers, and scanners. The standards and logos are uniform among participating nations.
This model doesn't provide setting options for power management.
Für EMVG
The following name may be provided for the safety regulations in each sales region of the Document Scanner.
DR-C350: Model 6130310
DR-C340: Model 6130320
Reproduction Warning
This device is designed to be used in a legal manner, in accordance with all applicable laws, including, but not limited to, counterfeit and copyright laws, as well as laws pertaining to national security.
Any person(s) found to have reproduced any of the following materials (regardless of whether such reproduction was intentional or not) for the purpose of misrepresenting such material as the original may be prosecuted in accordance with the applicable laws and regulations.
- Paper money or bank notes (domestic and foreign)
- Postage stamps, revenue stamps, or other similar stamps
• Stock certificates, bond certificates, promissory notes, cheques, or other valuable certificates
- Passports, licenses, or other certificates or documents issued by government officials or agencies
This is not an exhaustive list.
Canon is not responsible for how this scanner is used by an individual. Please note that certain intellectual property is protected by copyright law, and copyrighted items may not be reproduced without the express permission of the copyright holder except for personal or household use under limited circumstances.
Trademarks
- Canon and the Canon logo are registered trademarks, of Canon Inc. in the United States and may also be trademarks or registered trademarks in other countries.
- imageFORMULA is a trademark of CANON ELECTRONICS INC.
- Microsoft, Windows, Microsoft Edge, and Microsoft Teams are registered trademarks or trademarks of Microsoft Corporation in the United States and other countries.
- Microsoft product screen shot(s) reprinted with permission from Microsoft Corporation.
- ENERGY STAR is a registered trademark of the United States Environmental Protection Agency.
• Mac, macOS and Safari are trademarks of Apple Inc. registered in the U.S. and other countries.
• ISIS is a registered trademark of Open Text in the United States. - iDRS™ SDK 15 Windows 32 – 64 bit technology by Image Recognition Integrated Systems S.A. Copyright 1987 – 2019, I.R.I.S. S.A. All rights reserved.
- QR Code is a registered trademark of DENSO WAVE INCORPORATED in Japan and in other countries.
- USB 2.0 Type-C™ is a trademark of USB Implementers Forum.
- USB Type-C™ and USB-C™ are Trademarks of USB Implementers Forum.
- Other product and company names herein may be the trademarks of their respective owners. However, the TM and ® symbols are not used in this document.
Copyright
Copyright 2025 by CANON ELECTRONICS INC. All rights reserved. No part of this publication may be reproduced or transmitted in any form or by any means, electronic or mechanical, including photocopying and recording, or by any information storage or retrieval system without the prior written permission of CANON ELECTRONICS INC.
Disclaimers
The information in this document is subject to change without notice.
CANON ELECTRONICS INC. MAKES NO WARRANTY OF ANY KIND WITH REGARD TO THIS MATERIAL, EITHER EXPRESS OR IMPLIED, EXPECT AS PROVIDED HEREIN, INCLUDING WITHOUT LIMITATION, THEREOF, WARRANTIES AS TO MARKETABILITY, MERCHANTABILITY, FITNESS FOR A PARTICULAR PURPOSE OF USE OR NON-INFRINGEMENT. CANON ELECTRONICS INC. SHALL NOT BE LIABLE FOR ANY DIRECT, INCIDENTAL, OR CONSEQUENTIAL DAMAGES OF ANY NATURE, OR LOSSES OR EXPENSES RESULTING FROM THE USE OF THIS MATERIAL.
CANON ELECTRONICS INC. IS NOT LIABLE FOR THE STORAGE AND HANDLING OF DOCUMENTS SCANNED WITH THIS PRODUCT, OR THE STORAGE AND HANDLING OF RESULTING SCANNED IMAGE DATA. IF YOU INTEND TO DISCARD THE ORIGINALS OF SCANNED DOCUMENTS, YOU THE CUSTOMER ARE RESPONSIBLE FOR INSPECTING THE SCANNED IMAGES AND VERIFYING THAT DATA IS INTACT. THE MAXIMUM LIABILITY OF CANON ELECTRONICS INC. UNDER THIS WARRANTY IS LIMITED TO THE PURCHASE PRICE OF THE PRODUCT COVERED BY THE WARRANTY.
Index
B
Bypass mode 23
C
Canon imageFORMULA Driver Setting Tool 51
CaptureOnTouch 31
Card
Loading method 24
Carrier sheet 26,74
Counter 48
D
Display 15
Document 19
Card 24
Folio 25
Loading method 21
Double Feed Detection 33
F
Feed Roller 39,41
Flatbed scanner unit 75
Flatbed scanner unit 102 74
Flatbed scanner unit 202 74
Folio 25
Front Unit 40
L
Long Document Mode 33
M
Maintenance 35
0
Operation Panel 15
P
Paper jam 68
Passports 28,74
Power supply 17
R
Retard Roller 39,43
Roller 38
Cleaning 37
Replace 39
S
Scanning glass 37
Cleaning 37
Setting Auto Power Off 49
System Requirements 5
U
Uninstall 70
WEEE CAUTION

English
Only for European Union and EEA (Norway, Iceland and Liechtenstein)
This symbol indicates that this product is not to be disposed of with your household waste, according to the WEEE Directive (2012/19/EU) and national legislation. This product should be handed over to a designated collection point, e.g., on an authorized one-for-one basis when you buy a new similar product or to an authorized collection site for recycling waste electrical and electronic equipment (EEE). Improper handling of this type of waste could have a possible negative impact on the environment and human health due to potentially hazardous substances that are generally associated with EEE. At the same time, your cooperation in the correct disposal of this product will contribute to the effective usage of natural resources. For more information about where you can drop off your waste equipment for recycling, please contact your local city office, waste authority, approved WEEE scheme or your household waste disposal service. For more information regarding return and recycling of WEEE products, please visit www.canon-europe.com/sustainability/approach/.
Only for the United Kingdom
This symbol indicates that this product is not to be disposed of with your household waste, according to the UK Waste Electrical and Electronic Equipment Regulations. This product should be handed over to a designated collection point, e.g., on an authorized one-for-one basis when you buy a new similar product or to an authorized collection site for recycling waste electrical and electronic equipment (EEE). Improper handling of this type of waste could have a possible negative impact on the environment and human health due to
potentially hazardous substances that are generally associated with EEE. At the same time, your cooperation in the correct disposal of this product will contribute to the effective usage of natural resources. For more information about where you can drop off your waste equipment for recycling, please contact your local city office, waste authority, approved WEEE scheme or your household waste disposal service. For more information regarding return and recycling of WEEE products, please visit www.canon-europe.com/sustainability/approach/.
Français
Safety-related markings on the machine
[English] Switch (On)
[English] Switch (Off)
Power off (no standby current)
Power on/off (standby current on)
[English] Switch (Push-On/Push-Off)
Power on/off (no standby current)
[English] Heat hazard
[English] Class II equipment
Indicates this is Class II equipment
[English] DC symbol Indicates direct current
[English] DC polarity Indicates the power plug polarity
[English] Electrostatic precaution Avoid applying static electricity to the machine
CANON INDIA PVT. LTD
7TH FLOOR, TOWER B DLF CYBER TERRACES DLF PHASE III GURGAON - 122002 HARYANA, INDIA
CANON EURASIA GÖRÜNTÜLEME VE OFİS SİSTEMLERİ ANONİM ŞİRKETİ
KOZYATAĞI,DEĞİRMEN SOK.NİDA KULE İŞ MERKEZİ NO.18 KADIKÖY
PUB. 6T3-0215-E1.10 © CANON ELECTRONICS INC. 2025
- TABLE OF CONTENTS
- INTRODUCTION
- MANUALS FOR THE SCANNER
- WINDOWS
- MAC
- SYMBOLS USED IN THIS MANUAL
- WARNING
- CAUTION
- IMPORTANT
- HINT
- BEFORE USING THE SCANNER
- SYSTEM REQUIREMENTS OF SOFTWARE
- COMPUTER
- OPERATING SYSTEM
- OTHER REQUIREMENTS
- PRECAUTIONS FOR USE ON WINDOWS
- IMPORTANT SAFETY INSTRUCTIONS
- INSTALLATION LOCATION
- AC ADAPTER
- MOVING THE SCANNER
- HANDLING
- DISPOSAL
- WHEN SENDING THE SCANNER FOR REPAIRS
- FEATURES OF THE SCANNER
- SCANNER FEATURES
- COMPACT DESIGN
- USB TYPE-C INTERFACE
- ● HIGH-CAPACITY PAPER FEEDING
- ● MONOCHROME LCD
- SCAN PASSPORTS WITHOUT CARRIER SHEET
- ● SUPPORT OF A VARIETY OF DOCUMENTS
- ● FULL AUTO MODE
- PRESETS
- ● ENVIRONMENTALLY FRIENDLY ENERGY-SAVING DESIGN
- DETECTION FUNCTIONS
- ● AUTO RESOLUTION DETECTION
- ● AUTO COLOR DETECTION
- ● PAPER SIZE DETECTION
- ● CONTENT SKEW CORRECTION
- ● CHARACTER EMPHASIS
- ● ULTRASONIC DOUBLE FEED DETECTION
- ● TEXT ORIENTATION DETECTION
- ● TEXT ENHANCEMENT MODES
- IMAGE PROCESSING FUNCTIONS
- ● COLOR EMPHASIS FUNCTION
- ● COLOR DROP-OUT FUNCTION
- ● DOCUMENT WITH PHOTO MODE
- ● FOLIO SCAN AND FRONT/BACK COMBINATION FUNCTION
- ● COLOR UNEVENNESS REDUCTION
- ● MULTISTREAM WINDOWS
- BARCODE DETECTION WINDOWS
- ● PATCHCODE DETECTION WINDOWS
- ● 1200 DPI SUPPORT
- ● AUTO START
- SLEEP MODE
- ● A4/LEGAL CARRIER SHEET SUPPORT
- ● PASSPORT/BOOKLET SUPPORT
- CANON DR SCANNER MANAGEMENT TOOL (MANAGEMENT TOOL) WINDOWS
- NAMES AND FUNCTIONS OF PARTS
- FRONT VIEW (WITH THE DOCUMENT EJECT TRAY CLOSED)
- OPEN LEVER
- DOCUMENT FEED TRAY
- DOCUMENT GUIDES
- POWER BUTTON
- FRONT VIEW (WITH THE DOCUMENT EJECT TRAY OPEN)
- FEED EXTENSION SUPPORT
- FEED SUPPORT
- FEED SELECTION LEVER
- OPERATION PANEL (SEE P. 15)
- FRONT UNIT
- DOCUMENT EJECT TRAY
- DOCUMENT EJECT STOPPER
- BACK VIEW
- OPERATION PANEL
- INDICATION EXAMPLES ON THE DISPLAY
- USB CONNECTION STATUS
- BASIC OPERATION
- POWER SUPPLY
- TURNING THE POWER ON
- TURNING THE POWER OFF
- DOCUMENTS
- PLAIN PAPER
- OTHERS
- BUSINESS CARD
- CARD (PLASTIC)
- PASSPORT
- HOW TO PLACE DOCUMENTS
- SCANNING MULTIPLE DOCUMENTS
- PULL OUT THE DOCUMENT EJECT TRAY
- PULL OUT THE FEED SUPPORT
- SET THE FEED SELECTION LEVER TO NORMAL MODE
- OPEN THE DOCUMENT GUIDES WIDER THAN THE WIDTH OF THE DOCUMENT YOU ARE GOING TO SCAN
- PLACE THE DOCUMENT
- ALIGN THE DOCUMENT GUIDES WITH BOTH EDGES OF THE DOCUMENT
- WHEN SCANNING A DOCUMENT ONE PAGE AT A TIME (BYPASS MODE)
- SET THE FEED SELECTION LEVER TO BYPASS MODE
- PLACE THE DOCUMENT AS DESCRIBED IN THE “SCANNING MULTIPLE DOCUMENTS” (SEE P. 21)
- PLACING CARDS
- IN THE CASE OF CARDS WITH A BUMPY SURFACE (THAT HAVE BEEN EMBOSSED)
- IN THE CASE OF CARDS WITHOUT A BUMPY SURFACE (THAT HAVE NOT BEEN EMBOSSED)
- PLACING FOLDED DOCUMENTS
- PLACE THE DOCUMENT WITH THE FOLDED EDGE FACING RIGHT AND THE TOP EDGE FACING DOWNWARD
- SCANNING WITH CARRIER SHEETS
- LOADING PASSPORTS
- WHEN USING A CARRIER SHEET (FOR PASSPORTS)
- OPEN THE PAGE OF THE PASSPORT THAT YOU WANT TO SCAN. INSERT THE PASSPORT INTO THE CARRIER SHEET SO THAT THE THICKER SIDE IS POSITIONED AS CLOSE AS POSSIBLE TO THE SEALED END
- LOAD THE DOCUMENT WITH THE SEALED END OF THE CARRIER SHEET AS THE LEADING EDGE AND THE PAGE YOU WANT TO SCAN FACING DOWN
- SCANNING
- SCANNING WITH CAPTUREONTOUCH
- WHAT IS CAPTUREONTOUCH
- SCANNING BY SELECTING A CAPTUREONTOUCH JOB FROM THE SCANNER
- SCANNING WITH MORE DETAILED SETTINGS
- SETTING THE LONG DOCUMENT MODE
- DETECTING A DOCUMENT DOUBLE FEED
- WHAT TO DO WHEN A DOUBLE FEED IS DETECTED
- WHEN NOT USING THE RAPID RECOVERY SYSTEM
- WHEN USING THE RAPID RECOVERY SYSTEM
- MAINTENANCE
- DAILY MAINTENANCE
- CLEANING THE SCANNER
- CLEANING THE DISPLAY
- CLEANING THE INSIDE OF THE SCANNER
- CLEANING THE PAPER DETECTION SENSORS
- CLEANING THE SENSOR GLASS AND THE ROLLERS
- CLEAN THE ROLLERS (C)
- REMOVE THE RETARD ROLLER AND FEED ROLLER. (SEE P. 46, P. 47)
- WIPE THE REMOVED ROLLERS WITH A CLOTH THAT HAS BEEN DAMPENED WITH WATER AND THOROUGHLY WRUNG OUT
- REATTACH THE RETARD ROLLER AND FEEDING ROLLER. (SEE P. 46, P. 47)
- REPLACING CONSUMABLE PARTS
- MESSAGE THAT APPEARS ON THE COMPUTER
- OPENING AND CLOSING THE FRONT UNIT
- ABOUT REPLACEMENT PARTS
- REPLACEMENT USING REFILL REPLACEMENT ROLLERS
- REPLACING THE FEED ROLLER
- REPLACING THE RETARD ROLLER
- REMOVE THE BLUE FIXING COMPONENT ON THE LEFT SIDE
- HOLD THE KNOB (A) ON THE RIGHT AND REMOVE THE ROLLER
- HOLD THE KNOB (A) ON THE RIGHT SIDE AS YOU INSERT THE SHAFT INTO THE NEW ROLLER FIRMLY ALL THE WAY IN WITH THE SIDE (D) FACING (A)
- REPLACEMENT USING A REPLACEMENT ROLLER KIT
- RESETTING THE COUNTERS
- CLICK THE [START] BUTTON, THEN CLICK [ALL APPS] – [CANON DR-C300 SERIES] – [CANON IMAGEFORMULA DRIVER SETTING TOOL] IN THAT ORDER
- CLICK THE [MAINTENANCE] TAB, AND THEN CLICK [RESET]
- CLICK [CLOSE] TO CLOSE CANON IMAGEFORMULA DRIVER SETTING TOOL
- SETTING AUTO POWER OFF
- REMOVING THE DOCUMENT FEED TRAY
- ABOUT THE CANON IMAGEFORMULA DRIVER SETTING TOOL WINDOWS
- CONFIGURATION OF THE CANON IMAGEFORMULA DRIVER SETTING TOOL
- [INFORMATION] TAB
- [MAINTENANCE] TAB
- [CONTROL] TAB
- [DIAGNOSTIC] TAB
- START-UP OF THE CANON IMAGEFORMULA DRIVER SETTING TOOL
- TROUBLESHOOTING
- WHEN IN TROUBLE
- PROBLEMS WITH THE SCANNER
- PROBLEMS WITH SCANNING
- PROBLEMS WITH FEEDING
- A PLASTIC CARD, ENVELOPE, OR BOOKLET IS DETECTED ERRONEOUSLY AS A DOUBLE FEED
- PAPER JAMS OCCUR WHEN PASSPORTS ARE SCANNED
- WHEN SCANNING A PASSPORT, THE ERROR "PASSPORTS THAT ARE NOT INSERTED IN THE CARRIER SHEET CAN BE DAMAGED IN SEPARATE MODE. PLEASE SET THE FEED SELECTION LEVER TO BYPASS MODE." OCCURS
- PROBLEMS WITH THE SOFTWARE/SCANNER DRIVER
- PAGES ARE MISSING
- PROBLEMS WITH SCANNING QUALITY
- IF WHITE LINES OR STREAKS APPEAR IN SCANNED IMAGES
- THE SCANNED CHARACTERS AND IMAGES ARE BLURRED
- THE SCANNED IMAGE HAS UNEVEN SHADES
- THE BACK OF THE DOCUMENT IS REFLECTED
- MOIRE PATTERNS (GRID-SHAPED SHADING) APPEAR
- CHARACTERS ARE NOT RECOGNIZED PROPERLY
- FREQUENTLY ASKED QUESTIONS
- QUESTIONS ABOUT CAPTUREONTOUCH
- PROBLEM 1. WHERE ARE SCANNED IMAGES SAVED? CAN THE SAVE DESTINATION BE CHANGED
- PROBLEM 2. HOW ARE THE SCAN SETTINGS CONFIGURED
- PROBLEM 3. HOW DO I SAVE MULTIPLE PAGES IN ONE FILE, OR SAVE ONE FILE PER PAGE
- PROBLEM 4. CAN I COPY OR BACK UP SCANNER SETTING CONFIGURATIONS
- PROBLEM 5. WHAT RULES APPLY TO SCANNED IMAGE FILE NAMES
- PROBLEM 6. HOW DO I PRINT SCANNED DATA
- PROBLEM 7. I WANT TO SAVE TO OTHER FOLDERS
- PROBLEM 8. HOW CAN I ATTACH SCANNED DATA TO AN E-MAIL (OR SEND IT AS E-MAIL)
- QUESTIONS ABOUT THE SCANNER DRIVER
- PROBLEM 1. HOW DO I SCAN A DOCUMENT LARGER THAN A4 (LETTER)
- PROBLEM 2. HOW DO I COMBINE BOTH SIDES OF A DOCUMENT AND OUTPUT INTO ONE IMAGE
- PROBLEM 3. HOW CAN I SKIP BLANK PAGES, AND SCAN ONLY NON-BLANK PAGES
- PROBLEM 4. HOW DO I SCAN CARDS
- PROBLEM 5. HOW DO I LOAD AND SCAN DOCUMENTS WITH MIXED SIZES
- PROBLEM 6. HOW DO I SCAN A DOCUMENT WHOSE SIZE IS NOT FOUND IN THE PAGE SIZE LIST
- PROBLEM 7. HOW DO I SCAN CARDS
- PROBLEM 8. HOW DO I SCAN A DOCUMENT THAT INCLUDES BOTH PHOTOS AND CHARACTERS
- PROBLEM 9. HOW DO I SCAN PASSPORTS
- CLEARING A PAPER JAM
- UNINSTALLING THE SOFTWARE
- CLICK THE [START] BUTTON, AND THEN CLICK [ALL APPS]
- CLICK [WINDOWS TOOLS]
- CLICK [CONTROL PANEL]
- CLICK [UNINSTALL A PROGRAM]
- FROM THE PROGRAM LIST, SELECT THE APPLICATION TO BE REMOVED AND CLICK [UNINSTALL]
- CLICK [YES] TO PROCEED WITH UNINSTALLATION
- APPENDIX
- SPECIFICATIONS
- MAIN UNIT
- AC ADAPTER (100 TO 240 V TYPE)
- REPLACEMENT PARTS
- OPTION
- ABOUT THE FLATBED SCANNER UNIT
- SYSTEM REQUIREMENTS
- ABOUT USE WITH CAPTUREONTOUCH
- ABOUT ASSIGNING FUNCTION TO START BUTTON
- LIMITATION OF RESTARTING WITH START BUTTON
- ABOUT SETTING UP THE SCANNER DRIVER
- DIMENSIONS
- REGULATIONS
- FCC REGULATIONS (FOR 120 V MODEL)
- RADIO INTERFERENCE REGULATIONS (FOR 120 V MODELS)
- ENERGY STAR® OFFICE EQUIPMENT PROGRAM
- FÜR EMVG
- REPRODUCTION WARNING
- TRADEMARKS
- COPYRIGHT
- DISCLAIMERS
- INDEX
- B
- C
- D
- F
- L
- M
- P
- R
- S
- U
- WEEE CAUTION
- ENGLISH
- ONLY FOR EUROPEAN UNION AND EEA (NORWAY, ICELAND AND LIECHTENSTEIN)
- ONLY FOR THE UNITED KINGDOM
- FRANÇAIS
Brand : CANON
Model : imageFORMULA DR-C350
Category : Scanner