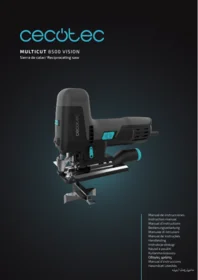
Multicut 8500 Vision - Washing machine CECOTEC - Free user manual and instructions
Find the device manual for free Multicut 8500 Vision CECOTEC in PDF.


| Product type | Jigsaw |
| Brand | Cecotec |
| Model | Multicut 8500 Vision |
| Power supply | Mains (220-240 V ~ 50/60 Hz) |
| Variable speed | Yes, via speed regulator |
| Pendulum motion | 4 selectable positions |
| Guide laser | Integrated, dedicated switch |
| Work light | Integrated LED lamp |
| Base plate | Adjustable, with release lever |
| Blade change | Tool-free, quick-release chuck |
| Edge guide | Included, bilateral mounting, max. distance 13 cm |
| Dust extraction adapter | Yes, for dust removal |
| Base protector | Included, removable |
| Protective cover | Included |
| Handle | Soft, for a better grip |
| Guide roller | Yes, for precise cutting |
| Included accessories | 8 blades, edge guide, manual |
| Safety | Disconnect before adjustment or changing accessories |
| Maintenance | Regular cleaning, disconnect the appliance before any maintenance |
| Spare parts | Available from the official technical service |
Frequently Asked Questions - Multicut 8500 Vision CECOTEC
User questions about Multicut 8500 Vision CECOTEC
0 question about this device. Answer the ones you know or ask your own.
Ask a new question about this device
Download the instructions for your Washing machine in PDF format for free! Find your manual Multicut 8500 Vision - CECOTEC and take your electronic device back in hand. On this page are published all the documents necessary for the use of your device. Multicut 8500 Vision by CECOTEC.
USER MANUAL Multicut 8500 Vision CECOTEC
Sierra de calar/ Reciprocating saw
- Parts and components 11
- Before use 11
- Operation 12
- Cleaning and maintenance 15
- Copyright 16
SOMMAIRE
EN • The coding in this manual is generic and applies to all code variants of the appliance.
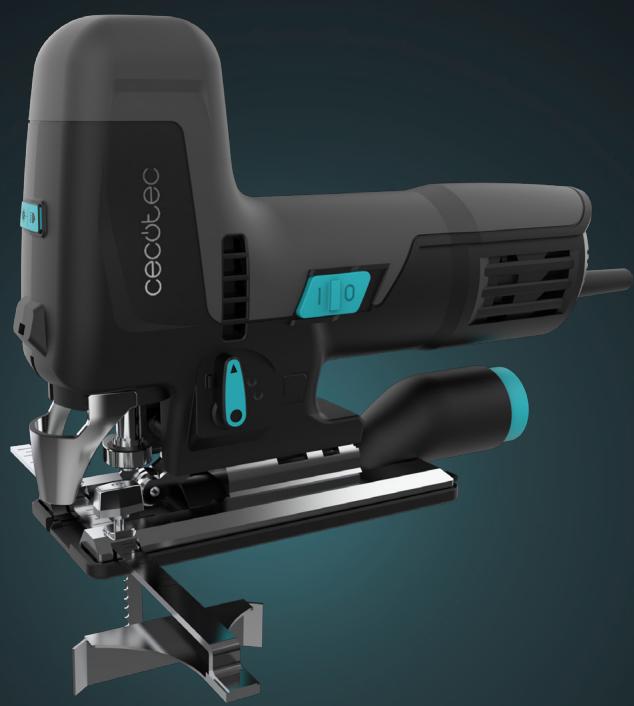
- Edge guide
- Protective guard
- LED work light
- Laser
- Laser/LED light on/off switch
- Soft-grip handle
- Power switch
- Speed knob
- Dust collection adapter
- Adjustable saw base plate
- Base plate protector
- Air flow direction switch
- Pendulum action knob (4 positions)
- Guide roller
- Quick-release blade clamp
- Edge guide locking screw
- Saw blade
- Adjustable saw base plate release lever
NOTE:
The graphics in this manual are schematic representations and may not exactly match the product.
2. BEFORE USE
- This appliance is packaged in a way as to protect it during transport. Take the appliance out of its box and remove all packaging materials. You can keep the original box and other packaging materials in a safe place to prevent damage to the appliance if you need to transport it in the future. If you wish to dispose of the original packaging, make sure all items are recycled properly.
- Check that all parts and components are included and in good condition. If there is any piece missing or in bad conditions, contact the official Cecotec Technical Support Service immediately.
Box content
- Jigsaw
- 8 saw blades
- Guide ruler
- Instruction manual
- Do not remove the product's serial number in order to keep proper traceability if technical assistance is required.
3. OPERATION
Warning: Before making any adjustments or changing accessories, make sure the jigsaw is unplugged from the mains.
3.1 Installing/removing the edge guide (Fig. 2)
The edge guide (1) enables straight and precise cuts parallel to the workpiece edge. It can be fitted to either side of the tool, with a maximum distance of approximately 13 cm.
3.1.1 Installing the edge guide
- Loosen the locking screws (16).
- Insert the edge guide into the saw base supports (10).
- Tighten the locking screws (16) to secure the edge guide.
3.1.2 Removing the edge guide
- Loosen the locking screws (16).
- Remove the edge guide (1).
3.2 Installing/removing the dust collection adapter (Fig. 3)
To connect an external dust extraction system (such as a vacuum cleaner), use the dust collection adapter (9).
Caution! When using an external dust extraction system, slide the dust-blowing function switch (12) forward to select the dust extraction mode.
3.2.1 Installing the dust collection adapter
- Slide the dust collection adapter (9) fully into the guide rail between the tool and saw base plate (10).
- Connect a suitable dust extractor/vacuum cleaner (not supplied) to the adapter.
3.2.2 Removing the dust collection adapter
- Disconnect the dust extractor/vacuum cleaner hose from the adapter (9).
- Pull the dust collection adapter (9) firmly to remove it.
3.3 Installing/removing the base protector (Fig. 4)
Use the base protector (11) when working with delicate materials to avoid scratches.
3.3.1 Installing the base protector
- Place the base protector (11) at the front of the saw base plate (10).
- Push the base protector tabs onto the saw base plate (10) until they click into place.
3.3.2 Removing the base protector
- Push the base protector (11) outwards from the saw base plate (10).
3.4 Start-up
3.4.1 Switching On and Off (Fig. 5)
To switch on: slide the power switch (7) forward. To switch off: slide the power switch (7) backward.
3.4.2 Speed setting (Fig. 6)
Use the speed knob (8) to adjust the desired cutting speed:
Turn the knob to a higher number for faster speed and to a lower number for slower speed. General recommendations:
- Steel: low speed.
- Aluminium, plastic, hardwood: medium speed.
- Softwood: high speed.
- The ideal speed depends on the material and working conditions.
NOTE: Remember to use appropriate lubricants/coolants to protect the saw blade.
3.5 Changing the saw blade (Fig. 7)
Important! Disconnect the jigsaw from the power supply before changing the blade.
- Pull the protective guard (2) upwards.
- Push the blade holder (with quick-release blade clamp (15)) to the front stop.
- Insert the new saw blade (with the teeth facing forward) into the guide slot.
- Make sure the saw blade is securely fastened.
3.6 Fitting/removing the protective guard
3.6.1 Fitting the protective guard
- Insert the two assembly tabs of the protective guard (2) into the tool housing holes.
- The protective guard (2) will click into place.
- The protective guard (2) can be tilted upwards (90°).
3.6.2 Removing the protective guard
- Carefully pull the assembly tabs of the protective guard (2) from the housing holes.
3.7 Adjusting the base plate (Fig. 8 & 9)
Warning! To achieve maximum mitre angle (left or right), remove the protective guard (2) and base protector (11).
- Release the saw base plate by pulling the adjustable saw base plate release lever (18). Fig. 8
- Slide the saw base plate (10) forward.
- Tilt the base plate to the desired angle (between 0° and 45° : -45° , -22.5° , 0° , 22.5° and 45° ). Fig. 9
- Slide the saw base plate (10) backwards, ensuring the teeth engage with the positioning pin.
- Push the release lever (18) to the locked position. Make sure it is securely fastened.
3.8 Using the laser and LED light (Fig. 10)
The LED light illuminates the cutting area. The laser projects a red guideline.
Laser/LED light on/off switch (5):
1 press: LED light and laser.
2 presses: LED light.
3 presses: Laser.
4 presses: Off.
- Switch on the laser/LED light using the laser/LED light on/off switch (5).
- Place the tool on the workpiece, aligning the saw blade mark with the start of the cutting line.
- Check that the laser line aligns with the cutting line marked on the workpiece.
- Switch on the appliance.
- Follow the instructions in section "3.4 Start-up" to make a cut.
- Switch off the laser/LED light after using the jigsaw.
3.9 Air flow direction switch (Fig. 11)
Slide the air flow direction switch (12) backwards to direct airflow and prevent sawdust from covering the cutting line.
Slide the air flow direction switch (12) forward to activate the dust extraction mode.
3.10 Using the pendulum action (Fig. 12)
| Setting | Cutting action | Applications |
| 0 | Straight line | Mild steel, stainless steel and plastics. |
| I | Small orbit | Clean cuts in wood and plywood. For cutting mild steel, aluminium and hardwood. |
| II | Medium orbit | Wood and plywood. For fast cutting of aluminium and mild steel. |
| III | Large orbit | For fast cutting of wood and plywood. |
4. CLEANING AND MAINTENANCE
Regular cleaning and maintenance are essential to extend the service life of your jigsaw and ensure safe and efficient performance.
Important warnings:
- Always switch off the tool before performing any maintenance or cleaning tasks!
- Always wear protective gloves when handling the saw blade to prevent accidental cuts.
- If repairs or maintenance not described in these instructions are required, please contact Cecotec's Official Technical Support Service.
- Use only original Cecotec spare parts to ensure safety and proper operation of the tool.
Cleaning
- Do not spray the tool with water or immerse it in any liquid. This could cause an electric shock and irreparably damage the tool.
- Do not use aggressive cleaning agents or solvents. These chemicals can damage the tool's plastic parts.
- Always keep the ventilation slots, motor housing and all parts clean. Use a damp cloth or soft brush to remove dust and dirt.
Maintenance
- This tool is designed to require minimal maintenance. However, check the condition of the saw blade regularly and replace if worn or damaged.
Transport
- Before transporting the jigsaw, remove the saw blade.
- Carry the tool by holding it firmly and securely.
Storage
- Always store the jigsaw and its accessories in a dry, clean, dust-free place and out of the reach of children.
5. COPYRIGHT
The intellectual property rights over the texts in this manual belong to CECOTEC INNOVACIONES, S.L. All rights reserved. The contents of this publication may not, in whole or in part, be reproduced, stored in a retrieval system, transmitted, or distributed by any means (electronic, mechanical, photocopying, recording or similar) without the prior authorization of CECOTEC INNOVACIONES, S.L.
1. PIÈCES ET COMPOSANTS
Fig. 1
Advertisements Importants:
- SOMMAIRE
- BEFORE USE
- BOX CONTENT
- OPERATION
- 3.1 INSTALLING/REMOVING THE EDGE GUIDE (FIG. 2)
- 3.1.1 INSTALLING THE EDGE GUIDE
- 3.1.2 REMOVING THE EDGE GUIDE
- 3.2 INSTALLING/REMOVING THE DUST COLLECTION ADAPTER (FIG. 3)
- 3.2.1 INSTALLING THE DUST COLLECTION ADAPTER
- 3.2.2 REMOVING THE DUST COLLECTION ADAPTER
- 3.3 INSTALLING/REMOVING THE BASE PROTECTOR (FIG. 4)
- 3.3.1 INSTALLING THE BASE PROTECTOR
- 3.3.2 REMOVING THE BASE PROTECTOR
- 3.4 START-UP
- 3.4.1 SWITCHING ON AND OFF (FIG. 5)
- 3.4.2 SPEED SETTING (FIG. 6)
- 3.5 CHANGING THE SAW BLADE (FIG. 7)
- 3.6 FITTING/REMOVING THE PROTECTIVE GUARD
- 3.6.1 FITTING THE PROTECTIVE GUARD
- 3.6.2 REMOVING THE PROTECTIVE GUARD
- 3.7 ADJUSTING THE BASE PLATE (FIG. 8 & 9)
- 3.8 USING THE LASER AND LED LIGHT (FIG. 10)
- LASER/LED LIGHT ON/OFF SWITCH (5)
- 3.9 AIR FLOW DIRECTION SWITCH (FIG. 11)
- CLEANING AND MAINTENANCE
- IMPORTANT WARNINGS
- CLEANING
- MAINTENANCE
- TRANSPORT
- STORAGE
- COPYRIGHT
- PIÈCES ET COMPOSANTS
- FIG. 1
- ADVERTISEMENTS IMPORTANTS
Brand : CECOTEC
Model : Multicut 8500 Vision
Category : Washing machine