MB20040622 - Barbecue Masterbuilt - Free user manual and instructions
Find the device manual for free MB20040622 Masterbuilt in PDF.


| Brand | Masterbuilt |
| Model | MB20040622 |
| Product Type | Charcoal Barbecue Grill |
| Cooking Surface | Approx. 460 sq in (2967 sq cm) |
| Dimensions (W x D x H) | 40 x 24 x 44 in (102 x 61 x 112 cm) |
| Weight | 52 lb (23.6 kg) |
| Material | Heavy-duty steel construction |
| Grill Grate | Porcelain-coated steel |
| Charcoal Grate | Steel with hinged side access |
| Heat Source | Charcoal (briquettes or lump) |
| Air Vents | Adjustable top and bottom dampers |
| Thermometer | Built-in temperature gauge in lid |
| Wheels | 4 caster wheels, front two lockable |
| Side Shelf | Foldable side shelf for prep space |
| Main Functions | Grilling, smoking, and roasting |
| Assembly Required | Yes, moderate assembly (about 45 min) |
| Cleaning | Removable ash pan; grates are dishwasher-safe |
| Safety | Heat-resistant handles; stable wide legs |
| Spare Parts | Available directly from Masterbuilt |
| Warranty | 1-year limited warranty |
Frequently Asked Questions - MB20040622 Masterbuilt
User questions about MB20040622 Masterbuilt
0 question about this device. Answer the ones you know or ask your own.
Ask a new question about this device
Download the instructions for your Barbecue in PDF format for free! Find your manual MB20040622 - Masterbuilt and take your electronic device back in hand. On this page are published all the documents necessary for the use of your device. MB20040622 by Masterbuilt.
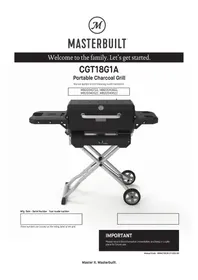
USER MANUAL MB20040622 Masterbuilt
Welcome to the family. Let's get started.
CGT18G1A
Portable Charcoal Grill
Manual applies to the following model number(s)
MB20040722, MB20040822,
MB20040522, MB20040622

Mfg. Date - Serial Number Your model number
These numbers are located on the rating label of the grill.
IMPORTANT
Please record this information immediately and keep in a safe place for future use.

WARNING

- This manual contains important information necessary for the proper assembly and safe use of the appliance.
- Read and follow all warnings and instructions before assembling and using the appliance.
- Keep this manual for future reference.

Failure to follow these instructions could result in fire, explosion or burn hazard which could cause property damage, personal injury, or death.


CARBON MONOXIDE HAZARD

- Burning wood chips, wood chunks, wood pellets, charcoal and propane gives off carbon monoxide, which has no odor and can cause death.
- DO NOT burn wood chips, wood chunks, wood pellets, charcoal or propane inside homes, vehicles, tents, garages or any enclosed areas.
- USE ONLY OUTDOORS where it is well ventilated.

WARNINGS AND IMPORTANT SAFEGUARDS

READ ALL INSTRUCTIONS
• Always use grill in accordance with all applicable local, state, and federal fire codes.
• Before each use check all nuts, screws, and bolts to make sure they are tight and secure.
- Never operate grill under combustible overhead construction such as roof coverings, carports, awnings, or overhangs.
- Grill is for OUTDOOR HOUSEHOLD USE ONLY.
- Never use inside enclosed areas such as patios, garages, buildings, or tents.
- Never use inside or on recreational vehicles or boats.
- Maintain a minimum distance of 10ft (3m) from overhead construction, walls, rails or other structures.
- Keep a minimum 10ft (3m) clearance of all combustible materials such as wood, dry plants, grass, brush, paper, or canvas.
- Never use grill for anything other than its intended use. This grill is NOT for commercial use.
- Accessory attachments not supplied by Masterbuilt Manufacturing, LLC are NOT recommended and may cause injury.
- Use of alcohol, prescription, or non-prescription drugs may impair user's ability to properly assemble or safely operate grill.
- Keep a fire extinguisher accessible at all times while operating grill.
- When cooking with oil or grease, have a type BC or ABC fire extinguisher readily available.
- In the event of an oil or grease fire do not attempt to extinguish with water. Immediately call the fire department. A type BC or ABC fire extinguisher may, in some circumstances, contain the fire.
- Use grill on a level, non-combustible, stable surface such as dirt, concrete, brick, or rock. An asphalt surface (blacktop) may not be acceptable for this purpose.
- Grill MUST be on the ground. Do not place grill on tables or counters. DO NOT move grill across uneven surfaces.
- Do not use grill on wooden or fl ammable surfaces.
- Keep grill clear and free from combustible materials such as gasoline and other flammable vapors and liquids.
- Do not leave grill unattended.
- Keep children and pets away from grill at all times. Do NOT allow children to use grill. Close supervision is necessary when children or pets are in the area where grill is being used.
- Do NOT allow anyone to conduct activities around grill during or following its use until it has cooled.
- Never use glass, plastic, or ceramic cookware in grill. Never place empty cookware in grill while in use.
- Never move grill when in use. Allow grill to cool completely (below 115°F (45°C)) before moving or storing.
- Do not store grill with hot ashes or charcoal inside grill/hopper. Store only when fire is completely out and all surfaces are cold.
- Never use grill as a heater (READ CARBON MONOXIDE HAZARD).
- The grillis HOT while in use and will remain HOT for a period of time afterwards and during cooling process. Use CAUTION. Wear protective gloves/mitts.
- Be careful when removing food from grill. All surfaces are HOT and may cause burns. Use protective gloves/ mitts or long, sturdy, cooking tools for protection from hot surfaces or splatter from cooking liquids.

WARNINGS AND IMPORTANT SAFEGUARDS

- DO NOT bump or impact the grill to prevent personal harm, damage to grill, or spillage/splashing of hot cooking liquid.
- Do not touch HOT surfaces
- Grill is hot during use. To avoid burns, keep face and body away from door(s) and vents. Steam and hot air are expelled during use.
- Grill has an open flame. Keep hands, hair, and face away from flame. Do NOT lean over grill when lighting. Loose hair and clothing may catch fire.
- DO NOT obstruct flow of combustion and ventilation.
- Do not cover cooking grates with metal foil. This will trap heat and may cause damage to the grill.
- Never leave HOT coals or ashes unattended.
- Do not remove ashes while ashes and charcoal are HOT.
- Keep hands, hair, and face away from the burning charcoal. Be careful of loose hair and clothing during operation as they could catch fire.
- Use protective gloves when handling this grill or working with fire. Use protective gloves or long, sturdy tools when adding wood or charcoal.
- Never use fast lighting charcoal, lighting fluid, gasoline, alcohol or other highly volatile fluids to ignite charcoal. These fluids can explode causing injury or death. Always follow specific lighting instructions for this grill.
- Never overfi ll charcoal hopper. This can cause serious injury as well as damage to the grill.
- Dispose of cold ashes by placing them in aluminum foil, soaking with water, and discarding in a non-combustible container.
- Do not clean this product with a water sprayer or the like.
- Grill should only be rolled on smooth surface.
- Grill should never be rolled up/down stairs or uneven surface.
- Potential damage to grill or harm to user may result from failure to follow warnings.
- Remove unused charcoal and allow grill to fully cool before transporting.
• Always cover grill when not in use outside. DO NOT leave in weather uncovered. - WARNING! This barbecue will become very hot. Do not move it during operation.
- WARNING! Do not use indoors!
- WARNING! Do not use spirit or petrol for lighting or re-lighting! Use only fi relighters complying to EN 1860-3!
- WARNING! Keep children and pets away.
- Do not use the barbecue in a confined and/or habitable space e.g. houses, tents, caravans, motor homes, boats. Danger of carbon monoxide poisoning fatality.
- Do not cook before the fuel has a coating of ash.
SAVE THESE INSTRUCTIONS
- BEFORE ASSEMBLY READ ALL INSTRUCTIONS CAREFULLY.
- Assemble on a clean fl at surface.
- Recommend assembling on cardboard to avoid oil residue on floors or scratches.
- Gloves recommended for assembly. Hopper gasket is fi berglass and will irritate skin.
- Tools needed: Phillips head screwdriver, adjustable wrench, 19mm socket wrench.
- Approximate assembly time: 30 minutes to 1 hour.
- Recommend two people assemble to increase ease and reduce assembly time.
• Actual product may differ from picture shown. - It is possible that some assembly steps have been completed in the factory.
- Remove all printed labels from the grill.

DO NOT RETURN TO RETAILER for assembly assistance, missing or damaged parts. Please contact MASTERBUILT Customer Service at www.masterbuilt.com/pages/support. Please have the model number and serial number available. These numbers are located on the silver rating label on the grill.


Parts Diagram

Parts List
| NO. QTY. | DESCRIPTION | NO. QTY. | DESCRIPTION | ||
| 1 1 | Temperature Gauge | 13 1 | Lid Handle Liner | ||
| 2 2 | Lid Handle Bezel | 14 1 | Charcoal Grate | ||
| 3 1 | Lid Handle | 15 1 | Grease Tent | ||
| 4 1 | Charcoal Hopper Lid | 16 1 | Cooking Grate | ||
| 5 1 | Charcoal Hopper | 17 2 | Handles (MODELS MB20040522 and MB20040622) | ||
| 6 1 | Manifold | 18 1 | Right Shelf | ||
| 7 1 | Body Liner | 19 1 | Metal Shelf Support Rear | ||
| 8 1 | Left Shelf | 20 1 | Metal Shelf Support Front | ||
| 9 4 | Mica Gaskets | 21 1 | Body | ||
| 10 1 | Leg Support | 22 1 | Body Spring | ||
| 11 1 | Foot Tube | 23 2 | 6" Wheels | ||
| 12 1 | Lid | 24 2 | Wheel Axle | ||
Hardware

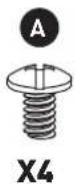
M6x15 Phillips Screw Qty - 10

M4x10 Phillips Screw Qty - 4

Mica Plat Qty - 4

M12 Nut Qty - 2

Wrench Qty - 1M12 Flat Gasket Qty - 2
E
F
KEY QTY. DESCRIPTION TOOL REQUIRED
| A 10 | M6x15 Screw |  |
| B 4 M | 4x10 Screw | |
| C 4 Mica Plat | ||
| D 2 M | 12 Nut | |
| E 2 M | 12 Flat Gasket | |
| F 1 | Wrench |
Structural Proximity and Safe Usage Recommendations
REMINDER: Maintain a minimum distance of 10 feet from rear and sides to walls, rails or other combustible construction. This clearance provides adequate space for proper combustion, air circulation and venting.

Charcoal does not come with this product.
Batteries do not come with this product.
Assembly

MODELS WITH NO CART
MB20040522, MB20040622


2

Assembly


Instructions for raising and lowering the cart are located on page 14.
Assembly




Assembly


Assembly
9

10

Assembly


Operating Instructions
ASSEMBLY IS DONE. LET'S HAVE SOME FUN!
PRE-SEASONING
Pre-seasoning will rid your grill of chemicals and oils left over by the manufacturing process, allowing them to burn off. PRE-SEASON GRILL PRIOR TO FIRST USE.
- Start grill following the START-UP instructions and set the temperature to medium.
- Set the temperature to medium and burn one hopper full.
- Shut down the grill following the SHUTDOWN instructions.
- Allow grill to cool COMPLETELY.
- Using a napkin or cloth, rub a light coat of cooking oil on charcoal grate and the inside of the grill lid, manifold and body.
- Repeat steps 2–6.
Frequent seasoning prevents rusting. If rusting occurs, clean with a steel brush, apply vegetable shortening and heat as indicated above.
Operating Instructions
START-UP
-
Open charcoal hopper.
-
Place fire starter in fire starter slot under the charcoal grate. Replace the charcoal grate and light the firestarter.
- Use a food safe fire starter block or twisted paper towel/paper.
- Use caution and wear protective gloves.
• Light with match stick or lighter.
- Wait 30 seconds to 1 minute after lighting fire starter to ensure fire starter is fully lit. Note – For a faster startup, we recommend using 2 of our fire starters.
- Pour charcoal on top of lit fire starter.
- Never use fast light charcoal or lighting fluid.
- Wait approximately 1 minute to allow charcoal to start smoking.
- Turn to desired setting and let charcoal burn for 4 minutes.
- Close the hopper lid.
- Close grill lid.

RELOAD
If it is necessary to refill the hopper while cooking, follow the safe reloading instructions below.
Adding charcoal:
- Turn control knob to off before opening hopper lid.
- Open hopper lid. Use caution, wear protective gloves, and use cooking utensil to lift hopper door. Hopper lid will be hot!
- Pour charcoal into hopper.
- Close hopper lid and reset the control knob to the desired setting.
SHUTDOWN
- Turn controller off.
- Open hopper lid and complete burning of remaining charcoal before moving to next step.
- Close hopper lid and close grill lid.
- Close top vent.
BATTERY / CORD


| Batteries Y | Y | N | ||||
| Corded | Y | N | Y | |||
 |  |  | ||||
| Powered by | Cord | Batteries | Cord | |||
| Remark | Removing the cord switches the grill to battery power. | Adding the cord switches the grill to cord power. | Removing the cord powers the grill off. | |||
Grill can run exclusively on battery power. In ideal conditions, grill batteries typically last 16hrs.
CONTROL PANEL

MASTERBUILT

Power ON/Off Controller:
- Rotate control knob clockwise to power controller ON and set temperature (the thermostat inside the grill body controls the fan ON/OFF automatically).
- Rotate control knob counter clockwise to power controller OFF and lower temperatures.

Set Temperature (250-550F / 121-288C):
- Pour charcoal over lit fire starter
- Wait approximatley 1 minute to allow charcoal to start smoking.
- Turn to desired setting and let charcoal burn for 4 minutes.
- Close the hopper lid.
- Close grill lid and set the vent 3/4 closed.
REGULATING TEMPERATURE IN YOUR GRILL:
- Your grill has a temp probe located under the cooking grate that will regulate the grill temp based on the position of the control knob.
- Knob positon in relation to the grill temperature will vary based on outside temperature, amount of food and charcoal type used.
- Once the grill reaches temp based on the knob position the fan will turn off. Once the temp falls below temp setting the fan will turn on and continue the cycle to maintain a stable temperature.
● The easiest way to find grill temperature setting is to turn the grill to high and once the desired temperature is reached turn the knob back down until the fan turns off, the grill will then maintain that temperature. You will need to check this setting again after loading food and adjust accordingly but after this the grill will hold temp by itself.
CLEANING AND STORAGE
ALWAYS MAKE SURE GRILL IS COOL TO THE TOUCH BEFORE CLEANING AND STORING.
- Once ashes have completely cooled, empty the charcoal hopper of ash after each use. This will help prolong the life of the charcoal hopper.
- Dispose of cold ashes by placing them in aluminum foil, soaking with water and discarding in a non-combustible container.
- Remove the charcoal grate and clean.
- Remove the cooking grates and manifold to clean.
- Remove grease cup. Empty and clean (See Figure 1).
- Inspect hardware and assembled parts on a regular basis to ensure grill is in safe working condition.
- Clean grill and cooking grates with mild dish detergent. Wipe outside of grill with a damp rag. DO NOT use oven cleaner or other cleaning agents. Make sure to dry thoroughly.
- Wipe down with cooking oil to avoid rusting
• Always cover and store grill in a protected DRY AREA. Store only when fire is out and all surfaces are cold. - When grill is not in frequent use, even when using a grill cover, remember to check your grill periodically to avoid possible rust and corrosion due to moisture buildup.
Figure 1

Operating Instructions
CART
RAISING AND LOWERING THE CART
From the lower position:
- Place foot on the bottom leg.
- Release the latch
- Using the side shelf, pull the grill up.
- Raise the top leg in the lock position.
Note: Do not remove foot from bottom leg until grill is fully locked in the raised position.
From the raised position:
- Lock the lid.
- Place foot on the bottom leg.
- Pull side shelf toward you while releasing the latch.
- Lower the grill until it makes contact with cart latch.
Note: Do not remove foot from bottom leg until grill is fully locked in the lowered position. - Unfold tow handle and lock.
- Grill is now ready to be transported.


TOW HANDLE


READY TO GO
Troubleshooting
PROBLEM REASONS SOLUTIONS
| Grill is not getting up to temperature. | Charcoal is not lit.Charcoal low.Ash buildup in the charcoal hopper and manifold.Each setting will vary with outside temperature, food qty. and type of charcoal being used.Low or depleted battery.Fan is not working properly. | Check the charcoal, re-run lighting procedure.Add charcoal to keep the temperature up.Cleanout old ash from both the hopper and manifold.Turn knob to a higher setting.Replace the batteries.Replace fan. |
| Fan is not working. Temperature setting is reached.Wires are disconnected or broken Thermostat malfunction.Failured power supply.Controller knob is set too low.Fan malfunction. | Turn control knob to higher setting.If adjusting the knob does not solve the problem follow below steps:If grill plugged into power supply then unplug power supply and install batteries. If this solves the problem then get a new power supply.If grill is only using batteries then plug in power supply. If this solves the problem then get new batteries. If new batteries still do not work then get a new battery box and PCB.Check and re-connect the wires.Replace thermostat.Check and replace the power adapter or batteries.Replace the fan. | |
| Knob is not working. Wires are disconnected or broken Thermostat malfunction. | Check and re-connect the wires.Replace thermostat. | |
| Batteries Wrong positive and negative position.Low or depleted battery.Battery box wiring. | Correct the positive and negative battery position.Replace the batteries.Replace the battery box. | |
Wiring Diagram

RED/BLACK WIRES FAN

MASTERBUILT®
Rest assured, we're here to help.
Customer Service
masterbuilt.com/contact-us masterbuilt.com/warranty masterbuilt.com/collections/parts
@masterbuilt


masterbuilt.com


- CGT18G1A
- PORTABLE CHARCOAL GRILL
- IMPORTANT
- WARNING
- CARBON MONOXIDE HAZARD
- WARNINGS AND IMPORTANT SAFEGUARDS
- READ ALL INSTRUCTIONS
- SAVE THESE INSTRUCTIONS
- BEFORE ASSEMBLY READ ALL INSTRUCTIONS CAREFULLY
- PARTS DIAGRAM
- HARDWARE
- STRUCTURAL PROXIMITY AND SAFE USAGE RECOMMENDATIONS
- ASSEMBLY
- OPERATING INSTRUCTIONS
- ASSEMBLY IS DONE. LET'S HAVE SOME FUN
- PRE-SEASONING
- START-UP
- RELOAD
- SHUTDOWN
- CONTROL PANEL
- POWER ON/OFF CONTROLLER
- SET TEMPERATURE (250-550F / 121-288C)
- REGULATING TEMPERATURE IN YOUR GRILL
- CLEANING AND STORAGE
- ALWAYS MAKE SURE GRILL IS COOL TO THE TOUCH BEFORE CLEANING AND STORING
- CART
- RAISING AND LOWERING THE CART
- FROM THE LOWER POSITION
- FROM THE RAISED POSITION
- TOW HANDLE
- TROUBLESHOOTING
- WIRING DIAGRAM
- MASTERBUILT®
Brand : Masterbuilt
Model : MB20040622
Category : Barbecue