ZKW30BV - Refrigerator Monogram - Free user manual and instructions
Find the device manual for free ZKW30BV Monogram in PDF.


| Product Type | Built-in Refrigerator |
| Brand | Monogram |
| Model | ZKW30BV |
| Installation Type | Built-in / Integrated |
| Width | 30 inches (76.2 cm) |
| Height | 69.5 inches (176.5 cm) |
| Depth | 24 inches (61 cm) without handles |
| Weight | Approximately 350 lbs (159 kg) |
| Power Supply | 115 Volts, 60 Hz, 15 Amps |
| Refrigerant | R-134a environmentally balanced refrigerant |
| Defrost Type | Frost-free (auto defrost) in both compartments |
| Temperature Control | Electronic digital thermostat with LED display |
| Refrigerator Shelves | 4 adjustable spill-proof glass shelves |
| Door Bins | 3 adjustable door bins with gallon capacity |
| Crisper Drawers | 2 humidity-controlled drawers for produce |
| Freezer Compartment | Bottom freezer with full-extension drawer |
| Internal Lighting | Energy-efficient LED lighting |
| Door Alarm | Audible alert when door left open |
| Control Lockout | Yes, to prevent accidental settings changes |
| Water Filter | Replaceable water filter for fresh taste |
| Handle Style | Stainless steel professional handle |
| Finish | Stainless steel with customizable panel option |
| Energy Star Rated | Yes, energy efficient design |
| Noise Level | Approximately 42 dB for quiet operation |
| Warranty | 2 years parts and labor (estimated) |
Frequently Asked Questions - ZKW30BV Monogram
User questions about ZKW30BV Monogram
0 question about this device. Answer the ones you know or ask your own.
Ask a new question about this device
Download the instructions for your Refrigerator in PDF format for free! Find your manual ZKW30BV - Monogram and take your electronic device back in hand. On this page are published all the documents necessary for the use of your device. ZKW30BV by Monogram.
USER MANUAL ZKW30BV Monogram
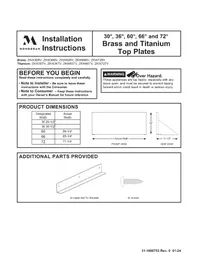
Installation Instructions
30", 36", 60", 66" and 72"
Brass and Titanium
Top Plates
Brass: ZKW30BV, ZKW36BV, ZKW60BV, ZKW66BV, ZKW72BV
Titanium: ZKW30TV, ZKW36TV, ZKW60TV, ZKW66TV, ZKW72TV
BEFORE YOU BEGIN
Read these instructions completely and carefully.
- Note to Installer – Be sure to leave these instructions with the Consumer.
- Note to Consumer – Keep these instructions with your Owner's Manual for future reference.
WARNING

ver Hazard.
These appliances are top heavy, especially with any doors open, and must be secured to prevent tipping forward which could result in death or serious injury.
PRODUCT DIMENSIONS
| Designated Width | Actual Width |
| 30 29-1/2" | |
| 36 35-1/2" | |
| 60 | 59-1/4" |
| 66 | 65-1/4" |
| 72 | 71-1/4" |

FRONT VIEW

SIDE VIEW
ADDITIONAL PARTS PROVIDED
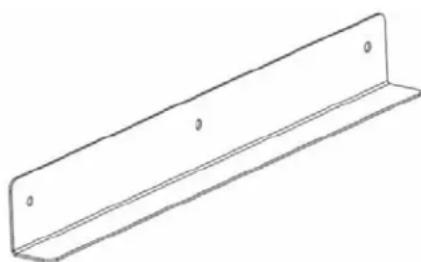
2x Upper Anti Tip Brackets

6x Screws
Prepare Column(s) for Installation as per Column Installation Instructions.
WARNING

Over Hazard.
These appliances are top heavy, especially with any doors open, and must be secured to prevent tipping forward which could result in death or serious injury. Read and follow the entire installation instructions for securing the appliance with the anti-tip system.
After installing the Column Anti-Tip Brackets as per the Column Installation Instructions, follow these instructions to install the Upper Anti-Tip Brackets.
This is not a replacement for proper column installation, be sure to follow all column installation instructions carefully.

INSTALL BOTH UPPER ANTI-TIP BRACKETS
Install one Upper Anti-Tip Bracket to each side of the cabinet enclosure. Use three screws per bracket, drill 5/32" holes to aid installation.
See diagram at right for location.
Be sure to install all three screws in each Upper Anti-Tip Bracket and confirm they are tight before proceeding.
If installing into drywall, use correctly sized drywall anchors.

Prepare Column(s) for Installation as per Column Installation Instructions.
For Dual Integrated Installation:
- Continue Column installation up to the point of unification, right before pushing the Column into the opening.
- Go to Page 4 of these Installation Instructions to install the Top Plate.
- Return to the Column Installation Instructions to complete the installation.

For Single Integrated Installation:
- Continue Column installation up to the point of unification, right before pushing the Column into the opening.
- Go to Page 5 of these Installation Instructions to install the Top Plate.
- Return to the Column Installation Instructions to complete the installation.

Installation Instructions
For Dual Integrated Installation
STEP 1
Confirm the columns have been properly unified with the installation of all unification brackets.
STEP 2
Loosen the 4 indicated screws on the top of the columns.

STEP 3
Place top plate keyhole slots over the screw heads on each side.

STEP 4

STEP 5
Confirm all screws are tight.
Return to the column installation instructions.
Installation Instructions
For Single Integrated Installation
STEP 1
Loosen the 4 indicated screws on the top of the column

STEP 2
Place top plate keyhole slots over the screw heads on each side.

STEP 3

Slide top plate forward until it is in line with the filter cover door.
Tighten all four screws.
STEP 4
Confirm all screws are tight.
Return to the column installation instructions.

Brand : Monogram
Model : ZKW30BV
Category : Refrigerator