
DDSX225WF - Dehumidifier DELONGHI - Free user manual and instructions
Find the device manual for free DDSX225WF DELONGHI in PDF.


| Product Type | Dehumidifier |
| Brand | DeLonghi |
| Model | DDSX225WF |
| Recommended Room Size | Up to 45 m² (380 sq ft) |
| Extraction Capacity | 22.5 L/day (at 30°C, 80% RH) |
| Water Tank Capacity | 4.5 L |
| Humidistat | Adjustable with digital display |
| Fan Speeds | 2 speeds |
| Continuous Drain Option | Yes (hose connection) |
| Auto Restart | Yes after power failure |
| Airflow | 150 m³/h |
| Power Supply | 120 V, 60 Hz |
| Power Consumption | 600 W |
| Noise Level | 45 dB |
| Dimensions (W x H x D) | 355 x 500 x 250 mm |
| Weight | 14.5 kg |
| Refrigerant | R290 |
| Filter | Washable anti-dust filter |
| Maintenance | Clean filter every 2-4 weeks |
| Safety Features | Overheat protection, frost protection, full tank shut-off |
| Included Accessories | Drain hose, user manual |
Frequently Asked Questions - DDSX225WF DELONGHI
User questions about DDSX225WF DELONGHI
0 question about this device. Answer the ones you know or ask your own.
Ask a new question about this device
Download the instructions for your Dehumidifier in PDF format for free! Find your manual DDSX225WF - DELONGHI and take your electronic device back in hand. On this page are published all the documents necessary for the use of your device. DDSX225WF by DELONGHI.
USER MANUAL DDSX225WF DELONGHI
1. FUNDAMENTAL SAFETY WARNINGS
- The appliance is not intended for use by persons (including children) with reduced physical, sensory or mental capabilities, or lack of experience and knowledge, unless they have been given supervision or instruction concerning use of the appliance by a person responsible for their safety.
- Children should be supervised to ensure that they do not play with the appliance.
- If the power cord is damaged, it must be replaced by the manufacturer or the manufacturer's Customer Experience in order to avoid all risk.
As the appliance is powered by electricity, the possibility of electrical shock cannot be excluded.
The following safety precautions must therefore be followed:
• After removing the packaging, check the condition of the appliance. If in doubt, do not use the appliance and contact professionally qualified personnel.
- Before use, always check the condition of the power cord.
- It is dangerous to modify or alter the characteristics of the appliance in any way.
- This appliance must be connected to an efficient "grounding" system. Have the electrical system checked by a qualified electrician.
- Before each cleaning or maintenance operation, always disconnect the plug from the power outlet.
- Never submerge the appliance in water.
- Do not use the appliance outdoors.
- Do not obstruct the entrances and exits of air.
- When the appliance is connected to the mains, keep the following safety rules in mind:
- Do not touch the appliance with wet or damp hands;
- Do not use the appliance with bare or wet feet;
- Do not pull on the power cord or appliance to detach the plug from the power outlet;
- Do not move the appliance by pulling the power cable.
- keep the appliance far from the reach of children;
- Do not insert foreign bodies into the appliance;
- Do not insert metal objects into the apertures.
Danger! Rotating parts; contact with the internal fan could cause electric shock or injury.
Do not drink the water collected from the appliance or use it as animal drinking water.
- do not leave the appliance exposed to atmospheric agents;
- If you wish to permanently eliminate the appliance, after disconnecting the plug from the power outlet it is recommended to make it unusable by severing the power cord.
- In the event of a fault and/or malfunction, turn the appliance off without tampering with it. For all repairs, contact an authorised technical service centre only and request the use of original spare parts and accessories.
- Avoid the use of power cord extensions.
1.1 Designated use
This appliance must be used exclusively for the intended purpose for which it was designed, specifically to dehumidify domestic environments. All other uses are considered improper and therefore hazardous. The manufacturer shall not be held liable for any damage caused by improper, erroneous and irresponsible use, and/or due to repairs made by unqualified personnel.
1.2 Installing the appliance
- The appliance must be installed in compliance with national standards regulating electrical systems.
- Do not install the appliance in rooms containing gas, oil or sulphur or near sources of heat.
- Do not use the appliance on sloping surfaces.
- Keep the appliance at least 50 cm away from flammable substances (alcohol, etc.) or pressurised containers (e.g. aerosol cans).
- Do not rest objects on top of the appliance.
- When transporting, the appliance must be kept upright or
- resting on one side. Before transporting, drain all the water from the appliance. After transporting, wait at least one hour before turning on the appliance.
1.3 Environmental information
- The materials used for packaging can be recycled. You are therefore recommended to dispose of them in special differentiated waste collection containers.
Specific information regarding appliances with R290 refrigerant gas
• Thoroughly read all of the warnings.
- When defrosting and cleaning the appliance, do not use any tools other than those recommended by the manufacturing company.
- The appliance must be placed in an area without any continuous sources of ignition (for example: open flames, gas or electrical appliances in operation).
- Do not puncture and do not burn.
• Refrigerant gases can be odourless.
- The appliance must be installed, used and stored in an area that is greater than 4m2 .
- This appliance contains R290 refrigerant gas. (For more details on the refrigerant, see back cover).
- R290 is a refrigerant gas that complies with the European directives on the environment. Do not puncture any part of the refrigerant circuit.
- If the appliance is installed, operated or stored in a non-ventilated area, the room must be designed to prevent the accumulation of refrigerant leaks resulting in a risk of fire or explosion due to ignition of the refrigerant caused by electric heaters, stoves, or other sources of ignition.
- The appliance must be stored in such a way as to prevent mechanical failure.
- Individuals who operate or work on the refrigerant circuit must have the appropriate certification issued by an accredited organisation that ensures competence in handling refrigerants according to a specific evaluation recognized by associations in the industry.
- Repairs must be performed based on the recommendations from the manufacturing company. Maintenance and repairs that require the assistance of other qualified personnel must be performed under the supervision of an individual specified in the use of flammable refrigerants.
- The materials used for packaging can be recycled. You are therefore recommended to dispose of them in special differentiated waste collection containers.
- Do not use the appliance outdoors.
- Do not obstruct the entrances and exits of air.
- Do not use the appliance in laundry rooms.
2. GENERAL INFORMATION
2.1 Instruction for Use
Read all the Instruction for Use carefully before using the appliance. Failure to follow this Instruction for Use may result in burns or damage to the appliance. The manufacturer is not liable for damage deriving from failure to respect this Instruction for Use.
Please note:
These safety warnings are valid for all De'Longhi dehumidifiers.
Keep this leaflet together with the instructions accompanying the appliance.
If the appliance is passed to other persons, they must also be provided with this Instruction for Use.
3. BEFORE USE
Important!
Store the packaging material (plastic bags, styrofoam) far from the reach of children.
CHOKING HAZARD. The appliance might contain small parts. Some of those small parts might be required to get disassembled during cleaning and maintenance operations. Handle with care and keep small parts out of reach of children.
3.1 Checking the appliance
After removing the packaging, make sure the product is complete and undamaged and that all accessories are present. Do not use the appliance if it is visibly damaged. Contact De'Longhi Customer Services.
3.2 Connecting the appliance
Before plugging the appliance into the outlet, check that:
- The mains voltage corresponds to the operating voltage stated on the rating plate.
- The mains socket and the electrical supply line are adequate for the required load.
- The power outlet matches the plug. If this is not the case, have the plug replaced by a qualified electrician
• The outlet is properly grounded.
4. CLEANING AND MAINTENANCE
Always remove the plug from the power socket before performing any cleaning or maintenance operations. For safety reasons, never wash the dehumidifier using a water jet.
Clean the air filter regularly.
5. DISPOSAL
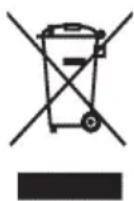
The appliance must not be disposed of with household waste, but taken to an authorised waste separation and recycling centre.
6. DESCRIPTION
6.1 Description of appliance (A)
A1. Air outlet louver
A2. Lifting handles
A3. Room sensor air intake
A4. Castors
A5. Water level viewing window
A6. Condensate collection tank
A7. HEPA-type (E12)* filter
A8. Silver ion dust filter
A9. Filter housing cover
A10. Continuous drain cap
A11. Condensate drain hose
6.2 Description of control panel (B)
B1. ON/STAND-BY button
B2. Ventilation button
B3. Dehumidifying button
B4. Wi-Fi button
B5. Swing button
B6. Dry button
B7. Timer button
6.3 Description of display(C)
C1. Full tank alarm
C2. HEPA-type (E12)* filter present symbol
C3. Ventilation mode active
C4. % Relative Humidity
C5. Wi-Fi symbol
C6. App control symbol
C7. Dry mode active
C8. Hours
C9. Dehumidifying mode active
C10. Low temperature alarm
C11. Remote timer symbol
C12. Local timer symbol
7. DOWNLOAD THE APP!


This appliance can also be used with the "De'Longhi Comfort APP" that is available on Google Play or can be downloaded from the App Store®.
To gain access to all functions, a Wi-Fi local network (Home WLAN) with Internet access is required. Moreover, check that there are no impediments to Internet access: Firewall, Proxy, authentications, etc.
8. DRAINING THE CONDENSATE WATER
The condensate can be drained in 2 ways:
8.1 Draining into the tank
The condensate is drained directly into the tank (A6).
When the tank is full, the appliance stops and the display (C) shows the tank alarm (C1). Proceed as follows:
-
Remove the tank (fig. 1) and empty it into a sink or bathtub.
-
Replace the tank in its housing, making sure the handle is properly positioned (fig. 2).
8.2 Continuous external draining
If the appliance is used for long periods of time without the possibility to regularly empty the tank, the continuous drain function should be used.
Proceed as follows:
-
Remove the continuous drain cap (A10) from the spout, turning it in an anti-clockwise direction (fig. 3) (Watch out for any leaking water!)
-
Attach the condensate drain hose (A11) to the spout (fig. 4).
3) Make sure the hose is positioned below the spout (fig. 5) or the water will flow back into the tank of the appliance. Also make sure there are no kinks in the hose.
9. MODE SELECTION
Connect the appliance to the mains supply. Upon first use, the — symbol will appear on the display and at the same time, an acoustic signal will sound to indicate that the appliance is in stand-by mode.
- To turn the appliance on, touch the button (B1).
The appliance will operate in the previously set mode and the air outlet louver (A1) will open in a preset position (fig. 6).
- If there is a blackout, when the power is restored the appliance will resume operation in the previously set operating mode.
Please note:
If the symbol (C1) appears on the display, the tank (A6) needs to be emptied or properly positioned (see paragraph "3.1 Draining into the tank").
Air filtration
If the HEPA-type (E12)* filter (A7) is installed, in addition to operating in the preset mode, the appliance will also filter the air in the room. In this case, the ☑ symbol (C2) will appear on the display.
The filter is designed to last up to 9 months, based on 8-hour daily usage at medium working load.
To maintain the efficiency of filtration, see paragraph "10.3 Replacing the HEPA-type (E12)* filter".
9.1 Dehumidifying mode
- Touch the button (B3). The symbol (A9) will blink on the display (fig. 7).
- The display shows the previously set relative humidity value. When the 🔊 symbol blinks, the setting can be changed by repeatedly touching the 🔊 button. There are 9 different relative humidity settings ranging from 30% (dry environment) to 70% (humid environment). Depending on the environmental conditions, it may not be possible for the appliance to reach the minimum settable value. In these cases, it is recommended the heat the environment that needs to be dehumidified.
- When the symbol stops blinking, the display shows the percentage of relative humidity in the room. The appliance may take a few seconds to display the value of the relative humidity in the room.
- When the room reaches the preset relative humidity level, the appliance stops dehumidifying and operates at a very slow ventilation speed.
9.2 Dry mode
- Touch the button (B6). The display shows the symbol (C7) (fig. 8).

Please note:
The appliance automatically operates at the maximum dehumidifying capacity. Recommended for particularly humid environments or to dry laundry more quickly.
9.3 Ventilation mode
-
Touch the ≈ button (B2). The display shows the ≈ symbol (C3) and the selected speed (fig. 9).
-
When the ≈ symbol blinks, the ventilation speed can be adjusted by repeatedly pressing the ≈ button. the display shows the number corresponding to the selected speed (1 ⇒ LOW; 2 ⇒ MED; 3 ⇒ HIGH).
9.4 Swing function
-
Press the button (B5). The air outlet louver (A1) moves up and down, evenly distributing the air flow in the room (fig. 10).
-
To stop the louver in the desired position, touch the same button again.
9.5 Timer function
The timer can be used to delay appliance start-up and shutdown. This will avoid energy wastage, ensuring the appliance operates only when needed.
The timer function can be programmed from either the control panel or the app.
- If programmed from the control panel: the display shows the ⏻ symbol (C12) (fig. 11).
- If programmed from the app: the display shows the symbol (C11) (fig. 12). To programme the timer from the app, follow the instructions provided in the app.
How to programme delayed start-up
- With the appliance in stand-by (— —), touch the button (B7): the display will show the symbol and the number relative to the selected hours (fig.11);
- Set the desired number of hours by repeatedly touching the button.1, 2, 4, 6, 8, 12 hours can be selected.
- After a few seconds, the appliance will return to stand-by mode and the ⏻ symbol will remain lit on the display.
- After the programmed time, the appliance will turn on in the previously set operating mode.
How to programme delayed shut-down
- While the appliance is running, touch the button (B7): the display shows the symbol and the relative number of selected hours (fig. 11);
- Set the desired number of hours by repeatedly touching the button. 1, 2, 4, 6, 8, 12 hours can be selected.
- After a few seconds, the display returns to the current operating mode and the ⏻ symbol remains lit.
- After the programmed time, the appliance will automatically turn off.
Please note:
- Once the timer has been programmed, to see the remaining time until start-up or shut-down, touch the button once.
- To deactivate the timer function, press the button twice. The symbol on the display will turn off.
9.6 Wi-Fi function
The appliance has a built-in Wi-Fi function. To activate or deactivate this function, hold the button (B4) pressed until the appliance emits two beeps. When the Wi-Fi function is active, the display will show the Wi-Fi symbol (C5) with the following operating modes:

this means the Wi-Fi functions are active and the "Home WLAN" has been found
- SLOW FLASHING
this means the appliance is searching for the "Home WLAN"
- FAST FLASHING

this means the "Home WLAN" has not been found or has not been set.
"APP CONTROL" ICON
When the APP CONTROL icon appears this means the last command was received via Remote connection (e.g. APP).
If the saved "Home WLAN" setting needs to be changed, proceed as follows:
-
Hold the button pressed for about 20 seconds until a long beep is heard;
-
Use the app to set the new "Home WLAN" settings in the unit.
10. CLEANING AND MAINTENANCE
• Always disconnect the appliance from the mains before carrying out cleaning operations (fig. 13).
- Never submerge the appliance in water.
10.1 Cleaning the cabinet
- Never pour water directly over the appliance (fig. 14).
- Never use petrol, alcohol or solvents.
- Never spray insecticides or similar substances as these may deform the plastic.
- Clean the surfaces of the appliance using a soft cloth and do not use abrasive sponges as these may scratch the surfaces themselves (fig. 15).
10.2 Cleaning the dust or silver ion filter
The frequency of cleaning will depend on the frequency of use: if used daily, it is recommended to clean the filter every week.
- Remove the filter housing cover (A9) from the appliance (fig. 16).
- Extract the dust filter (fig. 17).
- Remove any dust from the filter using a vacuum cleaner (fig. 18).
- If the dust filter is very dirty, rinse it well with warm water. The water temperature must not exceed 40° C .
- Leave it to dry completely, then put it back into place.
10.3 Replacing the HEPA-type (E12)* filter
The appliance will automatically remind you when the HEPA-type (E12)* filter (A7) needs to be replaced. After a preset number of operating hours, the display shows the blinking symbol (C2) to indicate that the filter needs to be replaced.
Always use original De'Longhi filters.
- Remove the filter housing cover (A9) (fig. 16).
- Extract the used filter (fig. 19) and replace it with a new one.
- Close the filter housing cover (with the dust filter (A8) inserted).
- Reset the filter alarm by holding the button (B2) pressed for at least 10 seconds until you hear a long beep.
Please note:
the 📁symbol is intended only as a guide and it may be necessary to replace the HEPA-type (E12)* filter more frequently, depending on the air quality.
For long periods of downtime
- Disconnect the appliance from the mains and empty the tank (A6).
- Clean the dust filter (A8) and re-insert it.
-
Cover the appliance with a plastic bag to protect it from dust.
-
TECHNICAL SPECIFICATIONS
| Power supply voltage | See rating plate |
| Input power | “ |
| Maximum input power | “ |
| Defrost device | Yes |
| Hygrometer | Yes |
| Fan speed | 3 |
| Air filter | Yes |
| Frequency: | 2400/2483.5 MHz |
| Maximum transmission power | 10 mW |
Operating limits:
| Temperature | 2°C - 30°C |
| Relative Humidity | 30 - 90% |
* Air purification up to 99.96%.
Test by third party organisations of MPPS particles according to EN 1822: 2010. Efficiency for 2.5 µ m particles at a rate of 80 m3/h – dehumidification and filtration active.
- ALARMS SHOWN ON DISPLAY
| ALARM CAUSE SOLUTION | ||
 | Tank (A6) missing or incorrectly positioned | Place the tank back in its correct position (see paragraph “3.1 Draining into the tank”) |
| Tank full Empty the tank (see paragraph “3.1 Draining into the tank”) | ||
 | Room temperature too low (see operating limits in chap. “6. Technical Specifications”) | Increase the room temperature if possible |
 | Humidity in room too low or too high for correct measuring (see operating limits in chap. “6. Technical Specifications”) | Move the appliance to another room with humidity and temperature levels within the operating limits: if the problem persists, call the Service Centre. |
| Faulty probe Call Service Centre | ||
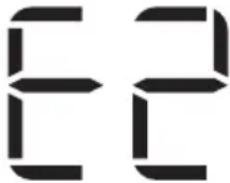 | Wi-Fi interface not working properly Turn | the appliance off and disconnect the plug from the power socket. Wait a few minutes, then re-insert the plug: if the problem persists, contact the Service Centre. |
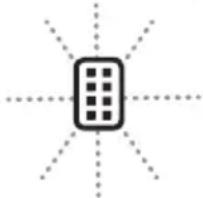 | After a preset number of operating hours, the symbol (C2) blinks on the display to indicate that the HEPA-type (E12)* filter (A7) needs to be replaced. | Replace the HEPA-type (E12)* filter (see para. “10.3 Replacing the HEPA-type (E12)* filter”). If the HEPA-type (E12)* filter has recently been replaced, reset the alarm (see para. “10.3 Replacing the HEPA-type (E12)* filter”) |
13. TROUBLESHOOTING
Below is a list of possible malfunctions.
If the problem cannot be resolved using the proposed solution, contact the Service Centre.
| PROBLEM CAUSE SOLUTION | ||
| The appliance is operating in dehumidifying mode, but the humidity does not decrease | The filter is clogged Clean the dust filter (para. “10.2 Cleaning the dust filter”) and check whether the HEPA-type (E12)* filter needs replacing (see paragrah. “10.3). | |
| Either the temperature or humidity in the room is too low | In certain conditions the appliance will not dehumidify: check the operating limits of the appliance (see chap. “6. Technical Specifications”). In certain cases, it is recommended to heat the room needing to be dehumidified. | |
| The set relative humidity level is too high Set a lower humidity value (see paragraph “4.1 Dehumidifying mode”). | ||
- FUNDAMENTAL SAFETY WARNINGS
- DESIGNATED USE
- INSTALLING THE APPLIANCE
- ENVIRONMENTAL INFORMATION
- SPECIFIC INFORMATION REGARDING APPLIANCES WITH R290 REFRIGERANT GAS
- GENERAL INFORMATION
- INSTRUCTION FOR USE
- PLEASE NOTE
- BEFORE USE
- IMPORTANT
- CHECKING THE APPLIANCE
- CONNECTING THE APPLIANCE
- CLEANING AND MAINTENANCE
- DISPOSAL
- DESCRIPTION
- DESCRIPTION OF APPLIANCE (A)
- DESCRIPTION OF CONTROL PANEL (B)
- DESCRIPTION OF DISPLAY(C)
- DOWNLOAD THE APP
- DRAINING THE CONDENSATE WATER
- DRAINING INTO THE TANK
- CONTINUOUS EXTERNAL DRAINING
- MODE SELECTION
- AIR FILTRATION
- DEHUMIDIFYING MODE
- DRY MODE
- VENTILATION MODE
- SWING FUNCTION
- TIMER FUNCTION
- HOW TO PROGRAMME DELAYED START-UP
- HOW TO PROGRAMME DELAYED SHUT-DOWN
- WI-FI FUNCTION
- SLOW FLASHING
- FAST FLASHING
- APP CONTROL" ICON
- CLEANING THE CABINET
- CLEANING THE DUST OR SILVER ION FILTER
- REPLACING THE HEPA-TYPE (E12)* FILTER
- FOR LONG PERIODS OF DOWNTIME
- TROUBLESHOOTING
Brand : DELONGHI
Model : DDSX225WF
Category : Dehumidifier