
RK 67325 E - Refrigerator GORENJE - Free user manual and instructions
Find the device manual for free RK 67325 E GORENJE in PDF.
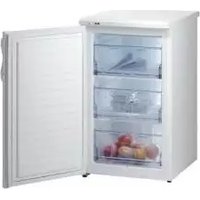


| Product Type | Combined refrigerator-freezer |
| Brand | Gorenje |
| Model | RK 67325 E |
| Installation Type | Freestanding |
| Total Net Volume | 295 L |
| Refrigerator Net Capacity | 210 L |
| Freezer Net Capacity | 85 L |
| Energy Efficiency Class | A |
| Annual Energy Consumption | 278 kWh/year |
| Noise Level | 41 dB |
| Climate Class | N-ST |
| Refrigeration System | Static |
| Defrost Type | Manual (freezer) |
| Interior Light | LED |
| Crisper Drawer | 1 drawer |
| Shelves | 4 glass shelves |
| Door Reversibility | Yes |
| Dimensions (W x D x H) | 600 x 640 x 1850 mm |
| Net Weight | 64 kg |
| Power Supply | 220-240 V, 50 Hz |
| Refrigerant | R600a |
| Spare Parts Availability | 7 years |
| Maintenance | Clean condenser annually |
Frequently Asked Questions - RK 67325 E GORENJE
User questions about RK 67325 E GORENJE
0 question about this device. Answer the ones you know or ask your own.
Ask a new question about this device
Download the instructions for your Refrigerator in PDF format for free! Find your manual RK 67325 E - GORENJE and take your electronic device back in hand. On this page are published all the documents necessary for the use of your device. RK 67325 E by GORENJE.
USER MANUAL RK 67325 E GORENJE
Instructions for use

Upright refrigerator - freezer

Thank you for your confidence in buying our appliance and congratulations on the excellent choice. We hope it will successfully serve its purpose for many years.
Upright refrigerator - freezer (hereinafter: the appliance) is combined from two parts: top part is refrigerator and bottom part is upright freezer.
Refrigerator is used in households for storage of fresh food at temperatures above 0° C).
Freezer is used in households for freezing fresh food and storage of frozen food for up to one year (depending on the type of food).
Before first operation .... 3
Description of the appliance .... 5
Installation and connection 6
Control panel 8
Recommended distribution of food 16
Storing fresh food in the
refrigerator 17
Storing of food in the ZERO'N'FRESH drawer ..... 19
Freezing and storage of frozen food 21
Defrosting the appliance 23
Cleaning 24
Troubleshooting guide 25
Noise level 27
Before fi rst operation


- The appliance is manufactured in compliance with all relevant safety standards; however, it is recommended that persons with impaired physical, motional, or mental abilities, or persons with inadequate experience and knowledge, do not use the appliance without due supervision. The same recommendation applies to minors using the appliance.
- Before connecting the appliance read these instructions carefully. They describe the appliance and provide instructions for its safe and correct use. The instructions are prepared for different types and models of the appliance so they may contain descriptions of functions and components your appliance may not have.
Instructions also contain the NO FROST freezer version, with integrated fan and automatic defrost.
- Remove the wrapping protecting the appliance during transport. Door corners are fitted with protective spacers. Remove the spacers and replace them with the attached pegs.
- Before connecting the appliance to the mains supply, leave it in upright position for about 2 hours. This will reduce possibility of malfunctions in the cooling system resulting from prior transport and handling.
- The appliance must be connected to the mains supply in accordance with the standing regulations and local requirements.
- The appliance must not be used in open air or exposed to weather precipitation.
- Always disconnect the appliance from power supply (pull the power cord from wall socket) before cleaning and before replacing the light bulb.
- If the power cord is damaged, it must be replaced by qualified service personnel.
- In case of longer disuse first turn the appliance off with the ON/OFF button and disconnect it from mains supply. Empty the appliance, clean the interior and leave the door ajar.
- For the protection of environment deliver the obsolete appliance to the authorized scrap appliance dealers.
- Wrappings contain environmentally friendly materials which can be recycled, recovered or disposed without threat to the environment.
- To prevent any pollution be careful not to damage the insulation or refrigeration tubes at the rear wall during the installation, cleaning and disposal of the appliance.
- Never let the children play with the appliance.
- Self closing door hinge pulls the door to the cabinet just before closing, thereby preventing the door to remain ajar. Equally it limits the door opening angle and prevents damage to adjacent elements.


- Practical longitudinal aluminum handle offers convenient grip anywhere along its length (convenient for children). It may also be decorated with a variety of design inserts (wood, inox,...).
- Odor fi Iter removes foul and unpleasant smells from inside the cabinet and prevents their absorption by other food stored in the refrigerator. First remove the protective foil from the fi Iter, then remove the aluminum gel protection at the back, and finally slip the filter onto the support from above, as shown on the sketch. Odor fi Iter removes foul and unpleasant smells from inside the cabinet and prevents their absorption by other food stored in the refrigerator. After approximately 3 months the gel inside the filter is used up and the filter needs replacement. It can be purchased from the authorized Gorenje service centers.
- For normal operation of radio receiver, connect the attached antenna to the antenna connection on the back side of the appliance. In case of bad reception, the appliance must be connected to the cable or external antenna.
- Rating plate with basic information is located in the interior of the appliance. If the sticker plate is not suitable for your language, replace it with the attached one.
- Warning: Ventilation slots on the appliance or built-in element should always be kept clean and unobstructed.
- Warning: Do not use any mechanical accessories when thawing the refrigerator, except for those explicitly recommended by the manufacturer.
- Warning: To prevent any pollution be careful not to damage the insulation or refrigeration tubes at the rear wall during the installation, cleaning and disposal of the appliance.
- Warning: Do not use any electrical devices inside the appliance, except for those explicitly recommended by the manufacturer.

The symbol on the product or on its packaging indicates that this product may not be treated as household waste. Instead it shall be handed over to applicable collection point for the recycling of electrical and electronic equipment. By ensuring this product is disposed of correctly, you will help prevent potential negative consequences for the environment and human health, which could otherwise be caused by appropriate waste handling of this product. For more failed information about recycling of this product, ease contact your local city offi ce, your household waste disposal service or the shop where you purchased a product.
Description of the appliance

A Refrigerator
B Freezer
1 Interior light
2 Shelf (adjustable height)
3 Telescopic guide shelf (max. 12 kg)
4 Foldable egg rack (closed - six eggs, open - 12 eggs)
5 Vegetable crisp pan*
6 ZERO'N'FRESH food storage drawer with pull-out guides (may. 20 kg)
7 Bottle rack*
8 Refrigerator door tray (max. 6 kg)
9 Deep shelf removable tray with lid READY'N'SERVE
10 Cheese board
11 Twin row bottle carrier with safety holder*
12 Tube holder*
13 Fast freeze drawer for small quantities of food
14 Large BIG'N'FREEZE drawer on telescopic guides (max. 16 kg)
15 Storage compartment (short)
16 Freezer door shelf*
17 Ice tray*
18 Defrost drain outlet groove*
19 Cooled water dispenser*
20 Legs
21 Wheels*
- Interior accessories of the appliance may vary according to the model.
- Pull-out guide drawers (or shelves) are extracted by lifting the rear end and pulling out inclined under the 45° angle. Reinsert in opposite sequence.
* Certain models only.
Installation and connection
Selecting the location
- Place the appliance in dry and well aired room. The appliance operates best at temperature ranges indicated in the chart below. Relevant class of the appliance is indicated on the rating plate.
| Class Ambient temperature | |
| SN (subnormal) from | +10°C to +32°C |
| N (normal) from +16°C to +32°C | |
| ST (subtropical) from | +16°C to +38°C |
| T (tropical) from +16°C to +43°C | |
Positioning the appliance


Positioning the appliance requires two persons in order to avoid injuries or damage to the appliance.
- Place the appliance flatly and firmly on a solid base. The appliance is fitted with adjustable feet on the front side, used to level the appliance. Rear side of the appliance is fitted with wheels facilitating the positioning of the appliance at the preselected place.
- The element above the appliance must be at least 5 cm away to allow sufficient cooling of the condenser.
- Avoid exposing the appliance to direct sunlight or heat sources. If this is not feasible, install insulation plate between the appliance and adjacent heat source.
- Bottom front side of the appliance is fitted with handles to facilitate relocation. The appliance may stand independently or adjacent to a furniture element or wall. Be sure to leave enough space for the opening of the door, to avoid damage to the appliance or injuries to persons. Also leave ample space for extracting shelves (see installation diagram).

Connecting to power supply
- Use the power cord to connect the appliance to the mains power. Wall outlet must be fitted with ground terminal (safety socket). Nominal voltage and frequency are indicated on the relevant label or rating plate of the appliance.
- Mains power connection and grounding must be made in line with standing regulations and local requirements.
The appliance is able to accommodate minor temporary voltage tolerances, but they may not exceed -6% to +6%.
Reverse door swing
Door swing change is not possible.
Control panel
Master menu
Control display is located on the outside the door and is controlled on touch screen principle.

Settings
I. Basic controls
- Setting refrigerator temperature
- Setting freezer temperature
- Help
- Child lock
- Current time
- Alarm
- ECO saving program
- Vacation program
- Super frost
- Super cool
- Quick bottle cool in the refrigerator
- Quick bottle cool in the freezer
II. Radio
III. Voice messages
IV. Other settings
V. Tips
I. Basic controls
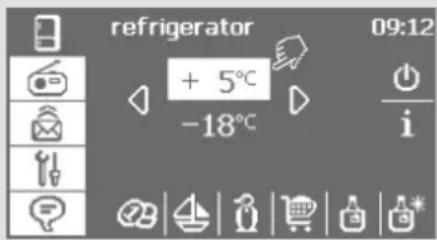

ON/OFF button ⏻
First plug the mains power lead into the wall mains outlet.
Screen illuminates, displays gorenje logo for a moment, and then changes to master menu.
The appliance is switched on/off by keeping the ⏻ symbol pressed for at least 3 seconds (separately for the fridge and for the freezer).
Setting the temperature
To set the refrigerator or freezer temperature press the relevant temperature setting button for each appliance.
Temperature is changed by pressing the arrows ◀ ▷.
After 5 seconds the setting is automatically saved.
Help is available by pressing the i symbol.
Help i
Press the i symbol to enter help.
Press the ▽ to move through the text.
Pressing the ⏻ symbol returns you back to the master menu in all settings.
Child lock
Integrated child lock protects the appliance against accidental alterations of temperature or even turning the appliance off.
Switch the child lock ON/OFF by pressing the symbo 07 for more than 2 seconds. Framed symbol indicates the function is active.
Warnings
There are four basic alarm functions
• refrigerator open door alarm;
• refrigerator temperature too high;
- freezer temperature too high;
- »quick bottle cool in the freezer« alarm;
Sound warning is switched of by pressing the symbol ↻.
Basic programs



You may select between several programs. After a setting is selected the display briefl y indicates that the selected setting is saved, and then returns to master menu, where the selected function is framed. Equally, when the selected function is switched off, the display briefl y indicates that the function has been deleted, then returns to master menu, where the selected function symbol is not framed any more (deleted setting).
ECO - saving program
By pressing the symbol. The refrigerator temperature is automatically set to +9°C (appliances with the ZERO'N'FRESH drawer to +8°C) and the freezer temperature to -18°C. The function used for longer absences from home. The setting is switched ON/OFF by pressing the symbol ⏻. To return to the master menu, press ↩.
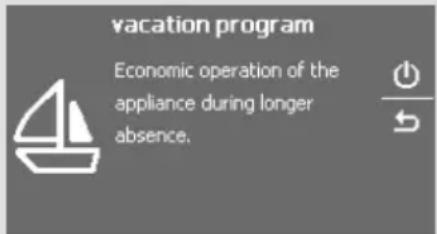
Vacation program

The program is activated by pressing the Symbol. The refrigerator temperature is automatically set to +9°C (appliances with the ZERO'N'FRESH drawer to +8°C) and the freezer temperature to -18°C. The function used for longer absences from home. Do not forget to remove quickly perishable food from the refrigerator prior leaving. Switch the function of when you return home. The setting is switched ON/OFF by pressing the symbol ⏻. To return to the master menu, press ↩.
Super frost function

The function is activated by pressing the symbol, and it is used for freezing large quantities of food inserted in the freezer at once. If it is not stopped before, the function is switched off automatically after 50 hours of operation. Maximum displayed temperature on the screen is -24°C . In case of power failure the process is repeated. The setting is switched ON/OFF by pressing the symbol 🔊. To return to the master menu, press ↩.
Super cool function

The function is activated by pressing the symbol. It is used for fast cooling of large quantities of food inserted in the refrigerator. The function is switched off automatically after 6 hours of operation, and the refrigerator temperature returns to the preset value. The setting is switched ON/OFF by pressing the symbol ⏻. To return to the master menu, press ↩.


II. Radio

III. Voice messages
Quick bottle cool in the refrigerator

Press the symbol to activate rapid cooling of the refrigerator bottle compartment located on the third shelf from the top. The function is switched off automatically after 3.5 hours of operation, and the refrigerator temperature returns to the preset value. The function is used for fast cooling of beverages in the refrigerator. The setting is switched ON/OFF by pressing the symbol ⏻. It may also be switched off manually.
To return to the master menu, press ↻.
Quick bottle cool in the freezer

Press the symbol 📄 to activate the quick cooling of bottles in the freezer. Place the 0.75 l bottle, or bigger into the central drawer. Attention! Make sure you take the bottle out of the freezer after cooling, otherwise it might freeze and burst. After 45 minutes, the sound warning and flashing of relevant symbol alerts you that your drink is cool (if you did not switch the setting off by yourself). The setting is switched ON/OFF by pressing the ⏻ symbol. It may also be switched off manually. To return to the master menu, press ↩.
Switching the radio ON/OFF
To enter the radio menu press the 🔒 symbol. To turn the radio ON/OFF press the 🔒 symbol.
Changing radio volume
Press the arrows ◀ to change radio volume.
Switching between the mono/stereo mode
To switch between the mono/stereo mode press the ∞ symbol.
Searching, saving and selection of new radio stations/programs
To search for new radio stations press the symbol. Use arrows to move from one to another station. Longer press of an arrow initiates automatic station search, by short pressing the search is manual. To save the found stations to the relevant memory places 1-4, press the symbols 1-4 and keep pressed, while by short pressing on symbols 1-4 you move between the preset stations. Press the symbol to set volume. Press the i symbol if you need help.
Press the ⚙ symbol to enter the voice messages menu. To get help, press the ⚡ symbol.


IV. Other settings

Recording messages
Press the ○ symbol to activate recording. "Recording" message appears on the screen.
By pressing the → symbol recording is cancelled and returns you to the master menu. Press the symbol to confirm end of recording. he display reads "message recipient".
Saving messages with recipient name input
Use arrows ▼ to select the target place for saving the message. Press the symbol to confirm
Press ↩ to return to the master menu. Display indicates »message recipient«.
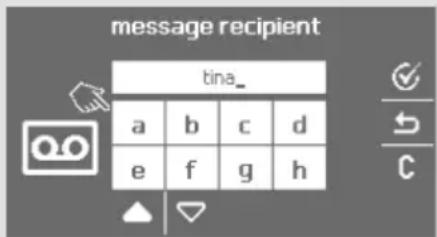
Press the 🔒 symbol to enter the new message recipient's name (maximum 8 characters). Use arrows ▽ to move along the character chart. Press the relevant character(s) to orm new recipient's name. Press C to delete characters. To confirm entry of new message recipient, press ⚙. Press → return to the master menu.
Playing messages
Use arrows ▽ to select the message you would like to play.
Press the ▷ arrow symbol to play the selected message.
Display reads »playing message«.
Press ↩ to stop playing and return to the master menu.
Non-played message - closed envelope in front of message recipient.
Played message - open envelope in front of message recipient.
New message - »closed envelope« symbol in the bottom right corner of the display.
Erasing messages
Use arrows ▽ to select the message to be erased. Press the × symbol to erase the message. Display asks the confirmation » erase message?«. To confirm deletion press the √ symbol. For a brief moment the display reads »message erased«. Press ← to return to the master menu.
To enter the Other settings menu, press the symbol.
Help i
To get help, press the i symbol.
Press ↩ to return to the master menu.


Setting the language
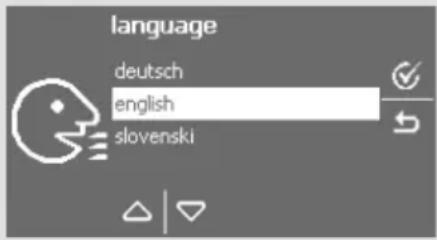
Default language setting is English.
To enter the language setting menu, press the ⚪ symbol.
Use arrows ▽ to select the language
Confir rm language selection by pressing the √. symbol. For a brief moment the display reads
»language selected«.
Press ↩ to cancel selection and return to the master menu.
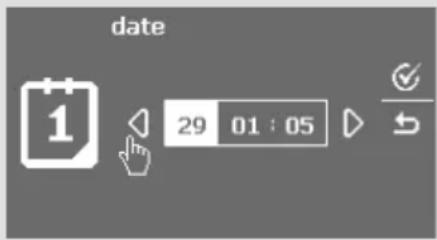
Setting the date 1
To enter the date setting menu, press the symbol.
Press the 1. digit to activate the day setting menu.
Press the 2. digit to activate the month setting menu.
Press the 3. digit to activate the year setting menu.
Use arrows ◀ to change the date. Confi rm the setting by pressing the √ symbol. For a brief moment the display reads »date set«.
Press ↩ to cancel selection and return to the master menu.
Clock setting
To enter the date setting menu, press the symbol.
Press the 1. digit to activate the hour setting menu.
Press the 1. digit to activate the minute setting menu. Use arrows
to change the hours and minutes. Confirm the setting by pressing the √ symbol. For a brief moment the display reads »clock set«.
Press ↩ to cancel selection and return to the master menu.
When the clock is set, the current time of day is displayed in the master menu screen in the top right corner.
Screen saver setting
Press the symbol to enter the screen saver menu (selection options).
Use arrows ▽ to select the screen saver. Confirm the setting by pressing the √ symbol. For a
brief moment the display reads »screen saver selected«.
Press ↩ to cancel selection and return to the master menu.
Sound setting
Press the Symbol to enter the sound setting menu. Use arrows ▽ to select the type of sound and alarm tone. You can select the key sound (with or without beep) and alarm sound (beep, voice alarm in different languages, or no sound). Confirm the setting by pressing the √ symbol.
Press ↩ to cancel selection and return to the master menu.

V. Tips


Contrast - Brightness setting

Press the symbol to enter the contrast and brightness menu. Use arrows ▼ to select contrast and brightness. Confirm selection by pressing the symbol √.
Contrast and brightness are changed by pressing the symbol ◀ □ confi rm the setting by pressing the √ symbol. For a brief moment the display reads »contrast/brightness set«.
Press ↩ to cancel selection and return to the master menu.
To save energy, after 3 minutes the screen saver automatically switches to the default saver.
There can appear on the display darker or lighter spots which become invisible by means of adequate contrast and brightness setting.
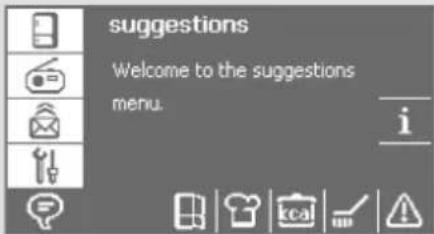
To enter the Tips menu, press the ⓕ symbol. To get extra help, press the i symbol.
Storage of food
Press the symbol to enter the food storage tips menu. Use arrows ▼ to select different compartments of the refrigerator. Confirm the selection of compartment by pressing the symbol. The detailed description of the selected compartment appears on the screen.
Press ↩ to return to the master menu.
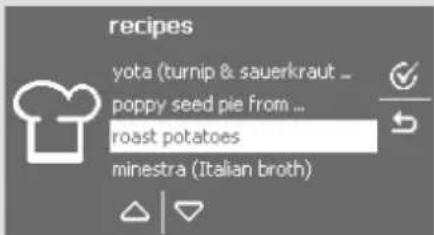
Recipes

Press the symbol to enter the recipes menu (you are offered several recipes to elect from). Use arrows ▽ to select a particular recipe. Confirm the selection of a recipe you wish to read by pressing the √ symbol. The detailed description of the selected recipe appears on the screen. Press → to return to the master menu.
Caloric chart

Press the symbol to enter the caloric chart menu. Use arrows ▼ to select a particular group of food. Confirm the selected group by pressing the √ symbol. The detailed description of the selected recipe appears on the screen.
Use arrows ▼ to select particular food. Press to return to the master menu.


Cleaning the appliance
Press the symbol to enter the cleaning tips menu. Press the symbol to select a tip. Confirm the selected tip by pressing the symbol. The detailed description appears on the screen. Press to return to the master menu.
Troubleshooting menu
Press the Symbol to enter the troubleshooting suggestions menu. Use arrows ▼ to select the type of fault. Confirm the selection by pressing the √ symbol. The detailed description appears on the screen. Press ↩ to return to the master menu.
Recommended distribution of food
Recommended distribution of food
Refrigerator compartments:
- top section: canned food, bread, wine, cake, ...
- middle section: dairy products, cheese, readymade food, desserts, juices, beer, TV-dinners, ...
- bottom section: meat, meat products, delicatessen, ...
- crisp pan: resh fruit, vegetables, salads, appliances without ZERO'N'FRESH drawer also: root vegetables, potatoes, onions, garlic, tomatoes, tropical fruit, sauerkraut, turnips, ...
- ZERO'N'FRESH drawer: fresh meat, meat products, fish, seafood, dairy products, salads, fruit, vegetables, mayonnaise, dips and sauces, ...
Refrigerator door lining compartments:
- top/middle section: eggs, butter, cheese, ...
- bottom section: beverages, cans, bottles, ...
Freezer sections:
- door compartments: packed vegetables, ice cream, ice, (certain models only)...
- other compartments: freezing, storing frozen food or quick cooling of bottles (see section "Freezing and storing frozen food", setting "Quick cooling of drinks in the freezer",...)

Storing fresh food in the refrigerator
Important precautions for storing fresh food
Interior accessories and space distribution

Proper use of the appliance, adequately packed food, correct temperature and hygienic precautions produce substantial impact on the quality of stored food.
Always respect the best before date, printed on the packaging.
Food to be stored in the refrigerator should be properly packed as to prevent emission and/or reception of moisture and odors.
Never store infl ammable, volatile or explosive substances.
⚠️ Beverages with high alcohol percentage shall be stored in tightly sealed bottles in vertical position.
Some organic solutions like volatile oils in lemon or orange peel, acids in butter etc. can cause damage in prolonged contact with plastic surfaces or gaskets for longer period of time they can cause accelerated aging of the plastic material.
⚠️ Unpleasant odor inside the refrigerator is a sign that something is wrong with food or that your refrigerator needs cleaning (see chapter Cleaning).
If you plan a longer absence, make sure you removed quickly perishable articles of food from the appliance before you leave.
Equipment depends on the model.
- Shelves can be optionally placed on the guides inside the appliance. They are protected against pulling out. To remove the shelf, slightly lift up the back part and pull it out. Quickly perishable food should be stored on the back i.e. the coldest part of the shelves.
- Special pull-out drawer is installed onto the guide at the most convenient location in the refrigerator, to allow extraction from the appliance on a shelf and transfer to the table (used as a serving tray).
- Crisp tray below the glass shelf at the bottom of the refrigerator is used for storage of fruit and vegetables. It retains the right level of moisture and prevents drying out.


- Bottle carrier (certain models only) offers a choice of location. It can carry different bottles and/or cans, and it may also be used as a table bottle support.
- Interior of the door is fitted with trays and shelves for storage of cheese, butter, eggs, yoghurt and other small packages, cans, jars, etc. Bottom part of the door is fitted with the bottle rack and further below is the tube holder for convenient storage of tubes without overturning.
- Portable trays with lids are placed on deep trays. They are used for storage of small size food, used for breakfast and/or other snacks. You may also store food separated by the sweet, salty, sour, etc. principle.
One of the lids carries the wooden cheese board.
- Two-row tray in the refrigerator door inner liner for frequently used food offer you much better use of space in the door inner liner.
Food should be sorted in two rows according to the principle - high at the back and low in the front.
- Fan (concealed behind the rear panel) helps distribute the temperature evenly and reduces dew on storage shelves.
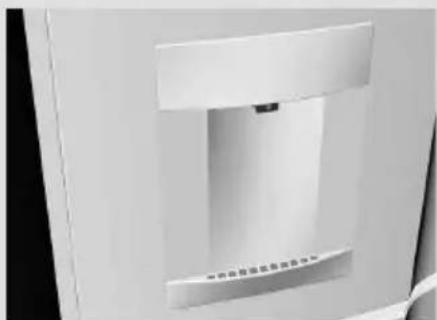
- Cool water dispenser (available only in certain models on the exterior side of the door) is used for pouring cool water without opening the refrigerator door.
Installation: take the tap with pipes from the attached bag and cork the plastic water bottle
(1,5 l). Remove the bag from the pipe coupled to the pump and connect it with the tap pipe by pressing one pipe into the other (minimum coverage 10 mm). The system is suitable only for water, and it is not suitable for aromatized water or any other beverage. Place the plastic bottle anywhere on the shelf under the pump.
Pouring: press the glass towards the dispenser wall and activate by pressing upwards. Periodically empty the dripped water from the receptacle underneath the dispenser.
Before first use of cool water dispenser, as well as after a prolonged period of disuse (more than 1 weeks), pump at least one liter of water through the system to purge it from bacteria and accumulated dirt.
Approximate storage time of fresh foods
| Food Period | |
| eggs, marinades, smoked meat, up to | 10 days |
| cheese up to 10 days | |
| carrots, etc... up to 8 days | |
| butter up to 7 days | |
| cake, fruit, TV-dinner dishes, raw chunks of meat | up to 2 days |
| fi sh, raw minced meat, seafood up to 1 day | |
Storing of food in the ZERO'N'FRESH drawer

The ZERO'N'FRESH drawer provides storage of wide selection of fresh food approximately three times longer than in the traditional refrigerator. Food remains fresh for long time and it preserves its taste and nutritive ingredients. It reduces decay and loss of mass, so fruit and vegetables are more fresh and natural. Storage temperature is around 0°C (preset). Temperature may vary between -2°C and +3°C, depending on the temperature variation within the refrigerator. If the temperature of the room, in which the appliance is installed, is lower than 16°C, the recommended setting of refrigerating compartment is 5°C or lower. For optimum operation the drawer must be completely closed. The drawer has pull-out guides and additional separate compartments (depending on the model) for the separate storage of food and usage of space according to the individual nutrition habits.
- Moisture level in the drawer depends upon the moisture of stored food, and on the frequency of opening the drawer.
- When you buy food check its freshness: quality and durability of food depends on it.
- Store non-wrapped animal or vegetable food separately, or wrap it in suitable packages. Be careful to prevent touching of different types of meat. They should be packed and stored separately to avoid bacterial decomposition in case meat turns foul.
- Approximately 30-60 minutes prior use remove food from the drawer to let its aroma and taste develop at ambient temperature.
- Do not store food sensitive to low temperature in the ZERO'N'FRESH drawer (hard cheese, potatoes, cucumber, fresh pepper, eggplant, avocado, half ripe tomatoes, beans, zucchini, tropical fruit).
Recommended storage periods in the ZERO'N'FRESH drawer*
| Food Storage period | |
| Meat: | |
| sausages, cold cuts, beef, pork, venison, raw meat | up to 7 days |
| poultry up to 5 days | |
| fi sh up to 4 days | |
| seafood up to 3 days | |
| Vegetables: | |
| cabbage, garlic, carrots up to 180 days | |
| celery, herbs up to 30 days | |
| lettuce, caulifl ower, chicory, rhubarb up to 21 days | |
| Brussels sprouts, asparagus, kale, Chinese cabbage, turnips, radish | up to 14 days |
| onions, mushrooms, spinach, peas up to 7 days | |
| Fruit: | |
| apples up to 180 days | |
| pears, kiwi up to 120 days | |
| grapes, quince up to 90 days | |
| peaches up to 30 days | |
| recurrant, gooseberry, plums up to 21 days | |
| apricots, huckleberry, cherry | up to 14 days |
| raspberry, strawberry | up to 3-5 days |
| Other: | |
| milk | up to 7 days |
| butter | up to 30 days |
| cheese up to 30 days |
* depending upon the quality and freshness of food
Freezing and storage of frozen food
Freezer interior accessories
Freezing procedure


I. Freezing compartment
II. Storage compartment
III. Fast freeze of small quantities of food

- The freezer interior door lining is also fitted with various shelves and holders (certain models only) used for storing frequently used frozen food - quick access (ice-cream, open packages of vegetables, etc.)
- Activate the fast freeze function by pressing the symbol (B) for continuous operation 24 hours prior intended freezing. After this period insert fresh food in the freezing compartment I or III, depending on the model (see illustration). In NO FROST freezer model use central drawer for freezing. Do not let the already frozen packages touch the fresh ones.
NO FROST freezers require enough space under the ceiling for the circulation of cold air, so avoid storing the food above the marked level (see photo).
• After 24 hours you may relocate the food to the storage compartment, and repeat the freezing procedure if required. You may also remove the drawers and store frozen food directly on cooling shelves. Do not remove the lower drawer if you have a NO FROST appliance!
- For freezing smaller quantities of fresh food (1-2 kg), the engagement of the fast freeze function is not required.
Important precautions for freezing of fresh food
⚠️ Freeze only such food which is suitable for freezing and sustain low temperatures. Food should be of adequate quality and fresh.
Select adequate packaging for each kind of food and pack it correctly.
The packaging should be air tight and well sealed without leaking since this could cause substantial vitamin loss and dehydration.
Mark packages with following data: kind and amount of foods and the date of loading.
It is imperative that food is frozen as quickly as possible. We therefore recommend the size of the package not to be too large and to be cooled before loading into the freezer.
The amount of the fresh foods that can be loaded in the freezer as a single load is declared on the rating plate. If the loaded amount is too large, the quality of freezing is reduced which in turn affects the quality of frozen foods.
Storing commercially frozen food
The storage time and recommended temperature for storing commercially frozen foods is indicated on the packaging. Always follow manufacturer's instructions for storage and use of frozen food. When shopping be careful to choose only food which is adequately packed and provided with complete data and stored in freezers where the temperature never rises above -18°C. Do not buy packages of food wrapped with frost. This indicates that the package was thawed before at least once.
Take care that packages don't start to thaw during transport to your home. Temperature rise shortens the storage time and affects the quality of commercially frozen foods.
Approximate storage time of frozen foods
| Food Period | |
| ruit, beef from 10 to 12 months | |
| Vegetables, veal, poultry from 8 to 10 months | |
| Venison from 6 to 8 months | |
| Pork from 4 to 6 months | |
| Chopped (minced) meat 4 months | |
| Bread, pastry, TV-dinner, fat free fi sh | 3 months |
| Intestines 2 months | |
| Smoked sausages, fat fi sh 1 month |
Defrosting frozen food
Partially thawed or defrosted foods should be used as soon as possible. Cold air preserves the food but it does not destroy microorganisms which rapidly activate themselves after defrosting and make foods perishable.
Partial defrosting reduces the nutritional value of food, especially fruits, vegetables and readymade meals.
Making ice

Remove the cap from ice tray and fi ll it to the mark with cold water or some other liquid, suitable for freezing. Close it and place it on the door shelf. Ice tray can produce 8 cubes.
It is recommended to make ice on stock.
Ice cubes are discharged from the tray by turning the tray upside down and placing it under cold running water. Shake the tray, open the cover and pour the ice out.
Defrosting the appliance
Automatic defrosting of the refrigerator
Refrigerator needs no special defrosting procedure, because ice deposited at the inner back wall is defrosted automatically. Ice deposited on the inner back wall during the compressor operation is defrosted when the compressor stops operating, and condensed water drops are drained through the outlet in the inner back wall into the drain pan situated above the compressor where it evaporates.
Defrosting traditional freezer

- Clean the freezer when the frost layer in the freezer reaches thickness of around 3-5 mm.
- 24 hours before defrosting set the fast freeze key (9), to continuous operation in order to additionally freeze the food inside. After that empty the freezer and take care that the packages remain frozen.
- Turn the freezer off by pressing the ⏻ symbol for more than 3 seconds (for freezer).
- To drain defrost water pull the funnel shaped groove at the bottom of the appliance out, and place a convenient vessel underneath to collect the defrost water.
- Never use powered appliances to defrost the freezer (hair dryer, etc.).
- Avoid using defrosting sprays, as they may cause damage to the plastic parts and may be hazardous to health.
- Clean the interior of the appliance and wipe it dry (see chapter Cleaning).
- Before reloading food into the freezer switch the appliance on.
- Defrosting of NO FROST freezer is automatic. Periodic appearance of frost layer eventually disappears automatically.
Cleaning
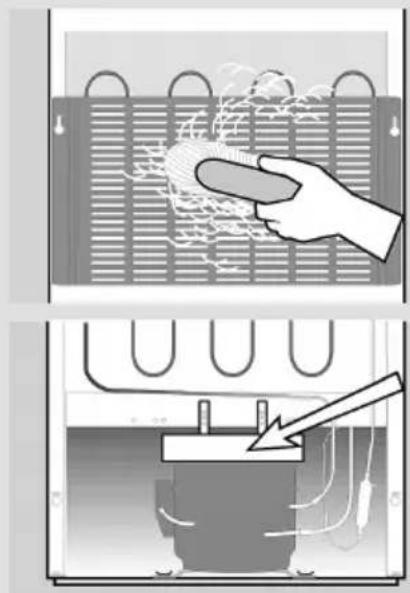
Prior any cleaning attempt disconnect the appliance from the mains (pull the power cord from the mains wall outlet).
Special antibacterial protection in top layer of inner walls prevents multiplication of bacteria and maintains the interior clean and germ free.
Make sure to remove traces of any cleansing agents you had been using.
- Clean the exterior of the appliance with water and liquid detergent.
- For cleaning of plastic, coated, or aluminum parts avoid using abrasive or special cleansing agents (like the stainless steel polish), otherwise you may damage the surface.
- Clean coated and aluminum surfaces using the soft cloth and alcohol based cleaning agent (like glass cleaner).
- Wash the interior of the appliance with liquid detergent and lukewarm water, mixed with a little vinegar.
- The condenser on the rear wall must always be clean and free of dust or kitchen fumes deposits, therefore clean the dust periodically with non-metallic brush or vacuum cleaner.
- Clean also the drip pan above the compressor. Ice and/or frost deposits exceeding 3-5 mm increase energy consumption, so you need to remove them regularly (not for the NO FROST freezer). Do not use sharp pointed objects, solvents or sprays.
- Clean the water dispenser pipes using dishwashing detergents. Pipe on the pump is disconnected by using the screwdriver to push the latches on the bottom side of the lid and removing the lid.
• After cleaning switch the appliance on and reload the food.
Troubleshooting guide
| Fault: Cause/Remedy | |
| The appliance does not operate after connection to the mains: | ·Check if there is power in the socket and if the appliance is switched on. |
| Cooling system operates continuously without intermittent stoppages: | ·Ambient temperature too high. |
| ·Frequent opening of the door, door open too long. | |
| ·Door not closed properly (particle between door gasket, sagged door, check gasket sealing, etc...). | |
| ·Excessive quantity of fresh food inserted at once. | |
| ·Check air circulation for suffi cient cooling of the compressor, and clean the condenser. | |
| ·‘Intensive freezing’ or ‘Intensive cooling’ option is on. | |
| Excessive ice formation at the rear interior wall of the refrigerator: | ·Frequent opening of the door, door open too long. |
| ·Inserting hot food in the refrigerator. | |
| ·Food or dish is touching the rear interior panel of the refrigerator. | |
| ·Bad door sealing; clean or replace the gasket if dirty or damaged. | |
| Water dripping from the appliance: | Drain outlet is clogged, drain water drips past the collection groove. |
Alarm (refrigerator/freezer):  | ·Frequent opening of the door, door open too long. |
| ·Door not closed properly (particle between door gasket, sagged door, damaged gasket, etc...). | |
| ·Excessively long power failure. | |
| ·Excessive quantity of fresh food inserted at once. | |
| ·Refrigerator sensor (A) is crammed with fresh food. Free the sensor and allow air to circulate around it. | |
| Difficult door opening: | ·If you want to open the immediately closed door, you may experience trouble in doing so. This happens because certain quantity of cold air escapes from the appliance through the open door and is replaced by warm ambient air. Cooling of such air creates negative pressure (vacuum) and suction, which prevents easy opening of the door. Situation is normalized after a few minutes, and you can open the door with ease. |
Bulb replacement: | · Before replacing the light bulb, disconnect the appliance form the power supply. Using the screwdriver remove the cover, replace the bulb with a new one (E14, same voltage as the factory one) and fi t back the cover. |
| · Don't forget: the old bulb does not belong to organic waste. | |
| · Light bulb is consumption material and is not covered by the warranty. | |
| Water dispenser doesn't work after connecting the appliance to the mains power | · Check pipe couplings. |
| · Check water level in the bottle. Before fi rst use, and if the dispenser was out of use for a longer period of time, the water bottle must be full, meaning that the lowest water level must be 5 cm below the pump. | |
| Error code displayed: · If the character E1 appears on the digital display call service assistance. | |
| Troubleshooting helpful hints: | · If you are not able to fix the trouble by any of the above tips, disconnect the power cord from the mains outlet, wait 10 minutes, and reconnect the appliance.In case trouble persists, contact the nearest authorized service center, giving them the type, model and serial number of the appliance, written on the rating plate in the inside of the appliance. |
Cooling of refrigerator-freezer appliances is provided by compressor cooling system (for certain appliances also the fan). Operation of this system results in certain noise, the intensity of which depends upon the installation, correct use, and age of the appliance.
- After starting the appliance, the operation of the compressor (the refrigerant flow) may be somewhat louder. This does not mean that something is wrong with the appliance, neither has it any influence on the lifetime of the appliance. Gradually the noise is reduced and eventually subsides.
-
Sometimes the appliance produces unusual and stronger noise which is rather unusual for the appliance. This noise is often the consequence of inadequate positioning of the appliance:
-
The appliance should be placed and leveled firmly on solid base.
- It should not touch the wall or adjacent kitchen units standing next to it.
- Check whether the accessories in the interior of the appliance are placed correctly in their positions; also check the bottles, tins and other vessels that might touch each other and rattle.
THE MANUFACTURER RESERVES THE RIGHT TO ALTER THE SPECIFICATIONS WITH NO IMPACT TO THE FUNCTIONAL OPERATION OF THE APPLIANCE.
HZOKS 3766, 3367;
HZOKF 3067, 3567 COMBI PRE
- INSTRUCTIONS FOR USE
- BEFORE FI RST OPERATION
- DESCRIPTION OF THE APPLIANCE
- A REFRIGERATOR
- B FREEZER
- INSTALLATION AND CONNECTION
- SELECTING THE LOCATION
- POSITIONING THE APPLIANCE
- CONNECTING TO POWER SUPPLY
- REVERSE DOOR SWING
- CONTROL PANEL
- MASTER MENU
- SETTINGS
- BASIC CONTROLS
- ON/OFF BUTTON ⏻
- SETTING THE TEMPERATURE
- HELP I
- CHILD LOCK
- WARNINGS
- BASIC PROGRAMS
- ECO - SAVING PROGRAM
- VACATION PROGRAM
- SUPER FROST FUNCTION
- SUPER COOL FUNCTION
- RADIO
- VOICE MESSAGES
- QUICK BOTTLE COOL IN THE REFRIGERATOR
- QUICK BOTTLE COOL IN THE FREEZER
- SWITCHING THE RADIO ON/OFF
- CHANGING RADIO VOLUME
- SWITCHING BETWEEN THE MONO/STEREO MODE
- SEARCHING, SAVING AND SELECTION OF NEW RADIO STATIONS/PROGRAMS
- OTHER SETTINGS
- RECORDING MESSAGES
- SAVING MESSAGES WITH RECIPIENT NAME INPUT
- PLAYING MESSAGES
- ERASING MESSAGES
- SETTING THE LANGUAGE
- SETTING THE DATE
- CLOCK SETTING
- SCREEN SAVER SETTING
- SOUND SETTING
- TIPS
- CONTRAST - BRIGHTNESS SETTING
- STORAGE OF FOOD
- RECIPES
- CALORIC CHART
- CLEANING THE APPLIANCE
- TROUBLESHOOTING MENU
- RECOMMENDED DISTRIBUTION OF FOOD
- REFRIGERATOR COMPARTMENTS
- REFRIGERATOR DOOR LINING COMPARTMENTS
- FREEZER SECTIONS
- STORING FRESH FOOD IN THE REFRIGERATOR
- EQUIPMENT DEPENDS ON THE MODEL
- APPROXIMATE STORAGE TIME OF FRESH FOODS
- STORING OF FOOD IN THE ZERO'N'FRESH DRAWER
- RECOMMENDED STORAGE PERIODS IN THE ZERO'N'FRESH DRAWER
- FREEZING AND STORAGE OF FROZEN FOOD
- FREEZER INTERIOR ACCESSORIES
- IMPORTANT PRECAUTIONS FOR FREEZING OF FRESH FOOD
- STORING COMMERCIALLY FROZEN FOOD
- APPROXIMATE STORAGE TIME OF FROZEN FOODS
- DEFROSTING FROZEN FOOD
- MAKING ICE
- DEFROSTING THE APPLIANCE
- AUTOMATIC DEFROSTING OF THE REFRIGERATOR
- DEFROSTING TRADITIONAL FREEZER
- CLEANING
- PRIOR ANY CLEANING ATTEMPT DISCONNECT THE APPLIANCE FROM THE MAINS (PULL THE POWER CORD FROM THE MAINS WALL OUTLET)
- MAKE SURE TO REMOVE TRACES OF ANY CLEANSING AGENTS YOU HAD BEEN USING
- TROUBLESHOOTING GUIDE
Brand : GORENJE
Model : RK 67325 E
Category : Refrigerator