
A2 - Guitar Effects ZOOM - Free user manual and instructions
Find the device manual for free A2 ZOOM in PDF.


| Product type | Effects processor for acoustic guitar |
| Dimensions (L x D x H) | 156 mm x 162 mm x 65 mm |
| Weight | 700 g (without batteries) |
| Power supply | 9 V DC, 300 mA AC adapter (ZOOM AD-0006) or 4 AA alkaline batteries (approx. 7.5 h) |
| Sampling frequency | 96 kHz, 24-bit, internal processing 32-bit |
| Number of effects | 47 effect types, up to 8 simultaneous modules |
| Patches | 80 patches (40 user, 40 preset) |
| Display | 2-digit 7-segment LED |
| Input | Standard mono jack (1 MΩ impedance) |
| Output | Standard stereo jack (line/headphones, 20 mW + 20 mW into 32 Ω) |
| External control | CONTROL IN input for FP01/FP02 expression pedal or FS01 footswitch |
| Main functions | Acoustic guitar modeling, microphone simulator, compressor/limiter, parametric equalizer, reverbs, delays, chorus, flanger, phaser, wah, tremolo, feedback control, chromatic tuner, built-in PCM rhythms |
| Maintenance and cleaning | Soft, dry cloth, slightly damp if necessary. Do not use solvents or abrasive cleaners. |
| Safety | Use only the specified AC adapter. Avoid moisture, shocks, and extreme temperatures. Do not open the housing. |
| Spare parts and repairability | No user-serviceable parts. Options available: FS01 (footswitch), FP01/FP02 (expression pedal). |
| General information | Frequency response: 20 Hz - 40 kHz (+1 dB / -3 dB). Signal-to-noise ratio: 100 dB. |
Frequently Asked Questions - A2 ZOOM
User questions about A2 ZOOM
0 question about this device. Answer the ones you know or ask your own.
Ask a new question about this device
Download the instructions for your Guitar Effects in PDF format for free! Find your manual A2 - ZOOM and take your electronic device back in hand. On this page are published all the documents necessary for the use of your device. A2 by ZOOM.
USER MANUAL A2 ZOOM
ACOUSTIC EFFECTS PEDAL
A2
Operation Manual
200m
© ZOOM Corporation
Reproduction of this manual, in whole or in part, by any means, is prohibited.
SAFETY PRECAUTIONS Usage Precautions
SAFETY PRECAUTIONS
In this manual, symbols are used to highlight warnings and cautions for you to read so that accidents can be prevented. The meanings of these symbols are as follows:

This symbol indicates explanations about extremely dangerous matters. If users ignore this symbol and handle the device the wrong way, serious injury or death could result.

This symbol indicates explanations about dangerous matters. If users ignore this symbol and handle the device the wrong way, bodily injury and damage to the equipment could result.
Please observe the following safety tips and precautions to ensure hazard-free use of the A2.

Power requirements
Since power consumption of this unit is fairly high, we recommend the use of an AC adapter whenever possible. When powering the unit from batteries, use only alkaline types.
[AC adapter operation]
- Be sure to use only an AC adapter which supplies 9 V DC, 300mA and is equipped with a "center minus" plug (Zoom AD-0006). The use of an adapter other than the specified type may damage the unit and pose a safety hazard.
- Connect the AC adapter only to an AC outlet that supplies the rated voltage required by the adapter.
- When disconnecting the AC adapter from the AC outlet, always grasp the adapter itself and do not pull at the cable.
- During lightning or when not using the unit for an extended period, disconnect the AC adapter from the AC outlet.
[Battery operation]
- Use four conventional IEC R6 (size AA) batteries (alkaline).
- The A2 cannot be used for recharging.
- Pay close attention to the labelling of the battery to make sure you choose the correct type.
- When not using the unit for an extended period, remove the batteries from the unit.
- If battery leakage has occurred, wipe the battery compartment and the battery terminals carefully to remove all remnants of battery fluid.
- While using the unit, the battery compartment cover should be closed.
![ZOOM A2 - [Battery operation] - 1](/content/2025/01/152187/images/98b66f67653050c1e0e5db147f6eada39cf56902a412a6d855778ec24383a8f8.jpg)
Environment
To prevent the risk of fire, electric shock or malfunction, avoid using your A2 in environments where it will be exposed to:
- Extreme temperatures
- Heat sources such as radiators or stoves
High humidity or moisture
- Excessive dust or sand
- Excessive vibration or shock

Handling
- Never place objects filled with liquids, such as vases, on the A2 since this can cause electric shock.
- Do not place naked flame sources, such as lighted candles, on the A2 since this can cause fire.
- The A2 is a precision instrument. Do not exert undue pressure on the keys and other controls. Also take care not to drop the unit, and do not subject it to shock or excessive pressure.
Take care that no foreign objects (coins or pins etc.) or liquids can enter the unit.

Connecting cables and input and output jacks
You should always turn off the power to the A2 and all other equipment before connecting or disconnecting any cables. Also make sure to disconnect all connection cables and the power cord before moving the A2.

Alterations
Never open the case of the A2 or attempt to modify the product in any way since this can result in damage to the unit.

Volume
Do not use the A2 at a loud volume for a long time since this can cause hearing impairment.
Usage Precautions
Electrical interference
For safety considerations, the A2 has been designed to provide maximum protection against the emission of electromagnetic radiation from inside the device, and protection from external interference. However, equipment that is very susceptible to interference or that emits powerful electromagnetic waves should not be placed near the A2, as the possibility of interference cannot be ruled out entirely.
With any type of digital control device, the A2 included, electromagnetic interference can cause malfunctioning and can corrupt or destroy data. Care should be taken to minimize the risk of damage.
Cleaning
Use a soft, dry cloth to clean the A2. If necessary, slightly moisten the cloth. Do not use abrasive cleanser, wax, or solvents (such as paint thinner or cleaning alcohol), since these may dull the finish or damage the surface.
Please keep this manual in a convenient place for future reference.
Contents
SAFETY PRECAUTIONS Usage Precautions 2
Features 4
Terms Used in This Manual 5
Controls and Functions / Connections 6
Selecting a Patch 8
Using the Tuner 10
Using the Rhythm Function 12
Editing a Patch 14
Storing/Copying Patches 16
Using the Feedback Control 18
Manual operation of feedback control 18
Automatic detection of feedback frequency 19
Using Manual Mode 20
Using an Optional Foot Switch or Pedal 21
Using the foot switch (FS01) 21
Using the expression pedal (FP01/FP02) 22
Restoring Factory Defaults 24
Linking Effects 25
CONTROL module and GLOBAL module 25
Effect Types and Parameters 26
How to read the parameter table 26
MODEL 27
MIC 28
COMP/LIMIT 28
LOEQ 28
HI EQ 29
ZNR 29
MOD/EFX 29
DELAY/REVERB 31
CONTROL 33
GLOBAL 34
Specifications 35
Troubleshooting 35
A2 Preset Pattern Back cover
The FCC regulation warning (for U.S.A.)
This equipment has been tested and found to comply with the limits for a Class B digital device, pursuant to Part 15 of the FCC Rules. These limits are designed to provide reasonable protection against harmful interference in a residential installation. This equipment generates, uses, and can radiate radio frequency energy and, if not installed and used in accordance with the instructions, may cause harmful interference to radio communications. However, there is no guarantee that interference will not occur in a particular installation. If this equipment does cause harmful interference to radio or television reception, which can be determined by turning the equipment off and on, the user is encouraged to try to correct the interference by one or more of the following measures:
- Reorient or relocate the receiving antenna.
- Increase the separation between the equipment and receiver.
- Connect the equipment into an outlet on a circuit different from that to which the receiver is connected.
- Consult the dealer or an experienced radio/TV technician for help.
Features
Thank you for selecting the ZOOM A2 (simply called the "A2" in this manual). The A2 is a sophisticated effect processor for acoustic guitar with the following features.
- Latest technology for top performance
Excellent sound quality is assured by signal processing circuitry featuring 96kHz / 24 bit sampling and internal 32-bit processing. Frequency response remains flat to 40kHz , and signal-to-noise ratio is an amazing 100dB .
Full array of effects optimized for acoustic guitar
Out of a versatile palette of 47 effects, up to eight (including ZNR) can be used simultaneously. In addition to standard effects such as compressor and delay/reverb, the A2 offers effects which simulate the sound of famous acoustic guitars, a mic simulator, and other specialized acoustic guitar effects.
- Select optimum characteristics for pickups and amps
The A2 allows you to select the best frequency response for your pickup and amp. This is great for eliminating sonic problems that can occur when playing an acoustic guitar through a guitar amplifier.
Automatic suppression of acoustic feedback
The feedback control feature pinpoints the frequency where acoustic feedback (howling) occurs and provides an efficient cure. The function can be activated by foot switch during a performance.
Advanced interface
Rotary selectors and three parameter knobs make operation extremely quick and intuitive. The muting interval when switching patches has been reduced to less than 8 milliseconds, allowing virtually seamless patch changes.
Rhythm function and auto-chromatic tuner
Rhythm patterns created from highly realistic PCM sources are convenient for use instead of a metronome during practice or for quick session work. The auto-chromatic tuner designed for guitar makes tuning a snap.
Support for foot switch and expression pedal
By connecting an optional foot switch (FS01) to the CONTROL IN jack, you can switch banks, specify the rhythm tempo, and switch feedback control on and off with your foot. Or use an expression pedal (FP01/FP02) to vary the volume or tone in real time.
- Dual power supply principle allows use anywhere
The A2 can be powered from four IEC R6 (size AA) batteries or an AC adapter. Continuous operating time on batteries is approximately 7.5 hours with alkaline batteries.
Please take the time to read this manual carefully, in order to get the most out of your A2 and to ensure optimum performance and reliability.
Terms Used in This Manual
This section explains some important terms that are used throughout the A2 documentation.

■ Effect module
As shown in the illustration above, the A2 can be thought of as a combination of several single effects. Each of these is referred to as an effect module. Among others, there is a module for ZNR (ZOOM Noise Reduction), as well as a modeling (sound simulation) module (MODEL), compressor/limiter module (COMP/LIMIT), modulation/special effects module (MOD/EFX). Parameters such as effect intensity can be adjusted for each module individually, and modules can be switched on and off.
■ Effect type
Most effect modules comprise several different effects which are referred to as effect types. For example, the MOD/EFX module comprises chorus, flanger, delay, phaser, and other effect types. Only one of these can be selected at any time.
■ Effect parameter
All effect modules have various parameters that can be adjusted. These are called effect parameters.
In the A2, effect parameters are adjusted with the parameter knobs 1 - 3. Similar to the knobs on a compact effect, these change aspects such as tonal character and effect intensity. Which parameter is assigned to each knob depends on the currently selected effect module and effect type.
Patch
In the A2, effect module combinations are stored and called up in units referred to as patches. A patch
comprises information about the on/off status of each effect module, about the effect type used in each module, and about effect parameter settings. The internal memory of the A2 holds 80 patches (40 of these can be rewritten by the user).
Bank and area
A group of ten patches is called a bank. The memory of the A2 comprises a total of eight banks, labelled A to d and 0 to 3. Banks A - d form the user area which allows read/write patches. Banks 0 to 3 are the preset area of read-only.
The patches within each bank are numbered 0 through 9. To specify a patch, you use the format "A1" (patch number 1 from bank A), "06" (patch number 6 from bank 0), etc.
■ Modes
The A2 has the following operation modes.
Play mode
In this mode, patches can be selected and played.
- Manual mode
In this mode, you play your instrument while using the foot switches to turn the MOD/EFX module or the feedback control function on and off. The mode also is used for automatic detection of acoustic feedback frequency.
Edit mode
In this mode, the effect parameters of a patch can be edited (changed).
Operating the A2 on batteries
-
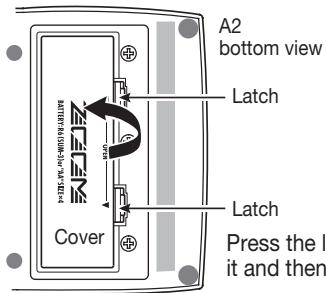
Turn the A2 over and open the cover 2 of the battery compartment on the bottom.
-
Insert four fresh IEC R61. (size AA) batteries.
-
Close the cover of the battery compartment. Push the cover in until the latch audibly snaps into place.
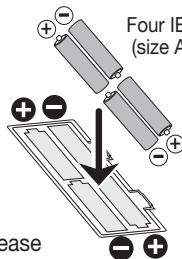
Insert batteries facing in alternate directions.
Use four IEC R6 (size AA) batteries.
When the batteries are getting low, the indication "bt" appears on the display.
Controls and Functions / Connections
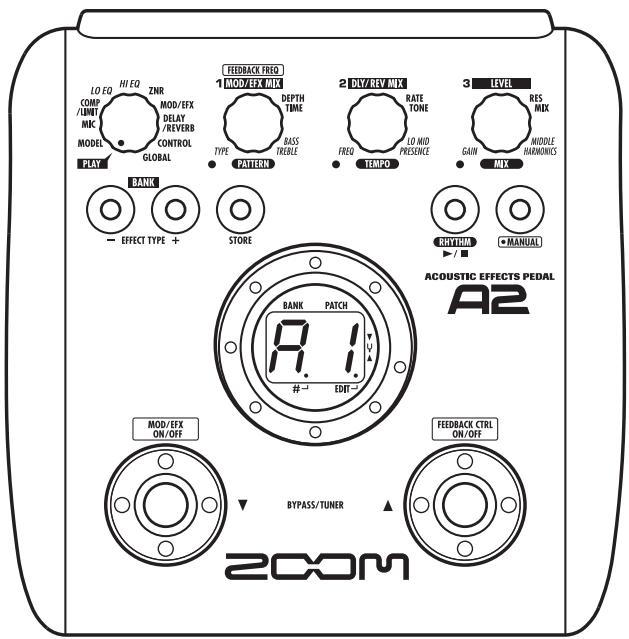
Module selector
Switches between play / manual mode and edit mode. In edit mode, the knob selects the module for operation.
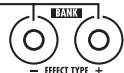
BANK[-]/[+] keys
In play / manual mode, the keys serve for directly switching to the next lower or higher bank. In edit mode, the keys switch the effect type for the currently selected module.
[STORE] key
Serves for storing edited patches in memory.
[INPUT] jack
Serves for connecting of an acoustic guitar with a pickup, an electroacoustic guitar, or an electric guitar.
About HI-GAIN mode
When using a magnetic pickup, a single-coil electric guitar, or any other pickup with low output level, the input gain of the A2 can be increased by selecting the HI-GAIN mode.
To start the A2 in HI-GAIN mode
Turn power on while holding down the [] foot switch. The indication "Hi-GAin" scrolls on the display, and input gain will be set to a higher value.
NOTE
The input gain setting is not stored in memory and will be canceled when the unit is turned off. Perform the above procedure every time at power-on, as needed.
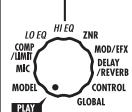
Top Panel

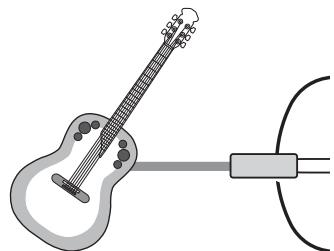
Acoustic guitar
[OUTPUT/PHONES] jack
This stereo phone jack can be used for connection to a guitar amplifier or hi-fi system. It is also possible to use a Y cable for sending the output to two amplifiers, or to plug a pair of stereo headphones into this jack.
![ZOOM A2 - [OUTPUT/PHONES] jack - 1](/content/2025/01/152187/images/d9cd7d784e0beccf5cad5b3c46a02af4ac12bcf2cbc0d3f86209bea0155a9c6f.jpg)
![ZOOM A2 - [OUTPUT/PHONES] jack - 2](/content/2025/01/152187/images/55325dd4f94ad823d6681c6fbd4663d23b72711c8332d64c589d258aac01e292.jpg)
![ZOOM A2 - [OUTPUT/PHONES] jack - 3](/content/2025/01/152187/images/a0cb560db5bed92240a5ebd2258473d37967c519e7f5940f91320b414bd1cfc9.jpg)
Headphones
PA system
![ZOOM A2 - [OUTPUT/PHONES] jack - 4](/content/2025/01/152187/images/7879a1d30b6226bc0e9333db1a185f946f92d12ecbc334766317c931031793a2.jpg)
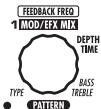
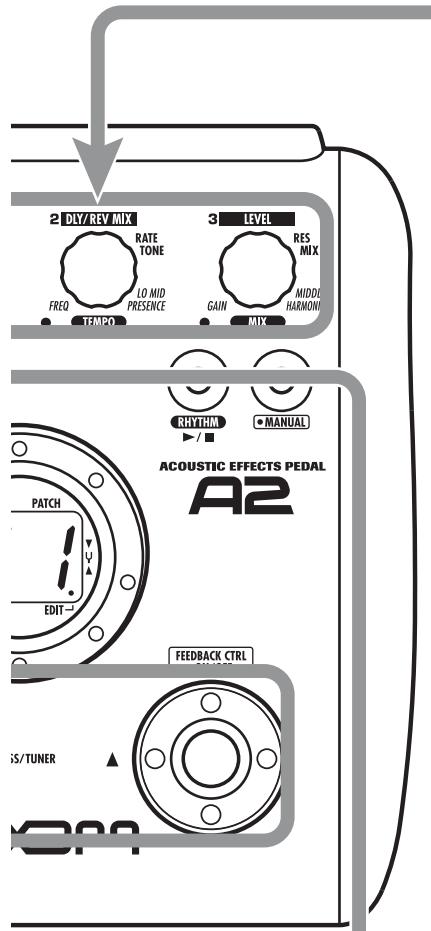
Parameter knobs 1 - 3
These knobs allow changing the value of effect parameters or the level of the overall patch. During rhythm playback, the knobs let you select a pattern, set the tempo, and adjust the rhythm volume.
RHYTHM [▶/■] key
Serves to start/stop rhythm playback.
[MANUAL] key
Switches between play mode and manual mode. The key is lit when the A2 is in manual mode.
Display
Shows patch numbers, setting values, and other information about operating the A2.
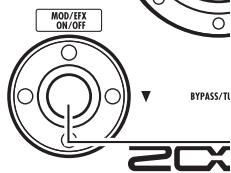
[ ] / [ ] foot switches
These switches serve for selecting patches, turning effect modules on and off, controlling the tuner, and other functions.
![ZOOM A2 - [ ] / [ ] foot switches - 1](/content/2025/01/152187/images/5efb01df061314e141a537f9e23d420146a539fa90f067b3decc5b98e2a1d509.jpg)
Selecting a Patch
While playing your instrument, try out various patches to see what the A2 can do.
1 Turn power on
- Use a shielded cable with mono phone plug to connect your guitar to the [INPUT] jack of the A2.
- To power the A2 from the AC adapter, plug the adapter into a wall outlet and plug the cable from the adapter into the [DC IN] jack on the A2.
- Set the [POWER] switch on the rear panel of the A2 to ON.
- Turn the playback system on and adjust the volume to a suitable position.
Set the A2 to play mode
- If the Module selector is set to a position other than "PLAY", set it to "PLAY".
The bank and patch that were selected when the power was last turned off will appear on the display.
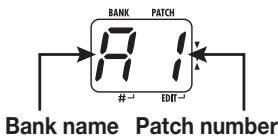
HINT Immediately after turning the A2 on, the unit will be in play mode, even if the Module selector is set to a position other than "PLAY".
3 Select a patch
- To switch the patch, press one of the [] / [] foot switches.
Pressing the [] foot switch calls up the next lower patch, and pressing the [] foot switch calls up the next higher patch.
Repeatedly pressing one foot switch cycles through patches in the order A0 - A9 ... d0 - d9 00 - 09 ... 30 - 39 A0 or the reverse order.
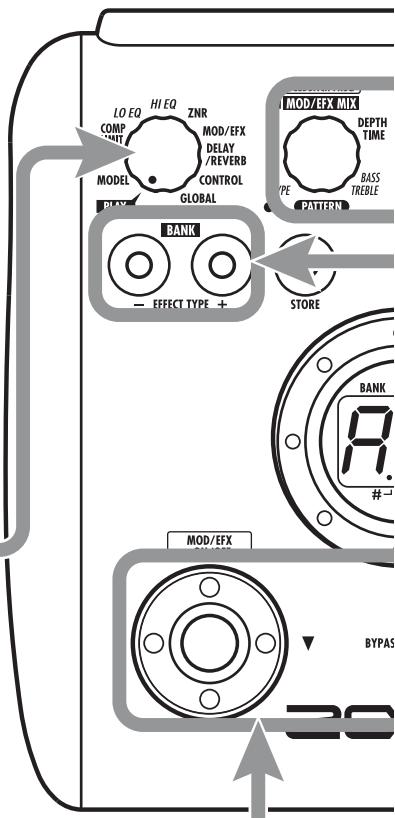
Adjust tone and volume
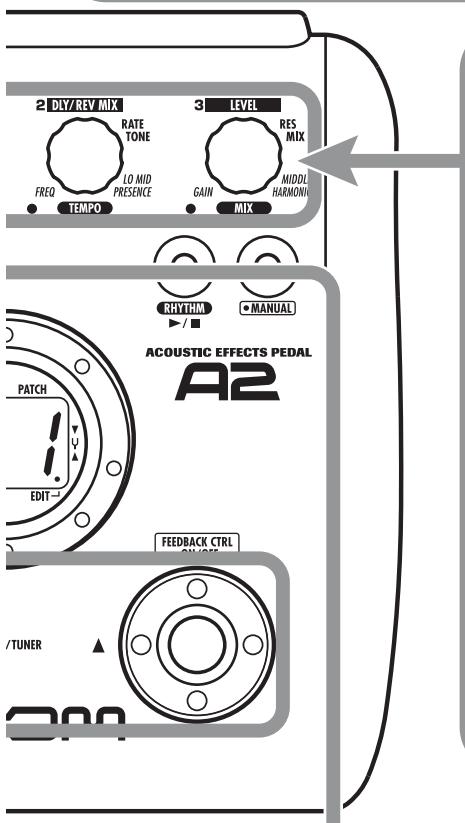
- To adjust the effect sound and volume levels in play mode, the Parameter knobs 1 - 3 can be used. Each knob controls a specific parameter.
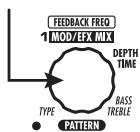
Parameter knob 1
Mainly adjusts the MIX parameter of the MOD/EFX module (the level of the effect sound mixed to the original sound).
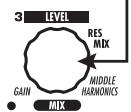
Parameter knob 3
Adjusts the PATCH LEVEL parameter (output level of the entire patch).
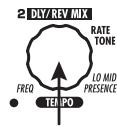
Parameter knob 2
Adjusts the MIX parameter of the DELAY/REVERB module (the level of the effect sound mixed to the original sound).
When you turn a Parameter knob, the corresponding LED lights up and the display briefly shows the current value of the respective parameter.
NOTE
- If the MOD/EFX module or DELAY/REVERB module is set to off for the currently selected patch (display shows "oF"), the respective parameter knobs (1 or 2) have no effect.
- Changes made here are temporary and will be lost when you select another patch. To retain the changes, store the patch ( p. 16).
- Besides the individual patch levels, the A2 also allows adjusting the master level. This setting affects all patches ( p. 33).
4 Directly selecting a bank
To select the banks A - d, 0 - 3 directly, use the BANK [-]/[+] keys.
Pressing the BANK [-] key calls up the next lower bank, and pressing the BANK [+] key calls up the next higher bank.
Using the Tuner
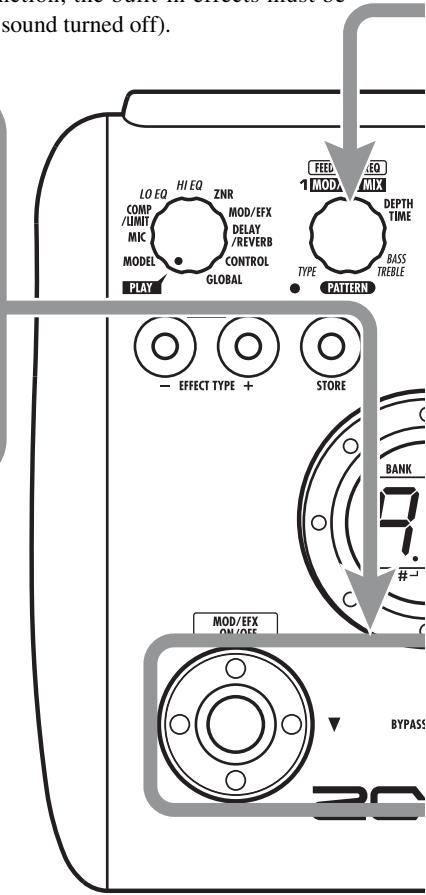
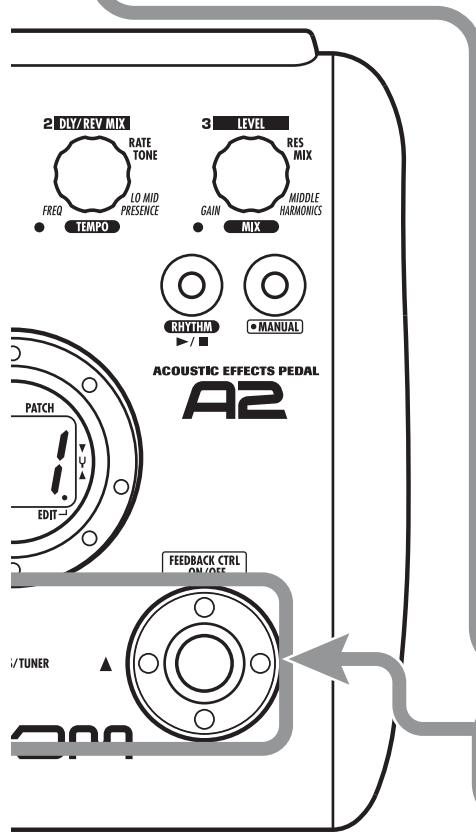
The A2 incorporates an auto-chromatic tuner. To use the tuner function, the built-in effects must be bypassed (temporarily turned off) or muted (original sound and effect sound turned off).
Switch to bypass or mute
- Setting the A2 to the bypass condition
In play mode (or manual mode), press both [ ] / [ ] foot switches together briefly and release.
- Setting the A2 to the mute condition
In play mode (or manual mode), press both [] / [] foot switches together and hold for at least 1 second.
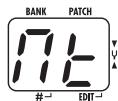

Patch change at bypass/mute
When you press both [] / [] foot switches together while playing your instrument, the bypass/mute condition is activated. However, the sound may change momentarily just before the condition is activated. This is because the A2 switches to the next higher or lower patch when one of the foot switches is pressed slightly earlier. (When you cancel the bypass/mute condition, the original patch number will be active again.)
This kind of behavior is not a defect. It is due to the very high speed at which the A2 responds to patch switching. To prevent the sound change caused by the above condition, do not produce sound with your instrument until the bypass/mute condition is fully established.

Play the string to tune
- Play the open string to tune, and adjust the pitch.
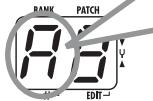
The left side of the display shows the note which is closest to the current pitch.
A = D = G =
A^# = _1 D^# = .G^# = .
B = E =
C = F =
C^# = · . F

Adjusting the reference pitch of the tuner
If required, you can fine-adjust the reference pitch of the A2 tuner. The default setting after power-on is center A = 440Hz .
- Turn parameter knob 1.
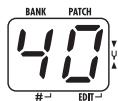
The current reference pitch is shown.
The adjustment range is 35 - 45 (center A = 435 to 445Hz ).
- While the reference pitch value is shown, turn parameter knob 1 to adjust it.
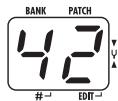
When you release the parameter knob, the display indication will return to the previous condition after a while.
NOTE
When you turn the A2 off and on again, the reference pitch setting will be reset to 40 (center A = 440Hz

Return to play mode
- Press one of the [] / [] foot switches.
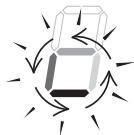
The right side of the display shows a symbol that indicates by how much the tuning is off.
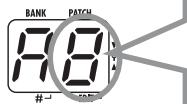
Tune other strings in the same way.
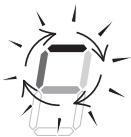
Pitch is high
Pitch is correct

Pitch is low
Indication turns faster the more the pitch is off.
Using the Rhythm Function
The A2 has a built-in rhythm function that plays realistic drum sounds in various patterns. The rhythm function is available in play mode or in the bypass/mute condition.
Set the A2 to play mode (or manual mode)
- If the Module selector is set to a position other than "PLAY", set it to "PLAY".
HINT The rhythm function can be used both in play mode and manual mode.
2 Start the rhythm function
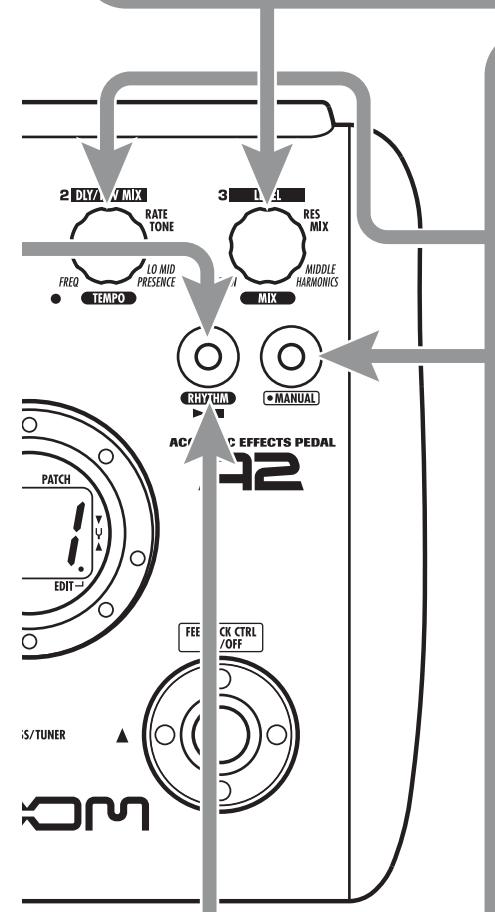
- To start the rhythm function, press the RHYTHM [▶/■] key.
NOTE While the rhythm is playing, the DELAY/REVERB module is set to off.
3 Select a rhythm pattern
The A2 has 40 built-in rhythm patterns. For more information on the pattern contents, see the back cover of this manual.
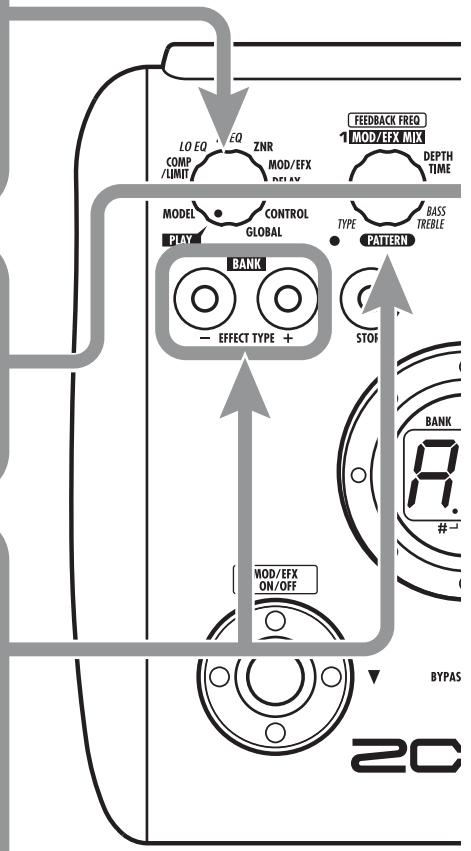
- To continuously switch rhythm patterns, turn parameter knob 1.
To select the next higher or next lower rhythm pattern, press one of the BANK [-]/[+] keys.
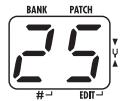
When the above steps are carried out, the current rhythm pattern number (01 - 40) is briefly shown on the display.
4 Adjust the rhythm volume
- To adjust the rhythm volume, turn parameter knob 3.
When you turn the parameter knob, the current setting (0 - 30) is shown on the display.
Adjust the tempo
The rhythm pattern tempo can be adjusted in the range of 40 - 250 BPM (beats per minute).
- To continuously change the rhythm tempo, turn parameter knob 2.
- By connecting a foot switch (FS01) to the [CONTROL IN] jack and assigning the "tap tempo" function to it, you can specify the tempo by tapping the foot switch in the desired interval ( p 21).
When you tap the foot switch the first time, the current tempo setting is shown. The setting is then adjusted automatically at the second and subsequent taps.
While the above steps are carried out, the current tempo value (40 - 250) is shown on the display. For values in the range from 100 to 199, a dot is shown in the center. For values of 200 and above, dots are shown in the center and at right.
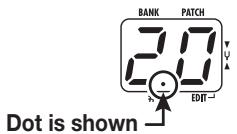
Tempo = 120 BPM
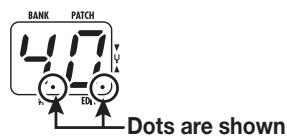
Tempo =240 BPM
Stop the rhythm
- To stop the rhythm, press the RHYTHM [▶/■] key.
The A2 returns to the previous condition.
Editing a Patch
The patches of the A2 can be freely edited by changing the effect parameter settings. Try editing the currently selected patch to create your own sound.
1 Select the effect module
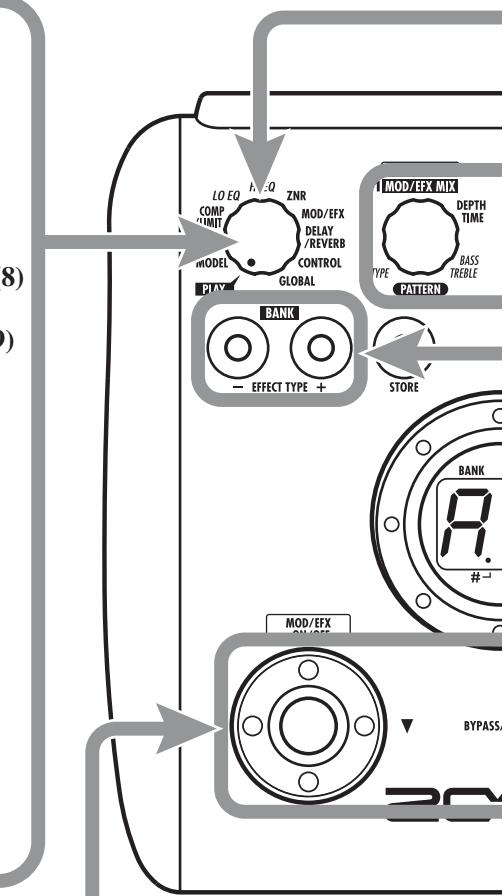
- Turn the Module selector to select the effect module to edit. The following settings are available.
(1)MODEL module
(2) MIC module
(3) COMP/LIMIT module
(4) LO EQ module
(5) HI EQ module
(6) ZNR module
(7) MOD/SFX module
(8) DELAY/REVERB module
(9) CONTROL module
(10) GLOBAL module
When you set the Module selector to a position other than "PLAY", the A2 switches to edit mode, and the effect type currently selected for the respective module is shown. In edit mode, a dot appears in the bottom right of the display.
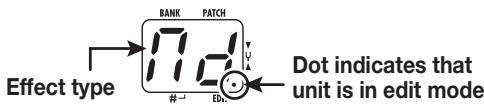
HINT You can switch to edit mode from play mode or manual mode.
To switch an effect module on and off
- To switch the selected effect module between on and off, press one of the [] / [] foot switches.
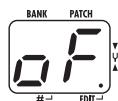
When the module is off, the indication "oF" appears on the display.
HINT
CONTROL and GLOBAL are special modules that serve for making settings that affect the entire unit, such as selection of pedal operation. These modules cannot be switched on/off.
5 Terminate the edit mode
- To terminate the edit mode and return to the play mode, set the Module selector to the "PLAY" position.
A2 returns to play mode (or manual mode).
NOTE
When you select another patch after editing, the changes you have made in edit mode will be lost unless you store the patch first. To retain the changes, store the patch as described on page 16.
4 Change the parameter value
- To change the setting value of effect parameters, use the parameter knobs 1 - 3.
Which parameter is assigned to a knob depends on which effect module/effect type is selected ( p.27-34).
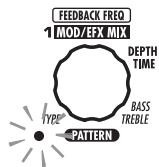
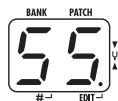
When you turn a parameter knob, the corresponding LED lights up and the display briefly shows the current value of the respective parameter.
NOTE When a module that is set to off is selected, the display shows "oF".
3 Select the effect type
- To switch the effect type of the selected module, use the BANK [-]/[+] keys.
NOTE
-
When you press the BANK [-]/[+] keys while a module is set to off, the module is switched on.
-
If you press the BANK [-]/[+] keys for a module that has only one effect type, nothing happens.
Storing/Copying Patches
An edited patch can be stored in a bank of the user area (A - d). It is also possible to store an existing patch in another location to create a copy.
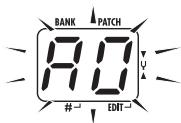
In play mode, manual mode, or edit mode, press the [STORE] key.
- The bank and patch number are shown on the display as a flashing indication.
NOTE
Patches of banks in the preset area (0 - 3) are read-only. No patches can be stored or copied into these locations. If you press the [STORE] key while a patch from the preset area is selected, the patch "A0" (bank A, patch number 0) will be selected automatically as default store/copy target.

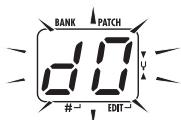
Select the store/copy target bank
- To select the store/copy target bank, use the BANK [-] / [+] keys.
NOTE
Only a bank of the user area (A-d) can be selected as store/copy target bank.
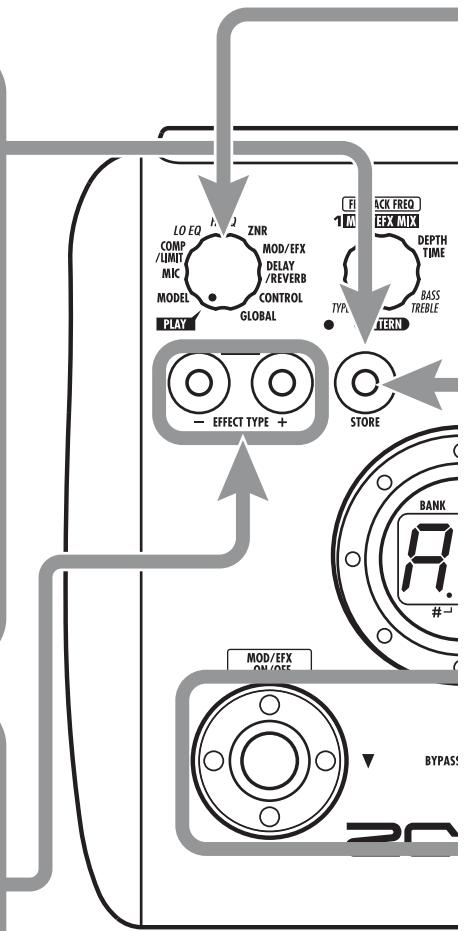
To cancel the store process
- To cancel the store process, operate the Module selector before pressing the [STORE] key again (step 4).
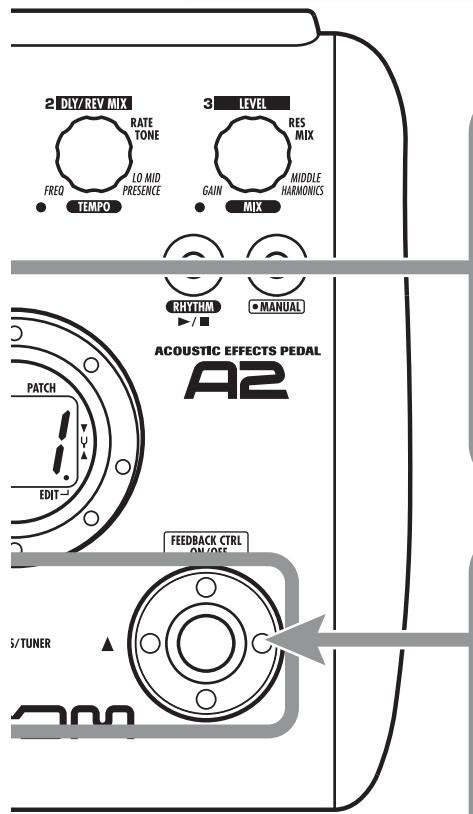
4 Press the [STORE] key once more
- When the store/copy process is completed, the unit returns to the previous mode, with the target patch being selected.
![ZOOM A2 - Press the [STORE] key once more - 1](/content/2025/01/152187/images/d7273d6acd673bc3c9990845cdc82f1c839118b2865c2a7de1cf80a3513281f0.jpg)
3 Specify the store/copy target patch number
- To specify the store/copy target patch number, use the [] / [] foot switches.
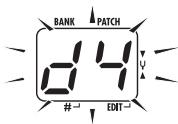
Using the Feedback Control
The feedback control function of the A2 allows automatic or manual detection of the frequency range where acoustic feedback occurs. This frequency range is then attenuated to eliminate feedback.
Manual operation of feedback control
This section describes how to detect the feedback frequency manually.
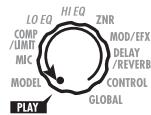
1. Set the Module selector to "GLOBAL".
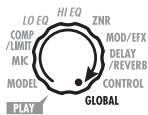
When the GLOBAL module is selected, parameter knob 2 can be used to adjust the feedback control parameter (FEEDBACK FREQ). The following settings are available.
oF
This turns the feedback control function off. When this setting is selected, the foot switch can be used in play mode or manual mode to turn the function on and perform automatic detection of feedback frequency.
At
Feedback frequency is detected automatically, and the respective range is attenuated.
1-30
This allows you to manually set the feedback frequency. Higher setting values correspond to higher frequency.
2. Turn parameter knob 2 to set the feedback frequency, using the setting range from 1 - 30.
The frequency range corresponding to the selected value will be cut. Select the value that
yields best reduction of acoustic feedback (howling).
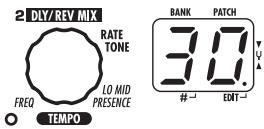
3. When the setting is complete, return the Module selector to the "PLAY" position.
HINT
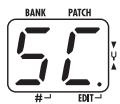
- If you select "At" in step 2, the automatic feedback frequency detection starts. During the process, the indication "SC" (Scan) is shown on the display.
- The feedback control setting applies to all patches, and the most recent value is always active. There is no need to store the setting.
Automatic detection of feedback frequency
The A2 can automatically detect the frequency range where acoustic feedback is occurring. If acoustic feedback should suddenly occur during a performance, you can simply hit the foot switch to turn the function on and suppress the feedback sound. This is possible both in play mode and manual mode.
1. Refer to the section "Manual operation of feedback control" and set the FEEDBACK FREQ value to "oF" or "At".
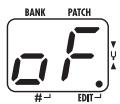
When you select the "oF" setting for the FEEDBACK FREQ value, the feedback control function is off, but it can be turned on by pressing the [▲] foot switch (in manual mode only) or an external foot switch. The setting will change to "At" and feedback frequency detection starts automatically.
When you select the "At" setting for the FEEDBACK FREQ value, the feedback control function is on. In this condition, pressing the foot switch twice initiates automatic detection of feedback frequency.
HINT
In manual mode, you can change the FEEDBACK FREQ value by turning parameter knob 1.
2. To automatically detect the feedback frequency while playing your guitar, proceed as follows.
In play mode
Use an external foot switch (FS01) connected to the [CONTROL IN] jack. Press the foot switch to turn feedback control on.
NOTE
If no external foot switch is connected, feedback control cannot be switched on and off in play mode.
In manual mode
Press the [▲] foot switch to turn feedback control on.
In either case, automatic feedback frequency detection starts when the function is turned on. The indication "SC" appears on the display.
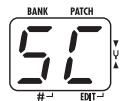
To repeat the automatic detection process, press the [▲] foot switch (in manual mode) or the external foot switch twice to turn the feedback control function first off and then on again. Automatic detection will then be performed once more.
HINT
You can use the optional expression pedal (FP01/ FP02) to adjust the feedback control frequency with your foot (setting range 1 - 30). For information about making foot switch or pedal settings, see pages 21 - 23.
Using Manual Mode
The condition where the foot switches are used to switch the MOD/EFX module or the feedback control function on and off during play is called "manual mode".
1. In play mode, select a patch.
When you enter manual mode, the [] / [] foot switches are assigned different functions and cannot be used to select patches. Therefore you should select the patch to use before entering manual mode.
2. Press the [MANUAL] key.
The [MANUAL] key lights up, and the A2 switches to manual mode.
![ZOOM A2 - Press the [MANUAL] key. - 1](/content/2025/01/152187/images/08327fb960b03195091693b02aff9715d8b0fae9388112c2c1bcb1707bd6cfd8.jpg)
In manual mode, the switches and knobs on the panel function as follows.
![ZOOM A2 - Press the [MANUAL] key. - 2](/content/2025/01/152187/images/8d7151f96ffa8dad2ca9721fd32f3ad8a58ed11e8b56bacf59d0a2a9d458579c.jpg)
[▼] foot switch
Switches the MOD/EFX module on and off.
![ZOOM A2 - Press the [MANUAL] key. - 3](/content/2025/01/152187/images/c8ecc25986b7a9ae2f43c8d0ee3bf1393de89b22a24b2b6150329c70b3432419.jpg)
[▲] foot switch
Switches the feedback control function on and off.
![ZOOM A2 - Press the [MANUAL] key. - 4](/content/2025/01/152187/images/f8733d7548f9b1c05883a190ec8b25474eba2e44d872b9b2dcbd5346b080604c.jpg)
Parameter knob 1
Switches the feedback control function on/off and allows manual setting of feedback frequency.
HINT
- The other controls of the unit operate in the same way as in play mode.
- In manual mode, you can also activate edit mode by turning the Module selector.
3. To switch feedback control between on and off, press the [▲] foot switch.
The operation of the unit when the [ ] foot switch is pressed depends on feedback control setting value.
oF
When you press the foot switch, the unit automatically detects the feedback frequency and attenuates it. Pressing the foot switch once more turns feedback control off.
At
When you press the foot switch, the feedback control function is turned off. When you press the foot switch once more, the function is turned on again, the unit automatically detects the feedback frequency and attenuates it.
1-30
Each time you press the foot switch, the feedback control is switched back and forth between on and off. When it is on, the feedback frequency as specified by this numeric setting will be attenuated.
4. To switch the MOD/EFX module between on and off, press the [▼] foot switch.
5. To return to play mode, press the [MANUAL] key.
The [MANUAL] key goes out and the A2 returns to play mode.
![ZOOM A2 - To return to play mode, press the [MANUAL] key. - 1](/content/2025/01/152187/images/6d557d0c560d678a1b917fd941a50d7b2094857b34496a16a1ec33c08ac7bbd4.jpg)
Out
Using an Optional Foot Switch or Pedal
The A2 is equipped with a [CONTROL IN] jack designed for connection of an optional foot switch or expression pedal. This section explains how to use these accessories.
Using the foot switch (FS01)
Connecting the optional foot switch FS01 to the [CONTROL IN] jack allows functions such as switching banks, performing tap tempo input, and switching the feedback control function on and off.
- Plug the cable from the FS01 into the [CONTROL IN] jack, and then turn the A2 on.
- Set the Module selector to the "CONTROL" position.
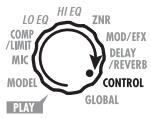
The A2 goes into edit mode. You can now make settings for the expression pedal and foot switch.
3. Turn parameter knob 2 to select one of the following functions for the foot switch.
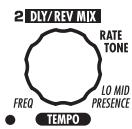
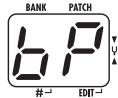
bP (bypass/mute)
The foot switch controls bypass or mute on/off. This has the same effect as pressing both [ ]/ [▲] foot switches at the same time in play mode or manual mode.
tP (tap tempo)
Pressing the foot switch repeatedly can be used to set the interval for the rhythm function or to make settings for effect parameters supporting the tap function.
bU (bank up)
Each push of the foot switch switches to the next higher bank. This has the same effect as pressing the BANK ([+] key.
rH (rhythm on/off)
The foot switch controls start/stop of the rhythm function. This has the same effect as pressing the RHYTHM [▶/■] key.
dH (delay hold)
The foot switch controls on/off of the delay hold function. When a patch using the hold function is selected, pressing the foot switch
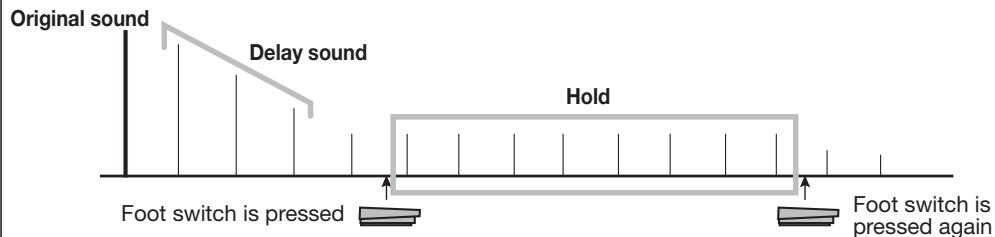
will activate hold, causing the current delay sound to be repeated (see illustration below). Pressing the foot switch once more cancels the hold condition, and the delay sound will decay normally.
dM (delay input mute)
The foot switch controls input mute on/off for the DELAY module.
Mn (manual mode)
The foot switch toggles between play mode and manual mode. This has the same effect as pressing the [MANUAL] key.
Fb (feedback control)
The foot switch toggles the feedback control function between on and off. This has the same effect as pressing the [▲] foot switch in manual mode. For details on the feedback control function, see page 18.
HINT
- For information on effect parameters supporting the tap function, see pages 27 - 34.
- To use the hold function, an effect type that supports the hold function must be selected in the patch. For details, see pages 27 - 34.
- While the DELAY/REVERB module is set to hold or mute, the dot in the center of the display flashes.
4. Use the foot switch in play mode or manual mode.
The switch operates according to the selected setting. This setting applies to all patches, and the most recent value is always active. There is no need to store the setting.
Using the expression pedal (FP01/FP02)
Connecting an expression pedal (FP01/FP02) to the [CONTROL IN] jack allows using it as a volume pedal or as a real-time controller for effect parameters. The function assignment for the expression pedal can be saved for each patch individually.
For information on parameters that can be adjusted with the expression pedal, refer to pages 27-34.
- Plug the cable from the expression pedal into the [CONTROL IN] jack, and then turn the A2 on.
- Select the patch for which you want to use the expression pedal.
- Set the Module selector to the "CONTROL" position.
The A2 goes into edit mode.
- Turn parameter knob 1 to select one of the following modulation targets for the expression pedal.
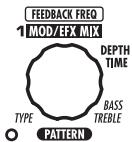
oF
Pedal is inactive.
vL
Volume
CU, Cd, CH, CL
COMP/LIMIT module
tU, td, tH, tL
TONE parameter (MODEL module)
EU, Ed, EH, EL
MOD/EFX module
dU, dd, dH, dL
DELAY/REVERB module
Fb
Feedback control frequency
HINT
-
Which parameter changes when the expression pedal is operated depends on the effect type of the selected module. For details, see pages 27 - 34.
-
The way in which the expression pedal changes the parameter can be selected from four patterns ( p.33)
-
If necessary, store the patch.
The expression pedal setting is stored as part of the patch.
- Select the patch in play mode and operate the expression pedal.
The selected function can be used.
In the bypass condition, the pedal always functions as a volume pedal, regardless of the selection made in step 4.
Restoring Factory Defaults
In the factory default condition, the patches of the user area (A0 - d9) contain the same settings as the patches of the preset area (00 - 39). Even after overwriting the user patches, their original content can be restored in a single operation ("All Initialize" function).
1. Turn the A2 on while holding down the [STORE] key.
The indication "AL" appears on the display.
![ZOOM A2 - Turn the A2 on while holding down the [STORE] key. - 1](/content/2025/01/152187/images/d804fb1aae0b9836d01e67f985c1a75e7302cdcf404b1cc23cdf6ca66fe75e14.jpg)
2. To carry out the All Initialize function, press the [STORE] key once more.
All patch settings are returned to the factory default condition, and the unit switches to play mode. To cancel All Initialize, press the RHYTHM [▶/■] key instead of the [STORE] key.
NOTE
When you carry out All Initialize, any newly created patches that were stored in the user area will be deleted (overwritten). Perform this operation with care to prevent losing any patches that you want to keep.
Linking Effects
The patches of the A2 can be thought of as eight serially linked effect modules, as shown in the illustration below. You can use all effect modules together or selectively set certain modules to off to use just specific effect modules,
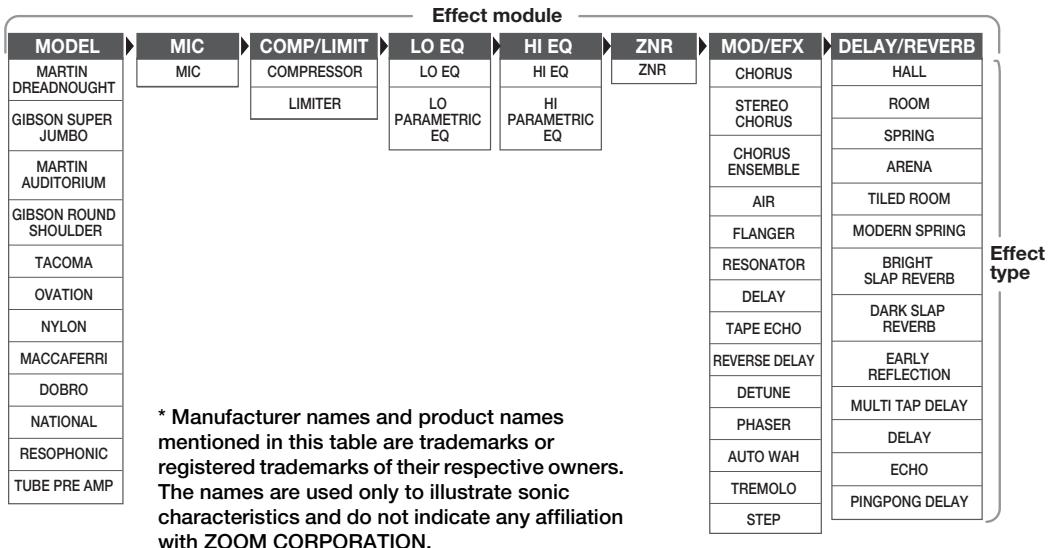
For some effect modules, you can select an effect type from several possible choices. For example, the MOD/EFX module comprises CHORUS, FLANGER, and other effect types from which you can choose one. The MODEL module is an effect for simulating the sound of various types of acoustic guitars. Switching effect types here means selecting different guitar body sounds.
CONTROL module and GLOBAL module
Besides the above modules, the A2 also incorporates a CONTROL module and GLOBAL module. The CONTROL module comprises settings such as expression pedal and foot switch function allocation, as well as the master level that applies to all patches.
The GLOBAL module lets you optimize the A2 characteristics to fit the requirements of pickup and guitar amp. It contains the following settings.
- AMP SELECT
This parameter serves to optimize the frequency response of the A2 to fit the type of amplifier. It can be helpful to reduce the trebly sound that can be a problem when playing an acoustic guitar with a pickup through an amplifier. Settings with different effect depth are available for Combo, Stack, and other amp types.
- PICKUP SELECT
This parameter serves to optimize the frequency response of the A2 to fit the type of pickup. It can also be used as a simulator for turning the sound of an electric guitar into that of an acoustic guitar.
Effect Types and Parameters
How to read the parameter table
Module selector
The Module selector symbol shows the position of the selector knob at which this module/parameter is called up.
Effect parameters 1-3
These are the parameters that can be adjusted with parameter knobs 1 - 3 when the effect type is selected. The setting range for each parameter is shown. Three-digit setting values are shown with a dot between the two numerals.
Example: 0 - 98, 1.0 = 0 - 98, 100
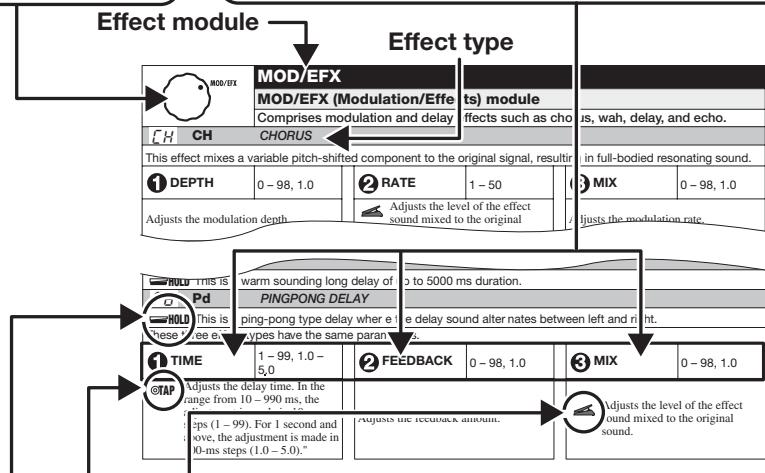
Expression pedal
A pedal icon ( ) in the listing indicates a parameter that can be controlled with the expression pedal (FP01/FP02).
Specify the respective module as modulation target for the expression pedal ( p. 22), and then select the respective effect type of the module. The parameter can then be controlled in real time with a connected expression pedal.
Tap
A tap icon (TAP) in the listing indicates a parameter that can be set by repeatedly hitting (tapping) the foot switch (FS01). The tap function must have been assigned to the foot switch beforehand ( p. 21), and a module that includes this parameter must be on.
In edit mode, tapping the foot switch will cause the respective parameter to be set according to the tapping interval (modulation cycle, delay time, etc.).
In play mode and manual mode, tapping the foot switch will cause the TIME parameter of the delay effect type in the DELAY/REVERB module to be temporarily changed. (In play mode and manual mode, only the delay effect in the DELAY/REVERB module can be controlled by tap input.)
Hold
A hold icon (HOLD) in the listing indicates an effect type for which hold can be turned on and off with the foot switch (FS01).
Set the foot switch function to "dH" (delay hold) ( p. 21) for the respective patch. When this patch is then selected in play mode or manual mode, the hold function can be switched on and off by pressing the foot switch.
| MODEL | MODEL module | |||
| This module provides 12 types of acoustic guitar and mic preamp simulations. * Manufacturer names and product names mentioned in this table are trademarks or registered trademarks of their respective owners. The names are used only to illustrate sonic characteristics and do not indicate any affiliation with ZOOM CORPORATION. | ||||
| Md MARTIN DREADNOUGHT | ||||
| Simulation of the MARTIN D-28, one of the most popular acoustic guitar. | ||||
| GJ GIBSON SUPER JUMBO | ||||
| Simulation of the GIBSON SJ-200, known as the "King of Flat-Tops". | ||||
| MA MARTIN AUDITORIUM | ||||
| Simulation of the MARTIN 000-18 with a small-sized body and clear sound. | ||||
| Gr GIBSON ROUND SHOULDER | ||||
| Simulation of the GIBSON J-45 that has a warm and rich sound. | ||||
| tC TACOMA | ||||
| Simulation of the TACOMA C3C that has a unique body and sound. | ||||
| ov OVATION | ||||
| Simulation of the OVATION ADAMAS that has a unique round backed body. | ||||
| ny NYLON | ||||
| Simulation of the NYLON guitar sound that is suitable for Bossa Nova music. | ||||
| MC MACCAFERRI | ||||
| Simulation of the SELMER MACCAFERRI that is known for its gypsy jazz sound. | ||||
| db DOBRO | ||||
| Simulation of the DOBRO MODEL 27 with a wood body and metal resonator. | ||||
| nt NATIONAL | ||||
| Simulation of the NATIONAL RESO-PHONIC STYLE O with a brass body and metal resonator. | ||||
| rE RESOPHONIC | ||||
| ZOOM original resonator guitar sound with strong character. | ||||
| All above effect types have the same parameters. | ||||
| DEPTH | 0-98, 1.0 | TONE | 0-10 | LEVEL 2-98, 1.0 |
| Adjusts the simulation intensity. | Adjusts the sound quality. | Adjusts the signal level after passing the module. | ||
| tP TUBE PRE AMP | ||||
| ZOOM original tube preamplifier sound that allows adjusting the balance from an all solid-state path to a tube-based preamp. | ||||
| TUBE BLEND | 0-98, 1.0 | TONE | 0-10 | LEVEL 2-98, 1.0 |
| Adjusts the amount of tube sound blended into the signal. | Adjusts the sound quality. | Adjusts the signal level after passing the module. | ||
| MIC | MIC | ||||
| MIC module | |||||
| This module simulates mic directional characteristics when recording the acoustic guitar type selected with the MODEL module by microphone. | |||||
| MIC MC MIC | |||||
| Simulates the sound that is recorded by microphone. You can select the mic type and position. | |||||
| MIC TYPE | dy, Co | POSITION | 0-2 | MIC DISTANCE | 0-2 |
| Selects the mic type. "dy" simulates the frequency response of a dynamic mic and "Co" simulates the frequency response of a condenser mic. | Lets you select different microphone characteristics according to sound pickup position. The following settings are available.0: Mic in front of soundhole1: Mic near the 15th fret2: Mic near the 12th fret | Lets you select different microphone characteristics according to sound pickup distance. The following settings are available.0: Mic near the guitar1: Mic about 50cm away2: Mic about 1m away | |||
| COMP/LIMIT | |||||
| COMP/LIMIT (Compressor/Limiter) module | |||||
| This module includes a compressor that keeps the overall signal level within a certain range by attenuating high-level signal components or boosting low-level signal components, and a limiter that suppresses peak components. | |||||
| COMP/COMPRESSOR | |||||
| The compressor attenuates high-level signal components and boosts low-level signal components to keep the overall signal level within a certain range. | |||||
| SENSE | 0-10 | ATTACK | 1-10 | LEVEL | 2-98, 1.0 |
| Adjusts the compressor sensitivity.Higher setting values result in higher sensitivity. | Adjusts the time between the sound attack point and the start of compression. Higher setting values result in faster compression action. | Adjusts the signal level after passing the module. | |||
| LMMLIMITER | |||||
| This is a limiter that suppresses signal peaks above a certain reference level. | |||||
| THRESHOLD | 0-10 | RATIO | 1-10 | LEVEL | 2-98, 1.0 |
| Adjusts the reference signal level for the limiter action. | Adjusts the limiter intensity. Higher setting values result in stronger compression of the input signal. | Adjusts the signal level after passing the module. | |||
| LOEQ | |||||
| LOEQ module | |||||
| This is an equalizer for the low frequency range. You can select either a 3-band equalizer or parametric equalizer. | |||||
| LELOEQ (Low EQ) | |||||
| This is a 3-band equalizer that adjusts the frequency range below 500 Hz. | |||||
| 60Hz | ±12 | 320Hz | ±12 | 500Hz | ±12 |
| 60 Hz, shelving type equalizer. | 320 Hz, peaking type equalizer. | 500 Hz, peaking type equalizer. | |||
| LPLOPARAMETRIC EQ (Low Parametric EQ) | |||||
| This is a parametric equalizer that adjusts the frequency range below 600 Hz. | |||||
| TYPE | 1, 2, SH | FREQUENCY | See Table 1 | GAIN | ±12 |
| Selects the type of filter. "1" gives a peaking type filter with narrow Q, "2" gives a peaking type filter with wide Q, and "SH" produces a shelving type LO EQ. | Selects a frequency within the range of 50-600 Hz. | Adjusts the gain. | |||
[Table 1]
| Display | 5 | 10 | 20 | 40 | 60 |
| Frequency | 50Hz | 100Hz | 200Hz | 400Hz | 600Hz |
| HI EQ HI EQ module | |||||
| This is an equalizer for the high frequency range. You can select either a 3-band equalizer or parametric equalizer. | |||||
| HE HE HI EQ (High EQ) | |||||
| This is a 3-band equalizer that adjusts the frequency range above 1.2 kHz. | |||||
| 1.2kHz | ±12 | 26.3kHz | ±12 | 312kHz | ±12 |
| 1.2 kHz, peaking type equalizer. | 6.3 kHz, peaking type equalizer. | 12 kHz, shelving type equalizer. | |||
| HP HP HI PARAMETRIC EQ (High Parametric EQ) | ||||||
| This is a parametric equalizer for the frequency range above 800 Hz. | ||||||
| TYPE | 1,2, SH | FREQUENCY | See Table 2 | GAIN | ±12 | |
| Selects the type of filter. "1" gives a peaking type filter with narrow Q, "2" gives a peaking type filter with wide Q, and "SH" produces a shelving type HI EQ. | Selects a frequency within the range of 800 Hz - 10 kHz. | Adjusts the gain. | ||||
[Table 2]
| Display | 80 | 2.0 | 4.0 | 8.0 | 10 |
| Frequency | 800Hz | 2kHz | 4kHz | 8kHz | 10kHz |
| ZNR | ZNR | ||
| ZNR (ZOOM Noise Reduction) module | |||
| This module serves for reducing noise during playing pauses. | |||
| nr | nr | ZNR (ZOOM Noise Reduction) | |
| ZOOM original noise reduction which reduces noise in playing pauses without affecting the overall tone. | |||
| 1 | THRESHOLD | 1 - 16 | |
| Adjusts the sensitivity. For maximum noise reduction, set the value as high as possible without causing the sound to decay unnaturally. | |||
| MOD/EFX MOD/EFX (Modulation/Effects) module | |||||
| Comprises modulation and delay effects such as chorus, wah, delay, and echo. | |||||
| CH CH CHORUS | |||||
| This effect mixes a variable pitch-shifted component to the original signal, resulting in full-bodied resonating sound. | |||||
| 1 DEPTH | 0-98, 1.0 | 2 RATE | 1-50 | 3 MIX | 0-98, 1.0 |
| Adjusts the modulation depth. | 4 Adjusts the modulation rate. | Adjusts the level of the effect sound mixed to the original sound. | |||
| 5C SC STEREO CHORUS | |||||
| This is a stereo chorus with clear sound. | |||||
| CE CE CHORUS ENSEMBLE | |||||
| This is a chorus ensemble with complex undulation. | |||||
The two effect types on the preceding page have the same parameters.
| 1 DEPTH | 0-98, 1.0 | 2 RATE | 1-50 | 3 MIX | 0-98, 1.0 | ||
| Adjusts the modulation depth. | Adjusts the modulation rate. | Adjusts the level of the effect sound mixed to the original sound. | |||||
| Simulates the ambience of a room, giving the sound spatial depth. | |||||
| SIZE | 2-98,1.0 | TONE | 0-10 | MIX | 0-98,1.0 |
| Adjusts the spatial width. | Adjusts the sound quality. | Adjusts the level of the effect sound mixed to the original sound. | |||
| FL FLANGER | |||||
| This effect produces a resonating and strongly undulating sound. | |||||
| 1 DEPTH | 0-98, 1.0 | 2 RATE | 0-50 | 3 RESONANCE | -10--1,0,1-10 |
| Adjusts the modulation depth. | 4 TAP Adjusts the modulation rate. | Adjusts the modulation resonance intensity. | |||
| r5 rS RESONATOR | ||||||
| Emphasizes a specific frequency, and produces an undulating sound such as from a resonator guitar. It is possible to use this effect as pedal wah too. | ||||||
| 1 FREQUENCY | 1-50 | 2 RESONATOR LEVEL | 0-98, 1.0 | 3 DIRECT LEVEL | 0-98, 1.0 | |
| 4 Adjusts the frequency that is emphasized. When an expression pedal is used, the effect is the same as pedal wah. | Adjusts the mixing balance of the effect sound. | Adjusts the mixing balance of the original sound. | ||||
| dL | dL | DELAY |
| This is a delay with a maximum setting of 5000 ms. | ||
| tE | tE | TAPE ECHO |
| This effect simulates a tape echo. | ||
The above two effect types have the same parameters.
| 1 TIME | 1-99, 1.0-5.0 | 2 FEEDBACK | 0 - 98, 1.0 | 3 MIX | 0 - 98, 1.0 |
| ○TAP Adjusts the delay time. In the range from 10 - 990 ms, the adjustment is made in 10-ms steps (1 - 99). For 1 second and above, the adjustment is made in 100-ms steps (1.0 - 5.0). | Adjusts the feedback amount. | 4 Adjusts the level of the effect sound mixed to the original sound. | |||
| r d REVERSE DELAY | |||||
| Produces a sound like a tape played in reverse. | |||||
| 1 TIME | 1-99, 1.0 - 2.5 | 2 FEEDBACK | 0-98, 1.0 | 3 BALANCE | 0-98, 1.0 |
| ±TAP Adjusts the delay time. In the range from 10-990 ms, the adjustment is made in 10-ms steps (1-99). For 1 second and above, the adjustment is made in 100-ms steps (1.0-2.5). | Adjusts the feedback amount. | 4 Adjusts the balance between original sound and effect sound. | |||
| dt DETUNE | |||||
| This effect mixes a pitch-shifted component to the original signal, resulting in resonating sound such as from a 12-string guitar. | |||||
| 1 DEPTH | -15 --1, 0, 1 - 15 | TONE | 0 - 10 | MIX | 0 - 98, 1.0 |
| Adjusts the modulation depth. | Adjusts the sound quality. | Adjusts the level of the effect sound mixed to the original sound. | |||
| PH PH PHASER | |||||
| This effect produces sound with a pulsating character. | |||||
| 1 COLOR | 1 - 4 | RATE | 0 - 50 | RESONANCE | 0 - 10 |
| Adjusts the type of sound. | ±TAP Adjusts the modulation rate. | Adjusts the modulation resonance intensity. | |||
| AH AW AUTO WAH | |||||
| This effect varies wah in accordance with playing intensity. | |||||
| 1 SENSE | -10 --1, 1 - 10 | RESONANCE | 0 - 10 | DIRECT MIX | 0 - 98, 1.0 |
| Adjusts the effect sensitivity. | Adjusts the resonance of the sound. | Adjusts the level of the original sound mixed to the effect sound. | |||
| tr TREMOLO | |||||
| This effect periodically varies the volume. | |||||
| 1 DEPTH | 0 - 98, 1.0 | RATE | 0 - 50 | WAVE | u0 - u9, d0 - d9, t0 - t9 |
| Adjusts the modulation depth. | ±TAP Adjusts the effect rate. | Allows selection of the modulation waveform. Available settings are "u" (rising sawtooth), "d" (falling sawtooth), and "t" (triangular). Higher setting values result in more clipping of wave peaks, which reinforces the effect. | |||
| St Step | |||||
| Special effect for acoustic guitar that changes the sound in a staircase pattern. | |||||
| 1 DEPTH | 0 - 98, 1.0 | RATE | 0 - 50 | MIX | 0 - 98, 1.0 |
| Adjusts the modulation depth. | ±TAP Adjusts the modulation rate. | Adjusts the level of the effect sound mixed to the original sound. | |||
| DELAY/REVERB | |||||
| DELAY/REVERB module | |||||
| This module comprises various reverb and delay functions. Delay effect allows use of the hold function. | |||||
| HL HL HALL | |||||
| Simulates the acoustics of a concert hall. | |||||
| rM ROOM | |||||
| Simulates the acoustics of a room. | |||||
| SP SPRING | |||||
| Simulates a spring-type reverb. | |||||
| Ar ARENA | |||||
| Simulates the acoustics of a big concert hall such as an arena. | |||||
| tr TILED ROOM | |||||
| Simulates the acoustics of a tiled room. | |||||
| MS | MODERN SPRING |
| This effect simulates a spring-type reverb with bright sound. | |
The above six effect types have the same parameters.
| 1 DECAY | 1 - 30 | 2 TONE | 0 - 10 | 3 MIX | 0 - 98, 1.0 | ||
| Adjusts the duration of the reverb. | Adjusts the sound quality. | 4 Adjusts the level of the effect sound mixed to the original sound. | |||||
| bS | bS | BRIGHT SLAP REVERB |
| This is a reverb with bright sound which allows adjusting the pre-delay parameter. | ||
| dS | dS | DARK SLAP REVERB |
| This is a reverb with dark sound which allows adjusting the pre-delay parameter. | ||
The above two effect types have the same parameters.
| 1 DECAY | 1 - 30 | 2 PRE DELAY | 0 - 30 | 3 MIX | 0 - 98, 1.0 | ||
| Adjusts the duration of the reverb. | Adjusts the pre-delay time. The adjustment is made in 10-ms steps in the range of 0-300 ms. | 4 Adjusts the level of the effect sound mixed to the original sound. | |||||
| ER Er EARLY REFLECTION | |||||
| This effect isolates only the early reflection components of the reverb. | |||||
| 1 decay | 1 - 30 | 2 SHAPE | -10 - -1, 0, 1 - 10 | 3 MIX | 0 - 98, 1.0 |
| Adjusts the duration of the reverb. | Adjusts the envelope of the effect sound. In the negative range, the envelope is reversed. At 0, the effect is a gate reverb. In the positive range, the envelope is a decay-type envelope. | 4 Adjusts the level of the effect sound mixed to the original sound. | |||
| This effect produces several delay components with different delay times. | |||||
| 1 TIME | 1-99, 1.0-5.0 | 2 PATTERN | 1-8 | 3 MIX | 0-98, 1.0 |
| TAP Adjusts the delay time. In the range from 10-990 ms, the adjustment is made in 10-ms steps (1-99). For 1 second and above, the adjustment is made in 100-ms steps (1.0-5.0). | Selects the combination pattern for the taps. The selection ranges from rhythmical to random patterns. | Adjusts the level of the effect sound mixed to the original sound. | |||
| dL | dL | DELAY |
| HOLD This is a delay with a maximum setting of 5000 ms. | ||
| EC | EC | ECHO |
| HOLD This is a warm sounding long delay of up to 5000 ms duration. | ||
| Pd | Pd | PINGPONG DELAY |
| HOLD This is a ping-pong type delay where the delay sound alternates between left and right. | ||
These three effect types have the same parameters.
| ① TIME | 1-99, 1.0-5.0 | ② FEEDBACK | 0-98, 1.0 | ③ MIX | 0-98, 1.0 | ||
| ○TAP Adjusts the delay time. In the range from 10-990 ms, the adjustment is made in 10-ms steps (1-99). For 1 second and above, the adjustment is made in 100-ms steps (1.0-5.0). | Adjusts the feedback amount. | Adjusts the level of the effect sound mixed to the original sound. | |||||
| CONTROL | |||||
| CONTROL module | |||||
| Serves for making pedal settings and lets you control the foot switch function and master level setting applying to all patches. | |||||
| CT Control | |||||
| RTM DESTINATION | See Table 3 | 2 FS | See Table 4 | 3 MASTER LEVEL | 0-98,1.0 |
| When an expression pedal (FP01/FP02) is connected to the [CONTROL IN] jack, this selects the modulation target module for the RTM function (see Table 3). | When a foot switch (FS01) is connected to the [CONTROL IN] jack, this selects the function that can be operated with the foot switch (see Table 4). The function selected here applies to all patches. | Adjusts the master level for all patches. | |||
[Table 3]
| Setting | Modulation target |
| oF | OFF |
| vL | Volume |
| CU, Cd, CH, CL | COMP/LIMIT module (*) |
| tU, td, tH, tL | TONE parameter of MODEL module (*) |
| EU, Ed, EH, EL | MOD/EFX module (*) |
| dU, dd, dH, dL | DELAY/REVERB module (*) |
| Fb | Frequency of feedback control function. |
[Table 4]
| Setting | Function |
| bP | Bypass/Mute |
| tP | Tap tempo |
| bU | Bank up |
| rH | Rhythm function on/off |
| dH | Delay hold |
| dM | Delay input mute |
| Mn | Manual mode on/off |
| Fb | Feedback control function on/off |
The operation of modules denoted by (^*) changes as follows, according to the letter at right.

UP
The parameter is at minimum when the pedal is fully raised and at maximum when the pedal is fully pushed down.

DOWN
The parameter is at maximum when the pedal is fully raised and at minimum when the pedal is fully pushed down.

HIGH
When the pedal is fully raised, the parameter is at the value set in the patch. When the pedal is fully pushed down, the parameter is at maximum.

LOW
When the pedal is fully raised, the parameter is at minimum. When the pedal is fully pushed down, the parameter is at the value set in the patch.
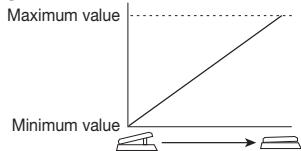
"UP"
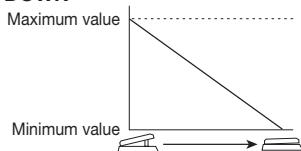
"DOWN"
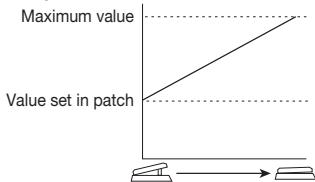
"HIGH"
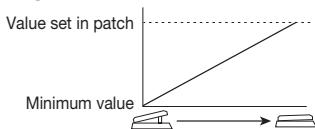
"LOW"
| GLOBAL | |||||
| GLOBAL module | |||||
| Serves for making settings to match the guitar amplifier and pickup in use and to control the feedback control function. The settings of this module apply to all patches. | |||||
| GL GL GLOBAL | |||||
| 1 PICK UP SELECT | See Table 5 | 2 FEEDBACK FREQ | oF, At,1-30 | 3 AMP SELECT | See table 6 |
| Modifies the sound quality depending on the guitar or pickup that is used, to fully bring out the simulation capabilities of the MODEL module (see table 5). | Reduces acoustic feedback by attenuating the frequency band where the feedback occurs. The frequency can be detected automatically or manually. For details on how to use the FEEDBACK CONTROL function, see page 18. | This parameter serves for attenuating frequency band that can sound harsh when an acoustic guitar is reproduced via a guitar amplifier (see table 6). Choose the suitable setting depending on the amplifier that is used, and adjust the value as required. | |||
[Table 5]
| Setting | Content |
| oF | OFF |
| bP | Designed for use with a piezo pickup having a bright sound. |
| dP | Designed for use with a piezo pickup having a dark sound. |
| bM | Designed for use with a magnetic pickup having a bright sound. |
| dM | Designed for use with a magnetic pickup having a dark sound. |
| SE | Designed for use with an electric guitar and single-coil pickup(s). |
| HE | Designed for use with an electric guitar and humbucker pickup(s). |
[Table 6]
| Setting | Content |
| oF | Sets the AMP SELECT parameter to OFF. |
| b1 – b9 | Designed for use with combo type amplifiers having a bright sound. Higher values result in stronger attenuation effect. |
| C1 – C9 | Designed for use with regular combo type amplifiers. Higher values result in stronger attenuation effect. |
| S1 – S9 | Designed for use with stack type amplifiers. Higher values result in stronger attenuation effect. |
Specifications
| Effect types | 47 |
| Effect modules | Max. 8 simultaneous modules |
| Patches | User area: 10 patches x 4 banks |
| Preset area: 10 patches x 4 banks | |
| Sampling frequency | 96 kHz |
| A/D converter | 24 bit, 64 times oversampling |
| D/A converter | 24 bit, 128 times oversampling |
| Signal processing | 32 bit |
| Frequency response | 20 Hz – 40 kHz +1 dB -3 dB (with 10 kilohms load) |
| Display | 2-digit 7-segment LED |
| Parameter LEDs | |
| Input | Standard mono phone jack |
| Rated input level | -20 dBm |
| Input impedance | 1 megohm |
| Output | Standard stereo phone jack (doubles as line and headphone jack) |
| Maximum output level | Line: +5 dBm (output load impedance 10 kilohms or more) |
| Phones: 20 mW + 20 mW (into 32 ohms load) | |
| Control input | For FP02 (FP01)/FS01 |
| Power requirements | |
| AC adapter | 9 V DC, 300 mA (center minus plug) (ZOOM AD-0006) |
| Batteries | Four IEC R6 (size AA) batteries, |
| Approx. 7.5 hours continuous operation (alkaline batteries) | |
| Dimensions | 162 mm (D) x 156 mm (W) x 65 mm (H) |
| Weight | 700 g (without batteries) |
| Options | Expression pedal FP02/ Foot switch FS01 |
- 0dBm = 0.775Vrms
- Design and specifications subject to change without notice.
Troubleshooting
Volume is low
Adjust the patch level ( p. 9) or master level ( p. 33). When using a pickup with low output, start the A2 in HI-GAIN mode ( p. 6).
Matching problem with particular pickup or guitar amplifier
Check the PICKUP SELECT and AMP SELECT settings.
- Delay/reverb effect does not work
DELAY/REVERB module is inactive while a
rhythm pattern is playing. Stop rhythm playback ( p. 12).
High level of noise
Adjust ZNR module. Be sure to use only a ZOOM AC adapter (ZOOM AD-0006).
Battery life is short
Are manganese batteries being used? Continuous operation time is 7.5 hours with alkaline batteries. The use of alkaline batteries is recommended.
A2 Preset Pattern
| No | PatternName | TimSig | No | PatternName | TimSig |
| 1 | 8beat_1 | 4/4 | 21 | 3per4 | 3/4 |
| 2 | 8beat_2 | 4/4 | 22 | 6per8 | 3/4 |
| 3 | 8beat_3 | 4/4 | 23 | 5per4_1 | 5/4 |
| 4 | 8shuffle | 4/4 | 24 | 5per4_2 | 5/4 |
| 5 | 16beat_1 | 4/4 | 25 | COUNTRY | 4/4 |
| 6 | 16beat_2 | 4/4 | 26 | RAGGAE | 4/4 |
| 7 | 16shuffle | 4/4 | 27 | LATIN1 | 4/4 |
| 8 | ROCK | 4/4 | 28 | LATIN2 | 4/4 |
| 9 | FUNK_1 | 4/4 | 29 | LATIN3 | 4/4 |
| 10 | FUNK_2 | 4/4 | 30 | BALLAD_1 | 4/4 |
| 11 | HIPHOP | 4/4 | 31 | BALLAD_2 | 3/4 |
| 12 | R'nR | 4/4 | 32 | BLUES_1 | 4/4 |
| 13 | POP_1 | 4/4 | 33 | BLUES_2 | 3/4 |
| 14 | POP_2 | 4/4 | 34 | JAZZ_1 | 4/4 |
| 15 | POP_3 | 4/4 | 35 | JAZZ_2 | 3/4 |
| 16 | POP_4 | 4/4 | 36 | JAZZ_3 | 4/4 |
| 17 | DANCE_1 | 4/4 | 37 | METRO_3 | 3/4 |
| 18 | DANCE_2 | 4/4 | 38 | METRO_4 | 4/4 |
| 19 | DANCE_3 | 4/4 | 39 | METRO_5 | 5/4 |
| 20 | DANCE_4 | 4/4 | 40 | METRO |
ZEEM
CATCH US IF YOU CAN
ZOOM CORPORATION
ITOHPIA Iwamotocho 2chome Bldg. 2F, 2-11-2, Iwamoto-cho,
Chiyoda-ku, Tokyo 101-0032, Japan
Web Site: http://wwwzoomo.co.jp
A2 Patch List
| CATEGORY | No. | NAME | MODEL | KEY EFFECT | COMMENT |
| MODEL | A0 | D-28 | MARTIN D-28 | MARTIN D-28 | The sound of a Martin D-28, the "gold standard" of acoustic guitars. Dynamic and gorgeous. |
| A1 | J-200 | GIBSON J-200 | GIBSON J-200 | Simulation of a Gibson J-200 with its large, impressive body and sound to match. | |
| A2 | TRIPLE 0 | MARTIN OOO-18 | MARTIN OOO-18 | Simulation of the increasingly popular Martin 000-18 with its compact, handy body and finely nuanced sound. | |
| A3 | J-45 | GIBSON J-45 | GIBSON J-45 | The Gibson J-45 is characterized by its warm and rich tone. A true "workhorse" beloved by many guitarists. | |
| A4 | ADAMAS | OVATION | OVATION | The tone of the Ovation Adamas which has a body made from a special material called Lyrachord and rounded shape to focus the sound. | |
| A5 | TACOMA | TACOMA C3C | TACOMA C3C | Typical midrange oriented sound of a Tacoma C3C with its innovative design and unique soundhole position. | |
| A6 | NYLON | NYLON | NYLON | Nylon guitar sound great for Bossa Nova and other Latin styles. The trick is to play with your finger cushions. | |
| A7 | DJANGO | SELMER MACCAFERRI | SELMER MACCAFERRI | Sound of the Selmer-Maccaferri guitar best known as the favored instrument of Django Reinhardt. The true sound of Gypsy Jazz. | |
| A8 | DOBRO | DOBRO | DOBRO | Sound of the Dobro Model 27 with its square neck and resonator. Indispensable for Bluegrass and Country Blues. | |
| A9 | NATIONAL | NATIONAL | NATIONAL | The brass body of the National Reso-Phonic Style "O" produces a more metallic sound than a Dobro. | |
| CHORUS & REVERB | B0 | SYMPHONY | MARTIN D-28 | CHORUS ENSEMBLE | Beautiful symphonic sound suitable for any playing style. |
| B1 | TUBY | TUBE PRE AMP | HALL | Straight sound of a tube preamp seasoned with some hall reverb. Really comes into its own when multiple strings resonate together. | |
| B2 | SLOW CHORUS | SELMER MACCAFERRI | CHORUS ENSEMBLE | Slow chorus sound for finger style Jazz. Experience the spatial depth and ambience of a chorus ensemble. | |
| B3 | BIG HALL | MARTIN D-28 | HALL | Long reverb that brings out the glorious Martin D-28 sound to the max. Let loose with fingerpicking. | |
| B4 | FLANG | TACOMA C3C | MODERN SPRING | Flanger with a chorus-like feel is great for a wide playing range, from arpeggios to stroking. | |
| B5 | MELODIC | TUBE PRE AMP | BRIGHT SLAP REVERB | Tube preamp patch for picked solos makes the original sound stand out with a slightly delayed reverb. | |
| B6 | CHORUS WALL | MARTIN D-28 | STEREO CHORUS | Select this stereo chorus & doubling patch and feel the sound waves move in like a wall. | |
| B7 | BRIGHT CHORUS | MARTIN OOO-18 | CHORUS | With a clearly defined effect similar to chorus for electric guitar, this bright and clear sound fits many music genres. | |
| B8 | STUDIO FLANGER | MARTIN D-28 | BRIGHT SLAP REVERB | Combination of flanger for chord and arpeggio playing, and reverb for bringing out the original sound. Lends impressive depth to the sound on slow numbers. | |
| B9 | 12STRINGS | OVATION | DETUNE | Simulates the sound of chord strokes on a 12-string guitar. Experience that naturally gorgeous tone with your own guitar. | |
| ARTIST | C0 | PARIS TEXAS | NATIONAL | NATIONAL | Slide sound such as played by Ry Cooder on the soundtrack of "Paris, Texas" by Wim Wenders. |
| C1 | AERIAL BOUNDARIES | MARTIN D-28 | CHORUS ENSEMBLE | This patch is inspired by the sound of Michael Hedges on his groundbreaking masterpiece "Aerial Boundaries". | |
| C2 | CROSS ROAD | NYLON | NYLON | The sound of legendary pre-war Blues guitarist Robert Johnson, spruced up with a simulation of that late 1930s atmosphere. | |
| C3 | SCARBOROUGH | MARTIN D-28 | HALL | Reexperience the translucent sound of Scarborough Fair on Simon & Garfunkel's third album. | |
| C4 | TEARS | MARTIN OOO-18 | ROOM | Eric Clapton, MTV Unplugged, say no more. Comfortable, warm sound, yet a clear standout even in a band ensemble. | |
| C5 | INNOCENT | NATIONAL | AIR | Whether for slide or fingerpicking, this Ben Harper inspired sound matches various styles. | |
| C6 | HERE COMES | GIBSON J-45 | STEREO CHORUS | The acoustic guitar sound plus the entire ambience of the Beatles' Abbey Road album. | |
| C7 | FRIDAY NIGHT | OVATION | ARENA | Al di Meola's epoch-making performances come to live again. Go for that peerless technique and feel the audience respond. | |
| C8 | ABOUT A GIRL | GIBSON J-200 | CHORUS | Simulates the unusual acoustic character of Nirvana Unplugged. Tune your strings lower and turn into Kurt. | |
| C9 | ACOUSTIC ELVIS | GIBSON J-200 | SPRING | Powerful acoustic sound familiar from Elvis Presley's Country style hits. | |
| VARIATION | D0 | PHASE TOP | GIBSON J-200 | PHASER | This solid and compact phase tone is the new "allrounder" for acoustic instruments. |
| D1 | SOFT TREMOLO | MARTIN D-28 | TREMLO | Soft, expressive tremolo sound optimized for acoustic guitar. | |
| D2 | REAL ACOUSTIC | GIBSON J-45 | AIR | Natural acoustic sound modeled on a live J-45. Suitable for finger play, picking, and many other applications. | |
| D3 | MINOR SWING | NYLON | NYLON | Classic Bebop Jazz sound for when you just can't stop swinging. | |
| D4 | BOTTLLE | DOBRO | ECHO | Warm wooden tone not only for nuanced bottleneck playing. | |
| D5 | FUNKY FOLK | TUBE PRE AMP | AUTO WAH & MULTI TAP DELAY | Funky sound with auto wah and multi tap takes acoustic guitar to a new level. | |
| D6 | MY BACKWARD FRIENDS | RESOPHONIC | REVERSE DELAY | Psychedelic sound using reverse delay will grow on you. Use it to develop a theme. | |
| D7 | STEPPING STONES | OVATION | STEP & MULTI TAP DELAY | Brilliant trickster sound using a new step technique specially developed for acoustic guitar use. | |
| D8 | OVATION SOLO | OVATION | DELAY | Bright sound with clear delay components and an Ovation style edge for solos. | |
| D9 | RESOPHONIC | RESOPHONIC | PINGPONG DELAY | Discover new possibilities in bottleneck playing with this combination of ping-pong delay and Zoom original resonator guitar sound. |
- The preset area of banks 0 - 3 contains the same patches as A - d.
- The ZNR value may need to be adjusted depending on the guitar and amplifier.
Manufacturer names and product names mentioned in this patch list are trademarks or registered trademarks of their respective owners. These names as well as artist's names are used only to illustrate sonic characteristics and do not indicate any affiliation with ZOOM CORPORATION.
- ACOUSTIC EFFECTS PEDAL
- A2
- Operation Manual
- 200m
- SAFETY PRECAUTIONS Usage Precautions
- SAFETY PRECAUTIONS
- Power requirements
- [AC adapter operation]
- [Battery operation]
- Environment
- Handling
- Connecting cables and input and output jacks
- Alterations
- Volume
- Usage Precautions
- Electrical interference
- Cleaning
- Contents
- The FCC regulation warning (for U.S.A.)
- Features
- - Latest technology for top performance
- Full array of effects optimized for acoustic guitar
- - Select optimum characteristics for pickups and amps
- Automatic suppression of acoustic feedback
- Advanced interface
- Rhythm function and auto-chromatic tuner
- Support for foot switch and expression pedal
- - Dual power supply principle allows use anywhere
- Terms Used in This Manual
- ■ Effect module
- ■ Effect type
- ■ Effect parameter
- Patch
- Bank and area
- ■ Modes
- Play mode
- - Manual mode
- Edit mode
- Operating the A2 on batteries
- Controls and Functions / Connections
- Module selector
- BANK[-]/[+] keys
- [STORE] key
- [INPUT] jack
- About HI-GAIN mode
- To start the A2 in HI-GAIN mode
- NOTE
- [OUTPUT/PHONES] jack
- Parameter knobs 1 - 3
- RHYTHM [▶/■] key
- [MANUAL] key
- Display
- [ ] / [ ] foot switches
- Selecting a Patch
- Turn power on
- Set the A2 to play mode
- Select a patch
- Adjust tone and volume
- Parameter knob 1
- Parameter knob 3
- Parameter knob 2
- Directly selecting a bank
- Using the Tuner
- Switch to bypass or mute
- - Setting the A2 to the bypass condition
- - Setting the A2 to the mute condition
- Patch change at bypass/mute
- Play the string to tune
- Adjusting the reference pitch of the tuner
- Return to play mode
- Using the Rhythm Function
- Set the A2 to play mode (or manual mode)
- Start the rhythm function
- Select a rhythm pattern
- Adjust the rhythm volume
- Adjust the tempo
- Stop the rhythm
- Editing a Patch
- Select the effect module
- To switch an effect module on and off
- HINT
- Terminate the edit mode
- Change the parameter value
- Select the effect type
- Storing/Copying Patches
- Select the store/copy target bank
- To cancel the store process
- Press the [STORE] key once more
- Specify the store/copy target patch number
- Using the Feedback Control
- Manual operation of feedback control
- Set the Module selector to "GLOBAL".
- oF
- At
- 1-30
- Turn parameter knob 2 to set the feedback frequency, using the setting range from 1 - 30.
- When the setting is complete, return the Module selector to the "PLAY" position.
- Automatic detection of feedback frequency
- Refer to the section "Manual operation of feedback control" and set the FEEDBACK FREQ value to "oF" or "At".
- To automatically detect the feedback frequency while playing your guitar, proceed as follows.
- In play mode
- In manual mode
- Using Manual Mode
- In play mode, select a patch.
- Press the [MANUAL] key.
- To switch feedback control between on and off, press the [▲] foot switch.
- To switch the MOD/EFX module between on and off, press the [▼] foot switch.
- To return to play mode, press the [MANUAL] key.
- Using an Optional Foot Switch or Pedal
- Using the foot switch (FS01)
- dM (delay input mute)
- Mn (manual mode)
- Fb (feedback control)
- Use the foot switch in play mode or manual mode.
- Using the expression pedal (FP01/FP02)
- vL
- CU, Cd, CH, CL
- Restoring Factory Defaults
- Turn the A2 on while holding down the [STORE] key.
- To carry out the All Initialize function, press the [STORE] key once more.
- Linking Effects
- CONTROL module and GLOBAL module
- - AMP SELECT
- - PICKUP SELECT
- Effect Types and Parameters
- How to read the parameter table
- Effect parameters 1-3
- Expression pedal
- Tap
- Hold
- UP
- DOWN
- HIGH
- LOW
- Specifications
- Troubleshooting
- Volume is low
- Matching problem with particular pickup or guitar amplifier
- - Delay/reverb effect does not work
- High level of noise
- Battery life is short
- A2 Preset Pattern
- ZEEM
- CATCH US IF YOU CAN
- A2 Patch List
Brand : ZOOM
Model : A2
Category : Guitar Effects