
D754BJB - Tumble dryer GORENJE - Free user manual and instructions
Find the device manual for free D754BJB GORENJE in PDF.
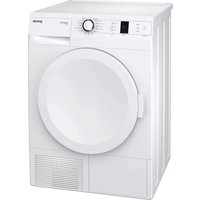


| Product Type | Tumble Dryer |
| Brand | Gorenje |
| Model | D754BJB |
| Installation Type | Freestanding |
| Drying System | Condenser |
| Capacity | 7 kg |
| Energy Class | B |
| Annual Energy Consumption | 504 kWh |
| Dimensions (H x W x D) | 85 x 60 x 60 cm |
| Net Weight | 44 kg |
| Power Supply | 230 V ~ 50 Hz |
| Rated Power | 2000 W |
| Noise Level | 65 dB(A) |
| Drying Programs | Cotton, Synthetics, Delicates, Mix, Quick 30 min, Eco, Anti-Allergy |
| Special Features | Reverse Tumbling, Anti-Crease, Delay Start (up to 24h), Child Lock |
| Lint Filter | Yes, removable and washable |
| Condenser Cleaning | Accessible for cleaning |
| Water Tank | Yes, with indicator |
| Safety Features | Overheating Protection, Door Lock, Child Lock |
| Spare Parts Availability | For 10 years after last unit production |
| Repairability Index | 7.5 / 10 |
| Manual | Free PDF available on notice-facile.com |
Frequently Asked Questions - D754BJB GORENJE
User questions about D754BJB GORENJE
0 question about this device. Answer the ones you know or ask your own.
Ask a new question about this device
Download the instructions for your Tumble dryer in PDF format for free! Find your manual D754BJB - GORENJE and take your electronic device back in hand. On this page are published all the documents necessary for the use of your device. D754BJB by GORENJE.
USER MANUAL D754BJB GORENJE
DETAILED INSTRUCTIONS
HOW TO USE YOUR DRYER
gorenje

We thank you for the confidence you have shown us by purchasing this dryer. Your new dryer complies with the requirements of modern laundry care; it will dry your laundry quickly, leaving it soft and smooth, while use of special programs will not deform it. SensoCare technology will allow simple operation of the dryer with very low power consumption. This appliance is designed exclusively for household use for clothes which may be drying in a dryer.
TABLE OF CONTENTS
| 4 | APPLIANCE | INTRODUCTION |
| 5 | Technical information | |
| 6 | Front panel description | |
| 8 | SAFETY PRECAUTIONS | |
| 10 | INSTALLATION AND CONNECTION | GETTING STARTED |
| 10 | Selecting the room | |
| 13 | Installation | |
| 14 | Condensate discharge | |
| 15 | Electrical connections | |
| 16 | Moving and transport | |
| 16 | Subsequent transport | |
| 17 | Emptying the steam generator tank | |
| 18 | Steam generator system | |
| 19 | BEFORE THE FIRST USE | |
| 22 | DRYING STEPS (1 - 6) | DRYING STEPS |
| 22 | 1. Step: Check the tags on your laundry | |
| 23 | 2. Step: Preparing the laundry | |
| 26 | 3. Step: Selecting a program | |
| 29 | 4. Step: Additional functions | |
| 32 | 5. Step: Program start-up | |
| 32 | 6. Step: End of drying cycle | |
| 33 | CLEANING AND MAINTENANCE | CLEANING AND MAINTANCE OF THE APPLIANCE |
| 34 | Cleaning the filter on the lower side of the door opening | |
| 35 | Cleaning the net filter in the door | |
| 36 | Cleaning the foam filter in the door | |
| 37 | Cleaning the heat pump filter | |
| 38 | Cleaning the steam generator tank filter | |
| 39 | Emptying the condensate tank | |
| 40 | Cleaning the dryer | |
| 41 | INTERRUPTING AND CHANGING THE PROGRAM | TROUBLE-SHOOTING |
| 42 | What to do...? | |
| 44 | TIPS AND RECOMMENDATIONS FOR DRYING AND ECONOMIC USE OF YOUR DRYER | OTHER |
| 45 | DISPOSAL |
SAFETY PRECAUTIONS

Please don't use the appliance unless you have studied and understood the instruction manual.
Your dryer is intended solely for household use.
If the dryer is used for professional, for-profit purpose or purpose exceeding normal use in a household, or if the dryer is used by a person who is not a consumer, the warranty period shall be equal to the shortest warranty period required by relevant legislation.
Before connecting the dryer to the power mains, please read carefully the instructions for use which describe the dryer and its correct and safe use. The instructions apply for several appliance types/models; thus, settings or equipment may be described herein which is not available in your dryer.
Failure to observe instructions or incorrect use of the dryer, can lead to damage of laundry, dryer or the user.
Store the instruction manual nearby the dryer.
Do not allow the children to play with the appliance.
Prevent your children and pets to enter the dryer drum.
Air in the dryer environment should not contain dust particles.
The air where the dryer is installed, should be well ventilated to prevent feedback of gases released from the gas appliances with open fire (e.g. fireplace).
Final drying cycle includes cooling; be careful not to extract excessively hot laundry from the drum.
Clean the filters after each drying cycle. If you have removed the filters, replace them before the next drying cycle.
After each cleaning insert the condenser back into the air duct. Operation of the appliance without condenser, or with damaged condenser is extremely dangerous and may cause fire.
Always switch off the dryer after use (the program selector switch should be in the "OFF" position) and unplug the power cord from the wall outlet (to prevent the hazard of lightning or voltage overload).
Leave any repairs and similar tasks on the dryer to an expert.
Unprofessional repair may result in an accident or major malfunction. Call the authorized service department (see list of service departments attached).
The warranty does not cover (consumables (light bulbs), minor deviations in colour, increased noise which is a consequence of the appliance age and does not affect the functionality of the appliance, and aesthetic defects on components that do not affect the functionality and safety of the appliance.
The appliance is manufactured in compliance with all effective safety standards.
Nevertheless, we recommend it is not used by persons with impaired physical or mental abilities and motor skills, or persons with deficient experience or knowledge, without due supervision. The same recommendation applies to the use of appliance by minors.
The dryer back wall can be hot danger of burns.
Never stop the drying cycle before it is completed; if you do interrupt the cycle for any reason, be careful when removing the laundry from the drum as it is very hot. Quickly remove the laundry from the drum and spread it to allow it to cool down as quickly as possible.
CHILDREN UNDER 3 YEARS SHOULD BE KEPT AWAY FROM THE MACHINE UNLESS THEY ARE NOT CONSTANTLY SUPERVISED AT ALL TIMES.
THE APPLIANCE IS MANUFACTURED IN COMPLIANCE WITH ALL RELEVANT SAFETY STANDARDS.
THIS APPLIANCE IS NOT INTENDED FOR USE BY PERSONS (INCLUDING CHILDREN) WITH REDUCED PHYSICAL, SENSORY OR MENTAL CAPABILITIES, OR LACK OF EXPERIENCE AND KNOWLEDGE, UNLESS THEY HAVE BEEN GIVEN SUPERVISION OR INSTRUCTION CONCERNING USE OF THE APPLIANCE BY A PERSON RESPONSIBLE FOR THEIR SAFETY. CHILDREN SHOULD BE SUPERVISED TO ENSURE THAT THEY DO NOT PLAY SHOULD BE SUPERVISED TO ENSURE THAT THEY DO NOT PLAY WITH THE APPLIANCE. CLEANING AND USER MAINTENANCE SHALL NOT BE MADE BY CHILDREN WITHOUT SUPERVISION.
TO REDUCE FIRE HAZARD, PLEASE READ THE FOLLOWING INSTRUCTIONS:

Do not dry in the dryer any laundry, that has not been washed earlier.
Use the dryer only to dry laundry that was washed with water. Do not dry any laundry that was washed of cleaned with inflammable cleaners or substances (such as gasoline, trichloroethylene etc.) as this may result in an explosion.
Laundry stained with oil, acetone, alcohol, oil derivatives, stain removers, turpentine, wax, and wax removers should be washed in a washing machine with hot water and detergent before it is dried in the dryer.
Clothing that includes foam rubber, latex, rubber parts, shower and bathing caps, water proof textiles, and rubber backed articles and clothes or pillows fitted with foam rubber pads should not be dried in the tumble dryer.
Laundry conditioners or similar products have to be used in compliance with manufacturer's instructions.
APPLIANCE
(DRYER DESCRIPTION)
FRONT
1 Program selector dial
2 Front panel
3 Condensate tank
4 Door
5 Net filter
6 Filter on the lower side of the door opening
7 Condenser
8 Air vent
9 Rating plate

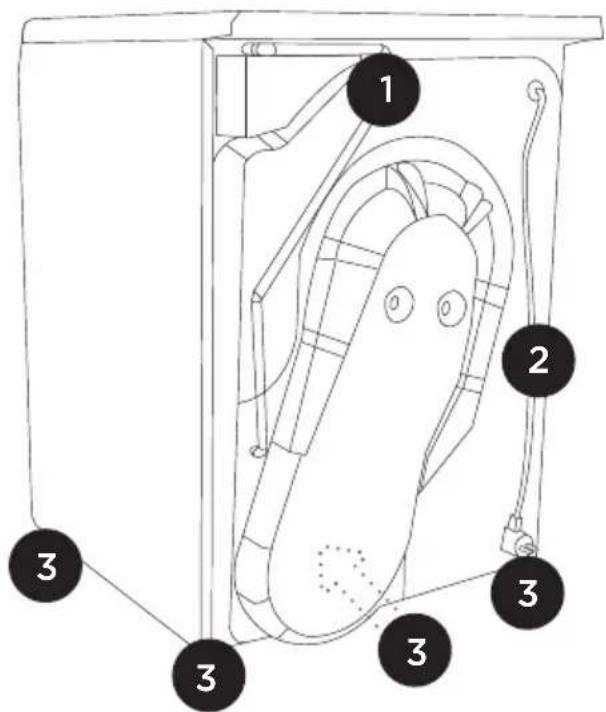
BACK
1 Condensate discharge pipe
2 Power cord
3 Adjustable feet
TECHNICAL INFORMATION
(DEPENDING ON THE MODEL)
The rating plate with the basic information on the dryer is located under the door frame.
| Width | 600mm |
| Height | 850mm |
| Depth | 600mm |
| Depth with door open | 1100mm |
| Weight | XX/YY kg (depending on the model) |
| Rated voltage | See rating plate |
| Fuse | See rating plate |
| Nominal power | See rating plate |
| Maximum load | See rating plate |
The rating plate
TYPE: SP10/XXX
Art.No.: XXXXXX
AC 220-240V 50 Hz
Pmax.: XXXXW

10A
MADE IN SLOVENIA
MODEL: XXXXXX
Ser.No.: XXXXXX

IPX4
FRONT PANEL DESCRIPTION
FOR MODELS A) WITH A STEAM GENERATOR AND
B) WITHOUT A STEAM GENERATOR
A) WITH A STEAM GENERATOR

1 START/ PAUSE key, use this key to start or stop the program. When selected, the signal light on the key will flash. When the program has started it will be lit continuously.
2 a, b, c: SIGNAL LIGHTS are on: when it is necessary to clean the filter, empty the condensate tank or when the child lock is on.
3 START DELAY key, to select the delayed start of the drying program.
4 DISPLAY of delay TIME or remaining time until the end of the drying cycle

5 a, b, c: ADDITIONALMOST USED PROGRAMS FUNCTION keys, to
extend or adjust the basic
programs.
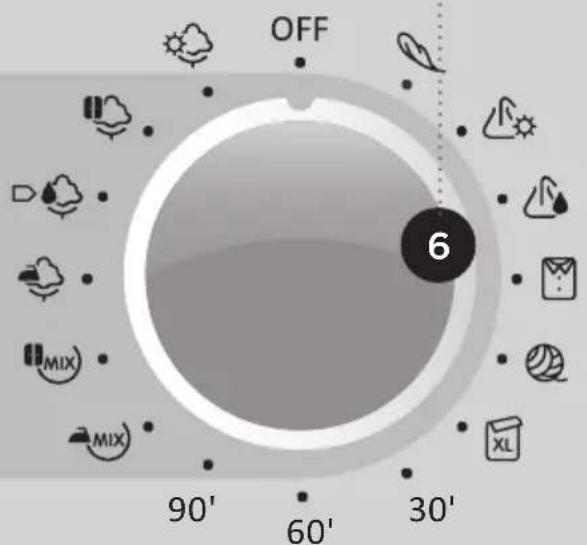
6 ON/OFF and PROGRAM SELECTOR dial
B) WITHOUT A STEAM GENERATOR


INSTALLATION AND CONNECTION
SELECTING THE ROOM

Ventilation slots and the opening on the front and rear side should always be kept free.
Do not install the appliance in a room where there is danger of frost.
The room in which the appliance is installed should be adequately ventilated, with temperature between 10° C and 25° C. When the dryer is operated at a lower ambient temperature, condensate can accumulate in the appliance interior. Frozen water in the condensate tank or pump may damage the dryer.
The surrounding illumination in the installation room should be adequate to read the front panel properly.
When installing the dryer in a room, note the required clearance as indicated in the image. In case of failure to heed the required minimum clearance, the dryer may overheat.
POSITIONING THE APPLIANCE
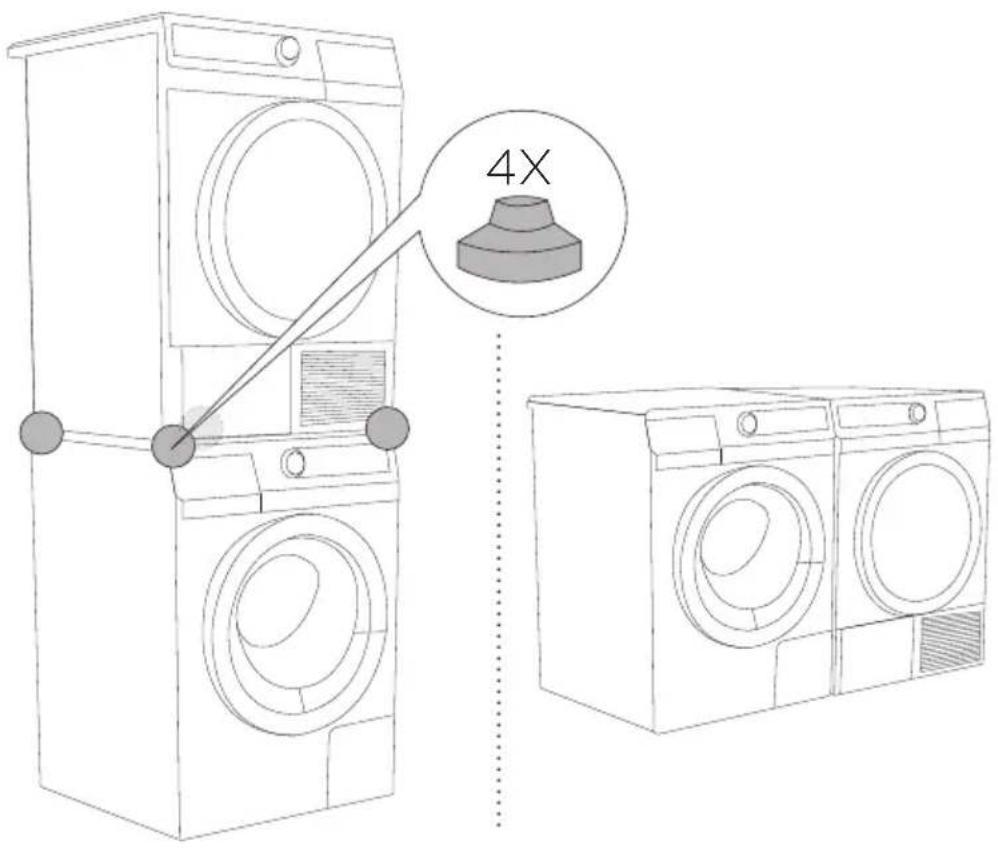
Positioning the appliance on top of the washing machine by using the vacuum feet or side by side.
Dryer can be stand freely on the floor or on a washing machine of the same dimensions - minimum width 517 mm, minimum depth 476 mm. The surface on which the dryer is placed should be clean and level.
Use the vacuum feet attached; they are designed to prevent the dryer from sliding. (Vacuum feet are attached or can be purchased (depending on model)).
Washing machine on which you wish to install the dryer must be able to bear the weight of the dryer (see washing machine's rating plate or technical information).

Do not place the dryer behind lockable or sliding door or door with a hinge opposite the dryer. Install the dryer in such way that the door can always be freely opened.
Never block the cool air opening (see dryer description).
Drying machine on top should be placed by at least two persons.
Do not place the dryer on a carpet with long fibres as this may impede air circulation.
The appliance may not be in contact with a wall or adjacent furniture.
Lint must not be allowed to accumulate around the tumble dryer.
INSTALLATION

Level the dryer in longitudinal and traverse direction by rotating the adjustable feet which allow levelling by +/- 1 cm. Use key nr. 22 and spirit level.

Floor on which the machine is placed must have a concrete base. They must be clean and dry; otherwise, the machine may slide. Also clean the adjustable feet.
The appliance must stand level and stable on a solid base.
Vibrations, moving of the appliance across the room, or loud operation due to improperly adjusted feet are not covered by the warranty.
Sometimes, unusual or loud noise may appear during appliance operation; these are mostly the result of improper installation.
CONDENSATE DISCHARGE
The moisture from the laundry is extracted in the condenser unit and accumulated in the condensate tank.
During the drying process, a control light will warm you of a full condensate tank which has to be emptied.
Interruption of the drying cycle due to full condensate tank can be avoided by running the condensate discharge tube found at the back of the appliance directly into a drain.

1 Pull the tube to remove it with flat screw-driver, from the holder on the appliance back wall (on the left hand side under the cover).
2 Install tube into the drain, at a height of 80 cm from the ground.

If the condensate discharge tube is run into a drain, make sure the tube is firmly secured. This will prevent any water spillage which could result in unexpected damage.
In this case, the steam generator tank will not be filled automatically. It will always require manual filling (see section Filling and replenishing the steam generator tank).
ELECTRICAL CONNECTIONS

The dryer should be left to stand still for at least two hours before it is connected to the power mains to allow the system to stabilize.
Use the power cord to connect the dryer to the power mains through a power outlet. The dryer may not be connected to the power mains through an extension cable (danger of overheating and fire). Nominal voltage and other information is given on the rating plate located under the door frame.
To prevent from damage by excess voltage on the mains due to lightning strike we recommend to use a class I over-voltage protector between the machine and the mains.

After installation, the wall outlet should be freely accessible. The outlet should be fitted with an earth contact (in compliance with the relevant regulations).
A damaged power cord may only be replaced by a person authorized by the manufacturer.
MOVING AND TRANSPORT

After transport, the dryer should be left to stand still for at least two hours before it is connected to the power mains to allow the system to stabilize. We recommend that installation and connection should be done by a qualified person.
SUBSEQUENT TRANSPORT
After each drying certain amount of condensed water is retained in the appliance. Switch on the appliance and choose one of the programs, then let the appliance operate for approximately half a minute. This will pump out the remaining water and prevent damage to the dryer during transport.

If the appliance was not transported in compliance with the instructions, the dryer should be left to stand still at least two hours before it is reconnected to the power mains.
Before connecting the appliance, read the instructions for use. Repair or any warranty claim resulting from incorrect connection or use of the appliance shall not be covered by the warranty.
The belt can be replaced by a servising engineer only, who incorporates an original spare part with the marking OPTIBELT EPH 1906, code 104265, OPTIBELT 8 EPH 1941, code 160165 (depending on model).
EMPTYING THE STEAM GENERATOR TANK (ONLY FOR MODELS WITH STEAM GENERATOR)
Before transporting a dryer that has been previously used, the steam generator tank must also be emptied. Otherwise, water from the tank may spill into the dryer interior. Move the dryer approximately 40 cm away from the wall and tilt it backwards.

1 The steam generator tank emptying plug is located on the front side (lower right hand side).
2 Place an empty vessel under the plug (approximately 2 l) and pull out the plug
3 When the water is discharged, replace the plug (if the plug is not replaced, water will spill from the dryer during the next drying cycle).
STEAM GENERATOR SYSTEM (DEPENDING ON THE MODEL)
Care and treatment of your laundry with steam.
Use steam to straighten the creases and refresh the laundry. The
laundry will become soft and smooth, making ironing much easier.

After the end of the drying program, immediately remove the laundry from the dryer to prevent it from creasing again.
BEFORE THE FIRST USE
Open the disconnected dryer by pressing the door on the left side.

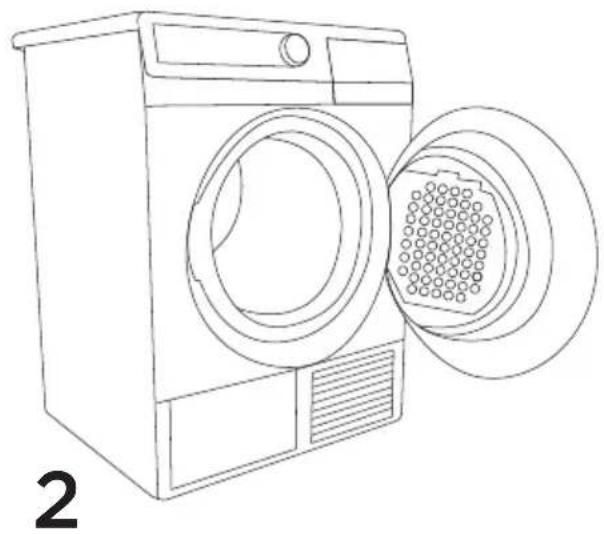

Clean the dryer drum before using the dryer for the first time. Use a damp cloth and a mild cleaning agent.
BEFORE USING THE APPLIANCE FOR THE FIRST TIME
(MODEL WITH STEAM GENERATOR)
If you select one of the steam programs as the first program to be run with your dryer, first add distilled water to the steam generator tank; the dryer needs the distilled water to generate steam.
If the steam generator tank is empty, none of the steam programs will be available. "LO" (steam generator tank empty) will appear on the display. Later, the system is automatically filled with condensed water accumulated during the drying process.

Only use distilled water. Do not use regular tap water or any additives. Limescale may damage the heater. Malfunction or failure due to accumulation of limescale is not covered by the warranty.
Add distilled water when the appliance is switched on and one of the steam programs is selected (but before starting any drying program). Otherwise, the level sensor will not operate and water may overflow to the dryer interior.
FILLING AND REPLENISHING THE STEAM GENERATOR TANK
(MODEL WITH STEAM GENERATOR)
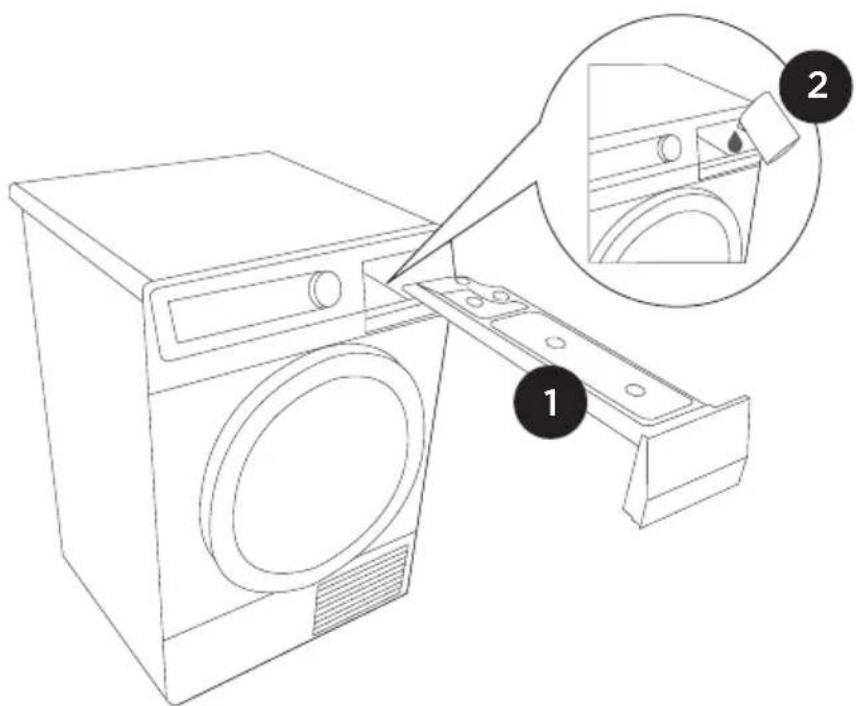
1 Remove the condensate tank.
2 Slowly add distilled water to the steam generator tank filter.

By slowly pouring, you will prevent the water from flowing down the front wall of the appliance. (Steam generator tank is not visible as it is located in the dryer interior; only the steam generator tank filter is visible.
When the steam generator tank is full, "FULL" will be displayed on the screen and an acoustic alarm will be emitted.
DRYING STEPS (1 - 6)
1. STEP: CHECK THE TAGS ON YOUR LAUNDRY
| Normal washDelicate wash | Max.washing95°C  | Max.washing60°C  | Max.washing40°C  | Max.washing30°C  | Manual washing | Washing not allowed |
| Whitening Whitening in cold water | Whitening not allowed | |||||
| Dry cleaning Dry cleaning in all solventsA | Perchloret-yhlene R11, R113,PetrolejP | Dry cleaning in kerosene, in pure alcohol and in R 113F | Dry cleaning not allowed | |||
| Ironing Hot iron max.200°C | Hot iron max.150°C | Hot iron max.110°C | Ironing not allowed | |||
| Drying Place on flatsurface | Hang wet | High temp. | Tumble drying not allowed | |||
| Hang | Low temp. | |||||
2. STEP: PREPARING THE LAUNDRY
- Sort the laundry by type and thickness of the fabric (see Program Table).
- Close the buttons and zips, tie any ribbons, and turn the pockets inside out.
- Place very sensitive clothes in a special-purpose laundry washing bag.
(The special-purpose textile bag is available separately.)


The following types of laundry may not be dried in the dryer as this may cause your garments to deform:
• leather garments and other leather products;
• garments that are waxed or treated in any other way;
• garments with major wooden, plastic, or metal parts;
• garments with spangles;
• garments with metal parts subject to rusting.
The final part of a tumble dryer cycle occurs without heat (cool down cycle) to ensure that the items are left at a temperature that ensures that the items will not be damaged.
Remove all objects from pockets such as lighters and matches.
Oil-affected items can ignite spontaneously, especially when exposed to heat sources such as in a tumble dryer. The items become warm, causing an oxidation reaction in the oil. Oxidation creates heat. If the heat cannot escape, the items can become hot enough to catch fire. Piling, stacking or storing oil-affected items can prevent heat from escaping and so create a fire hazard.
If it is unavoidable that fabrics that contain vegetable or cooking oil or have been contaminated by hair care products be placed in a tumble dryer they should first be washed in hot water with extra detergent - this will reduce, but not eliminate, the hazard.
DRYING IN A BASKET (ONLY WITH SOME MODELS)

Prior to first drying remove the basket and any wrappings from the drum.
Drying in a basket may be selected only at time defined drying.
Mount the basket in the opposite order of the procedure for its removal, but without the transport packaging.
The basket drying function is used to dry sneakers or other things which you want to prevent from tumbling within the drum (max. load: 2,5 kg).
Dry only clean sneakers. Wring them after washing to such extent that they do not drip water prior inserting into the dryer.
During this function the basket remains still. Be careful to avoid things which are being dried to touch the drum as they may get stuck and thus damaged.
After the drying is over, replace the filter again.

1 Before installing the basket, it is necessary to remove the filter situated on the lower side of the door opening.
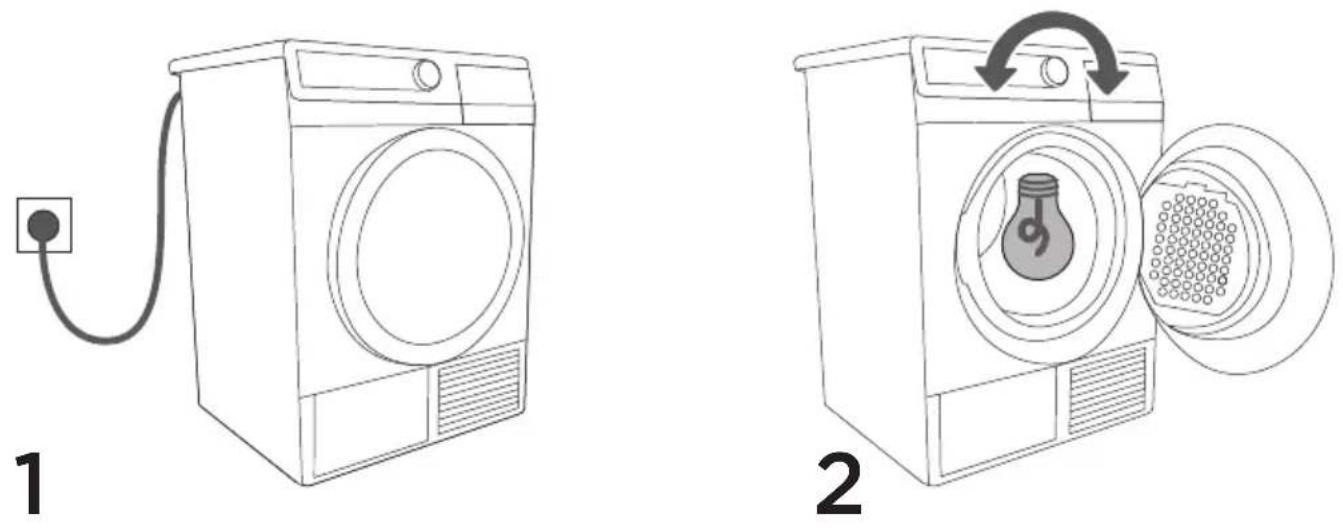
SWITCHING ON THE DRYER
Connect the appliance to the power mains by plugging in the power cord.
To light up the drum (certain models only), rotate the program selector dial to any position.
LOADING THE DRYER
Open the dryer door by pressing it on the left side towards the dryer.
Insert the laundry into the drum (make sure the drum is empty).


Do not insert laundry into the dryer if it has not been wrung or spun (recommended minimum spinning cycle: 800 rpm).
Close the dryer door.
3. STEP: SELECTING A PROGRAM
To select a program, rotate the program selector dial (6) to the left or to the right (according to the type of desired level of dryness of the laundry).
![graph TD A["OFF"] --> B["6°"] B --> C["MIX"] B --> D["MIX"] B --> E["XL"] B --> F["90'"] B --> G["30'"] style A fill:#f9f,stroke:#333 style B fill:#ccf,stroke:#333](/content/2026/07/1519929/images/299e3993887f1f7cde0217bc95a5d0a45aeac83c39040069599c66981e81b709.jpg)
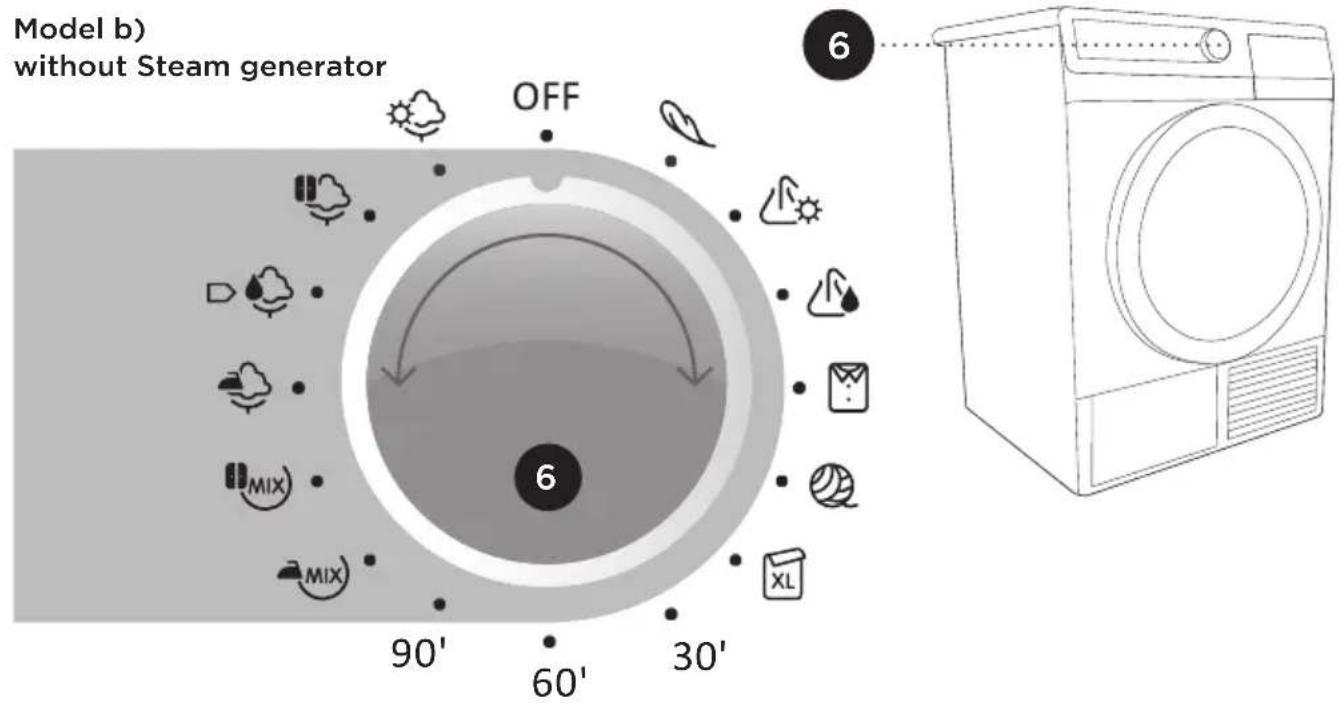

During operation, the dial will not rotate automatically.
PROGRAM TABLE
MODEL WITH STEAM GENERATOR
| ProgramDryness levels | Max. load Laundry Extra functions | ||
| CottonUltra*StorageStandardDIron | 7.5 kgD754BJD754BJ (*) | Non-delicate cotton laundry (towels, terry towels, stockinette, T-shirts, trousers, kitchen cloths etc.)NOTE: Cotton Ultra, Extra dry level 1, anti crease off is the program for drying a normal load at rated capacity. | Low temperatureStart delayExtra drySteam (only with cotton - storage dry) |
| MixMIXStorageIron | 3,5 kg Clothing made of a mixture of fibres (trousers, T-shirts, suits etc.) | Low temperatureStart delayExtra drySteam (only with mix - storage dry) | |
| Timed programDuration:30'/90' | 3,5 kg Laundry that needs to be thoroughly dried, or a small amount of laundry, or individual garments. | Low temperatureStart delayExtra dry | |
| XLBedlinen | 5 kg Larger pieces of laundry (bedding, large tablecloths, large towels etc.) - prevents the laundry from forming into a bulk. | Low temperatureStart delayExtra drySteam | |
| Refresh steam | 2 kg Clothing that you wish to treat with steam (seasonal clothing, preparing the laundry for easier ironing etc.) | Start delay | |
| Wool softening | 2 kg Wool garments and garments with mixed fibres containing wool, which you wish to soften (sweaters, scarves, shawls etc.) | ||
| Shirts | 2 kg Shirts and blouses • Low temperature | Start delayExtra drySteam | |
| SyntheticsDryUltra | 3,5 kg Garments made of or containing with synthetic fibres (T-shirts, trousers, suits, socks and stockings, gowns etc.) | Low temperatureStart delayExtra drySteam (only for synthetics - dry) | |
| Sensitive | 2 kg Laundry that requires drying at lower temperatures (blouses, delicate underwear, shirts with additional décor etc.) - Use of special-purpose laundry washing bag is recommended. | Start delayExtra dry | |
* Program Cotton Ultra, Extra dry level 1, anticrease turned off, at rated load capacity was used for the testing for energy according to AS/NZS 2442. The cool down cycle commences when 9min is noted on the control panel display.
PROGRAM TABLE
MODEL WITHOUT STEAM GENERATOR
| ProgramDryness levels | Max. load | Laundry Extra functions | |
| CottonUltra*StorageStandardDIron | 7,5 kg Non-delicate cotton laundry (towels, terry towels, stockinette, T-shirts, trousers, kitchen cloths etc.)NOTE: Cotton Ultra, Extra dry level 1 is the program recommended for a normal load at rated capacity - Anticrease turned off. | Low temperatureStart delayExtra dryAnticrease extra | |
| MixMIXStorageIron | 3,5 kg Clothing made of a mixture of fibres (trousers, T-shirts, suits etc.) | Low temperatureStart delayExtra dryAnticrease extra | |
| Timed programDuration:30'/60'/90' | 3,5 kg Laundry that needs to be thoroughly dried, or a small amount of laundry, or individual garments. | Low temperatureStart delayAnti-crease | |
| XLBedlinen | 5 kg Larger pieces of laundry (bedding, large tablecloths, large towels etc.) | Low temperatureStart delayExtra dryAnticrease extra | |
| Wool softening | 2 kg Wool garments and garments with mixed fibres containing wool (sweaters, scarves, shawls etc.) | ||
| Shirts | 2 kg Shirts and blouses • Low temperature | Start delayExtra dryAnticrease extra | |
| SyntheticsDryUltra | 3,5 kg Garments made of or containing with synthetic fibres (T-shirts, trousers, suits, socks and stockings, gowns etc.) | Low temperatureStart delayExtra dryAnticrease extra | |
| Sensitive | 2 kg Laundry that requires drying at lower temperatures (blouses, delicate underwear, shirts with additional décor etc.) - Use of special-purpose laundry washing bag is recommended. | Start delayExtra dryAnticrease extra | |
* Program Cotton Ultra, Extra dry level 1, anticrease turned off, at rated load capacity was used for the testing for energy according to AS/NZS 2442. The cool down cycle commences when 9min is noted on the control panel display.
4. STEP: ADDITIONAL FUNCTIONS (EXTRA)


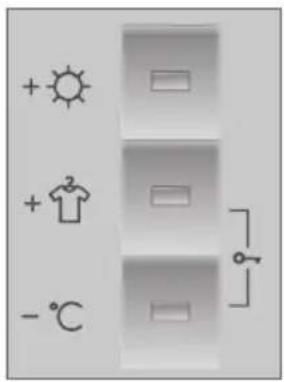
Activate/deactivate the function by pressing the relevant key (before pressing the START/PAUSE key).

Extra dry
Each time the key is pressed (three levels), the final level of laundry dryness and drying time will change.


Steam (depending on the model).
For straightening the creases and refreshing the laundry with steam, only for programs in which steam treatment is possible. (next to the program is symbol)

Anticrease Extra
To prevent creasing if the laundry is not taken from the dryer immediately after the end of the drying cycle.
Default setting is two hours. Duration can be set from zero to a maximum of four hours. The most recent setting is stored. The function is deactivated when the dryer door is opened.

Lower temperature
Used for delicates. Reduced temperature depends upon the program where this function is applied. After the program is completed the option is not memorized.

Child lock
To activate the child lock by simultaneously pressing the (5b) and (5c) keys and holding them for at least three seconds. The signal light will light up to confirm the selection.
Follow the same procedure to deactivate the child lock. As long as the child lock is activated, program or additional functions cannot be changed. The appliance can only be switched off by rotating the program selector dial to the "OFF" position. Child lock will remain activated even after the appliance is switched off. In order to select a new program, it has to be switched off.


Start delay
Use this function to start the drying cycle after a certain amount of time has elapsed.
Delay time can be set to up to five hours in 30-minute steps and up to 24 hours in 1-hour steps.
The function is activated when the START/PAUSE key is pressed. Time is counted down by minutes. When the countdown reaches zero, the selected drying program will start automatically.
To interrupt or change the program delay time press the START/PAUSE key. Press the (3) key to select a new delay time. To confirm the new setting, press the START/PAUSE key.
To quickly cancel the delayed start setting, press the (3) key and hold it for 3 seconds.
In case of a power supply failure before the delay time has elapsed, press the START/PAUSE key to resume the countdown.

Some functions cannot be selected with some programs; an acoustic signal and a flashing light will remind you of such cases (see Program Table).
SOUND SIGNAL LEVEL
Select the acoustic signal loudness by simultaneously pressing a key (5a) and rotating the program selector dial clockwise to the initial position.
Each time the key (5a) is pressed, the final loudness level is changed (three levels). Loudness level is indicated on the display unit. The most recent setting is stored.

After disconnecting the appliance from the power mains, all settings will be reset to their default factory values, except for the acoustic signal loudness, anti-crease, and child lock setting.
STANDBY MODE
If no program is selected and started and no other action is taken within five minutes after turning on the machine, the display will be automatically turned off to save energy. Signal light on the START/PAUSE key will flash.
The display will turn on again when you rotate the program selector dial or press any button. If no action is taken after the end of the program, the display will also be turned off after five minutes. Signal light on the START/PAUSE key will flash.
| Po = weighted power in ‘off mode’ [W] 0,00 |
| P1 = weighted power in the ‘left on mode’ [W] 0,5 |
| T1 = time in ‘left on mode’ [min] 10,0 |

As a result of low mains voltage or different laundry loads, drying time can change. This is regularly updated on the display.
5. STEP: PROGRAM START-UP
Press the START/PAUSE key.
Start delay time (if selected), or the time remaining until the end of the program and counting down will be indicated on the display unit.
Signal lights next to the selected functions will be lit.

6. STEP: END OF DRYING CYCLE
An acoustic signal will indicate the end of the drying cycle. Signal lights will light up and the light on the START/STOP key will flash.

- Open the dryer door.
- Clean the filters (see section Cleaning ...).
- Take the laundry from the drum.
- Close the door!
- Switch off the appliance (rotate the program selector dial (6) to the "OFF" position).
- Empty the condensate tank.
- Unplug the power cord from the outlet.

Drying time indicated is based on tests according to the EN 61121 standard and it may change in steps during the drying process, depending on the load and initial moisture of the laundry.
CLEANING AND MAINTENANCE
Dryer is fitted with the filtering system containing several filters.

1 Net filter
2 Filter on the lower side of the door opening
3 Condenser

The dryer should never be operated without the filters in place, or with damaged filters as excessive amount of accumulated fibres from the fabric could cause malfunction or failure of the dryer.
CLEANING THE FILTER ON THE LOWER SIDE OF THE DOOR OPENING
Before emptying the drum, clean the filter on the lower door opening using your hand or a damp cloth.

1 If the filter is clogged and requires washing, remove it from the support bed.
2 Rinse it under running water, and dry it. Make sure the filter snaps back into place before you close the filter cover.

If the filter is not cleaned regularly, airflow will be reduced which in turn prolongs the drying time; in addition, this could result in a dryer malfunction due to overheating.
After five drying cycles, clean the filter with water and dry it before replacing it.
CLEANING THE NET FILTER IN THE DOOR

1 Lift the filter cover.
2 Scrape the filter cover to remove the layer of lint and threads.
3 Close the filter cover.

Close the filter cover in the door always carefully not to crush your fingers.
If necessary, clean the filter housing and door gasket as well.
Clean the net filter after each drying cycle.
CLEANING OF WATER CONDENSER
Certain amount of water may drip out from the condenser, so it is advisable to spread absorbent cloth on the floor prior commencement of cleaning.

1 Open exterior lid, grab the handle on the left and pull downwards. Remove interior lid by turning the handle downwards.
2 Turn the condenser handle upwards.
3 Use the handle to pull the condenser out.
4 Rinse the interior of the condenser on both sides with lukewarm jet of water, and let dry thoroughly.
After five drying cycles:

1 Extract, wash and reinstall water condenser (see »Cleaning of water condenser« on preceding page).
2 Use damp cloth to clean the water condenser cavity;
2a Wipe thoroughly the back of the condenser cavity (reach deeply into the cavity to be able to touch the rear wall with your hand),
2b use damp cloth to wipe and clean all seals and sealing surfaces of the condenser cavity and door.
EMPTYING THE CONDENSATE TANK
Empty the condensate tank after each drying cycle.
![graph TD A["Washing Machine"] --> B["Add Air Bag"] B --> C{Air Drop} C -->|Yes| D["Car Washing"] C -->|No| E["Discharge Toilet"] D --> F["Recycling Dish"] E --> G["Reinjection Toilet"]](/content/2026/07/1519929/images/7c3b4e4f8472fbedcc0182e6ef1270d98d0a8517d554b085cfc5d4cefd675d71.jpg)
1 Remove the condensate tank and turn it.
2 Pour out the water and put the tank back to its place.
(2) Pull out the spout for easier emptying (only some models)

Water from the condensate tank is not potable. If thoroughly filtered, it can be used for ironing.
Never add any chemical means or scents or perfumes into the condensate tank.
Make sure you disconnect the appliance from the power mains before cleaning. Set the program selector dial to "OFF" position and unplug the power cord from the outlet.
CLEANING THE STEAM GENERATOR TANK FILTER
(MODEL WITH STEAM GENERATOR)
Each time you empty the condensate tank, clean the steam generator tank filter as well.
The filter is located in the tank housing (visible when the condensate tank is removed).

1 Remove the condensate tank.
2 Remove the filter from the support bed in the condensate tank housing.
3 Clean the filter thoroughly under running water. If necessary, clean the filter support bed as well.

Make sure the remains of the fibres accumulated during operation do not enter the dryer as this may clog the system).
Insert the filter correctly back into the support bed (otherwise, the filter will not perform its function, which may result in clogging of the system).
CLEANING THE DRYER
Wipe the dryer exterior using a damp cloth and mild detergent.
Do not use detergents or cleaners that could damage the dryer (heed the recommendations and warnings by the cleaner/detergent manufacturers).
Use a soft cloth to wipe dry all parts of the dryer.


Always disconnect the dryer from the power mains before cleaning.
Additional equipment and facilities for maintenance can be seen on: www.gorenje.com
INTERRUPTING AND CHANGING THE PROGRAM
INTERRUPTIONS
Interrupting the program process
Press the START/PAUSE key to pause/resume and the program.
Open door
If the dryer door is opened during the drying process, the drying cycle will be interrupted.
When the door is closed and the START/PAUSE key is pressed, the drying will resume from the point at which it was interrupted.
Full condensate tank
When the condensate tank is full, the drying program will be interrupted (signal light 2b will flash).
Empty the condensate tank (see section Cleaning and Maintenance).
Press the START/PAUSE key to resume the drying cycle from the point at which it was interrupted.
Power supply failure
When power supply is resumed, the signal light on the START/PAUSE key will flash.
To resume the drying process, press the START/PAUSE key.
CHANGING THE PROGRAM/FUNCTIONS
Press the START/PAUSE key and rotate the program selector dial to the "OFF" position.
Select another program/function and press the START/PAUSE key again.
SAVING PERSONAL SETTINGS
Initial settings may be changed. When the program and additional functions are selected, you may store such combination by pressing the START/ PAUSE key and holding it for five seconds.
A signal light on the START/PAUSE key and an acoustic signal will confirm your selection.
S C (settings changed) will be displayed briefly on the display.
Press the START/PAUSE key to start the drying process.
The changed combination will appear every time you switch on the dryer.
Follow the same procedure to change a previously saved combination.
WHAT TO DO...?
Disturbances from the environment (e.g. the power grid) may result in various error reports (see Table on the next page) In such case:
- switch off the appliance and wait at least one minute;
- switch on the appliance and restart the drying program.
- If the error persists, call an authorized service unit.
- You will be able to solve most of the problems in dryer operation by yourself.
• Repairs may only be carried out by an adequately trained person. - Repair or any warranty claim resulting from incorrect connection or use of the dryer shall not be covered by the warranty. In such cases, the costs of repair shall be charged to the user.

The warranty does not cover the errors or failures resulting from disturbances from the environment (lightning strike, power grid failures, natural disasters etc.).
| Problem/error Cause What to do ...? | ||
| The dryer does not work. | No voltage in the power outlet. | Check if the power cord plug is correctly inserted into the power outlet.Check the fuse. |
| There is voltage in the outlet, but the drum does not spin and the dryer does not work. | Program was not started in accordance with the instructions.The door is not properly closed.Condensate tank is full.Delayed start function has been selected. | Reread the instructions for use again.Push the door towards the appliance.Empty the condensate tank (see section Cleaning and Maintenance).Wait until the time indicated on the display elapses. |
| Laundry is not dried, or drying temperature is longer than 4h. | Filters are not clean. The room is not sufficiently ventilated.Inappropriate temperature in the room.Laundry was not sufficiently wrung or spun.Amount of laundry dried in the appliance is too large or insufficient. | Clean the filters.Check whether water condenser is cleaned.Install the dryer in an appropriate room (see section Installation ...).Check if the temperature in the room where the dryer is installed is too high (over 25°C) or too low (below 10°C).Laundry inserted into the dryer was not sufficiently wrung or spun, or an inappropriate drying program was selected.Use an appropriate program or use the timed program. Increase the final level of dryness for the selected program (intensive drying function). |
| Poor condensation | Inadequate location of the dryer. | Check whether the ambient temperature of the room is not too high.Check whether the condenser is clean. |
| Unevenly dried laundry. | The amount of laundry dried at a time is too large.Drying the pieces of different thicknesses.Drying the different types of laundry. | Make sure the laundry is sorted by type and size of items given the selected program (see section Drying - Preparing the Laundry and the Program Table). |
| Error in the drum lighting. | There is no lighting when the dryer door is opened. | Disconnect the dryer from the power mains and call an authorized service unit. |
| On display: F3 • Full condensate tank.If the condensate tank is empty, there is a pump failure. | Empty the condensate tank (see section Cleaning and Maintenance).Disconnect the appliance and call the nearest service unit. | |
| On display:F4 • Clogged filters.If the filters are clean, there may be a compressor failure. | Clean the filters.Disconnect the appliance and call the nearest service unit. | |
| On display:"LO" • Steam generator tank is empty • Add distilled water. | ||
Write down the failure/error code: F0, F1, or F2, disconnect the appliance and call the nearest authorized service (call center).
TIPS AND RECOMMENDATIONS FOR DRYING AND ECONOMIC USE OF YOUR DRYER
The most economical way of drying is to dry the recommended amount of laundry in each batch (see Program Table).
Drying laundry made of particularly delicate fabrics that may be deformed is not recommended.
Use of conditioner in the washing cycle is not necessary as the laundry is soft and smooth after drying in the dryer. Drying time will be shorter and power consumption will be lower if the garments are thoroughly wrung or spun before drying. By selecting the appropriate drying program, you will avoid overdrying your laundry and problems with ironing or shrinkage of fabric.
Regular cleaning of the filters will lead to optimum drying time and minimum power consumption.
When drying smaller amounts of laundry or individual garments, the sensor may not perceive the actual level of moisture in the laundry. In such cases, it is recommended to dry smaller items or amounts with programs for dryer laundry or with the timed program.
DISPOSAL

Packaging is made of environmentally friendly materials that can be recycled, disposed of, or destroyed without any hazard to the environment. To this end, packaging materials are labelled appropriately.
The symbol on the product or its packaging indicates that the product should not be treated as normal household waste. The product should be taken to an authorized collection center for waste electric and electronic equipment processing.
When disposing of an obsolete appliance, make sure you remove the power cord and destroy the door switch and latch to prevent the door from closing (children safety).
Disposing the product in the correct manner will help prevent any negative consequences and effects on the environment and human health which could occur in case of inappropriate product disposal. For detailed information on disposal and processing of the product, contact your relevant municipal authorities in charge of waste management, waste management service, or the store at which you bought the product.
We reserve the right to any changes and errors in the instructions for use.
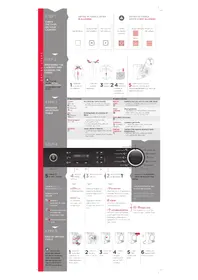
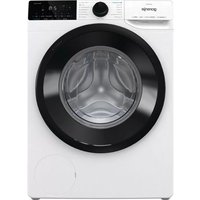
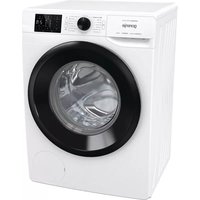
- DETAILED INSTRUCTIONS
- SAFETY PRECAUTIONS
- YOUR DRYER IS INTENDED SOLELY FOR HOUSEHOLD USE
- DO NOT ALLOW THE CHILDREN TO PLAY WITH THE APPLIANCE
- AIR IN THE DRYER ENVIRONMENT SHOULD NOT CONTAIN DUST PARTICLES
- LEAVE ANY REPAIRS AND SIMILAR TASKS ON THE DRYER TO AN EXPERT
- THE APPLIANCE IS MANUFACTURED IN COMPLIANCE WITH ALL RELEVANT SAFETY STANDARDS
- TO REDUCE FIRE HAZARD, PLEASE READ THE FOLLOWING INSTRUCTIONS
- APPLIANCE
- (DRYER DESCRIPTION)
- FRONT
- BACK
- TECHNICAL INFORMATION
- (DEPENDING ON THE MODEL)
- FRONT PANEL DESCRIPTION
- FOR MODELS A) WITH A STEAM GENERATOR AND
- WITHOUT A STEAM GENERATOR
- WITH A STEAM GENERATOR
- INSTALLATION AND CONNECTION
- POSITIONING THE APPLIANCE
- INSTALLATION
- CONDENSATE DISCHARGE
- ELECTRICAL CONNECTIONS
- MOVING AND TRANSPORT
- SUBSEQUENT TRANSPORT
- EMPTYING THE STEAM GENERATOR TANK (ONLY FOR MODELS WITH STEAM GENERATOR)
- STEAM GENERATOR SYSTEM (DEPENDING ON THE MODEL)
- BEFORE THE FIRST USE
- BEFORE USING THE APPLIANCE FOR THE FIRST TIME
- FILLING AND REPLENISHING THE STEAM GENERATOR TANK
- DRYING STEPS (1 - 6)
- STEP: CHECK THE TAGS ON YOUR LAUNDRY
- STEP: PREPARING THE LAUNDRY
- DRYING IN A BASKET (ONLY WITH SOME MODELS)
- AFTER THE DRYING IS OVER, REPLACE THE FILTER AGAIN
- SWITCHING ON THE DRYER
- LOADING THE DRYER
- STEP: SELECTING A PROGRAM
- PROGRAM TABLE
- MODEL WITH STEAM GENERATOR
- MODEL WITHOUT STEAM GENERATOR
- STEP: ADDITIONAL FUNCTIONS (EXTRA)
- EXTRA DRY
- ANTICREASE EXTRA
- LOWER TEMPERATURE
- CHILD LOCK
- START DELAY
- SOUND SIGNAL LEVEL
- STANDBY MODE
- STEP: PROGRAM START-UP
- STEP: END OF DRYING CYCLE
- CLEANING AND MAINTENANCE
- CLEANING THE FILTER ON THE LOWER SIDE OF THE DOOR OPENING
- CLEANING THE NET FILTER IN THE DOOR
- CLEANING OF WATER CONDENSER
- AFTER FIVE DRYING CYCLES
- EMPTYING THE CONDENSATE TANK
- CLEANING THE STEAM GENERATOR TANK FILTER
- (MODEL WITH STEAM GENERATOR)
- CLEANING THE DRYER
- INTERRUPTING AND CHANGING THE PROGRAM
- INTERRUPTIONS
- INTERRUPTING THE PROGRAM PROCESS
- OPEN DOOR
- FULL CONDENSATE TANK
- POWER SUPPLY FAILURE
- CHANGING THE PROGRAM/FUNCTIONS
- SAVING PERSONAL SETTINGS
- WHAT TO DO
- TIPS AND RECOMMENDATIONS FOR DRYING AND ECONOMIC USE OF YOUR DRYER
- DISPOSAL
Brand : GORENJE
Model : D754BJB
Category : Tumble dryer