
E-37-V - Surveillance Camera PANASONIC - Free user manual and instructions
Find the device manual for free E-37-V PANASONIC in PDF.
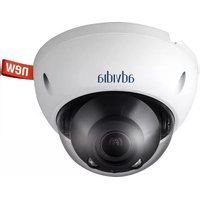


| Product Type | Security Camera |
| Brand | Panasonic |
| Model | E-37-V |
| Dimensions (H x W x D) | Approx. 68 x 68 x 110 mm |
| Weight | Approx. 300 g |
| Power Supply | DC 12V / PoE (Power over Ethernet) |
| Power Consumption | Max. 5 W |
| Image Sensor | 1/2.8" CMOS |
| Resolution | 1920 x 1080 (Full HD) |
| Frame Rate | 30 fps |
| Lens | Fixed focal length, f=3.6 mm |
| Field of View | Horizontal: 90°, Vertical: 50° |
| Night Vision | Infrared LED, range up to 30 m |
| Motion Detection | Yes, with adjustable sensitivity |
| Audio | Built-in microphone and speaker |
| Connection | Ethernet RJ-45, Wi-Fi 802.11 b/g/n |
| Operating Temperature | -10°C to +50°C |
| Ingress Protection | IP66 (weatherproof) |
| Mounting Type | Wall or ceiling mount |
| Storage | microSD slot (up to 256 GB) or NVR |
| Cleaning | Gently wipe with a soft, dry cloth. Avoid solvents. |
| Safety | Install out of reach; use correct voltage; ensure proper grounding. |
| Spare Parts | Contact Panasonic support for replacement parts. |
| Repairability | Refer to manual or authorized service center. |
| General Information | For indoor/outdoor use; compatible with Panasonic surveillance systems. |
Frequently Asked Questions - E-37-V PANASONIC
User questions about E-37-V PANASONIC
0 question about this device. Answer the ones you know or ask your own.
Ask a new question about this device
Download the instructions for your Surveillance Camera in PDF format for free! Find your manual E-37-V - PANASONIC and take your electronic device back in hand. On this page are published all the documents necessary for the use of your device. E-37-V by PANASONIC.
USER MANUAL E-37-V PANASONIC
E-37-V Dome Camera Operation Manual
Table of Contents
1 Network Config 1
1.1 Network Connection....1
1.2 Log in 1
2 Live 6
2.1 Encode Setup 6
2.2 System Menu 7
2.3 Video Window Function Option....7
2.4 Video Window Setup....8
2.4.1 Image Adjustment 8
2.4.2 Original Size 9
2.4.3 Full Screen 9
2.4.4 Width and Height Ratio....10
2.4.5 Fluency Adjustment 10
3.1.3 Playback Cut 15
3.1.4 Record Type 15
3.1.5 Progress Bar.... 15
3.1.6 Assistant Function 16
3.2 Picture Playback 16
3.2.1 Play.... 17
3.2.2 Playback File 17
3.2.3 Snapshot Type 19
4 Setup 21
4.1 Camera 21
4.1.1 Conditions....21
4.1.2 Zoom and Focus.... 27
4.1.3 Video 28
4.1.4 TCP/IP 35
4.1.5 Connection 37
4.1.6 PPPoE 39
4.1.7 DDNS 40
4.1.8 IP filter 42
4.1.9 SMTP (e-mail) 43
4.1.10 UPnP 44
4.1.11 Bonjour 45
4.1.12 Multicast 46
4.1.13 802.1x 47
4.1.14 QoS 48
4.2 Event 49
4.2.1 Video detect....49
4.2.2 Abnormity 54
4.3 Storage Management 56
4.3.1 Schedule....56
4.3.2 Destination....61
4.3.3 Record control 63
4.4 System 64
4.4.1 General 64
4.5 Information....73
4.5.1 Version 73
4.5.2 Log....74
4.5.3 Online User....75
5 Alarm....76
6 Log out 78
Important
The following functions are for reference only. Some series products may not support all the functions listed below.
1 Network Config
1.1 Network Connection
Network camera and PC connection mainly has two ways, see Figure 1-1 and Figure 1-2.

Figure 1- 1
![graph TD A["IPC"] -->|cable| B["Switch or router"] A -->|or| C["PC"] B -->|cable| D["PC"]](/content/2026/07/1517932/images/ee415bebe1f0eadd02a59bc4750a7988a4f3481d12ec953193fdd9086710a72a.jpg)
Figure 1-2
Before you access network camera via the Internet, you need to have its IP address. User can use quick config tool to search IP of the network camera. Please refer to Quick Configuration Tool manual.
1.2 Log in
It needs to install WEB plug-in when you use WEB client for the first time, the exact operation steps are shown as follows:
Open IE and input network camera address in the address bar. (The factory default IP address is 192.168.1.108).
After successful connection, the login interface is shown as in Figure 1-3; input your user name and password. Default factory username is admin and password is 12345.
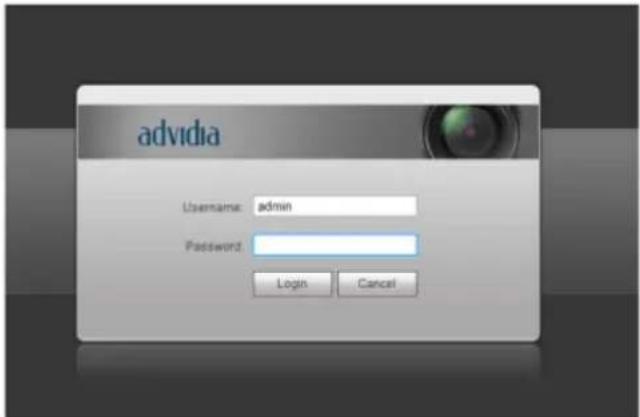
Figure 1-3
The system will display "Modify Password" prompt box for your first login, users need to modify the password and save it properly.


Figure 1-5
Click on "Please click here to download and install the plug-in". The system pops up warning information to ask you whether run or save this plug-in. See Figure 1-6.

Figure 1-6
You must either run or save the file to local and install it. Follow the following steps. Click on run, you will see Figure 1-7 and Figure 1-8.

Figure 1-7

Figure 1-8
When plug-in installation completes, the installation page closes automatically. The web-end will refresh automatically, and then you can view video captured by the camera.

2 Live
After you logged in, you can see the live monitor window. See
Figure 2-1.

Figure 2-1
There are four sections:
• Section 1: Encode setup bar
• Section 2: System menu
• Section 3: Window function option bar
• Section 4: Window adjust bar
| Parameter | Function |
| Main stream | Streaming media protocol connection, under main stream config, monitor video or not. Generally for storage and monitor. |
| Sub (Extra) stream 1 | Streaming media protocol connection, under sub stream 1 config, monitor video or not. When network bandwidth is insufficient, it substitutes main stream for monitoring. |
| Sub (Extra) stream 2 | Streaming media protocol connection, under sub stream 2 config, monitor video or not. When network bandwidth is insufficient, it substitutes main stream for monitoring. |
| Protocol | You can select stream media protocol from the dropdown list. There are three options: TCP/UDP/Multicast |
2.2 System Menu
System menu is shown as in Figure 2-3.
Please refer to chapter 2 Live, chapter 3 PTZ, chapter 4 Playback, chapter 5 Setup, chapter 6 Alarm, chapter 7 Log out for detailed information.

Figure 2-3
2.3 Video Window Function Option
The interface is shown as below. See Figure 2-4.

| 2 | Snapshot | Click on the button to snapshot, save picture to path in Ch 5.1.2.5. |
| 3 | Triple snap | Click it, system can snap at 11/s. All images are saved to path in Ch 5.1.2.5. |
| 4 | Record | Click it, system can record. All images are saved to path in Ch 5.1.2.5. |
| 5 | Easy focus | Click it, you can see there are two parameters on the preview video: AF Peak and AF Max.AF Peak: It is to display the video definition during the focus process.AF Max: It is the most suitable value for the video definition.The close the AF Peak and AF Max is, the better the focus effect is. |
| 6 | Help | Click it to open help file. |
2.4 Video Window Setup
The interface is shown as in Figure 2-5.

Figure 2-5

Figure 2-6
Click this button to display/hide image control interface. Click it to open picture setup interface. This interface is on the top right pane.
Please refer to the following sheet for detailed information.
| Parameter | Function | ||
| Video setup | It is to adjust monitor video brightness. | Note:All the operations here apply to WEB end only.Please go to Setup->Camera->Conditions to adjust corresponding items. | |
| It is to adjust monitor video contrastness. | |||
| It is to adjust monitor video hue. | |||
| It is to adjust monitor video saturation. | |||
2.4.4 Width and Height Ratio
Click it to restore original ratio or suitable window.
2.4.5 Fluency Adjustment
There are three levels of fluency for you to select (real-time, normal, fluent). The default is normal.
2.4.6 Focus zoom
Click this button and the focus zooming interface appears on the right of preview interface, as shown in Figure 2-7, click left mouse button to adjust focus zooming configuration.
Note:
- The product series which support motorized zoom, synchronous focus and back focus have this button.
• Auto-focus after zoom and focus adjustment.
3 Playback
Web client playback supports video playback and picture playback.
Note:
Before playback, user shall set storage management
3.1 Playback
The playback interface is shown as in Figure 3-1.

The function of play is shown as in Figure 3-2.

Figure 3-2
| Parameter | Function |
| 1 Play | When you see this button, it means pause or not played record. Click on this button, switch to normal play status. |
| 2 Stop | Click this button to stop playing. |
| 3 Play by frame | Click on this button to go to next frame.Note:You shall pause record when you use this function. |
| 4 Slow | Click on this button to play slowly. |
| 5 Quick | Click on this button to play quickly. |
| 6 Silent | When this button displays, it means audio is silent. Click on this button to switch back to normal. |
| 7 Volume | Click on left mouse to adjust volume. |
3.1.2 Playback File
In calendar, blue date represents data currently has video record or snapshot. See Figure 3-3.

Figure 3-3
| Parameter | Function |
| File Type | Select "dav", as video playback.Select "jpg" as picture playback. |
| Data Source | Default is SD card. |
Step 1. Click on data in blue, time axis displays record file progress bar in color. While, green represents normal record, yellow represents motion detect record, red represents alarm record, and blue represents manual record.
Step 2. Click on certain time on progress bar, playback starts from this time. See Figure 3-4.
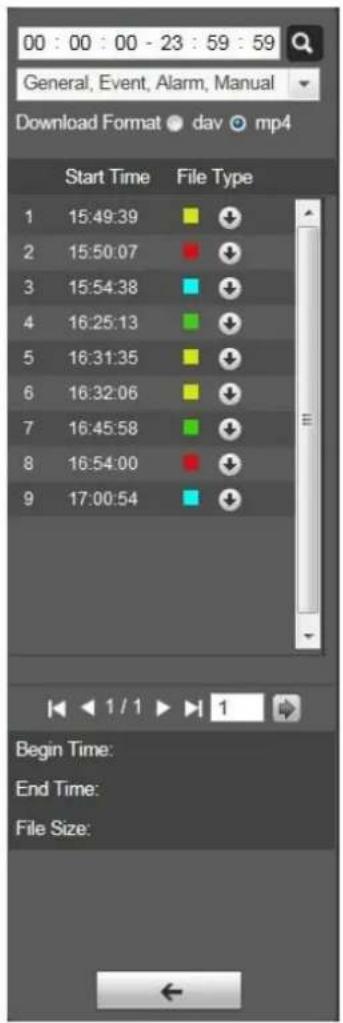
Figure 3-5
| Parameter | Function |
 Search Search | It means records within searched start time and end time on the date. |
| Record Download Format | There are two formats: dav, mp4. |
| Parameter | Function |
| Download | Record type is "dav", click on download button to download file to local.Record type is "mp4", click on download button and download file to path in Ch 5.1.2.5.Note:System does not support download and playback of MP4 file. |
| Back | Click on back button to go to calendar interface. |
3.1.3 Playback Cut
Note:
Playback cut function will automatically pause playing record as playback cut and playback cannot be at the same time.
Step 1. Click on start time to cut on time axis. This time must be within progress bar range.
Step 2. Move mouse to cut icon 📄. You will be ask to select start time. Click on cur icon 📄 as finish cutting.
Step 3. Click on playback cut end time on time axis. This time must be within progress bar range.
Step 4. Move mouse to cut icon, you will be asked to select end time. Click on cut icon as finish cutting.
Step 5. Click on Save button to save file cut to path. See Figure 3-6.

Figure 3-6

Figure 3-8
| Parameter | Function |
| 24 hr | Click on it, means video in past 24 hours. |
| 2 hr | Click on it, means video in past 2 hours. |
| 1 hr | Click on it, means video in past 1 hour. |
| 30 min | Click on it, means video in past 30 min. |
3.1.6 Assistant Function
Video playback assistant function is shown in Figure 3-9.

Figure 3-9
| Parameter | Function |
| Zoom in | Click on it, video in playback status if is in original size, user can zoom in any area, If it is not in its original size, click on mouse to restore its original size.Click on this button, you can scroll to zoom in. |

Figure 3-10
3.2.1 Play


图 4.1.1

| Parameter | Function |
| Download | Click on download button to download snapshot file to local. |
| Back | Click on back button to return to calendar interface and re-select time. |

After checking snapshot file type, in file list only display file of selected type. Users can also select the snapshot type to be displayed via the dropdown box above the file list. See Figure 3-14.

Figure 3-14
4 Setup
Web client setup support camera, network, time, storage, system and system info view.
4.1 Camera
4.1.1 Conditions
Here you can view device property information. Slight differences may be found due to different network camera series. The setups become valid immediately after you set. See Figure 4-1.
Note: Only motorized zoom lens device has zoom and focus function.

Figure 4-1
Please refer to the following sheet for detailed information.
| Parameter | Function |
| Profile | You may select normal, day and night mode. Then you can set and view profile and to effect. |
| Contrast | It is to adjust monitor window contrast. The larger the number, the higher the contrast is. You can use this function when the whole video bright is OK but the contrast is not proper. Please note the video may become hazy if the value is too low. If this value is too high, the dark section may lack brightness while the bright section may over exposure.The value ranges from 0 to 100. The recommended value ranges from 40 to 60. The default value is 50. |
| Saturation | It is to adjust monitor window saturation. The larger the number, the strong the color is. This value has no effect on the general brightness of the whole video. The video color may become too strong if the value is too high. For the grey part of the video, the distortion may occur if the white balance is not accurate. Please note the video may not be attractive if the value is too low.The value ranges from 0 to 100. The recommended value ranges from 40 to 60.The default value is 50. |
| Sharpness | The value here is to adjust the edge of the video. The larger the value is, the clear the edge is and vice versa. Please note there is noise if the value here is too high.The value ranges from 0 to 100. The recommended value ranges from 40 to 60.The default value is 50. |
| Gamma | This threshold value mainly change image brightness via nonlinear method and improves dynamic display range. The higher this value, the brighter image will be and vice versa. The value ranges from 0 to 100. The recommended value ranges from 40 to 60.The default value is 50. |
| Anti-flicker | ● Outdoor: In this mode, you can switch exposure mode to get the effect under the corresponding exposure mode. |
| Exposure | Note:Only when anti-flicker is outdoor, exposure mode is available.● Auto:◆ The video whole brightness can automatically change within the proper exposure range according to the different environments. The higher the gain max value is, the lower the noise is.● Low noise:◆ The video whole brightness can automatically change within the proper exposure range according to the different environments. The higher the gain max value is, the lower the noise is.◆ For the same environments, the noise of the low noise mode shall be smaller than the noise of the auto mode.● Low motion blur◆ The video whole brightness can automatically change within the proper exposure range according to the different environments. The lower the exposure max value is, the week the tail is.◆ For the same environments, the noise of the low motion blur mode shall be smaller than that of the auto mode.● Manual◆ It is to display manual exposure value. |
| White Balance | It is to set the white balance mode. It has effect on the general hue of the video. This function is on by default.You can select the different scene mode such as auto, sunny, cloudy, home, office, night, disable and etc to adjust the video to the best quality.● Auto: The auto white balance is on. System can auto |
| Day&Night | It is to set device day/night mode switch independently from config file. Default is auto mode.Color: Device outputs the color video.Auto: Device auto select to output the color or the B/W video according to the device feature (The general bright of the video or there is IR light or not.)B/W: The device outputs the black and white video.Sensor input: It is for external connection to IR light to control day/night mode.Note: Only some non-IR devices support sensor input function. |
| Sensitivity | It adjusts sensitivity of color and black/white switch. There are low, medium and high levels. Default is medium.Note:Available only when day/night is auto. |
| Delay | It adjusts delay value of color and black/white switch. Its value range is 2~10, and default is 6.Note:Available only when day/night is auto. |
| BLC Mode | BLC is used for backlight situation.● BLC◆ Default BLC: auto exposure according to scene.◆ Custom: select area to exposure, the objective is to make appropriate brightness in selected area.● WDR◆ For the WDR scene, this function can lower the high bright section and enhance the brightness of the low bright section. So that you can view these two sections clearly at the same time. The value ranges from 1 to 100. Default is 50.◆ When you switch the camera from no-WDR mode to the WDR mode, system may lose several seconds record video.● HLC◆ After you enabled HLC function, the device can lower the brightness of the brightest section according to the HLC control level. It can reduce the area of the halo and lower the brightness of the whole video. The value ranges from 0 to 100. The default value is 50 when HLC is on.● OffNote:It is to disable the BLC function. Please note this function is disabled by default. |
| 3D NR | This threshold is mainly for multi-frame (at least 2) image processing. It reduces noise with info between a frame and previous frame. The higher the value, the better NR will be. Default is enabled. NR level ranges from 0 to 100. The recommended value to from 40 to 60. Default value is 50. |
Profile management has three modes: normal, full time and schedule. If you select normal, the video will be configured as normal as in Figure 4-2.
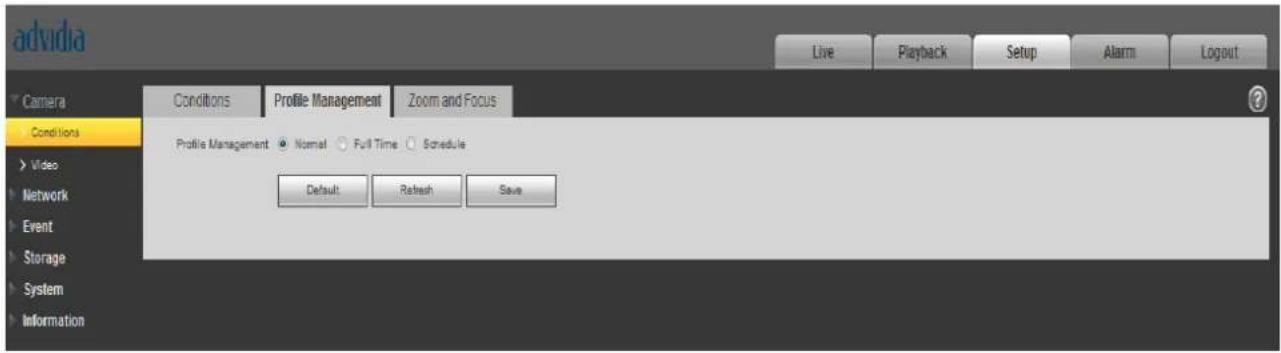
Figure 4-2
If you select full time, you must select either day or night, and the video will be configured accordingly as in Figure 4-3 and Figure 4-4.

Figure 4-3

Figure 4-4
If you select schedule, you can decide detained day time interval and night time interval as in Figure 4-5. You can set 0:00 \~ 12:00 as day, and 12:00 \~ 24:00 as night.

Figure 4-5
Important
● The setup becomes immediately effective after you click on OK.
- You can see WDR option only if your camera supports WDR function. System does not support long-time exposure or low noise mode.
4.1.2 Zoom and Focus
Note: Only motorized vari-focal devices support focus and zoom function.

| Parameter | Function |
| Zoom | Adjust the focal length of the lens by clicking or long press "+"or "-"Speed can be used to adjust the length of one step by single click.Note: After adjusting zoom, the device will focus automatically. |
| Focus | Adjust the lens definition by clicking or long pressing "+"+.Speed can be used to adjust the length of one step by single click. |
| Auto Focus | Click to adjust the image definition automatically. |
| Reset | Reset the lens to 0 position, which can be used to remove the accumulative error for the lens.Note:Please reset when adjusting unclear image or using zoom and focus for many times. |
| Refresh | After hardware zoom, synchronize the position of lens and dragging block of zoom and focus. |
4.1.3 Video
4.1.3.1 Video bit stream
The video bit stream interface is shown as below. See Figure 4-7.

Figure 4-7
Please refer to the following sheet for detailed information.
| Parameter | Function |
| Sub Stream Enable | Please check the box here to enable extra stream function.This function is enabled by default. |
| Code-Stream Type | ACF means using different fps to record.There are two options: VBR and CBR.Please note you can set video quality in VBR mode.Note:WEB interfaces don't support motion detect and alarm code stream setting. |
| Encode mode | There are five options: H.264 (main profile standard, H.264H (high profile standard), H.264B (Baseline Profile), H.265 (main profile standard) and MJPG encode.The H.264, H.264H both are H264 bit stream.H.264 is the Main Profile encode and you need to enable the sub stream function in your camera and set the resolution as CIF. Then you can monitor via the Blackberry cell phone.The H.265 is the main profile encode mode.MJPEG: In this encode mode, the video needs to large bit stream to guarantee the video definition.You can use the max bit stream value in the recommend bit to get the better video output effect. |
| Resolution | There are multiple resolutions. You can select from the dropdown list.For each resolution, the recommended bit stream value is different.Note: When video is under rotating status, you cannot set resolution higher than 1080P (excluding 1080P). |
| Frame Rate (FPS) | PAL: 1~25f/s, 1-50f/s NTSC: 1~30f/s or 1~60f/s.The frame rate may vary due to different resolutions. |
| Bit Rate Type | There are two options: VBR and CBR.Please note, you can set video quality in VBR mode.Under MJPEG mode, only CBR is available. |
| Recommended Bit | Recommended bit rate value according to the resolution and frame rate you have set. |
| Parameter | Function |
| Bit Rate | In CBR, the bit rate here is the max value. In dynamic video, system needs to low frame rate or video quality to guarantee the value.The value is null in VBR mode.Please refer to recommend bit rate for the detailed information. |
| I Frame | Here you can set the P frame amount between two I frames. The value ranges from 1 to 150. Default value is 50.Recommended value is frame rate *2. |
| Watermark Settings | By calibrating watermark, to see if video is modified.Select Watermark function. Default watermark is Digital CCTV.Watermark character can only be number, letter, _, - within 128 characters. |
4.13.2 Snapshot
The snapshot interface is shown as in Figure 4-8.

4.1.3.3 Video Overlay
The video overlay interface is shown as in Figure 4-9.

Figure 4-9


Figure 4-11
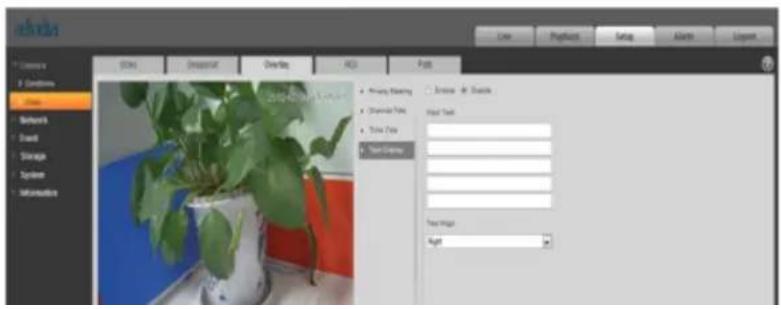
| Time Title | You can enable this function so that system overlays time information in video window.You can use the mouse to drag the time tile position. |
| Channel Title | You can enable this function so that system overlays channel information in video window.You can use the mouse to drag the channel tile position. |
| Overlay | You can enable this function to display overlay picture.Click on disable to turn it off.Click on Upload Picture to overlay local picture into monitoring window. You can drag the yellow box to move it.Note:You cannot enable location and overlay at the same time. |
4.13.4 ROI
Note: Some series don't support ROI setup function.


Figure 4-14
| Parameters | Note |
| Enable | Check “Enable”, then it will display the ROI in the video monitoring window;Check “Disable”, then it won't display. |
| Image Quality | Set the image quality of ROI, ranging from 1~6, default is 6.Note:For fisheye device, it ranges from 1~6 (best), default is 6 (best)Able to set area block, max 4 areas. |
Note:
Admin is locally logged in PC account.
Please click the Save button to save current setup.
![File Name Message Address Entry Help Live Address: [ ] [ ] [ ] [ ] [ ] [ ] [ ] [ ] [ ] [ ] [ ] [ ] [ ] [ ] [ ] [ ] [ ] [ ] [ ] [ ] [ ] [ ] [ ] [ ] [ ] [ ] [ ] [ ] [ ] [ ] [ ] [ ] [ ] [ ] [ ] [ ] [ ] [ ] [ ] [ ] [ ] [ ] [ ] [ ] [ ] [ ] [ ] [ ] [ ] [ ] [ ] ( )](/content/2026/07/1517932/images/7e750d916ba42232d4aae316e96ee6c974b7c97a06b554a934dcfe1c8fe23f8e.jpg)
Figure 4-15
4.1.4 TCP/IP
The TCP/IP interface is shown as in Figure 4-16. It supports IPv4 and IPv6. IPv4 supports static IP and DHCP. IPv6 supports static IP only. When users manually modify IP address, WEB will automatically jump to the new IP address.

| Parameter | Function |
| Host Name | It is to set current host device name. It max supports 15 characters. |
| Ethernet Card | Please select the Ethernet port. Default is wired.Please note you can modify the default Ethernet card if there is more than one card..Please note the device needs to reboot to activate the new setup once you modify the default setup. |
| Mode | There are two modes: static mode and the DHCP mode. Select DHCP mode, it auto searches IP, and you cannot set IP/subnet mask/gateway. Select static mode, you must manually set IP/subnet mask/gateway. |
| Mac Address | It is to display hose Mac address. |
| IP Version | It is to select IP version. IPV4 or IPV6.You can access the IP address of these two version. |
| IP Address | Please use the keyboard to input the corresponding number to modify the IP address and then set the corresponding subnet mask and the default gateway. |
| Preferred DNS | DNS IP address. |
| Alternate DNS | Alternate DNS IP address. |
| Enable ARP/Ping set device IP address service. | You can use ARP/Ping command to modify or set the device IP address if you know the device MAC address.Before the operation, please make sure the network camera and the PC in the same LAN. This function is on by default.You can refer to the steps listed below.Step 1: Get an IP address. Set the network camera and the PC in the same LAN.Step 2: Get the physical address from the label of the network camera.Step 3: Go to the Run interface and then input the following commands.arp -s <IP Address> <MAC>ping -l 480 -l <IP Address>Such as: arp -s 192.168.0.125 11-40-8c-18-10-11 ping -l 480 -l 192.168.0.125Step 4: Reboot the device.Step 5: You can see the setup is OK if you can see there are output information such as "Reply from 192.168.0.125..." from the command output lines. Now you can close the command line.Step 6: Open the browse and then input http://<IP address>.Click the Enter button, you can access now. |
4.1.5 Connection
4.1.5.1 Connection
The connection interface is shown as in Figure 4-17.

Figure 4-17
Please refer to the following sheet for detailed information.
| Parameter | Function |
| Max connection | It is the max Web connection for the same device. The value ranges from 1 to 20. Default connection amount is 10. |
| TCP port | Port range is 1025~65534. The default value is 37777. You can input the actual port number if necessary. |
| UDP port | Port range is 1025~65534. The default value is 37778. You can input the actual port number if necessary. |
| HTTP port | Port range is 1025~65524. The default value is 80. You can input the actual port number if necessary. |
| RTSP port | The default value is 554. Please leave blank if use default. User uses QuickTime or VLC can play the following formats. BlackBerry can play too.Real-time monitoring URL format, please require real-time RTSP media server, require channel no., bit stream type in URL. You may need username and password.User uses BlackBerry need to set encode mode to H.264B, resolution to CIF and turn off audio.URL format is:rtsp://username:password@ip:port/cam/realmonitor?channel=1&subtype=0 username/password/IP and port.The IP is device IP and the port default value is 554. You can leave it in blank if it is the default value.Follow standard RTP protocol and when encode mode is MJPEG, the max resolution only supports 2040*2040. |
4.1.5.2 ONVIF
ONVIF (Open Network Video Interface Forum), this standard describes network video mode, interface, data type and data interaction mode. ONVIF Standard's aim is to achieve a network video frame agreement and makes the network video products (including video front-end, video equipment, etc.) from different manufacturers completely compatible.
ONVIF function default is closed.

Figure 4-18
4.1.6 PPPoE
The PPPoE interface is shown as in Figure 4-19.

Figure 4-19
4.1.7 DDNS
The DDNS interface is shown as in Figure 4-20.
The DDNS is to set to connect the various servers so that you can access the system via the server. Please go to the corresponding service website to apply a domain name and then access the system via the domain. It works even your IP address has changed. When the device connects to WLAN, you should disable UPnP.

Figure 4-20
Please refer to the following sheet for detailed information.
| Parameter | Function |
| Server Type | You can select DDNS protocol from the dropdown list: CN99 DDNS, NO-IP DDNS, Dyndns DDNS, QUICK DDNS, the QUICK DDNS function is realized according to the customized private protocol. |
| Server Address | DDNS server IP addressCN99 DDNSServer address: www.3322.orgNO-IP DDNSServer address: dynupdate.no-ip.comDyndns DDNSServer address: members.dyndns.orgQUICK DDNSServer address: www.quickddns.com |
| Domain Name | Customized domain name by users |
| Username | The user name you input to log in the server. |
| Password | The password you input to log in the server |
| Refresh Period | The refresh period of the connection between the device IP and the server, default is 10 minutes. |
The QUICK DDNS interface is shown as in Figure 4-21.

| Parameter | Function |
| Server Type | You can select QUICK DDNS protocol |
| Server Address | Under QUICK DDNS the default server address is "www.quickddns.com" |
| Mode | Default is auto, manual is optional. |
| Domain Name | The default is "MAC address.quickddns.com" for both auto and manual, for manual users can set prefix by themselves. |
| Test | It is to test if the domain name can be used or not. The parameter exists only when selecting "manual" in "Mode". |
| Username | The user name you input to log in the server, optional. |
4.1.8 IP filter
The IP filter interface is shown as in Figure 4-22.
You can enable IP filter function so that some specified IP/MAC user can access the network camera.
You can add IP address or IP address section.
If you do not check the box here, it means there is on access limit.
Here you can add IP address and MAC address. You must add these addresses before enabling the trusted sites.
Please note: You must set MAC address in the same network segment.

4.1.9 SMTP (e-mail)
The SMTP interface is shown as in Figure 4-23.

Figure 4-23
Please refer to the following sheet for detailed information.
| Parameter | Function |
| SMTP Server | Input server address and then enable this function. |
| Port | Default value is 25. You can modify it if necessary. |
| Anonymity | For the server supports the anonymity function. You can auto login anonymously. You do not need to input the user name, password and the sender information. |
| User Name | The user name of the sender email account. |
| Interval | The send interval ranges from 0 to 3600 seconds. 0 means there is no interval.Please note system will not send out the email immediately when the alarm occurs. When the alarm, motion detection or the abnormality event activates the email, system sends out the email according to the interval you specified here. This function is very useful when there are too many emails activated by the abnormality events, which may result in heavy load for the email server. |
| Health mail enable | Please check the box here to enable this function. |
| Email test | The system will automatically sent out a email once to test the connection is OK or not .Before the email test, please save the email setup information. |
4.1.10 UPnP
It allows you to establish the mapping relationship between the LAN and the public network.
Here you can also add, modify or remove UPnP item. For UPnP on different routers, you must disable UPnP function. See Figure 4-24.
In the Windows OS, From Start->Control Panel->Add or remove programs. Click the "Add/Remove Windows Components" and then select the "Network Services" from the Windows Components Wizard. Click the Details button and then check the "Internet Gateway Device Discovery and Control client" and "UPnP User Interface". Please click OK to begin installation.
Enable UPnP from the Web. If your UPnP is enabled in the Windows OS, the network camera can auto detect it via the "My Network Places".
Under manual mode, you can modify external port. Under auto mode, select idle port for auto port mapping without user modification.

Figure 4-24
4.1.11 Bonjour
The Bonjour interface is shown as below. See Figure 4-25.
Bonjour is based on the multicast DNS service from the Apple. The Bonjour device can automatically broadcast its service information and listen to the service information from other device.
You can use the browse of the Bonjour service in the same LAN to search the network camera device and then access if you do not know the network camera information such as IP address.
You can view the server name when the network camera is detected by the Bonjour. Please note the safari browse support this function. Click the "Display All Bookmarks: and open the Bonjour, system can auto detect the network camera of the Bonjour function in the LAN.

Figure 4-25
4.1.12 Multicast
The multicast interface is shown as in Figure 4-26.
Multicast is a transmission mode of data packet. When there is multiple-host to receive the same data packet, multiple-cast is the best option to reduce the broad width and the CPU load. The source host can just send out one data to transit. This function also depends on the relationship of the group member and group of the outer.
Note:
- Open preview, streaming media protocol, select multicast, and monitor via multicast format.
- Here you can set multicast address and port. You also need to go to Live interface to set the protocol as Multicast.

Figure 4-26
Please refer to the following sheet for detailed information.
| Parameter | Function |
| Enable | Select to enable multicast function. Main stream and sub stream cannot be used at the same time. |
| Multicast address | Main/sub stream multicast default address is 224.1.2.4 and its range is 224.0.0.0~239.255.255.255. |
| Port | Multicast port. Main stream is 40000, sub stream is 40002 and the range is 1025~65534. |

Figure 4-27
Please refer to the following sheet for detailed information.
| Parameter | Function |
| Authentication | PEAP (protected EAP protocol). |
| Username | It needs the username to login, which is authenticated by the server. |
| Password | Please input password here. |
4.1.14 QoS
The QoS interface is shown as below. See Figure 4-28.
Qos (Quality of Service) is network security mechanism. It is a technology to fix the network delay and jam problem and etc. For the network service, the quality of service includes the transmission bandwidth, delay, the packet loss and etc. We can guarantee the transmission bandwidth, lower the delay, reduce the loss of the data packet and anti-dither to enhance the quality.
We can set the DSCP (Differentiated Services Code Point) of the IP to distinguish the data packet so that the router or the hub can provide different services for various data packets. It can select the different queues according to the priority (64 different priority levels) of the packets and select the bandwidth of the each queue. Level 0 is the lowest, and level 63 is the highest. It can also discard at the different ratio when the broad bandwidth is jam.
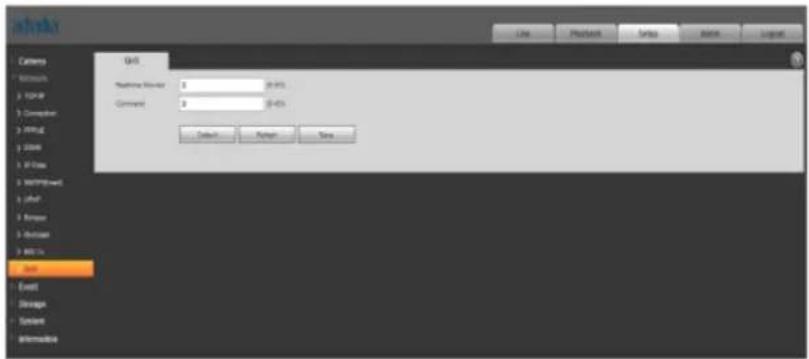
Figure 4-28
Please refer to the following sheet for detailed information.
| Parameter | Function |
| Real-time monitor | The value ranges from 0 to 63. The router or the switcher can provide different service for various data packets. |
| Command | The value ranges from 0 to 63. The router or the switcher can provide different service for various data packets. |
| Enable Wireless QoS | Check it to enable QoS. |
4.2 Event

Figure 4-29


Figure 4-31
Please refer to the following sheet for detailed information.
| Parameter | Function |
| Enable | You need to check the box to enable motion detection function. |
| Enable video | You need to check the box to enable video mask detection alarm. |
| Area | Here you can set motion detection region and its sensitivity and area. (The higher the sensitivity is, the easier to trigger motion detect; the smaller the area, the easier to trigger motion detect.) The default covers all regions.You must click on save before enabling your setup. |
| Record | Check it and so when alarm occurs, system will auto record. You shall set record period in Storage>Schedule and select auto record in record control interface. |
| Record Delay | System can delay the record for specified time after alarm ended. The value ranges from 10s to 300s. |
| Relay out | Enable alarm activation function. You need to select alarm output port so that system can activate corresponding alarm device when alarm occurs. |
| Alarm Delay | System can delay the alarm output for specified time after alarm ended. The value ranges from 10s to 300s. |
| Send Email | If you enabled this function, System can send out email to alert you when alarm occurs and ends. User can set email address in Network>SMTP. |
| Audio linkage | Check it and the system will play alarm audio file when alarm occurs. Use can set the recorded or uploaded audio file in "camera setting > audio > alarm audio". |
| Flash linkage | Check it and the flash will be on when alarm occurs, and the flash will be off until the end of alarm after corresponding delay. |
| PTZ | Here you can set PTZ movement when alarm occurs. Such as go to preset x when there is an alarm.The event type includes: preset, tour and pattern. |
| Snapshot | You need to check the box here so that system can backup motion detection snapshot file. You shall set snapshot period in Storage>Schedule. |
See Figure 4-32.

Figure 4-32
Different colors represent different areas. Each area can set different detection zones. Detection zone can be irregular and discontinuous.
Please refer to the following sheet for detailed information.
| Parameter | Function |
| Name | Default area name includes Region1, Region2, Region3, Redion4 and custom. |
Delete
Delete selected area.
4.2.2 Abnormity
Abnormity includes No SD Card, Capacity Warning, SD Card Error, Disconnection, IP Conflict and Unauthorized Access.
Note:
Only device with SD card function has these three statuses: No SD card, capacity warning, and SD card error.
Device without SD card function does not have the above three statuses. See Figure 5-61 to Figure 4-33.

Figure 4-33


Figure 4-35
Please refer to the following sheet for detailed information.
| Parameter | Function |
| Enable | Check to alarm when SD card is abnormal. |
| Relay-out | Check to enable relay-out alarm. |
| Relay out delay | The alarm output can delay for the specified time after alarm stops. The value ranges from 10s to 300s.Note:No SD card, capacity warning, SD card error, relay-out delay all start from alarm occurs. |
| Send email | After you enabled this function, the system can send out email to alarm the specified user.This function is invalid when network is offline or IP conflict occurs. |

Figure 4-36
When login password keep been wrong for a few times, unauthorized access alarm occurs. This operation is similar to SD card error. Allow login error times as when it exceeds this limit, user account will be locked.

Record schedule steps:
Step 1. Click on Record Schedule, see Figure 4-38.

Figure 4-38
Step 2. From Monday to Sunday select record time, click on setup on the right, see Figure 4-39.
- Set period according to actual need. There are six periods available each day.
- By checking or unchecking, you can add or delete three types of record schedule: General, Motion, and Alarm.
Note:
Period setup can be done by dragging in record schedule interface while not releasing left mouse.

● Yellow color stands for the motion detect record/snapshot.
● Red color stands for the alarm record/snapshot.

Figure 4-41
Step 4. In record schedule interface, click on OK. System prompts it is successfully saved.
4.3.1.2 Snapshot Schedule
Snapshot setup as:
Step 1. Click on Snapshot Schedule tab, see Figure 4-42.

Figure 4-42
Step 2. From Monday to Sunday select snapshot time, click on setup on the right. See Figure 4-43
- Set snapshot period according to actual need. There are six periods available each day.
- By checking or unchecking, user can add or delete three types of snapshot schedule: General, Motion and Alarm.
Note: Period setup can be done by dragging in snapshot schedule interface while not releasing left mouse.

Figure 4-43
Step 3. Click on OK, return to snapshot schedule interface. See Figure 4-44.
● Green color stands for the general record/snapshot.
● Yellow color stands for the motion detect record/snapshot.
● Red color stands for the alarm record/snapshot.

Figure 4-44
Step 5. In snapshot interface, click on OK. System prompts it is successfully saved.
4.3.1.3 Holiday Schedule
Holiday schedule can set specific date as holiday.
Step 1. Click on Holiday Schedule tab, see Figure 4-45.

Step 2. Select date to set as holiday. The selected date will be highlighted in yellow.
Step 3. Check Record/Snapshot, click on Save. System prompts it is successfully saved.
Step 4. Check Record Schedule/Snapshot Schedule interface, click on setup next to Holiday, refer to setup of Monday to Sunday.
Step 5. Complete setup of holiday, then it records/snapshots according to date in holiday schedule.
4.3.2 Destination
4.3.2.1 Path
The destination interface is shown as in Figure 4-46
Path can config record and snapshot storage path. There are three options: Local, FTP and NAS. You can only select one mode. System can save according to the event types. It is corresponding to the three modes (general/motion/alarm) in the Schedule interface. Please check the box to enable the save functions.
Note: Only device supports SD card has local.

Figure 4-46
Please refer to the following sheet for detailed information.
| Parameter | Function |
| Event Type | It includes: scheduled, motion detect and alarm. |
| Local | It saved in the SD card. |
| FTP | It saved in the FTP server. |
| NAS | It saved in NAS disk. |
4.3.2.2 Local
The local interface is shown as in Figure 4-47.
Here you can view local Micro SD card or NAS disk information. You can also operate the read-only, write-only, hot swap and format operation.

Figure 4-47
4.3.2.3 FTP
The FTP interface is shown as in Figure 4-48.
You need to check the box to enable the FTP function. When network disconnect occurred or there is malfunction. Emergency storage can save the record/snapshot picture to the local SD card.

You need to check the box to enable the NAS function. Select NAS storage, fill in NAS server address and corresponding store path, then you can store video file or pictorial information in the NAS server.
Select NAS storage as to same file to NAS disk. See Figure 4-49.

Figure 4-49
| Parameter | Function |
| Server Address | Set IP address of NAS server. |
| Remote Directory | Set storage directory, videos and pictures can be stored in to corresponding server directory. |
4.3.3 Record control
The record control interface is shown as in Figure 4-50.

| Parameter | Function |
| Pack Duration | Here you can select file size within 1min~120min. Default setup is 8 minutes. |
| Pre-record | Please input pre-record value here.For example, system can record the four seconds video in the buffer.The record begins from the fifth second.Note:Configure pre-record time, when alarm or motion detection occurs, if there is no record, system will record the preceding n seconds record. |
| Disk Full | There are two options: stop recording or overwrite the previous files when HDD is full.Stop: Current working HDD is overwriting or current HDD is full, it will stop record.Overwrite: Current working HDD is full; it will overwrite the previous file. |
| Record mode | There are three modes: Auto/manual/close. |
| Record stream | There are two options: main stream and sub stream. |
4.4 System
4.4.1 General
The General interface is shown as in Figure 4-52.

| Parameter | Function |
| Device Name | It is to set device name.Note: Different devices have different names. |
| Video Standard | This is to display video standard such as PAL. |
| Language | You can select the language from the dropdown list. |
The date and time interface is shown as in Figure 4-53.

Figure 4-53
Please refer to the following sheet for detailed information
| DST | Here you can set day night save time begin time and end time. You can set according to the date format or according to the week format. |
| NTP | You can check the box to enable NTP function. |
| NTP server | You can set the time server address. |
| Port | It is to set the time server port. |
| Update period | It is to set the sync periods between the device and the time server. |
4.4.2 Account
- For the character in the following user name or the user group name, system max supports 15-digits. The valid string includes: character, number, and underline.
- Password can be 0\~32 characters in number and letter only. User can modify other user's password.
- The user amount is 18 and the group amount is 8 when the device is shipped out of the factory. The factory default setup includes two levels: user and admin. You can set the corresponding group and then set the rights for the respective user in the specified groups.
- User management adopts group/user modes. The user name and the group name shall be unique. One user shall be included in only one group.
● Currently logged in user cannot change his/her own right.
4.42.1 Username
In this interface you can enable anonymity login, add/remove user and modify user name. See Figure 4-54.

Figure 4-54
Enable anonymity login: Enable anonymity login, and input IP. No username or password is required, you can log in by anonymity (with limited rights). You can click logout to end your session.
Add user: It is to add a name to group and set the user rights. See Figure 4-55.
Hidden user "default" is for system interior use only and cannot be deleted. When there is no login user, hidden user "default" automatically login. You can set some rights such as monitor for this user so that you can view some channel view without login.
Here you can input the user name and password and then select one group for current user.
Please note the user rights shall not exceed the group right setup.
For convenient setup, please make sure the general user has the lower rights setup than the admin.

Figure 4-55
Modify user
It is to modify the user property, belonging group, password and rights. See Figure 4-56.
Modify password
It is to modify the user password. You need to input the old password and then input the new password twice to confirm the new setup. Please click the OK button to save.
Please note, the password ranges from 0-digit to 32-digit. It shall include the number and letter only. For the user who has the account rights, he can modify the password of other users.

Figure 4-56
4.4.2.2 Group
The group management interface can add/remove group, modify group password and etc.
The interface is shown as in Figure 4-57.


Figure 4-57
Add group: It is to add group and set its corresponding rights. See Figure 4-58.
Please input the group name and then check the box to select the corresponding rights. It includes: preview, playback, record control, PTZ control and etc.
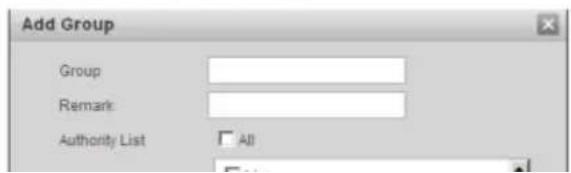
Here you can modify group information such as remarks and rights.

Figure 4-59
4.4.3 Default
The default setup interface is shown as in Figure 4-60.
Please note system cannot restore some information such as network IP address.

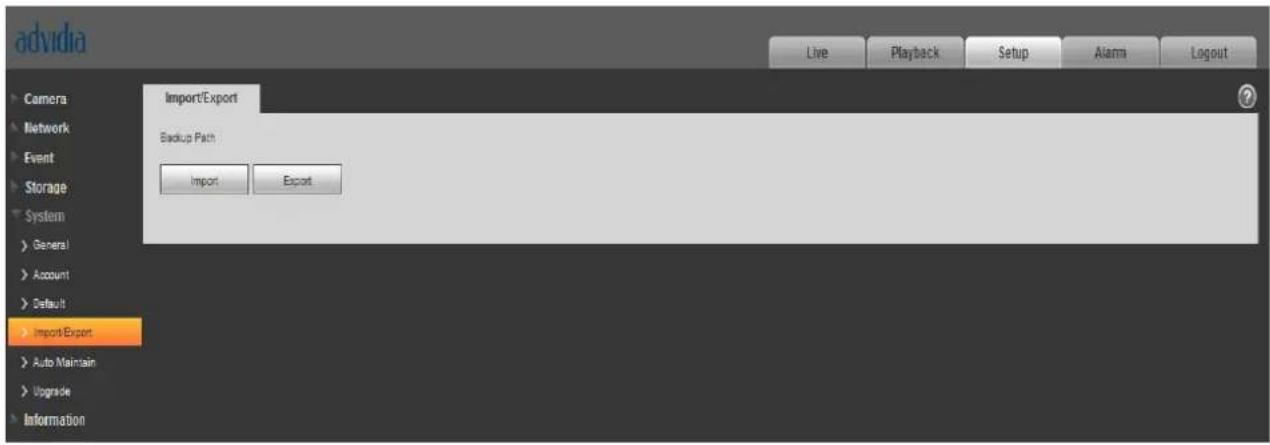
Figure 4-61
Please refer to the following sheet for detailed information.
| Parameter | Function |
| Import | It is to import the local setup files to the system. |
| Export | It is to export the corresponding system setup to your local PC. |
4.4.5 Auto Maintenance
The auto maintenance interface is shown as in Figure 4-62.
Here you can select auto reboot and auto delete old files interval from the dropdown list.
If you want to use the auto delete old files function, you need to set the file period.
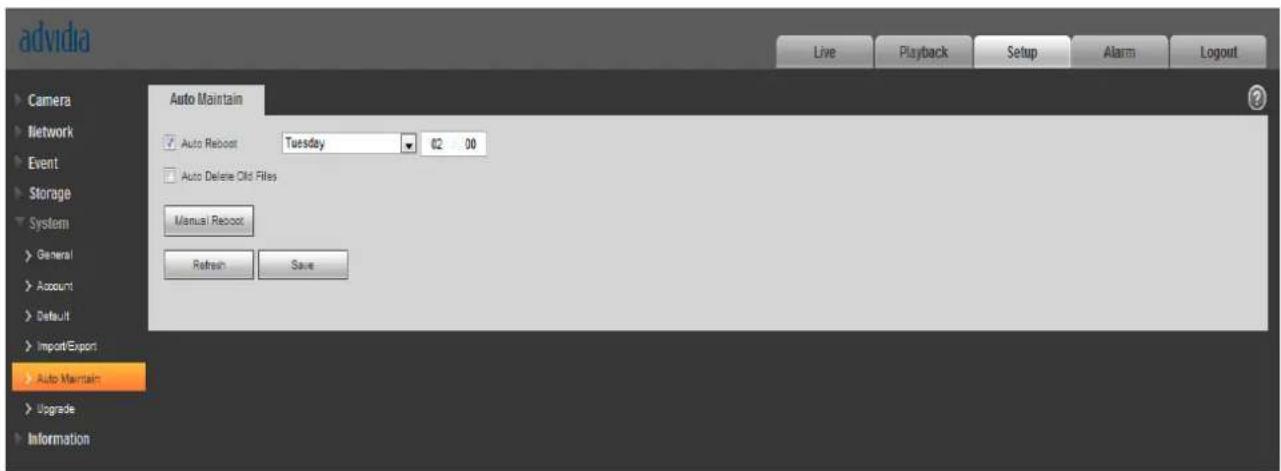
Figure 4-62
| Parameter | Function |
| Auto Reboot | Check it and set auto reboot time. |
| Auto Delete Old Files | Check it and set period within 1~31 days. |
4.4.6 Upgrade
The upgrade interface is shown as in Figure 4-63.
Please select the upgrade file (file extension is ".bin") and then click the update button to begin firmware update.
Important
Improper upgrade program may result in device malfunction!

Figure 4-63
4.5 Information

Figure 4-64
4.5.2 Log
Here you can view system log. See Figure 4-65.

| Parameter | Function |
| Search | You can select log type from the drop down list and then click search button to view the list.You can click the stop button to terminate current search operation. |
| Log information | You can select one item to view the detailed information. |
| Clear | You can click this button to delete all displayed log files. Please note system does not support clear by type. |
| Backup | You can click this button to backup log files to current PC. |
4.5.3 Online User
The online user interface is shown as in Figure 4-66.
Here you can view current online user, group name, IP address and login time.

Figure 4-66
5 Alarm
Please note some series product does not support this function.
Click alarm function, you can see an interface is shown as in Figure 5-1.
Here you can set device alarm type and alarm sound setup.

Figure 5-1
Please refer to the following sheet for detailed information.
| Type | Parameter | Function |
| Alarm type | Motion detection | System alarms when motion detection alarm occurs, |
| Disk full | System alarms when disk is full. | |
| Disk Error | System records alarm info when disk error happens. | |
| Video Tampering | System alarms when video is tampering. | |
| External alarm | Alarm input device sends out alarm. | |
| Illegal Access | System alarms when there is illegal access. | |
| Audio Detect | System alarms when there is audio detect. | |
| IVS | System alarms when IVS event is triggered. | |
| Operation | Prompt | When alarm is triggered, there will be s  inmain menu of alarm interface and system automatically records alarm info. The icon disappears when user click on alarm menu bar. Note: If alarm interface is displayed, when alarm is triggered, there will be no image prompt, but alarm record will be in list on the right. inmain menu of alarm interface and system automatically records alarm info. The icon disappears when user click on alarm menu bar. Note: If alarm interface is displayed, when alarm is triggered, there will be no image prompt, but alarm record will be in list on the right. |
| Alarm audio | Audio | When alarm occurs, system auto generates alarm audio. The audio supports customized setup. |
| Path | Here you can specify alarm sound file. |
6 Log out
Click log out button, system goes back to log in interface. See Figure 6-1.

Figure 6-1
Note:
● This manual is for reference only. Slight difference may be found in user interface.
● All the designs and software here are subject to change without prior written notice.
- All trademarks and registered trademarks mentioned are the properties of their respective owners.
- If there is any uncertainties or controversy, please select to the final explanation of us


- TABLE OF CONTENTS
- PICTURE PLAYBACK
- SETUP
- CAMERA
- IMPORTANT
- NETWORK CONFIG
- NETWORK CONNECTION
- LOG IN
- LIVE
- SYSTEM MENU
- VIDEO WINDOW FUNCTION OPTION
- VIDEO WINDOW SETUP
- WIDTH AND HEIGHT RATIO
- FLUENCY ADJUSTMENT
- FOCUS ZOOM
- PLAYBACK
- PLAYBACK FILE
- PLAYBACK CUT
- ASSISTANT FUNCTION
- PLAY
- CONDITIONS
- ZOOM AND FOCUS
- VIDEO
- SNAPSHOT
- VIDEO OVERLAY
- ROI
- TCP/IP
- CONNECTION
- ONVIF
- PPPOE
- DDNS
- IP FILTER
- SMTP (E-MAIL)
- UPNP
- BONJOUR
- MULTICAST
- QOS
- EVENT
- ABNORMITY
- SNAPSHOT SCHEDULE
- HOLIDAY SCHEDULE
- DESTINATION
- PATH
- LOCAL
- FTP
- RECORD CONTROL
- SYSTEM
- GENERAL
- ACCOUNT
- USERNAME
- MODIFY USER
- MODIFY PASSWORD
- GROUP
- DEFAULT
- AUTO MAINTENANCE
- UPGRADE
- INFORMATION
- LOG
- ONLINE USER
- ALARM
- LOG OUT
- NOTE
Brand : PANASONIC
Model : E-37-V
Category : Surveillance Camera