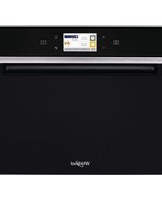
W11I MW161 UK - Microwave WHIRLPOOL - Free user manual and instructions
Find the device manual for free W11I MW161 UK WHIRLPOOL in PDF.


| Product Type | Built-in Microwave |
| Model | W11I MW161 UK |
| Brand | Whirlpool |
| Capacity | 25 Liters |
| Dimensions (H x W x D) | 390 x 595 x 400 mm |
| Weight | 25 kg |
| Power Supply | 230 V / 50 Hz |
| Power Consumption | 1450 W |
| Microwave Power Output | 900 W |
| Grill Power | 1000 W |
| Functions | Microwave, Grill, Microwave + Grill, Defrost, Auto Cook Menus |
| Control Type | Touch Control |
| Display | LED Digital Display |
| Child Lock | Yes |
| Interior Light | Yes |
| Turntable Diameter | 315 mm |
| Cleaning | Easy-clean enamel interior |
| Safety Features | Child lock, door interlock, overheat protection |
| Spare Parts Available | Yes, via authorized service centers |
| Repairability Index | 7.5/10 |
| Energy Efficiency Class | A |
| Color | Stainless Steel |
Frequently Asked Questions - W11I MW161 UK WHIRLPOOL
User questions about W11I MW161 UK WHIRLPOOL
0 question about this device. Answer the ones you know or ask your own.
Ask a new question about this device
Download the instructions for your Microwave in PDF format for free! Find your manual W11I MW161 UK - WHIRLPOOL and take your electronic device back in hand. On this page are published all the documents necessary for the use of your device. W11I MW161 UK by WHIRLPOOL.
USER MANUAL W11I MW161 UK WHIRLPOOL
THANK YOU FOR BUYING A WHIRLPOOL PRODUCT In order to receive a more complete assistance, please register your product on www.whirlpool.eu/register

Before using the appliance carefully read the Safety Instruction.
PRODUCT DESCRIPTION

- Control panel
- Circular heating element (non-visible)
- Identification plate (do not remove)
- Door
- Upper heating element/grill
- Light
- Turntable
CONTROL PANEL DESCRIPTION
![graph TD A["1"] --> B["2"] B --> C["3"] C --> D["4"] D --> E["65"] E --> F["7"] G["Heart Symbol"] --> H["Home Icon"] I["Phone Icon"] --> J["Mobile Phone"] K["Cross Symbol"] --> L["X"]](/content/2026/07/1516861/images/c9fce53c80d6a72e44a189f46765bf0c3f5111ee47957748f312604e7082eafd.jpg)
1. ON / OFF
For switching the oven on and off.
2. HOME
For gaining quick access to the main menu.
3. FAVORITE
For retrieving up the list of your favorite functions.
4. DISPLAY
5. TOOLS
To choose from several options and also change the oven settings and preferences
6. REMOTE CONTROL
To enable use of the 6 th Sense Live Whirlpool app.
7. CANCEL
To stop any oven function except the Clock, Kitchen Timer and Control Lock.
ACCESSORIES
TURNTABLE

Placed on its support, the glass turntable can be used with all cooking methods.
The turntable must always be used as a base for other containers or
accessories, with the exception of the Baking tray.
TURNTABLE SUPPORT

Only use the support for the glass turntable.
Do not rest other accessories on the support.
CRISP PLATE

Only for use with the designated functions.
The Crisp plate must always be placed in the centre of the glass turntable and can be pre-heated
when empty, using the special function for this purpose only. Place the food directly on the Crisp plate.
HANDLE FOR CRISP PLATE

Useful for removing the hot Crisp plate from the oven.
WIRE RACK

This allows you to place food closer to the grill, for perfectly browning your dish and allows an optimal air circulation.
It must be used as base for the crisp
plate in some "6 th Sense Crisp Fry" functions.
Place the wire rack on the turntable, making sure that it does not come into contact with other surfaces.
The number and the type of accessories may vary depending on which model is purchased.
RECTANGULAR BAKING TRAY

Only use the baking tray with functions that allow for convection cooking; it must never be used in combination with microwaves.
Insert the plate horizontally, resting
it on the rack in the cooking compartment.
Please note: You do not need to remove the turntable and its support when using the baking tray.
STEAMER

To steam foods such as fish or vegetables, place these in the basket (2) and pour drinking
water (100 ml) into the bottom of the steamer (3) to achieve the right amount of steam.
To boil foods such as potatoes, pasta, rice or cereals, place
these directly on the bottom of the steamer (the basket is not required) and add an appropriate amount of drinking water for the amount you are cooking.
For best results, cover the steamer with the lid (1) provided.
Always place the steamer on the glass turntable and only use it with the appropriate cooking functions, or with microwave function.
The steamer bottom has been designed also to be used in combination with the special steam clean function.
Other accessories that are not supplied can be purchased separately from the After-sales Service.
There are a number of accessories available on the market. Before you buy, ensure they are suitable for microwave use and resistant to oven temperatures.
Metallic containers for food or drink should never be used during microwave cooking.
Always ensure that foods and accessories do not come into contact with the inside walls of the oven.
Always ensure that the turntable is able to turn freely before starting the oven. Take care not to unseat the turntable whilst inserting or removing other accessories.
COOKING FUNCTIONS

MANUAL FUNCTIONS
- MICROWAVE
For quickly cooking and reheating food or drinks.
Power (W) Recommended for
| 900 | Quickly reheating drinks or other foods with a high water content. |
| 750 Cooking vegetables. | |
| 650 Cooking meat and fish. | |
| 500 | Cooking meaty sauces, or sauces containing cheese or egg. Finishing off meat pies or pasta bakes. |
| 350 | Slow, gently cooking. Perfect for melting butter or chocolate. |
| 160 | Defrosting frozen foods or softening butter and cheese. |
90 Softening ice cream.
Action Food Power (W) Duration (min.)
| Reheat 2 cups 900 1 - 2 | |||
| Reheat | Mashed potatoes 1 kg | 900 | 10 - 12 |
| Defrost | Minced Meat 500 g | 160 | 15 - 16 |
| Cook | Sponge cake | 750 | 7 - 8 |
| Cook | Egg custard | 500 | 16 - 17 |
| Cook | Meat loaf | 750 | 20 - 22 |
- CRISP
For perfectly browning a dish, both on the top and bottom of the food. This function must only be used with the special Crisp plate.
| Food | Duration (min.) |
| Leavened cake | 7 - 10 |
| Hamburger | 8 - 10* |
* Turn food halfway through cooking.
Required accessories: Crisp plate, handle for the Crisp plate
- FORCED AIR
For cooking dishes in a way that achieves similar results to using a conventional oven. The baking plate or other cookware that is suitable for oven use can be used to cook certain foods.
| Food | Temp. (°C) | Duration (min.) |
| Soufflé | 175 | 30 - 35 |
| Cheese Cupcake | 170 * | 25 - 30 |
| Cookies | 175 * | 12 - 18 |
* Preheat needed
Recommended accessories: Rectangular baking plate / Wire rack
• FORCED AIR + MW
To prepare oven dishes in a short time. It is suggested to use the rack in order to optimize the air circulation.
| Food | Power (W) | Temp. (°C) | Duration (min.) |
| Roasts | 350 | 170 | 35 - 40 |
| Meat Pie | 160 | 180 | 25 - 35 |
Recommended accessories: Wire rack
• GRILL
For browning, grilling and gratins. We recommend turning the food during cooking.
| Food | Grill Level | Duration (min.) |
| Toast | High | 5 - 6 |
| Prawns Medium | 18 - 22 |
Recommended accessories: Wire rack
- GRILL + MW
For quickly cooking and gratinating dishes, combining the microwave and grill functions.
| Food | Power (W) Grill Level Duration (min.) | ||
| Potatoes gratin | 650 | Medium | 20 - 22 |
| Jacket Potatoes | 650 | High | 10 - 12 |
Recommended accessories: Wire rack
• TURBO GRILL
For perfect results, combining the grill and oven air convection. We recommend turning the food during cooking.
| Food | Grill Level | Duration (min.) |
| Chicken Kebab | High | 25 - 35 |
Recommended accessories: Wire rack
• TURBO GRILL + MW
For quickly cooking and browning your food, combining the microwave, grill and the oven air convection.
| Food | Power (W) | Grill Level | Duration (min.) |
| Cannelloni Frozen | 650 | High | 20-25 |
| Pork Chops | 350 | High | 30-40 |
Recommended accessories: Wire rack
- FAST PREHEATING
For quickly preheating the oven before a cooking cycle.
- SPECIAL FUNCTIONS
» KEEP WARM
For keeping just-cooked food hot and crisp, including meat, fried foods or cakes.
» RISING
For optimal proving of sweet or savoury dough. To maintain the quality of proving, do not activate the function if the oven is still hot following a cooking cycle.
These enable all types of food to be cooked fully automatically. To use at best this function, follow the indications on the relative cooking table.
For quickly defrosting various different types of food simply by specifying their weight. Always place the food directly on the glass turntable for best results.
CRISP BREAD DEFROST
This exclusive Whirlpool function allows you to defrost frozen bread. Combining both Defrost and Crisp technologies, your bread will taste and feel as if it were freshly baked. Use this function to quickly defrost and heat frozen rolls, baguettes & croissants. The Crisp Plate must be used in combination with this function.
Food Weight
| CRISP BREAD DEFROST | 50 - 800 g |
| MEAT 100 - 2000 g | |
| POULTRY 100 - 3000 g | |
| FISH 100 - 2000 g | |
| VEGETABLE 100 - 2000 g | |
| BREAD 100 - 2000 g |
• 6 th SENSE REHEAT
For reheating ready-made food that is either frozen or at room temperature. The oven automatically calculates the settings required to achieve the best results in the shortest amount of time. Place food on a microwave-safe and heatproof dinner plate or dish. Take out from packaging being careful to remove any aluminium foil. At the end of reheating process, leaving to stand for 1-2 minutes will always improve the result, especially for frozen food.
Do not open the door during this function.
• 6 th SENSE STEAM
For steam-cooking foods such as vegetables or fish, using the steamer provided. The preparation phase automatically generates steam, bringing the water poured into the bottom of the steamer to the boil. Timings for this phase may vary. The oven then proceeds with steamcooking the food, according to the time set.
Set 1-4 minutes for soft vegetables such as broccoli and leek or 4-8 minutes for harder vegetables such as carrots and potatoes.
Do not open the door during this function.
Required accessories: Steamer
• 6 th SENSE CRISP FRY
This healthy and exclusive function combines the quality of crisp function with the properties of the warm air circulation. It allows crunchy, tasty frying results to be achieved, with a remarkable reduction of oil needed compared to the traditional way of cooking, even removing the need for oil in some recipes. It is possible fry a variety of preset foods, either fresh or frozen.
Follow the following table to use the accessories as indicated and obtain the best cooking results for each type of food (fresh or frozen * ).
| Food | Weight / portions |
| BREADED FILLET FRYCoat lightly in oil before cooking. Distribute evenly on the crisp plate. Set plate on rack | 100 - 500 g |
| MEATBALLSCoat lightly in oil before cooking. Distribute evenly on the crisp plate. Set plate on rack | 200 - 800 g |
| FISH AND CHIPS *Distribute evenly on the crisp plate | 1 - 3 pt |
| BREADED SHRIMPS *Distribute evenly on the crisp plate | 100 - 500 g |
| BREADED CALAMARI RINGS *Distribute evenly on the crisp plate | 100 - 500 g |
| BREADED FISH STICK *Distribute evenly on the crisp plate. Turn when prompted | 100 - 500 g |
| POTATOES FRIED *Distribute evenly on the crisp plate | 200 - 500 g |
| POTATOES FRIEDPeel and cut in stick. Soak in cold salted water for 30 min.Dry with a towel and weight them. Brush with olive oil (5%). Distribute on crisp plate. Set plate on rack. Turn when prompt | 200 - 500 g |
| POTATOES CROQUETTESDistribute evenly on the crisp plate | 100 - 600 g |
| EGGPLANTChop, salt and let rest for 30 min. Wash, dry and weigh.Brush with olive oil (5%). Distribute evenly on crisp plate.Set plate on rack. Turn when prompted | 200 - 600 g |
| PEPPERSlice, weight and brush with olive oil (5%). Distribute evenly on crisp plate. Set plate on rack | 200 - 500 g |
| ZUCCHINSlice, weigh and brush with olive oil (5%). Distribute evenly on crisp plate. Set plate on rack | 200 - 500 g |
| HASH BROWNSPeel and grind. Soak in cold salted water for 30 min. Dry with a towel and weight them. Brush with olive oil (5%). Distribute on crisp plate. Set plate on rack. Add and turn when prompted | 100 - 600 g |
| CHICKEN NUGGETS *Distribute evenly on the crisp plate. Set plate on rack | 200 - 600 g |
| BREADED CHEESE *Distribute evenly on the crisp plate. Set plate on rack | 100 - 400 g |
| FELAFELLightly grease the crisp plate. Add and turn food when prompted | 100 - 400 g |
| MIXED FRIED FISH *Distribute evenly on the crisp plate | 100 - 500 g |
| ONION RINGS *Distribute evenly on the crisp plate. Set plate on rack | 100 - 500 g |
HOW TO USE THE TOUCH DISPLAY

To scroll through a menu or a list:
Simply swipe your finger across the display to scroll through the items or values.

To select or confirm:
Tap the screen to select the value or menu item you require.
To go back to the previous screen:
Tap. <
To confirm a setting or go to the next screen:
Tap "SET" or "NEXT".
FIRST TIME USE
You will need to configure the product when you switch on the appliance for the first time.
The settings can be changed subsequently by pressing to access the "Tools" menu.
1. SELECT THE LANGUAGE
You will need to set the language and the time when you switch on the appliance for the first time.
- Swipe across the screen to scroll through the list of available languages.

• Tap the language you require.

Tapping will take you back to the previous screen.
2. SETTING UP WIFI
The 6th Sense Live feature allows you to operate the oven remotely from a mobile device. To enable the appliance to be controlled remotely, you will need to complete the connection process successfully first. This process is necessary to register your appliance and connect it to your home network.
- Tap "SETUP NOW" to set up the connection.

Otherwise tap "SKIP" to connect your product later.
HOW TO SET UP THE CONNECTION
To use this feature you will need: A smartphone or tablet and a wireless router connected to the Internet.
Please use your smart device to check that your home wireless network's signal is strong close to the appliance.
Minimum requirements.
Smart device: Android 4.3 (or higher) with a 1280x720 (or higher) screen or iOS 8 (or higher).
Wireless router: 2.4Ghz WiFi b/g/n.
1. Download the 6 th Sense Live app
The first step to connecting your appliance is to download the app on your mobile device. The 6 th Sense Live app will guide you through all the steps listed here. You can download the 6 th Sense Live app from the iTunes Store or the Google Play Store.
2. Create an account
If you haven't done so already, you'll need to create an account. This will enable you to network your appliances and also view and control them remotely.
3. Register your appliance
Follow the instructions in the app to register your appliance. You will need the Smart Appliance IDentifier (SAID) number to complete the registration process. You can find its unique code the number on the identification plate attached to the product.
4. Connect to WiFi
Follow the scan-to-connect setup procedure. The app will guide you through the process of connecting your appliance to the wireless network in your home. If your router supports WPS 2.0 (or higher), select "MANUALLY", then tap "WPS Setup": Press the WPS button on your wireless router to establish a connection between the two products.
If necessary you can also connect the product manually by using "Search for a network".
The SAID code is used to synchronise a smart device with your appliance.
MAC address is displayed for the WiFi module.
The connection procedure will only need to be carried out again if you change your router settings (e.g. network name or password or data provider).
3. SETTING THE TIME AND DATE
Connecting the oven to your home network will set the time and date automatically. Otherwise you will need to set them manually.
- Tap the relevant numbers to set the time.
- Tap "SET" to confirm.
Once you have set the time, you will need to set the date.
- Tap the relevant numbers to set the date.
- Tap "SET" to confirm.
After a long power loss, you need to set the time and date again.
4. HEAT THE OVEN
A new oven may release odours that have been left behind during manufacturing: this is completely normal.
Before starting to cook food, we therefore recommend heating the oven with it empty in order to remove any possible odours.
Remove any protective cardboard or transparent film from the oven and remove any accessories from inside it.
Heat the oven to 200 °C, ideally using the "Fast preheat" function.
It is advisable to air the room after using the appliance for the first time.
DAILY USE
1. SELECT A FUNCTION
• To switch on the oven, press or touch anywhere on the screen.
The display allows you to choose between Manual and 6 th Sense Functions.
- Tap the main function you require to access the corresponding menu.

- Scroll up or down to explore the list.

- Select the function you require by tapping it.
2. SET MANUAL FUNCTIONS
After having selected the function you require, you can change its settings. The display will show the settings that can be changed.
- Scroll through the suggested values and select the one you require.

In "Forced Air" function, you can tap 🔗 to activate preheating.
DURATION
In microwave and microwave-combinated functions, you always have to set a cook time.
- Tap the relevant numbers to set the cooking time. you require.

- Tap "NEXT" to confirm. At the end of the cooking time, the cooking is
stopped automatically.
In not-microwave functions, you do not have to set the cooking time if you want to manage cooking manually.
- To start setting the duration, tap "Set Cook Time".

To cancel a set duration during cooking and so manage manually the end of cooking, tap the duration value and then select "STOP".
3. SET 6 th SENSE FUNCTIONS
The 6th Sense functions enable you to prepare a wide variety of dishes, choosing from those shown in the list. Most cooking settings are automatically selected by the appliance in order to achieve the best results.
- Choose a cooking type from the list.
- Select a function.
Functions are displayed by food categories in the 6 th SENSE FOOD menu (see relative tables) and by recipe features in the LIFESTYLE menu.
- Once you have selected a function, simply indicate the characteristic of the food (quantity, weight, etc.) you want to cook to achieve the perfect result.
4. SET START TIME DELAY
Before starting a no-microwave function, you can delay the cooking: The function will start at the time you select in advance.
- Tap "DELAY" to set the start time you require.

- Once you have set the required delay, tap "START DELAY" to start the waiting time. - Place the food in the oven and close the door: The function will start automatically after the period of time that has been calculated.
Programming a delayed cooking start time will disable the oven preheating phase: The oven will reach the temperature your require gradually, meaning that cooking times will be slightly longer than those listed in the cooking table.
- To activate the function immediately, and cancel the programmed delay time, tap ⏻.
5. START THE FUNCTION
- Once you have configured the settings, tap "START" to activate the function.
If the oven is hot and the function requires a specific maximum temperature, a message will shown on the display.
In microwave functions is provided a start protection. The door must be opened and closed before starting the function.
- Open the door.
- Place food inside the oven and close the door.
- Tap "START".
You can change the values that have been set at any time during cooking by tapping the value you want to amend.
- Press to stop the active function at any time.
6. JET START
On Home Screen bottom there is a bar which shows three different duration. Tap one of them to start cooking with the microwave function set at full power (900 W).
- Open the door.
- Place food inside the oven and close the door.
- Tap the cook time you want to cook.

7. PREHEATING
If previously activated, once the function has been started the display indicates the status of preheating phase.
Once this phase has been finished, an audible signal will sound and the display will indicate that the oven has reached the set temperature.
- Open the door.
- Place the food in the oven.
- Close the door and tap "DONE" to start cooking.
Placing the food in the oven before preheating has finished may have an adverse effect on the final cooking result.
Opening the door during the preheating phase will pause it. The cooking time does not include a preheating phase.
You can change the default setting of the preheating option for cooking functions that allow you to do that manually.
- Select a function that allows you to select the preheating function manually.
- Tap 📄 icon to activate or deactivate preheating. It will be set as a default option.
8. PAUSING COOKING
Some of the 6th Sense functions will require to turn the food during cooking. An audible signal will sound and the displays shows the action must to be done.
- Open the door.
- Carry out the action prompted by the display.
- Close the door, then tap "DONE" to resume cooking.
Before cooking ends, the oven could prompt you to check the food in the same way.
An audible signal will sound and the displays shows the action must to be done.
- Check the food.
- Close the door, then tap "DONE" to resume cooking.
9. END OF COOKING
An audible signal will sound and the display will indicate that cooking is complete.
With some functions, once cooking has finished you can extend the cooking time or save the function as a favorite.

- Tap to save it as a favorite.
- Tap ⊕ to prolong the cooking.
10. FAVORITES
The Favorites feature stores the oven settings for your favorite recipes.
The oven automatically detects the functions you use most often. After a certain number of uses, you will be prompted to add the function to your favorites.
HOW TO SAVE A FUNCTION
Once a function has finished, you can tap to save it as favorite. This will enable you to use it quickly in the future, keeping the same settings. The display allows you to save the function by indicating up to 4 favorite meals time including breakfast, lunch, snack and dinner.
- Tap the icons to select at least one.

- Tap "SAVE AS FAVORITE" to save the function.
ONCE SAVED
Once you have saved functions as favorites, the main screen will display the functions you have saved for the current the time of day.

To view the favorite menu, press The functions will be divided by different meal times and some suggestions will be offered.
- Tap the meals icon to show the relevant lists.

Tapping 📷 also enables you to view your history of most recently used functions.
- Scroll through the prompted list.
- Tap the recipe or function you require.
- Tap "START" to activate the cooking.
CHANGING THE SETTINGS
In the Favorites screen, you can add an image or name to each favorite to customise it to your preferences.
- Select the function you want to change.
- Tap "EDIT".
- Select the attribute you want to change.
- Tap "NEXT": the display will show the new attributes.
- Tap "SAVE" to confirm the changes.
In the favorite screen you can also delete functions you have saved:
- Tap the ♥ on the relevant function.
- Tap "REMOVE IT".
You can also change the time when the various meals are shown:

- Press
- Select "Preferences".
- Select "Times and Dates".
- Tap "Your Meal Times".
- Scroll through the list and tap the relevant time.
- Tap the relevant meal to change it.
Each time slot can be combined with one meal only.
11. TOOLS
Press to open the "Tools" menu at any time.
This menu enables you to choose from several options and also change the settings or preferences for your product or the display.


REMOTE ENABLE
To enable use of the 6th Sense Live Whirlpool app.

TURN TABLE
This option stops the rotation of turntable in order to allow you to use large and squared microwave proof containers that may not rotate freely inside the product.

KITCHEN TIMER
This function can be activated either when using a cooking function or alone for keeping time.
Once started, the timer will continue to count down independently without interfering with the function itself.
Once the timer has been activated, you can also select and activate a function.
The timer will continue counting down, shown at the top-right corner of the screen.
To retrieve or changhe the kitchen timer:
- Press
- Tap
An audible signal will sound and the display will indicate once the timer has finished counting down the selected time.
- Tap "DISMISS" to cancel the timer or set a new timer duration.
- Tap "SET NEW TIMER" to set the timer again.

LIGHT
To switch on or off the oven lamp.

SELF CLEAN
The action of the steam released during this special cleaning cycle allows dirt and food residues to be removed with ease. Pour a cup of drinking water into the supplied steamer bottom (3) only or on a microwave proof container and activate the function.
Required accessories: Steamer

MUTE
Tap icon to mute or unmute all the sounds and alarms.

CONTROL LOCK
The "Control Lock" enables you to lock the buttons on the touch pad so they cannot be pressed accidentally.
To activate the lock:
- Tap the icon.
To deactivate the lock: - Tap the display.
- Swipe up on the message shown.


PREFERENCES
For changing several oven settings.

WI-FI
For changing settings or configuring a new home network.

INFO
For switching off "Store Demo Mode", resetting the product and obtaining further information about the product.
USEFUL TIPS
MICROWAVE COOKING
Microwaves only penetrate food to a certain depth, so when cooking several items at the same time space them out as much as possible to allow the maximum surface area to be exposed to the microwaves.
Small pieces cook more quickly than large pieces: in order to ensure uniform cooking, cut the food items into pieces of equal size.
Most foods will continue to cook after microwave has finished cooking it. Therefore, always allow for standing time to complete the cooking.
Remove any twist ties from paper or plastic bags before placing them in the oven for microwave cooking.
Plastic film should be scored or perforated with a fork in order to relieve the pressure and prevent bursting due to the steam building up during the cooking process.
LIQUIDS
Liquids may overheat beyond boiling point without visibly bubbling. This could cause hot liquids to suddenly boil over. To prevent this, avoid using narrow-necked containers, stir the liquid before placing the container in the microwave oven and leave a teaspoon immersed in the container.
After heating, stir again before carefully removing the container from the microwave oven.
FROZEN FOOD
For best results, we recommend defrosting directly on the glass drip tray. If needed, it is possible to use a light-plastic container that is suitable for microwave. Boiled foods, stews and meat-based sauces will defrost better if stirred occasionally while defrosting. Separate the food items once they begin to defrost: the separated portions will defrost more quickly.
FOOD FOR INFANTS
When heating food or liquids in a baby food container or a baby bottle, always stir and check the temperature before serving. This will ensure that the heat is evenly distributed and avoid the risk of scalding or burns.
Ensure that the container lid or bottle teat are removed before heating.
CAKES AND BREAD
For cakes and bread products it is recommended to use the "Forced Air" function. Alternatively, in order to decrease the cooking times, the user can select "Forced Air + MW", with the microwave power being set to a value no greater than 160 W in order to maintain the food products soft and fragrant.
With the "Forced Air" function, use dark metal cake tins and always place them on the supply wire shelf.
Alternatively, the rectangular baking tray or other cookware suitable for oven use can be utilized to cook certain food items, such as biscuits or bread rolls.
If using the "Forced Air + MW" function, only use containers suitable for microwaves, and place them on the supplied wire shelf.
To check whether the item you are baking is done, insert a skewer into the centre: If it comes out clean, the cake or bread is cooked.
If using non-stick cake tins, do not butter the edges as the cake may not rise evenly around the edges.
If the item "swells" during baking, use a lower temperature next time and consider reducing the amount of liquid you add or stirring the mixture more gently.
If the base of the cake is soggy, lower the shelf and sprinkle the bottom of the cake with breadcrumbs or biscuit crumbs before adding the filling.
PIZZA
In order to obtain uniform cooking and a crispy pizza base in just a short time, it is recommended to use the "Crisp" function together with the special supplied accessory.
Alternatively, for larger pizzas it is possible to use the rectangular baking tray together with the "Forced Air" function: in this case, pre-heat the oven to the temperature of 200°C and distribute the mozzarella on the pizza two-thirds of the way through the cooking process.
MEAT AND FISH
In order to obtain perfect surface browning in just a short period of time, while maintaining the inside of the meat or fish soft and juicy, it is recommended to use functions that combine the forced air function with microwaves, like "Turbo grill + microwave" or "Forced Air + microwave".
In order to obtain the best possible cooking results, set the microwave power level to the value of 350 W.
| Food categories Accessories Quantity Cooking Info | |||||
| CASSEROLE & BAKED PASTA | Lasagna | 4 - 10 portions | Prepare according to your favorite recipe. Pour bechamel sauce on top and sprinkle with cheese to get perfect browning | ||
| Cannelloni 400 - 1500 g | |||||
| Lasagna * | 500 - 1200 g | Take out from packaging being careful to remove any aluminium foil | |||
| Cannelloni * | 400 - 1500 g | ||||
| RICE, PASTA & CEREALS | RICE & PASTA | Rice | 100 - 400 g ◦◆ | Set recommended cook time for rice. Add salted water and rice into the steamer bottom and cover with lid. Use 2-3 cups of water for each cup of rice. | |
| Rice Porridge 2 - 4 portions | Add water and rice into the steamer bottom and cover with lid. Add milk when the oven prompts. For 2 portions use 75ml of rice, 200ml of water and 300ml of milk. | ||||
| Pasta 1 - 4 portions | Set recommended cook time for the pasta. Add pasta when oven prompts and cook covered. Use approximately 750ml of water for each 100g of pasta | ||||
| SEEDS & CEREALS | Burghul | Add salted water and cereal into the steamer bottom and cover with lid. Use 2 cups of water for each cup of burghul | |||
| Quinoa | Add salted water and cereal into the steamer bottom and cover with lid. Use 2 cups of water for each cup of quinoa | ||||
| Millet | Add salted water and cereal into the steamer bottom and cover with lid. Use 3 cups of water for each cup of millet | ||||
| Amaranth | Add salted water and cereal into the steamer bottom and cover with lid. Use 3-4 cups of water for each cup of amaranth | ||||
| Spelt | Add salted water and cereal into the steamer bottom and cover with lid. Use 3-4 cups of water for each cup of spelt | ||||
| Barley | Add salted water and cereal into the steamer bottom and cover with lid. Use 3-4 cups of water for each cup of barley | ||||
| Buckwheat | Add salted water and cereal into the steamer bottom and cover with lid. Use 3 cups of water for each cup of buckwheat | ||||
| Cous Cous | Add salted water and cereal into the steamer bottom and cover with lid. Use 2 cups of water for each cup of cous cous | ||||
| Oat Porridge | 1-2 portions ◦◆ | Add salted water and oat flakes into a container with high edges, mix and placing into the oven | |||
* Frozen •• Suggested quantity. Do not open door during cooking.
| Food categories Accessories Quantity Cooking Info | |||||
| MEAT | BEEF | Roast Beef | 800 - 1500 g | Brush with oil and rub with salt and pepper. Season with garlic and herbs as you prefer. At the end of cooking let rest for at least 15 minutes before carving | |
| Roast Veal | Brush with oil or melted butter. Rub with salt and pepper. At the end of cooking let rest for at least 15 minutes before carving | ||||
| Steak | 2 - 6 pieces | Brush with oil and rosemary. Rub with salt and black pepper.Distribute evenly on the grill rack | |||
| Hamburger | 2 - 6 pieces Brush with oil and sprinkle with salt before cooking | ||||
| Hamburger * | 100 - 500 g Lightly grease the crisp plate before preheating | ||||
| PORK | Roast Pork | 800 - 1500 g | Brush with oil or melted butter. Rub with salt and pepper. At the end of cooking let rest for at least 15 minutes before carving | ||
| Chops | 2 - 6 pieces | Brush with oil and rosemary. Rub with salt and black pepper.Distribute evenly on the grill rack | |||
| Ribs | 700 - 1200 g | Brush with oil and season as you prefer. Rub with salt and pepper.Evenly distribuite in the crisp plate with the bone side downwards | |||
| Bacon 50 - 150 g Evenly distribute in the crisp plate | |||||
| LAMB | Roast Lamb | 1000 - 1500 g | Brush with oil or melted butter. Rub with salt, pepper and chopped garlic. At the end of cooking let rest for at least 15 minutes before carving | ||
| Cutlet 2 - 8 pieces | Brush with oil and rub with salt and pepper. Evenly distribuite on rack | ||||
| CHICKEN | Roast Chicken | 800 - 2500 g | Brush with oil and season as you prefer. Rub with salt and pepper.Placing into the oven with the breast side up | ||
| Chicken Pieces | 400 - 1200 g | Brush with oil and season as you prefer. Evenly distribute in the crisp plate with the skin side down | |||
| Chicken Fillets / Breast | 300 - 1000g Lightly grease the crisp plate before preheating | ||||
| DUCK | Roast Duck | 800 - 2000 g | Brush with oil or melted butter. Rub with salt, pepper, and paprika.Placing into the oven with the breast side down | ||
| Duck Pieces | 400 - 1400 g | Brush with oil and season as you prefer. Evenly distribute in the crisp plate with the skin side down | |||
| STEAMED MEAT | Chicken Fillets | 300 - 800 g Distribute evenly in the steam grid | |||
| Turkey Fillets | |||||
| Hot Dog | 4 - 8 pieces ◦ | Add hot dog in the steamer bottom and cover with water. Cook uncovered | |||
| MEAT DISHES | Meat Loaf | 4-8 portions | Prepare according to your favorite recipe and shape into a loaf container pushing to avoid the formation of air pockets | ||
| Meat Pie | 1 batch | Prepare a meat gravy mixture for 6-9 individual serve pie tins. Line the greased cake tin with shortcrust pastry, fill with the meat gravy and close with a pouf pastry lid | |||
| Kebab | 400 - 1200 g | Brush with oil and flavor with herbs. Distribute evenly on the grill rack | |||
| Breaded Fillet Fry | 100 - 500 g Brush with oil. Distribute evenly in the crisp plate | ||||
| Sausages & Wurstel | 200 - 800 g | Lightly grease the crisp plate before preheating. Pierce the sausages with a fork to prevent bursting | |||
| Meatballs | 200 -800 g | Prepare according to your favorite recipe and shape it into balls with approximate weight of 30-40g each. Brush with oil. Distribute evenly in the crisp plate | |||
| ACCESSORIES | Mw/Oven proof container | Steamer (Complete) | Steamer (Bottom + Lid) | Steamer (bottom) | Wire rack | Rectangular baking plate | Crisp Plate |
| Food categories Accessories Quantity Cooking Info | ||||
| FISH & SEAFOOD | WHOLE FISH | Roasted Whole Fish | 600 - 1200 gBrush with oil. Season with lemon juice, garlic and parsley | |
| Steamed Whole Fish | 600 - 1200 g | |||
| STEAMED FILLETS & STEAKS | Tuna Steak | 300 - 800 g Distribute evenly in the steam grid | ||
| Salmon Steak | ||||
| Swordfish Steak | ||||
| Seabass Fillet | ||||
| Seabream Fillet | ||||
| Other Fillet | ||||
| Trout Fillet | ||||
| Other Steak | ||||
| FISH GRATIN | Fish Gratin | 500 - 1200 g Cover with breadcrumbs and sprinkle with butter curls | ||
| Fish Gratin | 600 - 1200 gTake out from packaging being careful to remove any aluminium foil | |||
| STEAMED SEAFOOD | Scallops | 1 - 6 pieces Distribute evenly in the steam grid | ||
| Mussels | 400 - 1000 gSeason with oil, pepper, lemon garlic and parsley before cooking.Mix well | |||
| Shrimps | 100 - 600 g Distribute evenly in the steam grid | |||
| FRIED FISH & SEAFOOD | Fish and Chips | 1 - 3 portionsDistribute evenly in the crisp plate altering the fish fillets and the potatoes | ||
| Breaded Shrimps | 100 - 500 g Distribute evenly in the crisp plate | |||
| Breaded Calamari Rings | ||||
| Breaded Fish Stick | ||||
| Mixed Fried Fish | ||||
| Fish steak 300 - 800 g | Lyghtly grease the crisp plate before preheating. Season fish steaks with oil and cover with sesame seeds | |||
* Frozen •• Suggested quantity. Do not open door during cooking.
| Food categories Accessories Quantity Cooking Info | |||||
| VEGETABLES | ROASTED VEGETABLES | Potatoes | 300 - 1200 g | Cut in pieces, season with oil, salt and flavor with herbs before placing into the oven | |
| Stuffed Vegetables | 600 - 2200 g | Scoop out the vegetable and fill with a mixture of the vegetable flesh itself, minced meat and shredded cheese. Season with garlic, salt and flavor with herbs as you prefer. | |||
| Vegetarian Burger | 2 - 6 pieces Lightly grease the crisp plate | ||||
| Jacket Potatoes | 200 - 1000 g | Brush with oil or melted butter. Cut a cross on top of the potato and pour with source cream and your favorite topping. | |||
| Potato Wedges | 300 - 800 g | Cut in wedges, season with oil, salt and flavor with herbs before placing into the oven | |||
| GRATIN VEGETABLES | Potatoes | 4 - 10 portions | Slice and place into a large container. Season with salt, pepper and pour over cream. Spinkle cheese on top | ||
| Broccoli | 600 - 1500 g | Cut in pieces and place into a large container. Season with salt, pepper and pour over cream. Spinkle cheese on top | |||
| Couliflowers | 600 - 1500 g | ||||
| Hash Browns | 100 - 500 g | Peel and grind. Soak in cold salted water for 30 minutes. Dry with a towel and squeeze out any excess moisture. Season with salt, black pepper, cayenne pepper, and paprika. Distribute evenly on greased crisp plate | |||
| Vegetable | 400 - 800 g | Take out from packaging being careful to remove any aluminium foil | |||
| STEAMED VEGETABLES | Potatoes Pieces | 300 - 1000 g | Cut in pieces. Distribute evenly in the steamer bottom | ||
| Peas | 200 - 500 g | Distribute evenly in the steam grid | |||
| Carrots | 200 - 500 g | Cut in pieces. Distribute evenly in the steam gridBroccoli | |||
| Couliflower | |||||
| Asparagus | 200 - 500 g | Distribute evenly in the steam grid | |||
| Pumpkin | 200 - 500 g | Cut in pieces. Distribute evenly in the steam grid | |||
| Brussel Sprout | 200 - 500 g | Distribute evenly in the steam grid | |||
| Corn on Cob | 300 - 1000 g | ||||
| Peppers | 200 - 500 g | Cut in pieces. Distribute evenly in the steam grid | |||
| Other Vegetables | Distribute evenly in the steam grid | ||||
| STEAMED FROZEN VEGETABLES | Peas | 300 - 800 g | Distribute evenly in the steam grid | ||
| Broccoli | |||||
| Brussel Sprout | |||||
| Carrots | |||||
| Asparagus | |||||
| Other Vegetables | |||||
| ACCESSORIES | Mw/Oven proof container | Steamer (Complete) | Steamer (Bottom + Lid) | Steamer (bottom) | Wire rack | Rectangular baking plate | Crisp Plate |
| Food categories Accessories Quantity Cooking Info | |||||
| VEGETABLES | FRIED VEGETABLES | Potatoes Fried ✦ | 100 - 600 g Distribute evenly in the crisp plate | 200 - 500 g Distribute evenly in the crisp plate | |
| Potatoes Fried 200 - 500 g | Peel and cut in stick. Soak in cold salted water for 30 minutes. Wash, dry and weight. Mix with oil, approximately 10g each 200g of dry potatoes. Distribute evenly in the crisp plate | ||||
| Potatoes Croquettes | |||||
| Egg Plant | + + | 200 - 600 g | Chop and soak in cold salted water for 30 minutes. Wash, dry and weigh. Mix with oil, approximately 10g for each 200g of dry eggplant. Distribute evenly in the crisp plate | ||
| Pepper 200 - 500 g | Slice, weigh and mix with oil, approximately 10g each 200g of dry pepper. Season with salt. Distribute evenly in the crisp plate | ||||
| Zucchini 200 - 500 g | Slice, weight and mix with oil, approximately 10g each 200g of dry zucchini. Season with salt and black pepper. Distribute evenly on crisp plate | ||||
| SALTY CAKES | Quiche Lorraine 1 batch | Line the crisp plate with the pastry and pierce it with a fork. Prepare quiche lorraine mixture considering a quantity for 8 portions | |||
| Quiche Lorraine ✦ | 200 - 800 g | Take out from packaging being careful to remove any aluminium foil | |||
| Salty Cake | + + | 1 batch | Line a pie dish for 8-10 portions with a pastry and pierce it with a fork. Fill the pastry according to your favorite recipe | ||
| Vegetable Strudel | 800 - 1500 g | Prepare a mix of chopped vegetable. Sprinkle with oil and cook into a pan for 15-20 minutes. Let cool down. Add fresh cheese and season with salt, balsamic vinegar and spices. Roll it into a pastry and fold the external part | |||
| Rolls | 1 batch | Prepare dough according to your favorite recipe for a light bread. Form to rolls before rise. Use the oven's dedicated rise function | |||
| BREAD | Rolls ✦ | 1 batch Take out from packaging. Evenly distribute on the baking plate | |||
| Sandwich Loaf in Tin 1 - 2 pieces | Prepare dough according to your favorite recipe for a light bread. Form into a loaf container before rise. Use the oven dedicated function to rise | ||||
| Rolls Prebacked | 1 batch | Take out from packaging. Evenly distribute on the baking plate | |||
| Scones | 1 batch Shape into one scone or in smaller pieces on greased crisp plate | ||||
| Rolls Canned | 1 batch Take out from packaging. Evenly distribute on the baking plate | ||||
| PIZZA | Pizza 2 - 6 portions | Prepare a pizza dough based on 150ml water, 15g yeast, 200-225g flour, oil and salt. Leave it to rise using the oven's dedicated function. Roll out the dough into a lightly greased baking plate. Add topping like tomatoes, mozzarella and ham | |||
| Thin Pizza ✦ | 250 - 500 g | Take out from packaging being careful to remove any aluminium foil | |||
| Thick Pizza ✦ | 300 - 800 g | ||||
| Chilled Pizza | 200 - 500 g | Take out from packaging. Evenly distribute in the crisp plate | |||
| CAKES & PASTRIES | RISING CAKES | Sponge Cake In Tin | + + | 1 batch | Prepare a fatless sponge cake batter of 500-900g. Pour into lined and greased baking pan |
| Fruit Rising Cake In Tin | 900 - 1900 g | Prepare a cake batter according to your favorite recipe by using shredded or chopped-sliced fresh fruit. Pour into lined and greased baking pan | |||
| Chocolate Rising Cake In Tin | 600 - 1200 g | Prepare a chocolate-cocoa cake batter according to your favorite recipe. Pour into lined and greased baking pan | |||
* Frozen ∞ Suggested quantity. Do not open door during cooking.
| Food categories Accessories Quantity Cooking Info | ||||
| CAKES & PASTRIES | PASTRIES & FILLED PIES | Cookies | 1 batchMake a batch of 250g flour, 100g salted butter, 100g sugar, 1 egg. Flavor with fruit essence. Let cool down. Shape into 10-12 strips on greased baking plate | |
| Chocolate cookies | 1 batchMake a batter of 250g flour, 150g butter, 100g sugar, 1 egg, 25g cocoa powder, salt and baking powder. Add vanilla essence. Let cool down. Spread to reach 5mm thickness, shape as required and evenly distribute in the crisp plate | |||
| Croissants | 1 batch Evenly distribute in the crisp plate. Let cool down before serving | |||
| Meringues | 1 batchMake a batch of 2 egg whites, 80g sugar and 100g desiccated coconut. Flavor with vanilla and almond essence. Shape into 20-24 pieces on greased baking plate | |||
| Fruit Filled Pie | 800 - 1500 gLine a pie dish with the pastry and sprinkle the bottom with bread crumbs to absorb the juice from the fruit. Fill with chopped fresh fruit mixed with sugar and cinnamon | |||
| Fruit Pie | 1 batchMake a pastry of 180g flour, 125g butter and 1 egg. Line the crisp plate with the pastry and fill with 700-800g sliced fresh fruit mixed with sugar and cinnamon | |||
| Fruit Pie | 300 - 800 gTake out from packaging being careful to remove any aluminium foil | |||
| MUFFINS & CUPCAKES | Muffins | 1 batchPrepare a batter for 16-18 pieces according to your favorite recipe and fill in paper moulds. Evenly distribute on the baking plate | ||
| Soufflé | 2 - 6 portionsPrepare a soufflé mix with lemon, chocolate or fruit and pour into an ovenproof dish with high edge | |||
| Cheese Cupcake | 1 batchPrepare a mix for 12-15 pieces by using shredded soft cheese and diced bacon or ham. Fill in individual serve muffin tins. | |||
| DESSERTS | Fruit Compote | 300 - 800 ml●Peel and core the fruit. Cut in pieces and place in the steam grid | ||
| Baked Apples | 4 - 8 piecesRemove the core and fill with marzipan or cinnamon, sugar and butter | |||
| Hot chocolate | 2 - 8 portionsPrepare according to your favorite recipe into a single container. Flavor with vanilla or cinnamon. Add maize starch to increase density | |||
| Brownies | 1 batchPrepare according to your favorite recipe. Spread batter on the baking plate covered with baking paper | |||
| EGGS | Scrambled | 2 - 10 piecesPrepare according to your favorite recipe into a single container | ||
| Bulls Eye | 1 - 6 piecesLyghtly grease the crisp plate before preheating | |||
| Omelette | 1 batch | |||
| Egg Custard | 1 - 2 batchMake a batch of 0.5 litre of milk, 4 egg yolks, 100g of sugar and 40g of flour. Pour the milk into a container and placing into the oven. When the oven prompts gently pour the hot milk into the eggs yolks, flour and sugar mixture and continue the cooking | |||
| SNACKS | Popcorn - | 90 - 100 g●Always place the bag directly on the glass turntable. Pop only one bag a time | ||
| Chicken Wings | 300 - 600 g●Distribute evenly in the crisp plate | |||
| Chicken Nuggets | 200 - 600 g | |||
| Breaded Cheese | 100 - 400 gBrush the cheese with a little oil before cooking. Distribute evenly in the crisp plate | |||
| Felafel | 100 - 400 gLyghtly grease the crisp plate. Brush the felafel with oil before cooking | |||
| Onion Rings | 100 - 500 gDistribute evenly in the crisp plate | |||
| Roasted Nuts | 50 - 200 g | |||
| ACCESSORIES | Mw/Oven proof container | Steamer (Complete) | Steamer (Bottom + Lid) | Steamer (bottom) | Wire rack | Rectangular baking plate | Crisp Plate |
CLEANING
Make sure that the appliance has cooled down before carrying out any maintenance or cleaning.
Never use steam cleaning equipment.
Do not use wire wool, abrasive scourers or abrasive/corrosive cleaning agents, as these could damage the surfaces of the appliance.
INTERIOR AND EXTERIOR SURFACES
- Clean the surfaces with a damp microfibre cloth. If they are very dirty, add a few drops of pH-neutral detergent. Finish off with a dry cloth.
- Clean the glass in the door with a suitable liquid detergent.
- At regular intervals, or in case of spills, remove the turntable and its support to clean the bottom of the oven, removing all food residue.
- Activate the "Self Clean" function for an optimum cleaning of the internal surfaces.
- The grill does not need to be cleaned as the intense heat burns away any dirt. Use this function on a regular basis.
ACCESSORIES
All accessories are dishwasher safe with the exception of the Crisp plate.
The Crisp plate should be cleaned using water and a mild detergent. For stubborn dirt, rub gently with a cloth. Always leave the Crisp plate to cool down before cleaning.
WIFI FAQs
Which WiFi protocols are supported?
The WiFi adapter installed supports WiFi b/g/n for European countries.
Which settings need to be configured in the router software?
The following router settings are required: 2.4 GHz enabled, WiFi b/g/n, DHCP and NAT activated.
Which Version of WPS is supported?
WPS 2.0 or higher. Check the router documentation.
Are there any differences between using a smartphone (or tablet) with Android or iOS?
You can use whichever operating system you prefer, it makes no difference.
Can I use mobile 3G tethering instead of a router?
Yes, but cloud services are designed for permanently connected devices.
How can I check whether my home Internet connection is working and wireless functionality is enabled?
You can search for your network on your smart device. Disable any other data connections before trying.
How can I check whether the appliance is connected to my home wireless network?
Access your router configuration (see router manual) and check whether the appliance's MAC address is listed on wireless connected devices page.
Where can I find the appliance's MAC address?
Press then tap WiFi or look on your appliance:
There is a label showing the SAID and MAC addresses. The MAC address consists of a combination of numbers and letters starting with "88:e7".
How can I check whether the appliance's wireless functionality is enabled?
Use your smart device and the 6th Sense Live app to check whether the appliance network is visible and connected to the cloud.
Is there anything that can prevent the signal reaching the appliance?
Check that the devices you have connected are not using up all the available bandwidth. Make sure that your WiFi-enabled devices do not exceed the maximum number permitted by the router.
How far should the router be from the oven?
Normally the WiFi signal is strong enough to cover a couple of rooms, but this very much depends on the material the walls are made of. You can check the signal strength by placing your smart device next to the appliance.
What can I do if my wireless connection does not reach the appliance?
You can use specific devices to extend your home WiFi coverage, such as access points, WiFi repeaters and power line bridges (not provided with appliance).
How can I find out the name of and password for my wireless network?
See the router documentation. There is usually a sticker on the router showing the information you need to reach the device setup page using a connected device.
What can I do if my router is using the neighbourhood WiFi channel?
Force the router to use your home WiFi channel.
What can I do if the display shows or the oven is unable to make a stable provision to home router?
The appliance might have successfully connected to the router, but it is not able to access the Internet. To connect the appliance to the Internet, you will need to check the router and/or carrier settings.
Router settings: NAT must be on, firewall and DHCP must be properly configured. Password encryption supported: WEP, WPA,WPA2. To try a different encryption type, please refer to the router manual.
Carrier settings: If your Internet service provider has fixed the number of MAC addresses able to connect to the Internet, you may not be able to connect your appliance to the cloud. The MAC address of a device is its unique identifier. Please ask your Internet service provider how to connect devices other than computers to the Internet.
How can I check whether data is being transmitted?
After setting up the network, switch the power off, wait 20 seconds and then switch on the oven: Check that the app is showing the UI status of the appliance. Select a cycle or another option and check its status on the app.
Some settings take several seconds to appear in the app.
How can I change my Whirlpool account but keep my appliances connected?
You can create a new account, but remember to remove your appliances from your old account before moving them to your new one.
I changed my router – what do I need to do?
You can either keep the same settings (network name and password) or delete the previous settings from the appliance and configure the settings again.
TROUBLESHOOTING
| Problem Possible cause Solution | ||
| The oven is not working. | Power cut.Disconnection from the mains. | Check for the presence of mains electrical power and whether the oven is connected to the electricity supply. Turn off the oven and restart it to see if the fault persists. |
| The display shows the letter “F” followed by a number or letter. | Oven failure. | Contact you nearest Client After-sales Service Centre and state the number following the letter “F”. Press®, tap "Info" and then select "Factory Reset". All settings saved will be deleted. |
| The oven makes noises, even when it is switched off. | Cooling fan active. | Open the door or hold or wait until the cooling process has finished. |
| The function does not start.The function is not available in demo mode. | Demo mode is running. | Press®, tap "Info" and then select "Store Demo Mode" to exit. |
| Theicon is shown on display. | The The WiFi router is off.The router settings have changed.The wireless connections does not reach the appliance.The oven is unable to establish a stable connection to home network.The connectivity is not supported. | Check that the WiFi router is connected to the Internet. Check that the WiFi signal close to the appliance is strong.Try to restart the router.See the "WiFi FAQs" section.If your home wireless network settings have changed, connect to the network: Press®, tap "WiFi" and then select "Connect to Network". |
| The connectivity is not supported. | Remote operation is not permitted in your country. | Check whether your country allows remote operation of electronic appliances before purchasing. |

Policies, standard documentation and additional product information can be found by:
- Visiting our website docs.whirlpool.eu
- Using QR Code
• Alternatively, contact our After-sales Service (See phone number in the warranty booklet). When contacting our After-sales Service, please state the codes provided on your product's identification plate.


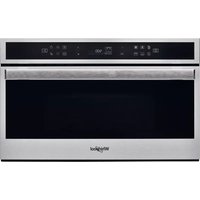
- PRODUCT DESCRIPTION
- CONTROL PANEL DESCRIPTION
- ON / OFF
- HOME
- FAVORITE
- DISPLAY
- TOOLS
- REMOTE CONTROL
- CANCEL
- ACCESSORIES
- TURNTABLE
- TURNTABLE SUPPORT
- CRISP PLATE
- HANDLE FOR CRISP PLATE
- WIRE RACK
- RECTANGULAR BAKING TRAY
- STEAMER
- COOKING FUNCTIONS
- MANUAL FUNCTIONS
- MICROWAVE
- CRISP
- FORCED AIR
- FORCED AIR + MW
- GRILL
- GRILL + MW
- TURBO GRILL
- TURBO GRILL + MW
- FAST PREHEATING
- SPECIAL FUNCTIONS
- KEEP WARM
- RISING
- 6 TH SENSE REHEAT
- 6 TH SENSE STEAM
- 6 TH SENSE CRISP FRY
- HOW TO USE THE TOUCH DISPLAY
- FIRST TIME USE
- SELECT THE LANGUAGE
- SETTING UP WIFI
- HOW TO SET UP THE CONNECTION
- DOWNLOAD THE 6 TH SENSE LIVE APP
- CREATE AN ACCOUNT
- REGISTER YOUR APPLIANCE
- CONNECT TO WIFI
- SETTING THE TIME AND DATE
- HEAT THE OVEN
- DAILY USE
- SELECT A FUNCTION
- SET MANUAL FUNCTIONS
- DURATION
- SET 6 TH SENSE FUNCTIONS
- SET START TIME DELAY
- START THE FUNCTION
- JET START
- PREHEATING
- PAUSING COOKING
- END OF COOKING
- FAVORITES
- HOW TO SAVE A FUNCTION
- ONCE SAVED
- CHANGING THE SETTINGS
- REMOTE ENABLE
- TURN TABLE
- KITCHEN TIMER
- LIGHT
- SELF CLEAN
- MUTE
- CONTROL LOCK
- PREFERENCES
- WI-FI
- INFO
- USEFUL TIPS
- MICROWAVE COOKING
- LIQUIDS
- FROZEN FOOD
- FOOD FOR INFANTS
- CAKES AND BREAD
- PIZZA
- MEAT AND FISH
- CLEANING
- INTERIOR AND EXTERIOR SURFACES
- WIFI FAQS
Brand : WHIRLPOOL
Model : W11I MW161 UK
Category : Microwave