
NRK60328O - Freezer GORENJE - Free user manual and instructions
Find the device manual for free NRK60328O GORENJE in PDF.


| Product Type | Freezer |
| Brand | Gorenje |
| Model | NRK60328O |
| Height | 180 cm |
| Width | 60 cm |
| Depth | 60 cm |
| Net Weight | 62 kg |
| Power Supply | 220-240 V, 50 Hz |
| Energy Class | A+ |
| Annual Energy Consumption | 250 kWh |
| Noise Level | 42 dB |
| Freezing Capacity | 12 kg/24h |
| Fast Freeze Function | Yes |
| Temperature Alarm | Yes |
| Interior Light | LED |
| Door Hinge | Right, reversible |
| Defrosting Method | Manual |
| Climate Class | SN-T |
| Number of Drawers | 6 |
| Spare Parts Availability | Yes, for 10 years |
| Repairability Index | 8.2/10 |
Frequently Asked Questions - NRK60328O GORENJE
User questions about NRK60328O GORENJE
0 question about this device. Answer the ones you know or ask your own.
Ask a new question about this device
Download the instructions for your Freezer in PDF format for free! Find your manual NRK60328O - GORENJE and take your electronic device back in hand. On this page are published all the documents necessary for the use of your device. NRK60328O by GORENJE.
USER MANUAL NRK60328O GORENJE
GB Instructions for use

Refrigerator-freezer
We thank you for the confidence you have shown by purchasing our appliance. We wish you a lot of pleasure using the appliance.
The appliance is intended solely for household use.
The refrigerator-freezer (hereinafter referred to as the appliance) consists of two parts: the upper part is the refrigerator compartment, and the lower part is the freezer compartment – freezer chest. The refrigerator compartment is intended for use in households, for storing fresh food at temperatures higher than 0° C.
The freezer is intended for use in households, for freezing fresh food and for long-term storage of frozen food (up to one year, depending on the type of food).
Important warnings .... 3
A few tips on how to save power with your refrigerator-freezer combo .... 5
Appliance description 6
Installation and connection 8
Changing the door opening direction .... 10
Operating the appliance with electronic controls .. 12
Operating the mechanically controlled appliance .... 20
Recommended food arrangement in the appliance.... 26
Storing food in the refrigerator 27
Storage of food in the FreshZone 28
Freezing fresh food and storing frozen food ..... 29
Defrosting the appliance 31
Cleaning the appliance 32
Troubleshooting 33
Information on appliance noise 35
Important warnings

- This appliance can be used by children aged from 8 years and above and persons with reduced physical, sensory or metal capabilities or lack of experience and knowledge if they have been given supervision or instruction concerning use of the appliance in a safe way and understand the hazards involved. Children shall not play with the appliance. Cleaning and user maintenance shall not be made by children without supervision.
- Before connecting the appliance, carefully read the instructions for use which describe the appliance and its correct and safe use. The instructions apply to several types / models; therefore, they may include descriptions of settings and equipment that may not be available in your refrigerator. The instructions also apply to the NO FROST version of the freezer, featuring a built-in fan and automatic defrosting.
- Remove the packaging that is intended for protecting the appliance or its respective parts during transport.
- Spacers are fitted in the corners of the doors; these should be removed and the plugs attached (only with some models) should be inserted into the openings.
- Before connecting to the power mains, the appliance should be left to stand still in upright position for at least 2 hours. Thus, operation errors due to the effect of transport on the cooling system will be much less likely to occur.
- The appliance must be connected to the power mains and grounded in compliance with the effective standards and regulations.
- The appliance may not be used outdoors and should not be exposed to rain.
- The appliance must be disconnected from the power mains (unplug the power cord from the wall outlet) before cleaning or before replacing the bulb.
- If the power cord is damaged, it should be replaced by a service technician or other authorized person.
- If the appliance is not used for a longer period of time, switch it off with the relevant button and disconnect it from the power mains. Empty the appliance, defrost it, clean it, and leave the door ajar.
- To protect the environment, dispose of the appliance after its useful life by taking it to an authorized waste collection center.
- The packaging is made of environment-friendly materials that can be recycled, disposed of, or destroyed without hazard to the environment.
• Children should not play with the appliance. - The label with basic information on the appliance is attached in the appliance interior. If the label is not in your local language, replace it with the one supplied with the appliance.
- WARNING! Ventilation openings on the appliance or built-in cupboard must be kept clean and unobstructed at all times.
- WARNING! Do not use any mechanical accessories or other methods to defrost the appliance, except for those expressly recommended by the manufacturer.
- WARNING! During installation, cleaning, and removal of appliance, be careful not to damage the insulation of the parts of the cooling system. This will also prevent pollution.
- WARNING! Do not use any electric devices inside the appliance, except for those allowed by the manufacturer of this refrigeration appliance.

The symbol on the product or on its packaging indicates that this product may not be treated as household waste. Instead it shall be handed over to the applicable collection point for the recycling of electrical and electronic equipment. By ensuring this product is disposed of correctly, you will help prevent potential negative
consequences for the environment and human health, which could otherwise be caused by inappropriate waste handling of this product. For more detailed information about recycling of this product, please contact your local city office, your household waste disposal service or the shop where you purchased the product.
A few tips on how to save power with your refrigerator-freezer combo
- Observe the installation instructions.
- Do not open the appliance door more frequently than necessary.
- Occasionally check whether air can circulate freely behind the appliance.
- Condenser unit mounted on the appliance back wall must be kept clean at all times (see section "Cleaning the appliance").
- If the seal is damaged or loose, replace it as soon as possible.
- Store your food in closed containers or other appropriate packaging.
- Before placing the food in the refrigerator, let it cool down to room temperature.
- Defrost your frozen food in the refrigerator compartment.
- Remove the freezer drawers and door as described in the instructions, in order to make use of the entire capacity.
- Defrost your conventional freezer when a frost layer approximately 3-5 millimetres thick has accumulated on the surfaces in the freezer compartment.
- Make sure the shelves are evenly distributed and that the food is arranged in a way that allows free circulation of air (heed the recommended food arrangement as described in the instructions).
- In appliances fitted with a fan, do not block the fan slots.
Appliance description
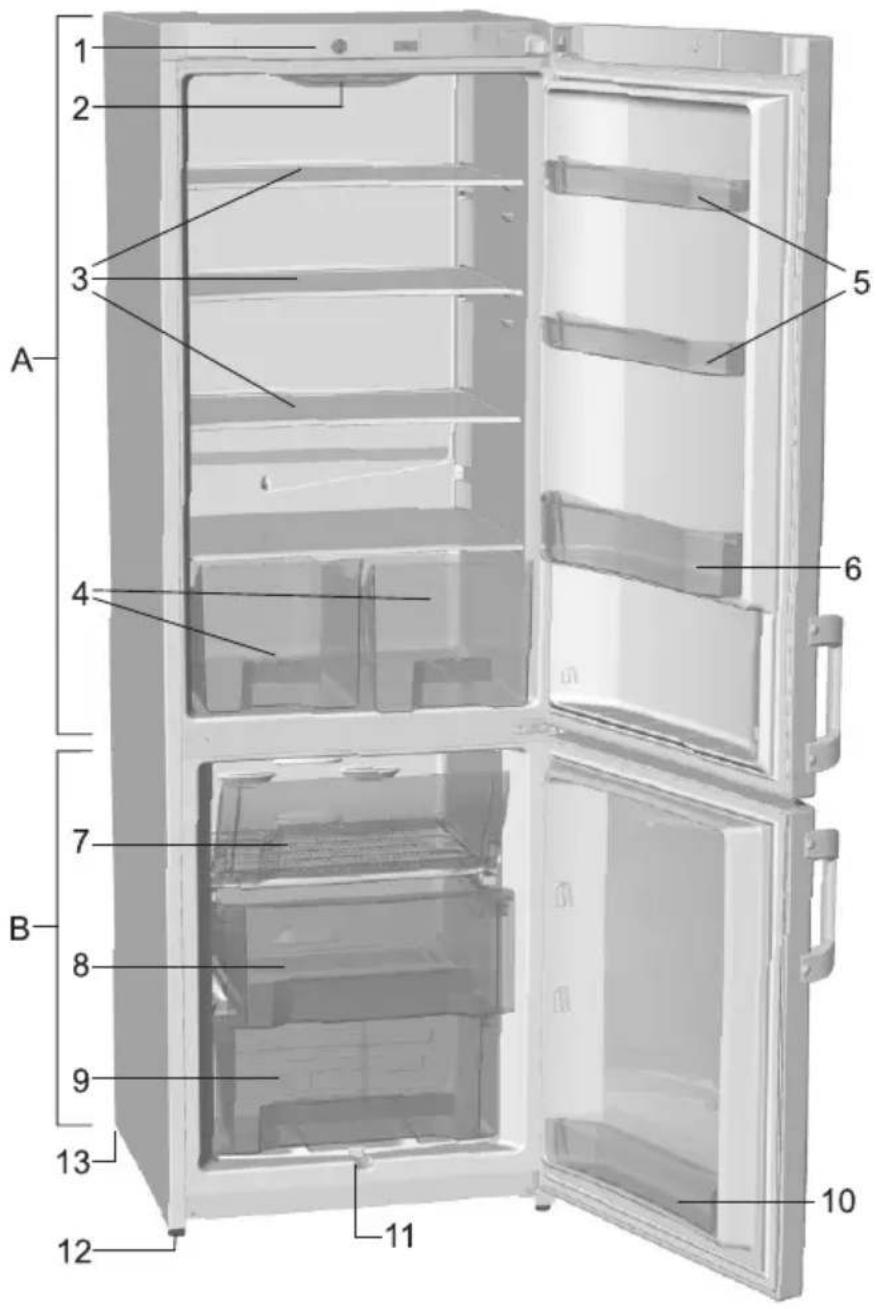
A Refrigerator compartment
1 Control unit
2 Interior illumination lamp
3 Shelf (height adjustable)
4 Fruit and vegetables
bin / drawer
5 Refrigerator door rack (deep and shallow version)
6 Bottle rack
B Standard freezer
(standard appliances)
7 Freezing drawer
8 Storage drawer
9 Storage drawer
10 Freezer door rack*
11 Water discharge groove*
12 Foot*
13 Wheel*
B NO FROST freezer
7 Storage drawer
8 Freezing drawer
9 Storage drawer
- Appliance interior equipment may change subject to appliance model.
- The drawers are protected against pulling out. If you wish to remove a drawer, pull it out as far as it will go, then lift its front part and pull it out completely.
* Only with some models.

A Refrigerator compartment
1 Control unit
2 Interior illumination lamp
3 Shelf (height adjustable)
4 Fruit and vegetables
bin / drawer
5 Refrigerator door rack (deep and shallow version)
6 Bottle rack
B Standard freezer
(standard appliances)
7 Freezing drawer
8 Storage drawer
9 Storage drawer
10 Freezer door rack*
11 Water discharge groove*
12 Foot*
13 Wheel*
B NO FROST freezer
7 Storage drawer
8 Freezing drawer
9 Storage drawer
- Appliance interior equipment may change subject to appliance model.
- The drawers are protected against pulling out. If you wish to remove a drawer, pull it out as far as it will go, then lift its front part and pull it out completely.
* Only with some models.
Installation and connection
Selecting the room
- The appliance should be installed in a dry and well ventilated room. The appliance will operate correctly if the environment temperature is within the ranges listed in the table below. The appliance class is indicated on the label with the basic information on the appliance.
| Class Temperature | |
| SN (subnormal) from | +10°C to +32°C |
| N (normal) from +16°C | C to +32°C |
| ST (subtropical) from | +16°C to +38°C |
| T (tropical) from +16°C | C to +43°C |
Installing the appliance

Appliance installation should be carried out by at least two persons to avoid any physical injury or damage to the appliance.
- The appliance should stand firmly in an upright position on a sufficiently solid base. At the front, the appliance is fitted with two adjustable legs that can be used to level the appliance (only with some models). Rear side of the appliance is fitted with wheels (certain models only) facilitating the positioning of the appliance at the preselected place.
- If there is a kitchen furniture element above the appliance, there should be a clearance of at least 5 centimeters between this element and the refrigerator, to ensure sufficient cooling of the condenser unit.
- Two spacers attached to the appliance must be fitted onto the upper edge of the condenser, thus preventing the appliance from being installed too close to the wall (only some models have it). Spacers are manufactured for all-purpose function depending on the distance of the condenser from the appliance. Therefore turn spacers correspondingly and fix them to the appliance.

- Do not expose the appliance to direct sunlight and do not place it near sources of heat. If this cannot be avoided, install an insulation panel.

- Handles are fitted under the housing at the front side to make moving the appliance easier (only with some models). The appliance may stand freely or it can be placed next to a kitchen furniture element or a wall. Mind the space required to open the door and pull out the drawers and shelves (see installation diagram).

Remark:
* Applies to OLD TIMER appliances.
- Use the power cord to connect the appliance to the power mains. The wall outlet should be fitted with a ground contact (safety socket). Nominal voltage and frequency are indicated on the label with basic information on the appliance.
- The appliance should be connected to the power mains and grounded in compliance with the relevant effective standards and regulations.
The appliance will withstand short-term deviations from the nominal voltages, but not more than from -6 % to +6%.
Connecting the appliance
Changing the door opening direction
Version I
Tools required: ring spanner (box-end wrench) No. 8, screwdriver, torx25, flathead screwdriver
- Use a flathead screwdriver to remove the hole plugs/covers A and B1.
- Unscrew and remove – one by one, in the specified order from top to bottom – the hinges (C, D, and E1) and the door (F, G). Make sure the door is not damaged.
- Move the hole plugs / covers (H) to the opposite side.
- Attach the lower hinge (E2, supplied in a bag) to the opposite side of the housing and add the washer (I).
- Upper door (F): Move the upper hinge (C) with the bearing (J) to the opposite side. Remove the door stopper with the hinge (K1) and attach a symmetrical door stopper (K2, supplied in a bag) to the opposite side.
- Lower door (G): move the hinges (L) and the cover (M) to the opposite side.
- Install / attach, from bottom up, the hinges (D, C) and doors (G, F). Do not forget to install the washers in the same way they were installed before disassembling (I).
- Install the covers A and B2 (cover B2 from the supplied bag).
- Replacing the handle: remove the hole plugs/covers, unscrew the screws and attach the handle to the opposite side. Insert the plugs into the holes on the opposite side.
Save the elements B1, E1, and K1 in case you need them to change the door opening direction again at a later time.

Version II


Changing the door opening direction
Required tools: socket spanner nr. 8, screwdriver, torx 25.
Caution! After unscrewing of before fi xing hinges, hold the door to prevent it from falling and damaging.
-
Remove upper hinge cover (save it for eventual later use), remove also the cover on the opposite side of the upper hinge cover (on the opposite side you will insert the attached cover during the assembly), and remove the cover on the opposite side of the upper part of the door.
-
Unscrew upper hinge screws and remove the upper door from the middle hinge.
-
On the bottom side of the upper door unscrew the swing stopper screws and remove the stopper (A). Keep this for eventual use later on. Fix the attached stopper with its bearing on the opposite side of the door.
-
Unscrew the forced door closure system (B) and fix it to the opposite side of the door (certain models only).
-
Unscrew middle hinge screws, remove the door from bottom hinge.
-
Loosen the screws fixing the leg supports (certain models only), then continue the procedure either under cf. 7 or 7.1, depending on the model of the appliance.
-
Tilt the appliance backward (max. 35°) to lean to the rear side of the cabinet. Unscrew the leg support screws (C) - left and right, and remove the leg support cover (D) and place it to the opposite side. Unscrew and remove, then reciprocally replace the position of end switch (E) and decorative peg (F) (for models with forced door closing system). Unscrew three screws fi xing the bottom hinge (save the hinge for later use), and fi x the attached bottom hinge on the opposite side.
7.1. Tilt the appliance backwards (max. 35°) to lean on the housing at the back.
Loosen three screws holding the bottom hinge (save the hinge for eventual subsequent door swing change). On the opposite side affi x the attached bottom hinge. Plug the holes left after the replacement with relevant pegs.
-
Repeat the procedure 3 and 4 on the bottom door. In case there is no bottom door limit peg, transfer the bearing (G) and washer to the opposite side of the door.
-
Proceed with the assembly procedure in opposite sequence.
Remark:
- At OLD TIMER appliances alteration of door opening direction is not possible.
Operating the appliance with electronic controls
CONTROL UNIT I

A Temperature setting knob, turn on/off, and SF/SUPER
CONTROL UNIT II


A Temperature setting and on/off button
B Signal light: on when the appliance is in operation
C Refrigerator sound alarm acknowledgement button
D Signal light: flashes if refrigerator temperature is too high
E Freezer boost button
F Signal light: on when freezer boost function is activated
G Digital refrigerator temperature display displays actual temperature in the appliance in the range from +1°C to +9°C*
* Only with some models.
No Frost sign – only with some models
Switching the appliance on / off


Selecting the temperature in the appliance


To switch on the appliance, rotate the A dial towards the max position.
Signal light B will light up (only with some models).
The appliance is switched off when the position of the recess on the dial is aligned with the ⏻ sign (there is still voltage in the appliance).
- Set the desired refrigerator temperature by rotating the A dial in the interval from min to max.
- Recommended setting is at the eco position.
- Settings towards max position correspond to lower (cooler) refrigerator temperature and settings towards the min position mean higher temperature (warmer).
- If the temperature of the room in which the appliance is installed is lower than 16°C, we recommend setting the thermostat dial to the max position.

Freezer boost


- If your appliance is fitted with a digital display, it will flash while changes are made to the temperature setting and the currently set temperature will be indicated. When the flashing stops, the setting is saved and automatically stored. When the appliance is switched on for the first time, temperature +9°C is displayed and display fl ashes. This value is displayed until temperature in the refrigerator drops below this value. Then, the flashing will stop and the actual temperature in the refrigerator will be displayed.
- Use this setting after switching on the appliance for the first time, before cleaning, or when inserting a large amount of food into the freezer. If the function is not deactivated manually, it will be deactivated automatically after approximately two days.
High refrigerator temperature alarm

Digital display
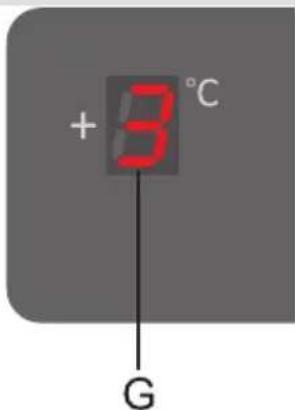
If the temperature is too high, acoustic alarm will be activated (intermittent beep) and the D signal light will flash. In models with a display unit, temperature display (+9°C) will flash as well. The alarm will be switched off automatically as soon as the temperature in the fridge drops to a level that no longer presents spoilage hazard.
- When the appliance is switched on for the first time, there is a 24-hour delay in temperature alarm operation to allow the appliance would to reach an adequate temperature. Thus, unnecessary activation of alarm is prevented.
- Acknowledge and turn off the acoustic alarm by pressing the C key.
- The acoustic alarm will be activated every 24 hours if the temperature in the refrigerator is not low enough and there is danger of food spoilage.
- Signal light D will be switched off automatically when the appliance cools down to a suitable temperature.
Displays actual temperature in the refrigerator (positive singledigit number). While changes are made to the set temperature, the display will flash and indicate the current setting. The display will also flash if the refrigerator temperature is too high and represents food spoilage hazard.
CONTROL UNIT III
Appliance with a valve and temperature display

A Refrigerator / freezer compartment selector switch
B Signal light: on when the appliance is in operation
C Freezer sound alarm acknowledgement key
D Signal light: flashes if freezer temperature is too high
E On/off and temperature control key
F Signal light: on when freezer boost function is activated
G Digital temperature display: displays actual temperature from +1 °C to +9°C for the refrigerator compartment and -16°C to -24°C (and SF) for the freezer compartment
Refrigerator / freezer selector

Use the A switch to select the compartment whose temperature you would like displayed and for which you would like to set the temperature using the E key. When selecting a compartment, make sure the recess on the dial is aligned with the indicated area.
Switching the appliance on/off and setting the temperature

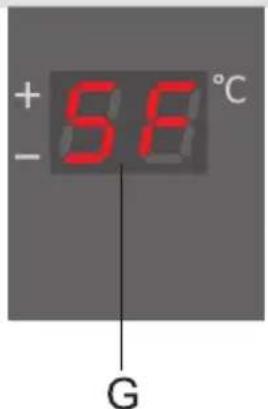
Switching the appliance on/off
Use the A switch to choose the freezer compartment. Then, press and hold (for three seconds) the E key to switch on the appliance. Both the refrigerator and the freezer compartment will be switched on. When the appliance is on, the B signal light will also be on. If the E key is pressed and held for three seconds again, the entire appliance will be switched off.
Switching the refrigerator on/off
The models with the temperature display allow switching off the refrigerator while the freezer continues to operate.
First, switch on the entire appliance. Then, select the refrigerator compartment using the A switch. Press and hold the E key for three seconds to switch off the refrigerator. When the E key is pressed and held for three seconds again, the refrigerator will be switched on again.
Setting the temperature in the appliance
Use the A switch to select refrigerator / freezer and press the E key to set the desired temperature. The settings are changed in circle, incrementally from maximum to minimum value (or to "super freeze" – freezer boost function for the freezer). When the desired temperature is set, the setting is automatically saved after fi ve seconds and the current temperature in the selected compartment is displayed.
Super freeze – freezer boost
Use the A switch to select the freezer compartment. Briefly press the E key several times until SF is selected and wait for five seconds until the F light will light up.
If this setting is not deactivated manually, it will be activated automatically (after approximately two days).
Use this setting after switching on the appliance for the first time, before cleaning, and when inserting major quantities of food into the freezer.
High freezer temperature alarm

Digital display

If the temperature inside the refrigerator is too high, an acoustic alarm will be activated (intermittent beep) and the signal light D will flash.
- Deactivate the alarm by pressing the C key. Signal light D will go off when the freezer temperature drops to a level that no longer presents food spoilage hazard.
- Acoustic alarm will be activated every 24 hours if the freezer temperature is still not low enough and there is danger of food spoilage. Sound alarm will be deactivated automatically when the freezer temperature drops to a level that no longer presents food spoilage hazard.
- After switching on the appliance for the first time, there is a 24-hour delay in the temperature alarm operation to allow the freezer to reach the set temperature and to prevent unnecessary alarm activation.
Displays actual temperature in the refrigerator (positive single digit number) or in the freezer (negative two-digit number). While the temperature is being set, the display will flash, indicating the currently selected setting. The display will also flash when the freezer temperature rises to a critical level that presents food spoilage hazard.
Operating the mechanically controlled appliance
CONTROL UNIT IV
Appliance with Dual Compressor System


A Temperature setting and on/off knob for the freezer compartment
B Temperature setting and on/off knob for the refrigerator compartment
C Lighting on/off key
D Red LED: excessive temperature warning
Turning the appliance on/off

Turning on the freezer: rotate the thermostat knob A in clockwise direction towards the Max position.
Turning off: rotate the A knob back until the arrow is aligned with the ⏻ symbol (the appliance is still powered).

Turning on the refrigerator: rotate the thermostat knob B in clockwise direction towards the Max position.
Turning off: rotate the B knob back until the arrow is aligned with the ⏻ symbol (the appliance is still powered).
Setting the temperature in the appliance

Set the temperature in the freezer compartment by rotating the A knob from Mix. to Max position. In order to set the refrigerator compartment temperature, rotate the B knob between Min and Max position.
- Recommended setting for both thermostat knobs is halfway between the Min and Max mark.
- A change in the environment temperature will also affect the temperature in the appliance. Hence, thermostat knob setting should be adjusted accordingly. Settings closer to the Max mark correspond to lower temperatures in the appliance (cooler air) and settings closer to the Min position correspond to higher temperatures.
- Red LED (D) will light up when the temperature in the freezer compartment rises to a level that may be detrimental to the food; it will go off as soon as the temperature drops to a safe level (see “Troubleshooting”).
CONTROL UNIT V
Appliance with a single compressor, without a fan

A Temperature setting and on/off knob
B Illumination on/off button
Appliance with a single compressor, with a fan


A Temperature setting and on/off knob
B Illumination on/off button
Turning the appliance on/off

Turn on: rotate the thermostat knob A in clockwise direction towards the Max position.
Turn off: rotate the thermostat knob A back into a position where the arrow is pointing at the symbol ⏻ (in this case, the appliance is still powered).

Setting the appliance temperature

- Set the desired refrigerator compartment temperature by rotating the A knob so that the arrow is pointing to a position between the Min. and Max. sign.
- The setting recommended by the manufacturer is in the middle, between the Min and Max signs.
- Any change in the environment temperature will affect the temperature inside the appliance. Hence, thermostat setting should be adjusted in such cases. Setting the thermostat to a position closer to the Max sign increase the temperature (cooler); setting it to a position closer to the Min sign will decrease the temperature (warmer).
- If the temperature of the environment in which the appliance is installed is lower than 16° C, we recommend setting the thermostat button to the Max. position.
Fan
(only with some models)
- The fan contributes to more equal distribution of temperature and faster cooling, as well as reduces formation of dew on the shelves. It only operates when the compressor is activated.
- Turning on the fan is recommended as an additional function in the following cases:
- increased temperature in the room (over 30°C),
- increased humidity (during the summer),
- when inserting larger quantities of food (rapid cooling).
- Turning the fan on / off
ON = OFF = 0


When the fan is on, a red dot is indicated on the switch.
Note: When the fan is activated, power consumption is increased and temperature in the refrigerator drops.
Hence, we recommend resetting the temperature in the appliance: - when the fan is activated: between "Min" and ✉ (dashed line), - without the fan: area between ✉ and "Max".

Temperature setting for the refrigerator also affects the temperature in the freezer compartment.
Recommended food arrangement in the appliance
Recommended food arrangement in the appliance
Refrigerator compartment areas:
- upper area: canned / preserved food, bread, wine, pastry, etc.
- medium area: dairy products, ready-to-eat meals, deserts, juices, beer, cooked food, etc.
- lower area: meat, meat produce, delicatessen, etc.
- vegetable drawer / bin: fresh fruit, vegetables, salads, root vegetables, potatoes, onions, garlic, tomatoes, tropical fruit, sauerkraut, turnips, etc.
Refrigerator door areas:
- upper / medium part: eggs, butter, cheeses, etc.
- lower part: beverages, cans, bottles, etc.
Freezer parts:
- door area: packed vegetables, ice cream, ice, etc.
- other areas: freezing, storing frozen food (see "Freezing and storing frozen food").
![graph TD A["Raw Materials"] --> B["Packaging"] B --> C["Processing"] C --> D["Storage"] D --> E["Finished Foods"] style A fill:#f9f,stroke:#333 style B fill:#ccf,stroke:#333 style C fill:#cfc,stroke:#333 style D fill:#fcc,stroke:#333 style E fill:#cff,stroke:#333](/content/2026/07/1515035/images/7e5e97a9ccd127da0767f67139e48e13e951bd35feec49649d278333bf42a57f.jpg)
Storing food in the refrigerator
Important warnings on food storage
⚠️ Appropriate use of the appliance, appropriate food packaging, maintaining the appropriate temperature and observing the hygienic guidelines will affect decisively the quality of food storage.
Observe the best before dates indicated on the product packaging.
Food stored in the refrigerator should be placed in closed containers or otherwise suitably packed to prevent emitting scent and moisture.
Do not store infl ammable, volatile, and explosive substances in the refrigerator.
⚠️ Bottles with high alcohol content should be tightly sealed and stored in an upright position.
Some organic solutions, essential oils in lemon and orange peel, butter acid, etc. may damage the plastic surfaces in case of a prolonged contact, causing premature ageing of these materials.
⚠️ Unpleasant smell warns of poor appliance cleanliness or deteriorated food (see Cleaning and Maintenance).
⚠️ Remove perishables from the refrigerator before a longer period of absence from home.
Refrigerator interior equipment

The equipment depends on the models.
- The shelves can be inserted to any of the shelf guides in the refrigerator interior. They are protected against pulling out. To remove a shelf from the refrigerator, lift is slightly at the front, tilt as required, and pull it out. Food that perishes quickly should be kept at the back of the shelf where the temperatures are lower.
- Certain models are equipped with wire bottle rack which enables placing of bottles on the cork. It is safeguarded against pulling out. It may be pulled out only if empty, by lifting the front part and pulling it towards you. Place the bottle rack in the appliance in such way to avoid obstruction of door closing by the length of the stacked bottles.
Maximum load of the rack is 9 bottles of 0,75 l, or 13 kg of total mass - see label at the right side of the interior of the appliance.
- The bin / drawer at the bottom of the refrigerator compartment, under the glass shelf, is intended for storing fruit and vegetables. It provides humidity, thus preventing the food from dehydrating. The food must be appropriately packaged in order to prevent emitting or receiving smell and moisture.
Food storage time
- Interior side of the refrigerator door is fitted with racks and bins intended for storing cheese, butter, eggs, yoghurt, and other smaller packages, tubes, cans, etc. The lower part of the door is fitted with a bottle rack.
- The rack fitted on the interior side of the freezer compartment door (only with some models) is intended for storing frozen food that is used often and requires quick access (ice cream, open packages of frozen vegetables, etc.).
Recommended storage time for the refrigerator
| Foodsmoked Time | |
| eggs, marinated meat, smoked meat up to 10 days | |
| cheese up to 10 days | |
| root vegetables up to 8 days | |
| butter up to 7 days | |
| deserts, fruit, ready-to-eat dishes, raw meat chunks | up to 2 days |
| fi sh, raw chopped meat, seafood up to 1 day | |
Storage of food in the FreshZone

The FreshZone drawer provides storage of wide selection of fresh food longer than in the traditional refrigerator. Food remains fresh for long time and it preserves its taste and nutritive ingredients. It reduces decay and loss of mass, so fruit and vegetables are more fresh and natural. The drawer must be tightly closed to provide optimum operation.
- Moisture level in the drawer depends upon the moisture of stored food, and on the frequency of opening the drawer.
- When you buy food check its freshness: quality and durability of food depends on it.
- Store non-wrapped animal or vegetable food separately, or wrap it in suitable packages. Be careful to prevent touching of different types of meat. They should be packed and stored separately to avoid bacterial decomposition in case meat turns foul.
- Approximately 30-60 minutes prior use remove food from the drawer to let its aroma and taste develop at ambient temperature.
- Food sensitive to low temperatures is not suitable for storage in the FreshZone drawer: pineapple, avocado, bananas, olives, potato, eggplant, cucumber, beans, bell pepper, melons, water melons, pumpkins,...
Freezing fresh food and storing frozen food
Freezing procedure


Maximum quantity of fresh food that can be introduced into the appliance at a time is indicated on the label with basic information on the appliance. If this quantity is exceeded, freezing quality will deteriorate, as will the quality of the already frozen food.
- 24 hours before freezing fresh food, activate the super freeze (freezer boost) function:
- control unit I: rotate the dial A to position SF/SUPER,
- control units II and III: Press the E key (signal light F will light up),
- control unit IV: rotate the dial A to position SF/ * ,
- control unit V with and without fan: rotate the dial A to a position between min and max with the fan switched off.
After 24 hours, place the fresh food into the freezer, as follows:
- NO FROST appliances: place the food into the middle section of the freezer compartment;
- standard appliances: place the food into the upper section of the freezer compartment.
Fresh food should not be in contact with the packages of already frozen food!
In NO FROST freezers, there should be a sufficient clearance just under the upper wall in order to allow air circulation.
Therefore, do not place any food higher than the indicated level (see figure).
- When freezing minor quantities of food (1-2 kg) the super freeze setting is not required
- After 24 hours, the food can be relocated to other freezer compartment areas or drawers and the freezing process may be repeated with new food if required.
- When the freezing process is complete, rotate the dial A back to the desired setting (control units I, IV and V).
- To use the entire freezer compartment volume, remove the middle drawer. In standard appliances with energy efficiency class A+++ , remove all three drawers.
Important warnings on freezing fresh food
The freezer should only be used for freezing food that is appropriate for freezing. The food should always be fresh and of adequate quality.
Choose an appropriate packaging for the food and package it correctly.
The packaging should be airtight and watertight to prevent loss of humidity or vitamins from the food.
⚠️ Indicate the type of food, quantity, and freezing date on each food package.
It is important that the food is frozen as quickly as possible; therefore, smaller packages should be preferred. Before freezing, the food should be cooled.
- When storing or using frozen food, observe the manufacturer's instructions. Temperature and best before date are indicated on the packaging.
- Only choose food with undamaged packaging, stored in freezers at temperatures of -18°C or lower.
- Do not buy a food package covered with frost, as this is a sign that the food has been slightly thawed several times. Such food is of lesser quality.
- When transporting frozen food, prevent it from defrosting / thawing. Higher temperature will result in shorter storage time and deteriorated food quality.
Storing pre-frozen food
Storage times for frozen food
Recommended time for storage in the freezer
| Food Time | |
| fruit, beef from 10 to 12 months | |
| vegetables, veal, poultry from 8 to 10 months | |
| venison from 6 to 8 months | |
| pork from 4 to 6 months | |
| chopped, dice, or ground meat 4 months | |
| bread, pastry, ready-to-eat meals, lean fi sh | 3 months |
| tripes / innards 2 months | |
| smoked sausage, fatty fi sh 1 month |
Defrosting frozen food
Microorganisms are not destroyed by freezing. After defrosting, their activity is resumed intensively and the food may perish quickly. Therefore, use the thawed food as quickly as possible. Partial thawing decreases the nutritive value of the food, particularly fruit, vegetables, and ready-to-eat food.
Defrosting the appliance
Automatic refrigerator defrosting
The refrigerator does not require defrosting, as ice accumulated on the back wall of the refrigerator compartment interior is melted automatically.
The accumulated ice is thawed when the compressor is not operating. The drops will drip through the opening in the refrigerator back wall into a container above the compressor, from where they will evaporate.
Defrosting a conventional freezer

If an excessive layer of ice is accumulated on the refrigerator back wall (3-5 mm), the appliance should be disconnected and defrosted manually.
- The freezer should be defrosted when approximately 3-5 mm of frost is accumulated.
- 24 hours before defrosting, activate the super freeze (freezer boost) function to additionally cool the food (see section "Freezing process").
After 24 hours, remove the frozen food from the freezer and protect them from thawing.
- Disconnect the appliance – rotate the thermostat knob A (and B) to the ⏻ position and unplug the power cord from the wall outlet.
- Pull out the drain trough on the bottom of the freezer and place a container under it to collect the water from thawed ice and frost.
- Do not use electrical appliances to defrost the appliance (hairdryer etc.);
- When defrosting the refrigerator, do not use any defrosting sprays as these may damage the plastic surfaces or harm your health.
- Clean the appliance interior and wipe it dry (see cleaning the appliance).
- Before putting the food back into the freezer, connect the appliance to the power mains and rotate the A button back to the desired setting.
- The NO FROST freezer is defrosted automatically. Occasional occurrence of frost will be eliminated automatically..
Defrosting a NO FROST freezer
Cleaning the appliance


Before cleaning, disconnect the appliance from the power mains – rotate the thermostat knobs A (and B) to position ⏻ and unplug the power cord.
- Use a soft cloth to clean all surfaces. Cleaners containing abrasive particles, acids, or solvents, are not appropriate as they will damage the surface.
Clean the appliance exterior with water or a mild solution of suds.
Lacquer-coated and aluminum surfaces can be cleaned with lukewarm water to which some mild detergent was added.
Cleaning agents with minor alcohol content are also acceptable (e.g. window cleaners).
Cleaners with alcohol content are not allowed for cleaning plastic parts.
Clean the appliance interior with lukewarm water to which you may add some vinegar.
- Placed under the cooling board that cools the refrigerator interior are a trough (groove) and an opening through which melted water is discharged from the appliance interior. The through and the opening should never be blocked; therefore, check them often and clean as required (e.g. using a plastic straw).
- Frost and ice accumulated in a layer of 3-5 mm will cause an increase in power consumption; therefore it should be removed regularly (this does not apply to the NO FROST freezer). Do not use any sharp objects, solvents, or sprays.
- Condenser unit on the back of the refrigerator should always be kept clean, free of dust or deposit from kitchen smoke. Use a soft non-metal brush or a vacuum cleaner to clean the dust periodically.
- Also clean the container above the refrigerator compressor. If it was removed for cleaning, replace it afterwards. Make sure the container is in a horizontal position!
• After cleaning, switch on the appliance and put the food back in.
Troubleshooting
| Problem: Cause or remedy: | |
| After connecting to the power mains, the appliance does not operate: | Make sure the wall outlet is powered and that the appliance is plugged in. |
Cooling system has been working continuously for a long period of time: | Too high environment temperature. |
| Door is open too often or it is left open too long. | |
| Door is not closed appropriately (there may be dirt between the door and the refrigerator, the door may be tilted, the seal should be checked, etc.). | |
| Too much fresh food was inserted. | |
| The sensor in the refrigerator (A) is blocked by fresh food.Make sure the air can circulate around the sensor (only with some models). | |
| Insuffi cient compressor and condenser cooling. Check the air circulation behind the appliance and clean the condenser. | |
| Excessive build-up of ice on the back wall of refrigerator interior may result from the following: | Door is opened to often or it is left open too long. |
| Warm food was placed in the refrigerator. | |
| Food or a container are in contact with the refrigerator interior back wall. | |
| Poor door sealing. If the seal is dirty or damaged, clean it or replace it. | |
| Water is dripping from the refrigerator: | Blocked water discharge opening; or water from thawed ice is dripping past the water collection trough. |
| Clean the blocked opening, e.g. using a plastic straw. | |
| If the layer of ice is too thick, defrost the appliance annually (see “Defrosting the appliance”). | |
| Signal light D flashes: | Door is opened too often or too long. |
| Door not closed properly (foreign object between the door and the housing, tilted door, damaged seal, etc.) | |
| A longer power failure. | |
| Too much fresh food inserted at the same time. | |
| Door won't open easily: • If you wish to open freezer door immediately or shortly after closing it, you may feel rather strong resistance. When the freezer door is opened, some cool air escapes from the freezer compartment and it is replaced by warm air from the environment. When this air is cooled, a sub-pressure builds up, causing resistance to door opening. After a few minutes, the condition is normalized and the door can be easily opened again. | |
| Replacing the bulb: • Before replacing HC8W] | • Before replacing the bulb, disconnect the appliance from the power mains (unplug the power cord from the wall outlet / socket). Remove the cover using a screwdriver, replace the bulb with a new one (E14, same power rating as the one provided by the manufacturer) and replace the cover. |
| • Do not dispose of the blown bulb with organic waste. | |
| • The bulb is considered a consumable and is excluded from any warranty! | |
| • Bulb lamps used in this appliance are special purpose lamps selected for household appliances use only. They are not suitable for household room illumination. | |
| Signal light B is flashing: | • If the signal light B is flashing, call a service technician. |
| Error code displayed (certain models only): | • If the character E appears on the digital display (certain models only), call service assistance. |
If none of the above reasons seems to match your problem, please contact the nearest service center and state the type, model and serial number as indicated on the label with basic information attached in the appliance interior.
Information on appliance noise
Cooling in the refrigerators-freezers is enabled by a cooling system with a compressor (with some appliances also a fan), which emits a certain level of noise during operation. The level of noise depends on installation, proper use, and appliance age.
- After appliance startup, the compressor may be somewhat louder (fluid noise, noise caused by refrigerant flowing through the system). This is not a sign of malfunction and it will not affect the appliance useful life. Eventually, the level of this noise will be reduced.
- Occasionally, sudden or louder noise may appear during appliance operation, which will appear uncommon; these are mostly the result of improper installation:
- The appliance must be placed horizontally and firmly on a solid base.
- The appliance should not be in contact with the wall or adjacent elements.
- Make sure the appliance interior equipment is appropriately fitted and that the noise is not caused by vibrating cans, bottles, or other containers in contact with each other.
WE RESERVE THE RIGHT TO CHANGES THAT TO NOT AFFECT THE APPLIANCE FUNCTIONALITY.
Instructions for use of the appliance can also be found on our website at www.gorenje.com / http://www.gorenje.com /
HZS3567
HZS3567F
HZS3567AFV
HZS4066AFV
HZS4066F
HZF3261AF
HZF3267A
HZF3767AF
HZF3767AFV
HZOS3567
HZOS4066
COMBI BASIC
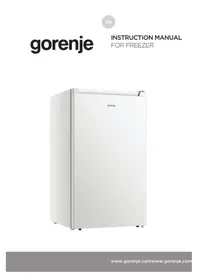

- GB INSTRUCTIONS FOR USE
- THE APPLIANCE IS INTENDED SOLELY FOR HOUSEHOLD USE
- IMPORTANT WARNINGS
- A FEW TIPS ON HOW TO SAVE POWER WITH YOUR REFRIGERATOR-FREEZER COMBO
- APPLIANCE DESCRIPTION
- A REFRIGERATOR COMPARTMENT
- B STANDARD FREEZER
- (STANDARD APPLIANCES)
- B NO FROST FREEZER
- INSTALLATION AND CONNECTION
- SELECTING THE ROOM
- INSTALLING THE APPLIANCE
- REMARK
- CONNECTING THE APPLIANCE
- CHANGING THE DOOR OPENING DIRECTION
- VERSION I
- TOOLS REQUIRED: RING SPANNER (BOX-END WRENCH) NO. 8, SCREWDRIVER, TORX25, FLATHEAD SCREWDRIVER
- VERSION II
- REQUIRED TOOLS: SOCKET SPANNER NR. 8, SCREWDRIVER, TORX
- OPERATING THE APPLIANCE WITH ELECTRONIC CONTROLS
- CONTROL UNIT II
- HIGH REFRIGERATOR TEMPERATURE ALARM
- DIGITAL DISPLAY
- CONTROL UNIT III
- SWITCHING THE APPLIANCE ON/OFF AND SETTING THE TEMPERATURE
- SWITCHING THE APPLIANCE ON/OFF
- SWITCHING THE REFRIGERATOR ON/OFF
- SETTING THE TEMPERATURE IN THE APPLIANCE
- SUPER FREEZE – FREEZER BOOST
- HIGH FREEZER TEMPERATURE ALARM
- OPERATING THE MECHANICALLY CONTROLLED APPLIANCE
- CONTROL UNIT IV
- TURNING THE APPLIANCE ON/OFF
- CONTROL UNIT V
- FAN
- RECOMMENDED FOOD ARRANGEMENT IN THE APPLIANCE
- REFRIGERATOR COMPARTMENT AREAS
- REFRIGERATOR DOOR AREAS
- FREEZER PARTS
- STORING FOOD IN THE REFRIGERATOR
- THE EQUIPMENT DEPENDS ON THE MODELS
- FOOD STORAGE TIME
- STORAGE OF FOOD IN THE FRESHZONE
- FREEZING FRESH FOOD AND STORING FROZEN FOOD
- FREEZING PROCEDURE
- IMPORTANT WARNINGS ON FREEZING FRESH FOOD
- STORING PRE-FROZEN FOOD
- STORAGE TIMES FOR FROZEN FOOD
- DEFROSTING FROZEN FOOD
- DEFROSTING THE APPLIANCE
- AUTOMATIC REFRIGERATOR DEFROSTING
- DEFROSTING A CONVENTIONAL FREEZER
- DEFROSTING A NO FROST FREEZER
- CLEANING THE APPLIANCE
- TROUBLESHOOTING
- INFORMATION ON APPLIANCE NOISE
Brand : GORENJE
Model : NRK60328O
Category : Freezer