
imageFORMULA DR-3060 - Scanner CANON - Free user manual and instructions
Find the device manual for free imageFORMULA DR-3060 CANON in PDF.
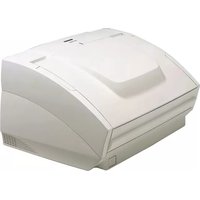


| Product Type | Document Scanner |
| Model | imageFORMULA DR-3060 |
| Dimensions (W x D x H) | 313 x 375 x 180 mm (12.3 x 14.8 x 7.1 in) |
| Weight | Approx. 4.5 kg (9.9 lb) |
| Power Supply | AC 100-240 V, 50/60 Hz |
| Scanning Speed | Up to 60 ppm / 120 ipm (300 dpi, A4) |
| Optical Resolution | 600 dpi |
| Document Feed | Automatic Document Feeder (ADF) with 80-sheet capacity |
| Scanning Modes | Color, Grayscale, Black-and-White |
| Double-Feed Detection | Ultrasonic sensor |
| Interface | USB 3.2 Gen 1 (USB 3.0) |
| Supported Media | Paper up to 34 x 396 mm (1.3 x 15.6 in) |
| Daily Duty Cycle | Up to 6,000 scans per day |
| Maintenance | Clean rollers and glass regularly; replace consumable kit (rollers, pads) |
| Safety Standards | UL, FCC Class B, CE, RoHS compliant |
| Spare Parts & Repairability | Roller kit and separation pad replaceable; easy-access design |
| Operating Environment | Temperature 10-35°C (50-95°F), Humidity 20-80% RH |
| Warranty | 1 year limited warranty (varies by region) |
| Included Software | Canon CaptureOnTouch, Scan Utility, ISIS/TWAIN drivers |
Frequently Asked Questions - imageFORMULA DR-3060 CANON
User questions about imageFORMULA DR-3060 CANON
0 question about this device. Answer the ones you know or ask your own.
Ask a new question about this device
Download the instructions for your Scanner in PDF format for free! Find your manual imageFORMULA DR-3060 - CANON and take your electronic device back in hand. On this page are published all the documents necessary for the use of your device. imageFORMULA DR-3060 by CANON.
USER MANUAL imageFORMULA DR-3060 CANON
Canon
CANON ELECTRONICS INC.
1248, SHIMOKAGEMORI, CHICHIBU-SHI, SAITAMA 369-1892, JAPAN
CANON U.S.A. INC.
ONE CANON PLAZA, LAKE SUCCESS, N.Y.11042, U.S.A.
CANON CANADA INC.
6390 DIXIE ROAD, MISSISSAUGA, ONTARIO L5T 1P7, CANADA
CANON EUROPA N.V.
BOVENKERKERWEG 59-61, P.O.BOX 2262, 1180 EG AMSTELVEEN, THE NETHERLANDS
CANON LATIN AMERICA, INC.
6505, BLUE LAGOON DRIVE, SUITE 325 MIAMI, FLORIDA 33126 U.S.A.
CANON AUSTRALIA PTY. LTD.
1 THOMAS HOLT DRIVE, NORTH RYDE, SYDNEY. N.S.W, 2113. AUSTRALIA
CANON SINGAPORE PTE. LTD.
79 ANSON ROAD #09-01/06, SINGAPORE 079906
The International ENERGY STAR Office Equipment Program is an international program that promotes energy saving through the use of computers and other office equipment. The program backs the development and dissemination of products with functions that effectively reduce energy consumption. It is an open system in which business proprietors can participate voluntarily. The targeted products are office equipment such as computers, monitors, printers, fax machines, copiers and Scanners. Their standards and logos are uniform among the participating nations.
FCC REGULATIONS (For 120V models)
This equipment has been tested and found to comply with the limits for a Class A digital device, pursuant to Part 15 of the FCC Rules. These limits are designed to provide reasonable protection against harmful interference when the equipment is operated in a commercial environment. This equipment generates, uses, and can radiate radio frequency energy and, if not installed and used in accordance with the instruction manual, may cause harmful interference to radio communications. Operation of this equipment in a residential area is likely to cause harmful interference in which case the user will be required to correct the interference at his own expense.
Do not make any changes or modifications to the equipment unless otherwise specified in the manual. If such changes or modifications should be made, you could be required to stop operation of the equipment.
RADIO INTERFERENCE REGULATIONS (For 120V models)
This digital apparatus does not exceed the Class A limits for radio noise emissions from digital apparatus as set out in the Interference-causing equipment standard entitled "Digital Apparatus", ICES-003 of the Industry Canada.
RÈGLEMENT SUR LE BROUILLAGE RADIOÉLECTRIQUE (For 120V models)
Copyright © 2001 by CANON ELECTRONICS INC. All rights reserved. No part of this publication may be reproduced, transmitted, transcribed, stored in a retrieval system, or translated into any language or computer language in any form or by any means, electronic, mechanical, magnetic, optical, chemical, manual, or otherwise, without the prior written permission of CANON ELECTRONICS INC.
Trademarks
- Microsoft, Windows and Windows NT are registered trademarks of Microsoft Corporation in the United States and/or other countries.
• ISIS is a registered trademark of Pixel Translations, a division of Captiva Software Corporation. - Intel and Pentium are registered trademarks of Intel Corporation.
Preface
Thank you for purchasing the Canon DR- 3060/3080C scanner. Be sure to read this manual thoroughly before using the scanner in order to ensure that you fully understand how to use the scanner correctly. After you have read this manual, retain it for future reference.
Caution:
Be aware of the following points when using this scanner for reproduction:
- Making duplicates of paper currency, coins, government-issued securities and other negotiable instruments is prohibited by law and subject to criminal penalties.
- Making duplicates of government-issued passports as well as licenses, permits, official documents and private documents issued by public or private institutions may also be subject to criminal penalties.
- Making duplicates of written works, music, paintings, prints, maps, drawings, movie stills, photographs and other copyrighted works is prohibited, except when done for personal and noncommercial purposes.
Notational Conventions
The symbols and indications used in this manual are explained below.
Familiarize yourself with these symbols and their meanings before reading this manual.
“(→ page 12)” means “Refer to page 12 for more details on the information.”
WARNING
This indicates a matter in which failure to follow proper procedure could result in loss of life or serious injury. In order to ensure safe operation, always observe these warnings.
CAUTION
This indicates a matter in which failure to follow proper procedure could result in serious injury or property damage. In order to ensure safe operation, always observe these cautions.
▶ Notice
This indicates important information regarding the operation of the unit that must be observed. Always read these items in order to prevent damage to the unit or physical injury.
▶ Note
This indicates supplemental information concerning the operation of the unit. Reading these notes is recommended.
Table of Contents
Preface ....1
Notational Conventions ......2
Table of Contents ...... 3
Before Using the Unit ....5
To Ensure Safe Operation 5
Installation Location 5
Power 6
Moving the Scanner 6
Notes on Normal Handling....7
Features of the DR-3060/3080C 9
Checking the Packing List ....11
Removing Protective Tape and Protective Sheet 12
Names and Functions of Parts....13
Installing the Scanner....15
Requirements....15
Installation Procedure 15
Connecting the Scanner to Your PC....16
SCSI ID and Terminator Settings 17
SCSI ID Settings 17
Terminator Setting 18
Connecting the Power Cord ....19
Turning the Power On/Off....20
Turning the Power On 20
Turning the Power Off 22
Installing the Software....23
Before Installing the software ....23
Installing the ISIS/TWAIN Driver 24
Installing CapturePerfect 26
Using the Software....27
Using the ISIS/TWAIN Driver 27
Using CapturePerfect 28
Starting CapturePerfect 28
Closing CapturePerfect 29
Using the Scanner....30
Documents ....30
Setting Up the Paper Feed Tray and the Document Eject Tray ....31
Installing the Document Eject Guide ....33
Loading a Document for Scanning....35
When Using Automatic Feed 35
When Using Manual Feed ....38
Patch Code Sheets 40
About the Patch Code Sheets....40
Functions of Patch Code Sheets 41
Using the Patch Code Sheets 41
Effective Area for Detecting Patch Code Patterns ....42
Clearing a Paper Jam 43
Regular Maintenance ....46
Cleaning the Scanner 46
Cleaning the Scanning Glass and the Rollers 47
Troubleshooting 48
Specifications....53
Index 55
Before Using the Unit
To Ensure Safe Operation
In order to ensure safe operation, be certain to read the cautions described below.
Installation Location

The performance of this unit is affected by the environment in which it is installed. Make sure that the location where the unit is installed meets the following environmental requirements.
- Provide adequate space around the unit (as indicated in the above diagram) for operation, maintenance and ventilation purposes.
- Avoid locations exposed to direct sunlight. If the unit must be placed in such a spot, hang a heavy curtain, etc., to shade the unit.
- Avoid dusty locations. Dust can get inside of the unit and cause problems.
- Avoid warm or humid locations, such as in the vicinity of a water faucet, water heater, humidifier, etc., and avoid locations where there fumes from ammonia, paint thinner, etc., may be present.
-
Avoid unstable surfaces and locations subject to vibration.
-
Avoid locations that are subject to rapid temperature changes.
Condensation inside of the unit can result in inferior image quality. Use this unit under the following environmental conditions:
Temperature: 10 degree C to 32.5 degree C
Humidity: 20% to 80% RH - Avoid locating the unit near equipment that generates electromagnetic fields, including speakers, televisions, and radios.
Power
- Before you plug the power cord into an outlet, be sure that the power source meets the requirements of the unit.
- Do not connect this unit to a power outlet that is shared with other equipment. When using an extension cord, make sure that the extension cord is rated for the current requirements of the unit.
- Do not place other objects on the power cord. Do not step on the power cord.
- Do not bundle the power cord, and do not wrap the power cord around a table or chair leg.
- Do not pull on the power cord. Always grasp the plug when unplugging the power cord.
- Do not place other objects around the outlet.
- If you have any questions concerning your local power supply, contact your dealer or your local power company.
Moving the Scanner
The scanner weighs approximately 8.1 kg. Always use two hands when moving the scanner, as shown in the illustration below.

Notes on Normal Handling

WARNING
To avoid fire and electric shock, always observe the following warnings when using this unit.
■ Do not place flammable chemicals, such as alcohol or paint thinner, near the unit.
■ Do not cut, damage, or modify the power cord. Do not place heavy objects on the power cord, do not pull on the power cord, and do not bend the power cord sharply.
■ Do not plug in or unplug the power cord with wet hands.
■ Do not multi-outlet adapters to connect multiple devices to one outlet.
■ Do not tie up or bundle the power cord. Push the plug in as far as it will go when plugging in the power cord.
■ Only use the power cord that was provided with this unit.
■ Do not attempt to disassemble or modify this unit.
■ Do not use flammable sprays near this unit.
■ Always turn the unit off and unplug the power cord before cleaning this unit.
■ To clean this unit, dampen a cloth in a mild detergent solution and then wring the cloth out thoroughly. Do not use flammable liquids to clean the unit, including alcohol, benzene, or paint thinner.
■ If the unit ever makes a strange noise, emits smoke or a strange odor, or becomes hot, or if the unit does not operate at all even though the power is on, immediately turn the unit off and unplug the power cord. Contact your dealer or service representative to have the unit serviced.
■ Do not drop, kick, or otherwise strike the unit. If the unit does somehow become damaged, immediately turn the unit off and unplug the power cord. Contact your dealer or service representative to have the unit serviced.
■ Always turn the unit off and unplug the power cord before moving this unit.
CAUTION
■ Do not set the unit up on a wobbly platform, a sloped surface, or any other type of unstable location. Do not set up the unit in a location that is subject to vibration. The unit could injure someone if it falls or tips over.
■ Do not block the ventilation openings. Doing so could cause the unit to overheat, creating a risk of fire.
■ Do not place any liquid container, such as a glass or a flower vase, on top of the unit. Do not place paper clips, staples, necklaces or any other metallic objects on top of the unit. Liquids or small metallic objects that get inside of the unit create a risk of fire or electric shock. If such foreign matter does get inside of the unit, unplug the power cord immediately, and then contact your dealer or service representative for assistance.
■ Do not set up the unit in a dusty or humid location. Doing so creates a risk of fire or electric shock.
■ Do not place heavy objects on top of the unit. The object could injure someone if it falls or tips over.
■ To prevent any risk of fire or electric shock, be sure that the power source meets the power requirements of the unit.
■ When unplugging the power cord, always grasp the plug. Pulling on the cord itself could expose or break the wires in the power cord, damaging the cord and creating a risk of fire or electric shock.
■ In order to allow you to easily unplug the power cord at any time, do not place other objects around the power outlet. Such obstacles could prevent you from unplugging the power cord quickly in an emergency.
■ Do not spill liquids or flammable chemicals (such as alcohol, paint thinner, or benzene) on the unit. Doing so creates a risk of fire or electric shock.
■ If the unit will not be used for an extended period of time, unplug the power cord for safety's sake.
■ When operating this unit, avoid wearing loose-fitting clothing, dangling jewelry, or other material that could get pulled into the unit. Injury could result. Be especially careful if you are wearing a necktie or have long hair. In the event that some article or clothing does get caught in the unit, turn the power off immediately.
■ Be careful when placing paper in the unit and when removing jammed paper. It is possible to cut your hand on the edge of a sheet of paper.
Features of the DR-3060/3080C
The main features of the DR-3060/3080C scanner are listed below.
■ Fast document feeding
Although the scanner is compact, it can rapidly scan up to forty A4 sheets (double side) per minute, and can scan documents ranging in size from business cards to B4 paper.
■ Gray scale support (DR-3060)
Documents can be scanned in 256-level gray scale.
■ Color/Gray scale support (DR-3080C)
Documents can be scanned in 24-bit color or 256-level gray scale.*
■ Supports a variety of scanning modes**
The scanner supports the following scanning modes, depending on the document type:
- Single-sided/double-sided mode
- Continuous/manual feed
■ Automatic document size detection**
The scanner automatically detects the length of a scanned document, and eliminates any unnecessary space around the edges of the document when storing the document, even when storing an irregularly sized document.
■ Automatic paper thickness adjustment
Because the scanner automatically detects and adjusts for the thickness of the paper that the document is printed on, there is no need to adjust for paper thickness beforehand.
■ Front paper feed/eject
Documents are fed into the scanner from the front and are ejected from the front, making the scanner easy to use and allowing more flexibility in choosing a location to set up the scanner.
■ Compact size
The scanner is extremely compact, 13.5W x 10.9D x 7.5H in. (344W x 278D x 191H mm).
■ Dropout color (DR-3080C)
The scanner is equipped with a "dropout color" function that allows you to specify a color for the scanner to omit from scanned images. (This function is only available on the front side of a page.)
■ Deskew
The deskew function automatically straightens an image if the document was loaded askew. (This correction is made by the ISIS/TWAIN driver.)
■ Text enhanced mode
The scanner is equipped with a "text enhanced" mode that allows you to clearly scan text printed on a dark background, and text that is written in faint pencil. (This function is implemented by the ISIS/TWAIN driver.)
■ "Skip blank page" function
The scanner is equipped with a "skip blank page" function that allows it to scan a document regardless of whether every page is double-sided or single-sided. (This function is implemented by the ISIS/TWAIN driver.)
■ Pre-scan function
The scanner is equipped with a pre-scan function that allows you to adjust the contrast and brightness of a pre-scanned image and then sends the adjusted image to the application software, without needing to scan the document again. In black and white (binary) mode, the intensity of the pre-scanned image can be adjusted. (This function is implemented by the ISIS/TWAIN driver.)
■ Auto Start
The scanner is equipped with an auto start function that automatically initiates scanning when a document is placed in the paper feed tray.
■ Compatible with carbonless duplicating paper
The scanner is able to scan carbonless duplicating paper.
■ Power-saving feature
The scanner has a power-saving feature that puts the scanner in low-power mode after it has been idle for a certain period of time.
* Only the top side of documents can be scanned in 24-bit color. With double-sided scanning, the bottom side is scanned in 256-level gray scale even if 24-bit color scanning is selected.
** Available when using applications that support these functions.
Checking the Packing List
The contents of the carton in which this unit is shipped are described below. If anything is missing or damaged, contact your dealer or service representative.

① Document eject guide
② Auxiliary paper support plate
③ Warranty card (120V model only)
④ Setup disc (CD-ROM)
⑤ Startup manual (this manual)
⑥ Software license agreement
⑦ Scanner
⑧ Power cord
- You will need to purchase an interface cable separately.
- The packed contents of the carton are subject to change without notice.
- Keep the carton and the packing material for future use if it is ever necessary to store or transport the unit.
Removing Protective Tape and Protective Sheet
Before using the scanner, remove the protective tape and protective sheet that protect the unit from damage during shipment.
- Remove the protective tape that is attached to the exterior of the unit.

- Open the paper feed tray and remove the protective tape that is inside the unit.

- Gently raise the upper unit and remove the protective sheet.

After removing the protective sheet, return the upper unit to its original position.
Names and Functions of Parts
This section explains the name and function of each part. Familiarize yourself with the parts before connecting the scanner.
■ Front

■ Front (with cover open)

■ Rear


CAUTION
Do not block the ventilation openings. Doing so could cause the unit to overheat, creating a risk of fire.
Installing the Scanner
Requirements
In order to install this scanner, you will need the following:
• PC
- SCSI interface cable (→ page 16)
- SCSI interface board
Note
- Some application software may require a device driver that is different from the one that is provided on the setup disc.
- Make sure that the device driver and application software that you will be using are compatible with your PC, the system configuration, and the type of SCSI interface board that you are using.
Installation Procedure
Install the unit according to the following procedure.
- Connect the SCSI cable to the PC or another SCSI device.
- Set the SCSI ID and the terminator.
- Turn the scanner on first, and then start up the PC.
- Install the necessary software (device driver, application software, etc.) in your PC.
- Restart your PC. The scanner is now ready for use.


Connecting the Scanner to Your PC
Connect the DR-3060/3080C either directly to your PC or to a SCSI device daisy chain.
Notes on the Shape of the Connector and the SCSI Interface Cable
- The DR-3060/3080C is equipped with a 50-pin half-pitch (pin type) SCSI connector.
• After checking the shape of the SCSI connector on your PC or on the SCSI device to which you will daisy chain the scanner, purchase a SCSI interface cable with the right combination of the appropriate connectors.
![graph TD A["Computer"] --> B["SCSI device"] B --> C["50-pin half-pitch (pin type)"] D["DR-3060/3080C"] --> E["SCSI interface cable"]](/content/2026/07/1513254/images/984c4de783cc9ec91a540c4bbbc91c4cbfbddc7f942402d11a76a344b25c72de.jpg)
▶ Notice
Make sure that the scanner and your PC are both turned off when connecting the scanner to the PC.
SCSI ID and Terminator Settings
Use the DIP switches on the rear of the scanner to make the SCSI ID and terminator settings.
For the DIP switches, the upper position is the ON position, and the lower position is the OFF position.

SCSI ID Settings
Refer to the following table when setting the SCSI ID. If there are other SCSI devices connected to or inside the PC, make sure to set a unique ID for the scanner.
| SCSI ID SW2 SW3 SW4 | |||
| 0 OFF OFF OFF | |||
| 1 OFF OFF ON | |||
| 2 OFF ON OFF | |||
| 3 OFF ON ON | |||
| 4 | O | N | OFF OFF |
| 5 | O | N | OFF ON |
| 6 | O | N | O |
| 7 | O | N | O |
F
▶ Notice
When the scanner is shipped from the factory, the SCSI ID is set to "2."
Although any value from 0 to 7 is valid as a SCSI ID, "7" is normally reserved for the SCSI host adapter, and should therefore not be used. In addition, "0" and "1" are normally used by internal SCSI hard disks that are used for system startup, so do not use these IDs either.
Terminator Setting
The terminator should be set to "ON" only in the SCSI device that is at the end of the SCSI daisy chain.
If the scanner is the only SCSI device that is being connected to the PC, or if the scanner is being connected at the end of a daisy chain of SCSI devices, set bit 1 of the scanner's DIP switch (terminator) to ON, and disable terminator for all other SCSI devices.
![graph LR A["Computer"] --> B["Tower"] B --> C["Printer"] C --> D["Printer ON"] note1["Terminator OFF Terminator ON"] --> B](/content/2026/07/1513254/images/6ec3501e41d8647c9985818ada867a3286efe43fe5dcfad36b8b95c23b0229f4.jpg)
If another SCSI device is located at the end of the daisy chain, turn the scanner's terminator "OFF," and turn the terminator in the last SCSI device "ON."
![graph LR A["Computer"] --> B["Printer"] B --> C["Server"] D["Terminator OFF"] --> B E["Terminator ON (or attached)"] --> C](/content/2026/07/1513254/images/9319a98edfc225af5b6dfd0c77c0be84721c96dd08340406d869fcbc6f8678a6.jpg)
CAUTION
When the scanner is the last device on the SCSI bus, enable termination either by DIP switch or by attaching a terminator plug. Note that incorrect operation may result if a terminator plug is attached while termination is enabled by DIP switch.
Connecting the Power Cord
Connect the power cord that is provided with this scanner to the power cord connector located on the rear of the scanner, and then plug the cord into a power outlet.

▶ Notice
- Only use the power cord that was provided with this unit.
- Always be sure to turn the power switch off before plugging in the power cord.
Turning the Power On/Off
Follow the procedures described below when turning the power on and off.
Turning the Power On
- Turn on the scanner.
The power switch is located on the lower right front corner of the scanner. To turn the scanner on, press the power switch. When the power indicator lights green, the scanner is on.

- Turn on the PC.
Note
If you are using Windows 95/98/Me/2000 or Windows XP, then the first time that you turn on your PC after connecting this scanner to your PC, Windows Plug and Play automatically displays a screen prompting you to install the scanner driver. Follow the instructions on the screen to proceed with the installation.
- If you are using Windows 95, the “Found New Hardware” dialog box appears.
-
Select "Driver from disk provided by hardware manufacturer" and then click the OK button.
-
Load the setup disc into your CD-ROM drive.
-
In the "Copy manufacturer's files from" box, type "D:\INF\Win95" (where "D" is the name of your CD-ROM drive), and then click the OK button.
- If you are using Windows 95 (OSR2), the “Update Device Driver Wizard” dialog box appears.
-
Click the Next button.
-
Click Other locations.
-
Load the setup disc into the computer's CD-ROM drive.
-
Type "D:\INF\Win95" (where "D" is the drive letter assigned to your CD-ROM drive) and then click the OK button.
-
Click the Finish button.
- If you are using Windows 98, the “Add New Hardware Wizard” dialog box appears.
- Click the Next button.
- Select "Search for the best driver for your device. (Recommended)." and then click the Next button.
- Load the setup disc into the computer's CD-ROM drive.
- Select "Specify a location", type "D:\INF" (where "D" is the drive letter assigned to your CD-ROM drive) and then click the Next button.
- Click the Next button.
- Click the Finish button.
- If you are using Windows Me, the “Add New Hardware Wizard” dialog box appears.
- Select "Specify the location of the driver (Advanced)" and then click the Next button.
- Load the setup disc into the computer's CD-ROM drive.
- Select "Search for the best driver for your device. (Recommended)." and then select "Specify a location". Next, type "D:\INF" (where "D" is the drive letter assigned to your CD-ROM drive) and then click the Next button.
- Click the Next button.
- Click the Finish button.
- If you are using Windows 2000 Professional, the “Found New Hardware Wizard” dialog box appears.
- Click the Next button to proceed to the "Install Hardware Device Drivers" screen.
- Select "Search for a suitable driver for my device (recommended)" and then click the Next button to proceed to the "Locate Driver Files" screen.
- Select "Specify a location" and then click the Next button.
- Load the setup disc into the computer's CD-ROM drive.
- Type “D:\INF” (where “D” is the drive letter assigned to your CD-ROM drive) and then click the OK button.
- In the "Driver Files Search Results" screen, click the Next button.
- If the message “Digital Signature Not Found” appears, simply click Yes to continue installation.
- On the “Completing the Found New Hardware Wizard” screen, click the Finish button.
- If you are using Windows XP, the “Found New Hardware Wizard” dialog box appears.
-
Load the setup disc into the computer's CD-ROM drive.
-
In the "Welcome to the Found New Hardware Wizard" screen, select "Install from a list or specific location (Advanced)", and then click the Next button.
-
Select "Search for the best driver in these locations", and then clear the "Search removable media (floppy, CD-ROM...)" check box. Select "Include this location in the search", type "D:\INF" (where "D" is the drive letter assigned to your CD-ROM drive), and then click the Next button.
-
Click the Continue Anyway button in the "Hardware Installation" dialog box.
Although a message appears indicating that the driver “has not passed Windows logo testing”, simply continue operation.
- Click the Finish button in the "Completing the Found New Hardware Wizard" screen.
WARNING
If the unit ever makes a strange noise, emits smoke or a strange odor, or becomes hot, or if the unit does not operate at all even though the power is on, immediately turn the unit off and unplug the power cord. Contact your dealer or service representative to have the unit serviced.
Turning the Power Off
CAUTION
If the unit will not be used for an extended period of time, unplug the power cord for safety's sake.
-
Turn off the PC.
-
Turn off the scanner.
The power switch is located on the lower right front corner of the scanner. To turn the scanner off, press the power switch. When the power indicator turns off, the scanner is off.

Note
Wait at least 10 seconds before turning the scanner back on.
Installing the Software
The following software is included with the scanner.
- ISIS/TWAIN driver
This driver allows this scanner to be used with ISIS-compatible application software or TWAIN-compatible application software. The driver must be installed in order to be able to use the scanner.
- CapturePerfect
CapturePerfecr is an TWAIN-compatible application. Install this application if necessary.
Before Installing the software
In order to use the ISIS/TWAIN driver, your PC must satisfy the following system requirements:
- IBM PC/AT-compatible that satisfies the following specifications:
- Intel Pentium II 266MHz or faster (for black and white scanning); For gray scale and color scanning, an Intel Pentium II 400MHz or faster is recommended.
- At least 128MB of main memory (recommended)
- At least 100MB of free hard disk space
- SCSI host adapter (Adaptec's AHA-2930 or AHA-2940 recommended)
- Display that is capable of resolution of 1024 x 768 (XGA) or better (recommended)
- One of the following operating systems, running normally:
• M icrosoft Windows 95
• M icrosoft Windows 98
• M icrosoft Windows Me
• M icrosoft Windows NT 4.0 Workstation
• M icrosoft Windows 2000 Professional
• M icrosoft Windows XP
- ISIS-compatible or TWAIN-compatible application software that runs normally under your operating system
Notice
If your CPU, memory or SCSI host adapter does not meet the recommended specifications, you may experience problems such as slow scanning speed.
Note
- The ISIS/TWAIN driver provided with the scanner is not necessarily compatible with all ISIS-compatible or TWAIN-compatible application software. For details, contact your application software dealer.
- Some functions described in this manual may not be supported by all application software.
Installing the ISIS/TWAIN Driver
Follow the procedure described below to install the ISIS/TWAIN driver.
▶ Notice
If another ISIS-compatible driver is already installed in your PC, you must make backups of the files listed below. These files may be overwritten when you install this ISIS/TWAIN driver.
C:\Windows\System\pix*.dll
C:\Windows\PixTran*.*
Note
The name of the "\Windows" and "\Windows\System" folder varies, depending on which version of Windows you are using. Substitute accordingly in the above folder names with the folder names for Windows used in your system.
- Turn on your PC and start Windows.
▶ Notice
If you are using Windows NT 4.0 Workstation, Windows 2000 Professional, or Windows XP, be sure to log on as a user with administrator privileges.
-
Load the setup disc in the PC's CD-ROM drive.
-
Click the Start button and then click Run.

The Run dialog box appears.

- In the Open box, type "D:\Driver\Setup.exe" (where "D" is the drive letter assigned to your CD-ROM drive) and then click the OK button.
The Installer starts.
- Follow the onscreen instructions and complete the installation process.
Installing CapturePerfect
Follow the procedure described below to install CapturePerfect.
- Turn on your PC. Windows starts.
▶ Notice
If you are using Windows NT 4.0 Workstation, Windows 2000 Professional, or Windows XP, be sure to log on as a user with administrator privileges.
-
Load the setup disc in the PC's CD-ROM drive.
-
On the Start menu, click Run.

The Run dialog box appears.

- In the Open box, type "D:\CapturePerfect\Setup.exe" (where "D" is the drive letter assigned to your CD-ROM drive) and then click the OK button.
The Installer starts.
- Follow the instructions on the screen and complete the installation process.
Using the Software
Using the ISIS/TWAIN Driver
The ISIS/TWAIN driver help file describes how to use the ISIS/TWAIN driver. To access the ISIS/TWAIN driver help file, click Start - Programs - Canon DR-3060 & 3080C - Canon DR-3060 & 3080C Help, or click the Help button in the driver's dialog box.

Note
The four files PATCH II (A4), PATCH II (LTR), PATCH T (A4), and PATCH T (LTR) contain patch code sheet data. For details, see "Patch Cpde Sheets" (→ page 40).
Using CapturePerfect
Follow the procedure described below to start and close CapturePerfect.
Note
The basic method for scanning using CapturePerfect is described in the CapturePerfect help. From the Help menu on the CapturePerfect menu bar, click Help, then refer to the explanation of how to use CapturePerfect.
Starting CapturePerfect
- Turn on the scanner.
- Turn on your computer. Windows starts.
- On the Start menu, point to Programs (when using Windows XP, point to All Programs) and then click CapturePerfect.

CapturePerfect starts.

Closing CapturePerfect
- On the File menu, click Exit.

CapturePerfect closes.
Notes
When the scanner is scanning or some operation is pending after scanning has been started (such as when scanning has been interrupted), the mouse pointer changes to an hourglass. If the mouse pointer appears as an hourglass while the scanner is not scanning, the previous scanning operation has not been completed. On the File menu, click Cancel Scanning to cancel hourglass display, then close CapturePerfect.
Using the Scanner
Documents
This scanner is able to scan documents ranging in size from business cards and checks up to B4 size documents. The scannable size range is:
Width: 2.2 in. to 10.1 in. (55 mm to 257 mm)
When using the auto start function, 2.8 in. to 10.1 in. (70 mm to 257 mm)
Length: 2.8 in. to 14.3 in. (70 mm to 364 mm)
Thickness: 0.0024 in. to 0.0059 in. (0.06 mm to 0.15 mm) with automatic feed 0.0019 in. to 0.0079 in. (0.05 mm to 0.2 mm) with manual feed
There are certain criteria that a document must meet in order to be scannable. Familiarize yourself with the following points:
- When scanning a multi-page document, pages must be grouped together so that they have the same size, thickness and weight. Scanning different types of paper at one time can cause the scanner to jam.
- Scanning documents before the ink is dry can cause problems with the scanner. Always make sure that the ink on a document is dry before scanning it.
- Scanning documents that are written in pencil or similar material can make the rollers dirty, which can then transfer the dirt to subsequent documents. Always clean the rollers after scanning a document written in pencil.
- When scanning a double-sided document that is printed on thin paper, the image on the opposite side of each page may show through. Adjust the scanning intensity in the application software before scanning the document.
- Scanning the following types of documents can cause a paper jam or malfunction. To scan such a document, make a photocopy of the document and then scan the photocopy.

Wrinkled or creased documents

Documents with paper clips or staples

Extremely
thin,
translucent
paper

Curled documents

Carbon paper

Paper with
square
holes

Torn
documents

Surface-treated paper
Setting Up the Paper Feed Tray and the Document Eject Tray
- Grasp the edge of the paper feed tray and lift it up.

- Gently open the paper feed tray towards you.

CAUTION
Do not place anything other than documents, and especially not heavy objects, on the paper feed tray. The object could fall suddenly and injure someone, or the scanner itself could be damaged, which could result in lower image quality.
- When scanning a large document, pull out the paper feed tray extension.

- Grasp the edge of the document eject tray extension and lift it up.

- Gently open the document eject tray extension towards you.

Note
- Always be sure to open the document eject tray extension. If the guide is not open when a document is scanned, the scanned document could droop down and become jammed in the scanner.
- To close the trays and extensions, follow the above procedure in reverse.
Installing the Document Eject Guide
When scanning a document that is particularly thin or particularly long, it could droop down over the edge of the document eject tray extension and become jammed in the scanner. Avoid this problem by attaching the document eject guide.
- Grasp the edge of the document eject tray extension and lift it up.

- Attach the Auxiliary paper support plate to the document eject tray extension.

- Gently open the document eject tray extension towards you.

- Attach the document eject guide to the document eject tray as shown in the illustrations. When doing so, align the ( ) mark on the guide with the ( ) ▽ mark on the scanner.

- To remove the document eject guide, reverse the procedure described above.

Note
- Although it is still possible to scan normal documents while the document eject guide is in place, the guide will cause stacking problems when scanning documents on paper that is thicker than normal. Therefore, the document eject guide should be removed when it is not needed.
- Be certain to remove the document eject guide before closing the document eject tray extension and the paper feed tray.
Loading a Document for Scanning
This scanner supports both automatic and manual feed operation. The methods for loading the document to be scanned when using automatic feed and manual feed are explained separately.
▶ Notice
When loading a document for scanning, be careful to remove all paper clips, staples, etc., from the document. During the scanning process, such objects can tear the document, cause a paper jam, and damage the scanner.
When Using Automatic Feed
- Get ready to perform the scanning operation with your application software, and set the automatic feed function.
- Straighten the edges of the document to be scanned.
CAUTION
Be careful when placing a document in the scanner. It is possible to cut your hand on the edge of a sheet of paper.
- Align the paper side guides with the width of the document that is to be scanned. If the document is printed on a standard size of paper, align the guides with the appropriate document positioning mark.

Note
Make sure that the left edge of the document does not extend to the left of the mark. A paper jam may occur if you begin to scan a document that is positioned at this mark.

- Place the document on the paper feed tray so that the document is face up.

▶ Notice
There are stacking limit marks (indicated on the paper feed tray. Do not load pages in excess of this mark. (The mark is equivalent to a capacity of approximately 100 sheets of ordinary copier paper (80g / m2) .)

- Adjust the paper side guides.

Note
Before starting a scan, make sure that the document is loaded in the scanner correctly. Scanning a curled document or a creased document can damage the document.
- Perform the scanning operation in accordance with the normal operating procedure for your application software.
Note
- If the paper feed operation stops due to a system error or a paper jam while the scanner is scanning, resolve the problem, make sure that the scanned image of the last page that was fed has been stored, and then resume the scanning operation.
- Note that documents that are printed on thin paper may fall out of the document eject tray.
- If the scanner is not going to be used again soon after the document has been scanned, protect the scanner from damage by removing the document eject guide (if it was attached to the document eject tray) and then closing the paper feed tray and the document eject tray extension.
Note
When operating this unit, avoid wearing loose-fitting clothing, dangling jewelry, or other material that could get pulled into the unit. Injury could result. Be especially careful if you are wearing a necktie or have long hair. In the event that some article or clothing does get caught in the unit, turn the power off immediately.
When Using Manual Feed
- Get ready to perform the scanning operation with your application software, and set the manual feed function.
Note
When "manual feed" is set, the document feed opening next to the paper feed tray rises up, allowing you to feed pages in manually. The document feed opening remains in the upper position as long as "manual feed" is set; if "automatic feed" is set, the document feed opening descends.
- Align the paper side guides with the width of the document that is to be scanned. If the document is printed on a standard size of paper, align the guides with the appropriate document positioning mark.

- Place a single sheet of the document in the paper feed tray and then gently push it into the document feed opening. The scanner will begin to take the sheet in and scan it.

Note
It may be difficult to manually feed a sheet that is unusually thin or that is curled. It may be necessary to gently hold down the edge of the sheet while feeding it into the scanner.

- Perform the scanning operation in accordance with the normal operating procedure for your application software, and continue to manually feed sheets into the scanner, one at a time.
Patch Code Sheets
Patch Code Sheets are sheets printed with a special pattern that is used for separating files without interrupting scanning. When a Patch Code Sheet is read on the scanner, and the pattern on the sheet is recognized, the sheet functions as a Patch Code Sheet, and a file separator is inserted.
Note
- Here will briefly describe how to use the Patch Code Sheets. For details, also refer to the ISIS/TWAIN Driver Help.
- Note that documents that are printed on thin paper may fall out of the document eject tray.
- Note that documents that are printed on thin paper may fall out of the document eject tray.
About the Patch Code Sheets
Patch Code Sheets are data in the form of PDF (Portable Document Format). There are 4 types of Patch Code Sheets: [PATCH II (A4)], [PATCH II (LTR)], [PATCH T (A4)], and [PATCH T (LTR)]. Click the [Start] button in Windows, and select [Programs] – [Canon DR-3080C] – [PATCH X(XX)]. Then use the sheets printed out by a printer.

Note
To open the Patch Code Sheets, an application associated with PDF formatted files is necessary.
Functions of Patch Code Sheets
- Patch code patterns
PATCH T

When this sheet is detected, a file separator is inserted after the document following this sheet.
PATCH II

When this sheet is detected, a file separator is inserted after this sheet. Note, however, that the setting is ignored, and this sheet is recorded as an image even if recording of sheets as an image has been disabled in the patch code detection settings.
Using the Patch Code Sheets
- First, print out the Patch Code Sheets by a printer. Please use papers of the same size as the Patch Code Sheet data.
Note
- Use A4-size papers for [PATCH II (A4)] and [PATCH T (A4)]
-
Use letter-size papers for [PATCH II (LTR)] and [PATCH T (LTR)]
-
Load the Patch Code Sheet in front of the document where a file separator is to be inserted before scanning.
(example: Inserting Patch Code Sheets)

Load Patch Code Sheets in front of the documents where a file separator is to be inserted.
Effective Area for Detecting Patch Code Patterns

▶ Notice
- When you copy the originals, adjust the size and density settings to match the original. Extremely dark or light copies may not scan correctly.
- When you copy the originals, adjust the original so that the patch code pattern is in the effective area for detecting patch code patterns.
- Make sure that the originals are not stained or marked in any way. Take special care to avoid staining or marking the effective area for detecting patch code patterns. Also, take care to avoid bending or wrinkling Patch Code Sheets. Damaged or marked Patch Code Sheets cannot be read correctly.
- To avoid a reading error, make sure that the scanning density for Patch Code Sheets is neither too light nor too dark.
Clearing a Paper Jam
If a paper jam occurs in the scanner, follow the procedure described below.
CAUTION
Be careful when removing jammed paper. It is possible to cut your hand on the edge of a sheet of paper.
- If there are any ejected sheets already in the document eject tray, remove them.
- Close the document eject tray extension. However, if the document eject guide is currently attached to the tray, it is not necessary to remove the document eject guide. Simply continue with the procedure described below.

- Grasping the upper unit as shown in the illustration, gently raise the upper unit.

- Raise the upper unit as far as it will go.

- Remove the jammed paper inside of the scanner.
When the jam occurred in the feed section

When the jam occurred in the eject section

▶ Notice
Do not pull hard on the jammed sheet; remove it gently. If the sheet does rip, be sure to remove all of the remaining pieces of paper.
- Gently lower the upper unit to its normal position.

- Gently push down on the top of the upper unit until the upper unit clicks into place.

Note
Once you have cleared the paper jam, check whether the scanned image on the last page has been stored properly or not, and then resume scanning.
Regular Maintenance
Clean the scanner on a regular basis as described below in order to maintain peak scanning quality.
CAUTION
For safety's sake, always turn the unit off and unplug the power cord before cleaning this unit.
Cleaning the Scanner
To clean the exterior of the scanner, dampen a cloth with water or a mild detergent, wring the cloth out thoroughly, and then wipe the dirt away. Then use a dry cloth to wipe away any moisture.

CAUTION
Never use paint thinner, alcohol, or other organic solvents to clean the scanner. Such solvents can damage or discolor the exterior of the scanner. They also create a risk of fire and electric shock.
Cleaning the Scanning Glass and the Rollers
-
Turn the power off and unplug the power cord from the power outlet.
-
If the document eject tray extension is open, close it.
-
Grasp the upper unit and gently lift it up as far as it will go.
-
Wipe the scanning glass (the shaded portion ■ in the illustration) with a clean, dry cloth.

CAUTION
There is scanning glass on the top and on the bottom. Wipe both clean. Do not spray the glass directly with water or mild detergent. Doing so could damage the light source or other precision optical components.
- Using a cloth that has been dampened with water, clean the rollers (the shaded portion ■ in the illustration), rotating them as you wipe them with the cloth. Note that the rollers labeled ①, ②, and ③ in the diagram should only be rotated in the direction indicated. Then use a clean, dry cloth to wipe away any moisture.

Troubleshooting
This section describes common problems that may occur while you are using the scanner, and how to resolve them.
Refer to the troubleshooting section related to the problem that you have encountered.
The scanner does not turn on P.48
The PC does not recognize the scanner.... P.49
Images are not scanned P.51
Documents do not feed properly.... P.51
Resulting scanned images are not correct P.52
If after consulting the above section you still cannot resolve the problem, contact your dealer or your service representative.
✗ The scanner does not turn on
Check the following:
- Is the power switch in the ON position?
- Is the power cord connected to the scanner securely?
- Is the power cord plugged into an outlet?
✗ The PC does not recognize the scanner
The following are possible causes of the PC failing to recognize the scanner.
Check each possible cause.
Cause The scanner is not connected correctly.
Action Check all of the SCSI cable connections between the scanner, the SCSI host adapter in the PC, and any other SCSI devices connected to the system.
Cause The SCSI host adapter is not installed in the PC correctly.
Action Refer to the instruction manual for the SCSI host adapter and install the SCSI host adapter in the PC correctly.
Also check the following, depending on which operating system you are using:
Windows 95/98/Me
Click Start - Settings - Control Panel - System - Device Manager, and make sure that no "x" or "!" symbol appears next to the SCSI Controller entry. If either of these symbols is displayed, refer to the instruction manual for the SCSI host adapter and redo the settings for the SCSI host adapter.
Windows NT 4.0 Workstation
Click Start - Settings - Control Panel - SCSI Adapter, and make sure that the system recognizes the SCSI host adapter properly. If the system is not recognizing the SCSI host adapter properly, refer to the instruction manual for the SCSI host adapter and redo the settings for the SCSI host adapter.
Windows 2000 Professional
Click Start - Settings - Control Panel - System - Hardware - Device Manager, and make sure that no “x” or “!” symbol appears next to the SCSI Controller entry. If either of these symbols is displayed, refer to the instruction manual for the SCSI host adapter and redo the settings for the SCSI host adapter.
Windows XP
Click Start - Control Panel - Performance and Maintenance - System - Hardware - Device Manager, and make sure that no “x” or “!” symbol appears next to the SCSI Controller entry. If either of these symbols appears, refer to the instruction manual for the SCSI board and reconfigure the SCSI board.
Cause The scanner's SCSI ID is identical to the SCSI ID of another device.
Action Check the SCSI IDs of all SCSI devices connected to the system and set a unique SCSI ID for the scanner.
Cause The terminator is not set correctly.
Action Connect a terminator to the SCSI device that is at the end of the SCSI daisy chain. If the SCSI device has a built-in terminator function, enable the terminator.
Cause The PC was turned on before the scanner.
Action Shut down both the PC and the scanner, and then turn the scanner back on, followed by the PC.
Cause The scanner is not on.
Action Refer to the previous section, "The scanner does not turn on," and check to see if the scanner is on. If the scanner is not on, shut down the PC, then turn the scanner on first, and then the PC.
Cause The SCSI host adapter is not compatible with the scanner.
Action Use a SCSI host adapter that is compatible with the scanner driver and your application software.
Cause In Windows NT 4.0 Workstation, Windows 2000 Professional or Windows XP, the ASPI manager has not been installed correctly.
Action Following the instructions in the SCSI host adapter instruction manual, install the ASPI manager and then start up the ASPI manager.
✗ Images are not scanned
Check the following if the scanner does not scan an image even though the scanning operation is being performed:
- Is the scanner connected to the PC correctly?
- Has the scanner driver been installed?
- Has the application software been installed correctly? Has the application software been set up correctly?
- Is there a problem in the PC system?
▶ Notice
If the scanner will not respond at all due to a system error, turn the scanner off, wait at least 10 seconds, and then turn the scanner back on again.
When you resume scanning, make sure that the last document was scanned correctly.
✗ Documents do not feed properly
The following are possible causes of a document failing to feed properly.
Check each possible cause.
Cause An attempt is being made to scan a document of a size, thickness or weight that the scanner cannot scan.
Action Check the size, thickness and weight of the document. For cautions concerning documents, refer to "Documents" on page 30.
Cause The rollers inside the scanner are dirty or worn.
Action Clean the rollers as described on page 47. If the rollers are worn, contact your service representative and request to have the rollers replaced.
For details on how to clear jammed paper, refer to "Clearing a Paper Jam" on page 43.
✗ Resulting scanned images are not correct
If the resulting scanned images are not crisp, if there are lines or spots on the image, or if there is some other problem with a scanned image, likely causes are listed below. Check each item and take the appropriate action.
Cause The scanning glass or the rollers inside the scanner are dirty.
Action Clean the scanning glass and rollers as described on page 47.
Cause The application software is not set up properly for scanning.
Action Check the scanning-related settings, such as "brightness," in the application software.
For example, if the document cannot be scanned at all, it is possible that the "brightness" setting is too high. If the resulting scanned image is too dark, it is possible that the "brightness" setting is too low.
Cause The scanner driver or application software is not running normally.
Action If the software is set properly for scanning and normal scanning is still not possible, it is possible that the scanner driver or the application software is not running normally. Re-install the scanning driver or the application software. For details on how to install the scanner driver, refer to page 24. For details on how to install the application software, refer to the application software instruction manual.
Cause An attempt was made to use a function of the scanner that is not supported by the application software.
Action Some application software may not support certain functions, such as automatic paper size detection and user-specified margins. Using such application software for scanning may yield abnormal scanning results. Try scanning without using functions such as automatic paper size detection or margins settings.
Specifications
Type Desktop color image scanner
Scanning document size Width: 2.2 in. to 10.1 in. (55 mm to 257 mm)
When using the auto start function, 2.8 in.
to 10.1 in. (70 mm to 257 mm)
Length: 2.8 in. to 14.3 in. (70 mm to 364 mm)
Thickness: 0.0024 in. to 0.0059 in. (0.06 mm to
0.15 mm) with automatic feed
0.0019 in. to 0.0079 in. (0.05 mm to
0.2 mm) with manual feed
Document feeding method Automatic/manual
Scanning method Contact sensor
Light source LED
Scanning side Simplex/Duplex
Scanning modes
DR-3060 Black and white, text enhanced, error diffusion,
256-level grayscale
DR-3080C Black and white, text enhanced, error diffusion,
256-level grayscale, 24-bit color (Only the front side can be scanned in 24-bit color. The back side of a page is scanned with a 256-level gray scale.)
Scanning resolution 300 x 300 dpi/300 x 150 dpi/
(primary scan lines x secondary scan lines) 240 dpi x 240 dpi/200 x 200 dpi
Scanning speed
Letter A4
Black and White Simplex
| 300 x 150 dpi 43 pages/minute | 40 pages/minute |
| 200 x 200 dpi 32 pages/minute | 30 pages/minute |
| 240 x 240 dpi 27 pages/minute | 25 pages/minute |
| 300 x 300 dpi 21 pages/minute | 20 pages/minute |
Duplex
| 300 x 150 dpi 86 images/minute | 80 images/minute |
| 200 x 200 dpi 64 images/minute | 60 images/minute |
| 240 x 240 dpi 54 images/minute | 50 images/minute |
| 300 x 300 dpi 42 images/minute | 40 images/minute |
256-level Gray
Simplex
| 300 x 150 dpi 43 pages/minute | 40 pages/minute |
| 200 x 200 dpi 32 pages/minute | 30 pages/minute |
| 240 x 240 dpi 27 pages/minute | 25 pages/minute |
| 300 x 300 dpi 21 pages/minute | 20 pages/minute |
Duplex
| 300 x 150 dpi 78 images/minute | 74 images/minute |
| 200 x 200 dpi 64 images/minute | 60 images/minute |
| 240 x 240 dpi 54 images/minute | 50 images/minute |
| 300 x 300 dpi 40 images/minute | 38 images/minute |
24-bit Color
Single-sided scanning
| 100 x 100 dpi | 21 pages/minute | 20 pages/minute |
| 200 x 200 dpi | 10 pages/minute | 10 pages/minute |
Duplex
(Back side of a page is scanned with a 256-level grayscale)
| 100 x 100 dpi 42 images/minute | 40 images/minute |
| 200 x 200 dpi 20 images/minute | 20 images/minute |
Amount of paper that can be 10 mm stack, maximum
stacked in automatic feeder
Interface SCSI-II
Other functions Automatic document thickness adjustment
Dimensions (with trays closed) 7.5 x 13.5 x 10.9 in. (H x W x D)
191 x 344 x 278 mm (H x W x D)
Dimensions (with trays open) 9.6 x 13.5 x 21.9 in. (H x W x D)
244 x 344 x 555 mm (H x W x D)
Weight Approximately 8.1 kg
power supply 100V to 120V AC (50/60Hz)
200V to 240V AC (50/60Hz)
Power consumption Scanning: 42W maximum
Standby: Under 20W
Low-power mode: Approx. 10W
Noise Not more than 70dB
Operating environment Temperature: 10 degree C to 32.5 degree C
Humidity: 20% to 80% RH
- The functions described above can be used if they are supported by the application software.
- Some functions may not be available, depending on the performance of your PC and depending on your software.
Due to our ongoing efforts to improve our products, the specifications described above are subject to change without notice.
Options
Endorser ED500 This device prints a six-digit number and a letter on the back side of a document that has been scanned.
Consumables
Exchange Roller Kit
This is a transport roller replacement kit. Service personnel must actually perform the replacement. Contact your service personnel.
Index
C
CapturePerfect 23, 28 Install 26
Cleaning glass 47 main unit 46 rollers 47
Connection interface cable 16 power cord 19 terminator 18
D
DIP switches position 14 setting 17
Document eject guide attachment 33
Document eject tray extension opening 32 position 13
Document positioning mark adjustment 35 position 13
Documents feeding 35 paper jam 43 stacking limit marks 36
DR-3080C cleaning 46 functions of 9 moving 6
|
Installation location 5
Interface cable connetion 16
P
Paper jam cleaning 43
Paper side guides adjustment 35 position 13
Patch Code Sheets 40 PDF 40
Power off 22 on 20
Power cord connection 19
Power cord connector position 14
Power indicator position 13
Power switch position 13, 20, 22
R
Rollers cleaning 47
S
Scanning glass cleaning 47
SCSI connector position 14
T
Terminator setting 17
V
Ventilation holes position 14
MEMO
- CANON
- FCC REGULATIONS (FOR 120V MODELS)
- RADIO INTERFERENCE REGULATIONS (FOR 120V MODELS)
- RÈGLEMENT SUR LE BROUILLAGE RADIOÉLECTRIQUE (FOR 120V MODELS)
- TRADEMARKS
- PREFACE
- CAUTION
- BE AWARE OF THE FOLLOWING POINTS WHEN USING THIS SCANNER FOR REPRODUCTION
- NOTATIONAL CONVENTIONS
- WARNING
- NOTICE
- NOTE
- TABLE OF CONTENTS
- BEFORE USING THE UNIT
- INSTALLING THE SCANNER
- INSTALLING THE SOFTWARE
- USING THE SOFTWARE
- USING THE SCANNER
- REGULAR MAINTENANCE
- TROUBLESHOOTING
- SPECIFICATIONS
- INDEX
- TO ENSURE SAFE OPERATION
- INSTALLATION LOCATION
- POWER
- MOVING THE SCANNER
- NOTES ON NORMAL HANDLING
- TO AVOID FIRE AND ELECTRIC SHOCK, ALWAYS OBSERVE THE FOLLOWING WARNINGS WHEN USING THIS UNIT
- FEATURES OF THE DR-3060/3080C
- FAST DOCUMENT FEEDING
- GRAY SCALE SUPPORT (DR-3060)
- COLOR/GRAY SCALE SUPPORT (DR-3080C)
- SUPPORTS A VARIETY OF SCANNING MODES
- AUTOMATIC DOCUMENT SIZE DETECTION
- AUTOMATIC PAPER THICKNESS ADJUSTMENT
- FRONT PAPER FEED/EJECT
- COMPACT SIZE
- DROPOUT COLOR (DR-3080C)
- DESKEW
- TEXT ENHANCED MODE
- SKIP BLANK PAGE" FUNCTION
- PRE-SCAN FUNCTION
- AUTO START
- COMPATIBLE WITH CARBONLESS DUPLICATING PAPER
- POWER-SAVING FEATURE
- CHECKING THE PACKING LIST
- REMOVING PROTECTIVE TAPE AND PROTECTIVE SHEET
- NAMES AND FUNCTIONS OF PARTS
- FRONT
- FRONT (WITH COVER OPEN)
- REAR
- REQUIREMENTS
- INSTALLATION PROCEDURE
- CONNECTING THE SCANNER TO YOUR PC
- SCSI ID AND TERMINATOR SETTINGS
- SCSI ID SETTINGS
- TERMINATOR SETTING
- CONNECTING THE POWER CORD
- TURNING THE POWER ON/OFF
- TURNING THE POWER ON
- TURNING THE POWER OFF
- ISIS/TWAIN DRIVER
- CAPTUREPERFECT
- BEFORE INSTALLING THE SOFTWARE
- INSTALLING THE ISIS/TWAIN DRIVER
- INSTALLING CAPTUREPERFECT
- USING THE ISIS/TWAIN DRIVER
- USING CAPTUREPERFECT
- STARTING CAPTUREPERFECT
- CLOSING CAPTUREPERFECT
- NOTES
- DOCUMENTS
- SETTING UP THE PAPER FEED TRAY AND THE DOCUMENT EJECT TRAY
- INSTALLING THE DOCUMENT EJECT GUIDE
- LOADING A DOCUMENT FOR SCANNING
- WHEN USING AUTOMATIC FEED
- WHEN USING MANUAL FEED
- PATCH CODE SHEETS
- ABOUT THE PATCH CODE SHEETS
- FUNCTIONS OF PATCH CODE SHEETS
- USING THE PATCH CODE SHEETS
- EFFECTIVE AREA FOR DETECTING PATCH CODE PATTERNS
- CLEARING A PAPER JAM
- CLEANING THE SCANNER
- CLEANING THE SCANNING GLASS AND THE ROLLERS
- ✗ THE SCANNER DOES NOT TURN ON
- ✗ THE PC DOES NOT RECOGNIZE THE SCANNER
- WINDOWS 95/98/ME
- WINDOWS NT 4.0 WORKSTATION
- WINDOWS 2000 PROFESSIONAL
- WINDOWS XP
- ✗ IMAGES ARE NOT SCANNED
- ✗ DOCUMENTS DO NOT FEED PROPERLY
- ✗ RESULTING SCANNED IMAGES ARE NOT CORRECT
- OPTIONS
- CONSUMABLES
- C
- D
- P
- R
- S
- T
- V
- MEMO
Brand : CANON
Model : imageFORMULA DR-3060
Category : Scanner