
THE BRIDGE III - Audio accessory HARMAN KARDON - Free user manual and instructions
Find the device manual for free THE BRIDGE III HARMAN KARDON in PDF.

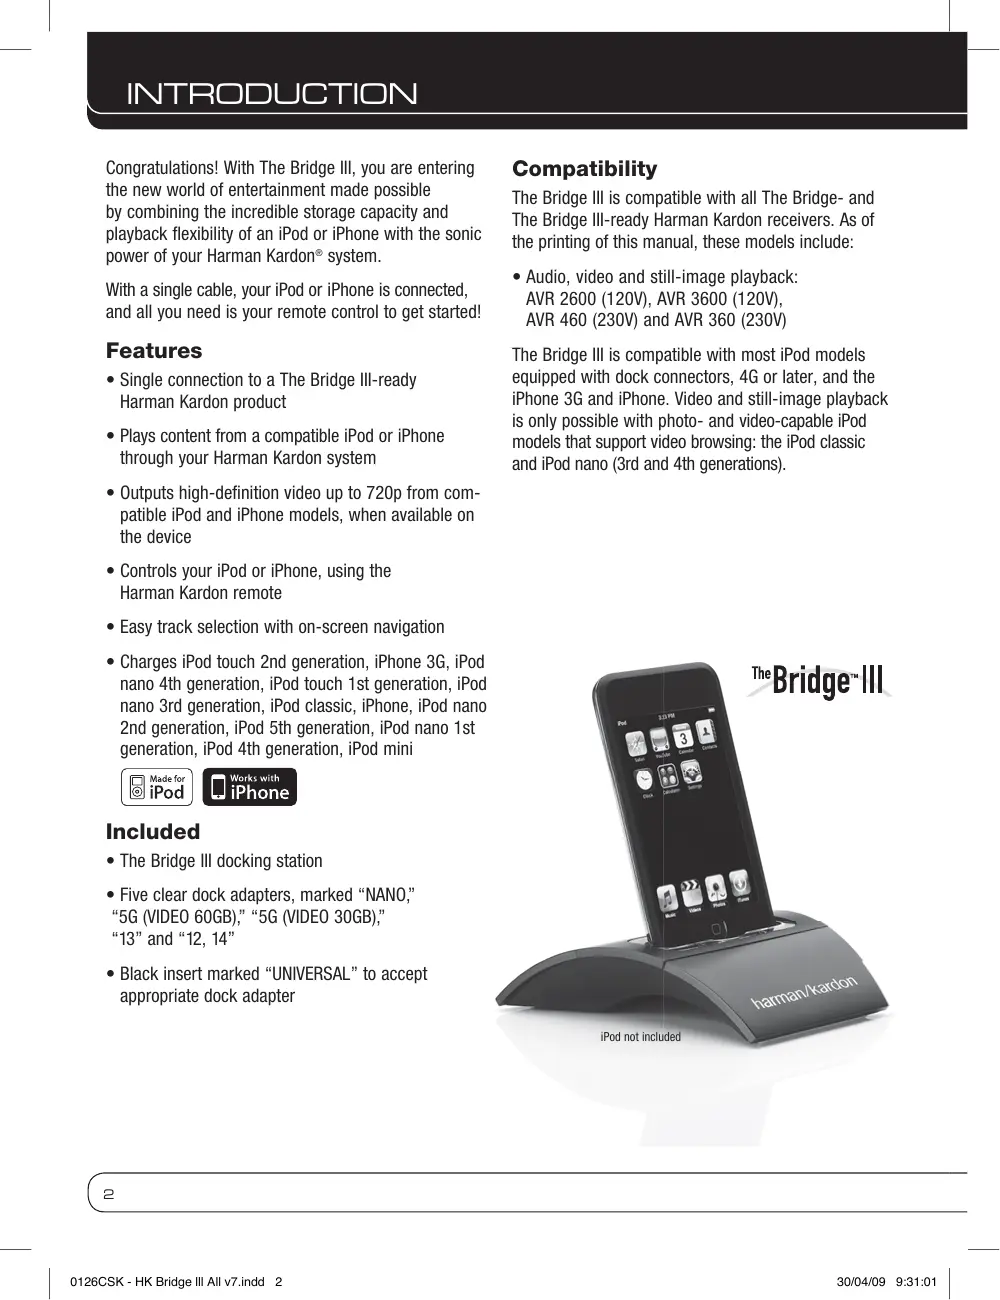

| Product Type | Docking station for iPod/iPhone |
| Brand | HARMAN KARDON |
| Model | The Bridge III |
| Dimensions (W x D x H) | 114 mm x 114 mm x 30 mm |
| Weight | 170 g |
| Power Supply | Via connection cable to compatible Harman Kardon receiver |
| iPod/iPhone Compatibility | iPod with dock connector (4G and later), iPhone, iPhone 3G |
| Receiver Compatibility | AVR 2600 (120V), AVR 3600 (120V), AVR 460 (230V), AVR 360 (230V) |
| Main Functions | Audio/video/photo playback, device charging, remote control, HD video output up to 720p, on-screen navigation |
| Package Contents | The Bridge III docking station, 5 transparent dock adapters (NANO, 5G 60GB, 5G 30GB, 13, 12/14), universal black insert |
| Care and Cleaning | Wipe with a soft, dry cloth. Do not use abrasive products or solvents. |
| Safety | Use only with compatible Harman Kardon receivers. Do not insert iPod/iPhone without a proper dock adapter to avoid damage. |
| Warranty | Standard manufacturer warranty (see manual for details) |
Frequently Asked Questions - THE BRIDGE III HARMAN KARDON
User questions about THE BRIDGE III HARMAN KARDON
0 question about this device. Answer the ones you know or ask your own.
Ask a new question about this device
Download the instructions for your Audio accessory in PDF format for free! Find your manual THE BRIDGE III - HARMAN KARDON and take your electronic device back in hand. On this page are published all the documents necessary for the use of your device. THE BRIDGE III by HARMAN KARDON.
USER MANUAL THE BRIDGE III HARMAN KARDON
Congratulations! With The Bridge III, you are entering the new world of entertainment made possible by combining the incredible storage capacity and playback flexibility of an iPod or iPhone with the sonic power of your Harman Kardon® system.
With a single cable, your iPod or iPhone is connected, and all you need is your remote control to get started!
Features
- Single connection to a The Bridge III-ready Harman Kardon product
- Plays content from a compatible iPod or iPhone through your Harman Kardon system
- Outputs high-definition video up to 720p from compatible iPod and iPhone models, when available on the device
Controls your iPod or iPhone, using the Harman Kardon remote - Easy track selection with on-screen navigation
- Charges iPod touch 2nd generation, iPhone 3G, iPod nano 4th generation, iPod touch 1st generation, iPod nano 3rd generation, iPod classic, iPhone, iPod nano 2nd generation, iPod 5th generation, iPod nano 1st generation, iPod 4th generation, iPod mini

Made for
iPod

Works with
iPhone
Included
The Bridge III docking station
- Five clear dock adapters, marked "NANO," "5G (VIDEO 60GB)," "5G (VIDEO 30GB)," "13" and "12, 14"
- Black insert marked "UNIVERSAL" to accept appropriate dock adapter
Compatibility
The Bridge III is compatible with all The Bridge- and The Bridge III-ready Harman Kardon receivers. As of the printing of this manual, these models include:
- Audio, video and still-image playback: AVR 2600 (120V), AVR 3600 (120V), AVR 460 (230V) and AVR 360 (230V)
The Bridge III is compatible with most iPod models equipped with dock connectors, 4G or later, and the iPhone 3G and iPhone. Video and still-image playback is only possible with photo- and video-capable iPod models that support video browsing: the iPod classic and iPod nano (3rd and 4th generations).
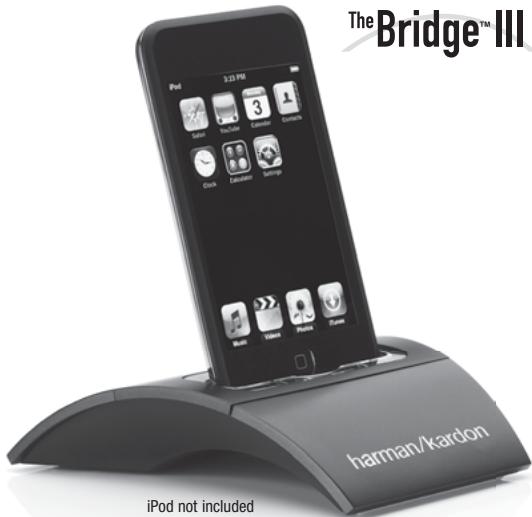
INSTALLING The Bridge III
With only a single cable connection, The Bridge III is easy to connect to your Harman Kardon product.
Step One: Turn off the Harman Kardon The Bridge III-ready product, using its main power switch.
Step Two: Holding the cable with the wider part of the connector at the bottom, gently squeeze the tabs on each side as you insert it into the connector on the rear panel of the Harman Kardon product. See Figure 1.
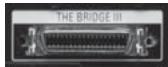
Figure 1 - The Bridge III connector.
Step Three: Place the black insert in The Bridge III, making sure to push it all the way down. See Figure 2.
NOTE: Do not place an iPod or iPhone in The Bridge III unless both the black insert and a dock adapter are installed. Otherwise, the iPod or iPhone will not connect properly, and both it and the Bridge III may sustain damage that is not covered by the warranty.
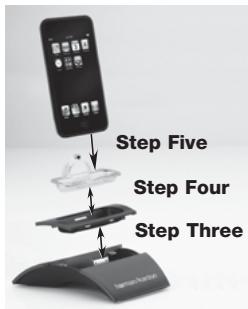
Figure 2 Docking an iPod or iPhone in The Bridge III
Step Four: Locate the dock adapter that was included with your iPod or iPhone, or select one of the included clear dock adapters by referring to Table 1. If your iPod or iPhone does not appear in Table 1 and did not include an adapter, contact Apple Inc. to purchase one.
Place the adapter in The Bridge III insert, as shown in Figure 2.
Step Five: Remove the iPod or iPhone from any case, and dock it in The Bridge III, as shown in Figure 2.
Table 1 - Select the Correct The Bridge III Insert
| The Bridge III Insert | iPod Model |
| NANO | iPod nano, 1st and 2nd generation |
| 5G (VIDEO 60GB) | iPod, 5th generation (60GB, 80GB) and iPod classic (160GB) |
| 5G (VIDEO 30GB) | iPod, 5th generation (30GB) and iPod classic (80GB) |
| 13 | iPod nano, 3rd and 4th generation |
| 12, 14 | iPod touch – install large bumper; iPhone and iPhone 3G – install small bumper |
USING Bridge-III DOCKING STATION
When The Bridge llls connected to its proprietary input on the AVR and the iPod or iPhone is docked, you may play the audio, video and still-image materials on your iPod or iPhone through your high-quality audio/video system; operate the iPod or iPhone using the AVR remote or the AVR's front-panel controls; view navigation messages on the AVR's front panel or a connected video display; and charge the iPod or iPhone.
When the source The Bridge is selected and an iPod or iPhone is docked, the message "The Bridge" appears in the front-panel Message Display. If the AVR doesn't detect the iPod or iPhone, turn off the AVR, remove the iPod or iPhone from The Bridge III and reset the iPod or iPhone. When the iPod or iPhone returns to its main menu, redock it and turn on the AVR. Table 4 summarizes the controls available with The Bridge III during normal playback.
Table 4 - Using The Bridge III
| iPod or iPhone Function | Remote Control Key |
| Play | Play (▶) |
| Pause | Pause (11) |
| Menu | Menu |
| Back/Exit | Back/Exit or Left Arrow (▲) |
| Select | OK or Right Arrow (▶) |
| Scroll Reverse | Up Arrow (▲) |
| Scroll Forward | Down Arrow (▼) |
| Forward Search | Forward Search (▶) |
| Reverse Search | Reverse Search (▲) |
| Next Track | Next (▶1) or Right Arrow (▶) |
| Previsions Track | Previous (▶←) or Left Arrow (▲) |
| Page Up/Down | Page Up/Down |
| Stop | Stop (■) |
While a selection is playing, the song title and playmode icon will appear in the front-panel Message Display. If a video monitor is connected to the AVR and the system is not in iPod Manual Mode (see below), the Now Playing screen will appear and display the play mode icon, song title, artist and album. A graphic bar indicates the current play position within the track. If random or repeat play has been programmed, an icon will appear in the upper right corner.
The screen may disappear from view, depending on the display settings on the AVR. Restore the Now Playing screen to view by pressing either of the / Buttons.
NOTE: It is strongly recommended that you use the screen saver built into your video display to avoid possible damage from "burn-in" that may occur with plasma and many CRT displays when a still image, such as a menu screen, remains on display for an extended period of time.
Press the Menu Button to view the slide-out menu:
Music: Navigates the audio materials stored on the iPod or iPhone. Use the Page Up/Down Control on the remote to scroll through the content a page at a time.
Photo/Manual: Select this line to view still images stored on a photo-capable iPod or iPhone. The system will switch to iPod Manual Mode, and control will shift to the iPod. Use the screen and controls on the iPod. The AVR remote may also be used. To view photos on a video monitor connected to the AVR, select the photo and press the Play Button on the iPod, or press the OK Button on the remote three times.
Videos: Select this line to view videos stored on an iPod that supports video browsing or an iPhone.
NOTES ON VIDEO PLAYBACK:
- As of this writing, video browsing is only supported on the iPod 5G, iPod classic (80GB, 120GB and 160GB), iPod nano 3G and 4G, and iPod touch or iPhone (when loaded with software version 2 or higher). For other iPod models, it is not possible to view photos (except iPod 4G) or videos on an external monitor while using The Bridge III.
- Before attempting to view photos or videos stored on your device, check the Video Settings menu on the device and make sure that the TV Out setting is On. The TV Signal setting should be NTSC/PAL, to match the capabilities of your video display. If your selection was playing and is paused, the iPod or iPhone requires you to reselect the video for the new TV Out setting to take effect.
- If you do not see the Videos line in the menu, and the iPod supports video browsing and has video content stored on it, you may need to turn off the AVR, remove the iPod from The Bridge III, reset the iPod, turn the AVR back on and dock the iPod again. An iPhone may not need to be reset, as simply undocking and redocking it may resolve the problem. This procedure may also help when a video program is selected but the "Now Playing" screen appears instead of the video images.
To exit iPod Manual Mode, with the AVR remote in The Bridge mode, press the Menu Button. To return to a previous menu level, press the Back/Exit Button or the Button.
Random: Select this setting for random playback, also known as "Shuffle Mode". Each press of the OK Button switches the setting: shuffle by Song, shuffle by Album, or Off to end random playback.
Repeat: Select this setting to repeat a track or all tracks in the current album or playlist. Each press of the OK Button switches the setting: repeat Off, repeat One or repeat All.
NOTE: The iTunes application allows you to exempt some tracks from Shuffle mode. The AVR cannot override this setting.
The AVR supports audio playback from some applications available for the iPhone and the iPod touch. Place the system in iPod Manual Mode by pressing the Menu Button and selecting "Photo/Manual". Then use the controls on the iPhone or iPod touch to run the application. Due to the wide variety of applications and many factors affecting them, playback is not guaranteed.
While scrolling, hold the key to scroll faster. Use the Page Up/Down control on the remote to scroll a page at a time (not in manual mode).
NOTES:
- The Play and Pause functions are not available unless content has been selected for playback.
- To search within a track (not in Manual Mode), press and hold the indicated button. Press the Previous Track Button once to skip to the beginning of the current track. Press the Previous Track Button twice to skip to the beginning of the previous track.
iPod MANUAL MODE
Press the Menu Button and select Photo/Manual to enter iPod Manual Mode. This is required to view photos stored on the iPod. Table 5 summarizes the controls available with The Bridge III in iPod in Manual mode.
Table 5 - Using The Bridge III in iPod Manual Mode
| iPod or iPhone Function | Remote Control Key |
| Play | Play (▶) |
| Pause | Pause (■) |
| Menu | Back/Exit or Left Arrow (▲) |
| Select | OK |
| Select Next Screen* (Scrubber, Cover Art, Ratings) | Right Arrow (▶) |
| Scroll Reverse | Page Up or Up Arrow (▲) |
| Scroll Forward | Page Down or Down Arrow (▼) |
| Next Track | Next (▶H) or Right Arrow (▶) |
| Previsions Track | Previous (I▲) or Left Arrow (▲) |
- Does not appear on video display connected to AVR.
When a slideshow is being displayed, some controls have different effects:
- To pause the slideshow, including any audio track that is playing, press the Pause Button.
- To resume a paused slideshow, press the Pause Button. Pressing the Play Button begins audio playback.
- To play an audio track stored on the iPod, adjust the Slideshow Settings on the iPod.
- To skip to the next or previous photo on the iPod, press the Next or Previous Transport Control.
- It is not possible to skip to the next or previous audio track during a slideshow.
- To search forward or in reverse within an audio track, press the Forward or Reverse Search Transport Control. If no audio track is playing, these controls will have no effect during the slideshow.
Charging the iPod or iPhone
You may leave your iPod or iPhone in The Bridge III even when you are not using it as a playback source. Whenever the iPod or iPhone is docked and your receiver is turned on, The Bridge III will charge the battery in the iPod or iPhone.
Undocking the iPod or iPhone
We recommend that you pause playback before physically removing the iPod or iPhone from The Bridge III.
SYMPTOM
SOLUTION
The iPod or iPhone does not play or respond to commands from the receiver's remote.
- Make sure that The Bridge III is properly connected to a compatible Harman Kardon receiver.
- Make sure that The Bridge is selected as the input on the receiver.
SPECIFICATIONS:
Dimensions (H x W x D): 1-3/16" x 4-1/2" x 4-1/2" (30mm x 114mm 114mm)
Weight: 0.37 lb (0.17kg)

Made for
iPod

Works with
iPhone
© 2009 Harman International Industries, Incorporated. All rights reserved.
Harman Kardon is a trademark of Harman International Industries, Incorporated, registered in the United States and/or other countries.
Designed to Entertain and The Bridge III logo are trademarks of Harman International Industries, Incorporated.
iPod and iPhone are trademarks of Apple Inc., registered in the U.S. and other countries. iPod and iPhone not included. "Made for iPod" means that an electronic accessory has been designed to connect specifically to iPod and has been certified by the developer to meet Apple performance standards. "Works with iPhone" means that an electronic accessory has been designed to connect specifically to iPhone and has been certified by the developer to meet Apple performance standards. Apple is not responsible for the operation of this device or its compliance with safety and regulatory standards.
Features, specifications and appearance are subject to change without notice.
harman/kardon
Designed to Entertain.
A Harman International Company
250 Crossways Park Drive, Woodbury, New York 11797
www.harmankardon.com
© 2009 Harman International Industries, Incorporated.
All rights reserved.
Part No. 950-0273-001
Brand : HARMAN KARDON
Model : THE BRIDGE III
Category : Audio accessory