
SoftBank 812SH - Smartphone SHARP - Free user manual and instructions
Find the device manual for free SoftBank 812SH SHARP in PDF.
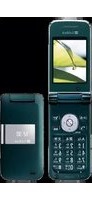


| Product Type | Smartphone (Feature phone) |
| Brand | Sharp |
| Model | SoftBank 812SH |
| Dimensions | Approx. 100 x 50 x 18 mm |
| Weight | Approx. 120 g |
| Display | 2.4-inch QVGA (240 × 320) TFT |
| Camera | 2.0 MP CMOS |
| Battery | Li-ion 750 mAh |
| Talk Time | Up to 4 hours |
| Standby Time | Up to 400 hours |
| Storage | microSD (up to 1 GB) |
| Network | W-CDMA / GSM |
| Connectivity | Bluetooth 2.0, Infrared |
| Operating System | Proprietary (Sharp) |
| Main Functions | Calling, SMS, Camera, Music Player, 1seg TV |
| Maintenance | Clean with soft dry cloth; avoid liquids |
| Safety | Use only original charger; do not disassemble |
| Spare Parts | Battery, charger, earphones (Sharp official) |
| Repair Service | Authorized Sharp service centers |
| Release Year | 2007 |
Frequently Asked Questions - SoftBank 812SH SHARP
User questions about SoftBank 812SH SHARP
0 question about this device. Answer the ones you know or ask your own.
Ask a new question about this device
Download the instructions for your Smartphone in PDF format for free! Find your manual SoftBank 812SH - SHARP and take your electronic device back in hand. On this page are published all the documents necessary for the use of your device. SoftBank 812SH by SHARP.
USER MANUAL SoftBank 812SH SHARP
- For proper handset use, read this manual beforehand.
• This manual was created exclusively for SoftBank 812SH and 813SH handsets sold in Japan. - Keep this manual in a convenient place for reference.
- Accessible SoftBank services may vary by service area, subscription, etc.
SoftBank 812SH and 813SH are compatible with both 3G and GSM network technologies.
Note
- Copying this manual in whole or part without authorisation is prohibited.
- Manual content is subject to change without prior notice.
- Efforts have been made to ensure the accuracy and clarity of this manual. Please contact Customer Service, General Information (see P.20-29) about unclear or missing information.
Symbols & Illustrations
In this manual, most operations are described with SoftBank 812SH open (see P.1-11) in Standby. Sample screen shots, etc. are provided for reference only. Actual handset windows, menus, etc. may differ in appearance.
SoftBank 813SH users, please note that SoftBank 813SH is not equipped with mobile camera. See SoftBank 813SH Supplementary Guide for operational and functional differences with SoftBank 812SH.
812SH-813SH Comparison
Functions
These functions are not available on SoftBank 813SH:
■ Video Call ■ Camera ■ Face Recognition ■ Scan Barcode ■ Create QR Code ■ Text Scanner
Main Menu
![graph LR A["SoftBank 812SH"] --> B["Communication"] A --> C["Yahoo! Keitai"] A --> D["Media Player"] A --> E["Messaging"] A --> F["Camera"] A --> G["Data Folder"] A --> H["Tools"] A --> I["Entertainment"] A --> J["S! Appli"] A --> K["Lifestyle-appli"] A --> L["Phone"] A --> M["Settings"] N["SoftBank…](/content/2026/07/1509125/images/824bcbda90e0fd11e7e7e448cadd2c57696861633f0aa394f6bfd1577bcbd4f8.jpg)
Keypad Keys
Indicated in this manual as shown below.

Select menu items, move cursor and scroll, etc. In this manual, Multi Selector operations are indicated as shown to the right.

Basic Multi Selector Operations
■: Press or
■: Press or
■: Press Ⓞ, Ⓞ, Ⓞ or Ⓞ
Side Keys
Indicated in this manual as shown below.
Activate/cancel Manner mode, adjust volume, etc.

Abbreviated Steps
Handset operations starting from Main Menu are abbreviated as follows:
![graph LR A["Press"] --> B["Main Menu"] B --> C["Menu Item"] C --> D["Selection"] D --> E["Operation"] E --> F["Options (☑)"] F --> G["Menu (😊)"] H["Select the menu item and press ⬙"] --> B I["Select the folder or file and press ⬙"] --> B J["Perform the operation such as opening a window"] --> E K["P…](/content/2026/07/1509125/images/85945502e0ad29bee835f02a18ba28fb1f9659b03df4afa304bd0ddc50c54f0b.jpg)
Manual descriptions are based on default Font Settings (see P.9-4). Actual handset windows, menus, etc. may differ in appearance when Font Settings are different or when Simple Menu (see P.2-21) is active.
In this SoftBank 812SH/813SH Instruction Manual, SoftBank 812SH/813SH is referred to as handset.
Accessories
■Lithium-ion Battery (Type 1) (SHBAY1)

■AC Charger (SHCAA1)

■ Utility Software (CD-ROM) * ★

*Utility Software updates/upgrades may become available on SoftBank Mobile Website (http://www.softbank.jp) without prior notification. Please check for the newest versions of Utility Software and download as required.
★Complimentary sample not available for purchase
Note ▶ Supplied Utility Software is designed exclusively for 812SH and 813SH.
Tip ▶ • For accessory-related information, please contact SoftBank Customer Centre, General Information (see P.20-29).
- 812SH and 813Sh are compatible with microSD™ Memory Card; microSD™ Memory Card is not included in this package. Purchase microSD™ Memory Card to use Memory Card-related handset functions.
- In this manual, microSD™ Memory Card is referred to as "Memory Card".
Contents
Symbols & Illustrations ....i
Accessories......iv
Contents ......v
Safety Precautions....xii
General Notes....xxii
Specific Absorption Rate (SAR) ....xxx
1 Getting Started
Function & Feature Preview.... 1-2
USIM Card 1-4
■General Information & Precautions 1-4
■ Inserting & Removing USIM Card 1-5
■ USIM PINs.... 1-6
Handset Parts & Functions 1-7
■ Handset.... 1-7
■ Display Indicators 1-9
■ Display Positions 1-11
Battery & Charger 1-12
■ Getting Started.... 1-12
■ Installing & Removing Battery 1-16
■ AC Charger 1-17
■ Desktop Holder.... 1-18
In-Car Charger 1-19
Handset Power On/Off 1-20
■ My Details.... 1-21
■ Keypad Lock.... 1-22
Handset Menus.... 1-23
■ Main Menu.... 1-23
■ User Shortcuts 1-24
■ Multi Job 1-26
Security Codes.... 1-27
■ Handset Code 1-27
Centre Access Code 1-27
■ Network Password.... 1-27
2 Basic Handset Operations
Initiating a Call 2-2
Emergency Calls 2-3
■ Redial 2-4
Placing an International Call from Japan 2-5
Incoming Call 2-6
■ Calling from Received Calls 2-8
Answer Phone 2-9
■ Activating & Cancelling.... 2-9
■ Playing Messages 2-10
Engaged Call Operations 2-11
■ Earpiece Volume 2-11
■ Voice Output 2-11
■ Voice Memo.... 2-12
■ Other Engaged Call Operations 2-12
Call Log 2-13
■ Using Call Log.... 2-13
Call Timers & Data Counter 2-14
■ Call Timers ...... 2-14
■ Data Counter 2-14
Call Costs 2-15
■ Limit Call Costs 2-15
Outside Japan (International Roaming) 2-16
■ Switching Network Services.... 2-16
■ Calling from Outside Japan 2-17
Manner Mode 2-18
■Minding Mobile Manners 2-18
■ Activating & Cancelling.... 2-19
■ Activating/Cancelling Offline Mode.... 2-20
Simple Menu 2-21
■ Activating/Cancelling Simple Menu 2-21
■ Simple Menu Operations.... 2-22
3 Text Entry
Character Selection 3-2
Entry Modes 3-2
■ Key Assignments.... 3-3
Entering Characters.... 3-5
■ Kanji, Hiragana & Katakana 3-5
■ Entering Alphanumerics 3-7
Symbols, Pictograms & Emoticons 3-8
Mail & Web Extensions 3-9
■ Character Code 3-9
■ Pager Code ...... 3-9
Conversion Methods (Japanese Only) 3-11
■Phonetic Conversion 3-11
■ One-Hiragana Conversion.... 3-11
Hiragana to Katakana/Alphanumerics Conversion.... 3-11
■ Quick Conversion (for Hiragana) 3-12
■ Conversion Settings 3-13
Editing Characters 3-13
■ Deleting & Replacing.... 3-13
■ Copy/Cut & Paste.... 3-13
■ Deleting Text On and After Cursor 3-14
Additional Functions 3-14
■ Copying from Phone Book 3-14
■ Using Text Templates 3-15
■ Changing Font Size 3-15
4 Phone Book
Overview 4-2
Saving to Phone Book 4-3
■Phone Book Entry Items 4-3
Creating Phone Book Entries 4-4
■ Saving from Call Log 4-8
■ Phone Book Memory Status 4-8
Using Phone Book 4-8
■ Dialling from Phone Book 4-8
Editing Phone Book Entries.... 4-10
■ Correction/Change 4-10
■ Copying Phone Book Entries 4-10
■ Deleting Phone Book Entries 4-11
Category Settings 4-11
■ Changing Category Name 4-11
■ Customising Handset Responses 4-12
Contact Groups 4-12
■ Creating Contact Groups.... 4-12
■ Saving Group Members 4-12
■Editing Contact Groups 4-12
■ Editing Group Members 4-13
Speed Dial List 4-13
Saving Phone Numbers 4-13
■ Speed Dial....4-14
S! Address Book (SAB) 4-15
■SAB Sync Commands & Features 4-15
■ Service Usage Outline 4-16
Saving User ID & Password 4-17
■Backup & Restore 4-17
■Synchronising Phone Book 4-18
■ Opening Log.... 4-19
My Details 4-19
■Opening My Details.... 4-19
5
Video Call
Getting Started 5-2
Initiating a Video Call.... 5-3
Answering a Video Call 5-3
Engaged Video Call Operations.... 5-4
Video Call Settings 5-6
6
Camera
Getting Started 6-2
■ Mobile Camera Basics 6-2
■ Camera Display Indicators 6-3
■ Key Assignments.... 6-4
Still Images 6-5
■ Photo Camera Mode 6-5
Capturing Still Images 6-6
Still Image Functions 6-7
Video 6-8
■ Video Camera Mode 6-8
■ Recording Video.... 6-8
■ Video Recording Operations 6-9
Opening Images & Playing Video 6-10
■ Opening Still Images 6-10
■ Playing Video 6-10
Special Shooting Modes 6-11
■ Self-timer 6-11
■ Continuous Shoot (Photo Camera) 6-12
■ Adding Frames (Photo Camera)...... 6-13
■ Camera Effects (Photo Camera) 6-14
Sending Images 6-14
Still Images 6-14
■ Video Clips 6-15
Camera Settings.... 6-15
■ Shooting Options.... 6-15
■ Image Settings 6-16
■ Additional Settings.... 6-17
7
Media Player
Media Player Basics.... 7-2
■ Downloading Music/Video 7-2
■ Saving Music Files from PCs 7-3
Playing Music 7-4
■ Playback....7-6
■ Playback Settings.... 7-7
Playing Video....7-8
■ Playback....7-8
■ Playback Settings.... 7-10
Editing Video 7-11
■ Clipping Portions between Two Points 7-11
■ Cropping Video Clips.... 7-12
■ Adding Subtitles 7-12
Managing Video & Music Files.... 7-15
■ Adding New Playlist.... 7-16
■ Adding Files to Playlists 7-16
■ Deleting SD VIDEO & SD AUDIO Files.... 7-17
8
Managing Files (Data Folder)
Data Folder 8-2
■ Window Description.... 8-2
■ Major Icons....8-3
■ Display Settings.... 8-4
Opening Files 8-5
Managing Files & Folders.... 8-8
■ Adding Folders 8-8
■ Changing File/Folder Name 8-8
■ Deleting Files & Folders 8-8
■ Copying/Moving Files 8-9
Using Files 8-10
■ Wallpaper 8-10
Saving to Phone Book 8-10
Ringvideo & Ringtone.... 8-10
■ S! Mail Attachments 8-11
■ Printing Images 8-11
Editing Still Images 8-12
■ Changing Image Size 8-12
■ Visual Effects (Retouch) 8-13
■ Adding Text & Stamps 8-14
■ Face Arrange....8-14
■ Additional Picture Effects 8-16
■ Panorama Images 8-17
Split Screen 8-18

Additional Settings
Mode Settings 9-2
■ Activating a Mode 9-2
■ Customising Modes.... 9-2
■ Reset....9-2
Display 9-3
■ Display Settings.... 9-3
■ Standby Window (Japanese Only) 9-6
■ Language Setting....9-9
■ Custom Screens....9-9
■Familiar Usability 9-12
■ Light Settings.... 9-13
■ External Display Settings 9-13
Sounds & Alerts 9-14
■Customising Handset Responses 9-14
■Customising System Sounds 9-16
■ Additional Sound Settings 9-17
Date & Time 9-18
User Dictionary 9-19
■ Entries (Japanese Only) 9-19
■812SH/813SH Download Dictionary (Japanese Only) ..... 9-19
Handset Security.... 9-20
■ Face Recognition....9-20
PIN 9-24
■ Handset Locks.... 9-25
■Opening Secret Entries 9-27
■ Changing Handset Code 9-28
Reset 9-28
Call Settings 9-29
International Call 9-29
■ Auto Answer 9-30
■ Additional Settings.... 9-30
10 Connectivity
Bluetooth ® 10-2
■ Getting Started.... 10-2
■ Transferring Files via Bluetooth ® 10-4
■Connecting Handsfree Devices.... 10-8
Bluetooth® Settings.... 10-9
Infrared....10-10
■ Getting Started.... 10-10
■ Transferring Files via Infrared.... 10-10
Network Settings.... 10-14
Location Info.... 10-15
11 Memory Card
Memory Card 11-2
■ Precautions ...... 11-2
■ Inserting & Removing Memory Card.... 11-3
■ Format Card 11-4
■ Backup & Restore 11-4
■ Additional Functions.... 11-7
Digital Print Order Format (DPOF).... 11-7
■ Selecting Images & Prints 11-7
■ Print Settings.... 11-8
Mass Storage.... 11-9
12 Tools
Calendar 12-2
■Opening Calendar 12-2
Saving Entries 12-4
■ Opening Entries 12-6
■ Searching Entries by Subject 12-6
■ Editing Entries.... 12-7
■ Deleting Entries 12-7
Tasks 12-8
Saving Entries 12-8
■ Opening Entries 12-10
■ Searching Entries by Subject 12-10
■ Editing Entries.... 12-11
■ Deleting Entries 12-11
Alarm 12-11
Setting Alarm.... 12-11
■ Cancelling & Reactivating Alarm 12-14
■ Deleting Alarm.... 12-14
World Clock 12-14
Setting Time Zone & Daylight Saving.... 12-14
■ Opening World Clock 12-15
Calculator 12-15
Voice Recorder 12-16
■ Preparation.... 12-16
■ Recording 12-16
■ Playback.... 12-17
■ Recording Setting.... 12-17
Document Viewer 12-18
Barcode....12-19
Create QR Codes 12-22
Text Scanner.... 12-23
Stopwatch 12-24
Countdown Timer.... 12-25
Expenses Memo.... 12-25
Text Templates 12-26
■ New Entry.... 12-26
■Opening Templates 12-26
■ Editing Templates.... 12-27
■ Deleting Templates.... 12-27
Phone Help 12-27
13 Optional Services
Optional Services Overview.... 13-2
Call Forwarding 13-2
Voicemail.... 13-4
Missed Call Notification.... 13-5
Call Waiting.... 13-5
Conference Call.... 13-6
Call Barring.... 13-7
■ Restricting Outgoing Calls.... 13-8
■ Restricting Incoming Calls.... 13-8
■ Rejecting a Call 13-9
■ Changing Network Password 13-10
Caller ID 13-10
14 Messaging
Basics 14-2
■ Messaging Folders.... 14-2
■ Window Description.... 14-3
■ Changing Views 14-4
■ Customising Handset Address 14-5
Sending Text Messages.... 14-5
Basics.... 14-5
Creating & Sending SMS Mail.... 14-6
■ Creating & Sending S! Mail 14-7
■ Delivery Options.... 14-15
■ Send Reservation.... 14-17
■ Using Drafts.... 14-18
Incoming Text Messages.... 14-18
■Opening New Messages 14-18
Retrieving Complete S! Mail Messages 14-21
Retrieving Mail List 14-22
Using Messages 14-23
■ Checking Messages.... 14-23
■ Replying to Messages.... 14-25
■ Forwarding Messages 14-26
■ Cancelling Sent Messages.... 14-27
■ Linked Info 14-27
■ Protecting Messages.... 14-28
■ Deleting Messages.... 14-29
Saving Attachments to Data Folder.... 14-30
■ Using Attachments ...... 14-30
■ My Folders.... 14-31
Additional Functions 14-33
■ Speed Mail List.... 14-33
■ Speed Mail 14-34
■ Auto Resend.... 14-34
■ General Settings.... 14-34
■ SMS Settings.... 14-36
■ S! Mail Settings 14-37
15 Yahoo! Keitai
Getting Started 15-2
Using Yahoo! Keitai 15-3
■Opening Yahoo! Keitai Menu 15-3
■ Entering URLs Directly.... 15-4
Basic Operations 15-5
Advanced Features 15-9
Bookmarks & Saved Pages 15-9
Saving Files to Data Folder 15-11
■ Using Linked Info.... 15-12
Streaming 15-12
Live Monitor (Japanese Only) 15-14
Live Monitor Basics 15-14
■ Opening Information.... 15-15
Registering with Live Monitor Items 15-15
■ Updating Live Monitor Items.... 15-16
■ Automatic Update.... 15-16
■ Deleting Live Monitor Items.... 15-17
Using PC Site Browser 15-18
■ Opening Yahoo! JAPAN.... 15-18
■ Entering URLs Directly.... 15-19
Additional Functions 15-19
■ Sub Menu Settings 15-19
■ Common Settings.... 15-20
■ PC Site Browser Settings 15-21
■ Security Settings 15-21
16 S! Applications
Getting Started 16-2
■ S! Appli Library.... 16-2
■ S! Applications on Memory Card.... 16-3
■ Downloading S! Applications.... 16-3
Using S! Applications 16-4
■ Starting S! Applications 16-4
■ Exit, Pause & Resume 16-4
Managing S! Applications 16-5
■ Opening S! Application Properties 16-5
■ Moving S! Applications to Memory Card 16-5
■De letting S! Applications 16-5
Screensaver 16-6
■ Setting Permissions.... 16-7
■ S! Application Operational Settings.... 16-7
■ Reset 16-8
17 S! FeliCa (Japanese Only)
Basics 17-2
■ Starting Lifestyle-Appli.... 17-3
Using S! FeliCa.... 17-3
S! FeliCa Settings 17-4
■ IC Card Status.... 17-4
IC Card Lock 17-4
■ Remote Lock 17-5
■ Interface Settings 17-7
■ Resetting Defaults 17-8
18 Entertainment
S! Cast (Japanese Only).... 18-2
■ Basics.... 18-2
■ Service Registration & Content Subscription 18-2
■Opening Received Information.... 18-2
■ Using Information 18-3
■ Using Weather Indicator.... 18-4
Electronic Books.... 18-5
■ Reading Content 18-6
■ Using E-Book Images.... 18-8
■ Using a Dictionary 18-8
BookSurfing ® (Japanese Only) 18-9
19 Communication
S! Town (Japanese Only).... 19-2
■ Using S! Town 19-2
■ S! Town Library.... 19-3
S! Loop (Japanese Only) 19-3
Hot Status 19-4
■ Adding Members 19-5
■Opening Member Status Details 19-7
■ My Status .... 19-8
■ Editing Hot Status Member List.... 19-10
■ Deleting Members 19-10
■ Using Hot Status Info 19-11
■ Hot Status Settings.... 19-11
■ Additional Functions .... 19-12
Circle Talk 19-13
■ Initiating Circle Talk 19-14
■Accepting a Circle Talk Request.... 19-16
■ Adding/Cancelling Participants.... 19-16
Creating Circle Talk Member List 19-17
■ Editing Circle Talk Member List 19-18
■ Circle Talk Settings.... 19-18
Near Chat (Japanese Only) 19-19
■ Basics.... 19-19
■ Using Near Chat.... 19-19
20 Appendix
Function List 20-2
Troubleshooting 20-4
Software Update.... 20-8
Character Code List 20-10
Pictogram List 20-16
Specifications.... 20-17
Memory List.... 20-19
Index 20-20
Warranty & After-Sales Services 20-28
Customer Service 20-29
Safety Precautions
- Read safety precautions before using handset.
- Observe precautions to avoid injury to self or others, or damage to property.
- SoftBank is not liable for any damages resulting from use of this product.
Before Using Handset
Symbols
Make sure you thoroughly understand these symbols before reading on. Symbols and their meanings are described below:

DANGER
Great risk of death or serious injury from improper use

WARNING
Risk of death or serious injury from improper use

CAUTION
Risk of injury or damage to property from improper use
Symbols


Prohibited Actions Compulsory Actions

Attention Required
⚠️DANGER
Handset, Battery & Charger
Use specified battery, Charger and Desktop Holder only (see P.iv).
Using non-specified equipment may cause malfunctions, electric shock or fire due to battery leakage, overheating or bursting.

Do not short-circuit Charger terminals.
Keep metal objects away from Charger terminals. Keep handset away from necklaces, hairpins, etc. Battery may leak, overheat, burst or ignite causing injury. Use a case to carry battery.

Battery
Prevent injury from battery leakage, breakage or fire. Do not:

- Heat or dispose of battery in fire
- Open/modify/disassemble battery
•Damage or solder battery - Use a damaged or deformed battery
- Use non-specified charger (see P.iv)
-Force battery into handset - Charge battery near fire or sources of heat; or expose it to extreme heat
- Use battery for other equipment
If battery fluid contacts eyes, do not rub them. Rinse with clean water and consult a doctor immediately.

Eyes may be severely damaged.
⚠ WARNING
Handset, Battery & Charger
Do not insert foreign objects into the handset, Charger or Desktop Holder.
Do not insert metal or flammable objects into handset, Charger or Desktop Holder; may cause fire or electric shock. Keep out of children's reach.

Keep handset out of rain or extreme humidity. Fire or electric shock may result.

Keep handset away from liquid-filled containers. Keep the handset, Charger and Desktop Holder away from chemicals or liquids; fire or electric shock may result.

Keep battery, handset, Charger or Desktop Holder away from microwave ovens.
Battery, handset, Charger or Desktop Holder may leak, burst, overheat or ignite, leading to accidents or injury.
Do not disassemble or modify handset or related hardware.
- Do not open handset, Charger or Desktop Holder; may cause electric shock or injury. Contact SoftBank Customer Centre, Customer Assistance for repairs.
- Do not modify handset, Charger or Desktop Holder; fire or electric shock may result.
If water or foreign matter is inside handset:
Discontinue handset use to prevent fire/electric shock. Turn off handset, remove battery and unplug Charger, then contact SoftBank Customer Centre, Customer Assistance.


⚠ WARNING
Handset, Battery & Charger
Keep handset off and Charger disconnected near filling stations or places with fire/explosion risk.
Handset use near petrochemicals or other flammables may cause fire/explosion; turn handset off before using SI FeliCa at filling stations (cancel IC Card Lock beforehand).

Do not subject handset to strong shocks or impacts.
Strong shocks or impacts to handset, Charger or Desktop Holder may cause malfunction or injury. Should handset be damaged, remove battery then contact SoftBank Customer Centre, Customer Assistance. Discontinue handset use; fire or electric shock may occur.

If an abnormality occurs:
If a handset emits an unusual sound, smoke or odour, discontinue use; may cause fire or electric shock. Turn off handset, remove battery and unplug Charger; contact SoftBank Customer Centre, Customer Assistance.

Handset
Take measures to prevent accidents.
- For safety, never use handset while driving. Pull over beforehand. Mobile phone use while driving is prohibited by the revised Road Traffic Law (effective 1 November 2004).
- Do not use Headphones while driving or riding a bicycle. Accidents may result.
- Moderate volume outside, especially near rail crossings/intersections, etc. to avoid accidents.

Do not swing handset by strap.
May result in injury or breakage.

Turn handset power off before boarding aircraft.
Using wireless devices aboard aircraft may cause electronic malfunctions or endanger aircraft operation.

Adjust vibration and ringtone settings:
Users with a heart condition/pacemaker/defibrillator should adjust handset settings accordingly.

During thunderstorms, turn power off; find cover.
There is a risk of lightning strike or electric shock.

⚠ WARNING
Charger
Use only the specified voltage.
Non-specified voltages may cause fire or electric shock.
•AC Charger: AC 100V-240V Input
■SoftBank is not liable for problems caused by charging battery abroad.
•In-Car Charger: DC 12V-24V Input
Do not use power adapters.
Using AC Charger with step-up/step-down transformer may cause fire, electric shock or damage.
Do not use In-Car Charger in positive earth vehicles.
Fire may result. Use In-Car Charger in negative earth vehicles only.
Charger care
- Do not touch with wet hands. Electric shock may occur.
- Do not use multiple cords in one outlet; may cause excess heat/fire.
- Do not bend, twist, pull or set objects on cord. Exposed wire may cause fire or electric shock.


Do not short-circuit Charger terminals.
May cause overheating, fire or electric shock. Keep metal away from terminals.
Do not use Desktop Holder inside vehicles.
Extreme temperature or vibration may cause fire or damage handset, etc.
Take measures to prevent accidents.
Secure In-Car Charger to avoid injury or accidents.
Damaged AC Charger/In-Car Charger cord:
May cause fire or electric shock; discontinue use and purchase a new Charger.
During thunderstorms:
Unplug Charger to avoid damage, fire or electric shock.
Charger/Desktop Holder use and children:
May cause electric shock/injury; keep out of reach.


⚠ WARNING
Battery
- If battery does not charge properly, stop charging. Battery may overheat, burst or ignite.
- If there is leakage or abnormal odour, avoid fire sources. Battery may catch fire or burst.

If there is abnormal odour, excessive heat, discolouration or distortion, remove battery from handset. It may leak, overheat or explode.

Handset Use & Electronic Medical Equipment
This section is based on "Guidelines on the Use of Radio Communications Equipment such as Cellular Telephones and Safeguards for Electronic Medical Equipment" (Electromagnetic Compatibility Conference, April 1997) and "Report of Investigation of the Effects of Radio Waves on Medical Equipment, etc." (Association of Radio Industries and Businesses, March 2001).
Persons with implanted pacemaker/defibrillator should keep handset more than 22 cm away.
Radio waves can interfere with implanted pacemakers or defibrillators causing such devices to malfunction.

Observe these rules inside medical facilities:
- Do not enter an operating room or an Intensive or Coronary Care Unit while carrying a handset.
- Keep handset off in hospitals, including lobbies.
- Obey medical facility rules on mobile phone use.
Turn handset off in crowds or trains where persons with implanted pacemaker/defibrillator may be near.
Radio waves can interfere with implanted pacemakers or defibrillators causing such devices to malfunction.

Consult electronic medical equipment vendor on radio wave effects.


⚠️CAUTION
Handset, Battery & Charger
Handset care
- Place handset on stable surfaces to avoid malfunction or injury.
- Keep handset away from oily smoke or steam. Fire or accidents may result.
- Cold air from air conditioners may condense, resulting in leakage or burnout.
- Keep handset away from direct sunlight (inside vehicles, etc.) or heat sources. Distortion, discolouration or fire may occur. Battery shape may be affected.
- Keep handset out of extremely cold places to avoid malfunction or accidents.
- Keep handset away from fire sources to avoid malfunction or accidents.

Usage environment
- Excessive dust may prevent heat release and cause burnout or fire.
- Avoid using handset on the beach. Sand may cause malfunction or accidents.
- Keep handset away from credit cards, telephone cards, etc. to avoid data loss.

Handset
Handset temperature
Handset may become hot while in use. Avoid prolonged contact with skin especially at high temperature. May cause burn injuries.

Avoid leaving handset in extreme heat (inside vehicles, etc.).
Handset may become hot to the touch, leading to burn injuries.

Volume settings
Moderate handset volume; excessive volume may damage ears or hearing.

Inside vehicles
Handset use may cause electronic equipment to malfunction.

⚠️CAUTION
Handset
If you experience any skin irritation associated with handset use, discontinue handset use and consult a doctor. See handset materials below. Some materials may cause skin irritation, rashes, or itchiness depending on your physical condition.

| Parts Materials & Finishing | |
| Housing (Display side), Display ornament | ABS resin/Acrylic UV curing painting (sealer: discontinuous deposition) |
| Housing (Display back side), hinge cover (Keypad side) | ABS resin/Acrylic UV curing painting (sealer: acrylic painting)ABS resin/Acrylic UV curing painting (sealer: discontinuous deposition) for metallic blue and silver |
| Hinge housing (left & right, Display side) | Nylon-based resin (with glass fibres)/Acrylic UV curing painting(sealer: acrylic and urethane painting) |
| External Display ornament panel | Acrylic resin/Acrylic UV curing painting (sealer: printed foil) |
| Housing (Keypad/Keypad back side), battery cover | ABS resin/Acrylic UV curing painting (sealer: acrylic painting) |
| Display window Acrylic resin | |
| Infrared Port ABS resin (infrared grade) | |
| Multi Selector (centre, Cursor Keys) ABS resin (chrome plating on nickel plating) | |
| Start Key, Power On/Off Key, Mail Key, Yahoo! Keitai Key, Shortcuts & A/a Key, Clear/Back Key, Multimedia/Text Key, Side Keys, Keypad | PC resin/Paint |
| Memory Card Slot cover, Headphone Port cover, External Device Port cover | Urethane-based resin, PC resin/Acrylic UV curing painting (sealer: acrylic painting) |
| Display stop rubber Silicon rubber | |
| Battery PC resin | |
| Charger Terminal SUS/Gold plating (sealer: nickel plating) | |
| Screw (all pieces) SWCH12A/Ni plating | |
| Screw cover PC resin | |
| USIM pin Copper alloy/Gold plating (sealer: nickel) | |
| External Camera window | Acrylic resin |
| Portrait/Macro Selector | ABS resin |
⚠️CAUTION
Charger
Charger & In-Car Charger
- Grasp plug (not cord) to disconnect Charger. May cause fire/electric shock.
- Keep cord away from heaters. Exposed wire may cause fire or electric shock.
- Stop use if plug is hot or improperly connected. May cause fire/electric shock.
- Keep In-Car Charger socket clean. May overheat and cause injury.


Do not touch Desktop Holder while in use.
May cause burn injuries.

Use only the specified fuse.
1 A fuse for In-Car Charger.
Or may cause damage/fire.

Always charge battery in a well-ventilated area.
Avoid covering/wrapping Charger and Desktop Holder; may cause damage/fire.

Do not use In-Car Charger when engine is off.
To avoid weakening the car battery, always start engine before charging the handset using In-Car Charger.

During periods of disuse
Always unplug AC Charger or In-Car Charger after use.

Handset maintenance
Always disconnect AC Charger or In-Car Charger when cleaning handset.

In-Car Charger installation
Properly position the cable for safe driving to avoid injury or accidents.

⚠️CAUTION
Battery
Do not throw or abuse battery. Battery may overheat, burst or ignite.

Do not leave battery in direct sunlight or inside a closed vehicle; may reduce battery performance or overheat. An overheated battery may cause fire.

Do not expose battery to liquids. Performance may deteriorate.

If battery fluid contacts skin or clothes, rinse with clean water immediately.

Do not dispose of an exhausted battery with ordinary refuse; always tape over battery terminals before disposal. Take exhausted battery to a SoftBank shop, or follow the local disposal regulations.

Keep battery out of children's reach.

- Charge battery in ambient temperatures between 5°C and 35°C; outside this range, battery may leak/overheat and performance may deteriorate.

- If your child is using handset, explain all instructions and supervise usage.
- If there is abnormal odour or excessive heat, stop using battery and call SoftBank Customer Centre, Customer Assistance.
- Charge battery at least once every six months; an uncharged battery may become unusable.
General Notes
General Use
- SoftBank is not liable for any damages resulting from accidental loss/alteration of handset or Memory Card data. Keep a copy of Phone Book entries, etc. in a separate place.
- Handset transmissions may be disrupted inside buildings, tunnels or underground, or when moving into/out of such places.
- Use handset without disturbing others.
- Handsets are radios as stipulated by the Radio Law. Under the Radio Law, handsets must be submitted for inspection upon request.
Inside Vehicles
- Never use handset while driving.
-
Do not park illegally to use handset.
-
Handset use near landlines, TVs or radios may cause interference.
- Beware of eavesdropping. Because this service is completely digital, the possibility of signal interception is greatly reduced. However, some transmissions may be overheard.
Eavesdropping
Deliberate/accidental interception of communications constitutes eavesdropping.
Aboard Aircraft
- Never use handset aboard aircraft (keep power off). Handset use may impair aircraft operation.
Electromagnetic Waves
- Handset use may affect a vehicle's electronic equipment.
For body-worn operation, this phone has been tested and meets RF exposure guidelines when used with accessories containing no metal, that position handset a minimum of 15 mm from the body. Use of other accessories may not ensure compliance with RF exposure guidelines.
FCC Notice
- This device complies with part 15 of the FCC Rules. Operation is subject to the following two conditions:
(1) This device may not cause harmful interference, and (2) this device must accept any interference received, including interference that may cause undesired operation. - Changes or modifications not expressly approved by the manufacturer responsible for compliance could void the user's authority to operate the equipment.
FCC RF Exposure Information
Your handset is a radio transmitter and receiver. It is designed and manufactured not to exceed the emission limits for exposure to radio frequency (RF) energy set by the Federal Communications Commission of the U.S. Government. The guidelines are based on standards that were developed by independent scientific organisations through periodic and thorough evaluation of scientific studies. The standards include a substantial safety margin designed to assure the safety of all persons, regardless of age and health. The exposure standard for wireless handsets employs a unit of measurement known as the Specific Absorption Rate, or SAR. The SAR limit set by the FCC is 1.6 W/kg. Highest SAR value:
| Model | FCC ID | At the Ear | On the Body |
| 812SH | APYHRO00054 | 1.27 W/kg | 0.77 W/kg |
| 813SH | APYHRO00055 | 1.45 W/kg | 1.10 W/kg |
This device was tested for typical body-worn operations with the back of the handset kept 1.5 cm from the body. To maintain compliance with FCC RF exposure requirements, use accessories that maintain a 1.5 cm separation distance between the user's body and the back of the handset. The use of beltclips, holsters and similar accessories should not contain metallic components in its assembly.
The use of accessories that do not satisfy these requirements may not comply with FCC RF exposure requirements, and should be avoided.
The FCC has granted an Equipment Authorisation for this model handset with all reported SAR levels evaluated as in compliance with the FCC RF emission guidelines. SAR information on this model handset is on file with the FCC and can be found under the Display Grant section of http://www.fcc.gov/oet/fccid after searching on the corresponding FCC ID (see table on the left).
Additional information on Specific Absorption Rates (SAR) can be found on the Cellular Telecommunications & Internet Association (CTIA) Website at http://www.phonefacts.net.
European RF Exposure Information
Your mobile device is a radio transmitter and receiver. It is designed not to exceed the limits for exposure to radio waves recommended by international guidelines. These guidelines were developed by the independent scientific organization ICNIRP and include safety margins designed to assure the protection of all persons, regardless of age and health. The guidelines use a unit of measurement known as the Specific Absorption Rate, or SAR. The SAR limit for mobile devices is 2 W/kg. As mobile devices offer a range of functions, they can be used in other positions, such as on the body as described in this user guide*.
Highest SAR value:
| Model At the Ear** On the Body | ||
| 812SH | 1.647 W/kg | 1.258 W/kg |
| 813SH | 1.619 W/kg | 0.903 W/kg |
As SAR is measured utilizing the device's highest transmitting power the actual SAR of this device while operating is typically below that indicated above. This is due to automatic changes to the power level of the device to ensure it only uses the minimum level required to reach the Network.
The World Health Organization has stated that present scientific information does not indicate the need for any special precautions for the use of mobile devices. They note that if you want to reduce your exposure then you can do so by limiting the length of calls or using a hands-free device to keep the mobile phone away from the head and body.
* Please see General Notes (Electromagnetic Waves) on P.xxii for important notes regarding body-worn operation.
**Values are measured in accordance with international guidelines for testing.
Declaration of Conformity
C € 0168
Hereby, Sharp Telecommunications of Europe Ltd, declares that 812SH and 813SH are in compliance with the essential requirements and other relevant provisions of Directive 1999/5/EC.
A copy of the original declaration of conformity for each model can be found at the following Internet address: http://www.sharp.co.jp/k-tai/
Handset Care
- If handset is left with no battery or an exhausted one, data may be altered/lost. SoftBank is not liable for any resulting damages.
- Use handset within 5°C to 35°C and 35% to 85% humidity. Avoid extreme temperatures/direct sunlight.
- Exposing lens to direct sunlight may damage colour filter and affect image colour.
- Do not drop or subject handset to shocks.
- Clean handset with dry, soft cloth. Using alcohol, thinner, etc. may damage it.
- Do not expose handset to rain, snow or high humidity.
- Never disassemble or modify handset.
- Avoid scratching handset Display.
- When closing handset, keep straps, etc. outside to avoid damaging the Display.
- When using Headphones, moderate volume to avoid sound bleed.
•Function Usage Limits
These functions are disabled after handset upgrade/replacement or service cancellation:
■ Camera
■ Media Player
■ S! Applications
After a period of disuse, these functions may be unusable; retrieve Network Information (see P.10-15) to restore usability.
- Handset is not water-proof. Avoid exposure to liquids and high humidity.
■Keep handset away from precipitation.
■Cold air from air conditioning, etc. may condense causing corrosion.
■Avoid dropping handset in damp places (toilet, bathroom, etc.).
■On the beach, keep handset away from water and direct sunlight.
■Perspiration may seep inside handset causing malfunction.
- Avoid heavy objects or excessive pressure. May cause malfunction or injury.
■Do not sit down with handset in a back pocket.
■Do not place heavy objects on handset in a bag.
- Connect only the specified products to Headphone Port. Non-specified devices may malfunction or cause damage.
- Always turn off handset before removing battery. If battery is removed while saving data or sending mail, data may be lost, changed or destroyed.
Copyrights
Copyright laws protect sounds, images, computer programs, databases, other materials and copyright holders. Duplicated material is limited to private use only. Use of materials beyond this limit or without permission of copyright holders may constitute copyright infringement, and be subject to criminal punishment. Comply with copyright laws when using images captured with 812SH camera.
Video recording and playback are based on MPEG-4.
This product is licensed under the MPEG-4 Visual Patent Portfolio License for the personal and non-commercial use of a consumer to (i) encode video in compliance with the MPEG-4 Video Standard ("MPEG-4 Video") and/or (ii) decode MPEG-4 Video that was encoded by a consumer engaged in a personal and non-commercial activity and/or was obtained from a licensed video provider. No licence is granted or implied for any other use.
Additional information may be obtained from MPEG LA. See http://www.mpegla.com.
This product is licensed under the MPEG-4 Systems Patent Portfolio License for encoding in compliance with the MPEG-4 Systems Standard, except that an additional licence and payment of royalties are necessary for encoding in connection with (i) data stored or replicated in physical media which is paid for on a title by title basis and/or (ii) data which is paid for on a title by title basis and is transmitted to an end user for permanent storage and/or use. Such additional licence may be obtained from MPEG LA, LLC.
See http://www.mpegla.com for additional details.

Handset employs RSA ® BSAFE TM software developed by RSA Security Inc.
RSA is a registered trademark of RSA Security Inc. BSAFE is a registered trademark of RSA Security Inc. in the United States and/or other countries.
This product is equipped with JBlend ™ designed to accelerate the performance of Java ™ Application.
Powered by JBlend™ Copyright 1997-2006 Aplx Corporation.
All rights reserved.


JBlend and JBlend-related brands are trademarks or registered trademarks of Aplix Corporation in Japan and other countries. Java and Java-related brands are trademarks or registered trademarks of Sun Microsystems, Inc. in the United States and other countries.


microSD ™ and miniSD ™ are trademarks of the SD Card Association.
Licensed by QUALCOMM Incorporated under one or more of the following United States Patents and/or their counterparts in other nations:
4,901,307 5,490,165 5,056,109 5,504,773 5,101,501
5,506,865 5,109,390 5,511,073 5,228,054 5,535,239
5,267,261 5,544,196 5,267,262 5,568,483 5,337,338
5,600,754 5,414,796 5,657,420 5,416,797 5,659,569
5,710,784 5,778,338
NetFront®
This product employs NetFront Browser (Internet browser) and NetFront SMIL Player (SMIL player) developed by ACCESS Co., Ltd.
Copyright© 2004-2006 ACCESS Co., Ltd.
ACCESS and NetFront are trademarks or registered trademarks of ACCESS Co., Ltd in Japan or other countries.
This product includes a module developed by Independent JPEG Group.
Bluetooth is a registered trademark of the Bluetooth SIG, Inc.

Bluetooth®
The Bluetooth word mark and logos are owned by the Bluetooth SIG, Inc. and any use of such marks by SHARP is under license. Other trademarks and trade names are those of their respective owners.
FeliCa is a contactless IC card technology developed by Sony Corporation.
FeliCa is a trademark of Sony Corporation. 2 is a trademark of FeliCa Network, Inc.
The frequency band used for the Bluetooth ® function of handset is shared with other industrial, scientific or medical equipment (microwave ovens, etc.), and used at premises radio stations, amateur radio stations, etc. (hereinafter "other radio stations").
1 Before using the Bluetooth ® function, visually check that there are no other radio stations sharing the same frequency band nearby.
2 Should interference occur between handset and other radio stations, move to other place or stop the Bluetooth ® function (stop the transmission) immediately.
3 For additional information and support, contact us at the following number.
SoftBank Customer Centre, General Information
From a SoftBank handset, call toll free at 157 for General Information.
From landlines, see P.20-29 "Customer Service".
- This radio equipment operates in the 2.4 GHz band using the FH-SS modulation, and its maximum communication distance is ten metres.

Microsoft ® Word is a product name of Microsoft Corporation in the United States.
Microsoft, PowerPoint and Microsoft Excel ® are registered trademarks of Microsoft Corporation in the United States and/or other countries.
This product employs Macromedia® Flash® Lite™
technology developed by Adobe Systems Incorporated.
Copyright© 1995-2006 Adobe Systems
Incorporated. All rights reserved.
Macromedia, Flash, Macromedia Flash and
Macromedia Flash Lite are either registered trademarks or trademarks of Adobe Systems
Incorporated in the United States and/or other countries.

macromedia
FLASH
ENABLED
QR Code is a registered trademark of DENSO WAVE INCORPORATED.
Powered by Mascot Capsule®/Micro3D Edition™
Mascot Capsule is a registered trademark of HI Corporation
©2002-2006 HI Corporation. All rights reserved.
picsel

Document Viewer is enabled by Picsel Technologies.
Picsel, Picsel Powered, Picsel Viewer, Picsel
File Viewer, Picsel Document Viewer, Picsel PDF Viewer and the Picsel cube logo are trademarks or registered trademarks of Picsel Technologies Ltd.
Chaku-Uta and Chaku-Uta Full are registered trademarks of Sony Music Entertainment (Japan) Inc.
BookSurfing is a trademark of CELSYS Inc., Voyager Japan, Inc. and INFOCITY Inc.
- SOFTBANK, SoftBank and the SoftBank logo are trademarks or registered trademarks of SOFTBANK CORP. in Japan and other countries.
- Yahoo! and the Yahoo! and Y! logos are trademarks or registered trademarks of Yahoo! Inc.
Video Call, S! Application, Custom Screen, Sky Mail, Movie Sha-mail, Sha-mail, 3D Pictogram, Input Memory, Near Chat, Multi Job, S! Mail, Arrange Mail, Feeling Mail, S! Cast, S! Town, S! Loop, Standby Window, PC Site Browser, Weather Indicator, Live Monitor, S! Address Book, Circle Talk, Hot Status, Lifestyle-Appli and Familiar Usability are trademarks or registered trademarks of SOFTBANK MOBILE Corp.
CP8 PAT ENT
Other company and product names mentioned herein are trademarks or registered trademarks of their respective owners.
The software contained in handset is copyrighted material; copyright, moral right and other related rights are protected by copyright laws. Do not copy, modify, alter, disassemble, decompile or reverse-engineer the software, and do not separate it from hardware in whole or part.
Specific Absorption Rate (SAR)
812SH and 813SH meet the government's requirements for exposure to radio waves.
These requirements are based on scientific basis to assure that radio waves emitted from mobile phones and other handheld wireless devices do not affect human health. They require that the Specific Absorption Rate (SAR), which is the unit of measurement for the amount of radiofrequency absorbed by the body, shall not exceed 2 W/kg * .
This limit includes a substantial safety margin designed to assure the safety of all persons, regardless of age or health, and meets the international standard set by International Commission on Non-Ionizing Radiation Protection (ICNIRP) in cooperation with World Health Organization (WHO).
The highest SAR value is 1.43 W/kg for 812SH, and 1.50 W/kg for 813SH. Tests for SAR are conducted with handset transmitting at its highest certified power level, and follow the testing methods set by the government. While there may be differences between the SAR levels for various handsets, they all meet the governmental requirements for safe exposure.
The actual SAR level of the handset while operating can be well below the highest value. This is because the handset is designed to operate at multiple power levels so as to use only the power required to reach the Network.
Additional information on SAR can be obtained on the Websites on the right.
Ministry of Internal Affairs and Communications (Protection from Radio Wave Environment)
http://www.tele.soumu.go.jp/e/ele/index.htm
Association of Radio Industries and Businesses (ARIB)
http://www.arib-emf.org/index02.html (Japanese only)
Requirements are stipulated in Radio Law (Ordinance Regulating Radio Equipment, Article 14-2)
Getting Started
Function & Feature Preview
- Memory Card is required for items with grey background.
• ★These items are not available on 813SH.
Circle Talk
Press one key to speak to up to ten parties simultaneously via this Walkie-Talkie type service. P.19-13
PC Site Browser
View websites designed for PCs on handset.
P.15-18
S! Town
Select an avatar to enter 3D virtual town via this online communication application. P.19-2
S! Loop
S! Loop is a communication service.
P.19-3
E-Book/Document Viewer
Read E-Book, E-Book dictionaries or documents (PDF files, etc.) on handset. P.18-5, P.12-18
USIM Card
For use only with USIM Card-compatible SoftBank handsets; contains vital user information. P.1-4
International Roaming
Make/receive calls, exchange mail or access services even outside Japan. P.2-16
Manner Mode
Press a single key to mute ringer and activate Answer Phone automatically.
P.2-18
Simple Menu
Select a simplified menu, ideal for users who use only basic handset functions. P.2-21
Phone Book
Save up to 750 entries; add up to three phone numbers/three mail addresses to each. P4-2
S! Address Book (SAB)
Backup Phone Book via Server; synchronise Phone Book/SAB to reflect changes. P.4-15
Video Call ★
Place or receive video calls: send live video or previously saved still image during calls. P5-2
Camera
Capture still/video images shot with the 2 megapixel handset camera; send images via S! Mail. P.6-2
Media Player
Play downloaded music and video images as well as those recorded/captured on handset. P.7-2
Data Folder
Access handset image and sound files from here; files are organised by file type. P.8-2
microSD™ Memory Card
Save files to Memory Card to expand handset memory or backup your handset files. P.11-2
Display
Change Wallpaper, System Graphics, Fonts, et cetera to customise handset interface.
P.9-3
Display Language
Change Phone Settings to make handset user interface appear in either English or Japanese.
P.9-9
Custom Screen
Load uni-themed Wallpaper, Indicators, ringtones, and more, all at the same time.
P.9-9
Face Recognition ★
Save up to five facial images to use along with passwords, etc. to restrict handset access.
P.9-20
Bluetooth® & High-Speed Infrared
Wirelessly exchange handset files with compatible devices. Use Bluetooth® headsets, etc. P.10-2, P.10-10
Mass Storage
Use a PC to directly access Memory Card content while card is inserted into handset. P.11-9
Calendar & Tasks
Add events by date with time parameters; set Reminder, add stamps and set other options. P.12-2, P.12-8
Voice Recorder
Save voice memos on handset or Memory Card; send via S! Mail or use as ringtone. P.12-16
Barcodes & Text Scanner
Scan UPC/QR Codes and text or create QR Codes from Phone Book entries, etc. P.12-19, P.12-22, P.12-23
S! FeliCa
Hold handset over compatible reader/writers to use e-money services, etc. all around Japan. P.17-2
S! Cast
Subscribe to Japanese mobile periodicals delivered overnight to your handset automatically. P.18-2
Near Chat
Exchange instant messages with compatible Bluetooth ® devices within ten metres. P.19-19
Optional Services
Call Forwarding
Automatically divert all or all unanswered incoming calls to another preset phone number. P.13-2
Voicemail
Redirect all or unanswered calls to Voicemail; access messages from handset/touchtone landline. P.13-4
Missed Call Notification
Receive records of calls missed while handset is off/out-of-range and Voicemail is active. P.13-5
Call Waiting
Reduce missed calls! Answer incoming calls even while the handset is already engaged. P.13-5
Conference Call
Switch between open lines or connect multiple lines at once for wireless teleconferencing. P.13-6
Call Barring
Restrict all incoming/outgoing calls or apply restrictions by type of call/current location. P.13-7
Caller ID
Set handset to show/hide your phone number for all outgoing calls or enter show/hide prefix. P.13-10
USIM Card
General Information & Precautions
Universal Subscriber Identity Module (USIM) Card is an IC card containing customer and authentication information, including the handset number, and limited storage for Phone Book entries and SMS messages. USIM Card must be inserted to use this handset.
- Save contacts on USIM Card Phone Book (see P.4-3).
- Insert into compatible SoftBank handsets to access files.
- Do not apply excessive force to insert/remove USIM Card.
-
Do not insert USIM Card into any other IC card device.
SoftBank is not liable for resulting damages. -
Keep the USIM Card IC chip clean.
- Use a dry, soft cloth to clean the USIM Card.
- Do not attach labels to USIM Card. Malfunction may result.

USIM Card
Note
Some downloaded files may be inaccessible after repairs, USIM Card replacement or handset upgrade/ replacement.
In addition, S! Applications, BookSurfing ® , S! Town and Near Chat may be disabled after USIM Card replacement.
If Handset is Dropped or Subjected to Shocks
Handset may not recognise USIM Card; REFRESH appears and handset returns to Standby. This is not a malfunction. If Insert USIM Card appears or handset does not restart, clean and properly reinsert USIM Card then restart handset.
Important
•USIM Card is the property of SoftBank.
- USIM Card will be reissued for a fee if lost or damaged.
- Return USIM Card to SoftBank upon subscription termination.
- Returned USIM Cards are recycled.
- USIM Card specifications may change without prior notice.
- Backup USIM Card files. SoftBank is not liable for lost files.
- If your USIM Card or handset (with USIM Card inserted) is lost or stolen, suspend your service immediately. For details, contact SoftBank Customer Centre, General Information (see P.20-29).
Inserting & Removing USIM Card
- Follow the steps below after removing battery (see P.1-16).
- Do not force USIM Card into or out of handset; damage may result.
- Avoid contact with USIM Card IC chip and Battery terminals; may hinder performance or result in lost data (see P.1-4).
Inserting
1 Slide in USIM Card with IC chip facing down
2 Insert battery (Steps 3 - 4 in "Inserting" on P.1-16)

Removing
Take care not to lose removed USIM Card.
1 Gently slide out USIM Card as shown
2 Insert battery (Steps 3 - 4 in "Inserting" on P.1-16)

USIM PINs
There are two Security Codes for USIM Card: PIN1 and PIN2.
PIN1
A 4-digit to 8-digit Security Code to prevent unauthorised use of handset.
- PIN 1 is 9999 by default; change as needed (see P.9-25 "Change PIN").
- Activate PIN Entry (see P.9-24) to require PIN1 entry each time handset (USIM Card inserted) is turned on.
PIN2
Required to clear Call Costs or set Max Cost (see P.2-15). PIN 2 is 9999 by default; change as needed (see P.9-25 "Change PIN").
PIN Lock & PUK Code
PIN1 Lock or PIN2 Lock is activated if PIN1 or PIN2 is incorrectly entered three times consecutively. Cancel PIN Lock (see P.9-24) by entering the Personal Unblocking Key (PUK Code). For information on PUK Code, contact SoftBank Customer Centre, General Information (see P20-29).
Note
- If PUK Code is incorrectly entered ten times consecutively, USIM Card is locked and handset is disabled. Write down PUK Code.
- For USIM Card unlocking procedures, call SoftBank Customer Centre, General Information (see P.20-29).
- Emergency calls (110, etc.) are not possible when PIN Entry (see P.9-24) is active. See P.2-3 "Emergency Calls".
Handset Parts & Functions
★813SH is not equipped with these parts (9, 29 and 30).
Handset


1 Display
2 Mail Key
Open Messaging menu or execute Soft Key functions (see P.1-23).
3 Start Key
Initiate/answer calls. Open records of All Calls.
4 Shortcuts & A/a Key
Open Shortcuts menu. In text entry windows, toggle upper/lower case roman letters or standard/small hiragana/katakana.
5 Clear/Back Key
Delete entries, escape/return to previous window.
6 Keypad
7 ✱ Key
In text entry windows, open Symbol/Pictogram Lists.
8 Earpiece
9 Internal Camera*
Use during Video Call.
10 Multi Selector & Keypad Lock Key
Select menu items, move cursor, scroll, etc. In Standby, press ⬙ for 1+ seconds to activate/cancel Keypad Lock.
11 Yahoo! Keitai Key
Open Yahoo! Keitai Main Menu or execute Soft Key functions (see P.1-23).
12 Power On/Off Key
Press and hold to turn handset power on/off.
13 Multimedia/Text Key
Start Media Player or change character entry mode. In Standby, press for 1+ seconds to activate/cancel Simple Menu.
14 # Key
15 Microphone
16 Strap Eyelet
Attach straps as shown; avoid metallic straps.
17 Memory Card Slot
Insert Memory Card here.
18 Headphone Port
Connect optional Headphones, etc.
19 Infrared Port
Use for infrared data transmissions.
20 Charger Terminal
21 Circle Talk Key
Press to speak during Circle Talk.
22 Volume/Zoom Key
Adjust Earpiece Volume or zoom mobile camera.
23 Multi Job/Manner Key
Toggle multiple active function windows. Press for 1+ seconds to activate/cancel Manner mode.
24 External Device Port
Connect Charger here.
25 Small Light
Flashes for calls/new mail; illuminates red while charging.
26 External Display
27 Speaker
28 Internal Antenna Location
29 External Camera (lens cover)*
30 Portrait (☐)/Macro (☐) Selector*
31 Logo
S! FeliCa contactless IC Card embedded. Place 📋 logo over reader/writer to use IC Card.
32 Battery Cover
Note ▶ Internal Antenna
- Handset has no external antenna. Handset transmits and receives signals via Internal Antenna.
- Do not cover or place stickers, etc. over the area containing Internal Antenna.
•Voice quality varies with handset usage/location. - For better reception in Standby, close handset (seeP.1-11).
Tip ▶ Descriptions (P.1-7 - 1-9) are illustrative of general handset usage.
Display Indicators
Display


“T”: Strong, “T”: Moderate, “T”: Low, “T”: Weak
out: Out-of-Range
2 Calls/Circle Talk, Offline Mode (see P.2-20) SSL, Packet Transmission (see P.15-3)
: Incoming Voice Call, ☑: Voice Call in Progress
1 : Incoming Video Call, 2 : Video Call in Progress
: Incoming Circle Talk Request, ☑: Offline Mode, ☒: SSL
: Packet Transmission Protocol Ready
◎: Waiting 2 /Packet Transmission in Progress
8 : Packet Transmission Available
1 Undisplayable on 813SH.
2 Appears constantly if IP Service Setting (see P.9-26) is On and Hot Status Connection Setting (see P.19-9) is Online.
3 Mail (see P.14-3)
✉: Unread Mail, ☑: Unread Delivery Report
(red): Memory Low
→: Receiving Mail, →: Sending Mail
4 Hot Status
: Hot Status Online, ☑: Unread Hot Status Notification
☐: Hot Status Registration Request Received
*Appears constantly if IP Service Setting (see P.9-26) is On and Hot Status Connection Setting (see P.19-9) is Online.
5 Auto Delivery Info, Cast Info (see P.18-2) Software Update (see P.20-8)
: Auto Delivery Info, : Cast Info
: Software Update, ☑: Software Update Result
: Live Monitor Info
6 S! Application (see P.16-4), Music Player (see P.7-5)
○: Activate S! Application, ○: Paused S! Application
Music Player Active
7 Memory Card Status, Loudspeaker Microphone Mute (see P.2-11)
→: Inserted, →: In Use, →: Formatting
: Unusable/Poor Connection
: Loudspeaker Active, %: Microphone Muted
: Loudspeaker Active & Microphone Muted
8 Multi Job (see P.1-26), IC Card Lock
: Multiple Functions (Multi Job) Active
IC Card Lock Active
9 External Transmission, PC Site Browser (see P.15-18)
Ψ : USB Transmission Ready
ψ: USB Transmission in Progress
: Infrared Connection in Progress
: Infrared Transmission in Progress
: Bluetooth® Transmission Ready
Appears in grey when Visibility is set to Hide My Phone.
®: Bluetooth® Transmission in Progress
8 : Bluetooth ® Talk in Progress
: PC Site Browser in Use
10 Mode (see P.9-2)
: Manner, #: Drive, #: Original
11 Battery Strength (see P.1-15)
Indicator may appear vertically (e.g. 📄).
12 Answer Phone (see P.2-9)
: Answer Phone Active
: Answer Phone Active & Message Recorded
: Answer Phone Cancelled & Message Recorded
13 Call Forwarding or Voicemail Active (see P.13-2)
Appears when Always (forwarding condition) is set for Voice Calls.
14 New Voicemail (see P.13-4)
15 Message Delivery Failure (see P.14-9)
16 Alarm (see P.12-11), Schedule (see P.12-4)
17 Show Secret Data (see P.9-27)
Password Lock (see P.9-25), Keypad Lock (see P.1-22)
⑤: Show Secret Data Active
: Password Lock Active, : Keypad Lock Active
18 Ringtone (see P.9-14), Vibration (see P.9-15)
: Silent, : Increasing Volume, : Vibration Active
鬱: Silent & Vibration Active
19 Copyright Information, Infrared Transmission
DRN : Content Key Received
When Content Key memory is low, (below 10 %) or
(below 5 %) appears.
(grey): Infrared Transmission Ready
20 Auto Answer (see P.9-30) or Remote Monitor (see P.5-8) Active
21 Weather Indicator (see P.18-4)
External Display
Press ☐, ▶ or ▶ with handset closed to turn External Display Backlight on. When new mail arrives, press ☐ to read the message (see P.14-19). External Display shuts off after set Duration (see P.9-13).
Indicators
See major External Display indicators below.


Clock View
■ While External Display Backlight is on (with handset closed), press ☐ to toggle Clock view (Large Clock, Clock (S),
World Clock or Clock & Date).
- Display Date & Time setting (see P.9-13) is not affected.
• View is fixed while music plays, during infrared transfers, etc.
■Additional Indicators
Indicator and number of calls/messages, etc. appear for missed calls, new mail/information, etc.
| Missed Calls | New Delivery Report | ||
| Answer Phone Message | Message Delivery Failure | ||
| Missed Call Notification | Content Key | ||
| New Voicemail | Bluetooth® Notification | ||
| Alarm | New Cast Info | ||
| Schedule Reminder | Cast Reception Failure | ||
| Task Reminder | Hot Status Notification | ||
| New Messages | Weather Indicator Update |
- Up to two indicators appear at the same time. Press ▼ or ▶ to view more.
- Corresponding Pictogram (✉, etc.) appears for Feeling Mail.
Display Positions
Handset Closed
Handset is closed. Keep handset in this position when not in use.

■Handset Open
Handset is open. Place or answer calls, enter text, etc.

Battery & Charger
Getting Started
Charge battery before first use/after period of disuse.
Battery Life
- Do not use/store battery at extreme temperatures; this may shorten battery life. Ideally, use/store between 5°C - 35°C .
- Use specified Charger only; others may damage handset/battery or overheat or ignite battery.
- Replace battery if operating time shortens noticeably.
Charging
- Do not use Charger for other purposes.
- Contact with metal may short, overheat or burst battery.
-
Small Light illuminates red while charging. (It may take longer for the light to illuminate when handset is off.)
-
Charging takes approximately 150 minutes (with handset off).
■Charging time may vary by ambient temperature. - Handset and Charger may warm during charging.
- Separate Charger from TV/radio if interference occurs.
Precautions
- Clean device charging terminals with a dry cotton swab.
- Avoid:
■Extreme temperatures
■Humidity, dust and vibration
■Direct sunlight
- Charge battery at least once every six months; an uncharged battery may become unusable.
- Use a case when carrying battery separately.
Tip
- Battery must be inside handset to charge it.
- While charging battery with handset on, (III) flashes until battery is fully charged.
- Battery will charge regardless of handset position.
Estimated Hours of Use (fully charged battery)
| Continuous Talk Time | 150 minutes in 3G240 minutes in GSM |
| Continuous Standby Time | 330 minutes in 3G320 minutes in GSM |
| Continuous Operating Time 7 hours | |
| Continuous Playback Time 16.5 hours | |
| Continuous Video Call Talk Time | 80 minutes(with Internal Camera in use) |
Values calculated with Backlight Brightness set to Level:2.
- Continuous Talk Time is an average measured with a new, fully charged battery, with stable signals. Continuous Talk Time may be less than half this value if signal is weak.
- Continuous Standby Time is an average measured with a new, fully charged battery, with handset closed without calls or operations, in Standby with stable signals. Standby Time may be less than half this value if handset is out-of-range or signal is weak. Standby Time may vary by environment (battery status, temperature, etc.).
- Continuous Operating Time is the length of time handset keys can be pressed continuously without calls.
- Continuous Playback Time is measured while music plays (Sound Effects set to Normal) using Headphones, Offline Mode cancelled, and with handset closed.
- The above values (Battery Time) are nominal values, measured under stable signal conditions.
Battery Time
Using handset in poor conditions may shorten Battery Time:
•Poor Usage Conditions
■ Extreme temperatures (use within a range of 5° C to 35° C)
■Impaired handset, battery or Charger terminals
■Signal is weak/handset is out-of-range
•Power Consuming Operations
■Activating/using S! Applications
■Repeated mobile camera use or barcode scanning
■Playing video images
■ Continuous Keypad use (keeping backlights on for long periods)
■Using Music Player/Voice Recorder
■ Frequent Bluetooth ® transmissions
■Frequent infrared transfers
■Frequent opening/closing of handset
•Power Consuming Settings
■Increasing Backlight Time Out/Display Saving time
■Setting Backlight to illuminate brighter
■ Activating Bluetooth 30 in Standby
■Activating Keypad Tones
Extend Battery Time
Adjust Light Settings (see P.9-13) to extend Battery Time.
Select shorter Display Saving/Backlight time and lower Brightness.
When Battery Runs Out
A message appears and short beeps sound. Press 🔒 to stop short beeps. (Short beeps do not sound in Manner mode.)
During Voice Call
A double beep sounds every five seconds. After 20 seconds, the call ends and handset shuts down.
During Video Call
A message appears and call ends with a double beep, then short beeps sound. Handset shuts down after 20 seconds.
Battery Disposal
Do not dispose of an exhausted battery with ordinary refuse; always tape over battery terminals before disposal. Take exhausted battery to a SoftBank shop, or follow the local disposal regulations.
Tip ▶ This product requires a lithium-ion battery. Lithium-ion batteries are a recyclable resource.
•To recycle a used lithium-ion battery, take it to any shop displaying the symbol shown to the right.
- To avoid fire or electric shock, do not:
■Short-circuit battery
■Disassemble battery

Li-ion
Battery Strength

When battery runs out, Battery low. Please connect to charger! appears and short beeps sound. Handset shuts down after 20 seconds.
Indicator
Battery Strength indicator varies as shown.
Charge or replace when level is low.

Battery Strength & Environment
At low temperatures, battery is consumed faster.
At high temperatures, battery lasts longer.
Note
- Battery Strength indicator is for reference only.
- At Level 1, some functions including Video Camera, Music Player and Voice Recorder do not operate (see P.6-8, P.7-4, P.12-16).
Small Light & Battery Strength Indicator
Handset Power On
| Small Light | Indicator(III / II) | Conditions |
| Off Flashes | Ambient temperature is outside the range of 5°C to 35°C | |
| Flashes red Flashes | Battery life has ended, or battery defect | |
| Illuminates red | Flashes | Charging |
| Off | On Charging completed/Standby | |
Handset Power Off
| Small Light | Indicator (000 / 10) | Conditions |
| Flashes red | Off | Battery life has ended, or battery defect |
| Illuminates red | Off | Charging |
| Off | Off | Charging completed |
Installing & Removing Battery
Inserting
1 Press down and slide cover as shown
Battery Cover
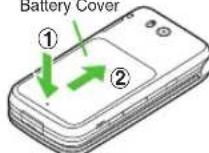
2 Lift and remove cover as shown

3 Insert battery
- With printed side up, fit tabs into battery cavity slots.

4 Close cover
- Position and slide the cover gently as shown until it stops.
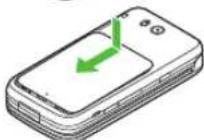
Removing
- Turn handset power off before removing battery.
- Do not remove battery immediately after saving files, sending messages, etc.
1 Press down and slide cover as shown
Battery Cover

2 Lift and remove cover as shown

3 Remove battery
•Take hold of Battery Tab here and lift as shown.

AC Charger

Use specified Charger only.
1 Open Port Cover to connect Charger
- Insert connector until it clicks.
- Use slot to gently pull Port Cover down and out as shown.

2 Plug Charger into AC outlet
- Charging starts and Small Light illuminates red (see P.1-15).
Charging takes approximately 150 minutes.
- Charging is complete when Small Light goes out.
- Extend Charger blades. (Fold back when not in use.)

3 After Charging Unplug Charger, then disconnect handset
- Squeeze release tabs to remove connector.
-Replace Port Cover to protect External Device Port.
Note
- Do not pull, bend or twist AC Charger cord.
- AC Charger is compatible with household currents between AC 100V and 240V.
- SoftBank is not liable for problems resulting from charging battery abroad.
Desktop Holder
Desktop Holder may be purchased separately.

Use specified Charger only.
1 Insert Charger connector into Desktop Holder until it clicks
- Connection Port is on the back of Desktop Holder.
2 Plug Charger into AC outlet
- Extend Charger blades. (Fold back when not in use.)

3 Gently insert handset into Desktop Holder
- Fit tabs into slots as shown in 1 and push handset as indicated in 2 until it clicks into place (resting flat).
- Charging starts and Small Light illuminates red (see P.1-15). Charging takes approximately 150 minutes.
- Charging is complete when Small Light goes out.
4 After Charging
Unplug Charger, then disconnect handset
•To remove connector, squeeze release tabs.
In-Car Charger
In-Car Charger may be purchased separately.

1 Open Port Cover to connect In-Car Charger
- Insert connector until it clicks.
2 Plug Charger into cigarette lighter socket
3 Start car engine
- Charging starts and Small Light illuminates red (see P.1-15). Charging takes approximately 150 minutes.
- Charging is complete when Small Light goes out.
Tip ▶ • For more information, see In-Car Charger manual. • Use optional In-Car Holder to secure handset.
4 After Charging
Unplug Charger, then disconnect handset
- Squeeze release tabs to remove connector.
-Replace Port Cover to protect External Device Port.
Note - Use In-Car Charger in negative earth vehicles only. - Disconnect Charger before leaving vehicle to prevent charging with engine off. - Do not use In-Car Charger with Desktop Holder. - Avoid charging battery inside extremely hot vehicles. - Never use handset while driving.
Handset Power On/Off

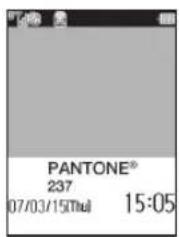
Standby
1 Open handset
2 Press and hold
After Power On Graphic, handset enters Standby.
3 Turning Off
Press 📊 for 2+ seconds
After Power Off Graphic, handset shuts down.
My Details Setup & Network Information
When handset is turned on for the first time, setup confirmation appears after Power On Graphic.
Choose Yes or はい→Press ●→Enter last name→Press ●→Enter first name
→ Press ●
■ Handset initiates Network Information retrieval when ☑, ☑ or ● is pressed for the first time.
Choose Yes or はい→Press ●
- Retrieve Network Information to use Network-related services. (Clock is set automatically after retrieval.)
• To update Network Information manually, see P.10-15 "Retrieve NW Info". - Unless otherwise noted, operations in this manual are described with Clock set.
Return to Standby
Press 📷 to return to Standby from function windows, menus, etc.
- When a confirmation appears, choose Yes and press Ⓞ. Handset returns to Standby.
Note
- USIM Card data is read after turning power on. Signal strength indicator may take some time to appear. It may take longer when turning power on for the first time.
- Insert USIM Card appears when USIM Card is not inserted (see P.1-4).
- Some functions are disabled if handset is left with power off or out-of-range for long periods.
For details, contact SoftBank Customer Centre, General Information (see P.20-29).
Tip
Display turns off after a period of inactivity.
Opening Standby Window

Standby

①

■ Press 🔒 to toggle Standby Window on/off.
My Details
1 Press ●0 わを 九十
Handset phone number appears.
• To add, edit or delete My Details, see P.4-19.
2 Press 🔒 to exit


Keypad Lock
Use Keypad Lock to lock handset keys and prevent accidental operation/function activation.
Activating Cancelling
1 Press ⬤ for 1+ seconds appears and Keypad Lock is set.
1 Press ⬙ for 1+ seconds disappears.
Note Emergency calls (110, etc.) are possible even when Keypad Lock is active. See P.2-3 "Emergency Calls".
Tip ▶ When Keypad Lock is Active
- Incoming calls temporarily cancel Keypad Lock. To answer a call, press 📄. [Activate Any Key Answer (see P.9-17) to answer calls with other keys (see P.2-6).] Keypad lock reactivates after the call.
- Handset power does not turn off even if 🔒 is pressed for 2+ seconds.
Handset Menus


Main Menu
Shortcut to Custom Screens (see P.9-9)
Main Menu
Access functions/operations from Main Menu.
1 Press
Main Menu opens.
2 Use ⚙ to select an item and press ♟
Sub Menu opens (see P.20-2 - 20-3).
Soft Keys
■Soft Key functions appear at the bottom of Display.
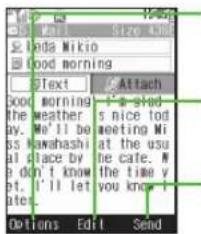
Press ☐ to select or execute the assigned function or operation.
Press ⬙ to select or execute the assigned function or operation.
Press ☐ to select or execute the assigned function or operation.
■Main Menu Items
| Communication | Launch Hot Status, Circle Talk,S! Town, S! Loop or Near Chat |
| Yahoo! Keitai | Access Yahoo! Keitai MobileInternet and PC sites or useLive Monitor |
| Media Player P | play/download music/video |
| Messaging Open | open/create messages, etc. |
| Camera | Capture still images or recordvideo |
| Data Folder | Open files saved on handset/Memory Card |
| Tools Use Calendar, Alarms, etc. | |
| Entertainment | Launch BookSurfing®/S! Cast orread E-Books |
| S! Appli Use/download S! Applications | |
| Lifestyle-appli | Customise IC Card settings touse e-money services, etc. |
| Phone | Search contacts, add entries, etc. |
| Settings | Customise handset interface,sounds, etc. |

User Shortcuts
Using Shortcuts
Press a key (1 5 - 9) to access assigned function, folder or menu.
Default Shortcuts:
| 15/2 | Received Msg. | 45/2 | Calendar | 75/2 | Calculator |
| 25/2 | Create Message | 55/2 | Phone Book List | 85/2 | Alarms |
| 35/2 | Bookmarks | 65/2 | Data Folder | 95/2 | Bluetooth ® |
1 In Standby, press a key (1 - 9) for 1+ seconds
Assigned function, folder or menu opens.
Editing Shortcuts
Edit items except Main Menu and Enter Number.
Assign Change default shortcuts
Press ☐ → Select an item → Press ☐ Options → Select Assign → Press ● → Select new item → Press ☐ Assign
Move Change item order
Press 📄 → Select an item → Press 📋 Options → Select Move → Press ⬤ → Use ⬇ to select target location → Press ⬙
Set to Default Restore default shortcuts
Press 📄 → Press 📋 Options → Select Set to Default → Press ⬙ → Choose Yes → Press ⬤

Quick Operations
In Standby, enter numbers to access functions. Accessible functions vary by entered digits. To activate functions, press corresponding Soft Key.
| Function\Digits | 1 2 3 | 4 5 - 6 | 7 - 10 | 11 - 12 | 13 - 24 25 | -32 | |||
| Speed Dial (see P.4-14) ○ | × | × | × | × | × | × | × | × | |
| Speed Video Call (see P.4-14) | ○ | × | × | × | × | × | × | × | × |
| Calculator (see P.12-15) ○ | ○ | ○ | ○ | ○ | ○ | ○ | × | × | |
| Expenses Memo (see P.12-25) | ○ | ○ | ○ | ○ | ○ | × | × | × | × |
| Speed Mail (see P.14-33) ○ | 1 | × | × | × | × | × | × | × | × |
| Calendar (see P.12-2) × | × | × | ○ | 2 | × | × | × | × | × |
| Set Alarm (see P.12-11) × | × | × | ○ | 3 | × | × | × | × | × |
| Call Circle Talk (see P.19-14) | × | × | × | × | × | × | ○ | ○ | × |
| Place International Calls(see P.2-5) | × | × | × | × | ○ | ○ | ○ | ○ | ○ |
1 Press ☑ Mail after entering a number. Save entries to Speed Mail List (see P.14-33) beforehand.
2 Enter four digits for month and day and press Ⓤ to view entries up to 12 months forward of current date.
3 Enter four digits for time (24-hour format) to set Alarm.
Example: Enter 1111 to use Calculator
Open a function window while another is active.
1 In a function window, press
Shortcuts menu opens.
•Some shortcuts are disabled.
- Multi Job cannot be activated from some windows/under some conditions (e.g. when an S! Application is active, etc.).
- In text/phone number entry windows, press 📄 for 1+ seconds.
2 Select a function and press ●
Menu/window opens (☐ appears).
- Press ☐ to toggle active windows.
3 Press 🔒 to exit
The other window appears (disappears).
When a confirmation appears, choose Yes
→ Press ●
Handling Incoming Calls
■ Press Ⓞ to answer a call. End the call to return.
Security Codes
Handset Code, Centre Access Code and Network Password are needed for handset use. For details, contact SoftBank Customer Centre, General Information (see P.20-29).
Handset Code
4-digit number (9999 by default) required to use or change some handset functions.
- ≠ appears as digits are entered.
- If Handset code is incorrect! appears, enter again.
- Change Handset Code as needed (see P.9-28).
Centre Access Code
4-digit number selected at initial subscription; required to access Voicemail via landlines or subscribe to fee-based information.
Network Password
4-digit number selected at initial subscription; required to restrict handset services. (see P.13-7).
- If Network Password is incorrectly entered three times consecutively, Call Barring settings are locked. To resolve, Network Password and Centre Access Code must be changed. For details, contact SoftBank Customer Centre, General Information (see P.20-29).
- Change Network Password as needed (see P.13-10).
Note
- Write down Handset Code, Centre Access Code and Network Password.
- Do not reveal Handset Code, Centre Access Code and Network Password. SoftBank is not liable for misuse or damages.
Tip
There are two other Security Codes. For details, see P.1-6 "PIN1" and "PIN2".
Basic Handset Operations
Initiating a Call
See P.2-5 to initiate international calls from Japan, P.2-17 for Voice Calls from outside Japan and P.5-3 for Video Calls.

1 Confirm handset is on
- Check signal strength (see P.1-9 1).
- Handset will not transmit when out, ☑, ☑ or ☑ appears (see P.20-4 - 20-6).
2 Enter a phone number

- Include dialling code for all numbers.
To send/block Caller ID, enter a phone number and press ☑ Options → Select Show My ID or Hide My ID → Press
3 Confirm the number and press
Correcting Numbers
- Use 🔒 to move cursor and press 📄 to delete the digit above the cursor. Move cursor and press 📄 for 1+ seconds to delete the digits above and after the cursor.
- Before moving cursor, press 1+2 for 1+ seconds to delete the entire number and return to Standby.
- If you misdial, press 📄 to hang up and try again.
Busy Numbers
- Press 🔒 to end the call and try again later.
4 Press 🔒 to end call
•Alternatively, close handset.
Calling Numbers Not Saved in Phone Book
- Save this number to your Phone Book? appears after calls.
- To save, choose Yes → Press Perform Step 4 in "Saving from Call Log" on P.4-8 - To end without saving, choose No → Press
- To hide this confirmation, see P.4-5 "Confirmation for Unsaved Numbers".
Note
- Do not cover Microphone while talking.
- Avoid covering area over Internal Antenna.
•Voice quality is affected depending on how and where handset is used.
Tip
- Check Call Timers (see P.2-14) and Call Costs (see P.2-15).
- For operations during a call (Loudspeaker, Mute, Hold, etc.), see P.2-11-2-12.
Emergency Calls
Emergency calls (110, 119, 118, etc.) are possible even while some handset restrictions are active.
| Active Restriction Emergency Calls | |
| Keypad Lock (see P.1-22) Possible | |
| Max Cost (see P.2-15) Possible | |
| Offline Mode (see P.2-20) Not Possible | |
| PIN Entry (see P.9-24) Not Possible | |
| Password Lock (see P.9-25) Possible | |
| Outgoing Calls (see P.13-8) Possible | |
Note
Emergency calls may not be possible when outside Japan as handset operations are affected by wireless network/radio signals available in the country or handset settings.
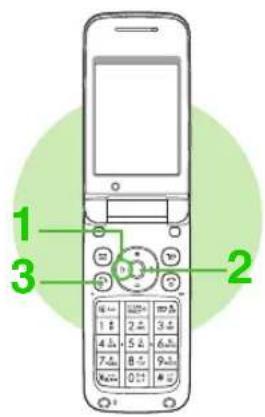
Redial
Place calls from Dialled Numbers. Up to 30 recently dialled numbers are saved.
1 Press Ⓞ (▶)

2 Select a record and press ●
3 Press
Handset dials the number.
■Indicators
| Dialled Voice Call | Dialled Video Call | ||
| Requested Circle Talk | |||
Dialled numbers appear with date and time,
most recent first.
•Name appears if saved in Phone Book.
- Use ⚙ to open Received Calls/All Calls.
Tip ▶ • When the same number is dialled more than once, only the last record appears. (All records appear for Circle Talk.)
•Records remain even after handset power is turned off.
- When there are 30 records, oldest records are replaced by new ones. To delete records manually, see P.2-13.
Placing an International Call from Japan
• See P.2-17 to initiate Voice Calls from outside Japan.
• Service requires an additional contract. For details, contact SoftBank Customer Centre, General Information (see P.20-29).
1 Enter a phone number
- Include dialling code for landline numbers.
2 Press 📧 Options
3 Select Int'l Call and press ●
Country names appear.
4 Select a country and press ●
- (international prefix symbol) and corresponding country code appear.
To call unlisted countries, select Enter Code → Press ● → Enter country code → Press ●
5 Press
Tip ▶ To change the default international prefix, see P.9-29 "Int'l Prefix".
- To save frequently used country codes, see P.9-29 "Country Codes".
- To restrict outgoing international calls, see P.13-7 "Call Barring".
Quick Operations
Enter a phone number → Press [A] → Select a country → Press → Skip ahead to Step 5
Direct Entry
Press 07/24A± A for 1+ seconds (+ appears) ➔ Enter country code ➔ Enter a phone number including the dialling code ➔ Skip ahead to Step 5
- Omit the first 0 of the dialling code except when calling Italy (country code: 39).
Incoming Call

1 When a call arrives, open handset

•Number appears when Caller ID is sent.
•Name appears if saved in Phone Book.
To reject an incoming call, press ☑ Options while handset is ringing/vibrating → Select Reject → Press ●
■Standby returns; record appears in Received Calls.
To place a caller on hold, press ☑ while handset is ringing/vibrating.
■ Press 📞 to answer the call on hold.
Answering a Video Call: see P.5-3
Tip ▶ • When Caller ID is not sent, Withheld appears instead of the phone number.
- Up to 30 received call records are saved (see P.2-13).
- Use Quick Recorder (see P.2-10) to record caller messages on handset when Answer Phone is inactive.
- Change ringtone volumes/patterns and vibration patterns (see P.9-14 - 9-16).
- To instantly mute ringer, press 📄/ 📄 (handset open) or 📄 (handset closed) for 1+ seconds.
2 Press
When Any Key Answer (see P.9-17) is Active
-Press any of these keys to answer calls: 0 15 - 9 5 , #, #, , [A], [B]
Press 📞 to end call
•Alternatively, close handset.
Calls from Numbers Not Saved in Phone Book
- Save this number to your Phone Book?
appears after calls.
■ To save, choose Yes ➤ Press ⬙ ➤ Perform Step 4 in "Saving from Call Log" on P4-8
■ To end without saving, choose No ▶
Press ●
• To hide this confirmation, see P.4-5 "Confirmation for Unsaved Numbers".
Redirecting a Call
■Call Forwarding: see P.13-2
Press ☐ Fwd to direct incoming call to a specified number.
■Voicemail: see P.13-4
Unanswered calls are forwarded to Voicemail Centre. Activate Missed Call Notification (see P.13-5) for records of calls missed while handset is off/out-of-range.
Answer Phone: see P.2-9
Record caller messages on handset. Use Quick Recorder (see P.2-10) to record caller messages on handset when Answer Phone is inactive.
Information
Information window opens for Missed Calls or Answer Phone messages.
- Select Call and press Ⓞ to see details (see P2-13).
- Select Voice Message and press Ⓞ to play recorded messages (see P.2-10).
Information window opens for other items as well. Select an item and press ⬙ to open the corresponding window.
To open Information list, follow these steps. Press ⬙ ➔ Select Phone ➔ Press ⬙ ➔ Select Information ➔ Press ⬙
■ To clear list, open Information list and press 📧 Options → Select Reset → Press ⬙ → Choose Yes → Press ⬤
Answering Calls with Headphones
■Press Call Button for 1+ seconds to answer a call.
- To end the call, press Call Button for 1+ seconds until a beep sounds.

Calling from Received Calls
Up to 30 received calls are saved. When Caller ID is sent, number appears. Place calls directly to those numbers.
1 Press ⬤ (▶)

Received numbers appear with date and time, most recent first.
•Name appears if saved in Phone Book.
- Use ⏻ to open Dialled Numbers/All Calls.
2 Select a record and press ●
3 Press
Handset dials the number.
Indicators
| Answered Voice Call | Rejected Voice Call | ||
| Answered Video Call | Rejected Video Call | ||
| Requested Circle Talk | Missed Call Notification | ||
| Missed Voice Call | Answer Phone Answered | ||
| Missed Video Call | Forwarded to Voicemail Centre | ||
| Missed Circle Talk Request | |||
Tip ▶ • Names in Secret entries appear only when Show Secret Data is active.
•Records remain even after handset power is turned off.
- When there are 30 records, oldest records are replaced by new ones. To delete records manually, see P.2-13.
Answer Phone
Record caller messages on handset.
- Answer Phone cannot be used when handset is off, out-of-range or in Offline Mode. Use Voicemail (see P.13-4) to record caller messages when Answer Phone is not available.
- Record up to 90 seconds or 20 messages between Answer Phone and Voice Memo (see P.2-12).
- Answer Phone is inactive by default.
Activating & Cancelling
Main Menu ▶ Settings → Call/Video Call (©) → Answer Phone
1 Select Switch On/Off and press ●
To sample outgoing message, select Outgoing Message → Press ⬙
■Press ☐ FOR to stop.
2 Activating
1 Choose On and press ●
- Press 📄 to return to Standby (☐ appears). (☐ appears when messages are recorded.)
Cancelling
1 Choose Off and press ●
Tip ▶ Alternatively, press 📄 for 1+ seconds in Standby to activate/cancel Answer Phone.
Note ▶ When less than 12 seconds remain or 20 messages are recorded, Answer Phone is disabled. Delete messages to activate Answer Phone.
- Answer Phone is not available for incoming Video Calls.
- In Manner, Drive or Original mode, respective Answer Phone setting (see P.9-2) takes priority.
When Answer Phone is Active
For incoming calls, outgoing message plays and recording starts.
- Recording continues even if handset is closed.
- To answer calls, press 📄 during recording (no message will be recorded).
- When recording ends, 📄 appears.
If recording capacity becomes full after the recording, Answer Phone is cancelled and 📄 appears.
Playing Messages
Main Menu
Phone
1 Select Play Messages and press ●
Number of recordings appears and playback starts from the most recent message. After all messages have played, playback
ends automatically.
Press ⓞ to replay.
Press C: 500 to stop playback.
To skip a message, press ⬙ Next or ⬦.
To play the previous message, press Ⓤ twice during playback.
To delete a message, press ☑ Delete during playback ➤ Choose Yes ➤ Press ⬙
Note
Message playback stops for incoming calls. Press 📄 to answer a call.
Tip
Alternatively, press □ in Standby to play messages.
Earpiece Volume
■ Follow these steps to activate or mute Earpiece for outgoing message/caller message recordings.
Press ⬤ → Select Settings → Press ⬤ → Use ⬦
to select Call/Video Call → Select Answer Phone →
Press ⬙ → Select Volume → Press ⬙ → Select
Link to Profile or Silent → Press ●
- For Link to Profile, current Earpiece Volume applies.
Answer Time
■Adjust ring time between 0 and 30 seconds (Answer Phone waits to answer calls).
Press ⬤ → Select Settings → Press ⬤ → Use ⬦
to select Call/Video Call → Select Answer Phone →
Press ⬤ ➔ Select Answer Time ➔ Press ⬤ ➔
Enter time (00 - 30) → Press ●
■To start recording immediately after a call arrives, enter 00 for time → Press ●
Activation Time is 09 seconds by default.
When Answer Phone and Voicemail or Call Forwarding are both active, the function with the shortest ring time takes priority.
Example:
Ring time for Answer Phone: 9 seconds
Ring time for Voicemail or Call Forwarding: 10 seconds
In this example, Answer Phone responds first. (Priority may change depending on signal conditions.)
- If Answer Phone is full or handset is in Offline Mode, incoming calls are handled by Voicemail or Call Forwarding.
Quick Recorder
Use Quick Recorder to record caller messages on handset when Answer Phone is inactive. When a call arrives, follow these steps. Outgoing message plays and caller's message is recorded.
Press 📧 Options → Select Record Message →
Press
Engaged Call Operations

Earpiece Volume
Adjust Earpiece Volume (5 levels).
•Volume level remains as set even after handset power is turned off.
• To adjust Earpiece Volume in Standby, see P.9-17.
- Earpiece Volume is Level 3 by default.
1 During a call, press ▼ or ▶
2 Press □ (up) or ▶ (down) to adjust volume
Voice Output
Loudspeaker Use Loudspeaker for handsfree conversations
During a call, press ♟. To cancel, press ♟.
Mute
Mute Microphone Other party's voice is audible
During a call, press Ⓨ Mute. To cancel, press Ⓨ Unmute.
Hold Hold tone sounds and each other's voice is not audible
■ Subscription to Call Waiting (see P.13-5) or Conference Call (see P.13-6) is required. During a call, press ☑ Options → Select Hold → Press ● ■ To cancel, press ☑ Options → Select Retrieve → Press ● ■ Alternatively, press □.
Touch Tones
Use Touch Tones to send alphanumeric messages to pagers or operate a home answerphone remotely. • Use 0 - 9, # and # to send Touch Tones.

Voice Memo
Record up to 90 seconds or 20 messages between Voice Memo and Answer Phone (see P29).
1 During a call, press 📧 Options
2 Select Record and press ●
Recording starts.
3 Press ♟ to stop
• Alternatively, end call to stop. (Recordings remain even after handset power is turned off.)
Play Play Voice Memos
Main Menu ▶ Phone
Select Play Messages → Press ●
For details, see P.2-10 "Playing Messages".
Other Engaged Call Operations
| Open Phone Book Entry | Open Phone Book entries |
| Press☑Options ➔ Select Phone Book List ➔ Press ● ➔ Select an entry ➔ Press ● | |
| Save Phone Book Entry | Save the other party's number to Phone Book |
| Press☑Options ➔ Select Phone Book List ➔ Press ● ➔ Press☑Options ➔ Select Add New Entry ➔ Press ● ➔ Perform from Step 2 on P.4-4 | |
| Open Message | Check received/sent/draft messages |
| Press☑Options ➔ Select Messaging ➔ Press ● ➔ Select an item ➔ Press ● | |
| Create Message | Create a new message |
| Press☑Options ➔ Select Messaging ➔ Press ● ➔ Select Create Message or Create New SMS ➔ Press ● ➔ Perform form Step 3 on P.14-7 or on P.14-6 | |
| Dial New Number | Call another number |
| Press☑Options ➔ Select Dial New Number ➔ Press ● ➔ Enter a phone number ➔ Press 📊 | |
| Enable/Disable DTMF | Select whether to send Touch Tones during a call |
| Press☑Options ➔ Select Disable DTMF or Enable DTMF ➔ Press ● |
Tip ▶ To switch sound output between handset and handsfree devices during a call, see P.10-8 "Sound Output".
Call Log

Open the following records:
| All Calls All dialled/received calls | |
| Dialled Numbers All dialled calls | |
| Received Calls All received calls |

Press
All Calls opens.
Press Ⓧ to open others.

Select a record and press ●
Record details appear.
Tip ▶ Press 🔒 to open All Calls during a call.
Delete Delete records one at a time
Press 📋 → Select a record → Press 📋 Options → Select Delete → Press ⬤ → Choose Yes → Press ⬤
Delete All Delete all records
Press 📄️ ➔ Open All Calls, Dialled Numbers or Received Calls ➔ Press 📋️ Options ➔ Select Delete All ➔ Press ⬙️ ➔ Enter Handset Code ➔ Press ⬙️ ➔ Choose Yes ➔ Press ⬙️
Tip ▶ To save phone numbers to Phone Book, see P.4-8 "Saving from Call Log".
Using Call Log
Call Place calls
Press 📋 → Select a record → Press 📋 Options → Select Call or Video Call → Press ●
To edit numbers before dialling, select a record and press ☐ Options → Select Edit Before Call → Press ⬙ → Edit number → Press 📄 (Long Press for Video Calls)
Create
Message
Create messages
Press → Select a record → Press Options → Select Create Message → Press
Select S! Mail or SMS Press Perform from Step 5 on P.14-8 or on P.14-6
Call Timers & Data Counter
Call Timers
Check estimated time of the most recent call (Last Call Time) and all calls made since Clear Timers was last applied (All Calls Time).
- Times for Dialled Calls and Received Calls appear separately.
- To show elapsed Call Time during a call, see P.9-30 "Call Time Counter".
Main Menu ▶ Settings → Call/Video Call (💡) → Call Time & Cost → Call Timers
1 Select Dialled Calls or Received Calls and press ●
2 Press ⬙ to return to Call Timers menu
- Press 📞 to return to Standby.
Tip ▶ • Last Call Time and All Calls Time remain even after handset power is turned off. • Ring time for incoming or outgoing calls is not counted. On hold time is counted.
Clear Timers Reset Call Timers
Main Menu ▶ Settings → Call/Video Call (💡) → Call Time & Cost → Call Timers
Select Clear Timers → Press ● → Enter Handset Code → Press ● → Choose Yes → Press ●
Data Counter
Check estimated volume of the most recent or all packet transmissions (sent, received and total). Charges do not appear.
Main Menu
▶ Settings → Call/Video Call (😊) → Call Time & Cost → Data Counter
1 Select Last Data or All Data and press ●
2 Press ⬙ to return to Data Counter menu
- Press 🔒 to return to Standby.
Clear Counter Reset Data Counter
Main Menu ▶ Settings → Call/Video Call (😊) → Call Time & Cost → Data Counter
Select Clear Counter → Press ● → Choose Yes → Press ●
Call Costs
Check estimated call charge of the most recent call or all calls. To show Call Cost automatically after each call, see P.9-30 "Display Call Cost".
Main Menu
▶ Settings → Call/Video Call (😊) → Call Time & Cost → Call Costs
1 Select Last Call or All Calls and press ●
2 Press ⬙ to return to Call Costs menu
- Press 📊 to return to Standby.
Tip ▶ Call Costs remain even after handset power is turned off. • Sum of charges appears for Conference Call (Optional Service).
Clear Costs Reset Call Costs
Main Menu
▶ Settings → Call/Video Call (😊) → Call Time & Cost → Call Costs
Select Clear Costs → Press ⬙ → Enter PIN2 → Press ⬙ → Choose Yes → Press ⬙
Cost Units
Set currency and conversion rate (per yen) to show converted amount in Call Costs
Default YEN 1
Main Menu
▶ Settings → Call/Video Call (😊) → Call Time & Cost → Call Costs → Cost Units
Press Edit Enter PIN2 Press Enter currency Press Enter conversion rate Press Press
Limit Call Costs
Max Cost
Set a limit of total call charges When the limit is reached, outgoing calls are blocked
Main Menu
Settings → Call/Video Call (😊) → Call Time & st → Call Costs
Select Max Cost → Press ● → Press ▼ Set → Select Set → Press ● → Enter PIN2 → Press ● → Enter the amount → Press ●
To cancel Max Cost, select Max Cost → Press ● → Press ▼ Set → Select Unset → Press ● → Enter PIN2 → Press ● To change Max Cost, select Max Cost → Press ● → Press ▼ Edit → Enter PIN2 → Press ● → Enter the amount → Press ● To check the remaining amount, select Residual Credit → Press ●
Note ▶ Emergency calls (110, etc.) are possible even when the limit is reached. See P.2-3 "Emergency Calls".
Outside Japan (International Roaming)

Switching Network Services
•Auto is set by default.
- Use Auto whenever possible.
| Auto | Sets Network by location (Network status) when selected and each time handset is turned on thereafter. | |
Main Menu ▶ Settings → Network Settings (◎) → Select Service
1 Select Auto, 3G/GSM, 3G or GSM and press ●
Selected service is activated.
Note
- International roaming requires a separate contract. For service basics, see Global Roaming Guide, available in English via SoftBank Mobile Website (http://www.softbank.jp). For up-to-date information, contact SoftBank Customer Centre, General Information (see P.20-29).
- Download and print Global Roaming Guide to carry with you while travelling abroad.

Calling from Outside Japan
Use the same SoftBank handset number overseas.
Calling Other Countries
1 Enter a phone number
- Include dialling code for landline numbers.
2 Press 📧 Options
3 Select Int'l Call and press ●
Country names appear.
To call Japan, select Call to Japan Press ⬙ → Skip ahead to Step 5
4 Select a country and press ●
•+ and country code are inserted before the phone number. The first 0 is omitted except when calling Italy (39). (+ indicates an outgoing international call.)
To call unlisted countries, select Enter Code → Press ● → Enter country code → Press ●
Calling SoftBank Handsets
•Always select 日本(JPN) (or press 8 TJN 1 for direct entry).
5 Press
Calling Japan via Quick Operation
Enter a phone number → Press 📄A/4 → Perform from Step 4
Direct Entry
Press 0.5 for 1+ seconds (+ appears) → Enter country code → Enter a phone number including the dialling code → Skip ahead to Step 5
■ Omit the first 0 of the dialling code except when calling Italy (country code: 39).
Calling Landlines & Mobiles within the Same Country
1 Enter a phone number
- Include dialling code for landline numbers.
2 Press
Note In some areas, other parties may not be able to hear you and vice versa after returning to calls on hold (see P.2-11).
Tip ▶ Adding Country Codes
To save frequently used country codes, see P.9-29 "Country Codes". For more information, contact SoftBank Customer Centre, General Information (see P.20-29).
Manner Mode
Minding Mobile Manners
Please use your handset responsibly. Use these basic tips as a guide. Inappropriate handset use can be both dangerous and bothersome. Please take care not to disturb others when using your handset. Adjust handset use according to your surroundings.
- Turn it off in theatres, museums and other places where silence is the norm.
•Refrain from using it in restaurants, hotel lobbies, lifts, etc. - Observe signs and instructions regarding handset use aboard trains, etc.
- Refrain from use that interrupts the flow of pedestrian or vehicle traffic.
Manner-Related Features
■Manner Mode: see P.2-19
Press Manner Key to automatically mute all sounds and activate vibration for incoming transmissions.
■Vibration Mode: see P.9-15
Activate vibration for incoming transmission alerts.
Volume Settings: see P.9-14
When carrying handset in public, decrease or mute incoming transmission alerts or S! Application tones.
■Offline Mode: see P.2-20
Temporarily suspend all handset transmissions without turning off handset power.
Answer Phone: see P.2-9
Handle incoming calls inappropriate/unsafe to answer.
Drive Mode: see P.9-2
Small Light flashes for incoming calls; if unanswered driving message plays and Answer Phone activates.

Activating & Cancelling
Activate/cancel Manner mode in Standby, while browsing the Internet or during calls, etc.
Activating Cancelling
1 Press ☐ for 1+ seconds
appears and Manner mode is set.
- (Answer Phone), 📋 (Silent) and 🌐 (Silent & Vibration) appear as set in Manner settings (see P9-2 "Mode Settings").
1 Press ☐ for 1+ seconds
disappears and Manner mode is cancelled.
When Manner Mode is Active
■ Keypad Tones, Power On/Off and error tones are muted. Swap Call (see P.13-6) beeps are audible.
- Even in Manner mode, ringtone is audible from Headphones. Volume is fixed to Level 1.
■Shutter click and Self-timer tone sound even in Manner mode.
■ Manner settings (see P.9-2 "Mode Settings") apply to Answer Phone, ringtones, Vibration, etc.
Tip ▶ •While Answer Phone is recording, caller's voice is audible from Earpiece.
- To change Manner settings, see P.9-2 "Mode Settings".
Activating/Cancelling Offline Mode
Use Offline Mode to temporarily suspend all handset transmissions.
- Offline Mode blocks all calls/Internet transmissions. Bluetooth®/infrared transmissions are available.
- Offline Mode is Off by default.


Simple Menu
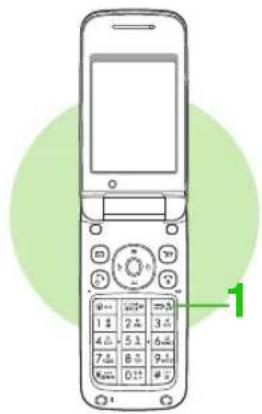
Activate Simple Menu to reduce available handset functions and simplify menus.
- Handset is limited to basic operations (see P.2-22).
- Fonts are enlarged while Simple Menu is active.

Standard Main Menu


Simple Main Menu
Press ☑ to toggle description on/off.
Activating/Cancelling Simple Menu
Activating Cancelling
1 Press for 1+ seconds
- Simple Menu remains active even after handset power is turned off.
1 Press for 1+ seconds
Note ▶ Some menu items, function names, etc. differ from Standard Menu.
Tip ▶ • Activate Simple Menu in Normal mode (see P.9-2). While Simple Menu is active, Drive and Original modes are not available.
- A message to end the corresponding function appears when Simple Menu is activated in the following cases:
■ Infrared transmission is in progress
■ S! Application is paused
■ Media Player is active (playing background music)
■ Bluetooth ® is active
Simple Menu Operations
Menus
In Standby, press Ⓞ to open Simple Main Menu.
| Messaging | Received Msg. See P.14-23 | ||
| Create Msg. See P.14-7 | |||
| Drafts See P.14-18 | |||
| Templates | See P.14-14 | ||
| Sent Messages See P.14-23 | |||
| Unsent Msg. See P.14-23 | |||
| Create SMS See P.14-6 | |||
| Phone | Ph. Book List See P.4-2 | ||
| Add New Entry See P.4-4 | |||
| Play Messages See P.2-10 | |||
| Call VM See P.13-4 | |||
| My Details See P.4-19 | |||
| Speed Dial See P.4-13 | |||
| Camera | - | See P.6-2 | |
| Convenient Tool | Calendar | See P.12-2 | |
| Alarms | See P.12-11 | ||
| Calculator | See P.12-15 | ||
| Assignment | Wallpaper | See P.9-3 | |
| Assign Tone | See P.9-14 | ||
| Volume | See P.9-14 | ||
| Hot Status See P.19-4 | |||
| Circle Talk | See P.19-13 | ||
| Answer Phone | See P.2-9 | ||
| Simple Menu | See P.2-21 | ||
| Data Folder | Pictures | See P.8-2 | |
| DCIM | See P.8-2 | ||
| My Pictograms See P.8-2 | |||
| Ring Tones | See P.8-2 | ||
| S! Appli See P.16-2 | |||
| Music See P.8-2 | |||
| Videos | See P.8-2 | ||
| Data Folder | Lifestyle-appli | See P.17-3 |
| Books | See P.8-2 | |
| CustomScreens | See P.9-9 | |
| Flash® | See P.8-2 | |
| Flash®Ringtones | See P.8-2 | |
| Other Docs. | See P.8-2 | |
| Memory Status See P.8-2 |
Key Assignments
In Standby:
| Switch to Standard Menu | See P.2-21 | |
| Turn handset on/off | See P.1-20 | |
| Open Yahoo! Keitai Main Menu | See P.15-2 | |
| Open Messaging menu | See P.14-2 | |
| Open S! Mail Composition window | See P.14-7 | |
| Open Call Log (All Calls) | See P.2-13 | |
| Open Call Log (Dialled No.) | See P.2-4 | |
| Open Call Log (Received Calls) | See P.2-8 | |
| Open Phone Book | See P.4-8 | |
| Create new Phone Book entry | See P.4-4 | |
| Activate/cancel Manner mode | See P.2-18 | |
| Activate/cancel Keypad Lock | See P.1-22 | |
| Play Answer Phone messages | See P.2-10 | |
| Activate/cancel Answer Phone | See P.2-9 |
- While Simple Menu is active, shortcuts and some Quick Operations (see P.1-25) are disabled.
Text Entry
Character Selection
Use Kana and Pager (see P.3-9) to enter alphanumeric, Symbols, hiragana, kanji, katakana and Pictograms. Unless otherwise noted, text entry operations are described for use in text entry windows using Kana Mode.

Entry Modes
Follow these steps to change character entry mode.
1
Press
2
Use ⏻ to select a mode and press ⏻
- For Pictogram or Symbols, corresponding list appears. (Entry mode remains unchanged.)

A and A appear in upper/lower case mode (see below).
Upper & Lower Case
In double or single-byte alphanumerics mode, press 📄 to toggle between upper/lower case and lower case modes.
Tip ▶ •Handset Character Codes correspond to 6,355 kanji. • Some characters are not available for mail addresses, etc.
Key Assignments
Multiple characters are assigned to each key. Press a key to toggle between character options for that key.
Example: In katakana entry, press 1 three times for ウ.
When entering characters, press 🔒 to toggle options in reverse. (Not available for single-byte numbers or Character Codes.)
Example: Enter 1, then press 📄 to return to ♂.
| Key | Kanji (Hiragana)[Double-byte] | Katakana[Double & Single-byte] | Alphanumerics[Double & Single-byte] | Numbers[Single-byte] | Character Codes |
| 1 2/3 | あいうえおあいうえお | アイウエオアイウエオ | @./-1□(Space) | 1 | 1 |
| 2 2/3 | かきくけこ カキク | ケコ ABCabc2 | 2 | 2 | |
| 3 2/3 | さしすせそ サシス | セソ DEFdef3 | 3 | 3 | |
| 4 2/3 | たちつてとっ タチ | ソテトッ GHIghi4 | 4 | 4 | |
| 5 2/3 | なにぬねの ナニヌ | ネノ JKLjk15 | 5 | 5 | |
| 6 2/3 | はひふへほ ハヒフ | ヘホ MNOmno6 | 6 | 6 | |
| 7 2/3 | まみむめも マミム | メモ PQRSpqrs7 | 7 | 7 | |
| 8 2/3 | やゆよやゆよ ヤユヨ | ヤユヨ TUVtuv8 | 8 | 8 | |
| 9 2/3 | らりるれろ ラリル | レロ WXYZwxyz9 | 9 | 9 | |
| 10 2/3 | わをんー ワランー 0 | 0 + 1 | 0 | ||
| 2/3 | ° Log/History,Pictogram List,Symbol List | ° ° -2 Log/History,Pictogram List, Symbol List 3 (Symbol List →Log/History →Pictogram List in single-byte entry mode) | Log/History, Pictogram List, Symbol List 3 (Symbol List → Log/History → Pictogram List in single-byte entry mode) | ¥ P (Pause) ? -4Symbol List, Log/History,Pictogram List | |
| # | 、。 ¶ (Line Break) ? ! □ (Space) | , . ¶ (Line Break)?!□ (Space) | # | ||
1 Press 0k=1p+2 for 1+ seconds to enter + (available for phone number entry).
2 - is available only in single-byte katakana entry.
3 Double or single-byte according to the entry mode.
4 ✗ P (Pause), ? and - are for phone number entry.
■Key Assignments (Continued)
| Key | Kanji (Hiragana) [Double-byte] | Katakana [Double & Single-byte] | Alphanumerics [Double & Single-byte] | Numbers [Single-byte] | Character Codes |
| Conversion (Up) 5 | Cursor Up | ||||
| Conversion (Down) 6 | Cursor Down ↓ (Line Break) | ||||
| Cursor Left | |||||
| Cursor Right | |||||
| Change Entry Mode | |||||
| Toggle Case (for some characters) | Toggle Case + Toggle Mode (upper/lower and lower case) | ||||
| Delete One Character, Cancel Conversion | Delete One Character | Delete Code/One Character | |||
| Delete before or after cursor | |||||
| Re-convert 7 Recover up to 64 deleted characters 8 | Recover up to 64 deleted characters 8 | ||||
| OK | |||||
| Phonetic Conversion | —— ——— | ||||
| Hiragana to Katakana/ Alphanumerics Conversion | |||||
5 Cursor moves up except during conversion.
6 Cursor moves down except during conversion.
7 Press 📄 immediately after inserting characters to re-convert them. (Not available for Arrange Mail.)
8 Press ☐ once for each character to recover immediately after deletion. (Not available for Arrange Mail or after using ☐ (Long Press).)
Entering Characters
Kanji, Hiragana & Katakana
Following the example below, enter 鈴木 to learn how to enter characters in kanji (hiragana) entry mode.
1 Press 3 twice
Word suggestions change as hiragana are entered.

2 Press 3 虚 for 1+ seconds
- Press a key for 1+ seconds to enter the next hiragana assigned to it and advance cursor (before conversion).

3 Press 3 2 three times and press V 100000

4 Press 2 ABC twice
• To enter unconverted hiragana, skip ahead to Step 6.
5 Press ⏻ (convert) and use ⏻ to select a word
•The most recent selection appears first in the list.
To see other suggestions, press ☑ Prev. or Next.
To exit the list, press 📄. To change segment, see P.3-6
"Segmenting Phrases".
6 Press


Predictive & Previous Usage
■Use these functions to convert hiragana to kanji more quickly.
| Predictive | Word suggestions change as up to five hiragana are entered |
| Previous Usage | Suggests words/characters likely to follow entry based on previous entries |
- Both functions are active by default (see P.3-13 "Optional Predictive Functions").
- To lower priority of particular types of words (names of people, places, etc.) in the word suggestion list, see P.3-13 "Set Low Priority".
User Dictionary
■ Save frequently used words/phrases to select from the word suggestion list. For details, see P.9-19.
- In text entry windows, save entered words/phrases from Options.
Segmenting Phrases
If the word is not listed, press ☐ after Step 5 on P.3-5 to exit. Use ⏻ to segment hiragana to convert separately.
Example: Segment みち into み and ち.
![graph LR A["みち"] --> B["ち→三"] B --> C["三智"] C --> D[" "] D --> E[" "] E --> F[" "]](/content/2026/07/1509125/images/5fce7f87ee0c7ad8d6f4c1f5906423f3ae7dd7bf95e08cb3359f109f4576bfb9.jpg)
■Selecting Multiple Converted Words
Press A1a
Enter small hiragana あ, いう, え, お, つ, や, ゆ and よ as well as small katakana.
1 Enter a character and press 📄 A/2
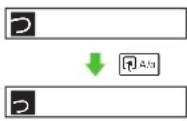
Adding ° or °
1 Enter a character and press
• In kanji (hiragana)/double-byte katakana entry, press the key once to add * to か (Ka) row, さ (Sa) row and た (Ta) row characters, and press twice to remove. For は (Ha) row characters, press once to add *, twice to add * and three times to remove.


Tip ▶ In Single-byte Katakana Entry
- Press once to add single-byte or twice for. - Press to remove or
Space
1 Press Alternatively, in kanji (hiragana), katakana or alphanumeric entry, press #6 six times for space.


Line Break
Insert line breaks in text, Text Templates, etc.
1 Press Ⓧ at the end of text
- To insert line breaks in text, press # @ until ↓ appears, then press ♁.



Undo & Recover
Cancel the previous conversion or recover deleted characters.
1 Press 📧 Options immediately after character entry
2 Select Undo/Reverse Order and press ●
Entering Alphanumerics
Enter alphanumerics in double or single-byte alphanumerics mode. Alternatively, enter numbers in single-byte number mode.
![graph LR A["a"] -->|3 off| B["ad"] B -->|Confirm| C["ad"]](/content/2026/07/1509125/images/2c44627be859a312235866ebb1b38c4b7b880208a464866208bd4540f037a68a.jpg)
- When the next character is on the same key (example: entering a then b), press Ⓞ first to move cursor.
- In double or single-byte alphanumerics mode, press 📄 to toggle between upper/lower and lower case modes.
• To convert hiragana to katakana/alphanumerics only, see P.3-11 "Hiragana to Katakana/Alphanumerics Conversion".
Symbols, Pictograms & Emoticons
Symbols & Pictograms
Pictograms do not appear in e-mail or on incompatible SoftBank handsets.
1 Press *to open Log/History (Log/History is available in some entry modes; see P.3-3)
Recently used Symbols/Pictograms appear.
- —appears by default or when Log/History is deleted.
To see Symbols, press ☐; toggle as follows: Symbol List(s) → Log/History.
To see Pictograms, press ☑; toggles as follows: Pictogram Lists → Log/History.
■ Alternatively, press ⏻ repeatedly to scroll Symbols or Pictograms.
To enter cross-carrier Pictograms, see P.14-8 (below Step 7).
2 Use ⚙ to select one and press ♟
- Repeat Step 2 to enter more.
3 Press a key (0.75 - 9.5) to exit list and enter the assigned character
• Alternatively, press 📄 to exit list.
Tip ▶ Double-byte Symbols appear only in double-byte entry mode. (All Pictograms are double-byte.)
- Single-byte Symbols do not appear in Log/History.
•Alternatively, enter きごう and press ⏻ (convert).
Some Symbols can be selected.
- For available Pictograms, see P.20-16. While creating Arrange Mail (see P.14-11), My Pictograms (see P.8-2) downloaded via the Internet can also be used.
- Enter a descriptive word such as はーと or はな and press ⏻ (convert). Corresponding Pictograms can be selected.
•My Pictogram History is available while creating S! Mail (see P.14-7) or Arrange Mail (see P.14-11).
Clear Log/History
In a text entry window, press 📧 Options → Select Input/
Conversion → Press ⬙ → Select Clear History →
Press ● → Choose Yes → Press ●
■ To return to the text entry window, press 📄 → Press 📄
Emoticons
1 Press 📧 Options
2 Select Emoticons and press ●
- Enter two digits (01 - 50) to jump to the emoticon assigned to the number.
3 Select an emoticon and press ●
Tip
- For other emoticons, enter かお and press Ⓤ (convert). Alternatively, enter a descriptive word such as カーい or ラール and press Ⓤ (convert). Corresponding emoticons can be selected.
- Immediately after inserting a descriptive word such as 瘙しい or 悲しい, corresponding emoticons may appear in the word suggestion list. To disable this function, see P.3-13 "Optional Predictive Functions" (EmotionWordlink).
Mail & Web Extensions
Enter .co.jp, http://, etc., easily.
1 Press 📧 Options
2 Select Quick Address List and press ●
3 Select an extension and press ●
- Mail addresses and URLs are single-byte.
Character Code
1 In Character Code entry mode, enter four digits (see P.20-10)
Pager Code
1 Press 📧 Options
2 Select Input/Conversion and press ●
3 Select Input Method and press ●
4 Select Pager Code and press ●
Pager Code ____ appears at the bottom.
To switch to Kana Mode, select Kana → Press ●
5 Enter two digits (see P.3-10)
- Pager Mode is active until switched to Kana Mode.
Character Entry Modes
In Pager Mode, toggle between entry modes as follows: Press ➕ Select P, P, Pictogram, Symbols or Character Code ➕ Press ●
- For Pictogram or Symbols, corresponding list appears. (Entry mode remains unchanged.)
■To toggle between upper and lower case modes, press 📄 → Press 📋 P/p
Tip ▶ •Hiragana to Katakana/Alphanumerics Conversion is disabled in Pager Mode.
- To enter or , see Pager Code List on P.3-10.
Pager Code List
- Blanks indicate no entry.
- Grey background indicates upper and lower case available. Press 📄 to switch immediately after character entry.
Double-byte upper case Single-byte upper case
Double-byte lower case Single-byte lower case
*1Press 7.000 0.25 to insert line breaks (in mail message text, Text Templates, etc.).
2 Press 8 to toggle between upper and lower case modes.
• and are double-byte.
Conversion Methods (Japanese Only)
Phonetic Conversion
Enter alternate readings to search for kanji.
1 Enter reading in hiragana
2 Press 📧 Kanji
3 Select a kanji and press ●

Enter the first hiragana to access previously selected words.
Example: To enter 鈴木

- Up to 20 word selections are saved per hiragana. When memory is full, the oldest entry is deleted to make room for a new entry.
Hiragana to Katakana/Alphanumerics Conversion
Enter katakana and alphanumerics in kanji (hiragana) entry mode.
1 Enter hiragana and press ¥7 Kana
• To enter AM, press 2 ABC 6 HNO then Y7 Kana
2 Use ⏻ to select a word and press ⬙
- Hiragana to Roman Letter Conversion (hiragana with * or o is converted to the same characters/Symbols):
- Hiragana to Number Conversion (hiragana with or is converted to the same numbers):
■ あ (A) row...1 ■ か (Ka) row...2 ■ さ (Sa) row...3 ■ た (Ta) row...4
■ な (Na) row...5 ■ は (Ha) row...6 ■ ま (Ma) row...7 ■ や (Ya) row...8
■ ら (Ra) row...9 ■ わをんー (Long Sound)...0
Quick Conversion (for Hiragana)
Quick Conversion helps reduce keystrokes needed to enter frequently used words.
A list of word suggestions appears based on the key pressed.
Example: To enter 微妙
| Normal Conversion | 6mno \\8tiv \\1 6mto \\8tiv \\1 (び) 7mto \\8tiv \\1 (み) 7mto \\8tiv \\1 (よ) (convert) |
| Quick Conversion | 6mno \\8mto \\1 (ば) 7mto \\8tiv \\1 (ま) 8tiv \\1 (や) (あ) (convert) |
1 Enter hiragana and press Ⓞ
Cursor turns green.
- While cursor is green, use ⏻ to segment entered hiragana and then convert one segment at a time.
To cancel Quick Conversion, press 📄 → Press 🔒 for normal conversion
2 Use ⏻ to select a word and press ⬙
Note ▶ Use Quick Conversion in kanji (hiragana) mode only.
Tip ▶ The most recent selection (mostly nouns) appears first.
One Hiragana Predictive Entry
Enter hiragana and initiate Quick Conversion. Words starting with a hiragana in the same row (あいうえおfor あ) appear. Word suggestions vary by time of day.
Example: When ♂ is entered
- Words in the list are preset by time blocks.
- If Clock is unset, only words for 11:00 - 16:59 are available.
One Hiragana Word Call
Enter the first hiragana of entries you used Quick
Conversion for. The most recent selection appears first.
Example: You entered あたあさわ and selected お父さん last time.

Conversion Settings
Optional Predictive Functions Activate or cancel Predictive, Previous Usage or EmoticonWordLink
DefaultOn (all)
Press Options → Select Input/Conversion → Press ● → Select Predictive, Previous Usage or EmoticonWordLink → Press ● → Choose On or Off → Press ●
Set Low Priority Select types of words to lower their priorities in the word suggestion list
Press Options → Select Input/Conversion → Press ● → Select Set Low Priority → Press ● → Select an item → Press ● → Press Y? OK
- To select multiple items, select and press ♟ for each item before pressing ☑ OK.
Reset Learning Clear log of words selected in kanji conversion, Predictive, etc.
Press 📧 Options → Select Input/Conversion → Press ⚙ → Select Reset Learning → Choose Yes → Press ⚙
- Words saved in User Dictionary remain.
Editing Characters
Deleting & Replacing
1 Use ☐ to select a character and press CLEAR/BACK (FT)
•The highlighted character is deleted.
- Place cursor at the end of text and press (F)An+12F for 1+ seconds to delete all text. When cursor is located amidst a block of text, characters on and after cursor are deleted.

2 Enter another character
Copy/Cut & Paste
When Options appears, copy or cut and paste text into the same window or another. (My Pictograms, etc. copied from Arrange Mail Composition window may not be pasted.)
1 Press 📧 Options
2 Select Copy or Cut and press ●
3 Use ☐ to select the first character of text and press ●
Start point is set.
To change the start point, press ☐ Quit.
4 Select the end point and press ●
5 Open text paste target window
6 Press 📧 Options
7 Select Paste and press ●

Cut

Deleting Text On and After Cursor
1 Select the first character of text
2 Press 📧 Options
3 Select Cursor Position and press ●
4 Select Delete Posterior and press ●
Jump to Top or End
In a text entry window, press 📋 Options → Select Cursor
Position → Press ⬙ → Select Jump to End or Jump to
Top → Press ●
Additional Functions
Copying from Phone Book
Insert Phone Book entry items into text entry windows.
Select from name, phone numbers, mail addresses,
Category, postal address, homepage, Note, and Birthday.
1 Press 📧 Options
- Move cursor to target location beforehand.
2 Select Advanced and press ●
3 Select Phone Book and press ●
4 Open a Phone Book entry or My Details
5 Use ⚙ to select an item and press ⬙
Using Text Templates
Insert text saved in Text Templates (see P.12-26) into text entry windows.
1 Press 📧 Options
2 Select Text Templates and press ●
3 Select Call Templates and press ●
4 Select text and press ●
Text is inserted.
Saving to Text Templates
■ Follow these steps to save text in text entry windows to Text Templates.
Press 📋 Options → Select Text Templates → Press ●
→ Select Save Templates → Press ⬙ → Select the first character of text → Press ⬙ → Select the end
point → Press ●
- Enter up to 1,536 characters. - Not available while creating Arrange Mail.
Changing Font Size
1 Press 📧 Options
2 Select Advanced and press ●
3 Select Font Size and press ●
4 Select a size and press ●
Tip ▶ Setting applies to Editor Font Size in Display Font Settings (see P.94).
Phone Book
Overview
Save frequently used phone numbers and mail addresses to Phone Book.
- Entry names appear for calls from numbers saved in Phone Book.
- Set ringtone/ringvideo by caller/sender, sort entries into Categories, etc. See P.4-3 for more about Phone Book entry items.
■Dialling from Phone Book

■Sending SMS/S! Mail messages from Phone Book

Note ▶ Back-up Important Information
When battery is exhausted/removed for long periods, Phone Book entries may be lost; handset damage may also affect handset information recovery. SoftBank is not liable for damages from lost/altered data.
When a Call Arrives

Service Dial
■Dial service dial numbers saved on compatible USIM Cards to use services.
Press ⬤ → Select Phone → Press ⬤ → Select Service Dial No. → Press ⬤ → Select service → Press ⬤
- For details, contact the service providers.
Tip ▶ Use Phone Book Lock (see P.9-26) to protect entries from accidental alteration and to restrict access to Phone Book information.
Saving to Phone Book
Phone Book Entry Items
Save up to 750 entries in handset Phone Book; USIM Card Phone Book entry limit varies according to card specifications.
| Item Description | Item Description | ||
| Last Name: | Enter up to 32 characters. (Select Name: when saving to USIM Card.) | Homepage: 1 | Save URLs. Enter up to 1,024 bytes. |
| First Name: Note: | 1 | Add personal details. Enter up to 256 characters. | |
| Reading: Enter up to | 64 characters. Birthday: | 1 | Enter birth date |
| Add Phone Number: | Enter up to three numbers on handset/two on USIM Card (32 digits each) | Picture: 1,2 | Set an image to appear for incoming calls/ mail |
| Add Email Address: | Enter up to three addresses on handset/one on USIM Card (128 single-byte alphanumerics each) | Tone/Video for Voice Call:1 | Set ringtone/ringvideo or Vibration by caller/ sender |
| Tone/Video for Video Call:1 | |||
| Category: | Sort entries into 16 Categories (11 on some USIM Cards). Category names can be changed. Set ringtone/ringvideo and Vibration by Category (handset only). | Tone/Video for New Message:1 | |
| Vibration for Incoming Call:1 | |||
| Address: 1 | Enter postal code (20 characters), country name (32 characters), state/province (64 characters), city name (64 characters) and street name/ number (64 characters) | Vibration for New Message:1 | |
| Secret: 1 | Restrict access to Phone Book entries by saving them as Secret entries |
1 Not supported on USIM Card.
2 Image may not appear while an S! Application is active, etc.
Note ▶ Depending on the USIM Card in use, some items may not be supported, and character entry limits or number of Categories may be lower. Also, the number of phone numbers or mail addresses per entry may be lower.
Creating Phone Book Entries
Enter a name, reading, phone number and mail address.
For other items, see P.4-5 - 4-7.
Storage media is set to handset (Phone) by default.
Main Menu

Phone
1
Select Add New Entry and press

Phone Book Details appears.
If storage media confirmation appears,
select To Phone or To USIM ➔ Press

2
Select Last Name: and press

3
Enter last name and press

4
Select First Name: and press

5
Enter first name and press

Characters entered for names (reading for kanji) appear.
• To correct reading, see P.4-7.
6
Select Add Phone Number: and press

7
Enter a phone number and press

- Include dialling code for landline numbers.
8
Select an icon and press ●

•To save additional phone numbers, repeat Steps 6 - 8.
9
Select Add Email Address: and press ●
10
Enter a mail address and press ●
11
Press
12
Select an icon and press ●
•To save additional mail addresses, repeat Steps 9 - 12.
13
Press Yr Save
Note
To save an entry, enter at least one of the following: a) last name; b) first name; c) phone number; or d) mail address.
Incoming Calls while Creating Entry
Contents are temporarily saved. End the call to return.
Storage Media
■ Follow these steps to set default storage media for new entries. Press ⬤ ➔ Select Phone ➔ Press ⬤ ➔ Select Ph.Book Settings ➔ Press ⬤ ➔ Select Save New Entry ➔ Press ⬤ ➔ Select Phone, USIM Memory or Ask Each Time ➔ Press ⬤
•Phone is set by default.
- For Ask Each Time, select storage media for each new entry.
Confirmation for Unsaved Numbers
■ Follow these steps to show/hide confirmation for saving to Phone Book after calls with unsaved numbers.
Press ⬙ → Select Phone → Press ⬙ → Select
Ph.Book Settings → Press ● → Select New
Number Prompt → Press ⬙ → Select Incoming
Call or Outgoing Call → Press ⬙ → Choose On or
Off → Press ●
- Both are On by default.
Personal Ringtone/Ringvideo
Select ringtones or ringvideos for calls/mail from numbers/addresses saved in Phone Book.
- Select from preset patterns or use the following melody or video files in Data Folder.
■ Files in Ring Songs-Tones, Music or Flash® Ringtones folder (file name: 55 characters or less including extension)
■Files in Videos folder (file name: 55 characters or less including extension) - Save files to Data Folder (Videos) before assigning video.
- Follow these steps after opening Phone Book Details (see P.4-4). When finished, Phone Book Details returns. Complete other fields.
1 Select form Tone/Video for Voice Call: to Tone/Video for New Message: and press ●
2 Select Assign Tone and press ●
To cancel assigned tone/video, select Remove Tone/Video
→ Press ⬙ → Choose Yes → Press ⬙
3 Ringtone
1 Select Preset Sounds, Ring Songs·Tones, Music or Flash®Ringtones and press ●
Ringvideo
1 Select Videos and press ●
4 Select a file and press ●
For Preset Sounds, select a tone → Press ●
Setting Ring Time for Incoming Mail
■ After Step 4, select Tone/Video for New Message: → Press ⬙ → Select Duration → Press ⬙ → Enter time → Press ⬙
Note ▶ If source file in Data Folder is deleted, renamed or moved to another handset/Memory Card folder (or is copy protected and licence expires), Sounds & Alerts (see P.9-14 "Ringtone/videos") setting applies. • To apply settings to Secret entries, first activate Show Secret Data.
Personal Vibration Personal Picture
Set handset vibration for calls/mail from numbers/addresses saved in Phone Book.
Follow these steps after opening Phone Book Details (see P4-4). When finished, Phone Book Details returns.
Complete other fields.
1 Select Vibration for Incoming Call: or Vibration for New Message: and press Ⓞ
2 Select Switch On/Off and press ●
3 Select On, Link to Sound or Off and press ●
- Link to Sound: Handset vibrates only when ringtone is a compatible SMAF file.
4 Select Vibration Pattern and press ●
5 Select a pattern and press ●
6 Press CLEAR BOOK
[Non-Text]
[Non-Text]
[Non-Text]
[Non-Text]
[Non-Text]
[Non-Text]
[Non-Text]
[Non-Text]
[Non-Text]
[Non-Text]
[Non-Text]
[Non-Text]
[Non-Text]
[Non-Text]
[Non-Text]
[Non-Text]
[Non-Text]
[Non-Text]
[Non-Text]
[Non-Text]
[Non-Text]
[Non-Text]
[Non-Text]
[Non-Text]
[Non-Text]
[Non-Text]
[Non-Text]
[Non-Text]
[Non-Text]
[Non-Text]
[Non-Text]
[Non-Text]
[Non-Text]
[Non-Text]
[Non-Text]
[Non-Text]
[Non-Text]
[Non-Text]
[Non-Text]
[Non-Text]
[Non-Text]
[Non-Text]
[Non-Text]
[Non-Text]
[Non-Text]
[Non-Text]
[Non-Text]
[Non-Text]
[Non-Text]
[Non-Text]
[Non-Text]
[Non-Text]
[Non-Text]
[Non-Text]
[Non-Text]
[Non-Text]
[Non-Text]
[Non-Text]
[Non-Text]
[Non-Text]
[Non-Text]
[Non-Text]
[Non-Text]
[Non-Text]
[Non-Text]
[Non-Text]
[Non-Text]
[Non-Text]
[Non-Text]
[Non-Text]
[Non-Text]
[Non-Text]
[Non-Text]
[Non-Text]
[Non-Text]
[Non-Text]
[Non-Text]
[Non-Text]
[Non-Text]
[Non-Text]
[Non-Text]
[Non-Text]
[Non-Text]
[Non-Text]
[Non-Text]
[Non-Text]
[Non-Text]
[Non-Text]
[Non-Text]
[Non-Text]
[Non-Text]
[Non-Text]
[Non-Text]
[Non-Text]
[Non-Text]
[Non-Text]
[Non-Text]
[Non-Text]
[Non-Text]
[Non-Text]
[Non-Text]
[Non-Text]
[Non-Text]
[Non-Text]
[Non-Text]
[Non-Text]
[Non-Text]
[Non-Text]
[Non-Text]
[Non-Text]
[Non-Text]
[Non-Text]
[Non-Text]
[Non-Text]
[Non-Text]
[Non-Text]
[Non-Text]
[Non-Text]
[Non-Text]
[Non-Text]
[Non-Text]
[Non-Text]
[Non-Text]
[Non-Text]
[Non-Text]
[Non-Text]
[Non-Text]
[Non-Text]
[Non-Text]
[Non-Text]
[Non-Text]
[Non-Text]
[Non-Text]
[Non-Text]
[Non-Text]
[Non-Text]
[Non-Text]
[Non-Text]
[Non-Text]
[Non-Text]
[Non-Text]
[Non-Text]
[Non-Text]
[Non-Text]
[Non-Text]
[Non-Text]
[Non-Text]
[Non-Text]
[Non-Text]
[Non-Text]
[Non-Text]
[Non-Text]
[Non-Text]
[Non-Text]
[Non-Text]
[Non-Text]
[Non-Text]
[Non-Text]
[Non-Text]
[Non-Text]
[Non-Text]
[Non-Text]
[Non-Text]
[Non-Text]
[Non-Text]
[Non-Text]
[Non-Text]
[Non-Text]
[Non-Text]
[Non-Text]
[Non-Text]
[Non-Text]
[Non-Text]
[Non-Text]
[Non-Text]
[Non-Text]
[Non-Text]
[Non-Text]
[Non-Text]
[Non-Text]
[Non-Text]
[Non-Text]
[Non-Text]
[Non-Text]
[Non-Text]
[Non-Text]
[Non-Text]
[Non-Text]
[Non-Text]
[Non-Text]
[Non-Text]
[Non-Text]
[Non-Text]
[Non-Text]
[Non-Text]
[Non-Text]
[Non-Text]
[Non-Text]
[Non-Text]
[Non-Text]
[Non-Text]
[Non-Text]
[Non-Text]
[Non-Text]
[Non-Text]
[Non-Text]
[Non-Text]
[Non-Text]
[Non-Text]
[Non-Text]
[Non-Text]
[Non-Text]
[Non-Text]
[Non-Text]
[Non-Text]
[Non-Text]
[Non-Text]
[Non-Text]
[Non-Text]
[Non-Text]
[Non-Text]
[Non-Text]
[Non-Text]
[Non-Text]
[Non-Text]
[Non-Text]
[Non-Text]
[Non-Text]
[Non-Text]
[Non-Text]
[Non-Text]
[Non-Text]
[Non-Text]
[Non-Text]
[Non-Text]
[Non-Text]
[Non-Text]
[Non-Text]
[Non-Text]
[Non-Text]
[Non-Text]
[Non-Text]
[Non-Text]
[Non-Text]
[Non-Text]
[Non-Text]
[Non-Text]
[Non-Text]
[Non-Text]
[Non-Text]
[Non-Text]
[Non-Text]
[Non-Text]
[Non-Text]
[Non-Text]
[Non-Text]
[Non-Text]
[Non-Text]
[Non-Text]
[Non-Text]
[Non-Text]
[Non-Text]
[Non-Text]
[Non-Text]
[Non-Text]
[Non-Text]
[Non-Text]
[Non-Text]
[Non-Text]
[Non-Text]
[Non-Text]
[Non-Text]
[Non-Text]
[Non-Text]
[Non-Text]
[Non-Text]
[Non-Text]
[Non-Text]
[Non-Text]
[Non-Text]
[Non-Text]
[Non-Text]
[Non-Text]
[Non-Text]
[Non-Text]
[Non-Text]
[Non-Text]
[Non-Text]
[Non-Text]
[Non-Text]
[Non-Text]
[Non-Text]
[Non-Text]
[Non-Text]
[Non-Text]
Saving Secret Entries
Restrict access to Phone Book entries by saving them as Secret entries.
Follow these steps after opening Phone Book Details (see P4-4). When finished, Phone Book Details returns.
Complete other fields.
1 Select Secret: and press ●
2 Choose On and press ●
Unlock Temporarily
For temporary access to Secret entries, follow these steps.
Press 📊 → Press 📧 Options → Select Unlock
Temporarily → Press ● → Enter Handset Code → Press ●
- Secret entries are hidden next time Phone Book is opened.
Note
- Activate Show Secret Data (see P.9-27) to open Secret entries.
• To cancel Secret, activate Show Secret Data (see P.9-27) and choose Off in Step 2. To edit Phone Book entries, see P.4-10 "Editing Phone Book Entries". - Secret entries do not appear in Standby Window or Hot Status member list.
Other Phone Book Entry Items
- For descriptions of each item, see P.4-3.
- Follow these steps after opening Phone Book Details (see P.4-4). When finished, Phone Book Details returns. Complete other fields.
| Reading | Select Reading: ➔ Press ⬤ ➔ Enter reading ➔ Press ⬤ ➔ Press ⬤ |
| Category | Select Category: ➔ Press ⬤ ➔ Select a Category ➔ Press ⬤ |
| Address | Select Address: ➔ Press ⬤ ➔ Select Postal Code: ➔ Press ⬤ ➔ Enter postal code ➔ Press ⬤ ➔ Select Country: ➔ Press ⬤ ➔ Enter name ➔ Press ⬤ ➔ Select State/Province: ➔ Press ⬤ ➔ Enter name ➔ Press ⬤ ➔ Select City: ➔ Press ⬤ ➔ Enter name ➔ Press ⬤ ➔ Select Street & Number: ➔ Press ⬤ ➔ Enter street name/number ➔ Press ⬤ ➔ Press ⬤ OK |
| Homepage | Select Homepage: ➔ Press ⬤ ➔ Enter URL ➔ Press ⬤ ➔ Press ⬤ |
| Note | Select Note: ➔ Press ⬤ ➔ Enter text ➔ Press ⬤ |
| Birthday | Select Birthday: ➔ Press ⬤ ➔ Enter date ➔ Press ⬤ |
Saving from Call Log
1 Use ⚙ to open Dialled Numbers/Received Calls
2 Use 🔒 to select a record and press 📧 Options
3 Select Save Number and press ●
4 New Entry
1 Select As New Entry and press ●
Phone number is entered automatically and Phone Book Details (see P.4-4) appears. Complete other fields.
Add to Existing Entry
1 Select a Phone Book entry and press ●
Phone number is entered automatically and Phone Book Details (see P.4-4) appears. Complete other fields.
Note Withheld records cannot be saved. New numbers cannot be saved to handset Phone Book entries with three phone numbers or USIM Card entries with two phone numbers.
Phone Book Memory Status
Main Menu ▶ Phone → Manage Entries
1 Select Memory Status and press ●
Numbers of entries on handset and USIM Card appear.
Press Ⓞ to return.
Using Phone Book
Dialling from Phone Book
Search Phone Book by katakana row (default search method) to call numbers within entries.
• To dial numbers saved in Secret entries, first activate Show Secret Data (see P.9-27).
- To search by other methods, see P.4-9.
1 Press
2 Use ⚙ to specify katakana row
•Alternatively, enter Reading to search Phone Book.
3 Use ⏻ to select an entry and press ⏻
Phone Book entry opens.
(Window Description: see P.4-9)
For entries with multiple numbers, use ⏻ to select one.
4 Press
Handset dials the number.
For other options, press ⬙ → Select an option → Press ⬙
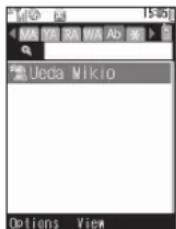

Switching Between Handset & USIM Card

Phone Book Search Methods
| By Reading Shows entries that start with specified Reading | |
| By Category Opens entries in the specified Category | |
| By a-ka-sa-ta-na | Shows entries with Readings that start with katakana in the specified row |
By a-ka-sa-ta-na is set by default.
Main Menu ▶ Phone → Ph.Book Settings → Sort Entries
1 Select By Reading, By Category or By a-ka-sa-ta-na and press ●
•Dialling Methods:
| By Reading | Enter Reading ➔ Select an entry ➔Press ⬙ ➔ Press 📋 |
| By Category | Select a Category ➔ Press ⬙ ➔ Selectan entry ➔ Press ⬙ ➔ Press 📋 |
| By a-ka-sa-ta-na | Use ⬙ to specify a row ➔ Select anentry ➔ Press ⬙ ➔ Press 📋 |
For entries with multiple numbers, select one and press ↗.
Tip ▶ In Standby, press ⏻ and follow the steps above.
Window Description

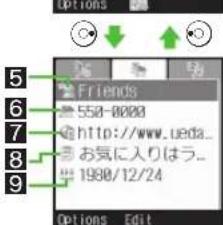


1 Name
2 Image Set for Picture
3 Phone Number
4 Mail Address
5 Category Name
6 Address
7 Homepage
8 Note
9 Birthday
10 Name of Image Set for Picture
11 Ringtone/Ringvideo Settings
12 Vibration Settings
13 Secret Status
Tip ▶ To see details or use saved information, select an item and press Ⓑ. To add information, select an item in angle brackets (
Editing Phone Book Entries
To edit Secret entries, first activate Show Secret Data (see P.9-27).
Correction/Change
1 Press ⏻, then select an entry
2 Press 📧 Options
3 Select Edit and press ●
4 Select an item and press ●
Edit contents.
• See procedure for saving items to Phone Book (see PA-4 - 4-7).
- Edit Reading after editing names.
5 Press ● when finished
•To edit other items, repeat Steps 4 - 5.
To cancel, press 📋 → Choose Yes → Press ●
6 Press Y! Save
The entry is overwritten.
Copying Phone Book Entries
Exchange entries between handset and USIM Card. USIM Card does not support some Phone Book entry items (see P.4-3). Those items are deleted when Phone Book entries are copied from handset.
One Entry
1 Press Ⓞ, then select an entry
2 Press 📧 Options
3 Select Manage Entries and press ●
4 Handset to USIM Card
1 Select Copy Entry to USIM and press ●
2 Choose Yes and press ●
USIM Card to Handset
1 Select Copy Entry to Phone and press ●
All Entries
If handset or USIM Card memory is low, entries cannot be copied all at once.
Main Menu ▶ Phone → Manage Entries → Copy All
1 Select USIM to Phone or Phone to USIM and press Ⓞ
2 Choose Yes and press ●
Deleting Phone Book Entries
One Entry
1 Press Ⓞ, then select an entry
2 Press 📧 Options
3 Select Delete and press ●
4 Choose Yes and press ●
Tip ▶ The source files remain in Data Folder, even when deleting entries containing melodies, video or images set for incoming calls/mail or Picture.
All Entries
Main Menu ▶ Phone → Manage Entries → Delete All
1 Select Phone Entries, USIM Entries or Both Entries and press ●
2 Choose Yes and press ●
3 Enter Handset Code and press ●
Category Settings
Customise Category options; create new Category names.
Changing Category Name
Main Menu
Phone → Category Control
1 Use Ⓧ to select handset or USIM
2 Select a Category and press ●
- No Category (on handset) cannot be renamed.
3 Select Edit Name and press ●
To change icons, select Change Icon → Press ● → Select an icon → Press ● (Omit the next steps.)
4 Enter name
- Enter up to 16 characters on handset; USIM Card character entry limit varies according to card specifications.
5 Press
- Repeat Steps 1 - 5 for other Categories.
Customising Handset Responses
Set ringtone/ringvideo or Vibration for incoming calls/mail by Category.
Category settings for incoming calls/mail are not available for Categories on USIM Card.
Main Menu
Phone → Category Control
1
Use ⚙ to select handset
2
Select a Category and press 📧 Options
3
Select Assign Ringtone or Assign Vibration and press Ⓞ
4
Select an item and press ●
• See the corresponding procedure for each setting.
■Ringtone/ringvideo: perform from Step 2 in "Personal Ringtone/Ringvideo" on P.4-5
■ Vibration: perform from Step 2 in "Personal Vibration" on P.4-6
Note
Personal ringtone/ringvideo and Vibration settings (see P.4-5 - 4-6) take priority.
Contact Groups
Create Contact Groups to send messages to multiple recipients at one time (see "Contact Groups" in Step 4 on P.14-7).
Creating Contact Groups
Create up to 20 Contact Groups.
Main Menu
▶ Phone → Contact Groups →
1
Enter a Group name and press ●
Saving Group Members
Save up to 20 members per Group.
Main Menu
▶ Phone → Contact Groups
1
Select a Group and press ●
2
Select Assign New Entry and press ●
3
Select an entry and press ●
For entries with multiple numbers/addresses, use ⚙ to select a SoftBank handset number or mail address → Press ⚙ •To add other numbers/mail addresses, repeat Steps 2 - 3.
Editing Contact Groups
Renaming Groups
Main Menu
▶ Phone → Contact Groups
1
Select a Group and press 📧 Options
2 Select Edit Name and press ●
3 Enter name and press ●
- Enter up to 16 characters.
4 Choose Yes and press ●
Deleting Groups
Main Menu ▶ Phone → Contact Groups
1 Select a Group and press 📧 Options
2 Select Delete and press ●
3 Choose Yes and press ●
4 Enter Handset Code and press ●
Editing Group Members
Changing Members
Main Menu ▶ Phone → Contact Groups → Open a Group
1 Select a member and press 📧 Options
2 Select Re-assign Entry and press ●
3 Select an entry and press ●
For entries with multiple numbers/addresses, use Ⓞ to select a SoftBank handset number or mail address → Press ⬇
4 Choose Yes and press ●
Deleting Members
Main Menu ▶ Phone → Contact Groups → Open a Group
1 Select a member and press 📧 Options
2 Select Remove Entry and press ●
3 Choose Yes and press ●
Tip ▶ Source Phone Book entries remain even after deleting members.
Speed Dial List
Saving Phone Numbers
Save phone numbers to Speed Dial List for easy dialling.
Main Menu ▶ Phone → Speed Dial List
1 Select from ☐ to ☉ and press ●
2 Select an entry and press ●
For entries with multiple numbers, use ⏻ to select one → Press ⏻
To overwrite existing number, choose Yes → Press ●
Saving from Phone Book

Note ▶ Saved numbers are deleted from Speed Dial List when edited in Phone Book or when source entry is deleted.
Tip ▶ Use Headphones with Call Button to call the number saved in Speed Dial ☐.
Speed Dial
1 Press a key (0 5 - 9 5 2 Press
Handset dials the number. (Name appears if saved.)
- Alternatively, select a name from Speed Dial List and press 📄.
- To place Video Calls, press 📄 for 1+ seconds. (Speed Video Call)
Delete Delete entries one at a time
Main Menu ▶ Phone → Speed Dial List
Select an entry → Press ☑ Options → Select Delete → Press ● → Choose Yes → Press ●
Tip ▶ Source Phone Book entries remain even after deleting Speed Dial entries.
Clear All Return Speed Dial List to default setting
Main Menu ▶ Phone → Speed Dial List
Press 📧 Options → Select Clear All → Press ● → Choose Yes → Press ●
Using Headphones with Call Button
In Standby, press Call Button for 1+ seconds until a double beep sounds; handset dials the number saved in Speed Dial ☐. • To end the call, press Call Button for 1+ seconds until a beep sounds.
S! Address Book (SAB)
Back up Phone Book content in SAB; add Phone Book changes to SAB anytime. Edit SAB online via PC; add SAB changes to Phone Book anytime. Restore lost or altered Phone Book content from SAB.
![graph TD A["Phone Book"] <-->|Backup/Restore| B["Server"] B -->|Synchronise| A B -->|Birthday Notification| C["Edit on PC"] C -->|Import from/Export to PC| D["Laptop"]](/content/2026/07/1509125/images/aa8a3ed2abb06d73a8deef2c2cb5da8ef08371449c67cce16fa1a753a942a622.jpg)
- SAB requires a separate contract and basic monthly fee.
- Use SAB to add Phone Book content to a new compatible SoftBank handset; some conditions apply (see P.4-16).
- Use a PC to edit SAB online (http://mb.softbank.jp/mb/en/support/useful/sab/).
- Save birthday information to SAB; use a PC to activate Birthday Notification online to receive SMS reminders.
Note ▶ Sync commands (Backup, Restore and Synchronise) all incur transmission fees.
SAB Sync Commands & Features
| Backup/Restore | Backup Export | Port Phone Book content to SAB1 |
| Restore Import | Port SAB content to Phone Book2 | |
| Synchronise | Normal Sync | ronise Phone Book and SAB3 |
| Sync from Client | Add Phone Book changes to SAB4 | |
| Sync from Server | Add SAB changes to Phone Book5 | |
| Edit on PC | Import from PC | Upload PC address book info to SAB |
| Export to PC | Export SAB content to PC address book | |
| Send Notice | Birthday Notification | SAB sends reminders via SMS to handset |
1 Any existing SAB content is deleted.
2 Any existing Phone Book content is deleted.
3 If the same entry item is edited in Phone Book and SAB, SAB content is referenced.
4 Unrelated SAB changes remain.
5 Unrelated Phone Book changes remain.
Service Usage Outline
Complete Contract
Visit a SoftBank shop, dial 157 from a SoftBank handset for SoftBank Customer Centre, General Information or access My SoftBank via Yahoo! Keitai.

Receive User ID & Password
After subscription, User ID and Password arrive via SMS. - Handset phone number serves as User ID.

Save User ID & Password
See P.4-17 for procedures.

Use SAB
Export Phone Book content to SAB.
- Using sync commands incurs transmission fees.
Tip
If User ID and Password SMS does not arrive, dial 157 for Customer Service or follow these steps:
Press Y? → Select 設定・申込 (My SoftBank)
→ Press ⬙ → Select English → Press ⬙ →
Select Password confirmation for S! Address
Book → Press ●
■Follow onscreen instructions.
Precautions
■Unsynchronisable Items
SAB restoration cancels these Phone Book settings:
■Picture, Tone/Video, Vibration
■Unintentional Phone Book or SAB Content Deletion
- When no Phone Book content exists, selecting, Normal, Sync from Client or Backup deletes all SAB content.
- When no SAB content exists, selecting Normal, Sync from Server or Restore deletes all Phone Book content.
■Phone Book ⇔ SAB Content Capacity Disparities
When the number of savable items varies between Phone Book and SAB entries, Synchronisation reflects lower limit.
SAB Transfers to New Handsets
•SAB-Compatible 3G Handsets
SAB content remains as last saved.
•Other 3G Handsets
Service contract and SAB content remain (accessible via PC).
•V3/V4/V5/V6/V8 Series
Service contract is terminated and SAB content is deleted.
Contract Termination
SAB content is deleted upon contract termination.
Availability
SAB is only accessible within Japan.
Saving User ID & Password
After completion of contract, User ID and Password arrive via SMS. Save them on handset to activate SAB.
Main Menu ▶ Phone ➔ S! Address Book ➔ Sync Settings
1 Select User Settings and press ●
2 User ID
1 Select User ID and press ●
2 Enter handset number and press ●
Password
1 Select Password and press ●
2 Enter Password and press ●
3 Press Save
Backup & Restore
Backup (Phone Book → SAB)
Main Menu ▶ Phone ▶ S! Address Book
1 Select Backup and press ●
2 Choose Yes and press ●
3 Enter Handset Code and press ●
Handset connects to the Server and Backup starts. •After Backup, details appear.
To cancel, press ☐ Cancel → Choose Yes → Press
4 Press ● to return
Restore (SAB → Phone Book)
Main Menu ▶ Phone ➔ S! Address Book
1 Select Restore and press ●
2 Choose Yes and press ●
3 Enter Handset Code and press ●
Handset connects to the Server and Restore starts. • After Restore, details appear.
To cancel, press ☑ Cancel → Choose Yes → Press ●
4 Press Ⓞ to return
Synchronising Phone Book
Manual Synchronisation
- For details, see the table on P.4-15.
- If this is your first use of SAB (new handset), Synchronisation is performed via Normal regardless of selection.
Main Menu ▶ Phone → S! Address Book
1 Select Normal, Sync from Client or Sync from Server and press ●
2 Choose Yes and press ●
3 Enter Handset Code and press ●
Handset connects to the Server and Synchronisation starts.
•After Synchronisation, details appear.
To cancel, press ☐ Cancel → Choose Yes → Press ●
4 Press ● to return
Auto Synchronisation
- Save User ID and Password beforehand.
• Auto Sync Settings is Off by default.
Main Menu ▶ Phone ➔ S! Address Book ➔ Sync Settings
1 Select Auto Sync Settings and press ●
2 Select Set On/Off and press ●
3 Choose On and press ●
4 Enter Handset Code and press ●
Set Frequency Select Auto Sync frequency
Default Every Sun. 00:00
Main Menu ▶ Phone → S! Address Book → Sync Settings → Auto Sync Settings → Set Frequency
Every Month
Select Every Month → Press ● → Enter date → Press ● → Enter time → Press ●
Every Week
Select Every Week → Press ● → Select a day of the week → Press ● → Enter time → Press ●
Every Day
Select Every Day → Press ● → Enter time → Press ●
Set Sync Mode Select Auto Sync command
Default Normal
Main Menu ▶ Phone ➞ S! Address Book ➞ Sync Settings ➞ Auto Sync Settings ➞ Set Sync Mode
Select a command → Press ●
Opening Log
View result of Backup, Restore or Synchronisation.
Main Menu
▶ Phone → S! Address Book
1 Select View Log and press ●
Press ⬙ to return.
My Details
Opening My Details
Confirm handset number (phone number on USIM Card). Save name, reading, phone number, mail address, personal data, etc.
Main Menu
Phone
1 Select My Details and press ●
- My Details are similar to Phone Book entries (see P.4-9).
2 Press 🔒 to exit
Tip ▶ Exchange My Details via Bluetooth ® (see P.10-2) or infrared (see P.10-10) with compatible devices.
Edit/Add
Details
Edit/add My Details
Main Menu
▶ Phone → My Details
Press 📧 Options → Select Edit/Add Details → Press ●
→ Select an item → Press ●
- For more, see P.4-4.
Note ▶ Phone number in Tel 1: cannot be changed.
Delete Clear My Details
Main Menu
▶ Phone → My Details
Press 📧 Options → Select Reset My Details → Press ●
→ Choose Yes → Press ●
Note ▶ Phone number in Tel 1: remains.
Video Call
Not Available for 813SH Users
Getting Started
Communicate with another party using live video images.
- Use Video Call with compatible handsets only.
- Use Internal Camera to send your own image.
- Use External Camera to send higher quality images.

Window Description

1 Change incoming/outgoing image size/position (see P.5-5 "Switch Images").
2 Name appears if saved in Phone Book.
Important Video Call Usage Notes
- If both parties are not using the same Video Call system, call may be interrupted. (Video Call charges apply.)
- Depending on the other party's handset specifications or settings, incoming image may appear small or not at all.
•Rapid motion can make images appear choppy or distorted. - Conversations may be hampered by ambient noise. Use Headphones to reduce noise.
- Increasing Earpiece Volume for Loudspeaker (see P.5-5, 5-7) use may cause feedback/interference. Moderate volume or use Headphones.
- Handset temperature may rise during Video Calls; this is normal.
- Use AC Charger during Video Call to avoid battery exhaustion.
Initiating a Video Call
1 Enter a phone number
2 Press 📧 Options
3 Select Video Call and press ●
When the call is answered, incoming image appears.
- Incoming image may not appear depending on handset settings.
(Video Call charges apply.)
For operations during a Video Call, see P5-4.

4 Press 🔒 to end call
- Alternatively, close handset to end calls. (Note, however, that if Headphones or a Bluetooth® headset is in use, line will remain open even when handset is closed.)
Tip
- Enter a phone number (or select a record from Call Log) and press 📄 for 1+ seconds to initiate a Video Call.
- To initiate a Video Call from Phone Book, see P.4-8. To select a record from Call Log, see P.2-13.
Answering a Video Call
1 When a Video Call arrives, open handset
Incoming Video Call appears.

2 Answer with Video Image
1 Press ☐ Answer
2 Choose Yes and press ●
Internal Camera image is sent.
For operations during a Video Call, see P.5-4.
Answer with Voice Only
1 Press ● Answer
2 Choose No and press ●
- Outgoing image is suppressed.
(Video Call charges apply.)
For operations during a Video Call, see P.5-4.
3 Press 🔒 to end call
- Alternatively, close handset to end calls. (Note, however, that if Headphones or a Bluetooth headset is in use, line will remain open even when handset is closed.)
Tip ▶ If image is not selected within five seconds of answering Video Call, outgoing image is not sent.
Rejecting Video Calls
When a Video Call arrives, press 📋 Options → Select Reject → Press ●
Redirecting Video Calls
When a Video Call arrives, press ☐ Fwd .
Placing Callers on Hold
When a Video Call arrives, press 📋 or follow these steps. Press 📋 Options ➔ Select Hold ➔ Press ⚙ ■ To answer the call on hold, press ⚙ ➔ Choose Yes or No ➔ Press ⚙ • Callers placed on hold receive Hold Guidance Picture; Microphone is muted.
Note ▶ Loudspeaker (see P.5-5, 5-7) is temporarily cancelled when receiving Video Calls in Manner mode. To reactivate, set to Loudspeaker On during a call.
Engaged Video Call Operations
Camera Picture
Change outgoing image
Default Internal Camera
During a call, press Ⓞ.
- Image toggles as follows: External Camera image → Alternative Image → Internal Camera image.
- Press Ⓞ to toggle image in reverse order.
- To change Alternative Image during a call, press 📄 Options ➔ Select Settings ➔ Press ⬙️ Perform from "Select Alternative Image" in "Camera Picture" on P.5-6
Earpiece Volu me
Adjust Earpiece Volume (5 levels)
Default Level 3
During a call, press ▶ or ▶ → Press ▶ (up) or ▶ (down) to adjust level
•Each press changes volume by one level.
• Volume level remains as set even after handset power is turned off.
Mute Mute Microphone
During a call, press ¥7 Mute To cancel, press ¥7 Unmute.
Switch Images Change incoming/outgoing image size/position
During a call, press Ⓞ.
- Incoming Priority (incoming image appears larger) is set when initiating Video Calls.
- Images toggle as shown below.

Incoming Priority


Outgoing Priority

Incoming Only Outgoing Only

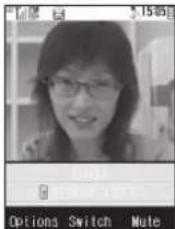
Note ▶ Outgoing image appears on other party's handset even when Incoming Only is active.
Loudspeaker Cancel or activate Loudspeaker
During a call, press 📋 Options → Select Loudspeaker Off or Loudspeaker On → Press ●
- Loudspeaker is temporarily cancelled when Manner mode is activated during calls.
Hold
Pause live voice/image transmissions Send Hold Guidance Picture
During a call, press 📧 Options → Select Hold → Press ⬙
To resume, press 📎 Retrive.
Open
Phone Book
Open/save Phone Book entries or My Details
Opening Phone Book
During a call, press Options → Select Open Phone Book → Press ● → Select an entry (or My Details) → Press ●
- My Details appears only when Sort Entries is set to By Reading or By Category (see "Phone Book Search Methods").
Saving Entries
During a call, press 📋 Options ➔ Select Open Phone Book ➔ Press ⬙️ ➔ Press 📋 Options ➔ Select Add New Entry ➔ Press ⬙️ ➔ Perform from Step 2 on P.4-4
Transfer Audio
Select sound output when a handsfree device, etc. is used for telephony
During a call, press 📋 Options → Select Transfer Audio → Press ● → Select To Phone or To Bluetooth → Press ●
Mirror Image
Activate or cancel reversed Internal Camera image

- External Camera image, Alternative Image and incoming images cannot be reversed.
- Mirror Image is On when initiating Video Calls.
Exposure
Adjust outgoing image brightness (5 levels: -2 to +2)

- Alternative Image appearance is fixed. - Exposure is Level 0 when initiating Video Calls.
Help View a summary of key assignments

Other Engaged Call Operations
Digital Zoom
Press Ⓞ (zoom in) or Ⓞ (zoom out).
•Not available for Alternative Image.
Manner Mode
Press ☐ for 1+ seconds to activate or cancel.
To change Incoming Picture, Outgoing Picture, Hold Guidance Pict or Backlight (see P.5-6, P.5-7) during a call, press ☑ Options, select Settings and press ♟.
Video Call Settings
To change these settings (except Remote Monitor) during calls, see P.5-4 - 5-6.
Camera Picture
Outgoing image is either live video via Internal Camera or Alternative Image when initiating Video Calls
Default Internal Camera
Main Menu
▶ Settings → Call/Video Call (◎) → Video Call → Camera Picture
Select Default Image → Press ● → Select Internal Camera or AlternativeImage → Press ●
To change Alternative Image, select Alternative Image → Press ⬙ → Select Preset Picture or Pictures → Press ⬙ → Select an image → Press ⬙ → Press ⬙
To use Custom Screen image, select Alternative Image → Press ● → Select Custom Screen → Press ● → Press ●
- Custom Screen does not appear when Custom Screen (see P.9-9) is set to Pattern 1.
- External Camera image is selectable during a call.
Incoming Picture
Select quality of incoming images
Default Normal
Main Menu
▶ Settings → Call/Video Call (◎) → Video Call → Incoming Picture
Select Normal, Quality Prior or Frame Rate Prior → Press ●
- Select Quality Prior for higher quality and Frame Rate Prior for faster frame rate.
Outgoing
Picture
Select quality of outgoing images
DefaultNormal
Main Menu
▶ Settings → Call/Video Call (○) → Video Call → Outgoing Picture
Select Normal, Quality Prior or Frame Rate Prior → Press ●
- Select Quality Prior for higher quality and Frame Rate Prior for faster frame rate.
- Outgoing Picture setting may automatically change during calls depending on the other party's Incoming Picture setting.
Hold Guidance
Pict
Select image that can be sent while calls are on hold
DefaultPicture 1
Main Menu
▶ Settings → Call/Video Call (◎) → Video Call → Hold Guidance Pict
Preset Picture
Select Preset Picture → Press ⬙ → Select an image → Press ⬙ → Press ⬙
Data Folder Images
Select Pictures → Press ● → Select an image → Press ● → Press ●
Custom Screens
Select Custom Screen → Press ● → Press ●
- Custom Screen does not appear when Custom Screen (see P.9-9) is set to Pattern 1.
Backlight Select a Backlight status for Video Calls
Default Always On
Main Menu
▶ Settings → Call/Video Call (◎) → Video Call → Backlight
Select Always On, Always Off or Normal Setting → Press ●
- Selecting Normal Setting applies Display Backlight setting (see P.9-13)
Loudspeaker Activate or cancel Loudspeaker for Video Calls
DefaultOn
Main Menu
▶ Settings → Call/Video Call (◎) → Video Call → Loudspeaker
Choose On or Off → Press ●
- Loudspeaker is temporarily cancelled when initiating Video Calls in Manner mode.
Mute Microphone
Mute Microphone for Video Calls
Default Off
Main Menu
▶ Settings → Call/Video Call (💡) → Video Call → Mute Microphone
Choose On (mute) or Off → Press ●
| Remote Monitor | Automatically answer Video Calls from numbers saved in Auto Answer List |
| Default Switch On/Off: Off, Answer Time: 00 seconds | |
| Main Menu | ▶ Settings → Call/Video Call (💡) → Video Call → Remote Monitor → Enter Handset Code |
Activating/Cancelling
Select Switch On/Off → Press ● → Choose On
(answer automatically) or Off → Press ●
Adding to Auto Answer List
| Select Auto Answer List ➔ Press ⬙ ➔ Select |
| <empty> ➔ Press ⬙ ➔ Enter a number ➔ Press ⬙ |
To select from Phone Book or Call Log, select Auto Answer
List → Press ⬤ → Select
Select Change → Press ⬙ → Select From Contacts List or
From Call Log → Press ● → Select a number → Press ●
To change entries, select Auto Answer List → Press ● →
Select an entry → Press ● → Enter a number → Press ●
To select from Phone Book or Call Log, select Auto
Answer List → Press ● → Select an entry → Press 🔒
Options → Select Change → Press ● → Select From
Contacts List or From Call Log → Press ● → Select a number → Press ●
To delete entries, select Auto Answer List → Press ● → Select an entry → Press ☑ Options → Select Delete → Press ● → Choose Yes → Press ●
- Save up to ten numbers.
Changing Ring Time
| Select Answer Time → Press ⬙ → Enter time →Press ⬙ |
Note ▶ Even if Remote Monitor is active, calls from non-Auto Answer List numbers are not answered.
- Remote Monitor is effective only when handset is open.
- For calls answered via Remote Monitor, a tone sounds from Speaker even if Manner mode is active/handsfree device is connected. (Tone and volume are fixed.)
Camera
Not Available for 813SH Users
Getting Started
812SH features a 2 megapixel CCD camera. Capture still images (see P.6-5) or record video (see P.6-8).
Tip
Use Internal Camera or External Camera; unless otherwise noted, mobile camera operations are described for External Camera.
Mobile Camera Basics
- Clean dust/smudges from lens cover with a soft cloth before use.
- Handset movement may blur images; hold handset firmly or place it on a stable surface and use Self-timer. (see P.6-11).
- Mobile camera is a precision instrument, however, some pixels may appear brighter or darker.
- Shooting/saving images while handset is hot may affect the image quality.
- Subjecting the lens to direct sunlight will damage the camera's colour filter.
Shutter Click
■ Shutter click volume is fixed, and sounds even in Manner mode.
To change shutter click sound for still images, see P.6-15.
Incoming Calls/Alarm while Using Camera
Before capturing image or recording video, mobile camera temporarily shuts down for incoming calls and Alarm. End the call or close Alarm Time notice to reactivate camera.
- Press ☐ during a call to toggle mobile camera and Call windows.
When recording video, Alarm Times are announced after exiting mobile camera.
Captured image or clip is temporarily saved. End the call, close Alarm Time notice or exit mobile camera to return.
Precautions for Video Recording
When battery is low, Video Camera is not available. If battery runs low while recording video, recording stops. (Recorded video is saved.)
Auto Shut-off
Before image capture, mobile camera shuts down after three minutes of inactivity and handset returns to Standby.
Camera Display Indicators
Photo Camera Mode

1 Capacity (see P.6-5)
- 108: 101 or more
•Red background: 3 or less
2 Picture Quality (see P.6-16)
: High Quality, : Fine, : Normal
*Hidden if IP Service Setting (see P.9-26) is On and Hot Status Connection Setting (see P.19-9) is Online.
3 Picture Size (see P.6-16)
4 Save to (see P.6-18)
: Handset, ☐: Memory Card (Pictures)
是: Memory Card (DCIM), %: Ask Each Time
5 Scene (see P.6-16)
A: Automatic, C: Night, D: Sports, E: Text
6 Exposure (see P.6-16)
-2 0 -1 0 +1 0 +2
Dark ← Standard → Bright
7 Continuous Shoot (see P.6-12)
- Captured/Total
☐: 4 Pictures, ☐: 9 Pictures, ☐: Overlapped
• : Index Image (composite image for Overlapped) is on Display.
8 Self-timer Active (see P.6-11)
10: 10 seconds, 5 seconds, 2 seconds
Video Camera Mode

1 Video Quality (see P.6-16)
: High Quality, : Fine, : Normal
*Hidden if IP Service Setting (see P.9-26) is On and Hot Status Connection Setting (see P.19-9) is Online.
2 Record Size (see P.6-17)
3 Save to (see P.6-18)
: Handset, : Memory Card, %: Ask Each Time
4 Record Time (see P.6-17)
☑: For Message, ☑: Extended Video, ☑: SD VIDEO
5 Exposure (see P.6-16)
-2 -1 0 +1 +2
Dark ← Standard → Bright
6 Self-timer Active (see P.6-11)
: 10 seconds, : 5 seconds, : 2 seconds
Key Assignments

1 Portrait (☐)/Macro (☐) Selector
- Slide to Macro to capture images as close as 10 cm. Allow at least 40 cm for Portrait.
2 Digital Zoom
Press Ⓤ (zoom in) or ⓔ (zoom out). - Alternatively, use ▶ (zoom in) and ▶ (zoom out).
3 Options
4 Cancel
5 Toggle Mode
6 Shutter
7 Exposure
Activate mobile camera and press the following keys to use the corresponding functions.
| 1 5/6 | how Exposure slider |
| 2\frac{6}{700} | Hide indicators to frame image on full Display (see P.6-15 "Display Indicators") |
| Toggle Viewfinder size (see P.6-16 "Display Size") | |
| 4\frac{6}{700} | Switch save location (see P.6-18 "Save to") |
| 5\frac{6}{71} | Change image size (see P.6-16 "Picture Size" or P.6-17 "Record Time/Size") |
| 6\frac{6}{700} | Switch Scene options for still image capture (see P.6-16) |
| Turn Microphone on/off for video recording (see P.6-16) | |
| 7\frac{6}{700} | Change image quality (see P.6-16) |
| 8\frac{6}{700} | Toggle Self-timer mode (see P.6-11) |
| 9\frac{6}{700\text{V}} | Maximise or cancel Digital Zoom |
| 10\frac{6}{700} | Open Help (see below) |
| \frac{6}{700\text{V}}$ | Toggle between Internal Camera and External Camera (see P.6-17 "Internal Camera/External Camera") |
- Available options vary by selected image capture mode. For details, see P.6-7 "Still Image Functions" and P.6-9 "Video Recording Operations".
Help
■ Activate mobile camera and press 0.5 to view a summary of key assignments.
■Press 🔒 to scroll down.
■Press ● to return.
Alternatively, press 📧 Options → Select Help → Press ●
Still Images
Photo Camera Mode
Capture images to send via S! Mail, save as Wallpaper, etc. Various settings and functions are available for camera use.
| Picture Size | 2M (W 1200 x H 1600 dots: UXGA)1.2M (W 960 x H 1280 dots: Quad-VGA)VGA (W 480 x H 640 dots: VGA)Mail L (W 240 x H 320 dots: QVGA)Mail S (W 120 x H 160 dots: QQVGA) |
| Format JPEG (.jpg) | 1 |
| Save Location | Handset Data Folder (Pictures) or Memory Card Data Folder (Pictures/DCIM 2 ) |
| Picture Quality High Quality/Fine/Normal | |
| Digital Zoom | 2M (W 1200 x H 1600 dots): None1.2M (W 960 x H 1280 dots): 1 - 1.3xVGA (W 480 x H 640 dots): 1 - 2.5xMail L (W 240 x H 320 dots ): 1- 10xMail S (W 120 x H 160 dots ): 1 - 20x |
| S! Mail Attachment | OK |
| Memory Capacity 4,050 files | 3 |
1 Default file names appear as Image001.jpg, Image002.jpg, etc.
2 Save W 480 x H 640 dots or larger images.
3 Approximate value for handset Data Folder, with default image size and quality (see P.6-16).
Tip
- Select storage media beforehand or each time you save an image (see P.6-18 "Save to").
- Saved video, melodies, S! Applications, etc. reduce still image memory.
• To check memory status, see P.8-2. - Images captured at or above W 480 x H 640 dots are saved as landscape images. (Images appear as portrait images when viewed on handset.)
■Open image Details and see Resolution for true image dimensions and orientation.
Capturing Still Images
Main Menu
Camera
1 Frame image on Display
In Video Camera mode, press Y?
(→) to switch to Photo Camera.
Key Assignments: see P.6-4
Special Shooting Modes: see P.6-11
Camera Settings: see P.6-15

Photo Camera
2 Press
Shutter clicks and the captured image appears on Display.
- When Auto Save is active, captured image is saved automatically and Viewfinder returns.
To start over, press
To send image via S! Mail, press ¥7
( ) Perform from Step 3 on P.14-7
3 Press ⬙ to save
Image is saved and Viewfinder returns for another shot.
When confirmation for save location appears, select a location → Press ●
To open saved images, see P.6-10 "Opening Still Images".
4 Press 🔒 to exit
Note ▶ Internal Camera Images
Your image appears on Display as a mirror image before/after shutter is released; saved image appears reversed.
Tip ▶ When Captured Image is Unsaved
Finished? appears when closing mobile camera before returning to Viewfinder.
- Choose Yes and press Ⓞ to end. Handset returns to Standby.
- Choose No and press Ⓞ to return to captured image.
Still Image Functions
Before Image Capture
Press 📧 Options to use the following functions:
| Exposure | Adjust amount of light (see P.6-16) | |
| Modes1 | Add Frame2 | Add frames (see P.6-13) |
| Continuous Shoot 3 | Capture images sequentially (see P.6-12) | |
| Camera Effects2 | Capture images with special effects (see P.6-14) | |
| Scan Barcode | Scan barcodes (see P.12-19) | |
| Data Folder | Access Data Folder files (see P.6-10) | |
| Picture Size | Select image size (see P.6-16) | |
| Scene1 | Select a mode to suit lighting conditions or subject (see P.6-16) | |
| Picture Quality | Select High Quality, Fine or Normal (see P.6-16) | |
| Self-timer1 | Set Self-timer (see P.6-11) | |
| Settings | Display Indicators | Hide indicators to frame image on full Display (see P.6-15) |
| Shutter Sound | Change shutter click sound (see P.6-15) | |
| Save Pictures to | Select handset or Memory Card (see P.6-18) | |
| Auto Save | Select whether to save captured image automatically (see P.6-18) | |
1 Available for External Camera.
2 Available when Picture Size is 240 x 320 or smaller.
3 Available when Picture Size is 480 x 640 or smaller.
| Internal Camera/External Camera | Toggle between Internal Camera and External Camera (see P.6-17) |
| Help | View a summary of key assignments (see P.6-4) |
Tip ▶ Open Options and use Multi Selector or Keypad to open/set items.
Before Saving
Press 📧 Options to use the following functions:
| Save Pictures to | Select handset or Memory Card (see P.6-18) |
| Data Folder Access | Data Folder; delete saved files |
Video
Video Camera Mode
Record short video clips to send via S! Mail. Use Memory Cards to save long recordings (recording time varies by card capacity).
| Image Size | W 176 x H 144 dots (QCIF)W 128 x H 96 dots (SubQCIF) | W 320 x H 240 dots (QVGA)W 240 x H 176 dots (HQVGA) 1 | ||
| Format | MPEG-4 or H.263 (.3gp) 2 | MPEG-4 (.3gp) 2 | MPEG-4 (.ASF) 3 | |
| Save Location | Handset or Memory Card Data Folder (Videos) | Memory Card Data Folder (Videos) | Memory Card (SD VIDEO) | |
| Video Quality | High Quality/Fine/ Normal | High Quality | ||
| S! Mail Attachment | OK N/A | |||
| Recording Time (per shot) | For Message | Approx. 60 seconds (Normal)Approx. 50 seconds (Fine)Approx. 30 seconds (High Quality) | — | |
| Extended Video | 30 minutes | — | ||
| SD VIDEO | — | Capacity-based | ||
1 MPEG-4 (.3gp) only.
2 Default file names appear as video001.3gp, video002.3gp, etc.
3 Default file names appear as MOL001.ASF, MOL002.ASF, etc.
Tip
- For best results, record within 1.5 metres, in good light.
- Select storage media beforehand or each time you save a video file (see P.6-18 "Save to").
- Saved still images, melodies, S! Applications, etc. reduce video memory.
• To check memory status, see P.8-2.
Recording Video
Make sure battery is adequately charged and there is enough free memory before recording video. When battery is low, Video Camera is not available. If battery runs low or memory becomes full while recording video, recording stops.
Main Menu
Camera

Press Y? (+)
Video Viewfinder appears.
- Omit this step if Video Camera is already active.

Frame image on Display
Key Assignments: see P.6-4
Special Shooting Modes: see P.6-11
Camera Settings: see P.6-15

Video Camera
3
Press ●
Recording begins after a tone.
To start over, press
4
To stop, press ●
Recording stops with a tone.
- Recording stops automatically when maximum recording time is reached or memory becomes full.
- When Auto Save is active, recorded video is saved automatically and Viewfinder returns.
To play back, select Preview → Press ●
■ Press 2 during playback to toggle Display Size.
To start over, press
5
To save, select Save and press ●
Image is saved and Viewfinder returns for another shot.
When confirmation for save location appears, select a location → Press ⬙
6
Press 📞 to exit
Tip
When Recorded Video is Unsaved
Finished? appears when closing mobile camera before returning to Viewfinder.
- Choose Yes and press Ⓞ to end. Handset returns to Standby.
- Choose No and press Ⓞ to return to Menu.

Video Recording Operations
Before Recording
Press 📧 Options to use the following functions:
| Exposure | Adjust amount of light (see P.6-16) | |
| Display Size1 | Change Viewfinder size (see P.6-16) | |
| Data Folder | Access Data Folder files (see P.6-10) | |
| Record Time/Size | Select a format based on recording time and image size (see P.6-17) | |
| Microphone | Activate to record sound (see P.6-16) | |
| Video Quality1 | Select High Quality, Fine or Normal (see P.6-16) | |
| Self-timer2 | Set Self-timer (see P.6-11) | |
| Settings | Save Videos to 3 | Select handset or Memory Card (see P.6-18) |
| Auto Save | Select whether to save recorded video automatically (see P.6-18) | |
| Video Encode 1 | Select a video encoding format (see P.6-17) | |
| Internal Camera1/ External Camera1 | Toggle between Internal Camera and External Camera (see P.6-17) | |
| Help | View a summary of key assignments (see P.6-4) | |
1 Available for SubQCIF or QCIF.
2 Available for External Camera.
3 Available when Record Time/Size is set to For Message.

Open Options and use Multi Selector or Keypad to open/set items.
Before Saving
The following menu items appear after recording:
| Save | Save video to handset or Memory Card (see P.6-9) |
| Preview | Play video (see P.6-9) |
| Save and Send* | Attach video to S! Mail (see P.6-15) |
*Available when Record Time/Size is set to For Message. If Attach Only is set for Send File Settings (see P.14-38), Multimedia appears.
Opening Images & Playing Video
To open files directly from Data Folder, see P.8-5.
Opening Still Images
Main Menu
Camera
→ Activate Photo Camera

Press
Options

Select Data Folder and press ●
•Memory Status appears at the top.
When Memory Card is inserted, select Pictures or DCIM Press ⬙
■To switch between handset and Memory Card (Pictures) press ☐ Options → Select Change to Phone or Change to Memory Card → Press ●
To open a created sub folder or a sub folder in DCIM, select it
→ Press ●

Select a file and press ●

To open other files, press 📄 → Select one → Press ⬇
Playing Video
Main Menu
Camera
→ Activate Photo Camera

Press
Options

Select Data Folder and press ●
•Memory Status appears at the top.
To switch between handset and Memory Card, press ☑
Options ➔ Select Change to Phone or Change to Memory
Card ➔ Press ●
To open a created sub folder, select it → Press ●
3 Select a file and press ●
Video plays. Press ⬙ to pause/resume playback.
To open other files, press 📄 → Select one → Press ●
SD Video Play QVGA size (.ASF) video
Main Menu ▶ Media Player ▶ Videos ▶ SD VIDEO
Select a file → Press ●
To open other files, press 📄 → Select one → Press ⬤
Special Shooting Modes
Self-timer
Delay shutter release after Shutter Key is pressed to capture still images or record video.
- Switch to External Camera to use Self-timer.
- Follow these steps before capturing an image (after Step 1 on P.6-6) or recording video (after Step 2 on P.6-8).
- Self-timer is Off by default.
1 Press 📧 Options
2 Select Self-timer and press ●
3 Select time and press ●
Viewfinder returns (®, or 📋 appears).
To cancel, choose Off → Press ●
4 Frame image on Display and press ●
Tone sounds and countdown starts.
- After selected time elapses, shutter is released and captured image appears or video recording starts.
To cancel Self-timer during countdown, press ☑ Cancel.
■Viewfinder returns. (Self-timer remains active.)
Saving Still Images
1 Press
Self-timer is cancelled and Viewfinder returns.
When confirmation for save location appears, select a location → Press ●
Saving Video
1 To stop, press ●
2 To save, select Save and press ●
Self-timer is cancelled and Viewfinder returns.
When confirmation for save location appears, select a location → Press ⬙
6 Press 🔒 to exit
When Captured Image/Recorded Video is Unsaved: see P.6-6 or P.6-9
Note ▶ Self-timer is not available when shooting speed for Continuous Shoot (see P.6-12) is Manual.
Tip ▶ Activate mobile camera and press 8→5 to toggle Self-timer as follows: 10 seconds → 5 seconds → 2 seconds → Off
Self-timer Details
To release shutter manually during countdown, press ●. Image is captured or video recording starts and Self-timer is cancelled.
■Incoming calls and Alarm interrupt countdown. (Self-timer remains active.)
■ Available functions during countdown are Digital Zoom and Exposure.
Continuous Shoot (Photo Camera)
Capture a series of 4 or 9 separate images automatically with a single press of the Shutter Key. Select from three speed settings or choose the manual option to control the rate at which images are captured.
| 4 Pictures 1 | Capture four separate images with Index Image 2 |
| 9 Pictures 3 | Capture nine separate images with Index Image 2 |
| Overlapped 3 | Capture five images to create a composite image |
1 Available when Picture Size is 480 x 640 or smaller. (Index image is not created for 480 x 640).
2 Index Image consists of reduced images of each shot.
3 Available when Picture Size is 240 x 320 or smaller.
- Press ⬙ for the first shot. Handset captures the rest automatically.
- In 4 Pictures or 9 Pictures mode, select shutter interval from three levels, or select Manual to release shutter manually.
- Switch to External Camera to use Continuous Shoot.
- Follow these steps before capturing an image (after Step 1 on P66).
1 Press 📧 Options
2 Select Modes and press ●
3 Select Continuous Shoot and press ●
4 Select from 4 Pictures to Overlapped and press ●
To cancel, choose Off → Press Ⓞ (Omit the next steps.)
5 Select speed and press ●
Viewfinder returns with corresponding indicator (see P.6-3).
- Manual is not available when Self-timer (see P.6-11) is active.
• Available shooting speed options vary by selected Picture Size.
6 Frame image on Display and press ●
The first frame is captured with subsequent frames captured at selected speed.
- For manual control (4 Pictures and 9 Pictures modes), repeat Step 6 for each frame.
To stop before capturing all frames, press ☐ Cancel.
■To save captured images, skip ahead to Step 8.
■ To discard captured images, press 📄. (Viewfinder returns with Continuous Shoot active.)
7 Index Image or a composite image appears
- When Picture Size is 480 x 640, the first captured image appears.
Use ⚙️ to toggle between frames and Index Image.
■To save images individually, select a frame or Index Image and proceed to Step 8.
To send image via S! Mail, press 📋 (✉) → Perform from Step 3 on P.14-7

4 Pictures
8 To save, press ●
When confirmation for save location appears, select a location → Press
9 Saving All Images
1 Select All Pictures and press ●
Images are saved and Viewfinder returns with Continuous Shoot active.
Saving the Selected Image
1 Select Selected Picture and press ●
Image is saved and captured image returns with Continuous Shoot active.
To save other images, use Ⓧ to select one ➤ Press Ⓧ ➤ Select Selected Picture ➤ Press Ⓧ ■ Press [icon] to return to Viewfinder.
10 Press 🔒 to exit
When Captured Image is Unsaved: see P.6-6
Note ▶ In low light, shooting speed may slow down.
Tip ▶ When Only Selected Image is Saved
Finished? appears when closing mobile camera before returning to Viewfinder.
- Choose Yes and press ⬙ to end. Handset returns to Standby.
- Choose No and press Ⓞ to return to captured image.
Adding Frames (Photo Camera)
• In addition to Preset Frames, use transparent PNG files (40 KB or smaller) obtained via the Internet, S! Mail, etc.
- Select Picture Size 240 x 320 or smaller to add frames.
- Switch to External Camera to add frames.
- Follow these steps before capturing an image (after Step 1 on P.6-6); after Viewfinder returns, complete image capture.
1 Press 📧 Options
2 Select Modes and press ●
3 Select Add Frame and press ●
4 Preset Frames
1 Select Preset Frames and press ●
2 Select a frame and press ●
To check frames, select one and press 📧 View. ■Press 📧 to return.
Original Frames
1 Select Data Folder and press ●
- Some images may not be used as frames.
2 Select a frame and press ●
To check frames, select one → Press ☐ View
■Press to return.
3 Press
Cancelling
1 Choose Off and press ●
Tip ▶ In Continuous Shoot, frame is added to each image.
Camera Effects (Photo Camera)
Capture images with special effects.
- Select Picture Size 240 x 320 or smaller to use Camera Effects.
- Switch to External Camera to use Camera Effects.
- Follow these steps before capturing an image (after Step 1 on P.6-6); after Viewfinder returns, complete image capture.
1 Press 📧 Options
2 Select Modes and press ●
3 Select Camera Effects and press ●
4 Select an effect and press ●
To check effects, press 📧 View.
■Press □ to return.
To cancel, choose Off → Press ●
Sending Images
Still Images
Capture and send images as S! Mail attachments.
To attach images in Data Folder, see P.8-11.
1 Capture an image
Perform Steps 1 - 2 on P.6-6.
To attach Continuous Shoot images, after Step 7 on P.6-13, use ⏻ to select a frame or Index Image.
2 Press Y! (→)
Image is saved to Data Folder and Mail Composition window opens with image attached.
- To attach images without saving to Data Folder, see P.14-38 "Send File Settings".
When confirmation for save location appears, select a location → Press ●
3 Complete other fields and send S! Mail (perform from Step 3 on P.14-7)
Tip ▶ Make sure recipient's handset is attachment-compatible. For information about Mail service and compatibility with other handset models, contact SoftBank Customer Centre, General Information (see P.20-29).
Video Clips
Send recorded video clips via S! Mail.
- For details of attachable files, see the table on P.6-8.
- To attach video files saved in Data Folder, see P.8-11.
1 Record video (perform Steps 1 - 4 on P.6-8 - 6-9)
2 Select Save and Send and press ●
Video is saved to Data Folder and Mail Composition window opens with the video file attached.
- To attach video without saving to Data Folder, see P.14-38 "Send File Settings".
■ If Attach Only is set for Send File Settings (see P.14-38), Multimedia appears instead of Save and Send.
When confirmation for save location appears, select a
location → Press ●
3 Complete other fields and send S! Mail (perform from Step 3 on P.14-7)
Note
- Send video clips to S! Mail- or VGS-compatible SoftBank handsets.
- Only MPEG-4 compatible SoftBank handsets support video files recorded on 812SH.
Tip
For information about Mail service and compatibility with other handset models, contact SoftBank Customer Centre, General Information (see P.20-29).
Camera Settings
• Available options vary by selected image capture mode.
- Shortcut keys are assigned to some functions (see P.6-4 "Function Shortcuts").
- Follow these steps before capturing an image (after Step 1 on P.6-6) or recording video (after Step 2 on P.6-8); after Viewfinder returns, complete image capture/recording.
Shooting Options
| Display Indicators | Hide indicators to frame image on full Display | ||
| Photo Camera | ○ | Video Camera | × |
Default Normal Finder
Press 📧 Options → Select Settings → Press ⬤ → Select Display Indicators → Press ⬤ → Select Normal Finder or Hide Indicators → Press ⬤
Shutter Sound Change shutter click sound
| Photo Camera | ○ | Video Camera | × |
DefaultPattern 1
Press Options Select Settings Press Select Shutter Sound Press Select a pattern Press
To check sound, select a pattern → Press 📧 Play
•Volume is fixed.
- Shutter click sound for Continuous Shoot is unique and fixed.
Display Size Change Viewfinder size for video
| Photo Camera | × | Video Camera | ○* |
Available when Record Time/Size is SubQCIF or QCIF.

Image Settings
Exposure Adjust brightness for still images and video
| Photo Camera | ○ | Video Camera | ○ |

- Exposure setting returns to default upon exiting Photo Camera/Video Camera or switching between Internal Camera and External Camera (see P.6-17).
Picture Size Select still image size
| Photo Camera | ○ | Video Camera | × |
DefaultMail L (240 x 320)

- Select Mail L (240 x 320) or Mail S (120 x 160) for Internal Camera. - To change video image size, see P.6-17 "Record Time/Size".
Picture/Video Quality
Select image or video quality
| Photo Camera | ○ | Video Camera | ○* |
Available when Record Time/Size is SubQCIF or QCIF.

- The image quality increases as follows: Normal → Fine → High Quality. Saving higher quality images/video requires more space in memory.
Scene Select a mode according to lighting or subject
| Photo Camera | ∅ | Video Camera | X |
Available for External Camera.

- Scene setting returns to default upon exiting Photo Camera/Video Camera or switching between Internal Camera and External Camera (see P.6-17).
| Automatic | Automatic adjustment |
| Night | Use in low light conditions |
| Sports | Best suited for action sports or fast-moving subjects |
| Text | Most suitable for high contrast black and white subjects |
Microphone Record sound together with video
| Photo Camera | × | Video Camera | ○ |
Default On
Press 📧 Options → Select Microphone → Press ⬤ →
Choose On or Off → Press ●
| Record Time/Size | Select For Message to record short video (up to 295 KB) to send via S! MailFor longer recording, select Extended Video | ||
| Photo Camera | × | Video Camera | ○ |
Default For Message, QCIF (176 x 144)
Press Options Select Record Time/Size Press
Select For Message, Extended Video or SD VIDEO
Press ● → Select a size → Press ●
■For Message
| QCIF (176 x 144) | W 176 x H 144 dotsFormat: MPEG-4 or H.263 (.3gp) |
| SubQCIF (128 x 96) | W 128 x H 96 dotsFormat: MPEG-4 or H.263 (.3gp) |
■Extended Video
| QVGA (320 x 240) | W 320 x H 240 dotsFormat: MPEG-4 (.3gp) |
| HQVGA (240 x 176) | W 240 x H 176 dotsFormat: MPEG-4 (.3gp) |
| QCIF (176 x 144) | W 176 x H 144 dotsFormat: MPEG-4 or H.263 (.3gp) |
| SubQCIF (128 x 96) | W 128 x H 96 dotsFormat: MPEG-4 or H.263 (.3gp) |
■SD VIDEO
| QVGA (320 x 240) | W 320 x H 240 dotsFormat: MPEG-4 (.ASF) |
Video Encode Select a video encoding format
| Photo Camera | × | Video Camera | ○* |
Available when Record Time/Size is SubQCIF or QCIF.
DefaultMPEG4
Press Options Select Settings Press Select Video Encode Press Select H.263 or MPEG4 Press
Additional Settings
Internal Camera/ External Camera Switch between Internal Camera and External Camera
| Photo Camera | ○ | Video Camera | ○* |
Available when Record Time/Size is SubQCIF or QCIF.
Default External Camera
Press 📋 Options → Select Internal Camera or External Camera → Press ⬙
- Setting returns to default after exiting mobile camera.
Save to Select a save location for images or video
| Photo Camera | ○ | Video Camera | ○* |
^Available when Record Time/Size is set to For Message.
Default Phone Memory (handset)
Press 📧 Options → Select Settings → Press ● →
Select Save Pictures to or Save Videos to ➞ Press ●
→ Select a location or Ask Each Time → Press ●
- For Ask Each Time, confirmation appears each time you save an image or video (with Record Time/Size set to For Message).
| Camera Mode/Size Save | Location |
| Photo Camera(120 x 160 or 240 x 320)Video Camera | Phone Memory (handset)Memory Card |
| Photo Camera(480 x 640 or larger) | Phone Memory (handset)SD (Pictures) (Memory Card)SD (DCIM) (Memory Card) |
Note ▶ • Ask Each Time is not available when Auto Save (see below) is active.
- To save to Memory Card, insert a card before saving image or recording video.
Auto Save
Select whether to save captured images or recorded video automatically
| Photo Camera | ○ | Video Camera | ○ |
DefaultOff
Press 📧 Options → Select Settings → Press ● → Select
Auto Save → Press ● → Choose On or Off → Press ●
Note Auto Save is not available when Ask Each Time is set for Save Pictures to or Save Videos to (see above).
Media Player
Media Player Basics
Use Media Player to listen to music (Music Player) or play video (Video Player). Save video/music files to handset or Memory Card (including SD VIDEO and SD AUDIO). To open files, specify the location first.
Video (Video Player)
My Videos
Handset
Memory Card
SD VIDEO
Memory Card
Music (Music Player)
My Music
Handset/Memory Card
SD AUDIO
Memory Card
- For My Videos and My Music details, see P.7-15.
- Playback stops when battery is low. Charge battery and resume from where it stopped (see Step 1 on P.7-6 or P.7-8).
- Consume media as it downloads (Streaming: see P.15-12).
Incoming Calls/Mail during Playback
■Playback stops for incoming calls or Alarm.
- When playback stops while streaming, the URL is saved to History (see P.15-13).
A notification appears for incoming mail without interrupting playback.
Downloading Music/Video
Open music/video-related links directly from Media Player to download music (Chaku-Uta ® ) and video via the Internet.
- Read information (price, expiry date, etc.) on the source site.
- Use Music Search (see P.7-3) to search by title, artist, etc.
Main Menu
Media Player
1 Select Music or Videos and press ●
2 Select Download Music or Download Videos and press ●
Handset connects to the Internet and download page appears.
- Follow the links to download music/video.
Music Search
■ Follow these steps to access Yahoo! Keitai Music Search site.
In Step 1 on P.7-2, select Music → Press ● →
Select Music Search → Press ●
- Fill in fields or follow links to search for/download music.
Downloading Content Keys
Content Keys are required to use some downloaded files.
- Acquire Key to play a copy protected file (✗ appears).
- To download Keys, open All Music/All Videos or Playlist (see Step 2 on P.7-6/Step 3 on P.7-9) then follow these steps.
1 Select a file and press ●
- Select a file with ≠.
2 Choose Yes and press ●
Handset connects to the Internet and download page appears.
- Follow onscreen instructions.
Saving Music Files from PCs
Save music files onto Memory Cards from CDs, etc. using PCs or other devices to play them on handset Music Player.
Precautions for Handling Music Files on PCs
■Respect copyrights.
- Comply with copyright and other intellectual property laws when using music saved on Memory Cards.
•Copyright laws limit duplicated material to private use only. - Converted CD files may not be attachable to S! Mail.
■Play SD-Audio standard compliant music files. (These files cannot be used as ringtones.)
Handset supports Secure AAC and AAC files compliant with the SD-Audio standard.
■For AAC files, see "Precautions for Handling AAC Files" on P.7-4.
■Save music to the specified directory.
Save music to either of the following folders on Memory Card via Mass Storage (see P.11-9), Memory Card reader/writer or other compatible devices.
■PRIVATE/MYFOLDER/My Items/Music
■PRIVATE/MYFOLDER/My Items/Sounds & Ringtones
Details
For more about saving music files from PCs, see "Utility Software Starter Guide" on Utility Software CD-ROM.
Precautions for Handling AAC Files
■Use software supporting AAC conversion.
- Use software such as iTunes to convert music to AAC format.
- iTunes is an example only. SoftBank does not guarantee compatibility with any software.
- For software usage and specifications, see the provider's website, etc.
iTunes is a registered trademark of Apple Computer, Inc. registered in the United States and other countries.
■Supported bit rate and sampling frequency are as follows.
| Bit Rate (kbps) 16 | 1 , 241 , 32, 48, 64, 962 , 1282 |
| Sampling Frequency (Hz) | 16000, 22050, 24000, 32000, 44100, 48000 |
1 Monaural only.
2 Stereo only.
Note ▶ Titles and artist names for AAC files created using iTunes, etc. do not appear on handset.
Playing Music
Play music on handset/Memory Card.
Use Headphones, etc. to listen to sound without bothering others.
Precautions before Playing Music/Video
- Music Player is not compatible with some recording/playback formats. Music may not play depending on the Memory Card status.
- Grasp the plug when connecting or disconnecting Headphones. Do not bend the plug to avoid damaging the cord or Headphone Port.
- Use only the specified accessories (Headphones, etc.). Other devices may not function properly and cause damage to Headphone Port.
- When battery is low, Music Player will not play. If battery runs low during playback, Music Player shuts off.
Tip
- To activate/cancel Manner mode during playback, press ☐ for 1+ seconds.
•In Manner mode, sound is audible from Headphones. - To answer calls during playback with Headphones, etc., press Call Button for 1+ seconds.
- Turn down the volume if distortion is noticeable in Speaker sound.
- As saved files increase, files, My Music and Playlists may take longer to open.
Playback Window Indicators

1 Playback in Progress
2 Playlist Name
3 Title
- Titles also appear on External Display during playback.
4 Artist Name
- No Artist Name appears if not available.
- Artist names also appear on External Display during playback.
5 Track Number
6 Status
▶: Playing, ▪: Paused, ▶: Fast Forwarding, ◀: Fast Rewinding
7 Playback Pattern (see P.7-7)
C1: Repeat, C : Repeat All, →: Random
- Indicator does not appear for Normal.
8 Elapsed Time
9 Volume
10 Information Link
- 📄 appears when linked information is accessible via Access WEB Link (see P.7-7 "Accessing Linked Information").
11 Sound Effects (see P.7-7)
: Bass, («»): Surround, («»): Surround Bass
- Indicator does not appear for Normal.
Playback
Main Menu
▶ Media Player → Music
1 Select My Music or SD AUDIO and press ●
For My Music, use 🔗 to select Music Folder or Ring Songs·Tones.
To play the last played file from where it stopped, select Last Played Music ➤ Press ⬙
2 Select All Music or a Playlist and press ●

Three Playlists (プレイラミ toプレイラミ3) are saved by default.
To search files, press 📋 Options → Select Search → Press ⬙️ → Enter search text → Press ⬤
■When no matching text is found, text entry window returns. Change text and try again.
To sort files, press Options → Select Sort → Press ● → Select a sort option → Press ●
■Sort is available for All Music files.
3 Select a file and press ●
Playback window opens and playback starts.
- Playback stops after the last file when Playback Pattern is set to Normal (see P.7-7).

Use LCD Remote/Mic with Headphones (optional accessory) to remote control Music Player activated via Music menu.
Playback Operations (Music/Video)
| Replay | Press ☺Press repeatedly to play previous files.1 |
| Skip Forward Press 2 | |
| Fast Forward | Press and hold ☺Release for playback. |
| Fast Rewind | Press and hold ☺Release for playback. |
| Pause | Press ☺Press again to resume playback. |
| Volume Control3 | Press ☺/ (up) or ☺/ (down) |
| Mute | Press ☺(Long Press)Press ☺to play sound. |
| Open Help | Press ☐, or press ☑Options ➔ Select Help ➔ Press ☺ |
1 In Random Play, ⊙ only replays the current file.
2 Not available for the last file when Playback Pattern is set to Normal.
3 Volume level remains as set until changed.
Opening File Properties
■ While playing or paused, press 📧 Options → Select
Details → Press ●
- Press Ⓞ to scroll down.
■Press Ⓞ to return.
Accessing Linked Information
■ While playing or paused, press 📧 Options → Select
Access WEB Link → Press ● → Choose Yes → Press ●
- Linked information is accessible while 🔒 appears.
- Accessing linked information activates Yahoo! Keitai (© appears) and may incur transmission fees.
-Press CLEAN to disconnect.
Note ▶ Playback pauses for Alarm, then resumes automatically.
Tip ▶ Press 📄 to create mail messages and use Phone Book, etc. during playback; however, some functions are not available.
- Stop music? appears when 📊 is pressed in Standby. Choose Yes or No and press Ⓗ.
Playback Settings
Sound Effects
Play back files in surround sound; increase bass or dynamic range
■Use Headphones to enjoy sound effects.
Default Normal
Main Menu ▶ Media Player → Music → Settings
Select Sound Effects → Press → Select an effect
→ Press ●
Normal No sound effects
Bass Boosts bass frequencies
Surround Adds surround effect
Surround Bass Adds surround effect with enhanced bass
Playback
Pattern
Play all or Playlist files repeatedly or randomly
Default Normal
Main Menu ▶ Media Player → Music → Settings
Select Playback Pattern → Press ⬙ → Select a pattern → Press ●
| Normal Play in order until the last file ends | |
| Repeat Repeat one file | |
| Repeat All Repeat all files | |
| Random | Play all files randomly |
Playing Video
Play video files recorded with mobile camera or obtained via the Internet, S! Mail, etc.
- Use Headphones, etc. to listen to sound without bothering others.
- Read the precautions on P.7-4 beforehand.
Playback Window Indicators

1 Video Image/Subtitles
2 Clip Number
3 Status
▶: Playing, ▪: Paused, ▶: Advancing Frame
■: Fast Forwarding, ■: Fast Rewinding
4 Playback Pattern (see P.7-10)
- Indicators are the same as those for Music Player (see P.7-5).
5 Elapsed Time - To specify start point, see P.7-9 "Time Search".
6 Volume
7 Information Link
- appears when linked information is accessible via Access WEB Link (see P.7-7 "Accessing Linked Information").
•To disable linked information, see P.7-10 "Web Link Setting".
Tip ▶ Press 2 during playback to toggle Display Size (see P.7-10).
Playback
Play video on Video Player.
• To change playback settings, see P.7-10.
• To add subtitles, see P.7-12.
Main Menu ▶ Media Player ➔ Videos
1 Select My Videos or SD VIDEO and press ●
- For SD VIDEO, skip ahead to Step 4 on P.7-9.
To play the last played file from where it stopped, select Last Played Video → Press
2 Select Phone Memory or Memory Card and press ●
3 Select All Videos or a Playlist and press ●
To search files, press 📋 Options → Select Search → Press ● → Enter search text → Press ●
■When no matching text is found, text entry window returns. Change text and try again.
To sort files, press 📋 Options → Select
Sort → Press ● → Select a sort option
→ Press ●
■Sort is available for All Videos files.
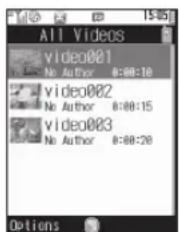
All Videos
4 Select a file and press ●
Playback window opens and playback starts.
- Playback stops after the last file when Playback Pattern is set to Normal (see P.7-10).
To access linked information, see P.7-7.
Playback Operations (Video Only)
For basic operations, see P.7-6 "Playback Operations (Music/Video)".
| Change Settings | Press ☑ Options ➔ Select Settings ➔ Press ⬙ ➔ P.7-10 |
| Edit See P.7-11 | |
| Frame Advance | While paused, press ⬙ (Long Press) |
| Toggle Display Size | Press 2 or 📞 (see P.7-10) |
Video with Linked Information
■ After playing video (with 🔒) Internet connection confirmation appears.
To access linked information, choose Yes → Press ●
- Confirmation does not appear when Web Link Setting (see P.7-10) is Off.
Time Search
■Specify start point while playing or paused.
Press 📧 Options → Select Time Search → Press ● → Enter time → Press ●
Tip ▶ • Video recorded on other devices may appear rotated. • Out of Video Playback window, Media Player shuts down after five minutes of inactivity.
Playback Settings
Available for My Videos files only.
Playback Pattern
Play all or Playlist files repeatedly or randomly
DefaultNormal
Main Menu
▶ Media Player → Videos → Settings
Select Playback Pattern → Press ● → Select a pattern → Press ●
| Normal Play in order until the last file ends | |
| Repeat Repeat one file | |
| Repeat All Repeat all files | |
| Random Play all files randomly | |
Backlight Select a Backlight status for playback
Default Always On
Main Menu
▶ Media Player → Videos → Settings
Select Backlight → Press ● → Select a pattern → Press ●
| Always On Backlight remains on during playback | |
| Always Off Backlight remains off during playback | |
| Normal Settings | Applies Display Backlight setting (see P.9-13) |
Display Size Change playback size
DefaultEnlarge
Main Menu
Media Player → Videos → Settings
Select Display Size → Press ● → Select Normal, Enlarge or Full Screen → Press ●
- Some Display sizes are not selectable.
- Alternatively, press 2.5 or 6 during playback to toggle Display Size as follows: Full Screen (no indicators) → Full Screen (with indicators) → Normal → Enlarge ■ Press 2.5 or 6 in paused Full Screen view to show or hide indicators.
Web Link
Select whether to show linked information
DefaultOn
Main Menu
Media Player → Videos → Settings
Select Web Link Setting → Press ● → Choose On (show) or Off → Press ●
Editing Video
HQVGA (W 240 x H 176 dots) or larger video cannot be edited.
| Crop | Select Two Points | Save portion between two points as a new file |
| Delete Before | Save portion after selected point as a new file | |
| Delete After | Save portion before selected point as a new file | |
| Subtitle Add subtitle text to video | ||
Note
• Some files may not be edited.
- Edited video may not play properly if Memory Card is not formatted for 812SH or 813SH.
•To save to Memory Card, a maximum of 1.2 MB of free memory is required in addition to the file size.
Clipping Portions between Two Points
Follow these steps after Step 4 on P.7-9.
1 While playing or paused, press 📧 Options
2 Select Edit and press ●
3 Choose Yes and press ●
- Incoming transmissions are blocked during editing.
4 Select Crop and press ●
5 Select Select Two Points and press ●
Video plays.
-Press to pause/start video.
6 Press 📧 Start at the start point
The start point is specified and playback resumes.
7 Press ☐ End at the end point
The portion is saved and playback starts.
Note ▶ Portions over 30 minutes may not be saved.
Cropping Video Clips
Delete the portion before or after the selected point to save the rest as a new file.
Follow these steps after Step 4 on P.7-9.
1 While playing or paused, press 📧 Options
2 Select Edit and press ●
3 Choose Yes and press ●
- Incoming transmissions are blocked during editing.
4 Select Crop and press ●
5 Select Delete Before or Delete After and press ●
Video plays.
- To adjust start point, press Ⓞ to start/pause video.
- The portion before or after the selected point will be deleted.
To cancel, press
6 Press ☒ Cut at approximate start point
The remaining portion is saved and playback starts.
Note ▶ Portions over 30 minutes may not be saved.
Adding Subtitles
Set subtitles to appear while playing video. Select timing, add effects, etc.
Entering Text
After entry, set timing and time period for subtitles.
- Save up to ten subtitles (48 single-byte alphanumerics each).
- Follow these steps after Step 4 on P.7-9.
1 While playing or paused, press 📧 Options
2 Select Edit and press ●
3 Choose Yes and press ●
- Incoming transmissions are blocked during editing.
4 Select Edit Subtitle and press ●
5 Select
6 Enter text and press ●
- Press Ⓞ to pause/play video.
7 Press 📧 Start at the start point
8 Press ☑ End at the end point Edit Subtitle menu opens.
- If video has ended before pressing End, start over from Step 7. - To edit text, select Edit Text → Press - Edit text → Press

Edit Subtitle Menu
9 Change display settings (see right) and add effects (see P.7-14)
- To complete without changing display settings or adding effects, proceed to Step 10.
10 After completing all the settings, press ☐ OK
• To add more, repeat Steps 5 - 10. To edit saved subtitles, select one → Press ⬤ → Select Edit Text → Press ⬤ → Edit → Press ⬤ → Perform from Step 9 To delete saved subtitles, select one → Press 📧 Options → Select Delete → Press ⬤ → Choose Yes → Press ⬤
11 Press Y Save
12 Select Overwrite or Create New and press ●
-Playback starts. (Subtitles appear only in Normal size.)
Display Settings
Follow these steps in Step 9 on the left.
Duration Set timing and time period for subtitles
Select Duration → Press ● → Press ☑ Start at the start point → Press ☑ End at the end point When finished, perform from Step 10 on the left.
Display Position Set position for subtitles to appear
Select Advanced → Press ● → Select Display Position → Press ● → Use 📋 to select a position → Press ● When finished, press 📋 Perform from Step 10 on the left.
Font Size Change font size of subtitles
Default Large (20 x 20) Select Advanced → Press ● → Select Font Size → Press ● → Select Large(20x20) or Small(12x12) → Press ● When finished, press □□□□□□□□□□□□□□□□□□□□□□□□□□□□□□□□□□□□□□□□□□□□□□□□□□□□□□□□□□□□□□□□□□□□□□□□□□□□□□□□□□□□□□□□□□□□□□□□□□□□□
Scrolling
Select a direction and visual effect for subtitle scroll
Default Direction: Stop, Effect: Frame In
Scroll Direction
Select Advanced → Press ⬙ → Select Scrolling →
Press ⬤ → Select Direction → Press ⬤ → Select
Stop, Left to Right or Right to Left → Press ●
When finished, press 📄 → Press 📄 → Perform from Step 10 on P.7-13
Scroll Effects
Select Advanced → Press ⬙ → Select Scrolling →
Press ⬤ → Select Effect → Press ⬤ → Select an
effect → Press ●
| Frame In | Subtitle comes in from an end, then disappears in the centre |
| Frame Out S | Subtitle appears in the centre and scrolls out |
| Rolling Subtle | scrolls from end to end |
When finished, press CLEAR™ → Press CLEAR™ → Perform from Step 10 on P.7-13
On-Screen Time
Select Advanced → Press ⬙ → Select Scrolling →
Press ⬤ → Select On-Screen Time → Press ⬤ →
Enter time → Press ●
When finished, press 12.44 → Press 12.44 → Perform from Step 10 on P.7-13
Background
Select from seven background colours
Default Black
Select Advanced → Press ● → Select Background
Colour → Press ● → Select a colour → Press ●
When finished, press [BLR] → Perform from Step 10 on P.7-13
Adding Text Effects
- Up to two effects can be applied per entry.
- Follow these steps in Step 9 on P.7-13.
Font Colour Change font colours
DefaultWhite
Changing Colour of Entire Text
Select Advanced → Press ⬤ → Select Font Colour → Press ⬤ → Select All → Press ⬤ → Select a colour → Press ⬤
When finished, press 📄 → Perform from Step 10 on P.7-13
Changing Colour of Portion
Select Advanced → Press ⬙ → Select Font Colour
→ Press ● → Select Select Text → Press ● →
Use ⚙ to select the first character of text →
Press ● → Use ⚙ to select the end point →
Press ● → Select a colour → Press ●
When finished, press CLEARBACK→ Perform from Step 10 on P.7-13
Highlight Highlight subtitles
DefaultWhite

When finished, press 📄 → Perform from Step 10 on P.7-13
Blink Set subtitles to flash

When finished, press 📄 Perform from Step 10 on P.7-13
Reset Reset Advanced subtitle settings

- Reset does not affect Duration setting.
Managing Video & Music Files
Organise video/music files on handset in My Videos and My Music. All files are saved in All Videos or All Music. Use Playlists to organise them.
![graph TD A["All Videos/All Music"] --> B["Classic_music_01"] A --> C["Classic_music_02"] A --> D["Classic_music_03"] A --> E["Pops_music_01"] A --> F["Pops_music_02"] A --> G["Pops_music_03"] A --> H["Rock_music_01"] A --> I["Rock_music_02"] A --> J["Rock_music_03"] K["Playlist"] --> L["Classic_musi…](/content/2026/07/1509125/images/ce4efdc8190dd0352cbeed35399eaefdadcedb6f18277799e36d78a60ecf1a3b.jpg)
All Files
- Playlists store only file locations. Source files remain in All Videos or All Music.
- Three Playlists are saved by default. To create new Playlists, see P.7-16.
- Use Music Manager on the supplied Utility Software CD-ROM to create Playlists and organise music files via PCs.
Note To save video to Memory Card, a maximum of 1.2 MB of free memory is required in addition to the file size.
Adding New Playlist
Create up to 99 Playlists in My Videos, My Music and SD AUDIO each.
- Playlists cannot be added into SD VIDEO.
- Playlist 1 to Playlist 3 (or プレイリスト1 to プレイリスト3) are saved in My Videos and My Music by default.
Main Menu
Media Player
1 Video Playlists
1 Select Videos and press ●
2 Select My Videos and press ●
3 Select Phone Memory or Memory Card
Music Playlists
1 Select Music and press ●
2 Select My Music or SD AUDIO
2 Press
To delete Playlists, select one →
Press 📧 Options → Select Delete
Playlist → Press ⬙ → Choose Yes →
Press
To rename Playlists, select one
Press 📧 Options → Select Edit List Title →
Press ⬙ → Enter new name → Press ⬙
3 Press
Options
4 Select Add New Playlist and press
5 Enter name and press ●

My Videos

Adding Files to Playlists
Add files to Playlists from All Videos or All Music.
- Playlists store only file locations. Source files remain in All Videos or All Music.
- SD VIDEO files cannot be added to Playlists.
Main Menu
Media Player
1 Adding Video Files
1 Select Videos and press ●
2 Select My Videos and press ●
3 Select Phone Memory or Memory Card
Adding Music Files
1 Select Music and press ●
2 Select My Music or SD AUDIO
2 Press
3 Select All Videos or All Music and press ●
4 Select a file and press 📧 Options
5 Select Add to Playlist and press ●

Select a Playlist and press ●
File is added to the end of the Playlist.
To delete saved files, press 📄 → Select a Playlist →
Press ⬙ → Select a file → Press 📋 Options → Select
Delete → Press ⬙ → Choose Yes → Press ⬙
To move files within a list, press [C:\Users\m] → Select a Playlist →
Press ⬤ → Select a file → Press 📧 Options → Select Change
Order → Press ⬤ → Use ⏻ to move file → Press ⬤
Opening Playlist Properties
■Follow these steps when Playlists are listed (see Step 2 on
P.7-6, Step 3 on P.7-9 or Step 2 on P.7-16).
Select All Music, All Videos or a Playlist
Press 📧 Options → Select Details → Press ●
Deleting SD VIDEO & SD AUDIO Files
Deleting SD VIDEO or SD AUDIO All Music files deletes source files.
Deleting Video Files
Main Menu ▶ Media Player → Videos → SD VIDEO
1 Select a file and press 📧 Options
2 Select Delete and press ●
3 Choose Yes and press ●
Deleting Music Files
Main Menu ▶ Media Player → Music → SD AUDIO → All Music
1 Select a file and press 📧 Options
2 Select Delete Track and press ●
3 Choose Yes and press ●
Deleting My Videos/My Music Files
■ Delete All Videos and All Music files from Videos and Ring Songs-Tones/Music in Data Folder respectively (see P.8-8).
Managing Files (Data Folder)
Data Folder
Handset files are organised in folders by file format.

Tip
- Access the corresponding Yahoo! Keitai Menu directly from Pictures, My Pictograms, Ring Songs-Tones, S! Appli, Music, Videos, Lifestyle-appli, Books and Custom Screens.
- Exchange files via Bluetooth (see P.10-2) or infrared (see P.10-10) with compatible SoftBank handsets.
Window Description
To open Data Folder from Standby, follow these steps.


Memory Status
To check memory usage status, open Data Folder and follow these steps.
Select Memory Status → Press → Select Phone Memory or Memory Card → Press
- Delete messages/files when memory is low. Handset performance may be affected when memory is full.
File List
In Data Folder, select a folder and press Ⓞ. File list appears.

Major Icons
Still Image & Animation Files
| Icon Format & Extension Description | ||
| JPEG (.jpg) JPEG image | ||
| PNG (.png) PNG image | ||
| E-Animation (NEVA files) (.nva) | Animation (may include sound) | |
| SVG (.svgz) SVG-T file | ||
Video Files
| Icon Format & Extension Description | ||
| MPEG-4 (.3gp) 3GPP video image | ||
| MPEG-4 or H.263(.3gp or .mp4) | 3GPP video image | |
Sound Files
| Icon Format & Extension Description | ||
| SMAF (.mmf) | Melody via the Internet (may include images) | |
| Audio (.mp4) Downloaded | Chaku-Uta® | |
| Voice (.amr) | Voice/sound recorded on Voice Recorder | |
Tip ▶ • → appears for copy protected files. ✗ appears for files in the public domain.
- 8 appears for files used for Wallpaper, System Graphics, ringtone, ringvideo, etc.
• appears for copy/forward protected files.
Display Settings
Switching File List View
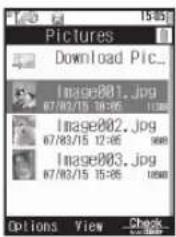
Inline

Grid
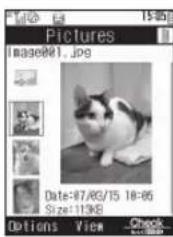
Preview
Main Menu ▶ Data Folder
1 Select a folder and press ●
2 Press 📧 Options
- Select a folder other than My Pictograms, Ring Songs-Tones, S! Appli, Music, Lifestyle-appli, Flash or Flash Ringtones.
3 Select Manage Items and press ●
4 Select Change List View and press ●
5 Select Inline View, Grid View or Preview View and press ●
- Preview View appears for folders other than Books, Videos, Custom Screens or Other Documents.
Tip ▶ Alternatively, press 📄 in file list to toggle the view.
Sorting Files
Sort files by name, date, size, type or Content Key status. Select Unsorted to list files randomly.
Main Menu ▶ Data Folder
1 Select a folder and press ●
To open a created sub folder or a sub folder in DCIM, select it → Press ⬙
2 Press 📧 Options
- Select a folder other than S! Appli or Lifestyle-appli.
- If Download icon is highlighted in file list, skip ahead to Step 4.
3 Select Manage Items and press ●
4 Select Sort and press ●
5 Select a method and press ●
Note ▶ It may take a while to sort many files.
Tip ▶ To reverse the order, sort by the same method again.
Opening Files
Main Menu
Data Folder
1
Select a folder and press ●
File list appears.
To switch between handset and Memory
Card, press 📋 Options → Select
Change to Phone or Change to
Memory Card → Press ●
To open a created sub folder or a sub
folder in DCIM, select it ➔ Press ●

File List
(Pictures)
2
Select a file and press ●
The content plays or appears.
Press ⬙ to zoom in. (Press repeatedly to zoom in more.)
■To zoom out, press
Press ⏻ (up) or ⏻ (down) to adjust volume.
To switch sound file name display, select a file → Press
Options → Select Item Displayed → Press ● → Select File
Name or Title (default) → Press ●
3
Press ☐ FAIL to return to file list
- Press twice to return to file list from zoomed view.
- From file list, press [1.24] to return to Data Folder.
Note
Remote control on LCD Remote/Mic (optional accessory) is disabled for Music Player activated via Data Folder.
Activating Mobile Camera
■ Open file list in Pictures, DCIM or Videos folder and follow these steps.
Press Options Select Take Picture or Record
Video → Press ●
■Mobile camera activates in Photo Camera mode from Pictures and DCIM folders, or in Video Camera mode from Videos folder.
■ To capture still images, see P.6-6.
■ To record video, see P.6-8.
Selecting Multiple Files
Select multiple files in a folder to move, copy or delete them all at the same time.
Main Menu
Data Folder
1
Select a folder and press ●
To open a created sub folder or a sub folder in DCIM, select it → Press ●
2
Select a file and press ☐ Check
√ appears.
- Select a folder other than S! Appli or Lifestyle-appli.
To uncheck, select a file with ☑️ ➔ Press ☑️ Uncheck
3
Repeat Step 2 to select more
- Copy, move, or delete files (see P.8-8, P.8-9).
Slide Show
Main Menu

Data Folder

Select Pictures or DCIM and press ●
To open a created sub folder or a sub folder in DCIM, select it → Press ●

Select a file and press 📧 Options

Select Slide Show and press ●
Slide Show starts.
- All images in the folder appear sequentially. - When Speed is set to Manual, press ⬙ or □ to advance or reverse frames.

Press Ⓞ to stop
Setting Interval
■ Follow these steps after Step 3.
Press 📧 Set → Select Speed → Press ⬙ →
Select Fast, Normal, Slow or Manual → Press ●
- Speed is Normal by default.
Repeat Slide Show
■Follow these steps after Step 3.
Press ☒ Set → Select Repeat → Press ● → Choose On or Off → Press ●
- For Off, all images in the folder appear then file list returns.
- Repeat is On by default.
Properties
Main Menu

Data Folder

Select a folder and press ●
To open a created sub folder or a sub folder in DCIM, select it → Press ●

Select a file and press 📧 Options
- Select multiple files as needed.

Select Details and press ●
-Press Ⓞ to scroll down.
- The following information appears: File name, type, size, last modified date, vendor, copy/forward protection and other restrictions (number of times to open, expiry term), etc.
■Available information varies by file.
SVG Files
■Handset supports Scalable Vector Graphics-Tiny (SVG-T). Follow these steps to view graphics such as tables or maps. Press ⬤ ➔ Select Data Folder ➔ Press ⬤ ➔ Select Other Documents ➔ Press ⬤ ➔ Select an SVG file ➔ Press ⬤
- Press ☑ Options to use the following functions.
•Key Assignments:
| Line Scroll | |
| Page Scroll | 2RC (Up), 4RA (Left) 6RD (Right), 8LC (Down) |
| Zoom | 15/n (Zoom Out), 3FF (Zoom In) |
| Rotate | 73nRD5 (Counterclockwise) 95nRV7 (Clockwise) |
| Key Action Mode 0FArL1 | |
| Set Default 5v/M |
- Some features may not be available depending on the file.
•To create SVG files via PC, use PC Document Conversion Utility on Utility Software CD-ROM. - For more information on SVG-T, visit http://j.sst.ne.jp/svgt/index_pdc.html (Japanese only).
CCF Files
■Follow these steps to read CCF files (comics, photo books, etc. saved in Books folder) designed for BookSurfing® application (see P.18-9).
Press ⬤ → Select Data Folder → Press ⬤ → Select Books → Press ⬤ → Select a CCF file → Press ⬤
■BookSurfing S! Application starts.
- Refer to the BookSurfing® help menu for operational instructions.
- When an S! Application is paused, Application suspended. End application? appears. Choose Yes and press ⬙ twice to start BookSurfing.
- When BookSurfing is paused, properties of opened CCF file may not be accessible.
Flash®
■ Download Flash ® animation files via the Internet; use as Wallpaper (see P.9-3), etc.
Flash® Ringtones
■ Download Flash ® Ringtones via the Internet; use as ringtones with Flash ® animation (see above).
My Pictograms
■ Download GIF image Pictograms via the Internet; create Arrange Mail (see P.14-11).
Managing Files & Folders
Adding Folders
- Assign different names to folders within a layer.
- Folders cannot be added to DCIM, S! Appli or Lifestyle-appli folder.
Main Menu
Data Folder
1 Select a folder and press ●
2 Press 📧 Options
3 Select Manage Items and press ●
4 Select Create Folder and press ●
5 Enter name and press ●
Changing File/Folder Name
- File extensions do not change.
- Assign different names to files/folders within a layer.
■ Single-byte Symbols ¥, /, :, :, <, >, |, ?, # and " are not supported.
• Make sure there is enough free memory. - Folders/files in DCIM, S! Appli or Lifestyle-appli folder cannot be renamed.
Main Menu
Data Folder
1 Select a folder and press ●
2 Select a file or folder and press 📧 Options
3 Select Manage Items and press ●
4 Select Rename and press ●
5 Edit name and press ●
Deleting Files & Folders
Delete files and created folders in Data Folder.
To delete S! Applications, see P.16-5 "Deleting S! Applications".
Main Menu
Data Folder
1 Select a folder and press ●
2 Deleting Folders
1 Select a folder and press 📧 Options
- Select a folder other than S! Appli or Lifestyle-appli.
Deleting Single Files
1 Select a file and press 📧 Options
Deleting Multiple Files
1 Perform from Step 2 on P.8-5 to select multiple files and press 📧 Options
Deleting All Created Folders & Files
1 Select a file and press 📧 Options
② Select Manage Items and press ●
3 Select Delete or Delete All and press ●
For deleting folders or Delete All, enter Handset Code → Press ●
4 Choose Yes and press ●
Copying/Moving Files
Copy or move files to the corresponding folder on Memory Card or to created sub folders within the folder (handset or Memory Card).
- Copy or move files in DCIM folder to Pictures folder (handset or Memory Card).
- Copy/forward protected files cannot be copied.
- Some files may not be copied or moved.
- Files in S! Appli and Lifestyle-appli folders cannot be copied or moved.
Main Menu ▶ Data Folder
1 Select a folder and press ●
- Select a folder other than S! Appli or Lifestyle-appli.
To open a created sub folder or a sub folder in DCIM, select it
→ Press Ⓞ
2 Copying/Moving Single Files
1 Select a file and press 📧 Options
Copying/Moving Multiple Files
1 Perform from Step 2 on P.8-5 to select multiple files and press 📧 Options
3 Select Copy or Move and press ●
4 Select Phone or Memory Card and press ●
To move files set as Wallpaper or used for other functions, choose Yes → Press ●
To copy/move to created sub folders, select a folder → Press ●
5 Select Copy here.. or Move here.. and press ●
Note ▶ If a copy protected file is included in the selected files, only the remaining files are copied.
- Files copied or moved to Memory Card may not be usable on other SoftBank handsets or PCs, etc.
- Name of copied or moved file may change when the same name already exists in the folder.
Using Files
Use Data Folder files as Wallpaper, Phone Book Picture, ringtone and ringvideo.
- Set as Wallpaper, Add to Ph.Book, Set as Ring Video and Set as Ringtone appear only for compatible files.
- Some files may not be used depending on the size.
Note
Some copy protected files ( → or ) cannot be used even if Set as Wallpaper, Add to Ph.Book, Set as Ring Video or Set as Ringtone appears.
Wallpaper
Main Menu
Data Folder
1 Select Pictures, DCIM, Flash ® or Other Documents and press ●
To open a created sub folder or a sub folder in DCIM, select it
→ Press ●
2 Select a file and press 📧 Options
3 Select Set as Wallpaper and press ●
For images smaller or larger than Display, select Centred, Full Screen or Fit Image → Press
■ For Display size images or Centred, use ⚙ to zoom in/out or press 📋 to rotate.
4 Press
Wallpaper is set.
Saving to Phone Book
Main Menu
Data Folder
1 Select Pictures, Ring Songs·Tones, Music, Videos or Flash® Ringtones and press ●
2 Select a file and press 📧 Options
3 Select Add to Ph.Book and press ●
■ For more, perform Step 4 in "Saving from Call Log" on P.4-8.
Ringvideo & Ringtone
Assign video or sound file as ringvideo or ringtone for Voice Calls.
Ringvideo
Main Menu
Data Folder → Videos
1 Select a file and press 📧 Options
2 Select Set as Ring Video and press ●
Ringtone
Main Menu ▶ Data Folder
1 Select Ring Songs-Tones, Music or Flash® Ringtones and press ●
2 Select a file and press 📧 Options
3 Select Set as Ringtone and press ●
S! Mail Attachments
Attach files to S! Mail from Data Folder.
Main Menu ▶ Data Folder
1 Select a folder and press ●
2 Select a file and press 📧 Options
3 Select Send and press ●
4 Select As Message and press ●
For large JPEG images, select attachment size → Press ●
5 Complete other fields and send S! Mail (perform from Step 3 on P.14-7)
Printing Images
Connect handset to a printer via Bluetooth ® and print JPEG/PNG images.
- Use a Bluetooth®-compatible printer.
- Activate Bluetooth on the printer.
Main Menu ▶ Data Folder
1 Select Pictures, DCIM or Other Documents and press ●
To open a created sub folder or a sub folder in DCIM, select it → Press ●
2 Select a still image and press 📧 Options
3 Select Print and press ●
4 Select Via Bluetooth and press ●
Device search starts.
5 Select a device and press ●
When requested, enter passcode → Press ●
When transmission is in progress, choose Yes → Press ●
6 Choose Yes and press ●
Offline Mode is set and printing starts.
- When printing completes, printer stops automatically.
To cancel, press ☐ Cancel
Note ▶ Some images sent to Basic Imaging Profile-compatible printers may not be printed due to printer limitations.
Editing Still Images
Changing Image Size
Resize Pictures folder images for Wallpaper, Alarm, etc.
• Alternatively, crop image for size or zoom in/out on portions. (File size changes when images are resized.)
•Picture Editor appears only for compatible files.
Resize to Preset Size
Main Menu
Data Folder → Pictures → Select a file → Options Edit → Picture Editor → Resize
1 Select from To Wallpaper to Alarm and press ●
A rectangle appears on the image (except for To Wallpaper and Power On/Off).
| To Wallpaper W 2 | 40 x H 320 dots |
| Power On/Off W 2 | 40 x H 320 dots |
| For Incoming Call | W 176 x H 144 dots |
| Alarm W 240 x H | 104 dots |

For Incoming Call
2 Use ⚙ to specify display area
- Display area may be unspecifiable depending on image size.
To zoom in/out, press ☑ Resize ➔ Press ⚙ (zoom in) or ⏻ (zoom out)
To start over from size selection, press
3 Press
4 Press Y! Save
5 Select Save as New and press ●
To overwrite, select Overwrite → Press ●
6 Enter name and press ●
7 Select a location and press ●
Image is saved to Data Folder as a new entry.
Cropping Images
Main Menu
Data Folder → Pictures → Select a file → Options Edit → Picture Editor → Resize
1 Select Cut and press ●
2 Use ✕ to move + to the upper left corner of the portion to crop and press Ⓞ
3 Use ⚙ to move + to the lower right corner of the portion to crop and press ⚙
To cancel, press [C:\WIN\BACK → Start over from Step 1
4 Use ⚙ to specify display area
- Display area may be unspecifiable depending on image size.
To zoom in/out, press ☑ Resize → Press ⚙ (zoom in) or ⏻ (zoom out)
To cancel, press [icon] → Start over from Step 1
5 Press
6 Press Save
7 Select Save as New and press ●
To overwrite, select Overwrite → Press ●
8 Enter name and press ●
9 Select a location and press ●
Image is saved to Data Folder as a new entry.
Visual Effects (Retouch)
Dress up images with pre-loaded visual effects.
- Apply to W 52 x H 52 dots or larger JPEG/PNG images including Continuous Shoot images.
•Picture Editor appears only for compatible files.
Main Menu
Data Folder → Pictures → Select a file → Options Edit → Picture Editor → Retouch
1 Select an effect and press ●
- Retouch Effects:
| Sepia Renders | image in sepia tone |
| Sparkling | Adds sparkling effect to bright portions of image |
| Ripples Superimposes widening rings over image | |
| Tile Adds a brick frame around image | |
| Emboss Renders image in black and white relief | |
| Oil Painting Renders image as a blurred image | |
| Clear Frame Adds a transparent 3D frame around image | |
| Round Frame | Adds a round, opaque frosting around image |
| Soft Frame | Adds a soft, opaque edged frame around image |
| Zigzag Frame | Adds a jagged edged frame around image |
To start over, press CLEAN
2 Press
3 Press Y? Save
4 Select Save as New and press ●
To overwrite, select Overwrite → Press ●
5 Enter name and press ●
6 Select a location and press ●
Image is saved to Data Folder as a new entry.
Note ▶ Edited images may be too large to save or send via S! Mail.
Adding Text & Stamps
Picture Editor appears only for compatible files.
Main Menu
Data Folder → Pictures → Select a file → Options Edit → Picture Editor
1 Adding Text
1 Select Paste and press ●
2 Select Free Text and press ●
To enter the date, select Date → Press ⬙ → Skip ahead to Step 2
3 Enter text and press ●
- Enter up to 16 characters.
Adding Stamps
1 Select Stamp and press ●
2 Select a stamp and press ●
To change the stamp, press
2 Use ✅ to move text or stamp to target location and press Ⓞ
To specify colours, press 📄 Colour → Select text colour → Press ⬇ → Select outline colour or no outline → Press ⬇ → Press √ Done
3 Press Y? Save
4 Select Save as New and press ●
To overwrite, select Overwrite → Press ●
5 Enter name and press ●
6 Select a location and press ●
Image is saved to Data Folder as a new entry.
Face Arrange
Make smiley, angry or sad faces.
- Apply to JPEG and PNG images.
- Face Arrange may not fit all images. Adjust position and size as required (see P.8-15).
- Picture Editor appears only for compatible files.
Main Menu
Data Folder → Pictures → Select a file → Options
(☑) → Edit → Picture Editor → Face Arrange
1 Select a type and press ●
•Face Arrange Types:
| Collage: Right-half Copies right side of face onto left side |
| Collage: Left-half Copies left side of face onto right side |
| Grin Pulls eyes down & mouth up |
| Mad Pulls eyes up & mouth down |
| Sad Pulls eyes & mouth down |
| Big Eyes Adds graphic eyes |
| Burning Eyes Adds flames in the eyes |
| Crying Adds tears |
| Aristocrat Adds a monocle and moustache |
| Angry MarkAdds a stress mark to face |
To check current positions of targets, press 📧 Parts.
■Press [CLDN] to return.
To start over, press
Press
Press Save
4
Select Save as New and press ●
To overwrite, select Overwrite → Press ●
5
Enter name and press ●
6
Select a location and press ●
Image is saved to Data Folder as a new entry.
Note
When using Face Arrange, take care not to create images that may embarrass or offend others. Always obtain permission before photographing others.
Adjusting Face Arrange Position
Change the default positions and sizes of targets to fit the image. Changes apply to the current image only.
1 In Step 1 under "Face Arrange" on P.8-14, press 📧 Parts
2 Press 📧 Modify
A rectangle appears with + in the upper left corner.
3
Set the face line
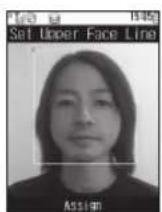
Use ⚙ to move + to the lower right corner


Use ⚙ to move + to the upper left corner


Face line is set
To start over, press
4
Set the eyes and then mouth in the same way
- When finished, all the targets appear.
•To readjust targets, start over from Step 2.
To restore the original positions, press [REDACTED]. (Not available after setting mouth position.)
5
Press
6
Choose Yes and press ●
7
Select a location and press ●
Image is saved to Data Folder as a new entry with Face Arrange positions adjusted, and Face Arrange menu returns.
- Complete Face Arrange. Face Arrange is applied to the adjusted positions.
Additional Picture Effects
Picture Editor appears only for compatible files.
Frame Add Frame to JPEG and PNG images
Main Menu
▶ Data Folder → Pictures → Select a file → Options (✉) → Edit → Picture Editor → Frame
Select a frame → Press ● → Press ● → Press Y? Save → Select Save as New → Press ● → Enter name → Press ● → Select a location → Press ●
To change the frame, press 📄 before assigning it. To overwrite, select Overwrite instead of Save as New → Press ⬙
Correction Correct images
Main Menu
▶ Data Folder → Pictures → Select a file → Options (✉) → Edit → Picture Editor → Correction
Select from Sharpness to Dark → Press ● → Press ● → Press Save → Select Save as New → Press ● → Enter name → Press ● → Select a location → Press ●
To change Correction type, press [GFP] before assigning it. To overwrite, select Overwrite instead of Save as New ➤ Press ⬙
- Apply to W 52 x H 52 dots or larger JPEG and PNG images.
Rotate Rotate images
Main Menu
Data Folder → Pictures → Select a file → Options (✉) → Edit → Picture Editor → Rotate
Select a type → Press ⬤ → Press ⬤ → Press Y7 Save → Select Save as New → Press ⬤ → Enter name → Press ⬤ → Select a location → Press ⬤
To start over from type selection, press 📄 before second press of ⭕.
To start over from type selection, press 📄 before second press of ⭕.
To overwrite, select Overwrite instead of Save as New Press
File Format/File Size
Convert file format and change file size
Main Menu
Data Folder → Pictures → Select a file → Options (✉) → Edit → Picture Editor → File Format
Converting File Format
Select File Format → Press ● → Select a format → Press ● → Press □→ Press Y? Save → Enter name → Press ● → Select a location → Press ●
- Changing file format may affect file size and image quality.
- Changing File Size
Select File Size → Press ● → Select a size → Press ● → Press ▼ ▼ ▼ ▼ ▼ ▼ ▼ ▼ ▼ ▼ ▼ ▼ ▼ ▼ ▼ ▼ ▼ ▼ ▼ ▼ ▼ ▼ ▼ ▼ ▼ ▼ ▼ ▼ ▼ ▼ ▼ ▼ ▼ ▼ ▼ ▼ ▼ ▼ ▼ ▼ ▼ ▼ ▼ ▼ ▼ ▼ ▼ ▼ ▼ ▼ ▽ Save as New → Press ● → Enter name → Press ● → Select a location → Press ●
To overwrite, select Overwrite instead of Save as New Press
- Changing file size may affect image quality.
Cancelling Effects
Before saving/adding an effect, select Undo → Press ●
■To restore effect immediately after cancelling, select
Redo → Press ●
Panorama Images
Combine two still images into one.

Select two images Merge Panorama
Panorama Image Effects:
| Standard Applicable to all kinds of shots | |
| Near View | Best suited for close-up shots with parallax correction |
| Document Use for images with text | |
- Use JPEG images between W 48 x H 64 and W 120 x H 160 dots/W 160 x H 120 dots.
- Some portions may be cropped to adjust two images to the same size.
- The result may not be satisfactory if colour tones are different between two images.
Main Menu
Data Folder → Pictures → Select a file → Options
) → Edit → Composite
1 Select Merge Panorama and press ●
Left image is set.
- Merge Panorama is selectable only for compatible files.
2 Select ② and press ●
3 Select another image and press ●
Two images are set.
- If image is incompatible, a message appears; select another.
4 Select EFFECT and press ●
5 Select from Standard to
Document and press ●
To check images, select either → Press ●
■Press [CUENO] to return.
To change images, select one
Press ⬤ → Press 📧 Change → Select
an image → Press ●
To switch the positions, press 📧 Flip
6 Press Y! Save
7 Press
8 Enter name and press ●
9 Select a location and press ●
Image is saved to Data Folder as a new entry.

Combine up to four reduced images into one.
- Apply to JPEG and PNG images.
•Make sure there is enough free memory.
- Images are placed in the upper left, upper right, lower left and lower right in numerical order.

Split Image
Main Menu
Data Folder → Pictures → Select a file → Options Edit → Composite
1 Select SplitPicture 240x320 or SplitPicture 120x160 and press ●
Upper left image is set.
2 Select ② and press ●
3 Select an image and press ●
- If image is incompatible, a message appears; select another.
4 Repeat Steps 2 - 3 to add images
- In Step 2, select ③ or ④.
To preview Split Picture, press ☑ Options → Select View Composite → Press ● ■Press ● to return.
To change images, select one Press ● → Press ▼ Change → Select an image → Press ●
To delete images, select one → Press Options → Select Remove → Press Choose Yes → Press
5 Press Save
6 Enter name and press ●
7 Select a location and press ●
Image is saved to Data Folder as a new entry.

Split Picture Preview
Additional Settings
Mode Settings
Activate Normal, Manner, Drive or Original mode to change multiple handset settings at one time; each mode offers a basket of defaults tailored to a particular usage pattern.
Activating a Mode
Mode Settings Select from four modes
DefaultNormal
Main Menu ▶ Settings → Phone Settings (😊) → Mode Settings
Select a mode → Press ●
Customising Modes
Customise Manner, Drive or Original in Mode Settings. To customise Normal, see P.9-14 "Sounds & Alerts", P.9-17 "Any Key Answer" or P.2-9 "Answer Phone".
Tip ▶ Volume settings are fixed in Manner mode. Volume, Vibration and Answer Phone settings are fixed in Drive mode.
Edit
Customise Volume, Vibration, Event Light and Status Light settings
Main Menu ▶ Settings → Phone Settings (💡) → Mode Settings
Select a mode → Press 📧 Edit → Select an item
→ Press ⬙ → Customise settings (see P.9-14
"Volume", P.9-15 "Vibration", P.9-16 "Event Light" and P.9-16 "Status Light")
Any Key
Answer
Activate or cancel Any Key Answer (see P.2-6)
DefaultDrive: On, Manner/Original: Off
Main Menu ▶ Settings → Phone Settings (💡) → Mode Settings
Select a mode → Press ☒ Edit → Select Any Key Answer → Press ● → Choose On or Off → Press ●
Answer Phone Activate of cancer Answer Phone for incoming calls in Manner or Original mode
Answer Phone setting is fixed for Drive mode. DefaultManner/Drive: On, Original: Off
Main Menu ▶ Settings → Phone Settings (○) → Mode Settings
Select Manner or Original → Press ☑ Edit → Select Answer Phone → Press ● → Choose On or Off → Press ●
Reset
Reset Reset settings for each mode
Main Menu ▶ Settings → Phone Settings (💡) → Mode Settings
Select a mode → Press ☐ Reset → Enter Handset Code → Press ● → Choose Yes → Press ●
Display
Display Settings
Wallpaper Use Wallpaper to show an image in Standby
DefaultFlash PANTONE
Main Menu
▶ Settings → Phone Settings (😊) → Display → Wallpaper
Preset Pictures
Select Preset Pictures → Press ⬙ → Select an
image → Press ●
Data Folder Images
Select Pictures, DCIM, Flash ® or Other Documents
Press ⬙ → Select an image → Press ⬙
To use files in DCIM folder, select DCIM → Press ● → Select a folder → Press ● → Select an image → Press ● → Select Centred, Full Screen or Fit Image → Press ● → Press ●
For images smaller or larger than Display, select an image → Press ⬤ → Select Centred, Full Screen or Fit Image → Press ⬤ → Press ⬤ ■ For Display size images or Centred, use ⬤ to zoom in/out or press 📋 to rotate.
Cancelling
Select Blank → Press ●
Restoring Custom Screen Wallpaper
When Wallpaper is set while Custom Screen is active, Wallpaper takes priority over Custom Screen Wallpaper. (Custom Screen remains active.) To restore Custom Screen Wallpaper, follow these steps after opening Wallpaper menu.
Select Custom Screen → Press ● → Press ●
Note
- Some images may be incompatible/not appear correctly.
- When an S! Application is set as Screensaver, Wallpaper may not appear.
- Files in My Pictograms are not selectable.
Tip
Using Wallpaper shortens Battery Time.
System Graphics
Use images for Power On/Off, incoming calls and Alarm windows
Default Power On/Power Off: Preset Animation Voice Call/Video Call/Circle Talk/Alarm: Pattern 1
Main Menu
▶ Settings → Phone Settings (◎) → Display → System Graphics
Power On/Power Off
Select Power On or Power Off → Press ⬙ → Select Preset Animation, Pictures, DCIM, Flash® or Other
Documents → Press ●
For Pictures, Flash ® or Other Documents, select an image
→ Press ● → Press ●
For DCIM, select a folder → Press ● → Select an image → Press ● → Press ●
Incoming Calls/Alarm
Select from Voice Call to Alarm ➔ Press ⬙ ➔ Select from Pattern 1 to Pattern 3, Pictures, DCIM, Flash®, Other Documents or Custom Screen ➔ Press ⬙
For Pictures, Flash ® or Other Documents, select an image
→ Press ● → Press ●
For DCIM, select a folder → Press ● → Select an image → Press ● → Press ●
- If a rectangle appears for images in Pictures, DCIM or Other Documents, use ⚙ to specify display area and press ⭕.
- Custom Screen is selectable when compatible Custom Screen is active.
Note Images may not appear for incoming calls/Alarm while messaging with an S! Application paused.
Restoring Custom Screen System Graphics
When System Graphics are set while Custom Screen is active, System Graphics take priority over Custom Screen System Graphics. (Custom Screen remains active.) To restore Custom Screen System Graphics for Voice Call, Video Call, Circle Talk or Alarm, follow these steps after opening the corresponding menu.
Select Custom Screen → Press ● → Press ●
Note ▶ Ringtone and ringvideo images for Sounds & Alerts may take priority over System Graphics for incoming calls. •Ringtone, ringvideo and Picture images for Phone Book entries take priority over System Graphics for incoming calls with caller ID.
Font Settings
Change font size/weight for menus, text entry, mail messages and the Internet
Default Font Size: Standard, Font Weight: Normal
Main Menu
▶ Settings → Phone Settings (😊) → Display → Font Settings
Font Size
Select Font Size → Press ● → Select an item → Press ● → Select a size → Press ●
Font Weight
Select Font Weight → Press ● → Select a weight → Press ●
- Selected font weight applies to all windows.
Note ▶ Some menu items, function names, etc. differ by font size.
Tip ▶ Some windows may not support Font Settings.

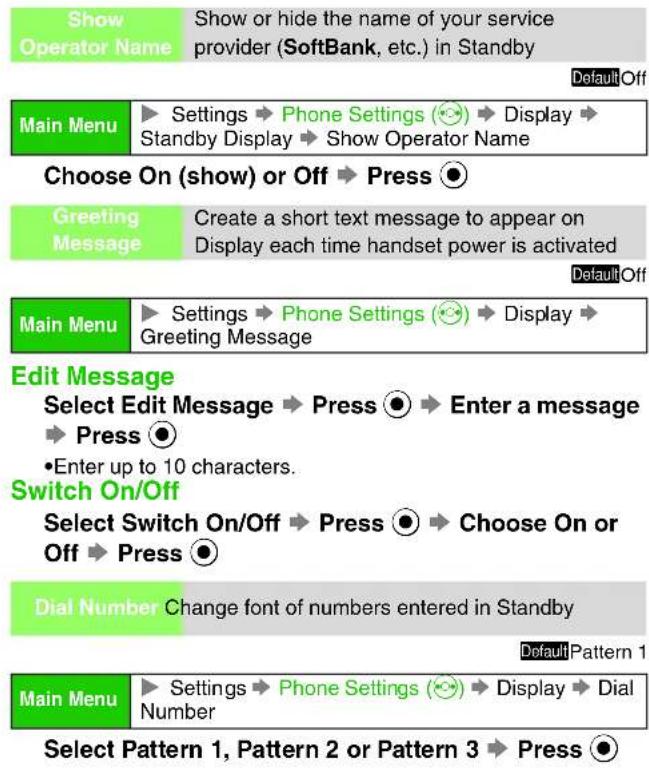
Standby Window (Japanese Only)
Access shortcut icons, view Live Monitor news (see P.15-14) or monitor Hot Status members (see P.19-4) in Standby; open Standby Window in Shortcut, Headline, Communication or Calendar mode.
■Window Description (Shortcut Mode)

- Above is an example of Icon Panel in Template 1 view.
- Icon Panel view is Template 7 by default.
Change Templates: see P.9-8
■Window Description (Headline Mode)

■Window Description (Communication Mode)
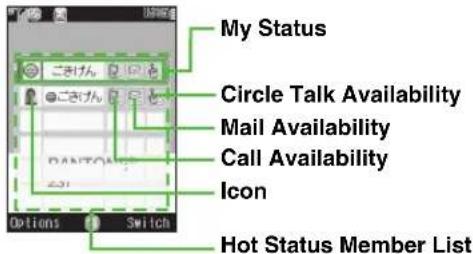
■Window Description (Calendar Mode)

- Subscription and member or content registration required to use Live Monitor (see P.15-14) or Hot Status (see P.19-4).
- Standby Window opens in Shortcut mode (see left) by default.
1 Press Ⓞ
Standby Window opens in last used mode.
2 Use ⚙ to select an item and press Ⓞ
Shortcut target, news or member status appears.
- In Calendar mode, press Ⓞ to use Calendar.
Press 🔒 to exit.
Tip ▶ For more about icons and information in Headline/Communication mode, see P.15-14 or P.19-4.
Toggle Modes
Press Y?
Customising Shortcut Mode
Follow these steps after opening Standby Window in Shortcut mode (see P.9-6).
Assign
Shortcut
Save up to six shortcuts
Select an icon or a blank entry → Press Options → Select Icon Panel Display → Press ● → Select Assign Shortcut → Press ● → Use to select a menu item → Press ● → Select a function, folder or menu → Press ● → Press Assign
Assign
Bookmark
Save up to six Bookmarks
Select an icon or a blank entry → Press Options → Select Icon Panel Display → Press ● → Select Assign Bookmark → Press ● → Use to select a Bookmark → Press ● → Select an icon → Press ● → Choose Yes → Press ●
Move Change the order of icons
Select an icon → Press ☑ Options → Select Icon Panel Display → Press ● → Select Move → Press ● → Select an icon → Press (Up) or (Down) → Press ●
Delete Delete shortcut/Bookmark icons
Select an icon → Press ☐ Options → Select Icon Panel Display → Press ● → Select Delete → Press ● → Choose Yes → Press ●
Assign
Member
Monitor up to five Hot Status members
Save members to Hot Status member list (see P.19-5) or save Phone Book entries (see P.4-3) beforehand. Select an icon or a blank entry → Press ☑ Options → Select Icon Panel Display → Press ● → Select Assign Member → Press ● → Select Status Member List → Press ● → Select a member → Press ● To select from Phone Book, select an icon or a blank entry → Press ☑ Options → Select Icon Panel Display → Press ● → Select Assign Member → Press ● → Select Phone Book → Press ● → Select an entry → Press ●
Move Change member order
Select an icon → Press Options → Select Icon Panel Display → Press ● → Select Move → Press ● → Select a member to move → Press (Up) or (Down) → Press ●
Delete
Member Icons
Delete Hot Status member icons
Select an icon → Press ☑ Options → Select Icon Panel Display → Press ● → Select Delete → Press ● → Choose Yes → Press ● •My Status icon cannot be deleted.
Change Icon Change member icons

Add News Content Add Live Monitor items; corresponding titles appear in News area

Change Templates Change Icon Panel view

News Speed Change title scroll speed

Target News Select whether to scroll all titles or unread only

Tip ▶ To update Live Monitor items automatically, see P.15-16 - 15-17 "Automatic Update".
Customising Headline Mode
Follow these steps after opening Standby Window in Headline mode (see P.9-6).
Add News Content Add Live Monitor items; corresponding news appears in News List

Tip ▶ To update Live Monitor items automatically, see P.15-16 - 15-17 "Automatic Update".
Customising Communication Mode
Follow these steps after opening Standby Window in Communication mode (see P.9-6).
Assign Member Monitor up to five Hot Status members

Move Change member order

Delete Hide members

Change Icon Change member icons

Language Setting
Language
Switch handset interface between Japanese and English
Default Automatic
Main Menu ▶ Settings → Phone Settings (💡) → 言語選択
Select Automatic, English or 日本語 → Press ●
- For Automatic, interface language switches according to language information on USIM Card.
Custom Screens
Download and install applications that load single-themed handset Wallpaper, menu windows, indicators, ringtones and more, all at the same time.
- In addition to preloaded Custom Screens (Pattern 1, Pattern 2 and Pattern 3), use Custom Screens downloaded via the Internet.
- カスタモご紹介 in handset Data Folder (Custom Screens) is a doorway to カスタモ Mobile Internet site offering Custom Screens.
•Pattern 1 is installed by default.
Downloading Custom Screens
To download Custom Screens, open handset Data Folder (Custom Screens).
- Some Custom Screens are fee-based.
•To use fee-based Custom Screens, download Custom Screen Keys to handset (see P.9-10). - Custom Screens and Custom Screen Keys are downloaded via the Internet. Make sure signal is strong.
- Custom Screens can also be downloaded via カスタモ (http://www.custamo.com/) using a PC.
Note ▶ Read information (Custom Screen Key price, expiry date, etc.) on Custom Screen download page.
Main Menu ▶ Data Folder ➔ Custom Screens
1 Select Download Custom Screens and press ●
Handset connects to the Internet and カスタモ appears.
→ Press ● → Press ● → Choose Yes → Press ●
2 Download a Custom Screen
- Read through information on the site.
- On PCs, download Custom Screens to the following Memory Card directory. Do not change file name, extension, etc.
- PRIVATE/MYFOLDER/My Items/Custom Screens
Purchasing Custom Screen Keys
Main Menu ▶ Data Folder
1 Select Custom Screens and press ●
Available Custom Screens appear.
•Fee-based Custom Screen Indicators:
| Key Found | Key Not Found |
• appears for the current Custom Screen.
To switch between handset and Memory Card, press ☒
Options → Select Change to Phone or Change to Memory
Card → Press ●
2 Select a Custom Screen for which to download the Key and press 📧 Options
- Select one with ≠.
3 Select Activate and press ●
- When 100 Content Keys are already downloaded, delete Keys before downloading new ones.
4 Press 📧 Actvte
Handset connects to the Internet and download page appears.
- Custom Screen Key download page contains the following information:
■Custom Screen Key price
■Payment method
■Terms of service
■Link to customer enquiry service
To cancel, press ☐ Cancel
5 Read through terms of service and download Custom Screen Key following online instructions
6 After download, press OK
Data Folder (Custom Screens) returns.
Delete
Delete Custom Screen and Custom Screen Key
Main Menu
Data Folder → Custom Screens
Select a Custom Screen → Press 📧 Options → Select
Delete → Press ● → Choose Yes → Press ●
To delete the corresponding Custom Screen Key at the
same time, choose Yes → Press ●
■ To cancel, choose No → Press ●
- Custom Screen Keys cannot be deleted independently.
- Delete カスタモご紹介 as needed.
Web Access Access Custom Screen source sites
Main Menu
Data Folder → Custom Screens
Select a Custom Screen → Press 📧 Options → Select
Web Access → Press ●
Custom Screen Setup
Custom Screen setup may take some time. (Pressing ☐ does not cancel setup.)
■Preset Custom Screens
Main Menu
▶ Settings → Phone Settings (💡) → Custom
Screens → Preset Screens
1 Select Pattern 1, Pattern 2 or Pattern 3 and press ●
2 Select Icon Menu, Horizontal or Vertical and press ●
Custom Screens in Data Folder
Main Menu
Data Folder
1 Select Custom Screens and press ●
Available Custom Screens appear.
(Fee-based Custom Screen Indicators: see P.9-10)
To switch between handset and Memory Card, press 📋
Options → Select Change to Phone or Change to Memory
Card → Press ●
2 Select a Custom Screen and press ●
- Custom Screens with ≠ cannot be set.
- Select a Custom Screen and press 📋 Options to open properties, change file names or copy/move to other folders (see P.8-6, P.8-8, P.8-9).
3 Press ●
Custom Screen is set and Data Folder (Custom Screens) returns.
Note ▶ • Some Custom Screens may not contain files for Wallpaper, System Graphics, ringtones or ringvideos; default settings apply for these functions.
- Custom Screen setup may fail when battery is low or depending on content.
Tip ▶ Once installed, Custom Screen remains active even after Memory Card is removed or replaced with another.
Familiar Usability
Download and install applications that load user interface themes based on previous SoftBank or other handsets.
Note ▶ Familiar Usability does not completely remake handset.
Downloading Familiar Usability
Download Familiar Usability applications via the Internet.
Main Menu ▶ Data Folder ➔ Custom Screens
1 Select Download Familiar Usability and press ●
Handset connects to the Internet and Familiar Usability download site appears.
- Follow onscreen instructions.
Familiar Usability Setup
Download Familiar Usability application beforehand.
Main Menu ▶ Data Folder ➞ Custom Screens
1 Select a Familiar Usability application and press ●
Cancelling Familiar Usability
Note ▶ •Activating Familiar Usability restores default Wallpaper, System Graphics, tones, etc. and cancels Simple Menu; cancelling Familiar Usability also returns these settings to their defaults.
- Familiar Usability does not support Font Settings (see P.9-4) or Language Setting (see P.9-9).
Light Settings
Backlight
Select Display and Keypad Backlight illumination time or Display Brightness
Default Time Out: 15 seconds, Brightness: Level 2
Main Menu
▶ Settings → Phone Settings (💡) → Display → Backlight
Backlight Illumination Time
Select Time Out → Press ● → Select time → Press ●
To disable Backlight, choose Off in Time Out list → Press ●
Display Brightness
Select Brightness → Press ⬙ → Use ⏻ to adjust
level → Press ●
Tip ▶ Keypad light Brightness is fixed.
Display Saving
Select a period of inactivity after which Display turns off
Default2 minutes
Main Menu
▶ Settings → Phone Settings (😊) → Display → Display Saving
Select a period → Press ●
Tip ▶ Even when Display Saving is set to Always On, Display turns off automatically after five minutes of Call Time. To turn it back on, press a key other than 📋.
External Display Settings
Duration Select active time for External Display
Default5 seconds
Main Menu ▶ Settings → Phone Settings (😊) → Display → External Display → Duration
Select time → Press ●
To disable External Display, choose Off → Press ●
Messages
Select whether to open new received messages on External Display
■ Set Caller Display (see P.9-14) to On beforehand. Default Display
Main Menu ▶ Settings → Phone Settings (💡) → Display → External Display → Messages
Select Display or Not Display → Press ●
Display Date & Time
Change External Display Clock view
DefaultClock & Date
Main Menu ▶ Settings ▶ Phone Settings (😊) ▶ Display ▶ External Display ▶ Display Date&Time
Select a type → Press ●
- With handset closed, press 📄 to toggle Clock view. (Display Date & Time setting is not affected.)
Clock Type Change External Display font
Default Pattern 1
Main Menu ▶ Settings → Phone Settings (💡) → Display → External Display → Clock Type
Select Pattern 1, Pattern 2 or Pattern 3 → Press ●
| Caller Display | Show or hide caller's number or name on External Display |
| Main Menu | ▶ Settings ➔ Phone Settings (💡) ➔ Display ➔ External Display ➔ Caller Display |
| Choose On (show) or Off ➔ Press ⬤ | |
Sounds & Alerts
Customising Handset Responses
Volume Set volume level for handset functions
Main Menu
▶ Settings → Phone Settings (💡) → Sounds & Alerts → Volume
Select an item → Press ● → Use ⚙ to adjust level → Press ●
- Select from five levels. When Increasing Volume is set, volume increases every four seconds from Level 1 to Level 5. Increasing Volume is not available for General Volume.
Ringtone/videos
Set ringtones or ringvideos for incoming communications
Main Menu
Settings → Phone Settings (💡) → Sounds & urchs → Ringtone/videos
Assign Tone in Preset Sounds
Select For Voice Call, For Video Call or Circle Talk → Press ⬙ → Select Preset Sounds → Press ⬙ → Select a tone → Press ⬙
For items other than For Voice Call, For Video Call or Circle Talk, select Assign Tone → Press ⬤ → Select Preset Sounds → Press ⬤ → Select a tone → Press ⬤ To play tones, select one and press Play. ■ Press □ Stop to stop.
Assign Tone in Data Folder
Select For Voice Call, For Video Call or Circle Talk → Press ⬙ → Select Ring Songs-Tones or Music → Press ⬙ → Select a file → Press ⬙
For items other than For Voice Call, For Video Call or Circle Talk, select Assign Tone → Press ● → Select Ring Songs-Tones or Music → Press ● → Select a file → Press ● To play files, select one and press ▼ Play. ■Press ▼ to stop.
Assign Video or Flash® Ringtone
Select For Voice Call or For Video Call → Press ⬤ Select Videos or Flash® Ringtones → Press ⬤ Select a file → Press ⬤
For For New Message or Delivery Report, select Assign Tone → Press → Select Videos or Flash®Ringtones → Press → Select a file → Press To play files, select one and press Play. Press BACK to stop.
Duration (Not Available for Calls or Circle Talk)
Select an item other than For Voice Call, For Video
Call or Circle Talk → Press ⬙ → Select Duration →
Press ● ➔ Enter time (01 - 99 seconds) ➔ Press ●
Restoring Custom Screen Ringtone/Ringvideo
When ringtone/ringvideo is set while Custom Screen is active, ringtone/ringvideo takes priority over Custom Screen ringtone/ringvideo. (Custom Screen remains active.) To restore Custom Screen ringtone/ringvideo, select Custom Screen instead of Preset Sounds, etc. and press Ⓞ.
Note
- Some files may not be usable.
- When a Memory Card file is set as ringtone/ringvideo or System Sounds, removing the card restores default tone/sound (except for Power On Sound). Inserting the same card restores Memory Card file-based tone/sound unless the corresponding setting/file is changed/edited.
- Default ringtone/ringvideo may sound/play for Voice Calls when downloading files, streaming, editing still images, etc.
- S! Application set as Screensaver that also responds to incoming communications may take priority.
- Video files over 3 MB and 3GPP video cannot be set as ringvideo.
Vibration Handset vibrates for incoming communications
Default Off
Main Menu
Settings → Phone Settings (💡) → Sounds &
Alerts → Vibration
Activating/Deactivating
Select an item → Press ⬙ → Select Switch On/Off
→ Press ⬙ → Select On, Link to Sound or Off →
Press
- Link to Sound: Handset vibrates only when ringtone is a compatible SMAF file.
Vibration Pattern
Select an item → Press ⬙ → Select Vibration
Pattern → Press ⬙ → Select from Pattern 1 to
Pattern 5 → Press ●
To check vibration patterns, select one and press ☒ Check.
■ Press ☐ Stop to stop.
Note ▶ Disable vibration when charging.
Event Light
Set Small Light illumination for incoming communications
Default On (Live Monitor: Off)
Main Menu
▶ Settings → Phone Settings (💡) → Sounds & Alerts → Event Light
Activating/Deactivating
Select an item → Press ⬙ → Select On, Link to Sound or Off → Press ⬙
- Select Link to Sound to allow compatible SMAF files to control Small Light. For other SMAF files, Small Light flashes to the main melody.
Status Light
Set Small Light illumination for missed incoming communications
Main Menu
▶ Settings → Phone Settings (💡) → Sounds & Alerts → Status Light
Activating/Deactivating
Select an item → Press ● → Choose On or Off → Press ●
- Default Settings:
| Switch On/Off | |
| For Missed Call On | |
| For New Message On | |
| Hot Status Off | |
| For Answer Phone Off | |
| outMissed Calls On | |
| Bluetooth Notif. Off | |
| Delivery Report Off |
Customising System Sounds
Keypad Tones A tone sounds when a key is pressed
Default Touch Tone
Main Menu
▶ Settings → Phone Settings (○) → Sounds & Alerts → System Sounds → Keypad Tones
Assign Touch Tone
Select Touch Tone → Press ●
Assign a Pattern
Select Pattern 1, Pattern 2 or Pattern 3 → Press ●
To check patterns, select one and press ☑ Play ■ Press ☑ Stop to stop.
Disable Keypad Tone
Choose Off → Press ●
Circle Talk Select a tone for Circle Talk
DefaultXylophone
Main Menu
▶ Settings → Phone Settings (💡) → Sounds & Alerts → System Sounds → Circle Talk
Select a tone → Press ●
To play tones, select one and press Play. Press Stop to stop.
- Earpiece Volume applies to tones during Circle Talk. (Volume setting on P.9-14 applies to Circle Talk ringtones.)
| Other System Sounds | Select tones for errors, power on/off, handset open/close, or charging completion; set duration |
| DefaultWarning Tone: Sound Effect 11 (0.5 seconds)Power On/Off Sound: Off (5 seconds)Handset Open: Sound Effect 14 (2 seconds)Handset Close: Sound Effect 15 (2 seconds)Charge Full: Off (2 seconds) | |
| Main Menu | ▶ Settings ➔ Phone Settings (😊) ➔ Sounds & Alerts ➔ System Sounds |
Sound Patterns in Preset Sounds
| Select an item → Press ⬤ → Select Tone or Sound |
| → Press ⬤ → Select Preset Sounds → Press ⬤ → Select a tone → Press ⬤ |
To play tones, select one and press Play.
■ Press ☒ Stop to stop.
Sound Patterns in Data Folder
| Select an item → Press ⬤ → Select Tone or Sound→ Press ⬤ → Select Ring Songs-Tones → Press ⬤→ Select a file → Press ⬤ |
| To play files, select one and press Play.■Press [REDACTED] to stop. |
Duration
| Select an item → Press ⬤ → Select Duration →Press ⬤ → Select/enter time → Press ⬤ |
- Tone/sound does not play longer than the source regardless of Duration setting.
Disable Tone
| Select an item → Press ⬙ → Select Tone or Sound → Press ⬙ → Choose Off → Press ⬙ |
Additional Sound Settings
Ringer Output Set ringer source when using Headphones, etc.
Default Earphone/Speaker
Main Menu ▶ Settings → Phone Settings (○) → Ringer Output
Select Earphone or Earphone/Speaker → Press ●
- Even if Earphone is selected, ringtone sounds from Speaker when Headphones are not connected.
Earpiece Volume
Setting applies when placing/answering calls
DefaultLevel 3
Main Menu ▶ Settings → Phone Settings (○) → Earpiece Volume
Use ⚙ to adjust level → Press ●
Any Key Answer Activate or cancel Any Key Answer (see P.2-6)
DefaultOff
Main Menu ▶ Settings → Phone Settings (😊) → Sounds & Alerts → Any Key Answer
Choose On or Off → Press ●
Date & Time
See indicated pages for these items.
| World Clock | See P.12-14 | Alarm | See P.12-11 |
Set Date/Time Set the date and time
Main Menu ▶ Settings → Phone Settings (😊) → Date & Time → Set Date/Time
When Time Format is 24 Hour
Enter the year → Enter the month → Enter the day → Enter the time → Press ●
When Time Format is 12 Hour
Enter the year → Enter the month → Enter the day → Enter the time → Use ⏻ to select am or pm → Press ●
Note ▶ •Entry order varies by Date Format (see right). Use the letters below the entry fields as a guide.
- When removing the battery for replacement, etc., Clock settings remain. However, should the handset go without power for an extended period of time (approximately three days), Clock will need to be reset.
Tip ▶ •The day of the week is set automatically.
- When Clock has not been set, --/--/-- --:-- appears for date and time in Call Log, etc.
- To correct numbers, use ⏻ to move cursor and re-enter digits.
- Choose a Clock type or use Calendar for Standby (see P.9-5).
Set Time Zone/
Daylight Saving
Change Time Zone or activate Daylight Saving
Default Time Zone: Tokyo, Daylight Saving: Off
Main Menu
Settings → Phone Settings (💡) → Date & Time
Time Zone
Select Set Time Zone → Press ⬙ → Use ⬙ to select a Time Zone → Press ⬙
If your zone is not preset, press ☑ Custom → Enter city
name (up to 16 characters) → Press ⬤ → Use ⬇ to select
+ or - → Press Ⓞ → Enter time difference → Press ●
Daylight Saving
Select Daylight Saving → Press ● → Choose On → Press ●
To cancel, select Daylight Saving → Press ⬙ → Choose Off → Press ⬙
- Activate Daylight Saving to advance handset local time by one hour.
Date/Time
Format
Change date/time format
Default Time Format: 24 Hour, Date Format: Y/M/D
Main Menu
▶ Settings → Phone Settings (○) → Date & Time
Time Format
Select Time Format → Press ● → Select 24 Hour or 12 Hour → Press ●
Date Format
Select Date Format → Press ⬙ → Select D.M.Y, M-D-Y or Y/M/D → Press ⬙

User Dictionary
Entries (Japanese Only)
Save frequently used words/phrases. Assign a reading (keyword) in hiragana to each entry. In text entry windows, enter a reading and convert. Saved words/phrases appear among word suggestions.
- Save up to 100 entries.
- Save up to five words/phrases per reading.
New Entry Save words/phrases to User Dictionary
Main Menu
▶ Settings → Phone Settings (😊) → User Dictionary → New Entry
Enter a word/phrase → Press ⬙ → Enter a reading (keyword) → Press ⬙
- Enter up to 15 characters per word/phrase and eight characters in hiragana per reading.
Alternatively, in other text entry windows, press Options Select Add to Dictionary → Press ● → Select the first character of text → Press ● → Select the end point → Press ● → Press ● → Enter a reading (keyword) → Press ● → Press ●
Edit/Delete Edit or delete entries
Main Menu
▶ Settings → Phone Settings (💡) → User Dictionary → Saved Word List
Edit
Select a word/phrase → Press ● → Edit the word/phrase → Press ● → Edit reading → Press ● → Choose Yes → Press ●
Delete
Select a work/phrase → Press ☑ Delete → Choose Yes → Press ●
812SH/813SH Download Dictionary (Japanese Only)
Download specialised 812SH/813SH Download Dictionaries from Sharp Space Town Mobile Internet site (see P.15-9). Activate up to five dictionaries at one time to improve handset character conversion. Dictionary words appear among word suggestions.
Acquire Dictionary
Activate downloaded dictionary
Main Menu
▶ Settings → Phone Settings (😊) → User Dictionary → Acquire Dictionary
Select from Dictionary 1 to Dictionary 5 → Press ● → Select a dictionary → Press ● To replace dictionaries, select one and press ● → Select a dictionary → Press ●
Note ▶ Some dictionary files may not be usable.
Cancel Cancel dictionary
Main Menu
▶ Settings → Phone Settings (💡) → User Dictionary → Acquire Dictionary
Select a dictionary → Press ☐ Options → Select Cancel → Press ●
Info View dictionary information
Main Menu
▶ Settings → Phone Settings (😊) → User Dictionary → Acquire Dictionary
Select a dictionary → Press ☑ Options → Select Info → Press ● Press ● to return.
Handset Security
Face Recognition
Activate to automatically lock handset when it is turned on, opened in Standby, or whenever Display is refreshed after Display Saving time, etc. Match live face image with saved one to unlock. When another function is active, etc., Face Recognition window may not open right away. Cancel the function to open Face Recognition window.
Precautions for capturing portrait/scanning face:
■Make sure your face is clearly visible; facial features may be obscured by hair, coloured glasses, masks, etc.
■Face should be lit evenly and brightly (avoid backlight and strong light).
Note
- Identification accuracy is not guaranteed. SoftBank cannot be held liable for misuse or any damages associated with the use of Face Recognition.
- Handset Code is required to activate/cancel Face Recognition. Changing the code (see P.9-28) helps enhance security.
- S! FeliCa is available even when Face Recognition is active.
Saving User Information
Save a name and portrait as well as a question and an answer to the question. In case recognition fails, enter the answer to unlock handset.
- Save up to five users (with up to five portraits each).
- If no question or answer is saved, enter Handset Code to unlock handset.
Main Menu
▶ Settings → Phone Settings (💡) → Locks → Face Recognition → User Registration
1
Enter Handset Code and press ●
2
Select from User 1 to User 5 and press ●
To edit user information, select a user → Press ● To delete users, select one → Press ☒ Delete → Choose Yes → Press ●
3
Select User Name: and press ●
4
Enter name and press ●
5
Select Register Riddle: and press ●
6
Enter a question and press ●
7
Select Register Answer: and press ●
8
Enter the answer and press ●
•Capture and save portrait if not already saved (see below).
9
Press ☐ Save to save
■
Saving Portraits
Save up to five portraits per user. Change location, face angle, accessory, brightness, etc. for each shot.
- Saving multiple portraits increases recognition accuracy. However, security will be compromised.
- A person's portraits can be saved to multiple users; this may increase recognition accuracy.
- Look straight into lens and frame whole face with no expression; adjust face size (may not be saved if too small). Stay still until shooting is completed.
- Follow these steps after Step 8 above.
1
Select Face Image: and press ●
2 Select from Image 1 to Image 5 and press 📄 Capture
To overwrite saved portrait, choose Yes → Press ⬤ To delete portraits, select one → Press ▼ Delete → Choose
Yes → Press ●
■Deleting all portraits cancels Face Recognition.
3 Frame your face on Display and press ●
- Stay still until shooting is completed.
- If Cannot Register. Please change the shooting condition. appears, start over from Step 2.
4 Press ☐ Yes
Portrait is saved.
5 Choose Yes and press ●
Face Recognition is activated.
•To save more, repeat Steps 2 - 4.
- To save user information, press 📄 → then 📅 Save
Note ▶ Do not wear a mask when capturing portraits, even for use with Low(Mask) (see P.9-24 "Security Level").
Activating & Cancelling
- Save a user beforehand.
- Face Recognition is Off by default.
Main Menu
▶ Settings → Phone Settings (💡) → Locks → Face Recognition → Switch On/Off
1 Choose On or Off and press ●
2 Enter Handset Code and press ●
Tip ▶ Activate to automatically lock handset when it is turned on, opened in Standby, or whenever Display is refreshed after Display Saving time, etc.
Scanning Face
Face Recognition window opens when handset is turned on, opened in Standby, or whenever Display is refreshed after Display Saving time, etc.
- Clean dust/smudges from lens cover of Internal Camera with a soft cloth before use.
- When another function is active, etc., Face Recognition window may not open right away. Cancel the function to open Face Recognition window.
1 Face the Display
- To show operational tips, select Panda in Conductor Setting (see P.9-23).
- Handset is unlocked when your face matches saved portrait.
When Face Recognition Fails
■ Under Pwd Key Lock. appears. Follow these steps to unlock handset.
Press ● → Enter Handset Code → Press ●
- To retry Face Recognition, press 📧 Recog
■ When saved question appears, press ●, enter the answer and press ●.
- If the answer is incorrect, Collate failure. appears. Press ⬙ to re-enter the answer, or follow these steps to unlock handset.
Press 📄 → Press ⬤ → Enter Handset Code → Press ⬤
■ While handset is locked, press ☑ to open contact information. - Save contact information first (see P.9-24 "Report").
Tip
When wearing a mask, set Security Level (see P.9-24) to Low(Mask) to make your face recognisable. However, security will be compromised.
Face Recognition Settings
Conductor Setting
Show or hide operational tips during recognition
DefaultOff
Main Menu
▶ Settings → Phone Settings (●) → Locks → Face Recognition → Conductor Setting
Select Off, Preview, Panda or Custom Screen → Press ●
| Off | Under Face Recognition. Please wait...appears. |
| Preview | Internal Camera Viewfinder appears as a guide |
| Panda | Panda graphic appears with operational tips |
| Custom Screen | Custom Screen (see P.9-9) graphic-based guidance appears |
Security Level Select accuracy level
DefaultNormal
| Main Menu | ▶ Settings ➔ Phone Settings (💡) ➔ Locks ➔ Face Recognition ➔ Security Level |
Select High, Normal, Low or Low(Mask) → Press ●
| High | Unsaved faces are least likely recognised by mistake; your face may be hard to recognise |
| Normal Standard recognition accuracy | |
| Low | Your face is most recognisable; unsaved faces are most likely recognised by mistake |
| Low (Mask) | Handset recognises faces with masks. (Accuracy is equal to that of Low.) |
Report
Save contact information to open when Face Recognition fails (see P9-23)
| Main Menu | ▶ Settings ➔ Phone Settings (💡) ➔ Locks ➔ Face Recognition ➔ Report |
Enter Handset Code → Press ● → Enter contact information → Press ●
- Enter up to 128 characters.
PIN
For more information on PIN, see P.1-6.
PIN Entry
Select whether to require PIN every time handset is turned on
DefaultOff
Main Menu
▶ Settings → Phone Settings (😊) → Locks → PIN Entry → Switch On/Off
Choose On or Off → Press ● → Enter PIN1 → Press ●
PIN Lock
PIN1 Lock or PIN2 Lock is activated if PIN1 or PIN2 is incorrectly entered three times consecutively. To cancel PIN1 Lock or PIN2 Lock, follow these steps.
Open a function requiring PIN1 or PIN2 → Enter Personal Unblocking Key (PUK Code) → Press ➕ Enter new PIN1 or PIN2 → Press ➕ Re-enter PIN1 or PIN2 → Press ➕
- For information on Personal Unblocking Key (PUK Code), contact SoftBank Customer Centre, General Information (see P20-29).
- If PUK Code is incorrectly entered ten times consecutively, USIM Card is locked. (Count continues even if handset power is turned off.)
- For procedures required to unlock USIM Card, contact SoftBank Customer Centre, General Information (see P.20-29).
Change PIN Change PIN1 or PIN2
■Activate PIN Entry first.
Main Menu ▶ Settings → Phone Settings (💡) → Locks
PIN1

PIN2

Handset Locks
Password Lock Restrict access to handset functions
■To unlock, enter Handset Code.
Default Off
Main Menu ▶ Settings → Phone Settings (😊) → Locks → Password Lock
Activating Lock when Handset is Closed

One Time Lock

- Password Lock is cancelled once handset is unlocked.
Activating Lock when Handset is Turned On

Cancelling

Tip ▶ Password Lock remains active even if handset power is deactivated, then reactivated.
When Password Lock is Active
In Standby, press ⏻ for 2+ seconds to deactivate handset power, ⏻ for 1+ seconds to activate/cancel Keypad Lock, Ⓞ for 0.74K - Ⓝ to enter Handset Code or Ⓜ to edit Handset Code entry.
During a call, press ⏻ to end the call, press 📋 to show Options, ⬙ to toggle Loudspeaker on/off or switch Video Call images, 📎 to mute/unmute Microphone, 🔒 to switch between callers in Call Waiting, 0224 - 95wv7 to enter Handset Code or 13+24-4 to edit Handset Code entry.
When a call arrives, press ☑ to show Options. Answer calls by pressing ☑, Ⓧ or keys for Any Key Answer (see P.2-6), or place callers on hold by pressing ☐. Press ☑ to forward incoming calls (when No Answer is set for Diverts).
Note ▶ Emergency calls (110, etc.) are possible even when Password Lock is active. See P.2-3 "Emergency Calls".
| IP Service Setting | Enable or disable Hot Status and Circle Talk |
| Default On | |
| Main Menu | ▶ Settings ➔ Phone Settings (💡) ➔ Locks ➔ IP Service Setting |
| Choose On (enable) or Off ➔ Enter Handset Code ➔ Press 🔒 | |
| Phone Book Lock | Protect Phone Book entries from accidental alteration and restrict access to Phone Book information |
| Default Off | |
| Main Menu | ▶ Settings ➔ Phone Settings (💡) ➔ Locks ➔ Phone Book Lock |
| Choose On ➔ Press 🔒 ➔ Enter Handset Code ➔ Press 🔒To cancel, choose Off ➔ Press 🔒 ➔ Enter Handset Code ➔ Press 🔒Enter Handset Code to temporarily cancel Phone Book Lock to access Phone Book entries. | |
| Note ➔ When Phone Book Lock is active, the following Phone Book operations are disabled:■Searching, saving, editing and dialling, including Speed Dial (see P.4-14). | |
| IP Service Setting | Enable or disable Hot Status and Circle Talk |
| Default On | |
| Main Menu | ▶ Settings ➔ Phone Settings (💡) ➔ Locks ➔ IP Service Setting |
| Choose On (enable) or Off ➔ Enter Handset Code ➔ Press 🔒 | |
| Phone Book Lock | Protect Phone Book entries from accidental alteration and restrict access to Phone Book information |
| Default Off | |
| Main Menu | ▶ Settings ➔ Phone Settings (💡) ➔ Locks ➔ Phone Book Lock |
| Choose On ➔ Press 🔒 ➔ Enter Handset Code ➔ Press 🔒To cancel, choose Off ➔ Press 🔒 ➔ Enter Handset Code ➔ Press 🔒Enter Handset Code to temporarily cancel Phone Book Lock to access Phone Book entries. | |
| Note ➔ When Phone Book Lock is active, the following Phone Book operations are disabled:■Searching, saving, editing and dialling, including Speed Dial (see P.4-14). | |
| Fixed Dialling No. | Allow calls only to designated numbers | |
| Main Menu | ► Settings ➔ Phone Settings (*) ➔ Locks ➔ Restrict Modes ➔ Fixed Dialling No. | |
| Activating/Cancelling Fixed Dialling No.Select Switch On/Off ➔ Press ● ➔ Choose On ➔ Press ● ➔ Choose Yes ➔ Press ● ➔ Enter PIN2 ➔ Press ●To cancel, choose Off ➔ Press ● ➔ Enter PIN2 ➔ Press ●Designating NumbersSelect Edit Dial List ➔ Press ● ➔ Select a list ➔ Press ● ➔ Enter PIN2 ➔ Press ● ➔ Select an entry ➔ Press ● ➔ Edit entry ➔ Press ● ➔Press ▼▼ Save | ||
| Editing ListsSelect Edit Dial List ➔ Press ● ➔ Select a list ➔ Press ▼▼ Options ➔ Select Edit ➔ Press ● ➔ Enter PIN2 ➔ Press ● ➔ Select an entry ➔ Press ● ➔ Edit entry ➔ Press ● ➔ Press ▼▼ Save | ||
| Deleting ListsSelect Edit Dial List ➔ Press ● ➔ Select a list ➔ Press ▼▼ Options ➔ Select Delete ➔ Press ● ➔ Enter PIN2 ➔ Press ● ➔ Choose Yes ➔ Press ● | ||
| Note ➔ This function is available only for compatible USIM Cards.To send SMS to designated numbers, save SMS Centre Number (+819066519300) to Fixed Dialling No. list. (Do not change Centre Number unless instructed to do so.) | ||
Packet Lock Disable packet transmissions
DefaultOff
Main Menu
▶ Settings → Phone Settings (💡) → Locks → Restrict Modes → Packet Lock
Choose On → Press ● → Choose Yes → Press ●
→ Enter PIN2 → Press ● ■ To cancel, choose Off → Press ● → Enter PIN2 → Press ●
Note ▶ This function is available only for compatible USIM Cards.
Opening Secret Entries
Activate Show Secret Data to open Secret entries.
Show Secret Data
Activate or cancel Show Secret Data
DefaultOff
Main Menu
▶ Settings → Phone Settings (😊) → Locks → Show Secret Data
Choose On → Press ● → Enter Handset Code → Press ●
To cancel, choose Off → Press ●
Note ▶ Do not save confidential information in Phone Book/schedule entries. Handset Code and thus Secret entries may be compromised.
When Show Secret Data is Off
■ Phone Book Names/Picture images do not appear for calls/mail from numbers/addresses in Secret entries. Personal ringtones/ringvideos are disabled. Names for numbers in Secret entries do not appear in Call Log or list of received messages.
Changing Handset Code
Chng
Handset Code
Whenever necessary, change Handset Code
Default9999
Main Menu
▶ Settings → Phone Settings (◎) → Locks → Chng Handset Code
Enter current Handset Code → Press ● → Enter new Handset Code → Press ● → Re-enter new Handset Code → Press ●
Reset
Reset Settings
Cancel custom settings and return handset functions to their default settings
Main Menu
▶ Settings → Phone Settings (○) → Master Reset → Reset Settings
Enter Handset Code → Press ● → Choose Yes → Press ● → Choose Yes → Press ●
•Phone Book entries, etc. are unaffected.
- A confirmation appears (before entering Handset Code) in the following cases. Choose Yes and press Ⓞ to proceed.
■ S! Application is paused
■ Music Player is active
■ Bluetooth ® is active
■ Infrared is active
Note
Some default settings may not be restored.
Reset All
Clear all Phone Book entries, Data Folder files, etc.
Main Menu
Settings → Phone Settings (💡) → Master Reset Reset All
Enter Handset Code → Press ⬙ → Choose Yes → Press ⬙ → Choose Yes → Press ⬙
- A confirmation appears (before entering Handset Code) in the following cases. Choose Yes and press Ⓞ to proceed.
■ S! Application is paused
■ Music Player is active
■ Bluetooth ® is active
■ Infrared is active
Note Files and records deleted by Reset All cannot be restored. Handset Code returns to the default setting. Reset All deletes downloaded S! Applications and Lifestyle-Appli.
- カスタモご紹介 in Data Folder (Custom Screens) and S! Applications are restored.
- Reset All is disabled if IC Card (see P.17-2) data remains. Delete IC Card data beforehand.
Call Settings
See indicated pages for these items.
| Voicemail/Divert | See P.13-4, P.13-2 | Show My Number | See P.13-10 |
| Call Waiting | See P.13-5 | Call Barring | See P.13-7 |
International Call
Int'l Prefix Save frequently used international prefix
Default0046010
Main Menu
▶ Settings → Call/Video Call (😊) → Int'l Calling → Int'l Prefix
Enter Handset Code → Press ● → Enter a prefix → Press ●
Country Codes Change, add or delete Country Codes
Main Menu ▶ Settings → Call/Video Call (😊) → Int'l Calling → Country Codes
Change
Select a country → Press ⬤ → Select Change → Press ⬤ → Enter country name → Press ⬤ → Enter country code → Press ⬤
Add
Select
Delete
Select a country → Press ● → Select Delete → Press ● → Choose Yes → Press ●
Auto Add Code
Add a preset country code automatically when placing calls
DefaultOff/Country Code: 81 (Japan)
Main Menu
Settings → Call/Video Call (😊) → Int'l Calling → to Add Code
Activating/Deactivating
Select Switch On/Off → Press ● → Choose On or Off → Press ●
Set Country Code
Select Country Code → Press ● → Select a country → Press ●
To enter a country code, select Enter Code in Country Code list → Press → Enter country code → Press
Note ▶ When Auto Add Code is active, preset country code is added to all phone numbers (except emergency call numbers) unless + is included.
Auto Answer
Set handset to answer Voice Calls automatically when using Headphones or handsfree devices.
When Auto Answer is active, Auto Answer tone sounds after ringtone (even in Manner mode).
- To avoid unintentional activation, cancel Auto Answer after use.
- Handsfree device Auto Answer tone varies by device.
•Ringtone/Auto Answer Tone Availability:
| Handset | Headphones | Handsfree Devices | |
| Ringtone Available | 1 | Available Available | Available |
| Auto Answer Tone | Available Available - | 2 | |
1 Not available in Manner mode.
2 Varies by device.
Tip ▶ To set handset to answer Video Calls automatically, see P.5-8 "Remote Monitor".
Switch On/Off Activate or cancel Auto Answer
DefaultOff
Main Menu ▶ Settings → Call/Video Call (○) → Auto Answer
Enter Handset Code → Press ● → Select Switch On/Off → Press ● → Choose On or Off → Press ●
Answer Time
Adjust ring time between 1 and 30 seconds (Auto Answer waits to answer calls)
Default5 seconds
Main Menu ▶ Settings → Call/Video Call (○) → Auto Answer
Enter Handset Code → Press ● → Select Answer Time → Press ● → Enter time → Press ●
Additional Settings
Minute Minder Handset beeps once each minute during calls
Default Off
Main Menu ▶ Settings → Call/Video Call (💡) → Minute Minder
Choose On (handset beeps) or Off → Press ●
- Handset beeps every minute.
Display Call Cost
Show or hide Call Cost after each call
DefaultOff
Main Menu ▶ Settings ▶ Call/Video Call (😊) ▶ Disp. Time/Call → Display Call Cost
Choose On (show) or Off → Press ●
Call Time Counter
Show or hide elapsed Call Time during a call
DefaultOn
Main Menu ▶ Settings → Call/Video Call (😊) → Disp. Time/Call → Call Time Counter
Choose On (show) or Off → Press ●
Connectivity
Bluetooth®
Getting Started
Bluetooth ® is a wireless technology that allows 812SH and 813SH to communicate with other 812SH and 813SH within ten metres or with other compatible devices (PCs, mobile phones, handsfree devices, etc.). In this chapter, "files" refers collectively to the following: Bookmarks, Tasks, Text Templates, Phone Book and Calendar entries; Messaging and Data Folder files.
Handset Bluetooth ® Specifications:
| Communication System | Bluetooth® specification Ver 2.0 |
| Bluetooth® Profiles Supported | Headset ProfileHands-Free ProfileDial-up Networking ProfileObject Push ProfileFile Transfer ProfileBasic Imaging Profile |
| Output | Bluetooth® Power Class 2 |
Note Bluetooth ® connection may not be possible with some Bluetooth ® devices.
- Handset shall be connected to certified Bluetooth ® devices that meet the specification standards developed by Bluetooth SIG.
- Depending on characteristics or specifications of the certified Bluetooth devices, connection or data transfers may fail, or operational procedures, display content and actual operations may differ from those described in this manual.
- Noise may interfere with wireless or handsfree conversations depending on the status of connected devices or signal conditions.
- For details about headset/handsfree devices, see the device manuals.
Precautions
- Bluetooth® connections are available with compatible devices supporting the same profile.
- Bring handsets to within ten metres. Bluetooth® connection/transfer rate is affected by distance between handsets, obstructions, signal conditions, handset status, etc.
- Bluetooth operates in the 2.4 GHz unlicensed frequency band. Depending on the status of other devices used in the spectrum, Bluetooth connection may slow down/terminate, or the range may decrease.
Activating Bluetooth®
Activate Bluetooth ® before receiving files or connecting handset to handsfree devices.
Bluetooth ® is Off by default.
Main Menu
▶ Settings → Connectivity (💡) → Bluetooth → Switch On/Off
1 Choose On and press ●
appears.
To cancel, choose Off → Press ●
■ When transmission is in progress, choose Yes → Press ●
Note Handset must be in Standby to accept connection requests from other devices or to receive files; these functions are disabled even in Standby if Password Lock/Keypad Lock is active or firmware update is in progress.
Bluetooth® Connection
Activate Bluetooth ® (see P.10-2) on recipient device. Connection starts when a request is received from the other device. (Authorisation Code may be required.)
Example
![graph TD A["Sender Recipient"] --> B["Search for devices"] B --> C["Select device"] C --> D["Request connection"] D --> E["Enter the same Authorisation Code\nConnection completes"] E --> F["Send"] E --> G["Receive"] H["Activate Bluetooth®"] --> I["Accept"] I --> E style A fill:#d4edda,stroke:#333 st…](/content/2026/07/1509125/images/54ebbfb829bdf4b43ba0f1ca63ba687483f2c424acfa64be19159246255be890.jpg)
Authorisation Code
■Authorisation Codes (4 to 16 digits) are specific for Bluetooth® connection. Pairing is possible when Authorisation Codes of both devices match. •Authorisation Codes are not necessary for paired devices.
Device Search & Pairing
Search for Bluetooth ® devices for pairing.
•Authorisation Codes are not necessary for paired devices.
- Search for up to 16 devices at a time.
- Device search is disabled if 32 devices are already registered.
- Activate Bluetooth on devices to be paired with.
Main Menu
Settings ➔ Connectivity (●) ➔ Bluetooth
1 Select Search for Devices and press ●
Found devices are listed after search. (The previous search result appears, if any.) • Device names appear with corresponding indicators (☑, etc.). Press ☑ Cancel to cancel.
2 Select a device and press Ⓞ Pairing
When transmission is in progress, choose Yes → Press ●
3 Enter the same Authorisation Code (4 to 16 digits) for handset and the other device and press ●
When pairing is complete, Pairing is successful. appears. - For handsfree devices, enter specified Authorisation Code - Complete code entry within 30 seconds.
4 Press
Pairing with Handsfree Devices
Start device search with handsfree devices for pairing.
Handset receives a connection request → Choose Yes
→ Press ● → Enter Authorisation Code → Press ●
- Activate Bluetooth (see P.10-2) on handset and set Visibility (see below) to Show My Phone.
Opening Paired Device List
Main Menu ▶ Settings → Connectivity (○) → Bluetooth
1 Select Paired Devices and press ●
List of all paired devices appears.
To open list of handsfree devices only, press Ⓞ.
To rename paired devices, select one → Press Options → Select Change Name → Press ● → Enter name (up to 16 characters) → Press ●
To delete paired devices, select one → Press ☑ Options → Select Delete → Press ● → Choose Yes → Press ●
Visibility
Make handset visible to other Bluetooth ® devices.
- Set Visibility to Hide My Phone to cloak handset.
- Visibility is set to Show My Phone by default.
Main Menu ▶ Settings → Connectivity (😊) → Bluetooth → My Device Settings → Visibility
1 Select Show My Phone or Hide My Phone and press ●
Transferring Files via Bluetooth®
Transfer Options
| One File Transfer | Transfer files one at a time. Received files are saved to corresponding functions. |
| All File Transfer Trasfer all files by function | |
| Receive Folder | Receive a folder and its contents. Folders are saved to Data Folder. (Handset does not support sending folders.) |
Note • Bluetooth ® transfers activate Offline Mode. Thus, transfers are disabled during calls, while receiving calls, using the Internet or Media Player, sending/receiving messages or accessing Server Mail. Offline Mode is cancelled after transfers.
• Some files may not be saved correctly.
Transferable Files
| Function One File All | Files Notes | ||
| Phone Book | Available | AvailableOne File Transfer omits Category, Tone/Video, Vibration and Secret. Picture may be omitted; transfer image alone then reset as Picture. | |
| Calendar Available | Available 1 | One File Transfer resetsReminder Tone/Video to Alert 1 and omits Secret setting.Received entries with unsetable start date/time (0:00 AM on 1 January 2016 or later) cannot be saved. | |
| Tasks Available | Available 1 | One File Transfer resetsReminder Tone/Video to Alert 1 and omits Secret setting.Received entries with unsetable due date/time (0:00 AM on 1 January 2016 or later) are saved asNo limit. | |
| Text Templates | Available 2 | Available | |
| Bookmarks | Available | Available 3 | |
| Received Msg. | N/A 4 | Available 5 | |
| Sent Messages | N/A 4 | Available | |
| Drafts N/A | 4 | Available 6 | |
| Templates Available | Available 7 | Copy protected files are not transferable. | |
| Data Folder | Available | Available 7 | Copy protected files are not transferable. Send files from DCIM folder one at a time;received DCIM folder files are saved to Pictures folder. |
1 In All File Transfers, Calendar and Tasks are sent together from Appointments/Tasks.
2 Only receiving files is supported.
3 All File Transfers send all Yahoo! Keitai, Streaming and PC Site Browser Bookmarks; Streaming Bookmarks are saved in Yahoo! Keitai Bookmarks.
4 Received files are saved to Other Documents folder as unknown files and cannot be used as messages.
5 All File Transfers save Spam Folder messages to the incoming message folder on recipient SoftBank handsets (except 812SH and 813SH) and S! Mail Notices as standard messages, invalidating complete message retrieval.
6 In All File Transfers, SMS addressed to multiple recipients may not be saved on recipient SoftBank handsets (except 812SH and 813SH), or only the first entered recipient remains.
7 Receive folders one at a time into handset Data Folder.
Note
- Handset stores up to 300 entries between Calendar and Tasks. If the limit is reached during a transfer, the remaining entries will not be received.
- Transfer most Memory Card Data Folder files one at a time. Send DCIM folder files one by one; received DCIM files are automatically saved in Pictures folder.
- Unsent Messages are not transferable.
- Messages may not be received depending on the size.
•Large Bookmarks may not be received correctly. - Handset stores up to 500 messages between Drafts, Unsent Messages and Sent Messages. If the limit is reached during a transfer, the remaining messages will not be received.
•Sky Mail may be received as S! Mail on handset depending on the sender SoftBank handset. - Receiving Messaging folders cancels Secret folder settings and deletes auto sort keys.
One File Transfer
Sending
Send one file from Phone Book, Calendar, Tasks, Bookmarks, Templates or Data Folder (see P.10-4 "Transferable Files").
1 Select a file and press 📧 Options
2 Select Send, Send Entry or Send My Card and press Ⓞ
3 Select Via Bluetooth and press ●
- When there is no entry in Paired Devices, device search starts.
To send files to unpaired devices, select More Devices → Press ⬙️ → Press 📋 Refresh → Device search starts
4 Select a device and press ●
When transmission is in progress, choose Yes → Press ●
5 Prepare recipient device
6 Choose Yes and press ●
Offline Mode is set and transfer starts.
When requested, enter Authorisation Code → Press ●
Receiving
Main Menu
▶ Settings → Connectivity (○) → Bluetooth → Switch On/Off
1 Choose On and press ●
Bluetooth ® is activated.
2 When connection is requested, Calling not available during operation, OK? appears
To accept connection request from unpaired devices, choose Yes → Press ● → Enter Authorisation Code → Press ●
3 Choose Yes and press ●
Offline Mode is set.
4 Transfer starts and confirmation appears
Press ☐ Cancel to cancel.
Press 📞 to end.
5 Choose Yes and press Ⓞ to save
To cancel transfer, choose No → Press ● → Choose Yes → Press ●
For Data Folder files, select Phone or Memory Card → Press ⬙
All File Transfer
|Sending
Main Menu ▶ Settings → Connectivity (○) → Bluetooth
1 Select Send All and press ●
- When there is no entry in Paired Devices, device search starts.
To send files to unpaired devices, select More Devices → Press ⬙️ → Press 📋 Refresh → Device search starts
2 Select a device and press ●
When transmission is in progress, choose Yes → Press ●
3 Choose Yes and press ●
Offline Mode is set.
4 Enter Handset Code and press ●
5 Prepare recipient device
6 Select an item and press ●
Transfer starts.
When requested, enter Authorisation Code → Press ●
For Phone Book, choose Yes or No → Press ●
Receiving
Main Menu ▶ Settings → Connectivity (😊) → Bluetooth → Switch On/Off
1 Choose On and press ●
Bluetooth® is activated.
2 When connection is requested, Calling not available during operation, OK? appears
To accept connection request from unpaired devices, choose Yes → Press ● → Enter Authorisation Code → Press ●
3 Choose Yes and press ●
Offline Mode is set.
4 Transfer starts and confirmation appears
Press ☐ Cancel to cancel.
Press 🔒 to end.
5 Adding Files
1 Select As New Items and press ●
When transfer completes, handset returns to Standby.
Press ☐ Cancel to cancel.
Press 🔒 to end.
Overwriting Existing Files
1 Select Delete All & Save and press ●
2 Choose Yes and press ●
3 Enter Handset Code and press ●
When transfer completes, handset returns to Standby.
- When Phone Book is overwritten, My Details except handset phone number is overwritten as well.
Press ☐ Cancel to cancel.
Press 🔗 to end.
Receiving Folders
Receive folders from compatible devices and save to handset Data Folder.
- Handset does not support sending folders.
- Handset receives folders when it can newly create a folder, or the same folder name exists in the same layer as that of sender's.
- For sender's procedures, see the device manual.
Main Menu
▶ Settings → Connectivity (◎) → Bluetooth → Switch On/Off
1 Choose On and press ●
Bluetooth ® is activated.
2 When connection is requested, Calling not available during operation, OK? appears
To accept connection request from unpaired devices, choose Yes → Press ● → Enter Authorisation Code → Press ●
3 Choose Yes and press ●
Offline Mode is set and transfer starts. When finished, handset returns to Standby.
Press ☐ Cancel to cancel.
Press 🔒 to end.
Connecting Handsfree Devices
Pair with handsfree devices beforehand (see P.10-3).
Main Menu
▶ Settings → Connectivity (●) → Bluetooth → Paired Devices
1 Press
List of paired handsfree devices appears.
2 Select a device and press ●
The device is connected and ☑ (checked) appears.
When transmission is in progress, choose Yes → Press ●
To disconnect, select a device → Press ●
To rename paired devices, select one→ Press 📋 Options →
Select Change Name → Press ● → Enter name → Press ●
Sound Output
■ Switch sound output between handset and handsfree devices.
While talking on the phone, press ☑ Options → Select Transfer Audio → Press ● → Select To Phone or To Bluetooth → Press ●
- Select To Phone to talk on handset.
- If To Bluetooth is selected, list of paired handsfree devices appears.
Note
- While talking on handsfree devices, adjust volume on the device.
- Place calls from handsfree devices while handset is in Standby.
Tip
• Devices marked with ☑ reconnect to handset when placing or receiving calls.
- □ indicates that the device is not selected. When □ is set to the connected device, a confirmation appears.
Bluetooth® Settings
Device Name
Specify a Bluetooth ® name for handset
Default812SH or 813SH
Main Menu
▶ Settings → Connectivity (😊) → Bluetooth → My Device Settings → Device Name
Enter name → Press ●
- Enter up to 16 characters. (Pictograms are not available.)
Bluetooth Timeout
Set idle time after which Bluetooth ® is cancelled
Default No Timeout
Main Menu
▶ Settings → Connectivity (😊) → Bluetooth → My Device Settings → Bluetooth Timeout
Select time → Press ●
To cancel, select No Timeout → Press ●
Handsfree Setting
Select whether to talk handsfree when placing calls from handset
Default Handsfree Mode
Main Menu
▶ Settings → Connectivity (😊) → Bluetooth → My Device Settings → Handsfree Setting
Choose Handsfree Mode or Private Mode → Press

- When placing calls from handsfree devices, only handsfree conversation is available regardless of setting.
My Device Details
Open Bluetooth ® -related handset properties
Main Menu
▶ Settings → Connectivity (😊) → Bluetooth
Select My Device Details → Press ●
Infrared
Getting Started
Infrared is a wireless technology that allows 812SH and 813SH to communicate with other 812SH and 813SH or with other compatible devices (PCs, mobile phones, etc.). In this chapter, "files" refers collectively to the following: Bookmarks, Tasks, Text Templates, Phone Book and Calendar entries; Messaging and Data Folder files.
- 812SH and 813SH comply with IrMC 1.1, but some files may not be exchanged.
• Infrared transfers are disabled while sending/receiving mail or using the Internet.
•Transfers in direct sunlight, under fluorescent lighting or near infrared equipment may fail.

When transfer fails, Device not found. Reconnect? appears. Take the precautions below then choose Yes and press ⬙ to try again.
Authorisation Code
■Authorisation Codes (four digits) are specific for infrared transfers. All File Transfers are possible when Authorisation Codes of both devices match.
Precautions
- Align Infrared Ports within 20 centimetres with no obstructions between handsets.

- Keep Infrared Ports aligned during transfer.
- Dust/oil may impair file transfers; clean Infrared Ports with a soft cloth beforehand.
Transferring Files via Infrared
Transfer Options
| One File Transfer | Transfer files one at a time. Received files are saved to corresponding functions. |
| All File Transfer Transfer all files by function | |
| Receive Folder | Receive a folder and its contents. Folders are saved to Data Folder. (Handset does not support sending folders.) |
| High-Speed Infrared (see P.10-12) | Transfer JPEG files one at a time from Data Folder (Pictures or DCIM). Received files are saved to Pictures folder. |
Note
- Transfers are disabled while using the Internet or Media Player, while editing mail or files, etc.
- Some files may not be saved in whole or part.
- Only compatible devices receive files transferred via high-speed infrared.
Transferable Files
| Function O | One File All | Files Notes | |
| Phone Book | Available | Available | One File Transfer omits Category, Tone/Video, Vibration and Secret. Picture may be omitted; transfer image alone then reset as Picture. |
| Calendar Available | Available1 | One File Transfer resets Reminder Tone/Video to Alert 1 and omits Secret setting. Received entries with unsetable start date/time (0:00 AM on 1 January 2016 or later) cannot be saved. | |
| Tasks Available | Available1 | One File Transfer resets Reminder Tone/Video to Alert 1 and omits Secret setting. Received entries with unsetable due date/time (0:00 AM on 1 January 2016 or later) are saved as No limit. | |
1 In All File Transfers, Calendar and Tasks are sent together from Appointments/Tasks.
| Function O | One File All | Files Notes | |
| Text Templates | Available 2 | Available | |
| Bookmarks | Available | Available 3 | |
| Received Msg. | N/A 4 | Available 5 | |
| Sent Messages | N/A 4 | Available | |
| Drafts N/A | 4 | Available 6 | |
| Templates Av | available | Available 7 | Copy protected files are not transferable. |
| Data Folder | Available | Available 7 | Copy protected files are not transferable. Send files from DCIM folder one at a time; received DCIM folder files are saved to Pictures folder. |
2 Only receiving files is supported.
3 All File Transfers send all Yahoo! Keitai, Streaming and PC Site Browser Bookmarks; Streaming Bookmarks are saved in Yahoo! Keitai Bookmarks.
4 Received files are saved to Other Documents folder as unknown files and cannot be used as messages.
5 All File Transfers save Spam Folder messages to the incoming message folder on recipient SoftBank handsets (except 812SH and 813SH) and S! Mail Notices as standard messages, invalidating complete message retrieval.
6 In All File Transfers, SMS addressed to multiple recipients may not be saved on recipient SoftBank handsets (except 812SH and 813SH), or only the first entered recipient remains.
7 Receive folders one at a time into handset Data Folder.
Note
- Handset stores up to 300 entries between Calendar and Tasks. If the limit is reached during a transfer, the remaining entries will not be received.
- Transfer most Memory Card Data Folder files one at a time. Send DCIM folder files one by one; received DCIM files are automatically saved in Pictures folder.
- Unsent Messages are not transferable.
- Messages may not be received depending on the size.
•Large Bookmarks may not be received correctly. - Handset stores up to 500 messages between Drafts, Unsent Messages and Sent Messages. If the limit is reached during a transfer, the remaining messages will not be received.
•Sky Mail may be received as S! Mail on handset depending on the sender SoftBank handset. - Receiving Messaging folders cancels Secret folder settings and deletes auto sort keys.
One File Transfer
Sending
Send one file from Phone Book, Calendar, Tasks, Bookmarks, Templates or Data Folder (see P.10-11 "Transferable Files").
1 Select a file and press 📧 Options
2 Select Send, Send Entry or Send My Card and press Ⓞ
3 Select Via Infrared and press ●
4 Prepare recipient device
5 Choose Yes and press ●
Offline Mode is set and transfer starts. When finished, file list returns.
Transferring Images via High-Speed Infrared
■ Follow these steps to send images to compatible devices.
Press ⬙ → Select Data Folder → Press ⬙ →
Select Pictures or DCIM → Press ⬙ → Select a file → Press ☑ (Long Press)
•Only JPEG images are supported.
- Transfers are one-way; start regardless of recipient device status and end even if files are not received.
- For recipient's procedures, see "Receiving" below.
Receiving
Main Menu
▶ Settings → Connectivity (○) → Infrared → Switch On/Off
1 Choose On (3 min.) and press ●
Infrared is activated and handset returns to Standby.
• Acquire infrared transmission within three minutes.
2 When connection is requested, Calling not available during operation, OK? appears
•High-speed infrared transfers activate Offline Mode.
3 Choose Yes and press ●
Offline Mode is set.
4 Transfer starts and confirmation appears
Press ☐ Cancel to cancel.
Press 🔒 to end.
5 Choose Yes and press Ⓞ to save
To cancel transfer, choose No → Press ● → Choose Yes → Press ●
For Data Folder files, select Phone or Memory Card → Press ●
■Files are automatically saved to handset or Memory Card depending on available memory.
Note
- Handset must be in Standby to receive files; this function is disabled even in Standby if Password Lock/Keypad Lock is active or firmware update is in progress.
•High-speed infrared transfer supports JPEG files only. Send up to 1.8 MB per transfer to 812SH or 813SH.
All File Transfer
Sending
Main Menu
Settings
Connectivity (○)
→ Infrared
1 Select Send All and press ●
2 Choose Yes and press ●
Offline Mode is set.
3 Enter Handset Code and press ●
4 Select an item and press ●
5 Prepare recipient device
6 Enter Authorisation Code and press ●
Transfer starts. When finished, Send All menu returns.
For Phone Book, choose Yes or No → Press ●
|Receiving
Main Menu
▶ Settings → Connectivity (◎) → Infrared → Switch On/Off
1 Choose On (3 min.) and press ●
Infrared is activated and handset returns to Standby. • Acquire infrared transmission within three minutes.
2 When connection is requested, Calling not available during operation, OK? appears
3 Choose Yes and press ●
Offline Mode is set.
4 Enter Authorisation Code and press ●
- Enter the same Authorisation Code as sender's.
5 Transfer starts and confirmation appears
Press ☑ Cancel to cancel.
Press 🔒 to end.
6 Adding Files
1 Select As New Items and press ●
When transfer completes, handset returns to Standby.
Press ☐ Cancel to cancel.
Press 🔒 to end.
Overwriting Existing Files
1 Select Delete All & Save and press ●
2 Choose Yes and press ●
3 Enter Handset Code and press ●
When transfer completes, handset returns to Standby.
- When Phone Book is overwritten, My Details except
handset phone number is overwritten as well.
Press ☑ Cancel to cancel.
Press 🔒 to end.
Receiving Folders
Receive folders from compatible devices and save to handset Data Folder.
- Handset does not support sending folders.
- Handset receives folders when it can newly create a folder, or the same folder name exists in the same layer as that of sender's.
- For sender's procedures, see the device manual.
Main Menu
▶ Settings → Connectivity (😊) → Infrared → Switch On/Off
1 Choose On (3 min.) and press ●
Infrared is activated and handset returns to Standby.
•Acquire infrared transmission within three minutes.
2 When connection is requested, Calling not available during operation, OK? appears
3 Choose Yes and press ●
Offline Mode is set and transfer starts. When finished, handset returns to Standby.
- If the same folder name exists, received files are saved there.
Press ☐ Cancel to cancel.
Press 🔒 to end.
Network Settings
See P.2-16 for information on Select Service.
Select Network Select a Network to connect
Default Automatic
Main Menu
▶ Settings → Network Settings (😊) → Select Network
Select Manual → Press ⬙ → Select a Network → Press ⬙
To change Network automatically, select Automatic Press
- Use default setting unless connecting to a specific Network.
Set Preferred
Set priority of Networks to be selected when Automatic is set for Select Network
Main Menu
▶ Settings → Network Settings (○) → Select Network → Set Preferred
Inserting Network
Select a place to insert → Press ⬙ → Select Insert
Press ● → Select a Network → Press ●
•Network is inserted above the selected entry.
Adding Network to the End
Press ⬙ → Select Add to End → Press ⬙ → Select a Network → Press ⬙
Deleting Network
Select a Network → Press ● → Select Delete → Press ●
Add, Edit & Delete
Main Menu
Add, edit or delete Networks
▶ Settings → Network Settings (◎) → Select Network → Add New Network
Adding Network
Select Add → Press ⬙ → Enter country code →
Press ● ➔ Enter a Network code ➔ Press ● ➔
Enter name → Press ● → Press ● → Select Select
NW Type → Press ⬙ → Select a Network type →
- Add up to five Networks.
- After selecting Add New Network and pressing , Network list appears if Network has already been added. In this case, press again and perform above operations.
- Use up to three digits for country code and Network code, and up to 25 single-byte alphanumerics for name.
Press
Editing Network
Select a Network → Press ● → Select Change → Press ● → Edit settings
- Edit in the same manner as in "Adding Network" above.
Deleting Network
Select a Network → Press ● → Select Delete → Press ●
Network Info Check Network Information
Main Menu
Settings → Network Settings (💡)
Select Network Info → Press ●
Retrieve NW Info
Retrieve Network Information manually
Main Menu
Settings → Network Settings (◎)
Select Retrieve NW Info → Press ● → Choose Yes → Press ●
Location Info
URL Setting Set URL of map information provider
Main Menu
▶ Settings → Network Settings (😊) → Location Info → URL Setting
Select URL → Press ●
To view complete URLs, select one → Press ☑ Options → Select Display → Press ●
To edit URLs, select one → Press 📧 Options → Select Edit
→ Press ⬙ → Edit URL → Press ⬙
■Default URL cannot be edited.
To delete URLs, select one → Press 📧 Options → Select
Delete → Press ● → Choose Yes → Press ●
■Default URL cannot be deleted.
To add URLs, select
![graph TD A["Datum On/Off"] --> B["Select whether to send Location Information automatically upon request"] C["Main Menu"] --> D["Settings ➕ Network Settings (💡) ➕ Location Info ➕ Datum On/Off"] E["Choose On (send) or Off ➕ Enter Handset Code ➕ Press ⬙"] F["Location Property"] --> G["Set Location Inf…](/content/2026/07/1509125/images/c6ac6d56ce1433e4dd8bb81c7bece191d71aaa77b840785c43137cf1bad47ef0.jpg)
Select Always Confirm, Send or Do not Send → Press ● ➔ Enter Handset Code ➔ Press ●
Memory Card
Memory Card
812SH and 813SH are compatible with microSD TM Memory Card.
- Format a new microSD™ Memory Card for use with handset (see P.11-4).
- To learn how to save a particular file to Memory Card, refer to that section of the manual.
Keep Memory Card out of children's reach; may cause suffocation if swallowed.
Note
- SoftBank is not liable for any damages resulting from accidental loss/alteration of information. Keep a copy of Phone Book entries, etc. in a separate place.
- microSD™ Memory Cards do not have Write Protection Switch. There is a risk of accidental erasure or overwriting of files.
Tip
To reduce risk of malfunction, use only recommended microSD™ Memory Cards. For information on compatibility with microSD™ Memory Cards, access the following Website:
■From Handset
Sharp Space Town Mobile Internet site (Japanese only)
■From PC
http://k-tai.sharp.co.jp/peripherals/sd_support.html (SHARP ケータイ daSH is available in Japanese only.)
Precautions
- To reduce risk of malfunction, use only recommended microSD™ Memory Cards.
- Turn handset power off before inserting or removing a Memory Card.
- Do not place labels or stickers on Memory Card. These items may affect card performance or result in lost information.
- Use an oil-based felt pen to write on Memory Card. Using a pencil or ballpoint pen may damage the card or result in lost information.
- Never disassemble or modify a Memory Card.
- Do not expose Memory Card to strong impacts, pressure or liquids.
- Do not touch Memory Card terminals or expose them to metal objects.
- Do not expose Memory Card to direct sunlight or excessive heat (e.g. inside vehicles, etc.).
- Do not expose Memory Card to static electricity or electrical noise.
- Keep a Memory Card away from dust or high humidity.
- Do not use in the presence of corrosive gases.
- Avoid heat sources and do not dispose of in fire.
- A Memory Card is a consumable item. Card performance deteriorates with usage.
Inserting & Removing Memory Card
Inserting
Turn handset power off.
1 Open cover

2 With logo side down, insert card until it clicks.

3 Close cover
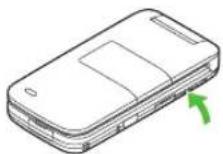
Removing
Turn handset power off.
1 Open cover and gently push down on card - With a light push, card pops out.

2 Remove card • Using the notch on its edge, pull card straight out.

3 Close cover
Note
- Do not force Memory Card into or out of handset; damage may result.
- When 📋 appears, Memory Card may not be connected properly; reinsert the card.
- Do not insert other objects into Memory Card slot; may damage handset/card.
- Never remove Memory Card or battery while files are being accessed. Damage to handset/card may result and files/data may be damaged/lost.
Tip
Insert a Memory Card and turn handset power on. Standby appears. Memory Card load times vary by card size and the amount of information saved.
Format Card
When using a new microSD ™ Memory Card, format it on handset for use with handset before trying to save files, etc.
Main Menu
▶ Settings → Connectivity (◎) → Memory Card → Format Card
1 Choose Yes and press ●
Offline Mode is set.
2 Enter Handset Code and press ●
3 Choose Yes and press ●
Note
- Before formatting a Memory Card, make sure there is no important information saved on the card. Format Card deletes all files from Memory Card.
- Never remove Memory Card or battery while formatting.
- An improperly formatted Memory Card may not function as it should with 812SH or 813SH.
Backup & Restore
Back up information to Memory Card, and restore to handset in case of accidental loss/alteration of data.
- All contents are copied to Memory Card as a single file. (File name is the date of transfer.)
- The following folders/entries can be transferred at once:
■ Received Msg. ■ Drafts ■ Sent Messages
■ Templates ■ Phone Book ■ Contact Groups
■ Calendar ■ Tasks ■ Text Templates
■ Bookmarks ■ User Dictionary ■ My Pictograms
■Content Keys
- Templates and My Pictograms are not copied as a single file.
- Unsent Messages are not transferable.
- Select an item to back up or transfer all at once.

Copy handset entries as backups, share information between microSD ™ Memory Card-compatible handsets, or transfer entries to a newly purchased handset.
Precautions
- Backup/Restore is not available when battery is low or while handset is in use.
• Transmissions are blocked during Backup or Restore. - When restoring data from Memory Card, select an item; when prompted, delete corresponding data on handset to proceed.
- Some items may not be transferable. Some backup files may not be usable on other SoftBank handsets or PCs, etc.
- When handset or Memory Card memory is low, entries may not transfer correctly.
- Handset stores up to 300 entries between Calendar and Tasks. If the limit is reached during a transfer, the remaining entries will not be received.
-
Yahoo! Keitai, Streaming and PC Site Browser Bookmarks are backed up. When restored, Streaming Bookmarks are saved in Yahoo! Keitai Bookmarks.
• Large Bookmarks may not restore correctly. -
Phone Book entry Picture settings may be lost depending on image; copy images separately and re-assign to entries after Phone Book is restored.
- S! Mail Notices are restored as standard messages, invalidating complete message retrieval.
- To access backed up content (excluding Templates and My Pictograms) restore it to handset.
- Use Backup and Restore for Content Keys.
■Moving Keys to Memory Card creates a special file. Performing Backup again on the same Memory Card overwrites that file. Perform Restore beforehand.
■While Keys are on Memory Card, files are inaccessible.
■Restoring Keys to handset does not overwrite existing ones. -
Restoring Messaging folders cancels Secret folder settings and deletes auto sort keys.
-
Observe the following when transferring data backed up on other SoftBank handsets to handset.
■Messages may not transfer depending on the size.
■Handset stores up to 500 messages between Drafts, Unsent Messages and Sent Messages. If the limit is reached during a transfer, the remaining messages will not be received.
■Sky Mail may transfer as S! Mail depending on the SoftBank handset used for backup. - Observe the following when transferring data backed up on handset to other SoftBank handsets.
■Messages in Spam Folder are saved as standard received messages.
■ SMS addressed to multiple recipients may not be saved or only the first entered recipient remains if transferred from Drafts.
Handset to Memory Card
Main Menu
▶ Settings → Connectivity (◎) → Memory Card → Backup/Restore → Backup
1 Enter Handset Code and press ●
2 Choose Yes and press ●
Offline Mode is set.
3 Select an item and press ●
For Select All, Phone Book or Content Keys confirmation appears. Choose Yes or No ➔ Press Ⓞ
To cancel, press ☑ Cancel.
Memory Card to Handset
Restoring backed up content to handset overwrites current handset content (with the exception of Content Keys).
Main Menu
▶ Settings → Connectivity (💡) → Memory Card → Backup/Restore → Restore
1 Enter Handset Code and press ●
2 Choose Yes and press ●
Offline Mode is set.
3 Select an item and press ●
- Some items may not be selected.
4 Select a file and press ●
- If there is more than one file, check the date of transfer to select. Example: 070214XX indicates the file was transferred on 14 February 2007. (XX: 00 - 99 or aa - zz)
- For Select All, repeat Step 4 for each item.
To delete files on Memory Card, select one → Press Delete → Choose Yes → Press
5 Choose Yes and press ●
To cancel, press Y7 Cancel.
For Select All, confirmation appears. Choose Yes or No → Press ⬙
Tip ▶ For Tasks, due dates that cannot be set on handset are overwritten as No limit.
Additional Functions
Memory Status Check Memory Card memory status
Main Menu ▶ Data Folder → Memory Status
Select Memory Card → Press ●
- A portion of Memory Card is reserved for storing copyright information, etc.
SD Local Contents Open HTML files on Memory Card to access Internet sites
■ Available only when HTML files are saved on Memory Card.
Main Menu ▶ Settings → Connectivity (◎) → Memory Card → SD Local Contents
Select a title → Press ●
- HTML files for SD Local Contents are saved in PRIVATE/MYFOLDER/Local Contents folder when viewed on PCs.
Digital Print Order Format (DPOF)
Digital Print Order Format (DPOF) is a standard specification for requesting prints from digital cameras. Select images from Memory Card and specify the number of copies to print on DPOF-compatible printers, or at digital printing services.
- DPOF does not support images obtained via the Internet, S! Mail, etc.
- If Memory Card capacity becomes insufficient while in use, a warning message appears. Delete files and try again.
- For printing procedures, see the printer manual.
Selecting Images & Prints
Main Menu
▶ Settings → Connectivity (○) → Memory Card → DPOF → Number of Copies → For Each Picture
1 Select a folder and press ●
Thumbnails appear.
2 Use 🔒 to select an image and press 📧 Count
To open images, select one → Press ● ■Press to return.
3 Enter a number of copies to print (00 - 99) and press Ⓞ
To return, press 📊→ Press 📊→ To cancel, enter 00 → Press ⬤
4 Repeat Steps 2 - 3 for other images
5 Press ☑ Done
Note
- DPOF settings made on other devices are unusable; delete existing settings to create new ones on handset.
- Some settings may not be supported depending on the printer or printing services.
- Process may take a while if print settings are made for many images.
- If image files are deleted or renamed on PCs or other devices, print settings change. Perform Reset Settings (see right) and start over with settings.
Print Settings
| For All Pictures | Apply a number to all DCF images to print the same number of copies |
| Main Menu | ▶ Settings → Connectivity (😊) → Memory Card → DPOF → Number of Copies → For All Pictures |
| Enter a number (01 - 99) → Press ⬤ | |
Add Date Add dates to prints
DefaultOff
Main Menu
▶ Settings → Connectivity (💡) → Memory Card → DPOF → Settings → Add Date
Choose On or Off → Press ●
Index Print Create Index Print (a print with thumbnails)
DefaultOff
Main Menu ▶ Settings → Connectivity (○) → Memory Card → DPOF → Settings → Index Print
Choose On (require) or Off → Press ●
Check Settings View current print settings
Main Menu ▶ Settings → Connectivity (😊) → Memory Card → DPOF
Select Check Settings → Press ●
Reset Settings Reset DPOF settings
Main Menu ▶ Settings → Connectivity (💡) → Memory Card → DPOF
Select Reset Settings → Press ● → Choose Yes → Press ●
Mass Storage
Activate Mass Storage and connect handset to a PC via USB Cable to access Memory Card from the PC without removing the card from handset.
- Activating Mass Storage activates Offline Mode.
- Mass Storage is not available when battery is low, when an S! Application is paused or while Music Player is active.
Main Menu ▶ Settings → Connectivity (😊)
1 Select Mass Storage and press ●
Calling not available during operation, OK? appears.
2 Choose Yes and press ●
3 Connect handset to a PC via USB Cable
- If it is already connected, remove it then reconnect it.
4 To exit, press ☑Cancel
5 Choose Yes and press ●
- Safely remove handset (recognised as removable hardware device) on the PC, then disconnect USB Cable.
Tools
Calendar
Opening Calendar
- Open Calendar in Month View, 2Month View or Week View.
- Calendar appears in Month View by default.
Main Menu
▶ Tools → Tools 1 (○)
1
Select Calendar and press ●
Calendar of the current month opens.
If Clock is unset, use ⏻ to select a Time
Zone → Press ⬙ → Enter date/time →
Press
To open Help (Key Assignments),
press 📧 Options → Select Help → Press ●
■Press ● to return.

Calendar Window
(Month View)
∴ m = 3/11
Key Assignments
| Key Month/2Month View Week View | ||
| Open the previous month1 | Open the previous week | |
| Open the next month1 | Open the next week | |
| 0.3 | Help | |
| 2.5 | Stamp2 | - |
| 4.5 | Set Colour (By Date) | |
| 5.5 | Go to (Today) | |
1 In 2Month View, view changes by two months.
2 Available in Month View.
1 In 2Month View, view changes by two months.
2 Available in Month View.
| Key Month/2Month View Week View | ||
| 6.∞ | Find | |
| 8.2∞ | Go to (Enter Date) | |
| Select the previous/next week1 | Select the previous/next time block | |
| Select date | ||
1 In 2Month View, view changes by two months.
Default View
Set to open Calendar in Month View, 2Month View or Week View
DefaultMonth View
Main Menu
▶ Tools → Tools 1 (○) → Calendar
Press 📋 Options → Select Calendar Settings → Press ⬙ → Select Default View → Press ⬙ → Select a type → Press ⬙
Set Colour
Set Calendar date colour
Default Sunday (and holiday): Red, Saturday: Blue, Others: Black
Main Menu
▶ Tools ➕ Tools 1 (😊) ➕ Calendar
By
Days of the Week
Press Options Select Calendar Settings Press Select Set Colour Press Select By Week Press Select a day Press Select a colour Press
By Date
Select a day → Press Options → Select Calendar Settings → Press ● → Select Set Colour → Press ● → Select By Date → Press ● → Select a colour → Press ●
To use the colour set for the day of the week, select No Setting → Press ●
To reset, press ☑ Options ➔ Select Calendar Settings ➔ Press ⬙️ ➔ Select Set Colour ➔ Press ⬙️ ➔ Select Reset
Colour → Press ⬙ → Select an option → Press ⬙ → Choose Yes → Press ⬙
Set Holiday
Remove/restore preset holidays or save additional holidays
Main Menu
▶ Tools → Tools 1 (💡) → Calendar
Removing/Restoring Holidays
Press 📧 Options → Select Calendar Settings → Press ●
→ Select Set Holiday → Press ● → Use 🔵 to select Set
My Holidays or Set Public Holidays → Select a holiday →
Press ● to check or uncheck
To check or uncheck all, press 📋 Options → Select Check All or Uncheck All → Press ●
Saving Additional Holidays
Press 📧 Options → Select Calendar Settings → Press ●
→ Select Set Holiday → Press ● → Use ○ to select Set
My Holidays → Select
name → Press ● → Enter date → Press ● → Select
frequency → Press ⬙ → Press 📎 Save
Editing Additional Holidays
Press 📧 Options → Select Calendar Settings → Press ●
→ Select Set Holiday → Press ⬙ → Use ⬦ to select Set
My Holidays → Select a holiday → Press 📧 Options →
Select Edit → Press ● → Select Name: → Press ● →
Enter name → Press ● → Select Date: → Press ● →
Enter date → Press ● → Select frequency → Press ●
→ Press Y? Save
Tip ▶ •Preset holidays cannot be deleted or edited. •Save up to ten additional holidays.
Stamp Create new entry quickly by entering a stamp
Available in Month View.
Main Menu
Tools → Tools 1 (○) → Calendar
Select a date → Press 2 AVC → Select a stamp → Press ●
Tip ▶ To edit the entry, see P.12-7.
Alarm Settings
Select Alarm Volume, Vibration and Manner Setting
DefaultAlarm Volume: Level 3, Vibration: Off, Manner Setting: Do not Ring
Main Menu
Tools → Tools 1 (😊) → Calendar
Alarm Volume
Press 📧 Options → Select Alarm Settings → Press ●
Select Alarm Volume: Press ● Use ⚙ to adjust level ▶ Press ●
Vibration
Press 📧 Options → Select Alarm Settings → Press ●
→ Select Vibration: → Press ⬙ → Select On, Link to Sound or Off → Press ⬙
Manner Setting
Press 📧 Options → Select Alarm Settings → Press ●
→ Select Manner Setting: → Press ● → Select Ring
or Do not Ring → Press ●
For Ring, choose Yes → Press ●
Saving Entries
Organise daily, weekly, monthly and yearly schedule. Save up to 300 entries between Calendar and Tasks (see P.12-8).
Main Menu
▶ Tools → Tools 1 (😊) → Calendar
1 Select a day and press ●
2 Select
3 Enter subject and press ●
•Enter up to 32 characters. Subject is mandatory.
4 Enter start date/time and press • For all-day entries, enter date and press (press again to cancel), then press and skip ahead to Step 7.
5 Select End: and press
6 Enter end date/time and press
7 Select Category: and press
8 Select a category and press
- To proceed without setting Reminder, skip ahead to Step 13. For all-day entries, set Repeat (see P.12-6) and skip ahead to Step 13.
9 Select Reminder: and press Ⓞ 10 Select Reminder Time: and press Ⓞ
11 Select from At Start Time to 1 hour before and press ●
For custom Reminder Time, select Other → Press ● → Enter date/time → Press ●
To set tone/video and duration, see P.12-5.
12 Press OK • If OK does not appear, press. Repeat: see P.12-6
13 Select Location: and press ●
14 Enter location and press ● •Enter up to 16 characters.
15 Select Description: and press ●
16 Enter schedule details and press •Enter up to 128 characters. Secret: see P.12-6
17 Press Save The entry is saved.
Note ▶ When entries are transferred to other devices, date/time or other information may appear different depending on the recipient device.
Tip ▶ (Reminder set) or □ (Reminder unset) appears on scheduled day. (Indicator disappears after scheduled time.)

New Entry Window
At Reminder Time
Reminder is activated, sounding/vibrating, etc. according to related settings.
Image appears if System Graphics is set (see P.9-3). However, video and SMAF file images take priority over System Graphics.
Stopping Reminder
■ Press ☑ Stop, 📞, or 📄.
Opening Entries
■ While Reminder is activated, press Ⓞ.
Tip
- If Reminder Time arrives during a call or while recording video, Reminder will not be announced. End the call or exit mobile camera to reactivate Reminder. - Active Reminder stops for incoming calls. Information window opens after the call ends.
Calendar Options
Follow these steps after Step 12 on P.12-4. After each setting, New Entry window returns. Complete other settings.
Assign Tone/Video
Set a tone/video to sound/play at Reminder Time
DefaultAlert 1
Preset Sounds
Select Reminder: → Press ● → Select Assign Tone/ Video: → Press ● → Select Preset Sounds → Press ● → Select a tone → Press ● → Press OK To play tones, select one and press Play. Press Stop to stop.
Data Folder Files
Select Reminder: ➤ Press ⬙ ➤ Select Assign Tone/Video: ➤ Press ⬙ ➤ Select Ring Songs-Tones, Music, Videos or Flash® Ringtones ➤ Press ⬙ ➤ Select a file ➤ Press ⬙ ➤ Press ☑ OK To play files, select one and press ☑ Play. ■Press ☑ to stop.
Duration Set how long Reminder operates
Default 10 seconds
Select Reminder: → Press ● → Select Duration: → Press ● → Select time → Press ● → Press ▼ OK For custom Duration, select Other → Press ● → Enter time → Press ● → Press ▼ OK
Repeat
Assign schedule type (once only, daily, weekly, monthly or yearly) for each event
Default Once Only
Once Only Schedule
Select Repeat: → Press ● → Select Once Only → Press ●
Repetitive Schedule
Select Repeat: ➔ Press ⬙️ ➔ Select from Day to Every Year ➔ Press ⬙️ ➔ Enter repeat time (00 - 99 times) ➔ Press ⬙️
- Start date and time are reflected in the items. For Month, if the day is 29, 30 or 31, entries are saved for the valid months only.
- Repeat time is not available for Every Year; the schedule is repeated until deleted.
- Set Repeat time to 00 to repeat until deleted.
Secret Restrict access to entries
DefaultOff
Select Secret: ➔ Press ⬙ ➔ Choose On or Off ➔ Press ⬙
- Activate Show Secret Data (see P.9-27) to open/edit Secret entries.
Opening Entries
Main Menu
Tools → Tools 1 (○) → Calendar
1 Select a date and press ●
Alternatively, to specify date, press ☐ Options → Select Go to → Press ● → Select Enter Date → Press ● → Enter date → Press ●
Alternatively, to open current date, press ☑ Options → Select Go to → Press ● → Select Today → Press ●
2 Select an entry and press ●
To send the entry via S! Mail, press Options Select Send Press Select As Message Press Complete and send message (Perform from Step 3 on P.14-7.)
3 Press CLEAR BACK to return
Memory Status
■ After Step 1 on the left, press 📧 Options → Select Memory Status → Press ⬙
Unlock Temporarily
For temporary access to Secret entries, open Calendar and follow these steps.
Press 📋 Options → Select Unlock Temporarily →
Press ● ➔ Enter Handset Code ➔ Press ●
- Secret entries are hidden next time Calendar is opened.
Searching Entries by Subject
Main Menu
Tools → Tools 1 (○) → Calendar
1 Press 📧 Options
2 Select Find and press ●
3 Enter search text and press
- Enter up to 32 characters.
4 Select an entry and press ●
Editing Entries
Main Menu
▶ Tools → Tools 1 (😊) → Calendar
1
Select a date and press ●
2
Select an entry and press 📧 Options
3
Select Edit and press ●
4
Select an item and press ●
- For details, see procedure for saving entries.
5
When finished editing, press ☐ Save
Deleting Entries
This Appointment/
All This Day
Delete one entry or all entries of the day
Main Menu
Tools → Tools 1 (○) → Calendar
One Entry
Select a date → Press ● → Select an entry → Press 📧
Options → Select Delete → Press ● → Select This
Appointment → Press ● → Choose Yes → Press ●
All Entries of the Day
Select a date → Press 📧 Options → Select Delete →
Press ● → Select All This Day → Press ● →
Choose Yes → Press ●
All This Week/
In Week View, delete all entries in the week or up to the end of the previous week
Up to Last Week
Main Menu
Tools → Tools 1 (○) → Calendar
Week
Select a week → Press 📧 Options → Select Delete → Press ●
→ Select All This Week → Press ● → Choose Yes → Press ●
Up to the End of Previous Week
Select a week → Press 📧 Options → Select Delete → Press ●
→ Select Up to Last Week → Press ● → Choose Yes → Press ●
All This Month/
In Month View, delete all entries in the month
Up to Last Month
or up to the end of the previous month
Main Menu
Tools → Tools 1 (○) → Calendar
Month
Select a month → Press 📋 Options → Select Delete → Press ●
→ Select All This Month → Press ⬙ → Choose Yes → Press ⬤
Up to the End of Previous Month
Select a month → Press 📧 Options → Select Delete → Press ●
→ Select Up to Last Month → Press ⬙ → Choose Yes → Press ⬙
All This
2Months
Delete all entries in two months on Display
Main Menu
Tools → Tools 1 (○) → Calendar
Select two months → Press 📧 Options → Select
Delete → Press ⬙ → Select All This 2Months →
Press ● → Choose Yes → Press ●
All
Appointments
Delete all entries
Main Menu
Tools → Tools 1 (_) → Calendar
Press 📧 Options → Select Delete → Press ⬙ → Select
All Appointments → Press ● → Enter Handset Code →
Press ● → Choose Yes → Press ●
Deleting Repetitive Entries
A confirmation appears except for All Appointments. To delete, follow these steps.
Choose Yes → Press ●
- To retain repetitive entries, choose No → Press ●
Tasks
Save event with deadlines.
- Check completed tasks (see P.12-10).
- Save up to 300 entries between Tasks and Calendar (see P.12-4).
Saving Entries
Main Menu ▶ Tools ▶ Tools 1 (😊) ▶ Tasks
1 Select
2 Enter subject and press ●
- Enter up to 32 characters. Subject is mandatory.
3 Enter due date/time and press ●
- To set no limit, press ☑ (press again to cancel), then press ♁ and skip ahead to Step 8.
•To proceed without setting Reminder, skip ahead to Step 8.
4 Select Reminder: and press ●
5 Select Reminder Time: and press ●
6 Select from At Due Time to 1 hour before and press ●
For custom Reminder Time, select Other → Press ● → Enter date/time → Press ●
To set tone/video and duration, see P.12-9.
7 Press ¥! OK
8 Select Description: and press Ⓞ
9 Enter task details and press ●
- Enter up to 128 characters.
Secret: see P.12-9
10 Press Y/ Save
The entry is saved.

New Entry Window
At Reminder Time
Reminder is activated, sounding/vibrating, etc. according to related settings.
Image appears if System Graphics is set (see P.9-3).
However, video and SMAF file images take priority over System Graphics.
Stopping Reminder

Opening Entries
■ While Reminder is activated, press Ⓞ.
Tip
- If Reminder Time arrives during a call or while recording video, Reminder will not be announced. End the call or exit mobile camera to reactivate Reminder. - Active Reminder stops for incoming calls. Information window opens after the call ends.
Task Options
Follow these steps after Step 7 on P.12-8. After each setting, New Entry window returns. Complete other settings.
Assign Tone/Video
Set a tone/video to sound/play at Reminder Time
DefaultAlert 1
Preset Sounds
Select Reminder: → Press ● → Select Assign Tone/Video: → Press ● → Select Preset Sounds → Press ● → Select a tone → Press ● → Press ▼ OK To play tones, select one and press ▼ Play. Press ▼ Stop to stop.
Data Folder Files
Select Reminder: ➤ Press ⬙️ ➤ Select Assign Tone/Video: ➤ Press ⬙️ ➤ Select Ring Songs-Tones, Music, Videos or Flash® Ringtones ➤ Press ⬙️ ➤ Select a file ➤ Press ⬙️ ➤ Press OK To play files, select one and press Play. Press to stop.
Duration Set how long Reminder operates
Default 10 seconds
Select Reminder: ▶ Press ⬤ ▶ Select Duration: ▶ Press ⬤ ▶ Select time ▶ Press ⬤ ▶ Press ☑ OK For custom Duration, select Other ▶ Press ⬤ ▶ Enter time ▶ Press ⬤ ▶ Press ☑ OK
Secret Restrict access to entries
DefaultOff
Select Secret: → Press ⬙ → Choose On or Off → Press ⬙
- Activate Show Secret Data (see P.9-27) to open/edit Secret entries.
Alarm Settings

Opening Entries
Main Menu ▶ Tools → Tools 1 (○)

2 Select an entry and press ●


3 Press ☑ CLEAR/BACK to return
Completed Tasks

Unlock Temporarily
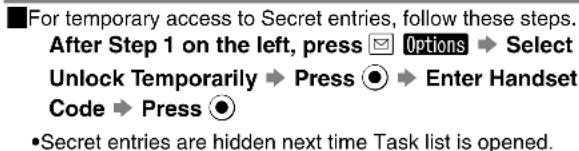
Memory Status

Searching Entries by Subject
Main Menu ▶ Tools → Tools 1 (○) → Tasks

Editing Entries
Main Menu
▶ Tools → Tools 1 (○) → Tasks
1 Select an entry and press 📧 Options
2 Select Edit and press ●
3 Select an item and press ●
- For details, see procedure for saving entries.
4 When finished editing, press Save
Deleting Entries
Delete Delete one entry
Main Menu ▶ Tools → Tools 1 (💡) → Tasks
Select an entry → Press 📧 Options → Select Delete
→ Press ⬙ → Select This Task → Press ⬙ →
Choose Yes → Press ●
All Tasks/ All Comp. Tasks Delete all tasks or all completed tasks
Main Menu ▶ Tools → Tools 1 (💡) → Tasks
All Tasks
Press 📧 Options → Select Delete → Press ⬤ →
Select All Tasks → Press ⬙ → Enter Handset Code
→ Press ● → Choose Yes → Press ●
All Completed Tasks
Press 📧 Options → Select Delete → Press ⬤ →
Select All Comp. Tasks → Press ● → Choose Yes
→ Press ●
Alarm
Setting Alarm
Set Alarm to sound at a specific time each day or on specific days of the week. Save up to 5 Alarm settings.
Main Menu ▶ Tools → Tools 1 (💡) → Alarms
1 Select -- : -- and press ●
2 Enter time and press ●
Alarm Options: see P.12-13
3 Select Repeat: and press ●
4 Daily
1 Select Every Day and press ●
Specified Day of the Week
1 Select Selected Days and press ●
To select all, press ☑ Options → Select Check All → Press ⬙ → Skip ahead to Step 4
2 Select a day of the week and press ●
The day is set and ☑ appears.
• To cancel, highlight the selected day and press ●.
3 Repeat Step 2 to select more
4 Press ☑ OK when finished
One Time Alarm
1 Select Once Only and press ●

Alarm Settings

Press

Save
Alarm is set.
- For more settings, start over from Step 1 in "Setting Alarm" on P.12-11.

Press

to exit
Handset returns to Standby and 📁 appears.
For Manner Mode

Select Manner mode ringer setting.
After Step 1 in "Setting Alarm" on P.12-11, select
Settings → Press ⬙ → Select For Manner Mode →
Press ● → Select Ring or Do not Ring → Press ●
■ For Ring, choose Yes → Press ●
For World Clock

Set Alarm for World Clock (see P.12-14) as follows:
After Step 1 in "Setting Alarm" on P.12-11, select
Settings → Press ⬙ → Select Link To World Clk →
Press ● → Choose On or Off → Press ●
At Alarm Time
Alarm is activated, sounding/vibrating, etc. according to related settings.
Image appears if System Graphics is set (see P.9-3). However, video and SMAF file images take priority over System Graphics.
Stopping Alarm

Press

Stop

CLENS BACK

[NO TEXT]
- Alarm activates only when handset is on at Alarm Time.
Snooze

When Snooze (see P.12-13) is set, Alarm repeats at the set interval.
- Accept incoming calls. End the call to reactivate Snooze.
- If other Alarm Time arrives while Snoozing, the other Alarm is activated only after Snooze is cancelled.
To cancel Snooze, follow these steps while Alarm is activated or Snoozing.
Press ☐ Stop, or ☐ Choose Yes ☐ Press
- Snooze is cancelled automatically 60 minutes after initial Alarm Time.

- If Alarm Time arrives during a call or while recording video, no tone will sound. End the call or exit mobile camera to reactivate Alarm.
- In Manner mode, volume depends on For Manner Mode setting (Do not Ring by default).
- Active Alarm stops for incoming calls. When Snooze is unset, Information window opens after the call ends.
Alarm Options
Follow these steps after Step 2 in "Setting Alarm" on P.12-11. After each setting, Alarm settings window returns. Complete other settings.
Assign Tone/Video
Set a tone/video to sound/play at Alarm Time
Default Alert 1
Preset Sounds
Select Assign Tone/Video: → Press ● → Select Preset Sounds → Press ● → Select a tone → Press ●
To play tones, select one and press Play Press Stop to stop.
Data Folder Files
Select Assign Tone/Video: ➤ Press ⬙ ➤ Select Ring Songs-Tones, Music, Videos or Flash Ringtones ➤ Press ⬙ ➤ Select a file ➤ Press ⬙
To play files, select one and press Play Press to stop.
Custom Screen Set Custom Screen tone/video to sound/play at Alarm Time
Select Assign Tone/Video: → Press ● → Select Custom Screen → Press ●
To play files, select Custom Screen and press Play Press Stop to stop.
- Custom Screen is selectable when compatible Custom Screen is active.
Snooze
Set Alarm to activate at set intervals after initial Alarm Time
Default Off
Select Snooze: → Press ● → Select an interval → Press ●
For custom intervals, select Other → Press ● → Enter interval → Press ●
Alarm Volume Set volume from seven levels
DefaultLevel 5
Select Alarm Volume: → Press ● → Use ⚙ to adjust level → Press ⚙
Vibration Set handset to vibrate at Alarm Time
DefaultOff
Select Vibration: ➤ Press ⬙ ➤ Select On, Link to Sound or Off ➤ Press ⬙
- For details on Link to Sound, see P.9-15 "Vibration".
Duration Set how long Alarm operates
Default 10 seconds
Select Duration: → Press ● → Select duration → Press ● For custom Duration, select Other → Press ● → Enter time → Press ●
Cancelling & Reactivating Alarm
Switch Off Cancel Alarm and retain the settings
Main Menu ▶ Tools → Tools 1 (💡) → Alarms
Select an entry → Press 📧 Options → Select Switch Off → Press ⬙
• disappears.
- Reactivate Alarm to use the same settings.
Switch On Reactivate Alarm with the same settings, or change current settings
Main Menu ▶ Tools → Tools 1 (💡) → Alarms
Select an entry → Press 📧 Options → Select Switch On → Press ⬙
To change settings, select an entry → Press → Edit settings For details, see procedure for saving entries.
Deleting Alarm
Reset Alarm Delete Alarm settings one by one
Main Menu ▶ Tools → Tools 1 (○) → Alarms
Select an entry → Press ☑ Options → Select Reset Alarm → Press ● → Choose Yes → Press ●
Clear All Delete all Alarm settings
Main Menu ▶ Tools → Tools 1 (○) → Alarms
Select an entry → Press ☑ Options → Select Clear All → Press ● → Enter Handset Code → Press ● → Choose Yes → Press ●
World Clock
Display local date/time (see P.9-18) and the date/time of another area in the world.
- Select from preset Time Zones or specify a new one; enter area name and time difference between new and local areas.
- To set World Clock to appear in Standby, see P.9-5 "Clock/ Calendar".
• Time Zone is set to Tokyo by default.
Setting Time Zone & Daylight Saving
Activate Daylight Saving to advance the selected area's time by one hour.
Main Menu ▶ Tools → Tools 1 (💡) → World Clock
1 Press
2 Time Zone
1 Select Set Time Zone and press ●
2 Use ⚙ to specify an area and press ⚙
To add Time Zone, press 📋 Custom ➔ Enter city name (up to 16 characters) ➔ Press ⬙️ ➔ Use ⏱ to select + or - ➔ Press ⬤️ ➔ Enter time difference ➔ Press ⬡
Daylight Saving
1 Select Daylight Saving and press ●
2 Choose On and press ●
To cancel, choose Off → Press ●
Opening World Clock
Main Menu
Tools → Tools 1 (○)
1 Select World Clock and press ●
Local date/time and the date/time of another area in the world appear.
Tip
• To change local Time Zone, see P.9-18.
- To set World Clock to appear in Standby, select World Clock (L), World Clock (S), World Clk+1mo. or World Clk+2mos. for Clock/Calendar (see P.9-5).
Calculator
Use Calculator for basic arithmetic (up to 12 digits) and percentage calculation, or currency conversion (Money Converter).
Main Menu
Tools → Tools 1 (○)
1 Select Calculator and press ●
Calculator opens.
- Alternatively, enter digits in Standby and press 📄 to open Calculator.
- Use Keypad to enter digits, and the keys in the table (see right) for calculation.
To copy the result, press 📋 Options → Select Copy → Press ●
| + (Add) | CM (Clear Memory) | ||
| - (Subtract) | RM (Recall Memory) | ||
| x (Multiply) | M+ (Add Memory) | ||
| ÷ (Divide) | . (Decimal) | ||
| = (Equal) | +/- (Switch) | ||
| C-CE (Clear) | % (Percent) |
1 While 0 appears, press to return to Tools 1 menu. 2 Press ☐ Options and select %.
2 Press 🔒 to exit
Money Converter
■ To change exchange rate, open Calculator and follow these steps.
Press Options → Select Money Converter Press ● → Select Exchange Rate → Press ● → Select Domestic or Foreign → Press ● → Enter rate → Press ●
- Exchange rate is 1 for both conversions by default.
To convert foreign currencies, follow these steps. Enter amount of money and press 📋 Options → Select Money Converter → Press ● → Select To Domestic or To Foreign → Press ●
- Conversion is based on the preset exchange rate.
Tip ▶ • Entered numbers, results and numbers saved in Memory are not affected by incoming calls. End the call to return.
- Clear Memory before starting Memory calculations.
- Numbers saved in Memory remain even if Calculator is closed, but are cleared when handset power is turned off.
Voice Recorder
Use Microphone to record short voice memos and save files on handset or Memory Card; record and save longer recordings on Memory Card.
- Modes:
| Recording Time Storage Media | ||
| For Message | Up to three minutes(attachable to S! Mail) | Handset or Memory Card 1 |
| Extended Voice | Up to 99 hours 59 minutes59 seconds | Memory Card 2 |
1 Specify storage media before recording, or set handset to ask each time; when set to ask, always record with Memory Card inserted.
2 Insert Memory Card to record in Extended Voice mode.
- For Message is set by default.
Preparation
- When battery is low, Voice Recorder does not activate. If battery runs low while recording in Extended Voice mode, Battery low. Please connect to charger! appears and Voice Recorder shuts off.
- Conversations during calls cannot be recorded.
- If incompatible microphone is connected, recording may fail.
Recording
Main Menu
Tools → Tools 2 (●)
1 Select Voice Recorder and press ●
To switch mode, press 📋 Options → Select Record Time →
Press ⬤ ➔ Select For Message or Extended Voice ➔
Press
To switch storage media, see P.12-17.
2 Press
Recording starts.
3 For Message
1 Press ● to stop
- Recording stops automatically when maximum recording time is reached.
To play the recording, select Playback → Press ● ■Press ● to pause.
■Press to return.
To start over without saving, press FLWR Black → Repeat from Step 2
To send via S! Mail, select Save and Send ➔ Press ⬤ → Complete and send message (Perform from Step 3 on P.14-7.)
■When confirmation for save location appears, select a location → Press ●
2 Select Save and press ●
Recording is saved to handset or Memory Card.
When confirmation for save location appears, select a location → Press ⬙
Extended Voice
1 Press Ⓞ to stop
Recording is saved to Memory Card.
Note ▶ Avoid shocks to handset; may cause noise or skipping.
- Recording window may take longer to open as more Voice files are saved on Memory Card.
Tip ▶ - Alarm is disabled while recording, and starts after Voice Recorder stops/closes. - Attach saved Voice file or record voice directly from Mail Composition windows (see P.14-10).
Playback
Play sounds from Speaker, or use Headphones.
Main Menu ▶ Tools → Tools 2 (○) → Voice Recorder
1 Press 📧 Options
2 Select Ring Songs·Tones and press ●
To switch between handset and Memory Card, press ☑ Options → Select Change to Phone or Change to Memory Card → Press ●
3 Select a file and press ●
Playback starts. ■ Press ⏻ (up) or ⏻ (down) to adjust volume.
Deleting Files
■Follow these steps after Step 2 on the left.
Select a file → Press 📧 Options → Select Delete →
Press ● → Choose Yes → Press ●
Incoming Calls/Mail during Playback
■Playback stops for incoming calls or Alarm.
A notification appears for incoming mail without interrupting playback.
Recording Setting
Save Recording To Select storage media for For Message
Default Phone Memory
Main Menu ▶ Tools → Tools 2 (💡) → Voice Recorder
Press 📋 Options → Select Save Recording To →
Press ⬙ ➔ Select Phone Memory, Memory Card or Ask Each Time ➔ Press ⬙
- Set to Ask Each Time to select media after every recording.
Document Viewer
Open documents via Data Folder, Internet, S! Mail, Bluetooth ® or infrared.
•Supported File Formats:
■PDF (.pdf) ■Microsoft Excel (.xls)
■Microsoft Word (.doc) ■Microsoft PowerPoint (.ppt)
- Some files may take time to open or may not appear correctly. (Complicated designs, special characters in file names, password-protected, language other than Japanese or English used, etc.)
- On PCs, save documents to this Memory Card directory:
■PRIVATE/MYFOLDER/MY Items/OTHER DOCUMENTS
- Open documents of up to 1 MB each. (Some documents may not open depending on content.)
Data Folder Files
Main Menu ▶ Tools ➔ Tools 2 (💡) ➔ Document Viewer
1 Select a file and press ●
Internet Files
1 Open a page, select a file and press ●
Tip ▶ Download files of up to 300 KB via Yahoo! Keitai or up to 500 KB via PC Site Browser.
Attachments
1 In a Messaging folder, select a message and press ●
2 Select a file and press ●
Key Assignments
| Whole Page Zoom to view the whole page | ||
| Vertical/Horizontal | Rotate page 90 degrees counterclockwise (press again to return) | |
| Up Scroll up | ||
| Down Scroll down | ||
| Left Scroll left | ||
| Right Scroll right | ||
| 1 2/3 | Upper Left | View upper left portion of page |
| 2 1/2 | Full Screen | View document in full screen |
| 3 1/2 | Upper Right | View upper right portion of page |
| 4 1/2 | Zoom Out | Zoom out |
| 5 1/2 | Centre | View page centre |
| 6 1/2 | Zoom In | Zoom in |
| 7 2/3 | Lower Left | View lower left portion of page |
| 8 1/2 | Select Page | Jump to specified page■ Enter page number ➔ Press ● |
| 9 1/2 | Lower Right | View lower right portion of page |
| 0 1/2 | Help | View a summary of key assignments |
| Next Page | Open the next page | |
| Previous Page | Open the previous page | |
| Fit | Page | Zoom to fit width |
Barcode
Scan printed barcodes with mobile camera or download/exchange QR Codes via the Internet, S! Mail, etc.
- Scan UPC (JAN) or QR Codes. Handset automatically detects code type and reads data.
- In Continuous mode, scan up to 50 UPC (JAN) or 16 QR Codes at one time. In some cases, continuous scans may be disrupted depending on barcode data or data size.
- Zoom is not available.
Note
- Scan may fail if the barcode is dirty or unclear.
- Scan barcodes under adequate light.
- Capture one barcode at a time; otherwise scan may fail.
Tip
- A UPC (Universal Product Code) or JAN (Japanese Article Number) is a series of varying width vertical lines (bars) and spaces. Bars and spaces together are elements, combinations of which represent different numbers. Handset cannot read other one-dimensional barcodes (ITF Code, Code39, Codabar/NW-7, etc.).
- A QR (Quick Response) Code is a matrix symbology consisting of an array of nominally square cells, which allows omni-directional reading of up to 4,296 alphanumerics and byte data, as well as kanji and kana.
Main Menu
▶ Tools → Tools 3 (○) → Barcode → Scan Barcode
1 Frame barcode in the centre of Display
- Slide Portrait/Macro Selector to Macro (💡).
- Hold handset approximately 10 cm away from barcode.
Use ⚙ to adjust brightness.
To activate or cancel Continuous mode,
press 📧 Options → Select Continuous
Scan → Press ⬙ → Choose On or Off
→ Press ●
To open Help (Key Assignments), press 0:
■Press ● to return.
2 Press
Mobile camera scans the barcode.
- If recognition takes time, move handset slowly and adjust the distance from barcode.
Press ☑ Cancel to stop scan → Start over from Step 1
3 Barcode recognition tone sounds and scan results appear
Using Scan Results: see P.12-20 - 12-22
To start over, press 13.4M 90.4K → Choose Yes
→ Press ⬙ → Repeat from Step 1


Continuous Mode
■ After scanning, Scan completed. Scan new? appears.
- To scan next code, choose Yes → Press → Frame the code on Display → Press
- To cancel, choose No → Press → Scan results appear
Split Data
■ After scanning, Split data. Scan next symbol? appears.
- To scan next code, choose Yes → Press → Frame the code on Display → Press
- To cancel, choose No → Press ● → Choose Yes → Press ●
■ Scan results do not appear until all split data is scanned.
The scanning status appears on the first line of Display. For example, 📋 indicates that 1 of 4 codes has been scanned.
Using Scan Results
| Place Calls 1 | Select a number starting with TEL: 2 →Press ➕ The number appears ➕ Press ➕ |
| Send Mail 3 | Select a mail address including @ ➕Press ➕ Complete and send message(Perform from Step 5 on P.14-8.) |
| Quote & Send Mail | Press ➕ Options ➕ Select Send Message ➕ Press ➕ Press ➕ Select S! Mailor SMS 4 ➕ Press ➕ Complete and sendmessage (Perform from Step 3 on P.14-6 oron P.14-7.)To use a part of text, press ➕ Cut inSend Message window ➕ Select the firstcharacter of text ➕ Press ➕ Select theend point ➕ Press ➕ |
| Save toPhone Book 1,3 | Select a number starting with TEL: 2 or mailaddress including @ ➕ Press ➕ Options ➕Select Save to Ph.Book ➕ Press ➕Select As New Entry ➕ Press ➕Perform from Step 2 on PA-4 |
| Access InternetSites 5 | Select a URL starting with http:// or rtsp:// ➕Press ➕ Handset connects to the Internet |
| Save to Data Folder(Images & Melodies) | Select an image or melody file ➕ Press ➕Options ➕ Select To Data Folder ➕ Press ➕ |
| Saving | Press ➕ Options ➕ Select Save ➕ Press ➕Save up to 10 items. To open saved items,see P.12-22 "Scanned Results". |
| Use for SystemGraphics | Select an image ➕ Press ➕ Options ➕Select As System ➕ Press ➕ Select anitem ➕ Press ➕ Press ➕ |
| Copy Text | Text | Press☑Options ➔ Select Copy ➔ Press ● ➔ Select the first character of text ➔ Press ● ➔ Select the end point ➔ Press ● |
| URL5 | Select a URL starting with http:// or rtsp:// ➔ Press☑Options ➔ Select Copy URL ➔ Press ● | |
| Mail Address3 | Select a mail address including @ ➔ Press☑ Options ➔ Select Copy Address ➔ Press ● | |
| Phone Number1 | Select a number starting with TEL:2 ➔ Press☑ Options ➔ Select Copy Telephone ➔ Press ● | |
| Wallpaper | Select an image ➔ Press☑Options ➔ Select As Wallpaper ➔ Press ● ➔ Press ●■For images smaller or larger than Display, select Centred, Full Screen or Fit Image ➔ Press ● ➔ Press ● (For Display size images or Centred, use ⏻ to zoom in/out or press ☑ to rotate.) | |
| Open Images or Play Melodies | Select an image or melody file ➔ Press ● | |
| Open Properties | Select an image or melody file ➔ Press☑ Options ➔ Select Details ➔ Press ● | |
1 Available when text is in TEL: ✗ format.
2 Text strings of 10 to 32 digits starting with 0 are recognised as phone numbers.
3 Available when text is in ✗@ ✗format.
4 S! Mail Composition window opens automatically if text exceeds the SMS character limit.
5 Available when text is in http://#or rtsp://#format. #represents one or more alphanumeric.
MEMORY: or MAILTO:
When MEMORY: or MAILTO: appears in scan results, press ⬙ to enter the items underlined with a dotted line automatically in Phone Book Details or SMS/S! Mail messages. However, text after an invalid character is not underlined and is not copied.
Scanning during Text Entry Scan barcodes during text entry and insert scan results into current cursor position
In a text entry window, press 📧 Options → Select
Scan → Press ● → Select Scan Code → Press ●
→ Frame barcode in the centre of Display →
Press ● → Press ●
To use a part of text, press 📄 Cut → Select the first character of text → Press ⬙ → Select the end point → Press ⬤
Note ▶ Barcodes/text cannot be scanned when: ■ Entering text during a call ■ S! Application is active
Open Barcode Read saved barcode images in Data Folder
Main Menu ▶ Tools ▶ Tools 3 (😊) ▶ Barcode ▶ Open Barcode
Select a barcode image → Press ●
For split data, choose Yes → Press ●
■ To cancel, choose No → Press ● → Choose Yes → Press ●
When scanning fails, press ⬙ ➔ Select next barcode image manually ➔ Press ⬙

Create QR Codes
Create QR Codes from entered text, Phone Book, Pictures, Ring Songs-Tones, Text Templates or Other Documents.
- Save up to the equivalent of 513 digits, 311 alphanumerics or 131 kanji per QR Code.
• Large items are divided into maximum of 16 QR Codes. - Created QR Codes are saved to Data Folder (Pictures). To open them, see P.8-5.
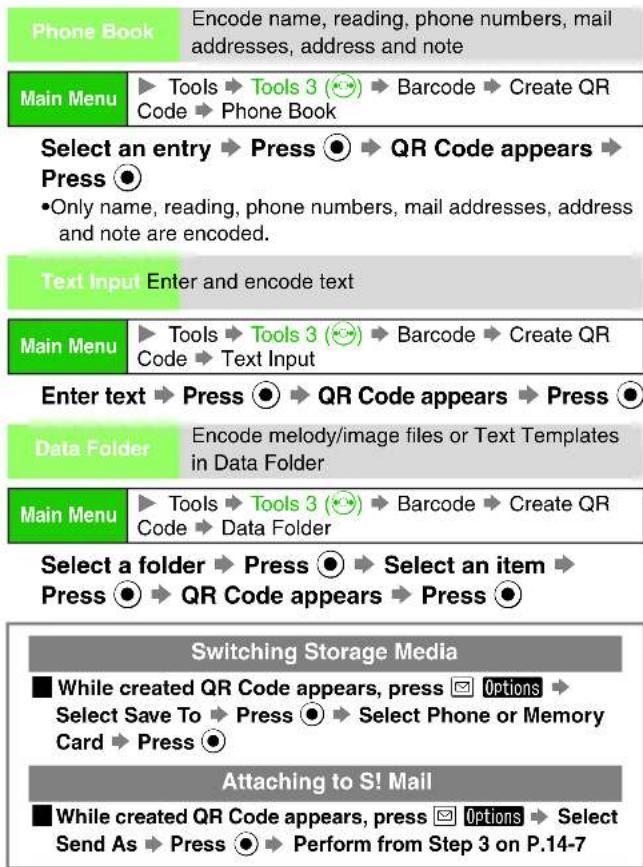
Incoming Calls while Creating QR Code
■Contents are temporarily saved. End the call to return.
Text Scanner
Scan text (URLs, mail addresses, phone numbers or roman letters) with mobile camera.
- Scan up to 256 characters continuously.
- Scan up to 60 single-byte characters within 3 lines. Scanning over 35 characters at one time may yield poor results.
• Some symbols may not be read. - Text mode is set to Auto each time Text Scanner is activated. Change the mode if text is distorted in Auto (such as white text in black background).
- Zoom is not available.
Note
- Text Scanner will not activate if music is playing; when Stop music? appears, choose Yes and press Ⓞ to proceed.
- Text Scanner will not activate if an S! Application is active.
Main Menu
▶ Tools → Tools 3 (💡) → Barcode → Scan Text
1 Frame text on Display
- Adjust to frame text in [ ]. Letters at the ends may be distorted.
- Slide Portrait/Macro Selector according to text size.
- Hold handset approximately 10 cm away from barcode.
Use ⚙ to adjust brightness.
To switch text mode, press Options
Select Reversed Text → Press ●
Select Auto, Normal or Reversed → Press ●
To open Help (Key Assignments), press 0:.
■Press ● to return.
2 Press
Text Scanner reads the text.
Press ☐ to stop scan → Start over from Step 1
3 Use ⏻ to select a line and press ⬙
- Text Scanner reads one line per scan.

Focus Adjustment Bar (Better focus in darker blue)

4 Scan results appear
Handset automatically registers scan results as a URL, Email Address, Phone Number or Text; if incorrect, change mode.
- If text exceeds limit, results appear with overage truncated.
To change mode, press 📋 Options ➔ Select Change Mode ➔ Press ⬙ ➔ Select a type ➔ Press ⬙ (Scan results and alternatives list change accordingly.)
To edit, press Options Select Select/Edit Press Select the character to edit Select an alternative from the list or enter the correction directly from Keypad
To start over, press 📄 → Choose Yes → Press ⬤ → Repeat from Step 1
5 Press
- To use scan results, see P.12-20.
Scanning More Text
■ After Step 5, press 📋 Options → Select Continue Part or
Scan More → Press ●
- Continue Part
Select Continue Part to enter additional text. (Mode remains the same.)
- Scan More
Select Scan More to enter text after a line break.
■ Continue Part and Scan More are disabled once 256 characters have been scanned.
Scanning during Text Entry Scan text during text entry and insert scan results into current cursor position
In a text entry window, press 📧 Options → Select
Scan → Press → Select Text Scanner → Press → Frame text in the centre of Display → Press
Select a line → Press ● → Press ●
- To change mode or edit scan results, see Step 4 on the left.
Stopwatch
Record elapsed time for up to 24 hours (23 hours 59 minutes 59.9 seconds) in 0.1-second increments. Use lap time feature to segment elapsed time.
- Save times (including the last four lap times) to handset Text Templates.
- Stopwatch is disabled when battery is low. Stopwatch ends when battery runs low.
Main Menu ▶ Tools → Tools 2 (💡) → Stopwatch
1 Press
Stopwatch starts.
To record Lap times, press 📧 LAP
■The last four Lap times are recorded. The records are deleted when Stopwatch is cancelled.
2 Press ● to stop countdown
To save the records to Text Template, press ☑ Options → Select Save to Templates → Press ●
■ To check saved records, open Text Templates (see P.12-26).
Press ⬙ to resume.
To clear the records, press 📧 Options → Select Reset → Press ⬙
3 To exit, press 📄 then choose Yes and press ♟
Tip
- Records are deleted when Stopwatch is cancelled. Save records to Text Templates.
- Stopwatch setting is not affected by incoming calls. End the call to return.
- Alarm is disabled while Stopwatch window is open, but is reactivated automatically when handset returns to Standby.
Countdown Timer
Set Countdown Timer up to 60 minutes in 1-second increments. Alarm Tone sounds and Small Light flashes when set time elapses.
Main Menu
▶ Tools → Tools 2 (●) → Countdown Timer
1 Enter time (00:01 - 60:00) and press ●
- To edit entered time, use ⏻ to move cursor and enter correct time. If ⏻ is already pressed, follow the steps below.
- When times over 60 minutes (60:00) are entered, the last set time returns.
To change time, press Edit Enter time Press
2 Press
Countdown starts.
3 Press Ⓞ to stop countdown
Press ⬙ to resume.
To reset, stop countdown and press 📧 Reset
4 To exit, press CLEAR BACK 25 then choose Yes and press ●
Countdown Timer End
■ Tone sounds according to General Volume setting.
- Alarm stops automatically after 60 seconds. Press ☑Cancel to stop manually.
•In Manner mode, Manner settings take priority.
- When the set timer time has elapsed during a call, Timer Expired appears after 📋 is pressed to end the call.
Tip ▶ •Countdown is not affected by incoming calls. End the call to return.
- Alarm is disabled while Countdown Timer window is open, but is reactivated automatically when handset returns to Standby.
Expenses Memo
Use Expenses Memo to add expenses, such as travel expenses. Enter up to 30 entries (up to 29,999,999.70 yen in total, 999,999.99 yen per entry).
Add New Expense
Enter monetary figure and categorise it
Main Menu
▶ Tools → Tools 3 (😊) → Expenses Memo → Add New Expense
Enter amount → Press ● → Select a category → Press ●
Shortcut: In Standby, enter amount → Press ⏻ → Press ⏻ → Select a category → Press ⏻
•The entry date, category and figure are saved.
- If Clock is unset, entry date and time will be saved as --/--/-- --:--.
Totals Check entries
Main Menu ▶ Tools → Tools 3 (○) → Expenses Memo
Select Totals → Press ●
Use ⏻ to scroll entries.
To change category, select an entry → Press ● → Select a category → Press ●
■ To enter custom category name, select Other in category list ➔ Press ⬙ ➔ Enter name (up to 14 characters) ➔ Press ⬙ (Preset category names are not affected.)
To change entry amount, select an entry → Press 📧 Options
→ Select Change Amount → Press ● → Edit → Press ●
To delete an entry, select one → Press 📧 Options → Select Delete Item → Press ⬙ → Choose Yes → Press ⬤
To delete all entries, press Options → Select Delete All → Press ● → Enter Handset Code → Press ● → Choose Yes → Press ●
Edit Category Rename categories
Main Menu ▶ Tools → Tools 3 (💡) → Expenses Memo
Select Edit Category → Press ● → Select a category → Press ● → Edit → Press ●
- Enter up to 14 characters.
Text Templates
Save frequently used phrases for use in mail message, etc. Save up to 60 entries (1,536 characters each).
New Entry
Main Menu
▶ Tools → Tools 3 (😊) → Text Templates →
1 Enter text and press ●
Tip ▶ To paste saved text into text entry windows, see P.3-15 "Using Text Templates".
Opening Templates
Main Menu ▶ Tools → Tools 3 (💡) → Text Templates
1 Select a file and press ●
Press CLEMN to return.
Editing Templates
Main Menu ▶ Tools → Tools 3 (○) → Text Templates
1 Select a file and press 📧 Options
2 Select Edit and press ●
3 Edit text and press ●
File is overwritten.
Deleting Templates
Delete single Text Templates.
Main Menu ▶ Tools ▶ Tools 3 (◎) ▶ Text Templates ▶ Select a file ▶ Options (☐) ▶ Delete
1 Choose Yes and press ●
Phone Help
Learn when/how to use Keypad functions/shortcuts. Most Phone Help functions are inaccessible from menu items.
Main Menu ▶ Tools → Tools 3 (○)
1 Select Phone Help and press ●
Phone Help window opens.

2 Press ⏻ to toggle guides
- Alternatively, press # or *
3 Press Ⓞ to return
Optional Services
Optional Services Overview
- When out appears, access services from a touch-tone landline.
- For details, contact SoftBank Customer Centre, General Information (see P20-29).
| Call Forwarding | When you know you won't be able to receive calls made to handset, automatically divert incoming calls to another phone number (see right) |
| Voicemail | Set handset to forward all or all unanswered calls to Voicemail Centre. Access caller messages from handset in service area or from a touch-tone phone anywhere (see P.13-4).■ Missed Call NotificationRecords of calls missed while handset is off/out-of-range and Voicemail is active. |
| Call Waiting* | Call Waiting alerts you to incoming calls when the line is already engaged. After the tone, place the current call on hold and answer the second, or alternate between calls (see P.13-5). |
| Conference Call† | Open a second line while the first is engaged. Switch back and forth between two lines or talk on both simultaneously. Add other parties to an existing conversation and talk on up to five lines simultaneously (see P.136). |
| Call Barring | Restrict incoming/outgoing calls depending on conditions (see P.13-7) |
| Caller ID | Show or hide your own number when placing calls (see P.13-10) |
*An additional contract is required.
Call Forwarding
- Voicemail and Call Forwarding can only be set simultaneously when Call Forwarding is set to Video Calls.
- Call Forwarding and Voicemail are not available when All Outgoing Calls or All Incoming Calls in Call Barring is active.
Call Forwarding Initiate Call Forwarding
Main Menu ▶ Settings → Call/Video Call (💡) → Voicemail/Divert → Diverts
Direct Entry
Select a call type → Press ⬙ → Select Always or No
Answer → Press ● → Select Enter Number →
Press ● ➔ Enter a phone number ➔ Press ●
For No Answer, select ring time → Press ●
- Include dialling code for landline numbers.
Phone Book
Select a call type → Press ● → Select Always or No Answer → Press ● → Select an entry → Press ●
→ Press ●
For entries with multiple numbers, select an entry
Press ⬙ → Select a number → Press ⬙ → Press ⬙
For No Answer, select ring time → Press ●
Call Forwarding Records
Select a call type → Press ● → Select Always or No
Answer → Press ⬙ → Select a phone number →
Press ● → Press ●
For No Answer, select ring time → Press ●
Incoming Calls while Call Forwarding is Active
■ To answer calls, press ☐ while handset is ringing/vibrating.
- When Always is set, handset does not ring/vibrate for calls.
Note ▶ Phone Numbers Beginning with the Following Numbers Cannot be Saved:
•1 (Public Service Numbers: 110, 119, 118, etc.)
•00 (International call numbers: 001, 0041, etc.)
•0120 (Toll-free numbers)
•0990 (Fee-based services: Dial Q2, etc.)
Forwarding Video Calls
Video Calls are forwarded only to Video Call-compatible devices that comply with 3G-324M.
Tip ▶ Adjust ring time to set the response priority when using Call Forwarding together with Answer Phone (see P.2-9).
Example: Ring time for Call Forwarding: 10 seconds
Ring time for Answer Phone: 9 seconds
In this example, Answer Phone responds first. (Priority may change depending on signal conditions.)
Cancel All Cancel Call Forwarding
Main Menu ▶ Settings → Call/Video Call (💡) → Voicemail/Divert
Select Cancel All → Press ● → Choose Yes → Press ●
- Cancel All also cancels Voicemail.
Status Check Call Forwarding status
Main Menu ▶ Settings → Call/Video Call (💡) → Voicemail/Divert
Select Status → Press ●
- Call Forwarding status appears.
Press ⬙ to return.
Voicemail
- Calls are diverted to Voicemail Centre via Call Forwarding function; Voicemail and Call Forwarding can only be set simultaneously when Call Forwarding is set to Video Calls.
- Call Forwarding and Voicemail are not available when All Outgoing Calls or All Incoming Calls in Call Barring is active.
- For details, contact SoftBank Customer Centre, General Information (see P.20-29).
- Activate Missed Call Notification (see P.13-5) for records of calls missed while handset is off/out-of-range.
Voicemail Initiate Voicemail
Main Menu
▶ Settings → Call/Video Call (😊) → Voicemail/Divert → Voicemail → Activate
Select Always or No Answer → Press ● ■ For No Answer, select ring time → Press ●
Incoming Calls while Voicemail is Active
■ To answer calls, press ☐ while handset is ringing/vibrating. - When Always is set, handset does not ring/vibrate for calls.
Tip ▶ Adjust ring time to set the response priority when using Voicemail together with Answer Phone (see P.2-9). Example: Ring time for Voicemail: 10 seconds Ring time for Answer Phone: 9 seconds In this example, Answer Phone responds first. (Priority may change depending on signal conditions.)
Cancel All Cancel Voicemail
Main Menu
▶ Settings → Call/Video Call (😊) → Voicemail/Divert
Select Cancel All → Press ● → Choose Yes → Press ●
- Cancel All also cancels Call Forwarding.
Call Voicemail Check Voicemail messages
Main Menu ▶ Phone
Select Call Voicemail → Press ●
- Follow the voice guidance for further operations after handset connects to Voicemail Centre.
•Alternatively, follow these steps in Standby.
■ Press ⬤ ➔ Select Settings ➔ Press ⬤ ➔ Use ⬦ to select Call/Video Call ➔ Select Voicemail/Divert ➔ Press ⬤ ➔ Select Voicemail ➔ Press ⬤ ➔ Select Call Voicemail ➔ Press ⬤
Tip ▶ 📋 appears when new messages are recorded, and disappears after they are checked from handset.
Status Check Voicemail status
Main Menu
▶ Settings → Call/Video Call (◎) → Voicemail/Divert
Select Status → Press ●
•Voicemail status appears.
Press ⬙ to return.
Missed Call Notification
Activate this function for records of calls missed while handset is off/out-of-range and Voicemail is active.
Activate/Cancel
Activate or cancel Missed Call Notification
Main Menu ▶ Settings → Call/Video Call (○)
Select out Missed Calls → Press ● → Press ●
- Follow the voice guidance for further operations after handset connects to the Network.
Retrieving Missed Call Notification Records
Missed Call Notification records are stored at the Centre. When handset is turned on or comes into range, Information window (see P2-7) appears with Missed Call records. •Information window may take some time to open.

Call Waiting
An additional contract is required.
Call Waiting On/Off
Activate or cancel Call Waiting
Main Menu ▶ Settings → Call/Video Call (💡) → Call Waiting
Choose On or Off → Press ●
Incoming Calls Place Line 1 on hold to answer Line 2
When a tone sounds during a call, press 📤.
- Press 📋 to switch between two lines.
Closing Handset while Someone is on Hold
All lines are disconnected.
Pressing ☎ while Someone is on Hold
■Active line ends and handset re-engages the party on hold.
Line 1 Ends while Line 2 is on Hold
■ Short beeps sound. To re-engage the party on hold: Press 📧 Options → Select Retrieve → Press ●
Tip ▶ Handset does not ring or vibrate for incoming calls while a line is engaged. A tone sounds from Earpiece. - When Voicemail or Call Forwarding is active, unanswered calls are transferred to Voicemail Centre or the forwarding number. When active service is set to Always Call Waiting is disabled.
Status Check Call Waiting status
Main Menu ▶ Settings → Call/Video Call (◎) → Call Waiting
Select Status → Press ●
- Call Waiting status appears. - Press Ⓞ to return.
Conference Call
An additional contract is required.
Dial New Number
Open another line during a call
Enter a phone number during a call → Press
- Line 2 is open. Line 1 is placed on hold. - Press 🔒 to select a number from Phone Book or press 🔒 for 1+ seconds to select from Call Log.
Swap Calls Switch between two open lines
During a call, press 📄.
•The line switches. The other line is placed on hold.
Closing Handset while Someone is on Hold
All lines are disconnected.
Pressing ☎ while Someone is on Hold
■Active line ends and handset re-engages the party on hold.
Line 1 Ends while Line 2 is on Hold
■Short beeps sound. To re-engage the party on hold: Press 📧 Options → Select Retrieve → Press ●
Conference Call
Use up to five lines simultaneously
Press ☑ Options while switching between two lines → Select Multi Party → Press ● → Select Conference All → Press ●
To switch to private conference during Conference Call, select a number/name → Press ● → Select Private → Press ●
■The other lines are placed on hold.
To switch back to Conference Call during private conference or after opening a new line, press ☑ Options ➔ Select Multi Party ➔ Press ⬙ ➔ Select Conference All ➔ Press ⬤
Ending Calls during Conference Call
All lines are disconnected.
Some Lines End during Conference Call
■Other lines remain connected.
Call Barring
Restrict incoming/outgoing calls or SMS messages. Following restrictions are available:
| Outgoing Calls | All Outgoing Calls | Restrict all non-emergency calls |
| Bar Int'l Call1 | Allow only domestic calls | |
| Only Local & Home2 | Restrict all international calls except to Japan | |
| Incoming Calls | All Incoming Calls | Reject all calls |
| Bar if Abroad | Reject calls when outside Japan |
1 Example: While in the UK, place domestic calls only.
2 Example: While in the UK, place calls domestically or to Japan.
Alternatively, restrict calls by number/Caller ID availability.
| Rejected Numbers | Black List Reject calls from designated numbers | |
| Unknown | Reject calls from numbers not saved in Phone Book | |
| Withheld Reject calls without Caller ID | ||
| Payphone Reject calls from public phones | ||
| Unavailable | Reject calls with undisplayable Caller ID | |
Note • Network Password selected at initial subscription (see P.1-27) is required to change Call Barring settings.
- If Network Password is incorrectly entered three times, Call Barring settings are locked. To resolve, Network Password and Centre Access Code must be changed. For details, contact SoftBank Customer Centre, General Information (see P.20-29).
- All Outgoing Calls and All Incoming Calls are disabled when Call Forwarding or Voicemail is active.
Tip ▶ If call is attempted when Call Barring is active, Call barred. appears. It may take longer to appear in some areas. Check Call Barring settings if the message does not appear.
Restricting Outgoing Calls
Set/Cancel Restriction
Set or cancel restriction of outgoing calls
Main Menu
▶ Settings → Call/Video Call (😊) → Call Barring → Outgoing Calls
Each Restriction
Select restriction → Press ● → Choose On (set) or Off → Press ● → Enter Network Password → Press ●
Cancelling All Restrictions
Select Cancel All → Press ● → Enter Network Password → Press ●
Tip ▶ Emergency calls (110, etc.) are possible even when outgoing calls are restricted. See P.2-3 "Emergency Calls".
Status Check Call Barring status for outgoing calls
Main Menu
▶ Settings → Call/Video Call (😊) → Call Barring → Outgoing Calls
Select restriction → Press ● → Select Status → Press ●
- Call Barring status appears. - Press Ⓞ to return.
Restricting Incoming Calls
Set/Cancel Restriction
Set or cancel restriction of incoming calls
Main Menu
▶ Settings → Call/Video Call (💡) → Call Barring → Incoming Calls
Each Restriction
Select restriction → Press ● → Choose On (set) or Off → Press ● → Enter Network Password → Press ●
Cancelling All Restrictions
Select Cancel All → Press ● → Enter Network Password → Press ●
Status Check Call Barring status for incoming calls
Main Menu
▶ Settings → Call/Video Call (💡) → Call Barring → Incoming Calls
Select All Incoming Calls → Press ⬙ → Select Status → Press ⬙
- Call Barring status appears. - Press Ⓞ to return.
Rejecting a Call
Set Reject
Number
Designate phone numbers to reject
Main Menu
▶ Settings → Call/Video Call (○) → Call Barring → Rejected Numbers → Black List → Set Reject Number
Adding Numbers
Select
Press
To select from Phone Book, select
Options → Select Ph.Book List → Press ● → Select an entry → Press ●
■ For entries with multiple numbers, select one → Press ●
■ Name appears for numbers saved in Phone Book.
To select from Call Log, select
Editing Numbers
Select an entry → Press ⬙ → Edit the number →
Press
Deleting Numbers
Select an entry → Press 📧 Options → Select Delete
Press ● → Choose Yes → Press ●
Tip ▶ Designate numbers to reject then set Switch On/Off to On.
Switch On/Off Reject calls from designated numbers
DefaultOff
Main Menu
▶ Settings → Call/Video Call (💡) → Call Barring →
Rejected Numbers → Black List → Switch On/Off
Choose On (reject) or Off → Press ●
Unknown
Reject calls from numbers not saved in Phone Book
Default Off
Main Menu ▶ Settings → Call/Video Call (😊) → Call Barring → Rejected Numbers → Unknown
Choose On (reject) or Off → Press ●
Withheld Reject calls without Caller ID
DefaultOff
Main Menu ▶ Settings → Call/Video Call (😊) → Call Barring → Rejected Numbers → Withheld
Choose On (reject) or Off → Press ●
Payphone Reject calls from public phones
Default Off
Main Menu ▶ Settings → Call/Video Call (😊) → Call Barring → Rejected Numbers → Payphone
Choose On (reject) or Off → Press ●
Unavailable Reject calls with undisplayable Caller ID
DefaultOff
Main Menu ▶ Settings ▶ Call/Video Call (😊) ▶ Call Barring ▶ Rejected Numbers ▶ Unavailable
Choose On (reject) or Off → Press ●
Changing Network Password
Change NW Password
Change Network Password
Main Menu
▶ Settings → Call/Video Call (😊) → Call Barring → Change NW Password
Enter current Network Password → Press ⬤ → Enter new Network Password → Press ⬤ → Enter new Network Password again → Press ⬤
Caller ID
Show or hide your own phone number when placing calls. Regardless of this setting, sending or blocking Caller ID can be selected for each call. Enter the following numbers/ symbols before a phone number when placing a call.
| Send | 1#08#76or###3#cr1## |
| Block | 1#08#4#or#3#cr1## |
Show My Number
Send or block Caller ID
DefaultOn
| Main Menu | ▶ Settings ➔ Call/Video Call (💡) ➔ Show My Number |
Choose On (send) or Off → Press ●
Status Check Caller ID status
| Main Menu | ▶ Settings ➔ Call/Video Call (💡) ➔ Show My Number |
Select Status → Press ●
- Caller ID status appears. - Press ⬙ to return.
Messaging
Basics
Use SMS and S! Mail for messaging.
Create Arrange Mail or Feeling Mail from S! Mail.
SMS
Exchange short text messages of up to 160 alphanumeric with SoftBank handsets.
- Send SMS to up to 20 recipients at one time.
S! Mail
Exchange text messages of up to 30,000 characters with e-mail compatible SoftBank handsets, other mobiles and PCs, etc. Attach image/sound files.
- Send S! Mail to up to 20 recipients at one time.
Arrange Mail
Select font colour, font size, background colour; insert images, background sound, and more (see P.14-11).
Feeling Mail
Ringtone, Vibration and Small Light response varies by the emotion set by sender (see P.14-15).

- An additional contract is required to use S! Mail and receive e-mail from PCs, etc.
- Address questions about messaging to SoftBank Customer Centre, General Information (see P.20-29).
Messaging Folders
Messages are organised in folders by type.
Received Msg. 1
Received messages
Drafts
Incomplete/unsent messages
Templates
Arrange Mail created/downloaded as templates
Sent Messages 2
Sent messages
Unsent Messages
Undelivered, cancelled, failed or Send Reservation messages
1 Received Folder and Folder 1 - Folder 7 (My Folders) appear within when Received Msg. View (see P.14-4) is set to Folder View. Spam Folder appears as well if Anti Spam Measures (see P.14-35) is active.
2 Sent Folder and Folder 1 - Folder 7 (My Folders) appear within when Sent Msg. View (see P.14-4) is set to Folder View.
Memory Status
■ Press ⬤ ➔ Select Messaging ➔ Press ⬤ ➔ Select Memory Status ➔ Press ⬤ ➔ Select Received Msg., Sent Total, Sent Msg., Drafts or Unsent Msg. ➔ Press ⬤ ■Press ⬤ to return.
- Save up to 5 MB or 1,000 messages in Received Msg. folder. Handset stores up to 3 MB or 500 messages between Sent Messages, Drafts and Unsent Messages.
•A notice appears when Messaging Folder memory is low. - Templates memory usage is reflected in memory status of Other Documents in Data Folder (see P.8-2).
• USIM Card SMS message count and volume do not appear.
Window Description
Messaging Folder Contents
Select a Messaging folder and press Ⓞ to open it.
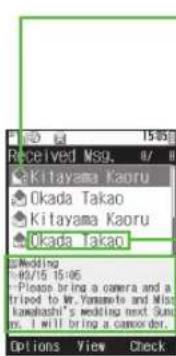
Sender+Preview
Message Type/Status
- Message Status:
| UnreadRead | |||
| SentFailed | |||
| RepliedForwarded | |||
| ! Mail Notice | Unread Delivery Report | ||
| SendReservation set* | |||
SMS appears below SMS messages (☐).
Send Reservation messages are saved to Unsent Messages folder.
- Message Settings:
| 8 Attachments @ Protected | |
| 1Priority (High) 2Priority (Low) | |
| 3 SMS Mail onUSIM Card | |
Sender or Recipient
•Number, address or name appears.
Message Text
Tip
- Follow these steps to sort messages.
Press 📧 Options → Select View Settings →
Press ⬤ → Select Sort → Press ⬤ → Select
an option → Press ●
•To change message list view, see right.
Message Contents
Select a message and press Ⓞ to open it.

Message Number
Sender or Recipient
• Number, address or name appears.
Subject (S! Mail only)
Received or Sent Date & Time
Message Text
Tip ▶
- To activate Display Backlight, press 0.5 - 9.5
- Press #3 to open previous message (older one), or press Xto to open next one (newer one).
Changing Views
Message List View
Main Menu ▶ Messaging → Settings → General Settings
1 Select Message List View and press ●
2 Select Two-line, Sender+Preview, Sunjects+Preview, Sender or Subjects and press ●
- Message List View is Sender+Preview by default.
Tip
- Alternatively, open a Messaging folder and follow these steps.
Press 📋 Options → Select View Settings →
Press ⬙ → Perform from Step 1 on the left
- Shortcut: Open a Messaging folder and press 📄 to toggle view.
Folder View
Set folders to appear in Received Msg. and Sent Messages folders. Organise messages into folders manually or automatically (see P.14-31).
Received Msg. View and Sent Msg. View are List View (folders are hidden) by default.
Main Menu
▶ Messaging → Settings → General Settings
1 Select Received Msg. View or Sent Msg.View and press Ⓞ
When the folder contains a Secret folder, enter Handset Code → Press
2 Select Folder View and press ●
To hide folders, select List View → Press ●
Note ▶ When folders are hidden, messages in Secret folders appear in message list.
Customising Handset Address
Change alphanumerics before @ of the default handset mail address.
![graph TD A["Default"] --> B["@softbank.ne.jp"] C["Custom"] --> D["Account Name"] D --> E["Entered Account Name @softbank.ne.jp"] F["Domain Name"] --> E](/content/2026/07/1509125/images/53cbf28b5399d811214b49a118ad2340c272476207dac92f019da684d42744e3.jpg)
- Handset must connect to the Internet to customise handset address.
- Retrieve Network Information (see P.1-20) before customising handset address.
- Customising handset mail address helps reduce spam.
- Default Account Name is random alphanumeric.
Main Menu ▶ Messaging → Settings
1 Select Address Setting and press ● Handset connects to the Internet.
2 Select English and press ●
• Follow onscreen instructions.
Tip ▶ Alternatively, customise handset address via Yahoo! Keitai Main Menu. (Click 設定·申込, then English, then Messaging Settings.)
Sending Text Messages
- Create Contact Groups beforehand to send the same message to multiple recipients at one time (see P.4-12).
- Save frequently used numbers/addresses to Speed Mail List (see P.14-33).
- Use Multi Job (see P.1-26) to view other messages while creating a message.
Basics
Available entry limits vary by Message Type.
| Recipient Subject Message | Attachments | |||
| SMS Available * | N/A Available N/A | |||
| S! Mail Available Available Available Available | ||||
SoftBank handset numbers only.
Mail Composition Overview
![graph TD A["SMS"] --> B["Enter Recipient"] C["S! Mail"] --> D["Enter Subject"] B --> E["Compose Message"] D --> E E --> F["Send Message"] F --> G["Attach Files\nAdd Arrange Mail Effects\nApply Feeling Mail Settings"]](/content/2026/07/1509125/images/47e453a7a1e077fb432e49600c1e3ee041f033dce9c2e64c05e23636075fa0e0.jpg)
Character Entry Limits
Character entry limit varies by Message Type.
SMS 160 single-byte alphanumerics
S! Mail Approximately 30,000 single-byte alphanumeric
- For SMS, only single-byte alphanumeric entry is available when Char-code (see P.14-37) is GSM 7bit.
- Send up to 300 KB including message text via S! Mail. Message text character limit differs by attachment size or number of recipients.
- Approximate mail size appears in Mail Composition window (see right, P.14-7).
Creating & Sending SMS Mail
1 Press ●, select Messaging and press ●
• Alternatively, press 📧 in Standby.
2 Select Create New SMS and press ●
Mail Composition window opens.
3 Select recipient field and press ●
■ Entering Recipients: see P.14-9
4 Enter recipients
To enter a recipient, perform Step 4 on P.14-7.
■ Enter Address is not available for SMS.

SMS Mail Composition
Window
5 Select message text field and press ● then enter a message
Alternatively, enter the first character; message text entry window opens automatically.
■ Entering Characters: see P.3-5
6 Press
To edit the message, see Step 8 on P.14-8.
To delete the message, see Step 8 on P.14-8.
To preview 3D Pictogram, see Step 8 on P.14-8.
Delivery Options: see P.14-15
Send Reservation: see P.14-17
Saving to Drafts: see P.14-18
7 Press Y? Send
Converting SMS Mail to S! Mail
In SMS Mail Composition window, press Options → Select Change to S! Mail → Press ● → Choose Yes → Press ●
- When entered message text exceeds SMS character limit, a confirmation appears. Choose Yes and press Ⓞ to convert SMS to S! Mail and continue entering text.
Creating & Sending S! Mail
1 Press ●, select Messaging and press ●
• Alternatively, press 📋 in Standby.
2 Select Create Message and press ●
Mail Composition window opens.
- Shortcut: In Standby, press 📄 for 1+ seconds

S! Mail Composition Window
3 Select recipient field and press ●
Select Recipient window opens. ■ Entering Recipients: see P.14-9
4 Phone Book
1 Select Phone Book and press ●
2 Select a recipient and press ●
To search Phone Book, perform Steps 2 - 3 in "Dialling from Phone Book" on P4-8.
When multiple items are saved, select one → Press Ⓞ
Contact Groups (see P.4-12)
1 Select Select Group and press ●
2 Select a Group and press ●
To add recipients, select recipient field → Press ● → Select Add Recipient → Press ● → Repeat Step 4
Sent Mail Records
1 Select a recipient and press ●
- Sent mail records are names, phone numbers or mail addresses with corresponding indicators.
Speed Mail List (see P.14-33)
1 Select Speed Mail List and press ●
2 Select a recipient and press ●

Select Recipient Window
Direct Entry
1 Select Enter Number or Enter Address and press ●
2 Enter recipient's SoftBank handset number or mail address and press ●
5 Select subject field and press ●
Subject entry window opens. Alternatively, enter the first character to open subject entry window.
6 Enter subject and press ●
- Enter up to 512 single-byte alphanumeric.
7 Select □ Text and press ● then enter a message
Entering Characters: see P.3-5
■ After entering My Pictogram from My Pict History, Arrange Mail Composition window (see P.14-11) opens automatically.
To enter cross-carrier Pictograms, press 📋 Options ➔ Select Pict Setting ➔ Press ⬙️ ➔ Select For DoCoMo, For au, For SoftBank or Common ➔ Press ⬙️ ➔ Select a Pictogram ➔ Press ⬙️
■Available Pictograms vary by Pict Setting mode.
■Mode selection applies to the current message only.
■Changing Pict Setting does not affect entered Pictograms.
Creating Arrange Mail: see P.14-11
To enter Signature, press 📋 Options → Select Advanced → Press ⬙ → Select Signature → Press ⬤
■ Activate Auto Insert (see P.14-35) to enter Signature automatically.
8 Press
To edit the message, select message text field → Press ● → Edit → Press ●
To delete the message, select message text field → Press ☑ Options → Select Remove Text → Press
To preview 3D Pictogram, select message text field → Press ☑ Options → Select 3D Pictogram → Press ● ■Preview how the message appears on 3D Pictogram-compatible recipient handsets.
Delivery Options: see P.14-15
Creating Feeling Mail: see P.14-15
Send Reservation: see P.14-17
Saving to Drafts: see P.14-18
9 Attach files
- Attaching Files: see P.14-10
10 Press ¥? Send
- Message is sent even if handset is closed.
To cancel, press ☐ Cancel.
■Message is not sent if cancelled quick enough.
Incoming Calls while Creating Message
■Content is saved temporarily. End the call to return.

Sending from Phone Book Entries
■Open a Phone Book entry and follow these steps.
- Phone Numbers
Select a number → Press ⬙ → Select Create
Message → Press ● → Select S! Mail or SMS →
Press ⬙ → Perform from Step 5 on P.14-8 or on P.14-6
- Mail Addresses
Select a mail address → Press ⬙ → Perform from Step 5 on P.14-8
When Recipient Handset is Off or Out-of-Range
■Messages are stored in Server Mail Box, and delivered when recipient handset detects signal.
- Messages are deleted if not received by the specified Expiry Time.
Delivery Failure
Information window opens (✗ appears) for delivery failure. To send unsent messages, select Sending failure
→ Press ⬙ → Select a message → Press ⬙
■ Activate Auto Resend (see P.14-34) to reattempt to send unsent messages automatically up to two times.
- If messages are not sent after two Automatic Resend attempts, follow the above steps to send manually.
•Automatic Resend may send the same message twice.
Entering Recipients
■To add recipients, open Mail Composition window (see
P.14-6, P.14-7) and follow these steps.
Select recipient field → Press ● → Select Add
Recipient → Press ● → Perform from Step 4 on P.14-7
■Press □ to return.
- Enter up to 20 recipients in total.
To switch recipient status between To, Cc (carbon copy) and Bcc (blind carbon copy), open S! Mail Composition window and follow these steps.
Select recipient field → Press ● → Select a
recipient → Press 📋 Options → Select Change to
To, Change to Cc or Change to Bcc → Press ●
- Other recipients cannot see numbers/addresses set to Bcc.
To change/edit, open Mail Composition window (see P.14-6, P.14-7) and follow these steps.
Select recipient field → Press ⬙ → Select a
recipient → Press ● → Edit → Press ●
■Press ☐ to return.
To delete, open Mail Composition window (see P.14-6, P.14-7) and follow these steps.
Select recipient field → Press ⬙ → Select a recipient
→ Press 📧 Options → Select Delete → Press ●
■ To delete all, select Delete All instead of Delete → Press ●
→ Choose Yes → Press ●
■Press ☐EAR BACI to return.
Note ▶ When a mail address is entered, do not use single-byte katakana or Pictograms in message text and subject. They may not appear properly on recipient devices.
Attaching Files
Attach images, sound files, vFiles (Phone Book/schedule entries), etc. to S! Mail messages.
- Attach up to 20 files or 300 KB including message text.
- Confirm compatibility with recipient handsets (file format, services, etc.) before sending files.
- Follow these steps after Step 8 on P.14-8; after S! Mail Composition window returns, complete and send message.
1 Select ☑ Attach
2 Select Attach File and press ●
Alternatively, press Options → Select Attach File → Press
3 Image Files
1 Select Picture and press ●
2 Select a folder and press ●
To capture an image, select Take Picture → Press ● → Press ● to shoot → Press ●
■When confirmation for save location appears, select a location → Press ●
3 Select a file and press ●
For large JPEG images, select attachment size → Press ●
To change image size, select attached image
Press Options Select Resize Picture Press
Select a size Press
■Resize Picture is not available when Multi Job is active or when a non-JPEG (.jpg) image is selected.
Sound Files
1 Select Sound and press ●
2 Select a folder and press ●
To record sound, select Record Voice → Press ● → Press ● to start recording → Press ● to stop → Select Accept → Press ● → Select To Phone Memory or To Memory Card → Press ● (Omit the next step.)
3 Select a file and press ●
Video Files
1 Select Video and press ●
2 Select Saved Videos and press ●
To record video, select Record Video → Press ● → Press ● to start recording → Press ● to stop → Select Accept → Press ● → Select To Phone Memory or To Memory Card → Press ● (Omit the next step.)
3 Select a file and press ●
Flash®/Flash® Ringtone Files (see P.8-7)
1 Select Flash ® or Flash ® Ringtone and press ●
2 Select a file and press ●
Phone Book Entries
1 Select Attach Contact and press ●
2 Select an entry and press ●
Schedule Entries
1 Select Attach Appointment and press ●
2 Select a date with schedule and press ●
3 Select an entry and press ●
Templates
1 Select Templates and press ●
2 Select a file and press ●
Books
1 Select Books and press ●
2 Select a file and press ●
Custom Screens
1 Select Custom Screens and press ●
2 Select a file and press ●
Other Files
1 Select Other Documents and press ●
2 Select a file and press ●
Deleting Attachments
In S! Mail Composition window, select a file → Press Options → Select Remove Item → Press
Adding Attachments
In S! Mail Composition window, select 📋 Attach → Select Attach File → Press ⬙ → Perform from Step 3 on P.14-10
Creating Arrange Mail
Select font colour, font size, background colour; insert images, background sound, and more.
- Insert one sound or Flash file per Arrange Mail.
- Enter up to 40 types of My Pictograms per Arrange Mail.
- Follow these steps in Step 7 on P.14-8; after S! Mail Composition window returns, complete and send message.
1 Press 📧 Options
2 Select Arrange and press ●
Arrange Mail Composition window opens.
- Shortcut: Press 📄 for 1+ seconds

3 Changing Font Colour
1 Select Font Colour: and press ●
2 Select a colour and press ●
3 Enter text
- To open Arrange menu, press 📎/.
To change colour of entered text, press Select Area Select the start point → Press ● → Select the end point → Press ● → Select Font Colour: → Press ● → Select a colour → Press ●
To change colour of all entered text, press Select Area → Press All → Select Font Colour: → Press ● → Select a colour → Press ●
Changing Font Size
1 Select Font Size: and press ●
2 Select a size and press ●
3 Enter text
- To open Arrange menu, press 📎.
To change font size of entered text, press Select Area Select the start point → Press ● → Select the end point → Press ● → Select Font Size: → Press ● → Select a size → Press ●
To change font size of all entered text, press Select Area → Press All → Select Font Size: → Press ● → Select a size → Press ●
Inserting Images
1 Select Insert Picture and press ●
2 Select Pictures or DCIM and press ●
3 Select a file and press ●
To capture an image, select Insert Picture → Press ⬙ → Select Take Picture → Press ⬙ → Press ⬙ to shoot → Press ⬙
4 Use ✦ to select target location and press ●
- Omit this step if there is no text.
Inserting My Pictograms (see P.8-7)
1 Select Insert My Pictogram and press ●
Data Folder (My Pictograms) opens.
2 Select a file and press ●
3 Press
Alternatively, while entering message text, press until History appears → Press # to open My Pict History → Select a file → Press
■After entering My Pictogram, Arrange Mail Composition window opens automatically.
■ To select My Pictograms from file list, press # in My Pict History.
Inserting Background Sound
1 Select Insert and press ●
2 Select Insert BGM Sound and press ●
3 Select Ring Songs·Tones or Music and press Ⓞ
4 Select a file and press ●
To record sound, select Insert → Press ● → Select Insert BGM Sound → Press ● → Select Record Voice → Press ● → Press ● to start recording → Press ● to stop → Select Accept → Press ● → Select To Phone Memory or To Memory Card → Press ● (Omit the next step.)
To delete inserted sound, select Insert → Press ● → Select Delete BGM Sound → Press ● → Choose Yes → Press ●
Inserting Flash ® (see P.8-7) File
1 Select Insert and press ●
2 Select Insert Flash and press ●
Data Folder (Flash ® ) opens.
3 Select a file and press ●
To preview inserted Flash ® , press Input Press Options Select Preview Press
To delete inserted file, press Input → Move cursor before the Flash® file icon → Press
Inserting Horizontal Lines
1 Select Insert and press ●
2 Select Insert Line and press ●
Press ☐ to return.
Flashing Text
1 Select Effect and press ●
2 Select Blink and press ●
3 Select Blink On and press ●
4 Enter text
To flash entered text, press Select Area → Select the start point → Press ● → Select the end point → Press ● → Select Effect → Press ● → Select Blink → Press ● → Select Blink On → Press ● To cancel, press Select Area → Select the start point → Press ● → Select the end point → Press ● → Select Effect → Press ● → Select Blink → Press ● → Select Blink Off → Press ●
Scrolling Text
1 Select Effect and press ●
2 Select Scrolling and press ●
3 Select Right to Left or Swing and press ●
4 Enter text
To scroll entered text, press Select Area → Select the start point → Press ● → Select the end point → Press ● → Select Effect → Press ● → Select Scrolling → Press ● → Select Right to Left or Swing → Press ● To cancel, press Select Area → Select the start point → Press ● → Select the end point → Press ● → Select Effect → Press ● → Select Scrolling → Press ● → Select Scroll Off → Press ●
Aligning Text
1 Select Effect and press ●
2 Select Alignment and press ●
3 Select Alignment Left, Alignment Centre or Alignment Right and press ●
4 Enter text
To align entered text, press ☑ SelectArea → Select the start point → Press ● → Select the end point → Press ● → Select Effect → Press ● → Select Alignment → Press ● → Select Alignment Left, Alignment Centre or Alignment Right → Press ●
Changing Background Colour
1 Select Background Colour: and press ●
2 Select a colour and press ●
Cancelling All
1 Select Normal and press ●
2 Choose Yes and press ●
- All Arrange Mail settings are cancelled and message text entry window returns.
Cancelling Last Action
In Arrange Mail Composition window, select Undo → Press ●
- Does not apply to Background sound insertion/deletion.
Creating Templates
In S! Mail Composition window, press Options Select Save as Template Press Enter name Press Select Save here.. Press Entered recipients, subject and attachments are deleted. Templates can also be downloaded via the Internet, etc.
Creating Arrange Mail from Templates
In Standby Press ⬤ ➔ Select Messaging ➔ Press ⬤ ➔ Select Templates ➔ Press ⬤ ➔ Select one ➔ Press ⬤
■To check Templates, select one in Templates list and press 📋 Options → Select Preview → Press ●
■ To switch Template name display, select one in Templates list and press ☐ Options → Select Item Displayed → Press ⬙ → Select File Name or Title → Press ⬙
• To organise Templates, see P.8-8 "Managing Files & Folders".
In S! Mail Composition Window Press 📧 Options → Select Launch Template → Press ⬙ → Select one → Press ⬤
Creating Feeling Mail
Apply Feeling Mail setting to S! Mail; corresponding Pictogram appears to the left of subject, and recipient handset responds according to Link to Feeling settings (see P.14-20).
- Send Feeling Mail to compatible SoftBank handsets only.
- Feeling Mail Pictograms appear as standard Pictograms in subjects on incompatible recipient handsets.
- Follow these steps in Step 8 on P.14-8; after Mail Composition window returns, complete and send message.
1
Press
Options
2
Select Feeling Settings and press ●
3
Select Happy/Glad, OK/Good, Sad/Sorry, NG/Bad or Imp./Notice and press ●
4
Select a Pictogram and press ●
S! Mail Composition window returns.
Delivery Options
- Options are effective only when sent to compatible handsets.
- Settings are valid for one message.
- Follow these steps after Step 6 on P.14-6 (for SMS) or Step 8 on P.14-8 (for S! Mail); press 2√3A2B2A to return to Mail Composition window then complete and send message.
SMS/S! Mail Delivery Option
Delivery Report
Set to receive Delivery Report (see P.14-19)
Available when messaging to SoftBank handset numbers.
Press 📧 Options → Select Messaging Settings → Press ⬙ → Select Delivery Report → Press ⬙ → Choose On or Off → Press ⬙
SMS Delivery Option
Expiry Time
Set Message Centre sent message storage limit
DefaultMaximum
Press Options Select Messaging Settings Press Select Expiry Time Press Select a limit Press
S! Mail Delivery Options
Reply To Settings
Designate a different mail address for receiving replies
Available when reply-to address is saved.
DefaultOff

To set reply-to address, see P.14-37 "Reply To Settings".
Note ▶ This function may not work depending on the recipient's mail software.
Priority Set message priority
DefaultNormal

- Priority setting does not affect delivery speed.
Remote Fwd. Action Select whether to delete Server Mail after forwarding it
Available when forwarding Server Mail (Remote Forward). Default Not Delete

Set Auto Delete Set the message to be deleted from recipient handsets once read
Available when messaging to SoftBank handset numbers. DefaultOff

Reply Request Set to show a reply request
Available when messaging to SoftBank handset numbers. Default Off
Press Options Select Messaging Settings Press Select Reply Request Press Choose On or Off Press
Forward NG Set to show a do not forward request
Available when messaging to SoftBank handset numbers.
DefaultOff
Press 📧 Options → Select Messaging Settings → Press ⬙ → Select Forward NG → Press ⬙ → Choose On or Off → Press ⬙
Delete NG Set to show a do not delete request
Available when messaging to SoftBank handset numbers. Default Off
Press Options → Select Messaging Settings → Press ● → Select Delete NG → Press ● → Choose On or Off → Press ●
Quiz Set up a question, recipients need to answer it correctly to open the message
Available when messaging to SoftBank handset numbers. DefaultOff
Setting Up Quiz
Press Options Select Messaging Settings Press Select Quiz Press Select Switch On/Off Press Choose On Press Select Question Press Enter a question Press Select Answer Press Enter the answer Press Done
- Entered question and answer are deleted when Quiz is set to Off. ■ Default question (When is my birthday?) returns.
Editing Question/Answer
Press 📧 Options → Select Messaging Settings → Press ●
→ Select Quiz → Press ● → Select Edit Question →
Press ⬙ → Select Question → Press ⬙ → Enter a
question → Press ● → Select Answer → Press ● →
Enter the answer → Press ⬤ → Press 📧 Done
Set Auto
Play File
Show a comment and open/play an attached file automatically before message text is opened on recipient handsets
Available when messaging to SoftBank handset numbers.
■ Follow these steps after Step 9 on P.14-8.
DefaultOff
Activating/Cancelling
Select a file → Press 📧 Options → Select Set Auto
Play File → Press ⬙ → Select Switch On/Off →
Press ● → Choose On or Off → Press ●
- Comment is deleted when Set Auto Play File is cancelled.
Entering a Comment
Select a file → Press 📧 Options → Select Set Auto
Play File → Press ⬙ → Select Enter Message →
Press ● → Enter text → Press ●
- Apply to one file per message.
•Not available for Arrange Mail. - Set Auto Play File appears only for compatible files.
Note ▶ Set Auto Delete, Reply Request, Forward NG, Delete
NG, Quiz and Set Auto Play File cannot be applied at the same time; select one per message.
Send Reservation
Send messages at the designated date/time in the future.
- Messages are saved to Unsent Messages folder.
- Save up to ten Send Reservation messages.
•Information window opens for successful delivery. - Follow these steps after Step 6 on P.14-6 (for SMS) or Step 8 on P.14-8 (for S! Mail).
1 Press 📧 Options
2 Select Send Reservation and press ●
3 Select Date & Time and press ●
To send messages ten seconds after signal returns, select
Within the Network → Press ⬙ → Choose Yes → Press ⬤
4 Enter date/time
- Select date/time within a week.
5 Choose Yes and press ● - When Auto Resend (see P.14-34 is Off, failed Send Reservation messages (due to out-of-range or power-off) will not be resent.
Using Drafts
Saving to Drafts
- When memory is full, delete messages (see P.14-29) before creating new ones.
- Follow these steps after Step 6 on P.14-6 (for SMS) or Step 8 on P.148 (for S! Mail).
1 Press 📧 Options
2 Select Save to Drafts and press ●
Message is saved to Drafts folder.
Note ▶ Recipient status (To/Cc/Bcc) or the order in which attachments appear may change when saving S! Mail messages.
Sending from Drafts
Main Menu ▶ Messaging
1 Select Drafts and press ●
Saved messages appear.

2 Select a message and press ● Mail Composition window (see P.14-6, P.14-7) opens with some fields filled in.
3 Edit/send the message
- For details, see procedures for creating SMS (see P.14-6) or S! Mail (see P.14-7 - 14-8).
- Sent messages are deleted from Drafts.
To save edited message to Drafts again, press Options Select Save to Drafts Press Select Save as New or Save (overwrite) Press
Incoming Text Messages
Opening New Messages
1 Delivery Notice appears and Information window opens (✉ appears) for new mail
- If closed, open handset for new information to see Delivery Notice appear and Information window open.
2 Select Message and press ●
Received Msg. folder opens.
• Alternatively, press ⬙ while Delivery Notice appears.
When folders appear (see P.14-4 "Folder View"), select one → Press

3 Select a message and press ●
Message window opens.
- To set 3D animation (see P.14-24 "3D Pictogram") to play for compatible messages, see P.14-24 "Display Effect".
To retrieve complete S! Mail messages, see P.14-21.
Using Messages: see P.14-23
Tip
- When no Delivery Notice or Information window appears, open from Received Msg. folder (see P.14-23 "Checking Messages").
- Handset does not respond to messages with Low Priority.
Viewing New Message Text on External Display
When a new message is received with handset closed, activate External Display Backlight and press 📄.
■ To scroll message text, press ▶ or ◀.
■ To exit, press 📄. (Next new message opens, if any.)
•Pictograms and My Pictograms do not appear.
- Up to 150 characters appear per message. (Line break counts as two characters.)
- New messages appear on External Display only when Message is set to Display and Caller Display is On in External Display settings (see P.9-13).
Retrieving Server Mail Box Messages Manually
Press


Messages with Reply Request
When closing a message containing Reply Request, a confirmation appears.
• To reply, choose Yes and press Ⓞ.
- Confirmation does not appear for replied messages.
Messages with Quiz
A question appears when opening a message locked with Quiz. To open, press Ⓞ, enter the answer and press Ⓞ.
- Message cannot be opened until the correct answer is entered.
- Subject and message text do not appear in message list.
Auto Play
If Set Auto Play File is set to an attached file, a comment appears and the file opens/plays automatically upon opening the message.
- Some files may not open/play.
Delivery Report
When messages are sent with Delivery Report (see P.14-35) On, handset receives a Delivery Report from Server Mail Box. To open Delivery Report, follow these steps in Information window (see P.14-18).
Select Delivery Report → Press ● → Select a message with unconfirmed Delivery Report → Press ● → Press Y? Report
■ When Report list appears, press Ⓞ to open first report
→ Press □ Select next report → Press ●
- Alternatively, open sent message; 📄 appears for delivered messages, 📄 for unknown and 📄 for failed messages.
New Mail Out of Standby
A double beep sounds and a notice such as New Message from XX (name/number). appears.
- To change/hide notice or mute double beep, see P.14-36 "Message Notice".
Information window opens when handset returns to Standby.
When Handset Address is Changed
■New handset address confirmation from SoftBank arrives. To update My Details automatically, follow these steps.
Select the message → Press → Choose Yes → Press
■My Details cannot be updated when three mail addresses are already saved.
Receiving Feeling Mail
Ringtone, Vibration and Small Light respond according to emotion set by sender and Information window opens.
•Ringtone, Small Light and Vibration settings in Phone Book take priority.
- Feeling Mail settings are disabled when:
■Sender is saved in Phone Book as Secret entry
■The message was filtered as spam
■The message was sorted to a Secret folder

■Customising Handset Response
Default Settings:
| Happy/Glad | OK/Good | Sad/Sorry | NG/Bad | Important/Notice | |
| Idle Screen Info. | On | ||||
| Light On/Off On | |||||
| Vibration Pattern | Link to Sound | ||||
| Ringtone On/Off | On | ||||
| Ringtone | Sound Effect 6 | Sound Effect 7 | Sound Effect 8 | Sound Effect 9 | Sound Effect 10 |
| Duration 5 seconds | |||||
| Idle Screen Info. | Show or hide subject, sender and graphics above Information window for received Feeling Mail |
| Main Menu | ▶ Messaging ➔ Settings ➔ General Settings ➔ Link to Feeling ➔ Idle Screen Info. |
Choose On (show) or Off → Press ●
| Light | Set Small Light illumination for incoming Feeling Mail |
| Main Menu | ▶ Messaging → Settings → General Settings → Link to Feeling → Light |
Activating/Deactivating
Choose On or Off → Press ●
| Vibration Pattern | Set handset vibration for incoming Feeling Mail |
| Main Menu | ▶ Messaging ➔ Settings ➔ General Settings ➔ Link to Feeling ➔ Vibration Pattern |
Select On, Link to Sound or Off → Press ●
Ringtone
Select sound/video for incoming Feeling Mail; set duration
Main Menu
▶ Messaging → Settings → General Settings → Link to Feeling → Ringtone
Activating/Deactivating
Select Switch On/Off → Press ● → Choose On or Off → Press ●
Assign Tone/Video
Select Assign Tone → Press ⬤ → Select Happy/Glad, OK/Good, Sad/Sorry, NG/Bad or Important/Notice → Press ⬤ → Select Preset Sounds, Ring Songs-Tones, Music, Videos or Flash® Ringtones → Press ⬤ → Select a tone or file → Press ⬤
Duration
Select Duration → Press ⬙ → Enter time → Press ⬙
Retrieving Complete S! Mail Messages
If Message DL (Japan)/Message DL (Abroad) is set to DL only Tel. No. or Always Defer (see P.14-37), Server Mail Box sends initial portion of S! Mail message in each of the following cases:
■The message was sent to multiple recipients
■Files are attached to the message
By default, Message DL (Japan) is set to Always Download and Message DL (Abroad) is set to Always Defer. To change settings, see P.14-37.
Tip
- (S! Mail Notice) appears for S! Mail messages in Received Msg. folder when the remaining portion is in Server Mail Box.
• To retrieve complete S! Mail via Mail List, see P.14-22.
Main Menu
▶ Messaging
1
Select Received Msg. and press ●
When folders appear, select one → Press ●
2
Select a message with 📋 and press ♟
3
Press Y7 More
Download starts.
•After download, complete message appears.
To cancel download, press ☐ Cancel
Note
Messages larger than 300 KB may be partially deleted depending on Server status.
Retrieving Mail List
Retrieve a list of messages stored in Server Mail Box (Server Mail).
Main Menu ▶ Messaging
1 Select Server Mail Box and press ●
To open retrieved Mail List, select Mail List → Press ●
To retrieve all Server Mail, select Retrieve All Mails → Press ⬙ (Omit the next steps.)
To delete all Server Mail, select Delete All Mails → Press ●
→ Enter Handset Code → Press ● → Select Except New Msg. or Delete All → Press ● (Omit the next steps.)
2 Select Mail List and press ●
3 Press 📧 Options
4 Select Retrieve Mail List and press ●
After retrieval, Mail List appears.
- When Mail List has already been retrieved, it is refreshed.
To cancel retrieval, press ☐ Cancel.
Using Mail List: see right
Server Status
To check Server status, follow these steps after Step 1 above.
Select Mailbox Volume → Press ●
■Press [C:\WINDOWS\BACK] to return.
■ To update Server Mail Volume, press ●.
Using Mail List
Get Retrieve complete S! Mail messages
Select a message → Press ●
To retrieve all Server Mail, press 📧 Options → Select Retrieve All → Press ⬙
- Retrieved messages are deleted from Mail List and saved to Received Msg. folder.
- To select multiple messages to retrieve, see P.14-24.
Remote
Forward Server Mail directly to other SoftBank handsets, PCs, etc.
Select a message → Press 📧 Options → Select
Remote Forward → Press ● → Select recipient field
→ Press ⬙ → Enter recipients (perform Step 4 on P.14-7) → Press 📋 Send
Delete Delete Server Mail
Select a message → Press 📧 Options → Select
Delete → Press ● → Choose Yes → Press ●
To delete all Server Mail, press ☑ Options ➔ Select Delete All ➔ Press ⚙️ ➔ Enter Handset Code ➔ Press ⚙️ ➔ Choose Yes ➔ Press ⚙️
Message
Open Server Mail properties
Details
Select a message → Press 📧 Options → Select
Message Details → Press ●
Press ⬙ to return.
Using Messages
Checking Messages
To open Received Msg. folder while using another function, press ☑ for 1+ seconds.
Main Menu ▶ Messaging
1 Select Received Msg., Drafts, Sent Messages or Unsent Messages and press ●
Messages appear.
While Information window appears, select Message → Press ●
When folders appear, select one → Press ●
To open properties (not available for unsent messages), select a message → Press ☐ Options → Select Message Details → Press ●
■Press ⏻ to scroll down.
■Press Ⓞ to return.
To open sender/recipient details, select a received or sent message → Press ☑ Options → Select View Mail Address
→ Press ● → Select sender or recipient → Press ●
■ To return, press 📄→ Press 📄→ Press 📄
■ Open sender/recipient details and press ☑ Options to copy number/address, save to Phone Book or set as an auto sort key (see P.14-32).
2 Select a message and press ●
- When an image is attached, press ⬙ to open it. Images may not appear if file size is too large.
- When a question appears, press ⬙ and enter the correct answer to open the message. ■ Message cannot be opened until the correct answer is entered.
- Mail Composition window (see P.14-7) opens after opening messages in Drafts.
Use ⏻ to scroll.
To jump to the top or bottom of the message, press 📄 Options → Select Scroll Jump → Press ⬙️ → Select Jump to Top or Jump to Bottom → Press ⬤
Note ▶ Attached text file contents may not appear correctly.
Changing Encoding
In Step 1 on the left, select Received Msg. and press ●, then perform Step 2 above and follow these steps. Press ☑ Options → Select Char-code → Press ● → Select an option → Press ●
Slide Playback
A slide consists of message text with image/sound or video. After Step 2 above, press ☐ Options → Select Slide Play → Press ● ■Press to stop.
Editing Sent/Unsent Messages
In Step 1 on the left, select Sent Messages or Unsent Messages and press ● then follow these steps. Select a message → Press 📋 Options → Select Edit & Send or Edit → Press ● → Press 🔒 → Perform from Step 5 on P.14-6 or on P.14-8
■ After Step 2 on P.14-23, press 📋 Options → Select Copy
→ Press ⬙ → Select Address, Subject or Message Text
→ Press ●
■ For Message Text or Subject, use ⚙️ to select the first character of text ➔ Press ⬙️ ➔ Use ⚙️ to select the end point ➔ Press ⬙️
- Paste text in other windows (see P.3-13 "Copy/Cut & Paste"). Copied Arrange Mail messages pastes as text; My Pictograms, images, etc. paste as single-byte spaces.
■Select a folder other than Drafts, Unsent Messages or Templates.
In Step 1 on P.14-23, select Received Msg. or Sent
Messages and press ● then follow these steps.
Select an SMS message → Press 📧 Options →
Select Manage Msg. → Press ● → Select SIM Sync → Press ●
■The number of savable messages varies by USIM Card.
■SIM Sync appears only for compatible USIM Cards.
3D Pictogram
To animate Pictograms, Emoticons and compatible words such as おはよう, 食事 and 新幹線 included in the first 150 characters of message text, in 3D, follow these steps after Step 1 on P.14-23.
1 Select a message and press ●
2 Press 📧 Options
3 Select 3D Pictogram and press ●
Press ☐ Stop to stop animation.
-Press to pause/resume.
■3D Pictogram Settings
Enable or disable 3D Pictogram upon opening received messages
DefaultDisable
▶ Messaging → Settings → General Settings → 3D Pictogram → Display Effect
Select Always, Only Unread or Disable → Press ●
Change background colour and animation speed
DefaultBackground Colour: Random, Display Speed: Standard
▶ Messaging → Settings → General Settings → 3D Pictogram
Background Colour
Select Background Colour → Press ● → Select a colour or Random → Press ●
Display Speed
Select Display Speed → Press ● → Select speed → Press ●
Selecting Multiple Messages
Select multiple messages to protect, delete, change the status of or move all selected items simultaneously.
▶ Messaging
1 Select a folder and press ●
When folders appear within, select one → Press ●
2 Select a message and press ☐ Check
☑ appears.
To uncheck, select a message with ☑ → Press ☑ Uncheck
3 Repeat Step 2 as required
To uncheck all, press 📋 Options → Select Unselect All → Press ⬙
Switch to Read/Unread
Change received message status to read or unread.
Main Menu ▶ Messaging
1 Select Received Msg. and press ●
When folders appear, select one → Press
2 Switching Status of a Message
1 Select a message and press 📧 Options
Switching Status of Selected Messages
1 Select messages (perform from Step 2 above) and press 📋 Options
- Skip ahead to Step 4.
3 Select Manage Msg. and press ●
4 Select Switch to Unread or Switch to Read and press ●
Replying to Messages
Main Menu ▶ Messaging
1 Select Received Msg. and press ●
When folders appear, select one → Press ●
2 Select a message and press ●
To reply to sender only without quoting text, press 📎 Reply
→ Skip ahead to Step 5
■Mail Composition window opens.
3 Press 📧 Options
4 Replying to SoftBank Handset
1 Select Reply or Reply All and press ●
2 Select S! Mail, S! Mail (History), SMS or SMS (History) and press ●
- For S! Mail or S! Mail (History), S! Mail Composition window opens.
- For SMS or SMS (History), SMS Mail Composition window opens.
Replying to E-mail
1 Select Reply or Reply All and press ●
2 Select S! Mail or S! Mail (History) and press ⚙ S! Mail Composition window opens.
5 Complete and send message (perform from Step 5 on P.14-6 or on P.14-8)
Tip
- Select Reply All to send the same message to the sender and up to 19 recipients (To/Cc) of the original message at one time. Reply All may not appear for some messages.
- For Reply All, your handset may be included in recipients.
- Select SMS (History) or S! Mail (History) to quote the original message text when replying.
Forwarding Messages
Main Menu
▶ Messaging

Select Received Msg. and press ●
When folders appear, select one → Press ●

Select a message and press ●

Press 📧 Options

Select Forward and press ●
- For S! Mail messages, S! Mail Composition window opens.
- To forward SMS messages, select S! Mail or SMS and press Ⓞ. Mail Composition window opens.

Select recipient field and press ●
Select Recipient window opens.

Enter recipients and press ●
To enter a recipient, perform Step 4 on P.14-7.
7
Press

Send
- Files attached to the original message are automatically attached to forwarded messages.
Forwarding Forward NG Messages
■ Sender prohibits forwarding. Forward this message? appears.
To forward, choose Yes → Press ●
Forwarding Server Mail
■ Follow these steps after Step 1 on the left.
Select an S! Mail Notice (☐) → Press ☐ Options → Select Forward → Press ● → Select Notifi.
Forward or Remote Forward → Press → Perform from Step 5 in "Forwarding Messages" on the left
- Some messages may not be forwardable.
- Notifi. Forward forwards S! Mail Notice subject and message text only.
Cancelling Sent Messages
Send cancellation request to delete sent messages saved in recipient's received message folder. Subjects of cancellation requests are prefaced with Del:.
• Available for S! Mail messages sent to compatible SoftBank handsets.
- Sent messages may not be deleted if message text is short.
- Protected sent messages cannot be deleted.
Main Menu ▶ Messaging
1 Select Sent Messages and press ●
When folders appear, select one → Press ●
2 Select a message and press 📧 Options
- When selected sent message is addressed to multiple recipients, cancellation request is sent to all the recipients.
3 Select Set Sent Cancel and press ●
4 Choose Yes and press ●
- Handset receives a Delivery Report.
Linked Info
Saving to Phone Book
Save a linked phone number/mail address from within message text or sender's/recipient's number/address to Phone Book. In message text, available numbers/addresses are selectable with 📋.
Main Menu ▶ Messaging
1 Select Received Msg. or Sent Messages and press ●
When folders appear, select one → Press ●
2 Select a message and press ●
3 Saving Sender's/Recipient's Address
1 Press 📧 Options
2 Select Save Address and press ●
3 Select a phone number or mail address and press Ⓞ
Saving Linked Info
1 Select a phone number or mail address and press Ⓞ
② Select Save to Phone Book or Save Address and press Ⓞ
4 Select As New Entry and press ●
Number or address is entered in corresponding Phone Book field. Complete other fields and save (see P.4-4).
To save to an existing Phone Book entry, open one → Press ⬙ → Press 📎 Save
Using Linked Info
Use linked numbers, addresses or URLs (http://, https:// or rtsp://) within message text to place calls, send messages or access Internet sites. Available numbers/addresses/ URLs are selectable with Ⓞ.
Main Menu
▶ Messaging
1 Select Received Msg., Sent Messages or Unsent Messages and press ●
When folders appear, select one → Press ●
2 Select a message and press ●
3 Dialling Numbers
1 Select a number and press ●
2 Select Call or Video Call and press ●
Sending Messages
1 Select a SoftBank handset number or mail address and press ●
2 Select Create Message and press ●
For phone numbers, select S! Mail or SMS → Press ● → Complete and send message (Perform from Step 5 on P.14-6 or on P.14-8.)
For mail addresses, complete and send S! Mail (perform from Step 5 on P.14-8).
Accessing Internet Sites
1 Select a URL and press ●
2 Choose Yes and press ●
Handset connects to the Internet.
- Video/sound plays for rtsp://URLs (see P.15-12 "Streaming").
Protecting Messages
Protect important messages in Received Msg. or Sent Messages folder from unintentional deletion. Protected messages cannot be deleted.
Main Menu
▶ Messaging
1 Select Received Msg. or Sent Messages and press ●
When folders appear, select one → Press ●
2 Protecting a Message
1 Select a message and press 📧 Options
- To cancel protection, select a message with ω .
Protecting Selected Messages
1 Select messages (perform from Step 2 in "Selecting Multiple Messages" on P.14-25) and press 📋 Options
3 Select Lock and press ●
appears for protected messages.
To cancel protection, select Unlock → Press ●
Deleting Messages
Protected messages cannot be deleted.
Selecting Messages to Delete
Main Menu ▶ Messaging
1 Select Received Msg., Drafts, Sent Messages or Unsent Messages and press ●
When folders appear, select one → Press ●
2 Deleting a Message
1 Select a message and press 📧 Options
Deleting Selected Messages
1 Select messages (perform from Step 2 in "Selecting Multiple Messages" on P.14-25)
and press 📧 Options
3 Select Delete and press ●
4 Choose Yes and press ●
Tip ▶ It may take some time to delete messages.
Deleting Delete NG Messages
■ Sender prohibits deletion. Delete this message? appears. To delete, choose Yes → Press Ⓞ
- Confirmation does not appear for Delete All.
Deleting Server Mail
■ Select Received Msg. in Step 1 on the left and follow these steps.
Select an S! Mail Notice (✉) → Press 📧 Options →
Select Delete → Press ⬙ → Select Notification,
Remote Delete or Notifi. and Remote → Press ● →
Choose Yes → Press ●
- Some messages cannot be deleted.
Delete All
Main Menu ▶ Messaging
1 Select Received Msg., Drafts, Sent Messages or Unsent Messages and press ●
When folders appear, select one → Press ●
2 Press 📧 Options
- To delete messages in Drafts or Unsent Messages, skip ahead to Step 4.
3 Select Manage Msg. and press ●
4 Select Delete All and press ●
When folder contains protected messages, select Delete All or Except Locked Msg. ➔ Press Ⓞ
5 Enter Handset Code and press ●
Saving Attachments to Data Folder
Save attached images, sounds, vFiles (Phone Book/schedule entries, etc.) and other files to Data Folder.
Main Menu
▶ Messaging
1 Select Received Msg. or Sent Messages and press ●
When folders appear, select one → Press ●
2 Select a message and press ●
3 Select a file and press 📧 Options
To open properties, select File Details → Press ● ■Press ⬙ to return.
To switch display size, select Picture Appearance → Press ⬙ → Select Normal or Fit for Screen → Press ⬙
4 Select Save to Data Folder and press ●
5 Enter name and press ●
- To save without changing file name, press Ⓞ and proceed to Step 6.
6 Select Save here.. and press ●
Message window returns.
- When memory is full, a confirmation appears. Delete files (see P8-8) and try again.
To save to Memory Card, press ☑ Options → Select Change to Memory Card → Press ⬙ → Select Save here.. → Press ⬙
Using Attachments
Assign attached files as Wallpaper, ringtone or ringvideo directly from messages and save to Data Folder.
Main Menu
▶ Messaging
1 Select Received Msg. or Sent Messages and press ●
When folders appear, select one → Press ●
2 Select a message and press ●
3 Select a file and press 📧 Options
4 Wallpaper
1 Select Save as Wallpaper and press ●
Ringtone
1 Select Set as Ringtone and press ●
Ringvideo
1 Select Set as Ring Video and press ●
5 Enter name and press ●
6 Select Save here.. and press ●
Wallpaper, ringtone or ringvideo is set.
For images smaller or larger than Display, select Centred, Full Screen or Fit Image → Press ●
7 Press
My Folders
Organise received/sent messages into My Folders. Activate Folder View beforehand (see P.14-4).
Adding My Folders
Create up to 13 folders in addition to default Folder 1 - 7.
Main Menu ▶ Messaging
1 Select Received Msg. or Sent Messages and press ●
2 Press 📧 Options
3 Select Create New Folder and press ●
4 Enter name and press ●
- Enter up to 20 characters.
Renaming My Folders
Main Menu ▶ Messaging
1 Select Received Msg. or Sent Messages and press ●
2 Select a folder (My Folder) and press 📧 Options
3 Select Rename and press ●
To select a Secret folder, see P.14-33 "Unlock Temporarily" or "Cancel Secret".
4 Enter name and press ●
- Enter up to 20 characters.
Moving Messages
- Protected or incoming linked messages cannot be moved.
• To move files to a Secret folder, unlock temporarily or cancel Secret beforehand.
Main Menu ▶ Messaging
1 Select Received Msg. or Sent Messages and press ●
2 Select a folder and press ●
To select a Secret folder, see P.14-33 "Unlock Temporarily" or "Cancel Secret".
3 Moving a Message
1 Select a message and press 📧 Options Moving Multiple Messages
1 Select messages (perform from Step 2 in "Selecting Multiple Messages" on P.14-25) and press ☑ Options
- Skip ahead to Step 5.
4 Select Manage Msg. and press ●
5 Select Move to Folder and press ●
6 Select a folder and press ●
Setting Auto Sort Keys
Set keys (sender/recipient, S! Mail subject or SMS message text string) by folder to sort received/sent messages automatically.
- Specify up to 20 keys for each folder including Spam Folder (see P.14-35 "Anti Spam Measures").
- Keys in folders with smaller numbers have higher priority.
- Settings apply to newly received or sent messages.
Main Menu
Messaging
1 Select Received Msg. or Sent Messages and press ●
2 Select a folder (My Folder or Spam Folder) and press ☑ Options
To select a Secret folder, see P.14-33 "Unlock Temporarily" or "Cancel Secret".
3 Select My Folders and press ●
4 Select a blank entry and press ●
To delete entries, select one → Press 📧 Options → Select Delete or Clear All → Press ● → Choose Yes → Press ●
5 Sort by Sender/Recipient
1 Select Address and press ●
② Enter sender/recipient (perform Step 4 on P.14-7)
To change entries, select one → Press 📧 Options → Select Replace → Press ⬙ → Perform Step 4 on P.147
Sort by Subject (S! Mail) or Text String (SMS)
1 Select Subject and press ●
2 Enter text and press ●
- Enter up to 40 single-byte alphanumerics.
Secret Folder
Hide folders to require Handset Code entry for access. Handset does not respond to messages sorted to Secret folders when Secret Folder (see P.14-36) in Message Notice is set to No Response.
Main Menu
Messaging
1 Select Received Msg. or Sent Messages and press ●
2 Select a folder (My Folder) and press 📧 Options
3 Select Set Secret and press ●
4 Enter Handset Code and press ●
Unlock Temporarily
For temporary access to Secret folders, set folders to appear and follow these steps.

- Secret folders are hidden next time Received Msg. or Sent Messages folder is opened.
Cancel Secret

Deleting Folders
Empty folder (move or delete messages) beforehand.
Main Menu ▶ Messaging
1 Select Received Msg. or Sent Messages and press ●
2 Select a folder (My Folder or Spam Folder) and press 📧 Options
3 Select Delete and press ●
Confirmation appears when auto sort keys are set to the folder. Choose Yes → Press ⬙
4 Enter Handset Code and press ●
Additional Functions
Speed Mail List
Save up to ten frequently used numbers/addresses here to use Speed Mail (see P.14-34). When creating messages, reference recipient addresses from Speed Mail List (see P.14-7).
Main Menu ▶ Messaging → Settings → Speed Mail List
1 Select
To change entries, select one → Press ● → Edit number/address → Press ● → Choose Yes → Press ●
To delete entries, select one → Press ☑ Options → Select Delete or Clear All → Press ● → Choose Yes → Press ●
2 Phone Book
1 Select Phone Book and press ●
2 Select an entry and press ●
To search Phone Book, perform Steps 2 - 3 in "Dialling from Phone Book" on P.4-8.
Direct Entry
1 Select Enter Number or Enter Address and press ●
② Enter recipient's SoftBank handset number or mail address and press ●
Adding to Speed Mail List while Creating Message
■ Follow these steps after Step 3 on P.14-6 or on P.14-7. Select Speed Mail List → Press ⬙ → Select empty → Press ⬙ → Choose Yes → Press ⬙ → Perform Step 2 on P.14-33
Speed Mail
Create mail from Standby using numbers/addresses saved to Speed Mail List (see P.14-33).
1 In Standby, press Speed Mail List entry number with Keypad (0.75 - 9.25)
2 Press 📧 Mail
■ When messaging
SMS → Press ♏
3 Complete and send message (perform from Step 5 on P.14-6 or on P.14-8)
Auto Resend
Activate Auto Resend to send unsent messages (failed due to out-of-range, etc.) automatically when signal returns.
- Resend is attempted up to two times for each message.
- Messages are sent in the same order they were created.
•Information window opens for successful delivery.
• Auto Resend is On by default.
Main Menu
▶ Messaging → Settings → General Settings → Auto Resend
1 Choose On and press ●
To cancel, choose Off → Press ● ■Remaining failed messages will not be sent automatically.
Note Auto Resend is available while roaming, however, message delivery may incur higher charges.
General Settings
Sending Progress
Show or hide animation when sending mail
DefaultShow
Main Menu ▶ Messaging ▶ Settings ▶ General Settings ▶ Sending Progress
Select Show or Do not Show → Press ●
Delivery Report Confirm SMS/S! Mail delivery (see P.14-19)
Available when messaging to SoftBank handset numbers.
Default Off
Main Menu ▶ Messaging ▶ Settings ▶ General Settings ▶ Delivery Report
Choose On (request) or Off → Press ●
- If On, reports arrive for all messages to SoftBank handsets.
Anti Spam Measures Filter incoming messages from numbers or addresses not saved in Phone Book
Default Off
Main Menu ▶ Messaging ▶ Settings ▶ General Settings ▶ Anti Spam Measures
Enter Handset Code → Press ● → Choose On or Off → Press ●
- When Anti Spam Measures is active, unsolicited messages (spam) are filtered into Spam Folder.
- Auto sort keys (see P.14-32) are available for Spam Folder.
- Keys in folders other than Spam Folder have higher priority.
- Handset does not respond to filtered messages. (No ringtones, Information window, etc.)
Signature Settings
Save a name, etc. to insert into message text
Default Auto Insert: Off
Main Menu ▶ Messaging ▶ Settings ▶ General Settings ▶ Signature Settings
Edit
Select Edit → Press ⬙ → Enter/edit signature →
Press
- Enter up to 256 single-byte alphanumerics.
Auto Insert
Select Auto Insert → Press ● → Choose On or Off → Press ●
When signature is not saved, enter signature → Press ●
- Activate Auto Insert to enter signature into message text automatically.
•Available only for S! Mail.
| Auto Delete | Activate or cancel automatic deletion of oldest received/sent messages to save new onesDefaultReceived Msg.: Off, Sent Messages: On | |
| Main Menu | ▶ Messaging ➔ Settings ➔ General Settings ➔ Auto Delete | |
| Received MessagesSelect Received Msg. ➔ Press ● ➔ Choose On or Off ➔ Press ●Sent MessagesSelect Sent Messages ➔ Press ● ➔ Choose On or Off ➔ Press ● | ||
| Message Notice | Change/hide notice or activate/mute alert sound (double beep) for messages received during handset useDefaultView Setting: Name, Alert Sound: On | |
| Main Menu | ▶ Messaging ➔ Settings ➔ General Settings ➔ Message Notice | |
| Edit MessageSelect View Setting ➔ Press ● ➔ Select Name, Address, Name & Subject or Off ➔ Press ●Alert SoundSelect Alert Sound ➔ Press ● ➔ Choose On or Off ➔ Press ● | ||
| Secret Folder | Select whether to notify (with ringtones, etc.) of incoming messages sorted to Secret folders |
| DefaultNotify | |
| Main Menu | ▶ Messaging ➔ Settings ➔ General Settings ➔ Message Notice ➔ Secret Folder |
| Select Notify or No Response ➔ Press | |
| Scroll Unit | Select from three scroll units |
| DefaultSingle Line | |
| Main Menu | ▶ Messaging ➔ Settings ➔ General Settings ➔ Scroll Unit |
| Select Single Line, Half Page or Whole Page ➔ Press | |
| SMS Settings | |
| Expiry Time | Set Message Centre sent message storage limit |
| DefaultMaximum | |
| Main Menu | ▶ Messaging ➔ Settings ➔ SMS Settings ➔ Expiry Time |
Select Maximum, 30 minutes, 1 hour, 6 hours, 1 day or 1 week → Press ●
- Expiry Time applies to SMS Centre Number set to Setting1(Default) in Message Centre (see P.14-37).
Message
Centre
Set SMS Centre Number
DefaultSetting1 (+819066519300)
Main Menu
▶ Messaging → Settings → SMS Settings → Message Centre
Adding Centre Number
Select Setting2 or Setting3 → Press ⬙ → Enter SMS
Centre Number → Press ●
Editing Centre Number
Select Setting1(Default), Setting2 or Setting3
Press ● → Edit SMS Centre Number → Press ●
Deleting Centre Number
Select Setting2 or Setting3 → Press 📧 Options →
Select Delete → Press ● → Choose Yes → Press ●
Setting Centre Number
Select Setting2 or Setting3 → Press 📧 Options →
Select Set Default → Press ●
- Selected number moves to Setting1(Default) and shifts the others down.
Note ▶ Do not change Centre Number unless instructed to do so.
Char-code
Select character encoding for composing SMS messages
Default Shift JIS
Main Menu
▶ Messaging → Settings → SMS Settings → Char-code
Select Shift JIS (70 characters) or GSM 7bit (160 single-byte alphanumerics) → Press
S! Mail Settings
Message DL (Japan)
Set complete S! Mail retrieval to auto or manual
■Adjust this setting when using handset in Japan.
Default Always Download
Main Menu
▶ Messaging → Settings → S! Mail Settings → Message DL (Japan)
Select Always Download, DL only Tel. No. or Always Defer → Press ●
Note ▶ Depending on the price plan, transmission fees may apply even when receiving messages addressed to SoftBank handset numbers. Change Message DL setting as needed.
Message DL (Abroad)
Set complete S! Mail retrieval to auto or manual
■Adjust this setting when using handset outside Japan.
Default Always Defer
Main Menu
▶ Messaging → Settings → S! Mail Settings → Message DL (Abroad)
Select Always Download or Always Defer → Press ●
Reply To Settings Designate a different mail address for receiving replies
DefaultOff
Main Menu
▶ Messaging → Settings → S! Mail Settings → Reply To Settings
Activating/Deactivating
Select Switch On/Off → Choose On or Off → Press ●
Set Address
Select Edit Address → Press ● → Select or enter address → Press ●
| Picture Appearance | Set display size for images in received messages |
| Main Menu | ▶ Messaging ➔ Settings ➔ S! Mail Settings ➔ Picture Appearance |
| Select Normal or Fir for Screen ➔ Press ●• Slides (see P.14-23) always play at Normal size. | |
| Auto Play File | Select whether to open/play attached images/ sounds automatically |
| Main Menu | ▶ Messaging ➔ Settings ➔ S! Mail Settings ➔ Auto Play File |
| ImagesSelect Pictures ➔ Press ● ➔ Choose On (open) or Off ➔ Press ● | |
| SoundsSelect Sounds ➔ Press ● ➔ Choose On (play) or Off ➔ Press ●• Images/sounds always open/play when playing slides (see P.14-23).• Auto Play File settings do not apply to Arrange Mail. | |
| Send File Settings | Select whether to save newly captured images and newly recorded Voice files to Data Folder before attaching them to messages |
| Main Menu | ▶ Messaging ➔ Settings ➔ S! Mail Settings ➔ Send File Settings |
| Select Save & Attach or Attach Only ➔ Press ● | |
Yahoo! Keitai
Getting Started
Access Yahoo! Keitai Mobile Internet and PC sites. In this manual, "Yahoo! Keitai" refers to the SoftBank Mobile Internet portal, "PC sites" to websites viewed via PC Site Browser, and "Internet" to both Yahoo! Keitai and PC sites. Retrieve Network Information (see P.1-20) before using the Internet.
![graph TD A["Internet"] --> B["Yahoo! Keitai"] A --> C["SoftBank Mobile Internet portal"] A --> D["PC Sites"] D --> E["Websites designed for PCs"]](/content/2026/07/1509125/images/ac30fefcb53cc0b5fa8d766578dc7f98c6ca47ee3ad85280401d9b0aa40fa54f.jpg)
Yahoo! Keitai Features
• Using Yahoo! Keitai: see P.15-3
•Saving Files to Data Folder: see P.15-11
- Streaming: see P.15-12
• Live Monitor: see P.15-14
PC Site Feature
Using PC Site Browser: see P.15-18
Note ▶ Some page content may automatically activate Internet connection and thus transmission fees apply. To disconnect, press |1/2|n .
Tip ▶ An additional contract is required to use the Internet. •Address questions about Yahoo! Keitai to SoftBank Customer Centre, General Information (see P.20-29).
Internet Content
Sample Internet page:
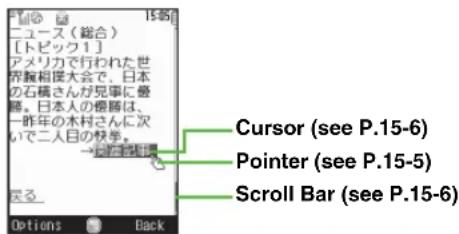
Note ▶ Requested pages may not appear due to transmission conditions/Server status.
Tip ▶ To activate PC Site Browser while browsing Yahoo! Keitai, see Step 1 in "Opening Yahoo! Keitai Menu" on P.15-3.
Cache Memory
- Cache Memory temporarily holds copies of retrieved pages; when full, oldest are deleted to make room for new ones. - Previously viewed pages may load from Cache Memory. - Cached items with expiry dates are deleted upon expiry.
SSL
Secure Sockets Layer (SSL) is an encryption protocol for secure Internet transmissions of important/sensitive information such as credit card numbers. Electronic certificates are saved on handset (see P.15-22 "Root Certificates").
Disclaimer
When a security notice appears, subscribers must decide for themselves whether or not to open the page. Opening secure pages constitutes agreement to the terms of usage. SoftBank, VeriSign Japan, Baltimore Technologies Japan, Entrust Japan, GeoTrust Japan, RSA Security and SECOM Trust Systems cannot be held liable for any damages associated with the use of SSL.
Using Yahoo! Keitai
Opening Yahoo! Keitai Menu
Select topics from Yahoo! Keitai Menu to access sites. Yahoo! Keitai Menu is subject to change.
Main Menu
Yahoo! Keitai
1 Select Yahoo! Keitai and press ●
Yahoo! Keitai Main Menu appears.
- Shortcut: In Standby, press ¥7
To activate PC Site Browser, press Options → Select Change to PC Browser → Press
■ A message appears. To proceed, press ⬙ twice. The current page opens via PC Site Browser.
■Some sites may not appear correctly.
2 Highlight a menu item
3 Press
Handset connects to the Internet.
- Handset remains connected to the Internet even if it is closed.
To disconnect, press CLEAR BLACK.
4 Repeat Steps 2 - 3 to open additional links
Basic Operations: see P.15-5
To return to Yahoo! Keitai Main Menu, press 📧 Options → Select Yahoo! Keitai → Press ⬙
5 To exit, press 📞 then choose Yes and press ♟
Using History
Open previously viewed Yahoo! Keitai pages. History stores up to 300 pages; when full, oldest are deleted to make room for new ones.
Main Menu ▶ Yahoo! Keitai → History
1 Select an item and press ●
2 To exit, press 🔒 then choose Yes and press ●
Opening Properties

Sending URLs via S! Mail/SMS
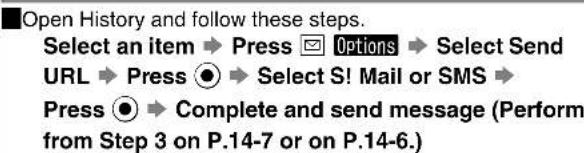
Sorting Items

Deleting History

Entering URLs Directly
Enter URLs directly to access Yahoo! Keitai sites.
•To use History, see left.
- http:// may be omitted.
Main Menu ▶ Yahoo! Keitai ➔ Enter URL
1 Enter URL and press ●
•PC Site Browser may activate depending on the URL.
2 To exit, press 🔒 then choose Yes and press Ⓞ
Selecting from Previously Entered URLs

Basic Operations
Back Return to the previous page
Press Back.
To return to the initial page, press 📋 Options → Select Forward → Press ●
Jump to
Top/Bottom
Jump to page top or bottom
Press 📧 Options → Select Convenient Functions → Press ⬙ → Select Jump to Top or Jump to Bottom → Press ⬙
Secure Area Open secure page
When Entering highly secure area. appears, press Ⓞ.
• appears for secure connections.
- To disable confirmations, see P.15-22 "Secure Prompt".
Authentication Access pages requiring user authentication
If requested, enter user ID or password → Press ● → Press Y7 Send
Help View a summary of key assignments
Press 📧 Options → Select Help → Press ● ■ Press ● to return.
Pointer Navigation
Move pointer ( l8 ) with Multi Selector to scroll or select items. When page content continues beyond view, move pointer to Display edges to scroll in those directions.
|Selecting Items

Activating/Cancelling Pointer Navigation
■Open a page and follow these steps.
Press Options → Select Settings → Press ● → Select Cursor Settings → Press ● → Select Cursor/Yahoo! Keitai or Cursor/PC Site Browser → Press ● → Choose On or Off → Press ●
- Alternatively, press 📄 for 1+ seconds to activate/cancel pointer navigation.
Changing Pointer Speed
■Open a page and follow these steps.
Press 📋 Options → Select Settings → Press ⬤ → Select Cursor Settings → Press ⬤ → Select Speed Settings → Press ⬤ → Select Slow, Normal or Fast → Press ⬤
Using Cursor
When pointer navigation is off, use cursor.
Use Ⓞ to scroll items.

Use Ⓧ to move left and right when multiple items are listed in one row. Cursor does not appear for unselectable items.
Tip ▶ Press and hold these keys to scroll by page. 2 (Up), 4 σ1 (Left), 6 2 (Right), 8 z/w (Down)
Scrolling Pages
Non-Framed Pages
Scroll bar appears on the right or bottom when page content continues beyond view. Slider indicates current page position.
Use ⚙ to scroll; slider moves accordingly.
Framed Pages
Press ☐ for 1+ seconds to select other frames. Use ⏻ to scroll.

■Open a framed page and follow these steps.
Press for 1+ seconds to select a frame
Press 📧 Options → Select Frame In → Press ●
■ To return, press 📋 Options → Select Frame Out →
Press
■ Alternatively, press ☑ FrR to return.
Tabbed Browsing
Open up to three pages at one time using tabs. Yahoo! Keitai and PC site pages cannot be open simultaneously.

2 Select Open in New Tab and press ●
Highlighted link opens in a new tab.
- From Bookmarks, Saved Pages, Enter URL and History, the selected/specified page opens in a new tab.
To open a third page, press ☑ Options → Select Tab Menu
→ Press ⬤ → Select Open in New Tab → Press ⬤
To switch between tabs, press 📋 Options → Select Tab
Menu → Press ● → Select Switch Tab → Press ● →
Select a tab → Press ●
■ Alternatively, press ⚡ for 1+ seconds then use ⏻ to select a tab.
To close the active tab, press 📧 Options → Select Tab Menu
→ Press ⬙ → Select Close Tab → Press ⬙
To close all but the active tab, press 📧 Options → Select Tab
Menu → Press ⬤ → Select Close All Other Tabs → Press ⬤
Note ▶ Portions of page content may not appear in tabbed browsing; close old tabs.
Tip ▶ Some pages automatically open in a new tab.
Text Entry & Item Selection
Enter text or select items to send information.
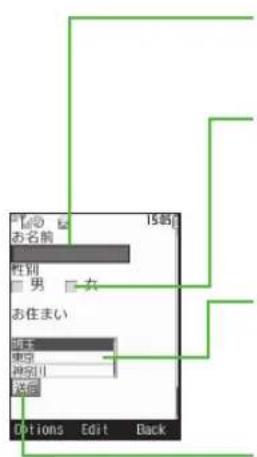
- Highlight □ and press ●. Text entry window opens. Enter text and press ●.
Check-box
- Highlight □ (check-box) and press ●. The box changes to ☑, indicating that the item is selected.
- In addition to , may also appear as selection indicators.
Menu List
- Highlight the field and press Ⓞ to select an item. Some menu lists support multiple selection; select items and press 📋 to exit list.
Command Button
- Use to send, reset, etc.
- Highlight □ and press Ⓞ to execute the indicated command.
Input Memory
■Entered text (except Security Code) is saved to Input Memory. Use saved text in other applications.
■ Up to 20 entries are saved. When full, oldest entries are deleted to make room for new ones.
Using Input Memory
In a text entry window, press Options → Select Advanced → Press ● → Select Input Memory → Press ● → Select text → Press ●
Advanced Features
Bookmarks & Saved Pages
Bookmark sites or save page content to Saved Pages.
| Item Description | |
| Bookmarks | Save links to sites. Handset connects to the Internet to access the site.•Create folders to organise Bookmarks.•Save up to 100 Bookmarks between Yahoo! Keitai and Streaming Bookmarks, and up to 100 for PC sites. |
| Saved Pages | Save page content; handset opens saved pages without connecting to the Internet.•Save frequently used items to Saved Pages.•Save up to 100 Bookmarks for Yahoo! Keitai and PC sites each. |
Default Bookmarks
■ Sharp Space Town and カスタ are links to Japanese Mobile Internet sites for SoftBank handsets by SHARP.
- Visit Space Town to download Wallpaper, games, Dictionary files, etc.
- Visit カレオ to download Custom Screens (see P.9-9).
Saving Bookmarks & Pages
Follow these steps after opening a page (after Step 4 on P.15-3 or on P.15-18).
1 Press 📧 Options
- Bookmark or Saved Pages appears only for savable pages.
2 Bookmarks
1 Select Bookmark and press ●
2 Select Save and press ●
3 Enter title and press ●
- Bookmarks saved while streaming are saved to Streaming Bookmarks.
Saved Pages
1 Select Saved Pages and press ●
2 Select Save and press ●
3 Enter title and press ●
Saving URLs to Bookmarks
Enter URLs directly to save site references to Bookmarks.
Press ● → Select Yahoo! Keitai → Press ● → Select
Bookmarks → Press ⬙ → Select Y7 (Yahoo! Keitai), 📋
(PC Site Browser) or 📄 (Streaming) → Press 📋 Options
→ Select Add New Bookmark → Press ⬙ → Enter URL
→ Press ● → Enter title → Press ●
Opening Bookmarks & Saved Pages
Main Menu

Yahoo! Keitai
1
Bookmarks
1 Select Bookmarks and press ●
To send URLs via S! Mail/SMS, select a title → Press Options → Select Send → Press ● → Select As Message → Press ● → Select S! Mail or SMS → Press ● → Complete and send message (Perform from Step 3 on P.14-6 or on P.14-7.)
■S! Mail Composition window opens automatically if a URL exceeds the SMS character limit.
To open properties, select a title → Press ☑ Options → Select Details → Press ● ■Press ● to return.
2 Use ⚙ to select Y (Yahoo! Keitai), 📄 (PC Site Browser) or 🌐 (Streaming)
Saved Pages
1 Select Saved Pages and press ●
To open properties, select a title → Press ☑ Options → Select Details → Press ● ■Press ● to return.
2 Use ⬤ to select Y (Yahoo! Keitai) or 📋 (PC Site Browser)

Select a title and press ●
Opening Bookmarks Online


Editing Bookmarks & Saved Pages
Open Bookmarks or Saved Pages first (perform Step 1 on the left).
Bookmarks
Edit Edit titles or URLs
Titles
Select a title → Press 📋 Options → Select Edit → Press ⬙ → Select Title: → Press ⬙ → Enter title → Press ⬙ → Press ↕ Save
URLs
Select a title → Press Options → Select Edit → Press ● → Select URL: → Press ● → Enter URL → Press ● → Press Save
Bookmarks Folder
Sort Bookmarks into folders
Creating a Folder
Press 📧 Options → Select Create Folder → Press ⚙️ → Enter name → Press ⚙️
Moving to Folder
Select a title → Press Options → Select Move → Press ● → Press Folder → Select a folder → Press ● → Press ● To move back from folders, select a title → Press Options Select Move → Press ● → Press Parent → Press ●
Changing Folder Names
Select a folder → Press 📧 Options → Select Rename
→ Press ⬙ → Enter name → Press ⬙
Saved Pages
Rename Change titles
Select a title → Press 📧 Options → Select Rename → Press ⬙ → Enter title → Press ⬤
Bookmarks & Saved Pages
Move Change entry order
Select a title → Press ☑ Options → Select Move → Press ● → Use 🔒 to select target location → Press ●
Delete Delete entries
Select a title or folder → Press Options → Select Delete → Press Choose Yes → Press To delete all titles/folders, press Options → Select Delete All → Press Enter Handset Code → Press Choose Yes → Press
Saving Files to Data Folder
Save images, sounds, etc. on Yahoo! Keitai to Data Folder.
Main Menu ▶ Yahoo! Keitai → Yahoo! Keitai → Open a page
1 Press 📧 Options
2 Select Save Items and press ●
- If there is only one file, skip ahead to Step 4.
To save background image, select Save Background Image → Press ⬙ → Skip ahead to Step 4 ■Save Background Image appears for pages with background images.
3 Select a file and press ●
To open files, select View or Play → Press ●
■Press □ to return.
To open properties, select Details → Press ●
■Press ● to return.
4 Select Save and press ●
Data Folder opens.
To switch between handset and Memory Card, press ☑ Options ➔ Select Change to Phone or Change to Memory Card ➔ Press ●
To save to a sub folder, select folder → Press ●
5 Press
File is saved to Data Folder.
- Handle File(s) menu may open with available file functions.
- When memory is full, notification appears. Delete files and try again (see P8-8).
If the same file name exists, select Rename, Overwrite or Cancel → Press ●
Clicking on File Links
Some files are saved automatically. Save location is indicated after download.
Using Linked Info
Use linked numbers (TEL:), addresses or URLs (http://, https:// or rtsp://) to place calls, send messages or access the Internet.
•Available only when number, address or URL is underlined.
- Underlined words may serve as a linked number, address or URL.
Main Menu
Yahoo! Keitai → Yahoo! Keitai
1 Open a page containing a phone number, mail address or URL
2 Dialling Numbers
1 Highlight a number and press ●
② Select Call or Video Call and press ●
Sending Messages
1 Highlight a SoftBank handset number or mail address and press ●
2 Select Create Message and press ●
To complete and send message, perform from Step 5 on P.14-6 or on P.14-8.
Accessing Internet Sites
1 Highlight a URL and press ●
Handset connects to the Internet.
• Video/sound plays for rtsp://URLs.
Saving to Phone Book
■To save as new entry, open page and follow these steps.
Select a phone number or mail address ➔ Press ●
→ Select Save to Phone Book → Press ● →
Select As New Entry → Press ●
■ Phone Book Details (see P.4-4) appears. Complete other fields and save.
To save as new item, open page and follow these steps. Select a phone number or mail address ➤ Press ⬙
→ Select Save to Phone Book → Press ● →
Select an entry → Press ⬙ → Press ¥ Save
Streaming
Enjoy audiovisual media while it downloads.
- Only compatible Yahoo! Keitai files support streaming.
-Downloaded content cannot be saved.
Main Menu
Yahoo! Keitai → Yahoo! Keitai → Open a page
1 Select a file and press ●
Streaming begins. (Playing Music/Video: see P.7-4, P.7-8)
To pause a stream, press ●.
■Press ⬙ to resume.
■ Streaming requires a continuous Internet connection. (Transmission fees apply.)
Incoming Calls/Mail while Streaming
■ Streaming stops for incoming calls. Press Ⓞ to answer calls.
To reject calls, press 📧 Options → Select Reject →
Press
• After the call, Reconnect? appears.
Notice appears or a double beep sounds for incoming mail (see P.14-36 "Message Notice").
Note
- Streaming continues even after handset is closed.
• After three minutes on pause, Reconnect? appears.
- Live streaming does not support pause, fast forward, rewind or Options.
Tip
Up to 10 previously accessed URLs are saved. When full, oldest URLs are deleted to make room for new ones.
Changing Display Size
■ Press 22 to toggle Display Size for current stream.
■ Display Size toggles as follows: Full Screen (no indicators)
→ Full Screen (with indicators) → Normal → Enlarge
■Display Size cannot be changed while stream is paused; press 2 to show or hide indicators.
- Display Size may not change depending on file/stream.
■Change Display Size setting for streaming while streaming.
Press 📋 Options → Select Settings → Press ⬤ →
Select Display Size → Press ● → Select Normal,
Enlarge or Full Screen → Press ●
Backlight
■Adjust streaming Backlight while streaming.
Press 📧 Options → Select Settings → Press ⬤ →
Select Backlight → Press ⬙ → Select Always On,
Always Off or Normal Settings → Press ●
- Selecting Normal Settings applies Display Backlight setting (see P9-13).
Time Search
■Specify start point while streaming.
Press 📧 Options → Select Time Search → Press ●
→ Enter time → Press ●
Streaming from
Media Player
Access the Internet from Media Player
Main Menu
Media Player → Streaming
Resuming the File Played Last
Select Last Played → Press ●
- File plays from where it stopped.
Entering URLs
Select Enter URL → Press ● → Enter URL → Press ●
- Enter up to 1,024 characters.
Using Bookmarks
Select Bookmarks → Press ⬙ → Select an entry →
Press
Using History
Select History → Press ● → Select an entry → Press ●
To open properties, select History → Press → Select an
entry → Press 📧 Options → Select Details → Press ●
■Press ● to return.
To edit and access URLs, select History → Press ● →
Select an entry → Press 📄 Options → Select Edit URL →
Press ⬤ → Edit URL → Press ⬤
Tip ▶ Select Settings in Streaming menu and press ⬙ to set Backlight and Display Size.
Live Monitor (Japanese Only)
Live Monitor Basics
Register with compatible Yahoo! Keitai content to receive update notices on handset.
•Live Monitor consists of Live Monitor List and S! Loop List.
•In Standby, view breaking news in Live Monitor List (see P9-6).
Opening Live Monitor List & S! Loop List
Main Menu
Yahoo! Keitai → Live Monitor
1 Select Live Monitor List or S! Loop List and press ●
Live Monitor List

Title List Information


S! Loop List
Register with up to five S! Loop items.
Main Menu
Yahoo! Keitai → Live Monitor
1 Select S! Loop List and press ●
2 Select S! Loop and press ●
3 Choose Yes and press ●
Handset connects to the Internet.
- Refer to the S! Loop help menu for operational instructions.
Updating Live Monitor Items
Main Menu
Yahoo! Keitai → Live Monitor
1 Select Live Monitor List or S! Loop List and press ●
2 Updating Single Items
1 Select an item and press 📧 Options
2 Select Reload and press ●
3 Select Reload This Monitor and press ●
Updating All Items
1 Press 📧 Options
2 Select Reload and press ●
3 Select Reload All and press ●
Opening Properties
Open Live Monitor List or S! Loop List (see P.15-14) and follow these steps. Select an item → Press 📋 Options → Select Details → Press ⬤
Automatic Update
- Update Live Monitor items automatically after a set interval (from Automatic Update activation). Open properties (see above) to see next Automatic Update time.
- Automatic Update does not affect Live Monitor List News Flash or S! Loop List update items overnight.
•Automatic Update is only available in Japan. - Update may fail if signal is weak/handset is out-of-range.
•To update manually, see left.
•USIM Card replacement cancels Automatic Update.
• Automatic Update is Off by default.
Live Monitor List
Main Menu
▶ Yahoo! Keitai → Live Monitor → Settings → Automatic Update → Live Monitor
1 News Flash
1 Select News Flash and press ●
2 Press
3 Select an interval and press ●
To cancel, choose Off → Press ●
General News
1 Select General and press ●
2 Press
3 Choose On and press ●
- General news items are updated once a day.
To cancel, choose Off → Press ●
S! Loop List
Main Menu
Yahoo! Keitai → Live Monitor → Settings → Automatic Update → S! Loop
1 Press
2 Choose On and press ●
- S! Loop List items are updated approximately four times a day.
To cancel, choose Off → Press ●
Deleting Live Monitor Items
Main Menu
Yahoo! Keitai → Live Monitor
1 Select Live Monitor List or S! Loop List and press ●
2 Deleting Single Items
1 Select an item and press 📧 Options
2 Select Delete and press ●
3 Select Delete This Monitor and press ●
4 Choose Yes and press ●
Deleting All Items
1 Press 📧 Options
2 Select Delete and press ●
3 Select Delete All and press ●
4 Enter Handset Code and press ●
5 Choose Yes and press ●
Note ▶ Items are not deleted during auto updates.
Activate PC Site Browser to view websites designed for PCs; only document files are downloadable and browsing PC sites may incur higher charges.
Opening Yahoo! JAPAN
Main Menu

Yahoo! Keitai
PC Site Browser
1
A message appears. To proceed, press ☑ twice. Yahoo! JAPAN Home opens (☐ appears).
To open Yahoo! Keitai, press 📧 Options
→ Select Switch Browser → Press ●
■A message appears. To proceed, press ⬙ twice. The current page opens via Yahoo Keitai.
■Some sites may not appear correctly.

Handset connects to the Internet.
- Handset remains connected to the Internet even if it is closed.
To disconnect, press
4
Repeat Steps 2 - 3 to open additional links
Basic Operations: see P.15-5
Saving Bookmarks & Pages: see P.15-9
Using Linked Info: see P.15-12
To return to Yahoo! JAPAN Home, press 📋 Options → Select Homepage → Press ●
5
To exit, press 📞 then choose Yes and press ●
Switching View
■Open a page and follow these steps.
Press 📧 Options → Select PC Screen → Press ●
■To switch from PC Screen view to Small Screen view, press 📧 Options → Select Small Screen → Press ●
- In Small Screen view, PC sites are redesigned to fit Display.
- In PC Screen view, PC sites appear in W 800 x H 600 dots.
Zoom
■Open a page and follow these steps.
Press 📧 Options → Select Convenient Functions →
Press ⬤ → Select Zoom → Press ⬤ → Select a
scale → Press ●
Using History
Open previously viewed pages. History stores up to 300 pages; when full, oldest are deleted to make room for new ones.
Main Menu
Yahoo! Keitai → PC Site Browser → History
1
Select an item and press ●
To open properties, send URL, sort items or delete, see P.15-4.
2
To exit, press 📞 then choose Yes and press ♟
Entering URLs Directly
Enter URLs directly to access sites.
•To use History, see above.
- http:// may be omitted.
Main Menu
Yahoo! Keitai → PC Site Browser → Enter URL
1
Enter URL and press ●
- Yahoo! Keitai page may open depending on the URL.
Selecting from Previously Entered URLs: see P.15-4
2
To exit, press 📞 then choose Yes and press ●
Additional Functions
Sub Menu Settings
Access Options menu settings from an open page.
Copy Text Copy text
Press
Options → Select Copy Text → Press ● →
Perform from Step 3 in "Copy/Cut & Paste" on P.3-14
Reload Update page content
Press
Options → Select Reload → Press
- Reload simultaneously updates the corresponding content saved in Saved Pages.
Enter URL
Enter URL directly to access Internet sites
Press
Options → Select Enter URL → Press ●
Perform from Step 1 in "Entering URLs Directly" on P.15-4 or on the left.
Search Search current page
Press
Options → Select Convenient Functions →
Press
● → Select Search → Press ● → Enter text
to sea
rch → Press ●
- First search result is highlighted; press Ⓞ to jump to next.
To cancel, press ☐ Cancel
Send URL Send URLs via S! Mail/SMS
Press Options → Select Convenient Functions → Press ● → Select Send URL → Press ● → Select S! Mail or SMS → Press ● → Complete and send message (Perform from Step 3 on P.14-7 or on P.14-6.) •S! Mail Composition window opens automatically if a URL exceeds the SMS character limit.
Details Open page properties
Press Options → Select Convenient Functions → Press ➕ Select Details → Press ➕ Select Page Information or Server Certificate → Press ➕ to return.
History Previously visited Internet site links
Press 📧 Options → Select History → Press ⬙ → Perform from Step 1 in "Using History" on P.15-4 or on P.15-19
Char-code Change encoding when text appears distorted
Press Options Select Settings Press Select Char-code Press Select an option Press Use Automatic whenever possible.
Uploading Files Upload images or other Data Folder files to the Centre via Internet sites
■Open compatible site first. Select Browse... → Press ● → Select a file → Press ● → Select Send → Press ● •Example above is for reference only. Follow site instructions for specific procedure. •Files are uploadable only via pages supporting uploads.
Common Settings
Font Size Change character size
DefaultStandard
Main Menu ▶ Yahoo! Keitai → Common Settings → Font Size
Select a size → Press ●
Scroll Unit Select from three scroll units
Default Single Line
Main Menu ▶ Yahoo! Keitai → Common Settings → Scroll Unit
Select a unit → Press ●
Downloads Select whether to download images and sounds on Internet sites automatically or to open text information only
Default Show Images/Play Sounds
Main Menu ▶ Yahoo! Keitai → Common Settings → Downloads
Images
Select Images → Press ● → Select Show Images or Do not Show → Press ●
Sounds
Select Sounds ➔ Press ⬙ ➔ Select Play Sounds or Do not Play ➔ Press ⬙
| Memory Operation | Clear cache, cookies or authentication information |
| Main Menu | ▶ Yahoo! Keitai ➔ Common Settings ➔ Memory Operation |
| Select Delete Cache, Delete Cookies or Delete Auth Info ➔ Press ⬙ ➔ Choose Yes ➔ Press ⬙ | |
| •Deleted Items: | |
| Cache | Temporarily saved information in Cache Memory |
| Cookies | Information sent by a server for user identification |
| Auth Info | User ID or password previously entered for authentication |
| Download to | Select whether to save downloaded files on handset or Memory Card |
| Default Phone Preferred | |
| Main Menu | ▶ Yahoo! Keitai ➔ Common Settings ➔ Download to |
| Select Phone Preferred or Prefer Card ➔ Press ⬙ | |
| •If selected memory is low, downloaded files are not saved. •Saving to Memory Card is prohibited depending on the file; such files are saved to handset. | |
| Initialized Browser | Restore default settings and reset Bookmarks and Saved Pages |
| Main Menu | ▶ Yahoo! Keitai ➔ Common Settings ➔ Initialized Browser |
| Enter Handset Code ➔ Press ⬙ ➔ Choose Yes ➔ Press ⬙ | |
| Reset Settings Restore default settings | |
| Main Menu | ▶ Yahoo! Keitai ➔ Common Settings ➔ Reset Settings |
| Enter Handset Code ➔ Press ⬙ ➔ Choose Yes ➔ Press ⬙ | |
| Cache | Temporarily saved information in Cache Memory |
| Cookies | Information sent by a server for user identification |
| Auth Info | User ID or password previously entered for authentication |
| Download to | Select whether to save downloaded files on handset or Memory Card |
| Main Menu | Yahoo! Keitai | Common Settings | Download to |
| Select Phone Preferred or Prefer Card ➔ Press ⬤ |
- If selected memory is low, downloaded files are not saved.
- Saving to Memory Card is prohibited depending on the file; such files are saved to handset.
| Initialized Browser | Restore default settings and reset Bookmarks and Saved Pages |
| Main Menu | Yahoo! Keitai → Common Settings → Initialized Browser |
| Enter Handset Code → Press ⬙ → Choose Yes → Press ⬙ |
| Reset Settings Restore default settings |
| Main Menu | Yahoo! Keitai→ Common Settings → Reset Settings |
| Enter Handset Code → Press ⬙ → Choose Yes → Press ⬙ |
| PC Site Browser Settings | |
| WarningMessage | Show or hide warning message when activating PC Site Browser or when switching to Yahoo! KeitaiDefaultOn |
| Main Menu | ▶ Yahoo! Keitai ➔ PC Site Browser ➔ PC Site Browser Settings ➔ Warning Message |
| Select PC Site Browser or Yahoo! Keitai ➔ Press ➔ Choose On (show) or Off ➔ Press | |
| Zoom Setting | Select page scaleDefault100% |
| Main Menu | ▶ Yahoo! Keitai ➔ PC Site Browser ➔ PC Site Browser Settings ➔ Zoom Setting |
| Select a scale ➔ Press | |
| Security Settings | |
| Security Settings affect both Yahoo! Keitai and PC Site Browser. | |
| Manufacture Number | Select whether or not to send handset manufacture number automatically for authenticationDefaultOff |
| Main Menu | ▶ Yahoo! Keitai ➔ Common Settings ➔ Security Settings ➔ Manufacture NumberChoose On (send) or Off ➔ Press |
| Send Referer | Select whether or not to send referer information to the Server |
| DefaultSend | |
| Main Menu | ▶ Yahoo! Keitai ➔ Common Settings ➔ Security Settings ➔ Send Referer |
| Select Send or Not Send ➔ Press | |
| Cookies | Enable or disable cookies (see P.15-21) |
| DefaultEnabled | |
| Main Menu | ▶ Yahoo! Keitai ➔ Common Settings ➔ Security Settings ➔ Cookies |
| Select Enabled, Disabled or Confirm ➔ Press | |
| Script Settings | Select whether or not to run scripts |
| DefaultOn | |
| Main Menu | ▶ Yahoo! Keitai ➔ Common Settings ➔ Security Settings ➔ Script Settings |
| Select On, Ask NW Access, Confirm or Off ➔ Press | |
| Secure Prompt | Show or hide confirmations before entering and exiting secure pages (see P.15-3) |
| DefaultShow | |
| Main Menu | ▶ Yahoo! Keitai ➔ Common Settings ➔ Security Settings ➔ Secure Prompt |
| Select Show or Do not Show ➔ Press | |
| Root Certificates | Open electronic certificates issued by Certificate Authorities saved on handset | |
| Main Menu | ▸ Yahoo! Keitai ➔ Common Settings ➔ Security Settings | |
| Select Root Certificates (preloaded certificates) ➔ Press ☑To open certificates, select one ➔ Press ☑Press ☑ to return. | ||
| Keep Auth Info | Previously entered user ID or password is entered automatically for authentication | |
| Default Per Browsing | ||
| Main Menu | ▸ Yahoo! Keitai ➔ Common Settings ➔ Security Settings ➔ Keep Auth Info | |
| Select Per Browsing, On (authenticate automatically) or Off ➔ Press ☑For Per Browsing, entered user ID or password remains for automatic authentication and is deleted upon exiting the Internet.For On, entered user ID or password remains even after exiting the Internet or turning handset power off. | ||
| Tip ➔ Saved user ID or password is applicable to Basic/Digest authentication. Some sites may employ other HTTP authentication schemes. | ||
| Flash® Restriction | Select whether or not to restrict Flash® downloads | |
| Default On | ||
| Main Menu | ▸ Yahoo! Keitai ➔ Common Settings ➔ Security Settings ➔ Flash® Restriction | |
| Choose On (restrict) or Off ➔ Press ☑ | ||
S! Applications
Getting Started
Download S! Applications, including games.
Download and use 812SH/813SH compatible S! Applications.
Tip
- Separate subscriptions are required for S! Applications downloaded via Yahoo! Keitai.
- Address questions about S! Applications to SoftBank Customer Centre, General Information (see P.20-29).
- Some preloaded S! Applications can be deleted (see P.16-5). To restore them, perform Memory All Clear (see P.168).
Lifestyle-Appli
■ Lifestyle-Appli, an S! Application required to use S! FeliCa, is preloaded on handset (see P.17-2). Lifestyle-Appli settings and usage patterns resemble those of other S! Applications.
Network S! Applications
■Network S! Applications require Internet connection. •Before using a Network S! Application, a message appears indicating that Internet connection is required. To skip this confirmation, see P.16-7.
S! Appli Library
Open S! Appli Library to access S! Applications saved on handset or Memory Card.
Main Menu
S! Appli
1 Select S! Appli and press ●
To switch between handset and Memory Card, press 📋
Options ➔ Select Change to Phone or Change to Memory
Card ➔ Press ⬙
To open Java™ Licence Information, select Information → Press ●
Tip ▶ When ⬙ is pressed in Standby with an S! Application paused, Application is suspended. appears. Select End and press ⬙ to open S! Appli Library.
Memory Status
■ Press ⬤ ➔ Select Data Folder ➔ Press ⬤ ➔ Select Memory Status ➔ Press ⬤ ➔ Select Phone Memory or Memory Card ➔ Press ⬤
S! Applications on Memory Card
Synchronise Memory Cards used on other SoftBank handsets, PCs and other devices to update S! Appli Library. Retrieve Network Information beforehand (see P.1-20).
Main Menu ▶ S! Appli → Settings → Synchronisation
1 Choose Yes and press ●
Tip ▶ It may take some time to update S! Appli Library depending on the number of files saved, etc.
Downloading S! Applications
- Retrieve Network Information beforehand (see P.1-20).
- Some S! Applications can be downloaded to Memory Cards.
•Make sure signal is strong.
Main Menu ▶ S! Appli → S! Appli → Download
1 Open an Internet site offering S! Applications
2 Select an S! Application and press ●
Properties appear.
When an S! Application is paused, choose Yes → Press ●
3 Press ☐ Yes
Download starts.
-Download may take time.
Press [Cuban] to cancel.
4 Downloaded S! Application is automatically saved and a confirmation appears
- When you download a new version of S! Application set as Screensaver (see P.16-6), Screensaver may be cancelled.
5 Choose Yes and press ●
Internet connection ends and S! Appli Library opens.
To return to the site, choose No and press Ⓞ.
Starting S! Applications: see P.16-4
Tip ▶ Some S! Applications require permission settings. Follow onscreen prompts to use the S! Application (may only be available in Japanese).
Properties
Check S! Application properties before completing download.
Using S! Applications
Starting S! Applications
Main Menu
S! Appli
1 Select S! Appli and press ●
S! Appli Library opens (see P.16-2).
2 Select an S! Application and press ●
S! Application starts.
- For operations, refer to the source Internet site, etc.
- If the S! Application cannot be used, S! Appli Library returns.
Tip ▶ S! Applications automatically pause for incoming transmissions. To set handset to ignore them, see P.16-8 "Calls & Alarms".
Starting Network S! Applications
If Internet connection confirmation appears after Step 2 above:
Choose Yes or No → Press ⬙ → S! Application starts
- To skip confirmation, select Never Ask for Network Access (see P.16-7 "Setting Permissions").
■ Some S! Applications require permission settings (see P.16-7).
Exit, Pause & Resume
Exiting or Pausing S! Applications
1 Press ☎ while using an S! Application
2 Exiting S! Application
1 Select End and press ●
S! Appli Library returns.
Pausing S! Application
1 Select Suspend and press ●
Handset returns to Standby.
- S! Application resumes from pause point.
Resuming S! Applications
1 While an S! Application is paused, press Ⓞ in Standby
2 Select Resume and press ●
To end the S! Application, select End → Press ●
To open Main Menu and keep the S! Application paused, select Cancel → Press ●
Managing S! Applications
Opening S! Application Properties
Main Menu
▶ S! Appli → S! Appli
1
Select an S! Application and press 📧 Options
2
Select Details and press ●
| Title Title of the S! | Application |
| Vendor | Name of the distributor (or supplier/manufacturer) |
| Version Version of | the S! Application |
| Description Description of the S! Application | |
| Save Size Downloaded file size | |
| Recorded Record | game scores, etc. up to this size |
| Screensaver Compatibility with Screensaver | |
| Profile | Versions: VSCL (Overseas)/JSCL (Domestic) |
| Link Link to source | Internet site |
| Certification Trusted/Untrusted | |
| Cert. Subject | Authority of Certification (Common Name, Country and Organization) |
| Push | Compatibility with automatic Internet connection |
| IC Support Compatibility with Lifestyle-Appli | |
| Book Support Compatibility with book viewing | |
Press ⏻ to scroll down.
Moving S! Applications to Memory Card
To move an S! Application set as Screensaver, cancel Screensaver first.
Main Menu
▶ S! Appli → S! Appli
1
Select an S! Application and press 📧 Options
2
Select Move to Card and press ●
When an older version of the S! Application is saved, choose Yes or No → Press ●
■ Choose Yes and press Ⓞ to overwrite.
Note
- S! Applications cannot be moved to Memory Card when the same S! Application is already saved or when Memory Card memory is low.
- Some S! Applications cannot be moved to Memory Card.
Deleting S! Applications
To delete an S! Application set as Screensaver, cancel Screensaver first.
Main Menu
▶ S! Appli → S! Appli
1
Select an S! Application and press 📧 Options
2
Select Delete and press ●
3
Choose Yes and press ●
- Handset Code may be required.
Tip
Some preloaded S! Applications can be deleted. To restore them, perform Memory All Clear (see P.16-8).
Screensaver
Set an S! Application to activate when handset enters Standby.
Activating/Cancelling Screensaver
Screensaver is Off by default.
Main Menu
▶ S! Appli → Settings → Screensaver → Switch On/Off
1
Choose On and press ●
To cancel, choose Off → Press ●
Setting Screensaver
- Only one compatible S! Application can be set for Screensaver.
- Screensaver cannot be set when another S! Application is paused.
- Lifestyle-Appli and S! Applications on Memory Card cannot be set.
Main Menu
S! Appli → S! Appli
1
Select an S! Application and press 📧 Options
2
Select As Screensaver and press ●
- As Screensaver appears for compatible S! Applications.
Activation Time
Enter time delay before Screensaver activates in Standby.
Press ● → Select S! Appli → Press ● → Select
Settings → Press ⬙ → Select Screensaver →
Press ● → Select Activation Time → Press ● →
Enter time (01 - 10 seconds) → Press ●
- Activation Time is 3 seconds by default.
Note
- Screensaver does not start when Headphones are connected.
- Connecting Headphones (with Memory Card inserted) cancels an active Screensaver.
- Screensaver may not start when an external device (handsfree kit, etc.) is connected to handset.
- Screensaver which responds to incoming transmissions may cancel out selected Mode Settings profile.
Setting Permissions
Customise the method of confirmation, etc. for each S! Application operation below.
- Settings:
| Phone Call Place Voice Calls |
| Network Access Connect to the Internet |
| Messaging Send/receive messages |
| Autorun Execute Autorun files |
| Bluetooth Conn. Connect via Bluetooth® |
| Local Connection Connect to other devices |
| Read User Data Access Phone Book, Calendar, etc. |
| Write User Data Edit Phone Book, Calendar, etc. |
| Use Multimedia Use Media Player |
| Location Access Send Location Information |
• These settings are also available for S! Applications on Memory Card.
- Permission settings may not be available for some S! Applications.
Main Menu ▶ S! Appli ▶ S! Appli
1 Select an S! Application and press 📧 Options
2 Select Permission and press ●
3 Select an item and press ●
4 Select an option and press ●
•Some options may not appear.
| Ask Once | Confirmation appears every time the S! Application starts |
| Always Ask | Confirmation appears before the specific operation |
| Never Ask No | confirmation |
| No Reject the | operation |
Resetting Permission Settings
■Follow these steps after Step 2 on the left.
Select Reset Settings → Press ● → Choose Yes
→ Press ●
S! Application Operational Settings
Application Volume Adjust the volume of S! Application sounds
DefaultLevel 3
Main Menu ▶ S! Appli → Settings → Application Volume
Use ⚙ to adjust level → Press ●
•In Manner mode, volume set in Manner settings applies.
Backlight Select a Backlight status for S! Applications
Default Normal Settings
Main Menu S! Appli → Settings → Backlight → Switch On/Off
Select Always On, Always Off or Normal Settings → Press ⬙
| Always On | Backlight remains on while S! Application runs |
| Always Off | Backlight remains off while S! Application runs |
| Normal Settings | Applies Display Backlight setting (see P.9-13) |
| Blink | When activated, Backlight flashes while compatible S! Applications play |
| Main Menu | ► S! Appli ➔ Settings ➔ Backlight ➔ Blink |
| Choose On (activate) or Off ➔ Press ● | |
| Vibration | When activated, handset vibrates while compatible S! Applications play |
| Main Menu | ► S! Appli ➔ Settings ➔ Vibration |
| Choose On (activate) or Off ➔ Press ●•In Manner mode, vibration set in Manner settings applies. | |
| Calls & Alarms | Select handset response to incoming calls, etc. while an S! Application is active |
| Default Accept Calls, Alarm/Start Priority, Message Notice | |
| Main Menu | ► S! Appli ➔ Settings ➔ Calls & Alarms |
| Select from Voice Calls to Start Demand ➔ Press ● ➔ Select handset response ➔ Press ● | |
| Accept Calls,Message/Alarm/Start Priority | S! Application pauses for incoming call/mail, Alarm or S! Appli Request |
| Show Call Notice,Message/Alarm/Start Notice | A message appears for incoming calls, mail, etc. For example, 090392XXXX1appears. Press → to answer a call. |
- Regardless of setting, a message appears for S! Applications started from Screensaver.
| Reset | |
| Set to Default Reset S! Application settings | |
| Main Menu | ► S! Appli ➔ Settings ➔ Set to Default |
| Enter Handset Code ➔ Press ● ➔ Choose Yes ➔ Press ● | |
| Memory All Clear | Restore S! Appli Library to default setting |
| Main Menu | ► S! Appli ➔ Settings ➔ Memory All Clear |
| Enter Handset Code ➔ Press ● ➔ Choose Yes ➔ Press ● | |
| Note | ● Memory All Clear deletes downloaded S! Applications and Lifestyle-Appli.● Memory All Clear resets Near Chat application password and thus cancels Near Chat access restriction.● Preloaded S! Applications are restored. |
S! FeliCa (Japanese Only)
Not Available for 813SH for Biz Users
Basics
S! FeliCa encompasses a range of IC Card-based services available via FeliCa-compatible SoftBank handsets. 812SH and 813SH support S! FeliCa. To use services such as e-money, e-ticketing and reward point systems, simply hold handset over a compatible reader/writer at a shop or restaurant, etc.
FeliCa
A contactless IC card technology enabling wireless data transmissions with compatible reader/writer terminals
IC Card
- The FeliCa chip embedded in FeliCa-compatible handsets - Holds information required to use S! FeliCa
Lifestyle-Appli
■S ! Applications required to use S! FeliCa •Edy e-money Lifestyle-Appli is preloaded on handset. ■Edy is a prepaid e-money service run by bitWallet Inc.
Note
IC Card data content varies by service and usage history. Procedures to delete IC Card data vary by Lifestyle-Appli; contact service providers for details.
Service Usage Outline
Download Lifestyle-Appli
Download Lifestyle-Appli via Internet site.
- Lifestyle-Appli is saved to Lifestyle-appli folder.

Complete Registration/Set Up
Activate Lifestyle-Appli, complete registration/customise settings.
- Charge accounts, check balance or payment records, etc.

Use Service
To use S! FeliCa at shops, restaurants, and locations, place 📋 logo over reader/writer.
- Use e-money/e-tickets to shop/travel; earn reward points.
Note
- Lifestyle-Appli registration and usage vary; contact the service provider for details.
- SoftBank is not liable for damages resulting from accidental loss/alteration of IC Card data/settings.
- Keep service passwords/customer service contact information, etc. in a separate place.
Starting Lifestyle-Appli
To use S! FeliCa, activate a service Lifestyle-Appli and complete service registration, setup, charge, balance check, etc.
Main Menu
▶ Lifestyle-appli
1 Select Lifestyle-appli and press ●
To download a Lifestyle-Appli, select Download → Press ●
2 Select an application and press ●
Lifestyle-Appli starts.
To end the Lifestyle-Appli, press 📞.
Note ▶ Lifestyle-Appli cannot be started during calls or when another S! Application is active.
Tip ▶ Lifestyle-Appli settings and usage patterns resemble those of other S! Applications (see P.16-5 - 16-8). However, Lifestyle-Appli cannot be set as Screensaver.
Using S! FeliCa
Follow these steps to conduct a transaction.
Example: making an electronic payment:
- Complete registration, setup and charge in advance.
- Complete transactions without activating a Lifestyle-Appli.
1 Place 📋 logo over reader/writer

Place this part over reader/writer
•The illustration above is for reference only.
- Confirm scan results on reader/writer display.
- If recognition is slow, move handset around slightly.
Note ▶ • Align handset parallel to reader/writer.
•Foreign articles can block/hamper recognition.

- When placed over sensor, handset may display a message, vibrate or activate mail, Internet or an S! Application for some services. To disable response, see P.17-7 "Interface Settings".
- Reader/writer will scan FeliCa IC Card even during calls or Internet transmissions. (It may take some time.)
When Handset Power is Off
■ Transactions possible; Lifestyle-Appli does not start automatically.
- After installing/reinstalling battery, always turn on handset power to use S! FeliCa.
When Battery is Low
■S! FeliCa is not available. Charge it beforehand.
S! FeliCa Settings
IC Card Status
Main Menu
▶ Lifestyle-appli → IC Card Settings

Select IC Card Status and press ●
If IC Card Lock is set, choose Yes → Press ● → Enter Handset Code → Press ●
Press ⬙ to return.
IC Card Lock
Use this function to restrict access to/prevent unauthorised use of S! FeliCa on handset.
IC Card Lock is Off by default.
Main Menu
▶ Lifestyle-appli → IC Card Settings → IC Card Lock

Choose On and press ●
To cancel, choose Off → Press ●

Enter Handset Code and press ●

Choose Yes and press ●
Remote Lock
Send mail with specified subject (Mail Remote Lock) or call from a specified phone (Call Remote Lock).
Preparation on Handset
Mail Remote Lock Password/Address
Save a password for Mail Remote Lock, and set mail address to send IC Card Lock notice to.
Main Menu
▶ Lifestyle-appli → IC Card Settings → Remote Lock
1 Enter Handset Code and press ●
2 Select Mail Remote Lock and press ●
3 Select Remote Lock PW and press ●
4 Enter a password and press ●
- Enter between 5 and 16 alphanumerics.
5 Select LockNoticeSettings and press ●
6 Select Email Lock Notice and press ●
7 Sending Notice to Remote Lock Activator
1 Select As Reply and press ●
Press 📄 to return.
Sending Notice to Specified Address
1 Select AddressTo Notice and press ●
② Select Address to Notice and press ●
3 Select Phone Book, Enter Number or Enter Address and press ●
4 Select/enter mail address or SoftBank handset number and press ●
Disabling Notice
1 Choose Off and press ●
Press ☐ to return.
8 To save settings without enabling Mail Remote
Lock, press ¥? Save
- To enable Mail Remote Lock, perform from Step 3 in "Remote Lock Setup" on P.17-6 and choose On in Step 4.
■Call Remote Lock Number/Count for Lock
Save up to two phone numbers from which to call handset, and set Missed Call count required to activate IC Card Lock (default count is 3 times).
Enable Remote Lock activation via public phones.
Main Menu ▶ Lifestyle-appli → IC Card Settings → Remote Lock
1 Enter Handset Code and press ●
2 Select Call Remote Lock and press ●
3 Select Phone No. to Lck 1 and press ●
To enable activation via public phone, select Set Public
Phone → Press ● → Choose On → Press ●
To disable activation via public phone, choose Off.
4 Select Phone Book or Enter Number and press ●
5 Select/enter a phone number and press ●
To save second phone number, select Phone No. to Lck 2
→ Press ⬙ → Repeat Steps 4 - 5
6 Select Count for Lock and press ●
- 3 times is set by default.
7 Enter Missed Call count (3 - 10 consecutive times) required to activate IC Card Lock and press ●
- To enable Call Remote Lock, perform from Step 3 in "Remote Lock Setup" below and choose On in Step 4.
8 To save settings without enabling Mail Remote Lock, press ☑ Save
Remote Lock Setup
Activate or cancel Mail Remote Lock/Call Remote Lock. Both Remote Locks are Off by default.
Main Menu ▶ Lifestyle-appli → IC Card Settings → Remote Lock
1 Enter Handset Code and press ●
2 Select Mail Remote Lock or Call Remote Lock and press ●
3 Select Switch On/Off and press ●
4 Choose On and press ●
To cancel, choose Off → Press ●
■Saved mail address and phone numbers remain.
Reactivate Remote Lock to use the same setting.
5 Press Save
Activating Remote Lock
Via Mail
1 Use S! Mail/e-mail to send password to handset
- Enter password as subject; leave other fields blank.
- To confirm IC Card Lock status, send a message via phone or PC with specified mail address (see P.17-5 "Mail Remote Lock Password/Address").
After Handset Receives Message
■IC Card Lock is set and notice is sent from handset to specified mail address.
Note ▶ If handset cannot receive mail IC Card Lock is not set.
Via Phone
1 Using one of the specified phones, call handset
2 End the call
The call is recorded as a Missed Call on your handset.
- Within three minutes, repeat Steps 1 - 2 until the specified number of Missed Calls are recorded.
- Public phones can be used for this function if Set Public Phone is activated beforehand.
- Send Caller ID when placing calls from specified phone. (Caller ID is not required for public phones.)
After Specified Number of Missed Calls
IC Card Lock is set; a message announces Remote Lock activation.
Note
- Missed Call count is reset by calls from numbers not saved for this function. If series is interrupted, start over from the beginning.
- When Call Forwarding is active, Missed Calls may not be recorded.
Interface Settings
Set handset response to reader/writer commands: Choose On for S! Appli to activate S! Application, Browser to access Internet, Messaging to activate mail, Vibration to vibrate handset, and Pop-up Message to open pop-up message. Interface Settings is On for all items by default.
Main Menu
▶ Lifestyle-appli → IC Card Settings → Interface Settings
1 Enter Handset Code and press ●
2 Select from S! Appli to Pop-up Message and press ●
3 Choose On or Off and press ●
Resetting Defaults
Cancel custom settings and return S! FeliCa settings to their defaults.
Main Menu
▶ Lifestyle-appli → IC Card Settings → Set to Default
1 Enter Handset Code and press ●
2 Choose Yes and press ●
Note
- Set to Default does not delete downloaded Lifestyle-Appli.
- Reset All (see P.9-28)/Memory All Clear (see P.16-8) returns Lifestyle-Appli settings to defaults; all downloaded Lifestyle-Applications are deleted. If IC Card data remains, Reset All and Memory All Clear are disabled.
Entertainment
S! Cast (Japanese Only)
Basics
Subscribe to Japanese mobile periodicals that download to handset automatically overnight.
•A separate subscription and registration are required.
- After registration, Weather Indicator (see P.18-4) appears in Standby.
- Only available within Japan on compatible 3G handsets.
- Retrieve Network Information (see P.1-20) before using S! Cast.
S! Cast Content
Sample S! Cast information page:

Service Registration & Content Subscription
Complete service registration to use S! Cast, then subscribe to content.
Registration and subscription require Internet use (connection fees apply). Confirm signal strength beforehand.
Main Menu
Entertainment → CAST
1 Select Registration/Cancel and press ●
Handset connects to the Internet and service registration page opens.
- Follow onscreen instructions.
Opening Received Information
New Received Information
1 Delivery Notice appears and Information window opens for new information
- If closed, open handset for new information to see Delivery Notice appear and Information window open.
2 Select CAST and press ●
Information appears.
- Follow onscreen instructions.
•Information handling is similar to that of Yahoo! Keitai.
■ Using Cursor: see P.15-6
■Saving Files to Data Folder: see P.15-11
■ Using Linked Info: see P.15-12

Information
3
Press 📞 to exit
Requesting Re-Delivery
If information delivery fails, follow these steps to request re-delivery of latest information. (Make sure signal is strong and stable.)
Press ⬤ → Select Entertainment → Press ⬤ →
Select CAST → Press ⬙ → Select Get Latest
Contents → Press ⬤ → Choose Yes → Press ⬤
CAST Notif. Setting
Toggle Notification (Information window) on/off
Default Notify
Main Menu
▶ Entertainment → CAST → CAST Notif. Setting
Select Notify or No Response → Press ●
Stored Information
Main Menu
Entertainment → CAST
1
Latest Information
1 Select What's New and press ●
Back Issues
1 Select History and press ●
2 Select date and press ●
2
Select an item and press ●
Information appears.
3
Press 📞 to exit
Using Information
| Save Sound/Chaku-Uta® | Select Save ➔ Press ⬤ |
| Change Font Size | Press ☑ Options ➔ Select Font Size ➔Press ⬤ ➔ Select a size ➔ Press ⬤ |
| Change Scroll Unit | Press ☑ Options ➔ Select Scroll Unit ➔Press ⬤ ➔ Select a unit ➔ Press ⬤ |
| Copy Text | Press ☑ Options ➔ Select Copy Text ➔Press ⬤ ➔ Perform from Step 3 in "Copy/Cut & Paste" on P.3-13 |
| Open Properties | Press ☑ Options ➔ Select Page Information ➔ Press ⬤■Press ⬤ to return. |
Using Weather Indicator
After S! Cast (see P.18-2) registration, local area weather forecast (based on Location Information) appears.
Indicators & Updates

- (chance of rain), (fall foliage season), etc. appear at the same time.
- Weather Indicator is updated when:
■Weather Indicator update time arrives
■Manually updated
Note ▶ When handset location changes, a new forecast appears at Weather Indicator update time. Alternatively, update Weather Indicator manually.
Activating/Cancelling Weather Indicator
Show or hide Weather Indicator in Standby. On (show) is set by default.
Main Menu ▶ Entertainment → CAST → Weather Icon → Settings
1 Select Standby Settings and press ●
2 Choose On or Off and press ●
Activating Updates
Activate automatic updates. On (activate) is set by default.
Main Menu ▶ Entertainment → CAST → Weather Icon → Settings
1 Select Icon Update and press ●
2 Choose On and press ●
To cancel, choose Off → Press ⬙ (Omit the next step.)
3 Choose Yes and press ●
Weather Indicator is updated when update time arrives.
Display Info Toggle Notification (Information window) on/off
DefaultOn
Main Menu
▶ Entertainment → CAST → Weather Icon → Settings → Display Info
Choose On (show) or Off → Press ●
Manual Update Update Weather Indicator manually
Main Menu
▶ Entertainment → CAST → Weather Icon
Select Manual Update → Press ●
- Handset connects to the Internet and Weather Indicator is updated.
Note ▶ Activate Icon Update (see P.18-4) beforehand.
Weather Forecast (Japanese Only)
Main Menu ▶ Entertainment → CAST → Weather Icon
1 Select Weather and press ●
Information appears.
Electronic Books
Read XMDF or Text format E-Books saved on handset/Memory Card.
•E-Book dictionaries turn handset into an electronic dictionary.
- Adjust Text Code (see P.18-7) for E-Books in other languages.
- Handset may not support some embedded sounds/images.
•E-Book folder cannot be accessed during Synchronisation.
Downloading E-Books
- Visit Sharp Space Town (see P.15-9) for more information on E-Books (how to purchase, etc.).
Support Book (Japanese Only)
■Download Support Book (E-Book on 812SH/813SH operational tips) via Sharp Space Town (see P.15-9).
Reading Content
Main Menu

Entertainment
1
Select E-Book and press ●
Book contents list appears. (When you press 📄 to close Reading window, the same page will open next time.)
To read E-Books saved in other folders, press ☐ Options → Select Switch Folders → Press ● → Select a folder → Press ●
■Selected item appears next time E-Book is selected.
■ Access E-Books saved in Book and Book (SD) from Entertainment or Data Folder (Books).
2
Select an E-Book and press ●
- % indicates location of the current page.
If the E-Book is password protected, enter password → Press ⬙ → Reading window opens
To see the title, author, etc., press Options Select Details Press
■Press ● to return.
3
Press 🔒 to close
•The last page opened will appear next time.
Note
- E-Books automatically close for low battery, five minutes of inactivity, or Memory Card removal.
- Only zbf, zbs, zbk, txt or text files appear in content list.
•Revised E-Books are not supported.
Key Assignments

Operations vary by text orientation as follows.
| Horizontal Vertical | ||
| Scroll up (by line) Backward (by page) | ||
| Scroll down (by line) Forward (by page) | ||
| Backward (by page) Scroll left (by line) | ||
| Forward (by page) Scroll right (by line) | ||
For some E-Books, use #/# to scroll by page.
Text Operations

Jump to the first or last page. Press ☑ Options → Select Jump to Top or Jump to Bottom → Press ●

Move to a specific location. Press ☐ Options → Select Move to Specified % → Press ● → Enter location by percentage (00 - 99%) → Press ●

Select a chapter when a table of contents is contained. Press ☑ Options → Select Contents → Press ● → Select a chapter → Press ●

Move back to link source or open link again. Press 📧 Options → Select Back or Next → Press ●

Return to E-Book list. Press 📧 Options → Select Back to List → Press ●

See P.18-8 to use Bookmarks.
Using Linked Info/Copying Text

Use linked numbers, addresses or URLs to place calls, send messages or access Internet sites. Select an Item → Press ⬙ → Choose Yes → Press ⬙ • Some linked information may not be usable.
■ Copy text (up to 20 characters).
In Reading window, press 📧 Options → Select Copy
→ Press ⬙ → Perform from Step 3 in "Copy/Cut & Paste" on P.3-14
■ Dictionary index text and search results cannot be copied.
■Images and ruby annotations cannot be copied.
Reading Window Settings
| Press ☑ Options → Select Settings → Press ● → Select an Item → Press ● → Change the setting → Press ● |
| Item Description Default | ||
| Font Size | Select Tiny, Small, Standard, Large or Huge | Standard |
| Text Orientation | Read text vertically or horizontally | Vertical Text |
| Ruby Show/hide | ruby annotations Off | |
| Text Code | Set encoding to Shift-JIS, Latin-1 or Latin-9 | Shift-JIS |
| View Settings | Select Detail View or Page View | Detail View |
| Vibration Activate/cancel vibration On | ||
| Resolution | Set to Low, Normal or High | Low |
*May vary by E-Book.
- Above settings are not available for some content.
Mask & Jump
Some E-Books may contain hidden text or images (masked info) or links (jump links).
- Select masked info and press ⬙ to see the text or image. Press ⬙ again to hide.
- Select a jump link and press ⬙ to jump to the specified page. Press 📄 to return.
Folders and Files in E-Book Folders
■Open E-Book list first.
- Adding Folders
Press Options → Select New Folder → Press ● → Enter name → Press ●
- Editing Folder/File Names
Select a folder/file → Press 📧 Options → Select Change Name → Press ⬙ → Edit → Press ⬤
- Deleting Folders/Files
Select a folder/file → Press 📧 Options → Select Delete → Press ⬙ → Choose Yes → Press ⬤
- Moving Files
Select a file → Press 📋 Options → Select Move → Press ⬙ → Select a location → Press ⬤ → Pres
Tip ▶ The above operations are not available for E-Books in Data Folder (handset/Memory Card). For managing folders/files on handset, see P.8-8.
Bookmark
Add bookmarks to return to the pages easily.
Use two bookmarks per E-Book (for up to five E-Books).
1 Press ●
If Marker is not on Display, press 📧 Options → Select Bookmark → Press ⬙
2 Select Bookmark1 or Bookmark2 and press ●
Bookmark is added.
Auto Bookmark
When Reading window is closed, Auto Bookmark 1 is added to the last page opened. When the same E-Book is opened and closed again, Auto Bookmark 1 changes to Auto Bookmark 2.
•Each E-Book holds up to two Auto Bookmarks, the oldest of which is deleted first when a new one is added.
Opening Bookmarked Page
In Reading window, press Options Select Move to Bookmark Press Select Bookmark1, Bookmark2, Auto Bookmark1 or Auto Bookmark2 Press
Using E-Book Images
Embedded Information Save images as Wallpaper or use information contained in images
Main Menu ▶ Entertainment ▶ E-Book ▶ Open E-Book
Select an image → Press ●
- Soft Key Assignments:
| Assign | Save images as WallpaperFor images smaller or larger than Display, select Centred, Full Screen or Fit Image ➔ Press ⬤(For Display size images or Centred, use 🔊 to zoom in/out or press ☑ to rotate.) |
| Jump to | Select jump information to move to other pages. Use linked information to send S! Mail messages or access Internet sites (E-Book will close).See P.18-6 "Using Linked Info/Copying Text". |
| Switch Hidden text or images appear | |
| Play Animation plays | |
Using a Dictionary
Look Up Word Use downloaded E-Book dictionaries to look up word definitions, etc.
Main Menu ▶ Entertainment → E-Book
Select a dictionary → Press ⬙ → Select an entry field → Press ⬙ → Enter a word → Press ⬙
- Select an entry and press Ⓞ to view its definitions.
•Key Assignments: see P.18-6
BookSurfing ® (Japanese Only)
Activate BookSurfing ® S! Application to read comics, photo books and other CCF files saved in Data Folder (Books). To read fee-based CCF files, download Content Keys.
Main Menu

Entertainment
1
Select BookSurfing and press ●
BookSurfing ® S! Application starts.
- Refer to the BookSurfing help menu for operational instructions.
- When an S! Application is paused, Application suspended. End application? appears. Choose Yes and press Ⓞ to start BookSurfing®.
Note
When purchasing a new handset, move CCF files via Memory Card and retrieve Content Key to open the files. Some files may need to be re-downloaded.
Tip
Save CCF files to handset/Memory Card Data Folder (Books).
Communication
S! Town (Japanese Only)
S! Town is an online communication application. Select an avatar to enter this 3D virtual town, where you can participate in events and meet other users.
- Usage requires the pre-installed S! Town S! Application.
- S! Town S! Application cannot be deleted.
- Internet connection is required; may incur high charges.
- S! Town is not available if Internet access is restricted by subscription.
Using S! Town
When using S! Town for the first time, agree to the terms of service then complete free user registration.
Main Menu
▶ Communication
1 Select S! Town and press ●
S! Town starts.
- Refer to the S! Town S! Application's help menu for operational instructions.
Tip ▶ •Check registration status or cancel registration via Yahoo! Keitai. For details, refer to the S! Town S! Application's help menu.
- An upgrade notice may appear when starting S! Town. Follow onscreen instructions to upgrade.
S! Town Library
Save S! Town-compatible S! Applications to S! Town Library.
- Start S! Applications from S! Town Library. (S! Town may start for some applications.)
- S! Town-compatible S! Applications are not saved in S! Town Library by default.
Main Menu
Communication
1
Select S! Town and press

Library
S! Town Library opens.
Tip
Downloaded S! Town-compatible applications are automatically saved to S! Town Library.
S! Loop (Japanese Only)
S! Loop is a communication service.
Main Menu
Communication

Select S! Loop and press ●
Handset connects to the Internet and S! Loop Main Menu opens.
- Refer to the S! Loop help menu for operational instructions.
Hot Status
Exchange current usage status, mood, etc. with compatible handsets.
•A separate subscription is required.
![graph TD A["My Status"] -->|Hot Status Info| B["Member Status"] B -->|Hot Status Info| C["Member Status"] C -->|Hot Status Info| D["Member Status"] D -->|Hot Status Info| E["Member Status"] E -->|Hot Status Info| F["Member Status"] F -->|Hot Status Info| G["Member Status"] G -->|Hot Status Info| H["…](/content/2026/07/1509125/images/e926a27b7d20b8696639975d38d21b896944741c9019a8cc4b67aee5a5a0dd2c.jpg)
- Save compatible handset numbers to member list. Hot Status information is updated automatically.
Note ▶ Before use, set IP Service Setting (see P.9-26) to On. • Only available on compatible 3G handsets.
Window Description
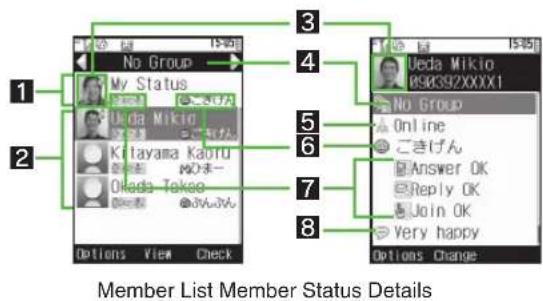
1 My Status (see P.19-8)
2 Members
3 Image
• Image set for Picture: in My Details or Phone Book appears.
4 Group Name
5 Connection Status
• Online, Offline or Unknown appears.
6 Status
- Current status indicated by Status Icon (Pictogram) and Status Label (description) appears.
7 Availability
•Availability for Calls, Mail and Circle Talk appear.
8 Comment
Hot Status Notification
Information window opens for the following notifications.
| Request Memo | A request for permission to add your number to Hot Status member list |
| Acceptance Memo | An acceptance reply to your Request Memo |
| Abstention Memo | A rejection reply to your Request Memo; also arrives when no reply is sent within two hours |
| Removal Memo | Your number is deleted from a member's Hot Status member list |
| NW Interruption | Network failure notice; Hot Status is not available |
Adding Members
Save up to 30 members to Hot Status member list.
Overview
![graph TD A["On Handset Prospective Member"] --> B["Save Number Receive Request Memo"] B --> C["Receive Acceptance Memo"] C --> D["Member Registered"] E["Accept Request"] --> D D --> F["Receive Acceptance Memo"] F --> C](/content/2026/07/1509125/images/9d72f48c8e7a21c3d0df46f47de4b2601515c2ede6d0d52f24bacfb53cd91dab.jpg)
My Status is sent and member's Hot Status information appears on handset.
Note ▶ Set Connection Setting (see P.19-9) to Online to add members.
Adding from Phone Book or Direct Entry
Main Menu
Communication → Hot Status
1
Use ⚙ to select a Group and press 📧 Options
When Register a member? appears, choose Yes → Press ⬙ → Skip ahead to Step 3
2
Select Add Member and press ●
3
Phone Book
1 Select Phone Book and press ●
2 Select an entry and press ● ■ For entries with multiple numbers, select one → Press ●
Direct Entry
1 Select Add New Entry and press ●
2 Enter a phone number and press ●
4
Choose Yes and press ●
Request Memo is sent to the number.
- Member is saved when Request Memo is accepted (Acceptance Memo arrives).
- Waiting and Unknown appear for pending members' availability and Status respectively.
Note
- When 30 members are already saved, delete members (see P.19-10 "Deleting Members") to add new ones.
- Abstention Memo arrives when Request Memo is sent to incompatible handsets.
- After sending Request Memo, Bluetooth® and infrared transfers are disabled until Acceptance or Abstention Memo arrives.
Tip
Update My Status (see P.19-8) as needed before adding members.
Adding from Request Memo
Save members via Request Memo.
When a request arrives, Accept the registration request from XX (name/number) ? appears. Accept or reject it.
1 Accepting
1 Choose Yes and press ●
Acceptance Memo is sent and the number is saved to Hot Status member list.
Rejecting
1 Choose No and press ●
Abstention Memo is sent; number is not saved to Hot Status member list.
Auto Reject
■Abstention Memo is sent automatically when:
- Handset fails to respond within two hours
•Thirty members are already saved in total
Note
- Once rejected, the same number cannot be added to member list for 24 hours.
- Request Memo arrives again when the requesting party fails to receive Abstention Memo within 24 hours.
Opening Member Status Details
Main Menu
▶ Communication → Hot Status
1 Use Ⓞ to select a Group, then ⏻ to select a member
2 Press
Member status details appear.
Window Description: see P.19-4
My Status
Opening My Status Details
1 In Standby, press maxXmin for 1+ seconds

1 Image/Name
• Image and name appear if saved in My Details.
2 Connection Status (see P.19-9)
3 Status
•To edit Status Icon/Label, see P.19-12 "Status Setting".
4 Answer Status
- Change availability for Calls, Mail and Circle Talk at once.
5 Availability
- Set availability for Calls, Mail and Circle Talk separately.
6 Comment
- Enter up to 15 characters.
7 Standby Window On/Off (see P.19-9)
Default Settings
| Item Default | |
| Status ☺ ごきげん | |
| Answer Status All OK | |
| Availability (Calls) Answer OK | |
| Availability (Mail) Reply OK | |
| Availability (Circle Talk) Join OK | |
| Comment | — |
Changing My Status
Follow these steps after opening My Status details (Step 1 on the left) to change Status, availability and Comment. For other items, see P.19-9.
1 Select an item (except Connection status and Standby Window On/Off) and press Ⓞ
2 Select status and press ●
•To change more items, repeat Steps 1 - 2.
For Comment, enter text → Press ●
3 Press Update
New status is sent to the members.
To exit without updating, press → Choose No → Press
•Available Settings:
| Item Setting | ||
| Status 16 Status | Icon/Label combinations | |
| Answer Status | All OK | Calls: Answer OKMail: Reply OKCircle Talk: Join OK |
| Only Mail is OK | Calls: Answer NGMail: Reply OKCircle Talk: Join NG | |
| All NG | Calls: Answer NGMail: Check LaterCircle Talk: Join NG | |
| User Setting | - (See P.19-11 "Answer Status" to assign custom combination) | |
| Calls Answer OK | Urgency Only or Answer NG | |
| Mail Reply OK or | Check Later | |
| Circle Talk Join OK, Auto Join 1 or Join NG 2 | ||
| Comment Up to 15 characters | ||
1 Automatically accepts Circle Talk requests.
2 Automatically rejects Circle Talk requests.
■Additional Settings
Follow these steps after opening My Status details (Step 1 on P.19-8).
Connection
Setting
Set Connection status
Select current Connection status (Online or Offline)
→ Press ● → Select Online or Offline → Press ●
- Set to Online to change Status/availability or to use Circle Talk.
Standby
Window
Show or hide My Status in Standby Window
Default On
Select current Standby Window status (Standby Window On or Off) → Press ● → Choose On (show) or Off → Press ●
Connection Status Auto Update
■ Connection status is updated to Unknown or Offline after a period of no signal detection.
- Connection status is updated to Online when signal returns.
Editing Hot Status Member List
Edit Group name or move members to other Groups.
Renaming Groups
Main Menu
▶ Communication → Hot Status
1 Use 🔒 to select a Group and press 📧 Options
2 Select Edit Group Name and press ●
3 Enter name and press ●
Moving Members
Main Menu
▶ Communication → Hot Status
1 Select a member and press 📧 Options
2 Select Change Group and press ●
3 Select target Group and press ●
Member is moved.
Tip ▶ Open Standby Window in Communication mode (see P.98) to view member Status/availability in Standby.
Deleting Members
Deleting a member simultaneously deletes your number from the deleted member's Hot Status member list.
Main Menu
▶ Communication → Hot Status
1 Select a member and press ●
2 Press 📧 Options
3 Select Registration Release and press ●
4 Choose Yes and press ●
5 Choose Yes and press ●
Removal Memo is sent and the member is deleted from Hot Status member list.
Note ▶ •Deleted members cannot be re-saved for 24 hours.
- Request Memo arrives when the member fails to receive Removal Memo within 24 hours.
When Abstention/Removal Memo Arrives
■Member is deleted from Hot Status member list. - When handset fails to receive Abstention/Removal Memo within 24 hours, Request Memo is sent to the member.
Using Hot Status Info
Use Hot Status to place calls, send messages, start Circle Talk or save numbers to Phone Book.
Calls, Messages & Circle Talk
Main Menu
Communication → Hot Status
1
Select a member and press 📧 Options
2
Select a contact method and press ●
For Call and Video Call, handset dials the number.
Creating & Sending SMS/S! Mail: see P.14-6
Initiating Circle Talk: see P.19-14 - 19-15
Saving to Phone Book
Main Menu
Communication → Hot Status
1
Select a member and press 📧 Options
2
Select Save to Phone Book and press ●
3
Select As New Entry or an existing entry and press ●
Number is entered in Phone Book. Complete other fields and save (see P4-4).
Hot Status Settings
Request Reply Select handset response to Request Memos
DefaultAlways Confirmed
Main Menu
Communication → Hot Status
Press 📧 Options → Select Settings → Press ⬤ → Select Request Reply → Press ⬤ → Select an option → Press ⬤
| Always Confirmed | Show confirmation for all Request Memos |
| Unregistered Entry | Reject Request Memos from numbers not saved in Phone Book; otherwise, confirmation appears |
| Always Ignored Reject all Request Memos | |
Answer Status
Assign custom availability combination to User Setting (see P.19-9)
DefaultCalls: Answer OK, Mail: Reply OK, Circle Talk: Join OK
Main Menu
Communication → Hot Status
Press 📋 Options → Select Settings → Press ⬤ → Select Answer Status → Press ⬤ → Select User Setting → Press ⬤ → Select a type → Press ⬤ → Select availability → Press ⬤
When finished setting for all types, press ☐ Save
Status Setting
Change Status Icon Pictogram or edit Status Label description for My Status
Main Menu
▶ Communication
Hot Status
Press 📧 Options → Select Settings → Press ● →
Select Status Setting → Press ⬙ → Select a Status
→ Press ⬙ → Select Status Icon → Press ⬙ →
Select a Pictogram → Press ⬙ → Select Status
Label → Press ● → Enter text → Press ●
Press ☐ Save to save.
•Pictogram List: see P.20-16
- Enter up to four characters for Status Label.
Additional Functions
Opening Hot Status Notification List
Main Menu
▶ Communication → Hot Status
1 Press 📧 Options
2 Select Hot Status Notification List and press ●
Hot Status Notification List appears.
To open details, select a notification → Press For Request Memos, see P.19-7 "Adding from Request Memo".
Manual Info Update
Normally Hot Status information is updated automatically. Follow these steps for manual update.
Main Menu
▶ Communication → Hot Status
1 Press 📧 Options
2 Select Settings and press ●
3 Select Status Update and press ●
Hot Status information is updated.
Circle Talk
Circle Talk is a Walkie-Talkie type communication service. Press one key to speak to up to ten parties simultaneously.
- Press ☐ to take the floor and speak; other participants may only listen until the floor is released.
•A subscription to Hot Status is required.
•Transmission/connection fees apply during Circle Talk.
![graph TD A["Initiator"] --> B["Send Request"] B --> C["Receiver"] C --> D["Receiver"] D --> E["Receiver"] E --> F["Receiver"] F --> G["Receiver (Speaker)"] G --> H["Press to speak"] style A fill:#f9f,stroke:#333 style B fill:#ccf,stroke:#333 style C fill:#cfc,stroke:#333 style D fill:#fcc,stroke:#33…](/content/2026/07/1509125/images/2c54c8db50f2d9073f945e14ada063e4923fc581acb176e919e53e916976ca13.jpg)
Note
- Before use, set IP Service Setting (see P.9-26) to On and Connection Setting (see P.19-9) to Online. (Circle Talk is disabled when Connection Setting is Offline.)
•A new Circle Talk session cannot begin during a call. - Only available on compatible 3G handsets.
Window Description
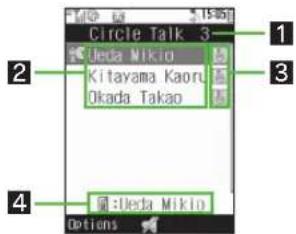
1 Total Number of Participants
2 Participants
Names appear if saved in Phone Book. Otherwise phone numbers appear.
3 Connection Status
4 Circle Talk Status
Initiating Circle Talk
Follow the steps below to start Circle Talk from Standby. When Register the circle talk member right now? appears, see P.19-17 to create Circle Talk member list.
1 Enter a phone number
2 Press (Circle Talk Key)
■ Adding/Cancelling Participants: see P.19-16
3 Press ● Call
- Circle Talk starts when request is accepted by a receiver.
4 Speak
Initiator is the first speaker when Circle Talk starts.
- Speaker's voice is heard by all other participants.
- Speak for up to 30 seconds at one time.
- Warning tone sounds five seconds before limit.
5 Press □ when finished
- The floor is released automatically when the time is up.
6 To speak again, press ☐ while Press ☑ to speak appears
Press 📋 when finish appears when you have the floor.
- Busy appears if the floor is taken by another participant; try again later.
7 Press 🔒 to exit
- Circle Talk ends automatically when there is only one participant left, including yourself.
Rejoining Circle Talk
In Standby, press 🙏/💡 to open Dialled Numbers/Received Calls → Select the most recent Circle Talk record → Press 📄 Options → Select Rejoin Circle Talk → Press 🔒
- An error message appears when all other participants have exited or 11 participants are already engaged.
Loudspeaker On/Off
■ Press ⬙ to toggle Loudspeaker on/off during Circle Talk.
•To activate/cancel Loudspeaker when starting Circle Talk, see P.19-18 "Loudspeaker".
Note ▶ Incoming Calls/Alarm during Circle Talk
- Handset responds to incoming calls according to
Incoming Calls settings (see P.19-18).
- Alarm Times are announced after exiting Circle Talk.
From Circle Talk Member List
Save members or Groups beforehand (see P.19-17).
1 Press
2 Select a member or Group and press ●
Adding/Cancelling Participants: see P.19-16
3 Press ● Call

From Hot Status Member List
Main Menu ▶ Communication → Hot Status
1 Use ⚙ to select a member and press 📊
■ Adding/Cancelling Participants: see P.19-16
2 Press ● Call
From Phone Book or Call Log
1 Phone Book
1 Press
2 Select an entry and press ●
Call Log
1 Use Ⓞ to open Dialled Numbers/Received Calls
2 Select a number and press
■ Adding/Cancelling Participants: see P.19-16
3 Press Ⓞ Call
Accepting a Circle Talk Request
1 While handset is ringing/vibrating, press 📄, 📋 or 📃
Circle Talk starts.
To take the floor, see P.19-14.
2 Press 🔒 to exit

Note ▶ To always accept Circle Talk requests automatically, set Circle Talk availability (see P.19-8) to Auto Join. If Join NG is set, Circle Talk requests are always rejected.
Adding/Cancelling Participants
Adding Participants
Follow these steps before starting Circle Talk or during Circle Talk.
1 Press 📧 Options
2 Select Add Member and press ●
3 From Hot Status Member List
1 Select Members List and press ●
2 Use Ⓧ to select a Group, then select a member
From Circle Talk Member List
1 Select C/T Members List and press ●
2 Select a member or Group
From Phone Book
1 Select Phone Book and press ●
2 Select an entry
For entries with multiple numbers, press ⬙ → Select one
Direct Entry
1 Select Enter Phone Number and press ●
2 Enter a phone number
4 Press
Selected member, Group or number is added.
•To add more participants, repeat Steps 1 - 4.
Cancelling Participants
Follow these steps before starting Circle Talk. Participants cannot be cancelled during Circle Talk.
1 Select a member and press 📧 Option
2 Select Delete Member and press ●
3 Choose Yes and press ●
Creating Circle Talk Member List
Save members from Hot Status member list or Phone Book to create Circle Talk member list.
- Save members as individuals or Groups.
- Save up to 30 entries in total (up to ten members per Group).
1 Press
2 Select Add New Entry and press ●
When opening Circle Talk member list for the first time, choose Yes → Press ●
3 Saving as Individuals
1 Select Individual and press ●
② Select Members List or Phone Book and press Ⓞ
3 Select an entry and press ●
The entry is saved as a member.
For entries with multiple numbers, select one→Press ●
Saving as Groups
1 Select Group and press ●
2 Press
3 Enter name and press ●
4 Select from No.1: to No.10: and press ●
5 Select Members List or Phone Book and press ●
6 Select an entry and press ●
For entries with multiple numbers, select one→Press ●
7 Repeat Steps 4 - 6 to add members
8 Press Y? Save
Tip ▶ To change Group names or saved members, see P.19-18 "Editing Circle Talk Member List".
Editing Circle Talk Member List
Edit or delete members and Groups.

Editing Members or Groups

Press

Individual Members
1 Select a member and press 📧 Options
2 Select Edit and press ●
3 Press
4 Perform Steps 2 - 3 in "Saving as Individuals" on P.19-17
Groups
1 Select a Group and press 📧 Options
2 Select Edit and press ●
3 Perform Steps 2 - 3 in "Saving as Groups" on P.19-17

Deleting Members or Groups

Press

Select a member or Group and press 📧 Options

Select Delete and press ●

Choose Yes and press ●
Circle Talk Settings
Loudspeaker Activate or cancel Loudspeaker for Circle Talk
DefaultOn
Press → Press Options → Select Loudspeaker
→ Press ● → Choose On or Off → Press ●
Incoming Calls Set response to calls received during Circle Talk
Default Voice Calls/Video Calls: Reject Calls
Press 📄 → Press 📋 Options → Select Incoming
Calls → Press ⬙ → Select Voice Calls or Video Calls
→ Press ● → Select handset response → Press ●
| Accept Calls | Incoming calls interrupt Circle Talk sessions |
| Reject Calls | Incoming calls are ignored. (Caller hears a busy tone.) |
Near Chat (Japanese Only)
- In the event that this handset may be used by a minor, access to this application may be password restricted by a supervising adult. In this case, Handset Code access must also be managed to prevent the execution of Memory All Clear (see P.16-8) that may be used to reset the application password.
- For more about password restriction, see Near Chat S! Application instructions.
- Because Near Chat employs Bluetooth® technology, users may receive unsolicited connection requests from unknown sources. To reject such requests, choose No and press ● in Step 2 on P.19-20 "Receiving Near Chat Request".
Basics
Exchange real-time text messages wirelessly with compatible Bluetooth ® devices within ten metres.
- Because this application employs Bluetooth wireless technology transmission/connection fees do not apply.
- Usage requires the pre-installed Near Chat S! Application.
Note
- Near Chat range may vary by ambient conditions. - Near Chat S! Application cannot be deleted.
Using Near Chat
Setup
Activate the following Bluetooth ® settings beforehand.
| Bluetooth® | See P.10-2 (choose On) |
| Visibility | See P.10-4 (select Show My Phone) |
| S! Appli Request | See P.19-20 (choose On) |
Note
- Always activate Bluetooth e to use Neat Chat.
- When Bluetooth is active and Visibility is set to Show My Phone, handset may receive unsolicited connection requests from other Bluetooth devices.
- Set Visibility to Show My Phone and activate S! Appli Request to receive Near Chat request from other parties.
Tip
Starting Near Chat activates Bluetooth ® and sets Visibility to Show My Phone. Bluetooth ® remains active even after ending Near Chat but Visibility returns to its previous state.
S! Appli Request
S! Appli Request is On by default.
Main Menu
▶ Settings → Connectivity (○) → Bluetooth → My Device Settings → S! Appli Request → Switch On/Off
1 Choose On or Off and press ●
For On, if Activate Bluetooth? appears, choose Yes → Press ●
Sending Near Chat Request
Main Menu
Communication
1 Select Near chat and press ●
If Activate Bluetooth? appears, choose Yes → Press ●
2 Send Near Chat request via the application
•Near Chat starts when the other party accepts your request.
3 To end Near Chat, exit the application (see P.16-4)
Receiving Near Chat Request
1 When a Near Chat request arrives, a tone sounds and Bluetooth® Notification appears
•After 30 seconds of inactivity, the tone sounds again, notification appears and Information window opens.
- Check request log in Latest Information (see below).

2 Choose Yes and press ●
Near Chat S! Application starts.
- For details, read the instructions on the application.
To reject request, choose No → Press ●
3 To end Near Chat, exit the application (see P.16-4)
Latest Information Open details of the most recently received Near Chat request
Main Menu ▶ Settings → Connectivity (💡) → Bluetooth → My Device Settings → S! Appli Request
Select Latest Information → Press ●
Press Ⓞ to return.
Appendix
Function List
For SoftBank 813SH Function List, see SoftBank 813SH Supplementary Guide.
| Main Menu Sub | Menu Refer to | |
| Communication | S! Town P.19-2 | |
| S! Loop P.19-3 | ||
| Hot Status P.19-4 | ||
| Circle Talk P.19-13 | ||
| Near chat P.19-19 | ||
| Yahoo! Keitai | Yahoo! Keitai P.15-3 | |
| Bookmarks P.15-9 | ||
| Saved Pages P.15-9 | ||
| Enter URL P.15-4 | ||
| History P.15-4 | ||
| Live Monitor | P.15-14 | |
| PC Site Browser | P.15-18 | |
| Common Settings | P.15-20 | |
| Media Player | Music | P.7-6 |
| Videos | P.7-8 | |
| Streaming P.15-12 | ||
| Messaging | Received Msg. | P.14-23 |
| Create Message | P.14-7 | |
| Retrieve New Msg. | P.14-19 | |
| Drafts | P.14-18 | |
| Templates | P.14-14 | |
| Sent Messages | P.14-23 | |
| Unsent Messages | P.14-23 | |
| Server Mail Box | P.14-22 | |
| Create New SMS | P.14-6 | |
| Settings | P.14-33 | |
| Memory Status | P.14-3 |
| Main Menu | Sub Menu Refer to | ||
| Camera | - | P.6-2 | |
| Data Folder | Pictures P.8-2 | ||
| DCIM | P.8-2 | ||
| My Pictograms | P.8-2 | ||
| Ring Song-Tones P.8-2 | |||
| S! Appli | P.16-2 | ||
| Music | P.8-2 | ||
| Videos | P.8-2 | ||
| Lifestyle-appli P.17-2 | |||
| Books | P.8-2 | ||
| Custom Screens | P.9-9 | ||
| Flash ® | P.8-2 | ||
| Flash ® Ringtones | P.8-2 | ||
| Other Documents | P.8-2 | ||
| Memory Status | P.8-2 | ||
| Tools | Tools 1 | Calendar | P.12-2 |
| Alarms | P.12-11 | ||
| Calculator P.12-15 | |||
| Tasks | P.12-8 | ||
| World Clock | P.12-14 | ||
| Tools 2 | Voice Recorder | P.12-16 | |
| Document Viewer | P.12-18 | ||
| Stopwatch | P.12-24 | ||
| Countdown Timer | P.12-25 | ||
| Tools 3 | Expenses Memo | P.12-25 | |
| Text Templates | P.12-26 | ||
| Barcode | P.12-19 | ||
| Phone Help | P.12-27 | ||
| Main Menu Sub | Menu Refer to | ||
| Entertainment | BookSurfing P.18-9 | ||
| E-Book P.18-5 | |||
| CAST P.18-2 | |||
| S! Appli | S! Appli P.16-2 | ||
| Settings P.16-7 | |||
| Information P.16-2 | |||
| Lifestyle-appli | Lifestyle-appli P.17-2 | ||
| IC Card Settings P.17-4 | |||
| Phone | Phone Book List P.4-2 | ||
| Add New Entry P.44 | |||
| Information P.2-7 | |||
| Call Log P.2-13 | |||
| Play Messages | P.2-10 | ||
| Call Voicemail | P.13-4 | ||
| Category Control | P.4-11 | ||
| My Details | P.4-19 | ||
| Speed Dial List | P.4-13 | ||
| Contact Groups | P.4-12 | ||
| S! Address Book | P.4-15 | ||
| Ph.Book Settings | P.49 | ||
| Manage Entries | P4-8 | ||
| Settings | Phone Settings | Mode Settings | P.92 |
| Display | P.93 | ||
| Custom Screens | P.99 | ||
| Sounds & Alerts | P.9-14 | ||
| Date & Time | P.9-18 | ||
| 言語選択(Language) | P.9-9 | ||
| User Dictionary | P.9-19 | ||
| Ringer Output | P.9-17 | ||
| Earpiece Volume | P.9-17 | ||
| Simple Menu | P.2-21 | ||
| Locks | P.9-20 | ||
| Software Update | P.20-8 | ||
| Master Reset | P.9-28 | ||
| Main Menu | Sub Menu | Refer to | |
| Settings | Connectivity | Bluetooth | P.10-2 |
| Infrared | P.10-10 | ||
| Mass Storage | P.11-9 | ||
| Memory Card | P.11-2 | ||
| Call/Video Call | Call Time & Cost | P.2-14 | |
| Answer Phone | P2-9 | ||
| Voicemail/Divert | P.13-2 | ||
| Video Call | P5-6 | ||
| Show My Number | P.13-10 | ||
| out Missed Calls P.13-5 | |||
| Int'l Calling | P.9-29 | ||
| Disp. Time/Call | P.9-30 | ||
| Call Barring | P.13-7 | ||
| Minute Minder P.9-30 | |||
| Auto Answer | P.9-30 | ||
| Call Waiting | P.13-5 | ||
| Network Settings | Select Network | P.10-14 | |
| Select Service | P.2-16 | ||
| Offline Mode | P.2-20 | ||
| Retrieve NW Info | P.10-15 | ||
| Location Info | P.10-15 | ||
| Network Info | P.10-15 | ||
Troubleshooting
| Problem Possible Cause Solution | ||
| Handset won't turn on | Waspressed and held long enough?Battery may need to be charged or replaced.Battery may not be properly installed. | Press and hold longer.Charge battery or install a charged battery.Install battery properly. |
| Handset won't respond | Is Switch On/Off in PIN Entry On? | If On, PIN1 is required. Enter PIN1 according to onscreen instructions. For more, see P.9-24. |
| Insert USIM Card appears in Standby and handset is unresponsive | USIM Card may not be properly inserted.The correct USIM Card may not be inserted.There may be debris on IC chip/terminals. | Make sure USIM Card is properly inserted. If the message still appears, USIM may be damaged.Make sure the correct USIM Card is inserted. The inserted USIM Card may not be valid.Clean relevant parts with a dry cloth and re-insert. |
| Keypad won't respond | Keypad Lock (see P.1-22) may be active.Password Lock (see P.9-25) may be active. | Cancel Keypad Lock (see P.1-22).Cancel Password Lock (see P.9-25). |
| Cannot place call from Phone Book | The number may be saved as Secret entry.Phone Book Lock may be active. | Activate Show Secret Data (see P.9-27).Cancel Phone Book Lock (see P.9-26). |
| outappears in Standby and call won't connectCall won't connect and there's a beeping tone | Handset may be outside the service area or otherwise beyond signal transmission range.Is GSM selected in Select Service (see P.2-16)? | Move to a place where signal is strong and retry.Select another mode according to service area. |
| Did you include the dialling code or the first 0?Handset may be out-of-range. (out appears)Handset Offline Mode (see P.2-20) may be active. | Dial the number including the dialling code or 0.Move to a place where signal is strong and retry.Cancel Offline Mode (see P.2-20). | |
| Call is choppy or cut off | Network signal may be weak.Battery may need to be charged or replaced. | Move to a place where signal is strong and retry.Charge battery or install a charged battery. |
| Line is noisy during calls | Network signal may be weak or unstable. | — |
| Battery won't charge | AC Charger may not be properly connected to handset or Desktop Holder.AC Charger may not be firmly plugged in to outlet.Battery may not be properly installed.Handset may not be properly inserted into Desktop Holder.There may be debris on: terminals (handset, battery or Desktop Holder); connector (AC Charger); Connection Port (Desktop Holder); External Device Port.Battery may not charge outside 5°C to 35°C.Battery may be terminally exhausted or defective. | Make sure connector is securely inserted and try again.Remove plug from outlet, re-insert and try again.Open handset, install battery properly and try again.Remove handset and re-insert correctly.Clean terminals, connector and Port with a cotton swab and try again.Charge within an ambient temperature of 5°C - 35°C.Replace battery with a new one. |
| Battery charges quickly | Remaining charge shortens charging time.Battery may be terminally exhausted or defective. | —Replace battery with a new one. |
| Handset/Charger/Desktop top Holder feels warm | During charging, AC Charger or Desktop Holder normally becomes warm; handset may feel warm to the touch during extended periods of use. | Unless handset/accessories become very hot to the touch, this should be considered normal; regardless, avoid prolonged skin contact which could cause burn injuries (see P.xviii). |
| Battery Time seems shorter than usual | Environmental factors (temperature, charging/signal conditions), usage or settings can affect Battery Time. | For more on Battery Time, usage factors and ways to extend Battery Time, see P.1-13 - 1-14. |
| Display flickers | Display may flicker under fluorescent lights. | — |
| Display went dark | Leaving handset open with no key presses for a preset period cancels Backlight (Time Out) then panel (Display Saving); this is not a malfunction. | Press any key to reactivate Display Backlight. |
Tip ▶ For repairs and after-sales services, contact SoftBank Customer Centre, Customer Assistance (see P.20-29).
Warning Signs S! Application Display Messages
out appears
Handset is out-of-range.
Move for a better signal.
Battery low. Please connect to charger! appears and short beeps sound
Battery is low (see P.1-15).
Charge or replace battery immediately.
appears
Keypad Lock is active (see P.1-22).
Cancel to use Keypad. Press keys for Any Key Answer (see P2-6) to answer calls.
appears
Password Lock is active (see P.9-25).
Cancel to place calls, etc.
Press keys for Any Key Answer (see P2-6) to answer calls.
| Message Cause & Solution | |
| Application suspended. End application?Application is suspended. | •An S! Application is paused.↓• Close application and try again. |
| ○○ Download to Phone Download Size: XXKB Save Size: XXKB Download?Battery low. Download may not be completed. | •Download may fail due to low battery.↓•Charge battery then try again. |
| ○○ Not Enough Memory in Phone. Download to Memory Card Download Size: XXKB Save Size: XXKB Download? | •Memory is full.↓• Press ⬤ to download orto cancel. |

| Message Cause & Solution | |
| Application suspended. End application?Application is suspended. | •An S! Application is paused.↓• Close application and try again. |
| ○○ Download to Phone Download Size: XXKB Save Size: XXKB Download?Battery low. Download may not be completed. | •Download may fail due to low battery.↓•Charge battery then try again. |
| ○○ Not Enough Memory in Phone. Download to Memory Card Download Size: XXKB Save Size: XXKB Download? | •Memory is full.↓• Press ⬙ to download orto cancel. |
| Exceeds limit. Cannot save. | 100 S! Applications are already saved. (The message disappears automatically.)Delete applications (see P.16-5) and try again. |
| Same version found Continue download? | The same version of selected S! Application is already saved.Choose Yes (download) or No (cancel) and press ●. |
| New version found Continue download? | An older version of the same S! Application is saved.Choose Yes (download) or No (cancel) and press ●. |
Tip ▶ If one of these messages appears, S! Application cannot be downloaded: •Improper data. Cannot download application. •Size too large. Cannot receive.
Messaging Mishaps
When S! Mail is not delivered as sent
Causes include the following. For details, contact SoftBank Customer Centre, General Information (see P.20-29).
- Recipient is not subscribed to S! Mail, Super Mail or Long Mail.
- Recipient handset is not S! Mail-compatible.
■The maximum size of messages/attachments recipient handsets can receive varies by make and model.
- Recipient handset is not JPEG-compatible.
■Some Long Mail-compatible handsets may only be able to process PNG images; convert JPEG files to PNG (see P.8-16), then attach and send.
■When handset memory is insufficient
New messages cannot be delivered (✉ appears in red). Undeliverable mail is saved at the Centre.
- Delete messages to free memory for new ones (see P.14-29). When memory is available, new messages are delivered automatically.
- Delete unprotected messages automatically to receive new ones (see P.14-36).
- Even if memory is not full, handset cannot receive new messages larger than remaining memory.
Software Update
Check for firmware updates and download as required.
Precautions
Before updating software, turn power off to end all active functions/applications, then restart handset.
- Choose to begin update or schedule update.
- Handset is disabled until update is complete. Update may take up to approximately 30 minutes.
- Connection fees do not apply to updates (including checking for updates, downloading and rewriting).
- Keep handset in a place where signal is strong and stable.
- Charge battery (☑ appears) beforehand; a low battery may cause update to fail.
- Do not remove battery during update; update may fail.
- To reduce risk of failure, disconnect USB Cable from handset beforehand.
Updating Software
Read Software Update Precautions (left) beforehand.
Main Menu
Settings
Phone Settings
( )
Software Update
1 Select Software Update and press
Confirmation appears.
- Follow onscreen instructions. (appears during update.)
- Update may take up to approximately 30 minutes.

Confirmation
- Confirmation appears for successful update then handset restarts. Completion message appears and Information window opens (appears).
■While completion message appears, press ⬙ to acknowledge update completion and cancel Information window.

Update Complete
Note
Update failure may disable handset. Contact SoftBank Customer Centre, Customer Assistance (see P.20-29).
Software Update
Please turn off your phone manually and contact the SoftBank customer service to solve your trouble promptly.
Update Failure
Update Result
■While Information window appears, select Update Result → Press ●
■Press ● again to exit.
In Standby, press ⬆ Select Settings ⬆ Press ⬆ Use ⬽ to select Phone Settings ⬆ Select Software Update ⬆ Press ⬆ Select Update Result ⬆ Press ⬆
■Press ⬆ again to return.

Update Result
Scheduled Update
Confirmation appears at scheduled update time. Press ⬙ or wait approximately ten seconds for update to start.
- Update will not start while handset is in use. When the current operation ends, confirmation appears. After ten minutes, scheduled update is automatically cancelled.
- Update automatically cancels Keypad Lock.

Confirmation
Note
- Handset Phone Book entries, media files, and other content are not affected by firmware updates, but users should always back up important information (note that some files cannot be copied). SoftBank is not liable for damages from lost information, etc.
- If handset does not return to Standby after update, turn power off, reinsert battery, then restart handset.
Character Code List
Note ▶ Pictograms do not appear in e-mail or on incompatible SoftBank handsets.
Tip ▶ Pictograms in □ are animated.
Specifications
SoftBank 812SH
| Weight Approximately 105 g | |
| Continuous Talk Time | Approximately 150 minutes (3G)Approximately 240 minutes (GSM) |
| Continuous Standby Time (handset closed) | Approximately 330 hours (3G)Approximately 320 hours (GSM) |
| Continuous Video Call Talk Time | Approximately 80 minutes(with Internal Camera in use) |
| Charging Time(power off) | AC Charger: Approximately 150 minutesIn-Car Charger: Approximately 150 minutes |
| Dimensions (W x H x D) | Approximately 49 x 97 x 17.6 mm(handset closed, without protruding parts) |
| Maximum Output | 0.25 W (3G)2.0 W (GSM) |
- Values above were calculated with battery installed.
- Continuous Talk Time is an average measured with a new, fully charged battery, with stable signals. Continuous Talk Time may be less than half this value if signal is weak.
SoftBank 813SH
| Weight Approximately 104 g | |
| Continuous Talk Time | Approximately 150 minutes (3G)Approximately 240 minutes (GSM) |
| Continuous Standby Time (handset closed) | Approximately 330 hours (3G)Approximately 320 hours (GSM) |
| Continuous Video Call Talk Time | - |
| Charging Time (power off) | AC Charger: Approximately 150 minutesIn-Car Charger: Approximately 150 minutes |
| Dimensions (W x H x D) | Approximately 49 x 97 x 17.6 mm(handset closed, without protruding parts) |
| Maximum Output | 0.25 W (3G)2.0 W (GSM) |
- Values above were calculated with battery installed.
-
Continuous Standby Time is an average measured with a new, fully charged battery, with handset closed without calls or operations, in Standby with stable signals. Standby Time may be less than half this value if handset is out-of-range or signal is weak. Standby Time may vary by environment (battery status, ambient temperature, etc.).
-
Talk Time/Standby Time decrease with frequent use of Display/Keypad backlights.
- Talk Time/Standby Time may decrease when an S! Application is active.
- Talk Time/Standby Time decrease with handset use in poor signal conditions (see P.1-13 "Battery Time").
- Display employs precision technology, however, some pixels may appear brighter/darker.
AC Charger
| Power Source AC 100V-240V, 50/60 Hz | |
| Power Consumption 12VA | |
| Output Voltage/Current DC 5.2V/650 mA | |
| Charging Temperature | 5°C to 35°C |
| Dimensions (W x H x D) | Approximately 55 x 45 x 22 mm(without protruding parts, cord) |
| Cord Length Approximately 1.5m | |
Battery
| Voltage 3.7V | |
| Battery Type Lithium-ion | |
| Capacity 820 mAh | |
| Dimensions (W x H x D) | Approximately 44.5 x 4.5 x 33.7 mm(without protruding parts) |
Memory List
| Messaging | |
| Received Msg. Approximately 5 MB or 1,000 messages | |
| Drafts Approximately 3 MB | 1 |
| Sent Messages Approximately 3 MB or 500 messages | 1 |
| Unsent Messages Approximately 3 MB | 1 |
| Templates Approximately 64 MB | 2 |
1 Drafts, Sent Messages and Unsent Messages share memory.
2 Shared with S! Appli Library and Data Folder.
| S! Applications | |
| S! Appli Approximately 64 MB | * (100 items) on handset |
* Shared with Templates folder and other folders in Data Folder.
| Data Folder | |
| Data Folder Approximately 64 MB | . |
* Shared with Templates folder and S! Appli Library.
Index
Number
3D Pictogram .....14-24
3D Pictogram Settings .....14-24
3G....2-16
A
AC Charger....1-17
Accept Calls (S! Applications) .....16-8
Access WEB Link....7-7
Acquire Dictionary 9-19
Activation Time (S! Applications)....16-6
Add Date....11-8
Add Email Address......4-3
Add Frame (Photo Camera)......6-13
Add Member....19-6
Alarm Settings 12-3
Alarm Volume....12-13
Alarms 12-11
Alarms (cancelling/reactivating)...12-14
All Calls 2-13
Alternative Image (Video Call)......5-6
Answer Phone....2-9
Answer Phone (Manner mode)......9-2
Answer Status....19-11
Anti Spam Measures 14-35
Any Key Answer 2-6, 9-2
Application Volume (S! Applications)....16-7
Arrange Mail....14-11
Assign Ringtone (by Phone Book Category)....4-12
Assign Tone/Video .... 12-5, 12-9, 12-13
Assign Tone/Videos (by Phone Book entry)....4-5
Attach File....14-10
Auth Info....15-21
Authentication 15-5
Authorisation Code ......10-3, 10-10
Auto (Network Settings)......2-16
Auto Add Code 9-29
Auto Answer 9-30
Auto Bookmark (E-Book)....18-8
Auto Delete 14-36
Auto Play File....14-38
Auto Resend (Messaging) .....14-34
Auto Save (mobile camera) ......6-18
B
Background Colour....7-14
Backlight (Display/Keypad) ......9-13
Backlight (S! Applications)......16-7
Backlight (Video Call) 5-7
Backlight (Video Player) ......7-10
Backup 11-6
Barcode (opening)......12-21
Battery....1-12, 1-16
Battery Strength 1-14, 1-15
Blink (S! Applications)......16-8
Bookmarks (editing) ......15-10
BookSurfing ® 8-7, 18-9
Brightness (Backlight)......9-13
By a-ka-sa-ta-na (Phone Book) ..... 4-9
By Category (Phone Book)......4-9
By Reading (Phone Book) 4-9
C
Cache 15-21
Cache Memory......15-2
Calculator.... 12-15
Calendar (schedule)......12-2
Calendar (Standby) 9-5
Calendar Format....9-19
Call Barring....13-7
Call Costs.... 2-15
Call Forwarding 13-2
Call Settings 9-29
Call Time Counter 9-30
Call Timers....2-14
Call Voicemail 13-4
Call Waiting...... 13-5
Caller Display (External Display).....9-14
Caller ID (sending/blocking)...2-2, 13-10
Calls & Alarms (S! Applications).....16-8
Calls (ending) 2-2
Calls (placing)......2-2, 5-3
Camera Picture (Video Call) .... 5-4, 5-6
Category Control (Phone Book) ... 4-11, 4-12
Centre Access Code 1-27
Change List View (Data Folder) .....8-4
Change NW Password......13-10
Change PIN 9-25
Change to Bcc 14-9
Change to Cc 14-9
Change to To....14-9
Character Code List ......20-10
Character Codes (entering) ......3-9
Character entry modes ....3-2
Char-code (Internet) 15-20
Char-code (Messaging)......14-37
Charging time ..... 1-12, 1-17, 1-18, 1-19
Check Settings......11-8
Chng Handset Code 9-28
Circle Talk....19-13
Circle Talk (System Sounds) .....9-16
Circle Talk member list... 19-15, 19-17, 19-18
Clear All (Speed Dial) 4-14
Clear Costs 2-15
Clear Counter......2-14
Clock Type (External Display) .....9-13
Clock/Calendar 9-5
Conductor Setting
(Face Recognition) 9-23
Conference Call 13-6
Connection Setting ......19-9
Contact Groups 4-12
Continuous Shoot 6-12
Cookies 15-21, 15-22
Copy (text)......3-13
Copy Text (Internet)......15-19
Cost Units 2-15
Countdown Timer......12-25
Country Codes 9-29
Create QR Code....12-22
Crop....7-11
Cursor....15-6
Custom Screens....9-9
Cut (images)......8-12
Cut (text)......3-13
D
Data Folder......8-2
Date Format 9-18
Datum On/Off....10-16
Daylight Saving 9-18, 12-14
Default Image (Video Call)......5-6
Default View (Calendar) ......12-2
Delete (Server Mail)......14-22
Delete NG (Messaging) ......14-16
Delete Posterior....3-14
Delivery Report..... 14-15, 14-19, 14-35
Desktop Holder....1-18
Details (Data Folder) 8-6
Details (Internet)......15-20
Details (Media Player) 7-7
Details (Messaging).. 14-18, 14-22, 14-30
Details (S! Applications)......16-5
Device Name.....10-9
Dial New Number (Conference Call) ... 13-6
Dial Number (Display).... 9-5
Dialled Numbers....2-4, 2-13
Digital Zoom 6-4
Disable DTMF 2-12
Display Call Cost.... 9-30
Display Date & Time
(External Display)....9-13
Display Indicators (Photo Camera).....6-15
Display indicators 1-9
Display Position 7-13
Display Saving....9-13
Display Settings 9-3
Display Size (streaming)......15-13
Display Size (Video Camera)......6-16
Display Size (Video Player) ......7-10
Document Viewer 12-18
Download to....15-21
Downloads 15-20
DPOF 11-7
Drafts (Messaging)......14-18
Duration (Calendar)......12-5
Duration (External Display) ......9-13
Duration (Tasks) 12-9
E
Earpiece Volume......2-11, 5-4, 9-17
E-Book....18-5
Edit Category......12-26
Emoticons....3-9
Enable DTMF....2-12
English 9-9
Exposure (mobile camera) ......6-16
Exposure (Video Call) 5-6
External Display....1-11
External Display Settings .....9-13
F
Face Arrange (Picture Editor)......8-14
Face Recognition....9-20
Familiar Usability....9-12
Fast forward (Media Player)....7-6
Fast rewind (Media Player) .....7-6
Feeling Mail.... 14-15, 14-20
FeliCa....17-2
File Format 8-16
File Size (Picture Editor)......8-16
Fixed Dialling No. (Locks)......9-26
Flash ® 8-2
Flash® Restriction....15-22
Flash® Ringtones 8-2
Font Size (E-Book) 18-7
Font Size (Internet)......15-20
Font Weight......9-4
For All Pictures (DPOF) ......11-8
Format Card (Memory Card)......11-4
Forward NG (Messaging)......14-16
Frame (Picture Editor)......8-16
Free Text (Picture Editor)......8-14
Function List......20-2
G
Get Latest Contents (S! Cast) .....18-3
Go to....12-6
Greeting Message 9-5
GSM 2-16
H
Handset Closed 1-11
Handset Code 1-27
Handset Open....1-11
Handset Security......9-20
Handsfree devices (connecting) ...10-8
Handsfree Setting......10-9
Help (Internet)......15-5
Help (mobile camera)......6-4
Help (Video Call)......5-6
Highlight....7-15
High-speed infrared .....10-12
Hiragana to Katakana/
Alphanumerics Conversion......3-11
History (Internet) ..... 15-4, 15-19, 15-20
Hold (Video Call)......5-5
Hold (Voice Call) 2-11
Hold Guidance Pict 5-7
Hot Status 19-4
Hot Status Notification .....19-5
Hot Status Notification List .....19-12
|
IC Card 17-2
IC Card Lock 17-4
IC Card Status ....17-4
Idle Screen Info. 14-20
In-Car Charger....1-19
Incoming calls (answering) .....2-6, 5-3
Incoming Calls (Call Barring)......13-8
Incoming Calls (Circle Talk) .....19-18
Incoming calls (Video Call) .....5-3
Incoming calls (Voice Call)...... 2-6
Incoming Picture (Video Call) ..... 5-6
Index Print.... 11-8
Information 2-7
Initialized Browser 15-21
Input Memory....15-8
Interface Settings.....17-7
Internal Antenna....1-8
Internal Camera/External Camera ... 6-17
International calls....2-5
Internet Content 15-2
Int'l Calling.... 9-29
Int'l Prefix....9-29
IP Service Setting....9-26
J
Jump to Top/Bottom 15-5
K
Keep Auth Info 15-22
Key Assignments (text entry)......3-3
Keypad Lock 1-22
Keypad Tones 9-16
L
Language 9-9
Last Played.... 7-6, 7-8, 15-14
Latest Information (Near Chat)....19-20
Lifestyle-Appli....17-2
Light....14-20
Live Monitor 15-14
Location Info 10-15
Location Property......10-16
Look Up Word (E-Book) ......18-8
Loudspeaker (Circle Talk)......19-18
Loudspeaker (Video Call) ..... 5-5, 5-7
Loudspeaker (Voice Call)......2-11
M
Mail address
(customising handset address) ....14-5
Mailbox Volume ......14-22
Main Menu....1-23
Manner Mode 2-18
Manual Update (Weather Indicator) ....18-5
Manufacture Number......15-21
Mass Storage 11-9
Master Reset (handset settings) ...9-28
Max Cost 2-15
Memory All Clear....16-8
Memory Card 11-2
Memory Status (Data Folder) ......8-2
Memory Status (Memory Card) .....11-7
Memory Status (Messaging)......14-3
Memory Status (Phone Book) .....4-8
Memory Status (S! Appli Library) ....16-2
Memory Status (schedule)......12-6
Memory Status (Tasks) ......12-10
Merge Panorama (Picture Editor) ....8-17
Message Centre......14-37
Message DL 14-37
Message List View....14-4
Message Notice 14-36
Message Notice (S! Applications)....16-8
Message Priority (S! Applications) ....16-8
Messages (External Display)......9-13
Messaging....14-2
Messaging
(checking messages) .....14-18, 14-23
Messaging
(creating & sending messages) ....14-7
Messaging (deleting messages)....14-29
Messaging (using attachments) ....14-30
Messaging Settings.....14-15
Microphone....1-8
Microphone (Video Camera)......6-16
Minute Minder....9-30
Mirror Image....5-6
Missed Call Notification....13-5
Mobile camera 6-2
Mode Settings....9-2
Money Converter (Calculator) .....12-15
Move to Card (S! Applications)..... 16-5
Multi Job 1-26
Multi Selector...... ii
Music Player 7-4
Music Search 7-3
Mute....2-11, 5-4
Mute Microphone ....5-7
My Details 1-21, 4-19
My Device Details (Bluetooth ® ) ..... 10-9
My Folders ....14-32
My Pictograms.... 8-2
My Status 19-8
N
Near Chat ....19-19
Network
(adding, editing & deleting)......10-15
Network Info....10-15
Network Password ......1-27, 13-10
Network S! Applications......16-2
Network Settings.....10-14
0
Offline Mode 2-20
One Hiragana Predictive Entry .....3-12
One Hiragana Word Call ....3-12
One-Hiragana Conversion ....3-11
Optional Predictive Functions
(text entry)....3-13
Outgoing Calls (Call Barring) .....13-8
Outgoing Picture (Video Call) .....5-7
Out-of-range.... 1-9, 20-6
P
Packet Lock (Locks)......9-27
Packet transmission volume .....2-14
Pager Code....3-9
Pager Code List 3-10
Paired Devices....10-4
Password Lock 9-25
Paste (Picture Editor)......8-14
Paste (text entry) 3-14
Payphone (Call Barring)......13-9
PC Site Browser....15-18
Permission 16-7
Phone Book 4-2
Phone Book (deleting entries) .....4-11
Phone Book (editing) 4-10
Phone Book (quoting information)...3-14
Phone Book (saving)......4-3
Phone Book (searching) 4-9
Phone Book Lock 9-26
Phone Help....12-27
Phonetic Conversion....3-11
Photo Camera Mode......6-5
Pictogram List 20-16
Pictograms....3-8
Picture (Phone Book)......4-6
Picture Appearance (Messaging) ..14-38
Picture Editor....8-12
Picture Quality (Photo Camera) ....6-16
Picture Size (Photo Camera) ......6-16
PIN 1-6, 9-24
PIN Entry 9-24
Play (Voice Memo)......2-12
Playback Pattern (Music Player) .....7-7
Playback Pattern (Video Player)....7-10
Playlist (Media Player)....7-15
Pointer 15-5
Portrait/Macro Selector......1-8
Power Off Sound 9-17
Power On Sound....9-17
Power on/off....1-20
Predictive (conversion)......3-6
Previous Usage (conversion)......3-6
Priority (Messaging)......14-16
Properties (S! Applications)......16-3
Q
Quick Conversion....3-12
Quick Operations 1-25
Quiz (Messaging)......14-16
R
Received Calls....2-8, 2-13
Received MsView 14-4
Record Time (Voice Recorder) ....12-16
Record Time/Size (Video Camera)...6-17
Rejected Numbers......13-9
Reload 15-19
Remote Forward....14-22
Remote FwAction....14-16
Remote Monitor....5-8
Repeat (Calendar) 12-6
Reply 14-25
Reply All....14-25
Reply Request 14-16
Reply To Settings ......14-16, 14-37
Report (Face Recognition) ......9-24
Request Reply 19-1
Reset (Mode Settings) 9-2
Reset Settings (DPOF)......11-8
Reset Settings (handset settings) ... 9-28
Reset Settings (S! Applications)... 16-7
Resize (Picture Editor)......8-12
Restore....11-6
Retouch (Picture Editor)......8-13
Retrieve Mail List....14-22
Retrieve New Msg....14-19
Retrieve NW Info....1-20, 10-15
Ringer Output 9-17
Ringtone (Feeling Mail)......14-21
Ringtone/videos (Phone Settings) ... 9-14
Roaming....2-16
Root Certificates ......15-22
Rotate......8-16
S
S! Address Book....4-15
S! Appli Library....16-2
S! Appli Request....19-20
S! Applications ......16-2
S! Applications (deleting) ......16-5
S! Applications (downloading).....16-3
S! Applications (exiting or pausing)...16-4
S! Applications (resetting)......16-8
S! Applications (resuming)......16-4
S! Applications (starting)......16-4
S! Cast 18-2
S! FeliCa 17-2
S! Loop 19-3
S! Mail....14-2
S! Mail
(retrieving remaining portion) .....14-21
S! Mail Settings....14-37
S! Town....19-2
Save Address (Messaging)......14-27
Save and Send....6-10
Save Items....15-11
Save Pictures to....6-18
Save Recording To 12-17
Save to Data Folder......14-30
Save to Phone Book (Internet) ....15-12
Save to Phone Book (Messaging)...14-27
Save Videos to....6-18
Saved Pages ......15-9
Saved Pages (editing) ......15-11
Scan Barcode 12-19
Scan Code (during text entry) .....12-20
Scan Text....12-24
Scanned Results (Barcode)......12-22
Scene......6-16
Screensaver....16-6
Script Settings......15-22
Scroll bar....15-6
Scroll Unit 14-36, 15-20
Scrolling 7-14
SD Local Contents ......11-7
SD VIDEO 6-11
Search 15-19
Search for Devices 10-3
Secret (Phone Book) 4-7
Secret (schedule) ......12-6
Secret (Tasks)......12-9
Secret Folder (Messaging) .....14-36
Secure Area
(opening secure page)....15-5
Secure Prompt....15-22
Security Codes 1-27
Security Level (Face Recognition)....9-24
Security Settings (Internet) .....15-21
Select Network....10-14
Self-timer......6-11
Send All (Bluetooth ® ) .....10-7
Send All (Infrared) 10-13
Send File Settings ......14-38
Send Referer....15-22
Send Reservation ....14-17
Send URL....15-4, 15-20
Sending Progress ......14-34
Sent Messages ......14-2
Sent MsView ....14-4
Server Mail Box 14-22
Set as Ring Video.... 8-10
Set as Ringtone 8-11
Set as Wallpaper......8-10
Set Auto Delete....14-16
Set Auto Play File ......14-17
Set Colour.... 12-2
Set Date/Time 9-18
Set Frequency (S! Address Book)... 4-18
Set Holiday.... 12-3
Set Low Priority....3-13
Set Sent Cancel 14-27
Set Sync Mode (S! Address Book) ... 4-18
Set Time Zone....9-18, 12-14
Set to Default (S! Applications) ....16-8
Set to Default (S! FeliCa) ...... 17-8
Set to Default (shortcuts) ...... 1-24
Settings (E-Book)......18-7
Settings (S! Applications) ......16-7
Sharp Space Town 15-9
Shortcuts 1-24
Show Call Notice (S! Applications)... 16-8
Show Indicators....9-5
Show My Number......13-10
Show Operator Name....9-5
Show Secret Data....9-27
Shutter Sound 6-15
Side Keys ......ii
Signature Settings (Messaging) ...14-35
Simple Menu 2-21
Slide Show 8-6
Slides....14-23
Small Light 1-15
SMS....14-2
SMS Settings ....14-36
Snooze (Alarm) 12-13
Soft Keys....1-23
Software Update ......20-8
Sort (Data Folder)......8-4
Sort (Media Player).... 7-6, 7-9
Sort (Messaging) 14-4
Sound Effects 7-7
Sounds & Alerts 9-14
Speed Dial List....4-13
Speed Mail....14-33
Split Picture 8-18
SSL 15-3
Stamp (Picture Editor) 8-14
Stamp (schedule)....12-3
Standby 1-20
Standby Window.... 9-6,19-9
Status Light....9-16
Status Setting 19-12
Stopwatch 12-24
Streaming....15-12
Subtitle (Video Player) 7-12
SVG files....8-7
Swap Calls ......13-6
Switch Images 5-5
Switch to Read (Messaging)......14-25
Switch to Unread (Messaging) ....14-25
Symbols 3-8
Sync Settings (Phone Book) ......4-17
Synchronisation (Phone Book)...4-15, 4-18
Synchronisation (S! Applications)...16-3
System Graphics....9-3
System Sounds 9-16
T
Tasks 12-8
Templates....14-14
Text Entry (Editing Characters).....3-13
Text Entry (Entering Characters) .....3-5
Text Orientation (E-Book) ......18-7
Text Templates....3-15, 12-26
Time Format....9-18
Time Search 7-9
Totals 12-26
Touch Tones....2-11
Transfer Audio (Video Call) 5-5
U
Unavailable (Call Barring)......13-9
Unknown (Call Barring) ......13-9
Unsent Messages....14-2
Uploading Files....15-20
User Dictionary....9-19
USIM Card 1-4
USIM PINs 1-6
v
Via Infrared 10-12
Vibration (Alarm).... 12-13
Vibration (Phone Settings) ......9-15
Vibration (S! Applications) .....16-8
Vibration Pattern ....14-20
Video Call.... 5-2
Video Call
(answering with voice only) 5-3
Video Call Settings.... 5-6
Video Camera Mode...... 6-8
Video Encode 6-17
Video Quality (Video Camera)...... 6-16
View Log (Phone Book) 4-19
Visibility 10-4
Voice Memo....2-12
Voice Recorder 12-16
Voicemail....13-4
Volume (Answer Phone) ......2-10
Volume (Earpiece Volume)...2-11, 5-4, 9-17
Volume (handset functions) .....9-14
Volume (Media Player) 7-6
W
Wallpaper 9-3
Warning Message....15-21
Warning Tone....9-17
Weather Indicator....18-4
Web Access (Custom Screen) ..... 9-11
Web Link Setting 7-10
Withheld (Call Barring) ......13-9
World Clock....12-14
Y
Yahoo! Keitai....15-2
Yahoo! Keitai (accessing) .....15-3
Warranty & After-Sales Services
Warranty
Warranty is provided when you purchase handset.
- Check the name of distributor and date of purchase.
- Read through contents and keep in a safe place.
•The warranty term is described in the warranty.
■After-Sales Services
See P.20-4 "Troubleshooting" before contacting SoftBank for service or repairs. If you cannot find solutions or solve problems, contact SoftBank Customer Centre, Customer Assistance (see P.20-29) in your subscription area and provide a detailed description of the problem.
• Repairs within warranty are performed under terms and conditions described.
- Out of warranty, possible repairs are performed upon request at subscriber expense.
For other services, contact the distributor, the nearest SoftBank shop or SoftBank Customer Centre, General Information (see P.20-29). Replacement parts are available for 6 years after termination of production.
Note
- SoftBank is not liable for any damages resulting from use of this product.
- SoftBank is not liable for any damages resulting from accidental loss/alteration of handset data. Keep a copy of Phone Book entries, etc. in a separate place.
- Disassembling or modifying handset may violate the Radio Law. Modified handset will not be repaired.
Customer Service
If you have questions about SoftBank handsets or services, please call General Information. For repairs, please call Customer Assistance.
SoftBank Customer Centres
From a SoftBank handset, dial toll free at 157 for General Information or 113 for Customer Assistance
SoftBank International Call Centre
From outside Japan, dial +81-3-5351-3491 (International charges will apply.)
■Call these numbers toll free from landlines.
| Service Centre Phone Number Subscription Area | |
| Hokkaido, Aomori, Akita, Iwate, Yamagata, Miyagi, Fukushima, Niigata, Tokyo, Kanagawa, Chiba, Saitama, Ibaraki, Tochigi, Gunma, Yamanashi, Nagano, Toyama, Ishikawa, Fukui | General Information 📞0088-240-157 |
| Customer Assistance 📞0088-240-113 | |
| Aichi, Gifu, Mie, Shizuoka | General Information 📞0088-241-157 |
| Customer Assistance 📞0088-241-113 | |
| Osaka, Hyogo, Kyoto, Nara, Shiga, Wakayama | General Information 📞0088-242-157 |
| Customer Assistance 📞0088-242-113 | |
| Hiroshima, Okayama, Yamaguchi, Tottori, Shimane, Tokushima, Kagawa, Ehime, Kochi, Fukuoka, Saga, Nagasaki, Oita, Kumamoto, Miyazaki, Kagoshima, Okinawa | General Information 📞0088-250-157 |
| Customer Assistance 📞0088-250-113 |
SoftBank 812SH/813SH Instruction Manual
March 2007, First Edition
SOFTBANK MOBILE Corp.
For additional information, please visit a SoftBank shop.
Model: SoftBank 812SH
813SH
Manufacturer: SHARP CORPORATION

Please help the mobile industry maintain high environmental standards. Recycle your old handsets, batteries and charger units (all manufacturers and brands). Before you recycle, please remember these important points:
- Handsets, batteries and chargers submitted for recycling cannot be returned.
• Always erase all data recorded on old handsets (Phone Book entries, call records, mail, etc.) before recycling.

Mind your mobile manners when carrying a handset.
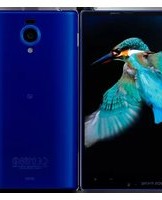
- NOTE
- SYMBOLS & ILLUSTRATIONS
- SH-813SH COMPARISON
- FUNCTIONS
- MAIN MENU
- KEYPAD KEYS
- SIDE KEYS
- ABBREVIATED STEPS
- ACCESSORIES
- CONTENTS
- GETTING STARTED
- BASIC HANDSET OPERATIONS
- TEXT ENTRY
- PHONE BOOK
- VIDEO CALL
- CAMERA
- MEDIA PLAYER
- MANAGING FILES (DATA FOLDER)
- ADDITIONAL SETTINGS
- CONNECTIVITY
- MEMORY CARD
- TOOLS
- OPTIONAL SERVICES
- MESSAGING
- USING MESSAGES
- ADDITIONAL FUNCTIONS
- YAHOO! KEITAI
- USING YAHOO! KEITAI
- BASIC OPERATIONS
- ADVANCED FEATURES
- STREAMING
- LIVE MONITOR (JAPANESE ONLY)
- USING PC SITE BROWSER
- S! APPLICATIONS
- USING S! APPLICATIONS
- MANAGING S! APPLICATIONS
- S! FELICA (JAPANESE ONLY)
- BASICS
- USING S! FELICA
- ENTERTAINMENT
- COMMUNICATION
- APPENDIX
- SAFETY PRECAUTIONS
- BEFORE USING HANDSET
- SYMBOLS
- ⚠️DANGER
- HANDSET, BATTERY & CHARGER
- BATTERY
- ⚠ WARNING
- KEEP HANDSET OFF AND CHARGER DISCONNECTED NEAR FILLING STATIONS OR PLACES WITH FIRE/EXPLOSION RISK
- DO NOT SUBJECT HANDSET TO STRONG SHOCKS OR IMPACTS
- IF AN ABNORMALITY OCCURS
- HANDSET
- TAKE MEASURES TO PREVENT ACCIDENTS
- DO NOT SWING HANDSET BY STRAP
- TURN HANDSET POWER OFF BEFORE BOARDING AIRCRAFT
- ADJUST VIBRATION AND RINGTONE SETTINGS
- DURING THUNDERSTORMS, TURN POWER OFF; FIND COVER
- CHARGER
- USE ONLY THE SPECIFIED VOLTAGE
- DO NOT USE POWER ADAPTERS
- DO NOT USE IN-CAR CHARGER IN POSITIVE EARTH VEHICLES
- CHARGER CARE
- DO NOT SHORT-CIRCUIT CHARGER TERMINALS
- DO NOT USE DESKTOP HOLDER INSIDE VEHICLES
- DAMAGED AC CHARGER/IN-CAR CHARGER CORD
- DURING THUNDERSTORMS
- CHARGER/DESKTOP HOLDER USE AND CHILDREN
- HANDSET USE & ELECTRONIC MEDICAL EQUIPMENT
- PERSONS WITH IMPLANTED PACEMAKER/DEFIBRILLATOR SHOULD KEEP HANDSET MORE THAN 22 CM AWAY
- OBSERVE THESE RULES INSIDE MEDICAL FACILITIES
- TURN HANDSET OFF IN CROWDS OR TRAINS WHERE PERSONS WITH IMPLANTED PACEMAKER/DEFIBRILLATOR MAY BE NEAR
- CONSULT ELECTRONIC MEDICAL EQUIPMENT VENDOR ON RADIO WAVE EFFECTS
- ⚠️CAUTION
- HANDSET CARE
- USAGE ENVIRONMENT
- HANDSET TEMPERATURE
- AVOID LEAVING HANDSET IN EXTREME HEAT (INSIDE VEHICLES, ETC.)
- VOLUME SETTINGS
- INSIDE VEHICLES
- CHARGER & IN-CAR CHARGER
- DO NOT TOUCH DESKTOP HOLDER WHILE IN USE
- USE ONLY THE SPECIFIED FUSE
- ALWAYS CHARGE BATTERY IN A WELL-VENTILATED AREA
- DO NOT USE IN-CAR CHARGER WHEN ENGINE IS OFF
- DURING PERIODS OF DISUSE
- HANDSET MAINTENANCE
- IN-CAR CHARGER INSTALLATION
- GENERAL NOTES
- GENERAL USE
- EAVESDROPPING
- ABOARD AIRCRAFT
- ELECTROMAGNETIC WAVES
- FCC NOTICE
- FCC RF EXPOSURE INFORMATION
- EUROPEAN RF EXPOSURE INFORMATION
- DECLARATION OF CONFORMITY
- C €
- COPYRIGHTS
- NETFRONT®
- SOFTBANK CUSTOMER CENTRE, GENERAL INFORMATION
- CP8 PAT ENT
- SPECIFIC ABSORPTION RATE (SAR)
- SH AND 813SH MEET THE GOVERNMENT'S REQUIREMENTS FOR EXPOSURE TO RADIO WAVES
- FUNCTION & FEATURE PREVIEW
- CIRCLE TALK
- PC SITE BROWSER
- S! TOWN
- S! LOOP
- E-BOOK/DOCUMENT VIEWER
- USIM CARD
- INTERNATIONAL ROAMING
- MANNER MODE
- SIMPLE MENU
- S! ADDRESS BOOK (SAB)
- VIDEO CALL ★
- DATA FOLDER
- MICROSD™ MEMORY CARD
- DISPLAY
- DISPLAY LANGUAGE
- CUSTOM SCREEN
- FACE RECOGNITION ★
- BLUETOOTH® & HIGH-SPEED INFRARED
- MASS STORAGE
- CALENDAR & TASKS
- VOICE RECORDER
- BARCODES & TEXT SCANNER
- S! FELICA
- S! CAST
- NEAR CHAT
- CALL FORWARDING
- VOICEMAIL
- MISSED CALL NOTIFICATION
- CALL WAITING
- CONFERENCE CALL
- CALL BARRING
- CALLER ID
- GENERAL INFORMATION & PRECAUTIONS
- IF HANDSET IS DROPPED OR SUBJECTED TO SHOCKS
- IMPORTANT
- INSERTING & REMOVING USIM CARD
- INSERTING
- REMOVING
- USIM PINS
- PIN
- PIN LOCK & PUK CODE
- HANDSET PARTS & FUNCTIONS
- LOGO
- BATTERY COVER
- NOTE ▶ INTERNAL ANTENNA
- DISPLAY INDICATORS
- CALLS/CIRCLE TALK, OFFLINE MODE (SEE P.2-20) SSL, PACKET TRANSMISSION (SEE P.15-3)
- INCOMING VOICE CALL, ☑: VOICE CALL IN PROGRESS
- PACKET TRANSMISSION PROTOCOL READY
- MAIL (SEE P.14-3)
- HOT STATUS
- AUTO DELIVERY INFO, CAST INFO (SEE P.18-2) SOFTWARE UPDATE (SEE P.20-8)
- S! APPLICATION (SEE P.16-4), MUSIC PLAYER (SEE P.7-5)
- INFRARED CONNECTION IN PROGRESS
- MANNER, #: DRIVE, #: ORIGINAL
- EXTERNAL DISPLAY
- INDICATORS
- CLOCK VIEW
- ADDITIONAL INDICATORS
- DISPLAY POSITIONS
- HANDSET CLOSED
- HANDSET OPEN
- BATTERY & CHARGER
- BATTERY LIFE
- CHARGING
- PRECAUTIONS
- BATTERY TIME
- USING HANDSET IN POOR CONDITIONS MAY SHORTEN BATTERY TIME
- POOR USAGE CONDITIONS
- POWER CONSUMING OPERATIONS
- POWER CONSUMING SETTINGS
- EXTEND BATTERY TIME
- WHEN BATTERY RUNS OUT
- BATTERY DISPOSAL
- BATTERY STRENGTH
- INDICATOR
- BATTERY STRENGTH & ENVIRONMENT
- SMALL LIGHT & BATTERY STRENGTH INDICATOR
- INSTALLING & REMOVING BATTERY
- AC CHARGER
- USE SPECIFIED CHARGER ONLY
- OPEN PORT COVER TO CONNECT CHARGER
- PLUG CHARGER INTO AC OUTLET
- AFTER CHARGING UNPLUG CHARGER, THEN DISCONNECT HANDSET
- DESKTOP HOLDER
- IN-CAR CHARGER
- HANDSET POWER ON/OFF
- OPEN HANDSET
- PRESS AND HOLD
- TURNING OFF
- MY DETAILS SETUP & NETWORK INFORMATION
- RETURN TO STANDBY
- TIP
- OPENING STANDBY WINDOW
- MY DETAILS
- PRESS ●0 わを 九十
- PRESS 🔒 TO EXIT
- KEYPAD LOCK
- ACTIVATING CANCELLING
- TIP ▶ WHEN KEYPAD LOCK IS ACTIVE
- HANDSET MENUS
- SOFT KEYS
- USER SHORTCUTS
- USING SHORTCUTS
- IN STANDBY, PRESS A KEY (1 - 9) FOR 1+ SECONDS
- EDITING SHORTCUTS
- QUICK OPERATIONS
- EXAMPLE: ENTER 1111 TO USE CALCULATOR
- IN A FUNCTION WINDOW, PRESS
- SELECT A FUNCTION AND PRESS ●
- HANDLING INCOMING CALLS
- SECURITY CODES
- HANDSET CODE
- CENTRE ACCESS CODE
- NETWORK PASSWORD
- INITIATING A CALL
- CONFIRM HANDSET IS ON
- ENTER A PHONE NUMBER
- CONFIRM THE NUMBER AND PRESS
- CORRECTING NUMBERS
- BUSY NUMBERS
- PRESS 🔒 TO END CALL
- EMERGENCY CALLS
- REDIAL
- PRESS Ⓞ (▶)
- SELECT A RECORD AND PRESS ●
- PRESS
- PLACING AN INTERNATIONAL CALL FROM JAPAN
- PRESS 📧 OPTIONS
- SELECT INT'L CALL AND PRESS ●
- SELECT A COUNTRY AND PRESS ●
- DIRECT ENTRY
- INCOMING CALL
- WHEN A CALL ARRIVES, OPEN HANDSET
- PRESS 📞 TO END CALL
- REDIRECTING A CALL
- INFORMATION
- ANSWERING CALLS WITH HEADPHONES
- CALLING FROM RECEIVED CALLS
- PRESS ⬤ (▶)
- ANSWER PHONE
- ACTIVATING & CANCELLING
- SELECT SWITCH ON/OFF AND PRESS ●
- ACTIVATING
- WHEN ANSWER PHONE IS ACTIVE
- PLAYING MESSAGES
- SELECT PLAY MESSAGES AND PRESS ●
- EARPIECE VOLUME
- ANSWER TIME
- QUICK RECORDER
- ENGAGED CALL OPERATIONS
- VOICE OUTPUT
- MUTE
- TOUCH TONES
- VOICE MEMO
- CALL LOG
- USING CALL LOG
- CALL TIMERS & DATA COUNTER
- CALL TIMERS
- DATA COUNTER
- CALL COSTS
- CLEAR COSTS RESET CALL COSTS
- COST UNITS
- LIMIT CALL COSTS
- MAX COST
- OUTSIDE JAPAN (INTERNATIONAL ROAMING)
- SWITCHING NETWORK SERVICES
- SELECT AUTO, 3G/GSM, 3G OR GSM AND PRESS ●
- CALLING FROM OUTSIDE JAPAN
- CALLING OTHER COUNTRIES
- CALLING JAPAN VIA QUICK OPERATION
- CALLING LANDLINES & MOBILES WITHIN THE SAME COUNTRY
- TIP ▶ ADDING COUNTRY CODES
- MINDING MOBILE MANNERS
- MANNER-RELATED FEATURES
- PRESS ☐ FOR 1+ SECONDS
- WHEN MANNER MODE IS ACTIVE
- ACTIVATING/CANCELLING OFFLINE MODE
- ACTIVATING/CANCELLING SIMPLE MENU
- PRESS FOR 1+ SECONDS
- SIMPLE MENU OPERATIONS
- MENUS
- KEY ASSIGNMENTS
- CHARACTER SELECTION
- ENTRY MODES
- UPPER & LOWER CASE
- ENTERING CHARACTERS
- KANJI, HIRAGANA & KATAKANA
- PRESS 3 TWICE
- PRESS 3 虚 FOR 1+ SECONDS
- PRESS 3 2 THREE TIMES AND PRESS V
- PRESS 2 ABC TWICE
- PRESS ⏻ (CONVERT) AND USE ⏻ TO SELECT A WORD
- PREDICTIVE & PREVIOUS USAGE
- USER DICTIONARY
- SEGMENTING PHRASES
- SELECTING MULTIPLE CONVERTED WORDS
- ENTER A CHARACTER AND PRESS 📄 A
- ADDING ° OR °
- ENTER A CHARACTER AND PRESS
- TIP ▶ IN SINGLE-BYTE KATAKANA ENTRY
- SPACE
- LINE BREAK
- PRESS Ⓧ AT THE END OF TEXT
- UNDO & RECOVER
- PRESS 📧 OPTIONS IMMEDIATELY AFTER CHARACTER ENTRY
- SELECT UNDO/REVERSE ORDER AND PRESS ●
- ENTERING ALPHANUMERICS
- SYMBOLS, PICTOGRAMS & EMOTICONS
- SYMBOLS & PICTOGRAMS
- PRESS *TO OPEN LOG/HISTORY (LOG/HISTORY IS AVAILABLE IN SOME ENTRY MODES; SEE P.3-3)
- USE ⚙ TO SELECT ONE AND PRESS ♟
- PRESS A KEY (0.75 - 9.5) TO EXIT LIST AND ENTER THE ASSIGNED CHARACTER
- CLEAR LOG/HISTORY
- EMOTICONS
- MAIL & WEB EXTENSIONS
- CHARACTER CODE
- PAGER CODE
- CHARACTER ENTRY MODES
- PAGER CODE LIST
- CONVERSION METHODS (JAPANESE ONLY)
- PHONETIC CONVERSION
- HIRAGANA TO KATAKANA/ALPHANUMERICS CONVERSION
- ENTER HIRAGANA AND PRESS ¥7 KANA
- USE ⏻ TO SELECT A WORD AND PRESS ⬙
- QUICK CONVERSION (FOR HIRAGANA)
- ENTER HIRAGANA AND PRESS Ⓞ
- ONE HIRAGANA PREDICTIVE ENTRY
- ONE HIRAGANA WORD CALL
- CONVERSION SETTINGS
- EDITING CHARACTERS
- DELETING & REPLACING
- COPY/CUT & PASTE
- DELETING TEXT ON AND AFTER CURSOR
- JUMP TO TOP OR END
- COPYING FROM PHONE BOOK
- USING TEXT TEMPLATES
- SAVING TO TEXT TEMPLATES
- CHANGING FONT SIZE
- OVERVIEW
- SERVICE DIAL
- SAVING TO PHONE BOOK
- PHONE BOOK ENTRY ITEMS
- CREATING PHONE BOOK ENTRIES
- INCOMING CALLS WHILE CREATING ENTRY
- STORAGE MEDIA
- CONFIRMATION FOR UNSAVED NUMBERS
- PERSONAL RINGTONE/RINGVIDEO
- RINGTONE
- SELECT A FILE AND PRESS ●
- SETTING RING TIME FOR INCOMING MAIL
- PERSONAL VIBRATION PERSONAL PICTURE
- SAVING SECRET ENTRIES
- UNLOCK TEMPORARILY
- OTHER PHONE BOOK ENTRY ITEMS
- SAVING FROM CALL LOG
- PHONE BOOK MEMORY STATUS
- USING PHONE BOOK
- DIALLING FROM PHONE BOOK
- SWITCHING BETWEEN HANDSET & USIM CARD
- PHONE BOOK SEARCH METHODS
- SELECT BY READING, BY CATEGORY OR BY A-KA-SA-TA-NA AND PRESS ●
- WINDOW DESCRIPTION
- EDITING PHONE BOOK ENTRIES
- CORRECTION/CHANGE
- COPYING PHONE BOOK ENTRIES
- ONE ENTRY
- ALL ENTRIES
- DELETING PHONE BOOK ENTRIES
- CATEGORY SETTINGS
- CHANGING CATEGORY NAME
- CUSTOMISING HANDSET RESPONSES
- CONTACT GROUPS
- CREATING CONTACT GROUPS
- SAVING GROUP MEMBERS
- EDITING CONTACT GROUPS
- DELETING GROUPS
- EDITING GROUP MEMBERS
- CHANGING MEMBERS
- DELETING MEMBERS
- SPEED DIAL LIST
- SAVING PHONE NUMBERS
- SAVING FROM PHONE BOOK
- SPEED DIAL
- USING HEADPHONES WITH CALL BUTTON
- SERVICE USAGE OUTLINE
- COMPLETE CONTRACT
- RECEIVE USER ID & PASSWORD
- SAVE USER ID & PASSWORD
- USE SAB
- SAVING USER ID & PASSWORD
- BACKUP & RESTORE
- SYNCHRONISING PHONE BOOK
- MANUAL SYNCHRONISATION
- AUTO SYNCHRONISATION
- OPENING LOG
- OPENING MY DETAILS
- IMPORTANT VIDEO CALL USAGE NOTES
- INITIATING A VIDEO CALL
- ANSWERING A VIDEO CALL
- REJECTING VIDEO CALLS
- REDIRECTING VIDEO CALLS
- PLACING CALLERS ON HOLD
- ENGAGED VIDEO CALL OPERATIONS
- CAMERA PICTURE
- EARPIECE VOLU ME
- SWITCH IMAGES CHANGE INCOMING/OUTGOING IMAGE SIZE/POSITION
- LOUDSPEAKER CANCEL OR ACTIVATE LOUDSPEAKER
- HOLD
- OPEN
- OPENING PHONE BOOK
- SAVING ENTRIES
- TRANSFER AUDIO
- MIRROR IMAGE
- EXPOSURE
- OTHER ENGAGED CALL OPERATIONS
- VIDEO CALL SETTINGS
- OUTGOING
- PICTURE
- SELECT NORMAL, QUALITY PRIOR OR FRAME RATE PRIOR → PRESS ●
- HOLD GUIDANCE
- PICT
- PRESET PICTURE
- DATA FOLDER IMAGES
- CUSTOM SCREENS
- SELECT ALWAYS ON, ALWAYS OFF OR NORMAL SETTING → PRESS ●
- LOUDSPEAKER ACTIVATE OR CANCEL LOUDSPEAKER FOR VIDEO CALLS
- CHOOSE ON OR OFF → PRESS ●
- MUTE MICROPHONE
- ACTIVATING/CANCELLING
- ADDING TO AUTO ANSWER LIST
- CHANGING RING TIME
- MOBILE CAMERA BASICS
- SHUTTER CLICK
- INCOMING CALLS/ALARM WHILE USING CAMERA
- PRECAUTIONS FOR VIDEO RECORDING
- AUTO SHUT-OFF
- CAMERA DISPLAY INDICATORS
- PHOTO CAMERA MODE
- VIDEO CAMERA MODE
- HELP
- STILL IMAGES
- CAPTURING STILL IMAGES
- FRAME IMAGE ON DISPLAY
- PRESS ⬙ TO SAVE
- NOTE ▶ INTERNAL CAMERA IMAGES
- TIP ▶ WHEN CAPTURED IMAGE IS UNSAVED
- STILL IMAGE FUNCTIONS
- BEFORE IMAGE CAPTURE
- BEFORE SAVING
- VIDEO
- RECORDING VIDEO
- PRESS ●
- TO STOP, PRESS ●
- TO SAVE, SELECT SAVE AND PRESS ●
- PRESS 📞 TO EXIT
- VIDEO RECORDING OPERATIONS
- BEFORE RECORDING
- OPENING IMAGES & PLAYING VIDEO
- OPENING STILL IMAGES
- PLAYING VIDEO
- SPECIAL SHOOTING MODES
- SELF-TIMER
- FRAME IMAGE ON DISPLAY AND PRESS ●
- SAVING STILL IMAGES
- SAVING VIDEO
- SELF-TIMER DETAILS
- CONTINUOUS SHOOT (PHOTO CAMERA)
- INDEX IMAGE OR A COMPOSITE IMAGE APPEARS
- TO SAVE, PRESS ●
- SAVING ALL IMAGES
- SAVING THE SELECTED IMAGE
- TIP ▶ WHEN ONLY SELECTED IMAGE IS SAVED
- ADDING FRAMES (PHOTO CAMERA)
- ORIGINAL FRAMES
- CANCELLING
- CAMERA EFFECTS (PHOTO CAMERA)
- SENDING IMAGES
- CAPTURE AN IMAGE
- PRESS Y! (→)
- COMPLETE OTHER FIELDS AND SEND S! MAIL (PERFORM FROM STEP 3 ON P.14-7)
- VIDEO CLIPS
- CAMERA SETTINGS
- IMAGE SETTINGS
- PICTURE/VIDEO QUALITY
- AUTO SAVE
- MEDIA PLAYER BASICS
- INCOMING CALLS/MAIL DURING PLAYBACK
- DOWNLOADING MUSIC/VIDEO
- MUSIC SEARCH
- DOWNLOADING CONTENT KEYS
- CHOOSE YES AND PRESS ●
- SAVING MUSIC FILES FROM PCS
- PRECAUTIONS FOR HANDLING MUSIC FILES ON PCS
- RESPECT COPYRIGHTS
- PLAY SD-AUDIO STANDARD COMPLIANT MUSIC FILES. (THESE FILES CANNOT BE USED AS RINGTONES.)
- SAVE MUSIC TO THE SPECIFIED DIRECTORY
- DETAILS
- PRECAUTIONS FOR HANDLING AAC FILES
- USE SOFTWARE SUPPORTING AAC CONVERSION
- SUPPORTED BIT RATE AND SAMPLING FREQUENCY ARE AS FOLLOWS
- PLAYING MUSIC
- PRECAUTIONS BEFORE PLAYING MUSIC/VIDEO
- PLAYBACK WINDOW INDICATORS
- PLAYBACK
- SELECT MY MUSIC OR SD AUDIO AND PRESS ●
- SELECT ALL MUSIC OR A PLAYLIST AND PRESS ●
- PLAYBACK OPERATIONS (MUSIC/VIDEO)
- OPENING FILE PROPERTIES
- ACCESSING LINKED INFORMATION
- PLAYBACK SETTINGS
- SOUND EFFECTS
- SELECT ALL VIDEOS OR A PLAYLIST AND PRESS ●
- PLAYBACK OPERATIONS (VIDEO ONLY)
- VIDEO WITH LINKED INFORMATION
- TIME SEARCH
- EDITING VIDEO
- CLIPPING PORTIONS BETWEEN TWO POINTS
- CROPPING VIDEO CLIPS
- ADDING SUBTITLES
- ENTERING TEXT
- PRESS ☑ END AT THE END POINT EDIT SUBTITLE MENU OPENS
- CHANGE DISPLAY SETTINGS (SEE RIGHT) AND ADD EFFECTS (SEE P.7-14)
- AFTER COMPLETING ALL THE SETTINGS, PRESS ☐ OK
- PRESS Y SAVE
- SELECT OVERWRITE OR CREATE NEW AND PRESS ●
- DISPLAY SETTINGS
- SCROLLING
- SCROLL DIRECTION
- SCROLL EFFECTS
- ON-SCREEN TIME
- BACKGROUND
- ADDING TEXT EFFECTS
- CHANGING COLOUR OF ENTIRE TEXT
- CHANGING COLOUR OF PORTION
- HIGHLIGHT HIGHLIGHT SUBTITLES
- BLINK SET SUBTITLES TO FLASH
- RESET RESET ADVANCED SUBTITLE SETTINGS
- MANAGING VIDEO & MUSIC FILES
- ADDING NEW PLAYLIST
- ADDING FILES TO PLAYLISTS
- SELECT A PLAYLIST AND PRESS ●
- OPENING PLAYLIST PROPERTIES
- DELETING SD VIDEO & SD AUDIO FILES
- DELETING VIDEO FILES
- DELETING MUSIC FILES
- DELETING MY VIDEOS/MY MUSIC FILES
- MEMORY STATUS
- FILE LIST
- MAJOR ICONS
- SWITCHING FILE LIST VIEW
- MAIN MENU ▶ DATA FOLDER
- SORTING FILES
- OPENING FILES
- SELECT A FOLDER AND PRESS ●
- PRESS ☐ FAIL TO RETURN TO FILE LIST
- ACTIVATING MOBILE CAMERA
- SELECTING MULTIPLE FILES
- SELECT A FILE AND PRESS ☐ CHECK
- REPEAT STEP 2 TO SELECT MORE
- SLIDE SHOW
- SETTING INTERVAL
- REPEAT SLIDE SHOW
- PROPERTIES
- SVG FILES
- CCF FILES
- FLASH®
- FLASH® RINGTONES
- MY PICTOGRAMS
- MANAGING FILES & FOLDERS
- ADDING FOLDERS
- CHANGING FILE/FOLDER NAME
- DELETING FILES & FOLDERS
- SELECT DELETE OR DELETE ALL AND PRESS ●
- COPYING/MOVING FILES
- COPYING/MOVING SINGLE FILES
- SELECT COPY OR MOVE AND PRESS ●
- SELECT PHONE OR MEMORY CARD AND PRESS ●
- SELECT COPY HERE.. OR MOVE HERE.. AND PRESS ●
- USING FILES
- WALLPAPER
- RINGVIDEO & RINGTONE
- S! MAIL ATTACHMENTS
- PRINTING IMAGES
- EDITING STILL IMAGES
- CHANGING IMAGE SIZE
- RESIZE TO PRESET SIZE
- SELECT FROM TO WALLPAPER TO ALARM AND PRESS ●
- USE ⚙ TO SPECIFY DISPLAY AREA
- CROPPING IMAGES
- VISUAL EFFECTS (RETOUCH)
- ADDING TEXT & STAMPS
- ADDING TEXT
- ADDING STAMPS
- USE ✅ TO MOVE TEXT OR STAMP TO TARGET LOCATION AND PRESS Ⓞ
- PRESS Y? SAVE
- ENTER NAME AND PRESS ●
- FACE ARRANGE
- SELECT A TYPE AND PRESS ●
- ADJUSTING FACE ARRANGE POSITION
- ADDITIONAL PICTURE EFFECTS
- ROTATE ROTATE IMAGES
- CONVERTING FILE FORMAT
- CANCELLING EFFECTS
- PANORAMA IMAGES
- SELECT MERGE PANORAMA AND PRESS ●
- SELECT ② AND PRESS ●
- SELECT ANOTHER IMAGE AND PRESS ●
- SELECT EFFECT AND PRESS ●
- SELECT FROM STANDARD TO
- SELECT A LOCATION AND PRESS ●
- MODE SETTINGS
- ACTIVATING A MODE
- CUSTOMISING MODES
- EDIT
- ANY KEY
- RESET
- PRESET PICTURES
- RESTORING CUSTOM SCREEN WALLPAPER
- SYSTEM GRAPHICS
- POWER ON/POWER OFF
- INCOMING CALLS/ALARM
- RESTORING CUSTOM SCREEN SYSTEM GRAPHICS
- FONT SETTINGS
- FONT SIZE
- FONT WEIGHT
- STANDBY WINDOW (JAPANESE ONLY)
- WINDOW DESCRIPTION (SHORTCUT MODE)
- WINDOW DESCRIPTION (HEADLINE MODE)
- WINDOW DESCRIPTION (COMMUNICATION MODE)
- WINDOW DESCRIPTION (CALENDAR MODE)
- TOGGLE MODES
- CUSTOMISING SHORTCUT MODE
- ASSIGN
- DELETE DELETE SHORTCUT/BOOKMARK ICONS
- MOVE CHANGE MEMBER ORDER
- DELETE
- CHANGE ICON CHANGE MEMBER ICONS
- CUSTOMISING HEADLINE MODE
- CUSTOMISING COMMUNICATION MODE
- LANGUAGE SETTING
- DOWNLOADING CUSTOM SCREENS
- SELECT DOWNLOAD CUSTOM SCREENS AND PRESS ●
- DOWNLOAD A CUSTOM SCREEN
- SELECT CUSTOM SCREENS AND PRESS ●
- SELECT A CUSTOM SCREEN FOR WHICH TO DOWNLOAD THE KEY AND PRESS 📧 OPTIONS
- SELECT ACTIVATE AND PRESS ●
- PRESS 📧 ACTVTE
- READ THROUGH TERMS OF SERVICE AND DOWNLOAD CUSTOM SCREEN KEY FOLLOWING ONLINE INSTRUCTIONS
- AFTER DOWNLOAD, PRESS OK
- CUSTOM SCREEN SETUP
- CUSTOM SCREENS IN DATA FOLDER
- FAMILIAR USABILITY
- DOWNLOADING FAMILIAR USABILITY
- FAMILIAR USABILITY SETUP
- CANCELLING FAMILIAR USABILITY
- LIGHT SETTINGS
- BACKLIGHT
- BACKLIGHT ILLUMINATION TIME
- DISPLAY BRIGHTNESS
- DISPLAY SAVING
- SELECT A PERIOD → PRESS ●
- EXTERNAL DISPLAY SETTINGS
- MESSAGES
- SELECT DISPLAY OR NOT DISPLAY → PRESS ●
- DISPLAY DATE & TIME
- SELECT A TYPE → PRESS ●
- CLOCK TYPE CHANGE EXTERNAL DISPLAY FONT
- SOUNDS & ALERTS
- ASSIGN TONE IN PRESET SOUNDS
- ASSIGN TONE IN DATA FOLDER
- ASSIGN VIDEO OR FLASH® RINGTONE
- DURATION (NOT AVAILABLE FOR CALLS OR CIRCLE TALK)
- RESTORING CUSTOM SCREEN RINGTONE/RINGVIDEO
- ACTIVATING/DEACTIVATING
- VIBRATION PATTERN
- EVENT LIGHT
- STATUS LIGHT
- CUSTOMISING SYSTEM SOUNDS
- ASSIGN TOUCH TONE
- ASSIGN A PATTERN
- DISABLE KEYPAD TONE
- SOUND PATTERNS IN PRESET SOUNDS
- SOUND PATTERNS IN DATA FOLDER
- DURATION
- DISABLE TONE
- ADDITIONAL SOUND SETTINGS
- DATE & TIME
- ENTRIES (JAPANESE ONLY)
- SH/813SH DOWNLOAD DICTIONARY (JAPANESE ONLY)
- HANDSET SECURITY
- FACE RECOGNITION
- SAVING USER INFORMATION
- SELECT FROM IMAGE 1 TO IMAGE 5 AND PRESS 📄 CAPTURE
- FRAME YOUR FACE ON DISPLAY AND PRESS ●
- PRESS ☐ YES
- CHOOSE ON OR OFF AND PRESS ●
- ENTER HANDSET CODE AND PRESS ●
- SCANNING FACE
- FACE THE DISPLAY
- WHEN FACE RECOGNITION FAILS
- FACE RECOGNITION SETTINGS
- PIN LOCK
- HANDSET LOCKS
- ACTIVATING LOCK WHEN HANDSET IS CLOSED
- ONE TIME LOCK
- ACTIVATING LOCK WHEN HANDSET IS TURNED ON
- WHEN PASSWORD LOCK IS ACTIVE
- OPENING SECRET ENTRIES
- WHEN SHOW SECRET DATA IS OFF
- CHANGING HANDSET CODE
- ENTER HANDSET CODE → PRESS ⬙ → CHOOSE YES → PRESS ⬙ → CHOOSE YES → PRESS ⬙
- CALL SETTINGS
- INTERNATIONAL CALL
- CHANGE
- ADD
- SET COUNTRY CODE
- AUTO ANSWER
- BLUETOOTH®
- NOTE BLUETOOTH ® CONNECTION MAY NOT BE POSSIBLE WITH SOME BLUETOOTH ® DEVICES
- ACTIVATING BLUETOOTH®
- CHOOSE ON AND PRESS ●
- BLUETOOTH® CONNECTION
- EXAMPLE
- AUTHORISATION CODE
- DEVICE SEARCH & PAIRING
- PAIRING WITH HANDSFREE DEVICES
- OPENING PAIRED DEVICE LIST
- VISIBILITY
- TRANSFERRING FILES VIA BLUETOOTH®
- TRANSFER OPTIONS
- TRANSFERABLE FILES
- ONE FILE TRANSFER
- SENDING
- RECEIVING
- ALL FILE TRANSFER
- SELECT SEND ALL AND PRESS ●
- SELECT A DEVICE AND PRESS ●
- PREPARE RECIPIENT DEVICE
- SELECT AN ITEM AND PRESS ●
- WHEN CONNECTION IS REQUESTED, CALLING NOT AVAILABLE DURING OPERATION, OK? APPEARS
- TRANSFER STARTS AND CONFIRMATION APPEARS
- ADDING FILES
- OVERWRITING EXISTING FILES
- RECEIVING FOLDERS
- CONNECTING HANDSFREE DEVICES
- SOUND OUTPUT
- BLUETOOTH® SETTINGS
- DEVICE NAME
- ENTER NAME → PRESS ●
- BLUETOOTH TIMEOUT
- SELECT TIME → PRESS ●
- HANDSFREE SETTING
- CHOOSE HANDSFREE MODE OR PRIVATE MODE → PRESS
- MY DEVICE DETAILS
- INFRARED
- TRANSFERRING FILES VIA INFRARED
- TRANSFERRING IMAGES VIA HIGH-SPEED INFRARED
- CHOOSE YES AND PRESS Ⓞ TO SAVE
- ENTER AUTHORISATION CODE AND PRESS ●
- NETWORK SETTINGS
- ADDING NETWORK TO THE END
- DELETING NETWORK
- ADDING NETWORK
- EDITING NETWORK
- LOCATION INFO
- KEEP MEMORY CARD OUT OF CHILDREN'S REACH; MAY CAUSE SUFFOCATION IF SWALLOWED
- INSERTING & REMOVING MEMORY CARD
- FORMAT CARD
- HANDSET TO MEMORY CARD
- MEMORY CARD TO HANDSET
- SELECT MEMORY CARD → PRESS ●
- SELECT A TITLE → PRESS ●
- DIGITAL PRINT ORDER FORMAT (DPOF)
- SELECTING IMAGES & PRINTS
- REPEAT STEPS 2 - 3 FOR OTHER IMAGES
- PRESS ☑ DONE
- PRINT SETTINGS
- CALENDAR
- OPENING CALENDAR
- SELECT CALENDAR AND PRESS ●
- ∴ M
- BY
- DAYS OF THE WEEK
- BY DATE
- SET HOLIDAY
- REMOVING/RESTORING HOLIDAYS
- SAVING ADDITIONAL HOLIDAYS
- EDITING ADDITIONAL HOLIDAYS
- ALARM SETTINGS
- ALARM VOLUME
- VIBRATION
- MANNER SETTING
- AT REMINDER TIME
- STOPPING REMINDER
- OPENING ENTRIES
- CALENDAR OPTIONS
- ASSIGN TONE/VIDEO
- PRESET SOUNDS
- DATA FOLDER FILES
- REPEAT
- ONCE ONLY SCHEDULE
- REPETITIVE SCHEDULE
- SELECT A DATE AND PRESS ●
- SELECT AN ENTRY AND PRESS ●
- PRESS CLEAR BACK TO RETURN
- SEARCHING ENTRIES BY SUBJECT
- EDITING ENTRIES
- DELETING ENTRIES
- DELETING REPETITIVE ENTRIES
- TASKS
- TASK OPTIONS
- MAIN MENU ▶ TOOLS → TOOLS 1 (○)
- PRESS ☑ CLEAR/BACK TO RETURN
- COMPLETED TASKS
- MAIN MENU ▶ TOOLS → TOOLS 1 (○) → TASKS
- ALL TASKS
- ALL COMPLETED TASKS
- ALARM
- SETTING ALARM
- ONE TIME ALARM
- FOR MANNER MODE
- FOR WORLD CLOCK
- AT ALARM TIME
- STOPPING ALARM
- SNOOZE
- ALARM OPTIONS
- CANCELLING & REACTIVATING ALARM
- DELETING ALARM
- WORLD CLOCK
- SETTING TIME ZONE & DAYLIGHT SAVING
- OPENING WORLD CLOCK
- SELECT WORLD CLOCK AND PRESS ●
- CALCULATOR
- SELECT CALCULATOR AND PRESS ●
- MONEY CONVERTER
- PREPARATION
- RECORDING
- SELECT VOICE RECORDER AND PRESS ●
- FOR MESSAGE
- PRESS ● TO STOP
- SELECT SAVE AND PRESS ●
- EXTENDED VOICE
- PRESS Ⓞ TO STOP
- DELETING FILES
- RECORDING SETTING
- DOCUMENT VIEWER
- INTERNET FILES
- ATTACHMENTS
- BARCODE
- FRAME BARCODE IN THE CENTRE OF DISPLAY
- BARCODE RECOGNITION TONE SOUNDS AND SCAN RESULTS APPEAR
- CONTINUOUS MODE
- SPLIT DATA
- MEMORY: OR MAILTO
- CREATE QR CODES
- INCOMING CALLS WHILE CREATING QR CODE
- TEXT SCANNER
- FRAME TEXT ON DISPLAY
- USE ⏻ TO SELECT A LINE AND PRESS ⬙
- SCAN RESULTS APPEAR
- SCANNING MORE TEXT
- SCANNING DURING TEXT ENTRY SCAN TEXT DURING TEXT ENTRY AND INSERT SCAN RESULTS INTO CURRENT CURSOR POSITION
- STOPWATCH
- MAIN MENU ▶ TOOLS → TOOLS 2 (💡) → STOPWATCH
- PRESS ● TO STOP COUNTDOWN
- TO EXIT, PRESS 📄 THEN CHOOSE YES AND PRESS ♟
- COUNTDOWN TIMER
- ENTER TIME (00:01 - 60:00) AND PRESS ●
- PRESS Ⓞ TO STOP COUNTDOWN
- TO EXIT, PRESS CLEAR BACK 25 THEN CHOOSE YES AND PRESS ●
- COUNTDOWN TIMER END
- EXPENSES MEMO
- ADD NEW EXPENSE
- TOTALS CHECK ENTRIES
- EDIT CATEGORY RENAME CATEGORIES
- TEXT TEMPLATES
- NEW ENTRY
- OPENING TEMPLATES
- EDITING TEMPLATES
- DELETING TEMPLATES
- PHONE HELP
- OPTIONAL SERVICES OVERVIEW
- CALL FORWARDING RECORDS
- INCOMING CALLS WHILE CALL FORWARDING IS ACTIVE
- NOTE ▶ PHONE NUMBERS BEGINNING WITH THE FOLLOWING NUMBERS CANNOT BE SAVED
- FORWARDING VIDEO CALLS
- CANCEL ALL CANCEL CALL FORWARDING
- MAIN MENU ▶ SETTINGS → CALL/VIDEO CALL (💡) → VOICEMAIL/DIVERT
- SELECT CANCEL ALL → PRESS ● → CHOOSE YES → PRESS ●
- STATUS CHECK CALL FORWARDING STATUS
- SELECT STATUS → PRESS ●
- INCOMING CALLS WHILE VOICEMAIL IS ACTIVE
- RETRIEVING MISSED CALL NOTIFICATION RECORDS
- CLOSING HANDSET WHILE SOMEONE IS ON HOLD
- PRESSING ☎ WHILE SOMEONE IS ON HOLD
- LINE 1 ENDS WHILE LINE 2 IS ON HOLD
- ENDING CALLS DURING CONFERENCE CALL
- SOME LINES END DURING CONFERENCE CALL
- RESTRICTING OUTGOING CALLS
- EACH RESTRICTION
- CANCELLING ALL RESTRICTIONS
- RESTRICTING INCOMING CALLS
- REJECTING A CALL
- ADDING NUMBERS
- EDITING NUMBERS
- DELETING NUMBERS
- CHANGING NETWORK PASSWORD
- SMS
- S! MAIL
- ARRANGE MAIL
- FEELING MAIL
- MESSAGING FOLDERS
- MESSAGING FOLDER CONTENTS
- MESSAGE TYPE/STATUS
- SENDER OR RECIPIENT
- MESSAGE CONTENTS
- CHANGING VIEWS
- MESSAGE LIST VIEW
- SELECT TWO-LINE, SENDER+PREVIEW, SUNJECTS+PREVIEW, SENDER OR SUBJECTS AND PRESS ●
- FOLDER VIEW
- SELECT RECEIVED MSG. VIEW OR SENT MSG.VIEW AND PRESS Ⓞ
- SELECT FOLDER VIEW AND PRESS ●
- CUSTOMISING HANDSET ADDRESS
- SENDING TEXT MESSAGES
- CHARACTER ENTRY LIMITS
- CREATING & SENDING SMS MAIL
- CONVERTING SMS MAIL TO S! MAIL
- CREATING & SENDING S! MAIL
- INCOMING CALLS WHILE CREATING MESSAGE
- SENDING FROM PHONE BOOK ENTRIES
- WHEN RECIPIENT HANDSET IS OFF OR OUT-OF-RANGE
- DELIVERY FAILURE
- ENTERING RECIPIENTS
- ATTACHING FILES
- SOUND FILES
- VIDEO FILES
- PHONE BOOK ENTRIES
- SCHEDULE ENTRIES
- TEMPLATES
- BOOKS
- OTHER FILES
- DELETING ATTACHMENTS
- ADDING ATTACHMENTS
- CREATING ARRANGE MAIL
- CHANGING FONT COLOUR
- INSERTING IMAGES
- INSERTING MY PICTOGRAMS (SEE P.8-7)
- INSERTING BACKGROUND SOUND
- INSERTING FLASH ® (SEE P.8-7) FILE
- INSERTING HORIZONTAL LINES
- FLASHING TEXT
- ENTER TEXT
- SCROLLING TEXT
- ALIGNING TEXT
- CANCELLING LAST ACTION
- CREATING TEMPLATES
- CREATING ARRANGE MAIL FROM TEMPLATES
- CREATING FEELING MAIL
- DELIVERY OPTIONS
- SMS/S! MAIL DELIVERY OPTION
- SMS DELIVERY OPTION
- S! MAIL DELIVERY OPTIONS
- REPLY REQUEST SET TO SHOW A REPLY REQUEST
- FORWARD NG SET TO SHOW A DO NOT FORWARD REQUEST
- DELETE NG SET TO SHOW A DO NOT DELETE REQUEST
- SETTING UP QUIZ
- EDITING QUESTION/ANSWER
- ENTERING A COMMENT
- SEND RESERVATION
- USING DRAFTS
- SAVING TO DRAFTS
- SENDING FROM DRAFTS
- EDIT/SEND THE MESSAGE
- INCOMING TEXT MESSAGES
- OPENING NEW MESSAGES
- SELECT A MESSAGE AND PRESS ●
- VIEWING NEW MESSAGE TEXT ON EXTERNAL DISPLAY
- RETRIEVING SERVER MAIL BOX MESSAGES MANUALLY
- MESSAGES WITH REPLY REQUEST
- MESSAGES WITH QUIZ
- AUTO PLAY
- DELIVERY REPORT
- NEW MAIL OUT OF STANDBY
- WHEN HANDSET ADDRESS IS CHANGED
- RECEIVING FEELING MAIL
- CUSTOMISING HANDSET RESPONSE
- RETRIEVING COMPLETE S! MAIL MESSAGES
- RETRIEVING MAIL LIST
- SERVER STATUS
- USING MAIL LIST
- CHECKING MESSAGES
- SELECT RECEIVED MSG., DRAFTS, SENT MESSAGES OR UNSENT MESSAGES AND PRESS ●
- CHANGING ENCODING
- SLIDE PLAYBACK
- EDITING SENT/UNSENT MESSAGES
- D PICTOGRAM
- SELECTING MULTIPLE MESSAGES
- SWITCH TO READ/UNREAD
- REPLYING TO MESSAGES
- FORWARDING MESSAGES
- SEND
- FORWARDING FORWARD NG MESSAGES
- FORWARDING SERVER MAIL
- CANCELLING SENT MESSAGES
- LINKED INFO
- USING LINKED INFO
- ACCESSING INTERNET SITES
- PROTECTING MESSAGES
- DELETING MESSAGES
- SELECTING MESSAGES TO DELETE
- MAIN MENU ▶ MESSAGING
- DELETING DELETE NG MESSAGES
- DELETING SERVER MAIL
- DELETE ALL
- SAVING ATTACHMENTS TO DATA FOLDER
- USING ATTACHMENTS
- MY FOLDERS
- ADDING MY FOLDERS
- RENAMING MY FOLDERS
- MOVING MESSAGES
- SETTING AUTO SORT KEYS
- SECRET FOLDER
- CANCEL SECRET
- DELETING FOLDERS
- SPEED MAIL LIST
- ADDING TO SPEED MAIL LIST WHILE CREATING MESSAGE
- SPEED MAIL
- AUTO RESEND
- GENERAL SETTINGS
- AUTO INSERT
- ADDING CENTRE NUMBER
- EDITING CENTRE NUMBER
- DELETING CENTRE NUMBER
- SETTING CENTRE NUMBER
- S! MAIL SETTINGS
- SET ADDRESS
- YAHOO! KEITAI FEATURES
- PC SITE FEATURE
- INTERNET CONTENT
- CACHE MEMORY
- SSL
- DISCLAIMER
- OPENING YAHOO! KEITAI MENU
- SELECT YAHOO! KEITAI AND PRESS ●
- HIGHLIGHT A MENU ITEM
- REPEAT STEPS 2 - 3 TO OPEN ADDITIONAL LINKS
- TO EXIT, PRESS 📞 THEN CHOOSE YES AND PRESS ♟
- USING HISTORY
- TO EXIT, PRESS 🔒 THEN CHOOSE YES AND PRESS ●
- OPENING PROPERTIES
- SENDING URLS VIA S! MAIL/SMS
- SORTING ITEMS
- DELETING HISTORY
- ENTERING URLS DIRECTLY
- ENTER URL AND PRESS ●
- TO EXIT, PRESS 🔒 THEN CHOOSE YES AND PRESS Ⓞ
- SELECTING FROM PREVIOUSLY ENTERED URLS
- POINTER NAVIGATION
- ACTIVATING/CANCELLING POINTER NAVIGATION
- CHANGING POINTER SPEED
- USING CURSOR
- SCROLLING PAGES
- NON-FRAMED PAGES
- FRAMED PAGES
- TABBED BROWSING
- SELECT OPEN IN NEW TAB AND PRESS ●
- TEXT ENTRY & ITEM SELECTION
- CHECK-BOX
- MENU LIST
- COMMAND BUTTON
- INPUT MEMORY
- USING INPUT MEMORY
- BOOKMARKS & SAVED PAGES
- DEFAULT BOOKMARKS
- SAVING BOOKMARKS & PAGES
- SAVING URLS TO BOOKMARKS
- OPENING BOOKMARKS & SAVED PAGES
- BOOKMARKS
- SAVED PAGES
- SELECT A TITLE AND PRESS ●
- OPENING BOOKMARKS ONLINE
- EDITING BOOKMARKS & SAVED PAGES
- EDIT EDIT TITLES OR URLS
- TITLES
- URLS
- BOOKMARKS FOLDER
- CREATING A FOLDER
- MOVING TO FOLDER
- CHANGING FOLDER NAMES
- SAVING FILES TO DATA FOLDER
- SELECT SAVE ITEMS AND PRESS ●
- CLICKING ON FILE LINKS
- INCOMING CALLS/MAIL WHILE STREAMING
- CHANGING DISPLAY SIZE
- STREAMING FROM
- RESUMING THE FILE PLAYED LAST
- ENTERING URLS
- USING BOOKMARKS
- LIVE MONITOR BASICS
- OPENING LIVE MONITOR LIST & S! LOOP LIST
- SELECT LIVE MONITOR LIST OR S! LOOP LIST AND PRESS ●
- LIVE MONITOR LIST
- S! LOOP LIST
- UPDATING LIVE MONITOR ITEMS
- AUTOMATIC UPDATE
- NEWS FLASH
- GENERAL NEWS
- DELETING LIVE MONITOR ITEMS
- DELETING SINGLE ITEMS
- DELETING ALL ITEMS
- OPENING YAHOO! JAPAN
- TO EXIT, PRESS 📞 THEN CHOOSE YES AND PRESS ●
- SWITCHING VIEW
- ZOOM
- SUB MENU SETTINGS
- COMMON SETTINGS
- IMAGES
- SOUNDS
- LIFESTYLE-APPLI
- NETWORK S! APPLICATIONS
- S! APPLI LIBRARY
- SELECT S! APPLI AND PRESS ●
- S! APPLICATIONS ON MEMORY CARD
- DOWNLOADING S! APPLICATIONS
- STARTING S! APPLICATIONS
- STARTING NETWORK S! APPLICATIONS
- EXIT, PAUSE & RESUME
- RESUMING S! APPLICATIONS
- OPENING S! APPLICATION PROPERTIES
- MOVING S! APPLICATIONS TO MEMORY CARD
- DELETING S! APPLICATIONS
- SCREENSAVER
- ACTIVATING/CANCELLING SCREENSAVER
- SETTING SCREENSAVER
- ACTIVATION TIME
- SETTING PERMISSIONS
- RESETTING PERMISSION SETTINGS
- S! APPLICATION OPERATIONAL SETTINGS
- FELICA
- IC CARD
- DOWNLOAD LIFESTYLE-APPLI
- COMPLETE REGISTRATION/SET UP
- USE SERVICE
- STARTING LIFESTYLE-APPLI
- WHEN HANDSET POWER IS OFF
- WHEN BATTERY IS LOW
- S! FELICA SETTINGS
- IC CARD STATUS
- IC CARD LOCK
- REMOTE LOCK
- PREPARATION ON HANDSET
- SENDING NOTICE TO REMOTE LOCK ACTIVATOR
- TO SAVE SETTINGS WITHOUT ENABLING MAIL REMOTE
- CALL REMOTE LOCK NUMBER/COUNT FOR LOCK
- REMOTE LOCK SETUP
- ACTIVATING REMOTE LOCK
- VIA MAIL
- USE S! MAIL/E-MAIL TO SEND PASSWORD TO HANDSET
- AFTER HANDSET RECEIVES MESSAGE
- VIA PHONE
- USING ONE OF THE SPECIFIED PHONES, CALL HANDSET
- END THE CALL
- AFTER SPECIFIED NUMBER OF MISSED CALLS
- INTERFACE SETTINGS
- SELECT FROM S! APPLI TO POP-UP MESSAGE AND PRESS ●
- RESETTING DEFAULTS
- S! CAST (JAPANESE ONLY)
- S! CAST CONTENT
- SERVICE REGISTRATION & CONTENT SUBSCRIPTION
- SELECT REGISTRATION/CANCEL AND PRESS ●
- OPENING RECEIVED INFORMATION
- NEW RECEIVED INFORMATION
- DELIVERY NOTICE APPEARS AND INFORMATION WINDOW OPENS FOR NEW INFORMATION
- SELECT CAST AND PRESS ●
- REQUESTING RE-DELIVERY
- STORED INFORMATION
- LATEST INFORMATION
- USING WEATHER INDICATOR
- ACTIVATING/CANCELLING WEATHER INDICATOR
- ACTIVATING UPDATES
- ELECTRONIC BOOKS
- DOWNLOADING E-BOOKS
- SUPPORT BOOK (JAPANESE ONLY)
- READING CONTENT
- SELECT E-BOOK AND PRESS ●
- SELECT AN E-BOOK AND PRESS ●
- PRESS 🔒 TO CLOSE
- TEXT OPERATIONS
- USING LINKED INFO/COPYING TEXT
- MASK & JUMP
- FOLDERS AND FILES IN E-BOOK FOLDERS
- BOOKMARK
- AUTO BOOKMARK
- OPENING BOOKMARKED PAGE
- USING E-BOOK IMAGES
- USING A DICTIONARY
- BOOKSURFING ® (JAPANESE ONLY)
- SELECT BOOKSURFING AND PRESS ●
- S! TOWN (JAPANESE ONLY)
- USING S! TOWN
- SELECT S! TOWN AND PRESS ●
- S! TOWN LIBRARY
- SELECT S! TOWN AND PRESS
- S! LOOP (JAPANESE ONLY)
- SELECT S! LOOP AND PRESS ●
- HOT STATUS NOTIFICATION
- ADDING MEMBERS
- ADDING FROM PHONE BOOK OR DIRECT ENTRY
- ADDING FROM REQUEST MEMO
- ACCEPTING
- REJECTING
- AUTO REJECT
- OPENING MEMBER STATUS DETAILS
- MY STATUS
- OPENING MY STATUS DETAILS
- IN STANDBY, PRESS FOR 1+ SECONDS
- IMAGE/NAME
- CONNECTION STATUS (SEE P.19-9)
- STATUS
- ANSWER STATUS
- AVAILABILITY
- COMMENT
- STANDBY WINDOW ON/OFF (SEE P.19-9)
- CHANGING MY STATUS
- SELECT AN ITEM (EXCEPT CONNECTION STATUS AND STANDBY WINDOW ON/OFF) AND PRESS Ⓞ
- SELECT STATUS AND PRESS ●
- PRESS UPDATE
- CONNECTION STATUS AUTO UPDATE
- EDITING HOT STATUS MEMBER LIST
- RENAMING GROUPS
- WHEN ABSTENTION/REMOVAL MEMO ARRIVES
- USING HOT STATUS INFO
- CALLS, MESSAGES & CIRCLE TALK
- HOT STATUS SETTINGS
- STATUS SETTING
- OPENING HOT STATUS NOTIFICATION LIST
- MANUAL INFO UPDATE
- INITIATING CIRCLE TALK
- REJOINING CIRCLE TALK
- LOUDSPEAKER ON/OFF
- FROM CIRCLE TALK MEMBER LIST
- FROM HOT STATUS MEMBER LIST
- ACCEPTING A CIRCLE TALK REQUEST
- ADDING/CANCELLING PARTICIPANTS
- ADDING PARTICIPANTS
- CANCELLING PARTICIPANTS
- CREATING CIRCLE TALK MEMBER LIST
- SAVING AS INDIVIDUALS
- SAVING AS GROUPS
- EDITING CIRCLE TALK MEMBER LIST
- EDITING MEMBERS OR GROUPS
- INDIVIDUAL MEMBERS
- GROUPS
- DELETING MEMBERS OR GROUPS
- CIRCLE TALK SETTINGS
- NEAR CHAT (JAPANESE ONLY)
- USING NEAR CHAT
- SETUP
- S! APPLI REQUEST
- SENDING NEAR CHAT REQUEST
- SELECT NEAR CHAT AND PRESS ●
- SEND NEAR CHAT REQUEST VIA THE APPLICATION
- TO END NEAR CHAT, EXIT THE APPLICATION (SEE P.16-4)
- RECEIVING NEAR CHAT REQUEST
- WHEN A NEAR CHAT REQUEST ARRIVES, A TONE SOUNDS AND BLUETOOTH® NOTIFICATION APPEARS
- FUNCTION LIST
- WARNING SIGNS S! APPLICATION DISPLAY MESSAGES
- OUT APPEARS
- BATTERY LOW. PLEASE CONNECT TO CHARGER! APPEARS AND SHORT BEEPS SOUND
- APPEARS
- MESSAGING MISHAPS
- WHEN S! MAIL IS NOT DELIVERED AS SENT
- WHEN HANDSET MEMORY IS INSUFFICIENT
- SOFTWARE UPDATE
- BEFORE UPDATING SOFTWARE, TURN POWER OFF TO END ALL ACTIVE FUNCTIONS/APPLICATIONS, THEN RESTART HANDSET
- UPDATING SOFTWARE
- SELECT SOFTWARE UPDATE AND PRESS
- UPDATE RESULT
- SCHEDULED UPDATE
- SPECIFICATIONS
- MEMORY LIST
- INDEX
- NUMBER
- A
- B
- C
- D
- E
- F
- G
- H
- J
- K
- L
- M
- N
- P
- Q
- R
- S
- T
- U
- V
- W
- Y
- WARRANTY & AFTER-SALES SERVICES
- WARRANTY
- AFTER-SALES SERVICES
- CUSTOMER SERVICE
- SOFTBANK CUSTOMER CENTRES
- SOFTBANK INTERNATIONAL CALL CENTRE
- SOFTBANK 812SH/813SH INSTRUCTION MANUAL
Brand : SHARP
Model : SoftBank 812SH
Category : Smartphone