
F121 - Range hood Airforce - Free user manual and instructions
Find the device manual for free F121 Airforce in PDF.
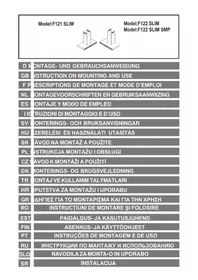


| Product Type | Under Cabinet Range Hood |
| Brand | Airforce |
| Model | F121 |
| Dimensions (W x D x H) | 600 mm x 500 mm x 150 mm |
| Net Weight | 12 kg |
| Power Supply | 220-240 V / 50 Hz |
| Max Power Consumption | 200 W |
| Max Extraction Rate | 600 m³/h |
| Noise Level (max speed) | 65 dB(A) |
| Number of Speeds | 3 |
| Filter Type | Aluminum Grease Filter (washable) |
| Charcoal Filter (optional) | Yes (for recirculation mode) |
| Lighting | LED (2 x 1.5 W) |
| Control Type | Push Buttons |
| Exhaust Diameter | 150 mm |
| Installation Type | Under Cabinet / Wall Mount |
| Venting Mode | Ducted or Recirculation (with carbon filter) |
| Material | Stainless Steel |
| Annual Energy Consumption | 32 kWh/year (est.) |
| Energy Efficiency Class | A+ |
| Grease Filtering Efficiency | Class B |
| Fluid Dynamic Efficiency Class | A |
| Lighting Efficiency Class | A |
| Noise Level (min speed) | 45 dB(A) |
| Warranty | 2 years (subject to terms) |
| Certifications | CE, RoHS |
Frequently Asked Questions - F121 Airforce
User questions about F121 Airforce
0 question about this device. Answer the ones you know or ask your own.
Ask a new question about this device
Download the instructions for your Range hood in PDF format for free! Find your manual F121 - Airforce and take your electronic device back in hand. On this page are published all the documents necessary for the use of your device. F121 by Airforce.
USER MANUAL F121 Airforce
| D | MONTAGE- UND GEBRAUCHSANWEISUNG |
| GB | INSTRUCTION ON MOUNTING AND USE |
| F | PRESCRIPTIONS DE MONTAGE ET MODE D'EMPLOI |
| NL | MONTAGEVOORSCHRIFTEN EN GEBRUIKSAANWIIIZING |
| ES | MONTAJE Y MODO DE EMPLEO |
| I | STRUZIONI DI MONTAGGIO E D'USO |
| SV | MONTERINGS- OCH BRUKSANVISNINGAR |
| HU | ZERELÉSI ÉS HASZNÁLATI UTASÍTÁS |
| SK | ÁVOD NA MONTÁŽ A POUŽITE |
| PL | NSTRUKCJA MONTAŽU I OBSŁUGI |
| CZ | ÁVOD K MONTÁŽI A POUŽITÍ |
| DK | MONTERINGS- OG BRUGSVEJLEDNING |
| TR | MONTAJ VE KULLANIM TALÝMATLARI |
| HR | PUTSTVA ZA MONTAŽU I UPORABU |
| GR | ДНГИЕГІА ТО МONTAPIΣΜΑ ΚΑΙ ΓΙΑ THN ΧΡΗΣΗ |
| RO | INSTRUCTIUNI DE MONTARE ŞI FOLOSIRE |
| EST | PAIGALDUS- JA KASUTUSJUHEND |
| FIN | ASENNUS- JA KÄYTTÖOHJEET |
| PT | INSTRUÇÕES DE MONTAGEM E DE USO |
| RU | ИНСТРУКЦИИ ПО МАНТАЖУ И ИСПОЛЬЗОВАНИЮ |
| SLO | NAVODILA ZA MONTA•O IN UPORABO |
| SR | INSTALACIJA |
D
Product performance test carried out in accordance with standard (EU) No 65/2014-Ref: IEC 61591
Maximum performance is achieved by placing the mobile panels, if any, in the open position.
All hoods with capacities exceeding 650 m3/h have the last timed speed; It lasts for 7 minutes, after which it automatically returns to the last non-timed speed.
Reducing environmental impact:
To reduce energy consumption, we recommend you always use the lowest suction speed among those suitable for the cooking mode currently active, avoid leaving the appliance running for more than 15 minutes after burner shutdown and switch off the lights if you leave the cooking area.
F

![graph TD A["Feed Filter"] --> B["12F"] B --> C["12A"] C --> D["10"] D --> E["7"] E --> F["20W max (G4)"] subgraph Initial Settings G["11F"] --> H["11A"] I["13F"] --> J["G"] end subgraph Experimental Details K["2-4 x Ø8mm / 2-4 x 5x45"] --> L["7F"] end M["Activkohlefilter: Charcoal Filter, Filtre à c…](/content/2026/07/1508798/images/8c5675a1e9cef4c4bdd32b66eca9bdf71804241014850a1746c65dd1fbe8813f.jpg)
D
GB INSTRUCTION ON MOUNTING AND USE
Check also the drawings on the initial pages with the alphabetical and numerical references in the explanatory text.
Closely follow the instructions in this manual. We cannot accept liability for any faults, detriment or fire damage to the appliance due to non-compliance with the manual's instructions. Installation and electrical connections must be executed by a qualified technician. You should affix the hood to a wall of sufficient weight-bearing capacity, so not to one made of plasterboard. Do not install it inside a cupboard. Attach it to the wall using the anchors provided.
Installation
The cooker hood must be placed at a minimum distance of 65 cm from the cooking plane for electric cookers and 65cm for gas or mixed cookers.
If the instructions for installation for the gas hob specify a greater distance, this has to be taken into account.
Do not tile, grout or silicone this appliance to the wall. Surface mounting only. Do not fix chimney flue to furniture or fly over shelves unless the chimney flue can be easily removed, in case maintenance is ever required.
Use
The cooker hood is provided with an upper air exit B for discharging fumes externally for models including chimney flue C (Suction Version A- exhaust pipe not supplied).
If cooking fumes and vapours cannot be externally discharged, the cooker hood can be used in the recirculating version F: the installation of 1 active charcoal filter F allows the recirculation of fumes and vapours through the upper grid G.
Electrical connection
Make sure that there is a power socket near the hood and that the system has a 30 mA differential. The mains voltage must be the same as that on the label inside the hood. The hood has a 1250 mm power cable with or without plug: if it does have a plug, connect the hood to an accessible approved socket; or if it does not (connection direct to the mains), fit an approved bipolar switch with a minimum contact opening of no less than 3 mm (accessible). This installation and electrical connection must be executed by a qualified technician.
Operation
![graph TD A["1"] --> B["2"] B --> C["3"] C --> D["Push"] style A fill:#f9f,stroke:#333 style B fill:#ccf,stroke:#333 style C fill:#cfc,stroke:#333 style D fill:#fcc,stroke:#333](/content/2026/07/1508798/images/469394140ad3164c4d192d5eb1ec1493f9c011aea7781fa53c145aeb1a51db19.jpg)
ANTI-ODOUR FILTER ACTIVATION WARNING:
If the hood is installed in filter mode, the anti-odour filter saturation warning must be activated, indicating when the filter needs to be replaced.
With the hood off, press and hold the knob for a few seconds – the function will be enabled or disabled: 4 green flashes for the symbol (F) indicate the function is enabled, whereas 4 red flashes indicate it is disabled.
Press the Push key to activate the hood; the four 4 icons will light up in blue. Press these icons lightly to enable them and enter a specific function. The hood will memorize the latest selected settings, i.e. aspiration power and lights.

MOTOR BUTTON
Press this control button to start up the motor, (at the same aspiration power selected before it was last switched off); the green pilot light will light up. Turn the knob clockwise or counter-clockwise to increase or decrease the aspiration power: the light indicators in this section (1) show the aspiration power, which varies from 0 to 4. After 5 seconds, if no action is taken on the knob, the system will exit the motor function and the green pilot light will turn blue once again, disabling the possibility of changing settings.
Press the control button a second time while it is still green to power off the motor and exit the function.
Automatic heat sensor functioning: To select this function, press the motor button and turn the handle in an anticlockwise direction until the light on the motor button begins to flash. The temperature sensor will start the motor, selecting the right aspiration speed. The speeds will vary in accordance with the change in temperature from the cooking top.

LIGHTS BUTTON
Press this control button to switch the lights on over the stove (at maximum intensity); the pilot light will light up to green. After 5 seconds, if no action is taken on the knob, the system will exit the light function and the green pilot light will turn blue once again, disabling the possibility of changing settings.
Press the control button a second time while it is still green to power off the lights and exit the function.

TIMER BUTTON
Press this control button to enable the hood's timer function; the pilot light will light up to green. Turn the knob clockwise or counter-clockwise to increase or decrease the automatic shutdown timer: the light indicators in this section (3) show the set time, from 5-10-20-40 minutes. After 5 seconds, if no action is taken on the knob, the system will exit the timer function and the green pilot light will turn blue once again, disabling the possibility of changing settings.
Press the control button a second time while it is still green to reset the timer to zero and exit the function.

FILTERS BUTTON
The hood features two warnings, one for the saturation of the anti-odour filter (if the function has been activated) and the other for the metal filter.
The red pilot light will light up when the control button is pressed once, showing the metal filter's saturation condition. When the control button is pressed a second time the pilot light will turn purple, showing the saturation condition of the anti-odour filter, if previously activated; in this case, the light indicators in this section (1) show the degree of saturation of the filters.
When the timer for the metal filter reaches 40 hours, the pilot light will flash red to indicate that the metal filter must be cleaned, whereas it will flash purple after 120 hours to indicate that the anti-odour filter needs to be replaced.
To reset the warning, enter the filter status menu, select the filter in alarm mode, then press and hold the knob until the pilot light is switched off.
Maintenance
Prior to any maintenance operation ensure that the cooker hood is disconnected from the electrical outlet.
Cleaning
The hood must be cleaned frequently both inside (apart from the area behind the grease filter) and outside. Use a cloth moistened with denatured alcohol or neutral liquid detergents. Never use products containing abrasives.
Warning: Failure to carry out the basic standards of the cleaning of the cooker hood and replacement of the filters may cause fire risks. Therefore we recommend observing these instructions.
Anti-grease Filter:
must be cleaned once a month, with non abrasive detergents, by hand or in dishwasher on low temperature and short cycle.
When washed in a dishwasher, the grease filter may discolour slightly, but this does not affect its filtering capacity.
Charcoal Filter - (only for filter version)
The active charcoal filters F are not washable nor regenerative. It should be changed every 6 months in normal use.
The active charcoal filters capture unpleasant cooking odours.
Replacing lightbulbs
Warning! Prior to touching the light bulbs ensure they are cooled down.
Extract the lamp cover by levering it off with a small screwdriver or similar tool.
Replace the damaged light bulb. Only use halogen bulbs of 20W max (G4), making sure you do not touch them with your hands. Close the lamp cover (it will snap shut).
Caution
The cooker hood must always work at least on the first speed while using the cooking top.
Never use the hood without the grill properly fitted!
WARNING:
The accessible components can overheat when the cooktop is in use.
The hood must not be connected to the flues of other appliances that run on gas or other fuels. When the hood is used at the same time as other appliances that run on gas or other fuels, provision must be made for an adequate supply of air. No food must be cooked flambé underneath the hood. The use of an unprotected flame could cause damage to the filters and could cause fires, so should be avoided. When frying food, never leave the pan unattended because the cooking oil could flare up. Please comply with the technical and safety provisions set forth by your local competent authorities regarding the ventilation of hoods.
This appliance conforms to European Directive 2002/96/EC, Waste Electrical and Electronic Equipment (WEEE). Please dispose of this product correctly in the interest of health and the environment.

The symbol on the product, or on the documents accompanying the product, indicates that this appliance may not be treated as household waste. Instead it shall be handed over to the applicable collection point for the recycling of electrical and electronic equipment. Disposal must be carried out in accordance with local environmental regulations for waste disposal.
For more detailed information about treatment, recovery and recycling of this product, please contact your local city office, your household waste disposal service or the shop where you purchased the product.
The device must not be used by a child or adult who suffers from a physical, mental or sensory handicap or has not the relevant experience and knowledge, unless they are aided or instructed on its use by a person responsible for their safety. If the power cable is damaged you should, in the interest of safety, contact the manufacturer or the manufacturer's technical assistance service to request a replacement, or ask someone who is similarly qualified.
F PRESCRIPTIONS DE MONTAGE ET MODE D'EMPLOI
AFLIF121IDS Ed. 02/15


- D
- REDUCING ENVIRONMENTAL IMPACT
- F
- GB INSTRUCTION ON MOUNTING AND USE
- INSTALLATION
- USE
- ELECTRICAL CONNECTION
- OPERATION
- ANTI-ODOUR FILTER ACTIVATION WARNING
- MOTOR BUTTON
- LIGHTS BUTTON
- TIMER BUTTON
- FILTERS BUTTON
- MAINTENANCE
- CLEANING
- ANTI-GREASE FILTER
- REPLACING LIGHTBULBS
- CAUTION
- F PRESCRIPTIONS DE MONTAGE ET MODE D'EMPLOI
Brand : Airforce
Model : F121
Category : Range hood