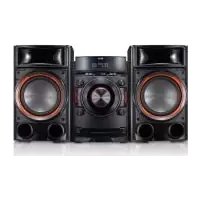
CM8330 - Hi-Fi System LG - Free user manual and instructions
Find the device manual for free CM8330 LG in PDF.


| Product Type | Hi-Fi System |
| Brand | LG |
| Model | CM8330 |
| Dimensions (Main Unit) | Approx. 250 x 100 x 200 mm |
| Weight (Main Unit) | Approx. 2.0 kg |
| Power Supply | AC 120V/60Hz or 230V/50Hz |
| Power Consumption | 30 W (standby <1 W) |
| Supported Media | CD, CD-R/RW, MP3 CD |
| Tuner | FM stereo (87.5-108 MHz) |
| Bluetooth | Yes, Bluetooth 3.0 (A2DP) |
| USB Port | Yes, front USB for MP3 playback |
| Audio Output Power | 2 x 10 W RMS |
| Speaker Impedance | 4 ohms |
| Speaker Type | Full-range, bass reflex |
| Display | Fluorescent display |
| Remote Control | Included (IR) |
| Clock/Timer | Yes, with sleep timer |
| Equalizer | Preset EQ modes (Rock, Pop, Classic, etc.) |
| Cleaning Instructions | Use a soft dry cloth. Do not use liquids or aerosols. |
| Safety Precautions | Avoid moisture, heat, and direct sunlight. Keep vents clear. |
| Spare Parts Availability | Contact LG service center or authorized dealers |
| Reparability | Repair by qualified technician recommended |
| General Information | LG CM8330 is a compact Hi-Fi system suitable for home audio. |
Frequently Asked Questions - CM8330 LG
User questions about CM8330 LG
0 question about this device. Answer the ones you know or ask your own.
Ask a new question about this device
Download the instructions for your Hi-Fi System in PDF format for free! Find your manual CM8330 - LG and take your electronic device back in hand. On this page are published all the documents necessary for the use of your device. CM8330 by LG.
USER MANUAL CM8330 LG
Please read this manual carefully before operating your set and retain it for future reference.
CM8530 (CM8530, CMS8530F/S/W)
CM8430 (CM8430, CMS8530F/W)
CM8330 (CM8330, CMS8530F)

MFL67840906
Safety Information


CAUTION: TO REDUCE THE RISK OF ELECTRIC SHOCK DO NOT REMOVE COVER (OR BACK) NO USER-SERVICEABLE PARTS INSIDE REFER SERVICING TO QUALIFIED SERVICE PERSONNEL.

This lightning flash with arrowhead symbol within an equilateral triangle is intended to alert the user to the presence of uninsulated dangerous voltage within the product's enclosure that may be of sufficient magnitude to constitute a risk of electric shock to persons.

The exclamation point within an equilateral triangle is intended to alert the user to the presence of important operating and maintenance (servicing) instructions in the literature accompanying the product.
WARNING: TO PREVENT FIRE OR ELECTRIC SHOCK HAZARD, DO NOT EXPOSE THIS PRODUCT TO RAIN OR MOISTURE.
CAUTION: The apparatus should not be exposed to water (dripping or splashing) and no objects filled with liquids, such as vases, should be placed on the apparatus.
WARNING: Do not install this equipment in a confined space such as a book case or similar unit.
CAUTION: Do not block any ventilation openings. Install in accordance with the manufacturer's instructions.
Slots and openings in the cabinet are provided for ventilation and to ensure reliable operation of the product and to protect it from over heating. The openings shall be never be blocked by placing the product on a bed, sofa, rug or other similar surface. This product should not be placed in a built-in installation such as a bookcase or rack unless proper ventilation is provided or the manufacturer's instruction has been adhered to.

CAUTION: This product employs a Laser System. To ensure proper use of this product, please read this owner's manual carefully and retain it for future reference. Shall the unit require maintenance, contact an authorized service center. Use of controls, adjustments or the performance of procedures other than those specified herein may result in hazardous radiation exposure. To prevent direct exposure to laser beam, do not try to open the enclosure.
CAUTION concerning the Power Cord
Most appliances recommend they be placed upon a dedicated circuit;
That is, a single outlet circuit which powers only that appliance and has no additional outlets or branch circuits. Check the specification page of this owner's manual to be certain. Do not overload wall outlets. Overloaded wall outlets, loose or damaged wall outlets, extension cords, frayed power cords, or damaged or cracked wire insulation are dangerous. Any of these conditions could result in electric shock or fire. Periodically examine the cord of your appliance, and if its appearance indicates damage or deterioration, unplug it, discontinue use of the appliance, and have the cord replaced with an exact replacement part by an authorized service center. Protect the power cord from physical or mechanical abuse, such as being twisted, kinked, pinched, closed in a door, or walked upon. Pay particular attention to plugs, wall outlets, and the point where the cord exits the appliance. To disconnect power from the mains, pull out the mains cord plug. When installing the product, ensure that the plug is easily accessible.
This device is equipped with a portable battery or accumulator.
Safety way to remove the battery or the battery from the equipment: Remove the old battery or battery pack, follow the steps in reverse order than the assembly. To prevent contamination of the environment and bring on possible threat to human and animal health, the old battery or the battery put it in the appropriate container at designated collection points. Do not dispose of batteries or battery together with other waste. It is recommended that you use local, free reimbursement systems batteries and accumulators. The battery shall not be exposed to excessive heat such as sunshine, fire or the like.
Table of Contents
1 Getting Started
2 Safety Information
6 Unique Features
6 Accessories
7 Playable file Requirement
7 - MP3/WMA music file requirement
7 - Compatible USB Devices
7 - USB device requirement
8 Front panel
10 Rear panel (CM8530)
11 Rear panel (CM8430)
12 Rear panel (CM8330)
13 Remote control
2 Connecting
14 How to Affix the Ferrite Core(For EMI only)
14 - Affix the Ferrite Core for power cord (For EMI only, CM8530, CM8430)
14 - Affix the Ferrite Core for lighting cable (For EMI only, CM8530, CM8430)
15 Connecting to speakers
15 - Before connecting (CM8530 only)
16 - Connecting to speakers
17 - Attaching the speaker light cables to the unit (For CM8530, CM8430)
18 Optional Equipment Connection
18 - AUX IN Connection
18 - PORT. IN Connection
18 - Listening to music from your portable player or external device
19 - USB Connection
19 - Antenna Connection
3 Operating
20 Basic Operations
20 - CD/USB Operations
20 - Selecting a folder and an MP3/WMA file
21 - Deleting an MP3/WMA file
22 Playback effect
22 - SMART DJ playback
23 - DJ effect
23 - AUTO DJ playback
24 - JUKE BOX Playback (Program play)
25 Using a Bluetooth wireless technology
25 - Listening to music stored on the Bluetooth devices
26 - Using Bluetooth App
28 Radio Operations
28 - Listening to the radio
28 - Improving poor FM reception
28 - Presetting the Radio Stations
28 - Deleting all the saved stations
29 Other Operations
29 - Turn off the sound temporarily
29 - Displaying file information (ID3 TAG)
29 - DEMO
29 - Using Microphone
29 - Switching on and off the speaker light(For CM8530, CM8430)
30 Sound adjustment
30 - Setting the surround mode
30 - Setting the USER EQ
31 Setting the Clock
31 - Setting the Clock Manually
31 - Setting the Clock through "LG Bluetooth Remote" App
31 - Using your player as an alarm clock
32 - Sleep Timer Setting
32 - Dimmer
32 Advanced Operations
32 - Recording to USB
4 Troubleshooting
35 Troubleshooting
5 Appendix
36 General specifications
37 Speakers specifications
38 Trademarks and Licenses
39 Maintenance
39 - Notes on Discs
39 - Handling the Unit
Unique Features
Bluetooth®
Listens to music stored on your bluetooth device.
Portable In
Listens to music from your portable device. (MP3, Notebook, etc)
Playback effects
Listens to music with various sound and playback effects.
USB Direct Recording
Records music to your USB device.
LG Bluetooth Remote
LG Bluetooth Remote is an App designed to let you take control of some of LG's latest Audio devices. Refer to the page 26.
Accessories
Please check and identify the supplied accessories.

FM Antenna (1) AM Antenna (1)


Remote Control (1) Batteries (2)

Non-skid pad (1)-
CM8530 only
Playable file Requirement
MP3/WMA music file requirement
MP3/WMA file compatibility with this unit is limited as follows.
- Sampling frequency: within 32 to 48 kHz (MP3), within 32 to 48 kHz (WMA)
- Bit rate: within 32 to 320 kbps (MP3), 40 to 192 kbps (WMA)
• Maximum files : Under 999
• Maximum folders : Under 99 - File extensions: ".mp3"/".wma"
• CD-ROM file format : ISO 9660/ JOLIET
• We recommend that you use Easy-CD Creator, which creates an ISO 9660 file system. - You have to set the disc format option to [Mastered] in order to make the discs compatible with the LG players when formatting rewritable discs. When setting the option to Live File System, you cannot use it on LG players. (Mastered/Live File System : Disc format system for Windows Vista)
Compatible USB Devices
• MP3 Player : Flash type MP3 player.
• USB Flash Drive : Devices that support USB2.0 or USB1.1.
- The USB function of this unit does not support all USB devices.
USB device requirement
- Devices which require additional program installation when you have connected it to a computer, are not supported.
- Do not extract the USB device while in operation.
- For a large capacity USB, it may take longer than a few minutes to be searched.
• To prevent data loss, back up all data. - If you use a USB extension cable or USB hub, the USB device is not recognized.
- Using NTFS file system is not supported. (Only FAT(16/32) file system is supported.)
- This unit is not supported when the total number of files is 1 000 or more.
- External HDD, Card readers, Locked devices, or hard type USB devices are not supported.
- USB port of the unit cannot be connected to PC. The unit cannot be used as a storage device.
- Some USB may not work with this unit.
1
Getting Started
Front panel

1 Display window
Remote sensor
2 ⏻/I(Power)
3 USB 1/2 Port
You can play or record sound files by connecting the USB device.
R USB REC
Records to USB.
4 FUNCTION
Selects the function and input source. Turn FUNCTION knob clockwise or counterclockwise.
5 LATIN EQ
Chooses locally special equalizer.
SMART DJ
Selects SMART DJ mode. (For more information refer to the page 22)
AUTO DJ
Selects the AUTO DJ mode. (For more information refer to the page 23)
USER EQ
Sets sound equalizer on your own.
EFFECT LEVEL
Selects DJ effect level between low, middle, and high.
6 DJ EFFECT
Press DJ EFFECT
-select DJ effect mode.
-Enters USER EQ setting mode and saves your equalizer setting
Turn DJ EFFECT
- makes a sound on DJ effect mode.
- Selects BASS, MIDDLE, and TREBLE when setting USER EQ.
7 Volume knob
Adjusts speaker volume.
8 ENTER
Selects a folder when searching a file.
FOLDER
Moves to folder and file selection mode.
DELETE
Deletes MP3/WMA files. (USB only) Deletes a song on JUKE BOX list.
9 FILE SEARCH
Selects a folder and a file on CD/USB function.
10 BASS BLAST
Selects the BASS BLAST or BYPASS sound directly.
▲ (Open/Close)
□
- Stops playback or recording.
- Cancels DELETE function.
SPK Lighting / DEMO (CM8530 / CM8430)
- Changes speaker's lighting effect.
- Shows demo
DEMO (CM8330)
- Shows demo
JUKE BOX
- Makes your favourites list.
- Switches on and off JUKE BOX.
11 |<</>>/||/>>|
Press this knob to / (Play/Pause).
- Starts or pauses playback.
- Selects Stereo/Mono.
Turn this knob clockwise or counterclockwise to |<</>>| (Skip/Search).
- Skips Fast backward or Forward.
- Searches for a section within a track/file.
- Adjusts the sound level when setting USER EQ.
12 Disc tray
13 PORT. IN jack
MIC jack
MIC VOL.
Rear panel (CM8530)

1 Cooling fan
2 Speakers connector
3 SPEAKER LIGHTING SYSTEM
4 AUX IN connectors (L/R)
5 ANTENNA (FM, AM)
6 Power cord
Caution
- Connect the power cord to wall outlet directly if possible. Or when you use an extension cable, it is highly recommended to use an extension cable of 110 V / 15 A or 230 V / 15 A, otherwise the unit may not operate properly because of the lack of power supply.
- Do not overload the extension cord with excessive electrical load.
Rear panel (CM8430)

1 Cooling fan
2 Speakers connector
3 SPEAKER LIGHTING SYSTEM
4 AUX IN connectors (L/R)
5 ANTENNA (FM, AM)
6 Power cord
Caution
- Connect the power cord to wall outlet directly if possible. Or when you use an extension cable, it is highly recommended to use an extension cable of 110 V / 15 A or 230 V / 15 A, otherwise the unit may not operate properly because of the lack of power supply.
- Do not overload the extension cord with excessive electrical load.
Rear panel (CM8330)

1 Cooling fan
2 Speakers connector
3 AUX IN connectors (L/R)
4 ANTENNA (FM, AM)
5 Power cord
Caution
- Connect the power cord to wall outlet directly if possible. Or when you use an extension cable, it is highly recommended to use an extension cable of 110 V / 15 A or 230 V / 15 A, otherwise the unit may not operate properly because of the lack of power supply.
- Do not overload the extension cord with excessive electrical load.
Remote control

Battery Installation

Remove the battery cover on the rear of the Remote Control, and insert two (size R03(AAA)) batteries with + and - matched correctly.
1
(Power): Switches the unit ON or OFF.
▲ (Open/Close): Opens and closes the disc tray.
PRESET·FOLDER ∧/V :
- Searches for a folder of MP3/WMA files. When a CD/USB containing MP3/WMA files in several folders is being played, press PRESET-FOLDER ∧/V to select the folder you want to play.
- Chooses a preset number for a radio station.
FUNCTION : Selects the function and input source.
MUTE : Mutes the sound.
VOL +/- : Adjusts speaker volume.
TUNER MEMORY :
- Stores radio stations.
- Deletes all the saved stations.
USB REC : USB direct recording.
SLEEP: Sets the system to turn off automatically at a specified time.
(Dimmer: The display window will be darkened by half.)
2
REPEAT (MENU): Listens to your tracks/files repeatedly or randomly.
TUNING-/+ : Selects the radio stations.
◀◀/▶▶ (Skip/Search):
- Skips Fast backward or Forward.
- Searches for a section within a track/file.
ENTER:
- Stops playback or recording.
- Cancels DELETE function.
▶/II (Play/Pause):
- Starts or pauses playback.
- Selects STEREO/MONO.
SOUND EFFECT: Chooses sound impressions.
AUTO DJ: Selects the AUTO DJ mode. (For more information refer to the page 23)
DELETE :
- Deletes MP3/WMA files.
- Deletes a song on JUKE BOX list.
3 . . . . . . .
0 to 9 numerical buttons: Selects numbered tracks, files, or preset number.
INFO : Sees informations about your music. An MP3 file often come with ID3 tag. The tag gives the Title, Artist, Album or Time information.
REGION EQ : Chooses region equalizer.
4
CLOCK: For setting the clock and checking the time.
TIMER: With the TIMER function you can turn CD, USB play and TUNER reception on or off at a desired time.
SET : Confirms the setting.
SMART DJ : Selects SMART DJ mode. (For more information refer to the page 22)
JUKE BOX :
- Selects JUKE BOX mode.
- Makes your favorites list.
EFFECT LEVEL +/- : Adjusts SMART DJ effect sound level.
How to Affix the Ferrite Core(For EMI only)
Affix the Ferrite Core for power cord (For EMI only, CM8530, CM8430)
You must affix a ferrite core in order to reduce or eliminate electrical interference.
- Pull the stopper [a] of the ferrite core to open.
- Wind the power cord around the ferrite core once.
- Close the ferrite core until it clicks.
![[a]](/content/2026/07/1506994/images/b58bcec3c9e4f1477f1adc1d633300e285b1f81c2c6e2ad04645052981220f4f.jpg)
Affix the Ferrite Core for lighting cable (For EMI only, CM8530, CM8430)
Before connecting speaker's lighting cable, you should affix ferrite core in order to reduce or eliminate electrical interference.
![[a]](/content/2026/07/1506994/images/a9f20a1dc087b92ba3e0d659416202c9974c2dee114304b5d773e903345f4819.jpg)
- Pull the stopper [a] of the ferrite core to open.
- Wind the speaker lighting cables around the ferrite core twice.
- Close the ferrite core until it clicks.
Connecting to speakers
Before connecting (CM8530 only)
You have to position the unit and the speakers before connecting the speakers. Note that the illustrations below are differ from the actual unit. The following illustrations show an example of the positioning which is the left side of the main unit.
Positioning the speakers

- Attach the non-skid pads to the right side of subwoofer.
- Lay the subwoofer down as the illustration above.

- Put the stacking board on the subwoofer.
- Place the front and the surround speakers on the stacking board firmly.
- Attach the non-skid pads between the front and the surround speakers for preventing scratches.
Positioning the main unit and the speakers

- The speaker ducts of subwoofer have to be faced opposite the main unit. Otherwise it may result in a malfunction of the main unit.
- The subwoofer have to be placed at a distance of about 20 cm from the main unit.
Connecting to speakers
Connect the speaker cable plugs to the SPEAKERS connector. Make sure to connect the speaker's plug to the corresponding speaker connector when connecting the plug.

CM8530
| Color Speaker | |
| Grey SURR R | |
| Red FRONT R | |
| Orange SUB WOOFER 1 | |
| Orange SUB WOOFER 2 | |
| Blue SURR L | |
| White FRONT L | |
CM8430
| Color Speaker | |
| Red FRONT | R |
| Orange SUB WOOFER | |
| White FRONT | L |
CM8330
| Color Speaker | |
| Red FRONT R | |
| White FRONT L |
Caution
- Do not try to lift the speaker alone. It needs two persons to lift the speaker. Otherwise it may result in the speaker malfunction and cause personal injury and/or property damage.
- Check the volume level before playing music to prevent infirm, child, and pregnant women from being shocked by the sudden and loud sound from the unit.
- Do not use the unit in a limited space. It may damage a person's hearing. It is recommended to use it in a wide space.
- Be careful to make sure children not to put their hands or any objects into the *speaker duct.
*Speaker duct: A hole for plentiful bass sound on speaker cabinet (enclosure).
- The speakers contain magnet parts, so color irregularity may occur on the TV screen or PC monitor screen. Please use the speakers far away from either TV screen or PC monitor.
- Make sure to install the speaker with other people in order to prevent it from falling and causing injuries to the installer.
Attaching the speaker light cables to the unit (For CM8530, CM8430)
Connect the speaker's lighting cables on the speakers to the SPEAKER LIGHTING SYSTEM jack on the unit.

Caution
• Make sure to connect the cables to connectors tightly on the unit.
• Make sure that the jacks and the speakers are matched correctly.
Optional Equipment Connection
AUX IN Connection
Connect an output of auxiliary device(Camcoder, TV, Player, etc) to the AUX IN (L/R) connector.
If your device has only one output for audio(mono), connect it to the left (white) audio jack on the unit.

PORT. IN Connection
Connect an output (earphone or line out) of portable device (MP3 or PMP etc) to the PORT. IN connector.

Listening to music from your portable player or external device
The unit can be used to play the music from many types of portable player or external device.
- Connect the portable player to the PORT. IN connector of the unit.
Or
Connect the external device to the AUX IN connector of the unit.
- Turn the power on by pressing ⏻/I.
- Select the PORTABLE or AUX function by using FUNCTION.
- Turn on the portable player or external device and start it playing.
USB Connection
Connect a USB device (or MP3 player, etc.) to the USB ports on the unit.

Note
Removing the USB device from the unit :
-
Choose a different function/mode or press ■ ENTER on the remote control or □ on the unit twice in a row.
-
Remove the USB device from the unit.
Antenna Connection
Connect the supplied FM/AM antenna for listening to the radio.
Connect the AM loop antenna to the AM antenna connector.
Connect the FM wire antenna to the FM antenna connector.
![graph TD A["FM antenna"] --> B["AM antenna"] B --> C["ANTENNA"] C --> D["FM"] C --> E["GND AM"]](/content/2026/07/1506994/images/77d7cb0b02b30a055b4fc2e29de53c4f5c9bfb153d201706b10babfadc9e51cc.jpg)
Note
- To prevent noise pickup, keep the AM Loop antenna away from the unit and other components.
- Be sure to fully extend the FM wire antenna.
Basic Operations
CD/USB Operations
- Insert the disc or connect the USB device to the USB port.
- Select a source by using FUNCTION. The selected source appears on the display window.
| To | Do this | |
| On the remote control | On the unit | |
| Stop Press | ■ ENTER. Press □. | |
| Playback Press | ▶ /II. Press | >/II. |
| Pause | Press ▶ /II during playback. | Press >/II during playback. |
| Searching for a section within a track/file | Press and hold ◀◀◀/▶▶ until the time you want to listen to is displayed. | Turn |<< />>| knob clockwise or counterclockwise and hold it until the time you want to listen to is displayed. |
| Selecting a track/file directly | Press 0 to 9 numerical buttons on the remote control to go to the desired file or track directly. | - |
| Skipping to the next/ previous track/file | Press ◀◀◀/▶▶ during playback. | Turn |<< />>| knob clockwise or counterclockwise during playback. |
| Playing repeatedly or randomly | Press REPEAT(MENU) repeatedly. Refer to the note for details about the display change. | - |
Note
• The display changes in the following order.
| USB MP3/WMA CD Audio CD | ||
| REPEAT TRK | REPEAT TRK | REPEAT TRK |
| REPEAT *DIR | REPEAT DIR | - |
| REPEAT ALL | REPEAT ALL | REPEAT ALL |
| RANDOM | RANDOM | RANDOM |
| OFF | OFF | OFF |
*DIR : Directory
- When you play JUKE BOX list, only REPEAT TRK and REPEAT ALL are available.
- Even after restarting the unit or switching one function to another, you can listen to music from the point where it's last been played.
- The next file name is displayed every 30 seconds. (Except RANDOM play, AUTO DJ RANDOM play, the last file of playlist, etc.)
- If you leave the disc tray open for 5 minutes, it will close automatically.
Selecting a folder and an MP3/WMA file
On the unit
- Press FOLDER and rotate FILE SEARCH until a desired folder appears.
- Press ENTER and rotate FILE SEARCH until a desired file appears. Press >>/II to play it.
On the remote control
- Press PRESET·FOLDER\V repeatedly until a desired folder appears.
- Press ▶/Ⅱ to play it. The first file of folder will play.
Note
- Folders/Files on the CD or USB are recognized as below.
![graph TD A["*ROOT"] --> B["Folder 1"] A --> C["Folder 2"] A --> D["Folder 3"] A --> E["Folder 4"] A --> F["Folder 5"] A --> G["Folder 6"] B --> H["File5"] B --> I["File6"] B --> J["File7"] C --> K["File8"] C --> L["File9"] C --> M["File10"] D --> N["File11"] D --> O["File12"] D --> P["File13"] D -->…](/content/2026/07/1506994/images/0809f60187a6955ce30889a8a87c5f4a5b703b4795a9ecc926fe3fa76c61971a.jpg)
- If there is no file in a folder, the folder will not appear.
- Folders will be presented as the following order:
ROOT → FOLDER 1 → FOLDER 3 → FOLDER 7 → FOLDER 8 → FOLDER 5 → FOLDER 6
- File will be played from ♪ file No.1 to ♪ file No.14 one by one.
- Files and folders will be presented in order recorded and may be presented differently according to the record circumstances.
- *ROOT: It is "ROOT" which is the first screen you can see when a computer recognizes the storage device.
Deleting an MP3/WMA file
You can delete file, folder or format by pressing DELETE. This function is supported only in stop status. (USB only)
-
- Select the file you want to delete and press DELETE.
-
Select the folder you want to delete by pressing FOLDER and rotating FILE SEARCH and press DELETE.
- Press and hold DELETE to format the USB device.
Or
Press DELETE repeatedly during selecting the MP3/WMA file.
The display changes in the following order.
- DEL FILE? : Deletes file
- DEL FOLDER : Deletes folder
-
FORMAT?: Formats USB
-
To delete file/folder or format, press ▶/Ⅱ on the remote control or press >/Ⅱ on the unit.
- If you want to exit the current mode, press
■ ENTER on the remote control or press □ on the unit.
Caution
- Do not extract the USB device during operation. (play, delete, etc.)
- Regular back up is recommended to prevent data loss.
- The delete function may not be supported according to the USB status. (lock, etc.)
Playback effect
The unit supports various sound and playback effects: SMART DJ, AUTO DJ, DJ EFFECT, and JUKE BOX playback.
SMART DJ playback
SMART DJ plays music with various sound and playback effects: auto effect, cross fade, back spin, loop, beat box, and voice sampling.
It plays repeatedly all the music and gives various effects randomly.
You can enjoy it with 3 types of genre: ELECTRO, HOUSE, and REGUETON. Press SMART DJ repeatedly. The display window changes each time you press SMART DJ as follows: SMART DJ OFF -> SMART DJ ELECTRO -> SMART DJ HOUSE -> SMART DJ REGUETON.
To cancel it, press SMART DJ repeatedly until "SMART DJ OFF" appears on the display window. You can listen to music as usual.
Adjusting the effect level
You can adjust SMART DJ effect sound level between LOW, MIDDLE, and HIGH. As the effect level moves from LOW to HIGH, SMART DJ effect appears more frequently and makes the sound feel more powerful.
On SMART DJ mode, press EFFECT LEVEL repeatedly on the unit or EFFECT LEVEL +/- on the remote control. The display window changes as follows: MIDDLE -> HIGH -> LOW.
Note
• Find sound and playback effects below.
| Effect Description | |
| Auto effect A | Auto effect blendsvarious sound effectsto fit the moodautomatically. It includesflanger, phaser, delay,and chorus. |
| Cross fade lt | playbacks toseamlessly fade fromone song into thebeginning of another. |
| Back spin lt | playbacks a section ofmusic fast in reverse. |
| Loop lt repeats | a section ofmusic. |
| Beat box lt inserts a beat boxduring playback. | |
| Voicesampling | It inserts a sound during playback. |
- SMART DJ is supported only on CD and USB function.
- You can identify the effect by hearing the sound, not by display window.
- It is recommended to play only the certain genres (ELECTRO, HOUSE, EGUETON) on SMART DJ mode. SMART DJ is optimized to enjoy that music
- If the function changes to the others or turn off and on the unit on SMART DJ mode, SMART DJ will be turned off.
- If you record your music you are listening to on SMART DJ mode, SMART DJ will be turned off and the music will be recorded without any sound effect.
- If SMART DJ is turned off, you should turn it on again to enjoy the effect.
- It is impossible to operate SMART DJ and AUTO DJ at the same time. If you select one, another will be turned off automatically.
DJ effect
It allows you to enjoy DJ effect such as scratch sound and several kinds of voices yourself.
- Press DJ EFFECT on the unit. The display window changes each time you press DJ EFFECT as follows: OFF -> SCRATCH -> VOICE 1 -> VOICE 2 -> VOICE 3.
| Display Window | Description |
| SCRATCH | You can hear two kinds of scratch sound depending on the direction in which you turn DJ EFFECT. |
| VOICE 1/2/3 | You can hear only one kind of the sound regardless of the direction in which you turn DJ EFFECT. |
- Turn DJ EFFECT clockwise or counterclockwise during playback.
To cancel it, press DJ EFFECT until "DJ EFFECT OFF" appears on the display window.
AUTO DJ playback
Auto DJ blends the end of one song into the beginning of another for seamless playback. It equalizes volume across tracks/files for uninterrupted playback.
Press AUTO DJ on the remote control or unit repeatedly, the display changes as followings. RANDOM (AUTO DJ RANDOM) -> REPEAT ALL (AUTO DJ SEQUENTIAL) -> (AUTO DJ OFF)
| Mode | Display Window | Description |
| OFF | - (AUTO DJ OFF) | - |
| RANDOM | RANDOM (AUTO DJ RANDOM) | The music is played randomly on this mode. |
| REPEAT | REPEAT ALL (AUTO DJ SEQUENTIAL) | The music is played repeatedly on this mode. |
Note
- It is not supported on the AUTO DJ mode to search for a section within a track/file or to play repeatedly or randomly.
- During AUTO DJ mode, it is not available to press PRESET·FOLDER A/V on the remote control or FOLDER on the unit.
- If you move to other functions or stop the music using □ on the unit (or ■ ENTER on the remote control) on AUTO DJ mode, AUTO DJ function will be disable.
- AUTO DJ function is not supported in the music file whose length is less than 60 seconds.
- During recording, AUTO DJ function is not available.
- Only AUTO DJ SEQUENTIAL is selected when played JUKE BOX list.
JUKE BOX Playback (Program play)
JUKE BOX function enables you to store your favourite tracks/files from any disc or USB device. Up to 100 tracks/files can be stored for each device.
It is supported only on stop status.
- Press and hold JUKE BOX to enter the edit mode.
- Select a track/file by pressing ◄◀◀/▶▶▶ on the remote control or by turning FILE SEARCH on the unit.
- Press JUKE BOX to save the track/file.
- Repeat steps 2 to 3 to store the other tracks/files.
- Press JUKE BOX once again,
To play the JUKE BOX list, press ▶/Ⅱ after you make the list.
Enjoying JUKE BOX
Press JUKE BOX twice on stop status. "JUKE BOX ON" appears on the display window. To play JUKE BOX list, press ▶/Ⅱ on the remote control or >/Ⅱ on the unit.
To cancel it, press JUKE BOX twice. "JUKE BOX OFF" appears on the display window.
Deleting JUKE BOX list
Deleting function is worked only on the edit mode. Refer to "Making JUKE BOX list" step 1.
To delete each song on JUKE BOX list,
- Select a song by pressing JUKE BOX repeatedly.
- Press DELETE while a song is selected.
To delete all the songs on JUKE BOX list, press ■ ENTER on the remote control or □ on the unit.
Note
- To check the status of JUKE BOX, press JUKE BOX once. You can also check it by the word "PROG." on the display window.
- If there is no JUKE BOX list, "JUKE BOX NONE" appears on the display window when you press JUKE BOX.
• JUKE BOX is switched off in the case below. - Changing the function to the others.
- Turning off and on the unit.
- Operating the numeric buttons on the remote control.
- Playing a file by using PRESET·FOLDER A/V on the remote control or FOLDER and FILESEARCH on the unit.
• JUKE BOX list is cleared in the case below. - Removing the disc or the USB device.
- Deleting or recording music files in the USB device.
Using a Bluetooth wireless technology
About Bluetooth
Bluetooth® is wireless communication technology for short range connection.
The available range is within 10 meters.
(The sound may be interrupted when the connection interfered by the other electronic wave or you connect the bluetooth in the other rooms.) Connecting individual devices under Bluetooth® wireless technology does not incur any charges. A mobile phone with Bluetooth® wireless technology can be operated via the Cascade if the connection was made via Bluetooth® wireless technology. Available Devices: Mobile phone, MP3, Laptop, PDA.
Bluetooth Profiles
In order to use Bluetooth wireless technology, devices must be able to interpret certain profiles. This unit is compatible with following profile. A2DP (Advanced Audio Distribution Profile)
Listening to music stored on the Bluetooth devices
Before you start the pairing procedure, make sure the Bluetooth feature is turned on in to your Bluetooth device. Refer to your Bluetooth device's user guide. Once a pairing operation is performed, it does not need to be performed again.
-
Select the Bluetooth function by using FUNCTION. "BT READY" appears on the display window.
-
Operate the Bluetooth device and perform the pairing operation. When searching for this unit with the Bluetooth device, a list of the devices found may appear in the Bluetooth device display depending on the type of Bluetooth device.
Your unit appears as "LG MINI(xx:xx)".
Note
XX:XX means the last four digits of BT address. For example, if your unit has a BT address such as 9C:02:98:4A:F7:08, you will see "LG MINI(F7:08)" on your Bluetooth device.
-
Enter the PIN code. PIN code : 0000
-
When this unit is successfully connected with your Bluetooth device, "PAIRED" will appear on the display window and bluetooth indicator will be lit up.
Note
Depending on the Bluetooth device type, some device have a different pairing way.
- Listen to music. To play a music stored on your Bluetooth device, refer to your Bluetooth device's user guide.
Note
- Sound from the main set can be distorted if you raise the volume of Bluetooth device up to two-thirds or more.
- When you use the bluetooth function, adjust the volume of a bluetooth device to a proper level to listen to.
Note
- The sound may be interrupted when the connection interfered by the other electronic wave.
- You cannot control the Bluetooth device with this unit.
- Pairing is limited one Bluetooth device per one unit and multi-pairing is not supported.
- Although the distance between your Bluetooth and the set is less than 10m, there are obstacles between both, your Bluetooth device cannot be connected.
- Depending on the type of the device, you may not be able to use the Bluetooth function.
- When not connected the Bluetooth, "BLUETOOTH" and "BT READY" appears on the control panel.
- The electrical malfunction due to devices using same frequency such as Medical equipment, Microwaves or wireless LAN devices, the connection will be disconnected.
- When someone stands and interrupts communication between Bluetooth device and the player, the connection will be disconnected.
- If the gotten away of the distance between Bluetooth and the unit, the sound quality is lower and lower. The connection will disconnect when the space between the Bluetooth and the unit gets out of the operating range of Bluetooth.
- The device with Bluetooth wireless technology is disconnected, if you turn off the main unit or put the device away from the main unit more than 10 m.
- Bluetooth connection will be disconnected. When the function changes to the others.
- If the Bluetooth device is disconnected, you should connect the Bluetooth device to your unit.
Using Bluetooth App
Note
Only Android OS is available to use "LG remote" app with this unit.
About "LG Bluetooth Remote" App
"LG Bluetooth Remote" app brings a suite of new features to this unit.
To enjoy more features, you are recommended to download and install free "LG Bluetooth Remote" app.
Install "LG Bluetooth Remote" App onto Your Bluetooth Device
- Install "LG Bluetooth Remote" app through QR code. Use the scanning software to scan the QR code.

-
Tap an icon for installation.
-
Tap an icon for downloading.
Note
• Make sure that your Bluetooth device is connected to the Internet.
- Make sure that your Bluetooth device has a scanning software application. If you don't have one, download one from "Google Android Market (Google Play Store)".
Install "LG Bluetooth Remote" App through "Google Android Market (Google Play Store)"
- Tap the "Google Android Market (Google Play Store)" icon.
- In the search bar, type in the "LG Bluetooth Remote" and search it.
- In the search result list, find and tap "LG Bluetooth Remote" to start downloading Bluetooth app.
- Tap an icon for installation.
- Tap an icon for downloading.
Note
• Make sure that your Bluetooth device is connected to the Internet.
- Make sure that your Bluetooth device is equipped with "Google Android Market (Google Play Store)".
Activate Bluetooth with "LG Bluetooth Remote" App
"LG Bluetooth Remote" app helps to connect your bluetooth device to this unit.
- Tap "LG Bluetooth Remote" app icon on the home screen to open "LG Bluetooth Remote" app, and go to the main menu.
- Tap [Setting] and select the unit you want.
- If you want to get more information to operate, tap [Setting] and [Help].
Note
- This unit does not support the multi-pairing. If this unit is already connected with other Bluetooth device, disconnect that device and then try again.
- If you use "LG Bluetooth Remote" app for operation, there would be some differences between "LG Bluetooth Remote" app and the supplied remote control. Use the supplied remote control as necessary.
- Depending on the Bluetooth device, "LG Bluetooth Remote" app may not work.
- The connection you've made may be disconnected if you select other application or change the setting of the connected device via "LG Bluetooth Remote" app. In such a case, please check the connection status.
Radio Operations
Listening to the radio
- Select tuner(FM/AM) function by using FUNCTION.
The last received station is tuned in. - Auto tuning :
Press and hold TUNING-/+ on the remote control or turn |<</>>| knob on the unit clockwise or counterclockwise and hold it for about two seconds until the frequency indication starts to change, then release. Scanning stops when the unit tunes in a station.
Manual tuning :
Press TUNING-/+ on the remote control or turn I<</>>| knob on the unit clockwise or counterclockwise repeatedly. - Adjust the volume by rotating volume knob on the unit or by pressing VOL +/- on the remote control repeatedly.
Improving poor FM reception
Press >/|| the unit or ▶/|| on the remote control. This will change the tuner from stereo to mono and usually improve the reception.
Presetting the Radio Stations
You can preset 50 stations for FM and AM.
Before tuning, make sure to turn down the volume.
- Select tuner(FM/AM) function by using FUNCTION.
- Select a radio station you want to preset by using TUNING-/+ on the remot control.
- Press TUNER MEMORY. A preset number will blink in the display window.
- Press PRESET·FOLDER\V to select the preset number you want.
- Press TUNER MEMORY. The station is stored.
- Repeat steps 2 to 5 to store other stations.
- To listen to a preset station, press PRESET·FOLDER ∧/∨ or 0 to 9 numerical buttons.
Deleting all the saved stations
- Press and hold TUNER MEMORY for two seconds.
"ERASE ALL" will flash up on the unit display. - Press TUNER MEMORY to erase all the saved radio stations.
Other Operations
Turn off the sound temporarily
Press MUTE on the remote control to mute your unit.
You can mute your unit, for example, to answer the telephone, the mute icon "X" is blinked in the display window.
To cancel it, press MUTE again on the remote control or change the volume level.
Displaying file information (ID3 TAG)
While playing an MP3 file containing file information, you can display the information by pressing INFO.
DEMO
In the power off state, it demonstrates the function on display window with a demo sound and a display by pressing DEMO.
To cancel the DEMO, press it again.
Note
- While DEMO, this unit will keep DEMO status even if you unplug the power cord connection.
- You can enjoy other functions during the DEMO. Then the DEMO will pause to temporary.
- Without input key in 10 sec, the DEMO will play back automatically.
Using Microphone
It is available on the function as follows: CD, USB, AUX-MIC and BLUETOOTH.
- Connect your microphone to the MIC jack.
- Play the music you want.
- Sing along with the accompaniment. Adjust the microphone volume by rotating MIC VOL. clockwise or unclockwise on the unit.
Note
- When not using the microphone, set the MIC VOL. to minimum or turn off the MIC and remove the microphone from the MIC jack.
- If the microphone is set too near the speaker, a howling sound may be produced. In this case, move the microphone away from the speaker or decrease the sound level by using the MIC VOL..
- If sound through the microphone is extremely loud, it may be distorted. In this case, rotate MIC VOL. to minimum.
- AUX-MIC function enables only your voice to output.
Switching on and off the speaker light(For CM8530, CM8430)
You can select various types of the speaker light by pressing SPK Lighting / DEMO (CM8530 / CM8430) on the unit.
To turn off the light, press SPK Lighting/DEMO (CM8530 / CM8430) repeatedly until the light will be turned off.
Sound adjustment
Setting the surround mode
This system has a number of pre-set surround sound fields. You can select a sound mode you want by using SOUND EFFECT on the remote control.
The displayed items for the Equalizer may be different depending on sound sources and effects.
| On Display Description | |
| NATURAL | You can enjoy comfortable and natural sound. |
| Local Specialization equalizer | Regionally optimized sound effect. (FORRO/FUNK/ SERTANEJO/DANGDUT/ARABIC/ PERSIAN/INDIA/REGUETON/ MERENGUE/SALSA/SAMBA/ CUMBIA/AFRO HIP HOP) |
| AUTO EQ | Realizes the sound equalizer that is the most similar to the genre of which is included in the MP3 ID3 tag of song files. |
| POP CLASSIC JAZZ ROCK | This program lends an enthusiastic atmosphere to the sound, giving you the feeling you are at an actual rock pop, jazz or classic concert. |
| MP3 - OPT | This function is optimized for compressible MP3 file. It improves the treble sound. |
| BASS BLAST | Reinforces the treble, bass and surround sound effect. |
| LOUDNESS | Improves the bass and treble sound. |
| BYPASS | You can enjoy the sound without equalizer effect. |
Note
- On some speakers, sound may not be heard or heard in low sound depending on the sound mode.
- Maybe you need to reset the surround mode, after switching the input, sometimes even after the sound track/file changed.
- By pressing BASS BLAST on the unit you can directly select the BYPASS or BASS BLAST sound.
- By pressing LATIN EQ on the unit, you can directly select various latin equalizers.
Setting the USER EQ
You can listen to music with equalizer by adjusting the sound level yourself.
- Press USER EQ on the unit. "USER EQ" is displayed.
- Press DJ EFFECT on the unit while "USER EQ" is displayed.
- Select BASS, MIDDLE, or TREBLE by using DJ EFFECT on the unit.
- Adjust the sound level by turning |<</>>| knob.
- To finish the setting, press DJ EFFECT.
Setting the Clock
Setting the Clock Manually
- Turn the unit on.
- Press CLOCK on the remote control.
- Select time format by using ◀◀◀/▶▶▶.
-
12-hour format (AM and PM display) or 24-hour format (24 hour display)
-
Press SET to confirm your selection.
-
Select the hours by using ◀◀◀/▶▶▶.
-
Press SET.
-
Select the minutes by using ◀◀◀/▶▶▶.
-
Press SET.
Setting the Clock through "LG Bluetooth Remote" App
Install "LG Bluetooth Remote" app on your Android device. (see page 26 - 27)
Your unit's clock will be automatically synchronized with your device by activating Bluetooth connection through "LG Bluetooth Remote" app.
Using your player as an alarm clock
- Turn the unit on.
- Press TIMER on the remote control. Each of functions flashes.
- Press SET when the function you want to be woken by is showing.
-
Select a radio station if you have preset them.
-
"ON TIME" will be displayed. Select the hours and the minutes by using ◀◀◀/▶▶▶ and press SET to save.
-
The "OFF TIME" will be displayed. Select the hours and the minutes by using ◀◀◀/▶▶▶ and press SET to save.
-
Adjust the volume level by using ◀◀/▶▶ and press SET to save. The clock icon "L" shows that the alarm is set.
-
Press TIMER button 2 times. You can check the setting status.
Note
- If you set the clock time, you can check the time by pressing CLOCK even when the player is turned off.
- If you set the clock time and alarm, you can check the alarm icon "L" by pressing CLOCK even when the player is turned off.
- If you set the clock time and alarm, you can check the alarm icon "L" and setting informaiton by pressing TIMER even when the unit is turned off.
- To reset the time, press and hold CLOCK or TIMER. And then follow the setting step from 3.
Sleep Timer Setting
Press SLEEP repeatedly to select delay time between 10 and 180 minutes. After the delay time, the unit will be turned off.
To cancel the sleep function, press SLEEP repeatedly until "SLEEP 10" appears, and then press SLEEP once again while "SLEEP 10" is displayed.
Note
Press SLEEP. The remaining time appears in the display window.
Dimmer
Press SLEEP once. The display window will be darkened by half. To cancel it, press SLEEP repeatedly until dim off.
Advanced Operations
Recording to USB
You can record a various sound source to USB. (CD, USB, AUX, AUX-MIC, PORTABLE, FM, AM)
- Connect the USB device to the unit.
- Select a function in which you want to record by using FUNCTION.
One track/file recording - You can record to USB after playing a track/file you want.
All tracks/files recording - You can record to USB after stop.
JUKE BOX list recording - After showing the JUKE BOX list, you can record it to USB. (Refer to the page 24)
- Press R USB REC on the unit or USB REC on the remote control.
- If you connect both USB1 and USB2, press >II to record to USB1 or press □ to record to USB2.
- To stop recording, press □ on the unit or ■ ENTER on the remote control.
Pausing recording
During recording, press REC on the unit or USB REC on the remote control to pause recording. Press it again to restart recording. (TUNER/AUX/AUX-MIC/PORTABLE only)
To select recording bit rate and speed
- Press R USB REC on the unit or USB REC on the remote control for longer than 3 seconds.
- Press ◀◀/▶▶ on the remote control or ◀<</>>> on the unit to select a bit rate.
- Press R USB REC on the unit or USB REC on the remote control again to select the recording speed.
- Press ◄◀◀/▶▶ on the remote control or ◀◀◀/▶▶ on the unit to select a desired recording speed. (AUDIO CD only)
X1 SPEED
- You can listen to music while recording it.
X2 SPEED
- You can just record the music file.
- Press R USB REC on the unit or USB REC on the remote control to finish the setting.
Dubbing USB to USB
You can do dubbing a various sound source in USB1 to USB2 on USB function.
- Connect a USB device including desired sound files to USB1.
- Connect another USB device to USB2.
- Press R USB REC on the unit or USB REC on the remote control.
- To stop recording, press □ on the unit or ■ ENTER on the remote control.
The making of unauthorized copies of copy-protected material, including computer programs, files, broadcasts and sound recordings, may be an infringement of copyrights and constitute a criminal offense.
This equipment should not be used for such purposes.
Be responsible
Respect copyrights
Note
- It is not supported to record music stored on bluetooth device.
- You can check the recording percentage rate for the USB record on the display window during the recording. (MP3/WMA, CD Only)
- During recording MP3/WMA, there is no sound.
- For stable recording, the output sound level goes down on its own when you record music from CD to USB.
- You can only change volume level between MIN and 10 during recording. It will be kept even after recording.
- When you stop recording during playback, the file that has been recorded at that time will be stored. (Except MP3/WMA files)
- Do not remove the USB device or turn off the unit during USB recording. If does not, an incomplete file may be made and not deleted on PC.
- If USB recording does not work, the message like "NO USB", "ERROR", "USB FULL" or "NO REC" is displayed on the display window.
- Multi card reader device or External HDD can not be used for USB recording.
- A file is recorded by about 512 Mbyte when you record for a long term.
• You may not store more than 999 files. - It'll be stored as follows.
| AUDIO CD MP3/WMA | The other source* | |
*: TUNER, AUX and the like.
Troubleshooting
| Problem Cause & Solution | |
| No Power. | The power cord is not plugged in. Plug in the power cord.Check whether electricity failed.Check the condition by operating other electronic devices. |
| No sound. | Check whether you select right function.Press FUNCTION and check the selected function.If not, connect speaker cables correctly.Speaker cables connected correctly. |
| The unit does not start playback. | An unplayable disc is inserted. Check the playable disc.No disc is inserted. Insert a disc.The disc is dirty. Clean the disc. (Refer to the page 39)The disc is inserted upside down.Place the disc with the label or printed side facing upwards. |
| Radio stations cannot be tuned in properly. | The antenna is positioned or connected poorly.Connect the antenna securely.The signal strength of the radio station is too weak.Tune to the station manually.No stations have been preset or preset stations have been cleared (when tuning by scanning preset channels).Preset some radio stations, see page 28 for details. |
| The remote control does not work properly. | The remote control is too far from the unit.Operate the remote control within about 23 ft (7 m).There is an obstacle in the path of the remote control and the unit.Remove the obstacle.The batteries in the remote control are exhausted.Replace the batteries with new ones. |
| No speaker light (CM8530, 8430 only) | Check whether the speaker light cables are connected to the unit correctly.Connect the speaker light cables to the unit correctly.Check the speaker light effects by pressing SPK Lighting/DEMO. |
General specifications
| General | |
| Power requirements Refer | to the main label |
| Power consumption Refer | to the main label |
| Dimensions (W x H x D) 285 mm x 398 mm x 357 mm | |
| Net Weight (Approx.) 8.2 kg | |
| Operating temperature 5 °C to 35 °C (41 °F to 95 °F) | |
| Operating humidity 5 % to 90 % | |
| Bus Power Supply USB DC | 5 V === 500 mA |
| Inputs | |
| Auxiliary Input 2.0 Vrms (1 kHz, 0 dB), 600 Ω, RCA jack (L, R) x 1 | |
| Microphone Input 6.3 mm jack | |
| Portable Input 1.2 Vrms (3.5 mm stereo jack) |
| Tuner | |
| FM Tuning Range 87.5 to 1 | 08.0 MHz or 87.50 to 108.00 MHz |
| AM Tuning Range 522 to 1 | 620 kHz, 520 to 1 710 kHz or 522 to 1 710 kHz |
| CD | |
| Frequency Response 40 to | 20 000 Hz |
| Signal-to-noise ratio 75 dB | |
| Dynamic range 80 dB | |
| Amplifier | ||||
| Model | CM8530 | CM8430 | CM8330 | |
| Stereo mode | 360 W x 2 (THD 10 %) | 400 W x 2 (THD 10 %) | 400 W x 2 (THD 10 %) | |
| Surround mode | Front | 360 W x 2 (THD 10 %) | 400 W x 2 (THD 10 %) | 400 W x 2 (THD 10 %) |
| Surround | 180 W x 2 (THD 10 %) | |||
| Subwoofer | 360 W x 2 (THD 10 %) | 400 W (THD 10 %) | ||
Speakers specifications
| Front speaker (CM8530, CM8430, CM8330) | ||
| Model CM8530 CM8430, CM8330 | ||
| Type 2 Way 2 speaker | ||
| Impedance 6 Ω | ||
| Rated Input Power 360 W 400 W | ||
| Max. Input power 720 W 800 W | ||
| Net Dimensions (W x H x D) 264 mm x 448 mm x 331 mm | ||
| Net Weight 8.9 kg | ||
| Surround speaker (CM8530) | |
| Type 2 Way 2 speaker | |
| Impedance 12 Ω | |
| Rated Input Power 180 W | |
| Max. Input power 360 W | |
| Net Dimensions (W x H x D) 190 mm x 339 mm x 240 mm | |
| Net Weight 3.8 kg | |
| Subwoofer (CM8530, CM8430) | ||
| Model | CM8530 | CM8430 |
| Type | 1 way 1 speaker | |
| Impedance | 6 Ω | |
| Rated Input Power | 360 W | 400 W |
| Max. Input power | 720 W | 800 W |
| Net Dimensions (W x H x D) | 332 mm x 445 mm x 354 mm | |
| Net Weight | 10.5 kg | |
- Design and specifications are subject to change without notice.
Trademarks and Licenses

Bluetooth®
Bluetooth® wireless technology is a system which allows radio contact between electronic devices within a max. range of 10 meters.
Connecting individual devices under Bluetooth® wireless technology does not incur any charges. A mobile phone with Bluetooth® wireless technology can be operated via the Cascade if the connection was made via Bluetooth® wireless technology.
The Bluetooth ® word mark and logos are owned by the Bluetooth ® SIG, Inc. and any use of such marks by LG Electronics is under license.
Other trademarks and trade names are those of their respective owners.

Maintenance
Notes on Discs
Handling Discs
Never stick paper or tape on the disc.
Storing Discs
After playing, store the disc in its case. Do not expose the disc to direct sunlight or sources of heat and never leave it in a parked car exposed to direct sunlight.
Cleaning Discs
Fingerprints and dust on the disc can cause poor picture quality and sound distortion. Before playing, clean the disc with a clean cloth. Wipe the disc from the center to out.
Do not use strong solvents such as alcohol, benzine, thinner, commercially available cleaners, or anti-static spray intended for old vinyl records.
Handling the Unit
When shipping the unit
Please save the original shipping carton and packing materials. If you need to ship the unit, for maximum protection, re-pack the unit as it was originally packed at the factory.
Keeping the exterior surfaces clean
Do not use volatile liquids such as insecticide spray near the unit. Wiping with strong pressure may damage the surface. Do not leave rubber or plastic products in contact with the unit for a long period of time.
Cleaning the unit
To clean the player, use a soft, dry cloth. If the surfaces are extremely dirty, use a soft cloth lightly moistened with a mild detergent solution. Do not use strong solvents such as alcohol, benzine, or thinner, as these might damage the surface of the unit.
Maintaining the Unit
The unit is a high-tech, precision device. If the optical pick-up lens and disc drive parts are dirty or worn, the picture quality could be diminished. For details, please contact your nearest authorized service center.

LG
Life's Good



- SAFETY INFORMATION
- CAUTION CONCERNING THE POWER CORD
- TABLE OF CONTENTS
- 1 GETTING STARTED
- 2 CONNECTING
- 3 OPERATING
- 4 TROUBLESHOOTING
- 5 APPENDIX
- UNIQUE FEATURES
- BLUETOOTH®
- PORTABLE IN
- PLAYBACK EFFECTS
- USB DIRECT RECORDING
- LG BLUETOOTH REMOTE
- ACCESSORIES
- PLAYABLE FILE REQUIREMENT
- MP3/WMA MUSIC FILE REQUIREMENT
- COMPATIBLE USB DEVICES
- USB DEVICE REQUIREMENT
- CAUTION
- REMOTE CONTROL
- 1
- PRESET·FOLDER ∧/V
- TUNER MEMORY
- 2
- ◀◀/▶▶ (SKIP/SEARCH)
- ENTER
- DELETE
- 4
- JUKE BOX
- HOW TO AFFIX THE FERRITE CORE(FOR EMI ONLY)
- AFFIX THE FERRITE CORE FOR POWER CORD (FOR EMI ONLY, CM8530, CM8430)
- AFFIX THE FERRITE CORE FOR LIGHTING CABLE (FOR EMI ONLY, CM8530, CM8430)
- CONNECTING TO SPEAKERS
- BEFORE CONNECTING (CM8530 ONLY)
- ATTACHING THE SPEAKER LIGHT CABLES TO THE UNIT (FOR CM8530, CM8430)
- OPTIONAL EQUIPMENT CONNECTION
- AUX IN CONNECTION
- PORT. IN CONNECTION
- LISTENING TO MUSIC FROM YOUR PORTABLE PLAYER OR EXTERNAL DEVICE
- USB CONNECTION
- NOTE
- ANTENNA CONNECTION
- BASIC OPERATIONS
- CD/USB OPERATIONS
- SELECTING A FOLDER AND AN MP3/WMA FILE
- ON THE UNIT
- ON THE REMOTE CONTROL
- DELETING AN MP3/WMA FILE
- PLAYBACK EFFECT
- SMART DJ PLAYBACK
- ADJUSTING THE EFFECT LEVEL
- DJ EFFECT
- AUTO DJ PLAYBACK
- JUKE BOX PLAYBACK (PROGRAM PLAY)
- ENJOYING JUKE BOX
- DELETING JUKE BOX LIST
- USING A BLUETOOTH WIRELESS TECHNOLOGY
- ABOUT BLUETOOTH
- BLUETOOTH PROFILES
- LISTENING TO MUSIC STORED ON THE BLUETOOTH DEVICES
- USING BLUETOOTH APP
- ABOUT "LG BLUETOOTH REMOTE" APP
- INSTALL "LG BLUETOOTH REMOTE" APP ONTO YOUR BLUETOOTH DEVICE
- INSTALL "LG BLUETOOTH REMOTE" APP THROUGH "GOOGLE ANDROID MARKET (GOOGLE PLAY STORE)
- ACTIVATE BLUETOOTH WITH "LG BLUETOOTH REMOTE" APP
- RADIO OPERATIONS
- LISTENING TO THE RADIO
- IMPROVING POOR FM RECEPTION
- PRESETTING THE RADIO STATIONS
- DELETING ALL THE SAVED STATIONS
- OTHER OPERATIONS
- TURN OFF THE SOUND TEMPORARILY
- DISPLAYING FILE INFORMATION (ID3 TAG)
- DEMO
- USING MICROPHONE
- SWITCHING ON AND OFF THE SPEAKER LIGHT(FOR CM8530, CM8430)
- SOUND ADJUSTMENT
- SETTING THE SURROUND MODE
- SETTING THE USER EQ
- SETTING THE CLOCK
- SETTING THE CLOCK MANUALLY
- SETTING THE CLOCK THROUGH "LG BLUETOOTH REMOTE" APP
- USING YOUR PLAYER AS AN ALARM CLOCK
- SLEEP TIMER SETTING
- DIMMER
- ADVANCED OPERATIONS
- RECORDING TO USB
- PAUSING RECORDING
- TO SELECT RECORDING BIT RATE AND SPEED
- X1 SPEED
- X2 SPEED
- DUBBING USB TO USB
- TRADEMARKS AND LICENSES
- MAINTENANCE
- NOTES ON DISCS
- HANDLING DISCS
- STORING DISCS
- CLEANING DISCS
- HANDLING THE UNIT
- WHEN SHIPPING THE UNIT
- KEEPING THE EXTERIOR SURFACES CLEAN
- CLEANING THE UNIT
- MAINTAINING THE UNIT
Brand : LG
Model : CM8330
Category : Hi-Fi System