
Aquos Phone Xx 206SH - Smartphone SHARP - Free user manual and instructions
Find the device manual for free Aquos Phone Xx 206SH SHARP in PDF.


| Product Type | Smartphone |
| Brand | Sharp |
| Model | Aquos Phone Xx 206SH |
| Dimensions | 140 x 70 x 10.3 mm |
| Weight | 155 g |
| Display | 5.0 inch IGZO with 1920x1080 resolution |
| Processor | Qualcomm Snapdragon 600 quad-core 1.7 GHz |
| RAM | 2 GB |
| Internal Storage | 16 GB (expandable via microSD) |
| Rear Camera | 13.1 MP with LED flash |
| Front Camera | 2.1 MP |
| Operating System | Android 4.2 Jelly Bean |
| Battery | Li-Ion 2600 mAh (removable) |
| Connectivity | Wi-Fi 802.11 a/b/g/n/ac, Bluetooth 4.0, NFC, GPS |
| SIM | Micro-SIM |
| Sensors | Accelerometer, gyroscope, proximity, compass |
| Water Resistance | IPX5/IPX7 (water resistant) |
| Care and Cleaning | Wipe with soft dry cloth; avoid liquids and abrasive cleaners. |
| Safety | Use only original charger and battery; avoid exposure to extreme temperatures. |
| Spare Parts & Repairability | Battery and SIM tray user-replaceable; other repairs by authorized service center. |
Frequently Asked Questions - Aquos Phone Xx 206SH SHARP
User questions about Aquos Phone Xx 206SH SHARP
0 question about this device. Answer the ones you know or ask your own.
Ask a new question about this device
Download the instructions for your Smartphone in PDF format for free! Find your manual Aquos Phone Xx 206SH - SHARP and take your electronic device back in hand. On this page are published all the documents necessary for the use of your device. Aquos Phone Xx 206SH by SHARP.
USER MANUAL Aquos Phone Xx 206SH SHARP
USIM Card Installation....8
Handset Memory & SD Card....9
Charging Handset....13
Power On/Off.... 15
Touchscreen Operations.... 16
Basic Operations
Basic Operations....18
Applications....20
Handset Phone Number.... 20
Mobile Manners.... 21
Text Entry....21
Google™ Accounts.... 24
Google Play™ 26
Security Codes.... 27
USIM PIN....28
Screen Lock.... 29
Software Updates....30
Handset Interface
Welcome Sheet (Lock Screen) Basics....32
3-Line Home Basics.... 33
Status Bar.... 34
Notifications Window....35
Using Application Usage History......36
Customizing 3-Line Home.... 37
Using Another View....39
Phone
Calling.... 42
Optional Services....43
Address Book.... 48
Messaging & Browser
Messaging.... 50
Sending S! Mail/SMS....50
Opening & Replying to S! Mail/SMS....52
Opening Received S! Mail/SMS.... 54
Creating/Sending Gmail....54
Opening Received Gmail.... 55
Using Internet Mail.... 56
Web Browsing (Browser).... 58
Camera
Photo Camera....64
Video Camera.... 65
Music & Images
Music & Images....68
Music Files (Music).... 68
Still Images & Video (Album)....69
Connectivity
Wi-Fi....72
Tethering Option.... 74
Bluetooth ® 75
Global Services
Global Roaming....80
Calling from Outside Japan....81
Settings
About Settings....86
Sound Settings....87
Wallpaper & Display Settings......89
Device Info.... 90
Add Account....91
Wi-Fi Settings....91
Home Applications Setting.... 92
Storage Settings....92
Application Settings....93
Other Settings....94
Appendix
Specifications....104
Customer Service....105
Safety Precautions
Safety Precautions....108
Important Product Information....114
Handset & Hardware Care.... 116
General Notes.... 118
FCC Notice.... 119
RF Exposure Information/Specific Absorption Rate* (SAR) Information....120 Water Resistance....121
Introduction
Thank you for purchasing SoftBank 206SH.
Before You Begin
- SoftBank 206SH is referred to as "handset" in this guide.
- Read "Quick Tips" (in お願いとご注意) and this guide thoroughly beforehand for proper usage.
- Accessible services may be limited by contract conditions.
- Unauthorized copying of any part of this guide is prohibited.
- Guide content subject to change without prior notice.
- SoftBank 206SH is compatible with 4G, 3G and GSM network technologies.
- "SoftBank 4G" is used as a service name based on the statement by the International Telecommunication Union (ITU) indicating that mobile communications systems for 3.5G and beyond can also be considered "4G."
Guide Usage Notes
- Most operation descriptions are based on default settings.
- Unless noted otherwise, descriptions are for application sheet in 3-Line Home.
- "Confirmation" refers to authentication prompt, selection, caution or other message that appears after operation.
- Some operation descriptions may be omitted.
- In this guide and on handset, "abroad" means "outside Japan" with regard to handset/service usage.
- In this guide, microSD/microSDHC/microSDXC Card is referred to as "SD Card."
Screenshots & Key Labels
Screenshots and key labels are provided for reference only. Actual handset windows, menus, etc. may differ in appearance.
Accessing Functions Guide
Access this Functions Guide via Guide indicator on Status Bar. Guide indicator appears on Status Bar by default. To hide Guide indicator:

Guide usage information and confirmation for automatic updates appear at initial startup. Follow onscreen prompts.
Getting Started
Package Contents.... 6
Parts & Functions.... 6
USIM Card Installation....8
Handset Memory & SD Card....9
Charging Handset....13
Power On/Off.... 15
Touchscreen Operations....16
Package Contents
Package Contents
- Handset (SoftBank 206SH)
- Battery is built into handset.
- Handset back cover is not removable.
· AC Charger (SHCEJ1) - Desktop Holder (SHEFA1)
• TV Input-to-Micro USB Cable
・クイックスタート (Japanese)
・お願いとご注意 (Japanese) with English "Quick Tips"
· Warranties (Japanese) for handset and AC Charger
Parts & Functions
Handset Parts

Name Description
| 1 StrapEyelet | Attach Straps here. |
| 2 HeadphonePort | Connect Headphones with Mic (optional accessories) here. |
| 3 InternalCamera | Shoot photos or videos. |
| 4 Proximity/Light Sensor | Detects ambient light level and prevents Touchscreen misoperation during call. |
| 5 NotificationLamp | Illuminates while charging or for notifications (missed calls, new messages, etc.). |
| 6 SD/USIMCard Slot | Access USIM Card and SD Card. |
| 7 Earpiece | Hear other party's voice through this. |
| 8 Display | Touch Display to select menu items, open functions, scroll pages, etc. |

Name Description
1 TV
Antenna
2 Infrared Port
3 Speaker
4 Mobile Light
5 External Device Port
6 Mic
7 Mic (Recorder Mic)
8 External Camera
9 FeliCa Logo
10 Charging Terminals
11 Pressure Vent
Pull out for Full Seg/One Seg reception.
Transfer files using Infrared.
Listen to music, video sounds, Full Seg/One Seg audio, etc. through this.
Use as a flashlight or camera flash.
Connect AC Charger or Micro USB Cable here.
Talk to other party through this.
Captures ambient sounds while recording videos.
Shoot photos or videos.
Place over reader/writer to use Osaifu-Keitai®.
For use with Desktop Holder.
Helps maintain handset performance. Do not place a sticker, label, etc.
Handset Keys

Name Description
1
(Power Key)
2
(Volume Down Key)
3
(Volume Up Key)
Activate/cancel Screen lock. Long Press for power on/off or phone options.
Decrease Volume. In Welcome sheet (lock screen) or 3-Line Home, Touch & Hold to activate/cancel Silent mode.
Increase Volume. In Welcome sheet (lock screen), Touch & Hold to turn on Mobile Light 1 .
1 To turn off, Tap Display.
USIM Card Installation
USIM Card is an IC card containing customer and authentication information, including handset number.
Inserting USIM Card
Always power off beforehand.
If SD Card is inserted, remove it first. (SD Card needs to be removed to insert USIM Card.)
- For SD Card removal procedure, see "Removing SD Card."
1
Open Card Slot Cover

2
Pull out USIM Tray

• Gently pull USIM Tray straight out from the edge.
- Do not pull it forcefully or at an angle; damage may result.
3
Place USIM Card in USIM Tray

- Check orientation of USIM Card (see the notch), then gently place it with metal contacts facing up.
4
Insert USIM Tray into USIM Card Slot (bottom opening)

- Check orientation of USIM Tray, then insert it all the way.
5
Close Card Slot Cover

- Close Card Slot Cover firmly. Debris trapped between gasket and base may expose handset to liquid.
Removing USIM Card
Always power off beforehand.
If SD Card is inserted, remove it first. (SD Card needs to be removed to remove USIM Card.)
- For SD Card removal procedure, see "Removing SD Card."
1
Open Card Slot Cover

2
Pull out USIM Tray

· Gently pull USIM Tray straight out from the edge.
- Do not pull it forcefully or at an angle; damage may result.
3
Remove USIM Card

4
Insert USIM Tray into USIM Card Slot (bottom opening)
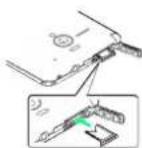
- Check orientation of USIM Tray, then insert it all the way.
5
Close Card Slot Cover

- Close Card Slot Cover firmly. Debris trapped between gasket and base may expose handset to liquid.
Handset Memory & SD Card
Handset supports SD Card up to 64 GB. Some SD Cards may not operate properly.
In addition to SD Cards, use handset memory as storage for shot photos/videos and other files.
Storage
Handset internal storage consists of system memory and handset memory. See below to learn about system memory, handset memory and SD Card.
Storage Description
| System memory | System files and applications are installed here. |
| Handset memory | Shot photos/videos, mail attachments, etc. are saved here. Connect handset to a PC to exchange files. |
| SD Card | Connect handset (with SD Card inserted) to a PC to exchange files. Save images, music and other files to SD Card for use on handset. |
Inserting SD Card
Always power off beforehand.
1
Open Card Slot Cover

2
Insert SD Card into SD Card Slot (top opening)

- Insert SD Card all the way with terminals facing up.
3
Close Card Slot Cover
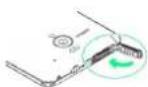
- Close Card Slot Cover firmly. Debris trapped between gasket and base may expose handset to liquid.
Formatting SD Card
When using a new SD Card for the first time, format it on handset before trying to save images, music, etc.
- Formatting deletes all SD Card files.
- Charge handset while formatting or charge it adequately beforehand.
1
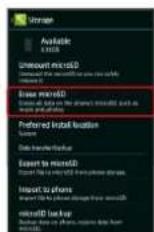
In application sheet, (Settings)

2
Storage

3
Erase microSD
4
Erase SD card

5
Enter Operation Password


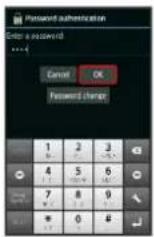
- If Operation Password is unset, follow onscreen prompts.
6
Erase everything


Handset erases all SD Card files.
- When finished, SD Card is mounted.
Unmounting SD Card
Always unmount SD Card before removing it.
1
In application sheet, (Settings)

2
Storage

3
Unmount microSD


Unmount microSD changes to Mount microSD . (SD Card
is unmounted.)
• To have SD Card recognized again, Tap Mount microSD.
Removing SD Card
Always power off beforehand.

Open Card Slot Cover
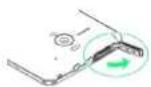

Remove SD Card

- Gently push in SD Card and release; it pops out. Carefully remove SD Card without bending it.

Close Card Slot Cover
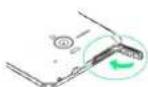
- Close Card Slot Cover firmly. Debris trapped between gasket and base may expose handset to liquid.
Formatting Handset Memory
Formatting deletes all handset memory files.
- Charge handset while formatting or charge it adequately beforehand.

In application sheet, (Settings)
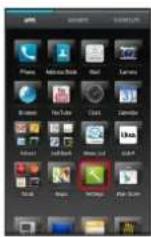

Storage


Erase phone storage
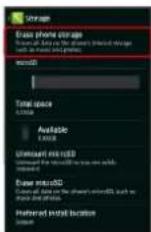

Erase internal storage


Enter Operation Password


- If Operation Password is unset, follow onscreen prompts.

Erase everything
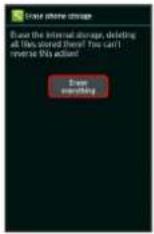

Handset erases all handset memory files.

Handset Memory & SD Card Usage Notes
General
Handset memory files and SD Card files may be lost/altered accidentally. Keep a copy of important information in a separate place. SoftBank Mobile Corp. is not liable for any damages resulting from accidental loss/alteration of information.
- Never power off while files are being accessed.
microSDXC Card
Handset supports microSDXC Cards (SDXC-compatible SD Cards). microSDXC Cards are supported by SDXC-compatible devices only.
Exchanging Files with Non-SDXC-Compatible Devices
To exchange files between handset and non-SDXC-compatible devices, use SD Cards (microSD/microSDHC Cards) supported by handset and those devices. Inserting a microSDXC Card used on handset in a non-SDXC-compatible device may corrupt card files. In such cases, do not format the microSDXC Card on that device even if prompted to do so.
- Formatting deletes all microSDXC Card files and changes the file system. The original memory capacity may be unavailable after formatting. To use a corrupted microSDXC Card, format it on an SDXC-compatible device.
Handling SD Cards Used on Other Mobiles
After installing SD Card used on other mobiles (such as previously used handsets) into handset, the notification Application data is present in the microSD. may appear on Status Bar. To use files on such SD Cards on handset, copy files to handset memory as follows.
Drag Status Bar down for Notifications Window

Application data is present in the microSD. Follow
onscreen prompts
- If the same folder/file name exists in handset memory, overwrite confirmation appears. Handset memory files cannot be restored once overwritten.
Handset Memory
Photos and videos shot on handset are saved to handset memory by default. Depending on downloaded application (sold separately), corresponding files may be saved to handset memory even if SD Card is specified as their save location in application description.

SD Card Caution
Keep SD Card out of infants' reach; may cause choking if swallowed.
Charging Handset
Battery is built into handset.
Desktop Holder, AC Charger, Micro USB Cable (optional accessory), Micro USB Charging Adapter (optional accessory) and In-Car Charger (optional accessory) are not water proof. Never charge handset while it is wet.
May cause fire, malfunction or burns due to electric shock or short-circuiting.
Desktop Holder
Use Desktop Holder (SHEFA1) with AC Charger (SHCEJ1).

1
Insert Micro USB plug of AC Charger into connector port of Desktop Holder

- Insert Micro USB plug in correct orientation; otherwise, connector port of Desktop Holder may be damaged. Check contours and orientation of Micro USB plug, then insert it with tabs (○) facing down.
2
Extend blades and plug AC Charger into AC outlet

- Rotate blades out as shown.
3
Place handset into Desktop Holder with Charging Terminals facing down

4
Tilt handset back as shown until it clicks

[NO TEXT]
Notification Lamp illuminates while charging.
- Take care not to get anything (e.g., Strap) caught between handset and Desktop Holder.
- Notification Lamp goes out when charge is full.
5
Remove handset and then Micro USB plug from Desktop Holder, then unplug AC Charger and retract blades
- To remove handset, tilt it toward you while holding Desktop Holder.
AC Charger
Use AC Charger (SHCEJ1).

1
Insert Micro USB plug of AC Charger into External Device Port
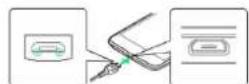
- Insert Micro USB plug in correct orientation; otherwise, External Device Port may be damaged. Check contours and orientation of Micro USB plug, then insert it with tabs (○) facing down.
2
Extend blades and plug AC Charger into AC outlet

[NO TEXT]
Notification Lamp illuminates while charging.
- Rotate blades out as shown.
- Notification Lamp goes out when charge is full.
3
Unplug AC Charger and retract blades
4
Remove Micro USB plug from External Device Port
USB Charging
Connect handset to a PC with Micro USB Cable (SHDDL1; optional accessory).
- Power on handset and PC first. - Handset may not charge or charge slowly depending on PC status/environment.
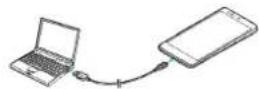
1
Insert Micro USB plug of Micro USB Cable into External Device Port

- Insert Micro USB plug in correct orientation; otherwise, External Device Port may be damaged. Check contours and orientation of Micro USB plug, then insert it with tabs (○) facing down.
2
Insert USB plug of Micro USB Cable into PC USB port


Notification Lamp illuminates while charging.
- Notification Lamp goes out when charge is full.
3
Remove Micro USB Cable from handset and PC
[Non-Text]
Lithium-ion Battery & Desktop Holder
Lithium-ion Battery
This product requires a lithium-ion battery. Lithium-ion batteries are recyclable. To recycle a used lithium-ion battery, take it to any shop displaying the recycling symbol.
- To avoid fire or electric shock, do not short-circuit or disassemble Battery.


Front Duct
When handset is placed into Desktop Holder, sounds from Speaker can be heard through the opening at the front of Desktop Holder (front duct), increasing audibility of music, video sounds, Full Seg/One Seg audio, etc.
!
Charging Precautions
Handling Cables
Do not pull, bend, or twist cable.
Important USB Charging Note
Handset may power on automatically when connected to a PC with Micro USB Cable; avoid connection aboard aircraft or in hospitals, etc. where handset use is prohibited.
Battery Care
To help maintain performance and life of Internal Battery, do not store in the following conditions.
• Full (immediately after charging is complete)
- Exhausted (too low to power on handset)
Periods of Disuse
Charge at least once every 6 months; if left uncharged, handset may become unusable or files/settings may be affected.
Bulges of Internal Battery
Depending on usage, bulges may appear near end of battery life; this does not affect safety.
Internal Battery Replacement
Internal Battery is a consumable item; may need to be replaced if operating time shortens noticeably. Internal Battery is not user replaceable; its replacement incurs fees and requires handset submission to a SoftBank Shop or other appropriate servicer. For details, contact a SoftBank Shop or SoftBank Customer Support, General Information.
Power On/Off
Power On
1
Long Press until SoftBank logo appears


After Power On Graphics, Welcome sheet (lock screen) ears.
- If Welcome sheet (lock screen) usage guide appears, follow onscreen prompts. (Tap Try it to proceed to .)2
2
Drag to the bottom of Display
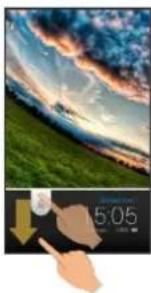

Google & location window opens.
- If confirmation appears, follow onscreen prompts. - Google & location window may open even when handset is not used.
3
Set Google's location service options

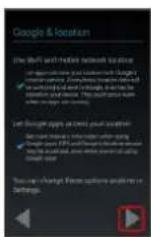

Initial setup menu opens.
- If 3-Line Home usage guide appears, follow onscreen prompts.
Power Off
1

(Long Press)

2
Power off

3
OK


Handset shuts down.
Touchscreen Operations
Touch Display to select menu items, open functions, scroll pages, etc.
Tap
Tap item or key to open or execute corresponding function/operation.

Touch & Hold
Touch item for 1+ seconds (handset vibrates) to move icon, open menu, etc.

Drag
Drag item to move it.
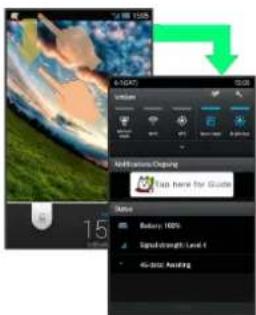
Flick
Flick to toggle sheets, pages, etc.

Pinch/Spread
Pinch or Spread to zoom in or out on images, maps, etc.

Basic Operations
Basic Operations....18
Applications....20
Handset Phone Number 20
Mobile Manners.... 21
Text Entry....21
Google™ Accounts 24
Google Play™ 26
Security Codes.... 27
USIM PIN....28
Screen Lock.... 29
Software Updates....30
Basic Operations
Home (3-Line Home)
3-Line Home consists of application sheet, widget sheet and shortcut sheet. Most operations start here. See "3-Line Home Basics" for details.

- Flick left/right to toggle sheets.
- Tap 🏠 Display bottom to return to 3-Line Home.
Handset Navigation
Tap item, icon, key, etc. to open menu/window or execute corresponding function/operation.
- Tap return to the previous screen.

Navigation Bar
Tap icons on Navigation Bar (Display bottom) for the following functions/operations.
Icon Description

Return to the previous screen.

Close keyboard.

Return to 3-Line Home.

Open Options menu.

Open application usage history.

Action Bar
Current menu/window title appears on Action Bar (Display top). Tap icons to the right of title to access frequently used functions.
- When or appears on Action Bar, Tap it to turn corresponding setting off or on.

- When check all)/ (uncheck all) appears on Action Bar, Tap it to select or cancel multiple items together at once.

Menu Operations
Tap ☐ Display bottom to open Options menu.

· In some windows, Drag down or Touch & Hold for menu.

Handset Settings
In application sheet, Tap (Settings) to customize settings.

- Checkbox (or) appears beside some options. Tap to enable ( ) or disable ( ) option.

- Drag/Flick slider, spinner, etc. to adjust some settings. If available, Tap or for additional settings.

Handset & Display Orientation
Rotate handset 90 degrees; Display orientation changes accordingly.
- Landscape orientation may be unavailable in some windows.
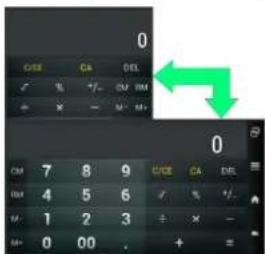
Capturing Screenshots
Long Press and at the same time.
- Open captured screenshots from Photo in Contents Manager or other locations.
Activating Applications that Support Assist Function
Touch Navigation Bar then Drag up (icon appears) Drag to icon and release finger Tap application
- Depending on icon, releasing finger may activate corresponding application.
Applications
Activating Applications

In application sheet, Tap application


Application activates.
- If confirmation appears, follow onscreen prompts.
Exiting Applications
In any application, Tap 📂 heatedly until 3-Line Home returns. (Some applications may remain active.)

Obtaining Applications
Obtain applications from (Play Store).
Handset Phone Number
My Phone Number

In application sheet, (Settings)


Profile opens.
- Handset number appears in Own phone number field.
Mobile Manners
Silent Mode
Mute ringtones and other handset sounds to avoid disturbing others around you.
- Camera shutter sound, video recording tones, music, video/game sounds, etc. still play even in Silent mode.
1
In Welcome sheet (lock screen) or 3-Line Home, Touch & Hold

Silent mode activates.
• To cancel, Touch & Hold in Welcome sheet (lock screen) or 3-Line Home.
Airplane Mode
Leaving power on, suspend signal-transmitting functions.
1
(Long Press)

Phone options appear.
2
Airplane mode


Airplane mode activates.
To cancel, Long Press, then Tap
lane mode.
+
Selecting Silent Mode Option
(Long Press) Tap icon (such as )

!
Airplane Mode Precautions
Activating Airplane mode disables Wi-Fi and Bluetooth *, interrupting corresponding transmissions.
Wi-Fi/Bluetooth® connections can be used even in Airplane mode by enabling Wi-Fi/Bluetooth® after activating
Airplane mode ; make sure that such connection/transmission is allowed in your current location before use.
Text Entry
Keyboards
Use onscreen keyboards for text entry. In 12-key Keyboard, multiple characters are assigned to each key. In QWERTY Keyboard, a single letter is assigned to each key.
Tap a text entry field for keyboard. Tap ▼ide it.
- Text entry descriptions are for iWnn IME - SH edition. Before reading on, switch input method from Android keyboard (selected when interface language is set to English) to iWnn IME - SH edition as follows.
In a text entry window, Drag Status Bar down Choose
input method
the
Switching Keyboards
1
In a text entry window,

input UI

- When How to Change Input UI window opens after Tapping Tap USE. To disable it thereafter, select Don't show again beforehand.
2
Set QWERTY keyboard
or
t 12 keyboard


Keyboard is switched.
12-Key Keyboard Layout

1 Enter characters.
2 Undo conversion; reverse-toggle character options before confirming entry.
3 Backspace cursor.
4 Enter pictograms, symbols, or emoticons; switch conversion options.
5 Toggle entry modes.
6 Enter space; toggle case; add " or ° for hiragana.
7 Current entry mode
8 Delete characters.
9 Advance cursor; add space at text end.
10 Open text entry options; enter space; convert hiragana.
11 Insert line break; confirm current characters.
QWERTY Keyboard Layout

1 Enter characters.
2 Toggle case.
3 Toggle entry modes.
4 Enter pictograms, symbols, or emoticons.
5 Undo conversion.
6 Open text entry options.
7 Current entry mode
8 Delete characters.
9 Insert line break; confirm current characters.
10 Advance cursor; add space at text end.
11 Backspace cursor.
12 Enter space; convert hiragana.
Switching Entry Modes
- Tap to toggle Half Numeric, Kanji, and Half Alphabet modes. Alternatively, Flick left/right to toggle these modes. To use other entry modes:
1
In a text entry window,


nput mode

- When How to Change Input UI window opens after
Tapping, Tap


disable it thereafter, select
Don't show again
beforehand.
2
Tap mode

Keyboard interface changes accordingly. Current entry mode indicator-- (half Alphabet), (Ka), (Full Kadakana), etc.--appears.
Alphabet
· In 12-key Keyboard, to enter Keitai in Half Alphabet:

Check Half Alphabet mode is selected ( oABStatus Bar)


(twice: K) (twice: e) (three times: i)
→ TUV (once: t) (once:a) (three times: i)

- The first letter is capitalized automatically by default. (Cancel auto capitalization as needed.)


Keitai is entered.
• To toggle case, enter a letter and Tap
Flick Input
In 12-key Keyboard, Flick key for target character (instead of Tapping it repeatedly).
- Touch & Hold a key for guide; Flick toward target character to enter.

| Target Character | Operation |
| P | Tap once. |
| Q | Touch and Flick left. |
| R | Touch and Flick up. |
| S | Touch and Flick right. |
| 7 | Touch and Flick down. |
- To enable/disable key preview and Flick input guide, in a text entry window, Tap Change settings
Display / Layout → input guide.
Google™ Accounts
Create a Google Account to use Google services. A Google Account is required to fully use some services and applications/functions.
Creating a Google Account
1
In application sheet, (Settings)


2

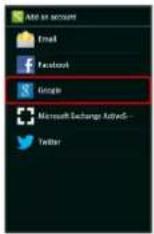

Add a Google Account appears.
3


4
Enter first name


5
Enter mail address

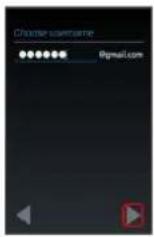
- If confirmation appears, follow onscreen prompts.
6
Enter password

Re-enter password


7
Tap Choose a security question field
Tap question

Tap Answer field Enter answer

address


8


To join Google+, Tap prompts.
Join Google+

onscreen

Tap entry field Enter shown characters (distorted)


- If shown characters are unreadable, enter a character then Tap; other distorted characters appear.

Not now


A Google Account is added.
- If confirmation appears, follow onscreen prompts.
• Even if Keep this phone backed up with my Google Account is selected, this backup function cannot be used.
Signing in to a Google Account
If an application requires a Google Account, Add a Google Account appears. Sign in to use the application.

In Add a Google Account,
existing


Enter mail address

Enter

word


Follow onscreen prompts

You are signed in to your Google Account.

Google Account Caution
Do not forget your Google Account ID and password.
Google Play™
Download applications via Google Play. Downloaded applications can be updated manually or automatically. Sign in to your Google Account beforehand.
Installing Free Applications
1
In application sheet, (Play Store)


Google Play opens.
- If confirmation appears, follow onscreen prompts.
2
Tap free application

ALL ACCE


Application downloads and installs.
Purchasing Applications
1
In application sheet, (Play Store)


Google Play opens.
- If confirmation appears, follow onscreen prompts.
2
Tap paid application Tap price Follow onscreen prompts

Application downloads and installs.
Updating Installed Applications
1
In application sheet, (Play Store)


Google Play opens.
- If confirmation appears, follow onscreen prompts.
2


My apps

application


Follow onscreen prompts

Application downloads and installs.
- If confirmation appears, follow onscreen prompts.

Purchased Applications
Payment
Pay once. Re-downloads of uninstalled applications are free of charge.
Use on Other Android Devices
Install same application on other Android devices under same Google Account at no added cost.

Application Operations
Refund Requests
Request refunds within designated period. Returned applications are deleted from handset; no payment is required. (One refund request per application.)
In Google Play,

Tap application

REFUND
- For details, Tap Help in Google Play, then refer to Google Play Help.
Enabling Automatic Updates
In Google Play,

Tap application


Auto-update

√
- Automatic update is not available for some applications.
Google Play Cautions
Application Installation Disclaimer
Download and install applications on this handset via Google Play (developed by Google Inc.) at your own risk. SoftBank Mobile Corp. is not responsible for user installed application content (quality, reliability, legality, appropriateness, accuracy, etc.) or malfunctions installed applications may cause (due to viruses, etc.).
Application Purchase Disclaimer
Purchase applications via Google Play at your own risk. SoftBank Mobile Corp. is not responsible for transactions between users and third party publishers.
Google Play Automatic Updates
Operations and user interface are subject to change due to automatic application updates.
Security Codes
Operation Password & Center Access Code
Center Access Code (Call Barring Password; 4-digit code in contract) is required to use Optional Services from landlines or subscribe to fee-based information.
- Do not forget Operation Password and Center Access Code (Call Barring Password). If you forget these codes, contact us for recovery. For details, contact SoftBank Customer Support, General Information.
- Do not reveal Operation Password or Center Access Code (Call Barring Password). SoftBank Mobile Corp. is not liable for misuse or damages.
- Call Barring settings will be locked if incorrect Center Access Code (Call Barring Password) is entered three times consecutively when making a setting. To unlock, the code must be changed. For details, contact SoftBank Customer Support, General Information.
- If Call Barring Password has been previously changed on a mobile phone, enter the latest code to set Call Barring.
Setting Operation Password
Do not forget Operation Password; write it down if necessary.
1
In application sheet, (Settings)

Lock & Security

2
Operation password setting

Password


3
Re-enter Operation Password


[NO TEXT]
Operation Password is set.
- To change Operation Password, refer to the steps above. (In 2 enter current Operation Password to proceed.)
USIM PIN
9999 by default; enable USIM card lock to restrict handset use.
Enabling USIM Card Lock
1
In application sheet, (Settings)

Lock & Security

2
USIM card lock settings



[NO TEXT]
USIM card lock is enabled.
Changing USIM PIN
Lock USIM card first. See "Enabling USIM Card Lock" for details.
1
In application sheet, (Settings)

Lock & Security

2
USIM card lock settings

current PIN

new PIN


enter new PIN

[NO TEXT]
PIN is changed.
! PIN Cautions
Entering incorrect PIN three consecutive times activates PIN Lock. To cancel, Personal Unblocking Key (PUK) is required; contact SoftBank Customer Support, General Information. Entering incorrect PUK ten consecutive times activates PUK Lock, disabling handset. For recovery, USIM Card must be reissued at a SoftBank Shop (fees apply).
Screen Lock
After a period of inactivity, Display goes completely dark to save battery power (Screen lock active). Screen lock prevents accidental Touchscreen operation.
Activating Screen Lock Manually
1
When Display is active,
Display goes completely dark and Screen lock activates.
Canceling Screen Lock
Press to open Welcome sheet (lock screen).
1
In Welcome sheet (lock screen), Drag down


Screen lock is canceled.
- When Screen lock option other than Slide or None is selected, follow onscreen prompts to cancel Screen lock.
Software Updates
Software Updates
At specified time, handset automatically checks for/downloads firmware updates as required. To update firmware manually:
1
In application sheet, (Settings)


2
Software update


Software update menu opens.
3
Software update

ite Follow
onscreen prompts

Software Update starts.
[NO TEXT]
Before Software Update
Handset data may be lost to damage, malfunction, etc. Back up important information before updating software. SoftBank Mobile Corp. is not liable for loss or associated damages.

Software Update Operations
Enabling/Disabling Automatic Updates
In Software update menu,
Auto update settings D

not update automatically or
date automatically
Changing Automatic Update Start Time
In Software update menu,
Update time settings

Select time


• Available when
Auto update settings is

automatically

Software Update Cautions
During Update
Handset cannot be used until Software Update completes; it may take some time to complete.
Signal Conditions
Check signal strength and battery charge beforehand. Poor signal strength or low battery charge may disrupt updates leading to update failure. Update failure may disable handset.
Handset Interface
Welcome Sheet (Lock Screen) Basics....32
3-Line Home Basics.... 33
Status Bar.... 34
Notifications Window....35
Using Application Usage History....36
Customizing 3-Line Home.... 37
Using Another View....39
Welcome Sheet (Lock Screen) Basics
Welcome sheet (lock screen) appears at power on or when iDPressed while Display is completely dark (Screen lock active). From Welcome sheet (lock screen), cancel Screen lock, activate an application such as Phone or Mail, etc.
Welcome Sheet (Lock Screen) Layout
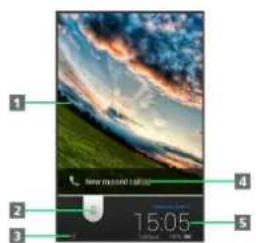
1 Wallpaper (and widget) 1
2 Drag down to cancel Screen lock; Tap for applications, settings, etc.
3 Tap show owner information 2 .
4 Notifications of missed calls and new messages appear here.
5 Date and time, weather, widget name, etc.1
1 Flick left/right to toggle view.
2 Set owner information beforehand. See "Lock & Security Settings" for details.
Activating Applications
Activate applications from Welcome sheet (lock screen) as follows.
- Change assigned applications as needed.
1
In Welcome sheet (lock screen), Tap


Menu opens.
2
Tap application
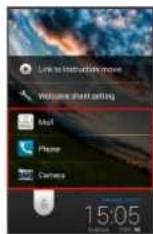

Application activates.
- Tap Link to Instruction movie for Welcome sheet introductory video (Japanese).
Tap Welcome sheet setting to open menu for customizing Welcome sheet (lock screen). Alternatively, Tap (Settings)
in application sheet
paper & display Weld
Sheet(lock screen)
See "Wallpaper & Display Settings" for


Missed Call & New Message Notifications
Notification--New missed call(s) or New mail(s)--appears in Welcome sheet (lock screen).
Drag notification down to open it.


3-Line Home Basics
3-Line Home consists of application sheet, widget sheet and shortcut sheet. Most operations start here.
Access applications and widgets, save frequently used applications to shortcut sheet, change handset settings, etc.
Toggling Sheets
Flick left/right to toggle these sheets.

Application Sheet Layout

1 Toggle sheets.
2 Activate applications. (Flick up for hidden applications; Flick down for menu.)
Widget Sheet Layout

1 Toggle sheets.
2 Use widgets. (Flick up for hidden widgets; Flick down for menu.)
Shortcut Sheet Layout
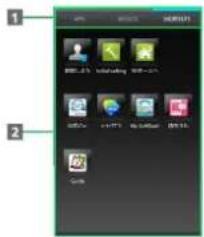
1 Toggle sheets.
2 Activate applications. (Flick up for hidden shortcuts; Flick down for menu.)
Status Bar
Indicators (new message notification, handset status, etc.) appear at the top of Display.

Status Bar Layout
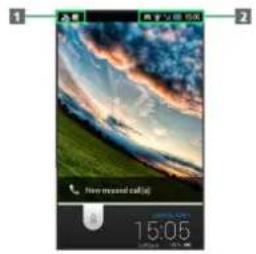
1 Notifications and warnings appear here. (Notification Indicators)
2 Handset status appears here. (Status Indicators)
Notification Indicators
Notification Indicators appear on the left.

Indicator Description
| Functions Guide (Drag Status Bar down and open from Notifications Window) | |
| Urgent News | |
| Call Arriving/in Progress | |
| Call on Hold | |
| Missed Call | |
| New Answer Phone Message | |
| New Voicemail | |
| New SMS/S! Mail | |
| New Internet Mail | |
| New Gmail | |
| Snoozing/Unchecked Alarm | |
| Event | |
| Energy Saving (Waza. Mode) Active | |
| Energy Saving (Emerg. Mode) Active | |
| Viewing Full Seg | |
| Viewing One Seg | |
| Recording Full Seg/One Seg | |
| Application Installation Complete/Update Available | |
| Text Entry Window (Choose Input Method) | |
| Positioning (GPS) | |
| Data Downloading | |
| SD Card Unmounted | |
| Reading SD Card | |
| Connected in Card Reader Mode | |
| Screenshot Captured | |
| More Notifications | |
| Mobile Light On |
Status Indicators
Status Indicators appear on the right.

Indicator Description
| Battery Strength | |
| Charging | |
| Signal Strength | |
| No Signal (4G/3G) | |
| 4G Data in Use | |
| 3G Data in Use | |
| Roaming | |
| Airplane Mode | |
| Wi-Fi Connected | |
| Bluetooth® On | |
| Bluetooth® Connected | |
| Silent (Standard) Mode | |
| Silent (Drive) Mode | |
| Silent Mode | |
| Mic Muted | |
| Speakerphone On | |
| Answer Phone Set | |
| Answer Phone Set (Message Recorded) | |
| Alarm Set | |
| NFC/Osaifu-Keitai® Locked | |
| NFC/Osaifu-Keitai® Locked (USIM Card Only) 1 | |
| Kanji Mode | |
| Half Alphabet Mode | |
| Half Numeric Mode | |
| Half Katakana Mode | |
| Full Alphabet Mode | |
| Full Numeric Mode | |
| Full Katakana Mode | |
| Character Code Mode |
1 Appears upon inserting USIM Card into handset after using that USIM Card to lock NFC on another mobile.
Notifications Window
Open notifications, check handset status or change various settings.
Opening Notifications Window

Drag Status Bar down


Notifications Window opens.
- Tap exit.
Notifications Window Layout

1 Setting Keys
2 Show second and subsequent lines of Setting Keys.
3 Notifications and active functions
4 Use corresponding functions.
5 Handset status 1
6 Close Notifications Window.
7 Open Energy save window.
8 Open Settings.
9 Delete all notifications and close Notifications Window.
1 Tap for corresponding settings.
Setting Keys

1 Set Silent mode option.
2 Toggle Wi-Fi on/off.
3 Enable/disable GPS satellites.
4 Enable/disable Auto-rotate screen.
5 Set Display brightness.
6 Show second and subsequent lines of Setting Keys.
7 Set Bright Keep.
8 Enable/disable VeilView.
9 Toggle Bluetooth® on/off.
10 Enable/disable account sync.
11 Open Wireless output menu.
12 Enable/disable Reader/Writer, P2P.
13 Open window for rearranging Setting Keys.
14 Hide second and subsequent lines of Setting Keys.
+ Notifications Window Operations
Deleting Notifications
In Notifications Window, Flick notification left/right
- Some notifications may not be deleted.
Rearranging Setting Keys
In Notifications Window, rearrange Drag icon to target location (done) on Action Bar
- Icons cannot be moved to the area where Rearrange appears in Notifications Window.
Using Application Usage History
Activate recently used applications, applications that support the assist function and assigned applications, all from a single window.
Opening Application Usage History
1
[NO TEXT]


Application usage history appears.
Application Usage History Layout

1 Activate application that supports the assist function.
2 Shortcuts to applications
3 Delete all application usage history items.
4 Activate recently used application.
5 Indicates corresponding application is running.
+ Application Usage History Operations
Deleting Single Usage History Item
In application usage history, Flick item left/right
- Corresponding application exits if running.
Changing Shortcuts
In application usage history, Touch & Hold shortcut
Select Application or Shortcut Tap item
(then select option)
Resetting Shortcuts
In application usage history, Touch & Hold shortcut
To default
Deleting Shortcuts
In application usage history, Touch & Hold shortcut
Peel off
Customizing 3-Line Home
Set theme and Wallpaper, move icons/widgets or add shortcuts/widgets to corresponding sheets.
Setting Theme & Wallpaper
1
In 3-Line Home, Drag down

Menu opens.
2
Home settings

3
Tap theme ( Standard , Color pop or Natural )

4
Select image, color, pattern, etc. by Tapping select from
list, user settings, , etc.

To select from images, Tap Select from list or from
list. Follow onscreen prompts.
Tap User settings to use image set in Wallpaper under
Wallpaper & display.


Theme and Wallpaper are set.

Moving Icons/Widgets

In 3-Line Home, Touch & Hold icon/widget
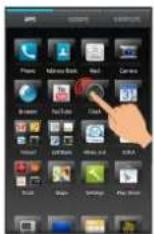

Drag to target location

Release to place icon/widget.
- To a folder: Drag icon to target folder.
Adding Shortcuts
Add an application shortcut.

In shortcut sheet, (設定しよう)


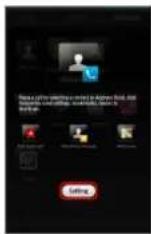

Application Tap application
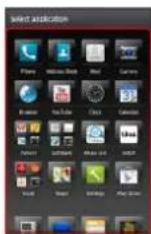

Shortcut is added to shortcut sheet.
Adding Widgets
Add Album, Analog clock, etc.

In 3-Line Home, Drag down


Menu opens.

Add widget


Tap widget


Widget is added.

Removing Widgets/Shortcuts
In widget sheet or shortcut sheet, Touch & Hold widget or
shortcut

off

Using Another View
Using Another View
Watch Full Seg or One Seg, play videos, open a map, etc. in mini-application window while using applications.
- May be unavailable depending on current application window.

Touch and Hold


Select mini-application window opens.

Select mini-application


Mini-application window opens.
If Operation Bar, indicators, etc. are hidden during playback, Tap mini-application window to show them again.
- Window interface varies by application.

1 Switch to/open standard application window 1 .
2 Application name
3 Open menu.
4 Exit mini-application 1 .
5 Operation Bar
6 Drag to change mini-application window size.
1 Icon may be hidden if mini-application window is reduced. In this case, use menu for corresponding operation.
Mini-Application Usage Note
While using a mini-application, videos may not play properly in other applications.
Phone
Calling.... 42
Optional Services....43
Address Book.... 48
Calling
See below to dial directly or answer calls. (Handset does not support Video Call.)
Placing Calls
1
In application sheet, (Phone)


Call Window opens.
- When Incoming History or Outgoing History opens, Tap Phone.
- When missed call window opens, Tap 3-Line Home returns, Tap (phone) in application sheet again.
2
Use onscreen dialpad to enter number

- Include area code for landline numbers.
3
Call
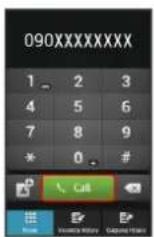

Handset dials the number.
- Wait for other party to accept the call.
4
To end the call,
end call


Call ends.
- After calls to/from unsaved numbers, save to Address Book confirmation appears. Follow onscreen prompts.
Answering Calls
1
When a call arrives, Drag answer down


Call connects.
- When Screen lock is inactive, Tap Answer.
2
To end the call,
nd call


Call ends.
- After calls to/from unsaved numbers, save to Address Book confirmation appears. Follow onscreen prompts.
Emergency Location Report
Using SoftBank 3G handset for emergency calls (110, 119 or 118) automatically reports handset location to corresponding agency (police, etc.).
- Location Report does not incur registration/transmission fees.
- Location/signal conditions affect positioning accuracy. Always provide location and call purpose.
- Hiding Caller ID (using 184, etc.) cancels Location Report. However, corresponding agency may obtain location information in life threatening situations.
- Location Report is not sent for calls made while outside Japan.

Missed Calls
For unanswered calls, appears. In Welcome sheet (lock screen), notification appears.

1 Notification Indicator
2 Notification
- Drag Status Bar down for Notifications Window, then Tap missed call notification to open Incoming History. When
Call or SMS appears below missed call notification, Tap it to call back or send SMS. - Drag notification down to open Incoming History.

Emergency Call Restriction
Emergency calls are restricted when Airplane mode is active. Long Press 📄 cancel it.
Optional Services
Use these SoftBank Optional Services:
Optional Services
| Service Description | |
| Call Forwarding | Divert all/ unanswered calls to a preset number. |
| Voicemail | Divert all/ unanswered calls to Voicemail Center; access messages via handset/touchtone phones. |
| Call Waiting1 | Answer calls during a call. |
| Group Calling1 | Switch between open lines/connect multiple lines. |
| Caller ID | Show or hide your number when placing calls. |
| Call Barring | Restrict incoming/outgoing calls by conditions. |
1 Requires separate subscription
Call Forwarding
1
In application sheet, (Settings)


Call settings opens.
2
Voicemail/divert


Voicemail/divert menu opens.
3
Settings/slop


Divert menu opens.
4
Always or to answer Enter number

- For No answer, Tap Wait time and select ring time as needed.
- To cancel Call Forwarding, Tap Stop call forward Yes.
5
OK

Call Forwarding is set.
Voicemail
1
In application sheet, (Settings)


Call settings opens.
2
Voicemail/divert

Voicemail/divert menu opens.
3
Settings/stop

Divert menu opens.
4
Always or the answer Vo email

- For No answer, Tap /ait time and select ring time as needed.
- To cancel Voicemail, Tap Stop call forward
5
OK

Voicemail is set.
When a new message is recorded, appears. To play messages, Tap Play voicemail in Voicemail/divert menu, then follow voice guidance.
Call Waiting
Requires separate subscription.
1
In application sheet, (Settings)


Call settings opens.
2
Other service settings


Other service settings opens.
3
Call waiting ( )


Call waiting is set.
- During a call, a tone sounds for incoming calls; Drag right to answer.
• To cancel Call Waiting, Tap Call waiting.
Group Calling
Requires separate subscription.
1
During a call,


2
Enter number


3
When call connects,


Group Calling starts.
Caller ID
1
In application sheet, (Settings)


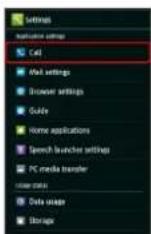

Call settings opens.
2
Other service settings

Other service settings opens.
3
Notify caller ID

number or S
umber


Caller ID is set.
Call Barring
Restrict outgoing/incoming calls and SMS messages.
- Call Barring requires Center Access Code (Call Barring Password).
- Call Barring settings will be locked if incorrect Center Access Code (Call Barring Password) is entered three times consecutively when making a setting. To unlock, the code must be changed. For details, contact SoftBank Customer Support, General Information.
- If Call Barring Password has been previously changed on a mobile phone, enter the latest code to set Call Barring.
- Failure message appears when attempting to place/send calls/SMS with outgoing call restriction active. Message may take time to appear in some areas.
Restriction Description
| All outgoing calls | Restrict all non-emergency calls. |
| Bar int'l call | Restrict international calls; while outside Japan, calls within current country are allowed. |
| Local & home only | Restrict international calls; while outside Japan, calls within current country and to Japan are allowed. |
| Restrict all incomings | Reject all calls. |
Bar if abroad Reject calls while outside Japan.
1
In application sheet, (Settings)


Call settings opens.
2
Call barring


Call barring menu opens.
3
Bar outgoing calls or for incoming calls Tap option

4
Enter Center Access Code (Call Barring Password)


Restriction is set.

Optional Services Operations
Setting Missed Call Notification
Activate this function for records of calls missed when handset is off/out-of-range. Initiate Voicemail then follow these steps:
In Call settings,
Missed calls S

gs Call


Follow voice guidance
Setting Handset Response to Missed Calls
In Call settings,
Missed calls S

& alerts

Tap item Follow onscreen prompts
- Set Missed calls sound, Vibration pattern, Incoming calls lamp and Ring duration.
Canceling All Outgoing Call Restrictions
In Call barring menu,
Bar outgoing calls S


outgoing calls Enter
Center Access
Code (Call Barring
Password)


Canceling All Incoming Call Restrictions
In Call barring menu,
Bar incoming calls S


incoming calls Enter
Center Access
Code (Call Barring
Password)


Limiting Calls to Numbers Saved in Address Book
In Call barring menu,
Restrict destinations

Operation Password

estr

address book
( √ )
Limiting Calls to Numbers in Call Permitted List
In Call barring menu,
Restrict destinations

Operation Password

peci

phone number

Switch on/off

[Unreadable]

ted list
Enter number


Rejecting Calls from Unsaved Numbers
In Call barring menu,
Reject call N

gistered
numbers


Rejecting Calls from Specified Numbers
In Call barring menu,
Reject ca

ed numbers

Switch on/off

[NO TEXT]

bers list
Enter number


Rejecting Calls with No/Undisplayable Caller ID or from Payphones
In Call barring menu,
eject call N

not sent,
Payphone or
available ()

Address Book
Save phone numbers, mail addresses and other information (birthdays, nicknames, etc.).
Set ringtones for each contact as needed.
Adding New Contacts
1
In application sheet, (Address Book)


Address Book opens.
2

(add) on Action Bar
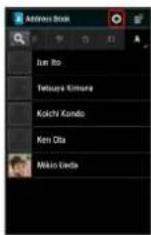

Add contact window opens.
- If confirmation appears, follow onscreen prompts.
3
Tap item Complete entry

4


Contact is saved.
Dialing from Address Book
1
In application sheet, (Address Book)
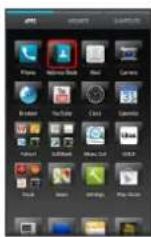

Address Book opens.
2
Tap tab Tap contact


Contact opens.
- Contacts are sorted by the first character of last name (Read last).
3


Handset dials the number. Wait for other party to accept call.
4
To end the call,
end call

Call ends.
!
Address Book Caution
If handset is left uncharged, contacts may be altered/lost; handset damage may also affect information recovery. SoftBank Mobile Corp. is not liable for any resulting damages. Keep separate copies of contacts and other important information.
Messaging & Browser
Messaging....50
Sending S! Mail/SMS....50
Opening & Replying to S! Mail/SMS....52
Opening Received S! Mail/SMS.... 54
Creating/Sending Gmail....54
Opening Received Gmail.... 55
Using Internet Mail.... 56
Web Browsing (Browser).... 58
Messaging
S! Mail
Exchange messages with SI Mail-compatible SoftBank handsets and e-mail compatible devices (other mobiles, PCs, etc.) beyond SMS character entry limit; attach media files.
SMS
Exchange short messages with mobiles using handset numbers as addresses.
Gmail
Gmail is Google's webmail service. Handset automatically syncs with Gmail.
Internet Mail
Use Internet Mail (POP3/IMAP4/Exchange) on handset.
- Set up an Internet Mail account beforehand.
- Retrieving Internet Mail on handset syncs handset and mail server; received messages are also accessible from PCs.
Sending S! Mail/SMS
Wi-Fi Connection Setup
Send/receive S! Mail using Wi-Fi. When using Mail (S! Mail/ SMS) for the first time, complete Wi-Fi connection setup as follows.
- Descriptions for Mail (S! Mail/SMS) are given assuming that Wi-Fi connection setup is complete.
1
In application sheet, (Mail)
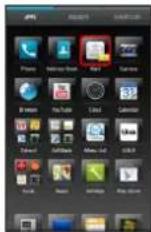

Wi-Fi connection setting opens.
2
Set now


Wi-Fi connection setup starts.
3


Wi-Fi connection setup is complete.
- After Wi-Fi connection setup is complete, Wi-Fi is used for sending/receiving S! Mail. When Wi-Fi is not available, 3G or 4G Network is used.
Sending S! Mail
To send S! Mail to a contact saved in Address Book:

In application sheet, (Mail)


Folder list appears.

Create


S! Mail Composition window opens.


Address Book


Address Book opens.

Tap recipient


- For multiple numbers/addresses, Tap one after Tapping recipient.

Tap Enter subject field Enter subject


Enter message

(Send) on Action Bar

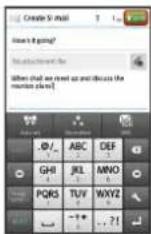

S! Mail is sent.
- Handset saves failed S! Mail messages to Unsent Folder; automatically attempts redelivery up to two times.
Sending SMS
To send SMS from sent/received mail records:
1
In application sheet, (Mail)
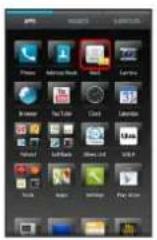

Folder list appears.
2


SMS Composition window opens.
3
Send/Receive history
4
SEND HISTORY or RECEIVE HISTORY Tap recipient
5
Enter message (Send) on Action Bar

SMS is sent.
- Handset saves failed SMS messages to Unsent Folder; automatically attempts redelivery up to two times.
+
Saving to Unsent Folder without Sending
In SI Mail Composition window or SMS Composition
window,


!
Important S! Mail/SMS Transmission Note
If Outbox is full, handset automatically deletes sent messages, unprotected ones first.
Opening & Replying to S! Mail/SMS
Handset retrieves S! Mail/SMS messages automatically (set manual retrieval as needed).
Opening New S! Mail/SMS
When message arrives, handset responds with ringtone/Vibration/Notification Lamp, and appears.
- In Welcome sheet (lock screen), notification appears.
- Unread message count ( ) appears in (Mail) icon in application sheet.
1
Drag notification (New mail(s)) down


Message window opens.
- For multiple new messages, message list (Inbox) opens; select one.
Replying to S! Mail/SMS

In application sheet, (Mail)
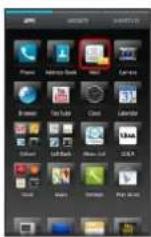

Folder list appears.

Tap folder in Inbox Tap message


Message window opens.


- Reply to all appears for messages addressed to multiple recipients.

Enter message (Send) on Action Bar

Message is sent.

Retrieving Complete Messages
In message window, Tap (receive) on Action Bar
Tap to select item to retrieve.

Important Message Retrieval Notes
Retrieval System
By default, complete message including attachments is retrieved; transmission fees may apply depending on subscribed price plan.
Automatic Message Deletion
If Inbox is full, handset automatically deletes oldest received messages, opened/unprotected ones first. If all messages are unopened, handset automatically deletes oldest unprotected ones first.
Retrieval Outside Japan
Message retrieval outside Japan may incur high charges.
Opening Received S! Mail/SMS
Opening S! Mail/SMS
To open received messages:
1
In application sheet, (Mail)


Folder list appears.
2
Tap folder in Inbox


Message list appears.
- Flick left/right for message lists in other folders.
3
Tap message


Message window opens.
- Flick left/right to open other messages.
Creating/Sending Gmail
Use Google's webmail service. Sign in to a Google Account beforehand.
Creating/Sending Gmail
1
In application sheet, (Gmail)


Inbox opens.
- If confirmation appears, follow onscreen prompts.
2


Mail Composition window opens.
3
Complete message on Action Bar


Message is sent.

Gmail Composition Operations
Adding Cc/Bcc Recipients
In Mail Composition window, Add recipient


Attaching Images/Videos
In Mail Composition window,


Attach video

t application Select file
- If confirmation appears, follow onscreen prompts.
Saving without Sending
After entering recipient, subject or message text,


Save draft
- Message is saved to Drafts.
Discarding Messages
After entering recipient, subject or message text,


Discard


Gmail Caution
Gmail messages are not received if recipient device is set to reject messages sent from PCs.
Opening Received Gmail
Gmail groups all related messages by subject. (Conversation View)

Opening New Gmail
When Gmail message arrives, handset responds with ringtone and Vibration, and hobears.

Drag Status Bar down for Notifications Window


Tap message notification


Message window opens.
- For two or more new messages with different subjects, Inbox opens; select one.
Opening Gmail

In application sheet, (Gmail)


Inbox opens.

Message window opens.

Replying to Messages
In message window, Complete message on Action Bar

Using Internet Mail
Adding Accounts
Check usernames (user IDs), passwords, server names, etc. of your Internet Mail accounts beforehand.

In application sheet, (Email)


Account setup menu opens (if no account is set up).

Follow onscreen prompts to set up account

Internet Mail setup is complete.
Creating/Sending Internet Mail

In application sheet, (Email)


Inbox opens.


Mail Composition window opens.

Complete message


Message is sent.
Opening New Internet Mail
When Internet Mail message arrives, handset responds with ringtone and Vibration, and appears.

Drag Status Bar down for Notifications Window


Notifications Window opens.

Tap message notification


Message window opens.
- For two or more new messages, Inbox opens; select one.
Opening Internet Mail

In application sheet, (Email)


Inbox opens.

Tap message


Message window opens.
Web Browsing (Browser)
View Internet sites in Browser.
Using Browser
Upon activating Browser, Quick toolbox guidance appears by default.
• To disable it thereafter, Tap Don't show again ( ) and
Tap
Close.


In application sheet, (Browser)


Browser activates.
- Flick to scroll.
Adding Bookmarks

In application sheet, (Browser)


Browser activates.

Open target webpage



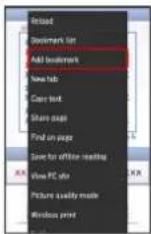

Add bookmark window opens.

Check/edit label, URL, etc.


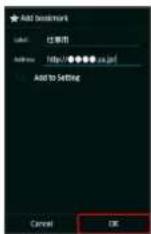

Current webpage is saved as a bookmark.
Opening Bookmarks

In application sheet, (Browser)


Browser activates.


Bookmark window opens.

Tap bookmark

Corresponding webpage opens.
Using History
1
In application sheet, (Browser)
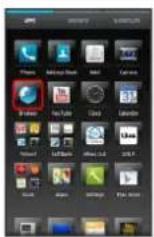

Browser activates.
2


Bookmark list


Bookmark window opens.
3
HISTORY


History list appears.
4
Tap item (such as
oday ) Tap record

Corresponding webpage opens.
· Frequently visited webpages are saved in Most visited.
Saving Webpages
1
In application sheet, (Browser)


Browser activates.
2
Open target webpage


ne reading

Current webpage is saved.

Opening New Tabs
Open up to 16 webpages in different tabs to switch between them easily.
1
In application sheet, (Browser)


Browser activates.
2


New tab


Another tab opens.
- When multiple tabs are open, Tap
to open another tab.
• To switch tabs, Tap Tab in Browser, then Tap target tab.

SSL & TLS
Secure Sockets Layer (SSL) and Transport Layer Security (TLS) are encryption protocols that secure Internet transmissions of important/sensitive information such as credit card numbers and corporate secrets, providing protection against online threats (eavesdropping, falsification, impersonation, etc.).

Browser Operations
Signing in to My SoftBank
Access My SoftBank to check service charges or reward points, change contract details (subscribed price plan, optional services, etc.), customize handset address, use anti-spam settings, etc.
In Browser,


list My SoftBa


Follow onscreen prompts
Searching for Information
In Browser, Tap URL entry field Enter search text


ap link
Editing Bookmarks
In Browser,


list Touch & Hold
bookmark

or move bookmark Edit


Deleting Bookmarks
In Browser,


list Touch & Hold
bookmark

te bookmark Yes

Searching within Current Webpage
In Browser,


age Enter search


Search results are highlighted.
Opening Saved Webpages
In Browser,


list SAVED PA


Tap page

SSL/TLS Caution
When a security notice appears upon opening a webpage, subscribers must decide for themselves whether or not to open the page. Opening secure pages constitutes agreement to the terms of SSL/TLS usage. SoftBank Mobile Corp., SHARP Corporation, VeriSign Japan and Cybertrust cannot be held liable for any damages associated with the use of SSL/TLS.
Camera
Photo Camera....64
Video Camera....65
Photo Camera
Capturing Photos
Capture JPEG images.
- Captured photos are saved to handset memory by default.

In application sheet, (Camera)


Photo Viewfinder appears.
- If confirmation appears, follow onscreen prompts.

Aim External Camera at subject

· For people, focus automatically locks on detected face.


Shutter sound plays; photo is saved to handset memory.

Photo Viewfinder Operations
Adjusting Brightness
Drag up/down for Brightness Scale
Adjusting Zoom
Drag left/right or Pinch/Spread for Zoom Slider
- Zoom may be unavailable depending on Camera mode.
Locking Focus
Tap subject for focus lock
• To release shutter, Tap the subject again.
- External Camera uses color to track subjects; may not correctly track faintly colored subjects or ones similar to background color.
Opening Captured Photo
Tap preview thumbnail

Album activates (appears) and photo appears.
Using Internal Camera
Use Internal Camera to capture self or others with Lens on Display side.


• Tap to toggle Internal/External Camera.
- Some functions/settings are not available for Internal Camera.

Camera Cautions
General Use
Mind etiquette when using Camera.
Keep Lens Clean
Fingerprints/smudges may hinder handset imaging. Clean Lens with a soft cloth beforehand.
Avoid Direct Sunlight Exposure
Do not expose Lens area to direct sunlight for extended periods; may damage color filter, altering images.

Mobile Light Warning
Do not shine Mobile Light in eyes; may affect eyesight or cause other problems.
Video Camera
Recording Videos
Record H.264/AAC videos.
• Available format varies by recording size.
- Recorded videos are saved to handset memory by default.
1
In application sheet, (Camera)


Photo Viewfinder appears.
- If confirmation appears, follow onscreen prompts.
2

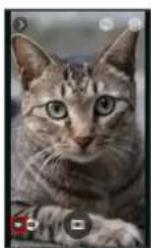

Video Viewfinder appears.
- If confirmation appears, follow onscreen prompts.
3
Aim External Camera at subject to start recording
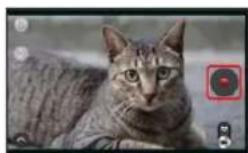

Tone sounds and recording starts.
- For people, focus automatically locks on detected face.
4

to stop recording


Tone sounds and recording stops; video is saved to handset story.

Video Viewfinder Operations
Adjusting Brightness
Drag up/down for Brightness Scale
Adjusting Zoom
Drag left/right or Pinch/Spread for Zoom Slider
Locking Focus
Tap subject for focus lock
- External Camera uses color to track subjects; may not correctly track faintly colored subjects or ones similar to background color.
Playing Recorded Video
Tap preview thumbnail Tap Follow-onscreen prompts

Album activates (appears) and video plays.
Using Internal Camera
Use Internal Camera to record self or others with Lens on Display side.


Tap to toggle Internal/External Camera.
- Some functions/settings are not available for Internal Camera.
! Camera Cautions
General Use
Mind etiquette when using Camera.
Keep Lens Clean
Fingerprints/smudges may hinder handset imaging. Clean Lens with a soft cloth beforehand.
Avoid Direct Sunlight Exposure
Do not expose Lens area to direct sunlight for extended periods; may damage color filter, altering images.
Continuous Recording Time
Recording capacity is 2 GB per file (recording stops when exceeded). To continue recording, start another session.
Mobile Light Warning
Do not shine Mobile Light in eyes; may affect eyesight or cause other problems.
Music & Images
Music & Images....68
Music Files (Music).... 68
Still Images & Video (Album)......69
Music & Images
Main Applications
Application Description
| Music | Play music files saved to handset or SD Card. |
| Album | Photos and videos shot on handsetor downloaded images are sorted intoPORTRAIT, EVENT and MAP tabs. |
Music Files (Music)
Playing Music Files
Supported file formats:
- 3GPP, 3GPP2, MP4, MP3, AMR, WMA (except WMDRM content), ASF (except WMDRM content), OGG Vorbis, WAVE, MIDI, XMF, RTTTL/RTX, OTA, iMelody, ADTS raw AAC, FLAC
1
In application sheet, (Music)


Library opens.
appears next to the last played song in song list.
2
Select category (such as
Albums)

3
Tap item Tap song


Song plays.
· In Songs, Tap song directly.
· After Tapping an item, you may need to Tap another item (such as album name) depending on category.
Still Images & Video (Album)
Photos and videos shot on handset or downloaded images are sorted into PORTRAIT, EVENT and MAP tabs.
Opening/Playing Files
View still images and videos saved to handset memory and SD Card. See below for supported file formats.
Image File Format
Still Image JPEG, PNG, GIF, BMP, WBMP, WebP
Video
3GPP, 3GPP2, MP4, WMV (except WMDRM content), ASF (except WMDRM content), WebM, Matroska, MPEG2-TS
1
In application sheet, (Album)


File list appears.
- Tap ALL, PORTRAIT, EVENT or MAP to open files by category.
- When activating Album for the first time, ALL file list appears. Album activates in the last-used state thereafter (file list or folder list appears).
- Flick up/down for hidden files.
- If confirmation appears, follow onscreen prompts.
2
Tap file


File opens.
- For video playback, Tap, then select application. If confirmation appears, follow onscreen prompts.
Connectivity
Wi-Fi....72
Tethering Option.... 74
Bluetooth ® 75
Wi-Fi
Use household Wi-Fi networks, etc. to connect to the Internet.
Enabling Wi-Fi
1
In application sheet, (Settings)

tings


Wi-Fi settings opens.
2

on Action Bar


Wi-Fi is enabled ( ).ON
- Access point search starts; available access points appear upon completion.
Tap to disable Wi-Fi (). OFF
Connecting Selected Access Points
Enable handset Wi-Fi first.
1
In application sheet, (Settings)

tings


Wi-Fi settings opens.
2
Tap access point

3
Enter password

ect


Connection is established.
- Password (indicated by WEP, WPA, KEY, etc.) may be found on a label on your Wi-Fi router. For details, contact the vendor of the router. For public wireless LAN services, check the password with your ISP.
- Omit password entry for unprotected access points.
Disconnecting Wi-Fi
1
In application sheet, (Settings)

tings


Wi-Fi settings opens.
2
Tap connected access point

et
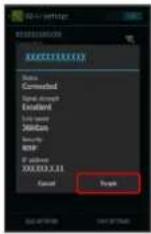

Wi-Fi is disconnected.
- Password entry may be required to reconnect to access point.
Using Wi-Fi Direct
Use Wi-Fi Direct to establish a Wi-Fi connection with other Wi-Fi Direct compatible devices with no need for an access point or Internet connection.
- Enable handset Wi-Fi first.
1
In application sheet, (Settings)

tings


Wi-Fi settings opens.
2

Wi-Fi Direct


Found Wi-Fi Direct compatible devices appear in Peerices field.
· If target device does not appear, Tap
SEARCH FOR
DEVICES
to try searching again.
3
Tap target device Follow onscreen prompts for authentication

Tapped device is connected.

Automatic Updates for Optimizing Wi-Fi Connection
While using Wi-Fi, updates for optimizing connection may be received or applied automatically.
+ Wi-Fi Operations
Connecting Access Points Manually
In Wi-Fi settings, ADD NETWORK Enter Network
SSID Tap Security field Tap security
protocol
• Available when Wi-Fi settings is enabled.
- Selected security protocol may require other fields to be completed.
Connecting Using AOSS
In Wi-Fi settings, EASY SETTINGS A Follow
onscreen prompts
Enabling/Disabling Available Network Notifications
In Wi-Fi settings, www Network
notification
• Available when Wi-Fi settings is enabled.
- Tap Network notification to toggle on ( )/off ( ).
Selecting a Wi-Fi Sleep Option
In Wi-Fi settings, Adwa → Wi-Fi slee →
policy Tap option
Setting Wi-Fi Frequency Band
In Wi-Fi settings, Adva Wi-Fi
frequency band , 5 G only or 2.4
only
Connecting Using WPS
In Wi-Fi settings, ASY SETTINGS ✕ ✘ ✘ ✘ ✘ ✘ ✘ ✘ ✘ ✘ ✘ ✘ ✘ ✘ ✘ ✘ ✘ ✘ ✘ ✘ ✘ ✘ ✘ ✘ ✘ ✘ ✘ ✘ ✘ ✘ ✘ ✘ ✘ ✘ ✘ ✘ ✘ ✘ ✘ ✘ ✘ ✘ ✘ ✘ ✘ ✘ ✘ ✘ ✘ ✘ ✘ ✕ ✕ ✕ ✕ ✕ ✕ ✕ ✕ ✕ ✕ ✕ ✕ ✕ ✕ ✕ ✕ ✕ ✕ ✕ ✕ ✕ ✕ ✕ ✕ ✕ ✕ ✕ ✕ ✕ ✕ ✕ ✕ ✕ ✕ ✕ ✕ ✕ ✕ ✕ ✕ ✕ ✕ ✕
Button Follow onscreen prompts
To connect using the PIN method, Tap EASY SETTINGS in Wi-Fi settings, Tap WPS Pin Entry, then follow onscreen prompts.
Dismissing Access Points
In Wi-Fi settings, Touch & Hold access point
network
? Troubleshooting
Q. Cannot detect access points
A. There may be multiple access points using neighboring channels. In this instance, handset may not detect access points correctly.
Tethering Option
About Tethering Option
Use handset like a Wi-Fi router to access the Internet from a PC or game device.
- Requires separate subscription.
- Use after checking that handset is updated to the latest software.
Starting Up Tethering Option
1
In application sheet, (Tools) (Tethering)
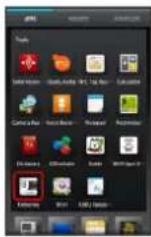
Tethering window appears.
- When Terms of Agreement appear, follow onscreen prompts.
Opening Tethering Option Help (Japanese)

In application sheet, (Tools) (Tethering)


Tethering window appears.

Help
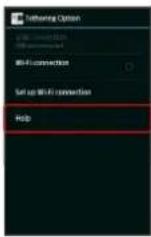

Help window appears.

Follow onscreen prompts

A description of each item appears.

Wi-Fi Connection
After enabling Wi-Fi connection (), it will be automatically disabled () when no connection is made to handset for a certain period of time.
Bluetooth®
Connect handset to other Bluetooth ® devices for wireless connectivity.
Bluetooth® Functions
Function Description
Sound output Listen to music, audio, etc. wirelessly.
Handsfree Use Bluetooth® devices (such as headsets) conversation for handsfree conversations.
File transfer Transfer files between handset and Bluetooth ® devices.
Enabling Bluetooth®

In application sheet, (Settings)

tings


Bluetooth


Bluetooth® menu opens.

OFF on Action Bar


Bluetooth ® is enabled
).ON
- Tap to disable Bluetooth
( ).OFF
Device Search & Pairing
Pair nearby Bluetooth ® devices with handset to transfer files, for handsfree conversations, or to listen to music.
- Enable Bluetooth® on handset and set target devices to be discoverable first.
1
In application sheet, (Settings)

tings

2
Bluetooth

Bluetooth® menu opens; found Bluetooth® devices appear in Available devices field.
• If target device does not appear, Tap SEARCH FOR DEVICES to try searching again.
3
Tap target device Follow onscreen prompts for authentication
Pairing completes; handset connects to some devices (such as handsfree devices) automatically.
- Authentication procedure varies by device. Passkey entry may be required.
- Passkey is a 1 to 16-digit alphanumeric code required for authentication between handset and other devices.
- Paired devices appear in Paired devices field.
Connecting Paired Bluetooth ® Devices
1
In application sheet, (Settings)

tings

2
Bluetooth

Bluetooth® menu opens.
- Paired Bluetooth® devices appear in Paired devices field.
3
Tap target device
Tapped device is connected.
Sending Files (e.g., Address Book)
1
In application sheet, (Address Book)


Address Book opens.
2
Tap tab Tap contact


Contact opens.
- Contacts are sorted by the first character of last name (Read last).
3

(send) on Action Bar

by Bluetooth

4

Tap device

File is sent.
- If confirmation appears, follow onscreen prompts.
Receiving Files (e.g., Address Book)
When file reception request arrives, pears. To receive files:
1
Drag Status Bar down for Notifications Window

2
Tap Bluetooth® share notification


3
After receiving files, Drag Status Bar down for Notifications Window
4
Tap Bluetooth® share notification Tap file


of data


Data is saved.
- If confirmation appears, follow onscreen prompts.
- Messages received via Bluetooth® can be used from Contents Manager.
#
Accepting Connection Requests
Handset automatically accepts connection requests from paired devices. For unpaired devices, set handset to be discoverable first; when connection request arrives, follow onscreen prompts.
- If confirmation appears, follow onscreen prompts.
+ Bluetooth® Connection Operations
Renaming Paired Devices
In Bluetooth ® menu, (next to target device name)

Rename Enter name

- Pictograms are not supported.
Unpairing Devices
In Bluetooth® menu, (next to target device name)

Unpair
Connecting to Bluetooth® Devices by Service
In Bluetooth® menu, (next to target device name)

Tap item
· Available for compatible devices only.
Disconnecting Devices (e.g., Handsfree Devices)
In Bluetooth® menu, Tap device

Setting whether to Allow Other Devices to Detect Handset
In Bluetooth® menu, Tap handset name (default:
SBM206SH
- Description below handset name changes to Visible to all nearby Bluetooth devices, and handset will be discoverable from other Bluetooth® devices for a period of time set in Visibility timeout.
- Handset returns to non-discoverable state automatically after a period of time set in Visibility timeout, and will be hidden from unpaired devices.
Changing Handset Name that Appears on Other Devices
In Bluetooth® menu,

none Enter

name

me
· Pictograms are not supported.
Changing Discoverable Time
In Bluetooth® menu,

timeout Tap

option
- For Never time out, handset does not return to non-discoverable state automatically.
? Troubleshooting
Q. Cannot use Bluetooth ®
A. Airplane mode may be active. Activating Airplane mode disables Bluetooth®. (Bluetooth® can be enabled again while Airplane mode is active.)
Important Bluetooth® Usage Notes
Connection
Bluetooth® connection may not be possible with some Bluetooth® devices. Noise may interfere with wireless or handsfree conversations.
File Transfer
Files may not appear correctly on recipient devices.
Global Services
Global Roaming....80
Calling from Outside Japan....81
Global Roaming
Handset is Global Roaming Service eligible. Use the same handset number outside Japan.
Selecting Network Service
Handset connects to 4G or 3G Network service automatically by default. Use default Network service setting in Japan and other areas with no GSM Network coverage.
To change setting according to Network service provided by target cellular provider outside Japan:
1
In application sheet, (Settings)

2
Other settings

ork settings
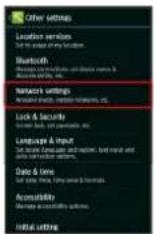
3
Mobile networks

4
4G/3G/GSM settings


4G/3G/GSM settings opens.
5
Manual

G/GSM,4G/
, 3G/GS
,3G

or


Network service is set.
• To select Network service automatically, Tap
Auto.
Selecting a Cellular Provider
Handset connects to an appropriate cellular provider automatically by default. To select a cellular provider manually:
1
In application sheet, (Settings)

2
Other settings work settings

3
Mobile networks

4
Network operators
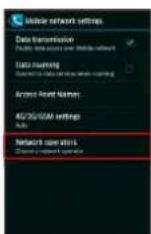
5
Tap provider

Cellular provider is set.
- Tap Choose automatically to set an appropriate cellular provider automatically.
- Tap Search networks to search for all available cellular providers.
Calling from Outside Japan
See SoftBank Mobile Website for details:
http://mb.softbank.jp/en/global_services/
Access roaming area/rate information or print it out to carry while traveling abroad.
Calling Japan
1
In application sheet, (Phone)


Call Window opens.
- When Incoming History or Outgoing History opens, Tap
Phone - When missed call window opens, Tap 3-Line Home returns, Tap (Phone) in application sheet again.
2
Use onscreen dialpad to enter number


Roaming assistant appears.
- Do not add + before the number.
3
Japan number


Handset dials the number.
Calling Landlines & Mobiles within Current Country
1
In application sheet, (Phone)


Call Window opens.
- When Incoming History or Outgoing History opens, Tap
Phone - When missed call window opens, Tap 3-Line Home returns, Tap phone) in application sheet again.
2
Use onscreen dialpad to enter number


Roaming assistant appears.
- Do not add + before the number.
3
Stay country number


Handset dials the number.
Calling Countries aside from Japan
1
In application sheet, (Phone)


Call Window opens.
· When Incoming History or Outgoing History opens, Tap
Phone
- When missed call window opens, Tap 📄3-Line Home returns, Tap (Phone) in application sheet again.
2
Use onscreen dialpad to enter number


Roaming assistant appears.
- Do not add + before the number.
3
Other country number


Country code list appears.
4
Tap country


Handset dials the number.
- When calling SoftBank handsets, always Tap
日本(JPN)

International Call Operations
Changing Country Codes

Tap Entry direct to enter country name and code directly.
Deleting Country Codes

Enabling/Disabling Abroad Assistant

- Tap Abroad assistant to toggle Enable ( ) and Disable ( ).
Settings
About Settings....86
Sound Settings....87
Wallpaper & Display Settings......89
Device Info....90
Add Account....91
Wi-Fi Settings....91
Home Applications Setting....92
Storage Settings....92
Application Settings....93
Other Settings....94
About Settings
About Settings
In application sheet, Tap (Settings) to customize the following settings.
Item Description
Profile Check handset number, mail address, etc.
| Sound settings | Set ringtone, confirmation tones, etc. |
| Wallpaper & display | Set Wallpaper, Display brightness, etc. |
| Energy saving | Adjust corresponding settings together at once to save battery power, or check battery status. |
| Device info Check handset status. | |
| Add account Create/add accounts and sync accounts. | |
| Wi-Fi settings Enable Wi-Fi connection. | |
| Wi-Fi spot settings | Make SoftBank Wi-Fi spot settings. |
| Call Set call options. | |
| Mail settings Set messaging options. | |
| Browser settings | Set Browser options. |
| Guide Show/hide Guide indicator. | |
| Home applications | Switch Home application. |
| Speech launcher settings | Set voice launcher options. |
| PC media transfer | Set MediaJet (application for PC connection) options. |
| Data usage Check data usage and set limit. | |
| Storage | Check handset/SD Card memory status, mount SD Card and erase handset memory files or SD Card files. |
| Application | Check installed applications and running applications. |
| Other settings | Set operation of other functions. |
1
In application sheet, (Settings)


Settings opens.
2
Set each item

Setting is complete.
Sound Settings
Sound Settings
Item Description
Mode settings Set Silent mode.
Volume Adjust volume levels.
| For Incoming call | Set ringtone and other options for incoming calls. |
| For new message | Set ringtone and other options for incoming messages. |
| For notification | Set sound and other options for notifications. |
Alarm Set volume and other options for Alarm.
Timer Set sound and other options for Timer.
| Haptic feedback | Enable Vibration when Tapping dialpad, keys, etc. |
| Audible touch tones | Enable confirmation tones when Tapping a menu. |
| Dial pad touch tones | Enable/disable dialpad tones. |
| Screen lock sounds | Enable tone when locking/unlocking Touchscreen. |
1
In application sheet, (Settings)

2
Sound settings


Sound settings opens.
3
Set each item

Setting is complete.

Sound Settings Operations
Set Silent Mode
In Sound settings, Mode settings Tap option
- Camera shutter sound, video recording tones, music, video/game sounds, etc. still play even in Silent mode.
Set Handset Volume
In Sound settings, volume Drag slider to adjust
Volume


· Sound plays at set Volume upon releasing finger.
Set Ringtone for Incoming Calls
In Sound settings, or Incoming call M
Tap option ( Media Storage, nd/Ringtone, etc.)
→ Always or st once Tap tone/file

- Sound plays upon Tapping a tone/file.
Enable/Disable Vibration for Incoming Calls
In Sound settings, or Incoming call Version
Tap option
Set Vibration Pattern for Incoming Calls
In Sound settings, or Incoming call V or
pattern Tap pattern

- Handset vibrates upon Tapping a pattern.
Set Notification Lamp Illumination for Incoming Calls
In Sound settings, for Incoming call In coming lamp
Blinking pattern or
inking color Tap item
→ OK
- Notification Lamp flashes upon Tapping an item.
Set Ringtone for Incoming Messages
In Sound settings, or new message M
Select melody Tap option (
Storage,
Sound/Ringtone, etc.)
WIS or JU

Tap tone/file


- Sound plays upon Tapping a tone/file.
· To disable ringtone, Tap OFF instead of
elect
melody.
Set Vibration Pattern for Incoming Messages
In Sound settings, for new message Vector or
Tap pattern
- Handset vibrates upon Tapping a pattern.
Set Notification Lamp Illumination for Incoming Messages

- Notification Lamp flashes upon Tapping an item.
Set Ringtone Duration for Incoming Messages

For Ring single song, selected tone/file plays until it ends.
Set Ringtone for Notifications
- Sound plays upon Tapping a tone/file.
Enable/Disable Notification Lamp for Notifications

- Tap Pulse notification light to toggle on ( )/off (☐).
Set Ringtone Duration for Notifications

- For Ring single song, selected tone/file plays until it ends.
Enable Vibration when Tapping Dialpad, Keys, Etc.
In Sound settings, Haptic feedback
- Tap Haptic feedback to toggle on ( )/off ( ).
- Disable Haptic feedback to save battery power.
Enable Confirmation Tones when Tapping a Menu
In Sound settings, audible touch tones
- Tap Audible touch tones to toggle on ( )/off ( ).
- Disable Audible touch tones to save battery power.
Enable/Disable Dialpad Tones
In Sound settings, dial pad touch tones
- Tap Dial pad touch tones to toggle on ( )/off ( ).
- Disable Dial pad touch tones to save battery power.
Enable Tone when Locking/Unlocking Touchscreen
In Sound settings, green lock sounds
- Tap Screen lock sounds to toggle on ( )/off ( ).
- Disable Screen lock sounds to save battery power.
Wallpaper & Display Settings
Item Description
| Wallpaper | Set Wallpaper for SH HOME (Home application). |
| Welcome Sheet(lock screen) | Set Wallpaper and other options for Welcome sheet (lock screen). |
| Brightness Set Display brightness. | |
| Screen timeout | Set a period of inactivity after which Display turns off automatically. |
| Quality mode | Select a mode (combination of Display color tone and brightness). |
| Auto-rotate screen | Set whether to rotate Display with handset orientation automatically. |
| Screen on/off with motion | Set Display to turn on/off upon Dragging or shaking handset, or keep it turned on while hand-holding handset. |
| Font Settings Set font size and font type. | |
| VeilView Prevent peeking. | |
| Daydream | Set screensaver (application, color pattern, slideshow, etc.) to activate when Display turns off in 3-Line Home while charging. |
| Display left percents of Battery | Set whether to show battery strength in percent. |
1
In application sheet, (Settings)

2
Wallpaper & display


Wallpaper & display menu opens.
3
Set each item

Setting is complete.

Wallpaper & Display Operations
Set Preset Image as Wallpaper
Change Wallpaper for SH Home (Home application).

- For some images, additional settings are available; follow onscreen prompts.
Set Still Image as Wallpaper for Welcome Sheet (Lock Screen)

To remove Wallpaper, Tap To cancel the setting when Tapping an option.
Set a Period of Inactivity after which Display Turns Off
In Wallpaper & display menu, green timeout Tap time
- Set a shorter time to save battery power.
Set whether to Keep Display Turned On while Hand-Holding Handset

For ON (Notify), a Years indicating Bright Keep is enabled.
- Hand-held state is determined based on handset angle and Proximity/Light Sensor responses; may not be determined correctly depending on usage status.
Device Info
Device Info
Check handset status.

In application sheet, (Settings)


Device info


Device info menu opens.
- For details on Software update, see "Software Updates."

Device Info Operations
Make Developer Options Available
In Device info menu, Tap build number seven times
• To access developer options, open Settings, then Tap
Other settings

oper options
Check Handset Status (Battery Status, Handset Number, Etc.)
In Device info menu,
tatus
- Tap Battery status to check battery performance.
- Tap IMEI to view barcode with IMEI number.
Calibrate Touchscreen
Calibrate Touchscreen to improve response. Hold handset normally during calibration.
In Device info menu, adjust touch panel Follow onscreen prompts
Calibrate Motion & Electromagnetic Sensors
In Device info menu,
adjust sensitivity of sensor

OK Follow onscreen prompts (tone sounds when
Check Legal Information, Authentication, & Technical Regulations Conformity Certification
In Device info menu,
egal information
Authentication or
Technical Regulations Conformity
Certification
- Handset complies with requirements as stipulated by the Radio Law and Telecommunications Business Law.
Add Account
Add Account
Create/add accounts and sync accounts.

In application sheet, (Settings)


Add account


Tap account type Follow onscreen prompts

An account is added.

Select Applications to Sync by Account
In application sheet, (Settings) Tap account type

Tap account Tap sync option ( )

Wi-Fi Settings
Wi-Fi Settings

In application sheet, (Settings)


Wi-Fi settings


Wi-Fi settings opens.


on Action Bar


Wi-Fi is enabled ( ). ON
- Access point search starts; available access points appear upon completion.
Tap to disable Wi-Fi ( ).


Tap access point Enter password


Connection is established.
- Password (indicated by WEP, WPA, KEY, etc.) may be found on a label on your Wi-Fi router. For details, contact the vendor of the router. For public wireless LAN services, check the password with your ISP.
- Omit password entry for unprotected access points.
- See "Wi-Fi" for more about Wi-Fi settings and operations.
Home Applications Setting
Home Applications Setting
Set Home application.

In application sheet, (Settings)


Home applications


Home applications menu opens.

Tap Home application

Setting is complete.
Storage Settings
Storage Settings
Item Description
| Total space | Check total space in handset system memory, handset memory and SD Card. |
| Available | Check free space in handset system memory, handset memory and SD Card. |
| Erase phone storage | Format handset memory.See "Formatting Handset Memory" for details. |
| Mount microSD | Mount SD Card.See "Unmounting SD Card" for details. |
| Unmount microSD | Unmount SD Card to remove it safely.See "Unmounting SD Card" for details. |
| Erase microSD | Format SD Card.See "Formatting SD Card" for details. |
| Preferred install location | Set install location for applications. |
| Export to microSD | Copy handset memory files to SD Card. |
| Import to phone | Copy SD Card files to handset memory. |
| microSD backup | Back up files to SD Card. |

In application sheet, (Settings)


Storage
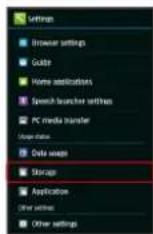

Storage menu opens.

Set each item

Setting is complete.
Storage Settings Operations
Set Install Location for Applications
In Storage menu, Preferred install location Tap Item
File Backup (Handset to SD Card)
Back up handset files (contacts, sent/received messages, bookmarks, etc.) to SD Card.

- If confirmation appears, follow onscreen prompts.
- Backup stops if Battery runs low. Check battery charge beforehand.
To select ( ) or cancel ( ) multiple items together at once in Backup item list, Tap check all) or (unchecked all) on Action Bar. - microSD backup requires 11 MB of free space in handset system memory.
Application Settings
Application Settings
Check installed applications and running applications.
1
In application sheet, (Settings)

2
Application

[NO TEXT]
Tap DOWNLOADED, ON SD CARD, RUNNING or ALL
to open applications by category.
- Flick application list left/right to toggle categories.
3
Tap application
[NO TEXT]
Details appear.
4
Set each item
[NO TEXT]
Setting is complete.
Other Settings
Other Settings
Item Description
| Location services | Enable location information. |
| Bluetooth Set Bluetooth® connections. | |
| Network settings | Set Airplane mode, mobile network, etc. |
| Lock & Security | Set Screen lock, Operation Password, etc. |
| Language & input | Set functions for language and text entry. |
Date & time Set functions for date and time.
Accessibility Set functions for text-to-speech, etc.
Initial setting Perform initial setup manually.
Reset all Delete all handset system memory files.
1
In application sheet, (Settings)

2
Other settings


Other settings opens.
3
Set each item

Setting is complete.
Bluetooth® Settings
1
In application sheet, (Settings)

2
Other settings


Other settings opens.
3
Bluetooth


Bluetooth® menu opens.
4
Set each item

Setting is complete.
- For details on each item, see "Bluetooth®."
Network Settings
Item Description
| Airplane mode | Leaving power on, suspend signal-transmitting functions. |
| NFC/Osaifu-Keitai settings | Set NFC/Osaifu-Keitai® operations. |
| Wireless output (Miracast) | Set wireless output. |
| Home network settings | Share media files with other devices over a home network. |
| VPN settings Set virtual private networks (VPNs). | |
| Set Network options. | |
| Mobile networks | For details on 4G/3G/GSM settings and Network operators, see "Global Roaming." |
1
In application sheet, (Settings)

2
Other settings


Other settings opens.
3
Network settings


Network settings opens.
4
Set each item

Setting is complete.
+ Network Settings Operations
Enable/Disable Signal-Transmitting Functions
In Network settings, Airplane mode
- Tap Airplane mode to toggle on ( )/off ( ).
Activate/Cancel NFC/Osaifu-Keitai® Lock
In Network settings, JFC/Osaifu-Keitai settings
NFC/Osaifu-Keitai lock OK
To cancel, follow the steps above. (After Tapping Next, enter Operation Password to proceed.)
Set whether to Require Operation Password for Activating NFC/Osaifu-Keitai® Lock
In Network settings, JFC/Osaifu-Keitai settings
Passcode settings vs demand or N
demand Enter Operation Password

Enable/Disable Sharing of Handset Memory/SD Card Media Files on DLNA Devices
In Network settings, Home network settings H
network server
- Set up Wi-Fi for home NW server beforehand.
- Tap Home network server to toggle on ( )/off ( □ ).
- See TV user guide to learn how to connect handset to DLNA-compatible TV.
Set up a Network (Wi-Fi Access Point) for DLNA Service
In Network settings, Home network settings V
for home NW server Tap access point
· Available when Home network server is off.
- If confirmation appears, follow onscreen prompts.
Save Handset Name that Appears on DLNA Devices
In Network settings, Home network settings H
network server name Tap server name field Enter
name
• Available when Home network server is off.
Add Virtual Private Networks (VPNs)
In Network settings, /PN settings A PN
profile Set →
- Set up pattern, Lock No. passcode or password for Screen lock beforehand.
- Tap an added VPN to connect/disconnect it. Touch & Hold to edit/delete it.
Enable/Disable Mobile Data Transmissions
In Network settings, Mobile networks D
transmission
- Tap Data transmission to toggle on ( )/off ( ).
Enable/Disable Data Roaming
In Network settings, mobile networks D
roaming
- Tap Data roaming to toggle on ( )/off ( ).
- If confirmation appears, follow onscreen prompts.
Add Access Points
In Network settings, Mobile networks A and Point

Delete Added Access Points (Restore Default Settings)
In Network settings, Mobile networks A Point
Names 50 Default

∴ m = 3/11
Lock & Security Settings
Item Description
| Operation password setting | Set Operation Password to use or change some functions.See "Setting Operation Password" for details. |
| Screen lock Set Screen lock option. | |
| NFC screen-unlock settings | Use IC Card (NFC) as an option to cancel Screen lock. |
| Owner info | Show owner information in Welcome sheet (lock screen). |
| Secrecy settings | Hide contacts, messaging folders, etc. |
| Contacts data access monitor | Control access of applications to Address Book. |
| USIM card lock settings | Set whether to require PIN entry when powering on.See "USIM PIN" for details. |
| Visible passwords | Show/hide passwords as you type. |
| Device administrator | Enable/disable device management option. |
| Unknown sources | Enable/disable installation of non-Google Play applications. |
| Verify apps | When installing a malicious application, show a warning or prevent its installation. |
| Use secure credentials | Control access of applications to secure certificates and other authentication information. |
| Install from microSD | Install encrypted authentication information from SD Card. |
| Clear credentials | Delete all authentication information and reset password for authentication information storage. |
1
In application sheet, (Settings)

2
Other settings


Other settings opens.
3
Lock & Security


Lock & Security menu opens.
4
Set each item

Setting is complete.
+ Lock & Security Operations
Disable Screen Lock
In Lock & Security menu,
screen lock N

- When an option other than None or Hide is selected, after Tapping Screen lock, cancel Screen lock to proceed.
Require Dragging for Canceling Screen Lock
In Lock & Security menu,
screen lock S

- When an option other than None or lide is selected, after Tapping Screen lock, cancel Screen lock to proceed.
Require Face Recognition for Canceling Screen Lock
In Lock & Security menu,
screen lock F


Read message

t up Cont


Align face with guide Face captured. appears

Continue Select secondary unlock option (in case of

face recognition failure) Set pattern or passcode

- When an option other than None or lide is selected, after Tapping Screen lock, cancel Screen lock to proceed.
Require Pattern Drawing for Canceling Screen Lock
In Lock & Security menu,
screen lock P


Draw pattern

inue Draw


Confirm
- When an option other than None or lide is selected, after Tapping Screen lock, cancel Screen lock to proceed.
Require Passcode Entry for Canceling Screen Lock
In Lock & Security menu,
screen lock L


Enter passcode

inue Re-enter passcode

OK
- When an option other than None orlide is selected, after Tapping Screen lock, cancel Screen lock to proceed.
Require Password Entry for Canceling Screen Lock
In Lock & Security menu,
green lock P


Enter password
inue Re-enter password
OK
- When an option other than None or lide is selected, after Tapping Screen lock, cancel Screen lock to proceed.
Set whether to Show Owner Information in Welcome Sheet (Lock Screen)
In Lock & Security menu,
Owner info S

owner
info on lock screen
- Tap Show owner info on lock screen to toggle on ( ) off ( ).
• After enabling Show owner info on lock screen, enter owner information.
To show owner information, Tap 📊 Welcome sheet (lock screen). (Tap 🌘 hide it.)
Control Access of Applications to Address Book
In Lock & Security menu,
contacts data access monitor

Tap application
it access or

access

- Select Notify statusbar, to show a notification when an application accesses Address Book.
Enable/Disable Installation of Non-Google Play Applications
In Lock & Security menu,
Unknown sources
- Tap Unknown sources to toggle on ( )/off ( ).
- If confirmation appears, follow onscreen prompts.

Language & Input Settings
Item Description
| Select language | Select handset interface language. |
| Spell checker Enable/disable spelling correction. | |
| Personal dictionary | Save words to user dictionary. |
| Default Set default input method. | |
| Android keyboard | Adjust Android keyboard settings. |
| Google voice typing | Enable/disable voice input. |
| iWnn IME - SH edition | Adjust iWnn IME - SH edition settings. |
| Voice Search Set | voice search options. |
| Text-to-speech output | Set text-to-speech options. |
Pointer speed Set pointer speed for mouse/trackpad use.
1
In application sheet, (Settings)

2
Other settings


Other settings opens.
3
Language & input


Language & input menu opens.
4
Set each item

Setting is complete.

Language & Input Operations
Select Handset Interface Language
In Language & input menu, elect language Tap option
Save Words to User Dictionary


To delete a word, Tap it then Tap
Adjust Android Keyboard Settings
In Language & input menu, in Android keyboard field
→ Tap item Follow onscreen prompts
· For some items, setting completes upon Tapping the item.
Adjust iWnn IME - SH edition Settings
Change keyboard design, input/conversion settings, dictionary settings, etc.
In Language & input menu, in iWnn IME - SH edition field Tap category Tap item Follow onscreen prompts
· For some items, setting completes upon Tapping the item.
Date & Time Settings
Item Description
| Automatic date & time | Set date and time automatically. |
| Auto timezone | Enable/disable automatic time zone adjustment. |
| Set date Set date manually. | |
| Set time Set time manually. | |
| Select time zone | Set time zone manually. |
| Use 24-hour format | Enable/disable 24-hour format. |
| Choose date format | Set date format. |
1
In application sheet, (Settings)

2
Other settings


Other settings opens.
3
Date & time


Date & time menu opens.
4
Set each item

Setting is complete.

Date & Time Operations
Set Date & Time Automatically
In Date & time menu, automatic date & time • Tap Automatic date & time to toggle on ( )/off ( □ ).
Enable/Disable Automatic Time Zone Adjustment
In Date & time menu, auto timezone · Tap Auto timezone to toggle on ( )/off ( ).
Set Date Manually
In Date & time menu, let date Select date • Available when Automatic date & time is off.
Set Time Manually
In Date & time menu, let time Select time • Available when Automatic date & time is off.
Set Time Zone Manually
In Date & time menu, elect time zone Tap country/area
• Available when Auto timezone is off.
Enable/Disable 24-hour Format
In Date & time menu, se 24-hour format Tap Use 24-hour format to toggle on ( )/off ( ).
Set Date Format
In Date & time menu, choose date format Tap option
Reset All
Delete all handset system memory files.
- Reset all deletes all handset system memory files including some preinstalled applications irreversibly. Back up important information before performing Reset all.
1
In application sheet, (Settings)

2
Other settings

Other settings opens.
3

4
Enter Operation Password


Reset all window opens.
5
Read message

phone

- To delete all handset memory files simultaneously, Tap Erase internal storage ( ).
To delete all SD Card files simultaneously, Tap Erase microSD ( ).
6
Erase everything

Reset all starts.
Appendix
Specifications....104
Customer Service....105
Handset
Item Description
| Weight 159 g (with Internal Battery) | |
| Internal | |
| Battery | 3,080 mAh |
| Capacity | |
| Continuous | 3G: 1,000 minutes 1 |
| Talk Time 2 | GSM: 700 minutes 1 |
| Continuous | 3G: 500 hours 1 |
| Standby | GSM: 430 hours 1 |
| Time 3 | 4G: 430 hours 1 |
| Continuous | |
| Full Seg/One | Full Seg: 4.5 hours 1 |
| Seg Reception | One Seg: 8.5 hours 1 |
| Time 4 | |
| Charging | |
| Time 5 | 280 minutes 1 |
| Dimensions (W x H x D) | 71 mm x 140 mm x 9.9 mm (without protruding parts) 1 |
| 3G: 0.25 W | |
| Maximum | GSM (900 MHz): 2 W, GSM (1800 MHz, 1900 MHz): 1 W |
| Output | |
| 4G: 0.2 W | |
1 Approximate value.
2 Average measured with handset fully charged, in strong signal conditions at rest.
3 Average measured with handset fully charged, without calls or operations, in strong signal conditions at rest, and with Data transmission and Urgent News disabled. May vary with battery strength, ambient temperature, settings, etc.
4 Average measured with handset fully charged, with Audio settings set to Natural in landscape view (full screen), using Headphones with Mic (optional accessory) at maximum volume, until Battery runs low (10% of capacity). Reception time may vary with signal strength and content to be viewed. One Seg Reception Time was measured with One-Seg only set.
5 Measured with power off using AC Charger.
- Talk Time, Standby Time and Full Seg/One Seg Reception Time when Eco backlight control is disabled, Outdoor view is disabled and Brightness is set to approximately half of maximum (11 of 21).
- Talk Time, Standby Time and Full Seg/One Seg Reception Time may vary with location, status, settings, etc.
- Display employs precision technology; however, some pixels may remain on/off.
AC Charger
Item Description
| Power Source AC 100 V - 240 V, 50/60 Hz | |
| Power Consumption | 9 W |
| Output Voltage/ Current | DC 5.0 V/1.0 A |
| Charging Temperature | 5°C to 35°C |
| Dimensions (W x H x D) | 40 mm x 53 mm x 23 mm (without protruding parts, cable) 1 |
| Cable Length 1.5 m 1 | |
| Material/ Finishing | PC, MBS, PBT, and TPE resin; copper alloy; SUS/Ni plating |
1 Approximate value.
Desktop Holder
Item Description
| Input | |
| Voltage/Current | DC 5.0 V/1.0 A |
| Output | |
| Voltage/Current | DC 5.0 V/1.0 A |
| Charging Temperature | 5°C to 35°C |
| Dimensions (W x H x D) | 158 mm x 71 mm x 55 mm 1 |
| Material/Finishing | ABS resin/Gold plating |
1 Approximate value.
Customer Service
For SoftBank handset or service information, call General Information. For repairs, call Customer Assistance.
SoftBank Customer Support

General Information
From a SoftBank handset, dial toll free at 157 From a landline/IP phone, dial toll free at 0800-919-0157

Customer Assistance (Repairs/Lost Handsets)
From a SoftBank handset, dial toll free at 113 From a landline/IP phone, dial toll free at 0800-919-0113 If you cannot reach a toll free number, use the number (charges apply) below for your service area: Hokkaido Area, Tohoku Area, Hokuriku Area, Kanto & Koshinetsu Area: 022-380-4380 Tokai Area: 052-388-2002 Kansai Area: 06-7669-0180 Chugoku Area, Shikoku Area, Kyushu & Okinawa Area: 092-687-0010
Smartphone Technical Support Center
From a SoftBank handset, dial toll free at 151 From a landline/IP phone, dial toll free at 0800-1700-151
SoftBank Mobile Global Call Center
From outside Japan, dial +81-3-5351-3491 (toll free from SoftBank handsets)
If handset is lost/stolen, call this number immediately (international charges apply)
Safety Precautions
Safety Precautions....108
Important Product Information....114
Handset & Hardware Care.... 116
General Notes.... 118
FCC Notice.... 119
RF Exposure Information/Specific Absorption Rate*
(SAR) Information....120
Water Resistance....121
Safety Precautions
Read Safety Precautions before using handset.
Observe precautions to avoid injury to self or others, or damage to property.
SoftBank Mobile Corp. is not liable for any damages resulting from use of this product.
Safety Precautions
These labels show degree of risk from improper use; learn them before reading on:
Label Description

DANGER
Great risk of death or serious injury

WARNING
Risk of death or serious injury

CAUTION
Risk of minor injury or damage to property
These symbols signify prohibited/compulsory actions; learn them before reading on:
Symbol Description
| Prohibited |
| Do Not Disassemble |
| Avoid Liquids Or Moisture |
| Do Not Use Wet Hands |
| Compulsory |
| Disconnect Power Source |
Prohibited actions
Disassembly prohibited
Exposure to liquids prohibited
Use with wet hands prohibited
Compulsory actions
Unplug from outlet
Handset, USIM Card, Charger (including Optional Accessories), Desktop Holder, TV Input-to-Micro USB Cable, Micro USB Cable (Optional Accessory) & SD Card (Optional Accessory)

DANGER

Use specified Charger, Desktop Holder and Micro USB Cable only.
Non-specified equipment use may cause Internal Battery to leak, overheat, burst or ignite, and may cause Charger to overheat, ignite, malfunction, etc.

Do not disassemble, modify or solder handset or related hardware.
May cause fire, injury, electric shock or malfunction.
Internal Battery may leak, overheat, burst or ignite.
Modifying handsets is prohibited by the Radio Law and subject to penalty.

Do not expose internal handset parts, Charger or Desktop Holder to liquids.
Do not let exposed internal parts remain wet; do not charge while they are wet. May cause overheating, electric shock, fire, injury or malfunction. Use only as directed.

Do not charge, use, or leave handset or related hardware in extreme heat (fire, heat sources, direct sunlight, inside vehicles, etc.).
Do not charge, leave, use, or be carrying handset or related hardware in a warm place or where heat collects, such as under a kotatsu (blanketed warming table) or electric blanket, next to a kairo (worn warming patch), etc.
May cause warping/malfunction; Internal Battery may leak, overheat, ignite or burst. Handset or related hardware may become hot to the touch, leading to burns or other problems.

Do not force Charger into handset. Check Micro USB plug orientation; retry.
Internal Battery may leak, overheat, burst, ignite, etc.
WARNING

Display uses tempered glass; however, do not subject to impact or apply excessive force.
Display may break, scattering sharp glass pieces. Should Display break, do not touch glass pieces or broken parts directly; may cause injury.

Do not place handset, Charger or Desktop Holder in/on ovens, microwave ovens, pressure cookers, induction stoves or other cooking appliances.
Internal Battery may leak, overheat, burst or ignite. Handset/Charger may overheat, emit smoke, ignite, malfunction, etc.

Keep handset off and Charger disconnected near gas stations or places with fire/explosion risk.
Handset use near petrochemicals or other flammables may cause fire/explosion; power off before using NFC (including Osaifu-Keitai®) at gas stations; unlock NFC (including Osaifu-Keitai®) before powering off.

Do not drop/throw or subject to strong impact.
Internal Battery may leak, overheat, burst or ignite, resulting in fire, electric shock, malfunction, etc.

For unusual sound/odor, smoke or other abnormality:
Continued use may cause fire, electric shock, etc.; grasp plug to disconnect Charger, then power off, being careful not to burn or injure yourself.

Keep liquid (e.g., pet urine) and conductive material (e.g., pencil lead, metal strip/jewelry) away from charging terminals and External Device Port.
May cause short-circuiting, resulting in fire, malfunction, etc.

Never charge handset while it is wet.
May cause fire, malfunction, burns, etc. due to electric shock or short-circuiting.

Do not expose handset or related hardware to hot air from dryers or other sources to dry them or for other purposes. Avoid saunas or hot water.
Internal Battery may leak, overheat, burst or ignite. Handset, Charger or Desktop Holder may overheat, emit smoke, ignite, malfunction, etc.
CAUTION

Do not place handset or related hardware on unstable surfaces.
Handset or related hardware may fall, resulting in injury, malfunction, etc.; take added care when Vibration is set or while charging.

Keep handset and related hardware away from infants and pets.
Infants and pets may choke from swallowing handset or related hardware or be injured, etc.

For use of handset/related hardware by child, explain instructions and supervise use.
Misuse may cause injury or other problems.
Internal Battery

DANGER
Use/dispose of Internal Battery according to battery type.
Symbol
on Label
Battery Type
Li-ion00 Lithium-ion

Prohibited
Do not dispose of handset in fire.
Internal Battery may leak, burst, ignite, etc.

Prohibited
Do not damage (nail, hammer, stomp, etc.)
Internal Battery or subject it to strong impact.
Internal Battery may leak, overheat, burst, ignite, etc.

Compulsory
If battery fluid gets in eyes, do not rub; rinse with clean water and consult a doctor immediately.
Eyes may be severely damaged.

WARNING

Compulsory
If battery fluid contacts skin or clothes, discontinue handset use and rinse with clean water immediately.
May cause skin damage.

Compulsory
If charging continues even after specified Charging Time, stop it.
Internal Battery may leak, overheat, burst, ignite, etc.

Compulsory
For abnormal odor, excessive heat, discoloration or distortion, move handset away from sources of flame, being careful not to burn or injure yourself.
Continued use may cause Internal Battery to leak, overheat, burst, ignite, etc.

Compulsory
Do not let your pet bite handset; if this occurs, do not use that handset.
Pet bites may cause Internal Battery to leak, overheat, burst or ignite. May cause handset/related hardware to malfunction, or fire may result.

CAUTION

Prohibited
Do not dispose of handset with ordinary refuse.
Battery is built into handset; take handset to a SoftBank Shop for appropriate disposal.
Handset
WARNING

Do not use handset while driving or cycling.
Accidents may result.
Phone use while driving or cycling is prohibited by law and subject to penalty; park legally beforehand.

Power off near electronic devices that employ high precision control systems or weak signals.
May cause electronic malfunctions or other problems. Take added care near these devices: Hearing aids, implanted pacemakers/defibrillators and other electronic medical equipment; fire alarms, automatic doors and other automatic control devices.

Power off before boarding aircraft to avoid possible radio wave interference with aircraft operations.
If mobile phone use is allowed on board, follow airline instructions regarding handset use.

Users with a heart condition should adjust ringtone Vibration and Volume as needed.
May cause heart damage.

If thunder is audible while outdoors, power off; find cover.
There is a risk of lightning strike or electric shock.

Do not look into Infrared Port during Infrared transmissions.
Eyesight may be affected.

Do not shine Mobile Light in eyes.
May temporarily affect eyesight or startle, leading to accidents.
CAUTION

Do not use handset when it may affect a vehicle's electronic equipment.
Handset use inside vehicles may cause electronic equipment to malfunction, resulting in accidents.

For any skin irritation associated with use, discontinue use and consult a doctor.
Metal and other materials may cause skin irritation, rashes, or itchiness depending on your physical condition.

Keep handset away from magnetic items (e.g., magnetic cards).
Data on bank cards, credit cards, telephone cards, floppy disks, etc. may be lost.

Do not swing handset by Strap or TV Antenna.
May harm self or others; Strap may break, resulting in injury or handset malfunction/breakage.

Handset may become hot while in use, especially in high temperatures.
Prolonged contact with skin may cause burns.

Always maintain some distance from Speaker while ringtones, music or other handset sounds play.
Excessive volume may damage ears or hearing.

Watch Full Seg and One Seg from a distance in good light.
Watching in poor light or too close may affect eyesight.

Moderate handset Volume when using Headphones.
Excessive volume may damage ears or hearing.
Charger (including Optional Accessories) & Desktop Holder
WARNING

Do not cover/wrap Charger while charging.
Charger may overheat, resulting in fire, malfunction, etc.

Use only the specified voltage.
Non-specified voltages may cause fire, malfunction, etc.
- AC Charger: AC 100 V - 240 V Input - In-Car Charger (use in negative earth vehicles only): DC 12 V/24 V Input
Do not use power adapters. Transformer use may cause fire, electric shock or malfunction.

Disconnect Power Source
Unplug Charger for periods of disuse; grasp plug to disconnect.
May cause electric shock, fire or malfunction.

Disconnect Power Source
If liquid (water, pet urine, etc.) gets inside, grasp plug to disconnect it immediately.
May cause electric shock, smoke or fire.

To remove debris, grasp plug to disconnect Charger, then clean with a dry cloth.
Fire may result.

Plug Charger firmly into the outlet, keeping the plug, Charger terminals and Desktop Holder terminals away from conductive material (pencil lead, metal strip/jewelry, etc.).
May cause electric shock, short-circuiting, fire, etc.

Do Not Use Wet Hands
Do not touch plug with wet hands.
May cause electric shock, malfunction, etc.

P/Offenders
Do not touch Charger if thunder is audible.
May cause electric shock or other problems.

Prohibited
Do not use Desktop Holder inside vehicles.
Extreme temperature or vibration may cause fire or malfunction.

Prohibited
Do not expose Charger or Desktop Holder to moisture (precipitation, bath/shower, etc.).
May cause fire, electric shock or malfunction.

Prohibites
Do not use In-Car Charger in positive earth vehicles.
May cause fire or other problems. Use in negative earth vehicles only.

Compulsory
Use only the specified fuse for In-Car Charger.
Non-specified fuse may cause fire or malfunction. See In-Car Charger manual for details.

CAUTION

Disconnect
Grasp plug to disconnect Charger before cleaning.
May cause electric shock or other problems.

Compulsory
Always grasp plug (not cord/cable) to disconnect Charger.
Pulling plug by cord/cable may damage cord/cable; may cause electric shock, fire, etc.

Prohibited
Do not subject Charger to strong impact while it is plugged in.
May cause malfunction or injury.

Prohibited
Do not touch charging terminals of Desktop Holder while it is connected to the outlet.
May cause burns.

Prohibited
Keep hands and other body parts away from charging terminals.
May cause electric shock, injury or malfunction.
TV Input-to-Micro USB Cable

DANGER

Prohibited
Never connect TV Input-to-Micro USB Cable if thunder is audible.
May cause electric shock, ignition, fire, etc.
Handset Use & Electronic Medical Equipment
This section is based on "Guidelines on the Use of Radio Communications Equipment such as Cellular Telephones and Safeguards for Electronic Medical Equipment" (Electromagnetic Compatibility Conference, April 1997) and "Guidelines to safeguard implanted medical devices against radio emissions from the use of radio equipment" (Ministry of Internal Affairs and Communications, January 2013).

WARNING

Compulsory
Persons with implanted pacemaker/defibrillator should keep handset more than 15 cm away.
Radio waves may interfere with implanted pacemakers or defibrillators.

Compulsory
Before using electronic medical equipment other than implanted pacemaker/defibrillator outside medical facilities, consult the vendor on radio wave effects.
Radio waves may interfere with electronic medical equipment.

Compulsory
If it may not be possible to keep handset 15 cm away from other persons (e.g., in a crowded situation where you cannot move freely), suspend signal-transmitting functions (e.g., by activating Airplane mode) or power off beforehand. If an application that automatically powers handset on is installed, disable that feature before powering off. Persons with implanted pacemaker/defibrillator may be near.
Radio waves may interfere with implanted pacemakers or defibrillators causing such devices to malfunction.

Compulsory
Observe these rules inside medical facilities to avoid effects of radio waves on electronic medical equipment:
- Do not enter an operating room or an Intensive or Coronary Care Unit while carrying a handset.
- Keep handset off in hospitals.
- Even in lobbies or other places where mobile phone use is permitted, keep handset off near electronic medical equipment.
- Obey medical facility rules on mobile phone use.
Important Product Information
General Use
- If your USIM Card or handset (with USIM Card inserted) is lost or stolen, suspend your service immediately. For details, contact SoftBank Customer Support, General Information.
- SoftBank Mobile Corp. is not liable for any damages resulting from accidental loss/alteration of handset/SD Card files or settings. Keep separate copies of contacts and other important information.
- Handset transmissions may be disrupted inside buildings, tunnels or underground, or when moving into/out of such places; may affect calls.
- Use handset without disturbing others.
- Handsets are radios as stipulated by the Radio Law. Under the Radio Law, handsets must be submitted for inspection upon request.
- Handset use near landlines, TVs or radios may cause interference.
· Beware of eavesdropping.
Because this service is completely digital, the possibility of signal interception is greatly reduced. However, some transmissions may be overheard.
Eavesdropping
Deliberate/accidental interception of communications constitutes eavesdropping.
- Beware of harmful/malicious websites. Take added care when posting personal information.
• An export license may be required to carry handset into other countries if it is to be used by or transferred to another person. However, no such license is required when taking handset abroad for personal use on a vacation or business trip and then bringing it back. Export control regulations in the United States provide that an export license granted by the US government is required to carry handset into Cuba, Iran, North Korea, Sudan or Syria.
Heat from Handset Use
- Handset internal temperature may increase depending on usage or environment; may cause housing to heat up. (Handset may stop charging or Display brightness may be adjusted for safety.) After a period of handset use under such conditions, warning appears and handset shuts down after approximately 3 minutes. To lower internal temperature and prevent automatic shutdown, exit all applications and activate Screen lock.
After a period of Camera use at high internal temperature, warning appears and handset automatically shuts down after approximately 1 minute. (Shot image is saved.)
Camera
- Mind etiquette when using Camera.
- Test Camera before shooting special moments.
- Do not use Camera in places where shooting is prohibited.
- Shot images may not be used/transferred without copyright holder (photographer) permission, except for personal use.
Full Seg & One Seg
- Handset Full Seg/One Seg reception may be disrupted inside buildings, tunnels or underground, or when moving into/out of such places; may affect Full Seg/One Seg images.
- Check reception beforehand; programs may not be viewable in some areas since reception varies depending on usage environment.
- Full Seg recordings are saved to SD Card only when handset is connected to a digital terrestrial television antenna with TV Input-to-Micro USB Cable. Otherwise, they are saved to handset memory.
- It is recommended to save Full Seg recordings to handset memory or microSDXC Cards. When saving them to a microSDHC Card, regardless of the amount of free space, maximum file size is 4 GB (approximately 30 minutes) per recording.
- Full Seg recordings of 4 GB (approximately 30 minutes) or more cannot be moved from handset memory to microSDHC Cards.
In-Call/Transmission Cautions
- During calls/transmissions, calling/transmission charges/fees apply even if other functions or operations are simultaneously in use.
- Transmissions involving JavaScript may incur high charges.
Urgent News (Application)
- Handset receives earthquake alerts by default (Urgent News Incoming Setting is enabled).
- Alert tones sound even in Silent mode.
- Alerts are not received during calls/transmissions or in poor signal conditions.
- Depending on usage/situation, handset may receive alerts for other areas or no alerts.
- Standby Time may decrease when Urgent News Incoming Setting is active.
- SoftBank Mobile Corp. cannot be held liable for any damages associated with this service, including accidents resulting from received information, reception timing or reception failure.
Wi-Fi (Wireless LAN)
Wireless LAN (hereafter "Wi-Fi") uses radio waves to enable communication between compatible devices within range. However, it is advisable for the user to configure security settings to avoid risk of data interception.
- Do not use Wi-Fi near electrical appliances, audiovisual equipment or office automation equipment; may affect Wi-Fi transmission speed, availability, clarity, etc. (Especially when a microwave oven is in use.) - If there are multiple access points nearby, handset may not detect access points correctly.
■Precautions
The frequency band utilized by handset Wi-Fi is shared with industrial, scientific or medical equipment, including household microwave ovens, and used by radio stations, amateur radio stations, etc. (hereafter "other radio stations").
1 Before using Wi-Fi, visually check that no other radio stations sharing the same frequency band are in use nearby.
2 Should interference occur between handset and other radio stations, move or disable Wi-Fi immediately.
3 For additional information and support, contact SoftBank Customer Support, General Information: From a SoftBank handset, call toll free at 157. To call toll free from a landline/IP phone, see "Customer Service."
Frequency Band
This radio station utilizes 2.4 GHz band and 5 GHz band with DSSS-OFDM modulation. Maximum transmission radius is 40 meters.
To view related information (Japanese):
In application sheet, (Settings)

Authentication

Available Channels in the 5 GHz Band
Three bands are available within the 5 GHz frequency band: 5.2 GHz, 5.3 GHz and 5.6 GHz (W52/W53/W56).
- W52 (5.2 GHz band; channels 36, 38, 40, 44, 46, 48) - W53 (5.3 GHz band; channels 52, 54, 56, 60, 62, 64) - W56 (5.6 GHz band; channels 100, 102, 104, 108, 110, 112, 116, 118, 120, 124, 126, 128, 132, 134, 136, 140) Using the 5.2 GHz or 5.3 GHz band (W52/W53) for outdoor communication is prohibited by the Radio Law.
■ Simultaneous Use with Bluetooth®
Wi-Fi (IEEE 802.11b/g/n) and Bluetooth ® transmit on the 2.4 GHz band. Enabling handset Bluetooth ® or using Bluetooth ® devices near handset may affect Wi-Fi transmission speed, availability and clarity. Should interference occur, cancel handset Bluetooth ® or discontinue Bluetooth ® device use.
- Handset supports Wi-Fi channels 1 - 13. Handset does not connect to access points set to other channels. - Available channels vary by country. - For use of Wi-Fi aboard aircraft, check with airline beforehand. - In some countries/regions, such as France, there are restrictions on the use of Wi-Fi. Check the local laws and regulations before using Wi-Fi on handset abroad.
Bluetooth® Function
SoftBank Mobile Corp. is not liable for any damages resulting from data/information leakage due to use of handset Bluetooth® function.
■Precautions
The frequency band utilized by handset Bluetooth® function is shared with industrial, scientific or medical equipment, including household microwave ovens, and used by radio stations, amateur radio stations, etc. (hereafter "other radio stations").
1 Before using Bluetooth®, visually check that no other radio stations sharing the same frequency band are in use nearby. 2 Should interference occur between handset and other radio stations, move or cancel Bluetooth® function immediately. 3 For additional information and support, contact SoftBank Customer Support, General Information: From a SoftBank handset, call toll free at 157. To call toll free from a landline/IP phone, see "Customer Service."
Frequency Band
This radio station utilizes 2.4 GHz band. FH1 indicates FHSS modulation with maximum transmission radius of 10 meters. XX4 indicates a different modulation scheme with maximum transmission radius of 40 meters. It is not possible for the radio station to avoid using the frequency band of a mobile unit identification apparatus.
To view related information (Japanese):
In application sheet, (Settings)

Authentication

MHL Connection
Mirror Display contents to other devices by connecting handset to Mobile High-Definition Link (MHL) compatible devices with an MHL cable (sold separately). (MHL connection) Handset charges through connected devices. Remember these points when using MHL connection:
- Handset may power on automatically upon MHL connection; avoid connection aboard aircraft or in hospitals, etc. where mobile phone use is prohibited.
- Handset may not charge adequately depending on MHL cable and connected device. Use AC Charger whenever possible.
- MHL connection may be unavailable depending on handset application.
- Full Seg and One Seg cannot be received during MHL connection. Remove MHL cable from handset when watching/ recording programs with Full Seg or One Seg.
· MHL connection is exclusively for use in Japan.
Wireless Output
Mirror Display contents to other devices by connecting handset to nearby Wi-Fi Direct compatible devices through Wi-Fi. (Wireless output)
Remember these points when using wireless output:
- Wireless output may be unavailable depending on handset application.
- Some applications may exit upon starting wireless output depending on handset application settings.
Handset & Hardware Care
Handset & Hardware Care
- If handset is left uncharged, data may be altered/lost. SoftBank Mobile Corp. is not liable for any resulting damages.
- Use handset within 5°C - 35°C (up to 40°C for brief periods in bathrooms, shower rooms, etc.) and 35% - 90% humidity.
- Avoid extreme temperature or direct sunlight.
- Handset/Internal Battery may become warm during operation or while charging. This is normal.
- Warranty does not cover malfunctions resulting from misuse.
- Exposing Camera area to direct sunlight may damage Color Filter and affect image color.
- Handset may not charge properly if Port is obstructed by dust, debris, etc. Clean with a dry cloth, cotton swab, etc.
- Clean handset with a soft dry cloth. Alcohol/solvent use may fade color/print.
- Avoid scratching Display.
- Avoid heavy objects or excessive pressure. May cause malfunction or injury.
- Do not sit on handset in back pants pocket.
- Do not place heavy objects on handset inside handbags, packs, etc.
- Handset back cover is not removable. Do not try to remove it; may cause damage or malfunction, or affect water resistance.
- Connect only specified products to Port. Other devices may malfunction or cause damage.
- Do not power off while using SD Card; may result in data loss or malfunction.
- When walking outside, moderate handset Volume to avoid accidents.
- Avoid covering Speaker while using handset.
SD Card Slot
SD Card Slot is located above USIM Card Slot. Do not insert SD Card into USIM Card Slot; insert it in correct orientation (see below).

Touchscreen
- Touchscreen may not respond in these situations:
- Use with gloves/long fingernails
· Use of pens, pencils or sharp objects
· Use with objects on/against Display
· To prevent malfunctions, do not:
- Touch Display with wet fingers
· Use if Display is wet - Subject Display to force/pressure
- Place labels or stickers over Display
- If Display is wet, wipe it with a soft cloth.
- To improve response, calibrate Touchscreen as follows.
In application sheet, (Settings)
info
Adjust touch panel Follow onscreen prompts
- In the following cases, Press to activate Screen lock, then Press again to cancel it.
- Handset operates automatically without touch input
- Handset does not respond to touch input
Mics
The small openings (shown below) are handset Mics.

Avoid covering Mics; obstructions may affect Mic sensitivity.
TV Antenna
Pulling TV Antenna by its top, extend it fully; adjust angle to find best reception. After use, straighten TV Antenna and gently retract it from the bottom. Do not carry handset with TV Antenna extended; damage may result.
USIM Tray
USIM Tray is required to insert/remove USIM Card; take care not to damage or lose it.
- Do not pull USIM Tray forcefully or at an angle; damage may result. Gently pull it straight out from the edge.

Headphones
Headphones with Mic (SHLDL1) are available for separate purchase. Other headphone mics may not function properly on handset.
- Do not subject Headphone Port to strong impact while using Headphones with Mic; water resistance may be affected.
Forcing Power Off
If handset has stopped processing or won't respond to operation, power off forcibly as follows.
(Long Press for at least 11 seconds)
- Handset vibrates twice before powering off.
- To reboot handset, release after first vibration.
Picasa™ Web Albums Sync Note
Save a Google Account associated with Picasa Web Albums to handset. If a Google Account is saved to handset then a Picasa Web Albums account is created with that Google Account, corresponding Picasa Web Albums is unsynchronizable on handset.
Saving Battery Power
To reduce battery consumption:
In application sheet, (Settings)
saving
Energy saving settings (Confirmation appears)
→
Waza, or Emerg. (Confirmation appears)
Notes
- If confirmation appears, follow onscreen prompts.
- Use three modes (Norm., Waza. and Emerg.) as needed.
- For Waza, and Emerg., some functions/settings are limited or disabled. Emerg. minimizes Brightness and disables Wi-Fi, GPS and some other transmissions.
- Tap Edit or check to change/check settings. (Emerg. settings are fixed and cannot be changed.)
- Energy saving standby disables some applications that run in the background when Screen lock is active. (Some applications may not run properly when Screen lock is active.) In Waza. mode, to specify applications to enable/disable:
Edit (below Waza.) (next to Energy saving standby)
→ OK or R next to target application
- Some applications that establish periodic network connections do not start communication after switching back to Norm. from Waza. or Emerg. In this case, power off, then power back on.
Portrait Rights
Portrait rights protect individuals' right to refuse to be photographed or to refuse unauthorized publication/use of their photographs. Portrait rights consist of the right to privacy, which is applicable to all persons, and the right to publicity, which protects the interests of celebrities. Therefore, photographing others including celebrities and publicizing/distributing their photographs without permission is illegal; use Camera responsively.
Copyrights
Copyright laws protect sounds, images, computer programs, databases, other materials and copyright holders. Duplicated material is limited to private use only. Use of materials beyond this limit or without copyright holder permission may constitute copyright infringement, and be subject to criminal punishment. Comply with copyright laws when using images shot with Camera.
The software contained in handset is copyrighted material; copyright, moral right and other related rights are protected by copyright laws. Do not copy, modify, alter, disassemble, decompile or reverse-engineer the software; do not separate it from hardware in whole or part.
Open Source Software
- Handset contains software based on GNU General Public License (GPL), GNU Lesser General Public License (LGPL), and other licenses. To check details of relevant software licenses:
In application sheet, (Settings)

Legal information

- The source code of software based on GPL, LGPL, and Mozilla Public License (MPL) is provided on the following website free of charge. https://sh-dev.sharp.co.jp/android/modules/oss/ (Japanese)
Electromagnetic Safety in Europe
For body-worn operation, this mobile phone has been tested and meets RF exposure guidelines when used with an accessory containing no metal and positioning the handset a minimum 15 mm from the body. Use of other accessories may not ensure compliance with RF exposure guidelines.
CE Declaration of Conformity
In some countries/regions including Europe, there are restrictions on the use of 5 GHz WLAN that may limit the use to indoors only.
If you intend to use 5 GHz WLAN on the device, check the local laws and regulations beforehand.
Hereby, Sharp Telecommunications of Europe Ltd, declares that 206SH is in compliance with the essential requirements and other relevant provisions of Directive 1999/5/EC.
A copy of the original declaration of conformity for each model can be found at the following Internet address: http://www.sharp.co.jp/k-tai/
CE0168①
Battery Cautions
Use specified Charger only.
Non-specified equipment use may cause Internal Battery to leak, overheat, burst or ignite, and may cause Charger to overheat, ignite, malfunction, etc.
Battery is built into handset. Do not dispose of handset with ordinary refuse; take it to a SoftBank Shop for appropriate disposal.
Charge handset in ambient temperature 5°C - 35°C; Internal Battery may leak/overheat and performance may deteriorate outside this range.
European RF Exposure Information
Your mobile device is a radio transmitter and receiver. It is designed not to exceed the limits for exposure to radio waves recommended by international guidelines. These guidelines were developed by the independent scientific organization ICNIRP and include safety margins designed to assure the protection of all persons, regardless of age and health. The guidelines use a unit of measurement known as the Specific Absorption Rate, or SAR. The SAR limit for mobile devices is 2.0 W/kg and the highest SAR value for this device when tested at the ear was 0.536 W/kg*. As mobile devices offer a range of functions, they can be used in other positions, such as on the body as described in this User Guide**. In this case, the highest tested SAR value is 0.402 W/kg***. As SAR is measured utilizing the device's highest transmitting power the actual SAR of this device while operating is typically below that indicated above. This is due to automatic changes to the power level of the device to ensure it only uses the minimum level required to reach the network.
The World Health Organization has stated that present scientific information does not indicate the need for any special precautions for the use of mobile devices. They note that if you want to reduce your exposure then you can do so by limiting the length of calls or using a hands-free device to keep the mobile phone away from the head and body.
*The tests are carried out in accordance with international guidelines for testing.
**Please see "Electromagnetic Safety in Europe" for important notes regarding body-worn operation.
***A method of measuring SAR when a mobile phone is used at positions other than at the ear was established in March 2010 through an international standard (IEC62209-2). MIC technical regulation was reported in October 2011 by the Information and Communications Council.
World Health Organization
http://www.who.int/emf
List of Specific Absorption Rates (SAR) for radio waves by smartphone model
http://mb.softbank.jp/mb/support/sar/ (Japanese)
Volume Level Caution
To prevent possible hearing damage, do not listen at high volume levels for long periods.

■Headphone Signal Level
The maximum output voltage for Music Player function, measured in accordance with EN 50332-2, is 115 mV.
5 GHz WLAN Operation in USA
Within the 5.15-5.25 GHz band, U-NII devices are restricted to indoor operations to reduce any potential for harmful interference to co-channel Mobile Satellite Services (MSS) operations.
FCC Notice
This device complies with part 15 of the FCC Rules. Operation is subject to the following two conditions:
(1) This device may not cause harmful interference, and (2) this device must accept any interference received, including interference that may cause undesired operation.
Changes or modifications not expressly approved by the manufacturer responsible for compliance could void the user's authority to operate the equipment.
FCC Information to User
This equipment has been tested and found to comply with the limits of a Class B digital device, pursuant to Part 15 of the FCC Rules. These limits are designed to provide reasonable protection against harmful interference in a residential installation. This equipment generates, uses and can radiate radio frequency energy and, if not installed and used in accordance with the instructions, may cause harmful interference to radio communications.
However, there is no guarantee that interference will not occur in a particular installation; if this equipment does cause harmful interference to radio or television reception, which can be determined by turning the equipment off and on, the user is encouraged to try to correct the interference by one or more of the following measures:
- Reorient/relocate the receiving antenna.
- Increase the separation between the equipment and receiver.
- Connect the equipment into an outlet on a circuit different from that to which the receiver is connected.
- Consult the dealer or an experienced radio/TV technician for help.
FCC RF Exposure Information
Your handset is a radio transmitter and receiver. It is designed and manufactured not to exceed the emission limits for exposure to radio frequency (RF) energy set by the Federal Communications Commission of the U.S. Government.
The guidelines are based on standards that were developed by independent scientific organization through periodic and thorough evaluation of scientific studies. The standards include a substantial safety margin designed to assure the safety of all persons, regardless of age and health.
The exposure standard for wireless handsets employs a unit of measurement known as the Specific Absorption Rate, or SAR. The SAR limit set by the FCC is 1.6 W/kg. The tests are performed in positions and locations (e.g. at the ear and worn on the body) as required by the FCC for each model.
The highest SAR value for this model handset as reported to the FCC when tested for use at the ear is 0.48 W/kg, and when worn on the body in a holder or carry case, is 0.50 W/kg. Body-worn Operation; This device was tested for typical body-worn operations with the back of the handset kept 1.0 cm from the body. To maintain compliance with FCC RF exposure requirements, use accessories that maintain a 1.0 cm separation distance between the user's body and the back of the handset. The use of beltclips, holsters and similar accessories should not contain metallic components in its assembly.
The use of accessories that do not satisfy these requirements may not comply with FCC RF exposure requirements, and should be avoided. The FCC has granted an Equipment Authorization for this model handset with all reported SAR levels evaluated as in compliance with the FCC RF emission guidelines. SAR information on this model handset is on file with the FCC and can be found under the Display Grant section of http://www.fcc.gov/oet/ea/ after searching on FCC ID APYHRO00194.
Additional information on Specific Absorption Rates (SAR) can be found on the FCC Radio Frequency Safety website at http://transition.fcc.gov/oet/rfsafety/.
RF Exposure Information/Specific Absorption Rate* (SAR) Information
RF Exposure Information/Specific Absorption Rate (SAR) Information
This mobile phone SoftBank 206SH meets the MIC's**** technical regulation for exposure to radio waves.
The technical regulation* established permitted levels of radio frequency energy, based on standards developed by independent scientific organizations through periodic and thorough evaluation of scientific studies.
The regulation employs a unit of measurement known as the Specific Absorption Rate, or SAR.
The SAR limit is 2 watts/kilogram (W/kg)** averaged over ten grams of tissue.
The limit includes a substantial safety margin designed to assure the safety of all persons, regardless of age and health. The value of the limit is equal to the international guidelines recommended by ICNIRP****.
The highest SAR value for this mobile phone is 0.477 W/kg when tested for use at the ear.
While there may be differences between the SAR levels of various phones and at various positions, all phones meet MIC's technical regulation.
Although the SAR is determined at the highest certified power level, the actual SAR of the phone during operation can be well below the maximum value.
Use at positions other than at the ear
This mobile phone may be used at positions other than at the ear. By using an accessory such as a belt clip holster that maintains a 1.5 cm separation with no metal (parts) between the body and the mobile phone, this mobile phone will comply with international guidelines for radio wave protection (**).
The World Health Organization has announced that "A large number of studies have been performed over the last two decades to assess whether mobile phones pose a potential health risk. To date, no adverse health effects have been established as being caused by mobile phone use."
For more information about SAR, see the following websites:
• Ministry of Internal Affairs and Communications (MIC) http://www.tele.soumu.go.jp/e/sys/ele/body/index.htm
· Association of Radio Industries and Businesses (ARIB) http://www.arib-emf.org/index02.html (Japanese)
*The technical regulation is provided in Article 14-2 of the Ministry Ordinance Regulating Radio Equipment.
**Provided for in "Radio-radiation protection guidelines," reported in 1997 by the Telecommunications Technology Council, Ministry of Posts and Telecommunications.
***A method of measuring SAR when a mobile phone is used at positions other than at the ear was established in March 2010 through an international standard (IEC62209-2). MIC technical regulation was reported in October 2011 by the Information and Communications Council.
****Ministry of Internal Affairs and Communications
*****International Commission on Non-Ionizing Radiation Protection
Standards of the Federal Communications Commission (FCC) of the U.S. Government and information from the E.U. are given as information relating to RF exposure. For details, see
"FCC RF Exposure Information" and "European RF Exposure Information."
Water Resistance
Water Resistance
Handset complies with IPX5 (former JIS protection level 5) 1 and IPX7 (former JIS protection level 7) 2 water protection standards, with Card Slot Cover closed firmly. (Handset is not dust proof.)
1 IPX5 compliant means that a handset continues to function as a phone after being subjected to a water jet (approximately 12.5 liters/min.) discharged from a nozzle (inner diameter: 6.3 mm), from all directions (approximately 3 m from handset) for at least 3 minutes.
2 IPX7 compliant means that a handset continues to function as a phone after being gently submerged to the depth of 1 m in still tap water at room temperature, left there for approximately 30 minutes, then removed from it.
- Water resistance may be affected under some circumstances. Warranty does not cover malfunctions resulting from misuse.
- Handset is compliant with IPX5 and IPX7 water protection standards. However, ingress of beverage, sea water, etc. may cause malfunction.
■Handset Care
- Close Card Slot Cover firmly. Debris (hair, sand, fibers, etc.) trapped between gasket and base may allow ingress of liquid.
- If Card Slot Cover is left open liquid exposure may cause handset malfunction/electric shock. Discontinue use and power off.
· If handset is wet, wipe it with a dry cloth. - Never open/close Card Slot Cover with wet hands or while handset is wet.
Do not use Headphone Port, External Device Port or Charging Terminals while they are wet or obstructed by sand/dirt; water resistance may be affected, or malfunction, burns or fire may result due to electric shock or short-circuiting. - Handset is only water resistant against fresh/tap water between 5°C - 35°C.
Precautions
- Do not subject handset to soap, detergent, bath powder/oil, sea/pool/spa water, hot water, etc.
- Rinse off sea/pool water, beverage, dirt, sand, mud, etc. immediately with fresh/tap water between 5°C - 35°C ; residue may cause malfunction if allowed to dry.
- Rinse off sand, dirt, etc. completely before use; any residue may damage handset causing malfunction.
- Do not soak handset in bath or pool; never use it in water (including key operation).
- Handset is not resistant to water pressure. Avoid high-pressure water/shower (over 6 liters/min.) or water immersion.
- Do not expose handset to extreme humidity for long periods; avoid prolonged use in bath/shower rooms.
- Do not use in saunas. Avoid hot air from dryers or other sources.
- Use handset within 5°C - 35°C (up to 40°C for brief periods in bathrooms, shower rooms, etc.) and 35% - 90% humidity.
- Avoid extreme temperature (near stoves, inside refrigerators, etc.).
• Volume may be low when Mic, Earpiece or Speaker is wet; dry handset before use (see "Drying Handset"). - Charger, Desktop Holder and optional accessories are not water or dust proof. Avoid moisture (precipitation, bath/shower, etc.); may cause fire, electric shock or damage.
- Do not subject handset to strong impact; do not poke Mic, Earpiece, Speaker, etc. with a cotton swab or sharp object; water resistance may be affected.
- Avoid placing handset directly on sand. Sand may penetrate Earpiece, Speaker, etc., resulting in low volume.
- Touchscreen may not respond properly if wet or touched with wet fingers.
- Do not move handset directly from a cold place to a warm humid place; condensation may occur. Should this happen, dry handset naturally at room temperature.
- Handset does not float on water.
- Keep handset out of heavy rain.
- Do not let liquid-exposed handset remain wet; exposure to cold may freeze liquid causing malfunction.
- Damaged Card Slot Cover affects water resistance; contact a SoftBank Shop.
Charging Precautions
- Never charge handset while it is wet; may cause fire, malfunction or burns due to electric shock or short circuiting. Be sure to dry it before use.
- Do not touch Desktop Holder or Charger with wet hands. Electric shock may occur.
- Do not use Desktop Holder or Charger in rooms in which water is regularly in use (kitchens, bathrooms, shower rooms, etc.); may cause fire or electric shock.
- If External Device Port or Charging Terminals are exposed to liquid, never charge handset; follow these steps first:
1 Holding handset firmly by its sides, shake it about 20 times
2 Pat against dry cloth to remove moisture from External Device Port or Charging Terminals
3 Leave handset on dry cloth for approximately 2 - 3 hours at room temperature
Care & Maintenance
- Proper care of Card Slot Cover gasket is crucial for continued handset water resistance. Observe the following:
- Do not remove or damage gasket. Keep it clean.
- Do not insert sharp objects into Card Slot Cover gap, Headphone Port or External Device Port; may damage gasket and affect water resistance.
- If Card Slot Cover is damaged or deformed, contact a SoftBank Shop.
• To maintain water resistance, replace Card Slot Cover every 2 years regardless of its condition. Customer-requested Card Slot Cover replacement incurs fees and requires handset submission. For details, contact a SoftBank Shop or SoftBank Customer Support, General Information.
Washing Handset
Wipe off dirt, sand, beverage, etc., gently with a cloth. Then hold handset approximately 10 cm below faucet or shower head and wash with low-pressure tap water (6 liters/min. or lower) at room temperature (5°C - 35°C). Wash with your hands, taking care not to open Card Slot Cover; do not use a brush or sponge. Dry handset before use; after drying it well, power on.
- Before washing handset, make sure that Card Slot Cover is closed firmly.
- Do not use a washing machine or ultrasonic cleaner.
Headphone Port and External Device Port tend to accumulate dust, sand, etc.; rinse and dry them completely before use. Any residue may cause malfunction, burns or fire. - Do not put a cotton swab, cloth, etc. into Headphone Port or External Device Port; water resistance may be affected causing malfunction.
- Do not place handset in a microwave oven to dry it. Internal Battery/handset may leak, burst, overheat or ignite; may cause malfunction, accident or injury.
- Do not dry handset using extreme heat (hot air from dryers or other sources); may cause warping, discoloration or damage.
Drying Handset
Dry Headphone Port, Earpiece, External Device Port, Charging Terminals, Speaker and Mics when exposed to water.
1
Wipe handset surface with dry cloth
2
Holding handset firmly by its sides, shake it about 20 times

3
Pat against dry cloth to remove moisture from grooves

- Do not put a cotton swab, cloth, etc. into openings.
4
Leave handset on dry cloth for approximately 2 - 3 hours at room temperature
!
Important
Do not use wet handset.
- Voice quality may be affected, or moisture may transfer to clothes, bag, etc.
- Moisture may short-circuit Headphone Port, External Device Port or other parts.
- Exposure to cold may freeze moisture; may cause malfunction.
206SH User Guide Index

About Settings....86
Add Account....91
Address Book....48
Applications....20
Application Settings....93

Basic Operations....18
Bluetooth ® 75

Calling.... 42
Calling from Outside Japan.... 81
Charging Handset....13
Creating/Sending Gmail....54
Customer Service.... 105
Customizing 3-Line Home.... 37

Device Info.... 90

FCC Notice.... 119

General Notes.... 118
Global Roaming....80
Google Play™ 26
Google™ Accounts.... 24

Handset & Hardware Care.... 116
Handset Memory & SD Card....9
Handset Phone Number.... 20
Home Applications Setting.... 92

Important Product Information....114
Introduction....3

Messaging.... 50
Mobile Manners.... 21
Music & Images....68
Music Files (Music).... 68

Notifications Window....35

Opening & Replying to S! Mail/SMS.... 52
Opening Received Gmail.... 55
Opening Received S! Mail/SMS....54
Optional Services....43
Other Settings.... 94

Package Contents.... 6
Parts & Functions....6
Photo Camera....64
Power On/Off.... 15

RF Exposure Information/Specific Absorption Rate*
(SAR) Information....120

Safety Precautions....108
Screen Lock.... 29
Security Codes.... 27
Sending S! Mail/SMS....50
Software Updates....30
Sound Settings....87
Specifications....104
Status Bar.... 34
Still Images & Video (Album)....69
Storage Settings....92

Tethering Option.... 74
Text Entry....21
Touchscreen Operations.... 16

USIM Card Installation....8
USIM PIN....28
Using Another View....39
Using Application Usage History....36
Using Internet Mail.... 56

Video Camera.... 65

Wallpaper & Display Settings....89
Water Resistance....121
Web Browsing (Browser).... 58
Welcome Sheet (Lock Screen) Basics....32
Wi-Fi....72
Wi-Fi Settings....91

3-Line Home Basics.... 33
September 2013, First Edition
SoftBank Mobile Corp.
Visit SoftBank Shop for assistance
Manufacturer : SHARP CORPORATION
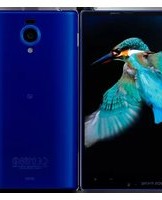
- BASIC OPERATIONS
- HANDSET INTERFACE
- PHONE
- MESSAGING & BROWSER
- CAMERA
- MUSIC & IMAGES
- CONNECTIVITY
- GLOBAL SERVICES
- SETTINGS
- APPENDIX
- SAFETY PRECAUTIONS
- INTRODUCTION
- BEFORE YOU BEGIN
- GUIDE USAGE NOTES
- SCREENSHOTS & KEY LABELS
- ACCESSING FUNCTIONS GUIDE
- GETTING STARTED
- PACKAGE CONTENTS
- PARTS & FUNCTIONS
- USIM CARD INSTALLATION
- INSERTING USIM CARD
- REMOVING USIM CARD
- HANDSET MEMORY & SD CARD
- STORAGE
- INSERTING SD CARD
- FORMATTING SD CARD
- UNMOUNTING SD CARD
- REMOVING SD CARD
- FORMATTING HANDSET MEMORY
- HANDSET MEMORY & SD CARD USAGE NOTES
- GENERAL
- MICROSDXC CARD
- EXCHANGING FILES WITH NON-SDXC-COMPATIBLE DEVICES
- HANDLING SD CARDS USED ON OTHER MOBILES
- HANDSET MEMORY
- SD CARD CAUTION
- CHARGING HANDSET
- DESKTOP HOLDER
- [NO TEXT]
- AC CHARGER
- USB CHARGING
- [NON-TEXT]
- LITHIUM-ION BATTERY & DESKTOP HOLDER
- LITHIUM-ION BATTERY
- FRONT DUCT
- CHARGING PRECAUTIONS
- HANDLING CABLES
- IMPORTANT USB CHARGING NOTE
- BATTERY CARE
- PERIODS OF DISUSE
- BULGES OF INTERNAL BATTERY
- INTERNAL BATTERY REPLACEMENT
- POWER ON/OFF
- POWER ON
- POWER OFF
- TOUCHSCREEN OPERATIONS
- TAP
- TOUCH & HOLD
- DRAG
- FLICK
- PINCH/SPREAD
- HOME (3-LINE HOME)
- HANDSET NAVIGATION
- NAVIGATION BAR
- ICON DESCRIPTION
- ACTION BAR
- MENU OPERATIONS
- HANDSET SETTINGS
- HANDSET & DISPLAY ORIENTATION
- CAPTURING SCREENSHOTS
- ACTIVATING APPLICATIONS THAT SUPPORT ASSIST FUNCTION
- APPLICATIONS
- HANDSET PHONE NUMBER
- MOBILE MANNERS
- SILENT MODE
- AIRPLANE MODE
- SELECTING SILENT MODE OPTION
- AIRPLANE MODE PRECAUTIONS
- TEXT ENTRY
- KEYBOARDS
- SWITCHING KEYBOARDS
- KEY KEYBOARD LAYOUT
- QWERTY KEYBOARD LAYOUT
- SWITCHING ENTRY MODES
- ALPHABET
- FLICK INPUT
- GOOGLE™ ACCOUNTS
- CREATING A GOOGLE ACCOUNT
- SIGNING IN TO A GOOGLE ACCOUNT
- GOOGLE ACCOUNT CAUTION
- GOOGLE PLAY™
- INSTALLING FREE APPLICATIONS
- PURCHASING APPLICATIONS
- UPDATING INSTALLED APPLICATIONS
- PURCHASED APPLICATIONS
- PAYMENT
- USE ON OTHER ANDROID DEVICES
- APPLICATION OPERATIONS
- REFUND REQUESTS
- REFUND
- ENABLING AUTOMATIC UPDATES
- GOOGLE PLAY CAUTIONS
- APPLICATION INSTALLATION DISCLAIMER
- APPLICATION PURCHASE DISCLAIMER
- GOOGLE PLAY AUTOMATIC UPDATES
- SECURITY CODES
- OPERATION PASSWORD & CENTER ACCESS CODE
- SETTING OPERATION PASSWORD
- USIM PIN
- ENABLING USIM CARD LOCK
- CHANGING USIM PIN
- PIN CAUTIONS
- SCREEN LOCK
- ACTIVATING SCREEN LOCK MANUALLY
- CANCELING SCREEN LOCK
- SOFTWARE UPDATES
- BEFORE SOFTWARE UPDATE
- SOFTWARE UPDATE OPERATIONS
- SOFTWARE UPDATE CAUTIONS
- DURING UPDATE
- SIGNAL CONDITIONS
- WELCOME SHEET (LOCK SCREEN) BASICS
- ACTIVATING APPLICATIONS
- MISSED CALL & NEW MESSAGE NOTIFICATIONS
- LINE HOME BASICS
- TOGGLING SHEETS
- APPLICATION SHEET LAYOUT
- WIDGET SHEET LAYOUT
- SHORTCUT SHEET LAYOUT
- STATUS BAR
- NOTIFICATION INDICATORS
- STATUS INDICATORS
- NOTIFICATIONS WINDOW
- OPENING NOTIFICATIONS WINDOW
- NOTIFICATIONS WINDOW LAYOUT
- SETTING KEYS
- NOTIFICATIONS WINDOW OPERATIONS
- DELETING NOTIFICATIONS
- REARRANGING SETTING KEYS
- USING APPLICATION USAGE HISTORY
- OPENING APPLICATION USAGE HISTORY
- APPLICATION USAGE HISTORY LAYOUT
- APPLICATION USAGE HISTORY OPERATIONS
- CHANGING SHORTCUTS
- RESETTING SHORTCUTS
- DELETING SHORTCUTS
- CUSTOMIZING 3-LINE HOME
- SETTING THEME & WALLPAPER
- ADDING SHORTCUTS
- ADDING WIDGETS
- REMOVING WIDGETS/SHORTCUTS
- USING ANOTHER VIEW
- MINI-APPLICATION USAGE NOTE
- CALLING
- PLACING CALLS
- CALL
- ANSWERING CALLS
- EMERGENCY LOCATION REPORT
- MISSED CALLS
- EMERGENCY CALL RESTRICTION
- OPTIONAL SERVICES
- CALL FORWARDING
- OK
- VOICEMAIL
- CALL WAITING
- GROUP CALLING
- CALLER ID
- CALL BARRING
- OPTIONAL SERVICES OPERATIONS
- SETTING MISSED CALL NOTIFICATION
- SETTING HANDSET RESPONSE TO MISSED CALLS
- CANCELING ALL OUTGOING CALL RESTRICTIONS
- CANCELING ALL INCOMING CALL RESTRICTIONS
- LIMITING CALLS TO NUMBERS SAVED IN ADDRESS BOOK
- LIMITING CALLS TO NUMBERS IN CALL PERMITTED LIST
- REJECTING CALLS FROM UNSAVED NUMBERS
- REJECTING CALLS FROM SPECIFIED NUMBERS
- REJECTING CALLS WITH NO/UNDISPLAYABLE CALLER ID OR FROM PAYPHONES
- ADDRESS BOOK
- ADDING NEW CONTACTS
- DIALING FROM ADDRESS BOOK
- ADDRESS BOOK CAUTION
- MESSAGING
- S! MAIL
- SMS
- GMAIL
- INTERNET MAIL
- SENDING S! MAIL/SMS
- WI-FI CONNECTION SETUP
- SENDING S! MAIL
- SENDING SMS
- SAVING TO UNSENT FOLDER WITHOUT SENDING
- IMPORTANT S! MAIL/SMS TRANSMISSION NOTE
- OPENING & REPLYING TO S! MAIL/SMS
- OPENING NEW S! MAIL/SMS
- REPLYING TO S! MAIL/SMS
- RETRIEVING COMPLETE MESSAGES
- IMPORTANT MESSAGE RETRIEVAL NOTES
- RETRIEVAL SYSTEM
- AUTOMATIC MESSAGE DELETION
- RETRIEVAL OUTSIDE JAPAN
- OPENING RECEIVED S! MAIL/SMS
- OPENING S! MAIL/SMS
- CREATING/SENDING GMAIL
- GMAIL COMPOSITION OPERATIONS
- GMAIL CAUTION
- OPENING RECEIVED GMAIL
- OPENING NEW GMAIL
- OPENING GMAIL
- REPLYING TO MESSAGES
- USING INTERNET MAIL
- ADDING ACCOUNTS
- CREATING/SENDING INTERNET MAIL
- OPENING NEW INTERNET MAIL
- OPENING INTERNET MAIL
- WEB BROWSING (BROWSER)
- USING BROWSER
- ADDING BOOKMARKS
- OPENING BOOKMARKS
- USING HISTORY
- SAVING WEBPAGES
- OPENING NEW TABS
- SSL & TLS
- BROWSER OPERATIONS
- SIGNING IN TO MY SOFTBANK
- SEARCHING FOR INFORMATION
- EDITING BOOKMARKS
- DELETING BOOKMARKS
- SEARCHING WITHIN CURRENT WEBPAGE
- OPENING SAVED WEBPAGES
- SSL/TLS CAUTION
- PHOTO CAMERA
- CAPTURING PHOTOS
- PHOTO VIEWFINDER OPERATIONS
- ADJUSTING BRIGHTNESS
- ADJUSTING ZOOM
- LOCKING FOCUS
- OPENING CAPTURED PHOTO
- USING INTERNAL CAMERA
- CAMERA CAUTIONS
- GENERAL USE
- KEEP LENS CLEAN
- AVOID DIRECT SUNLIGHT EXPOSURE
- MOBILE LIGHT WARNING
- VIDEO CAMERA
- RECORDING VIDEOS
- VIDEO VIEWFINDER OPERATIONS
- MAIN APPLICATIONS
- MUSIC FILES (MUSIC)
- PLAYING MUSIC FILES
- STILL IMAGES & VIDEO (ALBUM)
- OPENING/PLAYING FILES
- WI-FI
- ENABLING WI-FI
- CONNECTING SELECTED ACCESS POINTS
- DISCONNECTING WI-FI
- USING WI-FI DIRECT
- AUTOMATIC UPDATES FOR OPTIMIZING WI-FI CONNECTION
- WI-FI OPERATIONS
- CONNECTING ACCESS POINTS MANUALLY
- CONNECTING USING AOSS
- ENABLING/DISABLING AVAILABLE NETWORK NOTIFICATIONS
- SELECTING A WI-FI SLEEP OPTION
- SETTING WI-FI FREQUENCY BAND
- CONNECTING USING WPS
- DISMISSING ACCESS POINTS
- TROUBLESHOOTING
- TETHERING OPTION
- ABOUT TETHERING OPTION
- STARTING UP TETHERING OPTION
- OPENING TETHERING OPTION HELP (JAPANESE)
- WI-FI CONNECTION
- BLUETOOTH®
- BLUETOOTH® FUNCTIONS
- FUNCTION DESCRIPTION
- ENABLING BLUETOOTH®
- DEVICE SEARCH & PAIRING
- CONNECTING PAIRED BLUETOOTH ® DEVICES
- SENDING FILES (E.G., ADDRESS BOOK)
- RECEIVING FILES (E.G., ADDRESS BOOK)
- ACCEPTING CONNECTION REQUESTS
- BLUETOOTH® CONNECTION OPERATIONS
- RENAMING PAIRED DEVICES
- UNPAIRING DEVICES
- CONNECTING TO BLUETOOTH® DEVICES BY SERVICE
- DISCONNECTING DEVICES (E.G., HANDSFREE DEVICES)
- SETTING WHETHER TO ALLOW OTHER DEVICES TO DETECT HANDSET
- SBM206SH
- CHANGING HANDSET NAME THAT APPEARS ON OTHER DEVICES
- CHANGING DISCOVERABLE TIME
- IMPORTANT BLUETOOTH® USAGE NOTES
- CONNECTION
- FILE TRANSFER
- GLOBAL ROAMING
- SELECTING NETWORK SERVICE
- SELECTING A CELLULAR PROVIDER
- CALLING FROM OUTSIDE JAPAN
- CALLING JAPAN
- CALLING LANDLINES & MOBILES WITHIN CURRENT COUNTRY
- CALLING COUNTRIES ASIDE FROM JAPAN
- INTERNATIONAL CALL OPERATIONS
- CHANGING COUNTRY CODES
- DELETING COUNTRY CODES
- ENABLING/DISABLING ABROAD ASSISTANT
- ABOUT SETTINGS
- SOUND SETTINGS
- SOUND SETTINGS OPERATIONS
- SET SILENT MODE
- SET HANDSET VOLUME
- SET RINGTONE FOR INCOMING CALLS
- ENABLE/DISABLE VIBRATION FOR INCOMING CALLS
- SET VIBRATION PATTERN FOR INCOMING CALLS
- SET NOTIFICATION LAMP ILLUMINATION FOR INCOMING CALLS
- SET RINGTONE FOR INCOMING MESSAGES
- SET VIBRATION PATTERN FOR INCOMING MESSAGES
- SET NOTIFICATION LAMP ILLUMINATION FOR INCOMING MESSAGES
- SET RINGTONE DURATION FOR INCOMING MESSAGES
- SET RINGTONE FOR NOTIFICATIONS
- ENABLE/DISABLE NOTIFICATION LAMP FOR NOTIFICATIONS
- SET RINGTONE DURATION FOR NOTIFICATIONS
- ENABLE VIBRATION WHEN TAPPING DIALPAD, KEYS, ETC
- ENABLE CONFIRMATION TONES WHEN TAPPING A MENU
- ENABLE/DISABLE DIALPAD TONES
- ENABLE TONE WHEN LOCKING/UNLOCKING TOUCHSCREEN
- WALLPAPER & DISPLAY SETTINGS
- WALLPAPER & DISPLAY OPERATIONS
- SET PRESET IMAGE AS WALLPAPER
- SET STILL IMAGE AS WALLPAPER FOR WELCOME SHEET (LOCK SCREEN)
- SET A PERIOD OF INACTIVITY AFTER WHICH DISPLAY TURNS OFF
- SET WHETHER TO KEEP DISPLAY TURNED ON WHILE HAND-HOLDING HANDSET
- DEVICE INFO
- DEVICE INFO OPERATIONS
- MAKE DEVELOPER OPTIONS AVAILABLE
- CHECK HANDSET STATUS (BATTERY STATUS, HANDSET NUMBER, ETC.)
- CALIBRATE TOUCHSCREEN
- CALIBRATE MOTION & ELECTROMAGNETIC SENSORS
- CHECK LEGAL INFORMATION, AUTHENTICATION, & TECHNICAL REGULATIONS CONFORMITY CERTIFICATION
- CERTIFICATION
- ADD ACCOUNT
- SELECT APPLICATIONS TO SYNC BY ACCOUNT
- WI-FI SETTINGS
- HOME APPLICATIONS SETTING
- STORAGE SETTINGS
- STORAGE SETTINGS OPERATIONS
- APPLICATION SETTINGS
- APPLICATION
- OTHER SETTINGS
- BLUETOOTH® SETTINGS
- NETWORK SETTINGS
- NETWORK SETTINGS OPERATIONS
- ENABLE/DISABLE SIGNAL-TRANSMITTING FUNCTIONS
- ACTIVATE/CANCEL NFC/OSAIFU-KEITAI® LOCK
- SET WHETHER TO REQUIRE OPERATION PASSWORD FOR ACTIVATING NFC/OSAIFU-KEITAI® LOCK
- ENABLE/DISABLE SHARING OF HANDSET MEMORY/SD CARD MEDIA FILES ON DLNA DEVICES
- SET UP A NETWORK (WI-FI ACCESS POINT) FOR DLNA SERVICE
- SAVE HANDSET NAME THAT APPEARS ON DLNA DEVICES
- ADD VIRTUAL PRIVATE NETWORKS (VPNS)
- ENABLE/DISABLE MOBILE DATA TRANSMISSIONS
- ENABLE/DISABLE DATA ROAMING
- ADD ACCESS POINTS
- DELETE ADDED ACCESS POINTS (RESTORE DEFAULT SETTINGS)
- LOCK & SECURITY SETTINGS
- LOCK & SECURITY OPERATIONS
- DISABLE SCREEN LOCK
- REQUIRE DRAGGING FOR CANCELING SCREEN LOCK
- REQUIRE FACE RECOGNITION FOR CANCELING SCREEN LOCK
- REQUIRE PATTERN DRAWING FOR CANCELING SCREEN LOCK
- REQUIRE PASSCODE ENTRY FOR CANCELING SCREEN LOCK
- REQUIRE PASSWORD ENTRY FOR CANCELING SCREEN LOCK
- SET WHETHER TO SHOW OWNER INFORMATION IN WELCOME SHEET (LOCK SCREEN)
- INFO ON LOCK SCREEN
- CONTROL ACCESS OF APPLICATIONS TO ADDRESS BOOK
- ENABLE/DISABLE INSTALLATION OF NON-GOOGLE PLAY APPLICATIONS
- LANGUAGE & INPUT SETTINGS
- LANGUAGE & INPUT OPERATIONS
- SELECT HANDSET INTERFACE LANGUAGE
- SAVE WORDS TO USER DICTIONARY
- ADJUST ANDROID KEYBOARD SETTINGS
- ADJUST IWNN IME - SH EDITION SETTINGS
- DATE & TIME SETTINGS
- DATE & TIME OPERATIONS
- SET DATE & TIME AUTOMATICALLY
- ENABLE/DISABLE AUTOMATIC TIME ZONE ADJUSTMENT
- SET DATE MANUALLY
- SET TIME MANUALLY
- SET TIME ZONE MANUALLY
- ENABLE/DISABLE 24-HOUR FORMAT
- SET DATE FORMAT
- RESET ALL
- HANDSET
- CUSTOMER SERVICE
- SOFTBANK CUSTOMER SUPPORT
- GENERAL INFORMATION
- CUSTOMER ASSISTANCE (REPAIRS/LOST HANDSETS)
- SMARTPHONE TECHNICAL SUPPORT CENTER
- SOFTBANK MOBILE GLOBAL CALL CENTER
- DANGER
- WARNING
- CAUTION
- INTERNAL BATTERY
- TV INPUT-TO-MICRO USB CABLE
- HANDSET USE & ELECTRONIC MEDICAL EQUIPMENT
- IMPORTANT PRODUCT INFORMATION
- HEAT FROM HANDSET USE
- FULL SEG & ONE SEG
- IN-CALL/TRANSMISSION CAUTIONS
- URGENT NEWS (APPLICATION)
- WI-FI (WIRELESS LAN)
- PRECAUTIONS
- FREQUENCY BAND
- BLUETOOTH® FUNCTION
- MHL CONNECTION
- WIRELESS OUTPUT
- HANDSET & HARDWARE CARE
- SD CARD SLOT
- TOUCHSCREEN
- MICS
- TV ANTENNA
- USIM TRAY
- HEADPHONES
- FORCING POWER OFF
- PICASA™ WEB ALBUMS SYNC NOTE
- SAVING BATTERY POWER
- PORTRAIT RIGHTS
- COPYRIGHTS
- OPEN SOURCE SOFTWARE
- ELECTROMAGNETIC SAFETY IN EUROPE
- CE DECLARATION OF CONFORMITY
- CE0168①
- BATTERY CAUTIONS
- EUROPEAN RF EXPOSURE INFORMATION
- VOLUME LEVEL CAUTION
- GHZ WLAN OPERATION IN USA
- FCC NOTICE
- FCC INFORMATION TO USER
- FCC RF EXPOSURE INFORMATION
- RF EXPOSURE INFORMATION/SPECIFIC ABSORPTION RATE* (SAR) INFORMATION
- RF EXPOSURE INFORMATION/SPECIFIC ABSORPTION RATE (SAR) INFORMATION
- WATER RESISTANCE
- CARE & MAINTENANCE
- WASHING HANDSET
- DRYING HANDSET
- IMPORTANT
- SH USER GUIDE INDEX
Brand : SHARP
Model : Aquos Phone Xx 206SH
Category : Smartphone