
eXpanium EXP201P - Docking Station PHILIPS - Free user manual and instructions
Find the device manual for free eXpanium EXP201P PHILIPS in PDF.


| Product Type | Docking Station |
| Brand | Philips |
| Model | eXpanium EXP201P |
| Color | Black with silver accents |
| Dimensions (W x D x H) | 250 x 180 x 80 mm |
| Weight | 0.6 kg |
| Power Supply | 100-240V AC, 50/60Hz, 2A output |
| Output Power | 2 x 3W RMS stereo speakers |
| Frequency Response | 20Hz - 20kHz |
| Audio Input | 3.5mm auxiliary (AUX) input |
| Connectivity | Dock connector for Philips eXpanium devices |
| Supported Devices | Philips eXpanium series, other audio devices via AUX |
| Charging | Charges docked device via built-in battery charger |
| Controls | Play/Pause, Volume, Skip on device |
| Display | None |
| Remote Control | Not included |
| Packaging Contents | Docking station, AC adapter, user manual |
| Cleaning | Wipe with soft, dry cloth. Do not use solvents. |
| Safety Instructions | Use only in dry environment, do not open, refer to manual. |
| Spare Parts | Not available, contact Philips for service. |
| Repairability | Not user serviceable, take to qualified technician. |
| Operating Temperature | 5°C to 35°C |
| Humidity | 20-80% |
| Warranty | 2 years |
| Certifications | CE, RoHS |
Frequently Asked Questions - eXpanium EXP201P PHILIPS
User questions about eXpanium EXP201P PHILIPS
0 question about this device. Answer the ones you know or ask your own.
Ask a new question about this device
Download the instructions for your Docking Station in PDF format for free! Find your manual eXpanium EXP201P - PHILIPS and take your electronic device back in hand. On this page are published all the documents necessary for the use of your device. eXpanium EXP201P by PHILIPS.
USER MANUAL eXpanium EXP201P PHILIPS
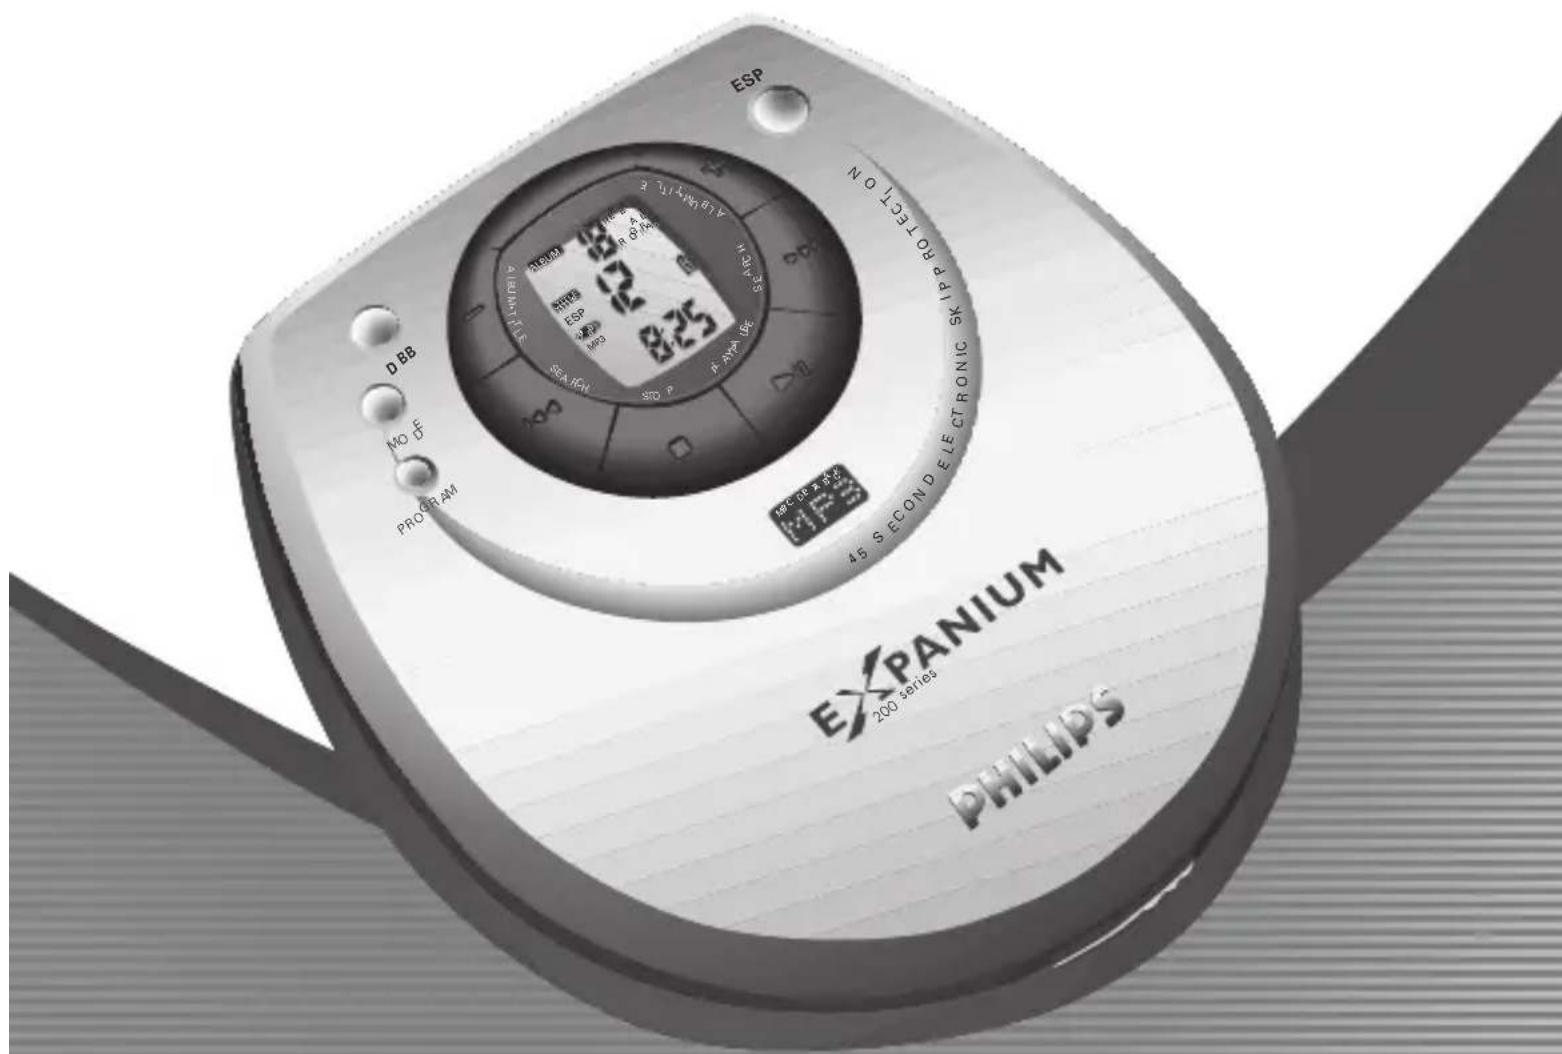
Portable MP3-CD Player
EXP 201
EXP 203
Audio
Toll Free Help Line
Return your Warranty Registration card today to ensure you receive all the benefits you're entitled to.
- Once your Philips purchase is registered, you're eligible to receive all the privileges of owning a Philips product.
- So complete and return the Warranty Registration Card enclosed with your purchase at once, and take advantage of these important benefits.
Warranty Verification
Registering your product within 10 days confirms your right to maximum protection under the terms and conditions of your Philips warranty.
Owner Confirmation
Your completed Warranty Registration Card serves as verification of ownership in the event of product theft or loss.
Model Registration
Returning your Warranty Registration Card right away guarantees you'll receive all the information and special offers which you qualify for as the owner of your model.
Know these
safety symbols
C50
CAUTION
RISK OF ELECTRIC SHOCK DO NOT OPEN

CAUTION: TO REDUCE THE RISK OF ELECTRIC SHOCK, DO NOT REMOVE COVER (OR BACK). NO USER-SERVICEABLE PARTS INSIDE. REFER SERVICING TO QUALIFIED SERVICE PERSONNEL.
For Customer Use
Enter below the Serial No. which is located on the rear of the cabinet. Retain this information for future reference.
Model No. ____
Serial No. ____
This “bolt of lightning” indicates uninsulated material
within your unit may cause an electrical shock. For the safety of everyone in your household, please do not remove product covering.

The “exclamation point” calls attention to features for
which you should read the enclosed literature closely to prevent operating and maintenance problems.
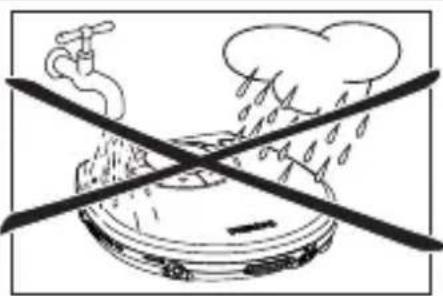
WARNING: TO PREVENT FIRE OR SHOCK HAZARD, DO NOT EXPOSE THIS EQUIPMENT TO RAIN OR MOISTURE.
CAUTION: To prevent electric shock, match wide blade of plug to wide slot, and fully insert.
IMPORTANT SAFETY INSTRUCTIONS
- Read these instructions.
- Keep these instructions.
- Heed all warnings.
- Follow all instructions.
-
Do not use this apparatus near water – for example, near a bathtub, washbowl, kitchen sink, laundry tub, in a wet basement or near a swimming pool, etc.
-
Do not use this apparatus near water.
-
Do not block any of the ventilation openings. Install in accordance with the manufacturers instructions.
-
Do not install near any heat sources such as radiators, heat registers, stoves, or other apparatus (including amplifiers) that produce heat.
-
Only use attachments/ accessories specified by the manufacturer.
-
Use only with a cart,

stand, tripod, bracket, or table specified by the manufacturer or sold with the apparatus. When a cart is used, use caution when moving the cart/apparatus combination to avoid injury from tip-over.
- Refer all servicing to qualified service personnel. Servicing is required when the apparatus has been damaged in any way, such as if the power-supply cord or plug is damaged, liquid has been spilled or objects have fallen into or when the apparatus, has been exposed to rain or moisture, does not operate normally, or has been dropped.
12.Battery usage CAUTION
- To prevent battery leakage which may result in bodily injury or damage to the unit:
• Install all batteries correctly,
+ and - as marked on the unit.
- Do not mix batteries (old and new or carbon and alkaline, etc.).
- Remove batteries when the unit is not used for a long time.
EL 6474-E002: 01/3
English
Safety instructions ....2 & 4
Controls/Quick start....6-7
Power supply/Line out 8–9
Headphones/sound options .....10
General information ....11
In-car connection....12
Features....13–17
CD play....18–19
MP3-CD playback....20–23
Troubleshooting......24–25
Limited warranty....26–27
Français
English: This digital apparatus does not exceed the Class B limits for radio noise emissions from digital apparatus as set out in the Radio Interference Regulations of the Canadian Department of Communications.
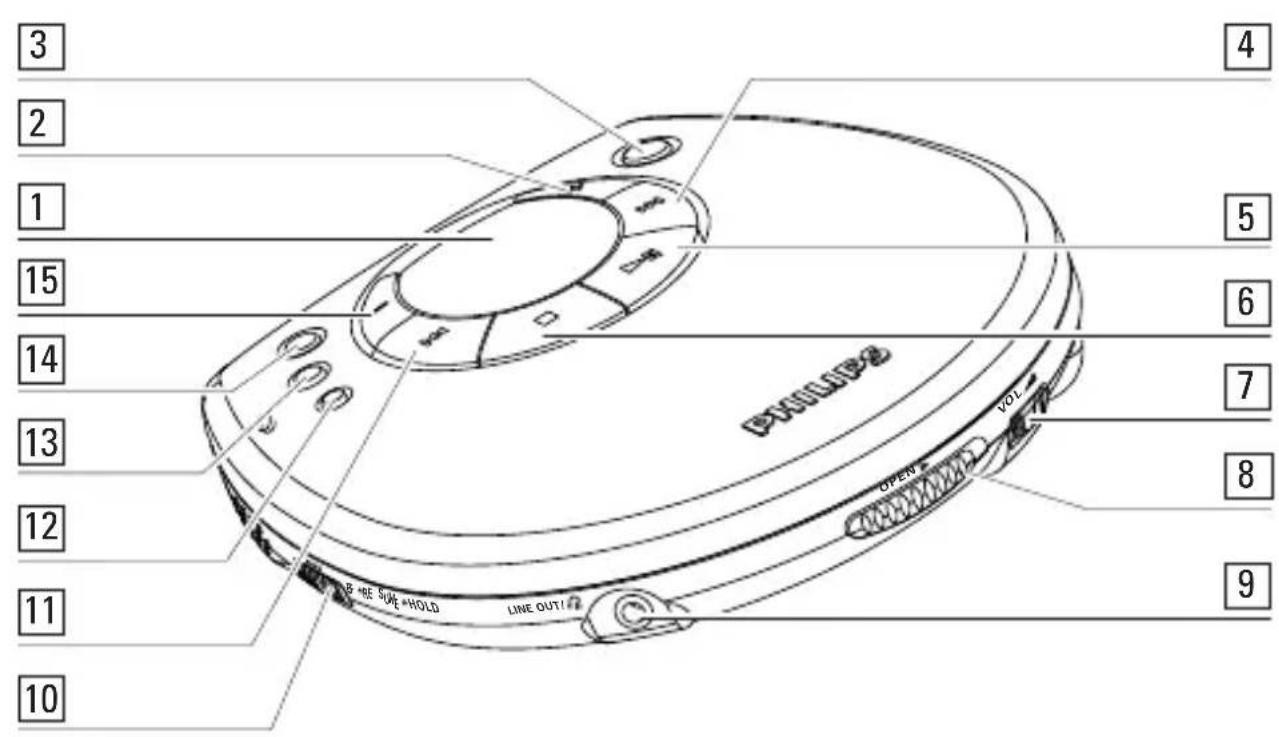
1......display
2 +......MP3 : searches to the next album/ fast searches next titles
3 ESP......ELECTRONIC SKIP PROTECTION ensures continuous playback regardless of vibrations and shocks
4 ▶▶▶I......CD Audio : searches within a track/ fast searches to the next track
MP3 : fast searches next titles/ searches to the next album
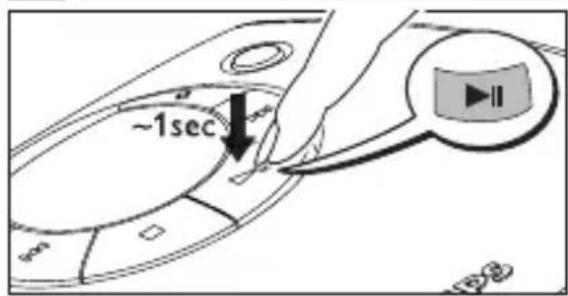
5 ▶II......switches the set on, starts and pause CD play
6 ■ ......stops CD play, erases a program and switches the set off
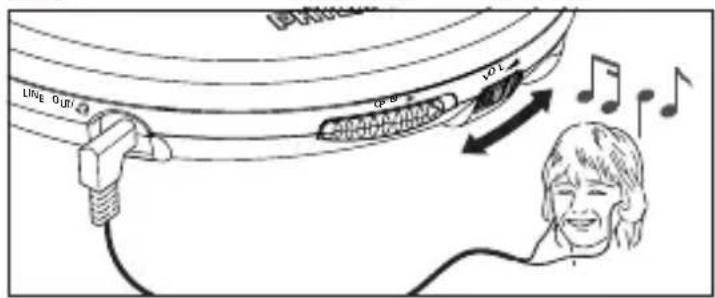
7 VOL ▲......adjusts the volume
8 OPEN ......opens the CD lid
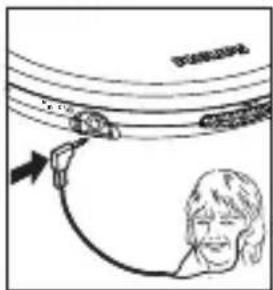
9 LINE OUT / ☉ ..3.5mm line out jack to connect the set to an audio input of an additional audio equipment and 3.5 mm headphone
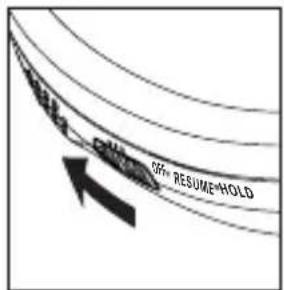
10 OFF.....switches RESUME and HOLD off
RESUME ......CD Audio : stores and continues playback from the last position played
MP3 : stores and continues playback from the last title played
HOLD......locks all buttons
11 CD Audio : searches within a track/ fast searches to a previous track
MP3 : fast searches previous titles/ searches to a previous album
12PROGRAM ......programs tracks and reviews the program
13 MODE ......selects the different playing possibilities e.g.: SHUFFLE, SHUFFLE REPEAT ALL, REPEAT and REPEAT ALL
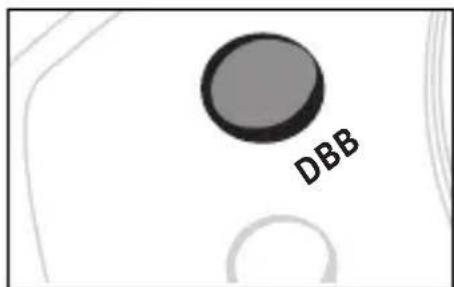
14 DBB......DYNAMIC BASS BOOST switches the bass enhancement on/off. This button also switches the acoustic feedback (the beep) on/off when pressed for more than 2 seconds
15 -......MP3 : searches to a previous album/ fast searches previous titles
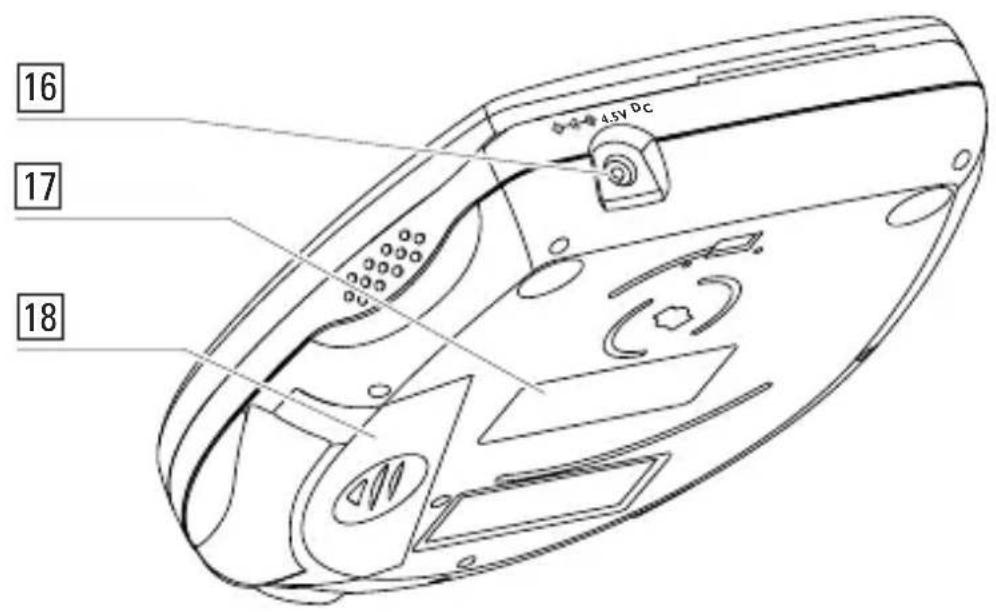
164.5V DC......jack for external power supply
17......model serial number plate
18......battery compartment
3 CD
4
5 HOLD→OFF
6 PLAY
7 VOLUME
! ! !
CAUTION
Use of controls or adjustments or performance of procedures other than herein may result in hazardous radiation exposure.
Batteries (not included)
With this set you can use :
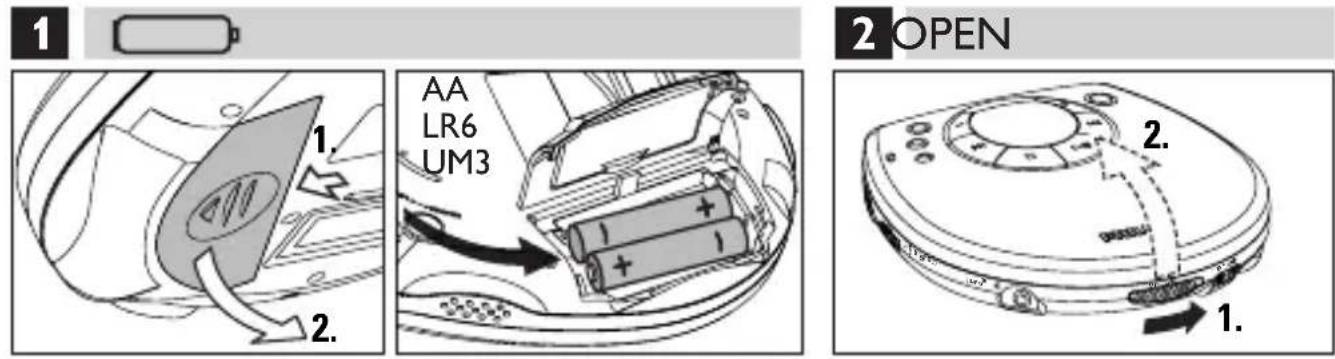
• alkaline batteries (type LR6, UM3 or AA)
Inserting batteries
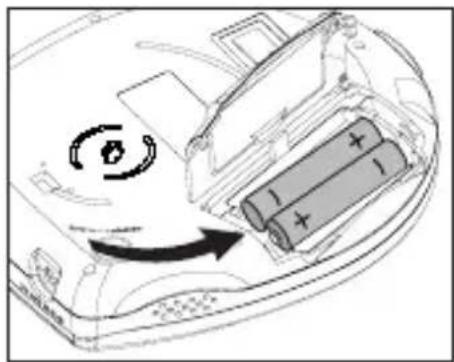
1 Open the battery compartment and insert 2 alkaline batteries.
Notes: – Old and new or different types of batteries should not be used in combination. – Remove batteries if they are empty or if the set will not be used for a long time.
Batteries contain chemical substances, so they should be disposed of properly.
Battery indication
- The battery symbol on the display is divided into 3 segments which indicate the approximate power capacity of the batteries. Full battery capacity is shown by three segments.
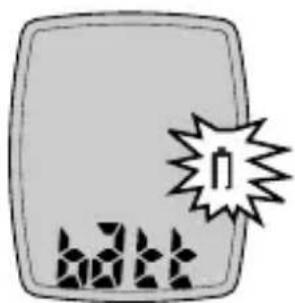
Indication of empty batteries
- Replace the batteries or connect the power adapter as soon as ■ flashes and △▽▽▽ is displayed.
Notes: The average playing time of batteries under normal conditions.
Battery type ESP on ESP off
MP3 Normal 3 hours N/A
MP3 Alkaline 10 hours N/A
Power adapter (supplied or optionally available)
Only use the AY 3160 power adapter (4.5 V/400mA direct current, positive pole to the center pin). Any other product may damage the set.
1 Make sure the local voltage corresponds to the adapter's voltage.
2 Connect the power adapter to the 4.5V DC jack of the player and to the wall outlet.
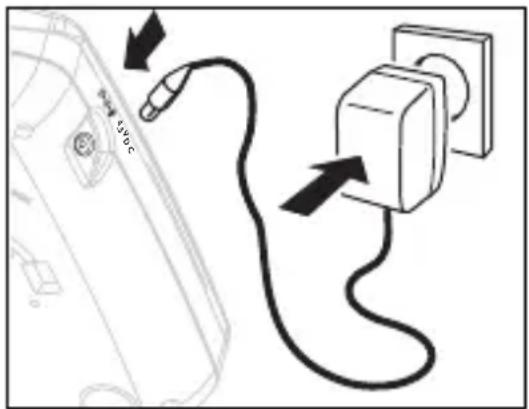
Note: Always disconnect the adapter when you are not using it.
Line out
You can connect the CD player to an additional audio equipment, E.g. amplifier, radio cassette recorder, etc., with a LINE IN jack.
1 Turn down the volume on the additional audio equipment.
2 Connect an audio signal cable (not supplied,) to the LINE OUT / jack of the CD player and the CD IN, AUX IN or LINE IN jack of the additional audio equipment.
3 To adjust the sound and volume, use the controls on the connected audio equipment and on the CD player.
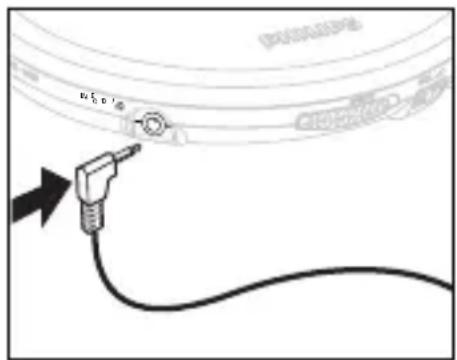
The player complies with the FCC-Rules, Part 15 and with 21 CFR 1040.10.
Operation is subject to the following two conditions:
- This device may not cause harmful interference, and
- This device must accept any interference received, including interference that may cause undesired operation.
Headphones (HL 350)
Connecting the headphones
- Connect the supplied headphones to LINE OUT / 📞.
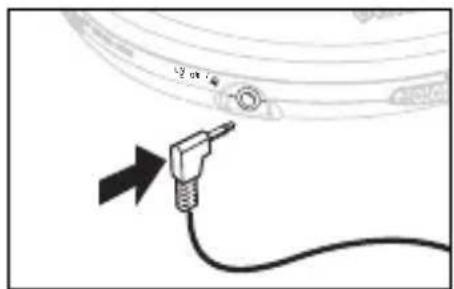
Volume and sound adjustment
- Adjust the volume by using VOL ▲.
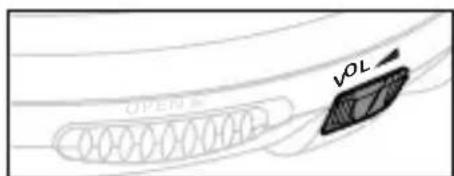
DBB - Dynamic bass boost and Audible (beep) feedback
- Press the DBB button once or more to select your DBB option.
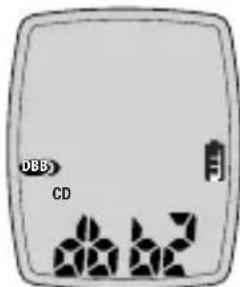
→The display shows the various DBB options:
DBB and DBB, or DBB and DBB.
→If deactivated, no DBB indications are shown.
- Press the DBB button for more than 2 seconds to select your beep option on/off.
→The display shows oEEP EEP
→If selected, the beep is heard when buttons on the set are pressed, the set is in pause mode, or battery power is low.
Use your head when using headphones
- Hearing safety: Do not play your headset at a high volume as extended play at high volume will damage your hearing.
- Traffic safety: Do not use while driving. It may create a traffic hazard and it's illegal in many areas. Even if your headset is an open-air type designed to let you hear outside sounds, don't turn up the volume so high that you can't hear what's around you.
MP3-CD player and CD handling
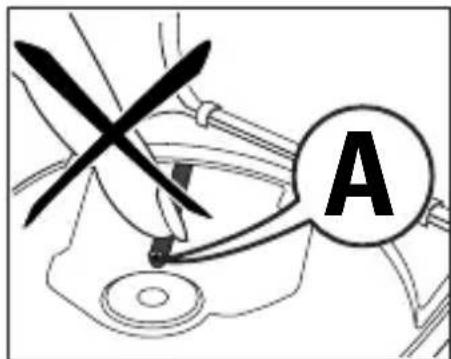
- Do not touch the lens Ⓐ of the CD player.
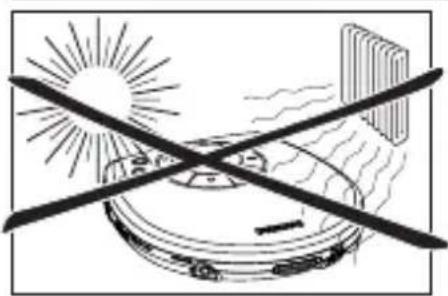
- Do not expose the set, batteries or CDs to humidity, rain, sand or excessive heat (caused by heating equipment or direct sunlight).
- You can clean the CD player with a soft, slightly dampened lint-free cloth. Do not use any cleaning agents as they may have a corrosive effect.
- To clean the CD, wipe it in a straight line from the center toward the edge using a soft, lint-free cloth. A cleaning agent may damage the disc! Never write on a CD or attach a sticker to it.
- The lens may fog up when the set is moved suddenly from cold to warm surroundings. Playing a CD is not possible then. Leave the CD player in a warm environment until the moisture evaporates.
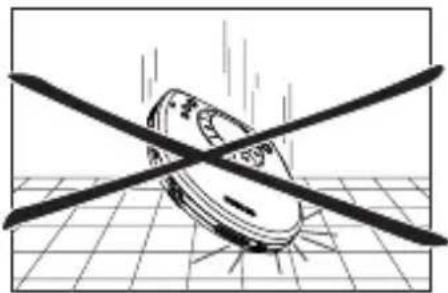
• Active cellular phones in the vicinity may cause inference to your CD player. - Avoid dropping the set as this may cause damage.
Environmental information
- All redundant packing material has been omitted. We have done our utmost to make the packaging easily separable into 2 materials: cardboard and polyethylene.
- Your set consists of materials which can be recycled if disassembled by a specialized company. Please observe the local regulations regarding the disposal of packing materials, dead batteries and old equipment.
In-car use (connections supplied or optionally available)
Only use the AY 3545 car voltage converter (4.5 V, DC, positive pole to the center pin) and the AY 3501 car cassette adapter. Any other product may damage the set.
1 Put the CD player on a horizontal, vibration-free and stable surface. Make sure it is a safe place, where the player is not a danger or obstacle to the driver and pass
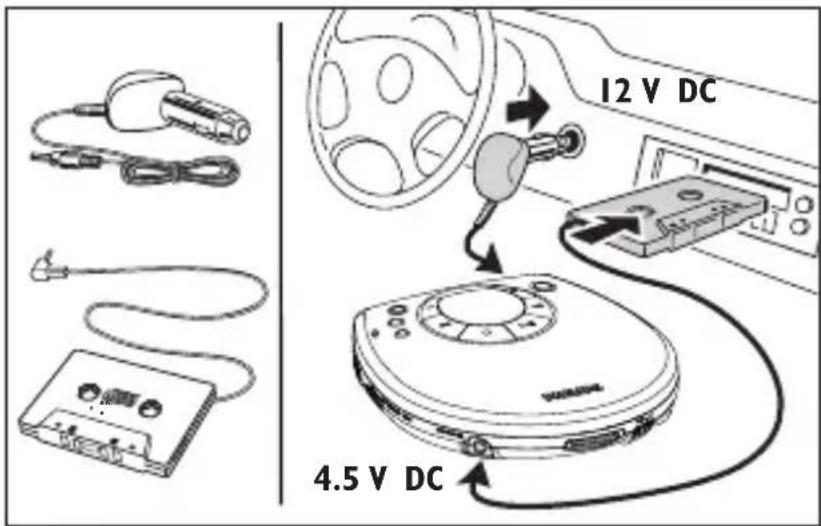
2 Insert the voltage converter into the cigarette lighter socket. If necessary, clean the cigarette lighter socket to obtain a good electrical contact. (only for a 12 V car battery, negative grounding).
3 Connect the DC plug of the voltage converter to the 4.5V DC socket of the CD player.
4 Turn down the volume and connect the cassette adapter plug to the LINE OUT / ☉ of the CD player.
5 Carefully insert the cassette adapter into the car radio's cassette compartment.
6 Make sure the cord does not hinder your driving.
7 Start the CD player, set VOL ▶ to position 8 and adjust the sound with the car radio controls.
- Always remove the voltage converter from the cigarette lighter jack when the CD player is not in use.
Notes: - Avoid excessive heat from the car heating or from direct sunlight (e.g. in a parked car in the summer).
- If your car radio has a LINE IN jack, use the LINE IN jack for the car radio connection instead of the cassette adapter. Connect the signal lead to this LINE IN jack and the LINE OUT / ☉ jack of the CD player.
Selecting a track / title and searching (CD and MP3)
Selecting a track / title during playback
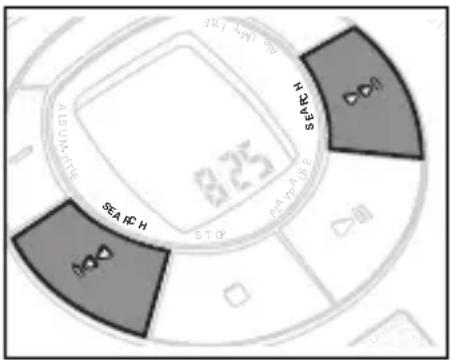
- Briefly press ◀◀◀ or ▶▶▶ once or several times to skip to the current, previous or subsequent track /title start.
→Playback continues with the selected track /title and its number is displayed.
Searching for a passage during playback
1 Keep ◀◀◀ or ▶▶▶ I pressed to find a particular passage in a backward or forward direction.
→Searching starts and playback continues at a low volume. After 2 seconds the search speeds up.
2 Release the button when you reach the desired passage.
→Normal playback continues.
Notes: – During SHUFFLE, SHUFFLE REPEAT ALL, REPEAT, REPEAT ALL or while playing a program searching is possible only within the track.
-- Sound is muted during MP3 search.
MP3 quick search (on MP3-CDs only)
Selecting an album during playback
- Toggle - or + to find your album.
→The first title of the selected album is played.
Searching an MP3 title during playback
- Keep + or –pressed to search a title in forward or backward direction.
→Searching starts at high speed through all the titles, album by album.
Programming track/title numbers
You can select up to 32 titles and store them in the memory in a desired sequence. You can store any track/titles more than once.
1 While playback is stopped, select a track/title with ◀◀◀ or ▶▶◀.
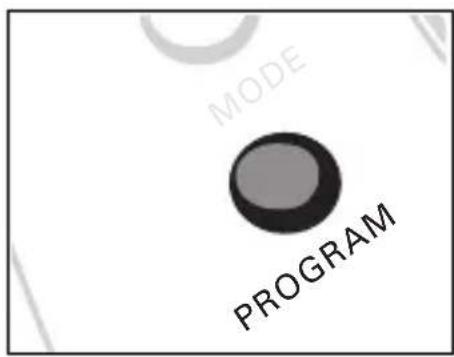
2 Press PROGRAM to store the track/titles.
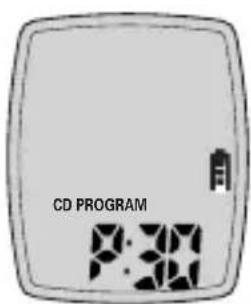
→PROGRAM lights up, the track/titles number programmed and F with the total number of stored track/titles are displayed.
3 Select and store all desired tracks in this way.
4 Press ▶II to start playback of your selected track/titles.
→PROGRAM is shown and playback starts.
- You can review the program by pressing PROGRAM for more than 2 seconds.
→The display shows all stored track/titles in sequence.
Note: - If you try to store more than 32 track/titles, FULL is displayed.
Erasing the program
1 If necessary, press ■ to stop playback.
2 Press ■ to erase the program.
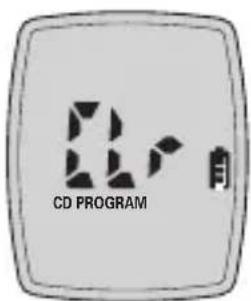
→ [L] is displayed once, PROGRAM goes off and the program is erased.
Notes: The program will also be erased if you
- interrupt the power supply,
- open the CD lid, or
– the set is switched off automatically.
Storing the last position played – RESUME
You can store the last position played. When restarting, playback continues from where you have stopped, according to CD Audio or MP3 playback.
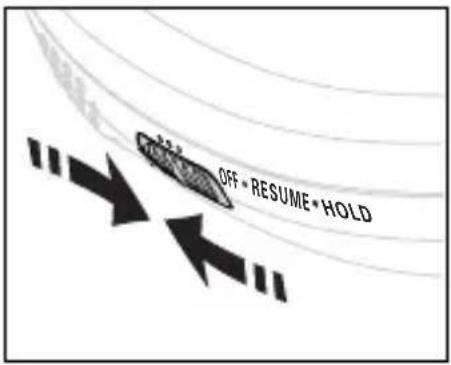
1 Switch the slider to RESUME during playback to activate RESUME.
→RESUME is shown.
2 Press ■ whenever you want to stop playback.
3 Press ▶II whenever you want to resume playback.
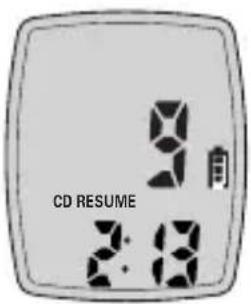
→ RESUME is shown and playback continues from where you have stopped (CD Audio), or from the last title played (MP3).
- To deactivate RESUME, switch the slider to OFF.
→RESUME goes off.
Locking all buttons – HOLD
You can lock the buttons of the set. When a key is pressed, no action will be executed then.
1 Switch the slider to HOLD to activate HOLD.
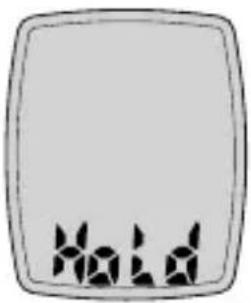
→ All buttons are locked. HOLD is displayed by pressing any key. If the set is switched off, HOLD is displayed only by pressing ▶II.
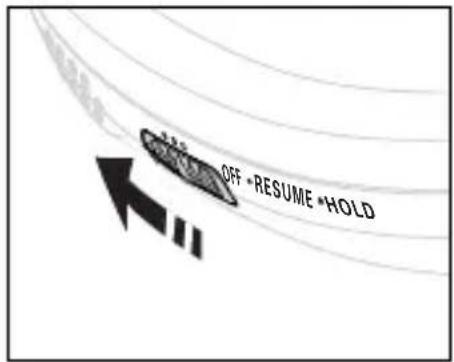
2 To deactivate HOLD, switch the slider to OFF.
Note: When you deactivate HOLD by switching the slider to RESUME and restart, playback continues from where you have stopped (CD Audio), or from the last title played (MP3).
ESP
With a conventional portable CD player, you might have experienced that the music stopped e.g. when jogging.
The ELECTRONIC SKIP PROTECTION protects against loss of sound caused by vibrations and shocks.
However, it does not protect the set against any damage caused by dropping!
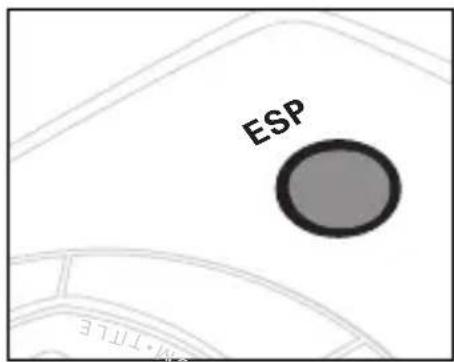
When switching on your player, the ESP function is displayed and automatically activated.
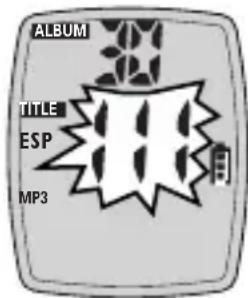
- Toggle the ESP button to select ESP on/off.
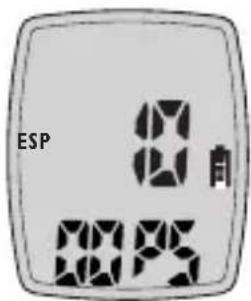
→ESP disappears from the display: ESP deactivated.
→ OOPS appears briefly: playback also starts to skip indicating you have exceeded the maximum ESP time, during ESP activation.
Note: In MP3-CD mode, the ESP feature is automatically activated and you cannot deactivate the ESP setting.
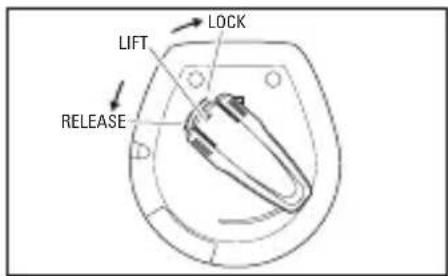
Belt Clip (not on all versions)
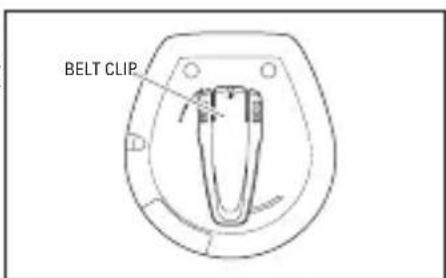
1 To attach the belt clip to the CD-player, position the shaped grip (found on the back of the belt clip) so that it fits into the belt clip hole of the CD-player.
2 Turn the clip to LOCK as indicated on the set.
3 To detach, gently lift the belt clip and turn to RELEASE as indicated on the set.
Selecting different playing options – MODE
During CD or MP3 playback, you can change play options. You can also combine the options with programmed tracks or titles.
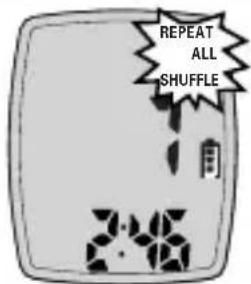
1 During playback, toggle MODE to select your option: →Playback starts in the chosen mode after blinking stops.
MP3:
REPEAT : repeats all titles within the current album.
REPEAT ALL : repeats all titles from all albums.
SHUFFLE : plays titles in random order within a current album
REPEAT ALL SHUFFLE : plays all titles in random order.
CD Audio:
REPEAT : repeats the current track.
REPEAT ALL : repeats all CD tracks.
SHUFFLE : plays tracks in random order.
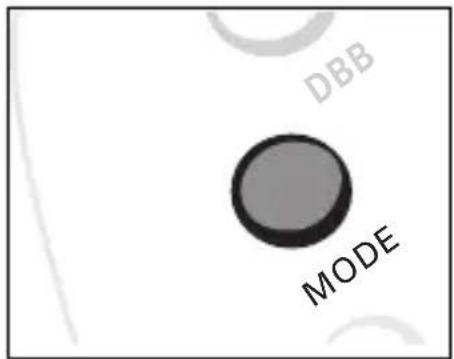
2 To return to normal playback, press MODE repeatedly until the mode option indication disappears.
Playing a CD
This CD player can play all kinds of Audio Discs such as MP3 CD-ROMs, CD Recordables and CD Rewritables. Do not try to play a CDi, CDV, DVD or VCD.
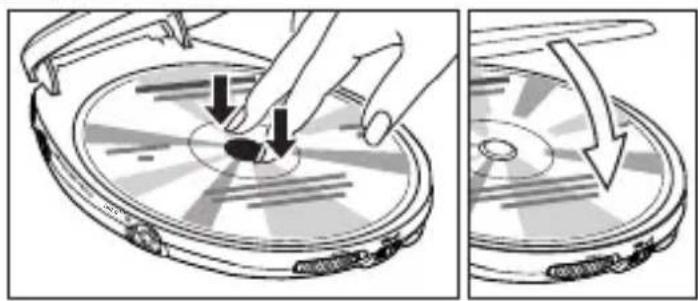
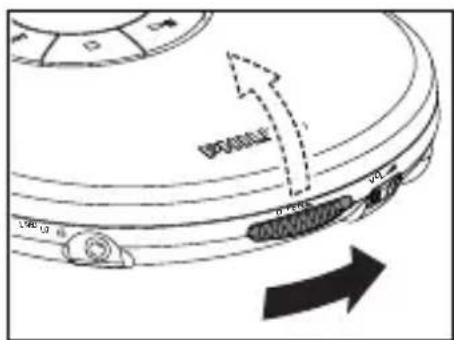
1 Push the OPEN ▶slider. →The lid opens.
2 Insert an audio CD, printed side up, by pressing gently on the CD center so that it fits onto the hub. Close the lid by pressing it down on the left side.
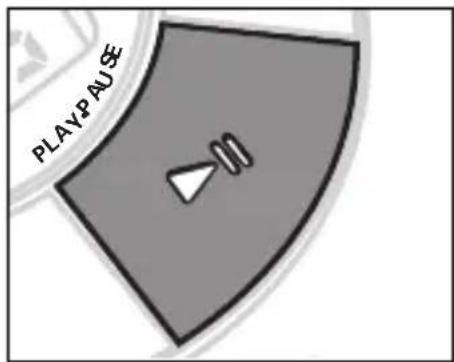
3 Toggle ▶II to switch on the set, start playback or pause.
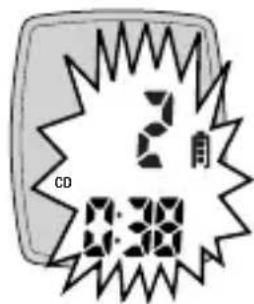
→The current track number and the elapsed playing time are displayed.
→When on pause mode, the playback time flashes.
4 Press ■ to stop playback.
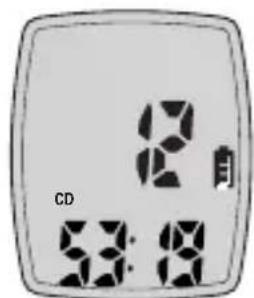
→The total number of tracks and the total playing time of the CD are displayed.
5 Press ■ again to switch off the set.
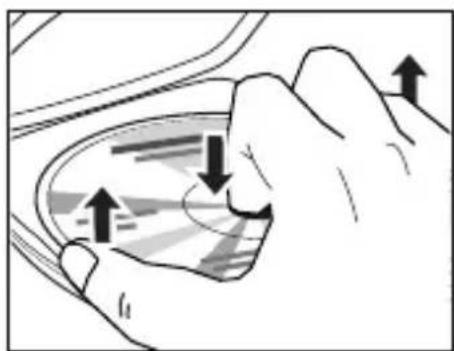
6 To remove the CD, hold it by its edge and press the hub gently while lifting the CD.
Playback information
- If a CD Rewritable (CD Recordable) is not recorded properly, nF d15C is displayed.
For CD Audio, use FINALIZE on your CD recorder to complete the recording.
Note : It is possible to play multi-session MP3 tracks without finalizing a CD. However, the session needs to be finalized or closed. - If you play CD Audio tracks on a CD Rewritable disc, it takes 10–25 seconds for sound reproduction to start after you have pressed ▶II . MP3 track recordings take 15-30 seconds for sound reproduction to start.
- Playback will stop if you open the CD lid.
- While the CD is reading, -EAD flashes.
- In the stop position, if there is no activity for 20 seconds the set will clear the display, and if there is no activity after another 5 seconds, the set will switch off automatically to save energy. Any settings like program and playing modes will be cancelled.
IMPORTANT SPECIFICATIONS
Supported formats
This set supports:
- Use ISO 9660 disc format when burning the CD-ROM.
– Disc format: ISO9660, Joliet, Multisession - MP3 music file formats
- MP3 bit rate (data rate): 32–320 kbps and variable bit rate.
General Information
MP3
The music compression technology MP3 (MPEG Audio Layer 3) reduces the original digital audio data by a factor up to 10 without losing significant sound quality. This allows you to record up to 10 hours of CD-like quality music on a single CD-ROM.
How to get MP3 music
- Either download legal MP3 music from the internet to your computer hard disk or insert your audio CD into your computer's CD-ROM drive and compress the music into MP3 format with any MP3 encoder software.
- To achieve a good sound quality a bit rate of 128 kbps is recommended for MP3 files.
When burning the MP3-CD
- Make sure that the file names of the MP3 files end with .mp3.
- Some MP3-encoders assign numbers to tracks automatically.
How to organize the MP3 files
The set can play up to 400 tracks on one MP3-CD.
- In order to find them easily, you can organize them in folders ("albums"), e.g. the album VERDI in CLASSIC has the album name CLASSIC\MOZART\VERDI (e.g. corresponding to Expanium number 3).
The albums in the illustration will be played in the following way:
| Expanium | PC | Pathway |
| Album | Display | |
Display
1 CLASSIC
2 CLASSIC\MOZART
3 CLASSIC\MOZART\VERDI
4 POP\BLUR
5 REGGAE
![graph TD A["CLASSIC"] --> B["MOZART"] B --> C["001XXXXX.mp3 VERDI"] C --> D["002XXXXX.mp3"] D --> E["003XXXXX.mp3"] E --> F["004XXXXX.mp3 011XXXXX.mp3 021XXXXX.mp3"] F --> G["005XXXXX.mp3 012XXXXX.mp3 022XXXXX.mp3"] G --> H["..."] I["POP"] --> J["BLUR"] J --> K["031XXXXX.mp3"] J --> L["032XXXXX.mp3"…](/content/2026/07/1497747/images/991e4f6d0e3e6215f7ed381c78635e6ac0a7bdea862918ef95f989fa5464707d.jpg)
Notes:
Arrow pathway shows the sequence of MP3 album and title playback. In POP, there are no MP3 files. POP is therefore skipped.
Visit the EXPANIUM homepage
http://www.expanium.philips.com
General information on Writing Formats
There are 3 formats used to record data on a disc:
1 DAO (Disc At Once)
All data to be recorded must be prepared and written onto a disc from start to finish in one recording (single session) and will be 'closed' or finalized. You will not be able to add further data onto your CD.
2 Multisession
Data is recorded at different times (multisession), where you can delete, copy, move and rename files. However, by default most CD-ROM drives will only access the last session of a CD-ROM disc. You should therefore use information or file pointers about the last session where the old files were located, and about the new files imported from the hard disk, in order to link all sessions and avoid any loss of titles and album arrangement.
3 Packet or Package Writing
Packet Writing format divides tracks into smaller pieces of data during recording. Depending on the available spaces on the disc, this means a single CD track recording will be broken up into perhaps 10 fragments of music!
IMPORTANT!
- THIS SET CANNOT READ recordings created on the following: DirectCD, Packet Writing, Package Writing and UDF.
- Do not attempt to combine CD audio and MP3 tracks within a CD-R(W) or CD-ROM, as the set will only be able to playback your CD audio tracks from mixed CD formats.
To play MP3-CDs
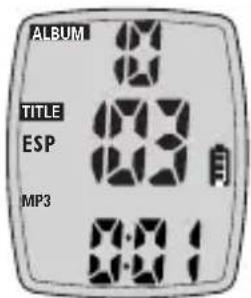
1 Insert an audio CD, printed side up, by pressing gently on the CD center so that it fits onto the hub. In the stop position, the display shows the total number of albums (maximum 40), and titles (maximum 400).
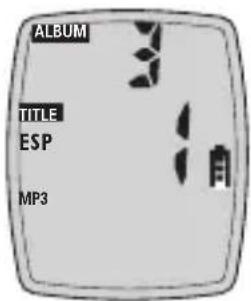
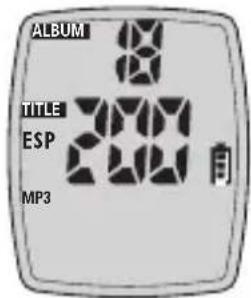
2 Press ▶II to start playback. The display shows MP3 and ESP, the current album and title numbers and the elapsed playing time.
3 Press ■to stop playback. Playback stops and the display shows the total number of titles and total number of albums.
WARNING
Under no circumstances should you try to repair the set yourself as this will invalidate the warranty.
If a fault occurs, first check the points listed, before taking the set for repair.
If you are unable to solve a problem by following these hints, consult your dealer or service center.
Symptom Check point Treatment
Power cannot Batteries
be turned on Are the batteries inserted Insert batteries in correctly? correctly.
Are the batteries dead? Replace batteries.
Power adapter
Loose connection? Connect the adapter securely
Is the power adapter Connect the power connected properly? adapter properly.
In-car use
Is the cigarette lighter Switch on ignition or power on? insert batteries.
HOLD, OOPS or Is the disc cover closed Close the disc cover
no d15C
properly?
tightly.
indication and
Is the set in the HOLD mode?
Deactivate HOLD
Playback is Is there condensation on impossible or stops the lens?
Wait until the lens has cleared.
Is the CD inserted properly?
Place the CD with the label side up.
Is the CD scratched or damaged?
Use another CD.
Symptom Check point Treatment
nF d15C CD-RW (CD-R) is not recorded Use FINALIZE on the indication properly. CD recorder to complete
the recording.
Playback does Is the RESUME or PROGRAM Switch off the RESUME not start from function activated? function or clear the first track PROGRAM.
No sound or poor Are connection plugs Check all connections. sound quality inserted properly?
| Is the volume set too low? | Adjust the volume. |
| Is the headphone plug dirty? | Clean the headphone plug. |
| Is the set located near strong magnetic fields? | Move the set away from strong magnetized fields. |
| In-car use | |
| Is the adapter cassette inserted properly? | Insert the adapter cassette correctly. |
| Is the temperature inside car too high/low? | Let the set recover to room temperature. |
| Is the cigarette lighter socket dirty? | Clean the cigarette lighter socket. |
| Is the car cassette using auto-reverse? | Change the auto reverse direction. |
The model and serial number plate is located on the bottom of the set.
LIMITED WARRANTY
PORTABLE COMPACT DISC
One Year Free Exchange
This product must be carried in for an exchange.
WHO IS COVERED?
You must have proof of purchase to exchange the product. A sales receipt or other document showing that you purchased the product is considered proof of purchase. Attach it to this owner's manual and keep both nearby.
WHAT IS COVERED?
Warranty coverage begins the day you buy your product. For one year thereafter, a defective or inoperative product will be replaced with a new, renewed or comparable product at no charge to you. A replacement product is covered only for the original warranty period. When the warranty on the original product expires, the warranty on the replacement product also expires.
WHAT IS EXCLUDED?
Your warranty does not cover:
- labor charges for installation or setup of the product, adjustment of customer controls on the product, and installation or repair of antenna systems outside of the product.
- product repair and/or part replacement because of misuse, accident, unauthorized repair or other cause not within the control of Philips Consumer Electronics Company.
- reception problems caused by signal conditions or cable or antenna systems outside the unit.
- a product that requires modification or adaptation to enable it to operate in any country other than the country for which it was designed, manufactured, approved and/or authorized, or repair of products damaged by these modifications.
- incidental or consequential damages resulting from the product. (Some states do not allow the exclusion of incidental or consequential damages, so the above exclusion may not apply to you. This includes, but is not limited to, prerecorded material, whether copyrighted or not copyrighted.)
- a product that is used for commercial or institutional purposes.
WHERE IS EXCHANGE AVAILABLE?
You may exchange the product in all countries where the product is officially distributed by Philips Consumer Electronics Company. In countries where Philips Consumer Electronics Company does not distribute the product, the local Philips service organization will attempt to provide a replacement product (although there may be a delay if the appropriate product is not readily available).
BEFORE REQUESTING EXCHANGE...
Please check your owner's manual before requesting an exchange. Adjustments of the controls discussed there may save you a trip.
EXCHANGING A PRODUCT IN U.S.A., PUERTO RICO OR U.S.VIRGIN ISLANDS...
Contact your dealer to arrange an exchange. Or, ship the product, insured and freight prepaid, and with proof of purchase enclosed, to the address listed below.
Small Product Service Center
Philips Service Company
907 Snapps Ferry Road, Plant 2, Building 6
Greeneville,TN 37743
(In U.S.A., Puerto Rico and U.S. Virgin Islands, all implied warranties, including implied warranties of merchantability and fitness for a particular purpose, are limited in duration to the duration of this express warranty. But, because some states do not allow limitations on how long an implied warranty may last, this limitation may not apply to you.)
EXCHANGING A PRODUCT IN CANADA...
Please contact Philips at:
1-800-661-6162 (French Speaking)
1-800-363-7278 (English Speaking)
(In Canada, this warranty is given in lieu of all other warranties. No other warranties are expressed or implied, including any implied warranties of merchantability or fitness for a particular purpose. Philips is not liable under any circumstances for any direct, indirect, special, incidental or consequential damages, howsoever incurred, even if notified of the possibility of such damages.)
TO GET OUT-OF-WARRANTY EXCHANGE...
In U.S.A., Puerto Rico or U.S. Virgin Islands, contact Philips Service Company at (800) 531-0039 to obtain the cost of out-of-warranty exchange. Then carefully pack the product and ship it to the Small Product Service Center (address listed above). In Canada, call the phone number listed above under “Exchanging a Product in Canada” to obtain the cost of out-of-warranty exchange.
REMEMBER...
Please record the model and serial numbers found on the product below. Also, please fill out and mail your warranty registration card promptly. It will be easier for us to notify you if necessary.
MODEL #
SERIAL #


- PORTABLE MP3-CD PLAYER
- AUDIO
- RETURN YOUR WARRANTY REGISTRATION CARD TODAY TO ENSURE YOU RECEIVE ALL THE BENEFITS YOU'RE ENTITLED TO
- WARRANTY VERIFICATION
- OWNER CONFIRMATION
- MODEL REGISTRATION
- CAUTION
- FOR CUSTOMER USE
- IMPORTANT SAFETY INSTRUCTIONS
- ENGLISH
- FRANÇAIS
- BATTERIES (NOT INCLUDED)
- INSERTING BATTERIES
- BATTERIES CONTAIN CHEMICAL SUBSTANCES, SO THEY SHOULD BE DISPOSED OF PROPERLY
- BATTERY INDICATION
- INDICATION OF EMPTY BATTERIES
- BATTERY TYPE ESP ON ESP OFF
- POWER ADAPTER (SUPPLIED OR OPTIONALLY AVAILABLE)
- LINE OUT
- HEADPHONES (HL 350)
- CONNECTING THE HEADPHONES
- VOLUME AND SOUND ADJUSTMENT
- DBB - DYNAMIC BASS BOOST AND AUDIBLE (BEEP) FEEDBACK
- USE YOUR HEAD WHEN USING HEADPHONES
- MP3-CD PLAYER AND CD HANDLING
- ENVIRONMENTAL INFORMATION
- IN-CAR USE (CONNECTIONS SUPPLIED OR OPTIONALLY AVAILABLE)
- SELECTING A TRACK / TITLE AND SEARCHING (CD AND MP3)
- SELECTING A TRACK / TITLE DURING PLAYBACK
- SEARCHING FOR A PASSAGE DURING PLAYBACK
- MP3 QUICK SEARCH (ON MP3-CDS ONLY)
- SELECTING AN ALBUM DURING PLAYBACK
- SEARCHING AN MP3 TITLE DURING PLAYBACK
- PROGRAMMING TRACK/TITLE NUMBERS
- ERASING THE PROGRAM
- STORING THE LAST POSITION PLAYED – RESUME
- LOCKING ALL BUTTONS – HOLD
- ESP
- BELT CLIP (NOT ON ALL VERSIONS)
- SELECTING DIFFERENT PLAYING OPTIONS – MODE
- PLAYING A CD
- PLAYBACK INFORMATION
- IMPORTANT SPECIFICATIONS
- SUPPORTED FORMATS
- GENERAL INFORMATION
- MP3
- HOW TO GET MP3 MUSIC
- WHEN BURNING THE MP3-CD
- HOW TO ORGANIZE THE MP3 FILES
- DISPLAY
- NOTES
- VISIT THE EXPANIUM HOMEPAGE
- GENERAL INFORMATION ON WRITING FORMATS
- 1 DAO (DISC AT ONCE)
- 2 MULTISESSION
- 3 PACKET OR PACKAGE WRITING
- IMPORTANT
- TO PLAY MP3-CDS
- WARNING
- SYMPTOM CHECK POINT TREATMENT
- POWER CANNOT BATTERIES
- POWER ADAPTER
- IN-CAR USE
- INDICATION AND
- LIMITED WARRANTY
- PORTABLE COMPACT DISC
- WHO IS COVERED
- WHAT IS COVERED
- WHAT IS EXCLUDED
- WHERE IS EXCHANGE AVAILABLE
- BEFORE REQUESTING EXCHANGE
- EXCHANGING A PRODUCT IN U.S.A., PUERTO RICO OR U.S.VIRGIN ISLANDS
- EXCHANGING A PRODUCT IN CANADA
- TO GET OUT-OF-WARRANTY EXCHANGE
- REMEMBER
Brand : PHILIPS
Model : eXpanium EXP201P
Category : Docking Station