
RVM1425WA - Microwave HOTPOINT - Free user manual and instructions
Find the device manual for free RVM1425WA HOTPOINT in PDF.
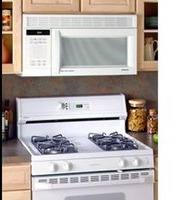


| Product Type | Countertop Microwave |
| Model | Hotpoint RVM1425WA |
| Capacity | 1.4 cu ft |
| Power Output | 1000 Watts |
| Power Supply | 120 V / 60 Hz / 1500 W |
| Dimensions (Width x Depth x Height) | 20.5 x 16.8 x 12.2 inches |
| Weight | 33 lbs |
| Control Type | Electronic touch pad with digital display |
| Power Levels | 10 |
| Cooking Functions | Auto Cook, Defrost, Popcorn, Potato, Beverage, Reheat, Timer |
| Turntable | 12.5 inch glass turntable, removable |
| Display | Digital LED clock and timer |
| Child Lock | Yes |
| Door Safety Interlocks | Yes |
| Interior Material | Stainless steel with easy-clean coating |
| Cleaning | Wipe interior with damp cloth; remove and wash turntable with mild detergent |
| Spare Parts Available | Replacement glass turntable, fuse, control board from authorized service centers |
| Repairability | Serviceable by qualified technicians; user replaceable fuse |
| Warranty | 1-year limited warranty |
| Energy Consumption | 1500 W (input) / 1000 W (output) |
Frequently Asked Questions - RVM1425WA HOTPOINT
User questions about RVM1425WA HOTPOINT
0 question about this device. Answer the ones you know or ask your own.
Ask a new question about this device
Download the instructions for your Microwave in PDF format for free! Find your manual RVM1425WA - HOTPOINT and take your electronic device back in hand. On this page are published all the documents necessary for the use of your device. RVM1425WA by HOTPOINT.
USER MANUAL RVM1425WA HOTPOINT
Countersaver Plus Microwave Oven
Owner's Manual

Important Safety Information
Precautions to Avoid Possible Exposure to Excessive Microwave Energy 2 Special Notes About Microwaving 6
2

Operating Instructions
Features of Your Microwave 11 The Controls on Your Microwave 12 Time Cooking 15 Automatic Cooking 21 Other Features 24
11

Helpful Information
Care and Cleaning 29
28

If Something Goes Wrong
Before You Call For Service 34 Hotpoint Service Numbers 38 Warranty Back Cover
34
GE Answer Center®
800.626.2000
HOTPOINT
FOR YOUR SAFETY

PRECAUTIONS TO AVOID POSSIBLE EXPOSURE TO EXCESSIVE MICROWAVE ENERGY
For your safety the information in this manual must be followed to minimize the risk of fire or explosion or to prevent property damage, personal injury or loss of life.
Do Not Attempt to operate this oven with the door open since open-door operation can result in harmful exposure to microwave energy. It is important not to defeat or tamper with the safety interlocks.
Do Not Place any object between the oven front face and the door or allow soil or cleaner residue to accumulate on sealing surfaces.
Do Not Operate the oven if it is damaged. It is particularly important that the oven door close properly and that there is no damage to the:
1 door (bent)
2 hinges and latches (broken or loosened)
3 door seals and sealing surfaces.
The Oven Should Not
be adjusted or repaired by anyone except properly qualified service personnel.
Welcome
Welcome to the Hotpoint family. We're proud of our quality products and we believe in dependable service.
You'll see it in this easy-to-use manual and you'll hear it in the friendly voices of our consumer service department.
Best of all, you'll experience these values each time you use your microwave. That's important, because your new microwave will be part of your family for a long time.
Start Here!...Before using your Microwave
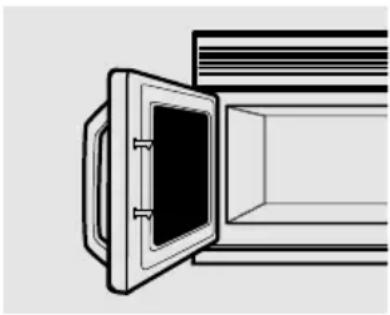
Write down the model and serial numbers here. They are on a label inside the oven.
Staple your receipt to the inside back cover of this manual. You will need it to obtain service under warranty.
Model number
Serial number
Date of purchase
Need Help?
Help us help you
800.626.2000
Before you call for service, there are a few things you can do to help us serve you better.
Read this manual.
It contains instructions to help you use and maintain your microwave properly.
If you received a damaged oven...immediately contact the dealer (or builder) that sold you the oven.
Save time and money.
Check the section titled "If Something Goes Wrong" before calling. This section helps you solve common problems that might occur.
If you do need service, you can relax knowing help is only a phone call away. A list of toll-free customer service numbers is included in the back of this manual. Or call the GE Answer Center® at 800.626.2000, 24 hours a day, 7 days a week.
WARNING
To reduce the risk of fire, burns, electric shock, injury to persons, or exposure to excessive microwave energy when using your appliance, follow basic precautions, including the following sections.
SAFETY PRECAUTIONS
This microwave oven is UL listed for installation over electric and gas ranges.
This microwave oven is not approved or tested for marine use.
- Read and follow the specific “Precautions to Avoid Possible Exposure to Excessive Microwave Energy” on page 2.
- This appliance must be grounded. Connect only to properly grounded outlet. See Grounding Instructions section on page 10.
- Do not mount this appliance over a sink.
• Install or locate this appliance only in accordance with the provided Installation Instructions. -
This over-the-range oven was designed for use over ranges no wider than 42 inches. It may be installed over both gas and electric cooking equipment.
-
Do not operate this appliance if it has a damaged power cord or plug, if it is not working properly, or if it has been damaged or dropped.
- Do not cover or block any openings on the appliance.
-
Use this appliance only for its intended use as described in this manual. Do not use corrosive chemicals or vapors in this appliance. This microwave oven is specifically designed to heat, dry or cook food, and is not intended for laboratory or industrial use.
-
Do not store this appliance outdoors. Do not use this product near water—for example, in a wet basement, near a swimming pool or near a sink.
- Keep power cord away from heated surfaces.
- Do not immerse power cord or plug in water.
• To reduce the risk of fire in the oven cavity:
— Do not overcook food.
Carefully attend
appliance if paper,
plastic or other com-
bustible materials are
placed inside the oven
while cooking.
- Remove wire twist-ties and metal handles from paper or plastic containers before placing them in the oven.
— Do not use the oven for storage purposes. Do not leave paper products, cooking utensils or food in the oven when not in use.
- If materials inside oven should ignite, keep the oven door closed, turn the oven off and disconnect the power cord, or shut off power at the fuse or circuit breaker panel. If the door is opened, the fire may spread.
• See door surface cleaning instructions in the Care and Cleaning section(s) of this manual.
- This appliance should be serviced only by qualified service personnel. Contact nearest authorized service facility for examination, repair or adjustment.
- As with any appliance, close supervision is necessary when used by children.
SAVE THESE INSTRUCTIONS
SPECIAL NOTES ABOUT MICROWAVING
ARCING
If you see arcing, press the CLEAR/OFF pad and correct the problem.
Arcing is the microwave term for sparks in the oven. Arcing is caused by:
• Metal or foil touching the side of the oven.
- Foil not molded to food (upturned edges act like antennas).
- Metal, such as twist-ties, poultry pins, or gold-rimmed dishes, in the microwave.
• Recycled paper towels containing small metal pieces being used in the microwave.
FOODS
- Do not pop popcorn in your microwave oven unless in a special microwave popcorn accessory or unless you use popcorn labeled for use in microwave ovens.
- Some products such as whole eggs and sealed containers—for example, closed jars—will explode and should not be heated in this microwave oven. Such use of the microwave oven could result in injury.
- Do not boil eggs in a microwave oven. Pressure will build up inside egg yolk and will cause it to burst, possibly resulting in injury.
- Operating the microwave with no food inside for more than a minute or two may cause damage to the oven and could start a fire. It increases the heat around the magnetron and can shorten the life of the oven.
- Foods with unbroken outer “skin” such as potatoes, hot dogs, sausages, tomatoes, apples, chicken livers and other giblets, and egg yolks should be pierced to allow steam to escape during cooking.
SAFETY FACT
SUPERHEATED WATER
Microwaved water and other liquids do not always bubble when they reach the boiling point. They can actually get superheated and not bubble at all.
Superheated liquid will bubble up out of the cup when it is moved or when something like a spoon or tea bag is put into it.
To prevent this from happening and causing injury, do not heat any liquid for more than 2 minutes per cup. After heating, let the cup stand in the microwave for 30 seconds before moving it or putting anything into it.
- Avoid heating baby food in glass jars, even with the lid off. Make sure all infant food is thoroughly cooked. Stir food to distribute the heat evenly. Be careful to prevent scalding when warming formula or breast milk. The container may feel cooler than the milk really is. Always test the milk before feeding the baby.
- Spontaneous boiling—Under certain special circumstances, liquids may start to boil during or shortly after removal from the microwave oven. To prevent burns from splashing liquid, we recommend the following: before removing the container from the oven, allow the container to stand in the oven for 30 to 40 seconds after the oven has shut off. Do not boil liquids in narrow-necked containers such as soft drink bottles, wine flasks and especially narrow-necked coffee cups. Even if the container is opened, excessive steam can build up and cause it to burst or overflow.
- Don't defrost frozen beverages in narrow-necked bottles (especially carbonated beverages). Even if the container is opened, pressure can build up. This can cause the container to burst, possibly resulting in injury.
- Hot foods and steam can cause burns. Be careful when opening any containers of hot food, including popcorn bags, cooking pouches and boxes. To prevent possible injury, direct steam away from hands and face.
- Do not overcook potatoes. They could dehydrate and catch fire, causing damage to your oven.
- When cooking pork, follow the directions exactly and always cook the meat to an internal temperature of at least 170°F . This assures that, in the remote possibility that trichina may be present in the meat, it will be killed and meat will be safe to eat.
SPECIAL NOTES ABOUT MICROWAVING
MICROWAVE- SAFE COOKWARE
Make sure all cookware used in your microwave oven is suitable for microwaving. Most glass casseroles, cooking dishes, measuring cups, custard cups, pottery or china dinnerware which does not have metallic trim or glaze with a metallic sheen can be used. Some cookware is labeled “suitable for microwaving.”
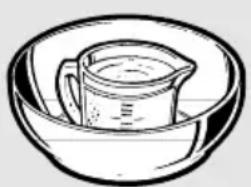
How to test for a microwave-safe dish.
- If you are not sure if a dish is microwave-safe, use this test: Place in the oven both the dish you are testing and a glass measuring cup filled with 1 cup of water—set the measuring cup either in or next to the dish. Microwave 1 minute at high. If the dish heats, it should not be used for microwaving.
If the dish remains cool and only the water in the cup heats, then the dish is microwave-safe.
- If you use a meat thermometer while cooking, make sure it is safe for use in microwave ovens.
- Do not use recycled paper products. Recycled paper towels, napkins and waxed paper can contain metal flecks which may cause arcing or ignite. Paper products containing nylon or nylon filaments should be avoided, as they may also ignite.
- Some styrofoam trays (like those that meat is packaged on) have a thin strip of metal embedded in the bottom. When microwaved, the metal can burn the floor of the oven or ignite a paper towel.
- Do not use the microwave to dry newspapers.
-
Not all plastic wrap is suitable for use in microwave ovens. Check the package for proper use.
-
Paper towels, waxed paper and plastic wrap can be used to cover dishes in order to retain moisture and prevent spattering. Be sure to vent plastic wrap so steam can escape.
• Cookware may become hot because of heat transferred from the heated food. Pot holders may be needed to handle the cookware. - “Boilable” cooking pouches and tightly closed plastic bags should be slit, pierced or vented as directed by package. If they are not, plastic could burst during or immediately after cooking, possibly resulting in injury. Also, plastic storage containers should be at least partially uncovered because they form a tight seal. When cooking with containers tightly covered with plastic wrap, remove covering carefully and direct steam away from hands and face.
- Use foil only as directed in this manual. TV dinners may be microwaved in foil trays less than 3/4" high; remove the top foil cover and return the tray to the box. When using foil in the microwave oven, keep the foil at least 1 inch away from the sides of the oven.
- Plastic cookware—Plastic cookware designed for microwave cooking is very useful, but should be used carefully. Even microwave-safe plastic may not be as tolerant of overcooking conditions as are glass or ceramic materials and may soften or char if subjected to short periods of overcooking. In longer exposures to over-cooking, the food and cookware could ignite.
Follow these guidelines:
1 Use microwave-safe plastics only and use them in strict compliance with the cookware manufacturer's recommendations.
2 Do not microwave empty containers.
3 Do not permit children to use plastic cookware without complete supervision.
THE VENT FAN
The fan will operate automatically under certain conditions (see Automatic Fan feature). Take care to prevent the starting and spreading of accidental cooking fires while the vent fan is in use.
- Clean the underside of the microwave often. Do not allow grease to build up on the microwave or the fan filters.
- In the event of a grease fire on the surface units below the microwave oven, smother a flaming pan on the surface unit by covering the pan completely with a lid, a cookie sheet or a flat tray.
- Use care when cleaning the vent fan filters. Corrosive cleaning agents, such as lye-based oven cleaners, may damage the filters.
- When flaming foods under the microwave, turn the vent fan off. The fan, if operating, may spread the flame.
- Never leave surface units beneath your microwave oven unattended at high heat settings. Boilovers cause smoking and greasy spillovers that may ignite and spread if the microwave vent fan is operating. To minimize automatic fan operation, use adequate sized cookware and use high heat on surface units only when necessary.
GROUNDING INSTRUCTIONS/OPTIONAL KITS
GROUNDING INSTRUCTIONS

WARNING
Improper use of the grounding plug can result in a risk of electric shock.
This appliance must be grounded. In the event of an electrical short circuit, grounding reduces the risk of electric shock by providing an escape wire for the electric current.
This appliance is equipped with a power cord having a grounding wire with a grounding plug. The plug must be plugged into an outlet that is properly installed and grounded.
Consult a qualified electrician or service technician if the grounding instructions are not completely understood, or if doubt exists as to whether the appliance is properly grounded.
If the outlet is a standard 2-prong wall outlet, it is your personal responsibility and obligation to have it replaced with a properly grounded 3-prong wall outlet.
Do not under any circumstances cut or remove the third (ground) prong from the power cord.
Do not use an adapter plug with this appliance.
Do not use an extension cord with this appliance. If the power cord is too short, have a qualified electrician or service technician install an outlet near the appliance.
For best operation, plug this appliance into its own electrical outlet to prevent flickering of lights, blowing of fuse or tripping of circuit breaker.
Optional Kits
Filler Panel Kits JX40WH or JX46WH—White JX41 or JX46BL—Black
When replacing a 36" or 42" range hood, filler panel kits fill in the additional width to provide a custom built-in appearance.
For installation between cabinets only; not for end-of-cabinet installation. Each kit contains two 3"-wide filler panels. Two kits are needed for a 42" opening.
Filter Kits
JX81A—Recirculating
Charcoal Filter Kit
Filter kits are used when the microwave oven cannot be vented to the outside.
Decorative Panel Kit JX22SS—Stainless Steel
When replacing a Hi/Low range, the decorative panel kit fills in the area between the microwave and the range left by the Hi/Low model.
Available at extra cost from your Hotpoint supplier.
Operating Instructions
Features of Your Microwave
(Throughout this manual, features and appearance may vary from your model.)
Features

1 Door Handle. Pull to open the door. The door must be securely latched for the microwave to operate.
2 Door Latches.
3 Window with Metal
Shield. Screen allows cooking to be viewed while keeping microwaves confined in the oven.
4 Removable Turntable.
Turntable and support must be in place when using the oven. The turntable may be removed for cleaning.
5 Touch Control Panel Display.
6 Cooktop Lights.
7 Grease Filters.
8 Glass Cooking Tray.
9 Convenience Guide.
NOTE: Rating plate, oven vent(s) and oven light are located on the inside walls of the microwave oven.
The Controls on Your Microwave Oven
(Throughout this manual, features and appearance may vary from your model.)
You can
microwave by
time or with the
convenience
features.

minute cook - 1 - 6


Time Features
Time Cooking
| Press Enter | |
| TIME COOK I & II (Press once or twice) Amount of cooking time. | |
| DEFROST AUTO/TIME (Press twice) | Amount of defrosting time. |
| POWER LEVEL Power level 1–10. | |
| MINUTE COOK Starts immediately! | |
GUIDE ON MICROWAVE
Before you begin, check the guide located on the inside front of the oven when you open the door.
GUIDES IN BOOK
- Cooking
- Time Defrost
- Reheat
POPCORN
REHEAT
DEFROST AUTO/TIME
2
Convenience Features
| Press Enter Option | |
| POPCORN Starts immediately! more/less timePress once 3.5 oz.Press twice 3.0 oz.Press 3 times 1.75 oz. | |
| REHEAT Food type 1-6 1-3 servings | |
| DEFROST Food weightAUTO/TIME(Press once) | |
Changing Power Levels


How to Change the Power Level
The power level may be entered or changed immediately after entering the feature time for TIME COOK, TIME DEFROST or MINUTE COOK. The power level may also be changed during time countdown.
1 Press TIME COOK or select Time Defrost.
2 Enter cooking or defrosting time.
3 Press POWER LEVEL.
4 Select desired power level 1–10.
5 Press START.
Variable power levels add flexibility to microwave cooking. The power levels on the microwave oven can be compared to the surface units on a range. High (power level 10) or full power is the fastest way to cook and gives you 100% power. Each power level gives you microwave energy a certain percent of the time. Power level 7 is microwave energy 70% of the time. Power level 3 is energy 30% of the time.
A high setting (10) will cook faster but food may need more frequent stirring, rotating or turning over. Most cooking will be done on High (power level 10). A lower setting will cook more evenly and need less stirring or rotating of the food.
Some foods may have better flavor, texture or appearance if one of the lower settings is used. Use a lower power level when cooking foods that have a tendency to boil over, such as scalloped potatoes.
Rest periods (when the microwave energy cycles off) give time for the food
to “equalize” or transfer heat to the inside of the food. An example of this is shown with power level 3—the defrost cycle. If microwave energy did not cycle off, the outside of the food would cook before the inside was defrosted.
Here are some examples of uses for various power levels:
Power Level Best Uses
| High 10 | Fish, bacon, vegetables, boiling liquids. |
| Med-High 7 | Gentle cooking of meat and poultry; baking casseroles and reheating. |
| Medium 5 | Slow cooking and tenderizing such as stews and less tender cuts of meat. |
| Low 3 | Defrosting without cooking; simmering; delicate sauces. |
| Warm 1 | Keeping food warm without overcooking; softening butter. |
Time Cook


1 Press TIME COOK.
2 Enter cooking time.
3 Change power level if you don't want full power. (Press POWER LEVEL. Select a desired power level 1–10.)
4 Press START.
Time Cook I
Allows you to microwave for any time up to 99 minutes and 99 seconds.
Power level 10 (High) is automatically set, but you may change it for more flexibility.
You may open the door during Time Cook to check the food. Close the door and press START to resume cooking.
Time Cook II
Lets you change power levels automatically during cooking. Here's how to do it:
1 Press TIME COOK.
2 Enter the first cook time.
3 Change the power level if you don't want full power. (Press POWER LEVEL. Select a desired power level 1-10.)
4 Press TIME COOK again.
5 Enter the second cook time.
6 Change the power level if you don't want full power. (Press POWER LEVEL. Select a power level 1-10.)
7 Press START.
At the end of Time Cook I, Time Cook II counts down.
Cooking Guide for Time Cook I & II
NOTE: Use power level High (10) unless otherwise noted.
| Vegetable Amount Time Comments | |||
| Asparagus(fresh spears) 1 lb. 7 to 9 min., In 1 (frozen spears) 10-oz. package 5 to 7 min. In 1-qt. casserole. | Med-High (7) | 1/2 -qt. oblong glass baking dish, place 1/4 cup water. | |
| Beans(fresh green) 1 lb. cut in half 10 to 12 min. In 1 (frozen green) 10-oz. package 6 to 8 min. In 1-qt. casserole, place 2 tablespoons water. (frozen lima) 10-oz. package 6 to 8 min. In 1-qt. casserole, place 1/4 cup water. | to 8 min. In 1-qt. casserole, place 1/4 cup water. | ||
| Beets(fresh, whole) 1 bunch 18 to 22 min. In 2-qt. casserole, place 1/2 cup water. | |||
| Broccoli(fresh cut) 1 bunch (1 1/4 to 1 1/2 lbs.) (fresh spears) 1 bunch 10 to 13 min. In 2-qt. oblong glass baking dish, place 1/4 cup water. Rotate dish after half of time. (frozen, chopped) 10-oz. package 5 to 7 min. In 1-qt. casserole. (frozen spears) 10-oz. package 5 to 7 min. In 1-qt. casserole, place 3 tablespoons water. | to 7 min. In 1-qt. casserole, place 3 tablespoons water. | ||
| Cabbage(fresh) (wedges) 1 medium head (about 2 lbs.) (frozen) 1 medium head (about 2 lbs.) (frozen) 1 medium head (about 2 lbs.) (frozen) 1 medium head (about 2 lbs.) (frozen) 1 medium head (about 2 lbs.) (frozen) 1 medium head (about 2 lbs.) (frozen) 1 medium head (about 2 lbs.) (frozen) 1 medium head (about 2 lbs.) (frozen) | 1 medium head (about 2 lbs.) (frozen) 1 medium head (about 2 lbs.) (frozen) 1 medium head (about 2 lbs.) (frozen) 1 medium head (about 2 lbs.) (frozen) 1 medium head (about 2 lbs.) (frozen) 1 medium head (about 2 lbs.) (frozen) 1 medium head (about 2 lbs.) (frozen) 1 Medium head (about 2 lbs.) (frozen) 1 Medium head (about 2 lbs.) (frozen) 1 Medium head (about 2 lbs.) (frozen) 1 Medium head (about 2 lbs.) (frozen) 1 Medium head (about 2 lbs.) (frozen) 1 Medium head (about 2 lbs.) (frozen) 1 Medium head (about 2 lbs.) (frozen) 1 Medium head(about 2 lbs.) (frozen) 1 Medium head (about 2 lbs.) (frozen) 1 Medium head (about 2 lbs.) (frozen) 1 Medium head (about 2 lbs.) (frozen) 1 Medium head (about 2 lbs.) (frozen) 1 Medium head (about 2 lbs.) (frozen) 1 Medium head (about 2 lbs.) (frozen) 1 Medium head (about2 lbs.) (frozen) 1 Medium head (about 2 lbs.) (frozen) 1 Medium head (about 2 lbs.) (frozen) 1 Medium head (about 2 lbs.) (frozen) 1 Medium head (about 2 lbs.) (frozen) 1 Medium head (about 2 lbs.) (frozen) 1 Medium head (about 2 lbs.) (frozen) 1 Medium head (about 2lbs.) (frozen) 1 Medium head (about 2 lbs.) (frozen) 1 Medium head (about 2 lbs.) (frozen) 1 Medium head (about 2 lbs.) (frozen) 1 Medium head (about 2 lbs.) (frozen) 1 Medium head (about 2 lbs.) (frozen) 1 Medium head (about 2 lbs.) (frozen) 1 Medium head (about 2 lbs.) | 9 to 11 min. 8 to 10 min. In 2-qt. oblong glass baking dish, place 1/4 cup water. Rotate dish after half of time. t. casserole. | In 1 1/2 - or 2-qt. casserole, place 1/4 cup water. In 2- or 3-qt. casserole, place 1/4 cup water. |
| Carrots(fresh, sliced) 1 lb. 7 to 9 min. In 1 (frozen) 10-oz. package 5 to 7 min. In 1-qt. casserole, place 1/4 cup water. t. casserole, place 2 tablespoons water. | to 7 min. In 1-qt. casserole, place 2 tablespoons water. | ||
| Cauliflower(flowerets) 1 medium head (frozen, whole) 1 medium head (frozen, whole) 1 medium head (frozen, whole) 1 medium head (frozen, whole) 1 medium head (frozen, whole) 1 medium head (frozen, whole) 1 medium head (frozen, whole) 1 medium head (frozen, whole) 1 medium head (frozen, whole) 1 medium head (frozen, whole) 1 medium head (frozen,Whole) 1 medium head (frozen, whole) 1 medium head (frozen, whole) 1 medium head (frozen, whole) 1 medium head (frozen, whole) 1 medium head (frozen, whole) 1 medium head (frozen, whole) 1 medium head (frozen, whole) 1 medium head (frozen, whole) 1 medium head (frozen, whole) 1 medium head (frozen, Whole) 1 medium head (frozen, whole) 1 medium head (frozen, whole) 1 medium head (frozen, whole) 1 medium head (frozen, whole) 1 medium head (frozen, whole) 1 medium head (frozen, whole) 1 medium head (frozen, whole) 1 medium head (frozen, whole) 1 medium head (frozen, whole) 1 medium head (frozen, Double) 1 medium head (frozen, whole) 1 medium head (frozen, whole) 1 medium head (frozen, whole) 1 medium head (frozen, whole) 1 medium head (frozen, whole) 1 medium head (frozen, whole) 1 medium head (frozen, whole) 1 medium head (frozen, whole) 1 medium head (frozen, whole) 1 medium head (frozen, double) 1 medium head (frozen, whole) 1 medium head (frozen, whole) 1 medium head (frozen, whole) 1 medium head (frozen, whole) 1 medium head (frozen, whole) 1 medium head (frozen, whole) 1 medium head (frozen, whole) 1 medium head (frozen, whole) 1 medium head (frozen, whole) 1 medium head (frozen, full) 1 medium head (frozen, whole) 1 medium head (frozen, whole) 1 medium head (frozen, whole) 1 medium head (frozen, whole) 1 medium head (frozen, whole) 1 medium head (frozen, whole) 1 medium head (frozen, whole) 1 medium head (frozen, whole) 1 medium head (frozen, whole) 1 medium head (frozen, fully) 1 medium head (frozen, whole) 1 medium head (frozen, whole) 1 medium head (frozen, whole) 1 medium head (frozen, whole) 1 medium head (frozen, whole) 1 medium head (frozen, whole) 1 medium head (frozen, whole) 1 medium head (frozen, whole) 1 medium head (frozen, whole) 1 medium head (frozen, half) 1 medium head (frozen, whole) 1 medium head (frozen, whole) 1 medium head (frozen, whole) 1 medium head (frozen, whole) 1 medium head (frozen, whole) 1 medium head (frozen, whole) 1 medium head (frozen, whole) 1 medium head (frozen, whole) 1 medium head (frozen, whole) 1 medium head (frozen, all) 1 medium head (frozen, whole) 1 medium head (frozen, whole) 1 medium head (frozen, whole) 1 medium head (frozen, whole) 1 medium head (frozen, whole) 1 medium head (frozen, whole) 1 medium head (frozen, whole) 1 medium head (frozen, whole) 1 medium head (frozen, whole) 1 medium head (frozen, total) 1 medium head (frozen, whole) 1 medium head (frozen, whole) 1 medium head (frozen, whole) 1 medium head (frozen, whole) 1 medium head (frozen, whole) 1 medium head (frozen, whole) 1 medium head (frozen, whole) 1 medium head (frozen, whole) 1 medium head (frozen, whole) 1 medium head (frozen, entire) 1 medium head (frozen, whole) 1 medium head (frozen, whole) 1 medium head (frozen, whole) 1 medium head (frozen, whole) 1 medium head (frozen, whole) 1 medium head (frozen, whole) 1 medium head (frozen, whole) 1 medium head (frozen, whole) 1 medium head (frozen, whole) 1 medium head (frozen, large) 1 medium head (frozen, whole) 1 medium head (frozen, whole) 1 medium head (frozen, whole) 1 medium head (frozen, whole) 1 medium head (frozen, whole) 1 medium head (frozen, whole) 1 medium head (frozen, whole) 1 medium head (frozen, whole) 1 medium head (frozen, whole) 1 medium head (frozen, sole) 1 medium head (frozen, whole) 1 medium head (frozen, whole) 1 medium head (frozen, whole) 1 medium head (frozen, whole) 1 medium head (frozen, whole) 1 medium head (frozen, whole) 1 medium head (frozen, whole) 1 medium head (frozen, whole) 1 medium head (frozen, whole) 1 medium head (frozen, single) 1 medium head (frozen, whole) 1 medium head (frozen, whole) 1 medium head (frozen, whole) 1 medium head (frozen, whole) 1 medium head (frozen, whole) 1 medium head (frozen, whole) 1 medium head (frozen, whole) 1 medium head (frozen, whole) 1 medium head (frozen, whole) 1 medium head (frozen, one) 1 medium head (frozen, whole) 1 medium head (frozen, whole) 1 medium head (frozen, whole) 1 medium head (frozen, whole) 1 medium head (frozen, whole) 1 medium head (frozen, whole) 1 medium head (frozen, whole) 1 medium head (frozen, whole) 1 medium head (frozen, whole) 1 medium head (frozen, some) 1 medium head (frozen, whole) 1 medium head (frozen, whole) 1 medium head (frozen, whole) 1 medium head (frozen, whole) 1 medium head (frozen, whole) 1 medium head (frozen, whole) 1 medium head (frozen, whole) 1 medium head (frozen, whole) 1 medium head (frozen, whole) 1 medium head (frozen, the whole) 1 medium head (frozen, whole) 1 medium head (frozen, whole) 1 medium head (frozen, whole) 1 medium head (frozen, whole) 1 medium head (frozen, whole) 1 medium head (frozen, whole) 1 medium head (frozen, whole) 1 medium head (frozen, whole) 1 medium head (frozen, whole) 1 medium head (frozen), the whole head (frozen), whole head (frozen), whole head (frozen), whole head (frozen), whole head (frozen), whole head (frozen), whole head (frozen), whole head (frozen), whole head (frozen), whole head (frozen), whole head (frozen), whole head (frozen), whole head (frozen), whole head (frozen), whole head (frozen), whole head (frozen), whole head (frozen), whole head (gulfur). | |||
Vegetable Amount Time Comments
| Corn(frozen kernel) | 10-oz. package 5 to 7 min. In 1-ct. casserole, place 2 tablespoons water. | ||
| Corn on the cob(fresh) 1 to 5 ears 3 to 4 min. In 2-qt. oblong glaper ear corn.If corn is in husk, use no water; if corn has been husked, add 1/4 cup water. Rearrange after half of time.(frozen) 1 ear 5 to 6 min. Place in 2-qt. oblong gllass baking dish.th vented plastic wrap.per ear Rearrange after half of time. | |||
| Mixed vegetables(frozen) 10-oz. package 5 to 7 min. In 1-qt. casserole, place 3 tablespoons water. | |||
| Peas(fresh, shelled) 2 lbs. unshelled (frozen) 10-oz. package 5 to 7 min. In 1-qt. casserole, place 2 tablespoons water. | |||
| Potatoes(fresh, cubed, 4 potatoes white) (6 to 8 oz. each) 2-qt. casserole with 1/2 cup water. Stir after half of time.(fresh, whole, 1 (6 to 8 oz.) 3 to 4 sweet or white) | |||
| Spinach(fresh)(frozen, chopped and leaf) | 10 to 16 oz.10-oz. package 5 to 7 min. In 1-qt. casserole, place washed spinach. qt. casserole, place 3 tablespoons water. | ||
| Squash(fresh, summer and yellow)(winter, acorn butternut) | 1 lb. sliced1 to 2 squash (about 1 lb. each) | 5 to 7 min.8 to 11 min. | In 11⁄2-qt. casserole, place 1/4 cup water.Cut in half and remove fibrous membranes. In 2-qt. oblong glass baking dish, place squash cut-side-down. Turn cut-side-up after 4 minutes. |
Time Features
Time Defrost
![graph TD A["DEFROST AUTO/TIME"] --> B["1"] A --> C["2"] A --> D["3"] A --> E["4"] A --> F["5"] A --> G["6"] A --> H["7"] A --> I["8"] A --> J["9"] K["START"] --> L["0"] style A fill:#f9f,stroke:#333 style K fill:#ccf,stroke:#333](/content/2026/07/1494829/images/733b713ffd091a29470a00dcf52800bd582aa8c00ea032eaa3003b5d72f50fa9.jpg)
1 Press DEFROST AUTO/TIME twice.
2 Enter defrosting time.
3 Press START.
4 Turn food over when the oven signals.
5 Press START.
(Auto Defrost explained in the section on Convenience Features.)
Allows you to defrost for the length of time you select. See the Defrosting Guide for suggested times.
Power level 3 is automatically set, but you may change this for more flexibility. You may defrost small items more quickly by raising the power level after entering the time. However, they will need more frequent attention than usual.
Power level 7 cuts the total defrosting time in about half; power level 10 cuts the total time to approximately 1/3. Rotate or stir food frequently.
At one half of selected defrosting time, the oven signals TURN. At this time, turn food over and break apart or rearrange pieces for more even defrosting. Shield any warm areas with small pieces of foil.
A dull thumping noise may be heard during defrosting. This sound is normal when the oven is not operating at High power.
Defrosting Tips
- Foods frozen in paper or plastic can be defrosted in the package. Tightly closed packages should be slit, pierced or vented AFTER food has partially defrosted. Plastic storage containers should be at least partially uncovered.
- Family-size, prepackaged frozen dinners can be defrosted and microwaved. If the food is in a foil container, transfer it to a microwave-safe dish.
- Foods that spoil easily, such as milk, eggs, fish, stuffings, poultry and pork, should not be allowed to sit out for more than one hour after defrosting. Room temperature promotes the growth of harmful bacteria.
- For more even defrosting of larger foods, such as beef, lamb and veal roasts, use Auto Defrost.
- Be sure large meats are completely defrosted before cooking.
- When defrosted, food should be cool but softened in all areas. If still slightly icy, return to the microwave very briefly, or let it stand a few minutes.
Food Time Comments
| Breads, Cakes Bread, buns or rolls (1 piece) 1 min. Sweet rolls (approx. 12 oz.) 3 to 5 min. | ||
| Fish and Seafood Fillets, frozen (1 lb.) 7 to 9 min. Shellfish, small pieces (1 lb.) 5 to 7 min. Place block in casserole. Turn over and break up after half the time. | ||
| Fruit Plastic pouch—1 to 2 (10-oz. package) | 3 to 6 min. | |
| Meat Bacon (1 lb.) 3 to 5 min. Place unopened package in oven. Let stand 5 minutes after defrosting. Franks (1 lb.) 3 to 5 min. Place unopened package in oven. Microwave just until franks can be separated. Let stand 5 minutes, if necessary, to complete defrosting. | ||
| Ground meat (1 lb.) 5 to 7 min. Roast: beef, lamb, veal, pork Steaks, chops and cutlets | Turn meat over after half the time. 12 to 16 min. Use power level 1. per lb. 6 to 8 min. Place unwrapped meat in cooking dish. per lb. Turn over after half the time and shield warm areas with foil. When finished, separate pieces and let stand to complete defrosting. | |
| Poultry Chicken, broiler-fryer cut up (21⁄2 to 3 lbs.) and turn over after half the time. When finished, separate pieces and microwave 2 to 4 minutes more, if necessary. Let stand to finish defrosting. | ||
| Chicken, whole (21⁄2 to 3 lbs.) the time, unwrap and turn chicken over. | ||
| Cornish hen | 8 to 14 min. Place unwrapped hen in the oven breast-per lb. side-up. Turn over after half the time. Run cool water in the cavity until giblets can be removed. | |
| Turkey breast (4 to 6 lbs.) 6 to 10 min. Place unwrapped breast in dish breast-per lb. side-down. After half the time, turn over and shield warm areas with foil. Finish defrosting. Let stand 1 to 2 hours in refrigerator to complete defrosting. | ||
Time Features
Minute Cook
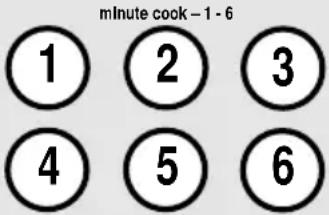
This is a quick way to set cooking time for 1–6 minutes.
Press one of the Minute Cook pads (from 1 to 6) for 1 to 6 minutes of cooking at power level 10. For example, press the 2 pad for 2 minutes of cooking time.
The power level can be changed as time is counting down. Press POWER LEVEL and enter 1–10.
Popcorn


(less time)
(more time)
Use only with prepackaged microwave popcorn weighing 1.75 to 3.5 ounces.
How to Use the Popcorn Feature
1 Follow package instructions, using Time Cook if the package is less than 1.75 ounces or larger than 3.5 ounces. Place the package of popcorn in the center of the microwave.
2 Press POPCORN. The oven starts immediately. Tap POPCORN to select the bag size you are cooking.
How to Adjust the Popcorn Program to Provide a Shorter or Longer Cook Time
If you find that the brand of popcorn you use underpops or overcooks consistently, you can add or subtract 20–30 seconds to the automatic popping time.
To add time:
After pressing POPCORN, press 9 immediately after the oven starts for an extra 20 seconds.
Press 9 again to add another 10 seconds (total 30 seconds additional time).
To subtract time:
After pressing POPCORN, press 1 immediately after the oven starts for 20 seconds less cooking time.
Press 1 again to reduce cooking time another 10 seconds (total 30 seconds less time).
Convenience Features
Reheat
REHEAT
2
3
START
The Reheat feature reheats 1 to 3 servings of many previously cooked foods.
1 Press REHEAT.
2 Select food type 1–6 for one serving (see Reheat Guide below).
3 Press 2 or 3 to reheat 2 or 3 servings.
4 Press START.
NOTE: The serving size may be changed or added after pressing START. Press number pad 2 or 3.
Reheat Guide
Food Type Comments
| 1 Pasta | Cover with lid or vented plastic wrap. |
| 2 Meats, casseroles, pizza | Cover with lid or vented plastic wrap. |
| 3 Fruits and vegetables | Cover with lid or vented plastic wrap. |
| 4 Beverages, 8–10 oz. | Works best with wide mouth mug—do not cover. |
| 5 Sauces and gravies | Cover with lid or vented plastic wrap. |
| 6 Plate of leftovers(2 to 3 foods, 4 oz. each) | Cover with vented plastic wrap. |
Auto Defrost
![graph TD A["DEFROST AUTO/TIME"] --> B["1"] A --> C["2"] A --> D["3"] B --> E["4"] B --> F["5"] B --> G["6"] C --> H["7"] C --> I["8"] C --> J["9"] D --> K["0"] D --> L["stop time"] M["START"] --> N](/content/2026/07/1494829/images/698c16b0bd1f8226f930368e6f531f4f37e8c034a4ff5fa7a915a96ec892fd08.jpg)
1 Press DEFROST AUTO/TIME once.
2 Using the Conversion Guide at right, enter food weight. For example, press pads 1 and 2 for 1.2 pounds (1 pound, 3 ounces).
3 Press START. (Time Defrost is explained in the Time Features section.)
The Defrost Auto/Time feature gives you two ways to defrost frozen foods. Press DEFROST AUTO/TIME once for Auto Defrost or twice for Time Defrost.
Use Auto Defrost for meat, poultry and fish. Use Time Defrost for most other frozen foods.
Auto Defrost automatically sets the defrosting times and power levels to give even defrosting results for meats, poultry and fish.
There is a handy guide located on the inside front of the oven.

Conversion Guide
If the weight of food is stated in pounds and ounces, the ounces must be converted to tenths (.1) of a pound.
| Weight of Enter FoodFood in WeightOunces (tenths ofa pound) | |
| 1-2.1 | |
| 3 | .2 |
| 4-5.3 | |
| 6-7.4 | |
| 8 | .5 |
| 9-10.6 | |
| 11.7 | |
| 12-13.8 | |
| 14-15.9 | |
- Remove meat from package and place on microwave-safe dish.
- Twice during defrost, the oven signals TURN. At each TURN signal, turn the food over. Remove defrosted meat or shield warm areas with small pieces of foil.
• After defrosting, most meats need to stand 5 minutes to complete defrosting. Large roasts should stand for about 30 minutes.
Other Features
Cooking Complete Reminder
To remind you that you have food in the oven, the oven will display "FOOD IS READY" and beep once a minute until you either open the oven door or press CLEAR/OFF.
Clock
![graph TD A["START"] --> B["AM / PM"] B --> C["CLOCK"] C --> D["1 2 3"] C --> E["4 5 6"] C --> F["7 8 9"] C --> G["0"] style A fill:#f9f,stroke:#333 style B fill:#ccf,stroke:#333 style C fill:#cfc,stroke:#333](/content/2026/07/1494829/images/aab9fe4d7a7c01e7f05c44668e13d00c57b02d07f34cadd4aad6bdb922787f5b.jpg)
Press to enter the time of day or to check the time of day while microwaving.
1 Press CLOCK.
2 Enter time of day.
3 Select AM or PM.
4 Press START or CLOCK.
Scroll Speed

scroll speed
The scroll speed of the display can be changed. Press and hold the AM/PM pad about 3 seconds to bring up the display. Select 1–5 for slow to fast scroll speed.
Display On/Off
display on / off
To turn the clock display off, press and hold 0 for about three seconds.
To redisplay the clock, repeat.
Delay Start


AM / PM
Delay Start allows you to set the microwave to delay cooking up to 24 hours.
1 Press DELAY START.
2 Enter the time you want the oven to start. (Be sure the microwave clock shows the correct time of day.)
3 Select AM or PM.
4 Select any combination of Defrost Auto/Time or Time Cook I & II.
5 Press START.
The Delay Start time will be displayed plus "DS." The oven will automatically start at the delayed time.
The time of day may be displayed by pressing CLOCK.
Other Features
Timer On/Off
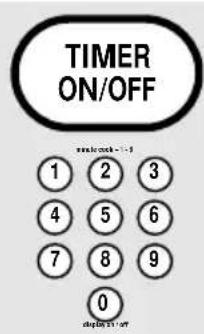
Timer On/Off operates as a minute timer and can be used at any time, even when the oven is operating.
1 Press TIMER ON/OFF.
2 Enter time you want to count down.
3 Press TIMER ON/OFF to start.
When time is up, the oven will signal. To turn off the timer signal, press TIMER ON/OFF.
NOTE: The timer indicator will be lit while the timer is operating.
Start/Pause

In addition to starting many functions, START/PAUSE allows you to stop cooking without opening the door or clearing the display.
Reminder

The Reminder feature can be used like an alarm clock and can be used at any time, even when the oven is operating. The Reminder time can be set up to 24 hours later.
1 Press REMINDER.
2 Enter the time you want the oven to remind you. (Be sure the microwave clock shows the correct time of day.)
3 Select AM or PM.
4 Press REMINDER. When Reminder signal occurs, press REMINDER to turn it off. The Reminder time may be displayed by pressing REMINDER.
NOTE: The REM indicator will remain lit to show that the Reminder is set. To clear the Reminder before it occurs, press REMINDER, then 0. The REM indicator will no longer be lit.
Child Lock-Out

You may lock the control panel to prevent the microwave from being accidentally started or used by children.
To lock or unlock the controls, press and hold CLEAR/OFF for about three seconds. When the control panel is locked, an "L" will be displayed to the extreme right.
Vent Fan

The vent fan removes steam and other vapors from surface cooking.
Press to turn the vent fan on or off.
Automatic Fan
An automatic fan feature protects the microwave from too much heat rising from the cooktop below it. It automatically turns on if it senses too much heat.
If you have turned the fan on you may find that you cannot turn it off. The fan will automatically turn off when the internal parts are cool. It may stay on for 30 minutes or more after the cooktop and microwave controls are turned off.
Surface Light

Press to turn the surface light on or off.
| Term Definition | |
| Arcing | Arcing is the microwave term for sparks in the oven. Arcing is caused by:metal or foil touching the side of the oven.foil that is not molded to food (upturned edges act like antennas).metal such as twist ties, poultry pins, gold-rimmed dishes.recycled paper towels containing small metal pieces. |
| Covering | Covers hold in moisture, allow for more even heating and reduce cooking time. Venting plastic wrap or covering with wax paper allows excess steam to escape. |
| Shielding | In a regular oven, you shield chicken breasts or baked foods to prevent over-browning. When microwaving, you use small strips of foil to shield thin parts, such as the tips of wings and legs on poultry, which would cook before larger parts. |
| Standing Time | When you cook with regular ovens, foods such as roasts or cakes are allowed to stand to finish cooking or to set. Standing time is especially important in microwave cooking. Note that a microwaved cake is not placed on a cooling rack. |
| Venting | After covering a dish with plastic wrap, you vent the plastic wrap by turning back one corner so excess steam can escape. |
Helpful Hints

Open the oven door a few minutes after cooking to air out the inside. An occasional thorough wiping with a solution of baking soda and water keeps the inside fresh.
NOTE: Be certain the power is off before cleaning any part of this oven.
How to Clean the Inside
Walls, Floor, Inside Window, Metal and Plastic Parts on the Door
Removable Turntable and Turntable Support
Some spatters can be removed with a paper towel, others may require a damp cloth. Remove greasy spatters with a sudsy cloth, then rinse with a damp cloth. Do not use abrasive cleaners or sharp utensils on oven walls. Never use a commercial oven cleaner on any part of your microwave.
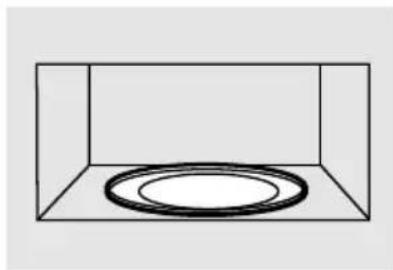
To prevent breakage, do not place the turntable into water just after cooking. Wash it carefully in warm, sudsy water or in the dishwasher. The turntable and support can be broken if dropped. Remember, do not operate the oven without the turntable and support in place.
Care and Cleaning
How to Clean the Outside
Do not use cleaners containing ammonia or alcohol on the microwave oven. Ammonia or alcohol can damage the appearance of the microwave.
Case
Clean the outside of the microwave with a sudsy cloth. Rinse and then dry. Wipe the window clean with a damp cloth.
Control Panel and Door
Wipe with a damp cloth. Dry thoroughly. Do not use cleaning sprays, large amounts of soap and water, abrasives or sharp objects on the panel—they can damage it. Some paper towels can also scratch the control panel.
Door Surface
It's important to keep the area clean where the door seals against the microwave. Use only mild, non-abrasive detergents applied with a clean sponge or soft cloth. Rinse well.
Bottom

Clean off the grease and dust on the bottom often. Use a solution of warm water and detergent.
Cooktop Light
Replace with 40-watt tubular bulbs. Order WB36X936 from your Hotpoint supplier. Tubular 40-watt bulbs (40T6 1/2 /2), available in supermarkets and hardware stores, may also be used for replacements.
1 To replace the bulb(s), first disconnect the power at the main fuse or circuit breaker panel or pull the plug. 2 Remove the screw at the front of the light cover and lower the cover.

3 Be sure the bulb(s) to be replaced are cool before removing. After breaking the adhesive seal, remove the bulb by gently turning. 4 Replace the screw. Connect electrical power to the oven.

Oven Light
Replace the burned-out bulb with a 30-watt incandescent bulb (WB02X4235), available from your Hotpoint supplier.
1 To replace the oven light, first disconnect the power at the main fuse or circuit breaker panel or pull the plug. 2 Remove the top grille by taking out the 2 screws that hold it in place.

3 Next, remove the screw located above the door near the center of the oven that secures the light housing.
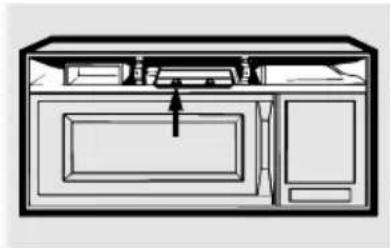
4 Replace the screw. Connect electrical power to the oven.
The Exhaust Feature
The Vent Fan

The vent fan has 2 metal reusable grease filters.
Models that recirculate air back into the room also use a charcoal filter.
Reusable Grease Filters
The metal filters trap grease released by foods on the cooktop. They also prevent flames from foods on the cooktop from damaging the inside of the microwave.
For this reason, the filters must ALWAYS be in place when the hood is used. The grease filters should be cleaned once a month, or as needed.
Removing and Cleaning the Filter

To remove, slide it to the rear using the tab. Pull it down and out.
To clean the grease filter, soak it and then swish it around in hot water and detergent. Don't use ammonia or ammonia products because they will darken the metal. Light brushing can be used to remove embedded dirt.
Rinse, shake and let it dry before replacing.
To replace, slide the filter in the frame slot on the back of the opening. Pull up and to the front to lock into place.
Charcoal Filter (on some models)
The charcoal filter cannot be cleaned. It must be replaced. Order Part No. WB02X9883 from your Hotpoint supplier.
If the model is not vented to the outside, the air will be recirculated through a disposable charcoal filter that helps remove smoke and odors.
The charcoal filter should be replaced when it is noticeably dirty or discolored (usually after 6 to 12 months, depending on hood usage).
To Remove Charcoal Filter

Remove 2 grille screws to remove the grille.
To remove the charcoal filter, disconnect power at the main fuse or circuit breaker panel or pull the plug.
Remove the top grille by removing the 2 screws that hold it in place. Slide the filter towards the front of the oven and remove it.
To Install Charcoal Filter

To install a new filter, remove plastic and other outer wrapping from the new filter.
Insert the filter into the top opening of the oven as shown. It will rest at an angle on 2 side support tabs and in front of the right rear tab. Replace the grille and 2 screws.
?
If Something Goes Wrong
Before You Call For Service
Problem Possible Cause What to Do
| Oven will not start | A fuse in your home • Replace fuse or reset circuit breaker.may be blown or the circuit breaker tripped.Power surge. • Unplug the microwave oven, then plug it back in.Plug not fully inserted • Make sure the 3-prong plug on the into wall outlet. oven is fully inserted into wall outlet. | |
| Floor of the oven is warm, even when the oven has not been used | The cooktop light is • This is normal.located below the oven floor. When the light is on, the heat it produces may make the oven floor get warm. | |
| “LOCKED” appears on display | The control has been • Press and hold CLEAR/OFF for locked. about 3 seconds to unlock the control. | |
| You hear an unusual, low-tone beep | You have tried to start the Reminder without a valid time of day.You have tried to change the power level when it is not allowed. | • Start over and enter a valid time of day.• Many of the oven’s features are preset and cannot be changed. |
Things That Are Normal
- Steam or vapor escaping from around the door.
• Light reflection around door or outer case. - Dimming oven light and change in the blower sound at power levels other than high.
• Dull thumping sound while oven is operating.
- TV-radio interference might be noticed while using the microwave. Similar to the interference caused by other small appliances, it does not indicate a problem with the microwave. Plug the microwave into a different electrical circuit, move the radio or TV as far away from the microwave as possible, or check the position and signal of the TV/radio antenna.
Notes
Notes
?
Hotpoint Service Numbers
We'll Be There!
GE Answer Center®
800.626.2000
Whatever your question about any Hotpoint major appliance, GE Answer Center® information service is available to help.
Open 24 hours a day, 7 days a week.
In-Home Repair Service
800-GE-CARES (800-432-2737)
A GE consumer service professional will provide expert repair service, scheduled at a time that's convenient for you.
Our factory-trained technicians know your appliance inside and out—so most repairs can be handled in just one visit.
For Customers With Special Needs
800.626.2000
GE offers Braille controls for a variety of GE appliances, and a brochure to assist in planning a barrier-free kitchen for persons with limited mobility.
800-TDD-GEAC (800-833-4322)
Service Contracts
800-626-2224
With a service contract GE Consumer Service will still be there after your warranty expires.
With a multiple-year contract, you're assured of future service at today's prices.
Parts and Accessories
800-626-2002
Individuals qualified to service their own appliances can have parts or accessories sent directly to their home. (VISA, MasterCard and Discover cards are accepted.)
Instructions contained in this manual cover procedures to be performed by any user. Other servicing generally should be referred to qualified service personnel. Caution must be exercised, since improper servicing may cause unsafe operation.
Further Service
If for some reason you are not happy with the service you receive, here are three steps to follow for further help.
First, contact the people who serviced your appliance. Explain why you are not pleased.
Next, if you are still not pleased, write all the details—including your phone number—to:
Manager Consumer Relations Hotpoint, Appliance Park Louisville, KY 40225
Finally, if your problem is still not resolved, write:
Major Appliance Consumer Action Program 20 North Wacker Drive Chicago, IL 60606
What Is Covered
FULL ONE-YEAR WARRANTY
For one year from date of original purchase, we will provide, free of charge, parts and service labor in your home to repair or replace any part of the microwave oven that fails because of a manufacturing defect.
LIMITED ADDITIONAL FOUR-YEAR WARRANTY
For the second through the fifth year from the date of original purchase, we will provide, free of charge, a replacement magnetron tube if the magnetron tube fails because of a manufacturing defect. You pay for the service trip to your home and service labor charges.
****************************************************************************************
This warranty is extended to the original purchaser and any succeeding owner for products purchased for ordinary home use in the 48 mainland states, Hawaii and Washington, D.C. In Alaska the warranty is the same except that it is LIMITED because you must pay to ship the product to the service shop or for the service technician's travel costs to your home.
All warranty service will be provided by our Factory Service Centers or by our authorized Customer Care ® servicers during normal working hours.
Should your appliance need service, during warranty period or beyond, call 800-GE-CARES (800-432-2737).
What Is Not Covered
Warrantor is not responsible for consequential damages.
• Service trips to your home to teach you how to use the product.
Read your Owner's Manual. If you then have any questions about operating the product, please contact your dealer or our Consumer Affairs office at the address below, or call, toll free:
GE Answer Center®
800.626.2000
consumer information service
- Improper installation.
If you have an installation problem, contact your dealer or installer. You are responsible for providing adequate electrical, exhausting and other connecting facilities.
- Replacement of house fuses or resetting of circuit breakers.
- Failure of the product if it is misused, or used for other than the intended purpose or used commercially.
- Damage to product caused by accident, fire, floods or acts of God.
Some states do not allow the exclusion or limitation of incidental or consequential damages, so the above limitation or exclusion may not apply to you. This warranty gives you specific legal rights, and you may also have other rights which vary from state to state. To know what your legal rights are in your state, consult your local or state consumer affairs office or your state's Attorney General.
Warrantor: General Electric Company
If further help is needed concerning this warranty, write:
Manager-Consumer Affairs, GE Appliances, Louisville, KY 40225
- COUNTERSAVER PLUS MICROWAVE OVEN
- OWNER'S MANUAL
- IMPORTANT SAFETY INFORMATION
- OPERATING INSTRUCTIONS
- HELPFUL INFORMATION
- IF SOMETHING GOES WRONG
- HOTPOINT
- FOR YOUR SAFETY
- PRECAUTIONS TO AVOID POSSIBLE EXPOSURE TO EXCESSIVE MICROWAVE ENERGY
- THE OVEN SHOULD NOT
- WELCOME
- START HERE!...BEFORE USING YOUR MICROWAVE
- NEED HELP
- READ THIS MANUAL
- SAVE TIME AND MONEY
- WARNING
- SAFETY PRECAUTIONS
- SAVE THESE INSTRUCTIONS
- SPECIAL NOTES ABOUT MICROWAVING
- ARCING
- FOODS
- SAFETY FACT
- MICROWAVE- SAFE COOKWARE
- THE VENT FAN
- GROUNDING INSTRUCTIONS/OPTIONAL KITS
- GROUNDING INSTRUCTIONS
- OPTIONAL KITS
- FILTER KITS
- JX81A—RECIRCULATING
- CHARCOAL FILTER KIT
- DECORATIVE PANEL KIT JX22SS—STAINLESS STEEL
- FEATURES OF YOUR MICROWAVE
- FEATURES
- DOOR LATCHES
- WINDOW WITH METAL
- REMOVABLE TURNTABLE
- THE CONTROLS ON YOUR MICROWAVE OVEN
- TIME FEATURES
- GUIDE ON MICROWAVE
- GUIDES IN BOOK
- CONVENIENCE FEATURES
- CHANGING POWER LEVELS
- HOW TO CHANGE THE POWER LEVEL
- TIME COOK
- TIME COOK I
- TIME COOK II
- COOKING GUIDE FOR TIME COOK I & II
- TIME DEFROST
- DEFROSTING TIPS
- MINUTE COOK
- POPCORN
- HOW TO USE THE POPCORN FEATURE
- HOW TO ADJUST THE POPCORN PROGRAM TO PROVIDE A SHORTER OR LONGER COOK TIME
- TO ADD TIME
- TO SUBTRACT TIME
- REHEAT
- AUTO DEFROST
- CONVERSION GUIDE
- OTHER FEATURES
- COOKING COMPLETE REMINDER
- CLOCK
- SCROLL SPEED
- DISPLAY ON/OFF
- DELAY START
- TIMER ON/OFF
- START/PAUSE
- REMINDER
- CHILD LOCK-OUT
- VENT FAN
- AUTOMATIC FAN
- SURFACE LIGHT
- HELPFUL HINTS
- HOW TO CLEAN THE INSIDE
- CARE AND CLEANING
- HOW TO CLEAN THE OUTSIDE
- CASE
- CONTROL PANEL AND DOOR
- DOOR SURFACE
- BOTTOM
- COOKTOP LIGHT
- OVEN LIGHT
- THE EXHAUST FEATURE
- REUSABLE GREASE FILTERS
- REMOVING AND CLEANING THE FILTER
- CHARCOAL FILTER (ON SOME MODELS)
- TO REMOVE CHARCOAL FILTER
- TO INSTALL CHARCOAL FILTER
- BEFORE YOU CALL FOR SERVICE
- THINGS THAT ARE NORMAL
- NOTES
- HOTPOINT SERVICE NUMBERS
- WE'LL BE THERE
- GE ANSWER CENTER®
- IN-HOME REPAIR SERVICE
- FOR CUSTOMERS WITH SPECIAL NEEDS
- SERVICE CONTRACTS
- PARTS AND ACCESSORIES
- FURTHER SERVICE
- WHAT IS COVERED
- FULL ONE-YEAR WARRANTY
- LIMITED ADDITIONAL FOUR-YEAR WARRANTY
- WHAT IS NOT COVERED
- WARRANTOR IS NOT RESPONSIBLE FOR CONSEQUENTIAL DAMAGES
Brand : HOTPOINT
Model : RVM1425WA
Category : Microwave