
Everio GZ-R460BUS - Camcorder JVC - Free user manual and instructions
Find the device manual for free Everio GZ-R460BUS JVC in PDF.
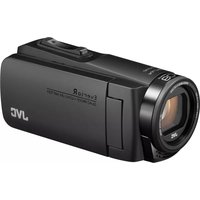


| Product Type | Camcorder |
| Brand | JVC |
| Model | Everio GZ-R460BUS |
| Dimensions | 57 x 63 x 118 mm (2.2 x 2.5 x 4.6 in) |
| Weight | Approx. 300 g (10.6 oz) with battery |
| Power Source | Rechargeable lithium-ion battery (BN-VG114U) |
| Battery Life | Approx. 2.5 hours continuous recording |
| Sensor | 1/4.5 inch 8.9 MP CMOS |
| Optical Zoom | 40x |
| Digital Zoom | 200x |
| Screen Size | 3.0 inch touchscreen LCD |
| Recording Resolution | Full HD 1920 x 1080 (50p/50i) |
| Waterproof Rating | IPX8 (up to 5 m for 30 minutes) |
| Shockproof | 1.5 m drop resistance |
| Dustproof | IP6X certified |
| Lens Aperture | f/1.8 |
| Image Stabilization | Optical image stabilization |
| Storage Media | SD/SDHC/SDXC memory card (up to 64 GB recommended) |
| Connectivity | USB 2.0, HDMI micro, AV output |
| Built-in Light | LED light for low-light recording |
| Audio Format | Dolby Digital 2ch |
| Cleaning Instructions | Wipe with soft dry cloth; avoid chemical cleaners |
| Safety Warnings | Do not immerse in water beyond specified depth; avoid drops |
| Repairability | Contact authorized service center for repairs |
Frequently Asked Questions - Everio GZ-R460BUS JVC
User questions about Everio GZ-R460BUS JVC
0 question about this device. Answer the ones you know or ask your own.
Ask a new question about this device
Download the instructions for your Camcorder in PDF format for free! Find your manual Everio GZ-R460BUS - JVC and take your electronic device back in hand. On this page are published all the documents necessary for the use of your device. Everio GZ-R460BUS by JVC.
USER MANUAL Everio GZ-R460BUS JVC
EverioR
Table of Contents
Getting Started
Verifying the Accessories 3
Turning on this Unit 4
Opening the Terminal Cover (SD Card Cover) 4
Charging 5
Resetting this Unit 5
Quad Proof 6
Before Using Underwater or under Low Temperature ..... 6
Grip Adjustment 8
Attaching the Lens Cap 8
Attaching the Core Filter 8
Inserting an SD Card 9
Types of Usable SD Card 9
Using the Touch Screen 10
Locking the Screen (when Shooting Underwater) 10
Adjusting the Touch Screen 11
Names of Buttons and Functions on the LCD Monitor ..... 12
Clock Setting 15
Resetting the Clock 15
Changing the Display Language 16
Holding this Unit 17
Tripod Mounting 17
Using this Unit Overseas 18
Charging the Battery Pack Overseas 18
Setting the Clock to Local Time when Traveling 18
Setting Daylight Saving Time 19
Optional Accessories 19
Recording
Taking Videos in Auto Mode 20
Capturing Still Images During Video Recording 23
Taking Still Images in Auto Mode 23
Zooming 26
Manual Recording 27
Adjusting Focus Manually (FOCUS) 28
Adjusting Brightness 29
Setting Backlight Compensation 30
Setting White Balance 31
Taking Close-up Shots (TELE MACRO) 32
Shooting under Water 33
Recording with Effects (RECORDING EFFECT) 34
Recording Images Like an Old Black and White Photo (GRAINY MONOCHROME) 35
Recording Food Images (FOOD) 36
Recording Images of a Baby (BABY) 37
Capturing Subjects Clearly (TOUCH PRIORITY AE/AF) ..... 38
Reducing Camera Shake 39
Recording at Intervals (TIME-LAPSE RECORDING) 40
Recording Video with Still Image Displayed in Sub Screen (Still Image Composite Recording) 42
Using the Self-timer 43
Recording at a Fixed Interval and Playing Back Repeatedly .. 45
Recording Videos with Date and Time 46
Recording Videos with Time Counter 47
Checking the Remaining Recording Time 48
Playback
Playing Back Videos 50
Normal Playback 50
Checking the Recording Date and Other Information ..... 53
TIME COUNTER PLAYBACK 54
DIGEST PLAYBACK 55
PLAYBACK OTHER FILE 56
Playing Back Still Images 57
Slideshow Playback 59
Connecting to and Viewing on TV 59
Connecting via the HDMI Mini Connector 60
Connecting via the AV Connector 61
Editing
Deleting Unwanted Files 63
Deleting the Currently Displayed File 63
Deleting Selected Files 63
Protecting Files 64
Protecting/Releasing Protection of the Currently Displayed File 64
Protecting/Releasing Protection of Selected Files 65
Capturing a Still Image in the Video During Playback 66
Combining Videos Recorded by Seamless Recording 67
Capturing a Required Part in the Video (TRIMMING) 68
Copying
Dubbing Files to a Disc by Connecting to a Blu-ray Recorder 69
Copying Files to an SD Card 70
Copying to Windows PC 71
Verifying System Requirements (Guideline) 71
Installing the Provided Software (Built-in) 75
Backing Up All Files 78
Organizing Files 80
Recording Videos to Discs 81
Backing Up Files Without Using Provided Software 82
List of Files and Folders 83
Copying to Mac Computer 84
Settings Menu
Operating the Menu 85
Operating the Top Menu 85
RECORD SETTING Menu (video) 86
RECORD SETTING Menu (still image) 91
PLAYBACK SETTING Menu (video) 93
EDIT Menu (video) 94
PLAYBACK SETTING Menu (still image) 95
EDIT Menu (still image) 96
SETUP (video/still image) 97
CONNECTION SETTINGS (video/still image) 100
USB CONNECTION MENU 101
Names of Parts 102
Indications on the LCD monitor 105
Troubleshooting 108
When the unit is not working properly 108
Charging 108
Power supply 109
Recording 109
SD Card 110
Playback 110
Editing/Copying 111
Computer 112
Screen/Image 112
Other Problems 113
Error Message? 114
Maintenance 116
Specifications 117
Trademarks 119
Verifying the Accessories
If any of the items are missing or defective, consult your JVC dealer or the nearest JVC service center.
| Illustration Description | |
 | AC AdapterAC-V11UCharges this unit. Attach the charging adapter cable to the tip of the cord.It can also be used when recording or playing back videos indoors. |
 | Charging Adapter CableQAM1580-001Attach to the tip of the cord of the AC adapter and connect to the USB connector of this unit to charge. |
 | USB Cable(Type A - Micro Type B)Connects this unit to a computer. |
 | AV CableE3A-0085-00Connects this unit to a TV to play back recorded images on the TV.Please consult your JVC dealer or the nearest JVC service center when purchasing a new AV cable. |
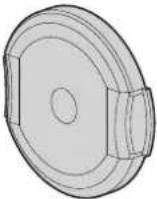 | Lens CapAttach the lens cap when this unit is not used or during transportation. |
 | Core Filter |
 | Basic User GuideRead well and keep in a safe place where it can be accessed easily when necessary. |
Memo :
- The provided software (application software) is built into this unit.
"Verifying System Requirements (Guideline)" (p. 71)
- The core filter is for use with an AV cable. Do not use it with any cable other than the AV cable.
"Attaching the Core Filter" (p. 8)
• SD cards are sold separately.
"Types of Usable SD Card" (p. 9)
- When using the AC adapter overseas, please prepare a commercially available converter plug for the country or region of visit.
"Charging the Battery Pack Overseas" (p. 18)
Turning on this Unit
Open the LCD monitor to turn on this unit. To turn off the power, close the LCD monitor.
■ To turn on the power
Open the LCD monitor.

■ To turn off the power
Close the LCD monitor.

The POWER/ACCESS lamp goes off and the power is turned off. "POWER/ACCESS (Power/Access) Lamp" (p. 103)
Memo :
- When "AUTO POWER OFF" is set to "ON", this unit turns itself off automatically to conserve power when it is not operated for 5 minutes. (When using the AC adapter, this unit goes into standby mode.)
"AUTO POWER OFF" (n.s. p. 98) - If "LCD CLOSED RECORDING" is activated, this unit does not turn off even when the LCD monitor is closed during recording.
"LCD CLOSED RECORDING" (p. 90)
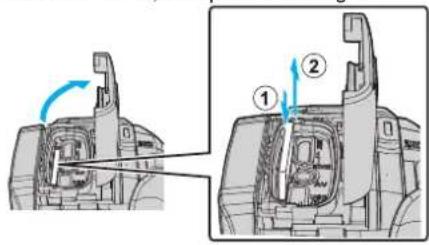
Opening the Terminal Cover (SD Card Cover)
■ To open

① Open the LCD monitor.
2 Slide down the cover lock and slide the cover aside.
3 Lift the cover slowly.
■ To close

The cover is not properly closed if the red mark at the terminal cover lock is visible.
Leave the LCD monitor open first.
1 Flip down the cover slowly while making sure the gray waterproof seal fits into the opening at the terminals.
2 Press the entire cover against the camcorder with equal force and firmly attach the cover completely.
3 Slide the cover until it clicks into place.
(The cover is not properly closed if the red mark on the cover lock is visible.)
Caution :
- Ensure that the terminal cover and the gray waterproof seal are not damaged and that there are no foreign materials (such as hair, lint, sand or dust) adhered on the cover.
- Stop using the unit underwater if there are damages to the cover, etc. and consult your JVC dealer or the nearest JVC service center.
- Do not apply excessive force when opening/closing the terminal cover.
- Read the "Cautions on Using Underwater" (p. 6) before using the camera underwater or in places exposed to water droplets.
Charging
This unit is equipped with a built-in battery.
Open the connector cover, and connect the AC adapter for charging as shown in the figure.

Caution :
- The built-in battery is not charged at the time of purchase.
- At the time of purchase or in case of the battery is not used for a long period of time, the charging time will be longer than usual. The camera does not turn on if the remaining battery power is low. In this case, charge the battery for more than 40 minutes before turning on the power.
- Charging time: Approx. 6 h 10 m (when charging at 25°C (77°F))
- The battery cannot be charged outside the room temperature range of 10°C to 35°C (50°F to 95°F). The CHARGE lamp does not light up when the battery is not being charged. If the temperature increases or decreases during charging, the CHARGE lamp will blink slowly and charging will stop. In this case, remove the AC adapter, press the Reset button and wait until the room temperature is within the above stated range before charging again.
- You can record or play back videos during charging. (However, the charging time will be longer than usual. In addition, the remaining battery power may decrease according to conditions.) If the internal temperature rises when using the unit, stop the charging temporarily. (The CHARGE lamp goes off.)
- If malfunctions (such as overvoltage) occur, charging will stop. In these cases, CHARGE lamp blinks quickly as a notification.
- During charging, the 📄icon on the screen changes to 🔍 to indicate that charging is in progress. (when the provided AC adapter is used)
- When the recording time becomes extremely short even when the battery is fully charged, the battery needs to be replaced. For details on replacing the built-in battery (subject to a fee), consult the nearest JVC service center.
Caution :
- There are certain specifications for a USB rechargeable device. To charge, use a device with the output voltage of 5 V/1 A or more.
- Depending on the specification of your charging device and the thickness and length of an USB cable used to connect to this unit, the charging time may be longer than usual, or it may not even start.
- We shall not be held liable for malfunctions that are due to using non-standard device or a device with poor quality.
Resetting this Unit
When a malfunction occurs on this unit, reset the unit in the following way. (Resetting the unit does not erase the recorded data.)
1 Open the terminal cover.
- Remove the power cord and all connecting cables.
2 Close the LCD monitor to turn off this unit.
3 Press the Reset button gently using an object with pointed tip.
Caution :
- Press the Reset button just once gently.
- Do not use sharp pointed objects. It may damage the unit or cause electric shock.
Memo :
- If malfunction persists even after pressing the Reset button, consult the nearest JVC service center.
Quad Proof
This unit is equipped with Waterproof, Dust-proof, Drop-proof and Freeze-proof features.
QUAD PROOF
 | Waterproof: Equivalent to IEC Standard publication 529 IPX8 and IPX6 (1 hour at depths up to 5 m (16.4 ft)) |  | Dust-proof: Equivalent to IEC Standard publication 529 IP5X |
 | Drop-proof: This camera clears company testing compliant with MIL-STD-810F Method; 516.5Shock: Dropping onto plywood 3 cm (1-3/16") thick from a height of 1.5 m (4.9 ft) |  | Freeze-proof: Allowable operating temperatures: -10°C to +40°C (14°F to 104°F)Note: Temperatures between -10°C and 0°C (14°F and 32°F) temporarily lower battery performance, reducing the time available for recording. |
Caution :
- There is no guarantee that there will be no damages when the unit is used within the above-mentioned limits.
Scratches and dent caused by the impact if the unit is dropped, or other changes in appearance are not included in the warranty. - Malfunction due to mishandling will void the warranty.
- Before use in water, be sure to read and understand the "Before Using Underwater or under Low Temperature" (E§p. 6).
- Close the terminal cover firmly until it clicks and confirm that the red sign completely goes off.
- Make sure that there is no damage to and no foreign material adhered to the packing inside the cover.
- Use within a water depth of 5m (16.4 ft) and a duration of 1 hour.
- The waterproof performance cannot be guaranteed if the camcorder is subject to impact such as dropping.
- Do not jump or dive into water holding the camcorder.
- Do not use the camcorder in strong water flows such as in rapids or under waterfalls. The strong water pressure may impair the waterproof performance.
- Do not immerse into hot spring, or hot water above 40°C (104°F).
Before Using Underwater or under Low Temperature
"Cautions on Using Underwater" (p. 6)
"Maintenance after Use" (p. 7)
"Cautions on Using under Low Temperature" (p. 7)
Cautions on Using Underwater
Please take note of the followings when using this unit near water or underwater.
- Ensure that the cover is closed tightly.
"Opening the Terminal Cover (SD Card Cover)" (p. 4) - Ensure that the terminal cover and the gray waterproof seal are not damaged and that there are no foreign materials (such as hair, lint, sand or dust) adhered on the cover.
- Stop using the unit underwater if there are damages to the cover, etc. and consult your JVC dealer or the nearest service center.
- Use within a water depth of 5m (16.4 ft) and a duration of 1 hour.

- Do not open/close the cover or insert/remove an SD card or any cables while using underwater or on the beach, or if your hands contain water droplets or sands. Doing so may cause water to enter into the camera or malfunction.
- Do not subject the camera to high pressure or vibration resulted from swift current, waterfall or diving into water.
- The waterproof performance is not guaranteed if the camera is dropped or subjected to other impact shock. If the camera has been subjected to impact shock, consult your nearest service center.
- While shooting underwater, noise generated inside of the camera (zooming sounds, etc) may be picked up. This is not a malfunction.
- Do not immerse into hot spring, or hot water above 40°C (104°F). Doing so deteriorates waterproof performance.
- Keep away from hands with sun oil or sun screen. Doing so may cause discoloration or deterioration of material.
- This unit sinks underwater. Fasten the grip belt firmly to prevent losing the camera underwater.
- The accessories are not waterproof.
- Do not use the lens filter or conversion lens underwater or at locations where there is water.
Maintenance after Use
After using underwater or in dusty places, rinse the camera with water immediately and dry it completely.
1 Ensure that the terminal cover is closed.
2 Rinse with clean water.
Soak the camera in a container filled with enough water to immerse the camera completely, and rinse it gently.

- After using the camera under the sea or on the beach, immerse the camera in fresh water for about 10 minutes to remove salt particles, replace the water and rinse the camera.
- Open and close the LCD screen, and operate the buttons or zoom operations to get rid of sands or dusts in the gap.
3 Dry the camera.
Wipe the camera completely with a soft dry cloth and allow it to dry in a well-ventilated and shady location.
- Place the camera with the lens facing downward while the LCD monitor is closed, and leave it for approximately 10 minutes. (By doing so, microphone and LCD part are dried out easily.) Place the camera in a up right position on a dry cloth afterward Close the terminal cover after the camera is dried out completely.
- Wipe off any foreign materials or water droplets inside the cover.
* If you leave the camera immersed in salt water or allow water droplets from the salt water to remain on the camera, this may cause corrosion, discoloration or deterioration of waterproof performance.
* If you wipe or dry the camera with sand particles adhered, this may cause scratches on the camera.
* Do not wash with chemicals, soap, neutral detergents, or alcohol.
* Do not dry the camera with a hair dryer or other heat sources. This could impair its waterproof performance.
Cautions on Using under Low Temperature
- The performance of the battery will drop temporarily when the temperature is -10°C to 0°C (14°F to 32°F), this will cause the remaining recording time to shorten.
- Charging cannot be performed when the surrounding temperature is below 10°C (50°F).
- Turning on the camera while it is still cold will deteriorate the performance of the LCD monitor. Problems such as the screen becoming dark momentarily or residual image can occur.
- If snow or water droplets adhere to the camera under sub-zero temperature environment, ice can formed between the gaps around the buttons, speaker or microphone. This will cause difficulty in operating the buttons as well as decrease in the volume level.
- Direct contact with exposed metal part under cold temperature can cause the skin to stick on the metal part resulting in injuries such as frostbite. Do not touch with bare hands.
Other Precautions
- Do not leave the camera under low temperature in cold climates or under high temperature above 40 °C (such as under direct sunlight, inside a vehicle in the hot sun, or near a heater). This will cause deterioration of the waterproof performance.
- Malfunction due to mishandling will void the warranty.
- We are not responsible for any loss of data due to water entering into inside of the camera. Please be forewarned.
- It is recommended to replace the waterproof packing once a year to maintain the waterproof performance. Consult your nearest service center. (Subject to a fee)
Grip Adjustment
1

2

3

1 Open the belt
2 Adjust the length of the belt
3 Fasten the belt
Caution :
- Be sure to fasten the grip belt properly. If the belt is loose, this unit may drop and result in injuries or damages.
Attaching the Lens Cap
Attach the cap to protect the lens when not shooting.

■ During recording

Fix to the grip belt
Attaching the Core Filter
Attach a core filter to the AV cable that is connected to this unit. The core filter reduces interference when this unit is connected to other devices.
![graph LR A["Release the stopper"] --> B["3 cm"] B --> C["To be connected to this unit"] C --> D["Wind once"] D --> E["Final device with cable"]](/content/2026/07/1494279/images/6d5ef85a57dcb2c665ae423ee6f31e911ae7a4794b770b71e92963166361c78e.jpg)
Inserting an SD Card
When a commercially available SD card is inserted, recordings can still be made to the card without stopping when the remaining recording time on the built-in memory runs out.
"SEAMLESS RECORDING" (p. 88)
Depending on the setting of the recording media, recording can be made to the SD card without using the built-in memory.
"Types of Usable SD Card" (p. 9)
"Approximate Video Recording Time" (p. 49)
1 Open the terminal cover.

2 Close the LCD monitor to turn off this unit.
3 Insert an SD card.

Warning
- Make sure not to insert the SD card in the wrong direction. It may cause damage to the unit and SD card.
- Before inserting or removing the SD card, close the LCD monitor and ensure that the POWER/ACCESS lamp goes off.
- Do not touch the metal contact area when inserting the SD card.
Memo :
- Both videos and still images can be recorded on one SD card. It is recommended to confirm the video operation of the SD card before usage.
- To use a new SD card, or SD card used on other devices, it is necessary to format (initialize) the SD card using "FORMAT SD CARD" from the "SETUP" menu.
"FORMAT SD CARD" (p. 99)
Removing the Card
Push the SD card inward once, then pull it out straight.
Types of Usable SD Card
The following SD cards can be used on this unit.
Operations are confirmed on the SD cards from the following manufacturers.
- Panasonic
• TOSHIBA - SanDisk
SD Card

• This unit supports 256 MB to 2 GB SD cards.
- Use a Class 4 or higher compatible SD card (2 GB) for video recording.
SDHC Card

- Use a Class 4 or higher compatible SDHC card (4 GB to 32 GB) for video recording.
SDXC Card

- Use a Class 4 or higher compatible SDXC card (Max. 128 GB) for video recording.
Memo :
- This unit is not guaranteed to operate with all SD cards.
- Do not use a miniSD card or microSD card (even if the card is inserted in an adapter). It may cause malfunction.
- To record videos with "VIDEO QUALITY" set to "UXP", use of a Class 6 or higher compliant SDHC/SDXC card is recommended.
- UHS-I SDHC/SDXC cards can be used in the same manner as standard SDHC/SDXC cards.
UHS Speed Class is not supported. - SD card used for recording and edited using this unit can only be played back and edited on this unit.
When your computer cannot recognize the SDXC card
Confirm and update the OS of your computer.
| Windows 7 D | Download and install the updating program (KB976422) from the following URL.32 bit versionhttp://www.microsoft.com/downloads/details.aspx?displaylang=ja&FamilyID=3ee91fc2-a9bc-4ee1-aca3-2a9aff5915eahttp://www.microsoft.com/downloads/en/details.aspx?FamilyID=3ee91fc2-a9bc-4ee1-aca3-2a9aff5915ea64 bit versionhttp://www.microsoft.com/downloads/details.aspx?displaylang=ja&FamilyID=73f766dd-7127-4445-b860-47084587155fhttp://www.microsoft.com/downloads/en/details.aspx?FamilyID=73f766dd-7127-4445-b860-47084587155f |
| Mac OS X10.4 Tiger /Mac OS X10.5Leopard | Not compatible. |
| Mac OS X10.6 SnowLeopard | Update the OS version to 10.6.5 or later. |
Using the Touch Screen
The LCD monitor of this unit is a touch panel which enables operations by touching the screen with your finger.
The operation buttons, thumbnails, and menu items are displayed on the screen according to each mode (recording/playback/setting).
- There are two ways to operate the touch screen, namely "tap" and "drag". The following are some examples.
A Tap the button (icon) or thumbnail (file) on the screen to make a selection.
B Drag the thumbnails on the screen to search for the desired file.

Memo :
- The touch screen of this unit is pressure-sensitive. When the touch screen does not respond smoothly, apply slightly more force to your fingertip.
- Do not press or rub with excessive force.
- Do not operate the touch screen using an object with a sharp tip.
- Perform "TOUCH SCREEN ADJUST" if the reactive area of the screen is misaligned with the touched area.
"Adjusting the Touch Screen" (p. 11)
- You cannot operate the touch screen under water. Lock the screen to prevent operation errors.
"Shooting under Water" (p. 33)
Locking the Screen (when Shooting Underwater)
Lock the screen before using this unit underwater to prevent operation errors on the touch screen due to water pressure.
- Once the screen is locked, operations on the touch screen except 🔒 are disabled.
- The START/STOP (recording) button and the zoom lever can be used while the screen is locked.
- You can set for both video and still image modes.
- If "SCREEN LOCK" has been set, it will take a longer time for the unit to power off after closing the LCD monitor.
Setting the "SCREEN LOCK"
1 Check that the unit is in the recording mode.
2 Tap "MENU".
3 Tap "RECORD SETTING".
4 Tap "SCREEN LOCK".
- The 🔒 button appears on the screen.

■ To cancel "SCREEN LOCK"
Tap the 🔒 button.
Memo :
- Once "SCREEN LOCK" is set, only the 🔒 button on the touch screen can be operated.
- "SCREEN LOCK" cannot be set for the following cases:
- during recording
- when "TIME-LAPSE RECORDING" or "DATE/TIME RECORDING" has been set
Adjusting the Touch Screen
Adjust the response position when the touch screen is touched.
1 Tap "MENU".

Caution :
\- Do not tap areas other than the “+” mark during touch screen adjustment (steps 4 - 5). Doing so may cause the touch screen to malfunction.Memo :
- Adjust by lightly tapping with a corner of an SD card, etc. - Do not press with an object with a sharp tip or do not press hard.Names of Buttons and Functions on the LCD Monitor
The following screens are displayed during video and still image modes. Recording Screen (Video/Still Image)  1 (Video/Still Image) Mode Button \- Switches between 📋 video and 📋 still image modes. 2 Zoom Button "Zooming" (p. 26) 3 Still Image Recording Button • Records still images during video recording. "Capturing Still Images During Video Recording" (p. 23) 4 Playback Mode Button • Switches to the playback mode. 5 Recording Start/Stop Button • REC: Video Recording Start Button • REC: Video Recording Stop Button 6 Menu Button "Operating the Menu" (p. 85) 7 Display Button Switches the display between full (D) and simple (D) with every tap of the button. \- Simple display: Some displays disappear automatically when the screen is not operated. \- Full display: Displays everything. The display button changes from D to D 2 . \- When the power is turned off, the display setting will revert to simple display (D). 8 Recording Mode Button Switches the recording mode (i.A. Intelligent Auto/M Manual). Playback Screen (Video)  \- When this unit is not operated for a certain period of time, the operation buttons on the LCD monitor disappear automatically. Tap on the screen to display the operation buttons again. 1 (Video/Still Image) Mode Button \- Switches between 📁 video and 📄 still image modes. 2 Video Scene Capture Button \- Displayed when playback is paused. \- Saves one scene of the video being played back as a still image. 3 Recording Mode Button • Switches to the recording mode. 4 Index Screen (Thumbnail Display) Button \- Returns to the index screen (thumbnail display). "Operation Buttons for Video Playback" (v5 p. 51) 5 Delete Button "Deleting the Currently Displayed File" (p. 63) 6 Playback Zoom Button \- Enlarges the video image that is played back. "During Video Playback" (p. 51) 7 Menu Button "Operating the Menu" (p. 85) 8 Operation Buttons "Operation Buttons for Video Playback" (p. 51) 9 Display Button Switches the display between full (D) and simple (D) with every tap of the button. \- Simple display: Some displays disappear automatically when the screen is not operated. \- Full display: Displays everything. The display button changes from D to D 2 . \- When the power is turned off, the display setting will revert to simple display (D).Playback Screen (Still Image)
 \- When this unit is not operated for a certain period of time, the operation buttons on the LCD monitor disappear automatically. Tap on the screen to display the operation buttons again. 1 (Video/Still Image) Mode Button \- Switches between 📁 video and 📄 still image modes. 2 Recording Mode Button \- Switches to the recording mode. 3 Index Screen (Thumbnail Display) Button \- Returns to the index screen (thumbnail display). "Operation Buttons for Still Image Playback" (u p. 58) 4 Delete Button "Deleting the Currently Displayed File" (n. p. 63) 5 Playback Zoom Button \- Enlarges the still image that is being played back. "Playing Back Still Images" (p. 58) 6 Menu Button "Operating the Menu" (p. 85) 7 Operation Buttons "Operation Buttons for Still Image Playback" (p. 58) 8 Display Button Switches the display between full (D) and simple (D) with every tap of the button. \- Simple display: Some displays disappear automatically when the screen is not operated. \- Full display: Displays everything. The display button changes from D to D 2 . \- When the power is turned off, the display setting will revert to simple display (D).Index Screen (Thumbnail Display) Display
 1 (Video/Still Image) Mode Button \- Switches between 📁 video and 📄 still image modes. 2 Page Forward/Back Button "Operation Buttons for Video Playback" (p. 51) "Operation Buttons for Still Image Playback" (p. 58) 3 Recording Mode Button • Switches to the recording mode. 4 Delete Button "Deleting Selected Files" (p. 63) "Deleting the Currently Displayed File" (p. 63) 5 Playback Media Button \- Switches between SD card and built-in memory. 6 Menu Button "Operating the Menu" (p. 85) 7 Date Button "Operation Buttons for Video Playback" (p. 51) "Operation Buttons for Still Image Playback" (p. 58) Menu screen (recording mode)  1 SILENT Button "Using the Silent Mode" (p. 22) 2 INFO. Button "Checking the Remaining Recording Time" (p. 48) 3 RECORD SETTING Menu "RECORD SETTING Menu (video)" (p. 86) "RECORD SETTING Menu (still image)" (p. 91) 4 CONNECTION SETTINGS Menu "CONNECTION SETTINGS (video/still image)" (p. 100) 5 SETUP Menu "SETUP (video/still image)" (p. 97) 6 Close Button Exit the menu. Menu screen ( playback mode)  1 SILENT Button "Using the Silent Mode" (p. 22) 2 INFO. Button (Displayed only after playback) "Checking the Recording Date and Other Information" (p. 53) 3 PLAYBACK SETTING Menu "PLAYBACK SETTING Menu (video)" (p. 93) "PLAYBACK SETTING Menu (still image)" (p. 95) 4 SETUP Menu "SETUP (video/still image)" (p. 97) 5 CONNECTION SETTINGS Menu "CONNECTION SETTINGS (video/still image)" (p. 100) 6 EDIT Menu "EDIT Menu (video)" (p. 94) "EDIT Menu (still image)" (p. 96) 7 Close Button Exit the menu.Clock Setting
"SET DATE/TIME!" is displayed when you turn on the unit for the first time or when the unit has not been used for a prolonged period. Set the clock before recording. 1 Open the LCD monitor.  - The unit turns on. - When the LCD monitor is closed, the unit turns off. 2 Tap "OK" when "SET DATE/TIME!" is displayed.  3 Set the date and time.  - When the day, month, year, hour, or minute item is tapped, “^” and “√” will be displayed. - Tap ∧ or ∨ to adjust the year, month, day, hour, and minute. 4 After setting the date and time, tap "SAVE". 5 Select the region where you live and tap "SAVE".  - Time difference between the selected city and the GMT (Greenwich Mean Time) is displayed. - Tap < or > to select the city name.Memo :
• The clock can be reset again later. "Resetting the Clock" (p. 15) - When using this unit overseas, you can set it to the local time for recording. "Setting the Clock to Local Time when Traveling" (p. 18) - The clock is reset about one month after the battery is depleted. "SET DATE/TIME!" is displayed the next time you turn on this unit. Set the clock again after charging the battery.Resetting the Clock
Set the clock with "DATE & TIME" from the menu. 1 Tap "MENU".  3 Tap "DATE & TIME".  \- Tap ∧ or ∨ to scroll the screen. 4 Tap "CLOCK SETTING".  5 Set the date and time.  - When the day, month, year, hour, or minute item is tapped, “^” and “∨” will be displayed. - Tap ∧ or ∨ to adjust the year, month, day, hour, and minute. 6 After setting the date and time, tap "SET". 7 Select the region where you live and tap "SAVE".  - Time difference between the selected city and the GMT (Greenwich Mean Time) is displayed. - Tap < or > to select the city name.Changing the Display Language
The language on the display can be changed. 1 Tap "MENU".  3 Tap "LANGUAGE".  \- Tap ∧ or ∨ to scroll the screen. 4 Tap to the desired language.  \- Tap ∧ or ∨ to scroll the screen.Holding this Unit
When holding this unit, keep your elbows close to your sides to prevent camera shake.  \- Hold the LCD monitor with your left hand and adjust the angle accordingly. Holding the LCD monitor with your left hand helps to stabilize the camera for recording.Caution :
- The photographer should pay attention to the surroundings during shooting, making sure that he/she is in no danger of falling or collision with another person or vehicle. - Be careful not to drop this unit during transportation. - Guardians should pay close attention when this unit is used by children.Tripod Mounting
This unit can be mounted on a tripod (or monopod). This is useful for preventing camera shake and recording from the fixed position.  \- To prevent this unit from falling off, check the tripod mounting screw holes and positioning holes on the unit carefully before mounting, and turn the screws until they are fastened firmly.Caution :
- To prevent injuries or damages which may result if this unit falls off, read the instruction manual of the tripod (or monopod) to be used and make sure that it is securely attached. - In strong wind conditions and when placed at an unstable location, there is a risk of the tripod toppling and falling. - Please check beforehand if the use of a tripod is allowed as it may be prohibited depending on the shooting location.Memo :
- It is recommended to use a tripod or monopod when recording in conditions prone to camera shake (such as in dark places or when zoomed to the telephoto end). - Set the image stabilizer to (OFF) when using a tripod for recording. "Reducing Camera Shake" (p. 39)Using this Unit Overseas
The shape of the power outlet varies according to countries and regions. To charge the battery pack, you need a converter plug that matches the shape of the outlet. "Charging the Battery Pack Overseas" (p. 18) Change the date and time display to the local time by selecting your travel destination in "AREA SETTING" of "DATE & TIME". "Setting the Clock to Local Time when Traveling" (r= p. 18) When "ON" is selected in "DST SETTING" of "DATE & TIME", the time is set 1 hour ahead. "Setting Daylight Saving Time" (p. 19)Charging the Battery Pack Overseas
The shape of the power outlet varies according to countries and regions. To charge the battery pack, you need a converter plug that matches the shape of the outlet.| North America | Europe | Oceania | Middle East | ||||
| United States | A | Iceland | C | Australia | Q | Israel | C |
| Canada | A | Ireland | C | Guam | A | Iran | C |
| Mexico | A | United Kingdom | B.BF | Taniti | C | Kuwait | B.C |
| Italy | C | Tonga | Q | Jordan | B.BF | ||
| Asia | Austria | C | New Zealand | Q | |||
| Japan | A | Netherlands | C | Fiji | Q | Africa | |
| India | B.C.BF | Canary Islands | C | Latin | Algeria | A.B.BF.C | |
| Indonesia | C | Greece | C | Egypt | B.BF.C | ||
| Singapore | B.BF | Switzerland | C | Argentina | Q | Guinea | C |
| Sri Lanka | B.C.BF | Sweden | C | Colombia | A | Kenya | B.C |
| Thailand | A.BF.C | Spain | A.C | Jamaica | A | Zambia | B.BF |
| South Korea | A.C | Denmark | C | Chile | B.C | Tanzania | B.BF |
| China | A.B.BF.C.O | Germany | C | Haiti | A | Republic of South | |
| Nepal | C | Norway | C | Panama | A | Africa | B.C.BF |
| Pakistan | B.C | Hungary | C | Bahamas | A | Mozambique | C |
| Bangladesh | C | Finland | C | Puerto Rico | A | Morocco | C |
| Philippines | A.BF.O | France | C | Brazil | A.C | ||
| Vietnam | A.C | Belgium | C | Venezuela | A | ||
| Hong Kong Special Administrative Region | B.BF | Poland | B.C | Peru | A.C | ||
| Macau Special Administrative Region | B.C | Portugal | B.C | ||||
| Malaysia | B.BF.C | Romania | C | ||||
| North America | Europe | Oceania | Middle East | ||||
| United States | A | Iceland | C | Australia | Q | Israel | C |
| Canada | A | Ireland | C | Guam | A | Iran | C |
| Mexico | A | United Kingdom | B.BF | Taniti | C | Kuwait | B.C |
| Italy | C | Tonga | Q | Jordan | B.BF | ||
| Asia | Austria | C | New Zealand | Q | |||
| Japan | A | Netherlands | C | Fiji | Q | Africa | |
| India | B.C.BF | Canary Islands | C | Algeria | A.B.BF.C | ||
| Indonesia | C | Greece | C | Latin | Egypt | B.BF.C | |
| Singapore | B.BF | Switzerland | C | Argentina | Q | Guinea | C |
| Sri Lanka | B.C.BF | Sweden | C | Colombia | A | Kenya | B.C |
| Thailand | A.BF.C | Spain | A.C | Jamaica | A | Zambia | B.BF |
| South Korea | A.C | Denmark | C | Chile | B.C | Tanzania | B.BF |
| China | A.B.BF.C.O | Germany | C | Haiti | A | Republic of South | |
| Nepal | C | Norway | C | Panama | A | Africa | B.C.BF |
| Pakistan | B.C | Hungary | C | Bahamas | A | Mozambique | C |
| Bangladesh | C | Finland | C | Puerto Rico | A | Morocco | C |
| Philippines | A.B.F.O | France | C | Brazil | A.C | ||
| Vietnam | A.C | Belgium | C | Venezuela | A | ||
| Hong Kong Special Administrative Region | B.BF | Poland | B.C | Peru | A.C | ||
| Portugal | B.C | ||||||
| Macau Special Administrative Region | B.C | Romania | C | ||||
| Malaysia | B.BF.C | ||||||
Setting the Clock to Local Time when Traveling
Change the date and time display to the local time by selecting your travel destination in "AREA SETTING" of "DATE & TIME". Restore the region settings after you returned from the trip. 1 Tap "MENU".  2 Tap "SETUP".  3 Tap "DATE & TIME".  \- Tap ∧ or ∨ to scroll the screen. 4 Tap "AREA SETTING".  5 Select the area you are traveling to and tap "SAVE".  - Time difference between the selected city and the GMT (Greenwich Mean Time) is displayed. - Tap < or > to select the city name.Memo :
\- Setting "AREA SETTING" changes the clock time such that time difference is accounted for. After returning to your country, re-select the region that was set initially to restore the original clock settings.Setting Daylight Saving Time
When "ON" is selected in "DST SETTING" of "DATE & TIME", the time is set 1 hour ahead. 1 Tap "MENU".  3 Tap "DATE & TIME".  \- Tap ∧ or ∨ to scroll the screen. 4 Tap "DST SETTING".  5 Tap "ON". Memo :
• What is daylight saving time? Daylight saving time is the system of setting the clock 1 hour ahead for a fixed period in summer. It is used mainly in the Western countries. - Restore the daylight saving time settings after you returned from the trip. Optional Accessories| Product Name Description | |
| HDMI Mini CableVX-HD310VX-HD315 | Allows viewing in high picture quality when connected to a TV.Transmits video, audio, and control signals between devices. |
Memo :
- The optional accessories above may not be supported in some regions. - For more information, refer to the catalog. - For details on the provided accessories, refer to "Verifying the Accessories". "Verifying the Accessories" (p. 3)Taking Videos in Auto Mode
With Intelligent Auto recording, the camera automatically adjusts the settings such as brightness and focus to suit the shooting conditions. - In case of specific shooting scenes such as person etc., its icon is displayed on the screen. - Before recording an important scene, it is recommended to conduct a trial recording. 1 Open the LCD monitor.  - Check if the recording mode is 📁. - If the mode is 📄 still image, tap 📋 on the recording screen to display the mode switching screen. Tap 🖱️ to switch the mode to video. 2 Check if the recording mode is i.A. Intelligent Auto.  - If the mode is ☐ Manual, tap ☐ on the recording screen to display the mode switching screen. Tap i.A. to switch the recording mode to Intelligent Auto.  3 Press the START/STOP button to start recording.  - Press again to stop. - Some displays disappear after approximately 3 seconds. Use the D button to change the displays. Indications for Video Recording | Display Icon Description | |
| 1 | Video Quality Displays the icon of the “VIDEO QUALITY” setting selected in the recording menu. “VIDEO QUALITY” (p. 88) |
| 2 | TOUCH PRIORITY AE/AF Displays the setting of “TOUCH PRIORITY AE/ AF”. By default, it is set to “FACE TRACKING”. “Capturing Subjects Clearly (TOUCH PRIORITY AE/AF)” (p. 38) |
| 3 | Time Displays the current time. “Clock Setting” (p. 15) |
| 4 | RECORDING EFFECT Displays the corresponding icon when a recording effect is specified. GRAINY MONOCHROME FOOD BABY “Recording with Effects (RECORDING EFFECT)” (p. 34) |
| 5 | Image Stabilizer Displays the image stabilizer setting. “Reducing Camera Shake” (p. 39) |
| 6 | Recording Media Displays the icon of the media where videos are recorded to. The recording media can be changed. “REC MEDIA FOR VIDEO” (p. 98) |
| 7 | Battery Indicator Displays the approximate remaining battery power during use. “Checking the Remaining Recording Time” (p. 48) |
| 8 | Recording Mode Displays the current recording mode of i.A. (Intelligent Auto) or M (Manual). Current shooting mode is displayed. |
| 9 | Setting Scenes of Intelligent Auto Displays scenes detected automatically in the Intelligent Auto function. Multiple scenes may be detected. |
| 10 | Remaining Recording Time Displays the remaining time for video recording. “Checking the Remaining Recording Time” (p. 48) |
| 11 | Scene Counter (Recorded Time) Displays the elapsed time of the video that is currently being recorded. |
| Display Icon Description | |
| Captures one's skin beautifully. | |
| Allows people to be captured naturally. | |
| Record a group of people with the most suitable settings. | |
| Records while focusing on a near object. | |
| Focuses at a far distance and captures a sharp image with vivid colors. | |
| Records in dark places with minimal noise in the overall image. | |
| Allows night scenes to be captured accurately with minimal noise in the overall image. | |
| Prevents colors from fading even when recording in a bright environment, such as snowfield and beaches. | |
| Prevents colors from fading when recording a subject in a spotlight. | |
| Reproduces the green color of trees vividly. | |
| Reproduces the colors of sunset naturally. | |
| Adjusts settings so that the subject does not appear too dark due to backlight. | |
| Records while emphasizing the brightness of the colors. | |
| Reproduces the natural colors of the outdoors during the day. | |
| Reproduces the natural colors of the indoors in a cold-color illumination. | |
| Reproduces the natural colors of the indoors in a warm-color illumination. | |
| Selects the most suitable settings for handheld shooting. | |
| Selects the most suitable settings when a tripod is used for shooting. | |
Memo :
- Scenes can be detected according to the shooting conditions and automatically adjusted in Intelligent Auto mode. - Multiple scenes may be detected depending on the recording conditions. - Some functions may not work properly depending on the shooting conditions. Operation Buttons for Video Recording | Operation Buttons | Description | |
| 1 | Video/Still Image Mode 📁/☐ | Switches between video and still image modes. |
| 2 | WT Zoom Allows the same functions as the zoom lever to be performed. Camera shake that often occurs when using the zoom lever can be minimized. “Zooming” (☎ p. 26) | |
| 3 | Still Image Recording ☐ | Tap this button to record a still image during video recording. “Capturing Still Images During Video Recording” (☎ p. 23) |
| 4 | Playback Mode Switches to the playback mode. | |
| 5/6 | Recording Start || REC Record-Standby ● REC | Functions as the START/STOP button. |
| 7 | MENU Displays the various menus of video recording. “Operating the Menu” (☎ p. 85) | |
| 8 | Display Button D Switches the display between full (DP) and simple (D) with every tap of the button. • Simple display: Some displays disappear automatically when the screen is not operated. • Full display: Displays everything. The display button changes from D to DP. • When the power is turned off, the display setting will revert to simple display (D). | |
| 9 | Recording Mode i.A./M | Switches between the i.A.Intelligent Auto and M Manual recording mode. |
Using the Silent Mode
The Silent mode is a function for turning off the operation sound. The screen can also be dimmed depending on the setting. Use this mode to record quietly in events such as recitals, presentations etc. \- When "SILENT MODE" is set to "LCD DARKENED AND SOUND OFF", it is displayed.■ Operating procedure
1 Tap "MENU". \- The top menu appears. 2 Tap NO.  3 Tap 📋 to turn off the operation sound only. And tap 📋 to dim the screen and turn off the operation sound. Useful Settings for Recording
\- When "DATE/TIME RECORDING" is used, the date and time can be recorded together with the video. "Recording Videos with Date and Time" (p. 46)Caution :
\- Do not expose the lens to direct sunlight. \- While this unit can be used with the LCD monitor reversed or the LCD monitor closed with "LCD CLOSED RECORDING" activated, the temperature of this unit rises more easily. Leave the LCD monitor open when using this unit for long periods of time, or in places exposed to direct sunlight or high temperatures. \- The power may turn off to protect the circuit if the temperature of this unit rises too much. \- If the temperature of this unit rises during recording, ● REC changes color to yellow as a notification. \- This unit is a microcomputer-controlled device. Electrostatic discharge, external noise and interference (from a TV, a radio, etc.) might prevent it from functioning properly. In such a case, close the monitor screen to turn off the power and remove the AC adapter, then press the Reset button to reset this unit. "Resetting this Unit" (p. 5) \- Disclaimer \- We shall not be held responsible for loss of recorded contents when recording videos/audio or playback cannot be operated due to malfunctions in this unit, provided parts, or SD card. \- Once deleted, recorded contents (data), including data loss due to malfunctions in this unit, cannot be restored. Please be forewarned. - JVC will not be responsible for any lost data.Memo :
\- Check that the remaining recording time in the media is sufficient before you start recording. "Checking the Remaining Recording Time" (18, p. 48) If the remaining recording time is not sufficient, save the files on a PC or disc before deleting the files from the unit. "Deleting Unwanted Files" (p. 63) \- When there are many files in the media, it may take time for them to be displayed on the playback screen. Wait for a while as the POWER/ACCESS lamp blinks, indicating normal operation. \- Recording stops automatically as it cannot be performed for 12 or more consecutive hours according to specifications. (It may take some time to resume recording.) \- Up to 4GB per video file can be recorded. File recorded using long recordings that exceeds 4GB is split and recorded into several video files. \- Depending on the shooting conditions, the four corners of the screen may appear dark, but this is not a malfunction. In this case, change the shooting conditions by moving the zoom lever, etc.Capturing Still Images During Video Recording
Still images can be captured by tapping the button while in the video mode (standby or recording).  \- "PHOTO" lights up on the screen when a still image is being captured.  \- The still images captured during video recording are saved to the destination set in "REC MEDIA FOR IMAGE".Memo :
- The size of the still image that is captured in the video mode is 1,920 x 1,080. • Operation is invalid under the following conditions: \- when menu is being displayed - when remaining recording time or battery power is being displayed - when the "TIME-LAPSE RECORDING", "RECORDING EFFECT" or "DATE/TIME RECORDING" function is set - when the special AV cable is connected to the AV connector - when the HDMI cable is connected and a resolution other than 1080i is outputTaking Still Images in Auto Mode
You can record without worrying about the setting details by using the i.A. Intelligent Auto mode. 1 Open the LCD monitor.  - Check if the recording mode is 📄. - If the mode is 🎨 video, tap 🎨 on the recording screen to display the mode switching screen. Tap 📄 to switch the mode to still image. 2 Check if the recording mode is i.A. Intelligent Auto.  \- If the mode is 📂 Manual, tap 📂 on the recording screen to display the mode switching screen. Tap i.A. to switch the recording mode to Intelligent Auto.  3 Press the START/STOP button.  \- PHOTO lights up when a still image is being captured.Memo :
\- Depending on the subject and shooting conditions, recording may not be performed properly even in the Intelligent Auto mode.■ Start recording after adjusting the focus
1 Press and hold the 📄 button on the touch screen until the focus is adjusted.  2 Remove your finger from the button to release the shutter. Available only when "SHUTTER MODE" is set to "RECORD ONE SHOT". Indications During Still Image Recording  - Some displays disappear after approximately 3 seconds. Use the D button to change the displays.| Display Icon Description | |
| 1 | Image Size Displays the icon of the image size.• The size of still images can be changed.“IMAGE SIZE” (p. 92) |
| 2 | TOUCH PRIORITY AE/AFDisplays the setting of “TOUCH PRIORITY AE/ AF”.By default, it is set to “FACE TRACKING”.“Capturing Subjects Clearly (TOUCH PRIORITY AE/AF)” (p. 38) |
| 3 | Time Displays the current time.“Clock Setting” (p. 15) |
| 4 | RECORDING EFFECTDisplays the corresponding icon when a recording effect is specified:GRAINY MONOCHROMEW: FOODBABY“Recording with Effects (RECORDING EFFECT)” (p. 34) |
| 5 | Recording media Displays the icon of the media where still images are recorded to.The recording media can be changed.“REC MEDIA FOR IMAGE” (p. 99) |
| 6 | Battery Indicator Displays the approximate remaining battery power during use.“Checking the Remaining Recording Time”(p. 48) |
| 7 | Recording Mode Displays the current recording mode of i.A.(Intelligent Auto) or M (Manual). |
| 8 | Setting Scenes of Intelligent AutoDisplays scenes detected automatically in the Intelligent Auto function. Multiple scenes may be detected. |
| 9 | Remaining Number of ShotsDisplays the remaining number of shots for still image recording.“Approximate Number of Still Images (Unit: Number of Shots)” (p. 49) |
| 10 | Recording in Progress“PHOTO” appears when a still image is being captured. |
| 11 | Focus Lights up in green when focused. |
| Display Icon Description | |
| Captures one's skin beautifully. | |
| Allows people to be captured naturally. | |
| Record a group of people with the most suitable settings. | |
| Records while focusing on a near object. | |
| Focuses at a far distance and captures a sharp image with vivid colors. | |
| Records in dark places with minimal noise in the overall image. | |
| Allows night scenes to be captured accurately with minimal noise in the overall image. | |
| Prevents colors from fading even when recording in a bright environment, such as snowfield and beaches. | |
| Prevents colors from fading when recording a subject in a spotlight. | |
| Reproduces the green color of trees vividly. | |
| Reproduces the colors of sunset naturally. | |
| Adjusts settings so that the subject does not appear too dark due to backlight. | |
| Records while emphasizing the brightness of the colors. | |
| Reproduces the natural colors of the outdoors during the day. | |
| Reproduces the natural colors of the indoors in a cold-color illumination. | |
| Reproduces the natural colors of the indoors in a warm-color illumination. | |
| Selects the most suitable settings for handheld shooting. | |
| Selects the most suitable settings when a tripod is used for shooting. | |
Memo :
- Scenes can be detected according to the shooting conditions and automatically adjusted in Intelligent Auto mode. - Multiple scenes may be detected depending on the recording conditions. - Some functions may not work properly depending on the shooting conditions. Operation Buttons for Still Image Recording | Operation Buttons | Description | |
| 1 | Video/Still Image Mode 📄/☐ | Switches between video and still image modes. |
| 2 | WT Zoom Allows the same functions as the zoom lever to be performed. Camera shake that often occurs when using the zoom lever can be minimized. “Zooming” (☒· p. 26) | |
| 3 | Still Image Recording ☐ | Allows you to take still images using the touch panel. Pressing and holding the button allows you to adjust the focus before shooting. “Start recording after adjusting the focus” (☒· p. 23) |
| 4 | Playback Mode Switches to the playback mode. | |
| 5 | MENU Displays the various menus of still image recording. “Operating the Menu” (☒· p. 85) | |
| 6 | Display Button D Switches the display between full ( D P) and simple ( D ) with every tap of the button. · Simple display: Some displays disappear automatically when the screen is not operated. · Full display: Displays everything. The display button changes from D to D P. · When the power is turned off, simple display ( D ) will be set. | |
| 7 | Recording Mode i.A.M | Switches between the i.A. Intelligent Auto and ☒ Manual recording mode. |
Using the Silent Mode
The Silent mode is a function for turning off the operation sound. The screen can also be dimmed depending on the setting. Use this mode to record quietly in events such as recitals, presentations etc. \- When "SILENT MODE" is set to "LCD DARKENED AND SOUND OFF", it is displayed.■ Operating procedure
1 Tap "MENU". • The top menu appears. 2 Tap NO.         3 Tap 📄 to turn off the operation sound only. And tap 📄 to dim the screen and turn off the operation sound. Caution :
- Do not expose the lens to direct sunlight. - While this unit may be used with the LCD monitor reversed and closed, the temperature rises more easily. Leave the LCD monitor open when using this unit for long periods of time, or in places exposed to direct sunlight or high temperatures. - The power may turn off to protect the circuit if the temperature of this unit rises too much. - Do not remove the AC adapter or SD card when the POWER/ACCESS lamp is lighted. The recorded data may become unreadable. - This unit is a microcomputer-controlled device. Electrostatic discharge, external noise and interference (from a TV, a radio, etc.) might prevent it from functioning properly. In such a case, close the monitor screen to turn off the power and remove the AC adapter, then press the Reset button to reset this unit. "Resetting this Unit" (p. 5)Memo :
- Before recording an important scene, it is recommended to conduct a trial recording. - Depending on the shooting conditions, the four corners of the screen may appear dark, but this is not a malfunction. In this case, change the shooting conditions by moving the zoom lever, etc.Zooming
The angle of view can be adjusted using zoom. - Use the W end (wide angle end) to shoot a wider field of view. - Use the T end (telephoto end) to magnify the subject for shooting.  W (Wide Angle End)   T (Telephoto End) \- The following zoom options are available: - Optical Zoom (1 - 40x) - Digital Zoom (41 - 200x) - You can also use the zoom (WT) button on the touch screen to zoom. - Tap the WT button, then press and hold the T (telephoto end) or W (wide angle end) button. Zoom Button (T/W) Memo :
- When digital zoom is used, the image becomes grainy as it is digitally enlarged. - The zoom ratio range can be changed. "ZOOM" (p. 88)Zoom Memory
The zoom position can be stored by the Zoom Memory icon (WT) on the touch screen.■ Storing Method
1 Zoom to the position to reach to the desired position for storing.  2 Tap "WT".  3 Press and hold "M" (approx. 1 second).  \- Store the zoom position.Operating Detail
1 Tap "WT".  2 Tap "M".  \- Zoom to the point that is stored in advance.Memo :
\- If the setting of DIS, VIDEO QUALITY or ZOOM is changed, the zoom position stored will be erased.Manual Recording
In situations where you are unable to recording properly using Intelligent Auto recording, you can change the settings and record using manual recording. 1 Open the LCD monitor.  - Set the recording mode to either 📁 video or 📄 still image. - To switch the mode between video and still image, tap 📋 or 📋 on the recording screen to display the mode switching screen. Tap 📁 or 📋 to switch the mode to video or still image respectively. 2 Select the Manual recording mode.  \- If the mode is i.A. Intelligent Auto, tap i.A. on the recording screen to display the mode switching screen. Tap M to switch the recording mode to Manual.  3 Tap "MENU".  • The top menu appears. 4 Tap "RECORD SETTING".  5 Tap the item to set manually.  \- For details on the various manual settings, refer to "Manual Recording Menu". Manual Recording Menu The following items can be set.| Name Description | |
| FOCUS | Use manual focus if the subject is not focused automatically."Adjusting Focus Manually (FOCUS)"(p. 28) |
| BRIGHTNESS ADJUST | Overall brightness on the screen can be adjusted.Use this when recording in a dark or bright location."Adjusting Brightness" (p. 29) |
| BACKLIGHT COMP. | Corrects the image when the subject appears dark due to backlight.Use this when shooting against the light."Setting Backlight Compensation" (p. 30) |
| WHITE BALANCE | Overall color on the screen can be adjusted.Use this when the color on the screen appears differently from the actual color."Setting White Balance" (p. 31) |
| TELE MACRO | Use this to take close-up (macro) shots of the subject."Taking Close-up Shots (TELE MACRO)"(p. 32) |
Adjusting Focus Manually (FOCUS)
Adjust the focus manually when you are unable to focus clearly using Intelligent Auto or when you want to lock the focus. 1 Select the Manual recording mode.  2 Tap "MENU".  4 Tap "FOCUS".  - Tap × to exit the menu. - Tap ↩ to return to the previous screen. 5 Tap "MANUAL".  6 Adjust the focus.  \- When focus is confirmed, the focusing frame disappears and ▲ and ▲ are displayed.Adjusting Brightness
You can adjust the brightness to your preferred level. 1 Select the Manual recording mode.  \- If the mode is i.A. Intelligent Auto, tap i.A. on the recording screen to display the mode switching screen. Tap M to switch the recording mode to Manual.  2 Tap "MENU".  4 Tap "BRIGHTNESS ADJUST".  - Tap × to exit the menu. - Tap → to return to the previous screen. 5 Tap "MANUAL".  6 Adjust the brightness value.  • Compensation range: -2.0 to +2.0 - Tap ∧ to increase the brightness. - Tap ∨ to decrease the brightness. 7 Tap "SET" to confirm.  \- If the mode is i.A. Intelligent Auto, tap i.A. on the recording screen to display the mode switching screen. Tap ☐ to switch the recording mode to Manual.  2 Tap "MENU".  4 Tap "BACKLIGHT COMP.".  - Tap × to exit the menu. - Tap → to return to the previous screen. 5 Tap "ON" or "ADVANCE".  - "ADVANCE" is designed to perform more effective backlight compensation. Choose this when the backlight compensation is not adjusted appropriately by "ON". • After setting, the icon (Advance: 📄) appears.| Setting Details | |
| OFF Backlight compensation is disabled. | |
| ON Backlight compensation is enabled. | |
| ADVANCE Should be selected for a better backlight compensation effect. | |
Setting White Balance
You can set the color tone to suit the light source. 1 Select the Manual recording mode.  \- If the mode is i.A. Intelligent Auto, tap i.A. on the recording screen to display the mode switching screen. Tap ☐ to switch the recording mode to Manual.  2 Tap "MENU".  \- The top menu appears. 3 Tap "RECORD SETTING".  4 Tap "WHITE BALANCE".  - Tap × to exit the menu. - Tap → to return to the previous screen. 5 Select the white balance setting.  - You can either tap the icon, or select the item using the "<" >" button and tap "SET". - The White Balance icon appears on the screen upon completing the setting.| Setting Details | |
| AUTO Adjusts automatically to the natural colors. | |
| MWB Use this when the problem of unnatural colors is not resolved. | |
| FINE Set this when shooting outdoors on a sunny day. | |
| CLOUD Set this when shooting on a cloudy day or inside a shade. | |
| HALOGEN Set this when shooting under illumination such as a video light. | |
| MARINE:BLUE Set this when shooting in deep waters (water appears blue). | |
| MARINE:GREEN | Set this when shooting in shallow waters (water appears green). |
Using MWB
1 Point the cursor to "MWB" using the "<>" ">" button. 2 Hold a sheet of plain white paper in front of the lens so that the white paper fills the screen, tap and hold the "SET" button. 3 blinks, release your finger after the setting screen disappears. \- You can also tap and hold the "MWB" icon to perform the setting.Memo :
\- The setting will not change if "MWB" is being tapped too fast (less than 1 second).Taking Close-up Shots (TELE MACRO)
You can take close-up shots of an object using the tele macro function even when the unit is at the telephoto zoom setting.   *The image is only an impression. 1 Select the Manual recording mode.  \- If the mode is i.A. Intelligent Auto, tap i.A. on the recording screen to display the mode switching screen. Tap M to switch the recording mode to Manual.  2 Tap "MENU".  4 Tap "TELE MACRO".  - Tap X to exit the menu. - Tap ↩ to return to the previous screen. 5 Tap "ON".  • After setting, the tele macro icon 📄 appears.| Setting Details | |
| OFF Enables close-up shots up to 1 m at the telephoto (T) end.Enables close-up shots up to 5 cm at the wide angle (W) end. | |
| ON Enables close-up shots up to 60 cm at the telephoto (T) end.Enables close-up shots up to 5 cm at the wide angle (W) end. |
Caution :
\- When you are not taking close-up shots, set "TELE MACRO" to "OFF". Otherwise, the image may be blur.Shooting under Water
Perform the following settings to shoot underwater.Setting the White Balance to Underwater Mode
Corrects the color when shooting underwater to record more natural images. Select from the following two settings depending on the color of the water at the shooting location. 1 Select the Manual recording mode.  \- If the mode is i.A. Intelligent Auto, tap i.A. on the recording screen to display the mode switching screen. Tap ☐ to switch the recording mode to Manual.  2 Tap "MENU".  • The top menu appears. 3 Tap "RECORD SETTING".  4 Tap "WHITE BALANCE".  5 Tap or | Setting Details | |
| MARINE:BLUE Set this when shooting in deep waters (water appears blue). | |
| MARINE:GREEN | Set this when shooting in shallow waters (water appears green). |
Locking the Screen
1 Tap "MENU".  • The top menu appears. 2 Tap "RECORD SETTING".  3 Tap > to change the items displayed. 4 Tap "SCREEN LOCK".
\- The 🔒 button appears. Memo :
- If "SCREEN LOCK" has been set, it will take a longer time for the unit to power off after closing the LCD monitor. If you open the LCD monitor after closing it, and the power is still turned on, you can continue to record. - If "LCD CLOSED RECORDING" (p. 90) is set to "ON", this unit does not turn off even when the LCD monitor is closed.■ To cancel "SCREEN LOCK"
Tap the 🔒 button. Memo :
- Once "SCREEN LOCK" is set, only the 🔒 button on the touch screen can be operated. - The START/STOP (recording) button and the zoom lever can be used while the screen is locked. - "SCREEN LOCK" cannot be set for the following cases: \- during recording \- when "TIME-LAPSE RECORDING" or "DATE/TIME RECORDING" is setCaution :
- Before using the camera underwater, read "Before Using Underwater or under Low Temperature" (e.g. p. 6) carefully. Improper usage resulting in water submersion will damage the device and cause injury. - Ensure that the terminal cover is closed tightly before using underwater or on the beach. "Opening the Terminal Cover (SD Card Cover)" (p. 4)Recording with Effects (RECORDING EFFECT)
You can add and record various effects to videos or still images. Once setting is done, you can easily record images that are suitable for each image.| Type of Effect Description of Effect | |
| GRAINY MONOCHROME | Captures film-like monochrome images by increasing the contrast of mid-level brightness and emphasizing the rough grainy feel on the image. “Recording Images Like an Old Black and White Photo (GRAINY MONOCHROME)” (p. 35) |
| FOOD | Captures food images such that the food looks appetizing even under fluorescent lighting in homes by changing the colors to warm-colors and deepening the colors. “Recording Food Images (FOOD)” (p. 36) |
| BABY | Captures a soft and gentle image by lightening the skin tone while retaining the reddish hue, enhancing the skin beautifying effect as well as smoothing the appearance of the skin. “Recording Images of a Baby (BABY)” (p. 37) |
Caution :
\- Depending on the shooting environment and subject, you may not achieve the shooting effect as intended.Recording Images Like an Old Black and White Photo (GRAINY MONOCHROME)
Captures film-like monochrome images by increasing the contrast of mid-level brightness and emphasizing the rough grainy feel on the image. 1 Open the LCD monitor.  \- Set the recording mode to either 📁 video or 📄 still image. \- To switch the mode between video and still image, tap 📁 or 📄 on the recording screen to display the mode switching screen. Tap 📋 or 📋 to switch the mode to video or still image respectively. 2 Tap "MENU".  • The top menu appears. 3 Tap "RECORD SETTING".  4 Tap "RECORDING EFFECT".  - If the icon is not displayed on the screen, tap > to scroll the screen. - Tap × to exit the menu. - Tap ↔ to return to the previous screen. 5 Tap "GRAINY MONOCHROME".  - Tap × to exit the menu. - Tap → to return to the previous screen. 6 Start recording. \- To cancel the setting, repeat the procedure from the beginning and tap "OFF" in Step 5.Recording Food Images (FOOD)
Captures food images such that the food looks appetizing even under fluorescent lighting in homes by changing the colors to warm-colors and deepening the colors. 1 Open the LCD monitor.  \- Set the recording mode to either 📁 video or 📄 still image. \- To switch the mode between video and still image, tap 📄 or 📋 on the recording screen to display the mode switching screen. Tap 📋 or 📋 to switch the mode to video or still image respectively. 2 Tap "MENU".  • The top menu appears. 3 Tap "RECORD SETTING".  4 Tap "RECORDING EFFECT".  - If the icon is not displayed on the screen, tap > to scroll the screen. - Tap × to exit the menu - Tap ↔ to return to the previous screen. 5 Tap "FOOD".  - Tap × to exit the menu. - Tap → to return to the previous screen. 6 Start recording \- To cancel the setting, repeat the procedure from the beginning and tap "OFF" in Step 5.Recording Images of a Baby (BABY)
Captures a soft and gentle image by lightening the skin tone while retaining the reddish hue, enhancing the skin beautifying effect as well as smoothing the appearance of the skin. 1 Open the LCD monitor.  \- Set the recording mode to either 📁 video or 📄 still image. \- To switch the mode between video and still image, tap 📋 or 🏱 on the recording screen to display the mode switching screen. Tap 📋 or 📋 to switch the mode to video or still image respectively. 2 Tap "MENU".  • The top menu appears. 3 Tap "RECORD SETTING".  4 Tap "RECORDING EFFECT".  - If the icon is not displayed on the screen, tap > to scroll the screen. - Tap × to exit the menu. - Tap ↔ to return to the previous screen. 5 Tap "BABY".  - Tap × to exit the menu. - Tap → to return to the previous screen. 6 Start recording. \- To cancel the setting, repeat the procedure from the beginning and tap "OFF" in Step 5.Capturing Subjects Clearly (TOUCH PRIORITY AE/AF)
"TOUCH PRIORITY AE/AF" is a function that adjusts focus and brightness based on a tapped position. This function is available for both videos and still images.1 Open the LCD monitor.
 \- Set the recording mode to either 🏠 video or 📞 still image. \- To switch the mode between video and still image, tap 📄 or 📋 on the recording screen to display the mode switching screen. Tap 📋 or 🔒 to switch the mode to video or still image respectively.2 Tap "MENU".
4 Tap "TOUCH PRIORITY AE/AF".
 - If the icon is not displayed on the screen, tap > to scroll the screen. - Tap × to exit the menu. - Tap → to return to the previous screen.5 Tap the desired setting.
 FACE TRACKING  COLOR TRACKING  AREA SELECT  - Focus and brightness will be adjusted automatically based on the tapped position (face/color/area). A blue frame appears around the selected subject (face/color), while a white frame appears around the selected area. - To reset, tap the desired position (face/color/area) again. - To cancel "FACE TRACKING" or "COLOR TRACKING", tap the blue frame. - To cancel "AREA SELECT", tap the white frame.| Setting Details | |
| OFF Deactivates the function. | |
| FACE TRACKING | appears on the screen. Recording is performed while tracking and automatically adjusting the tapped face (subject) with appropriate focus and brightness. In addition, a blue frame appears around the tapped face (subject). |
| COLOR TRACKING | appears on the screen. Recording is performed while tracking and automatically adjusting the tapped color (subject) with appropriate focus. In addition, a blue frame appears around the tapped color (subject). |
| AREA SELECT | appears on the screen. Recording is performed while automatically adjusting the tapped area (fixed position) with appropriate focus and brightness. In addition, a white frame appears around the tapped area.AREA SELECT in TOUCH PRIORITY AE/AF is only available within the optical zoom range. (unavailable when digital zoom is being used) |
Memo :
- When "TOUCH PRIORITY AE/AF" is set, "FOCUS" will be set to "AUTO" automatically. - Tap the selected position (face/color/area) again to cancel the setting. - Tap on an unselected position (face/color/area) to reset. - If the camera loses track of a subject, tap the subject again. - Settings are canceled when zoom operation is performed. ("AREA SELECT" only) - When "COLOR TRACKING" is set, the targeted subject (color) may change if similar colors are detected. In this case, tap the subject again. The targeted subject (color) may also be tracked back again if it appears in the center of the screen within a specific time.Caution :
- Subjects near the sides of the LCD monitor may not respond or be recognized when tapped. In this case, move the subject to the center and tap again. - “FACE TRACKING” may not work properly depending on the shooting conditions (distance, angle, brightness, etc.) and the subject (direction of face, etc.). It is also particularly difficult to detect faces in backlight. - "COLOR TRACKING" may not function properly in the following cases: - when recording subjects with no contrast - when recording subjects that are moving at high speed - when recording in a dark place - when the surrounding brightness changes - "AREA SELECT" is not available while the digital zoom is in use. - When "FACE TRACKING" is set, the subject may be lost if the camera is moved vertically or horizontally very fast.Reducing Camera Shake
When the image stabilizer is set, camera shake during video recording can be effectively reduced. 1 Tap "MENU".  3 Tap "OIS".  - If the icon is not displayed on the screen, tap > to scroll the screen. - Tap × to exit the menu. - Tap ⇔ to return to the previous screen. 4 Tap the desired setting. | Setting Details | |
| OFF | Deactivates image stabilizer. |
| ON | Reduces camera shake under normal shooting conditions. |
| ON (AIS) | Reduces camera shake more effectively when shooting bright scenes on the wide angle end. Only on the wide angle end (approx. 5x). |
| (Enhanced AIS) | The area of correction in the enhanced AIS mode is greater than that in the AIS mode. Camera shake can be reduced more effectively even when recording is performed by zooming from wide angle to telephoto. |
Memo :
0 It is recommended to set the image stabilizer to "OFF" when shooting a subject of little movement with the unit on a tripod. 0 Complete stabilization may not be possible if camera shake is excessive. 0 This setting is effective for video recording only. 0 Using the image stabilizer will narrow the angle of view. 0 Dynamic zoom is not available in the enhanced AIS mode. 0 The resolution for the enhanced AIS mode is lower compared to the other modes.Recording at Intervals (TIME-LAPSE RECORDING)
This function enables the changes of a scene that occur slowly over a long period to be shown within a short time by taking frames of it at a certain interval. This is useful for making observations such as the opening of a flower bud. 1 Open the LCD monitor.  0 Check if the recording mode is A. 0 If the mode is B still image, tap B on the recording screen to display the mode switching screen. Tap A to switch the mode to video. 2 Tap "MENU".  4 Tap "TIME-LAPSE RECORDING".  0 If the icon is not displayed on the screen, tap 1 to scroll the screen. 0 Tap L to exit the menu. 0 Tap J to return to the previous screen. 5 Tap to select a recording interval (1 to 80 seconds).  - If the icon is not displayed on the screen, tap > to scroll the screen. - The greater the number of seconds, the longer the recording interval. - Tap × to exit the menu. - Tap → to return to the previous screen. 6 Start recording.  - A frame is taken at intervals of the selected period. - When the recording interval is set to "20SEC INTERVAL" or higher, this unit switches to the power-saving mode between recordings. At the next point to record, the power-saving mode will be turned off and recording will start automatically. - Settings of Time-Lapse recording are not saved when the power is turned off. Indications During Time-Lapse Recording | Display Description | |
| 1 | Recording interval Displays the recording interval that is set. |
| 2 | Recorded Time Displays the actual recorded time of the video. Recorded time increases in units of frames. |
| 3 | Actual Elapsed Time Displays the actual elapsed time after recording starts. |
| 4 | Remaining Recording Time Remaining time left to record with the currently selected video quality. |
Time-Lapse Setting
The greater the number of seconds, the longer the recording interval.| Setting Details | |
| OFF Deactivates the function. | |
| 1SEC INTERVAL Takes a frame at 1-second intervals.Recorded videos will be played back at 30 times speed. | |
| 5SEC INTERVAL Takes a frame at 5-second intervals.Recorded videos will be played back at 150 times speed. | |
| 20SEC INTERVAL Takes a frame at 20-second intervals.Recorded videos will be played back at 600 times speed. | |
| 80SEC INTERVAL Takes a frame at 80-second intervals.Recorded videos will be played back at 2400 times speed. | |
Caution :
- During the time-lapse recording, video quality is set to XP mode. • Audio cannot be recorded during time-lapse recording. - When recording is stopped with the recorded time less than "0:00:00:14", the video will not be saved. - Zooming, simultaneous still image recording, and image stabilizer are not available in time-lapse recording. - When Time-Lapse recording is set, you cannot record still images.Memo :
- Settings of time-lapse recording are reset when the power is turned off. To start time-lapse recording again, it is necessary to make the selection once more. - Recording stops automatically 99 hours after it is started. - Make use of a tripod and AC adapter for time-lapse recordings with long intervals. It is also recommended to fix the focus and white balance manually. "Tripod Mounting" (p. 17)Recording Video with Still Image Displayed in Sub Screen (Still Image Composite Recording)
Displaying a captured still image in the sub screen before video recording and recording the image during video recording. 1 Open the LCD monitor.  - Check if the recording mode is 📁. - If the mode is 📄 still image, tap 📄 on the recording screen to display the mode switching screen. Tap 📄 to switch the mode to video. 2 Tap "MENU".  4 Tap "PHOTO-INSERT RECORDING".  - If the icon is not displayed on the screen, tap > to scroll the screen. - Tap × to exit the menu. - Tap → to return to the previous screen. 5 Press the START/STOP button, or tap the 🔒 button to capture a still image for the sub screen.  6 Select a position for the sub screen.  - Tapping the button changes the display position of the sub screen in the following order: top right → bottom right → bottom left → top left. - To hide the sub screen, tap the sub screen. Tap any position on the sub screen while it is displayed. - Tapping the ↩ button allows you capture a new still image for the sub screen again. - You can change the display position and hide or display the sub screen in the same way even after video recording has started. 7 Start recording a video.  - Press the START/STOP button again to stop recording. - Tapping × will end "PHOTO-INSERT RECORDING". (To perform operations other than recording, tap × to cancel the "PHOTO-INSERT RECORDING" first.) - When the camera is turned off, "PHOTO-INSERT RECORDING" will end. - When "PHOTO-INSERT RECORDING" ends, the captured still image for the sub screen disappears. (It will not be saved as a still image.)Using the Self-timer
You can record video or still image using the self-timer. This is useful when taking a video or still image that includes the photographer. The 2-second self-timer is useful for preventing camera shake caused by pressing the shutter button when taking a still image.Memo :
\- When shooting a photo using the self-timer function, use of a tripod is recommended. "Tripod Mounting" (p. 17)■ Using the Self-timer in Video Mode
1 Open the LCD monitor.  - Check if the recording mode is 📁. - If this unit is in the still image mode ☐, tap the 📋 (video/still image) button on the touch screen to display the mode switching screen. Tap 🔔 to switch the mode to video. 2 Tap "MENU".  4 Tap "SELF-TIMER".  - If the icon is not displayed on the screen, tap > to scroll the screen. - Tap × to exit the menu. - Tap ↔ to return to the previous screen. 5 Tap "ON".  6 Press the START/STOP button.  - The countdown to recording appears and recording will start after 5 seconds. - To stop the self-timer, press the recording button again.Using the Self-timer in Still Image Mode
1 Open the LCD monitor.
 - Check if the recording mode is 📄. - If the mode is 🎨video, tap 🎨 on the recording screen to display the mode switching screen. Tap 📄 to switch the mode to still image.2 Tap "MENU".
 • The top menu appears.3 Tap "RECORD SETTING".
4 Tap "SELF-TIMER".
 - If the icon is not displayed on the screen, tap > to scroll the screen. - Tap × to exit the menu. - Tap → to return to the previous screen.5 Tap "2SEC" or "10SEC".
6 Take a still image.
- A timer appears and countdown to shooting starts. - To stop the self-timer, press the START/STOP button again.Memo :
- The START/STOP button on this unit cannot be used to adjust the focus in advance. To adjust the focus in advance, press and hold the button on the touch screen until the focus is adjusted. "Start recording after adjusting the focus" (p. 23) - While the countdown timer is displayed, the buttons cannot be used as they are not displayed on the screen.Recording at a Fixed Interval and Playing Back Repeatedly
After recording for a specified duration, this unit automatically plays back the scene and then repeats the recording process and the playback process over and over again. This can be used to check a sports form or dance form. The recorded scene can also be deleted automatically depending on the setting. 1 Open the LCD monitor.  - Check if the recording mode is 📁. - If the mode is ☐ still image, tap ☐ on the recording screen to display the mode switching screen. Tap 🖱️ to switch the mode to video. 2 Tap "MENU".  4 Tap "SELF-CHECK REC/PLAY".  - If the icon is not displayed on the screen, tap > to scroll the screen. - Tap X to exit the menu. - Tap ↩ to return to the previous screen. 5 Tap "SET". | RECORDING TIME | 10 to 40 seconds (Can be set in 5-second interval.) |
| AUTO DELETE Off: | The recorded video is retained. |
| On: The recorded video is deleted. |
Recording Videos with Date and Time
You can record videos together with the date and time. Set this when you want to save the file with date and time display. (The date and time cannot be deleted after recording.)1 Open the LCD monitor.
 - Check if the recording mode is 📁. - If the mode is ☐ still image, tap ☐ on the recording screen to display the mode switching screen. Tap 🖼 to switch the mode to video.2 Tap "MENU".
4 Tap "DATE/TIME RECORDING".
 - If the icon is not displayed on the screen, tap > to scroll the screen. - Tap × to exit the menu. - Tap ↩ to return to the previous screen.5 Select the type of clock with , and tap "SET".

- When "SET" is tapped, the precaution for date/time recording appears.
- Tap × to exit the menu.
6 Tap the display position with your finger and drag your finger to adjust.
 \- Move the date and time display while touching it with your finger and tracing it on a screen.7 Press the START/STOP button to start recording.
 - Press the START/STOP button again to stop recording. - Tap ↩ to return to the screen for selecting the types of clock. - Tap X to exit "DATE/TIME RECORDING". (To perform operations other than recording, tap X to cancel the "DATE/TIME RECORDING" first.)Caution :
• The date and time cannot be deleted after recording.Recording Videos with Time Counter
You can take a video with a stopwatch recorded. You can start, stop and reset the stopwatch as with any stopwatch. This can be used to record sports video. (The recorded time counter cannot be deleted afterward.) 1 Open the LCD monitor.  \- Check if the recording mode is 📁. \- If the mode is 📄 still image, tap 📋 on the recording screen to display the mode switching screen. Tap 🎨 to switch the mode to video. 2 Tap "MENU".  4 Tap "TIME COUNTER RECORDING".  - If the icon is not displayed on the screen, tap > to scroll the screen. - Tap X to exit the menu. - Tap → to return to the previous screen. 5 Tap the display position with your finger and drag your finger to adjust.  \- The position can be adjusted when the recording stops. 6 Press the START/STOP button to start recording.  - Press the START/STOP button again to stop recording. - Tap X to exit "TIME COUNTER RECORDING" when the recording stops. (To perform operations other than recording, tap × to exit the "TIME COUNTER RECORDING" first.) 7 Tap "○ START" on the screen to start the counter.  - You can start the recording after the counter has been started. - You can freely stop, reset or resume the counter during recording.| 1 | START/STOP Starts and stops the counter. |
| 2 | RESET Sets the counter reading to 0:00:00. |
Memo :
- If "TIME COUNTER RECORDING" is exited while the counter is still running, the counter continues to count from where it left off the next time "TIME COUNTER RECORDING" is operated. - If 24 hours have elapsed since the counter started running or if the clock has been set, the counter reading automatically returns to "0:00:00" and the counter stops running. - The recorded time counter cannot be deleted afterward.Checking the Remaining Recording Time
Display the remaining battery power and the remaining recording time.Memo :
- The remaining battery power and the remaining recording time are estimates. • The remaining recording time is displayed only during video mode. - The remaining recording time is displayed for the recording media that is currently selected.1 Open the LCD monitor.
 \- Check that the camera is set to the recording mode. If the camera is in the playback mode, click «REC to switch to recording mode.2 Tap "MENU".
4 Display the remaining recording time.
 - The remaining recording time is displayed only in the video recording mode. - The remaining recording time is displayed for the recording media that is currently selected. - is displayed instead of the remaining battery power when the AC adapter is connected. - To exit the display, tap X. Approximate Video Recording Time| Picture quality Built-in memory | |
| 4GB | |
| UXP 15 m | |
| XP 20 m | |
| EP 1 h 20 m |
| Picture quality SDHC/SDXC card | ||||||
| 4GB 8GB 16GB 32GB 64GB 128GB | ||||||
| UXP 20 m 40 m 1 h 20 m 2 h 40 m 5 h 40 m 11 h 30 m | ||||||
| XP 30 m 1 h 1 h 50 m 3 h 50 m 8 h 10 m 16 h 20 m | ||||||
| EP 1 h 40 m 3 h 30 m 7 h 14 h 28 h 50 m 57 h 50 m | ||||||
| Image size Built-in memory | SDHC/SDXC card | |||||
| 4GB | 4GB | 8GB | 16GB | 32GB | 64GB | |
| 3680x2760(10M)(4:3) | 500 | 600 | 1300 | 2500 | 5100 | 9999 |
| 1920x1080(2M)(16:9) | 2500 | 3100 | 6400 | 9999 | 9999 | 9999 |
| 1440x1080(1.5M)(4:3) | 3300 | 4200 | 8400 | 9999 | 9999 | 9999 |
| 640x480(0.3M)(4:3) | 9999 | 9999 | 9999 | 9999 | 9999 | 9999 |
| Actual recording time | Continuous recording time(Maximum Recording Time) |
| 2 h 50 m 5 h 10 m |
Playing Back Videos
The followings are the types of playback that can be performed by this unit.| Item Description | |
| Normal Playback | Plays back the recorded videos. |
| DIGEST PLAYBACK | From the recorded video, scenes are extracted automatically, pieced together for a digest playback within the specified length.Start playback from “DIGEST PLAYBACK” in the “PLAYBACK SETTING” menu. |
| PLAYBACK OTHER FILE | Videos with defective management information can be played back.Start playback from “PLAYBACK OTHER FILE” in the “PLAYBACK SETTING” menu. |
Caution :
- Make a backup of important recorded data. It is recommended to copy your important recorded data to a BD or other recording media for storage. - This unit is a microcomputer-controlled device. Electrostatic discharge, external noise and interference (from a TV, a radio, etc.) might prevent it from functioning properly. In such a case, close the monitor screen to turn off the power and remove the AC adapter, then press the Reset button to reset this unit. "Resetting this Unit" (p. 5) - Disclaimer - We shall not be held responsible for loss of recorded contents when recording videos/audio or playback cannot be operated due to malfunctions in this unit, provided parts, or SD card. - Once deleted, recorded contents (data), including data loss due to malfunctions in this unit, cannot be restored. Please be forewarned. - JVC will not be responsible for any lost data. - In order for quality improvement, defective recording medium is subject to be analyzed. Therefore, it may not be returned.Normal Playback
Plays back the recorded videos. 1 Open the LCD monitor.  - Check if the recording mode is 📁. - If the mode is 📄 still image, tap 📋 on the recording screen to display the mode switching screen. Tap 🖱️ to switch the mode to video. 2 Tap «PLAY to select the playback mode.  3 Tap the file (image).  - Tap 🎨/SD to select the media for playback and change the index screen (thumbnail display). - ▶ appears on the last image played back. - Lines in different colors are displayed under the thumbnail display to distinguish the recording date. 4 Playback starts. - Tap II to pause - Tap ☐ to return to the index screen.Caution :
- While this unit may be used with the LCD monitor reversed and closed, the temperature rises more easily. Do not use this unit with the LCD monitor reversed and closed for long periods of time, or in places exposed to direct sunlight or high temperatures. - The power may turn off to protect the circuit if the temperature of this unit rises too much.Operation Buttons for Video Playback
During Index Screen Display | Display Description | ||
| 1 | Switches between video and still image modes. | |
| 2 | (Date and Time Display) | Moves to the previous/next date |
| 3 | > Displays the next index screen (thumbnail display)You can perform the same operation with the zoom lever. | |
| 4 | < Displays the previous index screen (thumbnail display)You can perform the same operation with the zoom lever. | |
| 5 | REC | Switches to the recording mode. |
| 6 | Displays the index screen (thumbnail display) to perform deletion | |
| 7 | ●/SD Switches between the memories in which images are recorded ( ⚪ built-in memory/ SD card) | |
| 8 | MENU Displays the menu screen. | |
| 9 | Thumbnail (File) Tap | Starts playbackDrag to right: Displays the file taken before the recording dateDrag to left: Displays the file taken after the recording dateThumbnails with the same underlined color indicate files with the same recording date. |
| Display Description | ||
| 1 | Switches between video and still image modes. | |
| 2 | (Timeline Bar) Tap on a random position - Moves to the tapped positionDrag playback point to the left or right - Starts playback from the new positionTap on a random position - Moves to the tapped position | |
| 3 | (Pointer) Displays the current estimated playback position within the scene | |
| 4 | Saves one scene of the video being played back as a still image.Displayed while playback is paused. | |
| 5 | Returns to the beginning of the scene Returns to the previous scene if tapped at the beginning of a scene.Allows the same functions as the zoom lever to be performs while pausing playback. | |
| 6 | Reverse search (speed increases with each tap) | |
| Reverse slow-motion / Press and hold to start reverse slow playback | ||
| 7 | Starts playback | |
| Pause | ||
| 8 | Forward search (speed increases with each tap) | |
| Forward slow-motion / Press and hold to start slow playback | ||
| 9 | Advances to the next scene | |
| 10 | The speed can be set using “SLOW-MOTION SPEED” (p. 93). | |
| 11 | Switches the display between full (D) and simple (D) with every tap of the button.Simple display: Some displays disappear automatically when the screen is not operated.Full display: Displays everything. The display button changes from D to D.When the power is turned off, the display setting will revert to simple display (D). | |
| 12 | Switches to the recording mode. | |
| 13 | Stop (returns to index screen) | |
 |
Memo :
- Tap or drag on the operation area of the touch screen. - The recording date and time can be displayed on the screen during playback. ( p. 93)Adjusting the Volume of Videos
You can use the zoom/volume lever to control the volume. Turn up the volume  Turn down the volumeChecking the Recording Date and Other Information
You can see the recording information of the recorded videos. 1 Open the LCD monitor.  \- Tap 📁 or 📋 to select the video or still image mode. 2 Tap « PLAY to select the playback mode.  4 Tap "MENU".  \- Tap × to exit the menu. You can display the recording date and duration of the selected file. TIME COUNTER PLAYBACK
A time counter that can be reset can be displayed during playback. This can be used to play sports video. 1 Open the LCD monitor.  - Check if the recording mode is 📁. - If the mode is ☐ still image, tap ☐ on the recording screen to display the mode switching screen. Tap 🖼 to switch the mode to video. 2 Tap « PLAY to select the playback mode.  3 Tap "MENU".  4 Tap "PLAYBACK SETTING".  5 Tap "TIME COUNTER PLAYBACK".  6 Set "TIME COUNTER PLAYBACK" to ON.  7 Tap on the file to start playback.  \- An hours:minutes:seconds counter appears. 8 Pause the playback and reset the counter.  - Tapping "RESET" sets the counter reading to "0:00:00". - The 1/10 second digit is displayed while playback is paused. - The counter can also be reset during normal playback and slow playback.Memo :
- To reset the counter during playback, switch to full display using the "Display ButtonD" (p. 21) button. - To reset the counter at the precise position, it is recommended to pause the playback then tap "RESET". - When the unit switches to the next scene, the counter is automatically reset.DIGEST PLAYBACK
You can play back a digest of recorded videos (Digest Playback). This is useful for checking the content of videos quickly. 1 Open the LCD monitor.  \- Check if the recording mode is 🎨. \- If the mode is 📄 still image, tap 📋 on the recording screen to display the mode switching screen. Tap 🖱️ to switch the mode to video. 2 Tap << PLAY to select the playback mode.  3 Tap "MENU".  4 Tap "PLAYBACK SETTING".  5 Tap "DIGEST PLAYBACK".  6 Tap to select a date for Digest Playback.  • After selecting a date, tap "NEXT". - When "ALL" is tapped, Digest Playback will be performed for all the dates. - Tap X to exit the menu. - Tap → to return to the previous screen. 7 Select the Digest Playback time (Only when "AUTO" is selected in Step 7)  - Select the Digest Playback time in minutes (min). - The time display of Digest Playback varies according to the recording time. - When it takes time (more than 2 seconds) for "DIGEST PLAYBACK" to start after selecting Digest Playback time, a progress status will be displayed. • The Digest Playback time is only a guide. 8 Digest Playback starts.  - Tap II to pause. - Tap ☐ to return to the index screen. - Tap "DIGESTX" to return to the normal playback screen. • Operations During Video Playback "Operation Buttons for Video Playback" (p. 51) 9 Digest playback stops automatically, or display the next screen by tapping "MENU".  • TO NORMAL PLAYBACK: start normal playback. - PLAYBACK AGAIN: start the digest playback again. - SELECT DATE: return to step 6.PLAYBACK OTHER FILE
The management information of a video may be damaged if recording is not performed correctly, such as turning off the power in the middle of recording. You can perform the following operations to play back the videos with defective management information. 1 Open the LCD monitor.  - Check if the recording mode is 📁. - If the mode is 📄 still image, tap 📄 on the recording screen to display the mode switching screen. Tap 🎨 to switch the mode to video. 2 Tap «PLAY to select the playback mode.  3 Tap "MENU".  4 Tap "PLAYBACK SETTING".  5 Tap "PLAYBACK OTHER FILE".  6 Tap on the file to start playback.  "Operation Buttons for Video Playback" (p. 51) \- Tap "X" to return to the usual index screen.Memo :
- An MTS file is created in the EXTMOV folder when management information is corrupted. - Depending on the condition of the damaged file, playback might fail or may not run smoothly.Playing Back Still Images
You can select and play back the recorded still images from an index screen (thumbnail display). 1 Open the LCD monitor.  - Check if the recording mode is 📄. - If the mode is 🎨 video, tap 🎨 on the recording screen to display the mode switching screen. Tap ☐ to switch the mode to still image. 2 Tap « PLAY to select the playback mode.  3 Tap on the file to start playback.  - Tap 📄/SD to select the media for playback and change the index screen (thumbnail display). - Tap ☐ to return to the index screen. - ▶ appears on the last image played back. - Lines in different colors are displayed under the thumbnail display to distinguish the recording date.Operation Buttons for Still Image Playback
During Index Screen Display  \- Still images that are recorded continuously in high-speed or medium-speed will be grouped together. Only the first recorded file (still image) is shown and the group is displayed with a green frame.| Display Description | |
| 1 | Switches between video and still image modes. |
| 2 | (Date and Time Display) Moves to the previous/next date |
| 3 | > Displays the next index screen (thumbnail display)You can perform the same operation with the zoom lever. |
| 4 | < Displays the previous index screen (thumbnail display)You can perform the same operation with the zoom lever. |
| 5 | < REC Switches to the recording mode. |
| 6 | Displays the index screen (thumbnail display) to perform deletion |
| 7 | Switches between the index screen of the built-in memory and SD card |
| 8 | MENU Displays the menu screen. |
| 9 | File (Still Image) Tap on thumbnail - Starts playbackDrag to right - Scrolls to the right to show the previous index screen (thumbnail display)Drag to left - Scrolls to the left to show the next index screen (thumbnail display) |
| Display Description | ||
| 1 | Video/Still Image Mode | Switches between video and still image modes. |
| 2 | Returns to the previous still imageYou can perform the same operation with the zoom lever. | |
| 3 | ► / || Starts/pauses | slideshow |
| 4 | Advances to the next still imageYou can perform the same operation with the zoom lever. | |
| 5 | «REC | Switches to the recording mode. |
| 6 | Returns to index screen | |
| 7 | Deletes the currently displayed still image. | |
| 8 | ⊕Playback Zoom En | larges the displayed video.Tap the position of the image you want to enlarge.Zoom ratio changes by using the (+) and (-) buttons. |
| 9 | MENU Displays the menu screen. | |
Memo :
\- Tap or drag on the operation area of the touch screen.Caution :
\- This unit is a microcomputer-controlled device. Electrostatic discharge, external noise and interference (from a TV, a radio, etc.) might prevent it from functioning properly. In such a case, close the monitor screen to turn off the power and remove the AC adapter, then press the Reset button to reset this unit. "Resetting this Unit" (p. 5)Slideshow Playback
Still images can be played back in a slideshow. Tap ▶ during still image playback to start the slideshow.  2 Connect the adapter cable and AC adapter to this unit.  3 Open the LCD monitor.  • The unit turns on automatically. 4 Press the external input button on the TV to switch to the input from this unit via the connected connector.  5 Play back a file.  "Playing Back Videos" (p. 50) "Playing Back Still Images" (p. 57)Memo :
- Change the settings in "HDMI OUTPUT" according to the connection. "HDMI OUTPUT" (p. 100) - When connected to the TV via the HDMI mini cable, images and sounds may not be output properly depending on the TV connected. In such cases, perform the following operations. 1) Disconnect the HDMI mini cable and connect it again. 2) Turn off and on this unit again. - For questions about the TV or method of connection, contact your TV's manufacturer.Operating in Conjunction with TV via HDMI
Connecting this unit to an HDMI-CEC enabled TV using the HDMI mini cable allows linked operations with the TV to be performed. \- HDMI-CEC (Consumer Electronics Control) is an industry standard that enables interoperability between HDMI-CEC compliant devices that are connected via HDMI cables.Memo :
- Not all HDMI control devices comply with the HDMI-CEC standard. The HDMI control function of this unit will not work when connected to these devices. - This unit is not guaranteed to operate with all HDMI-CEC enabled devices. - Depending on the specifications of each HDMI-CEC enabled device, some functions may not work with this unit. (For details, refer to the instruction manual of your TV.) - Unintended operations may occur with some connected devices. In these cases, set "HDMI CONTROL" to "OFF". "HDMI CONTROL" (p. 100)Preparations
- Connect an HDMI mini cable between this unit and the TV. "Connecting via the HDMI Mini Connector" (p. 60) - Turn on the TV and set the HDMI-CEC related setting to "ON". (For details, refer to the instruction manual of the TV.) - Set "HDMI CONTROL" in the CONNECTION SETTINGS menu to "ON". "HDMI CONTROL" (p. 100)Operation Method 1
1 Turn on this unit. 2 Select the playback mode. 3 Connect the HDMI mini cable. - TV turns on automatically and switches to HDMI input mode when this unit is turned on.Operation Method 2
1 Turn off the TV. • This unit turns off automatically.Memo :
- Depending on the TV connected, the display language of this unit will automatically switch to the language that is selected for the TV when this unit is turned on. (This is applicable only if this unit supports the language selected for the TV.) To use this unit with a language that differs from the display language of the TV, set "HDMI CONTROL" to "OFF". - The display language of the TV will not switch automatically, even if the display language of this unit is changed. - These functions may not work correctly when devices such as amplifier and selector are connected. Set "HDMI CONTROL" to "OFF". - If HDMI-CEC does not work properly, turn off and on this unit again.Connecting via the AV Connector
To playback videos on TV, connect the AV cable (provided: E3A-0085-00) to the AV terminal of this unit. • Refer also to the instruction manual of the TV in use. 1 Connect to a TV.  2 Connect the adapter cable and AC adapter to this unit.  3 Open the LCD monitor.  • The unit turns on automatically. 4 Press the external input button on the TV to switch to the input from this unit via the connected connector.  5 Play back a file.  "Playing Back Videos" (p. 50) "Playing Back Still Images" (p. 57)Memo :
- For questions about the TV or method of connection, contact your TV's manufacturer. • AV cable (provided: E3A-0085-00) Wiring specifications (for video/audio) of the 4-pole mini plug are described in the following. To purchase, consult your nearest JVC dealer or JVC service center.  \- When using the provided AV cable, attach the core filter provided with this unit first. "Attaching the Core Filter" (p. 8)Deleting Unwanted Files
Delete unwanted videos and still images when the space in the recording media is running out. Doing so frees up more space in the recording media. "Deleting the Currently Displayed File" (p. 63) "Deleting Selected Files" (p. 63)Memo :
- Deleted files cannot be restored. - Files that are protected cannot be deleted. Release protection before deleting the file. "Protecting Files" (p. 64) - Be sure to back up important files on a computer. "Backing Up All Files" (p. 78)Deleting the Currently Displayed File
Deletes the currently displayed file.Caution :
\- Deleted files cannot be restored.1 Tap ☑.
 \- While the video mode is shown in the image, the same operations apply for the still image mode.2 Tap "YES".
 - Tap ◀◀◀/▶▶▶ to select the previous or next file. - When no file remains, the screen returns to the index screen.Deleting Selected Files
Deletes the selected files.Caution :
\- Deleted files cannot be restored.1 Open the LCD monitor.
 - Tap 📋 or 📋 to select the video or still image mode. - Tap 📷 or 🌐 on the recording screen to display the mode switching screen. Tap 📁 to switch to the video mode 🏠. Tap ☐ to switch to the still image mode ☐2 Tap « PLAY to select the playback mode.
4 Tap on the files to delete.
 - appears on the selected files. To remove √ from a file, tap on the file again. - Tap "SEL ALL" to select all files. - Tap "REL ALL" to release all selections.5 Tap "SET".
 \- If no file is selected, the "SET" button cannot be pressed.6 Tap "EXECUTE" to confirm the deletion.
 • After deleting is complete, tap "OK". • To cancel the deletion, tap "QUIT".Protecting Files
Prevent important videos/still images from being deleted accidentally by protecting them. "Protecting/Releasing Protection of the Currently Displayed File" (r\$ p. 64) "Protecting/Releasing Protection of Selected Files" (p. 65)Caution :
\- When the recording media is formatted, even the protected files will be deleted.Protecting/Releasing Protection of the Currently Displayed File
Protects or releases protection of the currently displayed file.1 Tap "MENU".
 \- While the video mode is shown in the image, the same operations apply for the still image mode.2 Tap "EDIT".
3 Tap "PROTECT/CANCEL".
4 Tap "YES".
 - Tap ◀◀◀/▶▶▶ to select the previous or next file. - After setting, tap "OK".Protecting/Releasing Protection of Selected Files
Protects or releases protection of the selected files. 1 Open the LCD monitor.  - Tap 📋 or 📋 to select the video or still image mode. - Tap 📷 or 🏸 on the recording screen to display the mode switching screen. Tap 📁 to switch to the video mode 🏠. Tap ☐ to switch to the still image mode ☐. 2 Tap « PLAY to select the playback mode.  4 Tap "EDIT".  5 Tap "PROTECT/CANCEL".  6 Tap on the files to protect or release protection of.  - √ appears on the selected files. To remove √ from a file, tap on the file again. - On and √ are displayed on the files that are already protected. To release protection of a file, tap on the file such that √ is removed. - Tap "SEL ALL" to select all files. - Tap "REL ALL" to release all selections. 7 Tap "SET" to complete the setting.  \- Protect marks On appear on the selected files. Protect marks On disappear from the deselected files.Capturing a Still Image in the Video During Playback
You can capture still images of the scenes you like in the recorded videos. 1 Open the LCD monitor.  - Check if the recording mode is 📁. - If the mode is 📄 still image, tap 📄 on the recording screen to display the mode switching screen. Tap 📄 to switch the mode to video. 2 Tap « PLAY to select the playback mode.  4 Tap pause || at the desired scene during playback.  \- After pausing the video, you can fine-tune the point to capture by tapping forward slow-motion ▶ and reverse slow-motion ◀. 5 Tap the button. Memo :
- Still images are captured with a size of 1920×1080. - Captured still images are stored in the media where the video is being played back from.Combining Videos Recorded by Seamless Recording
Videos that are recorded on two separate media and with "SEAMLESS RECORDING" in the video recording menu enabled can be combined into a single video. "SEAMLESS RECORDING" (p. 88) 1 Open the LCD monitor.  \- Check if the recording mode is 📁. \- If the mode is 📄 still image, tap 📄 on the recording screen to display the mode switching screen. Tap 🖼 to switch the mode to video. 2 Tap << PLAY to select the playback mode.  4 Tap "EDIT".  5 Tap "SEAMLESS REC CTRL".  6 Tap "COMBINE SCENES".  \- This unit starts a search to detect seamless videos. Combining cannot be performed if no seamless videos are found. 7 Tap "YES".  8 Tap the media to store to.  9 Tap "YES".  • Combining of the videos starts. • After videos are combined, tap "OK".Memo :
\- Seamless videos cannot be combined if there is not enough free space in the built-in memory or SD card. Check the amount of remaining free space before combining.How to Enable Seamless Video Recording Again
To start seamless recording again after the previous session is complete, it is necessary to combine seamless videos, or delete the combination information of the seamless videos. To delete the combination information of seamless videos, select "DEL COMBINED SCENES" in step 6.Capturing a Required Part in the Video (TRIMMING)
Select the required part of a video and save it as a new video file. \- The original video remains in its existing location. 1 Open the LCD monitor.  \- Check if the recording mode is 📁. \- If the mode is ☐ still image, tap ☐ on the recording screen to display the mode switching screen. Tap 🖱️ to switch the mode to video. 2 Tap « PLAY to select the playback mode.  3 Tap "MENU".  4 Tap "EDIT".  5 Tap "TRIMMING".  6 Tap the video to edit.  7 Tap III to pause playback at the desired start point, then tap "A".  - When "A" is tapped, the start point is set. • After setting the start point, tap ▶ to continue playback. 8 Tap III to pause playback at the desired end point, then tap "B".  - When "B" is tapped, the end point is set. - To reset the start or end point, tap "A" or "B" at the desired scene (position). - You can fine adjust the position by pressing ◀ and ▶ while playback is paused. 9 Tap "SET".  \- When "SET" is tapped, the trimming area is confirmed. 10 Tap "YES".  • After copying, tap "OK". - When copying finishes, the copied file is added to the index screen. Memo : • The division point may deviate slightly from the selected scene.Dubbing Files to a Disc by Connecting to a Blu-ray Recorder
You can dub videos in the high definition quality by connecting an AVCHD-compliant Blu-ray recorder to this unit via a USB cable. For details on creating the disc, refer to the instruction manual of your Blu-ray recorder. \- This operation cannot be completed if the remaining battery power is not enough. Charge the battery fully first. 1 Open the terminal cover. 2 Connect to a Blu-ray recorder. - Connect using the USB cable provided with this unit. - Before making any connection, close the LCD monitor to turn off this unit.  3 Open the LCD monitor.  \- This unit turns on and the "SELECT DEVICE" screen appears. 4 Tap "CONNECT TO OTHER".  5 Tap the desired media.  \- The following screen is displayed after the camera operation is completed.  \- Operations are to be performed on the Blu-ray recorder after the screen switches. 6 Perform dubbing on the Blu-ray recorder. • Refer also to the instruction manual of the Blu-ray recorder. - After dubbing is complete, close the LCD monitor of this unit and check that the POWER/ACCESS lamp goes off before disconnecting the USB cable. Operations cannot be performed on this unit until the USB cable is disconnected.Copying Files to an SD Card
You can copy videos and still images from the built-in memory to SD card. Copying still images to cards makes it convenient to bring them to the shop for printing (developing). \- This operation cannot be completed if the remaining battery power is not enough. Charge the battery fully first.Caution :
- Make sure that there is enough space left in the destination medium. - Videos in the SD card cannot be copied to the built-in memory. 1 Open the LCD monitor.  \- Tap 📁 or 📋 to select the video or still image mode. 2 Tap « PLAY to select the playback mode.  4 Tap "EDIT".  5 Tap "COPY".  6 Tap on the files to copy.  - √ appears on the selected files. To remove √ from a file, tap on the file again. - Tap "SEL ALL" to select all files. - Tap "REL ALL" to release all selections. 7 Tap "SET".  \- "SET" is deactivated when no file is selected. 8 Tap "YES".  - Copying starts. • After copying, tap "OK".Copying to Windows PC
You can copy files to a computer using the provided software. Discs can also be created using the computer's DVD or Blu-ray drive. If the provided software is not installed, this unit will be recognized as an external storage when connected.Memo :
• To record to discs, a recordable DVD or Blu-ray drive is required for the computer in use. - To create DVD-Video discs using the provided software, it is necessary to install the additional software (software for creating DVD-Video). For details, refer to the Pixel a homepage. http://www.pixela.co.jp/oem/jvc/mediabrowser/e/ - Backing up of files using other softwares is not supported.Trouble with Using the Provided Software Everio MediaBrowser 4
Consult the customer service center below. \- Pixel a User Support Center| Telephone USA and Canada | (English): +1-800-458-4029 (toll-free)Europe (UK, Germany, France, and Spain)(English):+800-1532-4865 (toll-free)Other Countries in Europe(English):+44-1489-250-012Asia (Philippines) (English): +63-2-438-0090 |
| Homepage | http://www.pixela.co.jp/oem/jvc/mediabrowser/e/ |
Verifying System Requirements (Guideline)
Windows 10
1 Right-click the "start button", then select and click "System".  \- If a "This PC" icon is shown on desktop, right-click the icon and select "Properties" in the menu to display your computer information.Windows 8.1
1 Display "Apps". Click ⏻.  2 Right-click "Computer" or "PC" in the "Windows System Tool" menu to select the checkbox.  3 Click "Properties" on the bottom bar to display.  \- If a "Computer" icon is shown on desktop, right-click the icon and select "Properties" in the menu to display your computer information.Windows 7
1 Click the start button.  2 Right-click "Computer".  3 Click "Properties".  4 Check the items with the table below. | Windows 10/Windows 8.1 Windows 7 | ||
| OS Windows 10 | 64-bitWindows 10 Home or Windows 10 Pro(Pre-installed versions, desktop mode only)Windows8.1 64-bitWindows8.1 or Windows8.1 Pro(Pre-installed versions, desktop mode only) | Windows 7 32/64-bitHome Premium(Pre-installed versions only) Service Pack 1 |
| CPU Intel Core Duo | CPU 1.66 GHz or higher(Intel Core 2 Duo, CPU 2.13 GHz or higher recommended) | Intel Core Duo, CPU 1.66 GHz or higher(Intel Core 2 Duo, CPU 2.13 GHz or higher recommended) |
| RAM At least 2 GB | At least 2 GB | |
| Video editing Intel | Core i7, CPU 2.53 GHz or higher recommended Intel Core i7, CPU | 2.53 GHz or higher recommended |
■ Other requirements
Display: 1024×768 pixels or above (1280×1024 pixels or above recommended) Graphic: Intel G965 or higher recommendedMemo :
- If your PC does not meet the above system requirements, operations of the provided software cannot be guaranteed. - For more information, contact your PC's manufacturer.Installing the Provided Software (Built-in)
You can display the recorded images in calendar format and perform editing using the provided software. \- This operation cannot be completed if the remaining battery power is not enough. Charge the battery fully first.Preparations
Connect this unit to a computer with a USB cable.Windows 10
1 Open the terminal cover. 2 Connect to your PC using the provided USB cable. \- Before connecting the cable, close the LCD monitor to turn off this unit.  3 Open the LCD monitor.  \- This unit turns on and the "SELECT DEVICE" menu appears. 4 Tap "CONNECT TO PC".  5 Tap "PLAYBACK ON PC".  \- Disconnect the USB cable to return to the recording or playback screen. \- "Everio Software Setup" appears on the computer. Operations are to be performed on the computer after the screen switches. 6 Perform the following operations on your computer. ① Open the "Start menu", then click "All apps".  2 Click "This PC" in the "Windows System" menu.  \- If a "This PC" icon is shown on desktop, double-click the icon to open "This PC". 3 Double-click the "JVCCAM_APP" icon in "Devices with Removable Storage".  4 Double-click "install (or Install.exe)".  5 Click "Yes" on the User Account Control screen. \- "Software Setup" appears after a while. 7 Click "Everio MediaBrowser 4".  \- Follow the on-screen instructions to finish the installation. 8 Click "Finish".  9 Click "Quit".  Everio MediaBro...  Everio MediaBro... • Installation is complete, and two icons are created on the desktop. 10 Remove this unit from your PC. "Disconnecting this Unit from Computer" (v5 p. 79)Memo :
- If "Everio Software Setup" doesn't appear, double-click "JVCCAM_APP" in "My Computer" or "Computer", then double-click "install (or Install.exe)". - If the auto play dialog box appears, select "Open folder to view files" and click "OK". Then, click "install (or Install.exe)" in the folder.Windows 8.1
1 Open the terminal cover. 2 Connect to your PC using the provided USB cable. \- Before connecting the cable, close the LCD monitor to turn off this unit.  3 Open the LCD monitor.  \- This unit turns on and the "SELECT DEVICE" menu appears. 4 Tap "CONNECT TO PC".  5 Tap "PLAYBACK ON PC".  - Disconnect the USB cable to return to the recording or playback screen. - "Everio Software Setup" appears on the computer. Operations are to be performed on the computer after the screen switches. 6 Perform the following operations on your computer. 1 Display "Apps". Click ⏻.  2 Click "Computer" or "PC" in the "Windows System Tool" menu.  - If a "Computer" icon is shown on desktop, double-click the icon to open "Computer". 3 Double-click the "JVCCAM_APP" icon in "Devices with Removable Storage".  4 Double-click "install (or Install.exe)".  5 Click "Yes" on the User Account Control screen. - "Software Setup" appears after a while. 7 Click "Everio MediaBrowser 4".  \- Follow the on-screen instructions to finish the installation. 8 Click "Finish".  9 Click "Quit".  Everio MediaBro...  Everio MediaBro... • Installation is complete, and two icons are created on the desktop. 10 Remove this unit from your PC. "Disconnecting this Unit from Computer" (p. 79)Memo :
- If "Everio Software Setup" doesn't appear, double-click "JVCCAM_APP" in "My Computer" or "Computer", then double-click "install (or Install.exe)". - If the auto play dialog box appears, select "Open folder to view files" and click "OK". Then, click "install (or Install.exe)" in the folder.Windows 7
1 Open the terminal cover. 2 Connect to your PC using the provided USB cable. \- Before connecting the cable, close the LCD monitor to turn off this unit.  3 Open the LCD monitor.  \- This unit turns on and the "SELECT DEVICE" menu appears. 4 Tap "CONNECT TO PC".  5 Tap "PLAYBACK ON PC".  \- "Everio Software Setup" appears on the computer. Operations are to be performed on the computer after the screen switches. 6 Perform the following operations on your computer. 1 Click "Open folder to view files" on the auto play dialog box, and then double-click "install.exe". 2 Click "Yes" on the User Account Control screen.  - "Software Setup" appears after a while. - If it doesn't appear, double-click "JVCCAM_APP" in "Computer" or "My Computer", then double-click "install.exe". 7 Click "Everio MediaBrowser 4".  \- Follow the on-screen instructions to finish the installation. 8 Click "Finish".  9 Click "Quit".  Everio MediaBro...  Everio MediaBro... • Installation is complete, and two icons are created on the desktop. 10 Remove this unit from your PC. "Disconnecting this Unit from Computer" (p. 79)Memo :
- If "Everio Software Setup" doesn't appear, double-click "JVCCAM_APP" in "My Computer" or "Computer", then double-click "install (or Install.exe)". - If the auto play dialog box appears, select "Open folder to view files" and click "OK". Then, click "install (or Install.exe)" in the folder.Backing Up All Files
Before making backup, make sure that enough free space is left in the computer's hard disk (HDD). Backup will not start if there is not enough free space. \- This operation cannot be completed if the remaining battery power is not enough. Charge the battery fully first. 1 Open the terminal cover. 2 Connect to your PC using the provided USB cable. \- Before connecting the cable, close the LCD monitor to turn off this unit.  3 Open the LCD monitor.  \- This unit turns on and the "SELECT DEVICE" menu appears. 4 Tap "CONNECT TO PC".  5 Tap "BACK UP".  - Disconnect the USB cable to return to the recording or playback screen. - The provided software Everio MediaBrowser 4 starts up on the computer. The subsequent operations are to be performed on the computer. 6 Select the source of the image file.  7 Start backup.  \- Backup starts. 8 After backup is complete, click "OK".  9 Remove this unit from your PC.Memo :
- Before making backup, load the SD card in which the videos and still images are stored on this unit. - If you encounter any problems with the provided software Everio MediaBrowser 4, please consult the "Pixela User Support Center".| Telephone U | SA and Canada (English): +1-800-458-4029 (toll-free)Europe (UK, Germany, France, and Spain)(English):+800-1532-4865 (toll-free)Other Countries in Europe(English):+44-1489-564-764Asia (Philippines) (English): +63-2-438-0090 |
| Homepage | http://www.pixela.co.jp/oem/jvc/mediabrowser/e/ |
Disconnecting this Unit from Computer
 1 Click "Safely Remove Hardware and Eject Media". 2 Click all "JVCCAM\~". 3 Disconnect the USB cable and close the LCD monitor.Organizing Files
After backing up your files, organize them by adding labels such as "Family Trip" or "Athletic Meet". This is useful not only for creating discs, but for viewing the files too. 1 Double-click on the Everio MediaBrowser 4 icon. • The provided software starts up.  Everio MediaBro...  Everio MediaBro... 2 Display the month of the files to organize.  3 Create a user list.  \- A new user list is added to the user list library. 4 Click on the recording day. \- The thumbnails of the files recorded on the day are displayed. Recording Date  5 Register files to the created user list.  Identifying Video or Still Image : - You can select files using the "SELECT" menu on the top right of the screen. - Check the video/still image icon on the top right corner of the thumbnail. Memo :
\- If you encounter any problems with the provided software Everio MediaBrowser 4, please consult the "Pixela User Support Center".| Telephone USA and Canada (English): +1-800-458-4029 (toll-free)Europe (UK, Germany, France, and Spain)(English):+800-1532-4865 (toll-free)Other Countries in Europe(English):+44-1489-564-764Asia (Philippines) (English): +63-2-438-0090 |
| Homepage http://www.pixela.co.jp/oem/jvc/mediabrowser/e/ |
Recording Videos to Discs
Copy the files that are arranged using the user list to discs. 1 Insert a new disc into the PC's recordable DVD drive. 2 Select the desired user list.  3 Select the disc type.  4 Select the files to copy to disc in order.  - Click "Settings" to select the disc type. - Click "Select all" to select all the displayed files. • After selecting, click "Next". 5 Set the title of the top menu of the disc.  - Click "Settings" to select the menu background. • After setting, click "Start". 6 After copying is complete, click "OK". Memo :
\- The following types of discs can be used on the provided software Everio MediaBrowser 4. DVD-R DVD-R DL DVD-RW DVD+R DVD+R DL DVD+RW \- The following formats are supported by the provided software Everio MediaBrowser 4. AVCHD DVD-Video* * To create DVD-Video discs using the provided software, it is necessary to install the additional software (software for creating DVD-Video). For details, refer to the Pixela homepage. http://www.pixela.co.jp/oem/jvc/mediabrowser/e/ - Use commercially-available software to create a Blu-ray disc. - Use Everio MediaBrowser 4 Player to play back an AVCHD disc. Refer to the help file of the provided Everio MediaBrowser 4 software to operate. - When copying videos recorded in UXP recording mode to create an AVCHD disc, the videos need to be converted to XP recording mode before copying. Therefore, it may take a longer time than copying videos recorded in other modes. - To view the help file of Everio MediaBrowser 4, select "Help" from the Everio MediaBrowser 4's menu bar or press F1 on the keyboard. - If you encounter any problems with the provided software Everio MediaBrowser 4, please consult the "Pixela User Support Center".| Telephone USA and Canada (English): +1-800-458-4029 (toll-free)Europe (UK, Germany, France, and Spain)(English):+800-1532-4865 (toll-free)Other Countries in Europe(English):+44-1489-564-764Asia (Philippines) (English): +63-2-438-0090 |
| Homepage http://www.pixela.co.jp/oem/jvc/mediabrowser/e/ |
Backing Up Files Without Using Provided Software
Copy the files to a computer using the following method. \- This operation cannot be completed if the remaining battery power is not enough. Charge the battery fully first. 1 Open the terminal cover. 2 Connect to your PC using the provided USB cable. \- Before connecting the cable, close the LCD monitor to turn off this unit.  3 Open the LCD monitor.  \- This unit turns on and the "SELECT DEVICE" menu appears. 4 Tap "CONNECT TO PC".  5 Tap "PLAYBACK ON PC".  - Disconnect the USB cable to return to the recording or playback screen. - Close the Everio MediaBrowser 4 program, if it starts. - The following screen is displayed after the camera operation is completed.  \- Operations are to be performed on the computer after the screen switches. 6 (Windows10/ Windows8.1) Click "This PC" in "Windows System", then click the "JVCCAM_MEM" or "JVCCAM_SD" icon of "This PC". (Windows 7) Select "Computer" from the "Start" menu, then click on the "JVCCAM_MEM" or "JVCCAM_SD" icon. \- Open the folder with the desired files. "List of Files and Folders" (p. 83) 7 Copy the files to any folder in the computer (desktop, etc).Caution :
\- When the camera and PC are connected by an USB cable, recorded media are read-only.Memo :
- To edit/view the files, use a software that supports AVCHD (video)/JPEG (still image) files. - The above operations on computer may vary with the system used.Disconnecting this Unit from Computer
 1 Click "Safely Remove Hardware and Eject Media". 2 Click all "JVCCAM\~". 3 Disconnect the USB cable and close the LCD monitor.List of Files and Folders
Folders and files are created in the built-in memory and SD card as shown below. They are created only when necessary. Caution :
\- When the camera and PC are connected by an USB cable, recorded media are read-only.Copying to Mac Computer
Copy the files to a Mac computer using the following method.Caution :
\- This operation cannot be completed if the remaining battery power is not enough. Charge the battery fully first. 1 Open the terminal cover. 2 Connect to your PC using the provided USB cable. \- Before connecting the cable, close the LCD monitor to turn off this unit.  3 Open the LCD monitor.  4 Tap "CONNECT TO PC".  5 Tap "PLAYBACK ON PC".  - Disconnect the USB cable to return to the recording or playback screen. - The following screen is displayed after the camera operation is completed.  \- The "JVCCAM_MEM" or "JVCCAM_SD" icon appears on the desktop. 6 Load image file to iPhoto. - iPhoto launches automatically and videos recorded in the camera are displayed. Load the necessary images. - Images on the built-in memory and SD card are displayed separately. Switch between JVCCAM_MEM (built-in memory) and JVCCAM-SD (SD card) displayed under "Devices" in the iPhoto "Source list". - Videos loaded using iPhoto cannot be edited using iMovie. To edit videos, load the files from iMovie. 7 Edit the video using iMovie. - Run iMovie and load the necessary videos to iMovie. - Videos loaded using iPhoto cannot be imported to iMovie. - For details on operating iMovie, refer to the help file of iMovie.Caution :
- Do not remove the cable or turn off this unit before image loading is complete. - When the camera and PC are connected by an USB cable, recorded media are read-only. - MTS files that are copied to a Mac computer cannot be imported to iMovie. To use MTS files with iMovie, import the files using iMovie.Memo :
- To edit/view the files, use a software that supports AVCHD (video) files. - When removing this unit from the computer, drag and drop the "JVCCAM_MEM" or "JVCCAM_SD" icon on the desktop to the trash bin.iMovie and iPhoto
You can import files from this unit to a computer using Apple's iMovie '8, iMovie '9, iMovie '11, iMovie version 10 (video), or iPhoto (still image). For the PC operating system of iMovie and iPhoto, check the information provided by Apple. - For the latest information on iMovie or iPhoto, refer to the Apple website. - For details on how to use iMovie or iPhoto, refer to the help file of the respective softwares. - There is no guarantee that the operations will work with all computer environments.Operating the Menu
The following menu is available on this unit. \- TOP MENU: Menu that contains all the items specific to the video recording, still image recording, video playback, and still image playback modes respectively.Operating the Top Menu
You can configure various settings using the menu. 1 Tap "MENU".  3 Tap the desired setting. Memo :
• To display the previous/next menu Tap < or >. • To return to the previous screen Tap ↩. \- To exit the screen Tap × (quit).RECORD SETTING Menu (video)
FOCUS
Focus can be adjusted manually. "Adjusting Focus Manually (FOCUS)" (p. 28) *Displayed only in the manual recording mode.BRIGHTNESS ADJUST
Adjusts the overall brightness of the screen. "Adjusting Brightness" (p. 29) *Displayed only in the manual recording mode.BACKLIGHT COMP.
Corrects the image when the subject appears dark due to backlight. "Setting Backlight Compensation" (p. 30) *Displayed only in the manual recording mode.WHITE BALANCE
Adjusts the color according to the light source. "Setting White Balance" (p. 31) *Displayed only in the manual recording mode.TELE MACRO
Enables close-up shots when using the telephoto (T) end of the zoom. "Taking Close-up Shots (TELE MACRO)" (p. 32) *Displayed only in the manual recording mode.TOUCH PRIORITY AE/AF
Automatically adjusts focus and brightness based on the subjects' faces or selected area. "Capturing Subjects Clearly (TOUCH PRIORITY AE/AF)" (p. 38)DIS
Camera shake during video recording can be effectively reduced. "Reducing Camera Shake" (p. 39)GAIN UP
Makes the subject appear bright automatically when recording in dark places.| Setting Details | |
| OFF Deactivates the function. | |
| ON Electrically brightens the scene when it is dark. | |
| AUTO SLOW-SHUTTER Slows down the shutter speed to brighten the scene when it is dark. |
Memo :
\- Although "AUTO SLOW-SHUTTER" brightens the scene more than "ON", movements of the subject may become unnatural.WIND CUT
Reduces the noise caused by wind.| Setting Details | |
| OFF Deactivates the function. | |
| ON Activates the function. | |
| AUTO Activate the function automatically. |
SELF-TIMER
Use this function when you wish to include the photographer in the picture or video. "Using the Self-timer in Video Mode" (p. 43)TIME-LAPSE RECORDING
This function enables the changes of a scene that occur slowly over a long period to be shown within a short time by taking frames of it at a certain interval. This is useful for making observations such as the opening of a flower bud. "Recording at Intervals (TIME-LAPSE RECORDING)" (p. 40)SELF-CHECK REC/PLAY
After recording for a specified duration, this unit automatically plays back the scene and then repeats the recording process and the playback process over and over again. "Recording at a Fixed Interval and Playing Back Repeatedly" (p. 45)DATE/TIME RECORDING
You can record videos together with the date and time. Set this when you want to save the file with date and time display. (The date and time cannot be deleted after recording.) "Recording Videos with Date and Time" (p. 46)TIME COUNTER RECORDING
You can take a video with a stopwatch recorded. You can start, stop and reset the stopwatch as with any stopwatch. "Recording Videos with Time Counter" (p. 47)PHOTO-INSERT RECORDING
Displaying a captured still image in the sub screen before video recording and recording the image during video recording. "Recording Video with Still Image Displayed in Sub Screen (Still Image Composite Recording)" (p. 42)RECORDING EFFECT
You can add and record various effects to the images. Once setting is done, you can easily record images that are suitable for each image.GRAINY MONOCHROME
You can record images with a grainy black and white photo feel. "Recording Images Like an Old Black and White Photo (GRAINY MONOCHROME)" (p. 35)FOOD
You can capture images of the food to make the food look appetizing. "Recording Food Images (FOOD)" (p. 36)BABY
You can capture soft images by enhancing the clarity and brightness of skin color. This effect is suitable for capturing images of a baby. "Recording Images of a Baby (BABY)" (p. 37)SHUTTER MODE
Continuous shooting settings can be adjusted.| Setting Details | |
| RECORD ONE SHOT Records one still image. | |
| CONTINUOUS SHOOTING | Records still images continuously while the button on the LCD screen is tapped. |
Memo :
- The size of the still image that is captured in the video mode is 1,920 × 1,080 . - Some SD cards may not support continuous shooting. - The continuous shooting speed will drop if this function is used repeatedly.SEAMLESS RECORDING
Continues recording on the SD card without stopping when the remaining space on the built-in memory runs out.| Setting Details | |
| OFF Does not switch recording media automatically. | |
| ON Switches recording media automatically. | |
Memo :
- Seamless recording cannot be performed if there is not enough free space in the SD card. - 📁x appears if seamless recording cannot be performed. - To start seamless recording again after the previous session is complete, it is necessary to combine seamless videos, or delete the combination information of the seamless videos. "Combining Videos Recorded by Seamless Recording" (p. 67)VIDEO QUALITY
Sets the video quality.| Setting Details | |
| UXP Enables recording in the best picture quality. | |
| XP Enables recording in high picture quality. | |
| EP Enables long recordings. |
Memo :
- Set to "UXP" or "XP" mode when recording fast-moving scenes or scenes with extreme changes of brightness to avoid noise. - Copy videos recorded with the video quality set to "UXP" in blu-ray discs.ZOOM
Sets the maximum zoom ratio.| Setting Details | |
| 40x OPTICAL Enables recording with 1 - 40x | optical zoom. Set this when digital zoom is not desired. |
| 60x DYNAMIC Enables recording with 1 - 40x | optical zoom and 41 - 60x digital zoom. |
| 120x DIGITAL Enables recording with 1 - 40x | optical zoom and 41 - 120x digital zoom. |
| 200x DIGITAL Enables recording with 1 - 40x | optical zoom and 41 - 200x digital zoom. |
Memo :
- When digital zoom is used, the image becomes grainy as it is digitally enlarged. - The angle of view changes when the image stabilizer is turned on or off.ZOOM MIC
Sets the zoom microphone.| Setting Details | |
| OFF Deactivates the zoom microphone. | |
| ON Records audio sounds in the same direction as the zoom operation. | |
Memo :
\- When "ON" is selected, the volume of the wide angle (W) end is lower than the telephoto (T) end.MIC LEVEL
Make the adjustments such that "MIC LEVEL" does not turn red.| Setting Details | |
| OFF Hides display of microphone input level. | |
| ON Shows display of microphone input level. |
MIC LEVEL SETTING
Sets the microphone level. Make the adjustments such that "MIC LEVEL" does not turn red.| Setting Details | |
| +1 Increases the microphone input level. | |
| 0 The microphone input level is not changed. | |
| -1 Decreases the microphone input level. |
K2 TECHNOLOGY
Reduces the degradation of sound quality caused by digital signal processing, and records a sound quality close to the original.| Setting Details | |
| OFF Deactivates K2 TECHNOLOGY. | |
| ON Activates K2 TECHNOLOGY. |
SCREEN LOCK
When shooting under water, lock the touch screen to prevent operation errors. "Locking the Screen (when Shooting Underwater)" (p. 10) LCD CLOSED RECORDING This unit does not turn off even when the LCD monitor is closed during recording.| Setting Details | |
| OFF The unit is turned off when the LCD monitor is closed. | |
| ON Activates LCD CLOSED RECORDING. | |
Memo :
- If "LCD CLOSED RECORDING" is set to "ON", stop the recording before turning off the unit. - When "LCD CLOSED RECORDING" set to "ON" and recording is in progress with the LCD monitor closed (or LCD monitor reversed), the zoom lever and the START/STOP button cannot be operated.RECORD SETTING Menu (still image)
FOCUS
Focus can be adjusted manually. "Adjusting Focus Manually (FOCUS)" (p. 28) *Displayed only in the manual recording mode.BRIGHTNESS ADJUST
Adjusts the overall brightness of the screen. "Adjusting Brightness" (p. 29) *Displayed only in the manual recording mode.BACKLIGHT COMP.
Corrects the image when the subject appears dark due to backlight. "Setting Backlight Compensation" (p. 30) *Displayed only in the manual recording mode.WHITE BALANCE
Adjusts the color according to the light source. "Setting White Balance" (p. 31) *Displayed only in the manual recording mode.TELE MACRO
Enables close-up shots when using the telephoto (T) end of the zoom. "Taking Close-up Shots (TELE MACRO)" (p. 32) *Displayed only in the manual recording mode.TOUCH PRIORITY AE/AF
Automatically adjusts focus and brightness based on the subjects' faces or selected area. "Capturing Subjects Clearly (TOUCH PRIORITY AE/AF)" (p. 38)SELF-TIMER
Use this when taking a group photo. "Using the Self-timer" (p. 43)GAIN UP
Makes the subject appear bright automatically when recording in dark places.| Setting Details | |
| OFF Deactivates the function. | |
| ON Electrically brightens the scene when it is dark. | |
Memo :
\- Setting can be adjusted separately for videos. "GAIN UP (Video)" (p. 86)RECORDING EFFECT
You can add and record various effects to the images. Once setting is done, you can easily record images that are suitable for each image.GRAINY MONOCHROME
You can record images with a grainy black and white photo feel. "Recording Images Like an Old Black and White Photo (GRAINY MONOCHROME)" (E5 p. 35)FOOD
You can capture images of the food to make the food look appetizing. "Recording Food Images (FOOD)" (p. 36)BABY
You can capture soft images by enhancing the clarity and brightness of skin color. This effect is suitable for capturing images of a baby. "Recording Images of a Baby (BABY)" (p. 37)SHUTTER MODE
Continuous shooting settings can be adjusted.| Setting Details | |
| RECORD ONE SHOT Records one still image. | |
| CONTINUOUS SHOOTING Records still images continuously while the START/STOP button is pressed.Records still images continuously while the START/STOP button is pressed, or while the 📄 button on the LCD screen is tapped. | |
Memo :
\- Some SD cards may not support continuous shooting. \- The continuous shooting speed will drop if this function is used repeatedly.IMAGE SIZE
Sets the image size (number of pixels) for still images.| Setting Details | |
| 1920X1080(2M) Takes still images with aspect ratio 16:9.The sides of still images recorded in 16:9 aspect ratio may be cut off when printed. | |
| 3680X2760(10M)1440X1080(1.5M)640X480(0.3M) | Takes still images with aspect ratio 4:3. |
SCREEN LOCK
When shooting under water, lock the touch screen to prevent operation errors. "Locking the Screen (when Shooting Underwater)" (p. 10)PLAYBACK SETTING Menu (video)
DISPLAY DATE/TIME
Sets whether to display the recording date and time during video playback.| Setting Details | |
| OFF Does not display the date and time during playback. | |
| ON Displays the date and time during playback. | |
TIME COUNTER PLAYBACK
A time counter that can be reset can be displayed during playback. "TIME COUNTER PLAYBACK" (p. 54)SLOW-MOTION SPEED
For specifying the playback speed of slow playback.| Setting Details | |
| 1/2 Sets the speed of slow playback to 1/2 normal playback speed. | |
| 1/4 Sets the speed of slow playback to 1/4 normal playback speed. | |
| 1/8 Sets the speed of slow playback to 1/8 normal playback speed. | |
DIGEST PLAYBACK
Plays back a digest of the recorded videos. " DIGEST PLAYBACK " (p. 55)PLAYBACK OTHER FILE
Plays videos with defective management information. "PLAYBACK OTHER FILE" (p. 56)EDIT Menu (video)
PROTECT/CANCEL
Protects files from being deleted accidentally. "Protecting/Releasing Protection of the Currently Displayed File" (p. 64) "Protecting/Releasing Protection of Selected Files" (p. 65)COPY
Copies files from the built-in memory to the SD card. "Copying Files to an SD Card" (p. 70)TRIMMING
Select the required part of a video and save it as a new video file. The original video remains in its existing location. "Capturing a Required Part in the Video (TRIMMING)" (p. 68)SEAMLESS REC CTRL
Videos that are recorded on two separate media and with "SEAMLESS RECORDING" in the video recording menu enabled can be combined into a single video. "Combining Videos Recorded by Seamless Recording" (p. 67)PLAYBACK SETTING Menu (still image)
SLIDE SHOW EFFECTS
Sets the transition effects in slideshow playback.| Setting Details | |
| SLIDE Switches the screen by sliding in from right to left. | |
| BLINDS Switches the screen by dividing into vertical strips. | |
| CHECKERBOARD Switches the screen by changing through a checkered pattern. | |
| RANDOM Switches the screen with a random effect from SLIDE, “BLINDS”, and “CHECKERBOARD”. | |
Memo :
\- Slideshow effects are not available when playing back still images in external devices (such as USB external hard disk drives).EDIT Menu (still image)
PROTECT/CANCEL
Protects files from being deleted accidentally. "Protecting/Releasing Protection of the Currently Displayed File" (p. 64) "Protecting/Releasing Protection of Selected Files" (p. 65)COPY
Copies files from the built-in memory to the SD card. "Copying Files to an SD Card" (p. 70)SETUP (video/still image)
Mobile User Guide
Displays the QR code to access the Mobile User Guide.  \- The portal site appears when the QR code has been read correctly. Select the model name of your camera to display its Mobile User Guide.Memo :
• To read the QR code, a relevant application is required. Enter the URL in the internet browser manually if the QR code cannot be read. - The Mobile User Guide is supported by Android devices and iPhone. You can view it on standard browsers such as Google Chrome (Android) and Mobile Safari (iPhone). - QR Code is a registered trademark of Denso Wave Incorporated.DATE & TIME
Resets the current time or sets to the local time when using this unit overseas. "Clock Setting" (p. 15) "Setting the Clock to Local Time when Traveling" (p. 18) "Setting Daylight Saving Time" (p. 19)DATE DISPLAY STYLE
Sets the order of year, month, day and the time display format (24H/12H).| Sorting Order Time Display | |
| year.month.day 12h | |
| month.day.year 24h | |
| day.month.year - |
LANGUAGE
The language on the display can be changed. "Changing the Display Language" (p. 16)MONITOR BRIGHTNESS
Sets the brightness of the LCD monitor.| Setting Details | |
| AUTO Sets the brightness automatically to “4” when using outdoors and to “3” when using indoors. | |
| 4 Brightens the backlight of the monitor regardless of the surrounding conditions. | |
| 3 Sets to the standard brightness. | |
| 2 Darkens the backlight of the monitor regardless of the surrounding conditions. | |
| 1 Sets to dim brightness. | Helps to save battery life when selected. |
AUTO POWER OFF
When no operation is made for 5 minutes, this function turns off this unit or sets this unit to standby mode when using the AC adapter in case you forgot to turn off the power.| Setting Details | |
| OFF Power is not turned off even if this unit is not operated for 5 minutes. | |
| ON Turns off the power automatically if this unit is not operated for 5 minutes. | |
Memo :
- Turns off the power automatically if this unit is not operated for 5 minutes. - When using the AC adapter, this unit goes into standby mode.DEMO MODE
Plays a demonstration of the special features of this unit.| Setting Details | |
| OFF Deactivates the function. | |
| ON Plays a demonstration of the special features of this unit. | |
Memo :
\- This mode is not available in the playback mode.TOUCH SCREEN ADJUST
Adjusts the response position of the buttons on the touch screen. "Adjusting the Touch Screen" (p. 11)REC MEDIA FOR VIDEO
Sets the recording/playback media of videos.| Setting Details | |
| BUILT-IN MEMORY Records videos to this unit's built-in memory. | |
| SD CARD Records videos to the SD card. | |
REC MEDIA FOR IMAGE
Sets the recording/playback media of still images.| Setting Details | |
| BUILT-IN MEMORY Records still images to this unit's built-in memory. | |
| SD CARD Records still images to the SD card. | |
FORMAT BUILT-IN MEM.
Deletes all files on the built-in memory.| Setting Details | |
| FILE Deletes all files on the built-in memory. | |
| FILE + MANAGEMENT NO Deletes all files on the built-in memory and resets the folder and file numbers to "1". (File number of the AVCHD video file starts from "0".) | |
Caution :
- All data on the built-in memory will be deleted when it is formatted. Copy all files on the built-in memory to a computer before formatting. - Make sure that the battery pack is fully charged or connect the AC adapter as the formatting process may take some time.FORMAT SD CARD
Deletes all files on the SD card.| Setting Details | |
| FILE Deletes all files on the SD card. | |
| FILE + MANAGEMENT NO Deletes all files on the SD card and resets the folder and file numbers to "1". | |
Caution :
- Not available for selection when no SD card is inserted. - All data on the SD card will be deleted when it is formatted. Copy all files on the SD card to a computer before formatting. - Make sure that the battery pack is fully charged or connect the AC adapter as the formatting process may take some time.FACTORY PRESET
Returns all the settings to their default values.FIRMWARE UPDATE
Updates the functions of this unit to the latest version. For details, refer to the JVC homepage. (When no program to update the software of this unit is available, nothing will be provided on the homepage.) http://www3.jvckenwood.com/english/support/index.htmlOPEN SOURCE LICENSES (recording only)
Displays the open source software licenses that are used in this unit.CONNECTION SETTINGS (video/still image)
DISPLAY ON TV
Displays icons and date/time on a TV screen.| Setting Details | |
| OFF Does not display icons and date/time on TV. | |
| ON Displays icons and date/time on TV. | |
VIDEO OUTPUT
Sets the aspect ratio (16:9 or 4:3) according to the connecting TV.| Setting Details | |
| 4:3 Select this when connecting to a conventional TV (4:3). | |
| 16:9 Select this when connecting to a widescreen TV (16:9). | |
HDMI OUTPUT
Sets the output from the HDMI connector of this unit when it is connected to a TV.| Setting Details | |
| AUTO It is recommended to select “AUTO” usually. | |
| 576p Select this when the video is not output in “AUTO” correctly. | |
HDMI CONTROL
Sets whether to link operations with an HDMI-CEC compliant TV.| Setting Details | |
| OFF Turns off linked operations. | |
| ON Turns on linked operations. |
USB CONNECTION MENU
This menu appears when this unit is connected to a computer using an USB cable.PLAYBACK ON PC
- Displays videos recorded by this unit by using the Everio MediaBrowser 4. "Installing the Provided Software (Built-in)" (p. 75) - Saves videos recorded by this unit on your computer without using the provided software. "Backing Up Files Without Using Provided Software" (p. 82) "Copying to Mac Computer" (p. 84)BACK UP
Backup videos recorded by this unit to your computer using the Everio MediaBrowser 4. "Backing Up All Files" (p. 78)Memo :
- Before making backup, load the SD card in which the videos are stored on this unit. - After backing up your files using the provided software, they cannot be restored to this unit. - Delete unwanted videos before making backup. It takes time to back up many videos. "Deleting Unwanted Files" (p. 63) Right Side  ① Speaker ② Grip Belt • Pass your hand through the grip belt to hold this unit firmly. "Grip Adjustment" (p. 8) Bottom Side  ① Cover Lock ② Tripod Mounting Hole "Tripod Mounting" (p. 17)Top/Left/Rear Side
① Lens
- The lens is protected by a protective glass cover. - If the lens is dirty, use a commercially available lens blower to remove any dust, and a commercially available cleaning cloth to wipe off any dirt. - Do not cover the front of the lens with your fingers during recording.② Stereo Microphone
\- Do not cover the microphone with your fingers during video recording.③ LCD Monitor
④ CHARGE (Charging) Lamp
• Lights up: Charging in progress - Goes off: Charging completed/Beyond temperature range - Blinks: Charging error or abnormal temperature⑤ POWER/ACCESS (Power/Access) Lamp
- Lights up/blinks during recording or playback. Do not remove the SD card or any connecting cables.⑥ Zoom/Volume Lever
• During shooting: Adjusts the shooting range. - During playback (index screen): Moves to the next or previous page. • During video playback: Adjusts the volume.⑦ Strap Mount
• The strap is not supplied.⑧ START/STOP (Video Recording) Button
\- Starts/stops recording of videos/still images.⑨ Terminal Cover
Inside Terminal Cover
① SD Card Slot
\- Insert an optional SD card.② Reset Button
③ HDMI Mini Connector
\- Connects to TV using an HDMI mini cable.④ AV Connector
\- Connects to the AV connector of a TV, etc.⑤ USB Connector
\- Connect to the AC adapter to perform charging. You can also connect to the external device or computer using the USB cable.LCD Monitor
① LCD Monitor
- Turns the power on/off by opening and closing. - Enables self-portraits to be taken by rotating the monitor.  "Using the Touch Screen" (p. 10) "Names of Buttons and Functions on the LCD Monitor" (p. 12)Caution :
\- Do not press against the surface with force or subject it to strong impact. Doing so may damage or break the screen. Common Recording Indications  ① TOUCH PRIORITY AE/AF "Capturing Subjects Clearly (TOUCH PRIORITY AE/AF)" (p. 38) ② Backlight Compensation "Setting Backlight Compensation" (p. 30) ③ Tele Macro "Taking Close-up Shots (TELE MACRO)" (p. 32) ④ WHITE BALANCE "Setting White Balance" (p. 31) ⑤ Time "Clock Setting" (p. 15) 6 RECORDING EFFECT "Recording with Effects (RECORDING EFFECT)" (p. 34) ⑦ Recording media "REC MEDIA FOR VIDEO" (p. 98) "REC MEDIA FOR IMAGE" (p. 99) Battery Indicator "Checking the Remaining Recording Time" (p. 48) ⑨ CONTINUOUS SHOOTING "SHUTTER MODE (Video)" (p. 87) "SHUTTER MODE (Still Image)" (p. 92) ⑩ Recording Mode "Taking Videos in Auto Mode" (p. 20) "Manual Recording" (p. 27) ⑪ Setting Scenes of Intelligent Auto - Displays scenes detected automatically in the Intelligent Auto function. Multiple scenes may be detected. "Scenes of Intelligent Auto" (p. 21) ⑫ SILENT MODE "Using the Silent Mode" (p. 22) ⑬ Zoom "ZOOM" (p. 88) ⑭ Shutter 15 Focus "Adjusting Focus Manually (FOCUS)" (p. 28) 16 Brightness "Adjusting Brightness" (p. 29) Video Recording  ① Video Mode • Switches between video and still image modes. ② Video Quality "VIDEO QUALITY" (p. 88) ③ TIME-LAPSE RECORDING(1SEC) "Recording at Intervals (TIME-LAPSE RECORDING)" (p. 40) ④ Image Stabilizer "Reducing Camera Shake" (p. 39) ⑥ Wind Cut "WIND CUT" (p. 87) ⑦ LCD CLOSED RECORDING "LCD CLOSED RECORDING" (p. 90) ⑧ Time-Lapse Recording Counter "Recording at Intervals (TIME-LAPSE RECORDING)" (p. 40) ⑨ Remaining Recording Time "Checking the Remaining Recording Time" (p. 48) ⑩ Scene Counter ⑪ MIC LEVEL METER "MIC LEVEL" (p. 89) Still Image Recording ① Still Image Mode
• Switches between video and still image modes.② Image Size
"IMAGE SIZE" (p. 92)③ Self-Timer
"Using the Self-timer" (p. 43)④ Remaining Number of Shots
"Checking the Remaining Recording Time" (p. 49)⑤ Focus
6 Recording in Progress Video Playback  ① Still Image Mode \- Switches between video and still image modes. ② Folder Number ③ File Number ④ Date/Time • Displays the recording date and time. ⑤ Recording media "REC MEDIA FOR IMAGE" (p. 99) ⑥ Battery Indicator "Checking the Remaining Recording Time" (p. 48) ⑦ SILENT MODE "Using the Silent Mode" (p. 22) 8 1080p Output "HDMI OUTPUT" (p. 100)When the unit is not working properly
Resetting this Unit
This unit is a microcomputer-controlled device. Electrostatic discharge, external noise and interference (from a TV, a radio, etc.) might prevent it from functioning properly. In that case, perform the steps below to reset this unit. (The recorded data will not be erased.) 1 Open the terminal cover. - Remove the power cord and all connecting cables. 2 Close the LCD monitor to turn off this unit. 3 Press the Reset button gently using an object with pointed tip. Charging
Unable to charge the battery.
When the battery pack is fully charged, the lamp does not light up. Be sure to charge using the supplied AC adapter. Malfunction in the unit that occurred due to the use of an AC adapter other than the one provided is not included in the warranty. Check the connection, then disconnect and reconnect the charging adapter cable. Charging cannot be performed under low or high temperature environments. Charge under the room temperature range of 10° C to 35° C. (Under environments beyond the temperature range, charging may stop to protect the battery pack.) Using a non-original AC adapter may result in damage to this unit. Be sure to use an original AC adapter.The remaining battery display is not correct.
If this unit is used for long periods of time in high or low temperatures, or if the battery pack is repeatedly charged, the amount of remaining battery may not be displayed correctly.The battery runs out quickly even after charging.
Be sure to charge using the supplied AC adapter. Malfunction in the unit that occurred due to the use of an AC adapter other than the one provided is not included in the warranty. The performance of the battery will drop temporarily when the temperature is -10°C to 0°C , this will cause the remaining recording time to shorten. When the recording time becomes extremely short even when the battery is fully charged, the battery needs to be replaced. For details on replacing the built-in battery (subject to a fee), consult the nearest JVC service center.Power supply
Unable to turn on the power.
- The camera does not turn on if the remaining battery power is low. In this case, charge the battery for more than 40 minutes before turning on the power. - When the unit does not turn on even after charging, reset the unit. "Resetting this Unit" (p. 108)Recording
Recording cannot be performed.
Check the 📁 / 📝 button. "Top/Left/Rear Side" (p. 103) Set to the recording mode by tapping the <Recording stops automatically.
Recording stops automatically as it cannot be performed for 12 or more consecutive hours according to specifications. (It may take some time to resume recording.) Turn off this unit, wait for a while, and turn it on again. (This unit stops automatically to protect the circuit when the temperature rises.)The continuous shooting speed of still images is slow.
The continuous shooting speed will drop if this function is used repeatedly. Continuous shooting speed may drop depending on the SD card or under certain recording conditions.The focus is not adjusted automatically.
If you are recording in a dark place or a subject that has no contrast between dark and light, adjust the focus manually. "Adjusting Focus Manually (FOCUS)" (p. 28) Wipe the lens with a lens cleaning cloth. Cancel manual focus on the manual recording menu. "Adjusting Focus Manually (FOCUS)" (p. 28)Zoom does not work.
Digital zoom is not available in the still image recording mode. Zoom operation is not available in time-lapse recording. (Simultaneous still image recording and image stabilizer are also not available.) To use digital zoom, set "ZOOM" in the menu accordingly. "ZOOM" (p. 88)Mosaic-type noise occurs when recording scenes with fast movements or extreme changes in brightness.
Set the "VIDEO QUALITY" to "UXP" or "XP" for recording. "VIDEO QUALITY" (p. 88)The inside of the lens is foggy.
Open the terminal cover; close the LCD monitor and leave as is for a while to reduce the temperature.Preventing fogging inside the lens
\- Models with waterproof function are airtight. When the temperature rises during recording, condensation can occur inside the lens due to the internal humidity.■ During recording
To prevent the temperature of this unit from rising, we recommend that you use the unit in the following ways. 1 Avoid frequent exposure to direct sunlight. Record under the shade or use an umbrella. Best if you could keep a wet towel cover the unit. 2 The use of a tripod is recommended. Long hours of recording while holding the unit in your hands will cause the temperature of the unit to rise. 3 It is better to leave the terminal cover open while recording. However, the waterproof, dust-proof and shockproof features do not function in this condition. Do take note of the environment when using the camera. (Do not use a wet towel.) 4 Make sure to turn off the power when you are not recording. When the LCD monitor is closed, the unit turns off.■ During charging
It is recommended to charge the unit in a low humidity environment. The moist air inside the unit can cause condensation. We recommend that you charge the unit in a room where humidifier is not in use, and in an air-conditioned room during summer.SD Card
Cannot insert the SD card.
Make sure not to insert the SD card in the wrong direction. "Inserting an SD Card" (p. 9) Do not use a miniSD card or microSD card on this unit (even if the card is inserted in an adapter). It may cause malfunction. "Types of Usable SD Card" (p. 9)Unable to copy to SD card.
Set "REC MEDIA FOR VIDEO"/"REC MEDIA FOR IMAGE" to SD card. "REC MEDIA FOR VIDEO" (p. 98) "REC MEDIA FOR IMAGE" (p. 99) To use a new SD card, or SD card used on other devices, it is necessary to format (initialize) the SD card using "FORMAT SD CARD" from the "SETUP" menu. "FORMAT SD CARD" (p. 99) When "CHECK CARD'S WRITE PROTECTION SWITCH" appears, release the lock on the SD card. Playback
Sound or video is interrupted.
Sometimes playback is interrupted at the connecting section between two scenes. This is not a malfunction.There is no sound.
When the Silent mode is used, operation sounds will not be output. Turn off the Silent mode. "Using the Silent Mode" (p. 22) Set "OPERATION SOUND" in the "SETUP" menu to "ON". "OPERATION SOUND" (p. 97) Audio sound is not recorded for videos taken in TIME-LAPSE RECORDING. "Recording at Intervals (TIME-LAPSE RECORDING)" (p. 40)The same image is displayed for a long time.
Use a high speed SD card (Class 4 or higher). "Types of Usable SD Card" (p. 9) Clean the terminals of the SD card with a dry cotton swab or something similar. Execute "FORMAT SD CARD" in the "SETUP" menu. (All data will be deleted.) "FORMAT SD CARD" (p. 99)The motion is choppy.
Use a high speed SD card (Class 4 or higher). "Types of Usable SD Card" (p. 9) Clean the terminals of the SD card with a dry cotton swab or something similar. Execute "FORMAT SD CARD" in the "SETUP" menu. (All data will be deleted.) "FORMAT SD CARD" (p. 99) Verify the system requirements of your PC when using Everio MediaBrowser 4 to play back. "Verifying System Requirements (Guideline)" (p. 71)Cannot find a recorded file.
Change the playback media by tapping 🎨/SD on the touch screen. "Operation Buttons for Video Playback" (p. 51) "Operation Buttons for Still Image Playback" (p. 58) Select "PLAYBACK OTHER FILE" in the menu. (Video files that have damaged management information can be played back.) "PLAYBACK OTHER FILE" (p. 56)Images do not appear on the TV properly.
Disconnect the cable and connect again. "Connecting via the HDMI Mini Connector" (p. 60) Reset this unit. "Resetting this Unit" (p. 108)Images are projected vertically on the TV.
Set "VIDEO OUTPUT" in the "CONNECTION SETTINGS" menu to "4:3". "VIDEO OUTPUT" (p. 100) Adjust the TV's screen accordingly.The image displayed on TV is too small.
Set "VIDEO OUTPUT" in the "CONNECTION SETTINGS" menu to "16:9". "VIDEO OUTPUT" (p. 100)When connected to the TV via the HDMI mini cable, proper images and sounds are not output.
Images and sounds may not be output properly depending on the TV connected. In such cases, perform the following operations. 1 Disconnect the HDMI mini cable and connect it again. "Connecting via the HDMI Mini Connector" (p. 60) When connected to the TV via the HDMI mini cable, displays such as buttons on the screen are slow to appear. Depending on the type of TV connected, this symptom is normal and not a malfunction.Editing/Copying
Unable to delete file. Files (videos/still images) that are protected cannot be deleted. Release protection before deleting the file. "Protecting Files" (p. 64)Computer
Unable to copy files to the computer's HDD.
If the provided software Everio MediaBrowser 4 is not installed, some functions may not work properly. "Installing the Provided Software (Built-in)" (p. 75) Before making backup, make sure that enough free space is left in the computer's hard disk (HDD).Unable to copy files to DVD or Blu-ray disc with a PC.
To record to discs, a recordable DVD or Blu-ray drive is required for the computer in use.Cannot upload the file to YouTube.
Check if you have created an account with YouTube. (You need a YouTube account to upload files to YouTube.) Changing videos to the file format for uploading cannot be performed on this unit. Refer to the help file of the provided software Everio MediaBrowser 4I am using a Mac computer.
Load the files to a Mac computer using the following method. "Copying to Mac Computer" (p. 84)The computer cannot recognize the SDXC card.
Confirm and update the OS of your computer. "When your computer cannot recognize the SDXC card" (p. 10)Screen/Image
The LCD monitor is difficult to see.
The LCD monitor may be difficult to see if used in bright areas such as under direct sunlight.Color and brightness of the screen changes and horizontal stripes and flickers appear on screen
For images recorded under lighting from fluorescent or mercury lamps, the color and brightness of the screen may change and horizontal stripes and flickers may appear on the screen, but this is not a malfunction. If the image stabilizer has been set to "ON (AIS)", switch to "ON" to improve the condition. "Reducing Camera Shake" (p. 39)A band or a ball of bright light appears on the LCD monitor.
Change the direction of this unit to prevent the light source from coming into view. (A band or a ball of bright light may appear when there is a bright light source near this unit, but this is not a malfunction.)The recorded subject is too dark.
Use backlight compensation when the background is bright and the subject is dark. "Setting Backlight Compensation" (p. 30) Use "GAIN UP" in the menu. “GAIN UP” (p. 86) Set "BRIGHTNESS ADJUST" in the recording menu to the "+" side. "Adjusting Brightness" (p. 29)The recorded subject is too bright.
Set the backlight compensation to "OFF" if it is being used. "Setting Backlight Compensation" (p. 30) Set "BRIGHTNESS ADJUST" in the recording menu to the "-" side. "Adjusting Brightness" (p. 29)The color looks strange. (Too bluish, too reddish, etc.)
Wait for a while until natural colors are achieved. (It may take some time for white balance to be adjusted.) Set "WHITE BALANCE" in the recording menu to "MANUAL". Select from "FINE"/"CLOUD"/"HALOGEN" according to the light source. Select "MWB" and adjust accordingly. "Setting White Balance" (p. 31)The color looks different.
Set "WHITE BALANCE" in the recording menu accordingly. "Setting White Balance" (p. 31)There are bright or dark spots on the screen.
While the LCD monitor screen has more than 99.99% effective pixels, 0.01% of the pixels may be bright spots (red, blue, green) or dark spots. This is not a malfunction. The spots will not be recorded.Other Problems
The buttons on the touch screen do not work.
Tap the buttons on the touch screen with your fingers. The buttons may not respond if you touch them with your fingernails or with gloves on. Disable "SCREEN LOCK". You cannot operate the touch panel when "SCREEN LOCK" is enabled. "Locking the Screen" (p. 33) Save the recorded data before requesting service. 1 Connect to computer using a USB cable. The "SELECT DEVICE" menu appears. 2 Press and hold the START/STOP button for more than 2 seconds. The "PLAYBACK ON PC" appears. 3 Operations are to be performed on the computer after the screen switches.The image is grainy.
When digital zoom is used, the image becomes grainy as it is digitally enlarged.This unit heats up.
This is not a malfunction. (This unit may become warm when used for a long time.) Stop using the unit if it gets too warm.The language on the display changed.
It may occur when you connect this unit to a TV with different language setting using an HDMI mini cable. "Operating in Conjunction with TV via HDMI" (p. 61)When connected to the TV via the HDMI mini cable, proper images and sounds are not output.
Images and sounds may not be output properly depending on the TV connected. In such cases, perform the following operations. 1 Disconnect the HDMI mini cable and connect it again. 2 Turn off and on this unit again. "Connecting via the HDMI Mini Connector" (p. 60)HDMI-CEC functions do not work properly, and the TV does not work in conjunction with this unit.
TVs may operate differently depending on the specifications, even if they are HDMI-CEC compliant. Therefore, the HDMI-CEC functions of this unit cannot be guaranteed to operate in combination with all the TVs. In such cases, set "HDMI CONTROL" to "OFF". "HDMI CONTROL" (p. 100)The unit operates slowly when switching between video mode and still image mode, or when switching the power on or off.
It is recommended that you copy all videos and still images onto your computer, and erase the files from this unit. (If there are many recorded files on this unit, it takes time for the unit to respond.)This unit does not function properly and error messages appear.
This unit is a microcomputer-controlled device. Electrostatic discharge, external noise and interference (from a TV, a radio, etc.) might prevent it from functioning properly. In such a case, close the monitor screen to turn off the power and remove the AC adapter, then press the Reset button to reset this unit. "Resetting this Unit" (p. 5)CHARGE lamp and POWER/ACCESS lamp are blinking and operation is disabled
Close the monitor screen to turn off the power and remove the AC adapter, then press the Reset button to reset this unit. "Resetting this Unit" (p. 5) If these operations won't solve the problem, contact your JVC dealer or the JVC service center.Disclaimer
- We shall not be held responsible for loss of recorded contents when recording videos/audio or playback cannot be operated due to malfunctions in this unit, provided parts, or SD card. - Once deleted, recorded contents (data), including data loss due to malfunctions in this unit, cannot be restored. Please be forewarned. - JVC will not be responsible for any lost data. Please be forewarned. - In order for quality improvement, defective recording medium is subject to be analyzed. Therefore, it may not be returned.Error Message?
SET DATE/TIME!
The clock is reset about one month after the battery is depleted. Therefore, "SET DATE/TIME!" will appear the next time the power is turned on. Set the clock again after charging the battery. "Clock Setting" (p. 15)COMMUNICATION ERROR
Reconnect the USB cable. Turn off and on the devices connected to this unit, and reset this unit. "Resetting this Unit" (p. 108)FORMAT ERROR!
Check the operating procedure, and perform once again. Reset this unit. "Resetting this Unit" (p. 108)ERROR IN BUILT-IN MEMORY!
Reset this unit. "Resetting this Unit" (p. 108) If the above does not solve the problem, back up your files and execute "FORMAT BUILT-IN MEM." in the "SETUP" menu. (All data will be deleted.) "FORMAT BUILT-IN MEM." (v 2 p. 99)MEMORY CARD ERROR!
Check that the card is supported by this unit. "Types of Usable SD Card" (p. 9) Reset this unit. "Resetting this Unit" (p. 108) Turn off this unit, then remove and re-insert the SD card. Remove any dirt from the SD card terminals. If the above does not solve the problem, back up your files and execute "FORMAT SD CARD" in the "SETUP" menu. (All data will be deleted.) "FORMAT SD CARD" (p. 99)NOT FORMATTED
Select "OK", then select "YES" on the "DO YOU WANT TO FORMAT?" screen.RECORDING FAILURE
Reset this unit. "Resetting this Unit" (p. 108)CANNOT TAKE MORE STILL IMAGES AT THIS TIME
Stop video recording before taking still images. (If the SD card is removed and inserted during video recording, still images cannot be recorded.)PLAYBACK FAILED
Remove and re-insert the SD card. "Inserting an SD Card" (p. 9) Remove any dirt from the SD card terminals. Insert the SD card before turning on the power. Do not subject this unit to any strong impact or vibration.UNSUPPORTED SCENE!
Use files recorded with this unit. (Files recorded with other devices may not be playable.)UNSUPPORTED FILE!
Use files recorded with this unit. (Files recorded with other devices may not be playable.)THIS FILE IS PROTECTED
Switch off the "PROTECT/CANCEL" function in the "EDIT" menu. "Protecting Files" (p. 64)CHECK CARD'S WRITE PROTECTION SWITCH
Set the write protect switch of the SD card to off.INSUFFICIENT AVAILABLE SPACE
Delete files, or move files to a computer or other devices. Replace the SD card with a new one. Seamless videos cannot be combined if there is not enough free space in the built-in memory or SD card. Check the amount of remaining free space before combining.RECORDABLE MANAGEMENT CAPACITY LEVEL HAS BEEN REACHED
1 Move the files or folders to a computer or other device. (Back up your files.) [2] Select "FILE + MANAGEMENT NO" in "FORMAT BUILT-IN MEM." or "FORMAT SD CARD" of the "SETUP" menu. (All data on the built-in memory or SD card will be deleted.) "FORMAT BUILT-IN MEM." (p. 99) "FORMAT SD CARD" (u p. 99)SCENE QUANTITY EXCEEDED LIMIT
1 Move the files or folders to a computer or other device. (Back up your files.) ② Select "FILE + MANAGEMENT NO" in "FORMAT BUILT-IN MEM." or "FORMAT SD CARD" of the "SETUP" menu. (All data on the built-in memory or SD card will be deleted.) "FORMAT BUILT-IN MEM." (p. 99) "FORMAT SD CARD" (p. 99)NUMBER OF FOLDERS OVERFLOW
1 Move the files or folders to a computer or other device. (Back up your files.) ② Select "FILE + MANAGEMENT NO" in "FORMAT BUILT-IN MEM." or "FORMAT SD CARD" of the "SETUP" menu. (All data on the built-in memory or SD card will be deleted.) "FORMAT BUILT-IN MEM." (p. 99) "FORMAT SD CARD" (p. 99)FILE QUANTITY LIMIT EXCEEDED
1 Move the files or folders to a computer or other device. (Back up your files.) ② Select "FILE + MANAGEMENT NO" in "FORMAT BUILT-IN MEM." or "FORMAT SD CARD" of the "SETUP" menu. (All data on the built-in memory or SD card will be deleted.) "FORMAT BUILT-IN MEM." (p. 99) "FORMAT SD CARD" (p. 99)NO FILES
Change the setting of "REC MEDIA FOR IMAGE" or "REC MEDIA FOR VIDEO" in the "SETUP" menu, and check that files are not recorded to the other media. "REC MEDIA FOR VIDEO" (v 2 p. 98) "REC MEDIA FOR IMAGE" (p. 99)RECORDING CANCELLED
Set "REC MEDIA FOR VIDEO" to "SD CARD", then record to an SD card. "REC MEDIA FOR VIDEO" (p. 98) Reset this unit. "Resetting this Unit" (p. 108) Protect the unit from vibration and shock.DATA RECORDED FILE IS TOO SMALL TO BE SAVED (CONTINUE RECORDING?)
If time-lapse recording is stopped when the actual recorded time displayed is "0:00:00:17" or less, the video cannot be saved.CAMERA TEMPERATURE IS HIGH PLEASE TURN CAMERA OFF TO ALLOW IT TO COOL DOWN PLEASE WAIT
Turn off the power of this unit, let and it cool down before turning on the power again. Perform regular maintenance of this unit to enable it to be used for a long time.Caution :
\- Be sure to detach the AC adapter and power plug before performing any maintenance.Camcorder
- Wipe this unit with a dry, soft cloth to remove any dirt. - When it is extremely dirty, soak the cloth in a solution of neutral detergent, wipe the body with it, and then use a clean cloth to remove the detergent.Caution :
- Do not use solvents such as benzene, thinner, or alcohol. Doing so may cause damage to the unit. - When using a chemical cloth or cleaner, be sure to observe the warning labels and instructions of the product. - Do not leave the device in contact with rubber or plastic products for a long time.Lens/LCD Monitor
- Use a lens blower (commercially available) to remove any dust, and a cleaning cloth (commercially available) to wipe off any dirt. Mold may form if the lens is left dirty. - You can use a commercially available anti-reflection or protective film on the screen. However, depending on the thickness of the film, operations on the touch screen may not be performed smoothly or the screen may darken slightly.After using underwater or on the beach
\- For care and cleaning where there is mud or dirt on the camera after using underwater or on the beach, read "Before Using Underwater or under Low Temperature" (p. 6). Camera| Item Details | |
| Power supply Using AC adapter: DC 5.2 V | |
| Power consumption 2.2 W (MONITOR BRIGHTNESS: 3 (standard))2.4 W (MONITOR BRIGHTNESS: 4 (brighter))Rated Current Consumption: 1A | |
| Dimensions (mm) 60 x 59.5 x 128 (2-3/8" x 2-3/8" x 5-1/16")(W x H x D: excluding grip belt) | |
| Mass Approx. 301 g (0.66 lbs) (camera only) | |
| Operating environment | Allowable operating temperature: -10 °C to 40 °CAllowable storage temperature: -20 °C to 50 °CAllowable charging temperature: 10 °C to 35 °CAllowable relative humidity: 35 % to 80 % |
| Image pickup device | 1/5.8" 2,510,000 pixels (CMOS, back-illuminated) |
| Recording area (Video) | 1,280,000 to 2,290,000 pixels (image stabilizer: off) |
| Recording area (Still image) | 2,290,000 pixels (16:9)1,710,000 pixels (4:3) |
| Lens F1.8 to F6.3 | f= 2.9 mm to 116.0 mm35 mm conversion:Video40.5 mm to 1620 mm (image stabilizer: off)Still Image40.5 mm to 1620 mm (16:9)49.5 mm to 1980 mm (4:3) |
| Filter diameter * 37 mm (screw pitch: 0.75 mm) | |
| Lowest illumination 3 lux | |
| Zoom (during video recording) | Optical zoom: Up to 40xDynamic zoom: Up to 60xDigital zoom: Up to 200x |
| Zoom (during still image recording) | Optical zoom: Up to 40x |
| LCD monitor 3.0" Wide, 230,000 dots, color LCD | |
| Recording media Built-in memory (4 GB)SD/SDHC/SDXC card (commercially available)"Types of Usable SD Card" (€ p. 9) | |
| Item Details | |
| HDMI output connector | HDMI mini connector |
| AV output connector | Video output: 1.0 V (p-p), 75 ΩAudio output: 300 mV (rms), 1 KΩ |
| USB connector Micro | USB Type AB, USB 2.0 compliant |
| Item Details | |
| Recording/Playback format | AVCHD standardVideo: MPEG-4 AVC/H.264Audio: Dolby Digital 2ch |
| Extension .MTS | |
| Signal system NTSC | standard |
| Video Quality(Recording pixel count/Average recording bit rate) | UXP1920 pixels x 1080 pixelsAverage Approximate 24 MbpsXP1920 pixels x 1080 pixelsAverage Approximate 17 MbpsEP1920 pixels x 1080 pixelsAverage Approximate 4.8 Mbps |
| Sound quality(Audio) | 48 kHz, 256 kbps |
| Item Details | |
| Recording format JPEG standard | |
| Extension .JPG | |
| Image Size(Recording pixel count) | (16:9 aspect ratio)1920 pixels x 1080 pixels (2M)(4:3 aspect ratio)3680 pixels x 2760 pixels (10.15M)1440 pixels x 1080 pixels (1.5M)640 pixels x 480 pixels (0.3M)“Approximate Number of Still Images (Unit:Number of Shots)” (r p. 49) |
| Item Details | |
| Power supply AC 110 | V to 240 V, 50 Hz/60 Hz |
| Output DC 5.2 V, 1 A | |
| Allowable operating temperature | 0°C to 40°C (32°F to 104°F)(10°C to 35°C (50°F to 95°F) during charging) |
| Dimensions (mm) 66 | x 28 x 47 (2-5/8" x 1-1/8" x 1-7/8")(W x H x D: excluding cord and AC plug) |
| Mass Approx. 71 g (0.16 lbs) | |
Memo :
\- The specifications and appearance of this product are subject to changes for further improvement without prior notice.Trademarks
- AVCHD and AVCHD logo are trademarks of Panasonic Corporation and Sony Corporation. - The terms HDMI and HDMI High-Definition Multimedia Interface, and the HDMI Logo are trademarks or registered trademarks of HDMI Licensing Administrator, Inc. in the United States and other countries.  HH-DEFINITION MULTIMEDIA INTERFACE - Manufactured under license from Dolby Laboratories. Dolby, Dolby Audio and the double-D symbol are trademarks of Dolby Laboratories. • SDXC logo is a trademark of SD-3C LLC. - Microsoft and Windows are either registered trademarks or trademarks of Microsoft Corporation in the United States and/or other countries. - Mac, OS X, iMovie, iPhoto, iPhone and Safari are trademarks of Apple Inc., registered in the U.S. and other countries. - Intel and Intel Core are trademarks or registered trademarks of Intel Corporation in the United States. - Android, YouTube and Chrome are trademarks or registered trademarks of Google Inc. - QR Code is a registered trademark of Denso Wave Incorporated. - Other product and company names included in this instruction manual are trademarks and/or registered trademarks of their respective holders. - Marks such as TM and have been omitted in this manual.JVC
- TABLE OF CONTENTS
- GETTING STARTED
- RECORDING
- PLAYBACK
- EDITING
- COPYING
- SETTINGS MENU
- MEMO
- TURNING ON THIS UNIT
- TO TURN ON THE POWER
- TO TURN OFF THE POWER
- OPENING THE TERMINAL COVER (SD CARD COVER)
- TO OPEN
- TO CLOSE
- CAUTION
- CHARGING
- RESETTING THIS UNIT
- QUAD PROOF
- BEFORE USING UNDERWATER OR UNDER LOW TEMPERATURE
- CAUTIONS ON USING UNDERWATER
- MAINTENANCE AFTER USE
- CAUTIONS ON USING UNDER LOW TEMPERATURE
- OTHER PRECAUTIONS
- GRIP ADJUSTMENT
- ATTACHING THE LENS CAP
- DURING RECORDING
- ATTACHING THE CORE FILTER
- INSERTING AN SD CARD
- WARNING
- REMOVING THE CARD
- TYPES OF USABLE SD CARD
- SD CARD
- SDHC CARD
- SDXC CARD
- WHEN YOUR COMPUTER CANNOT RECOGNIZE THE SDXC CARD
- USING THE TOUCH SCREEN
- LOCKING THE SCREEN (WHEN SHOOTING UNDERWATER)
- SETTING THE "SCREEN LOCK
- TO CANCEL "SCREEN LOCK
- ADJUSTING THE TOUCH SCREEN
- NAMES OF BUTTONS AND FUNCTIONS ON THE LCD MONITOR
- PLAYBACK SCREEN (STILL IMAGE)
- INDEX SCREEN (THUMBNAIL DISPLAY) DISPLAY
- CLOCK SETTING
- RESETTING THE CLOCK
- CHANGING THE DISPLAY LANGUAGE
- HOLDING THIS UNIT
- TRIPOD MOUNTING
- USING THIS UNIT OVERSEAS
- CHARGING THE BATTERY PACK OVERSEAS
- SETTING THE CLOCK TO LOCAL TIME WHEN TRAVELING
- SETTING DAYLIGHT SAVING TIME
- TAKING VIDEOS IN AUTO MODE
- USING THE SILENT MODE
- OPERATING PROCEDURE
- USEFUL SETTINGS FOR RECORDING
- CAPTURING STILL IMAGES DURING VIDEO RECORDING
- TAKING STILL IMAGES IN AUTO MODE
- START RECORDING AFTER ADJUSTING THE FOCUS
- ZOOMING
- ZOOM MEMORY
- STORING METHOD
- OPERATING DETAIL
- MANUAL RECORDING
- ADJUSTING FOCUS MANUALLY (FOCUS)
- ADJUSTING BRIGHTNESS
- SETTING BACKLIGHT COMPENSATION
- SETTING WHITE BALANCE
- USING MWB
- TAKING CLOSE-UP SHOTS (TELE MACRO)
- SHOOTING UNDER WATER
- SETTING THE WHITE BALANCE TO UNDERWATER MODE
- LOCKING THE SCREEN
- TAP "SCREEN LOCK
- RECORDING WITH EFFECTS (RECORDING EFFECT)
- RECORDING IMAGES LIKE AN OLD BLACK AND WHITE PHOTO (GRAINY MONOCHROME)
- RECORDING FOOD IMAGES (FOOD)
- RECORDING IMAGES OF A BABY (BABY)
- CAPTURING SUBJECTS CLEARLY (TOUCH PRIORITY AE/AF)
- OPEN THE LCD MONITOR
- TAP "MENU
- TAP "RECORD SETTING
- TAP "TOUCH PRIORITY AE/AF
- TAP THE DESIRED SETTING
- REDUCING CAMERA SHAKE
- RECORDING AT INTERVALS (TIME-LAPSE RECORDING)
- TIME-LAPSE SETTING
- RECORDING VIDEO WITH STILL IMAGE DISPLAYED IN SUB SCREEN (STILL IMAGE COMPOSITE RECORDING)
- USING THE SELF-TIMER
- USING THE SELF-TIMER IN VIDEO MODE
- USING THE SELF-TIMER IN STILL IMAGE MODE
- TAP "SELF-TIMER
- TAP "2SEC" OR "10SEC
- TAKE A STILL IMAGE
- RECORDING AT A FIXED INTERVAL AND PLAYING BACK REPEATEDLY
- RECORDING VIDEOS WITH DATE AND TIME
- TAP "DATE/TIME RECORDING
- SELECT THE TYPE OF CLOCK WITH , AND TAP "SET
- TAP THE DISPLAY POSITION WITH YOUR FINGER AND DRAG YOUR FINGER TO ADJUST
- PRESS THE START/STOP BUTTON TO START RECORDING
- RECORDING VIDEOS WITH TIME COUNTER
- CHECKING THE REMAINING RECORDING TIME
- TAP Ⓘ
- DISPLAY THE REMAINING RECORDING TIME
- PLAYING BACK VIDEOS
- NORMAL PLAYBACK
- OPERATION BUTTONS FOR VIDEO PLAYBACK
- ADJUSTING THE VOLUME OF VIDEOS
- CHECKING THE RECORDING DATE AND OTHER INFORMATION
- TIME COUNTER PLAYBACK
- DIGEST PLAYBACK
- PLAYBACK OTHER FILE
- PLAYING BACK STILL IMAGES
- OPERATION BUTTONS FOR STILL IMAGE PLAYBACK
- SLIDESHOW PLAYBACK
- CONNECTING TO AND VIEWING ON TV
- CONNECTING VIA THE HDMI MINI CONNECTOR
- OPERATING IN CONJUNCTION WITH TV VIA HDMI
- PREPARATIONS
- OPERATION METHOD
- CONNECTING VIA THE AV CONNECTOR
- DELETING UNWANTED FILES
- DELETING THE CURRENTLY DISPLAYED FILE
- TAP ☑
- TAP "YES
- DELETING SELECTED FILES
- TAP « PLAY TO SELECT THE PLAYBACK MODE
- TAP ☐
- TAP ON THE FILES TO DELETE
- TAP "SET
- TAP "EXECUTE" TO CONFIRM THE DELETION
- PROTECTING FILES
- PROTECTING/RELEASING PROTECTION OF THE CURRENTLY DISPLAYED FILE
- TAP "EDIT
- TAP "PROTECT/CANCEL
- PROTECTING/RELEASING PROTECTION OF SELECTED FILES
- CAPTURING A STILL IMAGE IN THE VIDEO DURING PLAYBACK
- COMBINING VIDEOS RECORDED BY SEAMLESS RECORDING
- HOW TO ENABLE SEAMLESS VIDEO RECORDING AGAIN
- CAPTURING A REQUIRED PART IN THE VIDEO (TRIMMING)
- DUBBING FILES TO A DISC BY CONNECTING TO A BLU-RAY RECORDER
- COPYING FILES TO AN SD CARD
- COPYING TO WINDOWS PC
- TROUBLE WITH USING THE PROVIDED SOFTWARE EVERIO MEDIABROWSER
- VERIFYING SYSTEM REQUIREMENTS (GUIDELINE)
- WINDOWS
- OTHER REQUIREMENTS
- INSTALLING THE PROVIDED SOFTWARE (BUILT-IN)
- BACKING UP ALL FILES
- DISCONNECTING THIS UNIT FROM COMPUTER
- ORGANIZING FILES
- RECORDING VIDEOS TO DISCS
- BACKING UP FILES WITHOUT USING PROVIDED SOFTWARE
- LIST OF FILES AND FOLDERS
- COPYING TO MAC COMPUTER
- IMOVIE AND IPHOTO
- OPERATING THE MENU
- OPERATING THE TOP MENU
- RECORD SETTING MENU (VIDEO)
- FOCUS
- BRIGHTNESS ADJUST
- BACKLIGHT COMP
- WHITE BALANCE
- TELE MACRO
- TOUCH PRIORITY AE/AF
- DIS
- GAIN UP
- WIND CUT
- SELF-TIMER
- TIME-LAPSE RECORDING
- SELF-CHECK REC/PLAY
- DATE/TIME RECORDING
- TIME COUNTER RECORDING
- PHOTO-INSERT RECORDING
- RECORDING EFFECT
- GRAINY MONOCHROME
- FOOD
- BABY
- SHUTTER MODE
- SEAMLESS RECORDING
- VIDEO QUALITY
- ZOOM
- ZOOM MIC
- MIC LEVEL
- MIC LEVEL SETTING
- K2 TECHNOLOGY
- SCREEN LOCK
- RECORD SETTING MENU (STILL IMAGE)
- IMAGE SIZE
- PLAYBACK SETTING MENU (VIDEO)
- DISPLAY DATE/TIME
- SLOW-MOTION SPEED
- EDIT MENU (VIDEO)
- PROTECT/CANCEL
- COPY
- TRIMMING
- SEAMLESS REC CTRL
- PLAYBACK SETTING MENU (STILL IMAGE)
- SLIDE SHOW EFFECTS
- EDIT MENU (STILL IMAGE)
- SETUP (VIDEO/STILL IMAGE)
- MOBILE USER GUIDE
- DATE & TIME
- DATE DISPLAY STYLE
- LANGUAGE
- MONITOR BRIGHTNESS
- AUTO POWER OFF
- DEMO MODE
- TOUCH SCREEN ADJUST
- REC MEDIA FOR VIDEO
- REC MEDIA FOR IMAGE
- FORMAT BUILT-IN MEM
- FORMAT SD CARD
- FACTORY PRESET
- FIRMWARE UPDATE
- OPEN SOURCE LICENSES (RECORDING ONLY)
- CONNECTION SETTINGS (VIDEO/STILL IMAGE)
- DISPLAY ON TV
- VIDEO OUTPUT
- HDMI OUTPUT
- HDMI CONTROL
- USB CONNECTION MENU
- PLAYBACK ON PC
- BACK UP
- TOP/LEFT/REAR SIDE
- ① LENS
- ② STEREO MICROPHONE
- ③ LCD MONITOR
- ④ CHARGE (CHARGING) LAMP
- ⑤ POWER/ACCESS (POWER/ACCESS) LAMP
- ⑥ ZOOM/VOLUME LEVER
- ⑦ STRAP MOUNT
- ⑧ START/STOP (VIDEO RECORDING) BUTTON
- ⑨ TERMINAL COVER
- INSIDE TERMINAL COVER
- ① SD CARD SLOT
- ② RESET BUTTON
- ③ HDMI MINI CONNECTOR
- ④ AV CONNECTOR
- ⑤ USB CONNECTOR
- LCD MONITOR
- ① LCD MONITOR
- ① STILL IMAGE MODE
- ② IMAGE SIZE
- ③ SELF-TIMER
- ④ REMAINING NUMBER OF SHOTS
- ⑤ FOCUS
- ① VIDEO MODE
- ② VIDEO QUALITY
- ③ OPERATION INDICATOR
- ④ DATE/TIME
- ⑤ RECORDING MEDIA
- ⑥ BATTERY INDICATOR
- ⑦ PLAYBACK TIME
- ⑧ TIME-LAPSE PLAYBACK
- P OUTPUT
- ⑨ SILENT MODE
- ⑩ SCENE COUNTER
- STILL IMAGE PLAYBACK
- WHEN THE UNIT IS NOT WORKING PROPERLY
- UNABLE TO CHARGE THE BATTERY
- THE REMAINING BATTERY DISPLAY IS NOT CORRECT
- THE BATTERY RUNS OUT QUICKLY EVEN AFTER CHARGING
- POWER SUPPLY
- UNABLE TO TURN ON THE POWER
- RECORDING CANNOT BE PERFORMED
- RECORDING STOPS AUTOMATICALLY
- THE CONTINUOUS SHOOTING SPEED OF STILL IMAGES IS SLOW
- THE FOCUS IS NOT ADJUSTED AUTOMATICALLY
- ZOOM DOES NOT WORK
- MOSAIC-TYPE NOISE OCCURS WHEN RECORDING SCENES WITH FAST MOVEMENTS OR EXTREME CHANGES IN BRIGHTNESS
- THE INSIDE OF THE LENS IS FOGGY
- PREVENTING FOGGING INSIDE THE LENS
- DURING CHARGING
- CANNOT INSERT THE SD CARD
- UNABLE TO COPY TO SD CARD
- SOUND OR VIDEO IS INTERRUPTED
- THERE IS NO SOUND
- THE SAME IMAGE IS DISPLAYED FOR A LONG TIME
- THE MOTION IS CHOPPY
- CANNOT FIND A RECORDED FILE
- IMAGES DO NOT APPEAR ON THE TV PROPERLY
- IMAGES ARE PROJECTED VERTICALLY ON THE TV
- THE IMAGE DISPLAYED ON TV IS TOO SMALL
- WHEN CONNECTED TO THE TV VIA THE HDMI MINI CABLE, PROPER IMAGES AND SOUNDS ARE NOT OUTPUT
- EDITING/COPYING
- COMPUTER
- UNABLE TO COPY FILES TO THE COMPUTER'S HDD
- UNABLE TO COPY FILES TO DVD OR BLU-RAY DISC WITH A PC
- CANNOT UPLOAD THE FILE TO YOUTUBE
- I AM USING A MAC COMPUTER
- THE COMPUTER CANNOT RECOGNIZE THE SDXC CARD
- SCREEN/IMAGE
- THE LCD MONITOR IS DIFFICULT TO SEE
- COLOR AND BRIGHTNESS OF THE SCREEN CHANGES AND HORIZONTAL STRIPES AND FLICKERS APPEAR ON SCREEN
- A BAND OR A BALL OF BRIGHT LIGHT APPEARS ON THE LCD MONITOR
- THE RECORDED SUBJECT IS TOO DARK
- THE RECORDED SUBJECT IS TOO BRIGHT
- THE COLOR LOOKS STRANGE. (TOO BLUISH, TOO REDDISH, ETC.)
- THE COLOR LOOKS DIFFERENT
- THERE ARE BRIGHT OR DARK SPOTS ON THE SCREEN
- OTHER PROBLEMS
- THE BUTTONS ON THE TOUCH SCREEN DO NOT WORK
- THE IMAGE IS GRAINY
- THIS UNIT HEATS UP
- THE LANGUAGE ON THE DISPLAY CHANGED
- HDMI-CEC FUNCTIONS DO NOT WORK PROPERLY, AND THE TV DOES NOT WORK IN CONJUNCTION WITH THIS UNIT
- THE UNIT OPERATES SLOWLY WHEN SWITCHING BETWEEN VIDEO MODE AND STILL IMAGE MODE, OR WHEN SWITCHING THE POWER ON OR OFF
- THIS UNIT DOES NOT FUNCTION PROPERLY AND ERROR MESSAGES APPEAR
- CHARGE LAMP AND POWER/ACCESS LAMP ARE BLINKING AND OPERATION IS DISABLED
- DISCLAIMER
- ERROR MESSAGE
- SET DATE/TIME
- COMMUNICATION ERROR
- FORMAT ERROR
- ERROR IN BUILT-IN MEMORY
- MEMORY CARD ERROR
- NOT FORMATTED
- RECORDING FAILURE
- CANNOT TAKE MORE STILL IMAGES AT THIS TIME
- PLAYBACK FAILED
- UNSUPPORTED SCENE
- UNSUPPORTED FILE
- THIS FILE IS PROTECTED
- CHECK CARD'S WRITE PROTECTION SWITCH
- INSUFFICIENT AVAILABLE SPACE
- RECORDABLE MANAGEMENT CAPACITY LEVEL HAS BEEN REACHED
- SCENE QUANTITY EXCEEDED LIMIT
- NUMBER OF FOLDERS OVERFLOW
- FILE QUANTITY LIMIT EXCEEDED
- NO FILES
- RECORDING CANCELLED
- DATA RECORDED FILE IS TOO SMALL TO BE SAVED (CONTINUE RECORDING?)
- CAMERA TEMPERATURE IS HIGH PLEASE TURN CAMERA OFF TO ALLOW IT TO COOL DOWN PLEASE WAIT
- CAMCORDER
- LENS/LCD MONITOR
- AFTER USING UNDERWATER OR ON THE BEACH
- TRADEMARKS
- JVC
Brand : JVC
Model : Everio GZ-R460BUS
Category : Camcorder