
Aquos Ever SH-02J - Smartphone SHARP - Free user manual and instructions
Find the device manual for free Aquos Ever SH-02J SHARP in PDF.
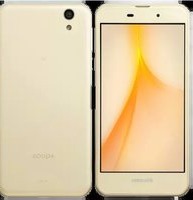


| Product Type | Smartphone |
| Brand | Sharp |
| Model | Aquos Ever SH-02J |
| Dimensions | Approximately 140 x 70 x 8 mm |
| Weight | Approximately 130 g |
| Power Supply | Rechargeable Li-Ion battery, 2000 mAh |
| Display | 5.0-inch TFT LCD, 720 x 1280 pixels |
| Processor | Quad-core 1.4 GHz |
| RAM | 2 GB |
| Internal Storage | 16 GB (expandable via microSD) |
| Main Camera | 8 MP with autofocus and LED flash |
| Front Camera | 2 MP |
| Operating System | Android 6.0 (Marshmallow) |
| Connectivity | Wi-Fi 802.11 b/g/n, Bluetooth 4.1, GPS, 4G LTE |
| Main Functions | Calls, messaging, internet browsing, camera, GPS navigation, media playback |
| Maintenance & Cleaning | Wipe with a soft dry cloth; avoid liquids and abrasive cleaners |
| Safety Precautions | Use only approved chargers; avoid high temperatures; do not disassemble |
| Spare Parts & Repairability | Battery replacement available; screen repair by authorized service |
| General Information | Manufacturer: Sharp Corporation; Japan market model |
Frequently Asked Questions - Aquos Ever SH-02J SHARP
User questions about Aquos Ever SH-02J SHARP
0 question about this device. Answer the ones you know or ask your own.
Ask a new question about this device
Download the instructions for your Smartphone in PDF format for free! Find your manual Aquos Ever SH-02J - SHARP and take your electronic device back in hand. On this page are published all the documents necessary for the use of your device. Aquos Ever SH-02J by SHARP.
USER MANUAL Aquos Ever SH-02J SHARP
INSTRUCTION MANUAL '16.10
Introduction
Thank you for purchasing "SH-02J".
Be sure to read this manual before and during use to ensure proper operation.
Checking operation method
Quick Start Guide (Basic package) (in Japanese only)
This guide describes part names and functions.
User's Manual (App of the handset) (in Japanese only)
This manual describes detailed guidance and operations of functions.
In the home screen, [ ]▶ [Instruction Manual]
User's Manual (in PDF format)
This manual describes detailed guidance and operations of functions.
Download from the DOCOMO website https://www.nttdocomo.co.jp/english/support/trouble/manual/download/sh02j/index.html
※ The latest information can be downloaded. The URL and contents are subject to change without prior notice.
● ● The screens and illustrations in this manual are shown as examples. The actual screens and illustrations may differ.
● The explanations in this manual are based on the case when the home app is docomo LIVE UX and the setting of kisekae is [Champagne Gold]. If you change the home app, operation procedures etc. may be different from the explanations of this manual.
- ● Note that "SH-02J" is referred to as "handset" in this manual.
- ● This manual refers to microSD Card, microSDHC Card or microSDXC Card as “microSD Card” or “microSD”.
● ● Reproduction of this manual in part or in whole without prior permission is prohibited.
● The contents of this manual are subject to change without prior notice.
Basic package
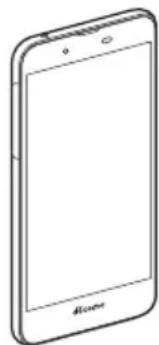
SH-02J
(includes warranty)

Quick Start Guide (in Japanese only)

Notes on usage (in Japanese only)
- ● Optional parts (sold separately) compatible with the handset can also be checked and purchased on docomo online shop. https://www.mydocomo.com/onlineshop/options/index.html (in Japanese only)
Contents
Using the handset 3
Precautions (ALWAYS FOLLOW THESE DIRECTIONS) . . . 4
Handling precautions . . . . . . . . . . . . . . . . . . . . . . . . . . . . . . . . . . . . . . . . . . . . . . . . . . . . . . . . . 8
Waterproof/Dustproof 11
Before Using the Handset
Part names and functions .....14
docomo nano UIM card 15
Charging 16
Turning power on/off 18
Basic operation....18
Character entry .....20
Changing screen display to English .....23
Initial settings....23
Incoming/Charging lamp .....26
Screen display/Icons 26
Recent Apps 29
Home applications .....29
Confirmation screen at first activation of apps....30
docomo LIVE UX
Home screen....31
App list screen....32
Installing recommended apps ....34
Backing up/Restoring the home screen. . . . . . . . . . . . . . . . . . . . . 34
Displaying all apps....35
My magazine 35
Information on apps 35
Call
Making a call....36
Answering a call 37
Operation during a call 38
Outgoing/Incoming call history 39
Voice/Answering memo ....39
Call settings/Other 39
Phonebook 41
Mail/Web Browser
docomo mail 44
SMS. 44
Email 45
Gmail TM 46
Early Warning "Area Mail" 47
Chrome 48
Apps
dmenu....50
dmarket....50
Play Store 50
Osaifu-Keitai 50
SHCamera 52
Album 55
Media Player....56
GPS/Navigation 57
YouTube 58
Clock....58
Schedule....59
Memo 60
Calculator 60
KARADA MATE 60
Convenient tool....61
docomo Data Copy....62
Handset Settings
Setting menu 63
Profile 63
Sound & notification 63
Illumination 64
Display 64
Useful 65
EMOPA....66
Battery & energy saving 67
Apps 67
Storage & USB 67
Memory....68
Data usage 68
More 68
docomo service/cloud 69
Location 69
Lock & security 69
Language & input 72
Backup & reset 72
Google TM 74
Date & time....74
Accessibility 74
Printing 74
About phone 74
File Management
Storage structure 75
Contents Manager 76
Data Communication
Bluetooth® function 77
NFC communication 79
External Device Connection
PC connection....80
Printing/Saving by print service .....80
USB host function 80
Wireless output 80
VPN (Virtual Private Network) 81
International Roaming
Outline of international roaming (WORLD WING) .....82
Available services overseas .....82
Before use overseas 82
Settings for use overseas .....82
Making/Receiving a call in your country of stay ..... 83
Setting international roaming 83
Checking after homecoming 84
Appendix/Index
Troubleshooting (FAQ) .....85
Anshin Enkaku Support 87
Warranty and After-Sales Service ....88
Software update ....89
Main specifications 90
Specific Absorption Rate (SAR) of Mobile Phones .....91
Export Administration Regulations 93
Intellectual Property Right .....93
Unlocking SIM lock .94
Index 95
Using the handset
● ● The handset supports LTE, W-CDMA, GSM/GPRS and wireless LAN systems.
- Because the handset relies on radio signals, it cannot be used in a place with no signal (such as tunnels, underground or in buildings), in places with a weak signal or outside the LTE service area or FOMA service area. You may not use the handset in the upper floors of a building even with no obstructions in sight. There may also be times when the signal is strong and you are not moving but the call is interrupted.
- Because the handset uses radio waves, it is possible for a third party to listen in on a conversation. However, since the LTE, W-CDMA and GSM/GPRS systems automatically apply a private call feature to every call, a third party that tries to listen in only hears noise.
- The handset converts conversations into a digital signal and sends it to the other party over the radio. If the signal cannot be reconverted properly by such as moving to an area with a weak signal, the voice may not be heard correctly.
● Take notes of information (e.g. the phonebook, calendar, note, voice memo, answering memo) stored on the handset or save the information to external memory devices such as microSD Cards and PCs periodically. DOCOMO shall not be liable for any loss of content due to a failure, repair, model change or other handling of the handset.
- As with PCs, some user-installed apps, -accessed websites, etc. may disrupt the stability of your handset performance or unexpectedly transmit information via the Internet causing improper use of your location information, personal information stored on the handset, etc. Therefore, verify the supplier and operating conditions of the apps, websites, etc. to be used before using them.
● ● The handset supports the FOMA Plus-Area and the FOMA HIGH-SPEED Area.
- When the available space on the microSD Card or the handset is insufficient, apps in use may not work properly. In this case, delete saved data.
- ● The handset does not support connection to i-mode website (program), i-αppli, etc.
- ● The handset does not support providers other than sp-mode, mopera U and Business mopera Internet.
- In the home screen, [ ] ▶ [Settings] ▶ [Profile] to check your phone number (own number).
● ● The handset does not support Public Mode (Drive Mode).
- Setting the handset to the manner mode does not mute sounds (camera shutter sound etc.) other than the ringtone, operation sound, and various notification sounds.
- The handset automatically performs communication for some functions, for example, to synchronize data, check the latest software version or maintain connection with the server. Also, making a communication with large-volume data such as downloading apps or watching videos will lead to higher packet communication charges. Subscription to Packet Pack/flat-rate packet communication services is highly recommended.
- Even while the Wi-Fi connection is set, packet communication charges may be incurred depending on the app and service you use.
- Software on the handset can be updated to up-to-date status (P. 89 "Software update").
- For details on software version of your handset P. 74 "About phone"
- ● New functions may be added to the handset or the operation method may change by upgrading the OS version. Check the DOCOMO website for the latest information on these additions and changes.
- If the OS is upgraded, some apps used in the previous OS version may not be available or some unintended bugs may occur.
- Secure the security of the handset by setting Screen lock in case you lose it (P. 69 "Lock & security").
- If your handset is lost, change your password for each account using a PC to prevent other persons from using Google services such as Gmail and Google Play™, and services such as SNS.
- ● Apps and their service contents are subject to change without prior notice.
- Read the terms of service of Google Inc. for details on Google services. Also, read each terms of service for details on other web services.
- If the terms of service etc. is displayed, follow the instructions on the screen and operate.
- Subscription to Packet Pack/flat-rate packet communication services is highly recommended to use tethering.
- ● For details on usage fees etc., refer to the DOCOMO website.
- The display is manufactured using high-precision technology, but it may contain dots that fail to light or that remain permanently lit on some areas. This is a characteristic of display and not a malfunction.
● The battery is built into the handset and you cannot replace it by yourself. - Note that DOCOMO shall not guarantee operation of commercially available optional parts.
Precautions (ALWAYS FOLLOW THESE DIRECTIONS)
■ ● Before use, read these “Precautions” carefully and use your handset properly.
These precautions contain information intended to prevent bodily injury to the user and to surrounding people, as well as damage to property, and must be observed at all times.
■ The following symbols indicate the different degrees of injury or damage that may occur if information provided is not observed and the handset is used improperly.
| Danger | This symbol indicates that “death or serious bodily injury (*1) may directly and immediately result from improper use”. |
| Warning | This symbol indicates that “death or serious bodily injury (*1) may result from improper use”. |
| Caution | This symbol indicates that “minor injury (*2) and/or property damage (*3) may result from improper use”. |
*1 Serious bodily injury: This refers to loss of eyesight, bodily injury, burns (high- and low-temperature), electric shock, broken bones, injuries with residual aftereffects from poisoning, etc., and injuries requiring hospital admission for treatment or long-term hospital attendance as an outpatient.
*2 Minor injury: This refers to bodily injury, burns (high- and low-temperature), electric shock, etc. that do not require hospital admission for treatment or long-term hospital attendance as an outpatient.
*3 Property damage: This refers to extended damage to buildings, furniture, livestock, pets, etc.
■ ● The following symbols indicate specific directions.
| Don't | Indicates a prohibited action. | No wet hands | Indicates not to handle the device with wet hands. |
| No disassembly | Indicates not to disassemble the device. | Instruction | Indicates that instructions specified are compulsory (must be followed). |
| No liquids | Indicates not to use the device near water or get it wet. | Unplug | Indicates that the power cord must be unplugged from the outlet. |
"Precautions" is explained in the following six sections.
● Handling the handset, adapters and docomo nano UIM card (general) P. 4
● Handling the handset P. 5
● Handling adapters.... P. 6
● Handling docomo nano UIM card ..... P. 7
● Handling near electronic medical equipment ..... P. 7
● Material list P. 8
Handling the handset, adapters and docomo nano UIM card (general)
Danger

Don't
Do not use, store or leave the equipment in locations subject to high temperatures or accumulation of heat (near a fire or heating unit, in a kotatsu or bedding, under direct sunlight, inside a vehicle on a hot day, etc.).
May cause fires, burns, bodily injury, electric shock, etc.

Don't
Do not place the equipment inside cooking appliances such as microwave ovens and induction cookers or high pressure vessels such as pressure cookers, or near them.
May cause fires, burns, bodily injury, electric shock, etc.

Don't
Do not sprinkle sand, soil or dirt on the equipment or put the equipment directly on it. Also, do not touch the equipment when sand etc. is adhering to your hand.
May cause fires, burns, bodily injury, electric shock, etc. Refer to the following for details on waterproofness/dustproofness.
P. 11 "Waterproof/Dustproof"

Don't
Do not charge the equipment while it is wet with liquids such as water (drinking water, sweat, seawater, pet urine, etc.).
May cause fires, burns, bodily injury, electric shock, etc.
Refer to the following for details on waterproofness.
P. 11 "Waterproof/Dustproof"

No disassembly
Do not attempt to disassemble or modify the equipment.
May cause fires, burns, bodily injury, electric shock, etc.

No liquids
Do not get the equipment wet with liquids such as water (drinking water, sweat, seawater, pet urine, etc.).
May cause fires, burns, bodily injury, electric shock, etc.
Refer to the following for details on waterproofness.
P. 11 "Waterproof/Dustproof"

No liquids
Do not allow liquids such as water (drinking water, sweat, seawater, pet urine, etc.) to get inside the charger terminal or external connection jack. May cause fires, burns, bodily injury, electric shock, etc. Refer to the following for details on waterproofness. P. 11 "Waterproof/Dustproof"

Instruction
Use only optional parts specified by NTT DOCOMO. May cause fires, burns, bodily injury, electric shock, etc.
Warning

Don't
Do not subject the equipment to strong force, impacts or vibration such as letting it fall, stepping on it or throwing it.
May cause fires, burns, bodily injury, electric shock, etc.

Don't
Do not allow conductive materials (such as metal objects and pencil lead) to come into contact with the charger terminal or external connection jack or dust to get inside it. May cause fires, burns, bodily injury, electric shock, etc.
 Don't Don't | Do not cover or wrap the equipment with bedding etc. when using or charging.May cause fires, burns, etc. |
| !Instruction | If charging is not completed after the specified charging time, stop charging.May cause fires, burns, bodily injury, etc. because of overcharging. |
| !Instruction | Be sure to turn off the handset and not to charge the battery in locations where flammable gas may be generated such as gas stations and where dust is generated.May cause explosions, fires etc. if using the equipment in location where flammable gas etc. is generated.To use Osaifu-Keitai in locations such as gas stations, be sure to turn off the power in advance (If NFC/Osaifu-Keitai lock is set, disable the lock before turning off the power). |
| !Instruction | If any trouble such as an unusual odor, unusual noise, smoking, overheating, discoloration or deformation is found during use, charge or storage, follow the instructions below.● ● Unplug the power plug from the outlet or accessory socket.● ● Turn off the handset.May cause fires, burns, bodily injury, electric shock, etc. if you do not follow the instructions above. |

Caution
| Don't | Do not use a damaged equipment.May cause fires, burns, bodily injury, etc. |
| Don't | Do not leave the equipment on unstable surfaces,such as on a wobbly table or sloped surface. Bevery careful while the vibrator is set.May fall and cause injury etc. |
| Don't | Do not use or store the equipment in locations thatare subject to humidity, dust or high temperatures.May cause fires, burns, electric shock, etc.Refer to the following for details on waterproofness/dustproofness.P. 11 "Waterproof/Dustproof" |
| Don't | If being used by a child, have a guardian teach him/her the proper handling procedures and do nothave him/her use it improperly.May cause bodily injury etc. |
| Don't | Do not place the equipment where the youngchildren can reach it.A young child may swallow the equipment, or suffer bodilyinjury, electric shock, etc. |
| Instruction | Be careful when using the handset continuously fora long time or charging because it may becomewarm. Also, be careful not to touch itunintentionally for a long time when you fall asleepetc.The handset or adapter may become warm when using anapp, a call, data communication, watching video, etc. for along time or charging.Directly touching a warmed part for a long time may causeredness, itching, rashes, low-temperature burns, etc. onyour skin depending on your constitution or health condition. |

Danger
 Don't Don't | Do not throw the handset into a fire or heat it.May cause fires, burns, bodily injury, etc. because ofcatching fire, exploding, overheating or leaking of thebattery. |
 Don't Don't | Do not apply excessive force on the handset suchas puncturing it with a nail (sharp object), hitting itwith a hammer (hard object) or stepping on it.May cause fires, burns, bodily injury, etc. because ofcatching fire, exploding, overheating or leaking of thebattery. |
 Instruction Instruction | If the substance etc. inside the internal batterycomes into contact with your eyes, do not rub youreyes but immediately rinse your eyes with cleanwater. Then seek prompt medical treatment.May result in loss of eyesight etc. because of the substanceetc. inside the internal battery. |
 Instruction Instruction | If the substance etc. inside the display comes intocount with your eyes or mouth, immediately rinsethe contacted area with clean water. Then seekprompt medical treatment.May result in loss of eyesight, sick, etc. because of thesubstance etc. inside the display. |
Don't
Don't
Instruction
Instruction

Warning
 Don't Don't | Do not point the illuminated light directly at someone's eyes. Especially when you use it for young children, keep sufficient distance from them.Do not use Mobile light near people's faces. Eyesight may be temporarily affected leading to accidents etc. |
 Don't Don't | Do not illuminate or emit the mobile light at anyone driving a car or other vehicles.May prevent a driver from driving safely and cause a traffic accident etc. |
 Don't Don't | Do not watch the screen which is flashing repeatedly for a long time.May cause spasm or loss of consciousness. |
 Don't Don't | Do not allow water or other liquids (drinking water, sweat, seawater, pet urine, etc.), metal, flammable material or other foreign object to enter the docomo nano UIM card slot or microSD Card slot on the handset.Also, do not insert the docomo nano UIM card or microSD Card in the wrong place or wrong side.May cause fires, burns, bodily injury, electric shock, etc. |
 Don't Don't | Do not expose the camera lens to direct sunlight etc. for an extended period.May cause fires, burns, bodily injury etc. because of the light-collecting mechanism of the lens. |
 Instruction Instruction | Turn off the handset or set it to Airplane mode before going aboard an airplane.Since using the handset on airplanes is restricted, follow the instructions given by the respective airlines.May interfere with the operation of electronic devices installed on the airplane.If you commit a prohibited act while using the handset on an airplane, you may be punished by law. |
| Instruction | Follow the instructions given by the respective medical facility regarding the use of the handset in a hospital.Turn off the handset in areas where the use of mobile phones is prohibited.May interfere with the operation of electronic devices and electronic medical equipment. |
| Instruction | Keep the handset away from the ears during a call in which hands-free is set, while the ringtone is ringing loudly, during stand-by, etc.When you attach the earphone/microphone etc. to the handset to play games, video/music, etc., do not make the volume too loud.Excessively high volume or using the handset continuously for a long time may damage your hearing etc.Also, it may prevent you from hearing ambient sounds and cause an accident. |
| Instruction | If you have a weak heart, take extra precautions when setting functions such as the vibrator and ringtone volume for incoming calls.May have harmful effects on your heart. |
| Instruction | If you are using electronic medical equipment etc., contact the respective manufacturer or dealer to check whether the operation of the equipment is affected by signals.May interfere with the operation of electronic medical equipment etc. |
| Instruction | Turn off the handset near high-precision electronic devices or devices that use weak electronic signals.May interfere with the operation of electronic devices.※ Take particular care with the following devices Hearing aids, implanted cardiac pacemakers, implanted cardioverter-defibrillators, other electronic medical equipment, other equipment controlled by electronic signals, etc. If you use an implanted cardiac pacemaker, implanted cardioverter-defibrillator or other electronic medical equipment, contact the respective manufacturer or dealer to check whether the operation of the equipment is affected by signals. |
| Instruction | If the display part or camera lens is damaged, be careful of broken glass and the exposed inside of the handset.May cause burns, bodily injury, electric shock, etc. if you touch the broken or exposed parts. |
| Instruction | If the internal battery leaks or emits an unusual odor, immediately stop using the handset and move it away from any naked flames or fire.The battery fluid is flammable and could ignite, causing a fire, explosion, etc. |
| Instruction | Do not allow a pet etc. to bite the handset.May cause fires, burns, bodily injury, etc. because of catching fire, exploding, overheating or leaking of the internal battery. |
| Caution | |
| Don't | Do not swing the handset by its strap etc.May hit you or others around you, resulting in an accident such as bodily injury. |
| Don't | For using a motion sensor and geomagnetic sensor, check the safety around, hold the handset and do not swing it more than necessary.May cause an accident such as bodily injury. |
Don't
Don't
Don't
Don't
Don't
Instruction
| Don't | If the display is broken and the internal substance etc. then leaks, do not get it on your skin (face, hands, etc.), clothes, etc.May result in damage to your eyes, skin, etc.If the internal substance etc. comes into contact with your eyes, mouth, skin or clothes, immediately rinse the contacted area with clean water.Also, if it comes into contact with your eyes or mouth, seek medical treatment immediately after rinsing the contacted area. |
| Don't | Do not dispose of the handset in ordinary garbage.May cause fires, burns, bodily injury, etc. because of catching fire. Also, may damage to the environment. Take the unnecessary handset to a sales outlet such as a docomo Shop or follow the instructions by a local institution that handles used handsets. |
| Don't | If the substance etc. inside the internal battery leaks, do not get the liquid on your skin (face, hands, etc.).May result in damage to your eyes, skin, etc.If the internal substance etc. comes into contact with your eyes, mouth, skin or clothes, immediately rinse the contacted area with clean water.Also, if it comes into contact with your eyes or mouth, seek medical treatment immediately after rinsing the contacted area. |
| Instruction | If you use the handset in a vehicle, contact the vehicle manufacturer or dealer to check whether the operation of the vehicle is affected by signals.May interfere with the operation of electronic equipment in some vehicle models. In this case, stop using the handset. |
| Instruction | If any trouble on your skin occurs due to using the handset, immediately stop using it and seek medical treatment. Use of the handset may cause itching, rashes, eczema, etc. depending on your constitution or health condition.Refer to the following for details on materials of each part.P. 8 "Material list" |
| Instruction | Make sure that there is no metal (a blade of cutter, staple, etc.) on the handset because the earpiece/speaker section and back camera section contain parts that generate magnetic waves.May cause bodily injury etc. because of the adhered object. |
| Instruction | Look at the display in a well-lit place, keeping a certain distance.Eyesight may be weakened etc. if you look at it in a dark place or closely. |
Handling adapters
| Warning | |
| Don't | Do not use if the cord of the adapter is damaged.May cause fires, burns, electric shock, etc. |
| Don't | Never use the adapter in humid locations such as a bathroom.May cause fires, burns, electric shock, etc. |
| Don't | The DC adapter should only be used in negative grounded vehicles. Never use it in positive grounded vehicles.May cause fires, burns, electric shock, etc. |
| Don't | Do not touch adapters if you hear thunder.May cause electric shock etc. |
| Don't | Do not short-circuit the charger terminal when connected to an outlet or accessory socket. Also, do not allow any part of your body (hands, fingers, etc.) to come into contact with the charger terminal.May cause fires, burns, electric shock, etc. |
| Don't | Do not place heavy objects on the cord of the adapter or apply excessive force on it such as pulling it.May cause fires, burns, electric shock, etc. |
| Don't | When plugging/unplugging an AC adapter into/from the outlet, do not allow metallic straps or other metallic objects to come into contact with the prongs of the plug.May cause fires, burns, electric shock, etc. |
| Don't | Do not connect the voltage converter for overseas travel (travel converter) to the AC adapter.May catch fire, or cause overheat, electric shock, etc. |
| Don't | Do not apply excessive force on the connection part with the adapter connected to the handset.May cause fires, burns, bodily injury, electric shock, etc. |
| No wet hands | Do not handle the cord, charger terminal or power plug of the adapter with wet hands.May cause fires, burns, electric shock, etc. |
| Instruction | Always use the specified power supply and voltage.When using overseas, use the AC adapter that is available overseas.Using the incorrect power supply and voltage may cause fires, burns, electric shock, etc.AC adapter: 100V AC (Connect only with a household AC outlet)AC adapter available overseas: 100 to 240V AC (Connect only with a household AC outlet)DC adapter: 12/24V DC (for negative grounded vehicles only) |
| Instruction | If you replace the fuse in the DC adapter, always replace it with a specified fuse.May cause fires, burns, electric shock, etc. if you use the fuse other than specified one. Refer to the respective manuals for information on specified fuses. |
| Instruction | Wipe off any dust on the power plug.May cause fires, burns, electric shock, etc. if you use the power plug with dust adhering. |
| Instruction | Fully plug the adapter into the outlet or accessory socket.May cause fires, burns, electric shock, etc. if you do not insert it securely. |
| Instruction | Always grasp the adapters when unplugging the power plug from the outlet or accessory socket. Do not apply excessive force on it such as pulling the cord of the adapter.May cause fires, burns, electric shock, etc. since the cord of the adapter is damaged by pulling it. |
| Instruction | When plugging/unplugging an adapter into/from the handset, plug/unplug it straightly toward the terminal to connect, not applying excessive force on it such as pulling the cord.May cause fires, burns, bodily injury, electric shock, etc. if you do not plug/unplug it correctly. |
| Instruction | If the charger terminal is deformed such as bending it, immediately stop using. Also, do not use the deformed one by returning it to the original shape.May cause fires, burns, bodily injury, electric shock, etc. because of short circuit of it. |
| Unplug | Unplug the power plug of the adapter from the outlet or accessory socket when not using.May cause fires, burns, bodily injury, electric shock, etc. if you leave the power plug with it plugged into the outlet or accessory socket. |
| Unplug | If water or other liquids (drinking water, sweat, seawater, pet urine, etc.) enter the equipment, immediately remove the power plug from the outlet or accessory socket.May cause fires, burns, electric shock, etc. |
| Unplug | Always unplug the power plug from the outlet or accessory socket before cleaning the equipment.May cause fires, burns, electric shock, etc. if you do not unplug it. |
Caution

Don't
Do not touch the adapter for a long time when connected to an outlet or accessory socket. May cause burns etc.
Handling docomo nano UIM card
Caution

Instruction
Be careful with the cutting surface not to injure any part of your body such as fingers when handling the docomo nano UIM card. May cause bodily injury etc.
Handling near electronic medical equipment
Warning

Instruction
If you have electronic medical equipment such as an implanted cardiac pacemaker or an implanted cardioverter-defibrillator, always carry or use your handset at least 15 cm away from your implant. Electromagnetic signals may have harmful effects on the operation of the electronic medical equipment.

Instruction
Patients receiving medical treatment away from a medical facility (e.g. home treatment) who are using electronic medical equipment other than implanted cardiac pacemakers or implanted cardioverter-defibrillators should consult the respective manufacturers etc. for information regarding the effects of signals on the equipment. Electromagnetic signals may have harmful effects on the operation of the electronic medical equipment.

If there is any chance that the distance between the handset and a person closest to you may get shorter than 15 cm such as when you cannot freely move around, set the handset not to emit radio wave in advance (by setting Airplane mode, turning the power off, etc.).
Somebody nearby may be equipped with electronic medical equipment such as an implanted cardiac pacemaker or an implanted cardioverter-defibrillator. Electromagnetic signals may have harmful effects on the operation of the electronic medical equipment.

Follow the instructions given by the respective medical facilities regarding the use of the handset on their premises.
May have harmful effects on the operation of the electronic medical equipment.
Material list
Handset
| Part Material/Surface treatment | |
| Display side | Reinforced glass/Antifouling coating |
| Surrounding area of display side | PA resin (With glass)/Coating, Hard coating |
| Back PC resin + ABS resin/Coating | |
| Power key Aluminum/Anodizing | |
| Volume up/down key Aluminum/Anodizing | |
| Fingerprint sensor Epoxy resin/Hard coating | |
| Camera panel Acrylic resin/Hard coating | |
| Decoration of camera Aluminum/Anodizing | |
| Mobile light PC resin | |
| Earpiece/Speaker mesh SUS/Coating | |
| External connection jack (Metal section) | Copper + SUS/Gold plating, Tin plating |
| External connection jack (Resin section) | PA resin |
| Docomo nano UIM Card and microSD Card cover | PC resin/Coating |
| Hinge section of docomo nano UIM Card and microSD Card cover | Elastomer resin |
| Gasket of docomo nano UIM Card and microSD Card cover | Silicon rubber |
| docomo nano UIM card slot SUS | |
| microSD Card slot SUS/Ni plating | |
| Tray for inserting docomo nano UIM card | POM resin |
| IMEI plate PET resin | |
Handling precautions
General notes
- SH-02J is waterproof/dustproof, however, do not allow liquid such as water (drinking water, sweat, seawater, pet urine, etc.) and foreign object such as dust to get inside the handset and do not allow them to adhere to optional parts. The adapter and docomo nano UIM card are not waterproof/ dustproof. Do not use in humid or steamy areas such as bathrooms and avoid exposing to rain and other forms of moisture. If they are carried close to the skin, perspiration may cause internal components to corrode and result in malfunction. Note that if a problem is found to be due to moisture, the handset and parts are not covered by warranty and in some cases may be irreparable. Even when repairs are possible, repair charges will be incurred, since the damage is not covered by warranty.
- Clean only with a soft and dry cloth (such as the type used for eyeglasses).
- Forceful rubbing of the display with a dry cloth etc. may scratch its surface.
- Water drops, dirt, etc. left on the display may cause stains to form on its surface.
- Never use chemicals such as alcohol, thinners, benzene or detergents, as these agents may erase the printing or cause discoloration.
- Occasionally clean terminals with a dry cotton swab etc. Dirty terminals may result in poor connections and loss of power or insufficient battery charge. Keep the terminals clean with a dry cotton swab etc. Be careful with the terminals while cleaning them.
- Do not place the equipment near an air conditioning vent. Condensation formed due to rapid changes in temperature may cause internal corrosion and lead to a malfunction.
- Do not apply excessive force on the handset when using it. Carrying the equipment in a tightly packed bag or sitting on it put in your pocket may cause damage to the display, internal components, internal battery, etc. or result in a malfunction. Keeping an external connector device plugged into the external connection jack may cause damage or a malfunction.
- Do not rub or scratch the display with metal etc. May scratch it and cause a malfunction or damage.
- Use only optional parts specified by NTT DOCOMO. May cause a malfunction or damage when optional parts other than those specified by NTT DOCOMO are used.
- Read the respective user's guides supplied with supported optional parts carefully.
- Do not drop or otherwise subject the handset to severe impact. May cause a malfunction or damage.
Notes about the handset
- Do not forcefully press the surface of the touch panel or operate with a pointed object such as a fingernail, ballpoint pen or pin.
May damage the touch panel.
- Avoid using the handset in extremely high or low temperatures.
Use the handset within the range of a temperature between 5°C and 35°C and a humidity between 45% and 85%. For details on using it at a bathroom P. 11 "What you can do with waterproof/dustproof of SH-02J"
- Using the handset close to land-line phones, TVs, radios, etc. may have harmful effects on the operation of such equipment. Move as far away as possible from such items before use.
- Back up to the microSD Card, PC, cloud, etc. or keep a separate memo noting information stored on the handset. DOCOMO shall not be liable for any loss of content.
- When connecting an external connector device to the external connection jack, do not put it in obliquely and do not pull it while it is plugged in. May cause a malfunction or damage.
● The handset becomes warm during use or charging but this is not a malfunction.
- Do not leave the camera in direct sunlight.
May cause discoloration or burn-in of pixels.
- Use the handset with the docomo nano UIM Card and microSD Card cover closed.
Liquid such as water (drinking water, sweat, seawater, pet urine, etc.) or foreign object such as dust may get inside and cause a malfunction.
- Do not give a strong impact on the fingerprint sensor or scratch the surface.
May cause not only malfunction of the fingerprint sensor but also disabling authentication.
- Clean the fingerprint sensor with a soft and dry cloth (such as the type used for eyeglasses).
When the fingerprint sensor is dirty or gets wet on the surface, it cannot read the fingerprint and may degrade the authentication performance or cause an error.
● ● While using a microSD Card, do not remove the card or turn off the handset.
May cause data loss or a malfunction.
● ● Never place a magnetic card near the handset.
The stored magnetic data in cash cards, credit cards, telephone cards, floppy disks, etc. may be erased.
● ● Never place magnetized items near the handset.
Putting highly magnetized items closer may cause an error.
- Do not cover the proximity sensor area with a film or sticker, or dirty it.
Each function for using the proximity sensor may not work normally. Refer to the following for details on the position of the proximity sensor.
P. 14 "Part names and functions"
● The internal battery is a consumable product.
Though the battery life varies with use, change the battery if the battery life is extremely short even after being fully charged. For details on replacing the internal battery, contact the number listed in "Repairs" (in Japanese only) on the last page or a repair counter that DOCOMO specifies.
- Charge battery in areas where ambient temperature is between 5°C and 35°C.
● The battery life depends on the usage and deterioration of the battery.
- Depending on usage, the internal battery may swell as it approaches the end of its usable life.
Note that if a problem is found to be due to swelling of the internal battery, the handset and parts are not covered by warranty and in some cases may be irreparable. Even when repairs are possible, repair charges will be incurred, since the damage is not covered by warranty.
- Avoid the following situations when the handset is stored.
- Storage with the internal battery fully charged (immediately after charging is completed)
- Storage with no battery level (cannot turn the handset on) May lower the performance or shorten the usable life of the internal battery. Approximately 40% is recommended as the proper battery level for storage.
● The following is the type of the internal battery built into the handset.
| Label Battery type | |
| Li-ion00 Lithium-ion |
● The surface of the handset uses the aluminum material. Note that dent and abrasion are easily remained as aluminum is a soft material.
Notes about adapters
- Charge the battery in areas where the ambient temperature is between 5°C and 35°C.
- Do not charge the internal battery in the following locations.
- Areas with high humidity or dust, or in areas exposed to frequent vibrations
- Close to land-line phones, TVs, radios, etc.
- ● Adapters may become warm during charging but this is not a malfunction.
- Do not use the DC adapter to charge the battery when the car engine is not running.
May cause the car battery to run down. - When using an outlet with a feature to prevent the plug from being removed accidentally, follow the instructions in the outlet user's guide.
- Do not subject to strong impacts. Also, do not deform the charger terminals.
May cause a malfunction.
Notes about docomo nano UIM card
- Do not apply unnecessary force when inserting/removing the docomo nano UIM card.
- Customer is responsible for malfunctions arising from inserting docomo nano UIM card into a different IC card reader/writer etc.
● ● Always keep IC area clean. - Clean only with a soft and dry cloth (such as the type used for eyeglasses).
- Keep a separate memo and note information stored on the docomo nano UIM card.
DOCOMO shall not be liable for any loss of content. - To protect the environment, please take any unneeded docomo nano UIM cards to a sales outlet such as a docomo Shop.
- Do not damage, touch haphazardly or short-circuit the IC. May cause data loss or a malfunction.
- Do not drop or otherwise subject the docomo nano UIM card to severe impact.
May cause a malfunction. - ● Never bend the docomo nano UIM card or place heavy objects on it.
May cause a malfunction. - Do not insert the docomo nano UIM card to the handset with a label, sticker, etc. attached on the card.
May cause a malfunction.
Notes on using Bluetooth function
- The handset supports the security function that meets the Bluetooth specification for security during communication using Bluetooth functions. However, the security may not be sufficient depending on the configuration etc. Take care of the security while making communication using Bluetooth function.
- Even if any leak of data or information occurs while making communication using Bluetooth function, DOCOMO shall not be liable for any loss of content.
● ● Radio frequencies
In the home screen, [ ] ▶ [Settings] ▶ [About phone] ▶ [Authentication] to confirm the radio frequencies the Bluetooth function of the handset uses. The followings are the descriptions:

① 2.4: This radio equipment uses the 2,400 MHz band.
② FH: The modulation system is the FH-SS system.
③ 1: The estimated coverage distance is 10 m or less.
④ XX: Another modulation system is used.
⑤ 4: The estimated coverage distance is 40 m or less.
⑥ All radio frequencies between 2,400 MHz and 2,483.5 MHz are used and the frequencies for mobile object identifiers cannot be avoided.
● ● Cautions on using Bluetooth devices
Bluetooth operates at radio frequencies assigned to the in-house radio stations for a mobile object identifier that have to be licensed and are used in production lines of a factory, specific unlicensed low power radio stations, and amateur radio stations (hereafter, referred to as “another radio station”) in addition to industrial, scientific and medical devices or home electric appliances such as microwave ovens.
- Before using the handset, make sure that "another radio station" is not operating nearby.
- If radio interference between the handset and "another radio station" occurs, avoid interference by moving immediately to another place or "turning off the power".
- Contact the number listed in "General Inquiries" on the last page for further details.
Notes about wireless LAN (WLAN)
- Wireless LAN (WLAN) uses radio waves to communicate information. Therefore, it has an advantage of freely connecting to the LAN within the service area. On the other hand, if security setting is not set, it is possible for a malicious third party to intercept the communication contents or hack. It is recommended to set security setting at your own risk and judgement.
● ● Wireless LAN
Do not use wireless LAN near magnetic devices such as electric appliances or AV/OA devices or in radio waves.
- Magnetism or radio waves may increase noises or disable communications (especially when using a microwave oven).
- When used near TV, radio, etc., reception interference may occur or channels on the TV screen may be disturbed.
- If there are multiple wireless LAN access points nearby and the same channel is used, search may not work correctly.
● ● Radio frequencies
In the home screen, [ ] ▶ [Settings] ▶ [About phone] ▶ [Authentication] to confirm the radio frequencies the WLAN-installed devices use. The followings are the descriptions:

① 2.4: This radio equipment uses the 2,400 MHz band.
② DS: The modulation system is the DS-SS system.
③ OF: The modulation system is the OFDM system.
④ 4: The estimated coverage distance is 40 m or less.
⑤ All radio frequencies between 2,400 MHz and 2,483.5 MHz are used and the frequencies for mobile object identifiers can be avoided.
Available channels for the handset's wireless LAN are between 1 and 13. Note that other channel access points cannot be connected.
Available channels may vary depending on the country. For use in an aircraft, contact the airline beforehand.
● ● Cautions on using 2.4 GHz devices
WLAN-installed devices operate at radio frequencies assigned to the in-house radio stations for a mobile object identifier (radio stations requiring a license) used in production lines of a factory, specific low power radio stations (radio stations requiring no license), and amateur radio stations (radio stations requiring a license) in addition to industrial, scientific and medical devices or home electric appliances such as microwave ovens.
- Before using this device, make sure that the in-house radio stations for a mobile object identifier, specific low power radio stations and amateur radio stations are not operating nearby.
- If the device causes harmful radio interference to the in-house radio stations for a mobile object identifier, immediately change the radio frequency or stop use, and contact the number listed in "General Inquiries" on the last page for crosstalk avoidance, etc. (e.g. partition setup).
- If the device causes radio interference to specific low power radio stations for a mobile object identifier or amateur radio stations, contact the number listed in "General Inquiries" on the last page for further details.
Voluntary control for radio wave interference
- This product satisfies technical requirements based on VCCI Rules for Voluntary Control Measures and its satisfied mark is displayed on the electronic nameplate of the product.
You can see the electronic nameplate by operating the product as follows.
In the home screen, [ ] ▶ [Settings] ▶ [About phone] ▶ [Authentication]
FeliCa and NFC reader/writer
● The FeliCa, NFC reader/writer and P2P function of the handset use weak radio waves whose handling does not require a license of radio station.
- The frequency in use is the 13.56 MHz band. When another reader/writer or P2P function is being used nearby, keep enough distance from it. Make sure that there is no radio station using the same frequency band in the nearby area.
- For use in an aircraft, contact the airline beforehand. Use of the function may be restricted in some countries. Check conditions such as regulations of the country/region to use the function.
Caution
- Never use the handset that is modified. Using a modified device violates the Radio Law and/or the Telecommunications Business Law.
The handset follows the regulations regarding the certification of conformity with technical regulations for specific radio stations etc. based on the Radio Law and authentication of conformity with technical regulations for devices etc. based on the
Telecommunications Business Law, and the "Technical Conformity Mark" can be displayed on the electronic nameplate of the handset as a proof. You can see it by operating as follows. In the home screen, [ ] ▶ [Settings] ▶ [About phone] ▶ [Authentication]
If the screws of the handset are removed and a modification is given to the inside, the certification of conformity with technical regulations etc. will become invalid. Never use the handset without the valid certification etc. Doing so violates the Radio Law and/or the Telecommunications Business Law.
- Be careful when using the handset while driving a motor vehicle.
Using the handset in hand while driving is regarded as a punishable act. However, the punishment has no application in some cases such as when rescuing sick and injured people or maintaining public safety.
- ● The FeliCa reader and NFC reader/writer function of the handset conform to the domestic radio wave standards. When you use it overseas, check conditions such as regulations of the country/region in advance.
- ● Never change the basic software improperly.
This may be regarded as a conversion of software and repairs may be refused.
Waterproof/Dustproof
SH-02J is waterproof to IPX5 1 and IPX8 2 standards, and dustproof to IP6X *3 standard if the docomo nano UIM Card and microSD Card cover is securely closed.
*1 IPX5 means that phone keeps functioning after being subjected to a jet flow (12.5 liters/min) discharged from a nozzle (inner diameter: 6.3 mm), from all directions (approximately 3 m from the handset) for 3 minutes or more.
*2 IPX8 means that SH-02J phone keeps functioning after it is slowly submerged to depth of 1.5 m in static tap water at room temperature, left there for approximately 30 minutes and then taken out.
*3 IP6X means the level of dust protection. Phone has the ability to prevent dust from entering inside after it is left in the device containing dust (diameter: 75 μm or smaller) for 8 hours, agitated and then taken out.
What you can do with waterproof/dustproof of SH-02J
- ● You can call without using an umbrella in the rain (for rainfall of approximately 20 mm per hour).
- ● You can rinse dirt off from the handset. Wash the handset with low-pressure water flow (6 liters/min or lower and tap water at room temperature (between 5°C and 35°C)), holding it approximately 10 cm below faucet or shower head. Wash by using only your hands, not a brush or sponge, with the docomo nano UIM Card and microSD Card cover held in position. Drain the handset before use (P. 12 "Draining water when the handset gets wet").
- ● You can use the handset at a poolside. Do not throw water in a swimming pool on the handset or soak the handset in the water of a swimming pool.
● ● You can use the handset in a bathroom.
- Do not let the handset get wet with liquids other than water at room temperature (hot spring water or water containing soap, detergent or bath powder) or do not soak the handset in a bathtub.
May cause a malfunction. If the handset gets wet with liquids other than water at room temperature or you fall the handset into the bathtub, immediately rinse it in the specific procedure.
- Use the handset within 2 hours in a bathroom where the range of a temperature is between 5°C and 40°C and a humidity is 99% or less.
All function's continuous operations are not completely guaranteed.
- If the handset gets wet, be sure to drain water and dry naturally in the specific procedure (P. 12 "Draining water when the handset gets wet").
Also, drain water after using the handset in a bathroom or when condensation occurs inside the camera lens.
- The rapid changes of temperature may cause condensation. Wait until the handset reaches room temperature before you bring it from a cold place into a warm place such as a bathroom. Also, do not splash cold water on the warmed handset in a bathroom. May cause a malfunction.
- Never charge the battery in a bathroom.
- The signal does not reach and a call or data communication may not be available depending on the structure and conditions of the bathroom.
- When you operate the handset with wet hands, it may not respond or inadvertent operations may occur.
- Do not use the handset connected to an earphone or external connector device in a bathroom.
Things to keep in mind
To maintain waterproof/dustproof performance, check the followings.
- Securely close the docomo nano UIM Card and microSD Card cover. Be careful not to apply excessive force on the rubber gasket when opening and closing.
- Make sure that the docomo nano UIM Card and microSD Card cover is completely closed without floating.
- To maintain waterproof/dustproof performance, the handset has the docomo nano UIM Card and microSD Card cover that allows you to close securely. Note that opening it forcibly may cause injuries to your nails, fingers, etc.
- For details on how to open/close the docomo nano UIM Card and microSD Card cover P. 15 "Inserting docomo nano UIM card"
- To maintain waterproof/dustproof performance, replacement of parts is recommended every 2 years regardless of whether the handset appears normal or abnormal. DOCOMO replaces the parts as a chargeable service. Bring the handset to a repair counter that DOCOMO specifies.
Precautions
- When your hands are wet or water/foreign object adheres to the handset, do not open/close the docomo nano UIM Card and microSD Card cover.
- Close the docomo nano UIM Card and microSD Card cover securely. Even a fine obstacle (one hair, one grain of sand, tiny fiber, etc.) put between contact surfaces may allow liquids or dust to get inside.
- If the handset gets wet with water or other liquids with the docomo nano UIM Card and microSD Card cover opened, the liquid may get inside causing electric shocks or malfunction. Stop using the handset, turn off the power and contact a repair counter that DOCOMO specifies.
● The rubber gasket of the contact surface between the main body and docomo nano UIM Card and microSD Card cover plays an important role in maintaining waterproof/dustproof performance. Do not remove or scratch it. Also, prevent dust from adhering to it.
If the rubber gasket is damaged or deformed, contact a repair counter that DOCOMO specifies.
- Do not insert a pointed object through the docomo nano UIM Card and microSD Card cover gaps. It may cause damage to the rubber gasket and allow liquids or dust to get inside.
- Do not use the handset underwater (including key operations). May cause a malfunction.
- Do not directly apply water flow stronger than allowed (over 6 liters/min). May cause malfunction though SH-02J provides waterproof performance of IPX5.
- Do not let the handset get wet with liquids other than water at room temperature (between 5°C and 35°C) or do not soak the handset in the liquids. If you let the handset get wet with liquids other than water at room temperature or soak the handset in the liquids, stop using the handset and wash it with water at room temperature.
- Do not wash the handset in a washing machine etc.
● To prevent condensation, wait until the handset reaches room temperature before you bring it from a cold place to a warm place.
● ● Never soak the handset in hot spring water or water containing soap, detergent or bath powder.
- Do not soak the handset in hot water, use it in a sauna or apply hot air (from a hair dryer etc.) to it.
● ● Do not soak the handset in seawater.
- Do not put the handset directly on sand/dirt.
- If foreign object such as salt water, seawater, drink, seasoning, food, dirt or soil adheres to the handset, rinse it off immediately. If it becomes dry and hard, it is difficult to remove it and may cause damage or malfunction.
- Do not leave the handset wet. In cold places, water may freeze and cause malfunction.
● ● The handset does not float on water.
- Do not let the handset fall. It may become scratched and cause the waterproof/dustproof performance to degrade.
- Do not leave water on the mouthpiece/microphone, earpiece/speaker or earphone/microphone terminal. Such water may interfere with talking.
- Do not poke the mouthpiece/microphone, earpiece/speaker, external connection jack, earphone/microphone terminal, etc. with a pointed object.
- Do not insert an earphone/microphone to the handset while the handset is wet. May cause a malfunction.
- ● Optional parts are not waterproof/dustproof. Do not use them in rooms where water is regularly in use such as bathroom, shower room, kitchen or lavatory.



Soap/Detergent/ Bath powder
Seawater
Swimming pool


Hot spring Sand/Dirt
- ● DOCOMO does not guarantee actual operations under all states. Malfunctions deemed to be caused by inappropriate operation by the customer are not covered by the warranty.
Draining water when the handset gets wet
When the handset is wet, water may flow out after wiping it off. Drain the water by following the steps below.
1 Wipe off water on the handset surface with dry and clean cloth etc.
- If a strap is attached, dry the strap as well.

2 Shake the handset approximately 20 times, securely holding it, until there is no more water splattering


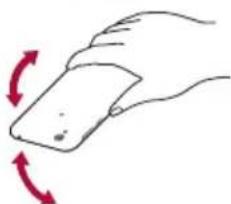
To drain water off, shake the handset with the mouthpiece/microphone turned down
To drain water off, shake the handset with the earpiece/speaker turned down
3 Softly press the handset against dry and clean cloth etc. to wipe off water remaining in the grooves of the mouthpiece/microphone, earpiece/speaker, keys, external connection jack, earphone/microphone terminal, strap hole, etc.
- Pat the opening with cloth etc. to remove water because there may be any water remaining in the grooves of each part.

4 Wipe off water oozing from the handset with dry and clean cloth etc. and dry naturally for approximately 3 hours
- Water, if any, remaining in the main body may ooze after wiping off.
- Pat the opening with cloth etc. again to remove water because you may not be able to hear sounds well if drainage is insufficient.
Charging
Optional parts are not waterproof/dustproof. Check the followings before and after charging.
● Make sure that there is no water or foreign object on the handset. If foreign object adheres to the handset, immediately rinse it off. Also, if the handset is wet or after the handset is wet, adequately drain it and wipe off water with dry and clean cloth etc. then dry naturally before opening the docomo nano UIM Card and microSD Card cover.
Warning
Never try to connect the microUSB plug when the handset is wet or foreign object adheres to the handset.
● The AC adapter (sold separately) does not provide waterproof dustproof performance though the handset provides them. Inserting the microUSB plug while the equipment is wet or dirty may cause short circuit when you charge the battery and lead to abnormal overheat, malfunction, fires or burns due to water, foreign object, etc. adhering to the handset or microUSB plug.
- Do not touch an AC adapter with your hands wet. May cause electric shock.
- Do not use the AC adapter in a place subject to water. Do not use it in rooms where water is regularly in use such as bathroom, shower room, kitchen or lavatory. May cause fires or electric shock.
Before Using the Handset
Part names and functions


1Docomo nano UIM Card and microSD Card cover
2docomo nano UIM card slot
● ● The tray for inserting the docomo nano UIM card is stowed.
- For details on docomo nano UIM card P. 15 "docomo nano UIM card"
3microSD Card slot
- For details on microSD Card P. 75 "microSD Card (external storage)"
4 Front camera
- For details on using camera P. 52 "SHCamera"
5 Earpiece/Speaker
● ● The other party's voice on the phone, ringtone, music, etc. can be heard from here.
6 Proximity sensor/Brightness sensor *1
- The proximity sensor detects the distance to the face and prevents inadvertent operation of touch panel during a call. - The brightness sensor detects the brightness of the surrounding area and adjusts the brightness of the backlight
7 Display/Touch panel *2
- For details on operation of the touch panel P. 18 "Operation of touch panel"
8Incoming/Charging lamp
- For details on incoming/charging lamp P. 26 "Incoming/Charging lamp"
9(+)//(-): Volume up/down key
- ● Adjusts the volume in each function.
10 | (●): Power key
- Use to turn the power on/off, etc. - Use to turn the display on/off. - For details on operation of the power key P. 18 "Turning power on/off"
11 Fingerprint sensor
- Use to unlock the touch panel etc. by fingerprint authentication. - For details on using fingerprint sensor P. 71 "Fingerprint authentication"
12Strap hole
13 Back camera
● For details on using camera P. 52 "SHCamera"
14 Earphone/Microphone terminal
15 Mobile light
16 mark
- IC card is contained (It cannot be removed). - For details on using mark P. 50 "Osaifu-Keitai", P. 79 "NFC communication"
17 External connection jack
- For details on connection to an external device P. 17 "Charging with AC adapter/DC adapter", P. 80 "PC connection", P. 80 "USB host function"
18 Mouthpiece/Microphone
- Use it during call, when recording videos, talking to EMOPA, etc.
19 LTE/FOMA antenna *3
20GPS antenna *3
21Wi-Fi/Bluetooth antenna *3
*1 Do not cover the sensor area with your hand or paste a sticker etc. on the sensor area. The sensor may not work properly.
*2 If the handset is equipped with a commercially available corresponding flip cover, you can turn the display on/off by opening/closing the flip cover. If you close the equipped flip cover obliquely, the display may not be turned off.
*3 The antenna of back is built into the main body. Covering the antenna area with your hand may influence the communication quality.
● The back cover cannot be removed. Removing it forcibly may cause damage or malfunction.
Earpiece/Speaker
- This handset combines the earpiece and speaker. When you convert to a hands-free talking, end a call, etc., sound gradually increases to the set volume to prevent a loud sound from the speaker at your ear. - When you use [Answer] function of Suguden, the handset detects that your ear is closing to the speaker from which the ringtone is ringing and the ringtone volume is changed to proper volume. However, the loud volume may be sounded about your ear such as when not detecting that your ear is closing, so set the ringtone volume properly and use.
Mobile light
● The mobile light may be automatically turned off if you use the handset for a long time or the handset becomes warm after the mobile light is turned on. Also, you may not be able to use the mobile light if the handset is warm.
Microphone
- When using functions which support the microphone, do not cover the hole of the microphone.
Earphone/Microphone
● Depending on the type of the earphone/microphone, it may not be available.
docomo nano UIM card
A docomo nano UIM card is an IC card that records personal information, such as your phone number.
- ● You cannot use functions such as the phone or packet communication without inserting a docomo nano UIM card.
- In Japan, you cannot call to the emergency number (110, 119 or 118) without inserting a docomo nano UIM card.
● A docomo nano UIM card has a security code called PIN code (P. 71 "PIN code").
● The handset supports only docomo nano UIM card. If you have a docomo mini UIM card, UIM or FOMA card, bring it to a docomo Shop to replace. - Before inserting or removing the docomo nano UIM card, turn off the power. Hold the handset securely with your hand.
- Inserting docomo nano UIM card
1 Open the docomo nano UIM Card and microSD Card cover
- Hook the tip of a finger into the slot and pull out it forward (1), and then rotate it in the direction of the arrow to open (2).

2 Remove the tray from the docomo nano UIM card slot
- Hook the tip of a finger into the tray to remove it by slowly pulling it straight out.
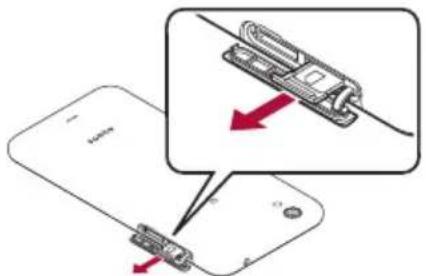
3 Hold the docomo nano UIM card with the IC (gold) side turned up and set it on the tray

4 Insert the tray slowly into the docomo nano UIM card slot

- The docomo nano UIM card slot is at the right side of the microSD Card slot. When you insert the tray, be careful not to insert it to the microSD Card slot.

docomo nano UIM card slot (right side)
- Do not forcibly insert the tray at an angle or with the wrong side up. The docomo nano UIM card slot or tray may be damaged.

5 Close the docomo nano UIM Card and microSD Card cover
- Stow the hinge section of the docomo nano UIM Card and microSD Card cover (1) and push the cover in the direction of the arrow to close it so that gaps are not left between the handset and the cover (2). When closing it, push securely like tracing it in the direction of the hinge section (3).

■ Removing docomo nano UIM card
1 Open the docomo nano UIM Card and microSD Card cover
2 Remove the tray from the docomo nano UIM card slot

3 Remove the docomo nano UIM card from the tray

4 Insert the tray slowly into the docomo nano UIM card slot

5 Close the docomo nano UIM Card and microSD Card cover
- Do not allow the docomo nano UIM card or tray to fall when removing them.
● Make sure not to touch or damage the IC (gold) of the docomo nano UIM card when handling it. Also, note that inserting or removing the docomo nano UIM card forcibly may damage it or deform the tray. - Refer to the docomo nano UIM card user's guide or the DOCOMO website for more information on the docomo nano UIM card.
- Do not misplace the docomo nano UIM card once it is removed.
IMEI plate
- A plate on which the IMEI number (International Mobile Equipment Identifier) is printed is stowed near the docomo nano UIM card slot. The IMEI number is required when you contact a repair counter that DOCOMO specifies, so do not pull it out.
- Note that pulling out the IMEI plate forcibly or adding forces on it may damage the plate.
- If you accidentally pull out the IMEI plate, slowly return the IMEI plate to the original position while taking care not to insert it too deep.
Charging
The internal battery is not fully charged at the time of purchase. Be sure to charge the battery before use.
■ Cautions while charging
- For details on the estimated charge time P. 90 "Main specifications"
- ● The battery can also be charged with the handset turned on (While charging, the battery icon appears with [ ] superimposed).
- Do not charge for a long time with the power left turned on. If the handset is left turned on after charging is complete, the internal battery charge level decreases.
In this case, an AC or DC adapter (sold separately) charges the battery again. However, depending on the time when the handset is disconnected from the AC or DC adapter, the battery charge level may be low or the battery may only be usable for a short time. - If the handset is left for a long time even after the charging is completed, the battery level may decrease.
- When the battery is empty and the handset is being charged, the charging lamp may not illuminate immediately. However, charging is in progress.
- If the battery empty alert is displayed and the power cannot be turned on, charge the battery for a while.
● While charging, the handset may not be turned on even when the charging lamp is illuminated in red. Charge longer and try turning the power on again. - Frequently recharging the battery when its power is still remaining enough may shorten the usable life of the internal battery. It is recommended to use the battery to a certain level (e.g. after the battery level decreases) before recharging.
- When the battery becomes warm, charging may automatically stop even if the battery has not been fully charged. Charging automatically resumes after the temperature lowers to an appropriate temperature.
■ Estimated battery life when fully charged
| Continuous talk time | FOMA/3GApprox. 900 minGSMApprox. 870 minVoLTE (Voice call)Approx. 900 min |
| Continuous stand-by time | FOMA/3GAt rest: Approx. 900 hr (Preferred network type: 4G/3G/GSM(Auto))GSMAt rest: Approx. 760 hr (Preferred network type: 4G/3G/GSM(Auto))LTEAt rest: Approx. 780 hr (Preferred network type: 4G/3G/GSM(Auto)) |
- For details on the battery life P. 90 "Main specifications"
Internal battery usable life
● Internal battery is a consumable product. Battery life per charge is gradually reduced every time the battery is charged.
- When battery life per charge is reduced to approximately half of the default time, this means that the internal battery is approaching the end of its usable life. In this case, it is recommended to replace the battery as soon as possible. For details on replacing the internal battery, contact the number listed in "Repairs" (in Japanese only) on the last page or a repair counter that DOCOMO specifies.
- If you watch videos etc. while charging for a long time, the usable life of the internal battery may become shorter than estimated.

AC adapter and DC adapter
- Refer to user's guide of AC Adapter 05 (sold separately) or DC Adapter 04 (sold separately).
● ● AC Adapter 05 covers from 100 to 240V AC.
● The shape of the plug for the AC adapter is for 100V AC (for domestic use). To use the AC adapter of 100 to 240V AC overseas, a conversion plug adapter applicable to your country of stay is required. Do not use a voltage converter for overseas travel to charge the battery.
Charging with AC adapter/DC adapter
[Read the user's guides of AC Adapter 05 (sold separately) and DC Adapter 04 (sold separately)]
● Following operations describe how to charge with AC Adapter 05 or DC Adapter 04.
1 Insert the microUSB plug of the AC adapter/DC adapter horizontally into the external connection jack on the handset with the side marked with "B" turned up
- Check the direction (front or rear) of the microUSB plug and insert it horizontally.

2 When you erect the AC adapter power plug and insert it into an outlet or insert the DC adapter power plug into a car accessory socket, the charging lamp illuminates and charging starts

3 When charging is complete, the charging lamp turns off
4 Remove the AC adapter power plug from the outlet, or remove the DC adapter power plug from the car accessory socket
5 Remove the microUSB plug of the AC adapter/DC adapter horizontally from the external connection jack
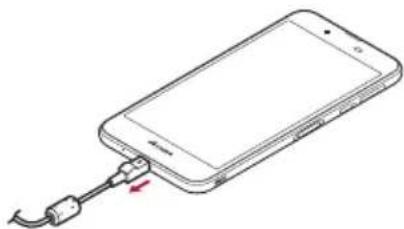
Note that inserting or removing the equipment forcibly may cause damage to the external connection jack and the microUSB plug or result in a malfunction.
When using a DC adapter
● The DC adapter should only be used in negative grounded vehicles (12 and 24V DC).
- Do not use with the car engine shut off. May drain the car battery.
● The DC adapter fuse is a consumable product. For replacement, purchase a new fuse at a nearest auto parts retailer etc.
● Refer to the user's guide of DC Adapter 04 for details.
Charging with Micro USB Cable 01
You can charge the handset by connecting the handset to a PC with Micro USB Cable 01 (sold separately).
- For details on connecting to a PC 📋 P. 80 "PC connection"
Turning power on/off
Turning power on
1 (for at least 2 seconds)
- When you turn the power on for the first time, make the initial settings (P. 23 "Initial settings").
■ Turning power off/Reboot/Emergency mode
1 ⏻(⊕) (for at least 1 second)
2 Select an item
■ Power off: Turn off the handset.
■ Reboot: Reboot the handset.
Emergency mode: For details ☑ P. 20 "Emergency mode"
Turning display on/off
The display is turned off when ⏻(⊕) is pressed or the handset is not in use for a set length of time.
Press (①) while the display is turned off to turn it on.
Touch panel lock
When the power or the display is turned on, the touch panel is locked.
Touch [ ] to unlock.
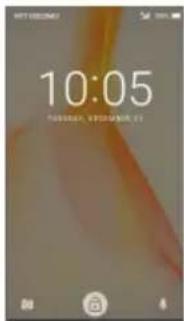
Operations in touch panel lock screen
● To set/disable the manner mode: (—) (for at least 2 seconds)
● ● To activate SHCamera: []
- To activate しゃべってコンシェル (Shabette-Concier): [ ]
● ● To activate Clock: Touch the clock
● ● To display the detailed information on notifications: Drag the clock down
● ● To display the status panel: Drag the status bar down
- The notifications are displayed in the lock screen of the touch panel. You can make settings for displaying of notifications in [When device is locked] (P. 63 "Sound & notification").
- If you set [エモパー設定] (EMOPA settings) to ON, various information delivered by EMOPA is displayed under the clock. Depending on the information, you can check the related information or details by touching it twice.
Also, when [エモパーメモ] (EMOPA memo) is ON, you can use EMOPA memo in the lock screen of the touch panel.
- When [エモパー設定] (EMOPA settings) is set to ON, Clock is not activated even if you touch the clock.
- For details on EMOPA ☐ P. 66 "EMOPA"
Basic operation
The followings describe basic operations of the handset such as operations of the touch panel and navigation keys, and operations for shooting screenshot.
Operation of touch panel
The followings describe the operations to use the display (touch panel).
● Operations may differ depending on the function and screen in use.
Cautions when using the touch panel
● The touch panel is designed to be lightly touched with your finger. Do not forcefully press with your finger or a pointed object (fingernail, ballpoint pen, pin, etc.).
- In the following cases, the touch panel may not work even if you touch it. May cause a malfunction.
■ ● Operation with a gloved finger
■ ● Operation with the tip of a fingernail
■ ● Operation with foreign object placed on the operation pad
■ ● Operation on the touch panel on which a protective sheet, sticker, etc. is put
■ ● Operation while the touch panel is wet
■ ● Operation with fingers wet with sweat, water, etc.
■ ● Operation under water
● Operations may be interrupted if you touch an area other than a confirmation screen or the status bar while the confirmation screen etc. is displayed.
Touch
Touch a key or an item displayed on the screen and then release your finger from it to select or set it.

Touch and hold
When you keep your finger on the touch panel, a menu may appear depending on the function and screen in use.
Slide (Swipe)/Drag
Move your finger while keeping it on the touch panel to scroll the screen or move an icon, a widget, etc. to the desired position. In addition, when you touch a menu or an item by mistake, move your finger away from it to cancel the selection.
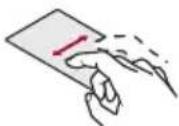
Flick
Move your finger like sweeping the touch panel in the home screen etc. to switch pages.

Pinch out/Pinch in
You may be able to zoom the screen in/out etc. by putting two fingers on the touch panel and moving them with putting a distance between two fingers apart (pinch out)/closer (pinch in) depending on the function and screen in use.
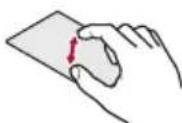
Operation while using function
Navigation keys
Use the navigation keys displayed at the bottom of the screen to perform the basic operations.
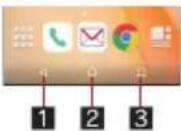
1 ◀/▽: Back key/Close key
- ● Return to the previous screen.
- ● Close the keyboard.
2 O: Home key
● ● Display the home screen.
3 □: Recent Apps key
- Display Recent Apps (P. 29 "Recent Apps").
Using user-aid function
You can quickly activate an app supporting the user-aid function.
1 Touch and hold [O]
- To set an activating app: In the home screen, [ ]▶ [Settings] ▶ [Apps] ▶ [+] ▶ [Default Apps] ▶ [Assist & voice input] ▶ [Assist app] ▶ select an app
Retrieving menu
When you touch [ ]/ [ ]tc. slide the left edge of the screen to the right or touch and hold the screen, functions (menus) available in that screen appear.
Example: App list screen

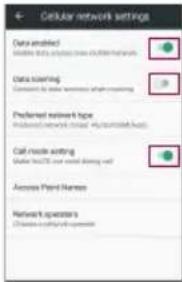
Switching the settings
When a check box etc. is displayed beside the setting item, you can set it enabled/disabled or ON/OFF by touching it.
Example: Call settings screen, Cellular network settings screen
● ● []: Enabled, [ ]: Disabled

● ● [ ]: ON, [ ]: OFF
Vertical/Horizontal display
The screen display is switched when you tilt the handset.
- Vertical/Horizontal display may not be switched even if the handset is turned depending on the screen being displayed.
- ● Vertical/Horizontal display is not switched if the handset is turned while it is positioned parallel to the ground.
● The screen display may not be switched properly when a sound or a vibration is being activated. - Vertical/Horizontal display may not be switched properly right after the display or power is turned on.
- ● You can set the display not to automatically switch (P. 64 "Display").
● Screens may be displayed in the full screen depending on the app when you switch from vertical display to horizontal display.
Shooting screenshot
Hold () + (-) down for at least 1 second to shoot the screen being displayed as an image.
● ● Shot images are saved on the handset memory and you can check them by using Album etc.
- Alternatively, you can shoot the screenshot by using Clip Now (P. 65 "Clip Now").
● Data cannot be saved while displaying e-books etc.
● Data may not be saved completely or partially depending on the app.
Twist magic
Twist your wrist holding the handset to switch to the previous app that you have used.
1 In the home screen, [ ] ▶ [Settings] ▶ [Useful] ▶ [Twist magic]
2 Select an item
■ Turn on/off Twist magic: Set whether to use Twist magic.
■ Setting to restrict operation: Set apps in which operations of Twist magic are restricted. Twist magic is not operated while using the set app.
■ Let's Try!: Try functions or check how to use with a video tutorial by using "Let's Try!".
● This function may not work depending on the app in use. Also, in the following cases, Twist magic is not available.
■ ● On horizontal display
■ ● In the lock screen
■ In the home screen
■ In the status panel
■ ● During an incoming call
■ ● While Childlock set
■ ● While [Screen pinning] function activated
■ ● While "Let's Try!" displayed
Using Twist magic
1 Twist your wrist, holding the handset (1)
2 Return your wrist to the original position (2)
- Switch to the previous app that you have used.

Switching Apps
Switch to the second app displayed in Recent Apps. Operate repeatedly to switch between the top and the second app displayed in it alternately. For details on Recent Apps P. 29 "Recent Apps"

1 The second usage history item
● ● This is the history item of previous app that you have used. Carry out Twist magic to switch to this app.
2The top usage history item
● ● This is the history item of app that you are using. Carry out Twist magic to move it to the second one in Recent Apps.
● The history item may not be remained in Recent Apps depending on the app. You cannot switch to the app whose history item is not remained.
Emergency mode
You can save the internal battery by restricting settings and functions on the handset.
1 (○) (for at least 1 second) ▶ [Emergency mode] ▶ [OK]
• The handset restarts and it switches to Emergency mode.
■ Disabling Emergency mode
1 (⊕) (for at least 1 second) ▶ [Emergency mode] ▶ [OK]
- Alternatively, in the Emergency mode screen, [Stop saving] ▶ [OK] to disable Emergency mode. - The handset restarts and Emergency mode is disabled.
Searching information on the handset and websites
1 In the home screen, select "Google" folder ▶ [Google]
- If the confirmation screen for Google Now ™ is displayed, check the content, follow the instructions on the screen and operate.
- Quick search box appears.
2 Enter the keyword

1 Search box
- Enter the keyword to search with. - When the keyword is entered, apps, data, etc. whose names start with the entered characters are searched and displayed as a list.
2Switch to Voice Search
- Alternatively, say "Ok Google" at the microphone to switch to Voice Search. - When [Search, or say "Ok Google"] is displayed in the search box etc., the operation is available.
3 Select the search result
- When a search result is an app, the corresponding app is activated.
- If [IMAGES] etc. is displayed, you can search by selecting a genre.
- When you cannot see search results hidden behind the keyboard, touch [▼] to close the keyboard.
- When [ ] is displayed in the search results screen etc., touch [ ] to set the search.
Character entry
You can enter characters using the QWERTY keyboard, 12 keyboard, voices and kuten codes.
- When entering characters, touch [] at the bottom of the screen to set the input software to use. The explanations are based on the case when [S-Shoin] is set here.
Keyboard layouts
● ● You can use the following two types of the keyboards.
| QWERTY keyboard | You can enter a displayed character by touching the character entry key. Use romaji for entry. |
| 12 keyboard Several characters are assigned to one character entry key. Enter characters by flicking a character entry key up/down or to the left/right.You can enter characters by touching a character entry key until a character which you want to enter is displayed. | |
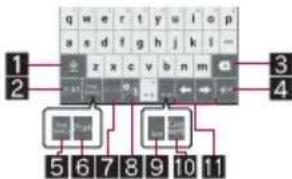
QWERTY keyboard

※Each key may change depending on the settings and the condition.
1 Shift key
- Touch to switch between upper/lower case characters etc.
- When [ ] is displayed, lower case characters are entered. When [ ] is displayed, the first character to be entered becomes upper case one. When [ ] is displayed, upper case characters are entered.
- Symbols that can be entered using the keyboard change when you switch the upper/lower case characters.
②Input mode switching key
- Switch input modes.
- Touch to switch input modes in the order of Half Numeric → Hiragana/Kanji → Half Alphabet. Slide to the right to switch input modes in the order of Hiragana/Kanji → Half Numeric → Half Alphabet.
- Slide up to select an input mode other than Hiragana/Kanji, Half Alphabet and Half Numeric as well.
• The keyboard set in each input mode is displayed.
3 Delete key
- Delete characters displayed in a direction set in Delete key behavior.
4 Enter key
- Insert a line feed.
● ● Determine the entered characters. - ● Execute operations entered in an entry field such as the search box.
- Move to the next entry field.
- Touch and hold to close the keyboard.
5 Symbol key
● ● Display the pictogram/Deco-mail pictogram/symbol/emoticon list.
You cannot enter these symbols in some apps.
- Slide to the right to display Quote apps list.
6 Katakana and alphabet key
- Display katakana of the entered characters or conversion candidates (katakana and alphabet conversion candidates) of alphabets or symbols assigned to a touched key.
- Slide to the right to display Quote apps list.
7 Undo key
- - Undo the previous operation.
8 Setting key
● ● Display setting menu.
9 Space key
- Enter a space.
10 Conversion key
- Convert the input characters.
11 Cursor key
- Move the cursor or change the range of characters to be converted.
12Move position
- Touch[]/[ ] to move the keyboard, conversion candidates field, etc. to the left/right.
13 Katakana and alphanumeric key
- Display katakana of the entered characters or conversion candidates (katakana and alphanumeric conversion candidates) of alphanumeric or symbols assigned to a touched key.
- Slide to the right to display Que apps list.
14 Reverse toggle key
- ● Display characters assigned to the same key in the inverse order.
15 Character switching key
- Touch to switch the upper/lower case characters.
- Touch to add dakuten/handakuten.
Switching keyboards
Example: In Hiragana/Kanji input mode on vertical display
1 In the character entry screen, [PZ[Input UI] ▶ [QWERTY keyboard]/[12 keyboard]
- Alternatively, slide [] up to switch keyboards.
Setting character entry
Display/Layout
1 In the character entry screen, [ ] [Display / Layout]
2 Select an item
■ Keyboard layout: Make settings for the keyboard size, the number of lines of the conversion candidates field, alignment, the key top guides and design.
■ Emoji/Symbol list rows: Set the number of columns of pictograms list/symbols list.
■ Key input guide: Set whether to zoom in the selected key and to display the guide of flick input.
■ Software keyboard display setting: Set whether to display the character entry screen when you connect a commercially available keyboard using the Bluetooth function etc. and enter characters.
Input assistance
1 In the character entry screen, [94][Input assistance]
2 Select an item
■ Flick sensitivity: Set the sensitivity of the keyboard for when selecting characters with flick input.
■ Guide display speed: Set how fast the guide is displayed while entering characters with flick input.
- Toggle input: Set whether to use the toggle input.
■ Sound on key press: Set whether or not to enable operation sounds of entering characters.
■ Vibrate on key press: Set whether to activate the vibrator when entering characters.
■ Vibration time on key press: Set how long Vibrate on key press keeps the vibrator activated.
■ Voice input provider: Set where to connect when using the voice input.
■ Delete key behavior: Set the operations of the delete key.
■ Romaji input assistance: Set to prevent unnecessary keys from being touched when entering Japanese with romaji.
■ Auto cursor move: Set the speed for the cursor to automatically move to the right side after entering characters.
■ Emoji/Symb/:) continuous input: Set whether to keep the pictogram/symbol/emoticon list displayed after selecting a candidate from it.
[Delete key behavior]
- When the cursor is on a character, delete the character. When [Left-delete (Backspace)] is set and the cursor is at the beginning of a text, you can delete characters on the right side of the cursor. When [Right-delete (Clear)] is set and the cursor is at the end of a text, you can delete characters on the left side of the cursor.
Conversion
1 In the character entry screen, [ ] [Other settings] ▶ [Conversion]
2 Select an item
■ ● Word prediction: Set whether to use the predictive conversion.
■ Next word guess: Display relational predictive candidates immediately after an entry is determined.
- ● Wildcard prediction: Set whether to use the wildcard prediction.
■ Typing error correction: Set Typing error correction.
■ Beginning prediction for mail: Display text candidates to use at the beginning of a message when entering the message for a mail.
■ Internet conversion engine: Display conversion candidates by using a conversion engine on the Internet.
■ Auto capitalization: In half-width alphabet entry, enter an initial character at the head of a text with upper case one.
■ Auto space input: In half-width alphabet entry, automatically insert a half-width space after selecting an English word.
[Auto capitalization]
- This function may not follow the setting depending on the app in use.
Dictionary
1 In the character entry screen, [9][Other settings] ▶ [Dictionary]
2 Select an item
- User dictionary: Edit words in the user dictionary.
- Download dictionary: Register/Cancel/Delete downloaded dictionaries.
- Update conversion dictionary: Update or download conversion dictionaries.
- Contacts name collaboration: Add name data of the phonebook to the dictionary or reset the name data in the dictionary.
Slide operation
1 In the character entry screen, [ ] [Other settings] ▶ [Slide operation]
2 Select an item
■ Upward slide: Set the operations available when you slide the keyboard from its bottom to top.
■ Downward slide: Set the operations available when you slide the keyboard from its top to bottom.
■ Rightward slide: Set the operations available when you slide the keyboard from its left edge to right edge.
■ Leftward slide: Set the operations available when you slide the keyboard from its right edge to left edge.
Reset
1 In the character entry screen, [ ] [Other settings] ▶ [Reset]
2 Select an item
- Set the default settings: Reset the settings of S-Shoin.
■ Clear learning dictionary: Reset the learning dictionary.
■ Reset facemark list: Reset the contents of the emoticon list.
Entering characters
Example: When entering “文字”
1 In the character entry screen, enter “もじ”

● ● Enlarge/Reduce the conversion candidates field.
2 Conversion candidates field
● ● Displayed when [Word prediction] is enabled.
- Touch one of conversion candidates to enter.
- If you set an Internet conversion engine, [Net conv] is displayed. Touch it to display conversion candidates searched by the conversion engine on the Internet.
2 [Convert]
3 In the conversion candidates field, select “文字”

1 Range reduction/Range enlargement
- Reduce/Enlarge the range of characters to convert.
● ● Displayed only when available.
2 Close
- ● Close the conversion candidates field.
3 Conversion candidates field
- Touch one of conversion candidates to enter.
- If you set an Internet conversion engine, [Net conv] is displayed. Touch it to display conversion candidates searched by the conversion engine on the Internet.
4 Determine
● ● Determine the conversion.
5Predictive candidates
● ● Predictive candidates are displayed.
6 Conversion candidates
- Conversion candidates are displayed.
7 Katakana and alphanumeric
- ● Katakana and alphanumeric conversion candidates are displayed.
■ Wildcard prediction
Conversion candidates are predicted according to the number of the entered characters and appear.
- Enable [Wildcard prediction] in advance (P. 22 "Conversion").
- ● This function is available in the Hiragana/Kanji input mode and the Half Alphabet input mode.
1 In the character entry screen, enter “あな”
2 [→]▶[→]▶[→]
- Each time you touch [→], [*] is entered and the predictive candidates appear according to the number of characters.
3 In the conversion candidates field, select “アナウンス”
- Inputting with kuten codes
You can use four-digit kuten codes assigned to each character for entering kanji, hiragana, katakana, symbol, alphanumeric characters, etc.
1 In the character entry screen, slide the input mode switching key up ▶ [Character Code]
2 Input a kuten code
• After the fourth digit is entered, the corresponding character appears.
• After the fourth digit is entered, the input mode is switched to the previous one.
- Inputting with voices
You can enter characters with voices.
1 In the character entry screen, [9] [Input UI] ▶ [Voice Input]
- Alternatively, slide [] to the right while the QWERTY keyboard is used or slide [] down while the 12 keyboard is used to switch to the voice input.
2 Speak at the microphone
- In the following cases, the voice input may not work properly.
■ ● When the voice is too loud
■ ● When the surrounding noise is big
■ ● When the phonation is not clear
■ ● When the phonation is not natural
■ ● When the pronunciation is too fast
■ ● When any key is pressed or the microphone is touched
Editing characters
You can perform operations such as cutting, copying or pasting by selecting the entered characters.
1 Touch and hold the entered characters
2 Edit the characters
- Drag [ ]/[] and specify the selection range to operate such as cut, copy or paste of characters. Touch [SELECT ALL] to select all the entered characters.
- Touch [CLIPBOARD] to display the history of cut and copied characters. Select characters to paste them.
- To display the list of cut or copied characters: [Quote apps] ▶ [Copy History SH]
- Touch [SHARE] to use selected characters in other apps.
-
If there are menus which are not displayed, [ ] is displayed. Touch it to display the menus.
-
Up to 10 history items of cut and copied characters can be saved.
- If the number of history items of cut and copied characters exceeds the maximum number to be saved, they are deleted from the oldest one.
- Displayed icons or operation methods may differ depending on the apps to use.
Changing screen display to English
1 In the home screen, [ ] ▶ [設定] (Settings) ▶ [言語と入力] (Language & input) ▶ [言語] (Language) ▶ [English]
Initial settings
When you turn the power on for the first time, the initial settings screen is displayed. Follow the instructions on the screen and set.
● ● The following items can be set. However, items to be displayed may differ depending on the Google account settings.
■ ● Language setting
■ Wi-Fi settings (P. 24 "Wi-Fi settings")
■ ● Copy your Google accounts etc. from your other device (Tap & Go)
■ Google account settings (P. 25 "Setting up Google account etc.")
■ ● Owner's name of the handset
■ ● Google services
■ ● Set up payment info
■ ● Add a mail address other than Google account
■ ● Protect your phone
■ ● Get your apps & data
■ ● Google Now setting
■ Initial settings for docomo service
1 When the initial settings screen for docomo service is displayed, [Agree to all] ▶ [Start settings]
2 Make the initial settings
•The following items can be set.
■ ●d ACCOUNT
■ ●docomo cloud
■ ●docomo apps password
■ ●docomo location information
■ ● Remote Initialization Service
■ ● Install all apps
* This is not displayed when you have not set a docomo apps password.
3 [Start using]
Setting an access point
An access point (sp-mode) for Internet connection is registered by default. You can add other access points and change them if necessary.
For details on sp-mode, refer to the DOCOMO website. https://www.nttdocomo.co.jp/service/spmode/ (in Japanese only)
If you use mopera U or Business mopera Internet, add an access point of either provider manually.
For details on mopera U, refer to the mopera U website.
https://www.mopera.net/ (in Japanese only)
- Checking an access point in use
1 In the home screen, [ ] ▶ [Settings] ▶ [More] ▶ [Cellular networks] ▶ [Access Point Names]
Setting additional access points
- ● Never set the MCC to a figure other than 440 or the MNC to a figure other than 10. Otherwise the added access point disappears from the screen.
1 In the home screen, [ ] ▶ [Settings] ▶ [More] ▶ [Cellular networks] ▶ [Access Point Names] ▶ [+]
2 [Name] ▶ enter the name of the network profile to create ▶ [OK]
3 [APN] ▶ enter the access point name ▶ [OK]
4 Enter other items required by network operators ▶ [B] ▶ [Save]
- If the settings of MCC and MNC are changed and the added access point disappears from the screen, reset the settings or set the access point manually.
Resetting an access point
Reset an access point to default setting.
1 In the home screen, [ ] ▶ [Settings] ▶ [More] ▶ [Cellular networks] ▶ [Access Point Names]
2 [☐] ▶ [Reset to default]
- When sp-mode is not subscribed or if you fail to make automatic setting of an access point due to signal status such as outside the service area, you are required to set the access point again manually.
Wi-Fi settings
If you use Wi-Fi function of the handset, you can use mail or Internet by connecting to access points of your home, corporate network or public wireless LAN service.
Radio interference with Bluetooth devices
- Wireless LANs (IEEE 802.11b/g/n) use the same frequency band (2.4 GHz) as Bluetooth devices. Therefore, using the wireless LAN device near a Bluetooth device may cause radio interference, lowering of communication speed, noise or connection failure. In this case, turn off the Bluetooth device or keep the handset and the wireless LAN device at least approximately 10 m away from the Bluetooth device.
- Packet communication is also available while [Wi-Fi] is set to On. Wi-Fi connection is prioritized while Wi-Fi connection is set, but the connection is automatically switched to that of LTE/3G/GPRS network once Wi-Fi connection is terminated. Note that packet communication charges may be incurred in this case. - Refer to the manual of your wireless LAN base unit when using the access point at home etc. - Operate access point registration near the access point. - If you use the docomo service by using Wi-Fi function, set d ACCOUNT in advance. In the home screen, [ [ ] ▶ [Settings] ▶ [docomo service/cloud] ▶ [d ACCOUNT setting] to set it.
1 In the home screen, [ ] ▶ [Settings] ▶ [Wi-Fi]
2 Set to On
3 Select an access point
- If you select an access point protected by security, enter the password (security key) and select [CONNECT].
- To register access points manually: [ H] ▶ [Add network] ▶ enter the network name ▶ set security ▶ [SAVE]
-
WPS compatible access points can be easily registered. In the home screen, [ ] ▶ [Settings] ▶ [Wi-Fi] ▶ [ ] ▶ [Easy Settings] ▶ [WPS Push Button]/[WPS Pin Entry] to register an access point.
-
When you select an access point and connect to it with a wrong password (security key), [IP Configuration Failure], [WiFi Connection Failure] or [Authentication problem] is displayed. Confirm the password (security key). When [IP Configuration Failure] is displayed after entering the correct password (security key), you may not have acquired the correct IP address. Connect to the access point again after confirming signal status.
● The registration process using WPS takes a few minutes. After completion of the registration of the access point, check that the proper connection to the access point is acquired. - As for the manual registration of an access point, this function supports WEP, WPA/WPA2 PSK and 802.1xEAP as the security setting.
- If you connect to an access point which is not connected to the Internet, [Fs] displayed and the communication may be made by mobile networks, not Wi-Fi connection. To make Wi-Fi communication by using such an access point, enable [Using this AP without internet connection] of Advanced options before connecting to the access point.
Detailed settings
1 In the home screen, [ ] ▶ [Settings] ▶ [Wi-Fi]
2 [☐] ▶ [Advanced]
3 Select an item
■ Network notification: Set whether to display a notification icon when an open network is detected.
- Set it after setting [Wi-Fi] to On.
■ Wi-Fi sleep policy: Set whether to disconnect Wi-Fi when the display is turned off.
■ Avoid poor connections: Set whether to use the Wi-Fi function only when stable Internet connections are available.
■ Handover: Set whether to automatically switch access points to use if you use the handset while moving.
- Install certificates: Install certificates.
■ ● Wi-Fi Direct: Make settings for Wi-Fi Direct.
- Passpoint: Set whether to automatically connect to the available Passport compatible access points when [Wi-Fi] is set to On.
■ ● MAC address: Confirm the MAC address.
■ ● IP address: Confirm the IP address.
Disconnecting
1 In the home screen, [ ] ▶ [Settings] ▶ [Wi-Fi]
2 Select the connected access point ▶ [DISCONNECT]
- Disconnect with the password retained. The access point may be automatically connected again such as when the display is turned on.
Tethering
You can use the tethering function that connects Wi-Fi compatible devices, or PCs etc. connected via Micro USB Cable 01 (sold separately) or Bluetooth communication to the Internet by using the handset as an access point.
- ● You can connect up to 15 devices in total at the same time: a PC connected via Micro USB Cable 01, 10 Wi-Fi compatible devices and four Bluetooth devices.
● ● The handset supports dial-up connections via DUN profile. - Before using Bluetooth tethering, register the other party's Bluetooth device in advance (P. 78 "Using Bluetooth function").
As for the settings on the Bluetooth device, refer to its manual.
1 In the home screen, [ ] ▶ [Settings] ▶ [More] ▶ [Tethering]
2 Select an item
■ USB tethering: Set whether to use the USB tethering.
■ Wi-Fi tethering: Set whether to use the Wi-Fi tethering.
■ Set up Wi-Fi hotspot: Make settings for Wi-Fi tethering such as network name and security.
■ Wi-Fi tethering Easy Connection: Set whether to use the tethering by connecting to WPS compatible access points.
■ Bluetooth tethering: Set whether to use the Bluetooth tethering.
[USB tethering]
● The tethering function is available when OS of PCs is Windows Vista, Windows 7, Windows 8.1, Windows 10 or Linux.
● A microSD Card inserted in the handset cannot be mounted on a PC during USB tethering.
- For details on USB tethering, refer to the following website. http://www.android.com/tether#usb
[Wi-Fi tethering]
● While the handset is functioning as an access point, it cannot access the Internet via Wi-Fi connection.
● Make settings for Wi-Fi access points in [Set up Wi-Fi hotspot].
- For details on Wi-Fi tethering, refer to the following website. http://www.android.com/tether#wifi
[Set up Wi-Fi hotspot]
- At the time of purchase, Network name is set to [SH-02J_AP] and Security is set to [WPA2 PSK] while Password is set randomly. Change the settings if necessary.
Setting up mail account
1 In the home screen, [ ]▶ [Email]
- Only when an account is not set up, the account setup screen appears.
2 Enter mail address ▶ [▶]
3 Enter password ▶ [▶]
- Provider information is preset for some mail accounts, and a receiving mail server and a sending mail server are automatically set.
- When you use an account whose provider information is not preset, it is necessary to set a receiving mail server and a sending mail server manually. For details on those settings, contact the Internet service provider you use.
4 Set up an account ▶ [▶]
5 Enter an account name and your name ▶ [▶]
Setting up Google account etc.
- ● You can use Google services such as Gmail and Google Play if you set up Google account.
1 In the home screen, [ ] ▶ [Settings] ▶ [Accounts] ▶ [Add account]
2 Select an account type
3 Set up an account - In the home screen, [ ] ▶ [Settings] ▶ [Accounts] to find the added account on the displayed menu.
- When activating the app that requires an account without setting one up, the account setup screen appears.
- Keep a separate memo of the set account and password.
- Deleting your account
1 In the home screen, [ ] ▶ [Settings] ▶ [Accounts]
2 Select an account ▶ [H] ▶ [Remove account] ▶ [REMOVE ACCOUNT]
• Operation methods may differ depending on the account.
Retrieving your Google account password
If you forget your Google account password, retrieve it.
1 In the home screen, [ ]
2 Enter "https://www.google.com/ncr" in the URL entry field ▶ [Go] ▶ [Sign in]
3 Enter mail address ▶ [Next] ▶ [Forgot password?] ▶ follow the instructions on the screen and operate
- Operation methods may differ depending on the using conditions.
Synchronizing data
You can synchronize data between the handset and online services. You can access the same personal information as those stored in online services from the handset and PC, and you can use and update data by synchronizing them.
When synchronizing automatically
Set whether to automatically synchronize items set in each account.
1 In the home screen, [ ] ▶ [Settings] ▶ [Accounts]
- To set items to synchronize: Select an account type ▶ select an account ▶ select an item
2 [☐]▶[Auto-sync data]▶[OK]
- Register a Google account in advance when you synchronize the phonebook of the handset memory with contacts on the online services even if you synchronize with an account other than Google account.
When synchronizing manually
- When Auto-sync data is disabled, you can synchronize selected items manually.
1 In the home screen, [■■■] ▶ [Settings] ▶ [Accounts]
2 Select an account type ▶ select an account
3 Select items to be synchronized
Importing/Exporting phonebook
- Importing from docomo nano UIM card
1 In the home screen, select “ドコモクラウド” (docomo cloud) folder ▶ [docomo phonebook] ▶ [Contacts]
2 [ : ] ▶ [SD card/SIM card/common]
3 [Restore from SIM card]
- If there are multiple accounts, the screen for selecting to which account to register is displayed.
4 Select the contact to import
- To import all contacts: [ : ]▶ [Import all]
- Importing from/Exporting to microSD Card
1 In the home screen, select “ドコモクラウド” (docomo cloud) folder ▶ [docomo phonebook] ▶ [Contacts]
2 [ : ] ▶ [SD card/SIM card/common]
3 [Activate docomo backup app]
- docomo Data Copy is activated. For details on backing up/restoring the phonebook by using docomo Data Copy P. 62 "Backing up to/Restoring from a microSD Card"
Incoming/Charging lamp
The incoming/charging lamp notifies you that there is a missed call, the handset is being charged, etc. by illuminating/ flashing.
| State of lamp | Color State of handset |
| Illuminating Ruby | (Red) Charging in progress (Battery level is approx. 94% or less) |
| Illuminating Emerald | (Green) Charging in progress (Battery level is approx. 95% or more) |
| Flashing Ruby | (Red) Charging unavailable |
| Flashing Prism | (White) Call missed/New mail received |
| Flashing Sapphire | (Blue) New docomo mail received |
- For details on the setting of when to make it flash or how to make it flash and the flashing pattern/color for when receiving a call P. 64 "Illumination"
- When the display is on, the incoming lamp which notifies you of missed calls, new mails and new docomo mails does not flash. Check them with notification icons. When notification icons do not appear since you play videos with Media Player etc., check them on a screen with the status bar appearing.
Screen display/Icons
Icons displayed on the status bar at the top of the screen give you various kinds of information, such as the status of the handset or the presence of missed calls. You can check the detailed information by displaying the status panel.
Viewing icons
● Two kinds of icons are displayed.
- Notification icon: Notifies you of missed calls, new mails, etc.
- Status icon: Display the status of the handset such as the battery level or the signal status.

■ Main notification icon list
: Missed call (P. 39 "Outgoing/Incoming call history")
: New SMS (P. 44 "SMS")
: New mail (P. 45 "Email")
M: New Gmail (P. 46 "Gmail")
: New message from Hangouts™
: New Area Mail (P. 47 "Early Warning "Area Mail")
: Error
● ● Displayed when an error has occurred.
3: Authentication of d ACCOUNT failed (P. 69 "docomo service/cloud")
: Data communication disabled (P. 68 "Data usage")
● ● Displayed when a data communication limit has been reached.
C: Alarm information (P. 58 "Alarm")
31 : Schedule notification from Calendar
: Playing music with Media Player (P. 56 "Media Player")
Call (P. 36 "Call")
: Making a call/Receiving a call/Talking on the handset
: Putting a call on hold
: Answering memo (P. 39 "Voice/Answering memo")
: Voice mail message (P. 39 "Network service")
: microSD Card (P. 67 "Storage & USB")
: Available space on the handset memory being run out (P. 67 "Storage & USB")
2 : Omakase Lock set
Bluetooth (P. 77 "Bluetooth function")
: Receiving registration/connection request from Bluetooth device
注:Data reception request
: DUN connection request/DUN connecting
Data transmission and reception
↑ : Transmission
: Reception
App
: App update available
: Finished installing app
: Open network (P. 24 "Wi-Fi settings")
Tethering (P. 25 "Tethering")
Ψ : [USB tethering] enabled
: [Wi-Fi tethering] enabled
: [Bluetooth tethering] enabled
: Multiple tethering enabled
: Bright Keep set to [ON (Notify)] (P. 65 "On/off with motion")
: VPN connected (P. 81 "Adding VPN")
: Software update available (P. 89 "Software update")
: Smart Lock (P. 69 "Lock & security")
: [RelaxAuto setting] running (P. 64 "Relax settings")
: Notification icon (not appearing)
Main status icon list
● The icon color becomes light while the manner mode is set to [Total silence].
Battery level (P. 67 "Battery & energy saving")
to Approx. 100 to 6%
: Approx. 5% or less
● ● While charging, the battery icon appears with 4] superimposed.
● Percentage of the remaining battery level appears on the left side of the battery icon. Display/Hide the percentage with [Display left percents of Battery] (P. 64 "Display").
Signal strength
: Level 4
: Level 3
: Level 2
: Level 1
: Level 0
: Outside the service area
■ : docomo nano UIM card not inserted (P. 15 "docomo nano UIM card")
: Airplane mode (P. 68 "More")
3G data communication status
: 3G available
: Receiving data via 3G
: Sending data via 3G
: Sending and receiving data via 3G
GSM data communication status
: GSM available
: Receiving data via GSM
: Sending data via GSM
: Sending and receiving data via GSM
4G (LTE) data communication status
: 4G (LTE) available
: Receiving data via 4G (LTE)
: Sending data via 4G (LTE)
: Sending and receiving data via 4G (LTE)
HSPA data communication status
: HSPA available
: Receiving data via HSPA
: Sending data via HSPA
: Sending and receiving data via HSPA
R: International roaming (P. 82 "Data roaming")
NFC/Osaifu-Keitai lock status (P. 51 "NFC/Osaifu-Keitai lock")
: Handset or docomo nano UIM card locked
IC: Handset and docomo nano UIM card locked
Omakase Lock status
: Handset or docomo nano UIM card locked by remote control
IC: Handset and docomo nano UIM card locked by remote control
: [Reader/Writer, P2P] enabled (P. 52 "NFC/Osaifu-Keitai settings")
Character input mode (P. 20 "Character entry")
あ:Hiragana/Kanji
AB : Half Alphabet
12: Half Numeric
A: Full Alphabet
1: Full Numeric
区: Character Code
Manner mode status (P. 28 "Manner mode")
: Standard manner
: Total silence
: Alarms only
: Priority only
During a call (P. 38 "Operation during a call")
: Talking with a hands-free call
: Mute set
Wi-Fi signal strength (P. 24 "Wi-Fi settings")
: Level 4
: Level 3
: Level 2
: Level 1
: Level 0
- The Wi-Fi signal strength icon appears with[] superimposed like [ ] while you connect to an access point which is not connected to the Internet.
Bluetooth (P. 77 "Bluetooth function")
: Connection stand-by
: Connected
: Measuring location information via GPS (P. 69 "Location")
Answering memo (P. 39 "Voice/Answering memo")
: No answering memo when the answering memo is set
: One to nine answering memos when the answering memo is
set
: 10 answering memos when the answering memo is set
Using the status panel
1 Drag the status bar down with your two fingers at the same time
- Alternatively, touch and hold [☐] to display the status panel.
2 Use the status panel
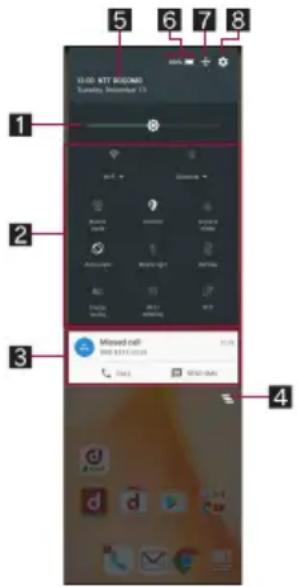
1 Brightness adjusting bar
- Drag it to adjust the brightness of the screen.
2 Function button
● Make settings for use of the manner mode, Wi-Fi function, location information, etc.
- If is displayed under the icon like Wi-Fi and Bluetooth, touch the display under the icon to carry out detailed settings. - If you touch [Location], the confirmation screens for the use of location information are displayed. The mode to be set may differ depending on whether you select [DISAGREE] or [AGREE] (P. 69 "Location"). [ ] is displayed when Mode is set to [High accuracy]/[Device only] while [ ] is displayed when Mode is set to [Battery saving].
- Slide the screen up/down or touch the top of the screen to display/hide function buttons.
3 Detailed information on notifications
- ● You can check the state of the handset or content of notifications.
● ● The following operations are available depending on the type of detailed information.
• To activate or operate a corresponding app: Touch the detailed information or the function
- To switch detailed display/simplified display: Slide the detailed information up/down with your two fingers at the same time or pinch out/in
- To delete detailed information: Flick the detailed information to the left/right
- To set [App notifications]: Touch and hold the detailed information ▶ [ ⓘ ]
4 Clear all
- Delete the detailed information on notifications and notification icons. Depending on the content of detailed information on notification, it cannot be deleted.
5 Network operator
- Connected network operator is displayed.
6 Battery level
- Check the battery usage etc. by touching it while function buttons are being displayed.
7 Customize of function button
- ● You can rearrange, add and delete the function buttons.
8 Settings
- Activate the "Settings" app.
- If the number of missed calls is one, [CALL] and [SEND SMS] are displayed by switching the detailed information on notification to detailed display. You can make a call or send an SMS by touching them.
Manner mode
You can set to avoid disturbing others when in public.
1 Drag the status bar down with your two fingers at the same time
2 [Manner mode]
- Manner mode settings screen is displayed. The items to be displayed may differ depending on the manner mode to select.

1Type of manner mode
- Select a manner mode to set.
- Standard manner: The ringtone and operation sound are silenced, and the vibrator is activated when receiving a call or others. For ringing the alarm sound, it rings according to the setting of "Clock" app. The media sound is not silenced.
■ ● Total silence: The ringtone and operation sound are silenced, and even the vibrator is not activated when receiving a call or others. Also, the alarm sound and media sound are silenced.
- Alarms only: The ringtone and operation sound are silenced, and even the vibrator is not activated when receiving a call or others. The alarm sound and media sound are not silenced.
- Priority only: The ringtone and notification sound ring according to the setting of [Priority only allows] in MORE SETTINGS. Other operations are same as those when the manner mode is not set.
2 Explanation of operations
- ● The operations are explained in case you set the selecting manner mode.
3 Duration until disabling manner mode
- Set duration until disabling the manner mode. If you select the item of the time or the until next alarm, the manner mode is automatically disabled when the set length of time has passed or next alarm rings.
- Touch [-]/[+] to set how long it takes the manner mode to be disabled.
4 More settings
● Make settings for the notification operation such as priority notification or specific periods of time.
- Priority only allowsWhen the manner mode is set to [Priority only], the ringtone and notification sound ring according to this settings.
■ ● Automatic rules: Make settings for the notification operation of specific periods of time or schedule periods.
* Since Alarms is always set to priority notification, you cannot change the setting.
- Touch it to set the selecting manner mode.
5Manner mode setting
- ● The setting condition of the manner mode is displayed. Touch it to disable the manner mode.
6 Customize
- ● Set [Priority only allows] in MORE SETTINGS.
- Touch it to set the selecting manner mode.
7Done
- ● Set the manner mode.
- Set the manner mode to change the display of function button. Touch it to disable the manner mode.
● The following sounds are not silenced even when the manner mode is set.
■ ● Shutter sound of shooting still pictures
■ ● Focus locking sound of shooting still pictures
■ ● Record start/end sound of shooting videos
- When Answering memo setting is set to [Mannermode] and the manner mode is set, the answering memo is enabled and operated according to its setting.
- The manner mode is disabled if you turn the ringtone volume up while Standard manner is set. The Standard manner is set if you set the ringtone volume to "0" when the manner mode is not set.
- Press (+)(-) and display the volume bar, and then press (-) to set Total silence while Standard manner is set.
- Press (+)(→) and display the volume bar, and then press (+) to set Standard manner while Total silence or Alarms only is set.
Recent Apps
You can activate apps by displaying the history of recently used apps. Also, you can use apps such as Copy Anywhere and KAKU Notepad, ShrinkScreen mode, Magnifier.
1 [☐]
2 Use a history item

1 App usage history item
- Touch it to activate the app.
- ● Flick it to the left/right to delete the history item.
②Screen pinning
- ● This is displayed in the latest history item when [Screen pinning] is set to On. For details on Screen pinning ☐ P. 69 "Lock & security"
- Touch it to restrict the use of apps other than selected app.
To disable Screen pinning: Touch and hold [◀] + [□]
3 Delete history item
- Touch it to delete app usage history item.
4 Clear all
- Touch it to delete all app usage history items.
5Tools
- ● You can use the following functions.
- Copy Anywhere: Copy characters on a screen being displayed.
- KAKU Notepad: Write note on a screen being displayed by handwritten and save it as an image.
- Childlock: Set Childlock to disable operations available by touching or the navigation keys. Childlock is canceled when you press ⏻(_) or the display is turned off.
6 ShrinkScreen
- Touch it to shrink the screen and allow you to operate the handset with one hand easily.
- Touch ☐ while the screen is shrunk to move the shrunk screen or change the size.
- [☐] ▶ [Fullscreen] to return the screen to the original size.
7 Magnifier
- Touch it to magnify part of the screen. Operate the handset with it activating and drag the magnification area to the point to magnify.
- Touch the magnification area or repeat the same operation as that done when activating it to end it.
-
Although you can select an item etc. in the magnification area, Magnifier ends if you select it.
-
Some apps may not be displayed in the history.
- If you delete the history item of the running app, you can end the app.
ShrinkScreen
- ● You may not be able to shrink the screen depending on the screen being displayed.
● The ShrinkScreen mode is disabled if you switch to horizontal display or the display is turned off while the ShrinkScreen mode is set.
Magnifier
● Magnifier may not be used in some apps.
Home applications
Switch lock screens or home apps to use.
- ● The following home apps are registered on the handset by default.
■ ●docomo LIVE UX
A home app optimized for smartphones provided by DOCOMO.
■ ● Feel Home(Simple)
A simple home app that icons and characters are displayed in large.
- Touch and hold the home screen ▶ [Home settings] and change layout setting to arrange shortcuts and widgets on the Desktop Sheet.
■ ● Google Now Launcher
You can check Google Now in the home screen when you use Google Now. Also, you can use voice search just by saying "Ok Google" while the home screen is displayed.
1 In the home screen, [ ] ▶ [Settings] ▶ [Home applications]
2 Select an item
■ Batch change lock screen/ home application: Switch lock screens and home apps.
■ ● Home applications: Switch home apps.
Confirmation screen at first activation of apps
When you activate each app for the first time, the confirmation screen of "First things first"/"Battery optimization" is displayed and make settings for the operations of an app.
- The type or content of the displayed confirmation screen may differ depending on the app. The followings describe two types of the confirmation screen, "First things first" and "Battery optimization".
- When you use a specific function for the first time, the confirmation screen may be displayed depending on the app.
First things first
You can allow the app to use the data of the handset, camera, etc.
- If you do not allow the app to use the functions, the app may not work properly.
Example: Activating Album
1 In the confirmation screen of "First things first", [NEXT]

2 [DENY]/[ALLOW]
- In general, select [ALLOW] and allow the app to use the functions.
- If there are multiple functions to use, operate in the same way.
Setting functions to use
You can make settings for the functions to use by following steps below as well.
Setting functions to use by app
1 In the home screen, [ ] ▶ [Settings] ▶ [Apps]
2 Select an app ▶ [Permissions]
3 Select a function
Setting apps to allow to use by function
1 In the home screen, [ Settings] ▶ [Apps] ▶ [App permissions]
2 Select a function
3 Select an app
Battery optimization
If you carry out Battery optimization, the apps are set not to work while the display is turned off (except while charging).
- If you carry out Battery optimization, the app does not work while the display is turned off (except while charging). Some unintended phenomena such as apps/functions are unavailable to use may occur.
Example: Setting "Auto sync" in Album
1 In the confirmation screen of Battery optimization, [SETTINGS]

2 [☐] ▶ [Battery optimization]
3 [Not optimized] ▶ [All apps]
4 [Album] ▶ [Optimize]/[Don't optimize] ▶ [DONE]
• In general, select [Don't optimize].
- Depending on the app, set to skip optimization in the confirmation screen displayed when activating it. If you carry out the optimization, the app may end.
Setting Battery optimization
You can make settings for Battery optimization by following steps below as well.
1 In the home screen, [☐] ▶ [Settings] ▶ [Apps] ▶ [☐] ▶ [Battery optimization]
- Alternatively, in the home screen, [ ]▶ [Settings] ▶ [Battery & energy saving] ▶ [Battery] ▶ [B] ▶ [Battery optimization] to carry out Battery optimization.
•The list of not optimized app is displayed.
2 [Not optimized] ▶ [All apps]
3 Select an app ▶ [Optimize]/[Don't optimize] ▶ [DONE]
docomo LIVE UX
Home screen
Home screen layout
In the home screen, you can activate apps by selecting apps or the quick menu or use widgets.
- If you install a new app, its icon is added to the home screen.

1 Machi-Chara
2App
3 Indicator
- Indicates the number of the home screen pages and present display position.
4 App button
● ● Display the app list screen.
5Widget
- Use simple functions such as a calendar or pedometer.
6 Folder
- When a folder is added, you can store apps into the folder.
7 My magazine button
- Use My magazine (P. 35 "My magazine").
8Quick menu
- ● Quickly activate an app from any page of the home screen.
● Pinch in on the home screen to display the home screen list.
- ● Flick the home screen to the left/right to switch the pages.
- ● Flick the home screen down to display the app list screen.
- ● Flick the home screen up to use My magazine.
Managing the home screen
Setting the home screen
1 Touch and hold the home screen
2 Select an item
■ Show apps: Display the Apps tab of the app list screen.
■ Show widgets: Display the Widgets tab of the app list screen.
■ ● Create folder: Add a folder.
■ Change Kisekae: Change the kisekae. For details on kisekae P. 31 "Changing kisekae"
■ Change wallpaper: Display the Wallpapers tab of the app list screen. For details on wallpapers ☑ P. 31 “Changing wallpapers”
■ Machi-Chara setting: Make settings for Machi-Chara. For details on Machi-Chara setting ☎ P. 32 “Machi-Chara display method”
■ Home screens: Display the home screen list. For details on the home screen list 📋 P. 32 “Managing pages”
■ Moving apps etc.
1 In the home screen, touch and hold an app etc.
2 Drag it to the destination
- If you drag it to the end of the page, the previous/next page is displayed and you can move it to the previous/next page.
- Drag an app onto another one to display the confirmation screen for folder creation. Touch [Create] to create a folder storing the two apps.
■ Restoring apps to the app list screen
1 In the home screen, touch and hold an app
2 Drag it to [Back to apps list]
- Deleting widgets etc.
1 In the home screen, touch and hold a widget etc.
2 Drag it to [Remove from Home]
- Apps are not uninstalled even if the folder storing the apps is deleted.
Uninstalling apps
1 In the home screen, touch and hold an app
2 Drag it to [Uninstall] ▶ [OK]
Renaming folders
1 In the home screen, select a folder
2 Touch the folder name
3 Enter a folder name
Setting quick menu
Up to three apps and/or folders etc. can be arranged.
1 In the home screen, touch and hold an app etc.
2 Drag it to the quick menu
- Drag an app onto another one to display the confirmation screen for folder creation. Touch [Create] to create a folder storing the two apps.
Changing kisekae
1 Touch and hold the home screen ▶ [Change Kisekae]
2 Select kisekae ▶ [Set]
Changing wallpapers
1 Touch and hold the home screen ▶ [Change wallpaper]
2 Select data ▶ [OK]
- Touch [See more wallpapers] to select a wallpaper from among photos, images and other apps.
- As for [Contents Manager], [Album] or [Photos], set each item and select [OK].
- As for [Google Now Launcher] or [Live Wallpapers], select [Set wallpaper].
-
As for [SHSHOWからダウンロード] (Download from SHSHOW), connect to the SHARP website and download wallpapers. Follow the instructions on the screen and operate.
-
As for [Contents Manager(wallpaper)] or [Album(wallpaper)], select the parts to cut and select [SAVE].
- As for [Preset wallpaper], select [SET TO WALLPAPER].
- Touch [See Kisekae] to change the kisekae.
Machi-Chara display method
1 Touch and hold the home screen ▶ [Machi-Chara setting]
- ● You can add up to seven pages.
1 In the home screen, pinch in
- Alternatively, touch and hold the home screen ▶ [Home screens] to display the home screen list.
2 [+]
Sorting pages
1 In the home screen, pinch in
- Alternatively, touch and hold the home screen ▶ [Home screens] to display the home screen list.
2 Touch and hold a thumbnail
3 Drag it to the destination
- Deleting pages
1 In the home screen, pinch in
- Alternatively, touch and hold the home screen ▶ [Home screens] to display the home screen list.
2 [×]
App list screen
App list screen layout
Loaded apps that are not added to the home screen are displayed as icons in the app list screen. Select an icon to activate an app. Also, you can add widgets and change wallpapers.
- If you uninstall an app, its icon is deleted.

1 List of app
- ● Flick the screen to the left/right to switch the display positions.
2Indicator
- Indicates the number of the app list screen pages and present display position.
3Home screen
● ● Part of the home screen remains to be displayed.
- ● Flick it up to display the home screen.
4 Apps tab
● ● Display apps that are not added to the home screen.
5Widgets tab
- Add widgets to the home screen.
6 Wallpapers tab
- Change wallpapers.
7 Recommends button
● ● Display apps recommended by DOCOMO.
App list
- ● You can check functions, operation procedures, etc. in Help depending on the app.
- ● A separate paid subscription will be required for using some apps.
● ● The followings are the apps installed.
| Icon A | App Description | |
 | Album Sort images and videos by event and location and use them (P. 55 “Album”). | |
 | Amazon Kindle*1 | Kindle is an app that you can carry a library in your pocket anytime and anywhere you go and enjoy reading. |
 | Amazon Shopping*1 | An app to use Amazon. You can sign in by using phone number. |
| [4KK0] | Anshin Scan*1, 2 | An app to use smartphones safely by detecting viruses, checking apps which deal with personal data, giving you a warning when you try accessing offensive websites, etc. |
 | Calculator | Use a calculator (P. 60 “Calculator”). |
 | Calendar Manage the schedule. | |
 | Chrome Display websites via packet communication or Wi-Fi function (P. 48 “Chrome”). | |
 | Clip Now Check the image (archival screenshot) or URL shot by Clip Now (P. 65 “Clip Now”). | |
 | Clock Use alarm, world clock, timer and stopwatch (P. 58 “Clock”). | |
 | Contents Manager | Manage data stored on the handset memory and the microSD Card (P. 76 “Contents Manager”). |
 | Convenient tool | Use convenient functions such as KARADA MATE and dictionaries (P. 61 “Convenient tool”). |
 | Data Copy An app to transfer data when changing models or back up to/restore from “microSD Card” or “Data Storage Box” (P. 62 “docomo Data Copy”). | |
| [20AZ] | Disaster kit An app to use Disaster Message Board, Disaster Voice Messaging and Early Warning “Area Mail”. | |
| [2X05] | dmarket*2 | An app which handles digital contents such as music, videos and books and provides you with various services such as shopping websites and travel reservation websites (P. 50 “dmarket”). |
| Icon App Description | ||
| docomo mail*1,2 | Send and receive mails using mail address of DOCOMO (@docomo.ne.jp). You can send, receive and view mails using the same mail address from multiple devices such as a tablet, PC browser, etc. if you use d ACCOUNT (P. 44 “docomo mail”). | |
| docomo phonebook | A phonebook app provided by DOCOMO. You can manage phonebook data of docomo account in cloud computing (P. 41 “Phonebook”). | |
| Downloads Manage data such as images downloaded from websites. | ||
| d POINT*2 | An app to “check”, “save” and “use” d POINT. | |
| Drive Save images, videos, etc. on Google DriveTM or share them. | ||
| dメニュー (dmenu)*2 | A shortcut app to “dmenu”. In dmenu, you can easily access websites or convenient apps recommended by DOCOMO (P. 50 “dmenu”). | |
| Email Use Email (P. 45 “Email”). | ||
| Facebook*1 | Facebook is a social networking service that allows you to build closer relationships with your friends, family, colleagues or classmates, and to know what is going on in the world. | |
| Gmail Use a mail service provided by Google or Email provided by general service providers (P. 46 “Gmail”). | ||
| Google Use quick search box (P. 20 “Searching information on the handset and websites”). | ||
| Google Now Launcher*3 | A home app which enables you to check Google Now in the home screen when you use Google Now. Also, you can use voice search just by saying “Ok Google” while the home screen is displayed. | |
| Hanashite Hon'yaku*1 | An app to translate your messages into the language the other party speaks. You can enjoy communication with other people who speak a different language. | |
| Hangouts Use chat (talk using characters), voice chat, etc. | ||
| iDアプリ (iD appli)*2 | An app to use electronic money “iD” provided by DOCOMO. You can pay easily and conveniently by holding an Osaifu-Keitai in which “iD” is set over scanning devices at stores (P. 52 “iD appli”). | |
| Instagram*1 | An app to edit photos or videos shot with the handset freely and share them with your family, friends and people all over the world easily. | |
| Instruction Manual*1,2 | Instruction manual for the handset. You can also activate the functions to use directly from the explanations on the manual. | |
| Icon A | App Description | |
| i コンシェル(i-concier) *2 | A service to have your smartphones support your life like a “butler” or “concierge”. According to your schedule, home area or present location, it delivers useful information in everyday life such as a rain cloud alarm, rail transit information or outgoing spot at better timing. | |
| KARADA MATE | An app to record the number of steps, weight, etc. You can also display the history of the number of steps or weight as a graph and compare it on a daily/monthly basis (P. 60 “KARADA MATE”). | |
| LAWSON *1,2 | An official app of LAWSON. The handset substitutes for a membership card. You can display it as a digital membership card, search stores or check an economical trial coupon. | |
| Maps Measure | your present location, use the navigation function to check how to get to your destination in detail, etc.(P. 58 “Maps”). | |
| McDonald's *1,2 | An official app of McDonald's. You can acquire coupons which are used at store and get latest information. | |
| Media Player A | An app to play music and videos(P. 56 “Media Player”). | |
| Memo An app | to create and manage memos(P. 60 “Memo”). Its data is shared with the Schedule app. The i-concier is supported. | |
| Messaging | Use SMS (P. 44 “SMS”). | |
| Messenger *1 | A chat app to send messages or stamps to your Facebook friends or contacts on your mobile phone. | |
| My Magazine *4 | A search service to display articles of genres you choose (P. 35 “My magazine”). | |
| OfficeSuite *1 | Use OfficeSuite.● ● For details on supported files, in the home screen, [ ] ▶ [OfficeSuite] ▶ [ ] ▶ [Help and Feedback] ▶ [Help] to refer to help. | |
| Osaifu-Keitai | Use Osaifu-Keitai (P. 51 “Using “Osaifu-Keitai compatible services””). | |
| Phone | An app to use the phone and make settings for calls (P. 36 “Call”). | |
| Photos | Manage images and videos. | |
| Play Movies & TV | Rent and watch movies. | |
| Play Music Play music. | ||
| Play Store | Use Google Play (P. 50 “Play Store”). | |
| Icon App | Description | |
 | Schedule An app to create and manage schedules (P. 59 “Schedule”). Its data is shared with the Memo app. The i-concier is supported. | |
| [40AX] | Settings Make various settings for the handset (P. 63 “Setting menu”).● The same operation can be performed as in the home screen, [ ]▶ [ : ]▶ [Settings]. | |
| [K407] | SHCamera Shoot with SHCamera (P. 52 “SHCamera”). | |
| [05CZ] | SHSHOW*2 | An app to introduce various information or content for handling AQUOS smartphones/tablets. |
 | ToruCa*2 | An app which enables you to store economical coupons of your favorite shops, useful information, etc. in one place (P. 52 “ToruCa”). |
 | Twitter*1 | An official client app of Twitter. You can communicate with other people by sharing short messages on websites. |
 | Voice Search Search information of websites by voice (P. 20 “Searching information on the handset and websites”). | |
 | YouTube | Use YouTube (P. 58 “YouTube”). |
 | 遠隔サポート (Remote support)*2 | An app to use “Anshin Enkaku Support”. “Anshin Enkaku Support” is a service that gives you operational support by having the handset screen you are using checked by special staff at a call center remotely (P. 87 “Anshin Enkaku Support”). |
| [XBWX] | おすすめアプリ (Osusume Apps)*4 | Apps recommended by DOCOMO are displayed (P. 34 “Installing recommended apps”). |
| [8KSK] | しゃべってコンシェル (Shabette-Concier)*2 | An app to figure out what you really want to know just by telling it and then allows you to search weather or transfer information of the public transport, make a call, set an alarm, etc. easily. Also, you can enjoy conversation with plenty of mascots. |
| [DEXA] | データ保管 BOX (Data Storage Box)*1, 2 | An app to use Data Storage Box. Data Storage Box is a service which enables you to upload necessary files and easily manage them in cloud computing. |
| [SC46] | フォトコレクション (Photo Collection)*1, 2 | A service to back up photos and videos of up to 5 GB to cloud computing for free and access them from smartphones, tablets, PCs, etc. |
 | マネレコ (manereco)*1, 2 | A household accounts app to check the balance in the bank account, credit card statement, etc. collectively. |
*1 When you use this app for the first time, you need to download it. Packet communication charges are incurred separately for downloading apps.
*2 This is provided in Japanese.
*3 This is displayed when the home app is an item other than Google Now Launcher.
*4 This is displayed when the home app is an item other than docomo LIVE UX.
- Some of the apps installed can be uninstalled. You may be able to download uninstalled apps again from Play Store (P. 50 "Play Store") etc. Check the following website. http://k-tai.sharp.co.jp/support/checkdev.html (in Japanese only)
Managing apps
■ Moving apps to the home screen
1 In the home screen, [ ]▶ touch and hold an app
2 Drag it to the home screen
Moving apps
1 In the home screen, [ ]▶ touch and hold an app
2 Drag it to the destination
Uninstalling apps
1 In the home screen, [ ]▶ touch and hold an app
2 Drag it to [Uninstall] ▶ [OK]
Installing recommended apps
Apps recommended by DOCOMO are displayed when you touch the Recommends button of the app list screen.
1 In the home screen, [ ]▶ [Recommends]
- When you use this for the first time, select [ENABLE] and follow the instructions on the screen and operate.
2 Select an app
- The screen for downloading the app is displayed.
- When you activate this for the first time, the notification
setting of recommended apps is set to ON. [ ]
[ ] of "Notification settings" to change the notification setting.

Backing up/Restoring the home screen
You can restore the positions of apps, widgets, etc. in the home screen using data of docomo LIVE UX backed up to docomo cloud. At the time of restoration, a page for docomo service is added at the end of the home screen.
■ Backing up the home screen
1 In the home screen, [ ] ▶ [ : ] ▶ [Layout backup & Restore]
2 [ ]
3 [BACKUP]
Restoring the home screen
1 In the home screen, [ ] ▶ [ ] ▶ [Layout backup & Restore]
2 Select an item
■ Restore the latest backup data: Restore the home screen backed up last time.
■ Restore from backup data list: Select and restore a home screen from the backup data list.
Displaying all apps
This is a function to search an app's position.
1 In the home screen, [ ] ▶ [ : ] ▶ [Display all apps]
2 Select an app
- The home screen/The app list screen that selected app is placed in is displayed.
My magazine
This is a search service to display articles of genres you choose. The more you use it, the more it makes the settings come to match your preferences by guessing your preferences from the history of articles you have read or from information on your profile. Also, you can set whether to use customize of My magazine which is using notification, location data, docomo service subscription information, etc.
1 In the home screen, []
- When you activate this for the first time, the genre selection screen is displayed. You can set genres to display by selecting ones and touching [OK].
•An article list screen sorted by genre is displayed.
2 Select an article
• To set My magazine: [ ]▶ [My Magazine settings]
• To use help: [ ]▶ [Help]
Setting genres
1 In the home screen, []
2 [☐] ▶ [Display category setting]
3 Select genres
Viewing articles

1 Genres to display
● ● Display articles of a selected genre.
- Slide it to the left/right to switch displays of genre.
2 Article
● ● Display articles.
3 See more info
● Display articles which are not displayed in the article list screen as a list.
4d POINT
● ● Connect to d POINT CLUB.
Information on apps
1 In the home screen, [ ] ▶ [ : ] ▶ [About]
Call
You can use the phone and phonebook, and make settings for call, voice/answering memo, operations available when calls are received, etc.
Making a call
1 In the home screen, [ ]▶ [Dial]
2 Enter a phone number
- Always enter the city code, even when it is a local number.
- You can set to notify/not to notify the other party of your phone number for each call by adding "186"/"184" to the head of the phone number.
- Add the number registered in advance to the head of the phone number: Enter a phone number ▶ [ : ] ▶ [Select prefix] ▶ select the registered name of the number
- You can add the number registered in [Prefix settings] (P. 39 "Call settings/Other").

1 Call
- Make a call. Also, if there are outgoing call history items, touch it to enter the latest one when the phone number has not been entered.
2 Favorites
● ● Display the contacts set as favorites.
3 Delete
- Delete an entered number.
- Touch and hold it to delete all the entered numbers.
4 Register
5 Dial
- ● Display the dial screen.
6Outgoing/Incoming call history
7Phonebook
● ● Display the phonebook.
3 [ ]
- To make a video call: [ : ] ▶ [Video call]
4 [END CALL] to end the call
- If you talk on the handset with your hair put between the earpiece and your ear, the proximity sensor may not work properly. The screen may be kept turned on and the call may be interrupted when the screen is touched accidentally.
VoLTE
- VoLTE enables you to use call and video call with high quality.
- When you use VoLTE, the handset and the other party's device need to satisfy the following conditions.
■ ● They are VoLTE compatible models
■ ● They are inside the VoLTE available area - ● Preferred network type is set to [4G/3G/GSM(Auto)] (P. 82 "Preferred network type")
■ Call mode setting is set to ON (P. 69 "Cellular networks")
Entering touch-tone signals
When using services in which you are required to enter numbers additionally during a call, such as inquiry about the balance in your bank account or ticket reservation, enter pause (,) / wait (;) after entering a phone number to make a call with an additional number added to the main phone number.
■ Adding 2 seconds pause
After making a call to a main phone number, the handset automatically pauses for 2 seconds and an additional number is sent.
1 In the home screen, [ ]▶ [Dial]
2 Enter a phone number ▶ [ : ] ▶ [Add 2-sec pause]
3 Enter a number to send ▶ [ ]
Adding wait
After making a call to a main phone number, the handset automatically waits and then a screen asking whether to send an additional number is displayed. Touch [YES] to send an additional number.
1 In the home screen, [ ]▶ [Dial]
2 Enter a phone number ▶ [ : ] ▶ [Add wait]
3 Enter a number to send ▶ [ ]
4 [YES] during the call
Video call
By using video call, you and the other party can talk on the handset while seeing each other's image. Also, you can switch between voice call and video call while talking on the handset.
- Call charges and packet communication charges are incurred when making a video call. In addition, packet communication charges are incurred also when receiving a video call.
● Quality of image may differ depending on the usage environment because suitable communication levels are applied according to the usage condition. - If you cannot switch to a video call during a voice call, [Switching to video call failed] is displayed and the voice call continues.
- Be careful not to cover the speaker section during a video call. The other party's voice may not be heard well.
● While using video call in the background, your image is not sent to the other party. - As for image displayed during a video call, since processes for displaying image may differ depending on the model to use, ranges of your image displayed on the handset may differ from those displayed on the other party's device.
Emergency call
| Emergency calls Phone number | |
| Police 110 | |
| Fire and ambulance 119 | |
| Marine emergency 118 | |
- The handset supports “Emergency call location notification”. When you make a call to an emergency number such as 110, 119 and 118, the information of your location (location information) is automatically notified to the agency that has received the emergency call (e.g. the police station). Depending on your location and the reception status of the signal, the agency that has received the emergency call may not be able to confirm the exact location.
If you are not sending your caller ID by calling with "184" added or other means, your location information and phone number are not notified. However, if the agency that has received the emergency call considers the exact location information measured via GPS and phone number necessary for important purposes, such as life saving, the agency may retrieve them regardless of your settings.
In addition, the area/timing to introduce “Emergency call location notification” depends on the state of preparation in each agency that receives emergency calls.
- In Japan, you cannot make a call to the emergency number (110, 119 or 118) when a docomo nano UIM card is not inserted, while the PIN code is locked, from the PUK (PIN Unlock Key) entry screen.
- When calling 110, 119 and 118 from your handset, the police or fire stations may return your call for verification purposes. State that you are calling from a mobile phone, and give your phone number and exact present location.
Remain stationary to ensure that the call is not disconnected while you are on the line, and keep the handset turned on to receive calls for approximately 10 minutes afterwards.
● Depending on the region, calls to the police or fire station of the local area may not be made.
- When you make a call to the emergency number (110, 119 or 118) while Reject call setting is set, items of Reject call setting are set to [OFF].
Emergency call may not be available in some networks.
- ● You cannot make a video call to the emergency number (110, 119 or 118).
International call (WORLD CALL)
WORLD CALL is an international calling service available from DOCOMO devices in Japan.
- ● The caller ID may not be notified or displayed correctly depending on overseas network operators. In this case, making a call with incoming call history is not available.
[Calling Method]
- When calling to a land-line phone: 010 ▶ country code ▶ area code (city code) ▶ the other party's phone number ▶ [ ]
- When calling to a mobile phone: 010 ▶ country code ▶ the other party's mobile phone number ▶ [ 📋 ]
- As for the other parties' mobile phone numbers and area codes (city codes) that begin with "0", omit the first "0" when entering (except some countries or regions such as Italy).
- Alternatively, enter "009130-010" as usual or "+" instead of "010".
Answering a call
※If you use Suguden, you can answer a call just by putting the handset on your ear when a call is received (P. 40 "Suguden setting").
1 When a call is received, the ringtone sounds and the incoming lamp flashes

2 Answer the call
- Operate after touching [ ].

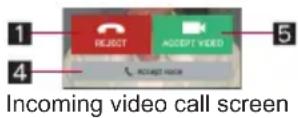
1Reject
- Reject the incoming call.
2Reject call with SMS
- Reject the incoming call and send a selected SMS message to the other party.
3 Accept
- Answer the call.
4 Accept voice
● ● Answer the call using voice call.
5 Accept video
● ● Answer the call using video call.
3 [END CALL] to end the call
■ Answering a call while display is turned on
When a call is received while a screen other than lock screen of the touch panel is displayed, the incoming notification is displayed. You can answer the call by using the notification.
1 When a call is received, the incoming notification is displayed at the top of the screen
2 [ACCEPT]
- Touch the incoming notification to display incoming voice call/video call screen.
■ Answering a video call without sending your own image
1 When a video call is received, the ringtone sounds and the incoming lamp flashes
2 In the incoming video call screen, [ ]▶ [Camera OFF response]
■ Answering a voice call by answering memo
1 When a voice call is received, the ringtone sounds and the incoming lamp flashes
2 In the incoming voice call screen, [ ]▶
[Absence Memo]
Playing an answering memo
1 In the home screen, [ ]
2 [ : ] ▶ [Call settings]
3 [Call/Ans Memo]
4 [Answering Memo List]
5 Select an answering memo
Operation during a call
You can carry out operations such as using a hands-free call and adjusting the in-call volume according to the usage condition during a call.


1 Other party's name and phone number
2 End call
- ● End a call.
3 Call time
4 Display of high-quality sound
- ● Display during a call with the high-quality sound in VoLTE. - It is also displayed during receiving a VoLTE of the voice call, video call, etc.
5 Dialpad
● ● You can enter touch-tone signals.
6 Mute
- Enable or disable the mute setting on a current call.
7Speaker
- ● You can talk with hands-free.
- When a Bluetooth device is connected, you can switch audio output ports.
8Switch to video
- Switch to a video call.
9The other party's image
- If you cannot receive the other party's image, is displayed.
10Your own image
11Switch camera
- Switch to the front camera/back camera.
● Note the followings to use hands-free or video call.
- Speak approximately 20 to 40 cm away from the mouthpiece. When the surroundings are noisy, the sound may break up and the call may not be satisfactory.
- When calling outdoors, in a location where surroundings are noisy or where the sound echoes loudly, use an earphone/microphone.
- If the sound breaks up during a hands-free call, lower the in-call volume.
■ Adjusting the in-call volume
1 Ⅱ(+)/Ⅱ(-) during a call
■ Switching to full screen display
Switch the video call screen to the full screen display.
1 Touch the screen during a call
•To disable the full screen display: Touch the screen
Hold
Hold/Unhold a current voice call.
- Subscription to Call Waiting Service is required to use hold.
1 [ ]:during a call ▶ [Hold]/[Cancel hold]
Adding a call
Place a current voice call on hold and make a call to another party.
- Subscription to Call Waiting Service is required to add a call.
1 [ ]:during a call ▶ [Add call]
2 Enter a phone number ▶ [ ]
- Touch the other party put on hold to switch to whom you talk.
■ Switching to voice call
Switch to a voice call during a video call.
1 [ ]:during a call ▶ [Switch to voice call]
Displaying dialpad
Display the dialpad during a video call.
1 [ ]:during a call ▶ [Dialpad]
■ Switching audio output port
Set whether to talk with hands-free during a video call. When a Bluetooth device is connected, you can switch audio output ports.
1 [ ]:during a call ▶ [Switch audio output destination]
2 Select an audio output port
■ Switching image of camera
Set whether to send your own image during a video call.
1 [ ]:during a call ▶ [Camera OFF]/[Camera ON]
Switching image area
Switch displaying area of the other party's/your own image during a video call.
1 [ ]:during a call ▶ [Switch video area]
Voice memo
Record a voice memo during a voice call.
1 [ ]:during a call ▶ [Sound Memo]
2 [STOP]
■ Displaying phonebook
1 [ ]:during a call ▶ [Address Book]
Outgoing/Incoming call history
The handset memory keeps a record of the 500 most recent outgoing and incoming call history items in total.
1 In the home screen, [ ]▶ [Recent calls]
2 [All]/[Incoming]/[Outgoing] ▶ select a history item
• Information on whether the outgoing/incoming call history items are of voice call or video call is not displayed.

1 Switch displays of history
- Switch among all history, only incoming history and only outgoing history.
2The other party's name/phone number
3Outgoing call/Incoming call/Missed call
4 Date and time of outgoing/incoming call
5Outgoing call icon
- Touch to make a voice call.
3 [Call]
- To register to the phonebook: [Register] ▶ select a type of registration ▶ set each item ▶ [Save]
- To compose and send SMS: [Send SMS] ▶ compose and send SMS
• To make a video call: [Video call]
Deleting outgoing/incoming call history
1 In the home screen, [ ]▶ [Recent calls]
2 [All]/[Incoming]/[Outgoing] ▶ [ : ] ▶ [Delete log]
3 Select a history item ▶ [Delete] ▶ [Delete]
- To delete all history items: [Select all] ▶ [Delete] ▶ [Delete]
Voice/Answering memo
You can play or set the voice/answering memo. If you set the answering memo, the handset answers a call and records the caller's message when you cannot answer.
1 In the home screen, [ ]
2 [ : ] ▶ [Call settings]
3 [Call/Ans Memo]
4 Select an item
■ ● Answering Memo List: Play or delete answering memos etc.
■ ● Voice Memo List: Play or delete voice memos etc.
■ Answering memo setting: Make settings for operations of the answering memo.
■ Answering message setting: Make settings for the reply message of the answering memo.
■ Answer time setting: Make settings for how long before the answering memo answers a call.
- Up to 10 answering memos and voice memos (approximately 60 seconds per memo) can be recorded respectively.
- If the number of saved answering memos exceeds the maximum number to be saved, answering memos which have been played are deleted from the oldest one. If no answering memo has been played, the handset does not answer calls by the answering memo.
- If the number of saved voice memos exceeds the maximum number to be saved, they are deleted from the oldest one.
- Answering memos and voice memos are not available in video call.
Call settings/Other
You can make settings for call such as voice mail and call rejection.
1 In the home screen, []
2 [ : ] ▶ [Call settings]
- Alternatively, in the home screen, [ ] ▶ [Settings] ▶ [Call] to make settings for call.
3 Select an item
■ Network service: For details 📋 P. 39 "Network service"
■ ● Roaming settings: Carry out settings when using international roaming service. For details on roaming settings P. 83 "Setting international roaming"
■ ● Phone ringtone: Set the ringtone.
■ Vibrate on ring: Set whether to activate the vibrator when receiving a call.
■ Dialpad touch tones: Set whether or not to enable dialing sounds.
■ Call/Ans Memo: For details ☑ P. 39 "Voice/Answering memo"
■ Reject call setting: For details ☑ P. 40 "Reject call setting"
■ Rejection SMS: Edit texts to use for Reject call with SMS.
■ Sub address settings: Set whether to call the particular device using sub addresses when you make a call to an ISDN device.
- Enter “*” after entering the phone number to recognize the number after “*” as the sub address.
- Prefix settings: Register the number added to the head of the phone number such as the international call access number and "186"/"184".
■ Suguden setting: For details 📄 P. 40 "Suguden setting"
■ Contact docomo: For details ☐ P. 41 "Contacting docomo"
■ Open source licenses: Display the open source licenses.
[Sub address settings]
● The sub address is the assigned number to distinguish multiple ISDN devices which connect to the same ISDN line.
Network service
1 In the home screen, [ ]
2 [ : ] ▶ [Call settings]
3 [Network service]
4 Select an item
■ Voicemail service: A service to answer calls with a reply message and record callers' messages for you.
- Call forwarding service: A service to forward calls.
■ Call waiting: A service to place the current call on hold and answer a new incoming call when receiving a call during another call. - Caller ID notification: Display your phone number on the other party's phone when you make a call.
■ Nuisance call blocking service: Register and reject phone numbers of "nuisance calls" such as prank calls. - Caller ID display request service: Answer calls without notifications of phone number and play the guidance for asking notifications of the numbers.
■ Call notification: Notify you of incoming call information with SMS.
■ English guidance: Play the guidance for setting each network service and the voice guidance stating that the handset is outside the service area etc. in English.
■ Remote operation settings: Operate Voice Mail Service, Call Forwarding Service, etc. from a touch-tone land-line phone, pay phone, mobile phone provided by DOCOMO, etc.
■ Public mode (power OFF) settings: Play a message stating that you are unable to answer because you are in a place that does not allow the use of mobile phone and automatically disconnect the call when receiving a call with the handset turned off.
● The following items are not available in video call.
■ ● Voicemail service
■ ● Call forwarding service
■ ● Call waiting
Reject call setting
1 In the home screen, [ ]
2 [ : ] ▶ [Call settings]
3 [Reject call setting]
4 Enter the passcode ▶ [OK]
5 Select an item
■ Reject specified numbers call: Set to reject incoming calls only from the specified callers.
- To edit a specified number: [H] ▶ [Edit] ▶ edit the phone number
■ Reject unregistered call: Set to reject incoming calls from callers not registered in the phonebook.
■ Reject anonymous call: Set to reject incoming calls from callers not notifying their phone numbers.
■ Reject call from pay phone: Set to reject incoming calls from pay phones.
■ Reject unknown call: Set to reject incoming calls from callers whose phone numbers cannot be notified.
[Reject unregistered call]
- Even if you set Reject unregistered call, calls from contacts for whom the secrecy setting is set are received. The names and images registered in the phonebook do not appear and only the phone numbers appear.
Suguden setting
You can make settings for the function (Suguden) which allows you to operate a call just by motions such as putting the handset on your ear.
1 In the home screen, [ ]
2 [ : ] ▶ [Call settings]
3 [Suguden setting]
4 Select an item
- ● Answer: Set whether to answer the call by placing the handset to your ear.
■ Disconnect: Set whether to end the call by placing the handset horizontally with the screen faced downwards or by shaking the handset twice during a call.
■ Call: Set whether to make a call to the person registered in advance or the person registered to the outgoing/incoming call history by shaking the handset once in the home screen and then placing the handset to your ear during an incoming call.
■ Mute, Reject: Set whether to stop the ringtone or reject the call by placing the handset horizontally with the screen faced downwards or by shaking the handset twice.
- Call ranking: Check who has made calls frequently.
■ Hide the name when receiving: Set whether to hide the other party's name and image until moving the handset when receiving a call.
- Sending of use information: Set whether to provide use information.
■ ● Disable Suguden during roaming: Set whether to disable Suguden during international roaming.
- Suguden does not support video call. However, [Hide the name when receiving] is enabled also when receiving a video call.
- If you put the handset in your bag or pocket with the display turned on during an incoming call, Suguden may activate and Answer or Disconnect may be carried out.
● The proximity sensor has the property of being difficult to respond the black object.
- If you place the handset to your ear with your hair put between the handset and your ear and answer a call, it may not respond (not answered). In this case, place the handset to your ear directly.
- If you turn the handset back on the black desk etc. and carry out Disconnect or Mute, Reject, it may not respond (Disconnect or Mute, Reject is not carried out). In this case, do not place the handset directly on the desk etc. and turn the handset back like floating it approximately 1 cm.
- In the following cases, Suguden does not work properly.
■ ● During a hands-free call
■ ● When using the earphone/microphone and headset
■ ● When connecting to a Bluetooth device with call function
■ ● When making a call/receiving a call during a call
- When the motion is not detected properly while lying down, running, walking up/down stairs, etc.
- When the handset is equipped with a flip cover and the cover is closed, Suguden does not work.
[Answer]
- This handset combines the earpiece and speaker. When you use this function, the handset detects that your ear is closing to the speaker from which the ringtone is ringing and the ringtone volume is changed to proper volume. However, the loud volume may be sounded near your ear such as when not detecting that your ear is closing, so set the ringtone volume properly and use.
[Disconnect]
● Even in the following cases, a call ends when the handset detects the motion.
■ ● When a call is putting on hold by the other party
- When activating the answering memo (playing a reply message/recording an answering memo)
- If you shake the handset forcefully, it recognizes a motion has carried out and the call may be disconnected.
- If you place the handset downwards quickly when disconnecting a call, it may not respond (cannot disconnect). In this case, carry out this movement slowly to respond (disconnect).
[Call]
● This is activated when the lock screen of the touch panel is displayed or while a home app is being used.
[Mute, Reject]
- If you shake the handset forcefully, it recognizes a motion has carried out and the ringtone may be stopped or the call may be rejected.
Contacting docomo
1 In the home screen, [ ]
2 [ : ] ▶ [Call settings]
3 [Contact docomo]
4 Select an item
■ ドコモ故障問合せ (Inquiries to DOCOMO about malfunctions): Make a call for inquiries about malfunctions.
■ ドコモ総合案内・受付 (General inquiries to DOCOMO): Make a call for general inquiries.
- 海外紛失・盗難等 (Inquiries about loss, theft, etc. while overseas): Make a call for inquiries about loss, theft, etc. from overseas.
- 海外故障 (Inquiries about malfunctions while overseas): Make a call for inquiries about malfunctions from overseas.
Phonebook
You can manage phonebook data of docomo account in cloud computing or check My profile.
Adding contacts to phonebook
1 In the home screen, select “ドコモクラウド” (docomo cloud) folder ▶ [docomo phonebook] ▶ [Contacts]
- When the confirmation screen for using cloud computing is displayed, check the content and select [Use]/[Not use].
2 [Register]
3 Set each item
• Information which can be registered may differ depending on the account type.
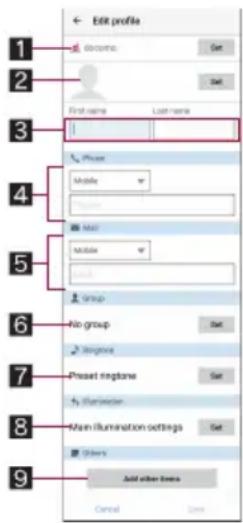
1 Account
- ● Set to which account to register.
2Image - Register an image to display when making and receiving a call or checking the contact.
3 First name, Last name
4 Phone
5 Mail
6 Group
● ● Displayed only when you are using the group function.
7 Ringtone
8Illumination
9 Add other items - Add items such as the address and organization.
4 [Save]
Checking/Using phonebook
You can retrieve registered contacts from the phonebook to make calls and send mails.
1 In the home screen, select “ドコモクラウド” (docomo cloud) folder ▶ [docomo phonebook] ▶ [Contacts]
2 Select a name

1 Contacts
2Image
3 My profile
● ● Display your phone number registered on the docomo nano UIM card.
4 Index bar
- Move to the touched heading.
5 Group
6 Use cloud computing
7 Register
8Search
9Index
● ● Display the index bar.
3 Check/Use registered information

1Image
2 Registered contents
- Check or use the registered contents.
3 Edit
4 Favorites
- ● Set the contact as a favorite.
- Check the contacts set as favorites in [Favorites] of Group.
- It is not available on contacts created with some accounts.
5Call
■ Selecting accounts to display
1 In the home screen, select “ドコモクラウド” (docomo cloud) folder ▶ [docomo phonebook] ▶ [Contacts]
2 [ : ] ▶ [Settings] ▶ [Accounts to display]
3 Select an item ▶ [OK]
- To customize an account to display: [Customize...] ▶ select accounts ▶ select groups ▶ [OK]
Sharing phonebook
You can send phonebook data to another device or save it in cloud computing.
1 In the home screen, select “ドコモクラウド” (docomo cloud) folder ▶ [docomo phonebook] ▶ [Contacts]
2 Select a name ▶ [ : ] ▶ [Share]
- To send all: [ : ]▶ [SD card/SIM card/common]▶ [Send all data (common)]
3 Select a sharing tool
- Follow the instructions on the screen and operate after this step.
Deleting phonebook
1 In the home screen, select “ドコモクラウド” (docomo cloud) folder ▶ [docomo phonebook] ▶ [Contacts]
2 [ : ] ▶ [Delete contact]
3 Select names ▶ [OK] ▶ [OK]
- To delete all items: [Select all] ▶ [OK] ▶ [OK]
Editing phonebook
1 In the home screen, select “ドコモクラウド” (docomo cloud) folder ▶ [docomo phonebook] ▶ [Contacts]
2 Select a name
3 [Edit]
4 Set each item ▶ [Save]
- For details on each item that can be set ☑ P. 41 "Adding contacts to phonebook"
Using groups
1 In the home screen, select “ドコモクラウド” (docomo cloud) folder ▶ [docomo phonebook] ▶ [Group]
2 Use groups
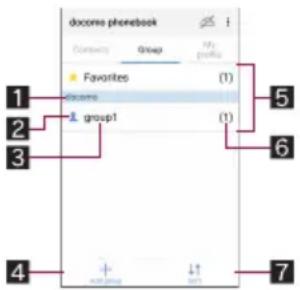
1 Account
2Group icon
3 Group name
4 Add group
- Add a group.
5Groups
6 Number of contacts registered in the group
7 Sort
- ● You cannot sort groups other than ones created with a docomo account.
■ Grouping/Ungrouping contacts
1 In the home screen, select “ドコモクラウド” (docomo cloud) folder ▶ [docomo phonebook] ▶ [Group]
2 Select a group
3 [Delete member]/[Add member]
4 Select names ▶ [OK] ▶ [OK]
- The group function is available on contacts created with a docomo account, Google account, etc.
My profile
You can display your phone number registered on the docomo nano UIM card. You can also register your name, mail addresses, etc.
1 In the home screen, select “ドコモクラウド” (docomo cloud) folder ▶ [docomo phonebook] ▶ [My profile]
2 Check/Use the profile

1Image
2 Registered content
3 Edit
Sharing My profile
You can send your profile to another device or save it in cloud computing.
1 In the home screen, select “ドコモクラウド” (docomo cloud) folder ▶ [docomo phonebook] ▶ [My profile]
2 [ : ] ▶ [Share]
3 Select a sharing tool
- Follow the instructions on the screen and operate after this step.
Editing My profile
1 In the home screen, select “ドコモクラウド” (docomo cloud) folder ▶ [docomo phonebook] ▶ [My profile]
2 [Edit]
3 Set each item ▶ [Save]
Backing up/Restoring phonebook
You can back up/restore the phonebook by using docomo Data Copy.
- For details on backing up/restoring phonebook by using docomo Data Copy P. 62 "Backing up to/Restoring from a microSD Card"
Mail/Web Browser
You can send and receive messages using docomo mail, SMS, Gmail, etc., and display websites using Chrome.
docomo mail
You can send and receive mails using mail address of DOCOMO (@docomo.ne.jp). Data can be easily transferred when you have changed models or restored when you have lost the handset since sent and received mails are saved on the docomo mail server. Also, you can send, receive and view mails using the same mail address from multiple devices such as a tablet, PC browser, etc. if you use d ACCOUNT.
- ● For details on docomo mail, refer to the DOCOMO website. https://www.nttdocomo.co.jp/service/docomo_mail/ (in Japanese only)
1 In the home screen, [ ]
- Follow the instructions on the screen and operate after this step.
SMS
You can send and receive text messages with mobile phone numbers serving as destinations.
※For details on the number of characters which can be sent and received etc., refer to "Short Message Service (SMS)" on the DOCOMO website.
https://www.nttdocomo.co.jp/service/sms/ (in Japanese only)
- ● You can also exchange messages with those who use network of overseas network operators. Refer to the DOCOMO website for information on countries where this service is available and available overseas network operators.
1 In the home screen, [ ]▶ [Messaging]
2 [三]
3 Enter the destination and message ▶ [▶]
- In the home screen, [ ]▶ [Settings] ▶ [Apps] ▶ [☑] ▶ [Default Apps] ▶ [SMS app] ▶ [Hangouts] to switch default SMS app to Hangouts.
- If destinations are devices owned by those who use network of overseas network operators, enter “+”, the country code and the recipient's mobile phone number. If the phone number begins with “0”, omit the first “0”. Alternatively, enter “010”, the country code and the phone number.
● Half-width katakana and special symbols in SMS messages may not appear correctly for recipient. - SMS cannot be sent when "186" or "184" is added.
Displaying message
1 In the home screen, [ ] ▶ [Messaging]
2 Select a thread
- Messages are grouped into threads according to their destinations/senders and displayed.

1 Image
● Displayed if an image of the other party is registered in the phonebook. Touch to display the registered content of the phonebook. If the person is not registered in the phonebook, you can register the person in the phonebook after touching it.
2 Destination/Sender
3Number of messages in thread
4 Number of threads included unread messages
5 Newly compose message
6 Message search
7 Date and time of the message exchange
3 Check the message

1 Destination/Sender
2Phone call
3Message
4 Date and time of the message exchange
Replying message
1 In the home screen, [ ]▶ [Messaging]
2 Select a thread
3 Enter the message ▶ [▶]
Forwarding message
1 In the home screen, [ ]▶ [Messaging]
2 Select a thread
3 Touch and hold a message ▶ [Forward]
4 Enter the destination and message ▶ [▶]
Deleting message
1 In the home screen, [ ]▶ [Messaging]
2 Select a thread
3 Touch and hold a message ▶ [Delete] ▶ [DELETE]
Deleting thread
1 In the home screen, [ ]▶ [Messaging]
- To delete all threads: [ ]▶ [Delete all threads]▶ [DELETE]
2 Touch and hold a thread ▶ [☐] ▶ [DELETE]
Setting Messaging
1 In the home screen, [ ]▶ [Messaging]
2 [☐] ▶ [Settings]
3 Select an item
■ ● SMS Enabled: Set an app to send and receive SMSs with.
■ Delete old messages: When the number of saved messages reaches its limit, messages are automatically deleted from the oldest one.
■ Text message limit: Set the number of messages to be saved by thread.
■ Delivery reports: Notify you that sent messages have been received every time a message is received.
■ ● Manage SIM card messages: Manage messages saved on the docomo nano UIM card.
■ Notifications: Notify you that messages have been received on the status bar.
■ Sound: Set the ringtone to be rung when a message is received.
■ Vibrate: Set whether to activate the vibrator when a message is received.
[SMS Enabled]
● Make settings for default SMS app in [SMS app].
- If Messaging is not set to default SMS app, [SMS Disabled] is displayed. [SMS Disabled] ▶ [YES] to switch default SMS app to Messaging.
[Delivery reports]
- When you send a message to mobile phones of other carriers, the notification for confirming that it has been received may not be sent to you.
You can send and receive mails by setting up a mail account provided by a service provider.
- Set up an account in advance (P. 25 "Setting up mail account").
1 In the home screen, [ ] ▶ [Email]
2 [●]
3 Compose a mail

1 Account
- If you set up multiple accounts, you can switch accounts.
2Destination
- When you enter part of a mail address or a name registered in the phonebook, destination candidates are displayed.
3Subject
4 Message
5 Add destinations
- Touch it to add Cc or Bcc.
6 File attachment
4 [>]
● Some receiving side models may not be able to receive the subject completely.
- Mails sent from a Gmail account are treated as ones from a PC. When receiving side models set PC-mail rejection, mails cannot be sent.
● Mails that could not be sent for any reason will be saved in Unsent folder as unsent mails.
● Depending on the signal status etc., characters may not appear correctly on the screen of the other party's device.
Attaching file
● Files of up to approximately 5 MB can be attached. There are no limits to the number of files to be attached.
- Depending on the receiving side device, files may not be received or correctly displayed/played. Also, the quality of videos may deteriorate or videos may be converted to continuous still pictures.
Displaying mail
● The screen may appear different depending on the account to use.
1 In the home screen, [ ]▶ [Email]
2 Select a mail

1 Box name/Folder name being displayed
- Touch [1] to switch or set folders/accounts.
2 Mails
● The characters of sender or subject are displayed in thin characters when a mail is read.
- Touch images to checkmark the mails and you can set them to be deleted/unread/read etc. collectively.
3 Mail search
4 Star icon
- Use it as a mark indicating that the mail is special or supposed to be dealt with later.
● ● You can check starred mails in the Starred folder.
5 Newly compose mail
3 Check the mail

1 Subject
2Sender/Destination
● Displayed if an image of the other party is registered in the phonebook. Touch to display the registered content of the phonebook. If the person is not registered in the phonebook, you can register the person in the phonebook after touching it.
3 Date and time of reception
- Touch to display/hide the details of sender, destination or date and time of reception.
4 Message
5 Attached file
6 Star icon
- Use it as a mark indicating that the mail is special or supposed to be dealt with later.
- ● You can check starred mails in the Starred folder.
7 Menu of each mail
- Touch to reply to all, forward or print by mail.
8Reply
9 Delete
10Unread
Replying/Forwarding mail
1 In the home screen, [ ]▶ [Email]
2 Select a mail
3 [←]
- To reply to all: [ : ] of each mail ▶ [Reply all]
- To forward: [ : ] of each mail ▶ [Forward]
4 Compose a mail

1 Reply type
- Touch to switch Reply/Reply all/Forward.
2Destination
3Message
4 Quote text
- Touch to display/hide the mail of the sender.
● ● You cannot operate it when forwarding mails.
5 Mail of sender
6Subject
7 Respond inline
- Enter the mail of the sender in the message.
5 [> ]
Deleting mail
1 In the home screen, [ ]▶ [Email]
- To delete selected mails: Touch the images of mails
[ ] ▶ [OK]
2 Select a mail
3 [☐] ▶ [OK]
Setting Email
1 In the home screen, [ ] ▶ [Email]
2 [←] ▶ [Settings]
3 Select an item
■ General settings: Make settings for the whole Email.
■ ● Add account: Add account.
■ ● Privacy policy: Check the privacy policy.
- Select an account to make settings for the details on the account such as Signature and Email notifications.
Gmail
You can use a mail service provided by Google or Email provided by general service providers.
- If you have not set up a Google account or Email account, follow the instructions on the screen and set.
1 In the home screen, select "Google" folder ▶ [Gmail]
2 [●]
3 Compose a mail
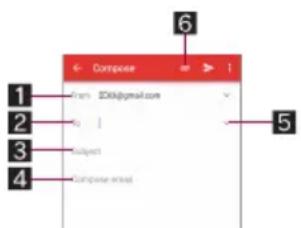
1 Account
- ● If you set up multiple accounts, you can switch accounts.
2Destination
- Permit the use of phonebook by touching [Allow contacts suggestions] to display destination candidates when you enter part of a mail address or a name registered in the phonebook.
3Subject
4 Message
5 Add destinations
- Touch to add Cc or Bcc.
6 File attachment
4 [> ]
Displaying mail
1 In the home screen, select "Google" folder ▶ [Gmail]
2 Select a thread
- In Gmail, mails are grouped into threads by reply and displayed. If new mails are replied ones of an existing mail, they are grouped into the same thread. A new thread is created for newly composed mails or mails whose subjects have been changed.

1 Box name/Label name being displayed
- Touch[] to switch or set displaying types/accounts.
2Threads
● ● The characters of sender or subject are displayed in thin characters when all mails in thread are read.
- Touch images to checkmark the threads and you can set them to be archived/deleted/unread/read etc. collectively.
3Mail search
4 Number of mails in thread
5 Star icon
- Use it as a mark indicating that the thread is special or supposed to be dealt with later.
- ● You can check starred threads in the Starred folder.
6 Newly compose mail
3 Check the mail

1Subject
2Grouped mails
- Touch to display grouped mails.
3Sender/Destination
- Touch the image to display available apps. Available functions may differ depending on the content of the phonebook.
- Touch the sender to switch detailed display/simplified display.
4 Message
5 Attached file
6 Star icon
- Use it as a mark indicating that the thread is special or supposed to be dealt with later.
● ● You can check starred threads in the Starred folder.
7Reply
8Menu of each mail
- Touch to reply to all, forward, starred/unstarred, print or block/unblock mail from sender by mail.
9 Date and time of reception
- Touch to display/hide the details of sender, destination or date and time of reception.
10Archive
11 Delete
12Unread
Replying/Forwarding mail
1 In the home screen, select "Google" folder ▶ [Gmail]
2 Select a thread
3 [←]
- To reply to all: [ : ] of each mail ▶ [Reply all]
- To forward: [ : ] of each mail ▶ [Forward]
4 Compose a mail
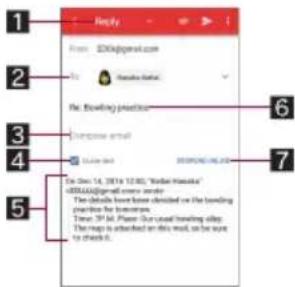
1 Reply type
● Touch to switch Reply/Reply all/Forward.
2Destination
3Message
4 Quote text
● Touch to display/hide the mail of the sender.
● ● You cannot operate it when forwarding mails.
5Mail of sender
6Subject
7 Respond inline
- Enter the mail of the sender in the message.
5 [> ]
Deleting thread
1 In the home screen, select "Google" folder ▶ [Gmail]
- To delete selected threads: Touch the images of threads ▶ [☐]
2 Select a thread
3 [□]
Setting Gmail
1 In the home screen, select "Google" folder ▶ [Gmail]
2 [■] ▶ [Settings]
3 Select an item
■ ● General settings: Make settings for the whole Gmail.
■ ● Add account: Add account.
- Select an account to make settings for the details on the account such as Notifications and Signature.
Early Warning "Area Mail"
Area Mail is an app to receive Early Warning "Area Mail" and check the received Area Mail.
● Area Mail is a service which enables you to receive earthquake early warnings or tsunami warning sent from the Japan Meteorological Agency or disaster and evacuation information sent from national and local governments without being influenced by congestion of the line.
- When an Area Mail is sent to you, it is automatically received and the contents of it are displayed whether or not the display is turned on or whether or not Screen lock is set.
● Area Mail may not be received or automatically displayed depending on the condition of the handset.
• In the following cases, you cannot receive Area Mail.
■ During a call
■ ● While the power is turned off
■ ● While outside the service area
■ ● During international roaming
■ In Airplane mode
* Voice calls in VoLTE can be received.
- In the following cases, you may not be able to receive Area Mail.
■ ● During packet communication
■ ● During Wi-Fi tethering
■ ● During USB tethering
■ ● During software update
- In the following cases, you can receive Area Mail but it may not be automatically displayed.
■ ● During packet communication
■ ● During software update
● ● Area Mail is a free service that does not require a subscription.
1 Automatically receive an Area Mail
2 When the Area Mail is received, the special buzzer or special ringtone sounds and its message is displayed
- Checking received Area Mail later
1 Drag the status bar down ▶ select the received Area Mail
- Alternatively, in the home screen, [ ]▶ [Disaster kit]▶ [Early Warning "Area Mail"] to check received Area Mail.
- ● You can receive Area Mail without subscription to sp-mode.
- ● You cannot receive the Area Mail (earthquake early warning) that failed to be received again.
It is possible to receive the Area Mail (tsunami warning, and disaster and evacuation information) that failed to be received again because it is resent.
- ● You can save up to 50 Area Mails.
- If the number of Area Mails saved on the handset memory exceeds the maximum number to be saved, they are deleted from the oldest one.
Deleting Early Warning "Area Mail"
1 In the home screen, [ ]▶ [Disaster kit]
2 [Early Warning "Area Mail"]
3 Select a mail
• To select all Area Mails: [Select all]
4 [Delete] ▶ [OK]
Setting Early Warning "Area Mail"
Whether to receive Area Mail, operations for when receiving Area Mail, etc. can be set.
1 In the home screen, [ ]▶ [Disaster kit]
2 [Early Warning "Area Mail"]
3 [ ] ▶ [Settings]
4 Select an item
■ Receive setting: Set whether to receive Area Mail.
■ Beep tone: Make settings for the ring duration and operations in the manner mode.
■ Check screen image and beep tone: Confirm the reception screen and the ringtone for earthquake early warning, tsunami warning, and disaster and evacuation information.
■ やさしい日本語表示 (Display with simple Japanese): Set whether to display earthquake early warning and tsunami warning with simple Japanese.
● Settings of the earthquake early warning buzzer, ringtone dedicated to tsunami warning, and disaster and evacuation information, ringtone volume and vibrator cannot be changed.
Chrome
You can display websites via packet communication or Wi-Fi function.
Displaying websites
1 In the home screen, [ ]
- Some websites may not appear properly.
Searching websites
1 Touch the URL entry field

2 Enter a keyword ▶ select a keyword
- Keywords that include the entered characters are displayed as a list.
- Alternatively, enter the entire keyword and [Go] to search websites.
- To reload the page: In the Chrome screen, [ : ]▶ [ C]
Opening new tabs
1 In the Chrome screen, [ ] ➤ [New tab]
Switching tabs
1 In the Chrome screen, [ ]2
2 Select a tab
Closing tabs
1 In the Chrome screen, [ ] [ ]
Opening incognito tabs
You can display websites without your browsing history and search history being recorded.
1 In the Chrome screen, [ ]▶ [New incognito tab]
- When you display websites on an incognito tab, the surrounding area of the URL entry field is displayed in gray.
2 Touch the URL entry field ▶ enter a keyword ▶ [Go]
- To close the incognito tab: In the Chrome screen, [1] ▶ [X]
- The websites opened on incognito tabs are not recorded in history of Chrome (P. 49 "Displaying websites from history"). Also, if you close all incognito tabs, information such as Cookie is deleted. Downloaded files and bookmarked websites from incognito tabs can be saved, too.
■ Searching characters in the page
1 In the Chrome screen, [ ]▶ [Find in page]
2 Search

1 Keyword entry field
- Enter the keyword to search with.
2Previous
3 Next
4 End search
5Search results bar
- Move to the search result at the touched position.
■ Copying characters
1 In the Chrome screen, touch and hold characters to copy
2 Drag your finger from the start position to the end position
- To change the copy range: Drag [ ]/[]
3 [COPY]
■ Convenient functions
You can display a link with a new tab or download data such as images.
1 In the Chrome screen, touch and hold a link/an image ▶ select a function to use
Setting Chrome
1 In the Chrome screen, [ ]▶ [Settings]
2 Select an item
■ Sign in to Chrome: Sign in to Chrome with your Google account. You can synchronize information such as tabs, bookmarks and history saved when you used Chrome with the same account.
■ Search engine: Set a search engine to use when searching in the URL entry field.
■ Autofill forms: Set information on your address or credit card to use when automatically filling out forms.
■ Save passwords: Make settings for saving passwords.
■ ● Home page: Set a home page.
■ Privacy: Make settings for the functions that use your browsing information to improve user-friendliness.
■ Accessibility: Make settings for the display such as font size and zoom.
■ Site settings: Make settings for displaying websites and the information that they can use to improve user-friendliness.
■ ● Data Saver: Set whether to suppress the data communication volume.
■ ● About Chrome: Check information on Chrome.
Using bookmark and history
Saving bookmarks
1 In the Chrome screen, [ ]▶ [ ]☆
■ Displaying websites from bookmarks
1 In the Chrome screen, [ ]▶ [Bookmarks]
2 Select a bookmark
■ Displaying websites from history
1 In the Chrome screen, [ ]▶ [History]
2 Select a history item
Apps
dmenu
In dmenu, you can easily access websites or convenient apps recommended by DOCOMO.
1 In the home screen, [dメニュー] (dmenu)
- Internet connection via packet communication (LTE/3G/GPRS) or Wi-Fi is required to use dmenu.
- Packet communication charge is incurred separately for connecting to dmenu and downloading apps introduced on dmenu. Some downloaded apps automatically perform packet communication.
- Apps introduced on dmenu include charged ones.
dmarket
An app which handles digital contents such as music, videos and books and provides you with various services such as shopping websites and travel reservation websites.
1 In the home screen, [dmarket]
- For details on dmarket, refer to the following website. https://d.dmkt-sp.jp/common/about/index.html (in Japanese only)
Play Store
By using Google Play, you can download and install useful apps or fun games to the handset.
- Set up a Google account in advance (P. 25 "Setting up Google account etc.").
1 In the home screen, [Play Store]
- To display help: [≡]▶ [Help & Feedback]
- Be sure to check the security of app, then install it at your own risk. The handset may be infected with a virus, data may be damaged, etc.
- Note that DOCOMO shall not be liable for malfunctions caused by the app etc. you installed.
- Note that DOCOMO shall not be liable for any disadvantage brought to you or any third party due to the app etc. you installed.
Purchasing apps
1 In the Google Play screen, select an app to purchase
2 Touch the price
- Follow the instructions on the screen and operate after this step.
- When the app is free: [INSTALL]
- If you make a purchase for the first time, select a payment method. You need to sign in to your Google Wallet account depending on the payment method.
- You can ask for a refund within a specified time after purchasing an app. The app is deleted and you are not charged. In addition, note that a refund request is available for each app only once. If you requested a refund for a purchased app in the past and purchase the same app again, a second refund request is not available. In the Google Play screen, [≡]▶ [Help & Feedback] for details on the payment method when purchasing an app, the terms on refund requests, etc.
- Once you accept installation of an app, you are responsible for the results of using the app. Be very cautious about installation of apps that access many functions or a significant amount of data.
- Some downloaded apps automatically perform packet communication. Note that the packet communication charges may be higher.
- You need to pay for an app only once. Re-downloading apps which you previously uninstalled after first downloading will not be charged.
- If you have multiple Android devices that use the same Google account, you can download a purchased app to all of them at no additional cost.
● Note that DOCOMO provides no assistance for purchase of apps, refund, etc. from Google Play.
Uninstalling apps
1 In the Google Play screen, [ ] ➤ [My apps & games]
2 Select an app to uninstall
3 [UNINSTALL] ▶ [OK]
Osaifu-Keitai
Osaifu-Keitai is a function for using “Osaifu-Keitai compatible services” which enable you to pay, use the handset as coupons, etc. by simply holding it over scanning devices at stores etc. and using “Kazashite-Link compatible services” which enable you to access information by holding the handset over home electric appliances, smart posters, etc.
You can save electronic money, points, etc. on the IC card or docomo nano UIM card of the handset and check the balance and the remaining points, etc. on the screen. In addition, you can lock Osaifu-Keitai functions to prevent an unauthorized use of it in case of theft or loss.
For details on Osaifu-Keitai, refer to the DOCOMO website.
※To use Osaifu-Keitai compatible services, settings are necessary on a website or an app.
Using Osaifu-Keitai compatible handset
- The handset malfunctions may cause data on the IC card 1 data on the docomo nano UIM card 2 to be lost or changed (Note that as a rule, you will be asked to delete data when leaving your handset for repairs etc., since we cannot keep your handset with such data still remaining in it). For the service such as a reissue, restoration, temporary keeping or transference of the data, contact a provider of the Osaifu-Keitai compatible service you use. Be sure to use the Osaifu-Keitai compatible service including a backup service for important data.
-
To use the Osaifu-Keitai compatible service by using data on the docomo nano UIM card, you need to install an app from a provider of the Osaifu-Keitai compatible service and set it even if you continue to use same docomo nano UIM card as before model change.
-
● DOCOMO shall not be liable for any loss or change of data on the IC card, data on the docomo nano UIM card or other damages related to Osaifu-Keitai compatible services caused by any reason such as malfunctions and model changes.
- When the handset is stolen or lost, immediately contact a provider of the Osaifu-Keitai compatible service you use for handling methods.
*1 The data saved on the built-in IC card of the Osaifu-Keitai compatible handset
*2 The data saved on the docomo nano UIM card
Using "Osaifu-Keitai compatible services"
- ● To use Osaifu-Keitai compatible services, download the Osaifu-Keitai compatible app from Osaifu-Keitai compatible websites and make the setting. Some services do not require the download of the Osaifu-Keitai compatible app.
1 In the home screen, [ ] ▶ [Osaifu-Keitai]
- If the initial settings are not completed, the initial settings screen appears. Follow the instructions on the screen and operate.
2 Select a service
- Make settings on the website of the service or after downloading the app compatible with the service.
3 Hold the 🔒 mark of the handset over the scanning device

- ● You cannot use Osaifu-Keitai compatible services in the following situations. However, you can pay by holding the handset over a scanning device.
■ ● In Airplane mode - When you are charging the handset, connecting Micro USB Cable 01 (sold separately) to it or connecting an earphone/microphone to it while the docomo nano UIM card is not inserted/when the handset has never received radio wave
- Osaifu-Keitai compatible services are available even if you cannot unlock the PIN code of the docomo nano UIM card or the PIN code is locked.
- If you have not subscribed to sp-mode, you may not be able to use some functions of an Osaifu-Keitai compatible service.
● The handset can communicate with scanning devices without activating Osaifu-Keitai compatible app. - Communicating with the scanning device is available even if you turn the power off. However, you may not be able to use it if the power remains turned off for a long time or the battery level is insufficient.
- Depending on the installed Osaifu-Keitai compatible app or app's settings, Osaifu-Keitai compatible services may not be used by holding the handset over the scanning device while the Screen lock is set, the display is turned off or power is turned off.
Using "Kazashite-Link compatible services"
- Enable [Reader/Writer, P2P] in advance (P. 52 "NFC/Osaifu-Keitai settings").
1 Hold the 🔒 mark of the handset over a device into which an NFC module is built, smart poster, etc.
Precautions about holding over the other device
- Pay attention to the following points when holding the Ⓜ mark over the other device such as a scanning device or device into which an NFC module is built.
- Do not let the handset strongly clashed with the other device but slowly bring the handset close to the other device when holding the Ⓞ mark over it.
■ Hold the Ⓜ mark over the center of the other device and in parallel with it. If the other device does not recognize the built-in IC card even when you do so, slightly move the handset away from the other device or move the handset around. - The other device may not recognize the built-in IC card if there are metallic objects between the Ⓜ mark and the other device. Remove the handset from its cover or case if the other device does not recognize the built-in IC card, since equipping the handset with it may influence the communication performance.
NFC/Osaifu-Keitai lock
You can restrict the use of the functions and services of Osaifu-Keitai by setting NFC/Osaifu-Keitai lock.
- NFC/Osaifu-Keitai lock differs from Screen lock of the handset and Set up SIM card lock.
1 In the home screen, [ ] ▶ [Settings] ▶ [More] ▶ [NFC/Osaifu-Keitai settings] ▶ [NFC/Osaifu-Keitai lock]
- Alternatively, in the home screen, [ ] ▶ [Osaifu-Keitai] ▶ [Lock Settings] to set NFC/Osaifu-Keitai lock.
2 Follow the instructions on the screen and enter the NFC/Osaifu-Keitai lock number
● While NFC/Osaifu-Keitai lock is set, or [ ] displayed on the status bar.
- When the battery runs out while NFC/Osaifu-Keitai lock is set, NFC/Osaifu-Keitai lock cannot be disabled. Be aware of the battery level. If the battery runs out, disable NFC/Osaifu-Keitai lock after charging the battery.
- To use the menu of Osaifu-Keitai while NFC/Osaifu-Keitai lock is set, disable NFC/Osaifu-Keitai lock.
● The NFC/Osaifu-Keitai lock number is not deleted even if you initialize the handset.
- When disabling NFC/Osaifu-Keitai lock, insert the docomo nano UIM card which had been inserted into the handset when NFC/Osaifu-Keitai lock was set.
NFC/Osaifu-Keitai settings
1 In the home screen, [ ] ▶ [Settings] ▶ [More] ▶ [NFC/Osaifu-Keitai settings]
2 Select an item
■ NFC/Osaifu-Keitai lock: For details ☎ P. 51 "NFC/Osaifu-Keitai lock"
■ Reader/Writer, P2P: Set whether to use the Reader/Writer, P2P function.
■ Android Beam: Perform data communication using Android Beam.
- For details on Android Beam ☑ P. 79 "Android Beam"
■ NFC Type setting: Select an NFC type to use from among "FeliCa/Type A/Type B (Standard)", "FeliCa/Type A" or "FeliCa/Type B".
■ Tap & Pay: For details ☎ P. 52 "Tap & Pay"
- Lock No. change: Change the lock number of NFC/Osaifu-Keitai lock.
Tap & Pay
You can enable/disable available services by holding the handset over the scanning device such as Osaifu-Keitai compatible services.
1 In the home screen, [ ] ▶ [Settings] ▶ [More] ▶ [NFC/Osaifu-Keitai settings] ▶ [Tap & Pay]
- Alternatively, in the home screen, [ ] ▶ [Osaifu-Keitai] ▶ [ ] ▶ [Change setting of credit card etc.] to activate it.
2 Select a service
- Follow the instructions on the screen and operate after this step.
- To display help: [ ] ▶ [Help] (in Japanese only)
ToruCa
ToruCa is an app which enables you to store economical coupons of your favorite shops, useful information, etc. in one place. You can retrieve one with various ways such as downloading from mail or website, Bluetooth function or IC tag. Retrieved information for ToruCa can be easily updated to the latest.
For details on ToruCa, refer to the DOCOMO website.
1 In the home screen, [ ]▶ [ToruCa]
- Packet communication charges may be incurred for retrieving, displaying or updating ToruCa.
- When you retrieve ToruCa by using the Bluetooth function, you need to set [Bluetoothでトル力を増やす] (Increase ToruCa via Bluetooth) to ON.
- When you retrieve ToruCa from IC tag, you need to enable [Reader/Writer, P2P] (P. 52 "NFC/Osaifu-Keitai settings").
● The following functions may not be available depending on the settings of the content provider.
■ ● Updating
■ ● Sharing ToruCa
■ ● Displaying a map
■ ● Retrieving from a scanning device - If the initial settings of Osaifu-Keitai have not been made, ToruCa may not be retrieved from a scanning device.
iD appli
“iD” is electronic money provided by DOCOMO. You can pay easily and conveniently by holding an Osaifu-Keitai in which “iD” is set over scanning devices at stores. Two types of card information can be registered and you can switch them according to the benefits etc.
- ● For using iD with Osaifu-Keitai, setting of iD appli is required.
- Expense (annual fee etc.) for using iD service may vary depending on the credit card company.
- ● For setting and checking iD appli overseas, packet communication charges differ from those in Japan.
- ● For information on iD, refer to iD website. http://id-credit.com/ (in Japanese only)
SHCamera
You can shoot still pictures and videos. Also, you can switch settings of the camera according to the object to shoot.
Before using camera
- If dirt such as fingerprint or fat adheres on the lens part, images may be out of focus or blur. Wipe the lens with a soft cloth before shooting images.
- ● You cannot shoot when the battery level is insufficient. When you use the camera, charge the battery sufficiently in advance.
- Although the camera is made with high-precision technology, some pixels or lines look constantly dark or bright. Further, white lines and other noise increase in images especially when shooting images in dimly lit surroundings.
- If the camera lens part is exposed to direct sunlight for a long time, the internal color filter may discolor, creating a discoloration of shot images.
● ● The quality of images may deteriorate when shot or saved after the handset has been left in a warm location for a long time.
● Images shot in shooting conditions which include strong light source such as the sun or a lamp may appear dark or distorted.
● ● Shooting the sun directly may impair the performance of the CMOS. - If you continue to use the camera in a state that internal temperature is high, the warning screen appears and the camera automatically ends after saving shot data.
- ● When [Focus Setting] is switched, sounds are heard from the camera lens. This is not a malfunction.
● The color and brightness of the object in images shot with the camera may differ from the actual color and brightness.
● Make sure that your fingers, hair, strap, etc. do not obscure the camera lens when shooting images. - Because a larger picture size requires more data, movement in the image on the handset display may appear slow.
- ● Indoor fluorescent lighting etc. may create flickering or streaky shading on the screen. This flickering or shading may be reduced by changing the lighting conditions and brightness of the room or adjusting the camera brightness and white balance.
- ● Shot still pictures are saved in DCF1.0 (ExifVer.2.3, JPEG) format.
Copyrights and rights of portrait
Images and audio recorded with the handset are for personal use and must not be used for any other purposes without the consent of the rightful person in accordance with the Copyright Act.
Please note that acts such as the use or defacement of the likeness or name of other individuals without their consent may infringe on an individual's rights of portrait. Please be aware of copyrights and rights of portrait when posting images and audio recorded with the handset on the Internet or similar media. The recording of images or audio may be restricted at stage performances, shows, exhibitions, etc. even when the images or audio is recorded for personal use etc. Do not use the handset to send copyrighted images for uses other than those permitted under the Copyright Act.
If you cause the public any trouble using the handset, you may be punished under law or regulations (for example, nuisance prevention ordinance).
Please be considerate of the privacy of individuals around you when shooting and sending pictures using camera-enabled devices.
Operations while using camera
- If no operations are performed for approximately 3 minutes while activating the camera, the camera automatically ends.
● ● The shutter sound volume cannot be changed.
Picture size of camera
● ● The following picture sizes are available.
| Shooting mode | Aspect ratio Picture | size |
| Shoot still picture | 16:9 | 4K2K: 3840×2160 |
| 3.7M: 2560×1440* | ||
| FULL HD: 1920×1080 | ||
| 4:3 | 13M: 4128×3096 | |
| 8M: 3264×2448 | ||
| 5M: 2592×1944* | ||
| VGA: 640×480* | ||
| 1:1 | 9M: 3096×3096 | |
| Shoot video 16:9 | FULL HD: 1920×1080 | |
| HD: 1280×720 | ||
| 4:3 | VGA: 640×480 |
* Available only when you use the front camera.
Shooting screen layout

1 Remaining number for shooting
● ● Displayed when the remaining number for shooting decreases to 99 or less.
- Even after shooting a still picture/video, the number may not be changed.
2Switching front camera/back camera
- ● Set to shoot with the front camera or back camera.
- Using some functions or changing settings are not available while you use the front camera.
3 Mobile light
● ● Switch settings of the mobile light.
4 Shooting mode
- Switch shooting modes (P. 55 "Switching shooting modes").
5 Shooting videos
6 Shooting still pictures
7 Album/Thumbnail
- ● Activate Album or display the still picture or video you have just shot.
- Icons for changing settings are displayed at the top of the screen depending on the shooting mode. Touch icons to change settings.
Easy Manual
A mode to be automatically applied the settings appropriate to the scenes by selecting the shooting scene. You can adjust settings.
1 In the home screen, [SHCamera]
2 [●] ▶ [Easy Manual]
3 Select the shooting scene

1 Setting icon displaying area
● ● Display setting icons according to the selected scene. Touch the icon to display the adjustment bar and adjust settings.
● ● The following settings are available with displayed icons.
- White Balance:
- ISO Sensitivity: [ ]
- Shutter Speed: [印]
- Focus: [ ]
- Saturation: []
- Contrast: [1]
- Clarity: [ ]
2 Adjustment bar
- Drag it to adjust settings.
3 Automatic adjustment
- Touch it to switch to the automatic adjustment.
4 Water Level
- Check angles of the shooting screen.
5 Shooting scene
- Switch the shooting scene.
ISO Sensitivity
- If you set ISO Sensitivity to high sensitivity, the shutter speed becomes fast. Therefore, it is possible to reduce object shake and camera shake, or shoot clear images of an object in a dark place. However, the quality of still pictures deteriorates.
Shooting still pictures
1 In the home screen, [SHCamera]
2 Turn the camera of the handset (back camera) to an object
- To adjust the brightness: Slide your finger up/down
- To zoom: Slide your finger to the left/right or pinch out/in
- Maximum magnification (zoom step) is approximately 8.0-fold (90 steps).
• To lock the focus: Touch the object
- Touch anywhere other than focus mark to cancel the focus lock.
- Drag [AE] to the part where you want to adjust the exposure if Focus Setting is set to [Separate AE/AF].
- The focus cannot be locked if Focus Setting is set to [AF OFF].
3 [ ] / Ⅱ(+)/Ⅱ(一)
- Alternatively, you can shoot still pictures by touching the focus mark when the focus is locked by one other than [Separate AE/AF].
- Touch and hold [ ] or hold [(+) / ] (−) down for at least 1 second to shoot multiple still pictures in a row.
- As for the focus lock, the object's movements are detected mainly on basis of the colors. Therefore, the object may not be detected properly if its color is faint or similar to the background color.
Shooting videos
1 In the home screen, [SHCamera]
2 Turn the camera of the handset (back camera) to an object
• To adjust the brightness: Slide your finger up/down
- To zoom: Slide your finger to the left/right or pinch out/in
• Maximum magnification (zoom step) is approximately 8.0-fold (90 steps).
3 [ ]
- To lock the focus: Touch the object
- Touch anywhere other than focus mark to cancel the focus lock.
- Drag [AE] to the part where you want to adjust the exposure if Focus Setting is set to [Separate AE/AF].
- Touch the focus mark to shoot a still picture when the focus is locked by one other than [Separate AE/AF].
- The focus cannot be locked if Focus Setting is set to [AF OFF].
4 [☐]
- As for the focus lock, the object's movements are detected mainly on basis of the colors. Therefore, the object may not be detected properly if its color is faint or similar to the background color.
Camera settings
- Some functions are not available depending on the shooting mode being used etc.
■ Settings on shooting still pictures
1 In the home screen, [SHCamera]
2 [ : ]
3 [PICTURE]
4 Select an item
■ Picture Size: Switch picture sizes of still pictures.
■ Framing Advisor: Switch division lines for compositions and types of guide according to the scene for shooting.
■ HDR: Set whether to reduce blown out highlights when you shoot still pictures in a high contrast scene such as when you shoot against the light.
■ NightCatch: Set whether to shoot bright still pictures in a dark scene.
■ ISO Sensitivity: Set the sensitivity for incorporation of light according to the ambient brightness.
■ Shutter Mode: Set whether to automatically shoot the object when he/she smiles or looks back on the camera.
■ One Touch Shutter: Set whether to shoot still pictures by touching the screen.
■ Beautiful Skin Effect: Set the effect level to carry out beautiful skin adjustment when using the front camera.
■ Distortion Correction: Set whether to correct the lens when using the front camera.
■ Settings on shooting videos
1 In the home screen, [SHCamera]
2 [ : ]
3 [VIDEO]
4 Select an item
■ ● Video Size: Switch picture sizes of videos.
■ NightCatch: Set whether to shoot bright videos in a dark scene.
■ ● Mic Setting: Set whether to use the microphone.
■ Common settings on shooting still pictures/videos
1 In the home screen, [SHCamera]
2 [ : ]
3 [COMMON]
4 Select an item
■ Select an item for full manual shooting: Select icons to display on the setting icon displaying area when using "Manual" in Easy Manual.
Up to four icons can be displayed.
■ Clipped whites/Crushed shadows: Set whether to display stripes in the part that clipped whites or crushed shadows occur.
■ ● Water Level: Set whether to display the water level.
■ Focus Setting: Set the focus according to the object. - If you set [Face AF], detect faces of people.
■ Self-timer: Set whether to automatically shoot with a timer set. - Touch [/][]/[ ] when using the front camera to set/ disable the timer.
■ Anti Flicker: Set to make the screen less susceptible to striped patterns when you shoot in a place with fluorescent lighting.
- Save To: Set a save destination.
- Add Location Information: Set whether to add location information.
■ Help: Check the functions of icons displayed on the shooting screen, operations on the touch panel or how to use functions.
■ Function Information: Check how to use with a video tutorial by using "Let's Try!".
■ ● PHOTOSHOW (Web): Connect to the SHARP website and check camera functions and shooting methods by using pictures shot with the SHARP smartphone as an example.
■ ● Reset Settings: Reset settings.
■ Switching shooting modes
You can switch shooting modes to shoot with according to the shooting condition and object.
1 In the home screen, [SHCamera]
2 [■]
3 Select an item
■ Easy Auto: A mode to automatically adjust the camera according to the object.
■ Easy Manual: For details ☎ P. 53 "Easy Manual"
■ Time Laps: Make a video by connecting still pictures that are shot at regular intervals.
■ ● Fireworks: A mode suitable for skyrocket shot. You can automatically shoot fireworks as well.
■ Monochrome: A mode for monochrome shot.
- Bleach bypass: A mode for shooting while making shady parts appear darker and stressing chromatic contrast.
- ● Camera Reader: Activate Camera reader and scan the QR code, bar code, business card, etc.
- When you use this app, you need to download it.
■ Hand Mirror: A mode for reflecting yourself like a hand mirror using the front camera (shooting is not available).
- Touch the screen while using Hand Mirror to pause the screen. Touch the screen again to disable the pause.
■ SHSHOW: Connect to the SHARP website and download an app for utilizing the camera.
Album
You can sort images and videos by event and location and use them.
- When the image is displayed, it is processed to improve the detail and more clearly.
1 In the home screen, [Album]
2 [≡] ▶ select a category
3 Select data
- To delete data: Touch and hold data ▶ [Delete] ▶ [YES]
4 Confirm the data
- If files are not displayed, they may be displayed normally by deleting a database file of Album. Connect the handset to a PC using Micro USB Cable 01 (sold separately) and delete /PRIVATE/SHARPV/PM/DATABASE folder on the handset memory or a microSD Card to use. If you delete the database file, created information of event, location, etc. are also deleted. Take extra precautions and check when deleting.
Sorting data
You can sort images and videos by created group.
Sorting by event
1 In the Album screen, [ Event]
2 [Not set]
3 [☐] ▶ [Create new event]
4 Select data to classify ▶ [Create]
5 [INPUT NEW EVENT.] ▶ enter an event name ▶
[OK] ▶ [Create]
Sorting by location
- ● The data with location information attached is automatically sorted on a map.
1 In the Album screen, [E][Map]
2 [ ] ▶ [Location settings]
3 Touch and hold the data to classify ▶ drag the data to the point to register it onto ▶ [OK]
Displaying/Hiding data
You can use the display mode that allows all images and videos to display and the hide mode that allows images and videos you have set in advance to hide.
Setting displaying/hiding data
Set whether to hide data with the hide mode.
- ● Setting is not available in the hide mode. Set it in the display mode.
Setting by data
1 In the Album screen, select data
2 [ ] [ ]
- [ ] indicates displaying while [ ] indicates hiding. When data is set to hide, [ ] is also displayed on a thumbnail of the Album screen.
Setting multiple data collectively
1 In the Album screen, [ ]▶ [Display/Hide images]
2 [Select images to hide]/[Select images to display]
3 Select data ▶ [OK] ▶ [Yes]
- Setting of hiding images and videos is available only in "Album". Even if images and videos are set to hide, they are displayed in other apps.
■ Switching displaying modes
Switch the display mode/hide mode.
1 In the Album screen, [ ]▶ [Display/Hide images]
2 [Switch to hide mode]/[Switch to display mode]
- If you register your fingerprint, you can switch the display mode/hide mode using fingerprint authentication while the Album screen is displayed.
For the operation by fingerprint authentication, [ ]▶ [Display/Hide images]▶ [Switching by FingerPrint] to set it.
Atokara Capture
You can select the frame from the video and save as a still picture.
1 In the Album screen, select a video
2 [ ]
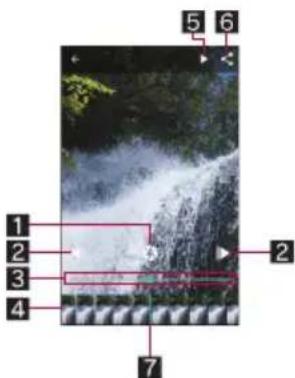
1 Still picture capture
- Touch it to save the frame being displayed as a still picture.
2To frame-by-frame reverse/frame-by-frame forward
● ● Display a previous/following frame.
3 Seek bar
● Drag the seek bar to change the playback position.
4 Thumbnail
● ● Display an image per second.
- Drag the thumbnail to change the playback position.
5Play/Pause
6 Share
● Touch it to save the frame being displayed as a still picture and you can use it in other apps.
7 Display position
● ● Display the position of the present display frame.
Media Player
Play music data and video data saved on the handset memory or a microSD Card.
● The followings are the main file formats of playable music data. AAC LC, AAC+, enhanced AAC+, enhanced low delay AAC, AMR-NB, AMR-WB, FLAC, MP3, MIDI, Vorbis, PCM/WAVE, Opus
- The followings are the main file formats of playable video data. However, some files may not be displayed/played or may become intermittent.
H.263, H.264, H.265, MPEG-4, WEBM
1 In the home screen, [ ] ▶ [Media Player]
- If the confirmation screen asking whether to read the usage explanations of Media Player appears, select [使い方の説明を見る] (See the usage explanations)/[使ってみる] (Try to use).
2 Select data
- Slide the data list screen down to display the search box of content.


1 Data being played/paused
2Tab bar
- Slide it to the left/right to switch displays of category.
3 Title/Artist name/Album title
4 Icon indicating the data is being played/paused
5 Music data settings
- Touch it to set the music as a ringtone, add the music to a playlist or delete the music.
6Index
- Slide the index up/down to move to the selected heading.
7dmarket
● ● Activate dmarket.
8 Thumbnail
9 Title/Artist name
10Playback time/Total playback time
11 Miracast settings
- Play videos on a TV with a wireless connection function etc. For details on Wireless output P. 80 "Wireless output"
3 Play music/video
• To adjust the playback volume: [(+)/](-)

Music playback screen

Video playback screen
1Playback time
2 Jacket image
- Touch it to display the volume bar etc.
3 Title/Artist name/Album title
4 Repeat
- When is superimposed, repeat only one song.
5Operation panel
- The following operations are available with displayed keys 1 . - To play previous data/return to the beginning of the data: [ ] 2
• To play next data: [▶]
- To return to a location of approx. 10 seconds ago/skip to a location of approx. 10 seconds later: [ ]
• To play/pause the data: ▶/[]
*1 In the video playback screen, the keys are displayed in white.
*2 When the playback time is less than approximately 2 seconds: Play previous data When the playback time is approximately 2 seconds or more: Return to the beginning of the data
6 Total playback time
7 Shuffle
8 Seek bar
- Drag the seek bar to change the playback position.
9Image
10 Title/Artist name
11 Data list screen
12 Auto-rotation lock of the screen
13Volume bar
14 Miracast settings
- ● Play videos on a TV with a wireless connection function etc. For details on Wireless output P. 80 "Wireless output"
15 Battery level
Sorting tabs
1 In the data list screen, [ ] [Settings]
2 [Arrange tabs]
3 Drag [ ] to the point to sort into ▶ [Done]
Managing playlists
Creating playlists
1 In the data list screen, [Playlist]
2 [Add] ▶ enter a playlist name ▶ [OK]
3 Select music data ▶ [Done]
4 [Save] ▶ [OK]
Editing playlists
1 In the data list screen, [Playlist]
2 Select a playlist
3 [Edit]
- To rename the playlist: [Edit title] ▶ enter a playlist name ▶ [OK]
• To sort music data: Drag [] appearing alongside the song to sort to the point to sort into
- To delete music data: Select music data ▶ [Delete selected songs]
4 [Save] ▶ [OK]
■ Deleting playlists
1 In the data list screen, [Playlist]
2 [Reorder/Delete]
3 Select playlists ▶ [Save] ▶ [OK]
GPS/Navigation
You can display Street View and search for routes using Maps. You can also search for facilities near a location on the map being displayed by genre.
Using GPS function
- GPS is a function to retrieve location information of devices by receiving radio wave from GPS satellites. It is necessary to set [Location] to On to measure the present location (P. 69 "Location").
- ● You cannot use the handset as a navigation system for professional use of aircrafts, vehicles, person, etc. or surveying GPS of high accuracy. Note that DOCOMO shall not be liable for the pure economic losses such as ones caused by using the GPS for these purposes or by failing to confirm a positioning result or to communicate due to handset failure, malfunction or external factors such as power failure (including battery exhaustion).
● GPS is a service administered by the U.S. Department of Defense. Therefore, GPS radio wave condition may be controlled (accuracy degradation, radio wave abort, etc.) for US national security reasons. In addition, the same results may not be retrieved even when positioned in the same location and environment, since the radio wave conditions may change depending on the location of the GPS satellites.
- Note that GPS uses the radio waves from artificial satellites, therefore the following conditions may prevent the radio waves from being received or prevent the reception status of the radio waves from being satisfactory, resulting in an error of 300m or more for location information.
■ In or under a dense forest, in density area with buildings or residence
■ In or under buildings
■ In a basement, tunnel, underground or underwater
■ ● Near high-tension line
■ ● Inside cars, trains, etc.
■ ● In bad weather with heavy rain/snow etc.
■ ● In bags or boxes
■ ● When people or objects are blocking the handset
■ ● When hands are covering the GPS antenna area
- When using a GPS function overseas, the displayed map based on the acquired location information (latitude and longitude information) may not be accurate because of the legal system etc. in each country and the area.
- Packet communication charges may be incurred, since assisted GPS data such as satellite information is automatically retrieved when you measure present location.
- Packet communication charges are incurred when you display a map based on location information etc.
Maps
You can measure your present location, use the navigation function to check how to get to your destination in detail, etc.
- ● It is necessary to set [Location] to On to measure the present location (P. 69 "Location").
1 In the home screen, select "Google" folder ▶ [Maps]
2 Use Maps
- To rotate the map: Keep a finger on the touch panel and turn the map to the desired direction with another finger
- To display sterically: Slide up with your two fingers at the same time
- To measure present location: [ ]
Street View
1 In the Maps screen, touch and hold any place
2 Touch a displayed image
- To change a displayed direction: Slide the screen up/down or to the left/right
- To move a displayed place: Touch an arrow
- To switch to the compass mode: []
● Some areas are not supported by Street View.
- When the compass mode is used, the geomagnetic compass of the handset and the direction displayed by Street View are associated with each other.
Searching for routes
You can search for a route from a start point to an end point.
1 In the Maps screen, [ ]
2 Select how to get to the end point ▶ touch the search box above
- The present location is entered while it is being measured.
3 Enter a start point
4 Touch the search box below
5 Enter an end point
- Follow the instructions on the screen and operate after this step.
■ Searching for facilities nearby
You can search for facilities near a location on the map being displayed by genre.
1 In the Maps screen, touch the search box
2 Select a genre of facilities to search
- Alternatively, you can search by entering a name of place to search in the search box.
3 Use the search result
- To display detailed information: Select an address, a name of place or facility, etc.
YouTube
YouTube is a free online video streaming service. You can play, search and upload videos.
1 In the home screen, select "Google" folder ▶ [YouTube]
2 Select a video
• To display the search box: []
Clock
You can use alarm, world clock, timer and stopwatch.
Alarm
Activate an alarm tone or vibrator at the specified time.
1 In the home screen, [ ] ▶ [Clock] ▶ [ ]
2 Touch a time of register destination
• To add a register destination: [ ]
3 Select a time ▶ [OK]
4 Set each item
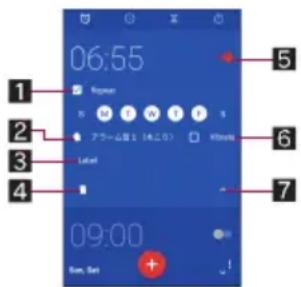
1 Repeat
- ● Set the repetition of the alarm.
2 Alarm sound
- ● Set the alarm sound.
3 Label
- Enter the label.
4 Delete
- Delete the alarm.
5 Alarm ON/OFF
- Enable/Disable the alarm.
6Vibration
- ● Set whether to use the vibrator.
7 Switch displays
- An alarm is not activated when the handset is turned off at the set alarm time.
- When the set alarm time arrives during a call, the other party's voice and notification sound are heard at the same time.
Stopping an alarm
Activate an alarm tone or vibrator at the set alarm time.
1 Slide [] to [] while an alarm is ringing
- To use a snooze: slide [] to []
Stopping an alarm while display is turned on
When the set alarm time arrives while a screen other than lock screen of the touch panel is displayed, the alarm notification is displayed. Stop the alarm by using the notification.
1 [DISMISS] while an alarm is ringing
• To use a snooze: [SNOOZE]
■ Adjusting an alarm volume
1 In the alarm screen, [ ] [Settings]
2 [Alarm volume] ▶ adjust the volume
World clock
Display clocks for cities around the world.
1 In the home screen, [☐] ▶ [Clock] ▶ [☐]
2 [●]
3 Select a city
Timer
Activate an alarm tone after the specified length of time passes.
1 In the home screen, [☐] ▶ [Clock] ▶ [☒]
2 Enter the time ▶ [▶]
• To add 1 minute: [+1']
• To stop the countdown: [ ]
- To reset the countdown: [ ]
- The alarm sound is activated after the specified length of time passes.
• To stop the alarm sound: []
Changing a name
1 In the timer screen, [Label]
2 Enter a name ▶ [OK]
■ Adding a timer
1 In the timer screen, [ ]
- Deleting a timer
1 In the timer screen, []
Stopwatch
You can measure the time using stopwatch. Also, you can measure the lap time (elapsed time)/split time (total elapsed time).
1 In the home screen, [☐] ▶ [Clock] ▶ [☐]
2 [▶]
• To measure the lap time and split time: [ ]
3 [☐]
• To reset the measuring result: [ ]
- ● You can record up to 98 history items of lap time and split time.
Schedule
Create and manage schedules.
1 In the home screen, select “ドコモクラウド” (docomo cloud) folder ▶ [Schedule]
2 Check schedules

1 Selected date, name of holiday
2 Registered schedule
3 Search i-schedule
- Use i-schedule.
4 Add
Setting Schedule
1 In the Schedule screen, [ ] [Settings]
2 Select an item
■ "Today's schedule" setting: Set to notify the schedules of the day at the specified time.
- Alarm: Make settings for the alarm.
■ Initial screen: Set a screen shown when Schedule is activated.
■ Starting day: Set the starting day of a week on the calendar.
■ Update birthday data: Apply birthday data in the phonebook to the calendar.
■ ● Cloud setting: Set whether to use cloud computing.
Creating a schedule
1 In the Schedule screen, [ ]
2 Set each item
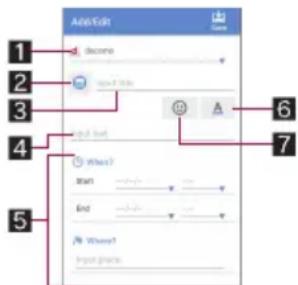
1 Account
- ● Set to which account to register.
2 Label
- Change label icons and colors.
3 Title
4 Text
5 Edit details
- ● Set the date and place. Touch [Display input option] to add input items of Repeat, Alarm, etc.
6 Text color
- Change text colors of the title.
7 Sticker
- ● You can paste and remove stickers (Deco-mail pictogram/pictogram) which decorate memos nicely.
3 [Save]
Deleting a schedule
1 In the Schedule screen, select a date
2 Touch and hold a schedule

3 [Delete one] ▶ [DELETE]
Memo
Create and manage memos and schedules.
1 In the home screen, select “ドコモクラウド” (docomo cloud) folder ▶ [Memo]
2 [Memo]/[Schedule] ▶ [+]
3 Create a memo/schedule ▶ [Save]
- For details on the methods for creating a schedule P. 59 "Creating a schedule"
- Basic methods for creating memos are the same as those for creating schedules. When creating a memo, set the date and time to be classified into a schedule.
Calculator
1 In the home screen, [ ]▶ [Calculator]
2 Calculate
- To copy the calculation result: Touch and hold the calculation result ▶ [COPY]
• To display help: [ ] ▶ [Help]
KARADA MATE
You can record the number of steps, weight, etc. You can also display the history of the number of steps or weight as a graph and compare it on a daily/monthly basis.
- Data such as the number of steps and weight recorded on KARADA MATE is backed up by a Google account and you can transfer it even though you change models. When you activate the new handset compatible with KARADA MATE for the first time, set the same Google account as before model change and restore data in the initial settings.
1 In the home screen, [ ]▶ [KARADA MATE]
- Alternatively, in the home screen, [ ] ▶ [Convenient tool] ▶ [Recommendation] ▶ [KARADA MATE] to activate it.
2 [YES]
3 Set each item of user information ▶ [Pedometer On] ▶ [◀]
- At the time of purchase, temporary figures are registered for User Information. Set User Information properly before use.
- The number of steps is always counted while the power is turned on.
- The display of the pedometer is reset once a day.
Cautions when counting the number of steps
- In the following cases, the number of steps may not be counted correctly.
■ ● When the handset shakes irregularly
- When a bag etc. which contains the handset shakes irregularly by hitting legs or hip
- When you are dangling the handset from your waist, bag, etc.
■ ● When you walk irregularly
- When you walk with your feet sliding or when you walk irregularly wearing sandals, geta, slippers, etc.
- When a disarray of walk occurs such as by walking in the crowded place
- When the handset is used in a place with up-and-down movement or frequent vibration
- When you stand up or sit down
- When you play sports
- When you walk up/down stairs or steep slope
- When the handset is being wobbled in a vehicle (bicycle, car, train, bus, etc.)
• While sounds are being emitted from the speaker
• While the vibrator is being activated
■ ● When you walk extremely slowly
- When carrying the handset in Carry Case 02 (sold separately), put the Carry Case 02 on a belt etc.
- When carrying the handset in a bag, pouch, etc., place it in a stable space such as in a pocket or compartment.
- The number of your first steps made for approximately 4 seconds is counted, but it will not be displayed as counted steps. Keep walking, and then the total number of steps including it will be displayed as counted steps.
KARADA MATE screen layout


1 Steps mode
2Number of steps made today
3 History of the pedometer
● Displayed daily number of steps in bar graph. Touch the graph to display the detailed information such as steps, distance and calories of the touched day.
4 Entering weight
● ● Touch it to enter a daily weight.
- Use EMOPA to enter a weight by voice as well. For details on EMOPA 📞 P. 66 "EMOPA"
5 Setting goal
- Touch it to set the goal of steps or weight. - Alternatively, in the KARADA MATE screen, [RE]▶ [Set Goal] to set the goal. - To delete the set goal: In the setting goal screen, [RESI
6 Weight mode
7 Goal value
8 Switching display
● ● Switch to the display of a daily/monthly
9Difference from previous weight
10 Latest weight
11 History of the weight
- Displayed daily weight in bar graph. Touch the graph to display the detailed information such as weight of the touched day and BMI. - To move to the displaying month or week:[]/[]
■ Changing the user information
1 In the KARADA MATE screen, [H] [User Information]
2 Set each item
■ Disabling KARADA MATE
1 In the KARADA MATE screen, [ ] [Settings]
2 [Pedometer On]
- Disable [Pedometer On] to stop KARADA MATE.
Resetting data
Delate all walking data and weight data.
1 In the KARADA MATE screen, [ ]▶ [Reset Data] ▶ [YES]
- Checking term explanations
1 In the KARADA MATE screen, [ ] [Term Explanation]
2 Select an explanation
Convenient tool
You can use convenient functions such as KARADA MATE and dictionaries.
- For details on Contents Manager P. 76 "Contents Manager" - For details on KARADA MATE P. 60 "KARADA MATE"
- When you use Voice Recorder or Camera reader for the first time, you need to download it. - The icon of Camera reader is not displayed in the app list screen even after it is downloaded. Activate it from Convenient tool or SHCamera.
Dictionary
Built-in dictionary
You can search the word meaning by using built-in dictionaries.
- By default, the following e-dictionaries are built in the handset (Part of the dictionaries may differ from printed versions due to computerization).
■ “明鏡国語辞典MX 第二版”
(Meikyo Japanese Dictionary MX (2nd edition))
©KITAHARA Yasuo and Taishukan, 2012
■ “ジーニアス英和辞典MX 増補版”
(Genius EJ Dictionary MX (expanded edition))
©MINAMIDE Kosei, NAKAMURA Mitsuo and Taishukan, 2012
■ “ジーニアス和英辞典MX 第2版”
(Genius JE Dictionary MX (2nd edition))
©MINAMIDE Kosei, NAKAMURA Mitsuo and Taishukan, 2012)
1 In the home screen, [ ]▶ [Convenient tool] ▶ [Dictionary]
2 [Japanese dictionary]/[English-Japanese dictionary]/[Japanese-English dictionary]
3 Enter a word/phrase ▶ select the word
- Corresponding candidate words are displayed every time a character is entered.
- To search another word: [Home] - After this, enter a word/phrase and search again. - To check history: [History] ▶ select a history item - To add word card: [Add word card] - To check word card: [ ] ▶ select a word card
Word test
1 In the built-in dictionary screen, [Word test]
2 Select the numbers of words and start test
3 [Show]/[Next]
• To end test before completion: [Exit]
4 [QUIT]/[AGAIN] after ending the test
Net dictionary
You can search the word meaning by using online dictionaries.
1 In the home screen, [ ] ▶ [Convenient tool] ▶ [Dictionary]
2 [Net dictionary]
3 Enter a word/phrase ▶ [SEARCH] ▶ select the search result
• To search another word: [Home]
After this, enter a word/phrase and search again.
- To check history: [History] ▶ select a history item
docomo Data Copy
"docomo Data Copy" is an app to copy data saved on the handset to other handsets, back up/restore data, etc. Use to transfer data when you change models or backup the important data periodically.
Data Transfer
You can directly copy data such as phonebooks and images to the device of transfer destination using the direct communication of one-to-one that does not use the internet. Activate "Data Copy" on both devices of copy source and copy destination, line two up and operate.
1 In the home screen, [ ]▶ [Data Copy]
2 [Data transfer]
- Follow the instructions on the screen and operate.
- This app is needed for both devices of copy source and copy destination. If it is not installed, you can download it from the DOCOMO website.
- Communication methods may differ depending on the model or OS you use.
- For details on the compatible models or usage methods, refer to the DOCOMO website.
Backing up to/Restoring from a microSD Card
You can move and back up data such as phonebooks and docomo mails by using a microSD Card.
- Do not remove the microSD Card from the handset or turn off the handset while backing up or restoring data. Data on the handset may be damaged.
- If the name of a phonebook item (phone number etc.) on other devices differs from that on your handset, the name of the item may be changed or deleted. Also, characters which can be registered to phonebook differ among devices, so the characters may be deleted at the copy destination.
- ● Phonebooks in the docomo account and registered in the handset can be backed up.
- When you back up phonebooks to a microSD Card, you cannot copy data without name.
- When the available space on the microSD Card is insufficient, backup may not be available. In this case, secure enough space by deleting unnecessary files from the microSD Card.
- When the battery level is insufficient, backup or restoration may not be available. In this case, back up or restore again after charging the handset.
- When the microSD Card is not inserted, data such as images and movies are saved on the handset due to the memory structure of the handset. In this app, only data such as images and movies saved on the handset are backed up. The data saved on a microSD Card are not backed up.
Backing up
You can back up data such as phonebooks, docomo mails and media files.
1 In the home screen, [ ]▶ [Data Copy]
2 [Backup & Restore]
3 [Backup]
4 Select data to back up ▶ [Start backup] ▶ [BACKUP]
- Selected data are saved on the microSD Card.
5 [Back to top]
Restoring
You can restore data such as phonebooks, docomo mails and media files backed up to the microSD Card to the handset.
1 In the home screen, [ ]▶ [Data Copy]
2 [Backup & Restore]
3 [Restore]
4 [Select] of a data category to restore
5 Select data to restore ▶ [Select]
6 Select the restoration method ▶ [Start restore] ▶ [RESTORE]
- It is not necessary to select the restoration method depending on the data category.
- Selected data are restored to the handset.
7 [Back to top]
■ Copying phonebooks to docomo account
You can copy contacts of Google account to the phonebook of the handset.
1 In the home screen, [ ]▶ [Data Copy]
2 [Backup & Restore]
3 [Phonebook account copy]
4 [Select] of a phonebook to copy ▶
[OVERWRITE]/[ADD]
- The copied account is saved to docomo account.
5 [OK]
Backing up to/Restoring from Data Storage Box
You can back up/restore call log/music data using Data Storage Box.
1 In the home screen, [ ]▶ [Data Copy]
2 [ : ] ▶ [Backup/Restore to Cloud]
3 [Backup]/[Restore]
- Follow the instructions on the screen and operate.
- If you have not logged in to docomo cloud, the confirmation screen is displayed.
- Note that the packet communication charges may be higher if you use Periodical backup in Data Storage Box.
Handset Settings
Setting menu
In the home screen, [ ] ▶ [Settings] to display the menu and make various settings for the handset.
- [Q] while Settings is displayed ▶ enter a keyword to search with to search the setting items.
| Profile Display your phone number registered on the docomo nano UIM card and register a name, mail address, etc. | |
| Sound & notification | Make settings for the ringtone, notification sound, etc. |
| Illumination Set when to make the incoming/charging lamp flash or how to make it flash. | |
| Display Make settings for the screen display etc. | |
| Useful Make settings for Twist magic, ScrollAuto, Clip Now, On/off with motion or View with flip cover, or perform Self check. | |
| エモパー (Japanese only) (EMOPA) | Based on your information and settings of EMOPA registered in advance, the handset delivers various information through voice or the screen display in the lock screen of the touch panel. |
| Battery & energy saving | Activate Energy saving, check the battery usage, etc. |
| Call Make settings for call such as voice mail and call rejection. | |
| Home applications | Switch lock screens or home apps to use. |
| Apps Check names, versions, memory usage, etc. of apps, enable/disable apps, uninstall them, etc. | |
| Storage & USB Check the used capacity/total capacity of the handset memory, microSD Card or USB memory, display the data saved on it, etc. | |
| Memory Check the memory usage. | |
| Wi-Fi Make settings for the Wi-Fi function. | |
| Bluetooth Connect the handset and Bluetooth devices wirelessly. | |
| Data usage | Measure the volume of data communicated via mobile networks and display it on a diagram. |
| More Make settings for other functions in Wireless & networks. | |
| docomo service/cloud | Make settings for the docomo service. |
| Location | Make settings for measuring location information. |
| Lock & Security | Make settings for the security lock. |
| Language & input | Make settings for the language displayed on the screen, character entry, text-to-speech, etc. |
| Backup & reset Back up data using a Google account, transfer data to/from among devices, perform Reset all, etc. | |
| Accounts | Add/Set accounts or make settings for data synchronization. |
| Make settings for various Google services collectively. | |
| Date & time | Make settings for the date and time and their format. |
| Accessibility | Make settings for accessibility options. |
| Printing | Print with an app supporting the print function by installing a print app (plug-in). |
| About phone | Check the information about the handset. |
Profile
You can display your phone number registered on the docomo nano UIM card and register a name, mail address, etc.
1 In the home screen, [ ] ▶ [Settings] ▶ [Profile]
2 [Edit]
3 Set each item ▶ [Save]
Sound & notification
You can make settings for the ringtone, notification sound, etc.
1 In the home screen, [ ] ▶ [Settings] ▶ [Sound & notification]
2 Select an item
■ Media volume: Set the volume of the media sound (music, video, etc.).
- Alarm volume: Set the volume of the alarm.
■ ● Ring volume: Set the volume of the ringtone.
■ エモパー volume (Volume of EMOPA): Set the volume of EMOPA.
■ ● Phone ringtone: Set the ringtone.
■ Vibrator when receiving a call: Set whether to activate the vibrator when receiving a call.
■ Vibrator pattern for incoming call: Set the vibrator pattern when receiving a call.
■ Do not disturb: Make settings for the priority notification or operation of notification at specific time etc.
- You can also set in MORE SETTINGS of Manner mode (P. 28 "Manner mode").
■ Default notification ringtone: Set the notification sounds.
■ Other sounds: Set whether to activate the vibrator when a specific key operation etc. is carried out or set whether or not to enable operation sounds for when touching menus etc.
■ When device is locked: Make settings for the notification displayed in the lock screen of the touch panel.
■ App notifications: Set to display/hide notifications or make settings for Priority of notifications by app.
■ Notification access: Check apps which allow you to access to the notification.
■ Do Not Disturb access: Check apps which allow you to access to [Do not disturb].
[When device is locked]
● The following items can be set.
■ ● Show all notification content: Set to display the notifications in the lock screen.
- Hide sensitive notification content: Set not to display details such as the other party's phone number or the number of notifications in the lock screen.
- You can use this item when Screen lock is set to an item other than [None] or [Swipe or Touch].
- Don't show notifications at all: Set not to display the notifications in the lock screen.
Illumination
You can set when to make the incoming/charging lamp flash or how to make it flash.
- The light performance is displayed on the screen according to the flashing pattern of the incoming/charging lamp when receiving a call, charging starts, etc. The light performance may vary depending on the flashing pattern or a flashing color of the incoming/charging lamp.
1 In the home screen, [ ] ▶ [Settings] ▶ [Illumination]
2 Select an item
■ For incoming call: Set whether to make the illumination flash when receiving a call.
■ Illumi pattern/color for incoming call: Make settings for a flashing pattern or a flashing color for when receiving a call.
■ Notification: Set whether to make the illumination flash when receiving a notification.
■ Darkening while sleeping: Set whether to suppress the light intensity of the incoming/charging lamp in a specific time zone.
■ Time settings: Set the time zone to suppress the light intensity by [Darkening while sleeping].
- If you select [エモパー mode] (EMOPA mode), [Darkening while sleeping] is enabled at your sleep time EMOPA learned.
■ When start charging: Set whether to make the illumination flash when charging starts.
■ Charging: Set whether to change the light intensity in a certain pattern while charging.
■ When unlocking: Set whether to make the illumination flash when unlocking the touch panel.
■ When ending a call: Set whether to make the illumination flash when ending a call.
■ When decreasing display brightness: Set whether to make the illumination flash when the handset is not operated for a certain period of time and the screen is turned off.
[Charging]
- If there are notifications such as a missed call or the power is turned off, the light intensity is not changed.
Display
You can make settings for the screen display etc.
1 In the home screen, [ ] ▶ [Settings] ▶ [Display]
2 Select an item
■ ● Wallpaper: Set an image for the home screen.
■ Brightness level: For details 📋 P. 64 "Brightness level"
- Sleep: Set the light duration of the backlight.
■ Press power button twice for camera: Set whether to activate SHCamera by pressing () twice.
■ Relax settings: For details ☐ P. 64 "Relax settings"
■ ● Quality mode: Make settings for the picture quality.
■ When device is rotated: Set whether to rotate the contents of the screen when rotating the handset.
■ Font Settings: Make settings for the text size or text font.
■ VeilView: For details ☑ P. 64 "VeilView"
■ ● Daydream: Set whether to use the screen saver.
■ Display left percents of Battery: Set whether to display the percentage of the remaining battery level on the status bar.
[Sleep]
- Note that the continuous stand-by time is shortened when increasing the light duration.
[Quality mode]
- If [RelaxView] is enabled, you cannot set Quality mode.
[When device is rotated]
- This function may not follow the setting depending on the app in use.
[Font Settings]
● ● Font may not appear correctly when activating an app downloaded from Google Play etc.
Brightness level
1 In the home screen, [ ] ▶ [Settings] ▶ [Display] ▶ [Brightness level]
2 Select an item
■ Automatic brightness: Set whether to automatically adjust brightness of the backlight. When not automatically adjusting, set the brightness manually.
■ Brighten while charging: Set whether to brighten the display while charging.
3 [OK]
[Automatic brightness]
● Note that the continuous stand-by time is shortened when increasing the brightness of the display.
Relax settings
You can make settings for using the quality mode of Eye-friendly.
1 In the home screen, [ ] ▶ [Settings] ▶ [Display] ▶ [Relax settings]
2 Select an item
- ● RelaxView: Set whether to switch to the quality mode of Eye-friendly.
■ RelaxAuto setting: Set whether to switch to RelaxView at the specific time.
■ Overview of RelaxAuto: Display the explanation of functions.
■ ● Time settings: Set the time to switch to RelaxView by [RelaxAuto setting]. - If you select [エモパー mode] (EMOPA mode), [RelaxView] is enabled before your sleep time EMOPA learned.
■ ● Adjust image quality: Set the RelaxView quality.
VeilView
You can prevent others from seeing the display.
1 In the home screen, [ ] ▶ [Settings] ▶ [Display] ▶ [VeilView]
2 Select an item
■ ● VeilView: Set whether to enable VeilView.
■ Density setting: Make an adjustment for the effect (shading) to prevent others from seeing the display.
[VeilView]
● [VeilView] is disabled if the power is turned off.
Useful
You can make settings for Twist magic, ScrollAuto, Clip Now, On/off with motion or View with flip cover, or perform Self check.
1 In the home screen, [ ] ▶ [Settings] ▶ [Useful]
2 Select an item
■ Twist magic: For details ☐ P. 19 "Twist magic"
■ ScrollAuto: For details 📋 P. 65 "ScrollAuto"
■ Clip Now: For details 📋 P. 65 "Clip Now"
■ On/off with motion: For details ☑ P. 65 "On/off with motion"
■ View with flip cover: Set whether to display the screen for the small window when the handset is equipped with a flip cover which is equipped with a small window.
■ Self check: For details ☑ P. 66 "Self check"
[View with flip cover]
- When Screen lock is set to an item other than [None], display the screen for the small window.
ScrollAuto
You can automatically scroll the screen such as a website being displayed upward/downward.
1 In the home screen, [ ] ▶ [Settings] ▶ [Useful] ▶ [ScrollAuto]
2 Select an item
■ Turn ON/OFF ScrollAuto: Set whether to use ScrollAuto.
■ Set Apps: Set apps to apply activation of ScrollAuto.
■ Notify in status bar: Set whether to notify by notification icon when the applicable app is running.
■ Let's Try!: Check how to use ScrollAuto by using "Let's Try!".
■ Scrolling the screen automatically
1 Drag the screen in the direction to scroll ▶ put your finger on the displayed arrow and put it off
- Put your finger off to start scrolling.
- Operate it for approximately 5 minutes to stop scrolling.
• To adjust the scroll speed: [+]/-] -
To stop scrolling: Touch the screen
-
If your drag speed is too fast, the arrow is not displayed.
● Depending on the position of the screen, even if you release your finger, the screen may not be scrolled automatically. - While the screen is scrolled automatically, [] is displayed on the left edge of the screen and indicate the movement of the scroll.
Clip Now
You can shoot the screen being displayed as an image (archival screenshot) by tracing the edge of the screen with your finger. You can save the URL with the archival screenshot when shooting a Chrome screen. Also, you can use a screenshot for a temporary memo which can be saved temporarily.
1 In the home screen, [ ] ▶ [Settings] ▶ [Useful] ▶ [Clip Now]
2 Select an item
- Clip Now: Set whether to use Clip Now.
■ ● Help: Display the explanation of Clip Now.
■ Slide operation settings: Set whether to shoot archival screenshots or screenshots for a temporary memo.
■ Display share options: Set whether to display share options when you shoot a temporary memo.
■ Delete All: Delete all archival screenshots you have shot.
● Data may not be saved completely or partially depending on the app.
[Slide operation settings]
- ● You cannot disable both functions. When you do not use Clip Now, disable Clip Now in [Clip Now]
■ Shooting archival screenshots
1 Display the screen to save ▶ trace the edge of the screen to the right/left from upper left/right of the screen
- The URL is also saved when shooting a Chrome screen.
- In the home screen, [ ]▶ [Clip Now] to check the shot image and URL.
■ Shooting screenshots for a temporary memo
1 Display the screen to save temporarily ▶ trace the edge of the screen down from upper left/right of the screen
- To check a temporary memo: Drag part of a temporary memo displayed on the left edge or right edge of the screen to the center of the screen
- To delete a temporary memo: Touch a temporary memo drag it to []
On/off with motion
You can make settings for the functions to turn the display on/off with motions such as when you hold the handset with your hand or when you put it into your pocket.
1 In the home screen, [ ] ▶ [Settings] ▶ [Useful] ▶ [On/off with motion]
2 Select an item
■ Turn screen on by holding: Set whether to turn the display on after you lift the handset and keep it stationary while the display is turned off.
- Let's Try!: Check how to use Turn screen on by holding by using "Let's Try!".
■ Bright Keep: Set whether to set the display not to be turned off while holding the handset with your hand.
■ Turn off by putting in pocket: Set whether to turn the display off when putting the handset in your pocket.
[Turn screen on by holding]
● This function is enabled by default.
- In the following cases etc., the display may not be turned on.
- When you are moving with the handset held (while getting in a car)
- When you keep the handset moving before or after lifting it
- When you lift the handset vertically or horizontally
[Bright Keep]
- If you do not move or operate the handset for a certain period of time, the display may be turned off even while Bright Keep is set and you are holding the handset with your hand.
- When Bright Keep is set to [ON (Notify)], is displayed on the status bar.
[Turn off by putting in pocket]
● This is activated when the lock screen of the touch panel is displayed, or while a home app is being used.
You can diagnose the handset by selecting the symptoms or functions.
1 In the home screen, [ ] ▶ [Settings] ▶ [Useful] ▶ [Self check]
- To restart the handset in safe mode: [REBOOT WITH SAFE MODE] ▶ [OK]
2 [START CHECKING]
3 [SELECT FROM PHONE SYMPTOMS]/[SELECT FROM PHONE FUNCTIONS]
4 Select an item
- As for [SELECT FROM PHONE FUNCTIONS], select items and touch [Next]. Touch [] of an item to display help about the diagnosis.
5 [Next]
6 [Start diagnosis]
- To stop a diagnosis: [Cancel] ▶ [NEXT ITEM]/[YES]
- Touch the history items of the diagnoses to check the results.
EMOPA
Based on your information and settings of EMOPA registered in advance, the handset delivers various information through voice or the screen display in the lock screen of the touch panel. EMOPA responds by its voice or the screen display if you answer EMOPA's voice with your voice.
Also, you can use the memo function (EMOPA memo) and health support function (health care of EMOPA) by using EMOPA.
The handset will get to deliver information at better timing by understanding the usage conditions of your handset.
- ● Packet communication charges are incurred when you use EMOPA.
- The present location may be measured so that EMOPA can recognize your home, information of nearby facilities, etc. It is necessary to set [Location] to On to measure the present location. Set Mode of Location to [High accuracy]. If [Location] is set to Off or Mode is set to [Battery saving], EMOPA cannot deliver information requiring measurement of the present location (P. 69 "Location").
- Some part of EMOPA is ON by default and EMOPA talks only when charging starts/finishes. If you set EMOPA to OFF, touch [OFFにする] (Set to OFF) in the initial settings screen of EMOPA.
1 In the home screen, [ ] ▶ [Settings] ▶ [エモパー (Japanese only)] (EMOPA)
- If the initial settings are not completed, the initial settings screen appears. Follow the instructions on the screen and operate.
- After completing the initial settings, it is recommended to make settings for workplace and school, birthday, etc. by [图标]▶[あなたについて] (About you). The opportunity or variation of contents that EMOPA talks may increase.
- If the initial settings are completed, the EMOPA screen is displayed. You can check the state of EMOPA, your information, daily records (for approximately a week), such as the number of steps or schedules.
Settings of EMOPA
1 In the EMOPA screen, [ ]
- You can switch ON/OFF of EMOPA.
2 Select an item
■ ● エモパー選択 (Select EMOPA): Set EMOPA and its name. Also, add EMOPA from the website.
■ ● 基本動作について (About basic operation): Make settings for the basic operations such as the volume of EMOPA and operations while setting the manner mode.
■ ● あなたについて (About you): Make settings for your information such as your nickname, home, workplace and school.
■ ● エモパーの話題 (Topics of EMOPA): Set what kind of information EMOPA delivers.
■ ● エモパーメモ (EMOPA memo): Make settings for use of EMOPA memo.
■ ● エモパーヘルスケア (Health care of EMOPA): Make settings for use of health care of EMOPA.
■ ● エモパーの記憶 (Memories of EMOPA): Save, delete or restore data according to the memory that EMOPA and you spent together or your lifestyle habit.
- The data is saved to the microSD Card.
■ 初期設定 (Initial settings): Make initial settings for EMOPA.
■ ● 注意事項 (Precautions): Check the EMOPA version, terms of service, privacy policy, etc.
■ FAQ: Access the “よくある質問 (FAQ)” (Frequently asked questions) of the official EMOPA information website, EMOPARK (in Japanese only).
Timing for EMOPA to talk
- ● If you put down the handset horizontally etc. while the lock screen is displayed or while the display is turned off in a place which you set for [自宅] (Home) or [自宅のほかにお話しできる場所] (The place EMOPA can talk other than your home) of あなたについて (About you), EMOPA starts to talk.
● While connecting an earphone to the handset, EMOPA talks to you regardless of the place or time.
● EMOPA starts to talk by shaking the handset several times (approximately 2 seconds) in the lock screen.
Using EMOPA memo
When you tell EMOPA the content what you want to take a memo such as a schedule, EMOPA memorizes and delivers it according to the schedule. Also, you can set an alarm using EMOPA memo.
● ● Touch the lock screen twice and tell EMOPA.
- In the lock screen, touch the area where the clock, icon, information etc. is not displayed.
- When you tell EMOPA outside, put the earpiece to your ear like making a call.
● A memo EMOPA memorized is registered in Calendar. If you tell EMOPA including the word to express time such as “明日” (tomorrow), “今週” (this week) or “そろそろ” (soon), EMOPA delivers information at the timing you have told with the memo.
- When you set an alarm, tell EMOPA like "XX時XX分にアラーム" (set the alarm XX:XX). It is registered in Clock.
Using health care of EMOPA
This is talks that EMOPA is anxious about your weight and number of steps or cheers up and supports health maintenance or diet.
- ● Your weight is memorized by same steps as EMOPA memo.
- When you tell your weight to EMOPA, tell like “今日の体重 XX.Xキロ” (today's weight is XX.X kg).
- ● Your weight is memorized by linking up with some body composition monitors of TANITA corporation as well.
- For linking up with the body composition monitor, [エモパーヘルスケア] (Health care of EMOPA) ▶ [タニタ体組成計との連携] (Link up with body composition monitor of TANITA) to set it. Follow the instructions on the screen and operate.
- For details on corresponding body composition monitors which link up with EMOPA, refer to the official EMOPA information website, EMOPARK (in Japanese only).
- ● Your weight and number of steps are managed by KARADA MATE.
- When you make initial settings for EMOPA, [Pedometer On] is enabled (P. 60 "KARADA MATE").
- You can adjust the volume by pressing (+)(一) while EMOPA is talking.
● EMOPA does not talk from 2:00 a.m. to 5:00 a.m.
● EMOPA supports only Japanese.
● Information delivered by EMOPA may not accurately correlate to the usage conditions of your handset. - If an earphone is not connected to the handset and the handset is put down with its display turned down, EMOPA does not talk.
- If you set [Call] in Suguden setting and shake the handset, Suguden is operated and EMOPA does not talk.
● Information delivered by EMOPA is restricted overseas.
Official EMOPA information website, EMOPARK
● EMOPA may be updated from Play Store for improving and changing how to use it, increasing variations of talking, etc. For the latest information on EMOPA, refer to the official EMOPA information website, EMOPARK, since EMOPA is subject to change from the contents of this manual. http://k-tai.sharp.co.jp/dash/emopa/index.html (in Japanese only)
Battery & energy saving
You can activate Energy saving, check the battery usage, etc.
1 In the home screen, [Settings] ▶ [Battery & energy saving]
2 Select an item
■ Energy saving: For details ☑ P. 67 "Energy saving"
■ ● Battery: Check the battery usage etc.
- If Battery optimization is carried out, the apps are set not to work while the display is turned off (except while charging) because of saving the battery consumption of each app. For details on the settings of Battery optimization P. 30 "Setting Battery optimization"
Energy saving
You can save the battery consumption by restricting the functions of the handset.
1 In the home screen, [ ] ▶ [Settings] ▶ [Battery & energy saving] ▶ [Energy saving]
2 [OFF]/[ON]
3 Select an item
■ Overview of Energy saving: Display the explanation of the functions.
■ Advanced settings: Set functions to be restricted individually.
- Switch by battery: Set whether to automatically switch Energy saving to [ON] when the battery level is less than the set battery level.
■ Battery level to switch: Set the battery level to switch Energy saving to [ON] by [Switch by battery].
- When you start charging, Energy saving is set to [OFF].
- When Energy saving is [ON] by [Switch by battery], Energy saving is not switched to [OFF] even if you disable [Switch by battery].
Apps
You can check names, versions, memory usage, etc. of apps, enable/disable apps, uninstall them, etc.
1 In the home screen, [ ] ▶ [Settings] ▶ [Apps]
2 Select an app
Disabling an app
Terminate operations of an app and set it not to be displayed on the app list screen without uninstalling it.
- ● You can disable apps which cannot be uninstalled.
1 In the home screen, [ ] ▶ [Settings] ▶ [Apps]
2 Select an app
3 [DISABLE] ▶ [DISABLE APP]
- If you disable an app, other apps which link up with the disabled app may not work properly. In this case, enable the app.
Enabling an app
1 In the home screen, [ ] ▶ [Settings] ▶ [Apps]
2 Select an app
3 [ENABLE]
Apps settings
1 In the home screen, [ ] ▶ [Settings] ▶ [Apps] ▶ [⚙️]
2 Select an item
■ App permissions: For details 📋 P. 30 “Setting functions to use”
■ App links: Make settings for the link from other apps etc.
■ Default Apps: Make settings for the default app to use when using call, SMS, etc.
■ Draw over other apps: Set whether to permit an app to superimpose on the other apps while using.
■ Modify system settings: Set whether to permit an app to modify the handset settings.
■ Battery optimization: For details ☑ P. 30 “Setting Battery optimization”
Storage & USB
You can check the used capacity/total capacity of the handset memory, microSD Card or USB memory, display the data saved on it, etc.
1 In the home screen, [ ] ▶ [Settings] ▶ [Storage & USB]
- The used capacity/total capacity of the handset memory, microSD Card or USB memory are displayed.
- If the microSD Card or USB memory is not inserted, the details screen of the used capacity on the handset memory is displayed.
2 Select a storage
- Select [Internal storage] to display the details screen of the used capacity on the handset memory. Select [Explore] in the details screen to display the data list saved on the handset memory.
- Select the microSD Card or USB memory to display the data list saved on it.
- To unmount the microSD Card or USB memory: [ ] of the microSD Card/USB memory
- To mount the microSD Card or USB memory: Select the microSD Card/USB memory ▶ [MOUNT]
- Unmount the microSD Card or USB memory before removing it.
Formatting microSD Card/USB memory
You can format the microSD Card or USB memory.
1 In the home screen, [ ] ▶ [Settings] ▶ [Storage & USB]
2 Select a microSD Card/USB memory ▶ [H] ▶ [Settings] ▶ [Format] ▶ [ERASE & FORMAT]
3 Enter the passcode ▶ [OK]
4 [DONE]
- Note that all the data on the microSD Card or USB memory will be deleted when formatted.
Encrypting/Decrypting microSD Card
If you encrypt the microSD Card, data on the microSD Card is not available in the devices other than the handset used for encrypting it.
You need to decrypt the microSD Card to use it as usual.
- Carry out the operations while charging the battery with its battery level still left sufficiently.
- Set Screen lock to [Lock No.] or [Password] in advance.
- For details on Screen lock P. 69 "Lock & security"
1 In the home screen, [306] ▶ [Settings] ▶ [Storage & USB]
2 Select a microSD Card ▶ [H] ▶ [Settings] ▶ [Encrypt]/[Release encryption] ▶ [CONFIRM]
3 Enter the passcode ▶ [OK]
4 [START]
- When the available space on the microSD Card is insufficient, encryption/decryption is not available.
- Note that when you have carried out Reset all with the microSD Card encrypted, you cannot use the data on the microSD Card. Decrypt it before carrying out Reset all.
- If you insert a microSD Card into the handset that has been used for encrypting another microSD Card, the handset can only read data on it.
● The handset can write data into the read-only microSD Card after encrypting the microSD Card. - Encrypting/Decrypting a microSD Card may take time. Do not stop charging the battery or do not remove the microSD Card while it is being encrypted. Data on it may be lost if the encryption is interrupted.
Memory
You can check the memory (RAM) usage.
1 In the home screen, [ ] ▶ [Settings] ▶ [Memory]
- To change the measurement time: Touch the time select the time
- To display the memory usage of apps: [Memory used by apps]
Data usage
You can measure the volume of data communicated via mobile networks and display it on a diagram. Also, you can set the handset to give you a warning or make data communication no longer available once the communication volume reaches its set limit.
1 In the home screen, [ ] ▶ [Settings] ▶ [Data usage]
2 Check the data communication volume

1 Data usage cycle
- ● Set the date on which the display of the data communication volume will be reset.
2Diagram
● ● Display the data communication volume.
● ● Warning line or limit line can be set.
3App having used data communication
4 Cellular data
- ● Set whether to use data communication.
5 Set cellular data limit
- ● Set the limit on the data communication volume and suspend data communication once the limit is reached.
- In the Data usage screen, [ ]▶ [Restrict background data]▶ [OK] to restrict data communications made by apps running in the background.
6 Data communication volume during a set period
- When the data communication volume reaches its limit and data communication is suspended, it can be restarted by disabling [Set cellular data limit], changing its limit, etc.
● The displayed data communication volume is an approximation. You can check the actual one on My docomo.
More
You can make settings for other functions in Wireless & networks.
1 In the home screen, [ ] ▶ [Settings] ▶ [More]
2 Select an item
■ Airplane mode: Restrict the use of some functions using communication such as call/mail function.
■ Tethering: For details 📋 P. 25 "Tethering"
■ NFC/Osaifu-Keitai settings: For details ☑ P. 52 "NFC/Osaifu-Keitai settings"
■ Wireless output: For details ☐ P. 80 "Wireless output"
■ VPN: Make settings for VPN. For details ☑ P. 81 "Adding VPN"
■ Cellular networks: For details ☐ P. 69 "Cellular networks"
■ ● Proxy settings: Set to connect to the network via proxy.
[Airplane mode]
- When [Lock SIM card] is enabled, you cannot call to the emergency number (110, 119 or 118). When [Lock SIM card] is disabled, you can call to the emergency number (110, 119 or 118) even in Airplane mode. If you call to the emergency number, [Airplane mode] is OFF and the call is made.
● [Wi-Fi] and [Bluetooth] can be set to On even when [Airplane mode] is ON.
Cellular networks
1 In the home screen, [ ] ▶ [Settings] ▶ [More] ▶ [Cellular networks]
2 Select an item
■ ● Data enabled: Set whether to use data communication.
■ Data roaming: For details ☎ P. 82 "Data roaming"
■ Preferred network type: For details 📞 P. 82 “Preferred network type”
- Call mode setting: Set whether to use VoLTE.
- Access Point Names: Set an access point. For details on setting an access point P. 24 "Setting an access point", P. 24 "Resetting an access point"
■ Network operators: For details ☎ P. 82 "Network operators"
docomo service/cloud
You can make settings for the docomo service.
1 In the home screen, [ ] ▶ [Settings] ▶ [docomo service/cloud]
2 Select an item
■ d ACCOUNT setting: Set d ACCOUNT to use in docomo apps. Also, you can set d ACCOUNT authentication which uses biological information (fingerprint) registered in the handset.
■ ●docomo cloud: Make settings for docomo cloud.
■ ●docomo apps management: Make settings for the confirmation for updating apps etc.
■ ● Osusume hint: Set whether to use Osusume hint.
■ ●docomo apps password: Set a password to use for apps provided by DOCOMO.
■ ● AUTO-GPS: Make settings for AUTO-GPS.
■docomo location information: Make settings for the location information service function of imadoco search, imadoco kantan search and Keitai-Osagashi Service.
■ Send device error information: Set whether to send error information to the server.
■ Remote Initialization Service: Make settings to use services which enable you to initialize data on the handset etc. by remote control.
■ Profile setting: Check or change your profile used in the docomo service.
■docomo service initial settings: Carry out the initial settings of docomo service.
- Switch USB debugging: Set whether to enable USB debugging.
■ ● Open source licenses: Display the open source licenses.
- Some apps displayed in docomo service/cloud can be disabled. The disabled apps may not be displayed in docomo service/cloud.
- When you newly download apps provided by DOCOMO, the downloaded apps may be displayed in docomo service/cloud.
[docomo apps password]
• docomo apps password is set to [0000] by default.
Location
You can make settings for measuring location information.
1 In the home screen, [ ] ▶ [Settings] ▶ [Location]
2 Set to On
- When the confirmation screens for the use of location information are displayed, select [NO]/[YES].
3 Select an item
■ Mode: Set a mode to measure location information with using GPS satellites, access points of Wi-Fi or base stations for mobile phones.
■ Google Location History: Display location histories if you have registered your Google account on the handset.
- If there are recent location requests, touch one of them to check the information on the app.
- Operate [H]▶ [Scanning]▶ [Wi-Fi scanning]/[Bluetooth scanning] to set whether the location information services or apps scan Wi-Fi networks or Bluetooth devices to improve the location information.
- Set it to ON to scan them even if [Wi-Fi] or [Bluetooth] is Off.
- It is necessary to set [Location] to On to measure the present location. Some apps require that settings be made for location information by using the apps.
[Mode]
● Power consumption of the handset may increase depending on the set mode.
- If you set [Location] to On, the confirmation screens for the use of location information are displayed. The mode to be set may differ depending on whether you select [NO]/[YES].
Lock & security
You can make settings for the security lock.
1 In the home screen, [ ] ▶ [Settings] ▶ [Lock & Security]
2 Select an item
■ Screen lock: Make settings for the unlock method of the touch panel for when the power or display is turned on or the notification to be displayed on the lock screen of the touch panel.
■ Lock screen message: Make settings for the message to be displayed on the lock screen of the touch panel.
■ Smart Lock: Set to unlock the touch panel by swiping or touching when Screen lock is set to an item other than [None] or [Swipe or Touch] and the handset confirms the trusted devices, places, face, etc.
- Security key setting: Change the security key. - For details on the security key ☐ P. 71 "Security key (security code for various functions)"
■ Fingerprint settings: Register your fingerprint used for fingerprint authentication. Register your fingerprint to unlock Screen lock and the security key by fingerprint authentication as well. For details on fingerprint authentication P. 71 "Fingerprint authentication"
■ Secrecy settings: For details ☑ P. 70 "Secrecy settings"
■ Set up SIM card lock: For details ☑ P. 72 "Setting up SIM card lock"
■ ● Encrypt phone: Check that the smartphone is encrypted.
■ Visible passwords: When you enter the PIN code etc., you can display the entered characters before they turn into [·].
■ Device administrators: Set a device management function of apps. Some apps may not be available if the device management function is disabled.
■ Unknown sources: Allow installation of apps received via websites other than Google Play, mails, etc.
■ ● Storage type: Display the storage type.
■ Trusted credentials: Check certificates and enable/disable them.
■ Install certificates: Install encrypted certificates.
- Clear credentials: Delete all credentials.
■ Trust agents: Make settings for apps (agents) that unlock the touch panel.
■ Screen pinning: Restrict the use of apps other than selected one. For details on the operation method ☑ P. 29 "Recent Apps"
■ Apps with usage access: Set apps that can access the data of app usage history item.
[Screen lock]
● The following items can be set.
■ ● None: The lock screen of the touch panel is not displayed.
- Swipe or Touch: Set the touch panel to be unlocked by touching [ ] When [Feel Home(Simple)] is selected in Batch change lock screen/ home application, slide [ ] up to unlock.
■ ● Pattern: Set a pattern which forms by linking four or more dots.
■ ● Lock No.: Set four- to sixteen-digit number.
- Password: Set four to sixteen alphanumeric or half-width symbols including at least one alphabet.
• Some half-width symbols are not available.
- If you have registered the fingerprint, unlock the screen by fingerprint authentication as well.
- If you fail in fingerprint authentication five times continuously, you cannot unlock the screen by the fingerprint for a certain period of time. Try again later or unlock the screen by method set in Screen lock.
- If you enter wrong patterns/lock numbers/passwords, you cannot unlock the screen for a certain period of time according to how many times you have entered wrong patterns.
■ ● Five times in a row: 30 seconds
■ ● 10 times in a row: 30 seconds
After you have entered wrong patterns 10 times in a row, you cannot enter the pattern for 30 seconds each time you enter wrong patterns. If you unlock the screen, the count is reset.
● The following items in Lock & Security may be displayed/hidden depending on the settings in Screen lock.
■ Make pattern visible: Display tracks of the entered pattern with line.
■ ● Automatically lock: Set how long it takes the touch panel to be locked.
■ Power key to lock instantly: Set whether to lock the touch panel regardless of the time set in Automatically lock when you turn off the display by pressing ☐(☐).
- If you forget the pattern/lock number/password, contact a docomo Shop.
Unlock the screen when activating the handset
- If you set Screen lock to an item other than [None] or [Swipe or Touch], you can set whether to unlock the screen when the power is turned on.
- If you enter wrong patterns/lock numbers/passwords 10 or 20 times in a row when turning on the power and unlocking the screen, you cannot enter them until turning the power on again. Note that if you enter wrong ones 30 times in a row, the handset is initialized.
[Smart Lock]
- When using Smart Lock, touch and hold the unlock icon such as [Fin the lock screen of the touch panel to temporarily disable Smart Lock.
- If Batch change lock screen/ home application is set to [Feel Home(Simple)], touch the unlock icon such as []to temporarily disable Smart Lock.
[Unknown sources]
- Apps you download from the websites may be of unknown origin. To protect your handset and personal data, download apps only from trusted sources such as Google Play.
[Trusted credentials]
- If you delete a certificate, you cannot refer to the certificate from [Trusted credentials] but it can be referred to from other functions. If you want to delete the certificate completely, carry out Clear credentials.
[Clear credentials]
- Settings for VPN are also deleted.
Secrecy settings
You can set contacts in the phonebook not to be displayed in the phonebook, outgoing/incoming call history, etc. by setting the secrecy setting for the contacts.
- When you temporarily disable the secret mode, both normal contacts and contacts for which the secrecy setting is set are displayed.
- If the display is turned off while the secret mode is temporarily disabled, the secret mode is enabled.
1 In the home screen, [ ] ▶ [Settings] ▶ [Lock & Security] ▶ [Secrecy settings]
2 Enter the passcode ▶ [OK]
- The secret mode is temporarily disabled.
3 Select an item
■ Set contact secrecy: Set the secrecy setting for contacts in the phonebook.
- ● Disable secret mode temporarily: Make settings for temporary cancellation of the secret mode.
■ Guide: Display how to temporarily disable the secret mode and explanation for contacts in the phonebook for which the secrecy setting is set.
Disabling the secret mode temporarily
1 Drag the status bar down with your two fingers at the same time
2 Touch and hold [ ]
3 Enter the passcode ▶ [OK]
Security codes used on the handset
Some functions for convenient use of the handset require security codes. In addition to security code used for various handset operations, use security codes such as the network security code when using network services. Use security codes properly according to the purposes to fully utilize the handset.
- ● Entered security code for various functions and PIN code turn into [·].
Precautions about various security codes
- Do not use easily predictable numbers for security codes to be set such as "birthday", "part of a phone number", "address or room number", "1111" or "1234". Keep a separate memo of security codes.
- Keep security codes private. If the security codes are found and improperly used by others, DOCOMO shall not be liable for any damages incurred on the users.
- If you forget your security codes, you are required to bring your identification (a driver's license etc.), your handset and your docomo nano UIM card to a docomo Shop.
For details, contact the number listed in "General Inquiries" on the last page. - ● PUK (PIN Unlock Key) is described in the agreement form (customer copy) you received at the time of subscription at a docomo Shop. If you made a subscription at a shop other than a docomo Shop, bring your identification (a driver's license etc.) and your docomo nano UIM card to a docomo Shop or contact the number listed in "General Inquiries" on the last page.
■ Security key (security code for various functions)
If you set any restrictions, you need to enter the security key to temporarily disable them. [0000] is set as a security key by default but you can change it (P. 69 "Lock & security").
- If you enter wrong security keys five times continuously, you cannot enter it for 30 seconds.
- If you register your fingerprint, you can unlock it by fingerprint authentication as well.
- If you fail in fingerprint authentication five times continuously, you cannot unlock it by the fingerprint. In this case, enter the security keys.
Network security code
Network security code is a four-digit code required for confirming the subscriber's identity when an order is received at a docomo Shop, docomo Information Center or "お客様サポート" (Support), used for accessing various network services, etc. You can set any code at the time of subscription but you can change the code.
- ● For details on network security code, refer to the DOCOMO website.
https://www.nttdocomo.co.jp/english/support/trouble/password/network/
PIN code
A docomo nano UIM card has a security code called PIN code. This security code is set to [0000] by default but you can change the code (P. 72 "Setting up SIM card lock").
The PIN code is a four- to eight-digit security code that needs to be entered for recognizing the user of the handset every time a docomo nano UIM card is inserted or when a device is turned on to prevent unauthorized use of the docomo nano UIM card by a third party. Making/Receiving a call and the device operation are enabled by entering PIN code.
- Use the previously set PIN code when inserting a docomo nano UIM card that has been used in another device. It is [0000] if the setting has not been changed.
- If you enter wrong PIN codes three times continuously, it is locked and the docomo nano UIM card becomes unavailable. In this case, unlock with "PUK" (PIN Unlock Key).
■ PUK (PIN Unlock Key)
PUK (PIN Unlock Key) is an eight-digit number used to disable the PIN code lock. You cannot change the code.
- If you enter wrong codes 10 times continuously, the docomo nano UIM card is completely locked. In this case, contact a docomo Shop.
Fingerprint authentication
Fingerprint authentication is an authentication function to operate by touching the fingerprint sensor with a finger. You can unlock the touch panel etc.
■ Cautions when using fingerprint authentication function
- Fingerprint authentication is carried out using characteristics information of a fingerprint image. If your fingerprint image has only a few characteristics information, you may not be able to use fingerprint authentication.
- Authentication performance (performance for authenticating your fingerprint when you touch the fingerprint sensor with your finger properly) depends on your usage of the handset. If your finger is in any of the following conditions, registration of a fingerprint may be difficult or authentication performance may degrade. You may be able to improve authentication performance when you deal with the situations according to the conditions of your finger such as by washing or drying your hands or putting another finger.
■ ● Your finger gets wrinkled after taking a bath etc.
■ ● Your finger is dry
■ ● The grooves of your fingerprint are filled up with sweat or fat on your finger
■ ● Your finger is dirty with mud or grease
■ ● Your finger is wet with sweat etc.
■ ● Your finger is rough or injured (cut, inflammation, etc.)
■ ● Your fingerprint is faint by attrition
■ ● The shape of your fingerprint has changed because you get fat or thin
■ ● The surface condition of your finger is extremely different from when you have registered your fingerprint
- Personal authentication and identification are not completely guaranteed by fingerprint authentication technology. Note that DOCOMO shall not be liable for any damage incurred due to a misuse by a third party and what you have not been able to use the handset.
■ Cautions when using fingerprint sensor
- Do not let the handset hit or subject to strong impacts. May cause a malfunction or damage. Do not scratch the surface of the sensor or poke it with a pointed object such as a ballpoint pen or pin.
- Do not put a sticker etc. on the surface of the fingerprint sensor or daub it with ink etc.
- If dust such as dirt or fat etc. adheres to the sensor, reading of a fingerprint may be difficult or authentication performance may degrade. Occasionally clean the surface of the fingerprint sensor.
- ● Your fingerprint cannot be authenticated properly if it is too fast to release your finger. Release the finger after the fingerprint is authenticated.
- If you start registration or authentication of your fingerprint while touching the fingerprint sensor with your finger, you may not be able to activate the function. Release your finger and try again.
Registration of fingerprint
You can register your fingerprint used for fingerprint authentication. Also, when a shortcut which is carried out to activate an app etc. is set to fingerprint, unlock the touch panel by fingerprint authentication to use the shortcut.
You can set the shortcut by fingerprint.
- ● You can register up to five fingerprints.
- If fingerprint sensor fails to read your fingerprint, you may be able to improve the authentication performance by using another finger.
- Set Screen lock to an item other than [None] or [Swipe or Touch] in advance (P. 69 "Lock & security").
1 In the home screen, [ ] ▶ [Settings] ▶ [Lock & Security] ▶ [Fingerprint settings]
- Unlock the screen by method set in Screen lock.
2 [Add new item]
- To change a registered name: Touch the registered fingerprint ▶ [Rename] ▶ enter the name ▶ [OK]
- To delete a registered fingerprint: Touch the registered fingerprint ▶ [Delete fingerprint] ▶ [OK]
3 Touch the fingerprint sensor with your finger ball
- For registering the wide range of the fingerprint, touch it repeatedly while shifting the touching position gradually until the percentage indicator becomes 100% .
- Register your fingerprint to unlock Screen lock and the security key by fingerprint authentication as well. Touch [OK] in the confirmation screen.
- If fingerprint authentication is not available, unlock the screen by method set in Screen lock or the security key.
4 [Continue to register shortcut next]/[Not now]
- If you select [Continue to register shortcut next], a shortcut activated by the registered fingerprint can be set.
5 [DONE]
- If the setting screen of the security key used when fingerprint authentication is unavailable is displayed, operate by following the instructions on the screen.
Changing a shortcut
1 In the Fingerprint settings screen, select a registered fingerprint ▶ [Edit shortcut]
• To delete a shortcut: [Delete shortcut]
2 Select a shortcut to set
3 [DONE]
- Note that if Screen lock is set to [None] or [Swipe or Touch], registered fingerprints are deleted.
■ Using fingerprint authentication function
1 While the display is turned off/In the lock screen of the touch panel/In the fingerprint authentication screen, touch the fingerprint sensor with your finger ball
- When you operate it while the display is turned off, the touch panel is unlocked and the display is turned on.
- If your fingerprint cannot be authenticated properly, release it from the fingerprint sensor and try again.
Setting up SIM card lock
You can make settings for the PIN code.
1 In the home screen, [ ] ▶ [Settings] ▶ [Lock & Security] ▶ [Set up SIM card lock]
2 Select an item
■ Lock SIM card: Set whether to enter the PIN code when the power is turned on.
■ ● Change SIM PIN: Change the PIN code.
- In Japan, you cannot make a call to the emergency number (110, 119 or 118) when a docomo nano UIM card is not inserted, while the PIN code is locked or from the PUK (PIN Unlock Key) entry screen.
● The setting is saved on the docomo nano UIM card.
Disabling PIN lock
1 In the PIN locking screen, enter PUK (PIN Unlock Key)
2 Enter a new PIN code
3 Enter the new PIN code again
Language & input
You can make settings for the language displayed on the screen, character entry, text-to-speech, etc.
1 In the home screen, [ ] ▶ [Settings] ▶ [Language & input]
2 Select an item
■ ● Language: Select Japanese/English.
■ Current Keyboard: Set the input software to use when entering characters.
- Touch [CHOOSE KEYBOARDS] to switch ON/OFF of the input software using on the handset.
■ ● Google Keyboard: Make settings for Google Keyboard.
■ S-Shoin: Make settings for S-Shoin. For details on each item that can be set ☑ P. 21 "Setting character entry"
■ Google voice typing: Make settings for Google voice typing.
■ Moji-Henshu: Check information on the app of Moji-Henshu.
■ Text-to-speech output: Make settings for the voice for reading the characters displayed on the handset.
■ ● Spell checker: Make settings for Spell checker.
■ ● Personal dictionary: Register any words into Personal dictionary.
- ● Pointer speed: Set the speed of the pointer.
Keyboard
- When you enter Japanese, use S-Shoin.
[Google Keyboard], [S-Shoin], [Google voice typing], [Moji-Henshu]
● These are displayed/hidden depending on the settings of [CHOOSE KEYBOARDS] in Current Keyboard.
[Spell checker]
● Japanese is not supported.
Backup & reset
You can back up data using a Google account, transfer data to/from among devices, perform Reset all, etc.
1 In the home screen, [ ] ▶ [Settings] ▶ [Backup & reset]
2 Select an item
■ Back up my data: Set whether to automatically back up app data, Wi-Fi passwords, etc. using a Google account.
■ Backup account: Set a Google account to use when backing up data.
■ Automatic restore: Set whether to restore backed up data, settings, etc. of an app when you re-install the app.
■ Data transfer: For details ☐ P. 73 "Data transfer"
■ Network settings rest: Reset all network settings.
■ Reset all: For details ☑ P. 73 "Resetting all"
Data transfer
You can import data or back up/restore data on the handset using a microSD Card. In addition, you can import phonebook data on other devices using the Bluetooth function.
- ● The following data can be backed up to/restored from a microSD Card.
■ ● Phonebook
■ ● SMS
- Calendar
■ ● Notepad
■ ● User/Learning dictionary (S-Shoin)
■ ● EMOPA
* You need to download the app separately.
● ● While you are backing up data to a microSD Card, [Airplane mode] is set to ON.
- ● When the available space on the handset memory is less than 11 MB, you cannot back up data to a microSD Card.
- Insert a microSD Card in advance when using one.
1 In the home screen, [ ] ▶ [Settings] ▶ [Backup & reset] ▶ [Data transfer]
2 Select an item
- Data import: Import data using a microSD Card or the Bluetooth function.
- Save data to microSD: Save data on a microSD Card.
■ Function information: Check how to use with a video tutorial.
Saving backup file
1 In the home screen, [ ] ▶ [Settings] ▶ [Backup & reset] ▶ [Data transfer]
2 [Save data to microSD]
3 Enter the passcode ▶ [OK]
4 Select the data categories to save
- If you select [Address Book], the screen for selecting which account to save is displayed.
5 [Save] ▶ [YES]
6 [Complete]
- ● You cannot save the data when the battery level is insufficient.
Restoring backup file
1 In the home screen, [■■■] ▶ [Settings] ▶ [Backup & reset] ▶ [Data transfer]
2 [Data import]
3 [Import]
4 Enter the passcode ▶ [OK]
5 Select backup files to restore ▶ [Add registration]/[Delete and register]
- The confirmation screen appears. Follow the instructions on the screen and operate after this step.
- ● You cannot restore the data when the battery level is insufficient.
Note that, when you restore User/Learning dictionary (S-Shoin) data, User/Learning dictionary (S-Shoin) data saved on the handset memory is deleted even if you select [Add registration].
Setting/Managing backup file
1 In the home screen, [ ] ▶ [Settings] ▶ [Backup & reset] ▶ [Data transfer]
2 [ : ] ▶ [Setting]
3 Select an item
■ ● Organize backup files: Delete saved backup data.
- ● Addr.book pic backup: Set whether to back up images registered in a phonebook when backing up the phonebook.
■ View result screen: Display the latest result of saving/restoring backup files.
- Importing phonebook data using Bluetooth function
1 In the home screen, [ ] ▶ [Settings] ▶ [Backup & reset] ▶ [Data transfer]
2 [Data import]
3 Select the type of a device from which you import data
- When the confirmation screen for the backup data on the microSD Card is displayed, select [Import phonebook data from smartphone.].
4 [Next]
5 Enable the Bluetooth function of the device from which you import data ▶ [Next]
- When the device from which you import data is Android, set the device to be displayed on the handset.
6 Select the device from which you import data
7 [Start]
- When the confirmation screen about the settings on pairing appears, select [PAIR].
8 [NEXT]
9 [Add registration]/[Delete before registration] ▶
[OK]
- If you set up multiple accounts, the screen for selecting to which account to register is displayed.
10 [OK]
Resetting all
You can erase all data on the handset memory.
1 In the home screen, [ ] ▶ [Settings] ▶ [Backup & reset] ▶ [Reset all]
2 [RESET PHONE]
- You can also erase data on a microSD Card at the same time by enabling [Delete data in microSD as well.].
3 Enter the passcode ▶ [OK]
4 [ERASE EVERYTHING]
● The following data are erased.
■ ● Data that are created, saved or registered
■ ● Contents that are set in the "Settings" app
■ ● Downloaded apps
You can make settings for various Google services collectively.
1 In the home screen, [ ] ▶ [Settings] ▶ [Google]
2 Select an item
- Follow the instructions on the screen and operate after this step.
Date & time
You can make settings for the date and time and their format.
1 In the home screen, [ ] ▶ [Settings] ▶ [Date & time]
2 Select an item
■ Automatic date & time: Set whether to automatically adjust the date and time.
■ Auto timezone: Set whether to use the time zone provided via a network.
■ ● Set date: Set the date manually.
■ ● Set time: Set the time manually.
- Select time zone: Set the time zone manually.
■ Use 24-hour format: Switch 12-hour format/24-hour format.
When [Automatic date & time] is enabled
- If the handset does not adjust the time for a while after the power is turned on, turn off the power and restart it.
● Time may not be adjusted depending on the signal status.
● The clock may gain or lose a few seconds.
Accessibility
You can make settings for accessibility options.
1 In the home screen, [■■■] ▶ [Settings] ▶ [Accessibility]
2 Select an item
■ Captions: Make settings for captions to display.
■ ● Magnification gestures: Set whether to zoom in/out the screen by touching the display three times.
■ Large text: Set whether to display fonts on the handset in large size.
■ High contrast text: Set whether to display text colors on the handset in high contrast.
■ Power button ends call: Set whether to end a call by pressing I(⊕).
■ Auto-rotate screen: Set whether to rotate the contents of the screen when rotating the handset.
- Speak passwords: Set whether to use voice output for passwords.
■ Accessibility shortcut: Set whether the accessibility functions can be enabled quickly.
■ Text-to-speech output: Make settings for the voice for reading the characters displayed on the handset.
■ Touch & hold delay: Set how long you need to keep touching.
■ Color inversion: Set whether to invert colors displayed on the screen.
■ Color correction: Make settings for the adjustment of colors displayed on the screen.
- For details on using other accessibility services, follow the instructions on the screen.
[Power button ends call]
- If the display is turned off according to the setting of [Sleep], press () to turn it on. Press () while the display is turned on to end the call.
Printing
You can print with an app supporting the print function by installing a print app (plug-in). To change settings on the installed print app (plug-in), carry out the following operations.
- Install a print app (plug-in) supporting a printer to use in advance.
1 In the home screen, [ ] ▶ [Settings] ▶ [Printing]
2 Select a print service
- Follow the instructions on the screen and operate after this step.
About phone
You can check the information about the handset.
1 In the home screen, [ ] ▶ [Settings] ▶ [About phone]
2 Select an item
■ ● Build number: Check the build number.
■ Status: Check the battery level, network in use, etc.
■ Adjust sensitivity of sensor: Adjust the accuracy of retrieval by the motion sensor and geomagnetic sensor.
■ Software Update: For details ☑ P. 89 "Software update"
■ Legal information: Check copyright notice, terms of service, etc.
■ Authentication: Check information such as the certification of conformity with technical regulations.
■ ● Model number: Check the model number.
■ ● Android version: Check the Android version.
■ Android security patch level: Check when the loaded security patch is released.
■ ● Baseband version: Check the baseband version.
- ● Kernel version: Check the kernel version.
[Adjust sensitivity of sensor]
● Make the adjustment approximately 10 seconds after the adjustment screen appears.
- Adjustment may be failed depending on surroundings or other simultaneously running apps. Change the place where you make adjustment, end running apps, etc.
File Management
Storage structure
Handset memory (internal storage)
You can save data to the handset.
● ● The followings are the name of the handset memory storage and path.
• Storage name: Internal storage
• Path: /storage/emulated/0
- ● The followings are the folder structure, types of data to be saved in each folder, etc. of the default handset memory.
| Alarms Alarm tones etc. are saved. | |
| Android Temporary files etc. of installed apps are saved. | |
| DCIM Still pictures and videos shot with the handset are saved. | |
| Download Files downloaded on Chrome are saved. | |
| Movies Videos etc. are saved. | |
| Music Music data etc. is saved. | |
| Notifications Notification sounds etc. are saved. | |
| Pictures Still pictures etc. are saved. | |
| Podcasts | Music data etc. transferred from a podcast is saved. |
| PRIVATE | Still pictures, videos, music data, etc. are saved. |
| Ringtones | Ringtones etc. are saved. |
microSD Card (external storage)
You can save data on the handset to microSD Card or import data on microSD Card to the handset.
- SH-02J is compatible with commercially available microSD Card of up to 2 GB, microSDHC Card of up to 32 GB and microSDXC Card of up to 256 GB. Also, as for Speed Class*, Class 10 or lower is available (as of October 2016).
* Speed Class as stated above indicates the performance of a microSD Card. Note that all the operations related to the performance indicated by Speed Class are not completely guaranteed.
For information on the microSD Card, refer to the following website.
http://k-tai.sharp.co.jp/support/d/sh02j/peripherals.html#!/microsd_support (in Japanese only)
- Do not turn off the handset immediately after inserting the microSD Card in the handset (while writing information needed for the handset operation) or while editing data on the microSD Card. Data may be damaged or the handset may not work properly.
- Format unformatted microSD Cards on the handset before use (P. 68 "Formatting microSD Card/USB memory"). microSD Cards formatted by PCs or other devices may not be used properly on the handset.
- Data saved on the microSD Cards from other devices may not be displayed or played on the handset. Some data saved on the microSD Card from the handset may not be displayed or played on other devices.
- ● microSDXC Card can be used only on the devices compatible with SDXC. If you insert a microSDXC Card to devices not compatible with SDXC, data saved on the microSDXC Card may be damaged etc., so do not insert it.
- ● For using a microSDXC Card with its data damaged again, formatting the microSDXC Card by devices compatible with SDXC is required (all the data will be deleted).
- ● For copying data to/from among devices not compatible with SDXC, use a card which conforms to the standard of the devices you copy the data to/from such as microSDHC Card or microSD Card.
- Back up the data saved on a microSD Card and store in another place. DOCOMO shall not be liable for any loss or change of the saved data.
- ● Hold the handset securely with your hand when inserting or removing the microSD Card.
- Inserting microSD Card
1 Open the docomo nano UIM Card and microSD Card cover (P. 15 "Inserting docomo nano UIM card")
2 Insert the microSD Card slowly into the microSD Card slot with the metal terminal side turned down
- Insert the microSD Card slowly with your finger until a click is heard.

- The microSD Card slot is at the left side of the docomo nano UIM card slot.

microSD Card slot (left side)
- Do not force the microSD Card in at an angle or with the wrong side up. The microSD Card slot may be damaged.

3 Close the docomo nano UIM Card and microSD Card cover (P. 15 "Inserting docomo nano UIM card")
Removing microSD Card
- Unmount the microSD Card in advance (P. 67 "Storage & USB"). If you do not unmount the microSD Card, data may be damaged or it may not work properly.
1 Open the docomo nano UIM Card and microSD Card cover (P. 15 "Inserting docomo nano UIM card")
2 Gently push the microSD Card towards inside
- Push the microSD Card until a click is heard. It will come out towards you. Pulling it forcibly may damage the handset or the microSD Card.

3 Remove the microSD Card
- Remove the microSD Card by slowly pulling it straight out.

4 Close the docomo nano UIM Card and microSD Card cover (P. 15 "Inserting docomo nano UIM card")
Contents Manager
You can manage the data saved on the handset memory or a microSD Card, classify them by type and display them.
1 In the home screen, [ ]▶ [Contents Manager]
- Alternatively, in the home screen, [ ] ▶ [Convenient tool] ▶ [Recommendation] ▶ [Contents Manager] to activate it.
2 Select data
- When a corresponding app has already been installed, select the data to display it.
- When there are multiple corresponding apps installed on the handset, the app selection screen may appear. Select an app to display the data.

1 Save destination
● ● Display data saved on the selected destination.
2 Search data
- ● Search for data on the handset memory or a microSD Card by selecting search criteria.
3 Category
● ● Display data in the selected category.
| Category Displayed data | |
| Photo Still pictures shot with the handset or downloaded images | |
| Movie Videos shot with the handset or downloaded videos | |
| Music Melody files | |
| Doc. Office type data (.doc, .xls, .ppt, .docx, .xlsx, .pptx, .csv), PDF data or Text files | |
| Others Other data |
- Slide it to the left/right to switch displays of category.
Deleting data
1 In the home screen, [ ]▶ [Contents Manager]
2 Touch and hold data ▶ [Delete] ▶ [YES]
- To delete selected data: [H] ▶ [Delete selected] ▶ select data to delete ▶ [Delete] ▶ [YES]
■ Moving/Copying data
Moving/Copying data between the handset and microSD Card
1 In the home screen, [ ] [Contents Manager]
2 Touch and hold data to move/copy ▶ [Move/ copy] ▶ select a destination to move to/copy to
- To move/copy selected data: [ ]▶[Move/copy]▶ select a destination to move to/copy to▶ select data to move/copy▶ follow the instructions on the screen and operate
Moving/Copying data after specifying folders to store
1 In the home screen, [ ]▶ [Contents Manager]
2 [B] ▶ [File Management]
3 Select a folder storing data to move/copy [Move]/[Copy]
4 Select data to move/copy ▶ [Select folder]
5 Select a folder to move to/copy to ▶ [Moved here]/[Copy here]
Data Communication
Bluetooth function
You can connect the handset to Bluetooth devices wirelessly.
- ● Wireless communications with all the Bluetooth devices are not completely guaranteed.
Specifications
■ ● Supported version
Bluetooth standard Ver.4.2 *1
■ ● Output
Bluetooth standard Power Class 1
■ ● Supported profile§2 (Supported services)
HSP: Headset Profile 4
HFP: Hands Free Profile 4
A2DP: Advanced Audio Distribution Profile *5
AVRCP: Audio/Video Remote Control Profile *5
HID: Human Interface Device Profile *6
DUN: Dial-up Networking Profile 4
OPP: Object Push Profile 4
SPP: Serial Port Profile 4
PBAP: Phone Book Access Profile *10
PAN: Personal Area Networking Profile *11
HOGP: HID Over GATT Profile 4
*1 The handset and all Bluetooth function-installed devices have ensured that they conform to the Bluetooth specification according to the rules that the Bluetooth SIG defines, and are all authenticated. However, operating methods might differ or data might not be exchanged even when a connection is made, depending on the features or specifications of the connected device.
*2 Standardizes the communication procedures of Bluetooth device by feature.
*3 Connect a commercially available Bluetooth compatible headset to the handset to talk wirelessly.
*4 Connect a commercially available Bluetooth compatible hands-free device such as a car navigation system to the handset to talk during hands-free operation using the car navigation system etc.
*5 Connect a commercially available Bluetooth compatible audio device to the handset to play music etc. wirelessly. Also, remote control operation may be available from Bluetooth devices. However, compatible devices may be limited depending on the data type.
*6 Connect a commercially available Bluetooth compatible input device such as a keyboard and mouse to the handset to operate the handset from the device.
*7 Connect a Bluetooth compatible PC etc. to the handset to use the handset as a modem and make data communications. Note that packet communication charges are incurred. You cannot use mobile networks on the handset during DUN connection.
*8 Connect a Bluetooth device to the handset with the file transfer service to send and receive data between them.
*9 Set the virtual connection with a serial cable and interconnect between devices.
*10 Transfer phonebook data on the handset memory to a Bluetooth device. Data may not be displayed correctly on the other party's device depending on the contents of the transferred phonebook data.
*11 Join a PC network etc. and share the Internet connection. Also, connect a PC etc. to the handset via Bluetooth to use the Bluetooth tethering.
*12 Connect a Bluetooth Smart device such as a keyboard and mouse to the handset to operate the handset from the device.
● Refer to manuals of Bluetooth devices as well.
- The settings of access points for DUN profile can be changed from a Bluetooth device such as a PC or car navigation system. If connection to an access point via DUN profile becomes unavailable, it is recommended to initialize access points (P. 24 "Resetting an access point").
● Audio may not be output with Bluetooth devices which are not compatible with SCMS-T depending on the data type.
Precautions about handling Bluetooth devices
Note the followings when using Bluetooth devices.
● ● Note the followings to make good connection.
- Keep the distance between the handset and another Bluetooth device within approximately 10 m with no obstructions in sight. The distance within which you can make connection may be shorter when there are obstructions between them or depending on the conditions of the surroundings (such as walls or furniture) and the structure of a building. Especially when there is a wall, floor or ceiling of reinforced concrete between them, they may be unable to connect with each other. Note the above mentioned distance is not guaranteed.
- Move the handset and another Bluetooth device as far away as possible from home electric appliances, AV devices, OA devices, etc. before connection. Bluetooth devices are liable to be adversely affected by a microwave oven, so move them as far away as possible from the microwave oven while using them. Otherwise, normal connection cannot be performed when other electric devices are powered on or Bluetooth devices may cause noises or reception failure on a TV or radio set.
- Move the other party's Bluetooth device to a place where connection is possible when there is a broadcast station, radio, etc. near the Bluetooth device and the handset cannot be connected to the device. Strong radio waves may prevent connection between Bluetooth devices.
- Wireless connection is available with Bluetooth devices put in a bag or pocket. However, lowering of communication speed or noise may result when you are in between the Bluetooth device and the handset.
- Electromagnetic signals from Bluetooth devices may affect the operation of electronic medical equipment etc. As some cases may result in accident, turn off the handset and other Bluetooth devices in the following places.
■ ● On trains
■ ● On airplanes
■ In hospitals
- Near automatic doors or fire alarms
■ In places such as gas stations where flammable gas is generated
Radio interference with Wi-Fi compatible devices
- The Bluetooth devices use the same frequency band (2.4 GHz) as wireless LANs (IEEE 802.11b/g/n). Therefore, using a Bluetooth device near a wireless LAN device may cause the radio interference, lowering of communication speed, noise or connection failure. In this case, turn off the wireless LAN device or keep the handset and the other party's Bluetooth device at least approximately 10 m away from the wireless LAN.
Using Bluetooth function
- To register/connect a Bluetooth device, the Bluetooth passkey may need to be entered. Before starting the registration, decide one- to sixteen-digit number. Enter the same number on the handset and the other party's Bluetooth device.
- ● Set the other party's Bluetooth device to the registration stand-by status in advance.
1 In the home screen, [ ] ▶ [Settings] ▶ [Bluetooth]
2 Set to On
3 Select a Bluetooth device ▶ [PAIR]
- The confirmation screen for connection may be displayed.
- Entering the Bluetooth passkey may be necessary depending on the other party's Bluetooth device. Also, some Bluetooth devices may start connection after completing registration.
- To search for Bluetooth devices: [ ]▶ [Refresh]
-
Touch [] of a paired Bluetooth device to set name and intended purpose of the other party's Bluetooth device.
-
● You can connect up to seven Bluetooth devices at the same time. Bluetooth devices may not work properly or the number of Bluetooth devices which can be connected at the same time may differ depending on the profile.
- If you fail to connect a Bluetooth device, connection may become available after re-registering it.
- When [Bluetooth] is set to On, the handset is set to receive registration requests/connection requests from other Bluetooth devices. Make the setting for displaying the handset's information on other Bluetooth devices in advance to allow the handset to be searched for by other Bluetooth devices.
● While in connection stand-by, even if a connection request from a Bluetooth device is received, connection may not be made depending on the signal status etc. - For details on the operations of the other party's Bluetooth device, refer to the manuals of the Bluetooth device to be used.
■ When receiving registration request from Bluetooth device or connection request from unregistered Bluetooth device
1 Registration request/Connection request from Bluetooth device
2 Drag the status bar down ▶ [Pairing request] ▶ [PAIR]
- When the confirmation screen about the settings on pairing appears, select [PAIR].
- Entering the Bluetooth passkey may be necessary depending on the other party's Bluetooth device.
- The confirmation screen for connection may be displayed.
■ Unregistering Bluetooth device
1 In the Bluetooth screen, [ ] of the Bluetooth device to unregister ▶ [FORGET]
■ Disconnecting Bluetooth device
1 In the Bluetooth screen, select the Bluetooth device to disconnect ▶ [OK]
Setting Bluetooth
- ● Set after setting [Bluetooth] to On.
1 In the Bluetooth screen, [ ]
2 Select an item
■ ● Refresh: Search for the Bluetooth device.
■ Rename this device: Change the handset's name.
- Qualcomm®aptX™: Set whether to use Qualcomm aptX audio.
■ Show received files: Display the history of data received via Bluetooth connection.
[Qualcomm® aptX™]
- When you enable [aptX], sounds may not be output depending on the Bluetooth device. In this case, disable [aptX].
Sending and receiving by Bluetooth
Sending data
Example: Still picture
1 In the home screen, [ ]▶ [Contents Manager]▶ [Photo]
2 Touch and hold a still picture ▶ [Share] ▶ [Bluetooth]
- Set the receiver's Bluetooth device to the reception stand-by status.
3 Select a Bluetooth device to connect to
Receiving data
1 Data is sent from the sender's Bluetooth device
2 Drag the status bar down ▶ select the incoming notification ▶ [ACCEPT]
3 Drag the status bar down ▶ select the received data
● Receiving all data may not be available depending on the data type.
- When available space in the save destination becomes insufficient while receiving data, the data being received to that point are saved and receiving ends.
NFC communication
NFC stands for Near Field Communication and is a near field wireless communication system which conforms to the international standards set by ISO (International Organization for Standardization). You can use the contactless IC card function, Reader/Writer function, P2P function, etc. on the handset.
Android Beam
You can send and receive data to and from devices which support Reader/Writer, P2P function.
- Enable [Reader/Writer, P2P] and set [Android Beam] to On in advance (P. 52 "NFC/Osaifu-Keitai settings").
- Android Beam is not available in Airplane mode or when NFC/Osaifu-Keitai lock is set.
- In the following cases, data may not be sent by Android Beam.
■ ● During charging
■ ● During earphone/microphone connection
■ ● During connecting to a PC by using Micro USB Cable 01 (sold separately)
● ● You can send and receive phonebooks, still pictures, videos, etc. - Android Beam may not be available depending on the app.
- Communication with all devices which support Reader/Writer, P2P function is not completely guaranteed.
When using Android Beam

- Use while placing the Ⓞ mark of the receiver's device over that of the sender's device as shown.
- Do not move the devices until sending and receiving of data are completed.
- There may be some cases in which data are poorly sent and received or the display is turned off by positioning a device near depending on the other party's device. In this case, put a distance between the 2 marks apart/closer or move them up/down or to the left/right.
- Other precautions are the same as those for when you hold the handset over the other device (P. 51 "Precautions about holding over the other device").
Sending data
Example: Phonebook
1 In the home screen, select “ドコモクラウド” (docomo cloud) folder ▶ [docomo phonebook] ▶ [Contacts]
2 Select a name
3 Place the Ⓞ mark over that of the other party's device
•[Touch to beam] appears.
4 Touch the screen
Receiving data
1 Place the Ⓞ mark over that of the other party's device
External Device Connection
PC connection
You can charge the handset and transfer data between a PC and the handset memory/microSD Card by connecting the handset and the PC.
1 Insert the microUSB plug of Micro USB Cable 01 (sold separately) horizontally into the external connection jack on the handset with the side marked with "B" turned up (1)
2 Insert the USB plug of Micro USB Cable 01 horizontally into the USB connector on a PC (2)
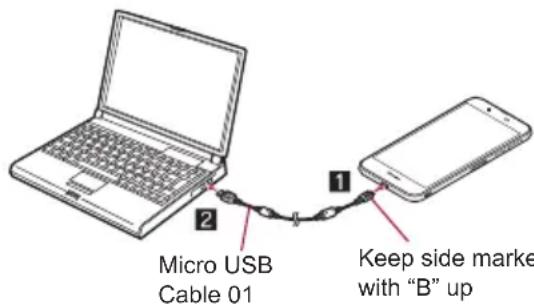
- The confirmation screen for the use of USB is displayed. If it is not displayed, drag the status bar down and select the notification for the use of USB.
3 Select a using method of USB
■ ● Charging: Just charge the handset.
■ File transfers: Transfer data between a PC compatible with MTP and the handset memory/microSD Card.
■ Photo transfer (PTP): Transfer still pictures between a PC compatible with PTP and the handset memory.
■ ● MIDI: Use the handset for MIDI input.
- For details on tethering settings ☎ P. 25 "Tethering"
4 Disconnect Micro USB Cable 01 from the handset and the PC
- Use Micro USB Cable 01 as a USB cable. USB cables for PC are not available, since the plug shape is different.
- Using a USB HUB may prevent the equipment from working normally.
- When you transfer a great deal of data at once, the transference may be interrupted. In this case, split the data into several files and send them separately.
- Do not remove Micro USB Cable 01 while exchanging data with PC. Data may be damaged.
- Windows Vista, Windows 7, Windows 8.1 and Windows 10 all of which are Japanese version are available OS of PCs for the connection.
Printing/Saving by print service
You can print images using a print app (plug-in) or save images in Google Drive etc.
Example: When using Album
1 In the image displaying screen of Album, [ ]▶ [Print by print service]
2 Set each item
- Follow the instructions on the screen and operate after this step.
USB host function
The USB host function is installed on the handset. You can use USB devices such as mice by connecting a commercially available USB cable for peripheral device connection to the external connection jack.
- ● For details on the USB host function, refer to the manuals of the USB cable for peripheral device connection and USB devices.
- Connection with all USB devices is not completely guaranteed.
- Connection with the USB device is disabled when the battery level decreases or the handset temperature lowers.
- When you use the USB host function, the handset operations may slow down.
- When you connect USB devices which consume large amount of electric power, the handset may be automatically turned off depending on the operating state or battery level of the handset, or surrounding temperature.
Removing USB memory
- Unmount the USB memory before removing it (P. 67 "Storage & USB"). Data may be damaged or it may not work properly.
Wireless output
You can display the same screen as that of the handset on a TV with a wireless connection function by connecting the handset to the TV.
- ● You can also connect the handset to other Miracast compatible devices such as a Miracast compatible TV or adapter.
1 In the home screen, [ ] ▶ [Settings] ▶ [More] ▶ [Wireless output]
2 Set to On
3 Select a device to connect to
- The setting screen may be displayed depending on the device to connect to. For details on the setting content, refer to the manual of a Miracast compatible device to use.
● Wireless output may not be available depending on the running app or the displayed content item.
- Wireless output may be terminated during its use depending on the running app.
- During the wireless output, you may not be able to play copyrighted content items.
● Wireless output automatically stops when the battery level becomes insufficient.
- Wireless output is not available during a call or incoming call. If you receive a call during the wireless output, the wireless output stops.
- The handset may be subjected to radio interference and image distortion or jumpiness may occur depending on the conditions of the surroundings. Also, connection may fail or output may be terminated. Use this function in a condition with no obstructions or other wireless devices put between the handset and a TV etc.
VPN (Virtual Private Network)
Adding VPN
VPN (Virtual Private Network) is a connection method to prepare and connect safely to a virtual dedicated line on the network of a household PC or in an office from outside etc.
● ● Acquire information about the security from network administrators to set VPN connection from the handset.
- Set Screen lock to an item other than [None] or [Swipe or Touch] in advance (P. 69 "Lock & security").
1 In the home screen, [ ] ▶ [Settings] ▶ [More] ▶ [VPN] ▶ [+]
2 Set each item ▶ [SAVE]
Connecting VPN
1 In the home screen, [ ] ▶ [Settings] ▶ [More] ▶ [VPN]
2 Select a VPN to connect to
3 Enter connecting information of the VPN ▶ [CONNECT]
Disconnecting VPN
1 In the home screen, [ ] ▶ [Settings] ▶ [More] ▶ [VPN]
2 Select a VPN to disconnect ▶ [DISCONNECT]
International Roaming
You can make a call using the handset while staying overseas or make settings for international roaming, network services, etc.
Outline of international roaming (WORLD WING)
International roaming (WORLD WING) is a service that enables you to use the same phone number and mail address of the handset as you use in Japan in the service area of DOCOMO affiliated overseas network operators. You can use calls and SMS without any changes in settings.
For details on the international roaming (WORLD WING), refer to the DOCOMO website.
https://www.nttdocomo.co.jp/english/service/world/roaming/
Available network
You can use the handset in the LTE network, 3G network and GSM/GPRS network service areas. In addition, it is available in countries and regions supporting 3G 850 MHz/GSM 850 MHz. Check the available area.
- For country codes, international call access number, universal number international prefix and information on countries and regions where connections are available and available network operators, refer to the DOCOMO website.
Available services overseas
* Enable [Data roaming] to use data communication when roaming (P. 82 "Data roaming").
- Some services may not be available depending on the network operator or network to connect to.
- Connected network operator can be checked in the status panel (P. 28 "Using the status panel").
Before use overseas
Checking before departure
Check the followings in Japan before using the handset overseas.
Subscription
- Check the status of a subscription to WORLD WING. For details, contact the number listed in "General Inquiries" on the last page.
Charging battery
- ● For details on charging the battery, refer to the DOCOMO website.
Charge
- Overseas charges (call charges, packet communication charges) differ from those in Japan. For details, refer to the DOCOMO website.
- ● Since some apps automatically perform communication, the packet communication charges may be higher. Contact the app provider for the operation of each app.
Setting before departure
Network service settings
If you subscribed to network services, network services such as Voice Mail Service, Call Forwarding Service and Caller ID Display Request Service are available from overseas. However, some network services are not available.
- To use network services overseas, setting the remote operation settings to "Activate" is required (P. 39 "Network service"). The remote operation settings can be set in your country of stay (P. 84 "Network services (overseas)").
- Some network services that can be set/disabled etc. may not be available depending on overseas network operators.
- Checking in your country of stay
The handset automatically connects to the available network operator when you turn the power on in your country of stay.
Connection
When Network operators (P. 82 "Network operators") is set to [Select automatically], the suitable network is automatically selected.
Settings for use overseas
Data roaming
You need to enable [Data roaming] to use packet communication overseas.
1 In the home screen, [ ] ▶ [Settings] ▶ [More] ▶ [Cellular networks] ▶ [Data roaming]
- When the confirmation screen is displayed, check the content and select [OK].
Preferred network type
Set a network to use.
1 In the home screen, [ ] ▶ [Settings] ▶ [More] ▶ [Cellular networks] ▶ [Preferred network type]
2 Select an item
■ ● 4G/3G/GSM(Auto): Automatically switch to an available network.
■ ● 3G/GSM: Use 3G/GSM/GPRS network.
■ ● GSM: Use GSM/GPRS network.
Network operators
At the time of purchase, the handset is set to automatically search for and switch to available networks. When you want to manually switch networks, set by performing following operations.
1 In the home screen, [ ] ▶ [Settings] ▶ [More] ▶ [Cellular networks] ▶ [Network operators]
- If the confirmation screen for data communication is displayed, check the content and select [OK].
- Search for networks and a list of network operators is displayed.
- When an error occurs during the network search, disable [Data enabled] (P. 69 "Cellular networks") and try again.
2 Select a network operator
- To search for network operators again: [Search networks]
- To automatically select a network operator: [Select automatically]
Date & time
If [Automatic date & time] and [Auto timezone] of Date & time are enabled, the handset receives information on time and time differences from the network of a connected overseas network operator, then time and time differences are corrected.
- Time and time differences may not be adjusted correctly depending on the network of an overseas network operator. In this case, set time zone manually.
- ● The correction timing may differ depending on the network operator.
- For details on Date & time P. 74 "Date & time"
Inquiries
- When the handset or the docomo nano UIM card is lost or stolen overseas, promptly contact DOCOMO and conduct a procedure for canceling the use of service from your country of stay. Refer to the last page for inquiries. You can also cancel the use of service from My docomo. Note that call/communication charges after the handset or the docomo nano UIM card is lost or stolen are incurred to the subscriber.
- As for land-line phone etc., “International call access number” of your country of stay or “Universal number international prefix” is required.
Making/Receiving a call in your country of stay
Making a call outside your country of stay (including Japan)
1 In the home screen, [ ]▶ [Dial]
2 “+” (touch and hold “0”) ▶ enter country code, area code (city code) and the other party's phone number ▶ [ ]
- When the area code (city code) begins with "0", omit the first "0" when dialing (Include the "0" when making a call to some countries or regions such as Italy).
- Alternatively, enter a phone number ▶ [ : ] ▶ [International call] ▶ select a country code to enter a country code.
- The first "0" of the area code (city code) will be omitted.
- To make a video call: [ : ] ▶ [Video call]
- For details on the video call P. 36 "Video call"
- Even if you notify the caller ID, [Unknown], [Anonymous], etc. may appear depending on the network operator, and the caller ID may not be displayed correctly.
Making a call using International Dial Assist
When you make a call to other countries from your country of stay, you can make an international call with simple operation using International Dial Assist.
- Set International dial assist in advance (P. 84 "International Dial Assist").
- ● The first "0" of a phone number will be automatically converted to the country code you set in Country code.
1 In the home screen, [ ]▶ [Dial]
2 Enter a phone number ▶ [ ]
3 [Convert number]
Making a call in your country of stay
You can make a domestic call in your country of stay in the same way as you do in Japan.
● ● Always enter the area code (city code), even when the number is in the same area.
Making a call to a WORLD WING subscriber overseas
When you make a call to a WORLD WING subscriber overseas, the call is made as an international call to Japan regardless of whether the call is made to the inside or outside of your country of stay.
1 In the home screen, [ ]▶ [Dial]
2 “+” (touch and hold “0”) ▶ enter country code “81” (Japan) and the other party's mobile phone number excluding the first “0” ▶ [ ]
Receiving a call overseas
You can receive a call overseas in the same way as you do in Japan.
- When a call is received during international roaming, the call is forwarded from Japan. Charges for connecting a call to Japan are incurred by the caller and receiving charges by the receiver.
■ Having calls made to your handset
When having calls made to your handset from Japan, have your phone number entered just as a domestic call in Japan. When having calls made to your handset from countries other than Japan, have the international call access number and country code "81" (Japan) added to the beginning of your phone number with the first "0" excluded as an international call to Japan regardless of your country of stay. International call access number of the country of the caller-81-90 (or 80/70)-XXXX-XXXX
Setting international roaming
You can make settings for using the international roaming service.
- Setting may not be made depending on the network operator.
1 In the home screen, [ ]
2 [ : ] ▶ [Call settings]
3 [Roaming settings]
4 Select an item
■ Incoming call restriction while roaming: Restrict incoming calls during international roaming.
■ Incoming call notification while roaming: Notify with SMS if you cannot receive calls because of out of service etc. while staying overseas.
■ ● Roaming guidance: Play the guidance notifying the other party who makes a call to you during international roaming that you are using international roaming.
■ International dial assist: For details 📞 P. 84 "International Dial Assist"
■ Network service: Make settings for network services such as Voice Mail Service used in your country of stay. For details P. 84 "Network services (overseas)"
International Dial Assist
1 In the home screen, [ ]
2 [ : ] ▶ [Call settings]
3 [Roaming settings]
4 [International dial assist]
5 Select an item
■ Automatic conversion: Automatically add the international prefix or country code.
■ Country code: Select the country code used in Automatic conversion.
■ International prefix: Select the international prefix used in Automatic conversion.
Network services (overseas)
You can make settings for network services such as Voice Mail Service used in your country of stay.
- ● It is necessary that Remote operation settings is set to "Activate" in advance (P. 39 "Network service").
- When you operate this service from overseas, charges for connecting a call to Japan from your country of stay are incurred.
- ● Setting may not be made depending on the network operator.
1 In the home screen, [ ]
2 [ : ] ▶ [Call settings]
3 [Roaming settings]
4 [Network service]
5 Select a target service
■ Remote operation (charges apply): Set whether to start remote operations.
- Caller ID notification request service (charges apply): When a call with no caller ID is received, play the guidance for requesting notifications of the numbers to callers.
■ Incoming call notification while roaming (charges apply): Notify with SMS if you cannot receive calls because of out of service etc. while staying overseas.
■ ● Roaming guidance (charges apply): Play the guidance notifying the other party who makes a call to you during international roaming that you are using international roaming.
■ Voicemail service (charges apply): Record callers' messages when the handset is outside the service area or turned off (subscription is required).
■ Call forwarding service (charges apply): Forward calls to other mobile phones registered in advance (subscription is required).
6 [OK]▶ follow the voice guidance and operate
Checking after homecoming
The handset automatically connects to the DOCOMO network after returning to Japan. If it fails, make the following settings.
- ● Set Preferred network type to [4G/3G/GSM(Auto)] (P. 82 "Preferred network type").
- ● Set Network operators to [Select automatically] (P. 82 "Network operators").
Appendix/Index
Troubleshooting (FAQ)
Troubleshooting
- ● You can diagnose the handset if there are problems with the performance. For details, refer to the DOCOMO website. https://www.nttdocomo.co.jp/english/support/trouble/repair/
- Check whether the software update is required. If it is required, update the software (P. 89 "Software update").
- If there is no improvement on the problems even after checking the following items, feel free to contact the number listed in "Repairs" (in Japanese only) on the last page or a repair counter that DOCOMO specifies.
Power
● ● The handset is not turned on
- Make sure the battery has not run out. P. 16 "Charging"
● ● The screen does not respond or the handset cannot be turned off
- You can turn the power off forcibly by pressing ⏻(⊕) for at least 8 seconds.
- Release your finger after the vibrator is activated to turn the power off.
- Note that data, contents you have set, etc. may be deleted since the power is turned off forcibly.
Charging
● ● Cannot charge the battery
The charging lamp does not illuminate or it flashes
- Is the power plug of the adapter inserted into the outlet or accessory socket properly? P. 17 "Charging with AC adapter/DC adapter"
- Are the adapter and the handset set properly? P. 17 "Charging with AC adapter/DC adapte
- When using an AC adapter (sold separately), are the microUSB plug of the AC adapter and the handset securely connected? ☑ P. 17 "Charging with AC adapter/DC adapter"
- If a call, communication or another function is performed for a long time while charging, the handset may become warm and charging may stop. Charge again after the handset temperature lowers. P. 16 "Cautions while charging"
- Is an adapter specified by NTT DOCOMO being used for charging? Contact the number listed in "Repairs" (in Japanese only) on the last page or a repair counter that DOCOMO specifies if you cannot charge the battery even when using a specified one.
- Is light intensity set to change by definite pattern while charging? ☐ P. 64 "Illumination"
Handset operation
- Becomes hot while operating/charging
- The handset, internal battery or adapter may become warm while you are operating or charging the handset, when you use video call, watch videos, etc. for a long time while charging, etc. There is no operational problem. P. 16 "Cautions while charging"
● ● Battery life is short
- Make sure the handset is not left for a long time outside the service area.
Outside the service area, since radio waves are searched to make communication available, more electric power than usual is used. - The battery life depends on the usage environment and deterioration level. P. 90 "Main specifications"
- Internal battery is a consumable product. Battery life per charge is gradually reduced every time the battery is charged. Contact the number listed in "Repairs" (in Japanese only) on the last page or a repair counter that DOCOMO specifies if the battery life becomes extremely shorter than at the time of purchase even after fully charged. P. 17 "Internal battery usable life"
● ● Not activated by touching or pressing keys
- Make sure the handset is not turned off. P. 18 "Turning power on"
- Screen response is slow when touching or pressing keys
- This may happen when a great deal of data is saved on the handset, when a large amount of data is being transferred between the handset and the microSD Card, etc. P. 67 "Storage & USB"
● ●docomo nano UIM card is not recognized
- Is the docomo nano UIM card inserted facing right direction? P. 15 "docomo nano UIM card"
- -Clock is incorrect
- Clock may become incorrect if the power is left turned on for a long time. Make sure [Automatic date & time] is enabled and turn the power on again in a location with good signal conditions. P. 74 "Date & time"
● Handset operation is unstable
- The apps installed on the handset after purchase may become a cause. If you can improve the symptoms by activating the handset with the safe mode set, you may be able to improve the symptoms by uninstalling the installed apps.
※ The safe mode is a function to activate the handset nearly in the state of default.
• For activating the safe mode
Turn the power on again when the power is turned off, then keep pressing (→) on the screen during activation until the lock screen of the touch panel is displayed.
※ Alternatively, 0(1) while the power is turned on (for at least 1 second) touch and hold [Power off] [OK] to activate the safe mode.
Also, activate the safe mode from Self check. P. 66 "Self check"
※ When the safe mode is activated, [Safe mode] is displayed at the bottom left of the screen.
※ To deactivate the safe mode, turn the power on again.
- Back up the necessary data in advance before using the safe mode.
- Widgets may disappear.
- The safe mode is not an ordinary activating state and thus deactivate the safe mode if you want to use in an ordinary way.
- ● Apps do not work properly (e.g. inability to activate them, frequent errors)
- Make sure there is no disabled app. Try again after enabling a disabled app, if any. P. 67 "Enabling an app"
- Is the use of requiring function for operating the app allowed? P. 30 "First things first"
- Make sure Battery optimization is not carried out. P. 30 "Battery optimization"
Calling
- Calls cannot be made
- Make sure Airplane mode is not set. ☑ P. 68 "More"
● Ringtone does not sound
- Make sure the ringtone volume is not set to "0". P. 63 "Sound & notification"
- Make sure the manner mode, Public mode (power OFF) or Airplane mode is not set. P. 28 "Manner mode", P. 39 "Network service", P. 68 "More"
- Make sure call rejection is not set. P. 40 "Reject call setting"
- Make sure Answer time setting is not set to "0 seconds". P. 39 "Voice/Answering memo"
- Make sure the ringing time for Voice Mail Service or Call Forwarding Service is not set to "0 seconds". P. 39 "Network service"
- Calls are not available 📄 does not disappear even after moving to another place or calls cannot be made/received even though signal status is not bad)
- Turn the power on again or attach the docomo nano UIM card again. P. 15 "docomo nano UIM card", P. 18 "Turning power on/off"
- Depending on the signal type, even though status is “inside the service area” or “[indicating signal status) appears”, making/receiving a call may not be available. Move to another place and call again.
- Make sure the call restriction such as call rejection is not set. P. 40 "Reject call setting"
- In a crowded place, heavy telephone/mail traffic may make it difficult to get a connection depending on how congested the radio waves are. In this case, a busy tone is played. Move to another place or call again later.
Screen
- Display is dark
- Make sure the light duration of the backlight is not set to be short. P. 64 "Display"
- Make sure brightness of the display is not changed. P. 64 "Brightness level"
- Make sure [Automatic brightness] of Brightness level is not enabled. The brightness of the screen varies depending on the surrounding light if the setting is enabled. P. 64 "Brightness level"
- Make sure [VeilView] is not enabled. P. 64 "VeilView"
Sound
● ● The other party's voice is not heard well or is too loud during a call
- Make sure you have not changed the in-call volume. P. 38 "Adjusting the in-call volume"
● ● Mail is not automatically received
- Make sure Sync frequency in the account settings of Email is not set to [Never]. P. 25 "Setting up mail account"
Camera
● ● Still picture or video shot by the camera is blurred
- Switch Focus Setting to [Macro] when shooting a nearby object with SHCamera. P. 54 "Common settings on shooting still pictures/videos"
- Make sure the camera lens is neither misted up nor exposed to dirt. P. 52 "Before using camera"
● ● Still pictures and videos shot while the mobile light is turned on go white
- If there is a case, cover, finger, etc. near the camera lens, lights of the mobile light may reflect on it and shot still pictures and videos may be adversely affected.
Osaifu-Keitai
● ● Cannot use Osaifu-Keitai
- If Omakase Lock is set, Osaifu-Keitai functions are not available regardless of the setting of NFC/Osaifu-Keitai lock.
- Make sure NFC/Osaifu-Keitai lock is not set. P. 51 "NFC/Osaifu-Keitai lock"
- Is the mark of the handset held over the scanning device? P. 51 "Precautions about holding over the other device"
International roaming
- - Cannot use the handset overseas (The signal icon appears)
- Make sure you have subscribed to "international roaming service (WORLD WING)". Check the status of a subscription to "international roaming service (WORLD WING)". P. 82 "Outline of international roaming (WORLD WING)"
- Cannot use the handset overseas (appears)
- Make sure the handset is not outside the service area of international roaming or in a place with weak signal. Refer to the DOCOMO website if the service area or network operator is available one. P. 82 "Outline of international roaming (WORLD WING)"
- Change the network setting or network operator setting. Set Preferred network type to [4G/3G/GSM(Auto)]. Set Network operators to [Select automatically]. P. 82 "Preferred network type", P. 82 "Network operators"
- Turn the power on again. The handset may recover. P. 18 "Turning power on/off"
- - Cannot use data communication overseas
- Enable [Data roaming]. P. 82 "Data roaming"
● ● Suddenly the handset becomes unavailable during overseas use
- Make sure the approximate limit of usage fee is not exceeded. As for “international roaming service (WORLD WING)”, the approximate limit of usage fee is set in advance. Pay off the usage fee to resume services if usage fee exceeds the limit.
- The other party's phone number is not notified/A different phone number from that of the other party is notified/Functions to use details saved in the phonebook or Caller ID notification are not activated
- The caller ID is not displayed on the handset even though the other party makes a call with the caller ID set to be notified if the used network or network operator does not notify. In addition, a different phone number from that of the other party may be notified depending on the used network or network operator.
Data management
● ● Data is not transferred
- Make sure a USB HUB is not used. If used, the transference may not be carried out normally. P. 80 "PC connection"
- Make sure the using method of USB is not set to [Charging]. P. 80 "PC connection"
● Data saved on the microSD Card is not displayed
- Remove the microSD Card and insert it again. P. 75 "microSD Card (external storage)"
● ● Images are not displayed correctly
- An entire image goes black when the image data is damaged.
Bluetooth function
- Cannot connect with Bluetooth connection compatible device/Cannot find it even if searching
- Set the Bluetooth connection compatible device (commercially available) side to the registration stand-by status and register it from the handset side. To delete the registered device once and register it again, both the Bluetooth connection compatible device (commercially available) and the handset are required to be deleted on each side. P. 78 "Using Bluetooth function"
- Calls cannot be made from the handset with an external device such as a car navigation system or hands-free device connected
- Making a call to a phone number may become unavailable if you make multiple calls to the phone number in the condition that the other party does not answer or outside the service area. In this case, turn off the handset power and turn it on again. P. 18 "Turning power on/off"
Map/GPS function
- Cannot set AUTO-GPS service information
- Make sure AUTO-GPS has not been suspended due to insufficient battery level. If AUTO-GPS has been suspended due to Low-power operation settings, you cannot set AUTO-GPS service information. In this case, set Low-power operation settings to [Not suspend] or charge the battery to set the service. P. 16 "Charging", P. 69 "docomo service/cloud"
- Make sure [AUTO-GPS operation settings] is not disabled. P. 69 "docomo service/cloud"
Error messages
● ● [Cellular network not available.]
- Make sure a valid preferred network type is set. P. 82 "Preferred network type"
● ● [Connection error; failed to send]
[Connection has been interrupted due to no answer]
[Server error; failed to send]
[The destination server is not supporting it.]
[Transmission error; try again in a while]
- Appears when attempting to use mail or SMS with the line system not in service or extremely congested. Try again later.
● ● [Enter passcode.]
- Appears when attempting to use a function that requires the passcode to be entered.
● ● [Failed to get license. Cannot play.]
- Appears when failed to update a license of copyrighted content that has reached the expiration date.
● ● [Failed to send]
• Appears when SMS was not sent properly.
- Appears when mail was not sent properly. Try again from a location with a strong signal.
● ● [Lift finger, then touch sensor again]
[Move finger for next touch.]
[Not recognized]
- Appears when failed to read your fingerprint.
● ● [Low on space]
- Available space on the handset memory is decreasing. Some functions or apps may not work properly. Uninstall unneeded apps or move/delete files.
● ● [No permissions to play this content.]
- Appears when there is no available license or when attempting to play copyrighted content whose playable period or limit has expired.
● ● [No SIM card - Emergency calls only]
- Make sure docomo nano UIM card is properly inserted. P. 15 "docomo nano UIM card"
● ● [Please wait for a while(data)]
- Packet communication network is extremely congested. Try again later.
● ● [Please wait for a while(voice call)]
• Audio line network is extremely congested. Try again later.
- ● [Quit fingerprint authentication since failure limit was reached.]
[Too many attempts. Try again later.]
- Appears when failed to authenticate your fingerprint five times. Unlock the screen by method set in Screen lock or security key depending on the situation.
● ● [xx mails have been received, but some have not been received.]
- Appears when not all mails can be received for an unspecified reason.
Anshin Enkaku Support
※This service is provided in Japanese.
By having the screen on your handset shared with DOCOMO, you can get supports for operating and setting the handset, using apps or connecting to peripheral devices such as PC.
● ● In the following cases, Anshin Enkaku Support is not available.
■ ● When the docomo nano UIM card is not inserted
■ ● During international roaming
■ In Airplane mode
- Anshin Enkaku Support is a paid service that requires subscription.
- Some operations and settings are not covered.
- ● For details on Anshin Enkaku Support, refer to the DOCOMO website.
1 Make a call to Anshin Enkaku Support center
Anshin Enkaku Support center
■ From DOCOMO mobile phones: 📋 (No prefix) 15710 (toll free)
■ From land-line phones: 📞 0120-783-360
Business hours: 9:00 a.m. to 8:00 p.m. (open all year round)
- In the home screen, [ ]▶[遠隔サポート] (Remote support)▶[このスマートフォンから発信する] (Make a call from this smartphone)▶[] to make a call to Anshin Enkaku Support center from the handset.
2 In the home screen, [ ]▶[遠隔サポート] (Remote support)
3 [遠隔サポートの接続画面に進む] (Proceed to the connection screen for Remote support)
4 [同意する] (Agree)
5 Enter the connection number provided by DOCOMO
6 The remote support starts after the connection is established
Warranty and After-Sales Service
Warranty
- Make sure that your handset is accompanied by a warranty card at the time of purchase. Check that the name of the retailer, the date of purchase, and the necessary details have been filled in on the warranty card. Be sure to keep it in a safe place. Contact the retailer if any necessary details on the warranty card are not completed.
The warranty period without charge is 1 year from the date of purchase.
- For the purpose of improvement, the specifications and the appearance for the handset are subject to change without prior notice.
- ● Information registered in your handset, such as phonebooks, may be lost or changed if your handset is damaged, repaired or mishandled. It is recommended that backup be kept of information such as phonebooks.
※The handset allows you to save phonebook data etc. to microSD Cards.
※The handset allows you to back up data such as phonebooks by using docomo cloud.
After-Sales Services
If you have problems with your handset
Refer to "Troubleshooting" on this manual before requesting repairs.
Contact the number listed in "Repairs" (in Japanese only) on the last page if problems persist.
If your handset needs repairs after contacting DOCOMO
Bring your handset to a repair counter that DOCOMO specifies. However, repair counters are only open during business hours.
Make sure to bring your warranty card with you. Note that it may take several days to repair depending on the condition on the malfunctions.
During the warranty period
- ● The handset will be repaired without charge in accordance with the terms of the warranty.
- When bringing the handset in for repairs, be sure to bring the warranty card. Even during the warranty period, a fee will be charged for repairs of malfunctions, damage, etc. caused by your improper handling (damage of external connection jack, display, etc.), if no warranty certificate is presented or if you have repaired the handset at a repair counter other than those specified by DOCOMO.
● Repairs for malfunctions caused by the use of devices and consumable products other than those specified by DOCOMO will also incur a fee, even during the warranty period.
Repairs may not be possible in the following circumstances.
- When, as a result of inspection, a corrosion resulted from water exposure, condensation, sweat or other liquids is found or when the internal circuit board is damaged or deformed (Repairs may not be possible when external connection jack, display, etc. is damaged or when a housing is cracked)
- If you have repaired the handset at a repair counter other than those specified by DOCOMO
※Even when repairs are possible, repair charges will be incurred because the warranty does not cover such damage.
After the warranty period has expired
Charged repairs will be carried out upon request.
Replacement parts
Replacement parts (required to maintain the functionality of the handset) will be kept in stock basically for at least 4 years following the halt of production.
For details on the repair acceptance conditions, refer to the DOCOMO website.
https://www.nttdocomo.co.jp/support/trouble/repair/shop/compatible/index.html (in Japanese only)
However, there may be a case when repair is not possible for the shortage of replacement parts etc. depending on the faulty part. For details, contact a repair counter that DOCOMO specifies.
IMPORTANT!
- ● Never attempt to modify the handset.
■ May cause fire, bodily injury or malfunction.
If your device has been modified previously, it will only be accepted for the repair as long as you agree that we restore the device to its original state. However, repairs may be refused depending on the extent of the modification.
The following cases may be considered as a modification.
- Stickers etc. are applied to the display or keys
- Decorations are made to the handset with adhesive agent etc.
- Exterior parts etc. are replaced with those which are not standard DOCOMO products
■ ● Repairs for any malfunction or damage caused by such modifications will incur fees, even during the warranty period.
- Do not peel off the model nameplate attached to the handset. Note that if the nameplate is removed or replaced on purpose, repairs may be refused.
- Information stored in your handset, such as the settings of various functions, may be cleared or reset if your handset is damaged, repaired or mishandled. If this occurs, please re-enter the information or re-specify the settings. At that time, packet communication charges may be incurred depending on the settings.
- When the handset is repaired, MAC address for Wi-Fi and Bluetooth address may be changed regardless of the faulty part.
- ● The following sections of the handset contain parts that generate magnetic waves. Keep cash cards and other objects likely to be affected by magnetic waves away from the handset. They may become unusable.
■ ● Sections: Earpiece/Speaker, back camera
- If the inside of the handset gets wet or becomes moist, immediately turn off the power though SH-02J provides waterproof performance. Then, visit a repair counter. The handset may not be repaired depending on its condition.
Created data and downloaded information
- Created, imported, downloaded data, etc. may be modified or deleted when changing models or repairing the handset. DOCOMO shall not be liable for any modification or deletion of content. Note that DOCOMO shall not be liable for the packet communication charges which are incurred by Re-downloading data. DOCOMO may, at our convenience, exchange your handset for a substitute in lieu of repairs. However, in this case, we cannot transfer these data etc. to replaced products except for some data.
Software update
Software update is a function to connect to the network and check if software update for the handset is required. If necessary, download and install update files.
Software update
- If update is necessary, you will be notified by (Software Update) on the status bar or you can visit the DOCOMO website to check the availability of update.
- The following contents etc. are included in software update. Be sure to keep the version up-to-date to use the handset safely and comfortably.
■ ● Improvement and addition of functions
■ ● Improvement of operations
■ ● Improvement of the product quality
■ ● Update of security patch
- You can update software even if the handset contains data in it. However, DOCOMO may not be able to protect data that could be lost due to malfunction, damage, water exposure and so on. It is recommended that important data be backed up before updating software. Note that some data cannot be backed up.
Precautions
- Once the update is completed, you cannot downgrade the software to the previous one.
- When updating software, the information unique to the handset (model, serial number, etc.) is automatically sent to the DOCOMO server. Sent information is only used for software update.
- If you use packet communication of Xi/FOMA, the download is free of charge.
- The docomo nano UIM card of DOCOMO subscription is required to update software via packet communication. If you use packet communication, subscription to sp-mode may be required depending on the content of the update.
● ● During installation, making or receiving calls, each communication function and other functions cannot be used.
- During installation, no key operations are available. It is not possible to cancel installation.
- When the update is completed, the handset restarts.
- ● When the update is completed, some settings may be reset. Re-enter the information or re-specify the settings.
- When PIN code is set, the PIN code entry screen appears during restart after rewriting and you are required to enter PIN code.
- If update fails and all operations become unavailable, bring the handset to a repair counter that DOCOMO specifies.
● ● While updating, sent SMSs are held at SMS center.
- Update may take time.
- In the following cases, update is not available.
■ ● During a call
- When the handset is not connected to the Wi-Fi and is displayed
- When the handset is functioning as a base unit during tethering
■ ● When date and time are set incorrectly
■ ● When battery level is insufficient for update - When available space on the handset memory is insufficient
■ ● When the basic software is changed improperly
● ● End all apps before installing software.
● ● Fully recharge battery before updating software.
- ● Do not turn the power off during updating software.
- ● It is recommended to download software at a location with good signal conditions while you are not moving. Software update may be interrupted if signal is weak.
- ● When software update is not necessary, [No upgrade is needed. Use it as it is.] appears.
- ● For information on available period of software update, refer to the DOCOMO website.
Updating software
- When you update the software, drag the status bar down ▶ select the notification ▶ [Install] to install the software by yourself.
■ Changing Aut download setting
1 In the home screen, [ ] ▶ [Settings] ▶ [About phone] ▶ [Software Update]
2 []/[ ] of Auto download
- If Auto download is set to OFF, carry out the operation of "When [ ] is not displayed on the status bar".
When is not displayed on the status bar
1 In the home screen, [ ] ▶ [Settings] ▶ [About phone] ▶ [Software Update]
2 [Update now]
- The confirmation screen for updating software is displayed depending on the content of the update.
3 [OK]/[Install]
When the confirmation screen for updating software is displayed
1 In the software update screen, [Update now]
2 Select an item
■ Perform now (only via Wi-Fi): Download update files immediately via Wi-Fi connection.
- Perform at scheduled time (via Wi-Fi/Xi) Download update files at the automatically reserved time via Wi-Fi connection or Xi/FOMA.
* When you cannot download update files via Xi/FOMA, [Perform at scheduled time (only via Wi-Fi)] is displayed.
- If sp-mode is not set and touch [Perform at scheduled time (via Wi-Fi/Xi)], the update is not available. Try with Wi-Fi connection.
- If the handset software is the latest, [No upgrade is needed. Use it as it is.] is displayed.
- If the download is interrupted, data downloaded up to that point is retained for up to 14 days. You can restart the download from [ ] [Downloading update file stopped) on the status panel.
- If you select [Perform at scheduled time (via Wi-Fi/Xi)] or [Perform at scheduled time (only via Wi-Fi)], the time for the download to start is automatically set. The time cannot be changed. If you do not want to download at the automatically set time, [Software Update] ▶ [Back]. Then select [Perform now (only via Wi-Fi)] and download update files.
[Download now (only via Wi-Fi)], [Perform at scheduled time (via Wi-Fi/Xi)]
- If you select [Download and install] and the download is finished, the installation automatically starts. Even if you do not touch [OK], the installation starts after approximately 10 seconds.
- Even if you select [Download] and the download is finished, the installation does not automatically start. When you want to install update files, you need to start installation by yourself.
Updating apps
- Check if update for apps is required after the update is completed. If you do not update an app which needs to be updated, the app's operations may become unstable or functions may not work normally. Be sure to keep the version up-to-date.
- ● For details on the supported OS version of an app, contact the provider of the app.
■ Updating from the status panel
When the update is finished and the handset restarts, [ ] (Updating has been completed) is displayed on the status bar. Drag the status bar down and [Updating has been completed] ▶ [Next] ▶ [OK] to update apps in the update list.
■ Updating from Play Store
In the home screen, [Play Store] ▶ [≡] ▶ [My apps & games] to update each app.
Main specifications
Handset
| Product name SH-02J | |
| Size | Approx. 143 (H) × Approx. 71 (W) × Approx. 8.3 (D) mm (Approx. 8.4 mm at thickest point) |
| Weight Approx. 138 g | |
| Memory | ROM: 16 GBRAM: 2 GB |
| Continuous talk time*1, 2, 3 | FOMA/3GApprox. 900 minGSMApprox. 870 minVoLTE (Voice call)Approx. 900 min |
| Continuous stand-by time*2, 3 | FOMA/3GAt rest: Approx. 900 hr (Preferred network type: 4G/3G/GSM(Auto))*4GSMAt rest: Approx. 760 hr (Preferred network type: 4G/3G/GSM(Auto))*4LTEAt rest: Approx. 780 hr (Preferred network type: 4G/3G/GSM(Auto))*4 |
| Charge time | AC Adapter 05: Approx. 140 minDC Adapter 04: Approx. 155 min |
| Display | TypeTFT (IGZO)16,777,216 colorsSizeApprox. 5.0 inchesPixels921,600 pixels (HD: horizontal 720 × vertical 1,280 pixels) |
| Earphone/Microphone terminal | Diameter of plug: 3.5 mm stereo mini plugType of pole: Quadrupoles |
| Image pickup device | TypeBack camera: Backside-illuminated CMOS*5Front camera: Backside-illuminated CMOS*5SizeBack camera: 1/3.0 inchesFront camera: 1/5.0 inches |
| Camera | Effective pixelsBack camera: Approx. 13.1 million pixelsFront camera: Approx. 5 million pixelsRecorded pixels (Max.)Back camera: Approx. 13.1 million pixelsFront camera: Approx. 5 million pixelsZoom (Digital)Back camera: Up to approx. 8.0× (Still picture)/Up to approx. 8.0× (Video)Front camera: Up to approx. 8.0× (Still picture)/Up to approx. 8.0× (Video) |
| Recording*6 | File formatStill picture: JPEGVideo: MP4 (FULL HD), 3GP (HD, VGA)Recording time for videoUp to approx. 16 min each (when saved on the handset)*7 |
| Memory capacity | Approx. 6.9 GB *8 |
| Wireless LAN Meets | IEEE 802.11b/g/n (2.4 GHz) |
| Bluetooth | Supported versionBluetooth standard Ver.4.2OutputBluetooth standard Power Class 1Supported profiles (Supported services/versions)HSP (1.2), HFP (1.6), A2DP (1.2)*9, AVRCP (1.3), HID (1.0), DUN (1.1), OPP (1.2), SPP (1.2), PBAP (1.2), PAN (PAN-NAP) (1.0), PAN (PANU) (1.0), HOGP (1.0) |
| Languages | Displayed languages: Japanese and EnglishInput languages (for typing): Japanese and EnglishInput languages (for speaking): Depending on Google voice typing |
*1 Continuous talk time is an estimate of the time during which you can talk on a phone in a status where signals are sent and received normally.
*2 Talk (Communication)/Stand-by time is shortened with the frequent use of each function such as data communications, Multiaccess, camera function or Bluetooth function. Actual usage time is the combination of talk (communication) and stand-by time. The longer the talk time is, the shorter the stand-by time becomes.
*3 Talk (Communication)/Stand-by time may be reduced by approximately half depending on conditions including the battery level status, functions used, temperature or other environmental conditions, and signal strength (no signal or weak signal).
*4 This is the average usage time during which the handset is not carried with you and in a status where signals are received normally.
*5 CMOS (Complementary metal-oxide semiconductor) is an image device equivalent to the film of silver salt cameras.
*6 This is the specifications when using SHCamera.
*7 Picture size: FULL HD (1920×1080)/File size limit: Unlimited/Type: Image + voice
*8 Depending on usage of apps which use common memory, the memory capacity of each data may be reduced.
*9 Sound codec, aptX and SBC are supported.
Internal battery
| Battery Lithium-ion | |
| Nominal voltage 3.8V DC | |
| Nominal capacity 2,700 mAh |
Specific Absorption Rate (SAR) of Mobile Phones
This model SH-02J mobile phone complies with Japanese technical regulations and international guidelines regarding exposure to radio waves.
This mobile phone was designed in observance of Japanese technical regulations regarding exposure to radio waves (*1) and limits to exposure to radio waves recommended by a set of equivalent international guidelines. This set of international guidelines was set out by the International Commission on Non-Ionizing Radiation Protection (ICNIRP), which is in collaboration with the World Health Organization (WHO), and the permissible limits include a substantial safety margin designed to assure the safety of all persons, regardless of age and health condition.
The technical regulations and international guidelines set out limits for radio waves as the Specific Absorption Rate, or SAR, which is the value of absorbed energy in any 10 grams of tissue over a 6-minute period. The SAR limit for mobile phones is 2.0 W/kg. The highest SAR value for this mobile phone when tested for use near the head is 0.504 W/kg (*2) and when worn on the body is 0.511 W/kg (*3). There may be slight differences between the SAR levels for each product, but they all satisfy the limit.
The actual SAR of this mobile phone while operating can be well below that indicated above. This is due to automatic changes to the power level of the device to ensure it only uses the minimum required to reach the network. Therefore in general, the closer you are to a base station, the lower the power output of the device.
This mobile phone can be used in positions other than against your head. Please keep the mobile phone farther than 1.5 cm away from your body by using such as a carrying case or a wearable accessory without including any metals. This mobile phone satisfies the technical regulations and international guidelines.
The World Health Organization has stated that “a large number of studies have been performed over the last two decades to assess whether mobile phones pose a potential health risk. To date, no adverse health effects have been established as being caused by mobile phone use.”
Please refer to the WHO website if you would like more detailed information.
http://www.who.int/docstore/peh-emf/publications/facts_press/fact_english.htm
Please refer to the websites listed below if you would like more detailed information regarding SAR.
Ministry of Internal Affairs and Communications Website:
http://www.tele.soumu.go.jp/e/sys/ele/index.htm
Association of Radio Industries and Businesses Website:
http://www.arib-emf.org/01denpa/denpa02-02.html (in Japanese only)
NTT DOCOMO, INC. Website:
https://www.nttdocomo.co.jp/english/product/sar/
SHARP Corporation Website:
http://k-tai.sharp.co.jp/support/sar/ (in Japanese only)
*1 Technical regulations are defined by the Ministerial Ordinance Related to Radio Law (Article 14-2 of Radio Equipment Regulations).
*2 Including other radio systems that can be simultaneously used with LTE/FOMA.
*3 Including other radio systems that can be simultaneously used with LTE/FOMA.
European RF Exposure Information
Your mobile device is a radio transmitter and receiver. It is designed not to exceed the limits for exposure to radio waves recommended by international guidelines. These guidelines were developed by the independent scientific organization ICNIRP and include safety margins designed to assure the protection of all persons, regardless of age and health.
The guidelines use a unit of measurement known as the Specific Absorption Rate, or SAR. The SAR limit for mobile devices is 2 W/kg and the highest SAR value for this device when tested at the ear is 0.549 W/kg and when worn on the body is 1.300 W/kg . For body-worn operation, this mobile device has been tested and meets the RF exposure guidelines when used with an accessory containing no metal and positioning the handset a minimum of 5 mm from the body. Use of other accessories may not ensure compliance with RF exposure guidelines.
As SAR is measured utilizing the devices highest transmitting power the actual SAR of this device while operating is typically below that indicated above. This is due to automatic changes to the power level of the device to ensure it only uses the minimum level required to reach the network.
* The tests are carried out in accordance with international guidelines for testing.
Declaration of Conformity

Hereby, SHARP CORPORATION declares that the radio equipment type SH-02J is in compliance with Directive 2014/53/EU.
The full text of the EU declaration of conformity is available at the following internet address:
http://www.sharp.co.jp/k-tai/ (in Japanese only)
Manufacturer's Address:
Sharp Corporation, IoT Communication BU
2-13-1 Iida Hachihonmatsu
Higashihiroshima-City
Hiroshima,
739-0192
Japan
● Description of accessories
| Headset, Handsfree Φ | 3.5 audio jack, Bluetooth. |
| Micro USB cable For charging, peripherals, etc. | |
| microSD Card microSD/microSDHC/microSDXC | |
| nano UIM card | DOCOMO SIM card/non-DOCOMO SIM cards non-DOCOMO SIM cards can be used after SIM-unlocking the handset. |
● Frequency range of supported bands in EU
| GSM 900 | Tx 880.2 to 914.8 MHzRx 925.2 to 959.8 MHz |
| DCS 1800 | Tx 1710.2 to 1784.8 MHzRx 1805.2 to 1879.8 MHz |
| WCDMA FDD I | Tx 1922.4 to 1977.6 MHzRx 2112.4 to 2167.6 MHz |
| LTE Band 1 | Tx 1922.5 to 1977.5 MHzRx 2112.5 to 2167.5 MHz |
| LTE Band 3 | Tx 1710.7 to 1784.3 MHzRx 1805.7 to 1879.3 MHz |
| Bluetooth | Tx 2402 to 2480 MHzRx 2402 to 2480 MHz |
| WLAN 2.4 GHz | Tx/Rx 2412 to 2472 MHz (Bandwidth: 20 MHz only) |
| NFC Tx/Rx 13.56 MHz | |
| GPS Rx L1 (1575.42 MHz) | |
● ● Maximum transmit power
| GSM 900 +33 dBm (Power Class4) | |
| DCS 1800 +30 dBm (Power Class1) | |
| WCDMA FDD I +24 dBm (Power Class3) | |
| LTE Band 1 | +23 dBm (Power Class3) |
| LTE Band 3 | +23 dBm (Power Class3) |
| Bluetooth +4.3 dBm (Power Class1) | |
| WLAN 2.4 GHz | +11.0 dBm |
| NFC -10 dBμA/m at 10 | m |
Volume level caution

To prevent possible hearing damage, do not listen at high volume levels for long periods.
Earphone Signal Level
The maximum output voltage for the music player function, measured in accordance with EN 50332-2, is 121.0 mV.
FCC Notice
● ● This device complies with part 15 of the FCC Rules. Operation is subject to the following two conditions:
(1) This device may not cause harmful interference, and (2) this device must accept any interference received, including interference that may cause undesired operation.
- Changes or modifications not expressly approved by the manufacturer responsible for compliance could void the user's authority to operate the equipment.
Information to User
This equipment has been tested and found to comply with the limits of a Class B digital device, pursuant to Part 15 of the FCC Rules.
These limits are designed to provide reasonable protection against harmful interference in a residential installation. This equipment generates, uses and can radiate radio frequency energy and, if not installed and used in accordance with the instructions, may cause harmful interference to radio communications.
However, there is no guarantee that interference will not occur in a particular installation; if this equipment does cause harmful interference to radio or television reception, which can be determined by turning the equipment off and on, the user is encouraged to try to correct the interference by one or more of the following measures:
- Reorient/relocate the receiving antenna.
- Increase the separation between the equipment and receiver.
-
Connect the equipment into an outlet on a circuit different from that to which the receiver is connected.
-
Consult the dealer or an experienced radio/TV technician for help.
FCC RF Exposure Information
Your handset is a radio transmitter and receiver.
It is designed and manufactured not to exceed the emission limits for exposure to radio frequency (RF) energy set by the Federal Communications Commission of the U.S. Government.
The guidelines are based on standards that were developed by independent scientific organizations through periodic and thorough evaluation of scientific studies. The standards include a substantial safety margin designed to assure the safety of all persons, regardless of age and health.
The exposure standard for wireless handsets employs a unit of measurement known as the Specific Absorption Rate, or SAR. The SAR limit set by the FCC is 1.6 W/kg.
The tests are performed in positions and locations (e.g., at the ear and worn on the body) as required by the FCC for each model. The highest SAR value for this model handset when tested for use at the ear is 0.76 W/kg and when worn on the body, as described in this user guide, is 0.82 W/kg.
For body worn operation, this phone has been tested and meets the FCC RF exposure guidelines. Please use an accessory designated for this product or an accessory which contains no metal and which positions the handset a minimum of 1.5 cm from the body. The use of accessories that do not satisfy these requirements may not comply with FCC RF exposure requirements, and should be avoided.
The FCC has granted an Equipment Authorization for this model handset with all reported SAR levels evaluated as in compliance with the FCC RF emission guidelines. SAR information on this model handset is on file with the FCC and can be found under the Display Grant section of http://transition.fcc.gov/oet/ea/fccid/ after searching on FCC ID APYHRO00242.
Additional information on Specific Absorption Rates (SAR) can be found on the FCC website at http://www.fcc.gov/encyclopedia/radio-frequency-safety.
FCC ID Location
The device is electronically labeled and the FCC ID can be displayed via the About phone & the Authentication under the Settings menu.
Export Administration Regulations
The Japan Export Administration Regulations (“Foreign Exchange and Foreign Trade Act” and its related laws) may be applied to this product and its accessories under certain conditions. The Export Administration Regulations may also be applied. To export or reexport the handset and its accessories, conduct all legally required procedures at your own risk and expense. For details on the procedures, contact the Ministry of Economy, Trade and Industry or the US Department of Commerce.
Intellectual Property Right
Copyrights and rights of portrait
- Data with third party copyrights such as text, images, music and software that is downloaded via Internet websites, acquired by TV, video, etc. or shot by the handset cannot be duplicated, altered or publicly transmitted without rightful party's consent. Only duplicating, quoting, etc. for personal use are permitted under the Copyright Act.
Even if for personal use, filming and recording may be prohibited for stage performances, shows, exhibitions, etc.
Also, shooting another's image or posting another's image on Internet websites without his/her consent may constitute a violation of one's right to his/her image.
Registered trademarks and trademarks
- “FOMA”, “dメニュー”, “dmenu”, “dmarket”, “おサイフケータイ”, “ToruCa”, “mopera U”, “i-αppli”, “i-mode”, “iD”, “WORLD WING”, “WORLD CALL”, “i コンシェル”, “sp-mode”, “Xi”, “e トリセツ”, “しゃべってコンシェル”, “フォトコレクション”, “LIVE UX”, the “ToruCa” logo, the “iD” logo, the “i-concier” logo, the “Osaifu-Keitai” logo, the “Area Mail” logo, the “docomo Anshin Scan” logo, the “docomo voicemail” logo, the “docomo phonebook” logo, the “dmenu” logo, the “Anshin Enkaku Support” logo, the “Shabette-Concier” logo, the “My magazine” logo, the “データ保管BOX” logo, the “Hanashite Hon'yaku” logo, the “dmarket” logo and the “フォトコレクション” logo are trademarks or registered trademarks of NTT DOCOMO, INC.
- “Catch Phone (Call waiting service)” is a registered trademark of Nippon Telegraph and Telephone Corporation.
- Microsoft Windows®, Windows Media® and Windows Vista® are trademarks or registered trademarks of Microsoft Corporation in the United States and/or other countries.
- Oracle and Java are registered trademarks of Oracle and/or its affiliates.
Other names may be trademarks of their respective owners.
- QR code is a registered trademark of Denso Wave Inc.
- microSD Logo, microSDHC Logo and microSDXC Logo are trademarks of SD-3C, LLC.


- ● The handset features LCFONT, developed by Sharp Corporation, to make the LCD easier to view and read. LCフォント/LCFONT and are registered trademarks of Sharp Corporation.
- OBEX is a trademark of Infrared Data Association®.
● ● 2 is a registered trademark of FeliCa Networks, Inc.
- ● FeliCa is a contactless IC card technology developed by Sony Corporation. FeliCa is a registered trademark of Sony Corporation.
● The Bluetooth word mark and logos are owned by the Bluetooth SIG, INC. and any use of such marks by NTT DOCOMO, INC. is under license. Other trademarks and trade names are those of their respective owners.
- Wi-Fiis a registered trademark of Wi-Fi Alliance®.
- Wi-Fi Direct™, Miracast™, Wi-Fi Protected Setup™ and Wi-Fi Protected Setup logo are trademarks of Wi-Fi Alliance®.
The Wi-Fi Protected Setup Mark is a mark of the Wi-Fi Alliance.
- Facebook and Facebook logo are trademarks or registered trademarks of Facebook, Inc.
- ● Instagram is a trademark of Instagram, LLC in the United States and elsewhere.
- ● Twitter and Twitter logo are trademarks or registered trademarks of Twitter, Inc.
- ● This product includes software developed by the OpenSSL Project for use in the OpenSSL Toolkit. (http://www.openssl.org/)
- ● This product includes cryptographic software written by Eric Young (eay@cryptsoft.com)
- iWnn of OMRON SOFTWARE Co., Ltd. is used for conversion methods for Japanese language, and for phrase prediction methods for English.
iWnn © OMRON SOFTWARE Co., Ltd. 2008-2016 All Rights Reserved.
iWnn IME © OMRON SOFTWARE Co., Ltd. 2009-2016 All Rights Reserved.
- Qualcomm aptX is a product of Qualcomm Technologies International, Ltd.
Qualcomm is a trademark of Qualcomm Incorporated, registered in the United States and other countries, used with permission. aptX is a trademark of Qualcomm Technologies International, Ltd., registered in the United States and other countries, used with permission. - VoiceText of HOYA Service Corporation is used for speech synthesis. VoiceText is a registered trademark of Voiceware co.,Ltd.
- Google, Google logo, Android, Google Play, Google Play logo, Gmail, Gmail logo, Google Calendar™, Google Calendar logo, Google Maps™, Google Maps logo, Google Chrome™, Google Chrome logo, Google Voice Search™, Google Voice Search logo, YouTube, YouTube logo, Google Drive, Google Drive logo, Google Now, Google Photos™ and Hangouts are trademarks of Google Inc.
- “AQUOS”, “EVER”, “Feel Home”, “VeilView”, “Bright Keep”, “NightCatch/ナイトキャッチ”, “フレーミングアドバイザー/FramingAdviser”, “エモパー/emopa”, “エモパーメモ”, “エモパーヘルスケア”, “エモパーク/emopark”, “エスショイン/S-Shoin”, “クリップナウ/Clip Now” “リラックスビュー/Relax View” and “AQUOS” logo are trademarks or registered trademarks of Sharp Corporation.
- ● All other company names and product names are trademarks or registered trademarks of the respective companies.
Others
● Under the MPEG-4 Visual Patent Portfolio License, customers have licensed permission for the following use of this product to engage in non-profit personal use. Other uses are not permitted.
■ ● Encoding MPEG-4 standard video (henceforth referred to as MPEG-4 video).
- Decoding an MPEG-4 video that a customer not engaged in personal commercial activities has encoded.
■ ● Decoding an MPEG-4 video obtained from a licensed provider. For details on other intended uses, contact MPEG LA, LLC.
- This product is licensed under the MPEG-4 Systems Patent Portfolio License for encoding in compliance with the MPEG-4 Systems Standard. An additional license and payment of royalties are necessary in the following cases.
■ ● Data stored or replicated in physical media which is paid for on a title by title basis.
■ ● Data which is paid for on a title by title basis and is transmitted to an end user for permanent storage and/or use.
Such additional license may be obtained from MPEG LA, LLC. Contact MPEG LA, LLC for additional details.
- This product is licensed under the AVC patent portfolio license for the personal and noncommercial use of a consumer to (i) encode video in compliance with the AVC standard (henceforth referred to as AVC video) and/or (ii) decode AVC video that was encoded by a consumer engaged in a personal and noncommercial activity and/or was obtained from a video provider licensed to provide AVC video. No license is granted or shall be implied for any other use. Additional information may be obtained from MPEG LA, L.L.C.
See http://www.mpegla.com
- This product is licensed under the VC-1 Patent Portfolio License for the personal and noncommercial use of a consumer to (i) encode video in compliance with the VC-1 standard (henceforth referred to as VC-1 video) and/or (ii) decode VC-1 video that was encoded by a consumer engaged in a personal and noncommercial activity and/or was obtained from a video provider licensed to provide VC-1 video. No license is granted or shall be implied for any other use. Additional information may be obtained from MPEG LA, L.L.C. See http://www.mpegla.com
- MPEG Layer-3 audio coding technology licensed from Fraunhofer IIS and Thomson.
- Content owners use Microsoft PlayReady content access technology to protect their intellectual property, including copyrighted content. This device uses PlayReady technology to access PlayReady-protected content and/or WMDRM-protected content. If the device fails to properly enforce restrictions on content usage, content owners may require Microsoft to revoke the device's ability to consume PlayReady-protected content. Revocation should not affect unprotected content or content protected by other content access technologies. Content owners may require you to upgrade PlayReady to access their content. If you decline an upgrade, you will not be able to access content that requires the upgrade.
- ● The abbreviations of operating systems (Japanese versions) below are used in this manual.
■ Windows 10 stands for Microsoft®Windows® 10 (Home, Pro, Enterprise and Education).
■ Windows 8.1 stands for Microsoft®Windows® 8.1, Microsoft® Windows® 8.1 Pro and Microsoft® Windows® 8.1 Enterprise.
■ Windows 7 stands for Microsoft®Windows® 7 (Starter, Home Basic, Home Premium, Professional, Enterprise and Ultimate).
- Windows Vista stands for Windows Vista®(Home Basic, Home Premium, Business, Enterprise and Ultimate).
Open source software
- This product includes software based on GNU General Public License (GPL), GNU Lesser General Public License (LGPL) and other licenses.
For details on licenses of related software, in the home screen, [ ] ▶ [Settings] ▶ [About phone] ▶ [Legal information] ▶ [Open source licenses]. - Source codes of software based on GPL, LGPL and Mozilla Public License (MPL) can be referred to on the following website for free. For details, refer to the following website. http://k-tai.sharp.co.jp/support/developers/oss/ (in Japanese only)
Unlocking SIM lock
- The handset can unlock the SIM lock. Unlock the SIM lock to use non-DOCOMO SIM cards.
- Some services, functions, etc. may be unavailable. DOCOMO shall not guarantee any operation of the handset.
- ● For details on the procedure of unlocking SIM lock, refer to the DOCOMO website.
1 Insert another carrier's SIM card
- For details on how to insert/remove the SIM card (P. 15 "docomo nano UIM card")
2 Turn the power on
3 Enter the SIM unlock code ▶ [Unlock]
Numerics
3G/GSM 82
4G/3G/GSM(Auto)....82
A
About basic operation 66
About Chrome 49
About phone 74
About you 66
Access Point Names 69
Accessibility Setting Chrome 49
Settings 74
Accessibility shortcut.... 74
Add account Setting Email 46 Setting Gmail 47
Add Location Information 54
Adding contacts to phonebook 41
Adding VPN....81
Addr.book pic backup 73
Adjust image quality 64
Adjust sensitivity of sensor 74
Advanced settings.... 67
Airplane mode 68
Alarm Clock 58
Setting Schedule 59
Alarm volume 63
Album 55
Android Beam NFC communication 79
NFC/Osaifu-Keitai settings 52
Android security patch level 74
Android version 74
Anshin Enkaku Support. 87
Answer 40
Answer time setting. 39
Answering a call 37
Answering Memo List 39
Answering memo setting. 39
Answering message setting 39
Anti Flicker 54
App links 67
App list 32
App list screen layout 32
App notifications 63
Apps 67
Apps settings.... 67
Apps with usage access 70
Atokara Capture 56
Authentication 74
Auto capitalization 22
Auto cursor move 21
Auto space input 22
Auto timezone 74
Autofill forms 49
AUTO-GPS 69
Automatic brightness. 64
Automatic conversion 84
Automatic date & time 74
Automatic restore 72
Auto-rotate screen....74
Available services overseas 82
Avoid poor connections. 25
B
Back up my data 72
Backing up to/Restoring from a microSD Card 62
Backing up to/Restoring from Data Storage Box 62
Backing up/Restoring phonebook 43
Backing up/Restoring the home screen 34
Backup & reset. 72
Backup account 72
Baseband version 74
Basic operation 18
Batch change lock screen/ home application. 29
Battery 67
Battery & energy saving.... 67
Battery level to switch 67
Battery optimization 30
Beautiful Skin Effect. 54
Beep tone. 48
Before use overseas 82
Before using camera 52
Beginning prediction for mail 22
Bleach bypass 55
Bluetooth function 77
Bluetooth tethering.... 25
Bookmark. 49
Bright Keep 65
Brighten while charging 64
Brightness level 64
Build number 74
C
Calculator....60
Call Call.... 36 Suguden setting.... 40
Call forwarding service.... 40
Call forwarding service (charges apply) 84
Call mode setting 69
Call notification.... 40
Call ranking 40
Call settings/Other 39
Call waiting. 40
Caller ID display request service 40
Caller ID notification. 40
Caller ID notification request service (charges apply) 84
Camera Reader 55
Camera settings. 54
Captions. 74
Cellular networks 69
Change Kisekae. 31
Change SIM PIN 72
Change wallpaper 31
Changing kisekae 31
Changing screen display to English. 23
Changing wallpapers 31
Character entry 20
Charging Charging .... 16
Illumination....64
PC connection 80
Charging with AC adapter/DC adapter 17
Charging with Micro USB Cable 01 17
Check screen image and beep tone 48
Checking after homecoming 84
Checking/Using phonebook 42
Chrome 48
Clear credentials 70
Clear learning dictionary 22
Clip Now Clip Now 65
Useful 65
Clipped whites/Crushed shadows 54
Clock 58
Cloud setting 59
Color correction.... 74
Color inversion 74
Confirmation screen at first activation of apps 30
Connecting VPN 81
Contacting docomo 41
Contacts name collaboration.... 22
Contents 1
Contents Manager.... 76
Convenient tool 61
Country code....84
Create folder 31
Current Keyboard 72
D
d ACCOUNT setting 69
Darkening while sleeping 64
Data enabled. 69
Data import 73
Data roaming....82
Data Saver 49
Data Transfer 62
Data transfer 73
Data usage 68
Date & time Settings 74
Settings for use overseas 83
Daydream 64
Default Apps 67
Default notification ringtone.... 63
Delete All. 65
Delete key behavior 21
Delete old messages. 45
Deleting Early Warning "Area Mail" 48
Deleting mail 46
Deleting message 44
Deleting outgoing/incoming call history. 39
Deleting phonebook 42
Deleting thread Gmail.... 47
SMS 44
Delivery reports 45
Density setting. 64
Device administrators 70
Dialpad touch tones 39
Dictionary 61
Disable secret mode temporarily.... 70
Disable Suguden during roaming 40
Disabling PIN lock 72
Disconnect 40
Disconnecting VPN 81
Display 64
Display left percents of Battery 64
Display share options 65
Display with simple Japanese 48
Displaying all apps 35
Displaying mail Email 45
Gmail.... 46
Displaying message 44
Displaying websites. 48
Displaying/Hiding data 55
Distortion Correction 54
dmarket 50
dmenu 50
Do not disturb.... 63
Do Not Disturb access 63
docomo apps management 69
docomo apps password 69
docomo cloud....69
docomo Data Copy 62
docomo location information 69
docomo mail. 44
docomo nano UIM card 15
docomo service initial settings 69
docomo service/cloud 69
Download dictionary.... 22
Downward slide 22
Draw over other apps. 67
E
Early Warning "Area Mail" 47
Easy Auto. 55
Easy Manual 53
Editing phonebook 42
Email 45
Emergency call 37
Emergency mode.... 20
Emoji/Symb/:) continuous input 21
Emoji/Symbol list rows 21
EMOPA 66
EMOPA memo 66
Encrypt phone 69
Encrypting/Decrypting microSD Card 68
Energy saving 67
English guidance 40
Entering characters 22
Entering touch-tone signals 36
Export Administration Regulations.... 93
F
FAQ 66
File transfers 80
Fingerprint authentication 71
Fingerprint settings 69
Fireworks 55
First things first. 30
Flick sensitivity 21
Focus Setting 54
Font Settings 64
For incoming call 64
Formatting microSD Card/USB memory 68
Forwarding message 44
Framing Advisor.... 54
Function Information 54
Function information 73
G
General inquiries to DOCOMO 41
General settings Setting Email 46 Setting Gmail 47
Gmail 46
Google 74
Google Keyboard 72
Google Location History.... 69
Google voice typing 72
GPS/Navigation 57
GSM....82
Guide 70
Guide display speed 21
H
Hand Mirror 55
Handling precautions 8
Handover.... 25
Handset memory (internal storage).... 75
HDR 54
Health care of EMOPA 66
Help Clip Now 65
Common settings on shooting still pictures/videos ..... 54
Hide the name when receiving 40
High contrast text 74
History 49
Home applications Home applications.... 29
Settings 29
Home page 49
Home screen layout 31
Home screens 31
|
iD appli 52
Illumi pattern/color for incoming call 64
Illumination 64
Importing/Exporting phonebook 26
Incoming call notification while roaming 83
Incoming call notification while roaming (charges apply) ..... 84
Incoming call restriction while roaming 83
Incoming/Charging lamp 26
Information on apps 35
Initial screen 59
Initial settings EMOPA 66 Initial settings 23
Inquiries....83
Inquiries about loss, theft, etc. while overseas 41
Inquiries about malfunctions while overseas. 41
Inquiries to DOCOMO about malfunctions 41
Install certificates Detailed settings 25 Lock & security 70
Installing recommended apps 34
Intellectual Property Right 93
International call (WORLD CALL) 37
International Dial Assist. 84
International prefix.... 84
International Roaming 82
Internet conversion engine 22
IP address 25
ISO Sensitivity.... 54
K
KARADA MATE 60
Kernel version 74
Key input guide 21
Keyboard layout 21
Keyboard layouts 20
L
Language 72
Language & input 72
Large text 74
Leftward slide 22
Legal information.... 74
Let's Try! On/off with motion....65 ScrollAuto....65
Twist magic 19
Location 69
Lock & security. 69
Lock No.change 52
Lock screen message 69
Lock SIM card 72
M
MAC address 25
Machi-Chara display method 32
Machi-Chara setting. 31
Magnification gestures 74
Mail/Web Browser 44
Main specifications....90
Making a call 36
Making a call in your country of stay 83
Making a call outside your country of stay (including Japan)....83
Making a call to a WORLD WING subscriber overseas. 83
Making a call using International Dial Assist 83
Manage SIM card messages 45
Managing apps 34
Managing pages 32
Managing playlists 57
Managing the home screen 31
Maps 58
Media Player 56
Media volume. 63
Memo 60
Memories of EMOPA 66
Memory 68
Mic Setting 54
microSD Card (external storage) 75
MIDI 80
Mode 69
Model number 74
Modify system settings. 67
Moji-Henshu. 72
Monochrome 55
More. 68
Mute, Reject. 40
My magazine 35
My profile 43
N
Network notification 25
Network operators 82
Network service Call settings/Other 39
Setting international roaming 83
Network services (overseas) 84
Network settings rest 72
Next word guess 22
NFC communication 79
NFC Type setting 52
NFC/Osaifu-Keitai lock. 51
NFC/Osaifu-Keitai settings. 52
NightCatch Settings on shooting still pictures.... 54
Settings on shooting videos 54
Notification 64
Notification access 63
Notifications 45
Notify in status bar 65
Nuisance call blocking service 40
O
On/off with motion 65
One Touch Shutter.... 54
Open source licenses
Call settings/Other.... 39
docomo service/cloud 69
Operation during a call 38
Operation of touch panel.... 18
Operation while using function 19
Organize backup files 73
Osaifu-Keitai 50
Osusume hint 69
Other sounds.... 63
Outgoing/Incoming call history 39
Outline of international roaming (WORLD WING)....82
Overview of Energy saving 67
Overview of RelaxAuto 64
P
Part names and functions 14
Passpoint 25
PC connection.... 80
Perform at scheduled time (via Wi-Fi/Xi). 89
Perform now (only via Wi-Fi). 89
Personal dictionary 72
Phone ringtone
Call settings/Other. 39
Sound & notification 63
Phonebook 41
Photo transfer (PTP) 80
PHOTOSHOW (Web) 54
Picture Size 54
Play Store 50
Pointer speed 72
Power button ends call 74
Power off 18
Precautions 66
Precautions (ALWAYS FOLLOW THESE DIRECTIONS) ..... 4
Precautions about holding over the other device 51
Preferred network type 82
Prefix settings 39
Press power button twice for camera 64
Printing 74
Printing/Saving by print service.... 80
Privacy 49
Privacy policy 46
Profile 63
Profile setting 69
Proxy settings 68
Public mode (power OFF) settings 40
Purchasing apps 50
Q
Qualcomm® aptX™ 78
Quality mode 64
R
Reader/Writer, P2P 52
Reboot....18
Receive setting 48
Receiving a call overseas 83
Recent Apps 29
Refresh 78
Reject anonymous call 40
Reject call from pay phone 40
Reject call setting 40
Reject specified numbers call 40
Reject unknown call 40
Reject unregistered call. 40
Rejection SMS 39
Relax settings 64
RelaxAuto setting. 64
RelaxView 64
Remote Initialization Service 69
Remote operation (charges apply).... 84
Remote operation settings 40
Rename this device 78
Replying message 44
Replying/Forwarding mail
Email ...... 46
Gmail ...... 47
Reset facemark list 22
Reset Settings 54
Resetting all 73
Resetting an access point 24
Restore from backup data list 34
Restore the latest backup data 34
Rightward slide 22
Ring volume 63
Roaming guidance 83
Roaming guidance (charges apply) 84
Roaming settings 39
Romaji input assistance 21
S
Save data to microSD 73
Save passwords.... 49
Save To 54
Schedule 59
Screen display/Icons 26
Screen lock 69
Screen pinning 70
ScrollAuto. 65
Search engine 49
Searching information on the handset and websites ..... 20
Secrecy settings....70
Security codes used on the handset 70
Security key setting 69
Select an item for full manual shooting 54
Select EMOPA 66
Select time zone 74
Self check 66
Self-timer 54
Send device error information 69
Sending and receiving by Bluetooth 78
Sending of use information 40
Set Apps 65
Set contact secrecy 70
Set date 74
Set the default settings 22
Set time 74
Set up Wi-Fi hotspot 25
Setting an access point 24
Setting character entry....21
Setting Chrome 49
Setting Early Warning "Area Mail" 48
Setting Email 46
Setting genres 35
Setting Gmail 47
Setting international roaming 83
Setting menu 63
Setting Messaging 45
Setting to restrict operation 19
Setting up Google account etc. 25
Setting up mail account 25
Setting up SIM card lock 72
Settings for use overseas 82
SHCamera 52
Shooting screen layout 53
Shooting screenshot 19
Shooting still pictures 54
Shooting videos. 54
Show apps 31
Show received files 78
Show widgets 31
SHSHOW 55
Shutter Mode.... 54
Sign in to Chrome 49
Site settings.... 49
Sleep 64
Slide operation settings.... 65
Smart Lock 69
SMS 44
SMS Enabled 45
Software keyboard display setting 21
Software update 89
Sorting data.... 55
Sound 45
Sound & notification 63
Sound on key press 21
Speak passwords 74
Specific Absorption Rate (SAR) of Mobile Phones 91
Spell checker....72
S-Shoin 72
Starting day 59
Status 74
Stopwatch 59
Storage & USB 67
Storage type 70
Sub address settings. 39
Suguden setting 40
Switch by battery.... 67
Switch USB debugging 69
T
Tap & Pay 52
Tethering 25
Text message limit 45
Text-to-speech output
Accessibility....74
Language & input 72
Time Laps 55
Time settings
Illumination 64
Relax settings 64
Timer 59
"Today's schedule" setting 59
Toggle input 21
Topics of EMOPA 66
ToruCa 52
Touch & hold delay 74
Troubleshooting (FAQ) 85
Trust agents 70
Trusted credentials 70
Turn off by putting in pocket 65
Turn ON/OFF ScrollAuto. 65
Turn on/off Twist magic. 19
Turn screen on by holding. 65
Turning power on/off 18
Twist magic 19
Typing error correction 22
U
Unknown sources 70
Unlocking SIM lock 94
Update birthday data.... 59
Update conversion dictionary 22
Upward slide 22
USB host function 80
USB tethering 25
Use 24-hour format 74
Useful....65
User dictionary 22
Using Bluetooth function 78
Using GPS function 57
Using groups 43
Using "Kazashite-Link compatible services" 51
Using Osaifu-Keitai compatible handset 50
Using "Osaifu-Keitai compatible services" 51
Using the handset 3
Using the status panel 28
V
VeilView
Display 64
VeilView 64
Vibrate 45
Vibrate on key press 21
Vibrate on ring 39
Vibration time on key press 21
Vibrator pattern for incoming call 63
Vibrator when receiving a call 63
Video call 36
Video Size 54
View result screen 73
View with flip cover 65
Viewing articles 35
Viewing icons 26
Visible passwords 69
Voice input provider 21
Voice Memo List 39
Voice/Answering memo 39
Voicemail service 39
Voicemail service (charges apply) 84
Volume of EMOPA. 63
VPN 68
W
Wallpaper....64
Warranty and After-Sales Service 88
Water Level 54
Waterproof/Dustproof. 11
When decreasing display brightness 64
When device is locked 63
When device is rotated 64
When ending a call 64
When start charging.... 64
When unlocking 64
Wi-Fi Direct 25
Wi-Fi settings 24
Wi-Fi sleep policy.... 25
Wi-Fi tethering 25
Wi-Fi tethering Easy Connection 25
Wildcard prediction 22
Wireless output 80
Word prediction 22
WORLD CALL 37
World clock 59
WORLD WING. 82
Y
YouTube 58
Using mobile phone with your manners!
Please be considerate of those around you when using the handset.
Turn off your handset in the following places
■ ● When in an area where use is prohibited
When you are on an airplane or in a hospital, follow the instructions given by the respective airlines or medical facilities. Turn off the handset in areas where the use of mobile phones is prohibited.
Set Public Mode in the following places
■ ● While driving
Using the handset in hand while driving is regarded as a punishable act. However, some cases such as when rescuing sick and injured people or maintaining public safety are exempted.
- When in public places such as theaters, movie theaters or museums
Using the handset in public places where you should be quiet results in disturbing others.
Be aware of the place to use a mobile phone and the volume of your voice and ringtone
- Be aware of the volume of your voice when using the handset in quiet places such as restaurant and hotel lobby.
- Use in places where you do not block a passage in the town.
Be considerate of the privacy of the individuals around you
- Please be considerate of the privacy of individuals around you when taking and sending photos using camera-equipped device.
Do not use your smartphone while walking
■ Using your smartphone while walking on a platform of a train station, street, etc. may narrow your vision and cause a collision.
- Use your smartphone in a safe place after you stop walking.
These functions ensure manners in public
The handset has convenient functions such as setting not to answer a call and setting to mute sound of the handset.
● Manner mode (P. 28 "Manner mode")
Mutes sound of the handset.
※ However, the manner mode cannot mute camera shutter sound.
- Public Mode (Phone OFF) (P. 39 "Network service")
When a call is received, a message stating that you are in a place that does not allow the use of mobile phone is played and the call is automatically disconnected.
● Phone vibration (P. 63 "Sound & notification")
Notifies you of incoming call with vibration.
- Answering memo (P. 39 "Voice/Answering memo")
Records callers' messages when you cannot answer the call.
※ Additionally, optional services such as Voice Mail Service (P. 39 "Network service") and Call Forwarding Service (P. 39 "Network service") are available.

We collect your unnecessary mobile phones and other devices irrespective of carrier. Bring them to a docomo Shop near you.
※ Intended devices: Mobile phone, PHS, battery pack, charger and desktop holder (irrespective of carrier)
Carrying out various procedures, checking subscription, etc. online
- From the handset dメニュー (dmenu) ▶ My docomo (お客様サポート) (My docomo (support)) ▶ ドコモオンライン手続き (docomo online procedure) (in Japanese only)
- From a PC My docomo (https://www.nttdocomo.co.jp/mydocomo/) ▶ select an item on “ドコモオンライン手続き” (docomo online procedure) (in Japanese only)
※ You may not be able to access some website services due to system maintenance, the content of your subscription, etc.
※ "Network security code" or "ID/Password" is required to use "ドコモオンライン手続き" (docomo online procedure).
General Inquiries
(Business hours: 9:00 a.m. to 8:00 p.m.)

0120-005-250 (toll free)
※Service available in: English, Portuguese, Chinese, Spanish.
※Unavailable from part of IP phones.
(Business hours: 9:00 a.m. to 8:00 p.m. (open all year round))
■From DOCOMO mobile phones (In Japanese only)

(No prefix) 151 (toll free)
※ Unavailable from land-line phones, etc.
■From land-line phones (In Japanese only)

0120-800-000 (toll free)
※Unavailable from part of IP phones.
● Please confirm the phone number before you dial.
- For Applications or Repairs and After-Sales Service, please contact the above-mentioned information center or check the docomo Shop etc. near you on the NTT DOCOMO website and contact.
NTT DOCOMO website https://www.nttdocomo.co.jp/english/
Repairs
(Business hours: 24 hours (open all year round))
■From DOCOMO mobile phones (In Japanese only)

(No prefix) 113 (toll free)
※ Unavailable from land-line phones, etc.
■From land-line phones (In Japanese only)

0120-800-000 (toll free)
※ Unavailable from part of IP phones.
Inquiries from overseas (In case of loss, theft, unconnected, etc.)
(Business hours: 24 hours (open all year round))
■From DOCOMO mobile phones
Display “+” on the screen
-81-3-6832-6600 (toll free)
(to enter "+" , touch and hold "0".)
※ You can call using international call access code instead of “+”.
■From land-line phones
International call access code for the country you stay
-81-3-6832-6600 (charges apply)
※ You are charged a call fee to Japan.
※For international call access codes, refer to DOCOMO website.
● Please confirm the phone number before you dial.
- If you lose your handset or have it stolen, immediately take the steps necessary for suspending the use of the handset.
- If the handset you purchased is damaged, bring your handset to a repair counter specified by DOCOMO after returning to Japan.

Don't forget your mobile phone... or your manners!
When using your mobile phone in a public place, don't forget to show common courtesy and consideration for others around you.

危険です、歩きスマホ。

キケン! 水ぬれ充電
Sales: NTT DOCOMO, INC.
Manufacturer: SHARP Corporation
- INTRODUCTION
- CHECKING OPERATION METHOD
- BASIC PACKAGE
- CONTENTS
- BEFORE USING THE HANDSET
- DOCOMO LIVE UX
- CALL
- MAIL/WEB BROWSER
- APPS
- HANDSET SETTINGS
- FILE MANAGEMENT
- DATA COMMUNICATION
- EXTERNAL DEVICE CONNECTION
- INTERNATIONAL ROAMING
- APPENDIX/INDEX
- USING THE HANDSET
- PRECAUTIONS (ALWAYS FOLLOW THESE DIRECTIONS)
- HANDLING THE HANDSET, ADAPTERS AND DOCOMO NANO UIM CARD (GENERAL)
- DANGER
- WARNING
- CAUTION
- HANDLING DOCOMO NANO UIM CARD
- HANDLING NEAR ELECTRONIC MEDICAL EQUIPMENT
- MATERIAL LIST
- HANDLING PRECAUTIONS
- GENERAL NOTES
- NOTES ABOUT THE HANDSET
- NOTES ABOUT ADAPTERS
- NOTES ABOUT DOCOMO NANO UIM CARD
- NOTES ON USING BLUETOOTH FUNCTION
- NOTES ABOUT WIRELESS LAN (WLAN)
- VOLUNTARY CONTROL FOR RADIO WAVE INTERFERENCE
- FELICA AND NFC READER/WRITER
- WATERPROOF/DUSTPROOF
- WHAT YOU CAN DO WITH WATERPROOF/DUSTPROOF OF SH-02J
- THINGS TO KEEP IN MIND
- PRECAUTIONS
- DRAINING WATER WHEN THE HANDSET GETS WET
- CHARGING
- PART NAMES AND FUNCTIONS
- DOCOMO NANO UIM CARD AND MICROSD CARD COVER
- DOCOMO NANO UIM CARD SLOT
- MICROSD CARD SLOT
- FRONT CAMERA
- EARPIECE/SPEAKER
- PROXIMITY SENSOR/BRIGHTNESS SENSOR
- DISPLAY/TOUCH PANEL
- INCOMING/CHARGING LAMP
- (+)//(-): VOLUME UP/DOWN KEY
- (●): POWER KEY
- FINGERPRINT SENSOR
- STRAP HOLE
- BACK CAMERA
- EARPHONE/MICROPHONE TERMINAL
- MOBILE LIGHT
- MARK
- EXTERNAL CONNECTION JACK
- MOUTHPIECE/MICROPHONE
- LTE/FOMA ANTENNA
- GPS ANTENNA
- WI-FI/BLUETOOTH ANTENNA
- MICROPHONE
- EARPHONE/MICROPHONE
- DOCOMO NANO UIM CARD
- A DOCOMO NANO UIM CARD IS AN IC CARD THAT RECORDS PERSONAL INFORMATION, SUCH AS YOUR PHONE NUMBER
- INSERTING DOCOMO NANO UIM CARD
- OPEN THE DOCOMO NANO UIM CARD AND MICROSD CARD COVER
- REMOVE THE TRAY FROM THE DOCOMO NANO UIM CARD SLOT
- HOLD THE DOCOMO NANO UIM CARD WITH THE IC (GOLD) SIDE TURNED UP AND SET IT ON THE TRAY
- INSERT THE TRAY SLOWLY INTO THE DOCOMO NANO UIM CARD SLOT
- CLOSE THE DOCOMO NANO UIM CARD AND MICROSD CARD COVER
- IMEI PLATE
- INTERNAL BATTERY USABLE LIFE
- AC ADAPTER AND DC ADAPTER
- CHARGING WITH AC ADAPTER/DC ADAPTER
- [READ THE USER'S GUIDES OF AC ADAPTER 05 (SOLD SEPARATELY) AND DC ADAPTER 04 (SOLD SEPARATELY)]
- INSERT THE MICROUSB PLUG OF THE AC ADAPTER/DC ADAPTER HORIZONTALLY INTO THE EXTERNAL CONNECTION JACK ON THE HANDSET WITH THE SIDE MARKED WITH "B" TURNED UP
- WHEN USING A DC ADAPTER
- CHARGING WITH MICRO USB CABLE
- TURNING POWER ON/OFF
- TURNING POWER ON
- (FOR AT LEAST 2 SECONDS)
- TURNING POWER OFF/REBOOT/EMERGENCY MODE
- ⏻(⊕) (FOR AT LEAST 1 SECOND)
- SELECT AN ITEM
- TURNING DISPLAY ON/OFF
- TOUCH PANEL LOCK
- OPERATIONS IN TOUCH PANEL LOCK SCREEN
- BASIC OPERATION
- OPERATION OF TOUCH PANEL
- CAUTIONS WHEN USING THE TOUCH PANEL
- TOUCH
- TOUCH AND HOLD
- SLIDE (SWIPE)/DRAG
- FLICK
- PINCH OUT/PINCH IN
- OPERATION WHILE USING FUNCTION
- NAVIGATION KEYS
- ◀/▽: BACK KEY/CLOSE KEY
- O: HOME KEY
- RECENT APPS KEY
- USING USER-AID FUNCTION
- TOUCH AND HOLD [O]
- RETRIEVING MENU
- EXAMPLE: APP LIST SCREEN
- SWITCHING THE SETTINGS
- EXAMPLE: CALL SETTINGS SCREEN, CELLULAR NETWORK SETTINGS SCREEN
- VERTICAL/HORIZONTAL DISPLAY
- SHOOTING SCREENSHOT
- TWIST MAGIC
- IN THE HOME SCREEN, [ ] ▶ [SETTINGS] ▶ [USEFUL] ▶ [TWIST MAGIC]
- USING TWIST MAGIC
- SWITCHING APPS
- THE SECOND USAGE HISTORY ITEM
- THE TOP USAGE HISTORY ITEM
- EMERGENCY MODE
- SEARCHING INFORMATION ON THE HANDSET AND WEBSITES
- ENTER THE KEYWORD
- SEARCH BOX
- SWITCH TO VOICE SEARCH
- SELECT THE SEARCH RESULT
- CHARACTER ENTRY
- KEYBOARD LAYOUTS
- SHIFT KEY
- ②INPUT MODE SWITCHING KEY
- DELETE KEY
- ENTER KEY
- SYMBOL KEY
- KATAKANA AND ALPHABET KEY
- UNDO KEY
- SETTING KEY
- SPACE KEY
- CONVERSION KEY
- CURSOR KEY
- MOVE POSITION
- KATAKANA AND ALPHANUMERIC KEY
- REVERSE TOGGLE KEY
- CHARACTER SWITCHING KEY
- SWITCHING KEYBOARDS
- SETTING CHARACTER ENTRY
- DISPLAY/LAYOUT
- INPUT ASSISTANCE
- [DELETE KEY BEHAVIOR]
- CONVERSION
- IN THE CHARACTER ENTRY SCREEN, [ ] [OTHER SETTINGS] ▶ [CONVERSION]
- [AUTO CAPITALIZATION]
- DICTIONARY
- IN THE CHARACTER ENTRY SCREEN, [9][OTHER SETTINGS] ▶ [DICTIONARY]
- SLIDE OPERATION
- IN THE CHARACTER ENTRY SCREEN, [ ] [OTHER SETTINGS] ▶ [SLIDE OPERATION]
- RESET
- IN THE CHARACTER ENTRY SCREEN, [ ] [OTHER SETTINGS] ▶ [RESET]
- ENTERING CHARACTERS
- EXAMPLE: WHEN ENTERING “文字
- IN THE CHARACTER ENTRY SCREEN, ENTER “もじ
- CONVERSION CANDIDATES FIELD
- [CONVERT]
- IN THE CONVERSION CANDIDATES FIELD, SELECT “文字
- RANGE REDUCTION/RANGE ENLARGEMENT
- CLOSE
- DETERMINE
- PREDICTIVE CANDIDATES
- CONVERSION CANDIDATES
- KATAKANA AND ALPHANUMERIC
- WILDCARD PREDICTION
- CHANGING SCREEN DISPLAY TO ENGLISH
- INITIAL SETTINGS
- SETTING AN ACCESS POINT
- CHECKING AN ACCESS POINT IN USE
- SETTING ADDITIONAL ACCESS POINTS
- RESETTING AN ACCESS POINT
- WI-FI SETTINGS
- RADIO INTERFERENCE WITH BLUETOOTH DEVICES
- DISCONNECTING
- TETHERING
- [USB TETHERING]
- [WI-FI TETHERING]
- [SET UP WI-FI HOTSPOT]
- SETTING UP MAIL ACCOUNT
- SETTING UP GOOGLE ACCOUNT ETC
- SYNCHRONIZING DATA
- WHEN SYNCHRONIZING AUTOMATICALLY
- IN THE HOME SCREEN, [ ] ▶ [SETTINGS] ▶ [ACCOUNTS]
- [☐]▶[AUTO-SYNC DATA]▶[OK]
- WHEN SYNCHRONIZING MANUALLY
- IMPORTING/EXPORTING PHONEBOOK
- SCREEN DISPLAY/ICONS
- VIEWING ICONS
- MAIN NOTIFICATION ICON LIST
- MAIN STATUS ICON LIST
- USING THE STATUS PANEL
- DRAG THE STATUS BAR DOWN WITH YOUR TWO FINGERS AT THE SAME TIME
- USE THE STATUS PANEL
- BRIGHTNESS ADJUSTING BAR
- FUNCTION BUTTON
- DETAILED INFORMATION ON NOTIFICATIONS
- CLEAR ALL
- NETWORK OPERATOR
- BATTERY LEVEL
- CUSTOMIZE OF FUNCTION BUTTON
- SETTINGS
- MANNER MODE
- [MANNER MODE]
- TYPE OF MANNER MODE
- EXPLANATION OF OPERATIONS
- DURATION UNTIL DISABLING MANNER MODE
- MORE SETTINGS
- MANNER MODE SETTING
- CUSTOMIZE
- DONE
- RECENT APPS
- [☐]
- USE A HISTORY ITEM
- APP USAGE HISTORY ITEM
- ②SCREEN PINNING
- DELETE HISTORY ITEM
- TOOLS
- SHRINKSCREEN
- MAGNIFIER
- HOME APPLICATIONS
- SWITCH LOCK SCREENS OR HOME APPS TO USE
- IN THE HOME SCREEN, [ ] ▶ [SETTINGS] ▶ [HOME APPLICATIONS]
- CONFIRMATION SCREEN AT FIRST ACTIVATION OF APPS
- FIRST THINGS FIRST
- EXAMPLE: ACTIVATING ALBUM
- BATTERY OPTIMIZATION
- HOME SCREEN
- HOME SCREEN LAYOUT
- MACHI-CHARA
- APP
- INDICATOR
- APP BUTTON
- WIDGET
- FOLDER
- MY MAGAZINE BUTTON
- QUICK MENU
- MANAGING THE HOME SCREEN
- SETTING THE HOME SCREEN
- TOUCH AND HOLD THE HOME SCREEN
- MOVING APPS ETC
- DRAG IT TO THE DESTINATION
- RESTORING APPS TO THE APP LIST SCREEN
- DELETING WIDGETS ETC
- DRAG IT TO [REMOVE FROM HOME]
- UNINSTALLING APPS
- RENAMING FOLDERS
- SETTING QUICK MENU
- CHANGING KISEKAE
- CHANGING WALLPAPERS
- TOUCH AND HOLD THE HOME SCREEN ▶ [CHANGE WALLPAPER]
- SELECT DATA ▶ [OK]
- MACHI-CHARA DISPLAY METHOD
- TOUCH AND HOLD THE HOME SCREEN ▶ [MACHI-CHARA SETTING]
- IN THE HOME SCREEN, PINCH IN
- [+]
- SORTING PAGES
- TOUCH AND HOLD A THUMBNAIL
- DELETING PAGES
- [×]
- APP LIST SCREEN
- APP LIST SCREEN LAYOUT
- LIST OF APP
- APPS TAB
- WIDGETS TAB
- WALLPAPERS TAB
- RECOMMENDS BUTTON
- APP LIST
- MANAGING APPS
- MOVING APPS TO THE HOME SCREEN
- INSTALLING RECOMMENDED APPS
- BACKING UP/RESTORING THE HOME SCREEN
- DISPLAYING ALL APPS
- MY MAGAZINE
- SETTING GENRES
- VIEWING ARTICLES
- INFORMATION ON APPS
- MAKING A CALL
- IN THE HOME SCREEN, [ ]▶ [DIAL]
- ENTER A PHONE NUMBER
- FAVORITES
- DELETE
- REGISTER
- DIAL
- OUTGOING/INCOMING CALL HISTORY
- PHONEBOOK
- [ ]
- [END CALL] TO END THE CALL
- VOLTE
- ENTERING TOUCH-TONE SIGNALS
- ADDING 2 SECONDS PAUSE
- ADDING WAIT
- VIDEO CALL
- EMERGENCY CALL
- INTERNATIONAL CALL (WORLD CALL)
- WORLD CALL IS AN INTERNATIONAL CALLING SERVICE AVAILABLE FROM DOCOMO DEVICES IN JAPAN
- [CALLING METHOD]
- ANSWERING A CALL
- WHEN A CALL IS RECEIVED, THE RINGTONE SOUNDS AND THE INCOMING LAMP FLASHES
- ANSWER THE CALL
- REJECT
- REJECT CALL WITH SMS
- ACCEPT
- ACCEPT VOICE
- ACCEPT VIDEO
- ANSWERING A CALL WHILE DISPLAY IS TURNED ON
- WHEN A CALL IS RECEIVED, THE INCOMING NOTIFICATION IS DISPLAYED AT THE TOP OF THE SCREEN
- [ACCEPT]
- ANSWERING A VIDEO CALL WITHOUT SENDING YOUR OWN IMAGE
- WHEN A VIDEO CALL IS RECEIVED, THE RINGTONE SOUNDS AND THE INCOMING LAMP FLASHES
- IN THE INCOMING VIDEO CALL SCREEN, [ ]▶ [CAMERA OFF RESPONSE]
- OPERATION DURING A CALL
- VOICE MEMO
- DELETING OUTGOING/INCOMING CALL HISTORY
- VOICE/ANSWERING MEMO
- CALL SETTINGS/OTHER
- [SUB ADDRESS SETTINGS]
- NETWORK SERVICE
- REJECT CALL SETTING
- [REJECT UNREGISTERED CALL]
- SUGUDEN SETTING
- [ANSWER]
- [DISCONNECT]
- [CALL]
- [MUTE, REJECT]
- CONTACTING DOCOMO
- ADDING CONTACTS TO PHONEBOOK
- CHECKING/USING PHONEBOOK
- DELETING PHONEBOOK
- EDITING PHONEBOOK
- USING GROUPS
- MY PROFILE
- BACKING UP/RESTORING PHONEBOOK
- DOCOMO MAIL
- IN THE HOME SCREEN, [ ]
- SMS
- IN THE HOME SCREEN, [ ]▶ [MESSAGING]
- [三]
- ENTER THE DESTINATION AND MESSAGE ▶ [▶]
- DISPLAYING MESSAGE
- IN THE HOME SCREEN, [ ] ▶ [MESSAGING]
- SELECT A THREAD
- IMAGE
- DESTINATION/SENDER
- CHECK THE MESSAGE
- REPLYING MESSAGE
- FORWARDING MESSAGE
- DELETING MESSAGE
- DELETING THREAD
- SETTING MESSAGING
- [☐] ▶ [SETTINGS]
- [SMS ENABLED]
- [DELIVERY REPORTS]
- ACCOUNT
- DESTINATION
- SUBJECT
- MESSAGE
- ADD DESTINATIONS
- FILE ATTACHMENT
- [>]
- ATTACHING FILE
- DISPLAYING MAIL
- IN THE HOME SCREEN, [ ]▶ [EMAIL]
- SELECT A MAIL
- MAILS
- MAIL SEARCH
- STAR ICON
- NEWLY COMPOSE MAIL
- CHECK THE MAIL
- SENDER/DESTINATION
- DATE AND TIME OF RECEPTION
- ATTACHED FILE
- MENU OF EACH MAIL
- REPLY
- UNREAD
- REPLYING/FORWARDING MAIL
- [←]
- COMPOSE A MAIL
- REPLY TYPE
- QUOTE TEXT
- MAIL OF SENDER
- RESPOND INLINE
- [> ]
- DELETING MAIL
- [☐] ▶ [OK]
- SETTING EMAIL
- IN THE HOME SCREEN, [ ] ▶ [EMAIL]
- [←] ▶ [SETTINGS]
- GMAIL
- YOU CAN USE A MAIL SERVICE PROVIDED BY GOOGLE OR EMAIL PROVIDED BY GENERAL SERVICE PROVIDERS
- IN THE HOME SCREEN, SELECT "GOOGLE" FOLDER ▶ [GMAIL]
- [●]
- BOX NAME/LABEL NAME BEING DISPLAYED
- THREADS
- SETTING GMAIL
- EARLY WARNING "AREA MAIL
- DELETING EARLY WARNING "AREA MAIL
- SETTING EARLY WARNING "AREA MAIL
- CHROME
- DISPLAYING WEBSITES
- SETTING CHROME
- USING BOOKMARK AND HISTORY
- DMENU
- IN THE HOME SCREEN, [Dメニュー] (DMENU)
- DMARKET
- IN THE HOME SCREEN, [DMARKET]
- PLAY STORE
- IN THE HOME SCREEN, [PLAY STORE]
- PURCHASING APPS
- IN THE GOOGLE PLAY SCREEN, SELECT AN APP TO PURCHASE
- TOUCH THE PRICE
- IN THE GOOGLE PLAY SCREEN, [ ] ➤ [MY APPS & GAMES]
- SELECT AN APP TO UNINSTALL
- [UNINSTALL] ▶ [OK]
- OSAIFU-KEITAI
- USING OSAIFU-KEITAI COMPATIBLE HANDSET
- USING "OSAIFU-KEITAI COMPATIBLE SERVICES
- IN THE HOME SCREEN, [ ] ▶ [OSAIFU-KEITAI]
- SELECT A SERVICE
- HOLD THE 🔒 MARK OF THE HANDSET OVER THE SCANNING DEVICE
- USING "KAZASHITE-LINK COMPATIBLE SERVICES
- HOLD THE 🔒 MARK OF THE HANDSET OVER A DEVICE INTO WHICH AN NFC MODULE IS BUILT, SMART POSTER, ETC
- PRECAUTIONS ABOUT HOLDING OVER THE OTHER DEVICE
- NFC/OSAIFU-KEITAI LOCK
- IN THE HOME SCREEN, [ ] ▶ [SETTINGS] ▶ [MORE] ▶ [NFC/OSAIFU-KEITAI SETTINGS] ▶ [NFC/OSAIFU-KEITAI LOCK]
- FOLLOW THE INSTRUCTIONS ON THE SCREEN AND ENTER THE NFC/OSAIFU-KEITAI LOCK NUMBER
- NFC/OSAIFU-KEITAI SETTINGS
- IN THE HOME SCREEN, [ ] ▶ [SETTINGS] ▶ [MORE] ▶ [NFC/OSAIFU-KEITAI SETTINGS]
- TAP & PAY
- IN THE HOME SCREEN, [ ] ▶ [SETTINGS] ▶ [MORE] ▶ [NFC/OSAIFU-KEITAI SETTINGS] ▶ [TAP & PAY]
- TORUCA
- IN THE HOME SCREEN, [ ]▶ [TORUCA]
- ID APPLI
- SHCAMERA
- BEFORE USING CAMERA
- COPYRIGHTS AND RIGHTS OF PORTRAIT
- OPERATIONS WHILE USING CAMERA
- PICTURE SIZE OF CAMERA
- SHOOTING SCREEN LAYOUT
- REMAINING NUMBER FOR SHOOTING
- SWITCHING FRONT CAMERA/BACK CAMERA
- SHOOTING MODE
- SHOOTING VIDEOS
- SHOOTING STILL PICTURES
- ALBUM/THUMBNAIL
- EASY MANUAL
- IN THE HOME SCREEN, [SHCAMERA]
- [●] ▶ [EASY MANUAL]
- SELECT THE SHOOTING SCENE
- SETTING ICON DISPLAYING AREA
- ADJUSTMENT BAR
- AUTOMATIC ADJUSTMENT
- WATER LEVEL
- SHOOTING SCENE
- ISO SENSITIVITY
- TURN THE CAMERA OF THE HANDSET (BACK CAMERA) TO AN OBJECT
- [ ] / Ⅱ(+)/Ⅱ(一)
- CAMERA SETTINGS
- SETTINGS ON SHOOTING STILL PICTURES
- [ : ]
- [PICTURE]
- SETTINGS ON SHOOTING VIDEOS
- [VIDEO]
- COMMON SETTINGS ON SHOOTING STILL PICTURES/VIDEOS
- [COMMON]
- SWITCHING SHOOTING MODES
- ALBUM
- SORTING DATA
- DISPLAYING/HIDING DATA
- ATOKARA CAPTURE
- MEDIA PLAYER
- SELECT DATA
- PLAY MUSIC/VIDEO
- MANAGING PLAYLISTS
- USING GPS FUNCTION
- MAPS
- YOUTUBE
- CLOCK
- ALARM
- STOPPING AN ALARM
- WORLD CLOCK
- TIMER
- STOPWATCH
- SCHEDULE
- TEXT COLOR
- STICKER
- [SAVE]
- DELETING A SCHEDULE
- IN THE SCHEDULE SCREEN, SELECT A DATE
- TOUCH AND HOLD A SCHEDULE
- [DELETE ONE] ▶ [DELETE]
- MEMO
- CALCULATOR
- KARADA MATE
- CAUTIONS WHEN COUNTING THE NUMBER OF STEPS
- KARADA MATE SCREEN LAYOUT
- STEPS MODE
- NUMBER OF STEPS MADE TODAY
- HISTORY OF THE PEDOMETER
- ENTERING WEIGHT
- SETTING GOAL
- WEIGHT MODE
- GOAL VALUE
- SWITCHING DISPLAY
- DIFFERENCE FROM PREVIOUS WEIGHT
- LATEST WEIGHT
- HISTORY OF THE WEIGHT
- CHANGING THE USER INFORMATION
- IN THE KARADA MATE SCREEN, [H] [USER INFORMATION]
- SET EACH ITEM
- DISABLING KARADA MATE
- IN THE KARADA MATE SCREEN, [ ] [SETTINGS]
- [PEDOMETER ON]
- RESETTING DATA
- CONVENIENT TOOL
- YOU CAN USE CONVENIENT FUNCTIONS SUCH AS KARADA MATE AND DICTIONARIES
- BUILT-IN DICTIONARY
- WORD TEST
- NET DICTIONARY
- DOCOMO DATA COPY
- DATA TRANSFER
- BACKING UP TO/RESTORING FROM A MICROSD CARD
- BACKING UP TO/RESTORING FROM DATA STORAGE BOX
- SETTING MENU
- PROFILE
- SOUND & NOTIFICATION
- [WHEN DEVICE IS LOCKED]
- ILLUMINATION
- IN THE HOME SCREEN, [ ] ▶ [SETTINGS] ▶ [ILLUMINATION]
- [CHARGING]
- DISPLAY
- IN THE HOME SCREEN, [ ] ▶ [SETTINGS] ▶ [DISPLAY]
- [SLEEP]
- [QUALITY MODE]
- [WHEN DEVICE IS ROTATED]
- [FONT SETTINGS]
- BRIGHTNESS LEVEL
- IN THE HOME SCREEN, [ ] ▶ [SETTINGS] ▶ [DISPLAY] ▶ [BRIGHTNESS LEVEL]
- [OK]
- [AUTOMATIC BRIGHTNESS]
- RELAX SETTINGS
- IN THE HOME SCREEN, [ ] ▶ [SETTINGS] ▶ [DISPLAY] ▶ [RELAX SETTINGS]
- VEILVIEW
- IN THE HOME SCREEN, [ ] ▶ [SETTINGS] ▶ [DISPLAY] ▶ [VEILVIEW]
- [VEILVIEW]
- USEFUL
- [VIEW WITH FLIP COVER]
- SCROLLAUTO
- CLIP NOW
- ON/OFF WITH MOTION
- [TURN SCREEN ON BY HOLDING]
- [BRIGHT KEEP]
- EMOPA
- SETTINGS OF EMOPA
- TIMING FOR EMOPA TO TALK
- USING EMOPA MEMO
- USING HEALTH CARE OF EMOPA
- OFFICIAL EMOPA INFORMATION WEBSITE, EMOPARK
- BATTERY & ENERGY SAVING
- ENERGY SAVING
- APPS SETTINGS
- STORAGE & USB
- FORMATTING MICROSD CARD/USB MEMORY
- ENCRYPTING/DECRYPTING MICROSD CARD
- MEMORY
- DATA USAGE
- MORE
- [AIRPLANE MODE]
- CELLULAR NETWORKS
- IN THE HOME SCREEN, [ ] ▶ [SETTINGS] ▶ [MORE] ▶ [CELLULAR NETWORKS]
- DOCOMO SERVICE/CLOUD
- YOU CAN MAKE SETTINGS FOR THE DOCOMO SERVICE
- IN THE HOME SCREEN, [ ] ▶ [SETTINGS] ▶ [DOCOMO SERVICE/CLOUD]
- [DOCOMO APPS PASSWORD]
- LOCATION
- YOU CAN MAKE SETTINGS FOR MEASURING LOCATION INFORMATION
- IN THE HOME SCREEN, [ ] ▶ [SETTINGS] ▶ [LOCATION]
- SET TO ON
- [MODE]
- LOCK & SECURITY
- YOU CAN MAKE SETTINGS FOR THE SECURITY LOCK
- IN THE HOME SCREEN, [ ] ▶ [SETTINGS] ▶ [LOCK & SECURITY]
- [SCREEN LOCK]
- UNLOCK THE SCREEN WHEN ACTIVATING THE HANDSET
- [SMART LOCK]
- [UNKNOWN SOURCES]
- [TRUSTED CREDENTIALS]
- [CLEAR CREDENTIALS]
- SECRECY SETTINGS
- DISABLING THE SECRET MODE TEMPORARILY
- SECURITY CODES USED ON THE HANDSET
- PRECAUTIONS ABOUT VARIOUS SECURITY CODES
- SECURITY KEY (SECURITY CODE FOR VARIOUS FUNCTIONS)
- NETWORK SECURITY CODE
- PIN CODE
- PUK (PIN UNLOCK KEY)
- FINGERPRINT AUTHENTICATION
- CAUTIONS WHEN USING FINGERPRINT AUTHENTICATION FUNCTION
- CAUTIONS WHEN USING FINGERPRINT SENSOR
- REGISTRATION OF FINGERPRINT
- IN THE HOME SCREEN, [ ] ▶ [SETTINGS] ▶ [LOCK & SECURITY] ▶ [FINGERPRINT SETTINGS]
- [ADD NEW ITEM]
- TOUCH THE FINGERPRINT SENSOR WITH YOUR FINGER BALL
- [CONTINUE TO REGISTER SHORTCUT NEXT]/[NOT NOW]
- [DONE]
- CHANGING A SHORTCUT
- IN THE FINGERPRINT SETTINGS SCREEN, SELECT A REGISTERED FINGERPRINT ▶ [EDIT SHORTCUT]
- SELECT A SHORTCUT TO SET
- USING FINGERPRINT AUTHENTICATION FUNCTION
- WHILE THE DISPLAY IS TURNED OFF/IN THE LOCK SCREEN OF THE TOUCH PANEL/IN THE FINGERPRINT AUTHENTICATION SCREEN, TOUCH THE FINGERPRINT SENSOR WITH YOUR FINGER BALL
- SETTING UP SIM CARD LOCK
- IN THE HOME SCREEN, [ ] ▶ [SETTINGS] ▶ [LOCK & SECURITY] ▶ [SET UP SIM CARD LOCK]
- DISABLING PIN LOCK
- IN THE PIN LOCKING SCREEN, ENTER PUK (PIN UNLOCK KEY)
- ENTER A NEW PIN CODE
- ENTER THE NEW PIN CODE AGAIN
- LANGUAGE & INPUT
- IN THE HOME SCREEN, [ ] ▶ [SETTINGS] ▶ [LANGUAGE & INPUT]
- KEYBOARD
- [GOOGLE KEYBOARD], [S-SHOIN], [GOOGLE VOICE TYPING], [MOJI-HENSHU]
- [SPELL CHECKER]
- BACKUP & RESET
- IN THE HOME SCREEN, [ ] ▶ [SETTINGS] ▶ [BACKUP & RESET]
- RESETTING ALL
- DATE & TIME
- WHEN [AUTOMATIC DATE & TIME] IS ENABLED
- ACCESSIBILITY
- [POWER BUTTON ENDS CALL]
- PRINTING
- ABOUT PHONE
- [ADJUST SENSITIVITY OF SENSOR]
- STORAGE STRUCTURE
- HANDSET MEMORY (INTERNAL STORAGE)
- YOU CAN SAVE DATA TO THE HANDSET
- MICROSD CARD (EXTERNAL STORAGE)
- YOU CAN SAVE DATA ON THE HANDSET TO MICROSD CARD OR IMPORT DATA ON MICROSD CARD TO THE HANDSET
- INSERTING MICROSD CARD
- OPEN THE DOCOMO NANO UIM CARD AND MICROSD CARD COVER (P. 15 "INSERTING DOCOMO NANO UIM CARD")
- INSERT THE MICROSD CARD SLOWLY INTO THE MICROSD CARD SLOT WITH THE METAL TERMINAL SIDE TURNED DOWN
- CLOSE THE DOCOMO NANO UIM CARD AND MICROSD CARD COVER (P. 15 "INSERTING DOCOMO NANO UIM CARD")
- REMOVING MICROSD CARD
- CONTENTS MANAGER
- BLUETOOTH FUNCTION
- SPECIFICATIONS
- PRECAUTIONS ABOUT HANDLING BLUETOOTH DEVICES
- RADIO INTERFERENCE WITH WI-FI COMPATIBLE DEVICES
- USING BLUETOOTH FUNCTION
- SENDING AND RECEIVING BY BLUETOOTH
- NFC COMMUNICATION
- ANDROID BEAM
- WHEN USING ANDROID BEAM
- SENDING DATA
- EXAMPLE: PHONEBOOK
- PC CONNECTION
- SELECT A USING METHOD OF USB
- DISCONNECT MICRO USB CABLE 01 FROM THE HANDSET AND THE PC
- PRINTING/SAVING BY PRINT SERVICE
- EXAMPLE: WHEN USING ALBUM
- USB HOST FUNCTION
- REMOVING USB MEMORY
- WIRELESS OUTPUT
- VPN (VIRTUAL PRIVATE NETWORK)
- ADDING VPN
- CONNECTING VPN
- DISCONNECTING VPN
- OUTLINE OF INTERNATIONAL ROAMING (WORLD WING)
- AVAILABLE NETWORK
- BEFORE USE OVERSEAS
- CHECKING BEFORE DEPARTURE
- SUBSCRIPTION
- CHARGING BATTERY
- CHARGE
- SETTING BEFORE DEPARTURE
- NETWORK SERVICE SETTINGS
- CHECKING IN YOUR COUNTRY OF STAY
- CONNECTION
- SETTINGS FOR USE OVERSEAS
- DATA ROAMING
- PREFERRED NETWORK TYPE
- NETWORK OPERATORS
- INQUIRIES
- MAKING/RECEIVING A CALL IN YOUR COUNTRY OF STAY
- MAKING A CALL OUTSIDE YOUR COUNTRY OF STAY (INCLUDING JAPAN)
- MAKING A CALL USING INTERNATIONAL DIAL ASSIST
- MAKING A CALL IN YOUR COUNTRY OF STAY
- MAKING A CALL TO A WORLD WING SUBSCRIBER OVERSEAS
- RECEIVING A CALL OVERSEAS
- HAVING CALLS MADE TO YOUR HANDSET
- SETTING INTERNATIONAL ROAMING
- INTERNATIONAL DIAL ASSIST
- NETWORK SERVICES (OVERSEAS)
- CHECKING AFTER HOMECOMING
- TROUBLESHOOTING (FAQ)
- TROUBLESHOOTING
- POWER
- HANDSET OPERATION
- CALLING
- SCREEN
- SOUND
- CAMERA
- DATA MANAGEMENT
- MAP/GPS FUNCTION
- ERROR MESSAGES
- ANSHIN ENKAKU SUPPORT
- MAKE A CALL TO ANSHIN ENKAKU SUPPORT CENTER
- ANSHIN ENKAKU SUPPORT CENTER
- IN THE HOME SCREEN, [ ]▶[遠隔サポート] (REMOTE SUPPORT)
- [遠隔サポートの接続画面に進む] (PROCEED TO THE CONNECTION SCREEN FOR REMOTE SUPPORT)
- [同意する] (AGREE)
- ENTER THE CONNECTION NUMBER PROVIDED BY DOCOMO
- THE REMOTE SUPPORT STARTS AFTER THE CONNECTION IS ESTABLISHED
- WARRANTY AND AFTER-SALES SERVICE
- WARRANTY
- AFTER-SALES SERVICES
- IF YOU HAVE PROBLEMS WITH YOUR HANDSET
- IF YOUR HANDSET NEEDS REPAIRS AFTER CONTACTING DOCOMO
- DURING THE WARRANTY PERIOD
- REPAIRS MAY NOT BE POSSIBLE IN THE FOLLOWING CIRCUMSTANCES
- AFTER THE WARRANTY PERIOD HAS EXPIRED
- REPLACEMENT PARTS
- IMPORTANT
- CREATED DATA AND DOWNLOADED INFORMATION
- SOFTWARE UPDATE
- UPDATING SOFTWARE
- CHANGING AUT DOWNLOAD SETTING
- []/[ ] OF AUTO DOWNLOAD
- WHEN IS NOT DISPLAYED ON THE STATUS BAR
- [UPDATE NOW]
- [OK]/[INSTALL]
- [DOWNLOAD NOW (ONLY VIA WI-FI)], [PERFORM AT SCHEDULED TIME (VIA WI-FI/XI)]
- UPDATING APPS
- UPDATING FROM THE STATUS PANEL
- UPDATING FROM PLAY STORE
- MAIN SPECIFICATIONS
- SPECIFIC ABSORPTION RATE (SAR) OF MOBILE PHONES
- EUROPEAN RF EXPOSURE INFORMATION
- VOLUME LEVEL CAUTION
- EARPHONE SIGNAL LEVEL
- FCC NOTICE
- INFORMATION TO USER
- FCC RF EXPOSURE INFORMATION
- FCC ID LOCATION
- EXPORT ADMINISTRATION REGULATIONS
- INTELLECTUAL PROPERTY RIGHT
- REGISTERED TRADEMARKS AND TRADEMARKS
- OTHERS
- OPEN SOURCE SOFTWARE
- UNLOCKING SIM LOCK
- INSERT ANOTHER CARRIER'S SIM CARD
- TURN THE POWER ON
- ENTER THE SIM UNLOCK CODE ▶ [UNLOCK]
- NUMERICS
- A
- B
- C
- D
- E
- F
- G
- H
- K
- L
- M
- N
- O
- P
- Q
- R
- S
- T
- U
- V
- W
- Y
- USING MOBILE PHONE WITH YOUR MANNERS
- TURN OFF YOUR HANDSET IN THE FOLLOWING PLACES
- ● WHEN IN AN AREA WHERE USE IS PROHIBITED
- SET PUBLIC MODE IN THE FOLLOWING PLACES
- ● WHILE DRIVING
- WHEN IN PUBLIC PLACES SUCH AS THEATERS, MOVIE THEATERS OR MUSEUMS
- BE AWARE OF THE PLACE TO USE A MOBILE PHONE AND THE VOLUME OF YOUR VOICE AND RINGTONE
- BE CONSIDERATE OF THE PRIVACY OF THE INDIVIDUALS AROUND YOU
- DO NOT USE YOUR SMARTPHONE WHILE WALKING
- THESE FUNCTIONS ENSURE MANNERS IN PUBLIC
- THE HANDSET HAS CONVENIENT FUNCTIONS SUCH AS SETTING NOT TO ANSWER A CALL AND SETTING TO MUTE SOUND OF THE HANDSET
- CARRYING OUT VARIOUS PROCEDURES, CHECKING SUBSCRIPTION, ETC. ONLINE
- GENERAL INQUIRIES
- REPAIRS
- INQUIRIES FROM OVERSEAS (IN CASE OF LOSS, THEFT, UNCONNECTED, ETC.)
Brand : SHARP
Model : Aquos Ever SH-02J
Category : Smartphone