
ZR600 - Camcorder CANON - Free user manual and instructions
Find the device manual for free ZR600 CANON in PDF.


| Product Type | MiniDV Camcorder |
| Brand | Canon |
| Model | ZR600 |
| Dimensions | Approx. 51 x 86 x 102 mm (W x H x D) |
| Weight | Approx. 380 g (without battery and tape) |
| Power Source | Rechargeable Lithium-ion battery pack (BP-508/512) |
| Recording Media | MiniDV tape |
| Optical Zoom | 18x |
| Digital Zoom | 360x (optional) |
| Image Sensor | 1/6-inch CCD, approx. 680K pixels |
| LCD Screen | 2.5-inch color LCD, 112K pixels |
| Viewfinder | 0.33-inch color LCD, 113K pixels |
| Image Stabilization | Electronic image stabilization (EIS) |
| Minimum Illumination | 0.4 lux (night mode) |
| Video Output | Composite video (RCA), S-Video |
| Audio Recording | PCM digital stereo (16-bit/12-bit) |
| Battery Life (approx.) | 90 minutes with BP-508 |
| Maintenance | Clean lens with soft cloth; avoid dust and moisture; use dry environment |
| Safety Precautions | Do not disassemble; avoid extreme temperatures; use only specified battery |
| Spare Parts | Battery pack BP-508/512, AC adapter CA-570, remote control WL-D85 |
| Reparability | Serviceable by authorized Canon centers; user-replaceable battery and tape |
| General Information | Compatible with Windows/Mac via FireWire (i.LINK) for video transfer |
Frequently Asked Questions - ZR600 CANON
User questions about ZR600 CANON
0 question about this device. Answer the ones you know or ask your own.
Ask a new question about this device
Download the instructions for your Camcorder in PDF format for free! Find your manual ZR600 - CANON and take your electronic device back in hand. On this page are published all the documents necessary for the use of your device. ZR600 by CANON.
USER MANUAL ZR600 CANON
Digital Video Camcorder
Instruction Manual
English
Caméscope numérique
Mini
DV
Digital
Video
Cassette
Important Usage Instructions
WARNING!

TO REDUCE THE RISK OF FIRE OR ELECTRIC SHOCK, DO NOT EXPOSE THIS PRODUCT TO RAIN OR MOISTURE.
WARNING!

TO REDUCE THE RISK OF ELECTRIC SHOCK AND TO REDUCE ANNOYING INTERFERENCE, USE THE RECOMMENDED ACCESSORIES ONLY.
COPYRIGHT WARNING:
Unauthorized recording of copyrighted materials may infringe on the rights of copyright owners and be contrary to copyright laws.
Digital Video Camcorder, ZR500 systems
This device complies with Part 15 of the FCC Rules. Operation is subject to the following two conditions: (1) This device may not cause harmful interference, and (2) this device must accept any interference received, including interference that may cause undesired operation.
Note: This equipment has been tested and found to comply with the limits for class B digital device, pursuant to Part 15 of the FCC Rules. These limits are designed to provide reasonable protection against harmful interference in a residential installation. This equipment generates, uses and can radiate radio frequency energy and, if not installed and use in accordance with the instructions, may cause harmful interference to radio communications. However, there is no guarantee that interference will not occur in a particular installation. If this equipment does cause harmful interference to radio or television reception, which can be determined by turning the equipment off and on, the user is encouraged to try to correct the interference by one or more of the following measures:
• Reorient or relocate the receiving antenna.
- Increase the separation between the equipment and receiver.
- Connect the equipment into an outlet on a circuit different from that to which the receiver is connected.
- Consult the dealer or an experienced radio/TV technician for help.
Use of shielded cable is required to comply with class B limits in Subpart B of Part 15 of FCC Rules. Do not make any changes or modifications to the equipment unless otherwise specified in the manual. If such changes or modifications should be made, you could be required to stop operation of the equipment.
Canon U.S.A. Inc.
One Canon Plaza, Lake Success, NY 11042, U.S.A.
Tel No. (516)328-5600
CAUTION:
TO PREVENT ELECTRIC SHOCK, MATCH WIDE BLADE OF PLUG TO WIDE SLOT, FULLY INSERT.
Important Warning


CAUTION:
TO REDUCE THE RISK OF ELECTRIC SHOCK, DO NOT REMOVE COVER (OR BACK). NO USER-SERVICEABLE PARTS INSIDE. REFER SERVICING TO QUALIFIED SERVICE PERSONNEL.

The lightning flash with arrowhead symbol, within an equilateral triangle, is intended to alert the user to the presence of uninsulated "dangerous voltage" within the product's enclosure, that may be of sufficient magnitude to constitute a risk of electric shock to persons.
The exclamation point, within an equilateral triangle, is intended to alert the user to the presence of important operating and maintenance (servicing) instructions in the literature accompanying the product.
IMPORTANT SAFETY INSTRUCTIONS
In these safety instructions the word "product" refers to the Canon Digital Video Camcorder ZR500 A and all its accessories.
- Read Instructions — All the safety and operating instructions should be read before the product is operated.
- Retain Instructions — The safety and operating instructions should be retained for future reference.
- Heed Warnings — All warnings on the product and in the operating instructions should be adhered to.
- Follow Instructions — All operating and maintenance instructions should be followed.
- Cleaning — Unplug this product from the wall outlet before cleaning. Do not use liquid or aerosol cleaners. The product should be cleaned only as recommended in this manual.
- Accessories — Do not use accessories not recommended in this manual as they may be hazardous.
- Avoid magnetic or electric fields — Do not use the camera close to TV transmitters, portable communication devices or other sources of electric or magnetic radiation. They may cause picture interference, or permanently damage the camera.
- Water and Moisture — Hazard of electric shock — Do not use this product near water or in rainy/moist situations.
- Placing or Moving — Do not place on an unstable cart, stand, tripod, bracket or table. The product may fall, causing serious injury to a child or adult, and serious damage to the product.
A product and cart combination should be moved with care. Quick stops, excessive force, and uneven surfaces may cause the product and cart combination to overturn.

-
Power Sources — The CA-570 Compact Power Adapter should be operated only from the type of power source indicated on the marking label. If you are not sure of the type of power supply to your home, consult your product dealer or local power company. Regarding other power sources such as battery power, refer to instructions in this manual.
-
Polarization — The CA-570 Compact Power Adapter is equipped with a polarized 2-prong plug (a plug having one blade wider than the other). The 2-prong polarized plug will fit into the power outlet only one way. This is a safety feature. If you are unable to insert the plug fully into the outlet, try reversing the plug. If the plug still fails to fit, contact your electrician to replace your obsolete outlet. Do not defeat the safety purpose of the polarized plug.
-
Power Cord Protection — Power cords should be routed so that they are not likely to be walked on or pinched by items placed upon or against them. Pay particular attention to plugs and the point from which the cords exit the product.
-
Outdoor Antenna Grounding — If an outside antenna is connected to the product, be sure the antenna is grounded so as to provide some protection against voltage surges and built-up static charges. Section 810 of the National Electrical Code, ANSI / NFPA No. 70—1984, provides information with respect to proper grounding of the mast and supporting structure, grounding of the lead-in wire to an antenna discharge unit, size of grounding conductors, location of antenna discharge unit, connection to grounding electrodes, and requirements for the grounding electrode. See figure 1.
Fig. 1
EXAMPLE OF ANTENNA GROUNDING
AS PER NATIONAL ELECTRICAL CODE

- Lightning — For added protection of this product during a lightning storm, or when it is left unattended and unused for long periods of time, disconnect it from the wall outlet and disconnect the antenna. This will prevent damage to the product due to lightning and power-line surges.
- Overloading — Do not overload wall outlets and extension cords as this can result in a risk of fire or electric shock.
- Objects and Liquid Entry — Never push objects of any kind into this product through openings as they may touch dangerous voltage points or short out parts that could result in a fire or electric shock. Be careful not to spill liquid of any kind onto the product.
-
Servicing — Do not attempt to service this product yourself as opening or removing covers may expose you to dangerous voltage or other hazards. Refer all servicing to qualified service personnel.
-
Damage Requiring Service — Disconnect this product from the wall outlet and all power sources including battery, and refer servicing to qualified service personnel under the following conditions:
a. When the power-supply cord or plug is damaged.
b. If any liquid has been spilled onto, or objects have fallen into, the product.
c. If the product has been exposed to rain or water.
d. If the product does not operate normally even if you follow the operating instructions. Adjust only those controls that are covered by the operation instructions. Improper adjustment of other controls may result in damage and will often require extensive work by a qualified technician to restore the product to its normal operation.
e. If the product has been dropped or the cabinet has been damaged.
f. When the product exhibits a distinct change in performance. This indicates a need for service.
-
Replacement Parts — When replacement parts are required, be sure the service technician has used replacement parts that are specified by Canon or that have the same characteristics as the original part. Unauthorized substitutions may result in fire, electric shock or other hazards.
-
Safety Check — Upon completion of any service or repairs to this product, ask the service technician to perform safety checks to determine that the product is in safe operating order.
When replacement of power supply is required, please return it to the responsible nearest Canon Service Center and please replace it with the same type number CA-570.
The Adapter can be used with a power supply between 100 and 240 V AC. For areas where 120 V AC power is not used, you will need a special plug adapter. Contact your nearest Canon Service Center for further information.
Thank you for purchasing the Canon ZR500. Please read this manual carefully before you use the camcorder and retain it for future reference. Should your camcorder fail to operate correctly, refer to the Troubleshooting table (☐ 75).
Change the display language before you begin (☐59).
Symbols and References Used in This Manual
○ ⚠ : Precautions related to the camcorder operation.
○ : Additional topics that complement the basic operating procedures.
○ □ : Reference page number.
○ Capital letters are used to refer to buttons on the camcorder.
☐ [ ] are used to refer to menu items displayed on the screen.
○ "Screen" refers to the LCD and the viewfinder screen.

About the Joystick and the Joystick Guide
The mini joystick allows you to control many of the camcorder's operations and to select and change setting options in menus.
| Push the joystick up, down, left or right (▲▼, ◀▶) to select an item or change settings. | |
| Press the joystick itself (○) to save the settings or confirm an action. |
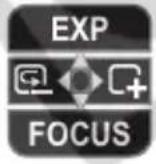
The functions assigned to the joystick change according to the operation mode. You can display the joystick guide to remind you of the joystick's functions in each operating mode.
| Recording: | Playback: |
 |  |
About the Operating Modes
The operating modes are determined by the position of the POWER switch.
| Operating Modes | POWER Switch | Icon Display | Operation | |
| CAMERA | Recording movies on a tape | 20 | ||
| PLAY | Playing movies from a tape | 27 |
CAMERA·
: Function can be used in this mode.
CAMERA·
: Function cannot be used in this mode.
Trademark Acknowledgments
• MiniDV is a trademark.
- Windows is either a registered trademark or trademark of Microsoft Corporation in the United States and/or other countries.
• Macintosh and Mac OS are trademarks of Apple Computer, Inc., registered in the United States and other countries.
- Other names and products not mentioned above may be registered trademarks or trademarks of their respective companies.
Table of contents
Introduction
Using this Manual....5
Checking the Supplied Accessories 9
Components Guide....10
Basic Functions
Preparations
Preparing the Power Supply....12
Loading/Unloading a Cassette 15
Preparing the Camcorder 16
Adjusting the LCD Screen 17
Setting the Time Zone, Date and Time....18
Recording
Recording Movies on a Tape 20
Zooming....24
Tips for Making Better Videos....26
Playback
Playing Back a Tape 27
Adjusting the Volume....29
Playing Back on a TV Screen 30
Advanced Functions
Menus and Settings....33
Recording
Using the Recording Programs 36
Adjusting the Exposure Manually 40
Adjusting the Focus Manually....41
Setting the White Balance 43
Selecting an Image Effect....44
Setting the Shutter Speed....45
Using the Self-Timer 47
Changing the Recording Mode (SP/LP) 48
Audio Recording....49
Using Digital Effects....51
Widescreen TV Recording (16:9) 54
Playback
Magnifying the Image 55
Displaying the Data Code....56
End Search....57
Playing Back a Tape with Added Sound....58
Other Functions
Changing the Display Language 59
Other Camcorder Settings....60
Editing
Recording to a VCR or Digital Video Device 63
Recording from Digital Video Devices (DV Dubbing) 65
Transferring Video Recordings to a Computer 66
Additional Information
Screen Displays....67
List of Messages....69
Maintenance/Others 70
Troubleshooting....75
System Diagram....78
Optional Accessories....79
Specifications....81
Item Codes 83
Index 84
Checking the Supplied Accessories
| CA-570 Compact Power Adapter (incl. power cord) | BP-2L5 Battery Pack | Lithium Button Battery CR1616 | STV-250N Stereo Video Cable |
 |  |  |  |
The serial number of this product can be found at the battery attachment unit of the camcorder. Write down the number and other information here and retain this book as a permanent record of your purchase to aid identification in case of theft.
Date of Purchase:
Model Name: ZR500 A
Purchased From:
Serial No.:
Dealer Address:
Dealer Phone No.:

LAMP(S) INSIDE THIS PRODUCT CONTAIN MERCURY AND MUST BE RECYCLED OR DISPOSED OF ACCORDING TO LOCAL, STATE OR FEDERAL LAWS.
ZR500
Left side view

Right side view

① Lens cover switch (☐ 20)
( ⊕ open, ⊗ closed)
② LCD BACKLIGHT button (☐☐ 17)
③ Speaker (☐ 29)
④ CHARGE indicator (☐ 12)
⑤ Terminal cover
⑥ POWER switch (☐ 6)
⑦ Grip belt (☐☐ 16)
⑧ AV terminal (☐ 30)
⑨ MIC (microphone) terminal (☐ 50)
⑩ DV terminal (☐ 63, 65)
⑪ Zoom lever (☐☐ 24)
⑫ Program selector (☐ 36)
EASY Easy recording
P Recording programs

① Stereo microphone
② Viewfinder (☐ 16)
③ Dioptric adjustment lever (☐☐ 16)
④ BATT. (battery release) button (☐ 12)
⑤ LCD screen (☐ 17)
⑥ Joystick (□□ 5)
⑦ FUNC. button (☐ 33)
⑧ D.EFFECTS button (☐ 51)
⑨ WIDE SCR button (☐☐ 54) /
DATA CODE button (☐ 56)
⑩ Backup battery compartment (☐ 14)
⑪ Start/stop button (☐ 20)
⑫ Battery attachment unit (☐☐ 12) / Serial number
⑬ DC IN terminal (☐☐ 12)
⑭ Cassette compartment (☐ 15)
⑮ Cassette compartment cover (☐ 15)
⑯ OPEN/EJECT ▲ switch (□□ 15)
⑰ Tripod socket (☐ 26)
Attaching the Battery Pack
- Turn the POWER switch to OFF.
-
Attach the battery pack to the camcorder.
-
Remove the terminal cover of the battery pack.
- Press lightly and slide the battery pack in the direction of the arrow until it clicks.

Charging the Battery Pack
- Connect the power cord to the adapter.
- Plug the power cord into a power outlet.
- Connect the power adapter to the camcorder's DC IN terminal.
The CHARGE indicator starts flashing. The indicator will stay on when the charging is completed.
- When the charging is completed, disconnect the power adapter from the camcorder. Unplug the power cord from the power outlet and disconnect it from the adapter.
- Remove the battery pack after use.
Press the BATT. button to remove the battery.

Using a Household Power Source
Connect to a household power source to use the camcorder without worrying about the battery power. You can keep the battery pack attached; the battery power will not be consumed.
- Turn the POWER switch to OFF.
- Connect the power cord to the power adapter.
- Plug the power cord into a power outlet.
- Connect the power adapter to the camcorder's DC IN terminal.


○ Turn off the camcorder before connecting or disconnecting the power adapter.
○ If the adapter is used close to a TV, it may cause picture interference. Move the adapter away from the TV or the antenna cable.
Do not connect any products that are not expressly recommended to the camcorder's DC IN terminal or to the power adapter.
- You may hear some noise from the power adapter during use. This is not a malfunction.
Do not disconnect and reconnect the power cord while charging a battery pack. Charging may stop. The battery pack may not be charged correctly even if the CHARGE indicator is continuously on. The battery pack may also not be charged correctly when a power outage occurs during charging. Remove the battery pack and attach it back to the camcorder.

When the power adapter or the battery pack is defective, the CHARGE indicator flashes rapidly (at about 2 flashes/second) and charging stops.
The CHARGE indicator informs you about the charge status.
0-50%: Flashes once every second
More than 50%: Flashes twice every second
100%: Continuously on
We recommend charging the battery pack in temperatures between 10 °C and 30 °C (50 °F and 86 °F). Outside the temperature range of 0 °C to 40 °C (32 °F to 104 °F), the charging will not start. If the battery temperature goes outside this temperature range while charging, the CHARGE indicator will start flashing rapidly and the charging will stop.
A lithium ion battery pack can be charged at any charge state. Unlike conventional battery packs, you do not need to completely use or discharge it before charging.
We recommend that you prepare battery packs 2 to 3 times longer than you think you might need.
To conserve battery power, turn off the camcorder instead of leaving it in record pause mode.
○ Charging, Recording and Playback Times
The following times are approximate and vary according to the charging, recording or playback conditions.
* Approximate times for recording with repeated operations such as start/stop, zooming, power on/off. Actual time may be shorter.
Installing the Backup Battery
The backup battery (lithium button battery CR1616) allows the camcorder to retain the date, time (☐ 18) and other camcorder settings while the power source is disconnected. Connect a power source to the camcorder when replacing the backup battery to retain the settings.

- Open the backup battery cover.
- Insert the backup battery with the + side facing out.
- Close the cover.
![graph TD A["CR1616"] --> B["+"] C["CR1614"] --> D["+"] E["-"] --> F["+"]](/content/2026/07/1492966/images/fc35b5fd6e1ea5640d989a2a45ff412f02c357783863483a7ae4b198fa845269.jpg)

The backup battery has a life span of about a year. “ ✉ ” flashes in red to inform you that it needs to be replaced.
Use only videocassettes marked with the Mn D Y logo.
- Slide the OPEN/EJECT ▲ switch and open the cassette compartment cover.
The cassette compartment opens automatically.
-
Load/unload the cassette.
-
Load the cassette with the window facing the grip belt.
-
Unload the cassette by pulling it straight out.
-
Press the PUSH mark on the cassette compartment until it clicks.
- Wait for the cassette compartment to retract automatically and close the cassette compartment cover.

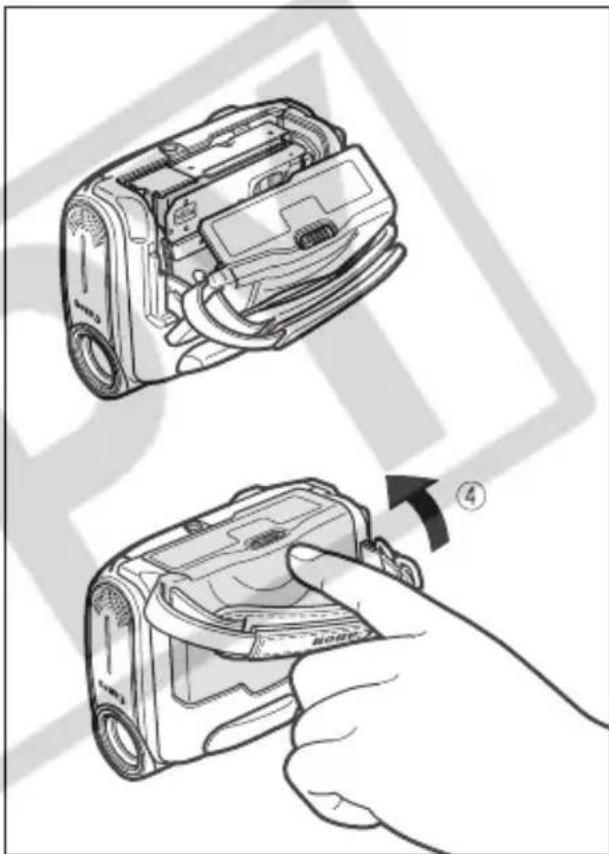

Do not interfere with the cassette compartment while it is opening or closing automatically, or attempt to close the cover before the cassette compartment has fully retracted.
○ Be careful not to get your fingers caught in the cassette compartment cover.

If the camcorder is connected to a power source, cassettes can be loaded/unloaded even if the POWER switch is set to OFF.
Adjusting the Viewfinder (Dioptric Adjustment)
- Turn on the camcorder and keep the LCD panel closed.
- Adjust the dioptric adjustment lever.

Fastening the Grip Belt
Adjust the grip belt so that you can reach the zoom lever with your index finger, and the start/stop button with your thumb.

Rotating the LCD Screen
Open the LCD panel 90 degrees.
- You can rotate the panel by 90 degrees outward.
- You can rotate the panel by 180 degrees inward.

LCD Backlight

You can switch the brightness of the LCD screen between normal and bright by pressing the LCD BACKLIGHT button. This is useful for outdoor recordings.
Press the LCD BACKLIGHT button.

- This setting does not affect the brightness of the recording or the viewfinder screen.
When using a battery pack, the camcorder retains the setting even if you change the position of the POWER switch.
The battery usage time shortens when the LCD screen is set brighter (☐ 14).
Setting the Time Zone, Date and Time
Set the time zone, date and time when you first start using your camcorder, or when you have replaced the backup battery.
Setting the Time Zone/Daylight Saving Time
CAMERA·
PLAY·
MENU
(□ 33)


DATE/TIME SETUP
T.ZONE/DST NEW YORK
1. Press the FUNC. button to open the FUNC. menu.
The FUNC. menu will open. Continue the procedure with the joystick to open the setup menus.
2. With the joystick select (▲▼) the 📄 icon and press (💡).
3. Select (▲▼) the [DATE/TIME SETUP] menu and press (○). Then, select (▲▼) the [T.ZONE/DST] option and press (○).

The time zone setting appears (see table on the next page). The default setting is New York or Singapore depending on the region.
4. Select (▲▼) your time zone and press (○).
To adjust for daylight saving time, select the time zone with the “*” next to the area.
Setting the Date and Time
CAMERA·

PLAY·
MENU
(□ 33)


DATE/TIME SETUP
DATE/TIME JAN.1,2006 12:00AM
5. Select (▲▼) the [DATE/TIME] option and press (○).
A selection frame will be displayed around the date and the selection arrows around the month will flash.

6. With the joystick change (▲▼) the month as required and move (▶) to the next field.
- The selection arrows will flash around the next field of the date/time.
- Set the day, year, hours and minutes in the same way.
- If you do not need to change all settings, you can use the joystick to move (◀▶) to the specific setting you want to change.
7. Press (☐) to start the clock.
8. Press the FUNC. button to close the menu.

E
Time Zones and Difference from GMT/UTC.
| London | GMT/UTC | Wellington (WELLGTN) | +12 |
| Paris | +1 | Samoa | -11 |
| Cairo | +2 | Honolulu | -10 |
| Moscow | +3 | Anchorage | -9 |
| Dubai | +4 | Los Angeles (L.A.) | -8 |
| Karachi | +5 | Denver | -7 |
| Dacca | +6 | Chicago | -6 |
| Bankok | +7 | New York | -5 |
| Singapore | +8 | Caracas | -4 |
| Tokyo | +9 | Rio de Janeiro (RIO) | -3 |
| Sydney | +10 | Fernando de Noronha (FERNANDO) | -2 |
| Solomon | +11 | Azores | -1 |

Once you have set time zone, date and time, you do not need to reset the clock each time you travel to another time zone. Just set the time zone to the one of your destination, and the camcorder automatically adjusts the clock.
Recording Movies on a Tape
Before You Begin Recording
Make a test recording first to check if the camcorder operates correctly. If necessary, clean the video heads (☐ 71).
Recording
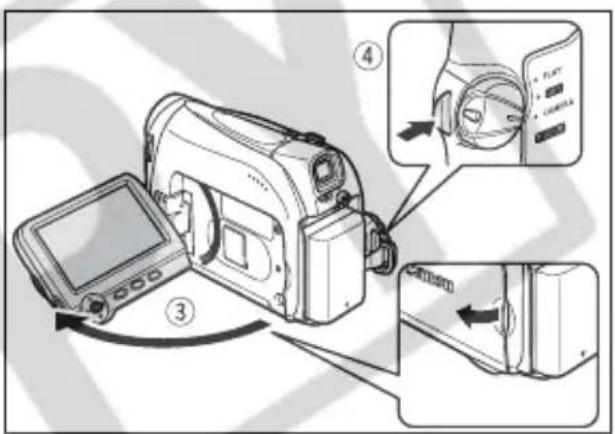
- Open the lens cover (move the lens cover switch down to Ⓑ).
- Set the camcorder to CAMERA · mode.
Set the POWER switch to CAMERA.

- Open the LCD panel.
- Press the start/stop button to begin recording.
Press the start/stop button again to pause the recording.
When You Have Finished Recording
- Turn the POWER switch to OFF.
- Close the LCD panel.
- Close the lens cover (move the lens cover switch to ⊕).
- Unload the cassette.
- Disconnect the power source.


About the LCD and viewfinder screen: The screens are produced with extremely high-precision manufacturing techniques, with more than 99.99% of the pixels operating to specification. Less than 0.01% of the pixels may occasionally misfire or appear as black or green dots. This has no effect on the recorded image and does not constitute a malfunction.
When powered by a battery pack, the camcorder shuts off to save power if left without any operation for 5 minutes. Approximately 30 seconds before the camcorder shuts off the message “⚠️ AUTO POWER OFF” will appear. To continue recording, turn the POWER switch to OFF and then back to CAMERA.
○ Wait until the tape counter stops completely before you start recording.
When you do not remove the cassette, you can record the next scene without producing any noise or blank sections between the recordings even if you turn the camcorder off.
- Bright light may make it difficult to use the LCD screen. In such case, use the viewfinder instead.
When recording near loud sounds (such as fireworks, drums or concerts), sound may become distorted or may be recorded not in the actual sound level. This is not a malfunction.
Allowing the Subject to Monitor the LCD Screen
You can rotate the LCD panel so that the screen faces in the same direction as the lens. The viewfinder switches on allowing you to use the viewfinder while the subject can monitor the screen.

Displaying the Level Marker
Use the level marker as a horizontal guideline to frame subjects more accurately.
![graph LR A["CAMERA"] --> B["PLAY"] C["MENU (33)"] --> D["DISPLAY SETUP/"] D --> E["LEVEL MARKER OFF"]](/content/2026/07/1492966/images/f3a3591133dbc580156b63a6950277c6f11822f25f8f77bc30dc66179121d328.jpg)
- Press the FUNC. button to open the FUNC. menu.
- With the joystick select (▲▼) the :icon and press (○○○).
- Select (▲▼) the [DISPLAY SETUP/☐] menu and press (☐). Then, select (▲▼) the [LEVEL MARKER] option and press (☐).
- Set it to [ON] and press ( ) to save the changes.
- Press the FUNC. button to close the menu.
The level marker will appear.
Reviewing and Searching when Recording

CAMERA·
PLAY·
Record Review
In record pause mode, this function allows you to review the last few seconds of your recording to check if it has been recorded properly.
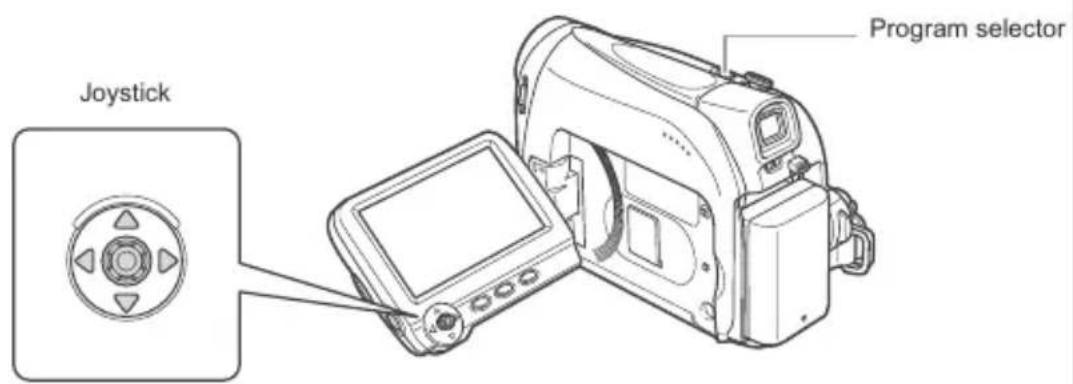
- Set the program selector to ☐.
- If the joystick guide does not appear on screen, press (💡) to display it.
- Push the joystick (◀) momentarily towards 📄 and release it.
The camcorder rewinds the tape, plays back the last few seconds, and returns to record pause mode.

Record Search
In record pause mode, this function allows you to play back the tape (forward or reverse) to locate the point where you wish to begin recording.
- Set the program selector to ☐.
- If the joystick guide does not appear on screen, press (💡) to display it.

- Hold the joystick pushed (◀) towards 📄 to search back towards the beginning of the recording or pushed (▶) towards 📄 to search forward towards the end of the recording.

- Release the joystick at the point where you wish to begin recording.
- The camcorder returns to record pause mode.
E
Screen Displays during Recording
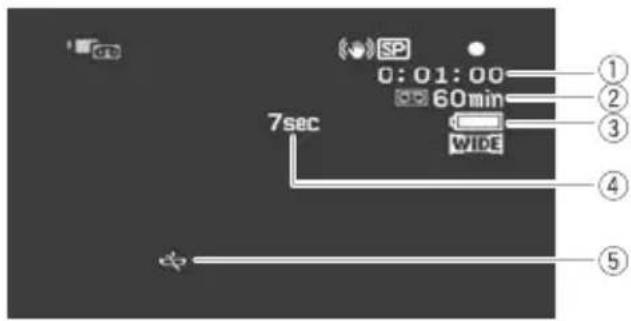
① Time Code
Indicates the recording time in hours, minutes and seconds.
② Remaining tape
Indicates the remaining time of the tape in minutes. “☐” moves during recording. “☐” END flashes when the tape reaches the end.
- When the time left is less than 15 seconds, the remaining tape time may not appear.
- Depending on the type of the tape, the indication may not be displayed correctly.
③ Remaining battery charge
The battery symbol indicates the charge status of the battery pack.
![graph LR A[" "] --> B[" "] B --> C[" "] C --> D[" "] D --> E[" "] E --> F[" "] F --> G[" "]](/content/2026/07/1492966/images/7925e57645440739d9fea5ba5e618b1b0f028bcd592d4b59a21d2f40e30d2b97.jpg)
- “☐” starts flashing in red when the battery pack is empty.
- When you attach an empty battery pack, the power may turn off without displaying "☐".
- The actual battery charge may not be indicated accurately depending on the conditions under which the battery pack and the camcorder are used.
④ Recording reminder
The camcorder counts from 1 to 10 seconds when you start recording. This is helpful to avoid scenes that are too short.
⑤ When “+” flashes
“💡” flashes in red when the lithium button battery is not installed, or when it needs replacing.
The camcorder is equipped with optical zoom and digital zoom.


25x Optical Zoom
CAMERA·
PLAY·
Move the zoom lever toward W to zoom out (wide-angle). Move it toward T to zoom in (telephoto).
You can also change the zoom speed (☐ 25).


Keep at least 1 m (3.3 ft.) to the subject. At wide-angle, you can focus on a subject as close as 1 cm (0.39 in.).
○ The zoom speed is slightly faster in record pause mode.
100x/800x Digital Zoom
When the digital zoom is activated, the camcorder automatically switches between optical and digital zoom. With digital zoom, image resolution becomes lower the more you zoom in.

MENU
(□ 33)
![graph LR A["File"] --> B["CAMERA SETUP"] B --> C["D.ZOOM OFF"]](/content/2026/07/1492966/images/2336a7fcf77309038c911877e905c4136623654326983d671a9a6d57a425143b.jpg)
-
Press the FUNC. button to open the FUNC. menu.
-
With the joystick select (▲▼) the 📋 icon and press (💡).
-
Select (▲▼) the [CAMERA SETUP] menu and press (○). Then, select (▲▼) the [D.ZOOM] option and press (○).
-
Select [100x] or [800x] and press ( ) to save the changes.
-
Press the FUNC. button to close the menu.


○ Digital zoom cannot be used in the ☐ Night recording program.
○ A zoom indicator appears for 4 seconds. It extends in light blue when the digital zoom is set to 100x, and extends further in dark blue when set to 800x.
Selecting the Zoom Speed
You can set the zoom speed to variable or to one of 3 levels of fixed zoom speeds. When set to [VARIABLE], the zoom speed depends on how you activate the zoom lever. Press softly for a slower zoom or press more strongly for a faster zoom.

MENU
(□ 33)
![graph LR A["Camera Setup"] --> B["CAMERA Setup"] B --> C["ZOOM SPEED VARIABLE"]](/content/2026/07/1492966/images/19aaaaaed03e63af865f0afa33ba2b64a3f20a6ad304a6cdc692529fabcb3a1b.jpg)
-
Press the FUNC. button to open the FUNC. menu.
-
With the joystick select (▲▼) the 📄 icon and press (💡).
-
Select (▲▼) the [CAMERA SETUP] menu and press (○). Then, select (▲▼) the [ZOOM SPEED] option and press (○).
-
Select a setting option and press ( ) to save the changes.
-
Press the FUNC. button to close the menu.


The fastest zoom speed can be achieved with the [VARIABLE] setting. Among the fixed zoom speeds [SPEED 3] is the fastest, and [SPEED 1] the slowest.
E
Tips for Making Better Videos
Holding the Camcorder
For maximum stability, grip the camcorder in your right hand and keep your right elbow pressed against your body. If necessary, support the camcorder with your left hand. Be careful that your fingers do not touch the microphone or lens.

For More Stability
Lean against a wall

Kneel on one knee

Lie on your elbow
Put the camcorder on a table

Use a tripod

Lighting
When recording outdoors, we recommend recording with the sun at your back.


When using a tripod, do not leave the viewfinder exposed to direct sunlight as it may melt (due to concentration of the light by the lens).
Do not use tripods with fastening screws longer than 5.5 mm (0.2 in.) as it may damage the camcorder. The camcorder cannot be mounted on tripods with fixed (non-retractable) camera positioning pins.
Camera positioning pin

If the playback picture is distorted, clean the video heads using a Canon Head Cleaning Cassette or a commercially available digital video head-cleaning cassette (71).
- Set the camcorder to PLAY·☐ mode.
Set the POWER switch to PLAY.

- Open the LCD panel.
You can also close the LCD panel with the screen facing out.
-
If the joystick guide does not appear on screen, press ( ) to display it.
-
Push the joystick (◀) towards ◀◀ to rewind the tape.
-
Push the joystick (▲) towards ▶/■ to play back the tape.
Push (▲) again to pause the playback.
- Push the joystick (▼) towards ■ to stop the playback.


To use the viewfinder, close the LCD panel.
About the screen display: During playback, the time code gives the hours, minutes, seconds and frames. The remaining tape time may not appear when the time left is less than 15 seconds.
Special Playback Modes

▶/II (Playback Pause)
During normal playback, push the joystick (▲) towards ▶/■.
▶▶ (Fast Forward Playback) / ◀◀ (Rewind Playback)
Plays back the tape at 9.5 times normal speed (forward or reverse). During normal playback, hold the joystick pushed (▶) towards ▶▶ or pushed (◀) towards ◀◀. Release the joystick to return to normal playback.

○ There is no sound during special playback.
○ The picture may become distorted during some special playback modes.
- The camcorder stops the tape automatically after 5 minutes in playback pause to protect the tape and video heads.
Adjusting the Volume
When you use the LCD screen for playback, the camcorder plays back the sound using the built-in speaker. The sound will be muted when the LCD panel is closed.

CAMERA·
PLAY·
MENU
(□ 33)

SPEAKER VOLUME
- Press the FUNC. button to open the FUNC. menu.

-
With the joystick select (▲▼) the speaker volume icon.
-
Adjust (◀▶) the volume as required.

- Press the FUNC. button to save the setting and close the menu.
If you turn off the volume completely the volume display will change to "##".
Refer also to the TV or VCR instruction manual.
![graph LR A["AV"] -->|Signal flow| B["STV-250N Stereo Video Cable (supplied)"] B --> C["VIDEO"] B --> D["AUDIO"] B --> E["L"] B --> F["R"] C --> G["Computer"] D --> H["Computer"] E --> I["Computer"] F --> J["Computer"] style A fill:#f9f,stroke:#333 style B fill:#ccf,stroke:#333 style C fill:#cfc,stro…](/content/2026/07/1492966/images/c3d569cbf399a211aeac8c609facabf7750b3df30ec81dea5c795f51bdb4e7fd.jpg)
- Turn off all the devices before starting the connections.
- Connect the STV-250N Stereo Video Cable to the camcorder's AV terminal and the audio/video terminals on the TV/VCR.
Connect the white plug to the white audio terminal L (left), the red plug to the red audio terminal R (right) and the yellow plug to the yellow video terminal VIDEO.
- If connecting to a TV, set the input selector to VIDEO. If connecting to a VCR, set the input selector to LINE.

We recommend powering the camcorder from a household power source.
☐ TVs with Video ID-1 system: Recordings made in the widescreen mode will be automatically played back in widescreen mode.
Selecting the Type of TV
During playback set the [TV TYPE] option according to the TV set to which you connect the camcorder.
CAMERA

PLAY·
MENU
(□ 33)


- Press the FUNC. button to open the FUNC. menu.
- With the joystick select (▲▼) the 📋 icon and press (💡).
- Select (▲▼) the [VCR SETUP] menu and press (☐). Then, select (▲▼) the [TV TYPE] option and press (☐).
- Select a setting option and press ( ) to save the changes.
• WIDE TV: TV sets with 16:9 aspect ratio.
• NORMAL TV: TV sets with 4:3 aspect ratio
- Press the FUNC. button to close the menu.


○ Playing back recordings made in the widescreen mode on a normal TV: If the TV type is set to [NORMAL TV] the recording will be played back in "letterbox" display. If the TV type is set to [WIDE TV] the image will appear horizontally squeezed.
○ If you connect the camcorder to a TV with Video ID-1 system, recordings made in the widescreen mode will be automatically played back in widescreen mode.
When the TV type is set to [NORMAL TV] the digital effects are not available in PLAY·mode.
Selecting the Audio Output Channel
You can select the output channels when playing back a tape with audio recorded on two channels.
CAMERA

PLAY·
MENU

33)


AUDIO SETUP

OUTPUT CH L/R
-
Press the FUNC. button to open the FUNC. menu.
-
With the joystick select (▲▼) the 📋 icon and press (💡).
-
Select (▲▼) the [AUDIO SETUP] menu and press (○). Then, select (▲▼) the [OUTPUT CH] option and press (○).

- Select (▲▼) a setting option and press (○) to save the changes.
• L/R: Stereo: L+R channels, Bilingual: Main+Sub.
• L/L: Stereo: L channel, Bilingual: Main.
• R/R: Stereo: R channel, Bilingual: Sub.
- Press the FUNC. button to close the menu.

The setting resets to the [L/R] setting when you turn the camcorder off.
Menus and Settings
The camcorder's functions and settings are controlled from a series of menus that appear when you press the FUNC. button. Most basic functions appear on the first menu screen - the FUNC. menu. For more advanced settings you have to open the setup menus by selecting the [MENU] option from the FUNC. menu.

Selecting Menus and Settings
FUNC. menu:
- Press the FUNC. button to open the FUNC. menu.
- With the joystick select (▲▼) the icon of the function you want to change.
- Select (◀) a setting option from the bottom bar.

With some settings, you will need to press ( ) or make further selections with the joystick. In such cases, a joystick icon (next to the bottom bar) or small arrows (around the setting option) will be displayed as an additional operation guide.
- Press the FUNC. button to save the setting and close the menu.
Setup menus:
- Press the FUNC. button to open the FUNC. menu.
- With the joystick select (▲▼) the icon and press (○○○).
- Select (▲▼) a setup menu and press (☐).
- Select (▲▼) a menu item and press (○).
- Select (▲▼) a setting option and press (○) to save the changes.
- Press the FUNC. button to close the menu.

○ Pressing the FUNC. button at any time closes the menu.
- Items that are not available appear grayed out.
- The menu will not appear when you press the FUNC. button while recording movies.
- You can open the menu directly on the setup menus screen by holding the FUNC. button pressed for more than 2 seconds.
Menu and Default Settings
Default settings are shown in boldface.
CAMERA·
* The item will not appear in EASY mode.
| Submenu | Menu Item | Setting Options | |
| FUNC. menu | Recording Programs* | PROGRAM AE, PORTRAIT, SPORTS, NIGHT, SNOW, BEACH, SUNSET, SPOTLIGHT, FIREWORKS | 36 |
| White Balance | AUTO, DAYLIGHT, TUNGSTEN, SET | 43 | |
| Image Effect | IMAGE EFFECT OFF, VIVID, NEUTRAL, SOFT SKIN DETAIL | 44 | |
| Self Timer | SELF TIMER OFF, SELF TIMER ON | 47 | |
| Digital Effects | D.EFFECT OFF, FADER, EFFECT | 51 | |
| CAMERA SETUP | SHUTTR SPEED* | AUTO, 1/60, 1/100, 1/250, 1/500, 1/1000, 1/2000 | 45 |
| A.SL SHUTTER | ON, OFF | 46 | |
| D.ZOOM | OFF, 100X, 800X | 25 | |
| ZOOM SPEED | VARIABLE, SPEED 3, SPEED 2, SPEED 1 | 25 | |
| IMG STAB* | ON, OFF | 61 | |
| VCR SETUP | REC MODE | STD PLAY, LONG PLAY | 48 |
| AUDIO SETUP | WIND SCREEN* | AUTO, OFF | 49 |
| AUDIO MODE | 16bit, 12bit | 49 | |
| DISPLAY SETUP/ | BRIGHTNESS | - | 60 |
| TV SCREEN | ON, OFF | 67 | |
| LEVEL MARKER | ON, OFF | 21 | |
| LANGUAGE | See list of languages. | 59 | |
| DEMO MODE | ON, OFF | 62 | |
| SYSTEM SETUP | BEEP | HIGH VOLUME, LOW VOLUME, OFF | 60 |
| START-UP IMG | ON, OFF | 61 | |
| POWER SAVE | ON, OFF | 21 | |
| DATE/TIME SETUP | T.ZONE/DST | See list of time zones. | 18 |
| DATE/TIME | - | 18 | |
| DATE FORMAT | Y.M.D: 2006.1.1 AM12:00M.D.Y: JAN.1,2006 12:00AMD.M.Y: 1.JAN.2006 12:00AM | 59 | |
| Submenu | Menu Item | Setting Options | ☐ |
| FUNC. menu | Speaker Volume | -...... | 29 |
| Recording Pause | - | 65 | |
| End Search | - | 57 | |
| Digital Effects | D.EFFECT OFF, FADER, EFFECT | 51 | |
| VCR SETUP | REC MODE | STD PLAY, LONG PLAY | 48 |
| TV TYPE | NORMAL TV, WIDE TV | 31 | |
| AUDIO SETUP | OUTPUT CH | L/R, L/L, R/R | 32 |
| 12bit AUDIO | STEREO1, STEREO2, MIX/FIXED, MIX/VAR. | 58 | |
| MIX BALANCE | ST-1———ST-2 | 58 | |
| AUDIO MODE | 16bit, 12bit | 49 | |
| DISPLAY SETUP/ | BRIGHTNESS | -+ | 60 |
| TV SCREEN | ON, OFF | 67 | |
| DISPLAYS | ON, OFF | 67 | |
| 6SEC.DATE | ON, OFF | 56 | |
| DATA CODE | DATE, TIME, DATE & TIME | 56 | |
| LANGUAGE | See list of languages. | 59 | |
| SYSTEM SETUP | BEEP | HIGH VOLUME, LOW VOLUME, OFF | 60 |
| START-UP IMG | ON, OFF | 61 | |
| DATE/TIME SETUP | T.ZONE/DST | See list of time zones. | 18 |
| DATE/TIME | - | 18 | |
| DATE FORMAT | Y.M.D : 2006.1.1 AM12:00M.D.Y : JAN.1,2006 12:00AMD.M.Y : 1.JAN.2006 12:00AM | 59 |
EASY Easy Recording Program
The camcorder adjusts focus, exposure and other settings automatically, allowing you to just point and shoot.

Recording Programs
Program AE
The camcorder adjusts focus, exposure and other settings automatically. However, you have the option of adjusting the settings manually.
Portrait
Use this mode to give accent to your subject by blurring the background or foreground. The blur effect increases the more you zoom to telephoto.
Sports
Use this mode to record sports scenes (such as tennis or golf) or moving objects (such as roller coasters).
Night
Use this mode to record in dimly lit places.
Snow
Use this mode to record in bright ski resorts. It prevents the subject from being underexposed.
Beach
Use this mode to record on a sunny beach. It prevents the subject from being underexposed.


Sunset
Use this mode to record sunsets in vibrant colors.
Spotlight
Use this mode to record spotlit scenes.
Fireworks
Use this mode to record fireworks.

E


Recording
Advanced Functions

Availability of Functions in Each Mode:
| Program Selector | EASY | P | ||||||||
| Recording Program | ||||||||||
| Image Stabilizer | ×(on) | ○ | ||||||||
| Focus | ×(A) | ○ | ||||||||
| White Balance | ×(A) | ○ | × | |||||||
| Wind Screen | ×(A) | ○ | ||||||||
| Shutter Speed | ×(A) | ○ | ×(A) | |||||||
| Exposure Adjustment | ×(A) | ○ | × | |||||||
| Digital Effects | × | ○ | ||||||||
○: Available ×: Not available A: Auto setting
Selecting the Easy Recording Program
CAMERA·
PLAY·
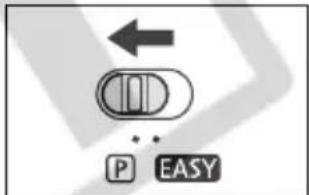
Set the program selector to EASY.
"□" appears.

Selecting a Recording Program
CAMERA·
PLAY·
MENU

33)

PROGRAM AE
- Set the program selector to ☐.

-
Press the FUNC. button to open the FUNC. menu.
-
With the joystick select (▲▼) the recording programs icon.
-
Select (◀) the recording program from the options on the bottom bar.

- Press the FUNC. button to save the setting and close the menu.
The symbol of the recording program selected appears.

Do not change the recording program while recording as the brightness of the image may change abruptly.
○ Portrait/Sports mode: The picture may not appear smooth when played back.
- Snow/Beach mode: - The subject may become overexposed in dark surround image on the screen. - The picture may not appear smooth when played back.
- Moving subjects may leave a trailing afterimage. - Picture quality may not be as good as in other modes. - White points may appear on the screen. - Autofocus may not work as well as in other modes. In such case, adjust the focus manually. - The digital zoom cannot be used with this recording program.
- Fireworks mode: To avoid camcorder shake, we recommend using a tripod.
Adjusting the Exposure Manually
Adjust the exposure when a backlit subject becomes underexposed, or overexposed due to bright light.
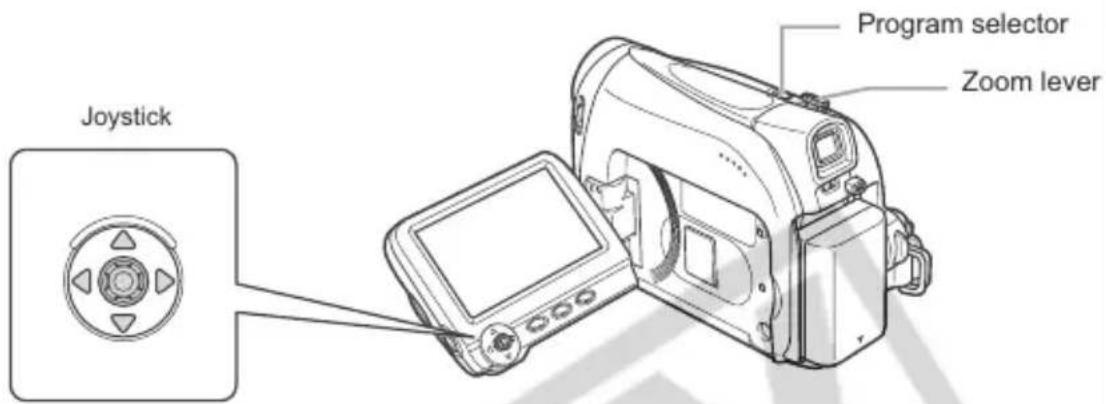
CAMERA·
PLAY·
- Set the program selector to ☐.

-
If the joystick guide does not appear on screen, press ( ) to display it.
-
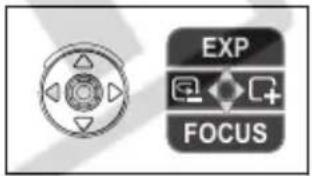
Push the joystick (▲) towards [EXP] to enter the exposure lock mode.

[EXP] on the joystick guide will be displayed in light blue and the exposure adjustment indicator and the neutral value “±0” appear on the screen.
- Adjust (◀) the brightness of the image as necessary.
To return to the automatic exposure, push the joystick (▲) towards [EXP] once more. The exposure adjustment indicator will disappear and [EXP] will turn white again.
-
Push the joystick (▼) towards [BACK] to save the exposure setting.
-
When you operate the zoom during exposure lock, the brightness of the image may change.
-
The adjustment range depends on the brightness at the time you locked the exposure.
-
If necessary, press ( ) again to hide the joystick guide.

The manual exposure setting will reset to auto exposure when you turn the camcorder off or change the recording program.
Adjusting the Focus Manually
Autofocus may not work well on the following subjects. In such case, focus manually.
Reflective surfaces

Subjects with low contrast or without vertical lines

Fast Moving Subjects

Through dirty or wet windows

Night Scenes

CAMERA·
PLAY·
-
Set the program selector to ☐.
-
Adjust the zoom.
When you operate the zoom after adjusting the focus, the subject may not stay in focus. Adjust the zoom before the focus.
- If the joystick guide does not appear on screen, press (💡) to display it.


- Push the joystick (▼) towards [FOCUS] to activate the manual focus.
[FOCUS] on the joystick guide will be displayed in light blue and "MF" appears on the screen.
- Adjust (◀▶) the focus as necessary.
- Push the joystick (▶) towards ▲ for a farther focal distance or push it (◀) towards □ for a closer focal distance.
- To return to autofocus, push the joystick (▼towards [FOCUS] once more. "MF" will disappear and [FOCUS] will turn white again.
- Push the joystick (▲) towards [BACK] to save the focus adjustment.
- If necessary, press ( ) again to hide the joystick guide.

The manual focus will reset to autofocus when you set the program selector to EASY.
Infinity Focus
Use this function when you wish to focus on faraway subjects such as mountains or fireworks.
- In the manual focus mode press (☐) to display the joystick guide.
-
Keep the joystick pushed (▼) towards [FOCUS] for more than 2 seconds.
-
At first, "MF" will appear on the screen and then it will be replaced by the "∞" symbol.
-
In the infinity focus mode: If you operate the zoom or the joystick (◀▶) or if you turn the camcorder off, the infinity focus will be canceled and the camcorder will return to manual focus.
-
Push the joystick (▲) towards [BACK] to save the focus adjustment.
- If necessary, press ( ) again to hide the joystick guide.
Setting the White Balance
You can use the preset modes to reproduce colors more accurately, or set a custom white balance to obtain the optimal setting.
| AWB AUTO | Settings are automatically set by the camcorder. |
| DAYLIGHT | For recording outdoors on a bright day. |
| TUNGSTEN | For recording under tungsten and tungsten type (3-wavelength) fluorescent lighting. |
| SET | Use the custom white balance setting to make white subjects appear white under colored lighting. |


| AWB | AUTO |
- Set the program selector to ☐.
- Press the FUNC. button to open the FUNC. menu.
- With the joystick select (▲▼) the white balance icon.
- Select (◀▶) the white balance setting from the options on the bottom bar.
If you select a white balance setting other than ■ [SET], continue to directly to step 6.
To set the custom white balance when you select ■ [SET]:
-
Point the camcorder at a white object, zoom in until it fills the whole screen and press ( ).
-
Keep the camcorder zoomed in at the white object until step 6 is completed.
-
The “■” icon flashes and stops flashing when the adjustment is completed.
-
Press the FUNC. button to save the setting and close the menu.

○ Use the auto setting for normal outdoor scenes.
When the program selector is set to EASY the white balance is preset to [AUTO].
○ The camcorder retains the custom white balance setting even if you turn it off.
When you have set the custom white balance:
- Depending on the light source, “,” may keep flashing. The result will still be better than with the auto setting.
- Reset the white balance when the lighting condition changes.
- Turn off the digital zoom.
○ Custom white balance may provide better results in the following cases:
- Changing lighting conditions
- Close-ups
- Subjects in a single color (sky, sea or forest)
- Under mercury lamps or certain types of fluorescent lights
Selecting an Image Effect
You can record with different color saturation and contrast effects.
| OFF IMAGE EFFECT OFF | Records with no image enhancing effects. |
| VIVID | Emphasizes the contrast and color saturation. |
| NEUTRAL | Tones down the contrast and color saturation. |
| SOFT SKIN DETAIL | Softens the details in the skin tone area for a more complimentary appearance. |
CAMERA·
PLAY·
MENU


IMAGE EFFECT OFF
- Press the FUNC. button to open the FUNC. menu.
- With the joystick select (▲▼) the image effects icon.
- Select (◀▶) the image effect from the options on the bottom bar.
- Press the FUNC. button to save the setting and close the menu.

The image effects cannot be used when the program selector is set to EASY.
☐ [SOFT SKIN DETAIL]: To obtain the best effect, use this function when recording a person in close-up. Note that areas similar to the skin color may lack in detail.
You can adjust the shutter speed manually to make stable shots of fast moving subjects. Available shutter speed settings: AUTO, 1/60, 1/100, 1/250, 1/500, 1/1000, 1/2000

MENU
(□ 33)
![graph LR A["Menu"] --> B["CAMERA SETUP"] B --> C["SHUTTR SPEED AUTO"]](/content/2026/07/1492966/images/f3d5777d85339fc680c17f383caeb0fba6581e3cc23364be9da4c6fc7355240d.jpg)
- Set the program selector to ☐.
- Press the FUNC. button to open the FUNC. menu.
- With the joystick select (▲▼) the recording program icon and select (◀▶) the P [PROGRAM AE] program.
- With the joystick select (▲▼) the icon and press (○○○).
- Select (▲▼) the [CAMERA SETUP] menu and press (○). Then, select (▲▼) the [SHUTTR SPEED] option and press (○).
- Select (▲▼) a setting option and press (○) to save the changes.
- Press the FUNC. button to close the menu.

Do not point the camcorder directly at the sun when the shutter speed is set to 1/1000 or higher.
○ The image may flicker when recording with high shutter speeds.
○ Recording under fluorescent lights: In the ☐ Easy Recording, P Program AE or ▶ Night recording programs, the camcorder automatically detects the flicker of fluorescent lighting and adjusts the shutter speed accordingly. However, if the screen starts to flicker, select the P Program AE recording program and set the shutter speed to 1/100.
The shutter speed resets to [AUTO] when you set the program selector to EASY or when you change the recording program.
○ Guidelines for Recording with High Shutter Speeds:
- Outdoor sports such as golf or tennis: 1/2000
- Moving objects such as cars or roller coasters: 1/1000, 1/500 or 1/250
- Indoor sports such as basketball: 1/100
E
Auto Slow Shutter
In the ☐ Easy Recording mode or when the shutter speed is set to [AUTO] in the Program AE recording program, the camcorder uses shutter speeds down to 1/30. This allows you to obtain a brighter recording in places with insufficient lighting. However, you can set the camcorder not to use a slow shutter speed.
CAMERA·

PLAY·
MENU


CAMERA SETUP

A.SL SHUTTER ON
- Open the FUNC. menu, select (▲▼) the icon and press (○).
- Select (▲▼) the [CAMERA SETUP] menu and press (💡). Then, select (▲▼) the [A.SL SHUTTER] option and press (💡).
- Set (▲▼) it to [OFF] and press (⊕) to save the changes, then close the menu.

When set to [ON], moving subjects may leave a trailing afterimage.


MENU
(□ 33)
| DEF | SELF TIMER OFF |
- Open the FUNC. menu and select (▲▼) the self timer icon.
- Set (◀▶) it to [SELF TIMER ON] and close the menu.
- Press the start/stop button.
The camcorder starts recording after a 10-second countdown. The countdown appears on the screen.

To cancel the self timer, select (◀▶) [SELF TIMER OFF] in step 2 above. Once the countdown has begun, you can also press the start/stop button to cancel the self-timer.
○ The self-timer will be canceled when you turn off the camcorder.
Changing the Recording Mode (SP|LP)
You can choose between SP (standard play) and LP (long play). LP extends the tape usage by 1.5 times.
CAMERA·
PLAY·
MENU
(□ 33)
![graph LR A["..."] --> B["OCD"] B --> C["VCR SETUP"] C --> D["REC MODE STD PLAY"]](/content/2026/07/1492966/images/5ece0a48ef8c94bd76edcd3a6357aebdfeb8401c6b4cdaf17267b98706672095.jpg)
- Open the FUNC. menu, select (▲▼) the icon and press (○○○).
- Select (▲▼) the [VCR SETUP] menu and press (○). Then, select (▲▼) the [REC MODE] option and press (○).
- Set (▲▼) it to [STD PLAY] or [LONG PLAY] and press (○) to save the changes, then close the menu.

Depending on the nature and usage condition of the tape, picture and sound recorded in LP mode may be distorted. We recommend using the SP mode for important recordings.

- If you record in both SP and LP modes on the same tape, the playback picture may become distorted and the time code may not be written correctly. - If you play back a tape that has been recorded in LP mode with another digital device on this camcorder, or vice versa, picture and sound may become distorted.
Changing the Audio Mode
You can record sound in two audio modes—16-bit and 12-bit. The 12-bit mode records sound on two channels (stereo 1), leaving 2 channels free (stereo 2) for adding new sound later with another editing device. Select the 16-bit mode for higher sound quality.
CAMERA·
PLAY·
MENU

![graph LR A[" "] --> B["<<"] --> C["AUDIO SETUP"] --> D["AUDIO MODE 12bit"]](/content/2026/07/1492966/images/c1cf676bf01f7b043b6d23120aaea884b18803fcda9314d93513641f364b8e39.jpg)
- Open the FUNC. menu, select (▲▼) the icon and press (○).
- Select (▲▼) the [AUDIO SETUP] menu and press (💡). Then, select (▲▼) the [AUDIO MODE] option and press (💡).
- Set (▲▼) it to [16bit] or [12bit] and press (💡) to save the changes, then close the menu.
The selected audio mode is displayed for approximately 4 seconds.
Wind Screen
The camcorder reduces the wind noise automatically (only when recording audio with the built-in microphone). However, you can turn off the wind screen when recording indoors, or when you want the microphone to be as sensitive as possible.
CAMERA·
PLAY·
MENU

![graph LR A[" "] --> B["<<"] --> C["AUDIO SETUP"] --> D["WIND SCREEN AUTO"]](/content/2026/07/1492966/images/91b32435bcd088fcf7a3175d4b13a6d754f8f4441bf923723b7641c2a14937ce.jpg)
- Open the FUNC. menu, select (▲▼) the icon and press (○).
- Select (▲▼) the [AUDIO SETUP] menu and press (○). Then, select (▲▼) the [WIND SCREEN] option and press (○).
- Set (▲▼) it to [OFF] and press (○) to save the changes, then close the menu.
"OFF/" appears when you turn the wind screen off.
E
Using an External Microphone
You can connect an external microphone to the MIC terminal. Use commercially available condenser microphones with their own power supply.

MIC terminal
Open the terminal cover

You can connect almost any stereo microphone equipped with a 3.5 mm plug but the audio level will be different than with the built-in microphone.
Faders (□ 52)
Begin or end scenes with a fade to or from black.
Fade Trigger (FADE-T) | Wipe (WIPE) |
Corner Wipe (CORNER) | Jump (JUMP) |
Flip (FLIP) | Puzzle (PUZZLE) |
Zigzag (ZIGZAG) | Beam (BEAM) |
Tide (TIDE) |
Effects (53)
Add flavor to your recordings.
| Black and White (BLK&WHT) | Sepia (SEPIA) | Art (ART) |
 |  |  |
| Mosaic (MOSAIC) | Ball (BALL) | Cube (CUBE) |
 |  |  |
| Wave (WAVE) | Color Mask (COLOR M.) | Mirror (MIRROR) |
 |  |  |
Selecting a Fader
In CAMERA · mode, set the program selector to P.
CAMERA·
PLAY·
* Not available if the TV type is set to [NORMAL TV].
MENU
(33)
| OFF | D.EFFECT OFF |
-
Open the FUNC. menu and select (▲▼) the digital effects icon.
-
Select (◀▶) the [FADER] option and press (○).
-
Select (◀▶) a setting option, press (○) and close the menu.
The symbol of the selected fader will appear on screen.

CAMERA·
- Fade in: In record pause mode, press the D.EFFECTS button and begin recording by pressing the start/stop button.
Fade out: During recording, press the D.EFFECTS button and pause recording by pressing the start/stop button.

The fader can be activated/deactivated by pressing the D.EFFECTS button.
PLAY·
- Fade in: In playback pause mode, press the D.EFFECTS button and begin playback by pushing the joystick (▲) towards ▶/■.
Fade out: During playback, press the D.EFFECTS button and pause playback by pushing the joystick (▲) towards ▶/■.

The fader can be activated/deactivated by pressing the D.EFFECTS button.
Selecting an Effect
In CAMERA · mode, set the program selector to P.


* Not available if the TV type is set to [NORMAL TV].
MENU

| OFF | D.EFFECT OFF |
- Open the FUNC. menu and select (▲▼) the digital effects icon.
- Select (◀▶) the [EFFECT] option and press (○).
- Select (◀▶) a setting option, press (💡) and close the menu.
The symbol of the selected effect will appear on screen.
- Press the D.EFFECTS button.
• The symbol of the selected effect will turn green.
- The effect can be activated/deactivated by pressing the D.EFFECTS button.


Turn off the digital effect when you do not use it.
- The camcorder retains the setting even if you turn it off or change the recording program.
○ The image quality may be slightly lower with digital effects.
○ Digital effects cannot be used in the following cases:
- When the program selector is set to EASY.
- During DV dubbing.
The camcorder uses the full width of the CCD providing high-resolution 16:9 recording.

CAMERA·
PLAY·
Press the WIDE SCR button.
- “WIDE” disappears and the picture changes to 4:3 aspect ratio.
- On the LCD screen: Widescreen video will display normally; video in 4:3 aspect ratio will appear with black side bars.
- On the viewfinder screen: Widescreen video will appear in "letterbox" display; video in 4:3 aspect ratio will display normally.

○ Playing back recordings made in the widescreen mode on a normal TV: If the TV type is set to [NORMAL TV] the recording will be played back in "letterbox" display. If the TV type is set to [WIDE TV] the image will appear horizontally squeezed (☐ 31).
○ If you connect the camcorder to a TV with Video ID-1 system, recordings made in the widescreen mode will be automatically played back in widescreen mode.
Magnifying the Image
The playback image can be magnified up to 5 times.

CAMERA·
PLAY·
1. Move the zoom lever toward T.
• The image is magnified by 2 times.
- A frame appears indicating the position of the magnified area.
- To further enlarge the image, move the zoom lever toward T. To shrink the image below 2 times magnification, move the zoom lever toward W.
2. Select (▲▼, ◀▶) the magnified area with the joystick.
To cancel the magnification, move the zoom lever toward W until the frame disappears.


While the magnification position frame is displayed it will replace the joystick guide. Cancel the magnification to return to normal playback.
The camcorder maintains a data code containing the recording date and time. You can select the data code combination and display it during playback.

CAMERA·oo
PLAY·
MENU
(□ 33)

DISPLAY SETUP/
DATA CODE DATE & TIME
- Open the FUNC. menu, select (▲▼) the :icon and press (○).
- Select (▲▼) the [DISPLAY SETUP/☐] menu and press (☐). Then, select (▲▼) the [DATA CODE] option and press (☐).
- Select a setting option and press ( ) to save the changes, then close the menu.
- To display the data code during playback: Press the DATA CODE button.

The data code will not display the next time you turn on the camcorder.
Six-Second Auto Date
Date and time appear for 6 seconds when you begin playback, or to indicate that date or time zone has changed.
CAMERA
PLAY·
MENU
(33)


DISPLAY SETUP/
6SEC.DATE OFF
- Open the FUNC. menu, select (▲▼) the :icon and press (○).
- Select (▲▼) the [DISPLAY SETUP/☐] menu and press (☐). Then, select (▲▼) the [6SEC.DATE] option and press (☐).
- Select a setting option and press (☐) to save the changes, then close the menu.
End Search
When you have played back a tape, you can use this function to locate the end of the last recorded scene.

CAMERA ·
PLAY·
In stop mode:
-
Open the FUNC. menu, select (▲▼) the end search icon → and press (💡).
-
Select (◀▶) [EXECUTE] and press (💡) to start the search.
-
"END SEARCH" appears.
- The camcorder rewinds/fast forwards the tape, plays back the last few seconds of the recording and stops the tape.
- Operating the joystick (▲▼, ◀▶) will cancel the search.

○ End search cannot be used once you unload the cassette.
○ End search may not work properly if a blank section exists on the tape.
Playing Back a Tape with Added Sound
You can select to play back Stereo 1 (original sound), Stereo 2 (added sound), or adjust the balance of both sounds.
CAMERA ·
PLAY·
MENU
(□ 33)
![graph LR A["Icon"] --> B["<< Audio SETUP"] B --> C["12bit AUDIO STERE01"]](/content/2026/07/1492966/images/8b736fd01e80e833f8c50987a50fe3524deec862e99d913f0c368296ae86ad8e.jpg)
- Open the FUNC. menu, select (▲▼) the icon and press (○○○).
- Select (▲▼) the [AUDIO SETUP] menu and press (○). Then, select (▲▼) the [12bit AUDIO] option and press (○).
- Select a setting option and press (ODD) to save the changes.
• STEREO1: Plays back the original sound.
• STEREO2: Plays back the added sound.
- MIX/FIXED: Plays back Stereo 1 and Stereo 2 in the same level.
- MIX/VAR.: Plays back Stereo 1 and Stereo 2. The mix balance can be adjusted.
- If you select an audio setting other than [MIX/VAR.], close the menu.
To adjust the mix level when you select [MIX/VAR.]:
- From the [AUDIO SETUP] menu select (▲▼) the [MIX BALANCE] option and press (💡).
- Adjust (◀) the mix level between ST-1 and ST-2 and press (💡) to save the changes, then close the menu.

The camcorder resets to [STEREO1] when you turn the camcorder off. However, the mix balance is memorized by the camcorder.
○ Audio dubbing cannot be performed with your camcorder.
Changing the Display Language
The language used for screen display and menu items can be changed. The available set of languages varies depending on the region. Follow the procedure below to check which set of languages are provided with your camcorder.
| Language Set A | English, German, Spanish, French, Italian, Polish, Russian, Simplified Chinese, Japanese |
| Language Set B | English, Simplified Chinese, Traditional Chinese, Korean |
CAMERA

PLAY

MENU


- Open the FUNC. menu, select (▲▼) the :icon and press (○○○).
- Select (▲▼) the [DISPLAY SETUP/☐] menu and press (☐). Then, select (▲▼) the [LANGUAGE] option and press (☐).
- Select a language and press (JDC) to save the changes, then close the menu.

○ If you have mistakenly changed the language, follow the 📋 mark next to the menu item to change the setting.
The display "FUNC." at the bottom of the screen refers to the button's name on the camcorder and will not change when you change the language.
Changing the Date Format
You can select between three date formats. For example, [JAN. 1, 2006], [1. JAN. 2006] and [2006. 1. 1].
CAMERA

PLAY

MENU


- Open the FUNC. menu, select (▲▼) the :icon and press (○○○).
- Select (▲▼) the [DATE/TIME SETUP] menu and press (○). Then, select (▲▼) the [DATE FORMAT] option and press (○).
- Select a setting option and press (💡) to save the changes, then close the menu.
E
Beep
You will hear a beep upon camcorder operations such as power on/off, start/stop, self-timer countdown, and unusual conditions of the camcorder. If you turn off the beep, all camcorder sounds will be turned off.
CAMERA·
PLAY·
MENU

33)


SYSTEM SETUP

BEEP HIGH VOLUME
To turn off the beep:
- Open the FUNC. menu, select (▲▼) the :icon and press (○).
- Select (▲▼) the [SYSTEM SETUP] menu and press (💡). Then, select (▲▼) the [BEEP] option and press (💡).
- Set it to [OFF] and press ( ) to save the changes, then close the menu.
Adjusting the Brightness of the LCD Screen
CAMERA·
PLAY·
MENU

33)


DISPLAY SETUP/

BRIGHTNESS - +
- Open the FUNC. menu, select (▲▼) the icon and press (○).
- Select (▲▼) the [DISPLAY SETUP/☐] menu and press (☐). Then, select (▲▼) the [BRIGHTNESS] option and press (☐).
- Adjust (◀) the brightness level and press (○) to save the changes, then close the menu.

Changing the brightness of the LCD screen does not affect that of the viewfinder or the recordings.
Turning Off the Image Stabilizer
The image stabilizer compensates for camcorder shake even at full telephoto. It tries to compensate for horizontal movements; therefore, you may decide to turn it off when you mount the camcorder on a tripod.
CAMERA·
PLAY·
MENU

33)


CAMERA SETUP

IMG STAB ON
-
Open the FUNC. menu, select (▲▼) the icon and press (○).
-
Select (▲▼) the [CAMERA SETUP] menu and press (○). Then, select (▲▼) the [IMG STAB] option and press (○).
-
Set it to [OFF] and press (💡) to save the changes, then close the menu.

" disappears.

The image stabilizer cannot be turned off when the program selector is set to EASY.
- The image stabilizer is designed to compensate a normal degree of camcorder shake.
- The image stabilizer might not be as effective when using the ☐ Night recording program.
Changing the Display of the Start-Up Image
You can set whether the Canon logo will be displayed or not when you turn on the camcorder.
CAMERA·
PLAY·
MENU

33)


SYSTEM SETUP

START-UP IMG ON
To turn off the start-up image:
- Open the FUNC. menu, select (▲▼) the icon and press (○).
- Select (▲▼) the [SYSTEM SETUP] menu and press (○). Then, select (▲▼) the [START-UP IMG] option and press (○).
- Set it to [OFF] and press (💡) to save the changes, then close the menu.
E
Demonstration Mode
The demonstration mode displays the camcorder's main features. It starts automatically when you leave the camcorder turned on (using the power adapter) without loading a recording media for more than 5 minutes. However, you can set the camcorder not to start the demonstration mode.
CAMERA·

PLAY·
MENU


DISPLAY SETUP/

DEMO MODE ON
To deactivate the demonstration mode:
- Open the FUNC. menu, select (▲▼) the 📄 icon and press (ód).
- Select (▲▼) the [DISPLAY SETUP/☐] menu and press (☐). Then, select (▲▼) the [DEMO MODE] option and press (☐).
- Set it to [OFF] and press (💡) to save the changes, then close the menu.

To cancel the demo mode once it has begun, press any button, turn off the camcorder or load a recording media.
Recording to a VCR or Digital Video Device
You can copy your recordings by connecting the camcorder to a VCR or a digital video device. If you connect a digital video device, you can copy recordings with virtually no generation loss in image and sound quality.
Connecting the Devices
① Connecting a VCR
See Playing Back on a TV Screen (☐ 30).
② Connecting a Digital Video Device
Refer also to the instruction manual of the digital video device.

Recording
CAMERA·
PLAY·
- Set the camcorder to PLAY·☐ mode and load a recorded cassette.
- Connected device: Load a blank cassette and set the device to record pause mode.
- Locate the scene you wish to copy and pause playback shortly before the scene.
- Play back the tape.
- Connected device: Begin recording when the scene you wish to copy appears. Stop recording when copying is complete.
- Stop playback.
E

We recommend powering the camcorder from a household power source.
When connecting a VCR, the quality of the edited tape will be slightly lower than that of the original.
When connecting a digital video device:
- If the picture does not appear, reconnect the DV cable or turn the camcorder off and back on again.
- Proper operation cannot be guaranteed for all digital video devices equipped with a DV terminal. If operation does not work, use the AV terminal.
Recording from Digital Video
Devices (DV Dubbing)
You can record from other digital video devices equipped with a DV terminal with virtually no loss in picture and sound quality.
CAMERA·
PLAY·
- Connect the camcorder to the digital video device.
See Connecting a Digital Video Device (☐ 63). - Set the camcorder to PLAY·oo mode and load a blank cassette.
- Connected device: Load the recorded cassette or disc.
- Open the FUNC. menu, select (▲▼) the recording pause icon ● II and press (💡).
- Select (◀▶) [EXECUTE] and press (💡).
In record pause and during recording, you can check the picture on the screen.
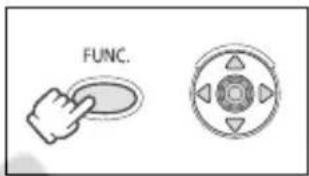
- Connected device: Play back the tape or disc.
- If the joystick guide does not appear on screen, press ( ) to display it.
-
Push the joystick (▲) towards ●/■ when the scene you wish to record appears.
-
Recording starts.
-
Push the joystick (▲) towards ●/■ again to pause/resume the recording.
-
Push the joystick (▼) towards ■ to stop recording.
-
Connected device: Stop playback.


○ Blank sections may be recorded as anomalous picture.
○ If the picture does not appear, reconnect the DV cable or turn the camcorder off and back on again.
- You can only record video signals from devices with the DV logo from recordings in SD (standard definition) standard, in SP or LP recording mode. Note that signals from identically shaped DV (IEEE1394) terminals may be in different video standards.

We recommend powering the camcorder from a household power source.
Copyright Signal
Certain software tapes are copyright protected. If you attempt to play back such tape, "COPYRIGHT PROTECTED PLAYBACK IS RESTRICTED" appears and you will not be able to view the contents of the tape. If you attempt to record from such tape via the DV terminal, "COPYRIGHT PROTECTED DUBBING RESTRICTED" appears and you will not be able to record the contents of the tape.
Transferring Video Recordings to a Computer
Transferring Using a DV Cable
You can transfer recordings to a computer equipped with a IEEE1394 (DV) terminal or IEEE1394 capture board. Use the editing software supplied with your computer/capture board to transfer video recording from tape to computer. Refer to the instruction manual of the software. A driver is preinstalled on Windows operating systems later than Windows 98 Second Edition and Mac operating systems later than Mac OS 9, and will be installed automatically.
![graph LR A["Camera"] -->|Commercially available DV cable| B["IEEE1394 (DV) terminal"] B --> C["Computer"] C --> D["6-pin"] C --> E["4-pin"]](/content/2026/07/1492966/images/076d1b17e42e3de504ff87e305534c457c5ac9467a0373bce1bc7b8c31a655fc.jpg)

Operation may not work correctly depending on the software and the specifications/settings of your computer.
If the computer freezes while you have connected the camcorder, disconnect and reconnect the DV cable. If the problem persists, disconnect the interface cable, turn off camcorder and computer, turn camcorder and computer back on and reconnect them.

We recommend powering the camcorder from a household power source while it is connected to the computer.
○ Refer also to the instruction manual of the computer.
Hiding the Displays on the LCD Screen
You can hide the displays on the LCD screen to have a clear screen for playback.
CAMERA·
PLAY·
MENU
(□ 33)
![graph LR A["File"] --> B["DISPLAY SETUP/"] B --> C["DISPLAYS ON"]](/content/2026/07/1492966/images/5aed02961b4f95e397a8b177ae0f03092d6bb1daa807e833a6592dd562e5f826.jpg)
- Open the FUNC. menu, select (▲▼) the :icon and press (○).
- Select (▲▼) the [DISPLAY SETUP/☐] menu and press (☐). Then, select (▲▼) the [DISPLAYS] option and press (☐).
-
Set it to [OFF
] and press (💡) to save the changes, then close the menu. -
Warning messages still appear, and the data code appears if turned on.
- The displays appear while a playback image is magnified or a digital effect is activated.
- Tape operation displays appear for 2 seconds.
Hiding/Showing the Displays on the TV Screen
When you connect a TV for recording, you can select to hide the camcorder displays on the TV screen. For playback, you can show the camcorder displays on the TV screen.
CAMERA·
PLAY·
MENU
(□ 33)
![graph LR A[" "] --> B[" "] B --> C["DISPLAY SETUP/"] C --> D["TV SCREEN ON"]](/content/2026/07/1492966/images/e75a16bb166cd8b64391e06a3b026cde53c188604faf88d4818f6cb0e480e324.jpg)
- Open the FUNC. menu, select (▲▼) the icon and press (💡).
- Select (▲▼) the [DISPLAY SETUP/☐] menu and press (☐). Then, select (▲▼) the [TV SCREEN] option and press (☐).
- Set it to [ON] or [OFF] and press ( ) to save the changes, then close the menu.
E
Screen Displays during Recording/Playback
CAMERA · (see also 23)

① Operating mode (☐ 6), Zoom (☐ 24), Exposure adjustment (☐ 41)
② Recording program (☐ 36)
③ White balance (☐ 43)
④ Image effects (☐ 44)
⑤ Self-timer (☐ 47)
⑥ Digital effects (☐ 51)
⑦ Shutter speed ( □□45)
⑧ Exposure lock (☐ 40)
⑨ Recording reminder (☐ 23)
⑩ Manual focus (☐ 41)
⑪ Image stabilizer (☐ 61)
⑫ Recording mode (☐ 48)
⑬ Tape operation
⑭ Time code (☐ 23)
⑮ Remaining tape (☐ 23)
⑯ Widescreen mode (☐ 54)
⑰ Wind screen ( 49)
⑱ Audio mode (☐ 49)
⑲ Condensation warning (☐ 71)
⑳ Level marker (☐ 21)
PLAY·

①12 bit audio (□□ 58)
②End search (☐ 57)
③ Tape operation
④Joystick guide (☐ 5)
⑤ Data code (☐ 56)
③ : Recording
● II: Record pause
:Stop
▲ : Eject
▶: Playback
▶: Fast
forward
◀: Rewind


Fast forward playback/rewind playback (☐ 28)
▶ III: Playback pause (☐☐ 28)
List of Messages
| Message | Explanation | ☐ |
| SET THE TIME ZONE, DATE AND TIME | You have not set the time zone, date and time. This message appears each time you turn the power on until you set the time zone, date and time. | 18 |
| CHANGE THE BATTERY PACK | Battery pack is exhausted. Replace or charge the battery pack. | 12 |
| THE TAPE IS SET FOR ERASURE PREVENTION | Cassette is protected. Replace the cassette or change the position of the protect switch. | 74 |
| REMOVE THE CASSETTE | Camcorder stopped operating to protect the tape. Unload and reload the cassette. | 15 |
| CHECK THE INPUT | DV cable is not connected, or the connected digital device is turned off. | 65 |
| CONDENSATION HAS BEEN DETECTED | Condensation has been detected in the camcorder. | 71 |
| CONDENSATION HAS BEEN DETECTED REMOVE THE CASSETTE | Condensation has been detected in the camcorder. Unload the cassette. | 71 |
| TAPE END | Tape reached the end. Rewind the tape or replace the cassette. | - |
| INCORRECT TAPE SPECIFICATION PLAYBACK IS RESTRICTED | You attempted to play back a tape recorded in HD standard. | - |
| INPUT SIGNAL NOT SUPPORTED | You attempted to input video signal in HD standard through the DV terminal. | 65 |
| HEADS DIRTY, USE CLEANING CASSETTE | Video heads are dirty. Clean the video heads. | 71 |
| COPYRIGHT PROTECTED PLAYBACK IS RESTRICTED | You attempted to play back a copyright protected tape. | 65 |
| COPYRIGHT PROTECTED DUBBING RESTRICTED | You attempted to dub a copyright protected tape. | 65 |
E
Camcorder Handling Precautions
○ Do not carry the camcorder by the LCD panel.
Do not leave the camcorder in places subject to high temperatures, such as a sun-heated car, and high humidity.
Do not use the camcorder near strong electric or magnetic fields such as above TVs, near plasma TVs or mobile phones.
Do not point the lens or viewfinder at strong light sources. Do not leave the camcorder pointed at a bright subject.
Do not use the camcorder in dusty or sandy places. Dust or sand getting inside the cassette or camcorder may cause damage. Dust and sand can also damage the lens. Attach the lens cap after use.
- The camcorder is not waterproof. Water, mud or salt getting inside the cassette or camcorder may cause damage.
○ Be careful of heat generated by lighting equipment.
Do not disassemble the camcorder. If the camcorder does not function properly, consult qualified service personnel.
○ Handle the camcorder with care. Do not subject the camcorder to shocks or vibration as this may cause damage.
○ Avoid sudden changes in temperature. Moving the camcorder rapidly between hot and cold temperatures may cause condensation to form on its internal surfaces (☐ 71).
Storage
○ If you do not intend to use the camcorder for a long time, store it in a place free of dust, in low humidity, and at temperatures not higher than 30 °C (86 °F).
- After storage, check the functions of your camcorder to make sure that the camcorder is still working properly.
Cleaning
Camcorder Body and Lens
Use a soft, dry cloth to clean the camcorder body and lens. Never use chemically treated cloth or volatile solvents such as paint thinner.
LCD Screen
○ Clean the LCD screen using a commercially available cleaning cloth for glasses.
○ Condensation may form on the surface of the screen when the temperature changes suddenly. Wipe it with a soft dry cloth.
At cold temperatures, the screen may be darker than usual. This is not a malfunction. The screen returns to normal when the camcorder warms up.
Viewfinder
- Clean the viewfinder screen using a blower brush or a commercially available cleaning cloth for glasses.
Video Heads
When the playback picture becomes distorted, the video heads need to be cleaned.
To maintain the best picture quality, we recommend cleaning the video heads frequently with the Canon DVM-CL Digital Video Head Cleaning Cassette or a commercially available dry cleaning cassette.
○ Tapes already recorded with dirty video heads may not be played back correctly even when you clean the video heads.
○ Do not use wet type cleaning cassettes as this may damage the camcorder.


Condensation
Moving the camcorder rapidly between hot and cold temperature may cause condensation (water droplets) to form on its internal surfaces. Stop using the camcorder if condensation is detected. Continued use may damage the camcorder.
Condensation may form in the following cases:
When the camcorder is moved from an air-conditioned room to warm, humid place
When the camcorder is moved from a cold place to a warm room

When the camcorder is left in a humid room

When a cold room is heated rapidly


How to avoid condensation:
○ Unload the cassette, place the camcorder in an airtight plastic bag and let it adjust to temperature changes slowly before removing it from the bag.
When condensation is detected:
The camcorder stops operating and the warning message "CONDENSATION HAS BEEN DETECTED" appears for approx. 4 seconds and "☐" starts flashing.
If a cassette is loaded, the warning message "REMOVE THE CASSETTE" appears and "→" starts flashing. Remove the cassette immediately and leave the cassette compartment open. Leaving the cassette in the camcorder may damage the tape.
○ A cassette cannot be loaded when condensation is detected.
Resuming use:
- It takes about 1 hour until the water droplets evaporate. After the condensation warning stops flashing, wait for 1 more hour before resuming use.
Battery Pack Handling Precautions
DANGER!
Treat the battery pack with care.
- Keep it away from fire (or it might explode).
- Do not expose the battery pack to temperatures higher than 60 °C (140 °F). Do not leave it near a heater or inside a car in hot weather.
- Do not try to disassemble or modify it.
- Do not drop or knock it.
- Do not get it wet.
○ Charged battery packs continue to discharge naturally. Therefore, charge them on the day of use, or the day before, to ensure a full charge.
○ Attach the terminal cover whenever a battery pack is not in use. Contact with metallic objects may cause a short circuit and damage the battery pack.
- Dirty terminals may cause a poor contact between the battery pack and the camcorder. Wipe the terminals with a soft cloth.
○ Since storing a charged battery pack for a long time (about 1 year) can shorten its lifecycle or affect performance, we recommend to discharge the battery pack fully and to store it in a dry place at temperatures no higher than 30 °C (86 °F). If you do not use the battery pack for long periods, charge and discharge it fully at least once a year. If you have more than 1 battery pack, perform these precautions at the same time for all battery packs.
Although the battery pack's operating temperature range is from 0 °C to 40 °C (32 °F to 104 °F), the optimal range is from 10 °C to 30 °C (50 °F to 86 °F). At cold temperatures, performance will temporarily decline. Warm it in your pocket before use.
- Replace the battery pack if the usable time after full charge diminishes substantially at normal temperatures.
About the battery terminal cover
The battery terminal cover has a [☐]-shaped hole. This is useful when you wish to differentiate between charged and uncharged battery packs. For example, with charged battery packs, attach the terminal cover so that the [☐]-shaped hole shows the blue label.
Back side of the battery pack
![graph TD A["Process Block"] --> B{Decision} B -->|Yes| C["Process Step 1"] B -->|No| D["Process Step 2"] C --> E["End"] D --> F["End"]](/content/2026/07/1492966/images/9b6d64c8c51a57e9e8e282d83bac128794c128a47777b9a9d7fd13b11b63c02c.jpg)
Terminal cover attached Charged

Uncharged

Lithium Button Battery Handling Precautions
WARNING!
- The battery used in this device may present a fire or chemical burn hazard if mishandled. Do not recharge, disassemble, heat above 100 °C (212 °F) or incinerate the battery.
-
Replace the battery with a CR1616 made by Panasonic, Hitachi Maxell, Sony, Toshiba, Varta or Renata. Use of other batteries may present a risk of fire or explosion.
-
Do not pick up the battery using tweezers or other metal tools as this will cause a short circuit.
○ Wipe the battery with a clean dry cloth to ensure proper contact.
Keep the battery out of reach of children. If it is swallowed, seek medical assistance immediately. The battery case may break and the battery fluids may damage stomach and intestines.
○ Do not disassemble, heat or immerse the battery in water to avoid the risk of explosion.
Cassette Handling Precautions
- Rewind tapes after use. If the tape becomes slack and damaged, it may cause picture and sound distortion.
- Return cassettes in the case and store them upright.
○ Do not leave the cassette in the camcorder after use. - Do not use spliced tapes or nonstandard cassettes as they may damage the camcorder.
○ Do not use tapes that have been jammed as video heads may become dirty. - Do not insert anything into the small holes of the cassette, or cover them with cellophane tape.
○ Handle cassettes with care. Do not drop or subject them to severe impact as this may damage the cassettes.
○ Rewind tapes from time to time if they are stored for a long time.
With cassettes equipped with a memory function, metal plated terminals may become dirty with use. Clean the terminals with a cotton swab after about 10 times of loading/unloading. The memory function is not supported by the camcorder.
Protecting Tapes from Accidental Erasure
To protect your recordings from accidental erasure, slide the tab on the cassette to the left. (This switch position is usually labeled SAVE or ERASE OFF.)
If you load a protected cassette in CAMERA mode, the message "THE TAPE IS SET FOR ERASURE PREVENTION" appears for approx. 4 seconds and "☐" starts flashing. If you wish to record on that cassette, slide the
![graph TD A["Device"] --> B["Memory Unit 1"] A --> C["Memory Unit 2"] B --> D["Rec SAVE"] C --> E["Rec SAVE"]](/content/2026/07/1492966/images/e167409a9de2283866b6a9590a0cdb3a2acf5277c60f51d6c8f4ac6ace94062c.jpg)
Using the Camcorder Abroad
Power Sources
You can use the compact power adapter to operate the camcorder and to charge battery packs in any country with power supply between 100 and 240 V AC, 50/60 Hz. Consult the Canon Service Center for information on plug adapters for overseas use.
Playback on a TV Screen
You can only play back your recordings on TVs with NTSC system. The NTSC system is used in the following countries/areas:
American Samoa, Antigua, Aruba, Bahamas, Barbados, Bermuda, Bolivia, Canada, Chile, Colombia, Costa Rica, Cuba, Ecuador, El Salvador, Guam, Guatemala, Greenland, Haiti, Honduras, Jamaica, Japan, Korea, Mexico, Micronesia, Myanmar, Nicaragua, Panama, Peru, Philippines, Puerto Rico, Saint Kitts and Nevis, Saint Lucia, Saint Vincent and the Grenadines, Surinam, Taiwan, Trinidad and Tobago, USA, Venezuela, Virgin Islands.
Troubleshooting
If you have a problem with your camcorder, refer to this checklist. Consult your dealer or a Canon Service Center if the problem persists.
Power Source
| Problem | Cause | Solution | |
| Camcorder will not turn on. | Battery pack is exhausted. | Replace or charge the battery pack. | 12 |
| Battery pack is not correctly attached. | Attach the battery pack correctly. | 12 | |
| The camcorder switches off by itself. | Battery pack is exhausted. | Replace or charge the battery pack. | 12 |
| Power save function has been activated. | Turn on the camcorder. | 21 | |
| Cassette compartment will not open. | Battery pack is exhausted. | Replace or charge the battery pack. | 12 |
| Cassette compartment cover is not fully open. | Open the cassette compartment cover fully. | 15 | |
| Cassette compartment stopped during loading/unloading. | Battery pack is exhausted. | Replace or charge the battery pack. | 12 |
| The camcorder malfunctions. | Consult a Canon Service Center. | - | |
| LCD/viewfinder switches on and off. | Battery pack is exhausted. | Replace or charge the battery pack. | 12 |
| Battery pack will not charge. | Battery packs will not charge outside the temperature range of 0 °C and 40°C (32°F and 104°F). | Charge the battery pack in temperatures between 0 °C and 40 °C (32°F and 104°F). | - |
| Battery packs become hot with use and may not charge. | Wait until the battery pack temperature is below 40 °C (104°F) and retry charging. | - | |
| The battery pack is damaged. | Use a different battery pack. | - |
Recording/Playback
| Problem | Cause | Solution | |
| Buttons will not work. | Camcorder is not turned on. | Turn on the camcorder. | 20 |
| Cassette is not loaded. | Load a cassette. | 15 | |
| “ [IMAGE] ” flashes on the screen. | Cassette is not loaded. | Load a cassette. | 15 |
| “ [IMAGE] ” flashes on the screen. | Battery pack is exhausted. | Replace or charge the battery pack. | 12 |
| “ [IMAGE] ” flashes on the screen. | Condensation is detected. | See reference page. | 71 |
| “REMOVE THE CASSETTE” appears on the screen. | Camcorder stopped operating to protect the tape. | Unload and reload the cassette. | 15 |
E
Recording
| Problem | Cause | Solution | |
| Image will not appear on the screen. | Camcorder is not set to CAMERA · mode. | Set the camcorder to CAMERA · mode. | 20 |
| "SET THE TIME ZONE, DATE AND TIME" appears on the screen. | Time zone, date and time are not set. | Set the time zone, date and time. | 18 |
| Backup battery is exhausted. | Replace the backup battery and reset the time zone, date and time. | 14 | |
| Backup battery is inserted the wrong way. | Insert the backup battery with the + side facing outward and set the time zone, date and time. | 14 | |
| Pressing the start/stop button will not start recording. | Camcorder is turned off. | Turn on the power. | 20 |
| Cassette is not loaded. | Load a cassette. | 15 | |
| Tape reached the end ("END" flashes on the screen). | Rewind the tape or replace the cassette. | 15 | |
| Cassette is protected ("flashes on the screen). | Change the position of the protect switch. | 74 | |
| Camcorder is set to a mode other than the CAMERA · mode. | Set the camcorder to CAMERA · mode. | 20 | |
| Camcorder will not focus. | Autofocus does not work on that subject. | Focus manually. | 41 |
| Viewfinder is not adjusted. | Adjust the viewfinder with the dioptric adjustment lever. | 16 | |
| Lens is dirty. | Clean the lens. | 70 | |
| A vertical light bar appears on the screen. | Bright light in a dark scene may cause a vertical light bar (smear) to appear. This is not a malfunction. | --- | - |
| Viewfinder picture is blurred. | Viewfinder is not adjusted. | Adjust the viewfinder with the dioptric adjustment lever. | 16 |
| Sound is distorted or recorded in a lower volume than the actual volume. | When recording near loud sound (such as fireworks, drums or concerts), sound may become distorted or may not be recorded in the actual sound level. This is not a malfunction. | --- | - |
Playback
| Problem | Cause | Solution | |
| Pressing the playback button does not start playback. | Camcorder is turned off, or is not set to PLAY·mode. | Set the camcorder to PLAY·mode. | 27 |
| Cassette is not loaded. | Load a cassette. | 15 | |
| Tape reached the end ("END" flashes on the screen). | Rewind the tape. | 27 | |
| Tape is running, but image will not appear on the TV screen. | TV/VIDEO selector on the TV is not set to VIDEO. | Set the selector to VIDEO. | 30 |
| Video heads are dirty. | Clean the video heads. | 71 | |
| You attempted to play back or dub copyright protected tape. | Stop playback/dubbing. | - | |
| No sound from the built-in speaker. | Speaker volume is turned off. | Adjust the volume with the [SPEAKER VOLUME] option. | 29 |
E
![graph TD A["WS-20 Wrist Strap"] --> B["MiniDV Video Cassette"] C["Shoulder Strap"] --> B D["SC-2000 Soft Carrying Case"] --> E["Canon"] F["SB/SAT"] --> G["CBC-NB2 Car Battery Charger"] H["Car Battery Charger"] --> I["CB-2LT Battery Charger"] J["Car Battery Charger"] --> K["CB-2LW Battery Charger"] L…](/content/2026/07/1492966/images/52d57f17b5b3c7d2cc8f532560daeba54a4c26392b1eba70f7dfa6a5721f38a2.jpg)
* The BP-2L5 is not available as a separate optional accessory.
Optional Accessories
Call or visit your local retailer/dealer for genuine Canon video accessories. You can also obtain genuine accessories for your Canon camcorder by calling: 1-800-828-4040, Canon U.S.A. Information Center.
Use of genuine Canon accessories is recommended.
This product is designed to achieve excellent performance when used with genuine Canon accessories. Canon shall not be liable for any damage to this product and/or accidents such as fire, etc., caused by the malfunction of non-genuine Canon accessories (e.g., a leakage and/or explosion of a battery pack). Please note that this warranty does not apply to repairs arising out of the malfunction of non-genuine Canon accessories, although you may request such repairs on a chargeable basis.
Battery Packs
When you need extra battery packs, select from the following: NB-2L, NB-2LH, BP-2L12, BP-2L14.

CB-2LT/CB-2LW Battery Charger
Use the battery charger for charging the battery packs. It plugs directly into a power outlet without a cable.

| Battery Pack | Charging Time |
| BP-2L5 | 70 min. |
| NB-2L | 80 min. |
| NB-2LH | 90 min. |
| BP-2L12 | 150 min. |
| BP-2L14 | 170 min. |
Charging time varies according to the charging condition.
CBC-NB2 Car Battery Charger
Use the car battery charger to charge battery packs on the move. The car battery cable plugs into your car's cigarette lighter and runs off a 12-24 V DC negative ground battery.
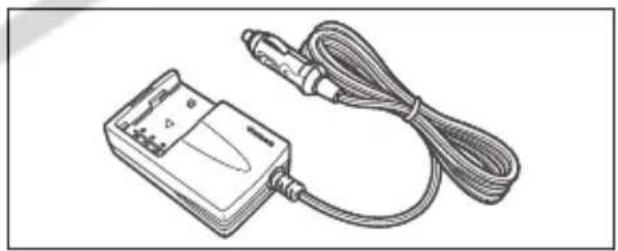
WS-20 Wrist Strap
Use this for extra additional protection for active shooting.

Shoulder Strap
You can attach a shoulder strap for more security and portability.
Pass the ends through the strap mount and adjust the length of the strap.

SC-2000 Soft Carrying Case
A handy camcorder bag with padded compartments and plenty of space for accessories.

This mark identifies genuine Canon video accessories. When you use Canon video equipment, we recommend Canon-brand accessories or products bearing the same mark.

ZR500
System
| Video Recording System | 2 rotary heads, helical scanning DV system (consumer digital VCR SD system), digital component recording |
| Audio Recording System | PCM digital sound: 16 bit (48 kHz/2 ch); 12 bit (32 kHz/4 ch) |
| Television System | EIA standard (525 lines, 60 fields) NTSC color signal |
| Image Sensor | 1/6-inch CCD, approx. 680,000 pixelsEffective pixels: Tape: 16:9 (with image stabilizer): approx. 400,00016:9 (no image stabilizer): approx. 450,0004:3 recording: approx. 340,000 |
| Tape Format | Videocassettes bearing the "MiniDV" mark. |
| Tape Speed | SP: 18.81 mm/s (0.74 ips), LP: 12.56 mm/s (0.49 ips) |
| Maximum Recording Time(80 min. cassette) | SP: 80 min., LP: 120 min. |
| Fast Forward/Rewind Time | Approx. 2 min. 20 sec. (with a 60 min. cassette) |
| LCD Screen | 2.7-inch. wide, TFT color, approx. 112,000 pixels |
| Viewfinder | 0.3-inch. TFT color, approx. 123,000 pixels |
| Microphone | Stereo electret condenser microphone |
| Lens | f=2.6-65 mm, F/1.8-4.4, 25x power zoom35 mm equivalent:Tape: 16:9 (with image stabilizer): 43.8-1095 mm16:9 (no image stabilizer): 41.0-1025 mm4:3 recording: 49.8-1245 mm |
| Lens Configuration | 10 elements in 8 groups |
| AF System | TTL autofocus, manual focusing possible |
| Minimum Focusing Distance | 1 m (3.3 ft.); 1 cm (0.39 in.) on maximum wide angle |
| White Balance | Auto white balance, pre-set white balance (DAYLIGHT, TUNGSTEN) orcustom white balance |
| Minimum Illumination | 2.0 lx (Night recording program, shutter speed at 1/8) |
| Recommended Illumination | More than 100 lx |
| Image Stabilization | Electronic |
Input/Output Terminals
| AV Terminal | ∅3.5 mm minijack, output onlyVideo:1 Vp-p/75 ohms unbalancedAudio:-10 dBV (47 kohm load)/3 kohms or less |
| DV Terminal | Special 4-pin connector (IEEE 1394 compliant) |
| MIC Terminal | ∅3.5 mm stereo mini-jack-57 dBV (with 600 ohm mic)/5 kohms or more |
Power/Others
| Power supply (rated) | 7.4 V DC |
| Power consumption (AF on) | 2.4W (using viewfinder), 2.5W (using LCD screen in normal brightness) |
| Operating temperature | 0 – 40 °C (32 – 104 °F) |
| Dimensions (W x H x D) | 49 x 92 x 115 mm (1.9 x 3.6 x 4.5 in.) excluding protrusions |
| Weight (camcorder body only) | 375 g (13.2 oz.) |
E
CA-570 Compact Power Adapter
| Power supply | 100 – 240 V AC, 50/60 Hz |
| Power consumption | 17W |
| Rated output | 8.4 V DC, 1.5 A |
| Operating temperature | 0 – 40 °C (32 – 104 °F) |
| Dimensions | 52 x 90 x 29 mm (2.1 x 3.5 x 1.1 in.) |
| Weight | 135 g (4.8 oz.) |
BP-2L5 Battery Pack
| Battery type | Rechargeable Lithium Ion Battery |
| Rated voltage | 7.4 V DC |
| Operating temperature | 0 – 40 °C (32 – 104 °F) |
| Battery capacity | 530 mAh |
| Dimensions | 33.3 x 16.2 x 45.2 mm (1.3 x 0.64 x 1.8 in.) |
| Weight | 40 g (1.4 oz.) |
Weight and dimensions are approximate. Errors and omissions excepted. Subject to change without notice.
Provided Accessories
| CA-570 Compact Power Adapter | 8468A002AA |
| STV-250N Stereo Video Cable | 3067A002AA (D82-0590-201) |
Optional Accessories
| BP-2L12 Battery Pack | 7871A002AA |
| BP-2L14 Battery Pack | 9582A002AA |
| NB-2L Battery Pack | 7302A001AA |
| CB-2LT Battery Charger | 7303A001AA |
| CBC-NB2 Car Battery Charger | 7873A002AA |
| WS-20 Wrist Strap | 3118A002AA (D81-0190-202) |
| SC-2000 Soft Carrying Case | 9389A001AA |
| SC-1000 Soft Carrying Case | 3083A002AA (D81-1200-201) |
| SC-A50 Soft Carrying Case | D81-1302-201 |
| DVM-CL DV Cleaning Cassette | 3134A002AA (D36-0032-201) |
E
Index
16:9 (Widescreen) 54
6-second auto date 56
A
Abroad, using the camcorder ..... 74
Accessories 79
Audio mode 49
Audio output channel 32
Auto slow shutter 46
Autofocus 41
AV terminal 30
B
Backup battery 14
Battery pack 12
Beach (recording program) 36
Beep 60
C
Condensation 71
Connection to a computer 66
Connection to a digital recording device ..... 63
Connection to a TV or VCR 30
Copyright signals 65
D
Data code 56
Date and time 18
Date format 59
Demo mode 62
Digital effects 51
Digital zoom 25
DV dubbing 65
DV terminal 63,66
E
Easy mode 36
Effects 52
End search 57
Exposure 40
F
Faders 51
Fireworks (recording program) ..... 37
Focus 41
G
Grip belt 16
H
Handling precautions 70
1
Image effects 44
Image stabilizer 61
Infinity focus 42
L
Language 59
LCD backlight 17
LCD brightness 60
LCD screen 17
LP mode 48
M
Magnification of playback image .....55
Maintenance 70
Manual focus 41
Menus 33
Messages 69
MIC (microphone) terminal 50
N
Night (recording program) 36
0
On-screen displays 67
Operating modes 6
P
Playback 27
Portrait (recording program) 36
Power adapter 12
Program AE (recording program) ..... 36
Protecting tapes 74
R
Record review 22
Record search 22
Recording 20
Recording mode 48
Recording programs .... 36
S
Self timer 47
Shutter speed 45
Snow (recording program) 36
SP mode 48
Speaker volume 29
Sports (recording program) 36
Spotlight (recording program) ..... 37
Start-up image 61
Sunset (recording program) 37
T
Time zone 18
Transferring video to a computer ..... 66
Tripod 26
Troubleshooting 75
V
Video heads 71
Videocassettes 15
Viewfinder, dioptric adjustment ..... 16
Volume 29
W
White balance 43
Widescreen 54
Wind screen 49
Z
Zoom 24
Zoom speed 25
U.S.A.
CANON CONSUMER DIGITAL VIDEO EQUIPMENT LIMITED WARRANTY FOR THE UNITED STATES
The warranty set forward below is given by Canon U.S.A., Inc. with respect to equipment purchased in the United States. The limited warranty is only effective upon presentation of your Bill of Sale or other proof of purchase.
Canon consumer digital video equipment is warranted under normal, non-commercial, personal use, against defective materials or workmanship as follows:
Parts: Defective parts will be exchanged for new parts or comparable rebuilt parts for a period of ONE YEAR from the date of original purchase, except for a defective Video Head, which will be exchanged for a period of three months from the date of purchase.
Labor: For a period of ONE YEAR from the date of original purchase, labor will be provided free of charge by our factory service centers or designated service facilities located in the United States.
When returning equipment under this warranty, you must pre-pay the shipping charges, and you must enclose the Bill of Sale or other proof of purchase with a complete explanation of the problem. During your ONE-YEAR warranty period, repairs will be made and the equipment return-shipped to you free of charge. After your warranty period is over, you will be given an estimate of the cost of repair and an opportunity to approve or disapprove of the repair expense before it is incurred. If you approve, repairs will be made and the equipment return-shipped to you. (shipping charges apply). If you disapprove, we will return-ship the equipment at no charge to you.
Non-Canon brand peripheral equipment and software which may be distributed with Canon DV camcorders are sold "AS IS" without warranty of any kind by CUSA, including any implied warranty regarding merchantability or fitness for a particular purpose. The sole warranty with respect to such non-Canon brand items is given by the manufacturer or producer thereof.
CUSA shall have no responsibility under this limited warranty for use of Canon DV Camcorders in conjunction with incompatible peripheral equipment and incompatible software.
In order to obtain warranty service, contact the authorized Canon retail dealer from whom you purchased the DV Camcorder or call the CANON INFORMATION CENTER AT 1-800-828-4040). You will be directed to the nearest service facility for your product.
This Limited Warranty covers all defects encountered in normal use of the equipment and does not apply in the following cases:
A) Loss or damage to the equipment due to abuse, mishandling, accident, improper maintenance, or failure to follow operating instructions;
B) If the equipment is defective as a result of leaking batteries, sand, dirt or water damage;
C) If defects or damages are caused by the use of unauthorized parts or by service other than our authorized agent;
D) If the equipment is used for commercial or industrial use.
This Limited Warranty does not cover cabinet (exterior finish), video cassette tape, head cleanings, nor does it apply to equipment purchased outside the United States. This warranty does not cover units sold to rental firms, military operations, hotels, schools, hospitals or for other commercial, industrial, or institutional applications.
These uses are covered only by such specific warranty as Canon may issue with such sales.
This Limited Warranty does not apply to accessories or consumables for the DV Camcorder, which are sold "AS IS", without warranty of any kind by CUSA.
Please retain this warranty card and your Bill of Sale as a permanent record of your purchase. This card is most important in order to be sure you are contacted right away should there be a safety inspection, modification or product recall under applicable laws or regulations.
NO IMPLIED WARRANTY, INCLUDING MERCHANTABILITY AND FITNESS FOR A PARTICULAR PURPOSE APPLIES TO THIS EQUIPMENT AFTER THE APPLICABLE PERIOD OF EXPRESS WARRANTY OR GUARANTY, EXCEPT AS MENTIONED ABOVE, GIVEN BY ANY PERSON, FIRM OR CORPORATION WITH RESPECT TO THIS EQUIPMENT SHALL BIND THE UNDERSIGNED. (SOME STATES DO NOT ALLOW LIMITATIONS ON HOW LONG AN IMPLIED WARRANTY LASTS, SO THE ABOVE LIMITATION OR EXCLUSION MAY NOT APPLY TO YOU). CUSA SHALL NOT BE LIABLE FOR LOSS OF REVENUES OR PROFITS, EXPENSE FOR SUBSTITUTE EQUIPMENT OR SERVICE, STORAGE CHARGES, LOSS OF DATA, OR ANY OTHER SPECIAL, INCIDENTAL OR CONSEQUENTIAL DAMAGES CAUSED BY THE USE, MISUSE OR INABILITY TO USE THE DV CAMCORDER, REGARDLESS OF THE LEGAL THEORY ON WHICH THE CLAIM IS BASED, AND EVEN IF CUSA HAS BEEN ADVISED OF THE POSSIBILITY OF SUCH DAMAGES. NOR SHALL RECOVERY OF ANY KIND AGAINST CUSA BE GREATER THAN THE PURCHASE PRICE OF THE DV CAMCORDER SOLD BY CUSA AND CAUSING THE ALLEGED DAMAGE. WITHOUT LIMITING THE FOREGOING, YOU ASSUME ALL RISK AND LIABILITY FOR LOSS, DAMAGE OR INJURY TO YOU AND YOUR PROPERTY AND TO OTHERS AND THEIR PROPERTY ARISING OUT OF USE, MISUSE OR INABILITY TO USE THE DV CAMCORDER NOT CAUSED DIRECTLY BY THE NEGLIGENCE OF CUSA. (SOME STATES DO NOT ALLOW THE EXCLUSION OR LIMITATION OF INCIDENTAL OR CONSEQUENTIAL DAMAGES, SO THE ABOVE LIMITATION MAY NOT APPLY TO YOU).THIS WARRANTY SHALL NOT EXTEND TO ANYONE OTHER THAN THE ORIGINAL PURCHASER OF THIS EQUIPMENT OR THE PERSON FOR WHOM IT WAS PURCHASED AS A GIFT.
This warranty gives you specific legal rights, and you may also have other rights which vary from state to state. CANON U.S.A., INC.
CANADA
CANON CONSUMER DIGITAL VIDEO EQUIPMENT LIMITED WARRANTY
The limited warranty set forth below is given by Canon Canada Inc. ("Canon Canada") with respect to Canon digital video equipment purchased in Canada. This limited warranty is only effective upon presentation of a bill of sale or other proof of purchase for this Canon digital video equipment to a Canon Service Facility when repairs are required.
Canon consumer video digital equipment is warranted under normal, non-commercial, personal use, against defective materials or workmanship as follows:
Parts: Defective parts will be exchanged for new parts or, at Canon Canada's option, comparable rebuilt parts for a period of one year from the date of original purchase, except Video Heads which will be exchanged for a period of 3 months from the date of purchase.
Labour: For a period of one year from the date of original purchase, labour will be provided free of charge by our Canon Service Facilities in Canada.
This limited warranty covers all defects except where:
(a) The loss or damage to the product results from:
i) accident, natural disaster, mishandling, abuse, neglect, unauthorized product modification or failure to follow instructions contained in the instruction manual;
ii) the use of accessories, attachments, products, supplies, parts or devices with this Canon product that do not conform to Canon specifications or that cause abnormally frequent service problems;
iii) repairs or services performed by any party other than a Canon Service Facility;
iv) defective batteries or any exposure to water, sand or dirt;
v) shipping (claim must be presented to the shipper);
(b) Any serial number on the video equipment is altered or removed.
(c) The digital video equipment is used for commercial, professional or industrial purposes.
This limited warranty does not cover the cabinet (exterior finish) of the digital video equipment, video cassette tapes, head cleanings, nor does it apply to digital video equipment purchased outside Canada.
TO OBTAIN WARRANTY SERVICE
Ship your Canon digital video equipment in its original carton, box or equivalent, properly packed, fully insured with shipping charges prepaid, together with a copy of your bill of sale or other proof of purchase and a description of the problem to any of the Canon Service Facilities in Canada.
LIMITATIONS
Except as otherwise required by applicable legislation, this warranty is in lieu of all other warranties, conditions, guarantees or representations, express or implied, statutory or otherwise, relative to this Canon product, including implied warranties or conditions of merchantability or fitness for a particular purpose.
Canon Canada assumes no liability for special, consequential or incidental damages or loss that may arise, whether on account of negligence or otherwise, from the use, misuse or inability to use this Canon product (including loss of profit, revenue, video tapes or enjoyment) or from failure to conform to any express or implied warranties, conditions, guarantees or representations. Any recovery under this limited warranty shall not exceed the purchase price of the product. Canon Canada does not assume or authorize any other person to assume for Canon Canada any other liability with respect to this Canon product.
This warranty does not extend to any person other than the original purchaser of this Canon product or the person for whom it was purchased as a gift and states your exclusive remedy.
NOTICE TO CONSUMER
If you plan to take important videos or if the product has not been used for some time, please check all functions with the instruction book before using it.
Canon
CANON INC.
U.S.A.
CANON U.S.A., INC. NEW JERSEY OFFICE
100 Jamesburg Road, Jamesburg, NJ 08831 USA
CANON U.S.A., INC. CHICAGO OFFICE
100 Park Blvd., Itasca, IL 60143 USA
15955 Alton Parkway, Irvine, CA 92618 USA
CANON U.S.A., INC. HONOLULU OFFICE
210 Ward Avenue, Suite 200, Honolulu, HI 96814 USA
● If you have any questions, call the Canon U.S.A. Information Center toll-free at 1-800-828-4040 (U.S.A. only).
CANADA
CANON CANADA INC. NATIONAL HEADQUARTERS
6390 Dixie Road, Mississauga, Ontario L5T 1P7
CANON CANADA INC. CALGARY
2828, 16th Street, N.E. Calgary, Alberta T2E 7K7
CANON CANADA INC. MONTREAL
5990 Côte de Liesse, Quebec H4T 1V7
- If you have any questions, call the Canon Canada Information Center toll-free at 1-800-828-4040 (CANADA only).
100 Jamesburg Road, Jamesburg, NJ 08831 USA
CENTRO Y SURAMÉRICA
CANON LATIN AMERICA, INC.
703 Waterford Way Suite 400 Miami, FL 33126 USA
ASIA
19/F, The Metropolis Tower, 10 Metropolis Drive, Hunghom, Kowloon, Hong Kong

Printed on 100% reused paper.
- IMPORTANT USAGE INSTRUCTIONS
- WARNING
- COPYRIGHT WARNING
- CAUTION
- IMPORTANT WARNING
- IMPORTANT SAFETY INSTRUCTIONS
- SYMBOLS AND REFERENCES USED IN THIS MANUAL
- ABOUT THE JOYSTICK AND THE JOYSTICK GUIDE
- ABOUT THE OPERATING MODES
- TRADEMARK ACKNOWLEDGMENTS
- TABLE OF CONTENTS
- INTRODUCTION
- BASIC FUNCTIONS
- PREPARATIONS
- RECORDING
- PLAYBACK
- ADVANCED FUNCTIONS
- OTHER FUNCTIONS
- EDITING
- ADDITIONAL INFORMATION
- CHECKING THE SUPPLIED ACCESSORIES
- ZR
- ATTACHING THE BATTERY PACK
- CHARGING THE BATTERY PACK
- USING A HOUSEHOLD POWER SOURCE
- ○ CHARGING, RECORDING AND PLAYBACK TIMES
- INSTALLING THE BACKUP BATTERY
- ADJUSTING THE VIEWFINDER (DIOPTRIC ADJUSTMENT)
- FASTENING THE GRIP BELT
- ROTATING THE LCD SCREEN
- OPEN THE LCD PANEL 90 DEGREES
- LCD BACKLIGHT
- PRESS THE LCD BACKLIGHT BUTTON
- SETTING THE TIME ZONE, DATE AND TIME
- SETTING THE TIME ZONE/DAYLIGHT SAVING TIME
- MENU
- PRESS THE FUNC. BUTTON TO OPEN THE FUNC. MENU
- WITH THE JOYSTICK SELECT (▲▼) THE 📄 ICON AND PRESS (💡)
- SELECT (▲▼) THE [DATE/TIME SETUP] MENU AND PRESS (○). THEN, SELECT (▲▼) THE [T.ZONE/DST] OPTION AND PRESS (○)
- SELECT (▲▼) YOUR TIME ZONE AND PRESS (○)
- SETTING THE DATE AND TIME
- SELECT (▲▼) THE [DATE/TIME] OPTION AND PRESS (○)
- WITH THE JOYSTICK CHANGE (▲▼) THE MONTH AS REQUIRED AND MOVE (▶) TO THE NEXT FIELD
- PRESS (☐) TO START THE CLOCK
- PRESS THE FUNC. BUTTON TO CLOSE THE MENU
- RECORDING MOVIES ON A TAPE
- WHEN YOU HAVE FINISHED RECORDING
- ALLOWING THE SUBJECT TO MONITOR THE LCD SCREEN
- DISPLAYING THE LEVEL MARKER
- REVIEWING AND SEARCHING WHEN RECORDING
- RECORD REVIEW
- RECORD SEARCH
- SCREEN DISPLAYS DURING RECORDING
- ① TIME CODE
- ② REMAINING TAPE
- ③ REMAINING BATTERY CHARGE
- ④ RECORDING REMINDER
- ⑤ WHEN “+” FLASHES
- X OPTICAL ZOOM
- CAMERA
- PLAY
- X/800X DIGITAL ZOOM
- SELECTING THE ZOOM SPEED
- TIPS FOR MAKING BETTER VIDEOS
- HOLDING THE CAMCORDER
- FOR MORE STABILITY
- LIGHTING
- SPECIAL PLAYBACK MODES
- II (PLAYBACK PAUSE)
- (FAST FORWARD PLAYBACK) / ◀◀ (REWIND PLAYBACK)
- ADJUSTING THE VOLUME
- SELECTING THE TYPE OF TV
- SELECTING THE AUDIO OUTPUT CHANNEL
- MENUS AND SETTINGS
- SELECTING MENUS AND SETTINGS
- MENU AND DEFAULT SETTINGS
- EASY EASY RECORDING PROGRAM
- RECORDING PROGRAMS
- PROGRAM AE
- PORTRAIT
- SPORTS
- NIGHT
- SNOW
- BEACH
- SUNSET
- SPOTLIGHT
- FIREWORKS
- SELECTING THE EASY RECORDING PROGRAM
- SELECTING A RECORDING PROGRAM
- ADJUSTING THE EXPOSURE MANUALLY
- ADJUSTING THE FOCUS MANUALLY
- INFINITY FOCUS
- SETTING THE WHITE BALANCE
- SELECTING AN IMAGE EFFECT
- AUTO SLOW SHUTTER
- CHANGING THE RECORDING MODE (SP|LP)
- CHANGING THE AUDIO MODE
- WIND SCREEN
- USING AN EXTERNAL MICROPHONE
- FADERS (□ 52)
- EFFECTS (53)
- SELECTING A FADER
- SELECTING AN EFFECT
- PRESS THE WIDE SCR BUTTON
- MAGNIFYING THE IMAGE
- MOVE THE ZOOM LEVER TOWARD T
- SELECT (▲▼, ◀▶) THE MAGNIFIED AREA WITH THE JOYSTICK
- SIX-SECOND AUTO DATE
- END SEARCH
- PLAYING BACK A TAPE WITH ADDED SOUND
- CHANGING THE DISPLAY LANGUAGE
- CHANGING THE DATE FORMAT
- BEEP
- ADJUSTING THE BRIGHTNESS OF THE LCD SCREEN
- TURNING OFF THE IMAGE STABILIZER
- CHANGING THE DISPLAY OF THE START-UP IMAGE
- DEMONSTRATION MODE
- RECORDING TO A VCR OR DIGITAL VIDEO DEVICE
- CONNECTING THE DEVICES
- RECORDING FROM DIGITAL VIDEO
- DEVICES (DV DUBBING)
- COPYRIGHT SIGNAL
- TRANSFERRING VIDEO RECORDINGS TO A COMPUTER
- TRANSFERRING USING A DV CABLE
- HIDING THE DISPLAYS ON THE LCD SCREEN
- HIDING/SHOWING THE DISPLAYS ON THE TV SCREEN
- SCREEN DISPLAYS DURING RECORDING/PLAYBACK
- CAMERA · (SEE ALSO 23)
- CAMCORDER HANDLING PRECAUTIONS
- STORAGE
- CLEANING
- CAMCORDER BODY AND LENS
- LCD SCREEN
- VIEWFINDER
- VIDEO HEADS
- CONDENSATION
- CONDENSATION MAY FORM IN THE FOLLOWING CASES
- HOW TO AVOID CONDENSATION
- WHEN CONDENSATION IS DETECTED
- RESUMING USE
- BATTERY PACK HANDLING PRECAUTIONS
- DANGER
- TREAT THE BATTERY PACK WITH CARE
- ABOUT THE BATTERY TERMINAL COVER
- LITHIUM BUTTON BATTERY HANDLING PRECAUTIONS
- CASSETTE HANDLING PRECAUTIONS
- PROTECTING TAPES FROM ACCIDENTAL ERASURE
- USING THE CAMCORDER ABROAD
- POWER SOURCES
- PLAYBACK ON A TV SCREEN
- TROUBLESHOOTING
- OPTIONAL ACCESSORIES
- USE OF GENUINE CANON ACCESSORIES IS RECOMMENDED
- BATTERY PACKS
- CB-2LT/CB-2LW BATTERY CHARGER
- CBC-NB2 CAR BATTERY CHARGER
- WS-20 WRIST STRAP
- SHOULDER STRAP
- SC-2000 SOFT CARRYING CASE
- INDEX
- A
- B
- C
- D
- E
- F
- G
- H
- L
- M
- N
- P
- R
- S
- T
- V
- W
- Z
- U.S.A
- CANON CONSUMER DIGITAL VIDEO EQUIPMENT LIMITED WARRANTY FOR THE UNITED STATES
- CANADA
- CANON CONSUMER DIGITAL VIDEO EQUIPMENT LIMITED WARRANTY
- TO OBTAIN WARRANTY SERVICE
- LIMITATIONS
- NOTICE TO CONSUMER
- CANON
Brand : CANON
Model : ZR600
Category : Camcorder