
1190 RC8 - Sport Motorcycle KTM - Free user manual and instructions
Find the device manual for free 1190 RC8 KTM in PDF.


| Product type | Sport motorcycle |
| Brand | KTM |
| Model | 1190 RC8 |
| Engine | V-twin, 4-stroke, liquid-cooled |
| Displacement | 1195 cc |
| Maximum power | 175 hp (129 kW) at 10,200 rpm |
| Maximum torque | 127 Nm at 8,000 rpm |
| Transmission | 6-speed |
| Final drive | Chain |
| Frame | Chrome-molybdenum steel trellis frame |
| Front suspension | WP inverted fork, adjustable |
| Rear suspension | WP monoshock, adjustable |
| Front brake | Dual 320 mm floating discs, Brembo radial calipers |
| Rear brake | Single 220 mm disc, Brembo floating caliper |
| Dry weight | 177 kg |
| Fuel tank capacity | 16.5 liters |
| Seat height | 805 mm |
| Wheelbase | 1425 mm |
| Tires | Front: 120/70 ZR17; Rear: 190/55 ZR17 |
| Oil change interval | Every 5,000 km or 1 year |
| Brake fluid change | Every 2 years |
| Emission standard | Euro 3 compliant |
Frequently Asked Questions - 1190 RC8 KTM
User questions about 1190 RC8 KTM
0 question about this device. Answer the ones you know or ask your own.
Ask a new question about this device
Download the instructions for your Sport Motorcycle in PDF format for free! Find your manual 1190 RC8 - KTM and take your electronic device back in hand. On this page are published all the documents necessary for the use of your device. 1190 RC8 by KTM.
USER MANUAL 1190 RC8 KTM
Congratulations on your decision to purchase a KTM motorcycle. You are now the owner of a state-of-the-art sports motorcycle that will give you enormous pleasure if you service and maintain it accordingly.
We wish you great pleasure riding the vehicle!
Please enter the serial numbers of your vehicle below.
| Chassis number/type label (▼ p. 24) | Dealer's stamp |
| Engine number (▼ p. 25) | |
| Key number (▼ p. 24) |
The owner's manual corresponded to the latest state of this series at the time of printing. However, it is never possible to exclude small deviations arising from further development in design and construction.
All specifications are non-binding. KTM Sportmotorcycle AG specifically reserves the right to modify or delete technical specifications, prices, colors, forms, materials, services, designs, equipment, etc., without prior notice and without specifying reasons, to adapt these to local conditions, as well as to stop production of a particular model without prior notice. KTM accepts no liability for delivery options, deviations from illustrations and descriptions, as well as printing and other errors. The models portrayed partly contain special equipment that does not belong to the regular scope of delivery.
© 2008 by KTM-Sportmotorcycle AG, Mattighofen Austria
All rights reserved
Reproduction, even in part, is permitted only with the express written permission of the copyright owner.

REG.NO.12 1006061
ISO 9001(12 100 6061)
According to the international quality management standard ISO 9001, KTM uses quality assurance processes that lead to the maximum possible quality of the products.
Issued by: TÜV Management Service
KTM-Sportmotorcycle AG
5230 Mattighofen, Austria
MEANS OF REPRESENTATION 7
IMPORTANT NOTES 8
Overview of labels. 10
VIEW OF VEHICLE 20
View of vehicle, front left side 20
View of vehicle, rear right side 22
LOCATION OF SERIAL NUMBERS 24
Chassis number/type label 24
Key number 24
Engine number. 25
Fork part number. 25
Shock absorber part number 26
Steering damper part number 26
CONTROLS 27
Clutch lever 27
Hand brake lever 27
Light switch 28
Headlight flasher switch 28
Flasherswitch 29
Horn button 29
Ignition/steering lock 30
Emergency OFF switch 30
Electric starter button 31
Combination instrument - overview 32
Combination instrument - function buttons on handlebar .... 33
Combination instrument - activation and test 34
Display 35
Info display. 36
Indicator lamps 37
Notes/warnings on the combination instrument 38
ODO menu 41
FUELDISTANCE menu 42
FUELRANGE menu. 43
DISTANCE TO Next Service menu 44
LAPSTOGO menu 45
TOPSPEED menu 46
LAP/BESTLAP/LastLap menu. 47
LAP/BESTLAP/TopSpeed menu 48
Total distance menu in Race mode RACEODO 49
SET-UP menu 50
CHANGE MODE menu 51
SET CLOCK menu 52
SETTINGSMenu 53
SHIFT RPMS menu 54
LAP menu, LAP BLANK T button 55
SET NUM LAPS menu 56
TRIP F RESET menu 57
UNITS menu. 58
SET KM/MILES menu 59
SET ^ C / F menu 60
OPTIONS menu. 61
TPMS menu 62
OUTERTEMP menu 63
Displaying lap times 68
Displaying maximum speed 69
Setting ROAD or RACE mode 70
Setting the clock with SET CLOCK 70
Adjusting shift speed RPM1/2 71
Setting the blank time of the LAP button LAP BLANK T...... 72
Setting the number of laps SET NUM LAPS 74
Setting the fuel reserve display TRIPF RESET 75
Setting the kilometers/miles SET KM/MILES 76
Setting the temperature unit SET ^ C / ^ 77
Switching the external temperature display on/off 77
Opening the filler cap 79
Closing the filler cap. 80
Supporting strap. 80
Seat lock 81
Helmet lock 81
Passenger footrests 82
Shift lever. 82
Foot brake pedal 83
Side stand 84
Advice on first use 85
Running the engine in. 86
Loading the vehicle 87
RIDINGINSTRUCTIONS 89
Checks to be made before putting into operation 89
Starting 90
Starting up 91
Shifting, riding 92
Braking 95
Stopping, parking 96
Refueling. 97
SERVICE SCHEDULE 99
Important service tasks to be carried out by an authorized KTM-RC8 workshop. 99
Important service tasks to be carried out by an authorized KTM-RC8 workshop. (as additional job) 102
MAINTENANCE WORK ON CHASSIS AND ENGINE 103
Jacking up motorcycle front 103
Taking front of motorcycle off work stand. 103
Jacking up motorcycle rear 104
Taking rear of motorcycle off work stand 104
Fork/shock absorber 105
Adjusting compression damping of fork 105
Adjusting rebound damping of fork 106
Adjusting spring preload of fork 107
Bleeding fork legs. 108
Compression damping of the shock absorber 109
Adjusting the low-speed compression damping of the shock absorber 109
Adjusting high-speed compression damping of the shock absorber 111
Adjusting rebound damping of the shock absorber 112
Adjusting spring preload of shock absorber 112
Steering damper 115
Adjusting the steering damper 115
Vehicle level 117
Adjusting front vehicle level 118
Adjusting the vehicle level at the rear 120
Footrest position 122
Adjusting footrest position 122
Adjusting shift lever stub. 124
Adjusting shift lever. 124
Adjusting the footbrake pedal stub 128
Adjusting the footbrake pedal 129
Checking for chain dirt. 129
Cleaning the chain. 130
Checking the chain tension 131
Adjusting the chain tension 132
Checking rear sprocket / engine sprocket for wear 134
Checking chain wear. 135
Checking chain sliding guard 136
Checking the front brake discs. 136
Checking the rear brake disc. 137
Adjusting the basic position of the handbrake lever. 137
Checking brake fluid level of front brake 138
Topping up brake fluid of front brake 138
Brake linings. 140
Checking the front brake linings. 140
Checking rear brake fluid level 141
Topping up rear brake fluid 142
Checking the rear brake linings 143
Removing front wheel 144
Fitting front wheel 145
Removing rear wheel 146
Installing the rear wheel 148
Checking rear hub shock absorbers 151
Tire condition checking. 151
Checking tire air pressure 153
Removing the seat 154
Fitting the seat. 154
Removing passenger seat 155
Fitting the passenger seat 155
Mounting helmet lock on vehicle. 156
Removing the battery 156
Installing the battery 158
Recharging the battery 159
Changing the main fuse 161
Changing the fuses of individual power consumers. 163
Changing the low beam bulb. 165
Changing the high beam bulb 168
Changing the parking light bulb 172
Checking headlight adjustment 175
Adjusting headlamp range 175
Activating/deactivating ignition key 176
Cooling system 179
Checking the coolant level. 180
Filling the cooling system compensating tank 181
Adjusting basic position of clutch lever. 183
Checking fluid level of hydraulic clutch 183
Correcting fluid level of hydraulic clutch. 184
Adjusting gas Bowden cable 185
Handlebar height. 185
Adjusting the handlebar height 186
Rear frame position 188
Adjusting the rear frame position 189
Checking engine oil level 193
Changing engine oil and filter, cleaning oil screen 194
Draining engine oil, cleaning oil screens 194
Removing oil filter 197
Fitting oil filter 199
Filling up with engine oil 199
Topping up engine oil 201
TROUBLESHOOTING 203
IMMOBILIZER FLASH CODE 206
ENGINE CONTROL FLASH CODE 208
CLEANING 215
Cleaning motorcycle 215
CONSERVATION FOR WINTER OPERATION 217
Conservation for winter operation 217
STORAGE 218
Storage 218
Putting into operation after storage 219
TECHNICAL DATA - ENGINE 220
Capacity- engine oil 221
Capacity - coolant 221
TECHNICAL DATA - ENGINE TIGHTENING TORQUES 222
TECHNICAL DATA - CHASSIS 225
Lighting equipment 226
Capacity - fuel 227
TECHNICAL DATA - FORK. 228
TECHNICAL DATA - SHOCK ABSORBER 229
TECHNICAL DATA - CHASSIS TIGHTENING TORQUES 231
SUBSTANCES 234
AUXILIARY SUBSTANCES 237
STANDARDS 239
INDEX 240
Symbols used
The following explains the meaning of specific symbols.

Identifies an expected reaction (e.g. of an operation or a function).

Identifies an unexpected reaction (e.g. of an operation or a function).

All jobs marked with this symbol require specialist knowledge and technical understanding. In the interests of your own safety, have these jobs done in an authorized KTM-RC8 workshop! There, your motorcycle will be handled optimally by specially trained experts with the necessary special tools.

Identifies a page reference (more information is provided on the specified page).
Formats used
The type formats used are explained here.
Specific name
Identifies a name.
Name®
Identifies a protected name.
BrandTM
Identifies a trademark.
Use definition
KTM sport motorcycles are designed and constructed to meet the normal demands of regular road and race track operation, but not for use on dirt roads.

Info
The motorcycle is authorized for public road traffic in the homologous version only.
Maintenance
A prerequisite for fault-free operation and avoiding premature wear is compliance with the maintenance, care and adjustments to the engine and chassis described in the service manual. Poor suspension settings can cause damage and breakage to chassis components. Using the motorcycle in extreme conditions such as racing can lead to above-average wear to components such as the power train or brakes. It may therefore be necessary to service or replace worn parts before the wear limit shown in the service schedule is reached. Pay special attention to the prescribed running-in times, inspection and maintenance intervals. Proper compliance will contribute considerably to a longer service life of your motorcycle.
Warranty
The work described in the service schedule must be carried out exclusively in an authorized KTM-RC8 workshop and confirmed in the service record, since otherwise any warranty claim is meaningless. No warranty claim can be met for damage resulting from manipulation and/or other changes to the vehicle.
Materials
The fuels and lubricants named in the owner's manual must be used according to specifications.
Spare parts, accessories
In the interests of your own safety, use only spare parts and accessories approved and/or recommended by KTM, and have these fitted in an authorized KTM-RC8 workshop. KTM accepts no liability for other products and any resulting damage.
You will find the current KTM PowerParts for your vehicle on the KTM website.
International KTM Website: http://www.ktm.com
Work rules
During assembly, non-reusable parts (e.g. self-locking screws and nuts, seals and seal rings, O-rings, pins, lock washers) must be replaced by new parts.
If a thread lock (e.g. Loctite) is used for screw connections, be sure to comply with the manufacturer's specific advice on its usage.
Parts that you want to reuse following repairs and servicing should be cleaned and checked for damage and wear. Change damaged or worn parts.
Following repair and servicing, the vehicle must be checked for roadworthiness.
Transport
Note
Danger of damage Danger of damage by the vehicle running away or falling over.
Always place the vehicle on a firm and even surface.
Note
Fire hazard Some components (engine, radiator and exhaust system) get very hot when the engine is running.
-
Do not place the vehicle where there are flammable or explosive substances.
-
Switch off the engine and remove the ignition key.
- Secure the motorcycle against falling over or running away using straps or other suitable devices.
Environment
Motorcycling is a wonderful sport and we naturally hope that you can enjoy it to the full. However, it can also lead to problems with the environment and conflict with other persons. Responsible behavior in handling the motorcycle can help to avoid such problems and conflicts. To ensure the future of motorcycle sport, make sure you use the motorcycle legally, demonstrate a consciousness for the environment, and respect the rights of others.
Overview of labels
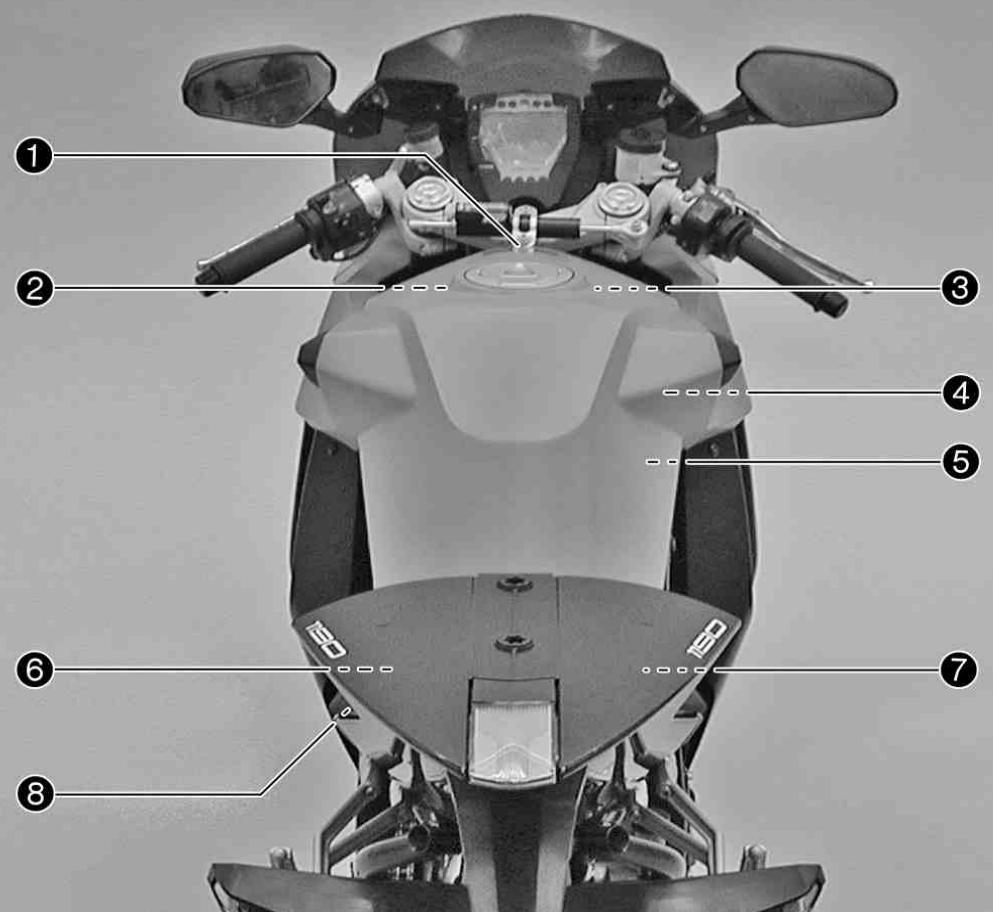
| 1 | Information on putting into operation |
| 2 | Type label for Canada |
| 3 | Type label for the USA |
| 4 | Emission control information |
| 5 | Noise emission information |
| 6 | Chain tension information |
| 7 | Information on suspension setting |
| 8 | Fuel evaporative system information |
ACHTUNG
Before you go for the first ride on your motorbike, read the entire User's Guide carefully!
ATTENZIONE
Information on putting into operation
| MANUFACTURED BY/FABRIQUE PAR: KTM SPORTMOTORCYCLE AG | ||||
| GWR/PNBV: 387 KG DATE: XX.XX | ||||
| V.I.N./N.I.V.: VBKXXX40XMXXXXXX | ||||
| TYPE: MC | ||||
| GAWR/PNBE | TIRE/PNEU-DIMENSION-RIM/JANTE | COLD INFL. PRESS. PRESS. DE GONFL. À FROID PSI/LPC KPA | ||
| 1st 180 KG | 120/70-17 3.50-17 | 36 | 250 | |
| 2nd 250 KG | 190/55-17 6.00-17 | 36 | 250 | |
| THIS VEHICLE CONFORMS TO ALL APPLICABLE STANDARDS PRESERVED UNDER THE CANADIAN SAFETY REGULATIONS IN EFFECT ON THE DATE OF MANUFACTURE - CE VÉHICULE EST CONFORME À TOUTES LES NORMES ÀQUIL LUI SONT APPLICABLES EN VERTU DU RÉGLEMENT SUR LA SECURITÉ DES VÉHICULES AUTOMOBILES DU CANADA EN VIGUEUR À LA DATE DE SA FABRICATION | ||||
Type label for Canada
| MFD. BY KTM SPORTMOTORCYCLE AG AUSTRIA MOTORCYCLE DATE | ||
| GVWR | 853 lbs | 387 kg |
| GAWR FRONT | 397 lbs | 180 kg WITH 120/70-17 TIRE, 58W TYPE, 3,50-17 RIM, AT |
| GAWR REAR | 551 lbs | 36 psi 2,5 bar COLD |
| 6,00-17 RIM, AT | 250 kg WITH 190/55-17 TIRE, 75W TYPE, 36 psi 2,6 bar COLD | |
| THIS VEHICLE CONFORMS TO ALL APPLICABLE U.S. FEDERAL MOTOR VEHICLE SAFETY STANDARDS IN EFFECT ON THE DATE OF MANUFACTURE SHOWN ABOVE. | ||
| VBKXXX40XMXXXXXX | ||
Type label for the USA
Emission control information
| VEHICLE EMISSION CONTROL INFORMATION | ||
| MANUFACTURER: KTM SPORTMOTORCYCLE AG - Mattighofen, Austria IMPORTER: KTM NORTH AMERICA, INC. - 1119 Millan Ave, Amherst, OH 44001 | ||
| ENGINE DISPLACEMENT: 1150 cc ENGINE FAMILY: 9KTXC1,16SPR PERMEATION FAMILY: 9KTXPP104RK1 | ENGINE EXHAUST EMISSION CONTROL SYSTEM TWC, PAIR, TBI MODEL NAME: 1190 RC8 | |
| THIS VEHICLE CONFORMS WITH US EPA AND CALIFORNIA REGULATIONS APPLICABLE TO 2008 MODEL YEAR NEW MOTORCYCLES AND IS CERTIFIED TO 0.8/GKM HC+NOV. 12.0 GKM CO EXHAUST EMISSION STANDARD IN CALIFORNIA | ||
| ENGINE TUNEUP SPECIFICATIONS: IGNITION TIMING: NON ADJUSTABLE IDLE SPEED: 1500 RPM IN NEUTRAL IDLE MOUNTURE: NON ADJUSTABLE VALVE CLEARANCE: 0.10 - 0.15 INTAKE: 0.25- 0.30 EXHAUST SPARK PLUG: NGK LKAR9BL9 SPARK PLUG GAP: 0.9 mm FUEL: UNLEADED GASOLINE ONLY: 91 (R+M)2 OCTANE OR HIGHER OIL: SAE 10 W 50 | ||
| VIN: VBKxxxxxxMxxxxxx | DATE OF MANUFACTURE: xxx.xx20xx | |
Noise emission information
| MOTORCYCLE NOISE EMISSION CONTROL INFORMATION KTM SPORTMOTORCYCLE AG, AUSTRIA | 700384-01 |
| THIS 2009 KTM9211150 MOTORCYCLE 690.05.183.000 MEETS U.S. EPA NOISE EMISSION REQUIREMENTS OF 80 dBA AT 3500 RPM BY THE U.S. FEDERAL TEST PROCEDURE. MODIFICATIONS WHICH CAUSE THIS MOTORCYCLE TO EXCEED FEDERAL NOISE STANDARDS ARE PROHIBITED BY U.S. FEDERAL LAW. SEE OWNER'S MANUAL. | |
| Motorcycle Type : 1190 RC8 Date manufactured : 20XXXXXX VIN : VBKXXX40x9MXXXXXX |
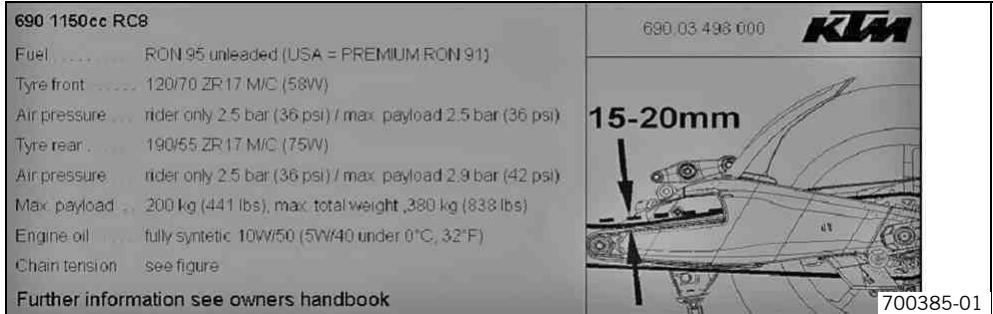
Chain tension information
| 690.03 097.000 | FORK | SHOCK | |||
| SETTING | Compression (clicks) | Rebound (clicks) | Congr low speed (clicks) | Congr high speed (burns) | Rebound Spring preload (mm) |
| Comfort | 15 | 15 | 20 | 2,0 | 15 |
| Basic setting | 10 | 10 | 15 | 1,5 | 10 |
| Sport | 5 | 5 | 10 | 1,0 | 5 |
| Max. payload | 5 | 5 | 10 | 1,0 | 10 |
Information on suspension setting
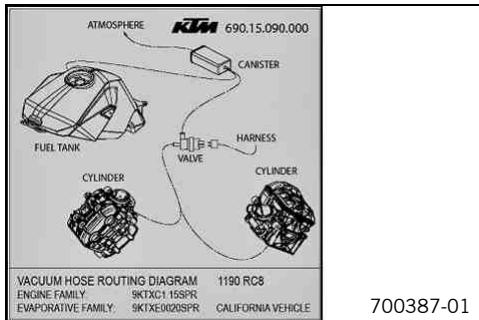
Fuel evaporative system information
Notes/warnings
Be sure to pay attention to the notes and warnings given here.

Info
Various notes and warning stickers are attached to the vehicle. Do not remove any notes and warning stickers. If they are missing, you or others may not recognize dangers and may therefore be injured.
Grades of risks

Danger
Danger that leads immediately and certainly to severe and permanent injury or death.

Warning
Danger that will probably lead to severe and permanent injury or death.
Note
Danger of serious damage to machine or material.

Warning
Risk of environmental damage.
Operating instructions
- Be sure to read these operating instructions carefully and completely before taking your first ride. They contain much information and tips that will help you to operate and handle your motorcycle. Only in this way will you find out how to adjust the motorcycle best for your own use and how to protect yourself from injury. These operating instructions also contain important information about servicing the motorcycle.
The service manual is an important component of the motorcycle and should be passed on to the new owner if the bike is sold.
Reporting safety defects
If you believe that your vehicle has a defect which could cause an accident resulting in injury or death, you should immediately inform the National Highway Traffic Safety Administration (NHTSA) in addition to notifying KTM North America, Inc.
If NHTSA receives similar complaints, it may open an investigation. If it finds that a safety defect exists in a group of vehicles, it may order a recall and remedy campaign. However, NHTSA cannot become involved in individual problems between you, your dealer, or KTM North America, Inc.
To contact NHTSA, you may either call the Vehicle Safety Hotline toll-free at 1-888-327-4236; or visit www.nhtsa.dot.gov; or write to: NHTSA Headquarters, 1200 New Jersey Avenue, SE, West Building, Washington, DC 20590. You can also obtain other information about motor vehicle safety from the Hotline.
Noise emission warranty
KTM Sportmotorcycle AG warrants that this exhaust system, at the time of sale, meets all applicable U.S. EPA Federal noise standards.
This warranty extends to the first person who buys this exhaust system for purposes other than resale, and to all subsequent buyers.
Warranty claims should be directed to:
KTM North America, Inc., Customer Support, 1119 Milan Ave., Amherst, OH 44001, USA
Telephone: (440) 985-3553
www.ktmusa.com
KTM Canada, Inc., Customer Support, 1375-1 Marie-Victorin, Saint-Bruno, QC J3V 6B7, Canada
Telephone: (450) 441-4451 x 39
www.ktmcanada.com
Tampering warning
Tampering with the noise control system is prohibited. Federal law prohibits the following acts or the causing thereof:
1 The removal or rendering inoperative by any person, other than for purposes of maintenance, repair, or replacement, of any device or element of design incorporated into any new vehicle for the purpose of noise control prior to its sale or delivery to the ultimate purchaser or while it is in use; or
2 The use of the vehicle after such device or element of design has been removed or rendered inoperative by any person.
Among those acts presumed to constitute tampering are the acts listed below:
1 Removal of, or puncturing the muffler, baffles, header pipes or any other components which conducts exhaust gases.
2 Removal or puncturing of any part of the intake system.
3 Lack of proper maintenance.
4 Replacement of any moving parts of the vehicle, or parts of the exhaust or intake system, with parts other than those specified by the manufacturer.
Operating noise warning
This product should be checked for repair or replacement if the motorcycle noise has increased significantly through use. Otherwise, the owner may become subject to penalties under state and local ordinances.
Consumer rights
Warranty claims should be directed to a KTM workshop. If you wish to make a complaint, please contact:
KTM North America, Inc., Customer Support, 1119 Milan Ave., Amherst, OH 44001, USA
Telephone: (440) 985-3553
www.ktmusa.com
KTM Canada, Inc., Customer Support, 1375-1 Marie-Victorin, Saint-Bruno, QC J3V 6B7, Canada
Telephone: (450) 441-4451 x 39
www.ktmcanada.com
Your rights may vary depending on national and regional laws.

View of vehicle, front left side
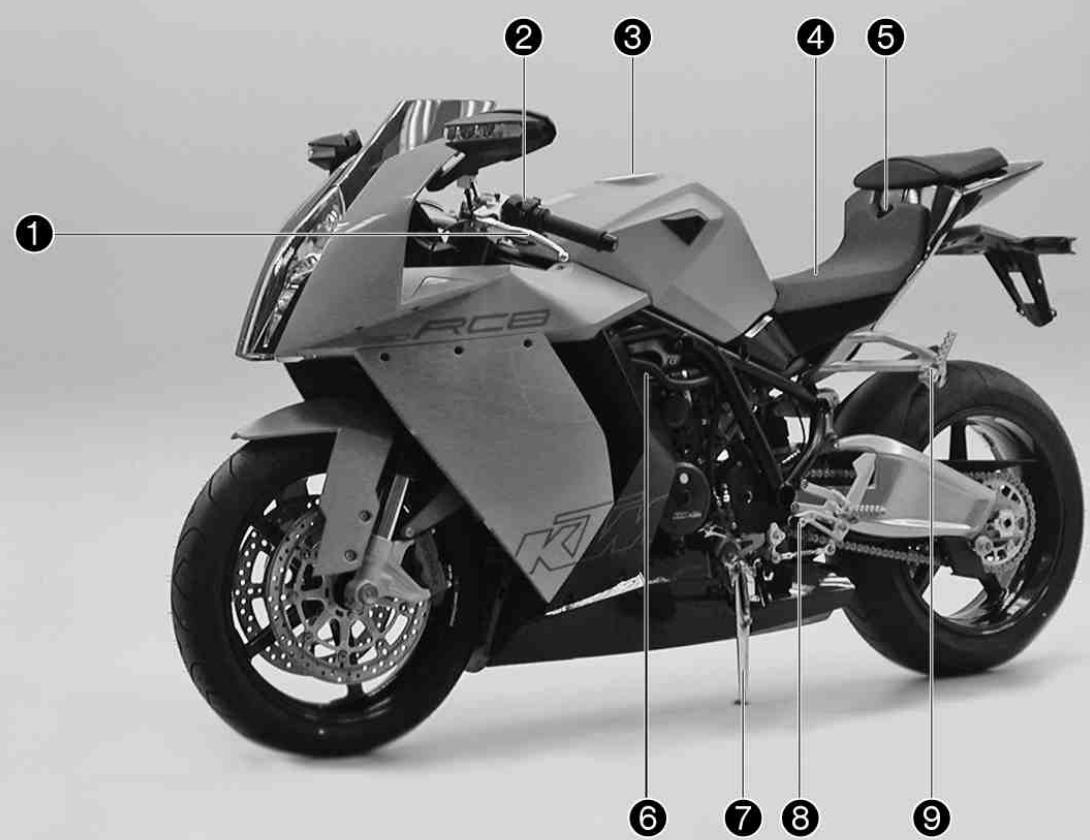
VIEW OF VEHICLE
| 1 | Clutch lever |
| 2 | Light switch, headlight flasher switch, indicator switch, horn button |
| 3 | Filler cap |
| 4 | Seat |
| 5 | Seat lock |
| 6 | Oil dipstick |
| 7 | Side stand |
| 8 | Shift lever |
| 9 | Passenger footrests |
View of vehicle, rear right side
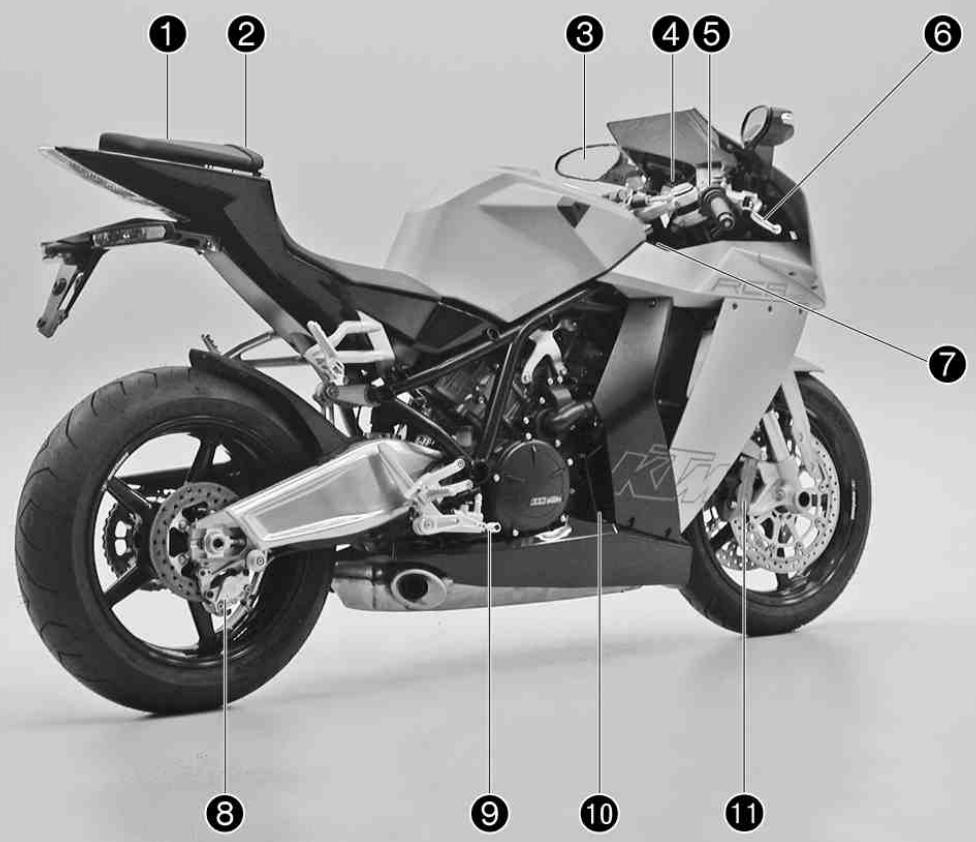
VIEW OF VEHICLE
1 Passenger seat
2 Supporting strap
3 Rear mirror
4 Combination instrument
5 Emergency OFF switch, electric starter button
6 Hand brake lever
7 Chassis number, type label
8 Rear brake caliper
9 Foot brake pedal
10 Engine number
11 Brake calipers, front
Chassis number/type label
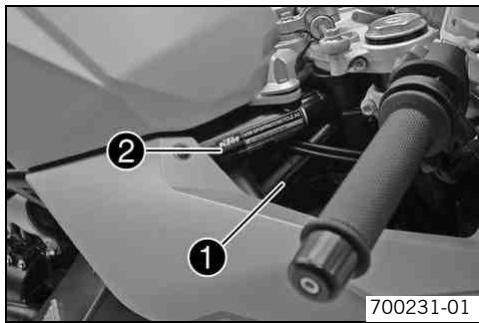
The chassis number 1 is stamped on the frame behind the steering head on the right. Type label 2 for the USA is on the frame above the chassis number. The type label for Canada is fixed to the frame on the left behind the steering head.
Key number
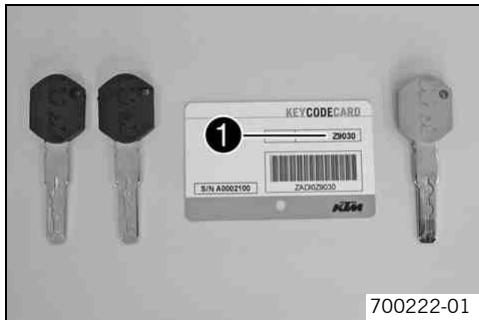
The key number Code number can be found on the KEYCODECARD.

Info
You need the key number to order a spare key. Keep the KEYCODECARD in a safe place.
Use the orange programming key to activate and deactivate the black ignition key. Keep the orange programming key in a safe place: it must only be used for learning and programming functions.
Engine number
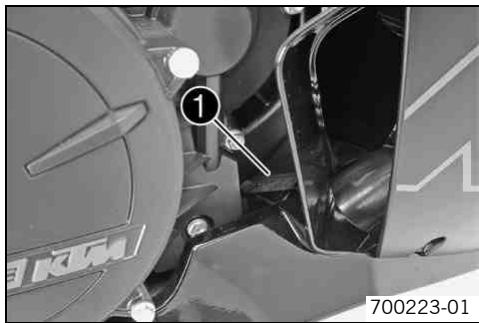
The engine number is stamped on the right side of the engine.
Fork part number
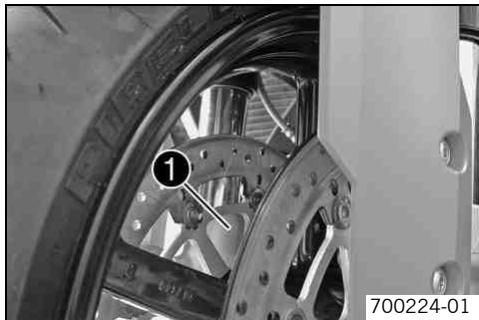
The fork part number ① is stamped on the inner side of the fork stub.
Shock absorber part number

The shock absorber part number ① is stamped on the upper part of the shock absorber above the adjusting ring towards the rear.
Steering damper part number
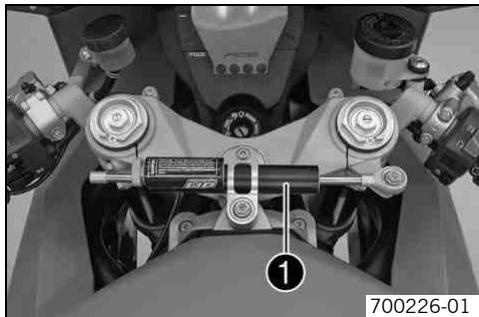
The steering damper part number 1 is stamped on the top of the steering damper.
Clutch lever
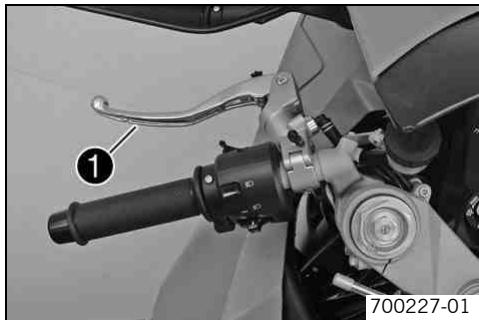
The clutch lever 1 is fitted on the left side of the handlebar. The clutch is hydraulic and self-adjusting.
Hand brake lever
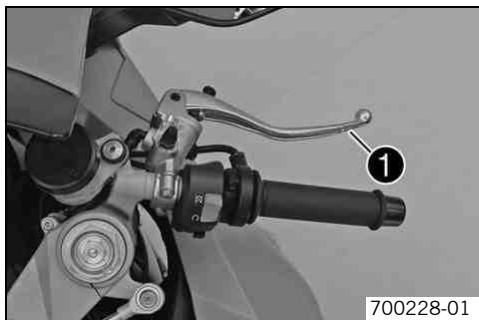
The hand brake lever ① is fitted on the right side of the handlebar. The hand brake lever operates the front brake.
Light switch
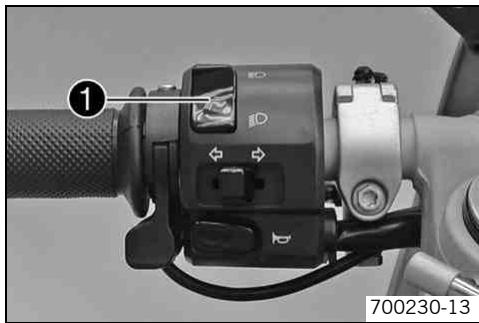
The light switch 1 is fitted on the left side of the handlebar.
Possible states
| D | Low beam on - Light switch is turned downwards. In this position, the low beam and tail light are switched on. |
| D | High beam on - Light switch is turned upwards. In this position, the low beam, the high beam and the tail light are switched on. |
Headlight flasher switch
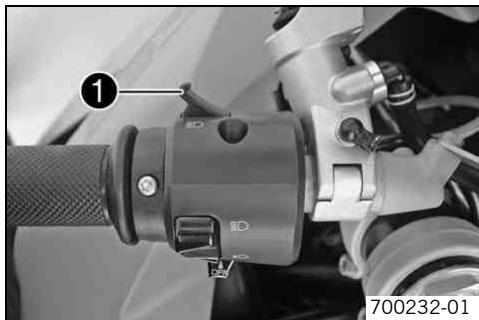
The headlight flasher switch ① is fitted on the left side of the handlebar.
Possible states
- Headlight flasher switch in neutral position
- Headlight flasher switch pressed - The headlight flasher switch (high beam) is operated in this position.
Flasher switch
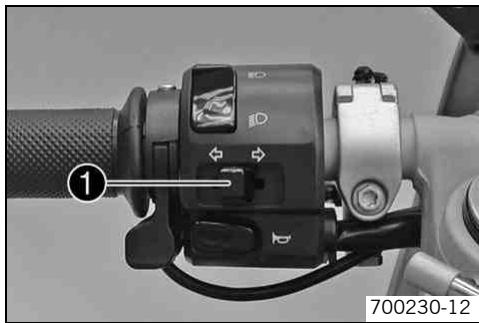
The flasher switch is fitted on the left side of the handlebar.
Possible states
| Flasher light off | |
| ← | Flasher light, left, on - Flasher switch pressed to the right. The flasher switch returns automatically to the central position after use. |
| → | Flasher light, right, on - Flasher switch pressed to the right. The flasher switch returns automatically to the central position after use. |
To switch off the flasher light, press the flasher switch towards the switch case.
Horn button
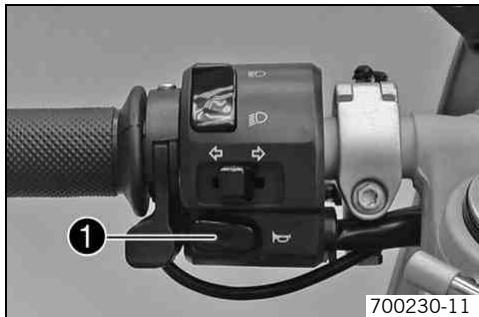
The horn button 1 is fitted on the left side of the handlebar.
Possible states
- Horn button in neutral position
- Horn button pressed - The horn is operated in this position.
Ignition/steering lock
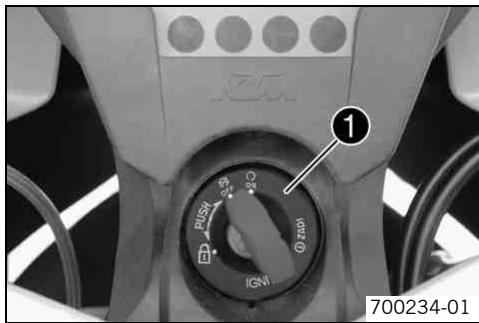
The ignition/steering lock is located in front of the upper triple clamp.
Possible states
| OFF | Ignition off – In this position, the ignition circuit is interrupted, a running engine stops, and a non-running engine will not start. The black ignition key can be removed. |
| ON | Ignition on – In this position, the ignition circuit is closed, and the engine can be started. |
| Steering locked – In this position, the ignition circuit is interrupted and the steering locked. The black ignition key can be removed. |
Emergency OFF switch
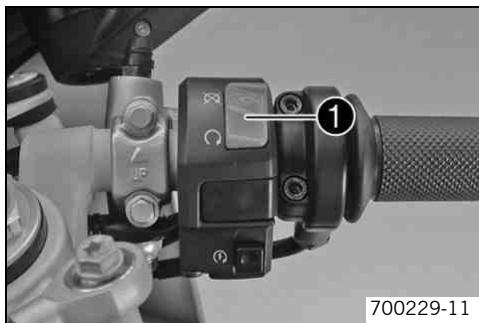
The emergency OFF switch 1 is installed on the right side of the handlebar.
Possible states
| ○ | Emergency OFF switch on – This position is necessary for operation; the ignition circuit is closed. |
| × | Emergency OFF switch off – In this position, the ignition circuit is interrupted, a running engine stops, and a non-running engine cannot be started. |
Electric starter button
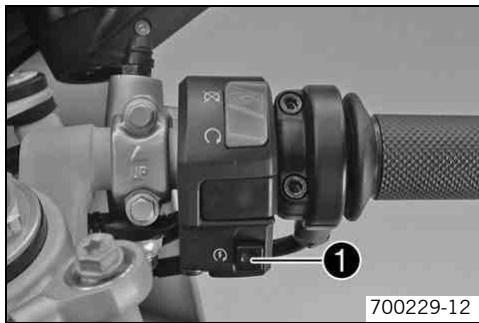
The electric starter button 1 is fitted on the right side of the handlebar.
Possible states
Electric starter button in neutral position
Electric starter button pressed - In this position, the electric starter is operated.
Combination instrument - overview
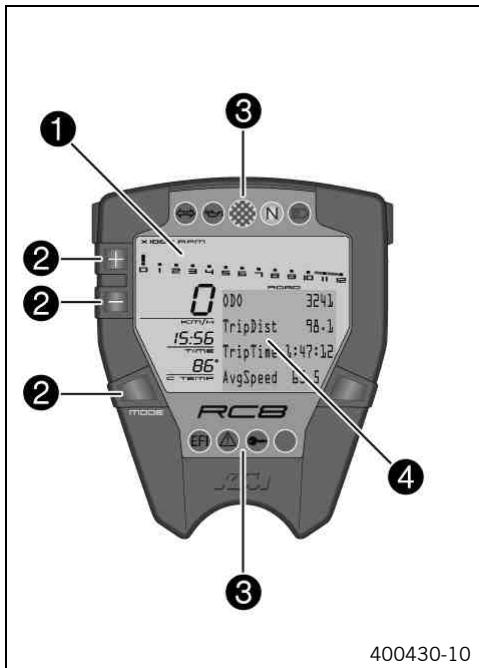
| 1 | Display (▼ p. 35) |
| 2 | Function buttons |
| 3 | Indicator lamps (▼ p. 37) |
| 4 | Info display (▼ p. 36) |
Combination instrument - function buttons on handlebar
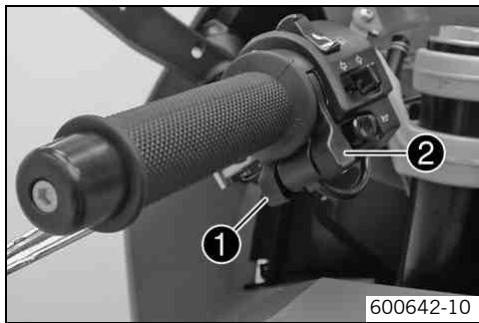
The MODE button 1 is fitted on the handlebar, front left. The LAP button 2 is fitted on the handlebar, rear left.
Combination instrument - activation and test
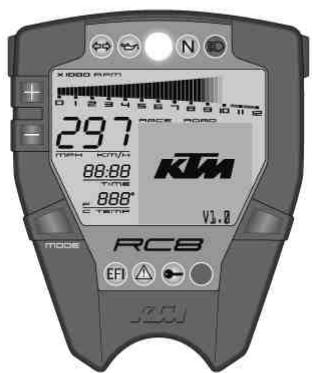
400429-10
Activation
The combination instrument is activated when the ignition is switched on.
Test
The segments of the tachometer light up in and switch off in sequence.
The speed display counts from 0 to 300 and back.
The remaining display segments outside the info display light up briefly.
The KTM logo appears in the info display.
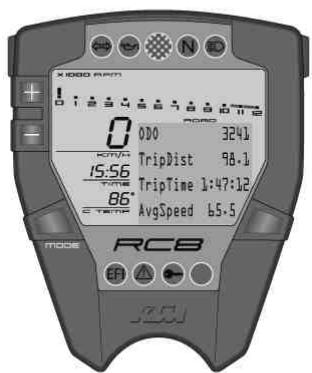
In ROAD mode, the info display switches to ODO, TripDist, TripTime, AvgSpeed mode.
In RACE mode, the info display switches to LAPSTOGO, LastLap, ± Last, ± Best mode.
Display
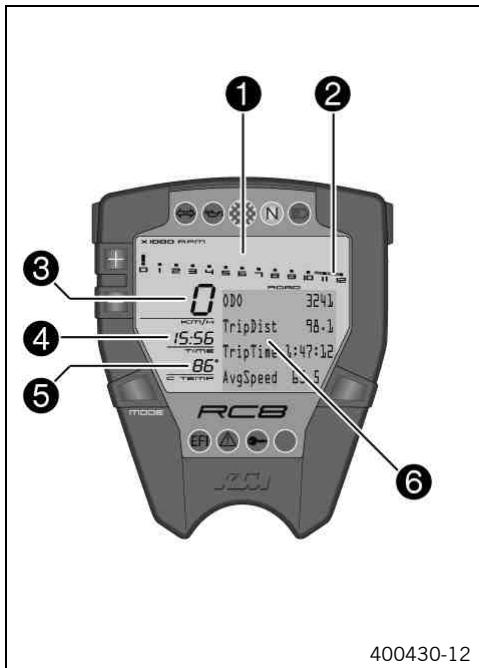
The tachometer ① displays the engine speed in revolutions per minute (RPM). The red marking ② marks the over-rev (excessive speed) range of the engine. The speed ③ is displayed in kilometers per hour km/h or in miles per hour Mph. The time appears in segment ④.
The coolant temperature is shown in degrees Celsius or Fahrenheit in segment ⑤. The info display ③ shows additional information.
Info display
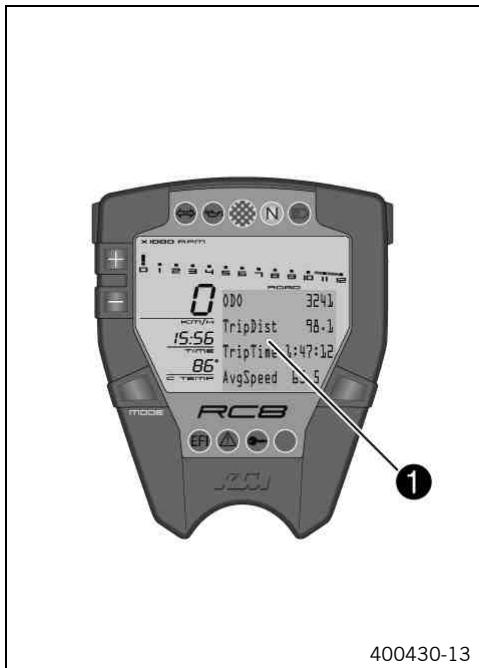
The info display 1 has two menus.
Menu 1 is ROAD mode (standard) for riding on public roads.
Menu 2 is RACE mode for riding on race courses. It allows riders to time laps themselves. If the general warning lamp lights up, the corresponding message is shown periodically in the info display.
| Information repeat | 45 s |
The information shown in the info display can be controlled with the function buttons.
Indicator lamps
400430-14
Possible states
| ←→ | The flasher indicator lamp flashes green in the same rhythm as the flasher. – The flasher is switched on. |
| The oil indicator lamp lights up red – The oil pressure is too low. | |
| The shift warning light shows/flashes red – The set shift speed is reached. | |
| N | The idling speed indicator lamp lights up green – The gearbox is in neutral. |
| E | The high beam indicator lamp lights up blue – The high beam is on. |
| EFI | EFI warning lamp (MIL) lights up / flashes red – The OBD has detected an emission- or safety-critical error. |
| The general warning light shows green – An operating safety (warning) message was detected. This is also shown periodically in the info display. | |
| The immobilizer indicator lamp lights up or flashes red – Status or error message for immobilizer / alarm system. |
Notes/warnings on the combination instrument
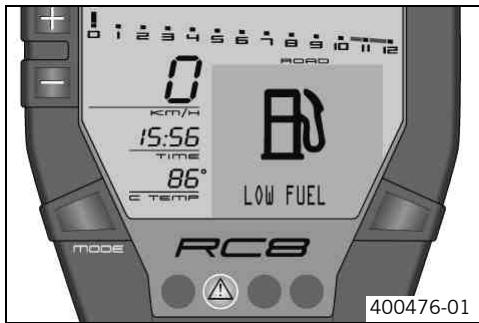
LOW FUEL appears on the info display if the minimum range falls below the specified value.
Distance
25 km (15.5 mi)
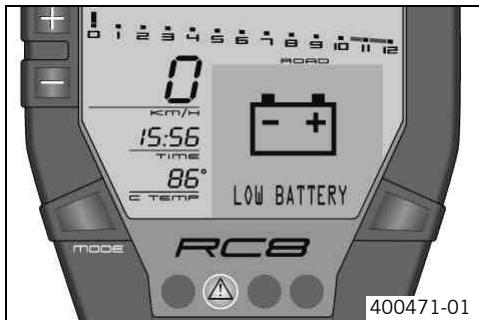
LOW BATTERY appears on the info display if the battery voltage falls below the specified value.
Battery voltage
10.80 V
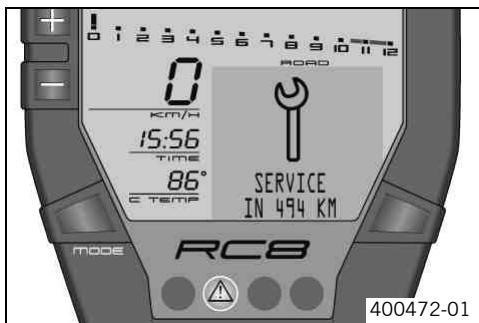
SERVICE IN xxx KM(MPH) appears on the info display if the distance to the next service falls below the specified value.
| Distance | 500 km (310.7 mi) |
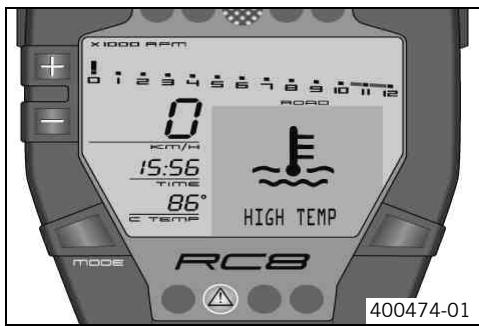
HIGH TEMP appears on the info display if the coolant temperature rises above the specified value.
| Coolant temperature | 120 °C (248 °F) |
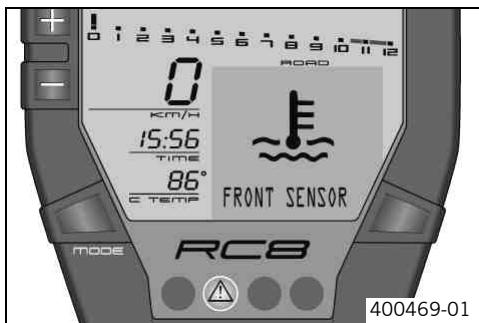
FRONT SENSOR appears on the info display if the coolant temperature sensor of the front cylinder is defective.
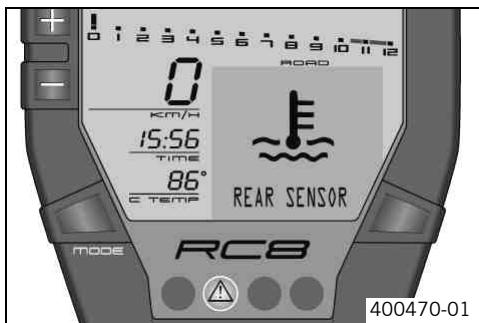
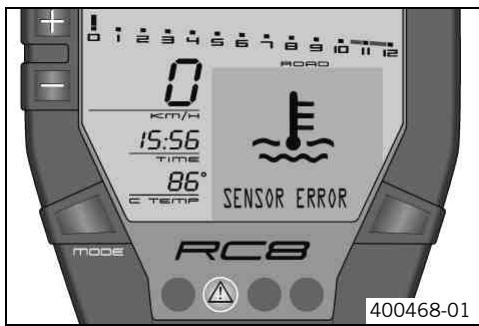
REAR SENSOR appears on the info display if the coolant temperature sensor of the rear cylinder is defective.
SENSOR ERROR appears on the info display if the coolant temperature between the coolant temperature sensors of the front and rear cylinders differs by more than the specified value.
| Coolant temperature | 10 °C (50 °F) |
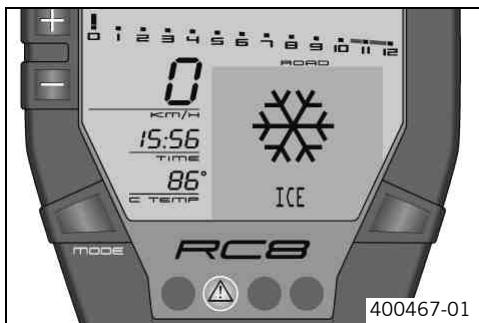
ICE appears on the info display if the external temperature falls below the specified value.
| Temperature | 3 °C (37 °F) |
ICE switches off on the info display if the external temperature rises above the specified value.
| Temperature | 4 °C (39 °F) |
ODO menu
Condition
The ignition is on.
ROAD mode
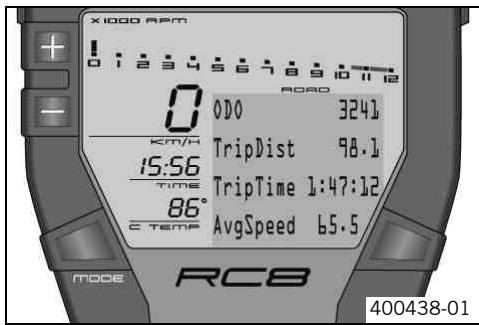
- Press the MODE button briefly and repeatedly until ODO appears at the top left of the info display.
ODO shows the total distance covered.
TripDist shows the distance covered since the last reset. For example, this could be between two refueling stops. TripDist is always running and counts up to 999.9.
TripTime shows the trip time on the basis of TripDist and resumes running as soon as a speed signal is received.
The calculation of this value starts with the first speed signal and ends three seconds after the last speed signal.
AvgSpeed (average speed) is coupled with TripDist and TripTime.
| Press the button. | No function |
| Press the button. | No function |
| Press the button and the button for 3 - 5 seconds. | The display changes to the SET-UP menu |
| Press the MODE button for 3 - 5 seconds. | The display of TripDist, TripTime and AvgSpeed is reset |
| Press the MODE button briefly. | Next display mode |
FUELDISTANCE menu
Condition
The ignition is on.
ROAD mode
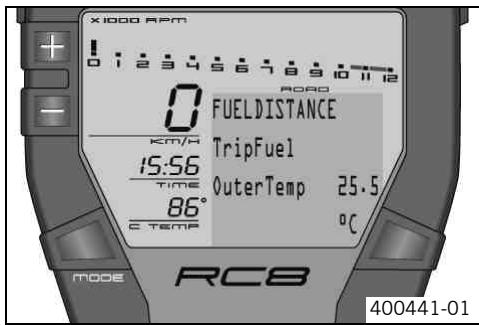
- Press the MODE button briefly and repeatedly until FUELDISTANCE appears at the top of the info display.
TripFuel shows the distance covered since the fuel reserve level was reached.

Info
This is displayed only after you reach the fuel reserve level.
OuterTemp shows the external temperature.
The external temperature can be switched on and off in the SET-UP menu.
| Press the button. | No function |
| Press the button. | No function |
| Press the button and the button for 3 - 5 seconds. | The display changes to the SET-UP menu |
| Press the MODE button for 3 - 5 seconds. | No function |
| Press the MODE button briefly. | Next display mode |
FUELRANGE menu
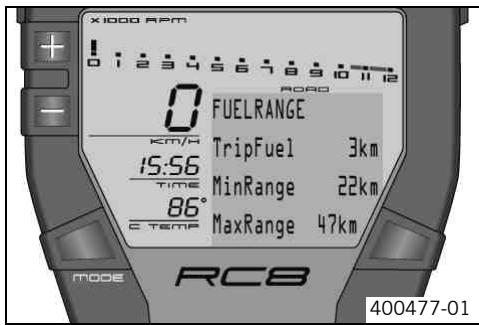
Condition
The ignition is on.
ROAD mode
- Press the MODE button briefly and repeatedly until FUELRANGE appears at the top of the info display.
TripFuel shows the distance covered since the fuel reserve level was reached.

Info
This is displayed only after you reach the fuel reserve level.
MinRange shows the minimum range you can cover with the fuel reserve.
MaxRange shows the maximum range you can cover with the fuel reserve.
The possible range of the fuel reserve depends on your riding style.
| Press the button. | No function |
| Press the button. | No function |
| Press the button and the button for 3 - 5 seconds. | The display changes to the SET-UP menu |
| Press the MODE button for 3 - 5 seconds. | No function |
| Press the MODE button briefly. | Next display mode |
DISTANCE TO Next Service menu
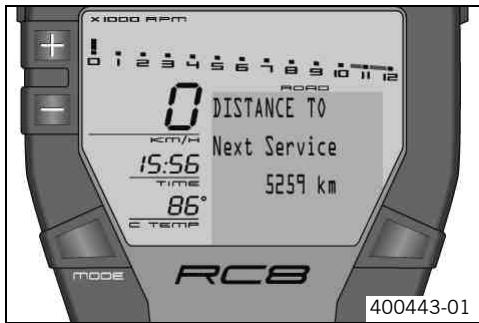
Condition
The ignition is on.
- The motorcycle is stationary.
ROAD mode
- Press the MODE button briefly and repeatedly until DISTANCE TO Next Service appears in the info display.
DISTANCE TO Next Service shows the distance before the next service is necessary.
| Press the button. | No function |
| Press the button. | No function |
| Press the button and the button for 3 - 5 seconds. | The display changes to the SET-UP menu |
| Press the MODE button for 3 - 5 seconds. | No function |
| Press the MODE button briefly. | Next display mode |
LAPSTOGO menu
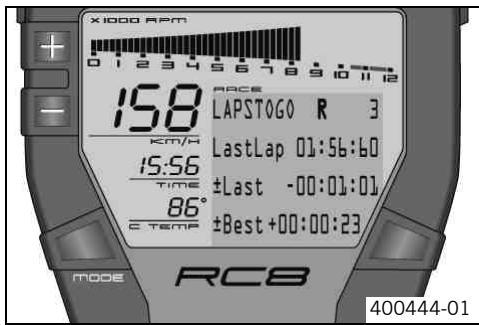
Condition
The ignition is on.
RACE mode
- Press the MODE button briefly and repeatedly until LAPSTOGO appears at the top left of the info display.
LAPSTOGO shows the number of remaining laps.
If an R appears after LAPSTOGO, the stopwatch is running in the background.
If a P appears after LAPSTOGO, the stopwatch in the background is active but waiting for a speed signal. The time is not running.
This function is controlled by the button "LAP".
LastLap shows the lap time of the last round.
±Last shows the difference between the last lap and the lap before last.
± Best shows the difference between the last lap and the best lap.
If the last lap was the fastest, you see behind ±Best: the Best! symbol in the info display.
| Press the button. | no function |
| Press the button. | no function |
| Press the button and the button for 3 - 5 seconds. | The display changes to the SET-UP menu |
| Press the MODE button for 3 - 5 seconds. | All values in RACE mode are reset (except RACEODO) |
| Press the MODE button briefly. | Next display mode |
TOPSPEED menu
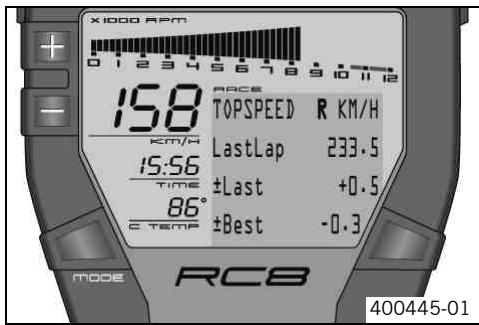
Condition
The ignition is on.
RACE mode
- Press the MODE button briefly and repeatedly until TOPSPEED appears at the top left of the info display.
If an R appears after TOPSPEED, the stopwatch is running in the background.
If a P appears after TOPSPEED, the stopwatch is not running in the background.
This function is controlled by the button "LAP".
TOPSPEED shows the highest lap speed.
LastLap shows the maximum speed of the last round.
±Last shows the maximum speed difference between the last lap and the lap before.
±Best shows the maximum speed difference between the last lap and the highest maximum speed.
If the last lap was the lap with the highest maximum speed, the info display shows ±Best:
Best!
| Press the button. | no function |
| Press the button. | no function |
| Press the button and the button for 3 - 5 seconds. | The display changes to the SET-UP menu |
| Press the MODE button for 3 - 5 seconds. | The display of LastLap, ±Last and ±Best are set to 0 |
| Press the MODE button briefly. | Next display mode |
LAP/BESTLAP/LastLap menu
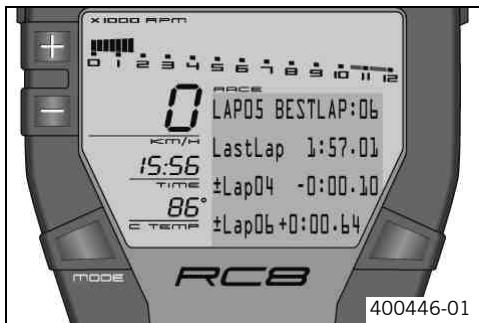
Condition
The ignition is on.
- The motorcycle is stationary.
RACE mode
- Press the MODE button briefly and repeatedly until LAP/BESTLAP/LastLap appears in the info display.
LAP shows the selected lap.
BESTLAP shows the number of the lap with the best lap time.
LastLap shows the time of the lap behind LAP.
± Lap shows the difference to the lap before.
± Lap shows the difference to the lap after.
| Press the button. | The next lap is displayed |
| Press the button. | The previous lap is displayed |
| Press the button and the button for 3 - 5 seconds. | The display changes to the SET-UP menu |
| Press the MODE button for 3 - 5 seconds. | All values in RACE mode are reset (except RACEODO) |
| Press the MODE button briefly. | Next display mode |
LAP/BESTLAP/TopSpeed menu
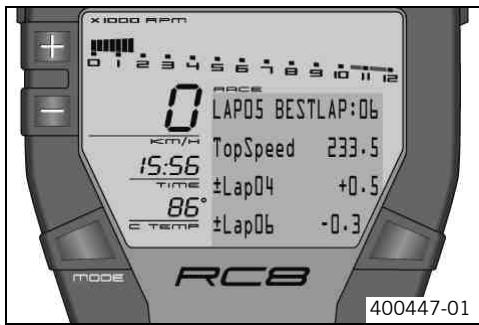
Condition
The ignition is on.
- The motorcycle is stationary.
RACE mode
- Press the MODE button briefly and repeatedly until LAP/BESTLAP/TopSpeed appears in the info display.
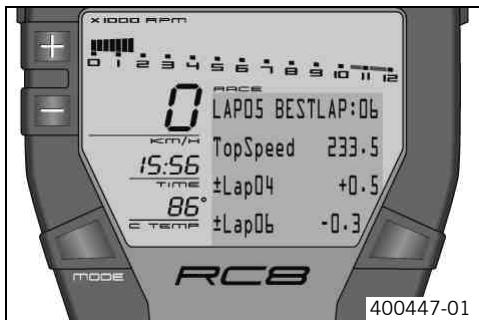
LAP shows the selected lap.
BESTLAP shows the lap in which the highest maximum speed was reached.
TopSpeed shows maximum speed of the lap behind LAP.
± Lap shows the difference to the lap before.
± Lap shows the difference to the lap after.
| Press the button. | The next lap is displayed |
| Press the button. | The previous lap is displayed |
| Press the button and the button for 3 - 5 seconds. | The display changes to the SET-UP menu |
| Press the MODE button for 3 - 5 seconds. | All values in RACE mode are reset (except RACEODO) |
| Press the MODE button briefly. | Next display mode |
Total distance menu in Race mode RACEODO
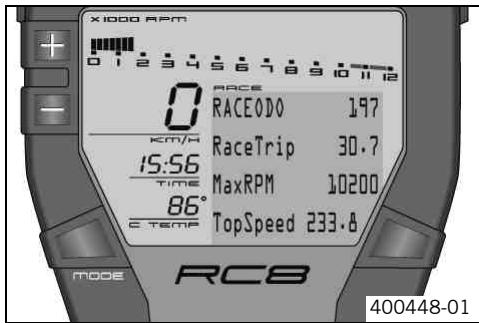
Condition
The ignition is on.
- The motorcycle is stationary.
RACE mode
- Press the MODE button briefly and repeatedly until RACEODO appears at the top of the info display.
RACEODO shows the total distance covered in RACE mode.
RaceTrip shows the distance covered since the last reset. For example, this could be between two refueling stops. RaceTrip is always running and counts up to 999.9.
MaxRPM shows the highest engine speed reached during the RaceTrip.
TopSpeed shows the highest speed reached during the RaceTrip.
| Press the button. | No function |
| Press the button. | No function |
| Press the button and the button for 3 - 5 seconds. | The display changes to the SET-UP menu |
| Press the MODE button for 3 - 5 seconds. | All values in RACE mode are reset (except RACEODO) |
| Press the MODE button briefly. | Next display mode |
SET-UP menu
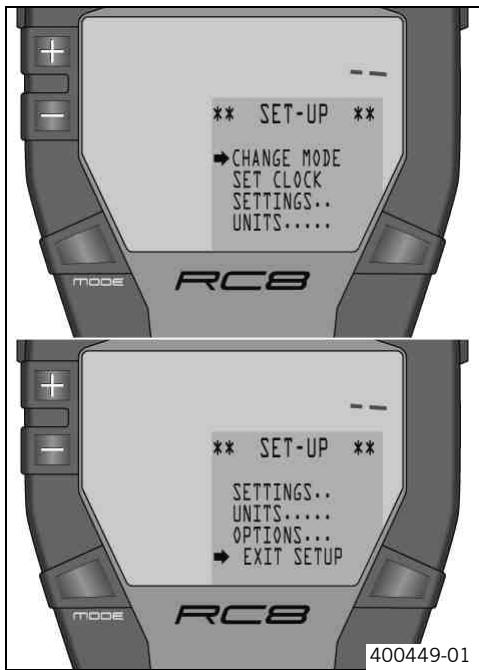
Condition
The ignition is on.
- The motorcycle is stationary.
- Press the button and the button for 3 - 5 seconds.
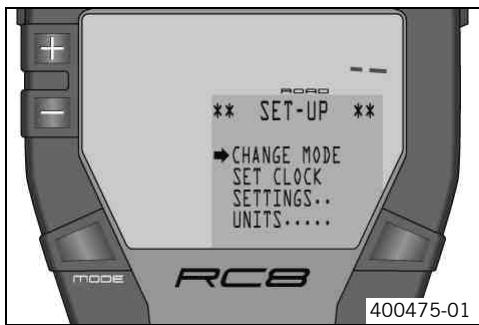
On the CHANGE MODE menu, you can select between ROAD and RACE mode.
You can set the clock on the SET CLOCK menu.
On the SETTINGS menu, you can set the shift warning light, the lap blank time of the LAP button, the number of laps, and the reset time of the fuel reserve display.
On the UNITS menu, you can set the units for measuring speed, distance, and temperature.
On the OPTIONS menu, you can switch the tire pressure check and external temperature display on/off (available as accessories).
Select EXIT SETUP to close the SET-UP menu.
The symbol shows which menu you can activate with the "MODE" button.
| Press the button. | The arrow moves up |
| Press the button. | The arrow moves down |
| Press the button and the button for 3 - 5 seconds. | No function |
| Press the MODE button for 3 - 5 seconds. | The menu in front of the arrow is selected |
| Press the MODE button briefly. | The menu in front of the arrow is selected |
CHANGE MODE menu
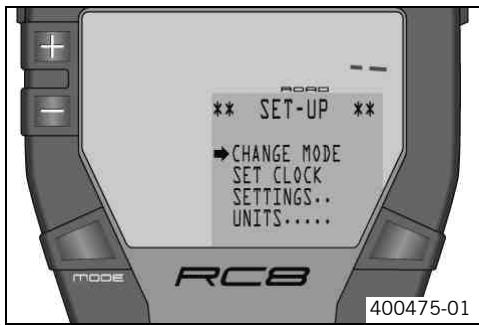
Condition
The ignition is on.
- The motorcycle is stationary.
- Press the button and the button for 3 - 5 seconds.
- Press the MODE button briefly.
On the CHANGE MODE menu, you can select between ROAD and RACE mode.
| Press the button. | Changes the menu |
| Press the button. | Changes the menu |
| Press the button and the button for 3 - 5 seconds. | No function |
| Press the MODE button for 3 - 5 seconds. | Opens and exits CHANGE MODE |
| Press the MODE button briefly. | Opens and exits CHANGE MODE |
SET CLOCK menu
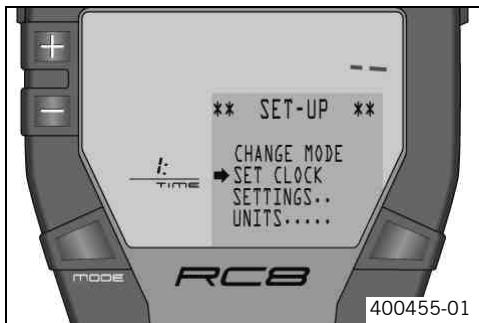
Condition
The ignition is on.
- The motorcycle is stationary.
- Press the button and the button for 3 - 5 seconds.
- Press the button once until the symbol is on SET CLOCK in the info display.
- Press the MODE button briefly.
You can set the clock on the SET CLOCK menu.
| Press the button. | Increases the value |
| Press the button. | Decreases the value |
| Press the button and the button for 3 - 5 seconds. | No function |
| Press the MODE button for 3 - 5 seconds. | Opens and exits SET CLOCK or changes to next value |
| Press the MODE button briefly. | Opens and exits SET CLOCK or changes to next value |
SETTINGSMenu
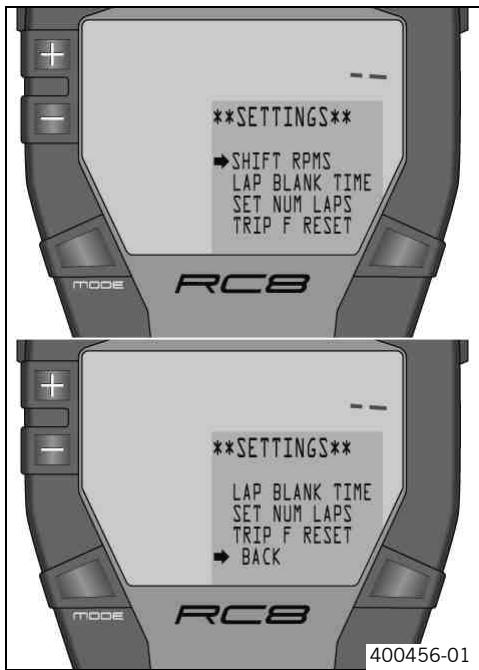
Condition
The ignition is on.
- The motorcycle is stationary.
- Press the button and the button for 3 - 5 seconds.
- Press the button twice until the symbol is on SETTINGS in the info display.
- Press the MODE button briefly.
On the SHIFT RPMS menu, you can activate the shift warning light.
On the LAP BLANK TIME menu, you can set the lap blank time of the LAP button.
On the SET NUM LAPS menu, you can set the number of laps to cover in RACE mode.
On the TRIP F RESET menu, you can set the reaction time of the fuel reserve display to changes of the fuel level.
Only a KTM-RC8 workshop can make changes on the S.LEARN TPMS menu.
On the BACK... menu, you switch back to the SET-UP menu.
The symbol shows which menu you can activate with the "MODE" button.
| Press the button. | The arrow moves up |
| Press the button. | The arrow moves down |
| Press the button and the button for 3 - 5 seconds. | No function |
| Press the MODE button for 3 - 5 seconds. | The menu in front of the arrow is selected |
| Press the MODE button briefly. | The menu in front of the arrow is selected |
SHIFT RPMS menu
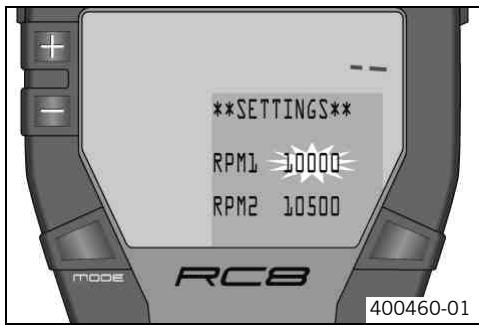
Condition
The ignition is on.
- The motorcycle is stationary.
- Press the button and the button for 3 - 5 seconds.
- Press the button twice until the symbol is on SETTINGS in the info display.
- Press the MODE button briefly.
- Press the MODE button briefly.
On the SHIFT RPMS menu, you can activate the shift warning light.
| Press the button. | Increases the value |
| Press the button. | Decreases the value |
| Press the button and the button for 3 - 5 seconds. | No function |
| Press the MODE button for 3 - 5 seconds. | Opens and exits SHIFT RPMS or changes to next value |
| Press the MODE button briefly. | Opens and exits SHIFT RPMS or changes to next value |
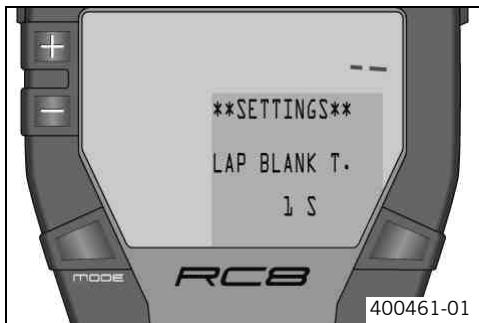
LAP menu, LAP BLANK T button
Condition
The ignition is on.
- The motorcycle is stationary.
- Press the button and the button for 3 - 5 seconds.
- Press the button twice until the symbol is on SETTINGS in the info display.
- Press the MODE button briefly.
- Press the button once until the symbol is on LAP BLANK T in the info display.
- Press the MODE button briefly.
On the LAP BLANK T menu, you can set the lap blank time of the LAP button.
| Press the button. | Increases the value |
| Press the button. | Decreases the value |
| Press the button and the button for 3 - 5 seconds. | No function |
| Press the MODE button for 3 - 5 seconds. | Opens and exits LAP BLANK T |
| Press the MODE button briefly. | Opens and exits LAP BLANK T |
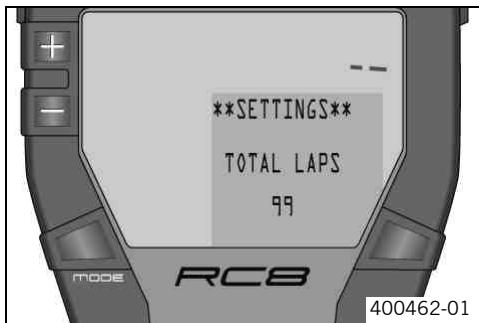
SET NUM LAPS menu
Condition
The ignition is on.
- The motorcycle is stationary.
- Press the button and the button for 3 - 5 seconds.
- Press the button twice until the symbol is on SETTINGS in the info display.
- Press the MODE button briefly.
- Press the button twice until the symbol is on SET NUM LAPS in the info display.
- Press the MODE button briefly.
On the SET NUM LAPS menu, you can set the number of laps to cover in RACE mode.
| Press the button. | Increases the value |
| Press the button. | Decreases the value |
| Press the button and the button for 3 - 5 seconds. | No function |
| Press the MODE button for 3 - 5 seconds. | Opens and exits SET NUM LAPS |
| Press the MODE button briefly. | Opens and exits SET NUM LAPS |
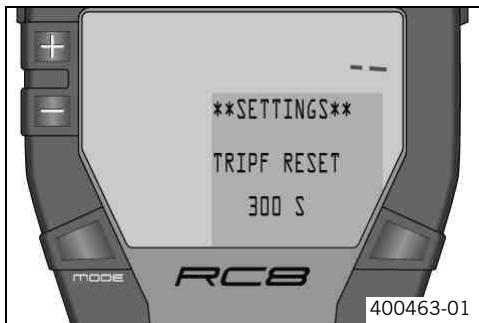
TRIP F RESET menu
Condition
The ignition is on.
- The motorcycle is stationary.
- Press the button and the button for 3 - 5 seconds.
- Press the button twice until the symbol is on SETTINGS in the info display.
- Press the MODE button briefly.
- Press the button three times until the symbol is on TRIP F RESET in the info display.
- Press the MODE button briefly.
On the TRIP F RESET menu, you can set the reaction time of the fuel reserve display to changes of the fuel level.
| Press the button. | Increases the value |
| Press the button. | Decreases the value |
| Press the button and the button for 3 - 5 seconds. | No function |
| Press the MODE button for 3 - 5 seconds. | Opens and exits TRIP F RESET |
| Press the MODE button briefly. | Opens and exits TRIP F RESET |
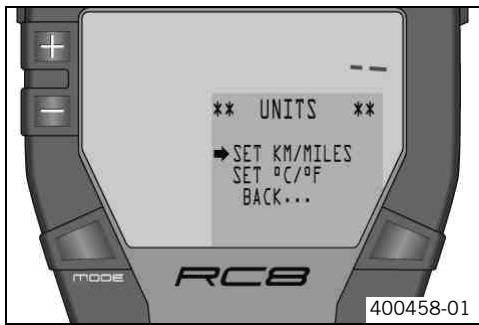
UNITS menu
Condition
The ignition is on.
- The motorcycle is stationary.
- Press the button and the button for 3 - 5 seconds.
- Press the button three times until the symbol is on UNITS in the info display.
- Press the MODE button briefly.
On the SET KM/MILES menu, you can set the units for measuring speed and distance.
On the SET ^ C / ^ menu, you can set the unit for the temperature display.
On the BACK... menu, you switch back to the SET-UP menu.
The symbol shows which menu you can activate with the "MODE" button.
| Press the button. | The arrow moves up |
| Press the button. | The arrow moves down |
| Press the button and the button for 3 - 5 seconds. | No function |
| Press the MODE button for 3 - 5 seconds. | The menu in front of the arrow is selected |
| Press the MODE button briefly. | The menu in front of the arrow is selected |
SET KM/MILES menu
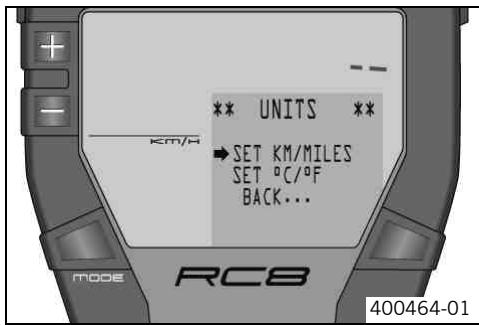
Condition
The ignition is on.
- The motorcycle is stationary.
- Press the button and the button for 3 - 5 seconds.
- Press the button three times until the symbol is on UNITS in the info display.
- Press the MODE button briefly.
Press the MODE button briefly.
On the SET KM/MILES menu, you can set the units for measuring speed and distance.
| Press the button. | Changes the unit |
| Press the button. | Changes the unit |
| Press the button and the button for 3 - 5 seconds. | No function |
| Press the MODE button for 3 - 5 seconds. | Opens and exits SET KM/MILES |
| Press the MODE button briefly. | Opens and exits SET KM/MILES |
SET ^ C / ^ F menu
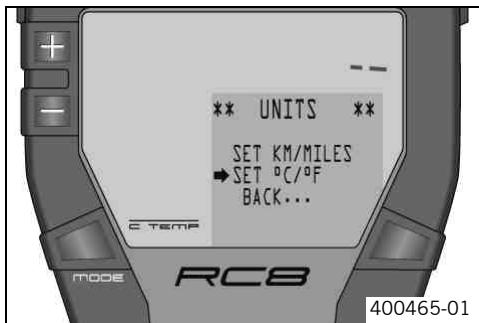
Condition
The ignition is on.
- The motorcycle is stationary.
- Press the button and the button for 3 - 5 seconds.
- Press the button three times until the symbol is on UNITS in the info display.
- Press the MODE button briefly.
- Press the button once until the symbol is on SET°C/F in the info display.
- Press the MODE button briefly.
On the SET ^ C / ^ menu, you can set the unit for the temperature display.
| Press the button. | Changes the unit |
| Press the button. | Changes the unit |
| Press the button and the button for 3 - 5 seconds. | No function |
| Press the MODE button for 3 - 5 seconds. | Opens and exits SET °C/°F |
| Press the MODE button briefly. | Opens and exits SET °C/°F |
OPTIONS menu
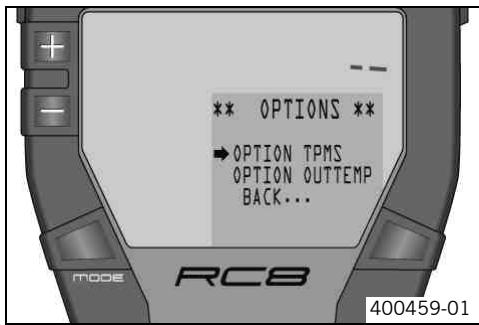
Condition
The ignition is on.
- The motorcycle is stationary.
- Press the button and the button for 3 - 5 seconds.
- Press the button four times until the symbol is on OPTIONS in the info display.
- Press the MODE button briefly.
On the OPTION TPMS menu, you can switch the tire pressure check on/off (available as an accessory).
On the OPTION OUTTEMP menu, you can switch the external temperature display on/off. On the BACK... menu, you switch back to the SET-UP menu.
The symbol shows which menu you can activate with the "MODE" button.
| Press the button. | The arrow moves up |
| Press the button. | The arrow moves down |
| Press the button and the button for 3 - 5 seconds. | No function |
| Press the MODE button for 3 - 5 seconds. | The menu in front of the arrow is selected |
| Press the MODE button briefly. | The menu in front of the arrow is selected |
TPMS menu
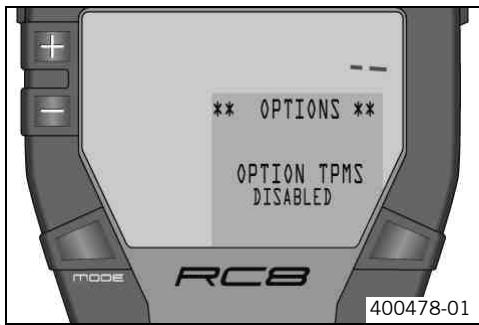
Condition
The ignition is on.
- The motorcycle is stationary.
- Press the button and the button for 3 - 5 seconds.
- Press the button four times until the symbol is on OPTIONS in the info display.
- Press the MODE button briefly.
- Press the MODE button briefly.
On the OPTION TPMS menu, you can switch the tire pressure check on/off (available as an accessory).
| Press the button. | Switches the tire pressure display on/off |
| Press the button. | Switches the tire pressure display on/off |
| Press the button and the button for 3 - 5 seconds. | No function |
| Press the MODE button for 3 - 5 seconds. | Opens and exits OPTION TPMS |
| Press the MODE button briefly. | Opens and exits OPTION TPMS |
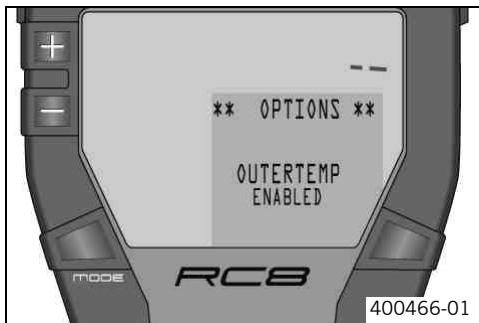
OUTERTEMP menu
Condition
The ignition is on.
- The motorcycle is stationary.
- Press the button and the button for 3 - 5 seconds.
- Press the button four times until the symbol is on OPTIONS in the info display.
- Press the MODE button briefly.
- Press the button once until the symbol is on OPTION OUTTEMP in the info display.
- Press the MODE button briefly.
On the OPTION OUTTEMP menu, you can switch the external temperature display on/off.
| Press the button. | Switches the external temperature display on/off |
| Press the button. | Switches the external temperature display on/off |
| Press the button and the button for 3 - 5 seconds. | No function |
| Press the MODE button for 3 - 5 seconds. | Opens and exits OPTIONOUTTEMP |
| Press the MODE button briefly. | Opens and exits OPTIONOUTTEMP |
| Table of functions | |||||
| Display | Press the button. | Press the button. | Press the button and the button for 3 - 5 seconds. | Press the MODE button for 3 - 5 seconds. | Press the MODE button briefly. |
| ODO menu | No function | No function | The display changes to the SET-UP menu | The display of TripDist, TripTime and AvgSpeed is reset | Next display mode |
| FUELDISTANCE menu | No function | No function | The display changes to the SET-UP menu | No function | Next display mode |
| FUELRANGE menu | No function | No function | The display changes to the SET-UP menu | No function | Next display mode |
| DISTANCE TO Next Service menu | No function | No function | The display changes to the SET-UP menu | No function | Next display mode |
| LAPSTOGO menu | no function | no function | The display changes to the SET-UP menu | All values in RACE mode are reset (except RACEODO) | Next display mode |
| TOPSPEED menu | no function | no function | The display changes to the SET-UP menu | The display of Last-Lap, ±Last and ±Best are set to 0 | Next display mode |
| LAP/BESTLAP/Last-Lap menu | The next lap is displayed | The previous lap is displayed | The display changes to the SET-UP menu | All values in RACE mode are reset (except RACEODO) | Next display mode |
| LAP/BESTLAP/Top-Speed menu | The next lap is displayed | The previous lap is displayed | The display changes to the SET-UP menu | All values in RACE mode are reset (except RACEODO) | Next display mode |
| Total distance menu in Race mode RACEODO | No function | No function | The display changes to the SET-UP menu | All values in RACE mode are reset (except RACEODO) | Next display mode |
| SET-UP menu | The arrow moves up | The arrow moves down | No function | The menu in front of the arrow is selected | The menu in front of the arrow is selected |
| CHANGE MODE menu | Changes the menu | Changes the menu | No function | Opens and exits CHANGE MODE | Opens and exits CHANGE MODE |
| SET CLOCK menu | Increases the value | Decreases the value | No function | Opens and exits SET CLOCK or changes to next value | Opens and exits SET CLOCK or changes to next value |
| SETTINGS menu | The arrow moves up | The arrow moves down | No function | The menu in front of the arrow is selected | The menu in front of the arrow is selected |
| SHIFT RPMS menu | Increases the value | Decreases the value | No function | Opens and exits SHIFT RPMS or changes to next value | Opens and exits SHIFT RPMS or changes to next value |
| LAP menu, LAP BLANK T button | Increases the value | Decreases the value | No function | Opens and exits LAP BLANK T | Opens and exits LAP BLANK T |
| SET NUM LAPS menu | Increases the value | Decreases the value | No function | Opens and exits SET NUM LAPS | Opens and exits SET NUM LAPS |
| TRIP F RESET menu | Increases the value | Decreases the value | No function | Opens and exits TRIP F RESET | Opens and exits TRIP F RESET |
| UNITS menu | The arrow moves up | The arrow moves down | No function | The menu in front of the arrow is selected | The menu in front of the arrow is selected |
| SET KM/MILES menu | Changes the unit | Changes the unit | No function | Opens and exits SET KM/MILES | Opens and exits SET KM/MILES |
| SET °C/°F menu | Changes the unit | Changes the unit | No function | Opens and exits SET °C/°F | Opens and exits SET °C/°F |
| OPTIONS menu | The arrow moves up | The arrow moves down | No function | The menu in front of the arrow is selected | The menu in front of the arrow is selected |
| TPMS menu | Switches the tire pressure display on/off | Switches the tire pressure display on/off | No function | Opens and exits OPTION TPMS | Opens and exits OPTION TPMS |
| OUTERTEMP menu | Switches the external temperature display on/off | Switches the external temperature display on/off | No function | Opens and exits OPTIONOUTTEMP | Opens and exits OPTIONOUTTEMP |
| Table of conditions and activability | ||||||
| Display | The ignition is on. ROAD mode | The ignition is on. The motor-cycle is stationary. ROAD mode | The ignition is on. RACE mode | The ignition is on. The motor-cycle is stationary. RACE mode | The ignition is on. The motor-cycle is stationary. | Menu can be activated |
| ODO menu | ● | |||||
| FUELDISTANCE menu | ● | |||||
| FUELRange menu | ● | |||||
| DISTANCE TO Next Service menu | ● | |||||
| LAPSTOGO menu | ● | |||||
| TOPSPEED menu | ● | |||||
| LAP/BESTLAP/LastLap menu | ● | |||||
| LAP/BESTLAP/TopSpeed menu | ● | |||||
| Total distance menu in Race mode RACEODO | ● | |||||
| SET-UP menu | ● | |||||
| CHANGE MODE menu | ● | ● | ||||
| SET CLOCK menu | ● | |||||
| SETTINGS menu | ● | |||||
| SHIFT RPMS menu | ● | |||||
| LAP menu, LAP BLANK T button | ● | |||||
| SET NUM LAPS menu | ● | |||||
| TRIP F RESET menu | ● | |||||
| Display | • The igni- tion is on. • ROAD mode | • The igni- tion is on. • The motor- cycle is stationary. • ROAD mode | • The igni- tion is on. • RACE mode | • The igni- tion is on. • The motor- cycle is stationary. • RACE mode | • The igni- tion is on. • The motor- cycle is stationary. | Menu can be activated |
| UNITS menu | • | |||||
| SET KM/MILES menu | • | |||||
| SET °C/°F menu | • | |||||
| OPTIONS menu | • | |||||
| TPMS menu | • | • | ||||
| OUTERTEMP menu | • | • | ||||
Displaying lap times
Condition
The ignition is on.
The motorcycle is stationary.
RACE mode
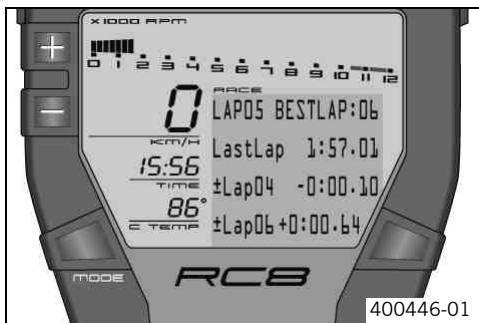
- Press the MODE button briefly and repeatedly until LAP/BESTLAP/LastLap appears in the info display.
LAP01 appears on the left of the info display.
Press the button.
The next lap is displayed.
Press the button.
The previous lap is displayed.
- Press the MODE button briefly.
Next display mode
Displaying maximum speed
Condition
The ignition is on.
The motorcycle is stationary.
RACE mode
- Press the MODE button briefly and repeatedly until LAP/BESTLAP/TopSpeed appears in the info display.
LAP01 appears on the left of the info display.
Press the button.
The next lap is displayed.
- Press the button.
The previous lap is displayed.
- Press the MODE button briefly.
Next display mode
Setting ROAD or RACE mode
Condition
The ignition is on.
The motorcycle is stationary.
- Press the button and the button for 3 - 5 seconds.
- Press the MODE button briefly.
The mode set is shown in the info display.
- Select ROAD mode or RACE mode with the + button or the + button.
- Press the MODE button briefly.
The settings are stored and the display changes to the SET-UP menu.
- Press the button briefly and repeatedly until the symbol is on EXIT SETUP in the info display.
- Press the MODE button briefly.
Setting the clock with SET CLOCK

Condition
The ignition is on.
The motorcycle is stationary.
- Press the button and the button for 3 - 5 seconds.
- Press the button once until the symbol is on SET CLOCK in the info display.
- Press the MODE button briefly.
The hour is shown.
- Set the hour with the + button or the - button.
- Press the MODE button briefly.
The minutes are shown.
- Set the minutes with the + button or the + button.
Press the MODE button briefly.
The settings are stored and the display changes to the SET-UP menu.
- Press the button briefly and repeatedly until the symbol is on EXIT SETUP in the info display.
- Press the MODE button briefly.
Adjusting shift speed RPM1/2
Condition
The ignition is on.
The motorcycle is stationary.
- Press the button and the button for 3 - 5 seconds.
- Press the button twice until the symbol is on SETTINGS in the info display.
- Press the MODE button briefly.
- Press the MODE button briefly.
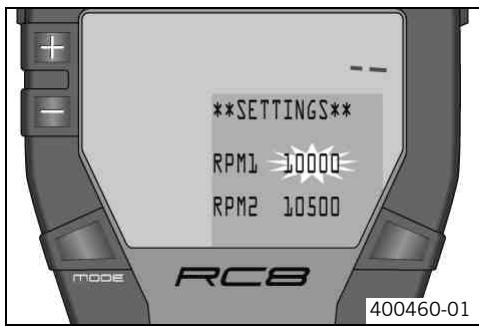
RPM1 and RPM2 appear on the info display.
The engine speed after RPM1 flashes.
The engine speed can be set at intervals of 50. RPM1 is the engine speed above which the shift warning light starts to flash.
-
Set the engine speed with the button or the button.
-
Press the MODE button briefly.
The engine speed after RPM2 flashes.
Info
RPM2 is the engine speed above which the shift warning light lights up constantly. If RPM1 = RPM2, the shift warning light lights up constantly when you reach the engine speed set.
- Set the engine speed with the button or the button.
- Press the MODE button briefly.
The settings are stored and the display changes to the SETTING menu.
Info At d
At delivery, RPM1 is set to 10000 and RPM2 to 10500.
- Press the button briefly and repeatedly until the symbol is on BACK... in the info display.
- Press the MODE button briefly.
- Press the button briefly and repeatedly until the symbol is on EXIT SETUP in the info display.
- Press the MODE button briefly.
Setting the blank time of the LAP button LAP BLANK T
Condition
The ignition is on.
The motorcycle is stationary.
- Press the button and the button for 3 - 5 seconds.
- Press the button twice until the symbol is on SETTINGS in the info display.
- Press the MODE button briefly.
- Press the button once until the symbol is on LAP BLANK T in the info display.
- Press the MODE button briefly.
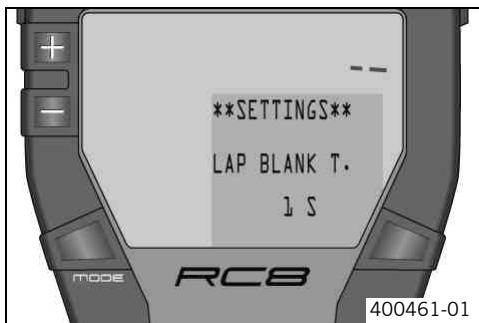
LAP BLANK T. appears in the info display.
i Info At d
Tip Wit
With LAP BLANK T., you can prevent the lap from being timed too short. This may happen if you accidentally press the LAP button twice in a row.
- Set the blank time of the LAP button with the + button or the - button.
Info LAP
Info LAP BLANK T. can be set between 1 and 200.
- Press the MODE button briefly.
The settings are stored and the display changes to the SETTINGS menu.
- Press the button briefly and repeatedly until the symbol is on BACK... in the info display.
- Press the MODE button briefly.
- Press the button briefly and repeatedly until the symbol is on EXIT SETUP in the info display.
- Press the MODE button briefly.
Setting the number of laps SET NUM LAPS
Condition
The ignition is on.
The motorcycle is stationary.
- Press the button and the button for 3 - 5 seconds.
- Press the button twice until the symbol is on SETTINGS in the info display.
- Press the MODE button briefly.
- Press the button twice until the symbol is on SET NUM LAPS in the info display.
- Press the MODE button briefly.
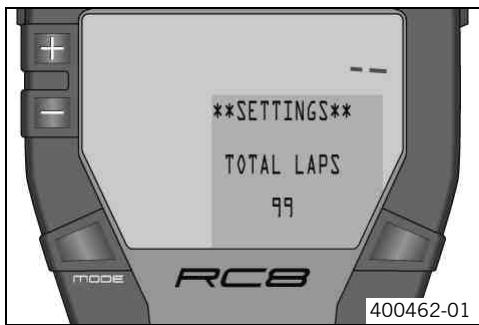
TOTAL LAPS appears in the info display with the number of laps.
Info
When delivered, the number of TOTAL LAPS is set to 99 laps.
- Set the number of laps with the button or the button.
Info
You can set TOTAL LAPS to between 1 and 99 laps.
- Press the MODE button briefly.
The settings are stored and the display changes to the SETTINGS menu.
- Press the button briefly and repeatedly until the symbol is on BACK... in the info display.
- Press the MODE button briefly.
- Press the button briefly and repeatedly until the symbol is on EXIT SETUP in the info display.
- Press the MODE button briefly.
Setting the fuel reserve display TRIPF RESET
Condition
The ignition is on.
The motorcycle is stationary.
- Press the button and the button for 3 - 5 seconds.
- Press the button twice until the symbol is on SETTINGS in the info display.
- Press the MODE button briefly.
- Press the button three times until the symbol is on TRIP F RESET in the info display.
- Press the MODE button briefly.
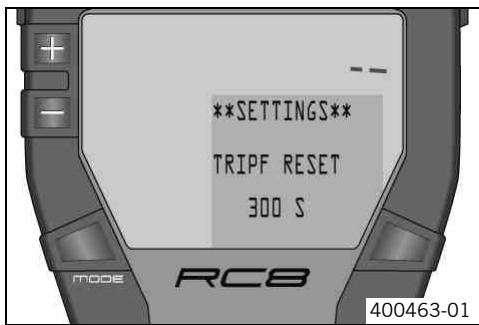
TRIPF RESET appears in the info display with the reaction time.
At delivery, TRIPF RESET is set to 300 seconds.
- Set the reaction time of the fuel reserve display with the button or the button.
You can set the TRIPF RESET to between 10 and 1000 seconds in steps of 10.
- Press the MODE button briefly.
The settings are stored and the display changes to the SETTINGS menu.
- Press the button briefly and repeatedly until the symbol is on BACK... in the info display.
- Press the MODE button briefly.
- Press the button briefly and repeatedly until the symbol is on EXIT SETUP in the info display.
- Press the MODE button briefly.
Setting the kilometers/miles SET KM/MILES

Info
Making a country-specific setting.
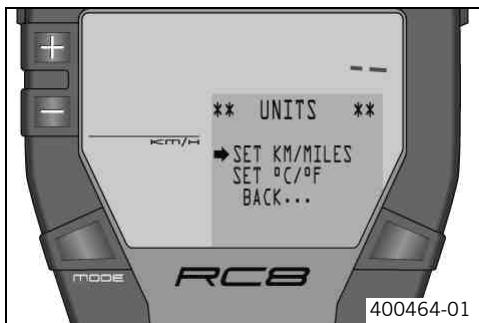
Condition
The ignition is on.
The motorcycle is stationary.
- Press the button and the button for 3 - 5 seconds.
- Press the button three times until the symbol is on UNITS in the info display.
- Press the MODE button briefly.
- Press the MODE button briefly.
The selected unit appears on the left of the display.
- Select the unit with the button or the button.
- Press the MODE button briefly.
The settings are stored and the display changes to the UNITS menu.
- Press the button briefly and repeatedly until the symbol is on BACK... in the info display.
- Press the MODE button briefly.
- Press the button briefly and repeatedly until the symbol is on EXIT SETUP in the info display.
- Press the MODE button briefly.
Setting the temperature unit SET ^ C / ^ F
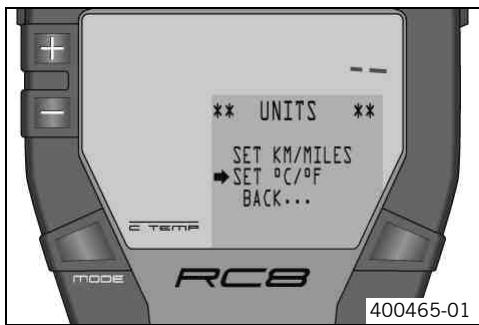
Condition
The ignition is on.
The motorcycle is stationary.
- Press the button and the button for 3 - 5 seconds.
- Press the button three times until the symbol is on UNITS in the info display.
- Press the MODE button briefly.
- Press the button once until the symbol is on SET°C/F in the info display.
- Press the MODE button briefly.
The selected unit appears on the left of the display.
- Select the unit with the + button or the - button.
- Press the MODE button briefly.
The settings are stored and the display changes to the UNITS menu.
- Press the button briefly and repeatedly until the symbol is on BACK... in the info display.
- Press the MODE button briefly.
- Press the button briefly and repeatedly until the symbol is on EXIT SETUP in the info display.
- Press the MODE button briefly.
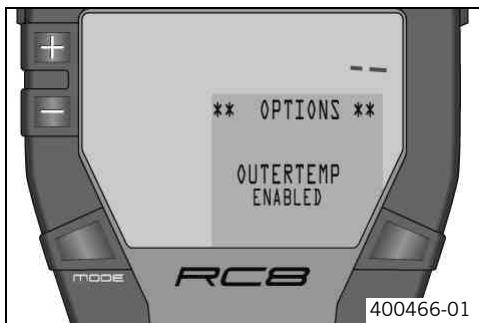
Switching the external temperature display on/off
Condition
The ignition is on.
The motorcycle is stationary.
- Press the button and the button for 3 - 5 seconds.
- Press the 一 button four times until the symbol is on OPTIONS in the info display.
- Press the MODE button briefly.
- Press the button once until the symbol is on OPTION OUTTEMP in the info display.
- Press the MODE button briefly.
√ You see ENABLED or DISABLED in the info display.
- You can switch the external temperature display on/off with the button or the button.
- Press the MODE button briefly.
The settings are stored and the display changes to the OPTIONS menu.
- Press the button briefly and repeatedly until the symbol is on BACK... in the info display.
- Press the MODE button briefly.
- Press the button briefly and repeatedly until the symbol is on EXIT SETUP in the info display.
- Press the MODE button briefly.
Opening the filler cap
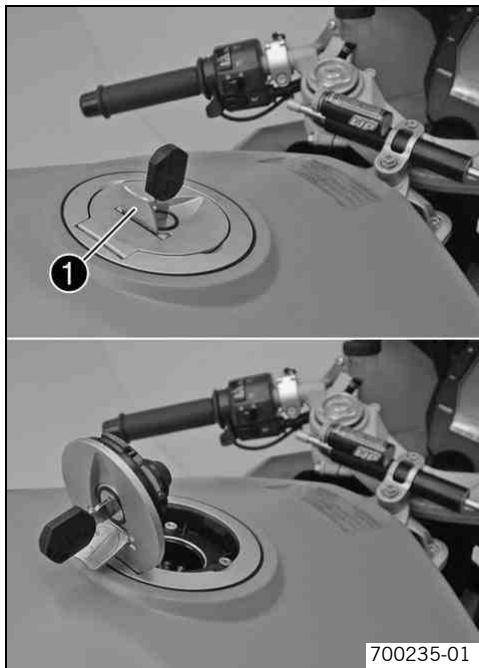
- Lift the cover ① of the filler cap and insert the ignition key in the lock.
- Turn the ignition key clockwise until the filler cap opens.
- Open the filler cap.
Closing the filler cap
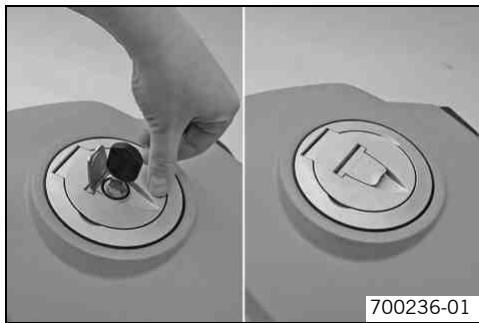
- Close the filler cap. Push down the filler cap slightly until the lock closes.
- Remove the ignition key and close the cover.
Supporting strap
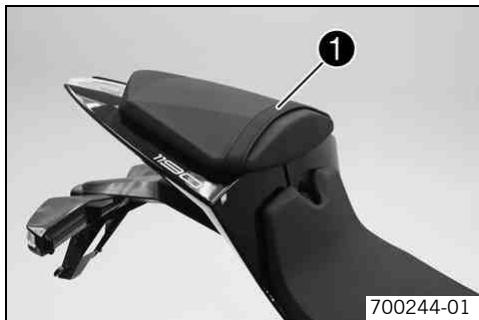
The supporting strap 1 is provided for the passenger to hold on to.
Seat lock
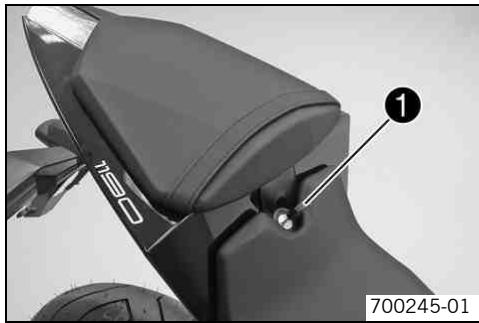
The seat lock is behind the seat. It can be locked with the ignition key.
Helmet lock
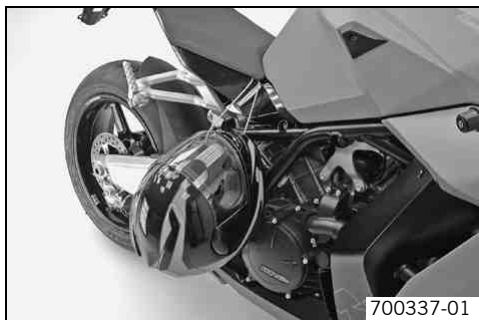
The steel cable in the tool set can be used to lock a helmet to the vehicle to prevent it from being stolen.

Warning
Danger of accidents Impairment of handling characteristics and vehicle operation by a fitted helmet lock or helmet.
- Do not use the helmet lock for holding a helmet or other objects during the journey. Always remove the helmet lock before starting out.
Passenger footrests
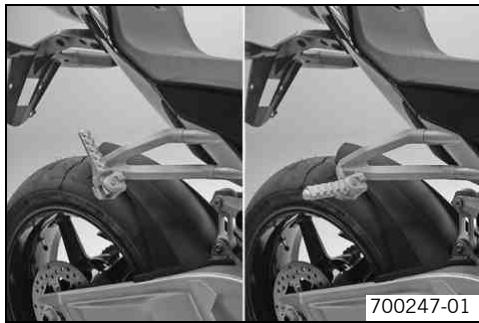
The passenger footrests can be folded up and down.
Possible states
- Passenger footrests folded up - For operation without a passenger.
- Passenger footrests folded down - For operation with a passenger.
Shift lever
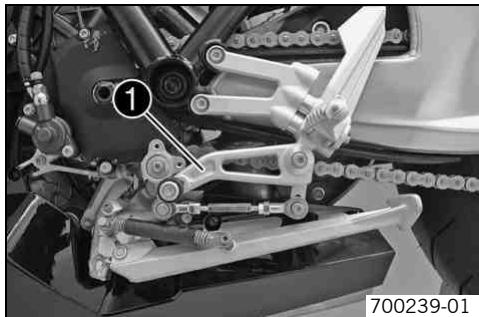
The shift lever 1 is mounted on the left of the engine.
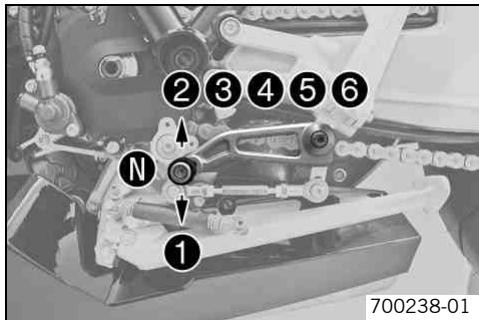
The gear positions can be seen in the picture.
The neutral or idle position is between the first and second gear.
Foot brake pedal
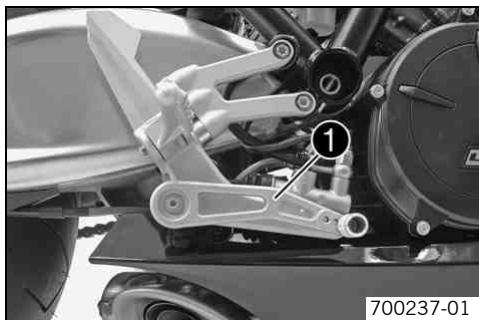
The foot brake pedal 1 is in front of the right footrest.
The foot brake pedal operates the rear brake.
Side stand
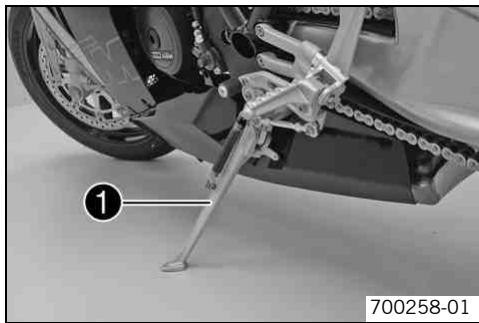
The side stand is coupled with the safety start system; see the riding instructions.
Possible states
- Side stand folded out - The vehicle can be leaned on the side stand. The safety start system is active.
- Side stand folded in - This position is mandatory for all journeys. The safety start system is inactive.
Advice on first use

Danger
Danger of accidents Danger from insufficient traffic competence.
Do not use the vehicle if you are not fit to deal with traffic or if you have consumed alcohol and/or medicaments or drugs.

Warning
Risk of injury Risk of injury by missing/inadequate protective clothing.
- Wear protective clothing (helmet, boots, gloves, pants and jacket with protectors) every time you ride the vehicle. Always wear protective clothing, which must be in perfect condition and meet legal requirements.

Warning
Danger of crashing Impairment of riding behavior due to different tire tread patterns on front and rear wheels.
The front and rear wheels must be fitted with tires with similar tread patterns to prevent loss of control over the vehicle.

Warning
Danger of accidents Uncontrollable handling characteristics due to non-approved and/or non-recommended tires/wheels.
- Only tires/wheels approved by KTM and with the corresponding speed index should be used.

Warning
Danger of accidents Reduced road grip with new tires.
- New tires have a smooth roll surface and therefore cannot provide full road grip. The entire roll surface must be roughened in the first 200 kilometers (124.3 miles) by moderate driving at alternating angles. The full grip is not reached until the vehicle has been run in.

Warning
Danger of accidents Brake system failure.
If the foot brake pedal is not released, the brake linings drag permanently. The rear brake can fail due to overheating. Take your foot off the foot brake pedal if you do not want to brake.

Info
When using your vehicle, remember that others may feel disturbed by excessive noise.
- Make sure that the pre-delivery inspection work has been carried out exclusively by an authorized KTM-RC8 workshop. You receive a delivery certificate and the service record at vehicle handover.
Before your first trip, read the entire operating instructions carefully.
Get to know the operating elements. - Adjust the basic position of clutch lever. (p. 183)
- Adjust the basic position of the handbrake lever. (p. 137)
- Adjust the footbrake pedal. (p. 129)
Get used to handling the vehicle on an empty car park before making a longer trip. Try also to ride as slowly as possible to get a better feeling for the motorcycle. - Hold the handlebar firmly with both hands and keep your feet on the footrests when riding.
- Do not make any changes to the vehicle, and use only KTM approved/recommended parts.

Info
Parts from other manufacturers can reduce the operational safety of the vehicle.
- Run the engine in. (p. 86)
Running the engine in
- Do not exceed the specified engine speed and load during the running-in period.
Guideline
| Maximum engine speed | |
| During the first: 1,000 km (621.4 mi) | 7,500 rpm |
| After the first: 1,000 km (621.4 mi) | 10,500 rpm |
- Avoid full-throttle operation!
Loading the vehicle

Warning
Danger of accidents Unstable riding behavior.
- Do not exceed the maximum permitted weight and axle loads. The overall weight consists of: motorcycle operational and with a full tank, driver and passenger with protective clothing and helmet, baggage.

Warning
Danger of accidents Unstable handling characteristics due to incorrect mounting of suitcase and/or tank rucksack.
Mount and secure suitcase and tank rucksack according to the manufacturer's instructions.

Warning
Danger of accidents Unstable handling characteristics at high speed.
- Adapt your speed according to your payload. If the motorcycle is loaded with luggage, ride more slowly. Maximum speed with luggage 130 km/h (80.8 mph)

Warning
Danger of accidents Destruction of luggage carrier system.
If the motorcycle is fitted with luggage cases, note the manufacturer's specifications concerning the maximum payload.

Warning
Danger of accidents Poor visibility for other road users due to slipped baggage.
If the tail light is covered, you are less visible to following traffic, especially in the dark. Check the way your baggage is fixed regularly.

Warning
Danger of accidents Changed handling characteristics and longer stopping distance with excessive payload.
- Adapt your speed according to your payload.

Warning
Danger of accidents Unstable handling characteristics due to slipped baggage.
- Check the way your baggage is fixed regularly.
If you carry any baggage, make sure it is fixed firmly as close as possible to the center of the vehicle and ensure even weight distribution between the front and rear wheels.
- Do not exceed the overall maximum permitted weight and the axle loads.
Guideline
| Maximum permissible total weight | 380 kg (838 lb.) |
| Maximum permissible front axle load | 200 kg (441 lb.) |
| Maximum permissible rear axle load | 220 kg (485 lb.) |
Checks to be made before putting into operation

Info
During operation, the motorcycle must be in a technically perfect condition.
In the interest of riding safety, you should get into the habit of making a general check of the motorcycle before every journey.
- Check the engine oil level. (p. 193)
- Check the engine for oil leaks.
- Check the fuel level.
- Bleed fork legs. (p. 108)
Guideline
Every
1,000 km (621.4 mi)
- Check the chain tension. (p. 131)
Clean the chain. (p. 130) - Check the tire condition. (p. 151)
- Check the tire air pressure. (p. 153)
- Check the brake fluid level of the front brake. (p. 138)
- Check the rear brake fluid level. (p. 141)
- Check the front brake linings. (p. 140)
- Check the rear brake linings. (p. 143)
- Check the brake system.
- Check the coolant level. (p. 180)
- Check the adjustment and smooth operation of all operating elements.
- Check the functioning of the electrical equipment.
- Check that any luggage is fastened correctly.
- Sit on the motorcycle and check the setting of the rear mirror.
Starting

Danger
Danger of poisoning Exhaust gases are poisonous and can result in unconsciousness and/or death.
- When running the engine, always make sure there is sufficient ventilation, and do not start or run the engine in a closed space.
Note
Engine failure High engine speeds in cold engines have a negative effect on the service life of the engine.
Always warm up the engine at low engine speeds.
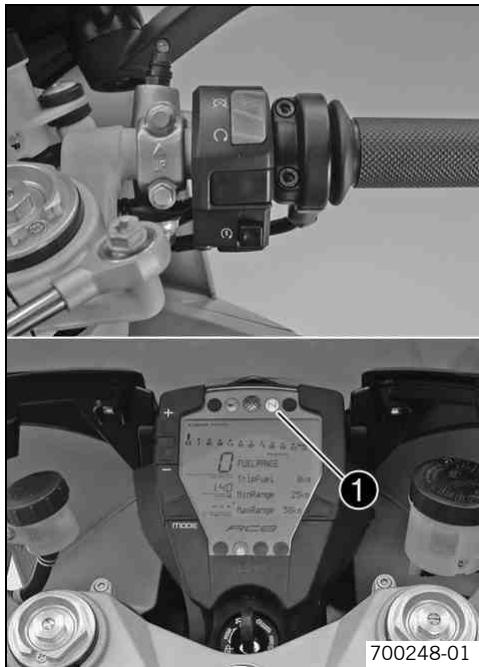
- Press the emergency OFF switch into the position .
-
Switch on the ignition by turning the black ignition key to the position .
-
When you switch on the ignition, you hear the fuel pump working for about 2 seconds. At the same time, the function test of the combination instrument is run.
-
Shift into neutral.
The green idling speed indicator lamp N lights up. - Press the electric starter button (5).
Info Do r
Do not press the electric starter button until the combination instrument function test finishes.
Do not open the throttle to start. If you open the throttle during starting, the engine management does not supply any fuel, so the engine cannot start.
Press the starter for a maximum of 5 seconds without a break. Wait at least 5 seconds before trying to start again.
This motorcycle is equipped with a safety start system. The engine will only start if in neutral or, if a gear is engaged, when the clutch lever is pulled. If the side-stand is out and the machine is in gear and you release the clutch lever, the engine stops.
Take the weight off the side stand and swing it upwards with your foot as far as it will go.
Starting up
Pull the clutch lever, shift into first gear, release the clutch slowly and at the same time open the throttle.
Shifting, riding

Warning
Danger of accidents An abrupt load alterations can cause the vehicle to get out of control.
- Avoid abrupt load alterations and sudden braking actions, and adapt your speed to the road conditions.

Warning
Danger of accidents If you change down at high engine speed, the rear wheel can lock up.
- Do not change into a low gear at high engine speed. The engine races and the rear wheel can block.

Warning
Danger of accidents Malfunctions caused by incorrect ignition key position.
- Do not change the ignition key position during a journey.

Warning
Danger of accidents Distraction from traffic activity by adjustments to the vehicle.
- Make all adjustments when the vehicle is at a standstill.

Warning
Risk of injury The passenger must be able to sit securely on the passenger seat.
- The passenger must hold on to the rider or supporting strap firmly and place his/her feet on the passenger footrests. Observe the regulations concerning the minimum age for passengers in your country.

Warning
Danger of accidents Danger of accidents caused by dangerous driving.
- Observe the traffic regulations and ride defensively and with foresight in order to recognize danger as early as possible.

Warning
Danger of accidents Reduced road grip with cold tires.
- On every journey, take the first miles carefully at moderate speed until the tires reach operating temperature and optimal road grip is ensured.

Warning
Danger of accidents Reduced road grip with new tires.
- New tires have a smooth roll surface and therefore cannot provide full road grip. The entire roll surface must be roughened in the first 200 kilometers (124.3 miles) by moderate driving at alternating angles. The full grip is not reached until the vehicle has been run in.

Warning
Danger of accidents Unstable riding behavior.
- Do not exceed the maximum permitted weight and axle loads. The overall weight consists of: motorcycle operational and with a full tank, driver and passenger with protective clothing and helmet, baggage.

Warning
Danger of accidents Unstable handling characteristics due to slipped baggage.
- Check the way your baggage is fixed regularly.

Warning
Danger of accidents After a fall, check the vehicle.
After a fall, check the vehicle as usual before putting it into operation.
Note
Engine failure Unfiltered intake air has a negative effect on the service life of the engine.
- Never ride the vehicle without an air filter since dust and dirt can get into the engine and result in increased wear.
Note
Engine damage Engine overheating.
- If the coolant temperature warning lamp lights up, stop the vehicle and switch off the engine. Let the engine cool down, and then check the coolant level in the radiator and top up if necessary. If you continue your journey with the coolant temperature warning lamp on, you can cause an engine failure.

Info
If you hear unusual noises while riding, stop immediately, switch off the engine and contact an authorized KTM-RC8 workshop.
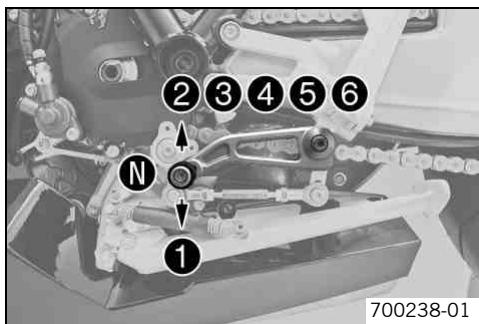
- When conditions allow (incline, road situation, etc.), you can shift into a higher gear.
- Release the throttle while simultaneously pulling the clutch lever, shift into the next gear, release the clutch and open the throttle.
For the positions of the 6 forward gears, see the illustration. The neutral or idle position is between the first and second gear. First gear is used for starting off or for steep inclines.
- When you reach maximum speed after fully opening the throttle, turn back the throttle to about 34 of its range; the speed hardly drops, but the fuel consumption falls considerably.
- Open the throttle only as far as the road and weather conditions permit. Particularly in bends, do not shift and open the throttle only very cautiously.
- To shift down, brake if necessary and close the throttle at the same time.
- Pull the clutch lever and shift into a lower gear, release the clutch lever slowly and open the throttle or shift again.
- For example, if the engine stalls at a junction, just pull the clutch and press the electric starter button. You do not need to shift into neutral.
-
Switch off the engine if you expect to be standing for a long time.
-
If the EFI warning lamp (MIL) starts to light up during the journey, stop immediately. If you shift to neutral, the EFI warning lamp (MIL) begins to flash.

Info
From the flash rhythm, you can deduce a two-digit number, the so-called flash code. The flash code tells you which component is affected by a fault.
Braking

Warning
Danger of accidents If you brake too hard, the wheels can lock.
- Adapt your braking to the traffic situation and the road conditions.

Warning
Danger of accidents Reduced braking due to wet or dirty brakes.
Clean or dry dirty or wet brakes by riding and braking gently.

Warning
Danger of accidents Reduced braking effect caused by spongy pressure point of front or rear brake.
- Have the brake system checked in an authorized KTM-RC8 workshop before continuing your journey.

Warning
Danger of accidents Brake system failure.
If the foot brake pedal is not released, the brake linings drag permanently. The rear brake can fail due to overheating. Take your foot off the foot brake pedal if you do not want to brake.

Warning
Danger of accidents Longer stopping distance due to higher overall weight.
Take the longer stopping distance into account when carrying a passenger and baggage.

Warning
Danger of accidents Delayed brake action on salted roads.
Salt can be deposited on the brake discs. To achieve the normal braking effect, the brake discs must first be cleaned by braking.
- When braking, first throttle back and then apply the front and rear brakes at the same time.
- On wet or slippery surfaces, mainly use the rear brake.
- Make sure you complete braking before going into a bend. Change down to a lower gear corresponding to your speed.
- On long downhill stretches, use the braking effect of the engine. Do this by changing down two gears, but do not race the engine. You then do not need to brake so much, and the brakes do not overheat.
Stopping, parking

Warning
Risk of misappropriation Usage by unauthorized persons.
- Never leave the vehicle while the engine is running. Secure the vehicle against use by unauthorized persons. If you leave the vehicle, lock the steering and remove the ignition key.

Warning
Danger of burns Some vehicle components get very hot when the machine is driven.
- Do not touch hot components such as exhaust system, radiator, engine, shock absorber and brakes. Allow these components to cool down before starting work on them.
Note
Danger of damage Danger of damage by the vehicle running away or falling over.
Always place the vehicle on a firm and even surface.
Note
Fire hazard Some components (engine, radiator and exhaust system) get very hot when the engine is running.
- Do not place the vehicle where there are flammable or explosive substances.
Note
Material damage Damage and destruction of components by excessive load.
-
The side stand is designed for the weight of the motorcycle only. Do not sit on the motorcycle when it is supported by the side stand only. The side stand and/or the frame could be damaged and the motorcycle could fall over.
-
Apply the brakes.
- Shift into neutral.
- Switch off the ignition by turning the black ignition key to the position 品

Info
If you switch off the engine with the emergency OFF switch but the ignition remains switched on at the ignition lock, power continues to flow to most power consumers and the battery is soon discharged. Therefore, always switch off the engine with the ignition key, the emergency OFF switch is provided for emergency situations only.
- Park the motorcycle on firm ground.
Swing the side stand to the front with your foot as far as it will go, and lean the motorcycle onto it.
Lock the steering by moving the handlebar to the left, pressing down the black ignition key to the position and turning it to the position . To make locking the steering easier, move the handlebar a little to the left and right. Remove the black ignition key.
Refueling

Danger
Fire hazard Fuel can easily catch fire.
- Never fill up the vehicle near open flames or burning cigarettes, and always switch off the engine first. Be careful that no fuel is spilt, especially on hot vehicle components. Clean up spilt fuel immediately.
Fuel in the fuel tank expands when warm and can escape if the tank is overfilled. See specifications on filling up with fuel.

Warning
Danger of poisoning Fuel is poisonous and a health hazard.
- Avoid contact between fuel and skin, eyes and clothing. Do not inhale fuel vapors. If fuel gets into your eyes, rinse immediately with water and contact a doctor. Wash affected skin areas immediately with soap and water. If fuel is swallowed, contact a doctor immediately. Change clothing that has come into contact with fuel.

Warning
Environmental hazard Improper handling of fuel is a danger to the environment.
- Do not allow fuel to get into the ground water, the ground, or the sewage system.

Info
This motorcycle is equipped with a regulated catalyst. Leaded fuel will destroy the catalyst. You should therefore use unleaded fuel only.
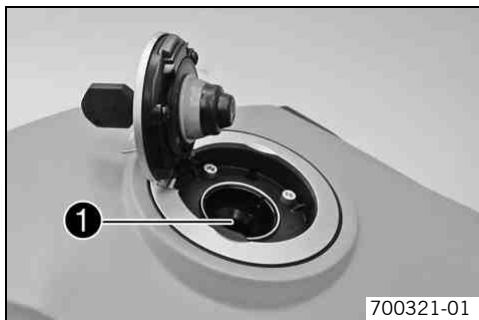
- Switch off engine.
- Open the filler cap. (p. 79)
- Fill the fuel tank with fuel up to the lower edge ① of the fuel filler.
| Total fuel tank capacity, approx. | 16.5 l (4.36 US gal) | Super unleaded (ROZ 95 / RON 95 / PON 91) (p. 236) |
- Close the filler cap. (p. 80)
Important service tasks to be carried out by an authorized KTM-RC8 workshop.
| K10N | K75A | K150A | J1A | J2A | ||
| Engine | Change the engine oil and filter, clean the oil screen. (p. 194) | ● | ● | ● | ● | ● |
| Check the valve clearance. | ● | |||||
| Replace the spark plugs. | ● | |||||
| Check the engine fixing screws and other engine screws accessible from outside to ensure that they are tight. | ● | ● | ● | |||
| Check the clutch. | ● | |||||
| Clean the oil jet for clutch lubrication. | ● | |||||
| Fuel injection | Read out the status query and fault memory with KTM DIA. | ● | ● | ● | ||
| Check bellows for tears and leaks, and check the linkage of the throttle valve spigot for freedom of movement. | ● | |||||
| Check the cable harness of the throttle valve body for damage and correct routing. | ● | |||||
| Check hoses of vacuum sensors, SLS hoses and vent hoses for damage, correct routing and leaks. | ● | ● | ● | ● | ● | |
| Check the fuel hose for damage, correct routing and leaks. | ● | ● | ● | ● | ● | |
| Check the fuel pressure. | ● | ● | ||||
| Attachments | Check the cooling system for leaks. | ● | ● | ● | ● | ● |
| Check the water pump for leaks (visual check). | ● | ● | ● | |||
| Check the coolant level. (p. 180) | ● | ● | ● | ● | ● | |
| Check the antifreeze. | ● | ● | ● | ● | ● | |
| Check the functioning of the radiator fan. | ● | ● | ● | |||
| Check the exhaust system for leaks and correct fitting and check that the exhaust holders are tight. | ● | ● | ● | |||
| Attachments | Check bowden cables for damage, smooth operation, kink-free routing and adjustment. | ● | ● | ● | ● | ● |
| Check the fluid level of the hydraulic clutch. (p. 183) | ● | ● | ● | ● | ||
| Check the air filter and change if necessary. Clean the air filter box. | ● | |||||
| Drain the drainage hose of the air filter box. | ● | ● | ● | ● | ● | |
| Check cables for damage and kink-free routing. | ● | ● | ● | |||
| Check the headlight adjustment. (p. 175) | ● | ● | ● | ● | ● | |
| Check the functioning of the electrical equipment. | ● | ● | ● | ● | ● | |
| Check the fairing parts for damage and breakage. | ● | ● | ● | |||
| Check screws and nuts for tightness. | ● | ● | ● | |||
| Brakes | Check the front brake linings. (p. 140) | ● | ● | ● | ||
| Check the rear brake linings. (p. 143) | ● | ● | ● | |||
| Check the front brake discs. (p. 136) | ● | ● | ● | |||
| Check the rear brake disc. (p. 137) | ● | ● | ● | |||
| Check the brake fluid level of the front brake. (p. 138) | ● | ● | ● | ● | ● | |
| Check the rear brake fluid level. (p. 141) | ● | ● | ● | ● | ● | |
| Change brake fluid. | ● | ● | ||||
| Check that brake lines are undamaged and free of leaks. | ● | ● | ● | ● | ● | |
| Check the braking. | ● | ● | ● | ● | ● | |
| Check screws and guide pins of the brake system for tightness. | ● | ● | ● | |||
| Chassis | Check the shock absorber and fork for leaks and function. | ● | ● | ● | ● | ● |
| Bleed fork legs. (p. 108) | ● | ● | ● | ● | ● | |
| Chassis | Check the steering head bearing and adjust if necessary. | ● | ● | ● | ||
| Check the swingarm bearing. | ● | ● | ● | |||
| Check deflector. | ● | ● | ||||
| Check the eccentric shaft adjustment. | ● | ● | ||||
| Check all screws to make sure they are tight. | ● | ● | ● | |||
| Wheels | Check the tire condition. (p. 151) | ● | ● | ● | ||
| Check the tire air pressure. (p. 153) | ● | ● | ● | ● | ● | |
| Check the chain wear. (p. 135) | ● | ● | ● | |||
| Check the rear sprocket / engine sprocket / chain sliding guard to ensure that they are tight. | ● | ● | ● | |||
| Check the rear sprocket / engine sprocket for wear. (p. 134) | ● | ● | ● | |||
| Check the chain tension. (p. 131) | ● | ● | ● | |||
| Clean the chain. (p. 130) | ● | ● | ● | ● | ● | |
| Check chain sliding guard. (p. 136) | ● | ● | ● | ● | ● | |
| Check wheel bearings for play. | ● | ● | ● | |||
| Check the rear hub shock absorbers. (p. 151) | ● | ● | ● | ● | ● |
K10N: after 1,000 km (621.4 mi)
K75A: every 7,500 km (4,660 mi)
K150A: every 15,000 km (9,320 mi) / after every sporting use
J1A: annually
J2A: every 2 years
Important service tasks to be carried out by an authorized KTM-RC8 workshop. (as additional job)
| K150A | K300A | J1A | J2A | |
| Completely service fork. | ● | |||
| Completely service shock absorber. | ● | |||
| Clean and grease the steering head bearing and sealing elements. | ● | ● | ● | |
| Clean battery poles and treat with contact grease. | ● | ● | ||
| Change the coolant. | ● |
K150A: every 15,000 km (9,320 mi) / after every sporting use
K300A: every 30,000 km (18,640 mi)
J1A: annually
J2A: every 2 years
Jacking up motorcycle front
Note
Danger of damage Danger of damage by the vehicle running away or falling over.
Always place the vehicle on a firm and even surface.
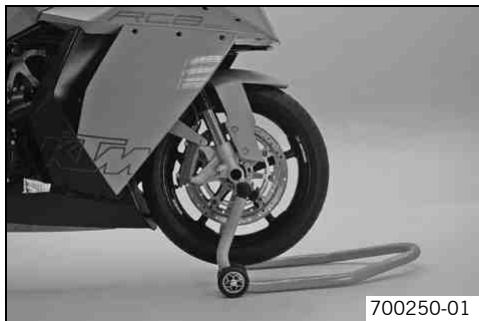
- Jack up the motorcycle rear end. (p. 104)
- Move the handlebar to the straight-ahead position. Align the work stand at the front with the adapters to the fork legs.
Work stand front (61029055300)
Info
Always jack up the rear of the motorcycle first.
- Jack up the motorcycle at the front.
Taking front of motorcycle off work stand
Note
Danger of damage Danger of damage by the vehicle running away or falling over.
Always place the vehicle on a firm and even surface.
- Secure the motorcycle against falling over.
- Remove the work stand from the front.
Jacking up motorcycle rear
Note
Danger of damage Danger of damage by the vehicle running away or falling over.
Always place the vehicle on a firm and even surface.
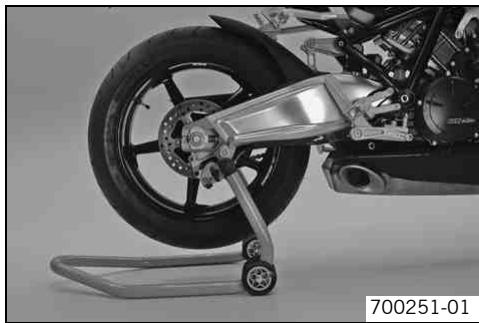
- Insert the work stand adapter in the rear of the work stand.
Work stand adapter (61029055120)
Work stand rear (61029055100)
- Stand the motorcycle upright, align the work stand to the link fork and the adapters, and jack up the motorcycle.
Taking rear of motorcycle off work stand
Note
Danger of damage Danger of damage by the vehicle running away or falling over.
Always place the vehicle on a firm and even surface.
- Secure the motorcycle against falling over.
- Remove the work stand from the rear and lean the vehicle on the sidestand.
Fork/shock absorber
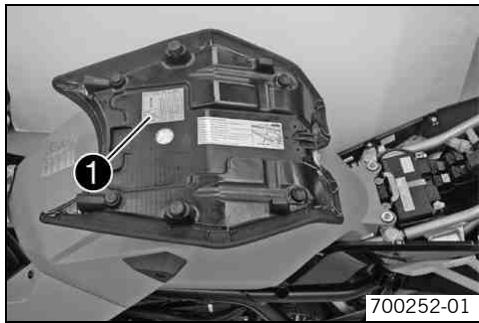
The fork and the shock absorber offer many options of adapting the chassis to your riding style and the payload.

Info
To help you adapt the vehicle, we have summarized our findings in Table 1. You will find the table on the underside of the seat. For almost all damping steps, with the exception of the spring preload of the shock absorber, start from the maximum screwed-in position with the highest damping factor and set to the specified values. Do not use excessive force to turn the adjusting screws against the stop, and take the last perceptible click as the end position.
These adjustments should be understood as a guideline and should always be the basis of your own personal chassis adaptation. Do not change the adjustments at random or by more than ± 40% , since otherwise the riding characteristics could deteriorate, particularly at high speeds.
Adjusting compression damping of fork
Info
The hydraulic compression damping determines the fork suspension behavior.
An optimally adjusted compression damping ensures that the fork does not compress too far and fast when you brake hard or when the load shifts very fast. It gives the rider good feedback about the road conditions.
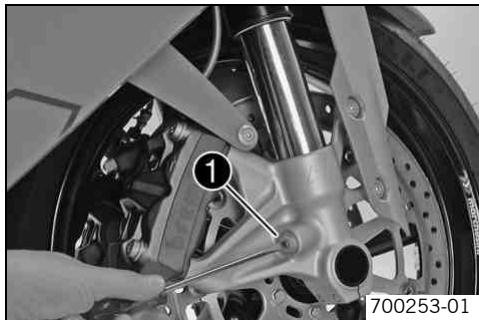
Turn adjusting screws 1 clockwise until they stop.

Info The adjusting screws are located at the bottom end of the fork legs. Make the same adjustment on both fork legs.
- Turn back counterclockwise the number of clicks corresponding to the fork type. Guideline
| Compression damping | |
| Comfort | 15 clicks |
| Standard | 10 clicks |
| Sport | 5 clicks |
| Full payload | 5 clicks |
Turn clockwise to increase damping, turn counterclockwise to reduce suspension damping.
Adjusting rebound damping of fork

Info
The hydraulic rebound damping determines the fork suspension behavior.
An optimally adjusted rebound damping brakes the springing energy and enables a fast, vibration-free resetting of the fork to the zero position.
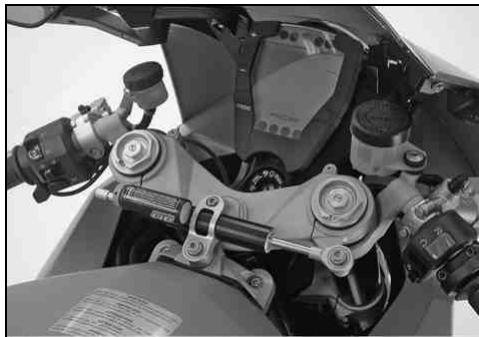
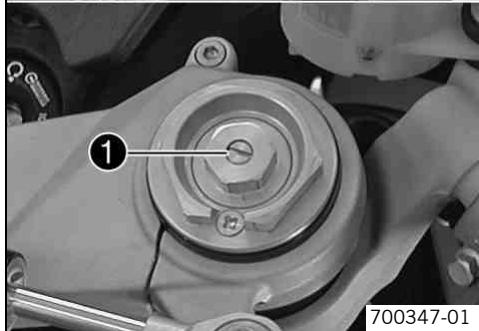
Turn adjusting screws 1 clockwise until they stop.
Info
The adjusting screws are located at the top end of the fork legs.
Make the same adjustment on both fork legs.
- Turn back counterclockwise the number of clicks corresponding to the fork type. Guideline
| Rebound damping | |
| Comfort | 15 clicks |
| Standard | 10 clicks |
| Sport | 5 clicks |
| Full payload | 5 clicks |
Turn clockwise to increase damping, turn counterclockwise to reduce suspension damping.
Adjusting spring preload of fork

Info
The spring preload defines the initial situation of the spring process of the fork.
An optimally adjusted spring preload is adapted to the rider's weight and ensures a compromise between easy handling and stability.
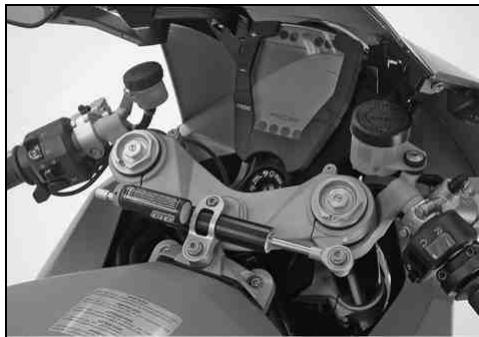
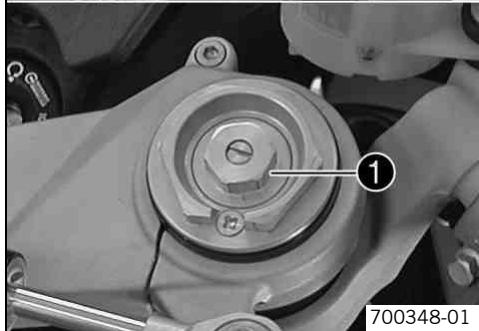
Turn the adjusting spindles 1 clockwise until they stop.
Info The adjusting spindles are located at the top end of the fork legs. Make the same adjustment on both fork legs.
- Turn back counterclockwise the number of turns corresponding to the fork type. Guideline
| Spring preload - Preload Adjuster | |
| Comfort | 5 turns |
| Standard | 5 turns |
| Sport | 3 turns |
| full payload | 3 turns |
Info Turn clockwise to increase preload, turn counterclockwise to reduce spring preload.
Changing the spring preload has no influence on the rebound damping although the adjusting screws turn during the adjustment work. However, you should also adjust the rebound damping when you alter the spring preload.
Bleeding fork legs
- Lean the motorcycle on the side stand.
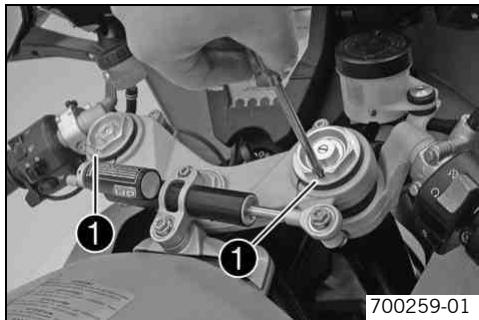
- Remove bleeder screws briefly.
✓ Any excess pressure escapes from the interior of the fork.
Mount and tighten bleeder screws.
I Info Perform this action on both fork legs.
Compression damping of the shock absorber
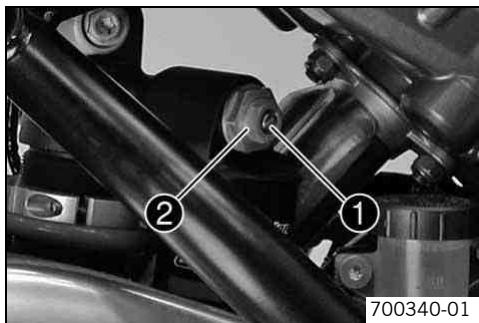
The shock absorber can coordinate the compression damping separately in the low 1 and high 2 speed range (Dual Compression Control).
The term low and high speed refers to the movement of the shock absorber during compression and not the riding speed of the motorcycle.
The low and high speed adjustment works for all areas.
Adjusting the low-speed compression damping of the shock absorber

Danger
Danger of accidents The shock absorber is under high pressure.
The shock absorber is filled with highly compressed nitrogen, so never dismantle the shock absorber or carry out any maintenance on it yourself.

Info
The low-speed setting can be seen during the slow to normal compression of the shock absorber.
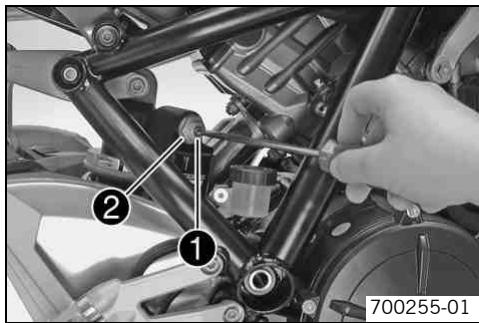
- Turn the adjusting screw ① clockwise with a screwdriver up to the last perceptible click.

Info
Do not loosen nut 2!
- Turn back counterclockwise the number of clicks corresponding to the shock absorber type.
Guideline
| Compression damping, low-speed | |
| Comfort | 20 clicks |
| Standard | 15 clicks |
| Sport | 10 clicks |
| Full payload | 10 clicks |

Info
Turn clockwise to increase damping, turn counterclockwise to reduce suspension damping.
Adjusting high-speed compression damping of the shock absorber

Danger
Danger of accidents The shock absorber is under high pressure.
The shock absorber is filled with highly compressed nitrogen, so never dismantle the shock absorber or carry out any maintenance on it yourself.

Info
The high-speed setting can be seen during the fast compression of the shock absorber.
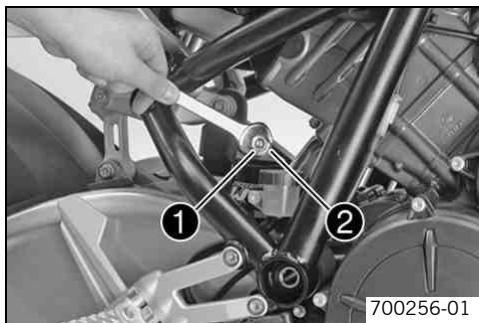
- Turn the adjusting screw ① clockwise with an open-ended spanner until it stops.

Info
Do not loosen nut 2!
- Turn back counterclockwise the number of turns corresponding to the shock absorber type.
Guideline
| Compression damping, high-speed | |
| Comfort | 2 turns |
| Standard | 1.5 turns |
| Sport | 1 turn |
| full payload | 1 turn |
Info Turn clockwise to increase damping, turn counterclockwise to reduce suspension damping.
Adjusting rebound damping of the shock absorber

Danger
Danger of accidents The shock absorber is under high pressure.
The shock absorber is filled with highly compressed nitrogen, so never dismantle the shock absorber or carry out any maintenance on it yourself.
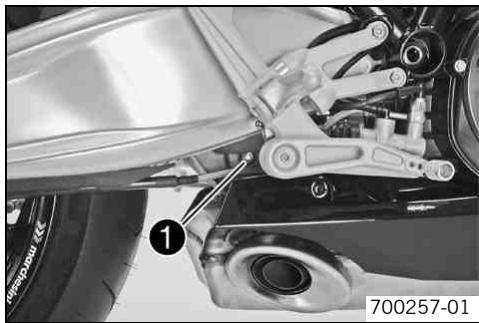
- Turn the adjusting screw ① clockwise up to the last perceptible click.
- Turn back counterclockwise the number of clicks corresponding to the shock absorber type.
Guideline
| Rebound damping | |
| Comfort | 15 clicks |
| Standard | 10 clicks |
| Sport | 5 clicks |
| full payload | 10 clicks |

Info
Turn clockwise to increase damping, turn counterclockwise to reduce suspension damping.
Adjusting spring preload of shock absorber

Warning
Danger of accidents Modifications to the chassis can seriously alter the vehicle's handling characteristics.
- Following modifications, ride slowly at first to get the feel of the new handling characteristics.

Info
The spring preload defines the initial situation of the spring process on the shock absorber.
An optimally adjusted spring preload is adapted to the rider's weight and ensures a compromise between easy handling and stability.
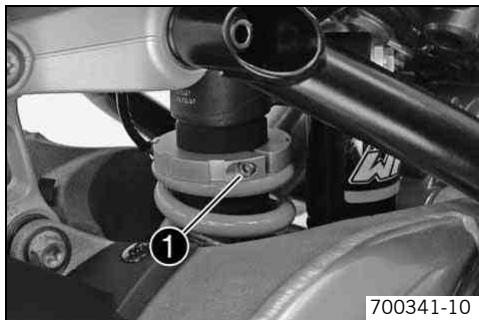
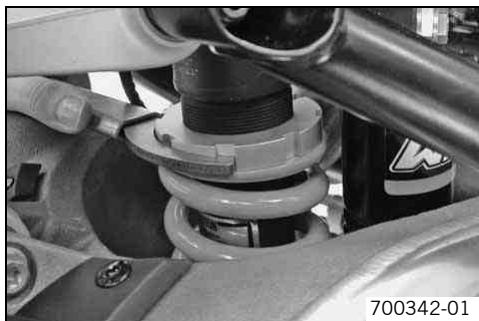
Take the weight off the rear wheel and swingarm.
The spring preload can be adjusted correctly only if the rear wheel and the swingarm are fully relieved of weight.
- Loosen screw two turns, but do not remove.
- Turn the adjusting ring counterclockwise with the toolset wrench until the spring is completely relaxed.
Hook wrench (69012022000)
Extension (60012060000)
MAINTENANCE WORK ON CHASSIS AND ENGINE
- Turn the adjusting ring clockwise and tension it to the specified value.
Guideline
| Spring preload | |
| Comfort | 6 mm (0.24 in) |
| Standard | 6 mm (0.24 in) |
| Sport | 8 mm (0.31 in) |
| full payload | 8 mm (0.31 in) |
Info
Turn clockwise to increase preload, turn counterclockwise to reduce spring preload.
- Tighten screw ②.
Guideline
| Remaining chassis screws | M5 | 5 Nm (3.7 lbf ft) |
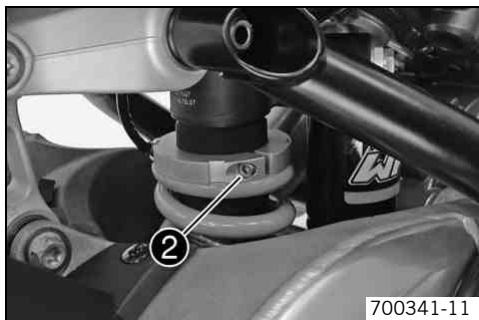
Steering damper
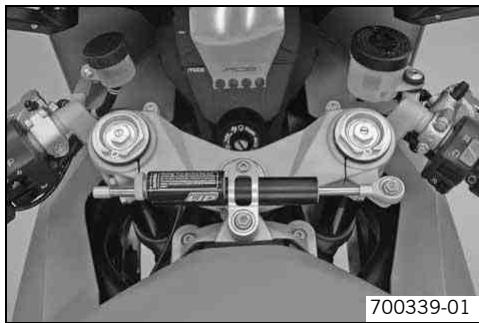
The steering damper suppresses shocks to the steering arising from acceleration on uneven ground at high speed or when the load is temporarily taken from the front wheel.
The steering damper is adjusted to suit the manner of driving and the road conditions. For high speeds, an adjustment with high damping can be chosen in order to use the steering damping function optimally. In slow, tight bends, intensive damping can negatively affect handling and steering precision, so the damping should be set to low.
Adjusting the steering damper

Info
The hydraulic steering damper stabilizes the steering if the front wheel is raised off the ground or carries no load. In contrast to other damping elements, the steering damper is adjusted with the damping element open.
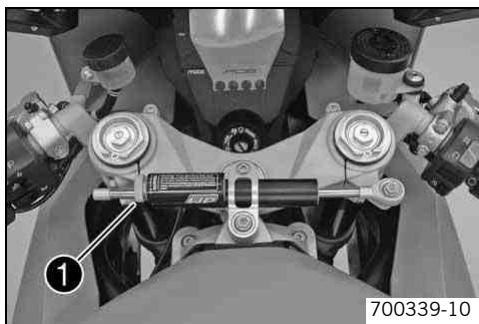
- Turn the adjusting screw ① counterclockwise towards "--" as far as the last perceptible click.
MAINTENANCE WORK ON CHASSIS AND ENGINE
- Adjust the steering damper according to your riding style and the road conditions by turning the adjust screw clockwise towards "+"
Guideline
| Steering damper adjustment range | 1... 32 clicks |
| Recommended range for use | 1... 20 clicks |
| Standard | 1 click |
Do not change the adjustment of the steering damper during the journey! After adjusting the steering damper, check the steering for smooth operation, making sure that the handlebar can be moved from extreme left to extreme right without a tendency to lock.
Vehicle level
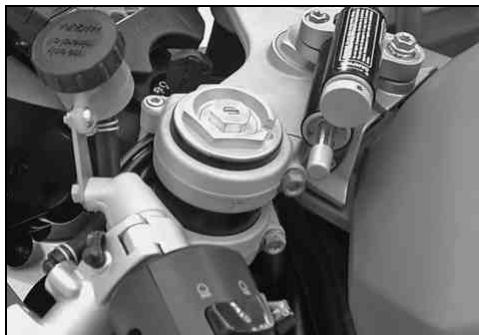
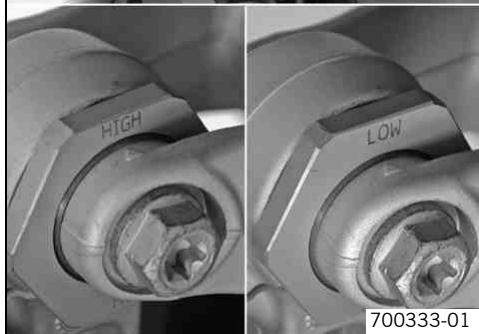

Warning
Danger of accidents Modifications to the chassis can seriously alter the vehicle's handling characteristics.
- Following modifications, ride slowly at first to get the feel of the new handling characteristics.
The vehicle level can be adjusted at the front by means of the fork leg clamp and at the rear by the eccentric shaft.
The fork legs can be clamped at three positions in the triple clamps.
| Upper triple clamp flush with upper edge of fork legs | 0 mm (0 in) |
| Upper triple clamp flush with 1st ring of fork legs | 2.5 mm (0.098 in) |
| Upper triple clamp flush with 2nd ring of fork legs (standard) | 5 mm (0.2 in) |
The chassis height can be adjusted stepplessly by turning the eccentric shaft.
| Chassis height difference HIGH - LOW | 7 mm (0.28 in) |
| Maximum adjustment range between HIGH - LOW | 180° |
Adjusting front vehicle level

Warning
Danger of accidents Modifications to the chassis can seriously alter the vehicle's handling characteristics.
- Following modifications, ride slowly at first to get the feel of the new handling characteristics.
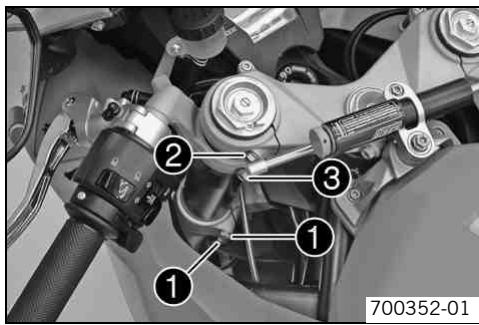
- Loosen screws ① on the lower triple clamp.
- Loosen screw ② on the upper triple clamp.
- Loosen screw of the handlebar stub.
Info Loos
Loosen the screws far enough to prevent damage to the lacquer when the fork legs are moved.
Make the adjustments first on one fork leg and then on the other. When the screws of both fork legs are loosened, the vehicle sags toward the front.
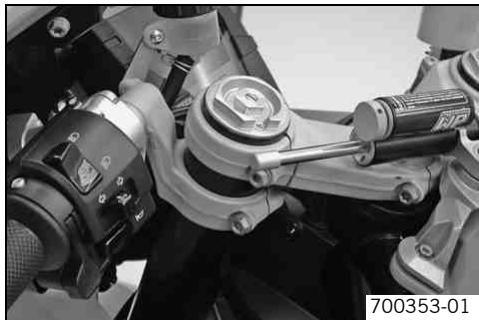
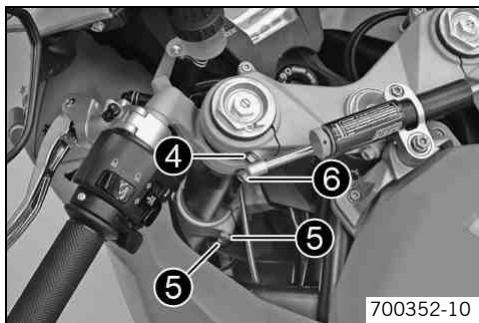
- Align the fork leg in the desired position by means of the fork rings.
Guideline
| Upper triple clamp flush with upper edge of fork legs | 0 mm (0 in) |
| Upper triple clamp flush with 1st ring of fork legs | 2.5 mm (0.098 in) |
| Upper triple clamp flush with 2nd ring of fork legs (standard) | 5 mm (0.2 in) |
The standard adjustment is the setting that provides the best vehicle handling. When the fork is compressed, the chassis setting changes, causing the vehicle become more stable but also more difficult to handle.
- Tighten screw 4.
Guideline
| Screw, top triple clamp | M8 | 17 Nm (12.5 lbf ft) |
- Tighten screws ⑤.
Guideline
| Screw, bottom triple clamp | M8 | 15 Nm (11.1 lbf ft) |
- Tighten screw ⑥.
Guideline
| Screw, handlebar stub | M8 | 20 Nm (14.8 lbf ft) |
- Repeat the adjustment on the other fork leg.
Info The setting of the vehicle level via the fork legs must be identical on both fork legs.
Adjusting the vehicle level at the rear

Warning
Danger of accidents Modifications to the chassis can seriously alter the vehicle's handling characteristics.
- Following modifications, ride slowly at first to get the feel of the new handling characteristics.
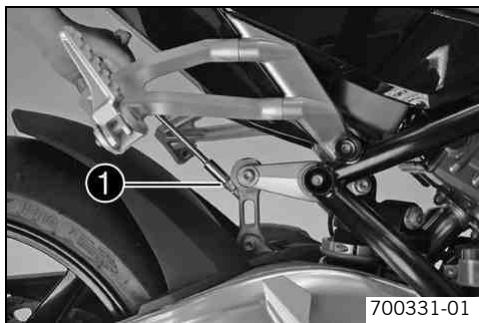
- Loosen screw ① but do not remove it.
MAINTENANCE WORK ON CHASSIS AND ENGINE
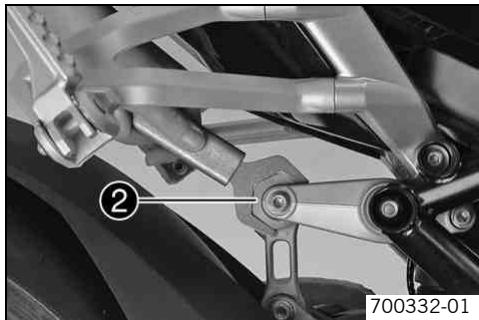
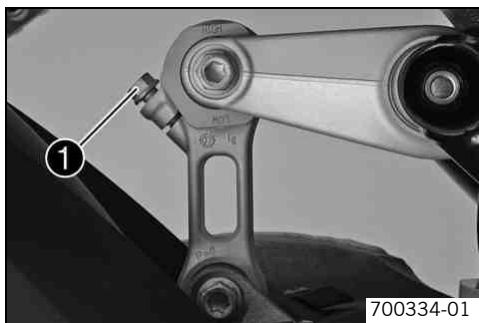
- Turn eccentric shaft ② to the desired position using the tool from the tool set.
Guideline
| Standard | LOW |
| Maximum adjustment range between HIGH - LOW | 180° |
Open end wrench SW 38 (69012021000)
Info The chassis height can be adjusted in both directions.
- Tighten screw 1.
Guideline
| Remaining chassis screws | M8 | 25 Nm (18.4 lbf ft) |
Footrest position
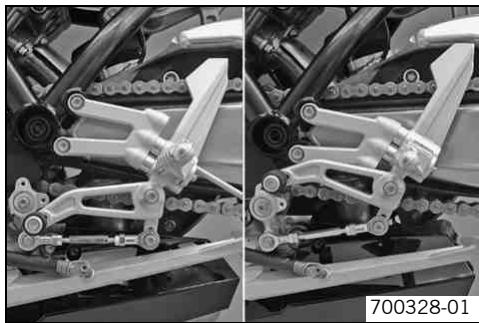
The adjustable footrest system enables an individual setting of the footrest height and an individual adjustment of the operating elements.
The lower footrest position enables a more comfortable knee angle, the upper footrest position a sporting sitting position and more forward-leaning freedom for use in racing.
Adjusting footrest position

Info
The footrest position must be identical on the left and the right.
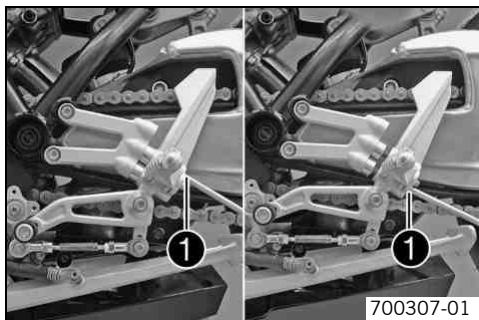
- Remove screws 1.
MAINTENANCE WORK ON CHASSIS AND ENGINE
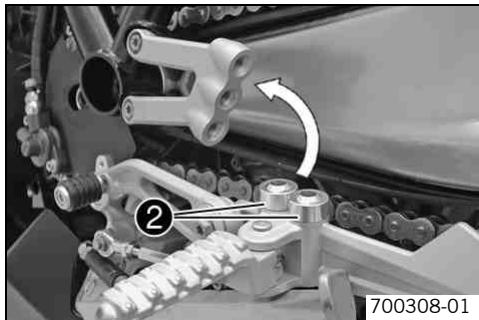
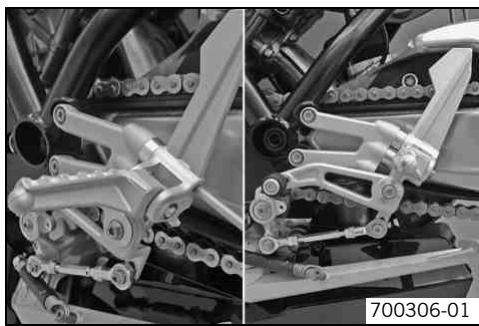
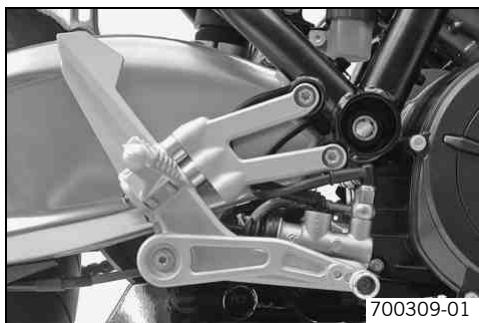
Position the footrest bracket with spacers 2 and screws.
Guideline
| Standard | Lower position |
The adjustable footrest bracket enables a more comfortable lower footrest position or a sporting upper footrest position.
Mount and tighten screws.
Guideline
| Screw, front footrest bracket | M8 | 25 Nm (18.4 lbf ft) | Loctite® 243TM |
- Repeat adjustment work on the footrest bracket on the other side.
- Adjust the shift lever. (p. 124)
- Adjust the footbrake pedal. (p. 129)
Adjusting shift lever stub
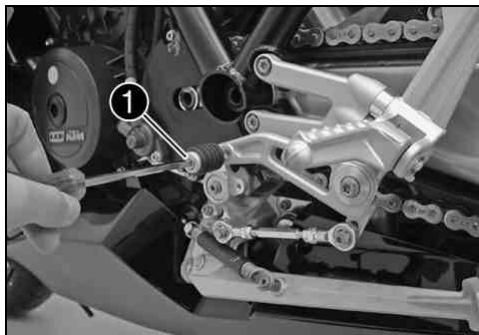
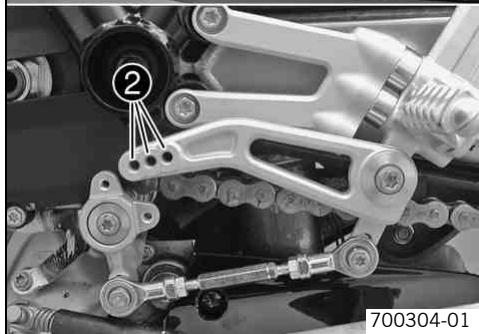
- Remove the screw with the shift lever stub.
- Position the shift lever stub with the screw in one of the holes ② according to the desired lever length.
Guideline
| Standard | Central hole |
Tightenscrew.
Guideline
| Screw, shift lever stub | M6 | 10 Nm (7.4 lbf ft) | Loctite® 243TM |
Adjusting shift lever

Info
The footrest system offers many ways of adjusting the shift lever to your riding style and requirements.
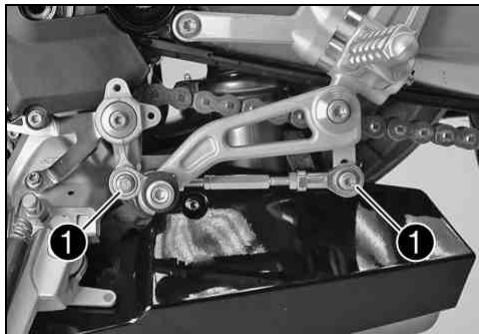
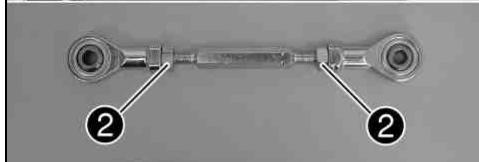
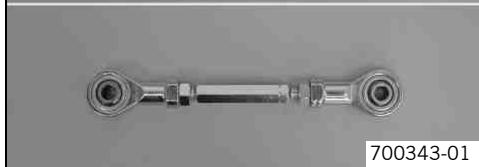
- Remove screws 1 and take off the shift rod.
- The length of the shift rod can be adjusted by means of the screw thread.
Guideline
| Shift rod | 115... 130 mm (4.53... 5.12 in) |
- Loosen the counter nuts ②
- Adjust the shift shaft.
After the counter nuts have been tightened, the bearings of the shift shaft must be central and aligned identically to each other in order to ensure freedom of movement in the bearing shells.
At least 5 screw threads must be screwed into the seating.
- Tighten the counter nuts.
MAINTENANCE WORK ON CHASSIS AND ENGINE
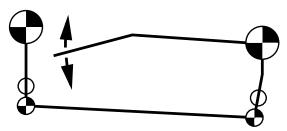
A
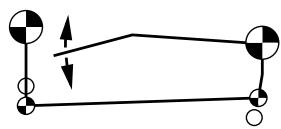
B
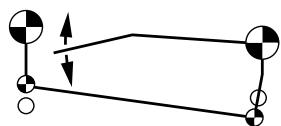
C
400479-10
- The shift rod can be mounted both on the shift lever variably at an upper or lower position, and on the reverse gear change of the shift shaft in two different positions.
Guideline
| Standard A | Shift lever: lower drill hole, shift shaft: lower drill hole |
| Shift power low, long shift travel B | Shift lever: lower drill hole, shift shaft: upper drill hole |
| Shift power high, short shift travel C | Shift lever: upper drill hole, shift shaft: lower drill hole |
Position the shift rod.
- Tighten the screws.
Guideline
| Screw, shift rod | M6 | 12 Nm (8.9 lbf ft) | Loctite® 243TM |
MAINTENANCE WORK ON CHASSIS AND ENGINE
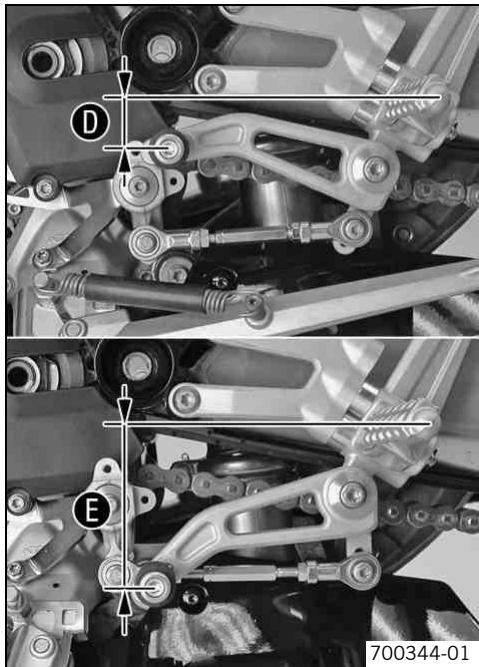
- The position of the shift lever can be greatly varied, depending on the length of the shift rod and the drill holes selected. As seen from the footrest, there is either a high position of the shift lever D or a low position of the shift lever E .
If you turn the reverse shift shaft 2 teeth on the serration of the shift shaft, you can adjust the footrest system optimally for the upper footrest position.
- After adjusting the shift lever, conduct a function test. There must be a minimum distance between the moving parts of the shift lever and other parts of the vehicle. Guideline
| Minimum distance | 5 mm (0.2 in) |
Adjusting the footbrake pedal stub
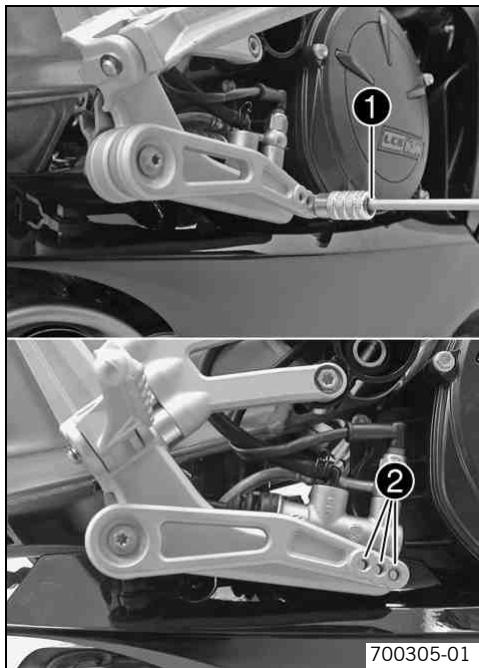
- Remove the screw with the footbrake pedal stub.
- Position the footbrake pedal stub with the screw in one of the holes ② according to the desired lever length.
Guideline
| Standard | Central hole |
Tightenscrew.
Guideline
| Screw, footbrake pedal stub | M6 | 10 Nm (7.4 lbf ft) | Loctite® 243TM |
Adjusting the footbrake pedal
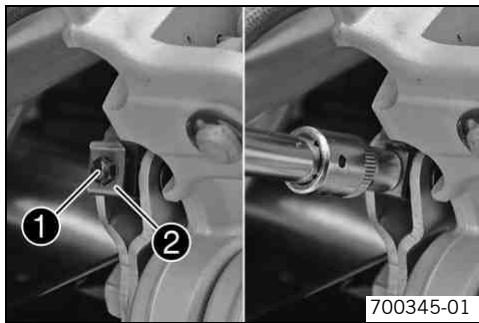
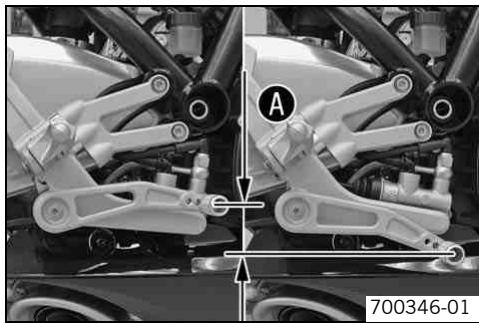
- Use the tool to press in the anti-rotation lock ② , then turn the piston rod 1.

The range of adjustment is limited.
- Remove the tool.
The spring tension on the anti-rotation lock is released and the hex nut is locked.
- Check the footbrake pedal setting.

tion A of the shift lever can vary considerably, depending on the setting.
Checking for chain dirt
- Check the chain for loose dirt.
If the chain is very dirty:
Clean the chain. (p. 130)
Cleaning the chain

Warning
Danger of accidents Oil or grease on the tires reduces their grip.
- Remove oil and grease with a suitable cleaning material.

Warning
Danger of accidents Reduced braking due to oil or grease on the brake discs.
Always keep the brake discs free of oil and grease, and clean them with brake cleaner when necessary.

Warning
Environmental hazard Problem materials cause environmental damage.
- Dispose of oil, grease, filters, fuel, cleaning substances, brake fluid, batteries, etc. according to regulations.

Info
The service life of the chain depends largely on its maintenance.
Clean the chain regularly.
Rinse off loose dirt with a soft jet of water.
- Remove old grease remains with chain cleaner.
Chain cleaner (p. 237)
After drying, apply chain spray.
Onroad chain spray (p. 238)
Checking the chain tension

Warning
Danger of accidents Danger caused by incorrect chain tension.
- If the chain tension is too high, the components of the secondary power train (chain, engine sprocket, rear sprocket, bearings in transmission and rear wheel) are under additional load. Apart from premature wear, in extreme cases the chain can rupture or the countershaf of the transmission can break. On the other hand, if the chain is loose, it can fall off the engine sprocket or the rear sprocket and block the rear wheel or damage the engine. Check for correct chain tension and adjust if necessary.
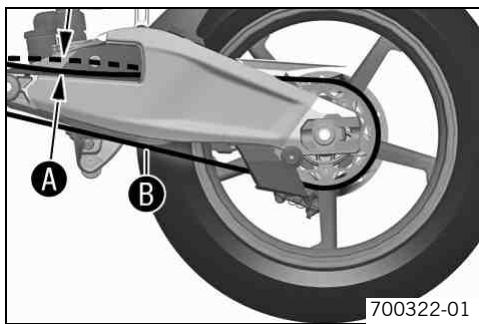
- Lean the motorcycle on the side stand.
- Shift into neutral.
- In the area in front of where the chain passes through the link fork, push the chain upward and measure chain tension A .
The lower chain section 3 must be taut.
Chain wear is not always even, so you should repeat this measurement at different chain positions.
Chain tension
15... 20 mm (0.59... 0.79 in)
If the chain tension does not meet specifications:
- Adjust the chain tension. (p. 132)
Adjusting the chain tension

Warning
Danger of accidents Danger caused by incorrect chain tension.
-
If the chain tension is too high, the components of the secondary power train (chain, engine sprocket, rear sprocket, bearings in transmission and rear wheel) are under additional load. Apart from premature wear, in extreme cases the chain can rupture or the countershaf of the transmission can break. On the other hand, if the chain is loose, it can fall off the engine sprocket or the rear sprocket and block the rear wheel or damage the engine. Check for correct chain tension and adjust if necessary.
-
Check the chain tension. (p. 131)
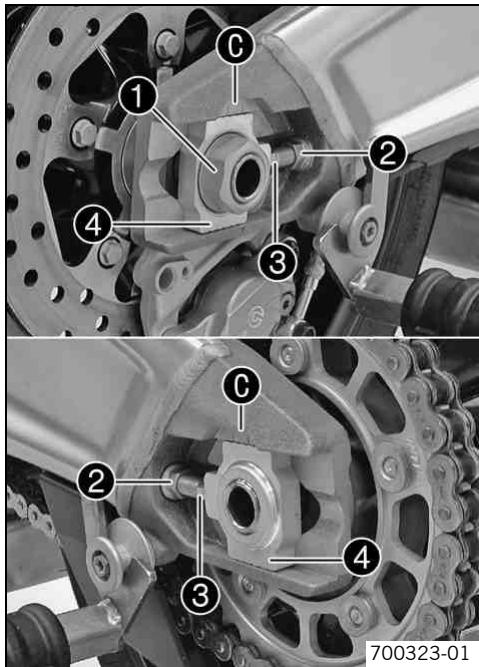
- Loosen nut 1.
- Loosen nuts ②.
- Adjust chain tension by turning the adjustment screws ③ on the left and right.
Guideline
| Chain tension | 15... 20 mm (0.59... 0.79 in) |
| Turn the adjusting screws ➀ on the left and right so that the markings on the left and right chain adjuster ➁ are in the same position in relation to the reference marks ➂. The rear wheel is then correctly aligned. | |
The lower chain section must be taut.
Chain wear is not always even, so you should check the setting at different chain positions.
- Tighten nuts ②.
- Make sure that the chain adjusters 4 are on the adjusting screws 6.
- Tighten nut 1.
Guideline
| Nut, rear wheel spindle | M25x1.5 | 90 Nm (66.4 lbf ft) | Thread greased |
Info
The wide adjustment range of the chain adjuster (35mm / 1.38") allows differ-
ent secondary transmission ratios to be used with the same chain length.
The chain adjusters ④ can be turned through 180^
Checking rear sprocket / engine sprocket for wear
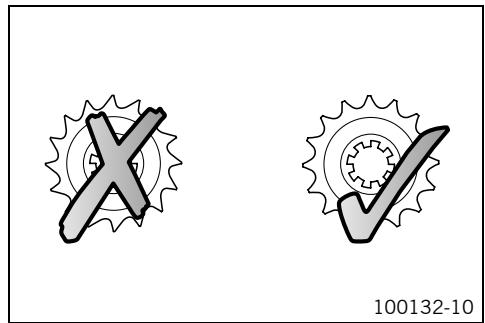
- Check the rear sprocket / engine sprocket for wear.
If the rear sprocket / engine sprocket are worn:
- Change the rear sprocket / engine sprocket, chain and chain sliding guard.


Info
The rear sprocket, engine sprocket, chain and chain sliding guard should always be changed together.
Checking chain wear
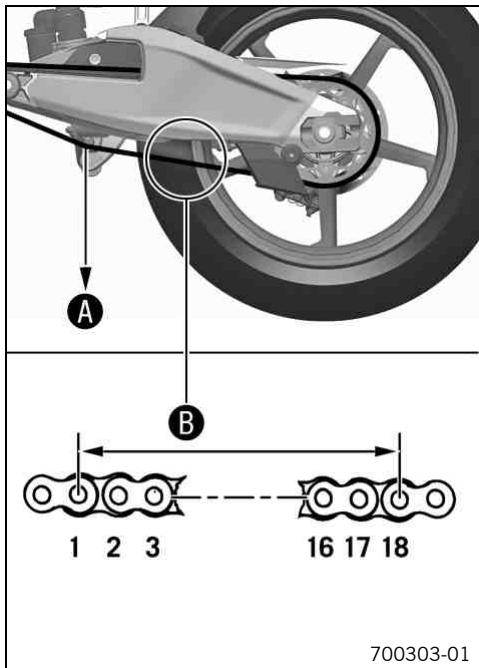
Engage neutral gear.
Pull the lower chain section with specified weight A.
Guideline
| Weight, chain wear measurement | 15 kg (33 lb.) |
Measure distance of 18 chain links in the lower chain section.
Chain wear is not always even, so you should repeat this measurement at different chain positions.
| Maximum distance ③ at the longest chain section | 272 mm (10.71 in) |
If the distance B is greater than the specified measurement:
- Change the rear sprocket / engine sprocket, chain and chain sliding guard.

New chains wear out faster on old, worn sprockets.
For safety reasons, the chain has no chain joint. Always have the chain changed in an authorized KTM-RC8 workshop, where they have the necessary special tools.
Checking chain sliding guard
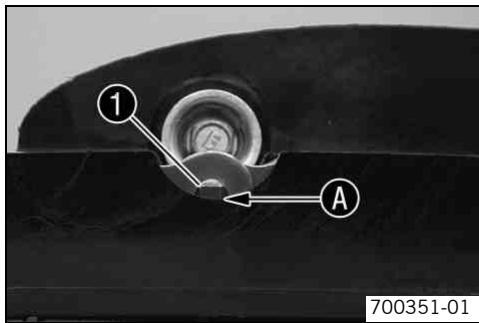
- Check the chain sliding guard for wear at the opening.
If the rivets 1 of the chain are no longer visible at the lower edge A of the opening of the chain sliding guard:
- Change the chain sliding guard.
Checking the front brake discs

Warning
Danger of accidents Reduced braking effect caused by worn brake discs.
- Have worn brake discs replaced immediately in an authorized KTM-RC8 workshop.
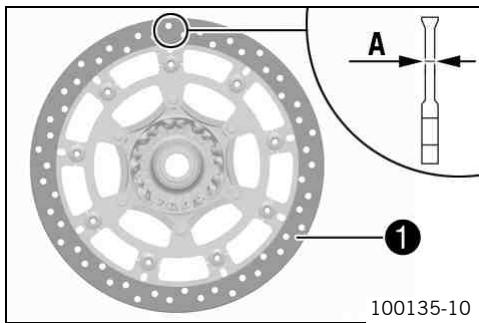
- Check the thickness of the brake disc in several places to see if it conforms to measurement ④.
Info
Wear reduces the thickness of the brake discs in area 1 of the brake discs.
| Brake discs - wear limit | |
| Front | 4.0 mm (0.157 in) |
If the brake disc thickness is less than the specified value:
- Change the brake discs.
Checking the rear brake disc

Warning
Danger of accidents Reduced braking effect caused by worn brake discs.
- Have worn brake discs replaced immediately in an authorized KTM-RC8 workshop.
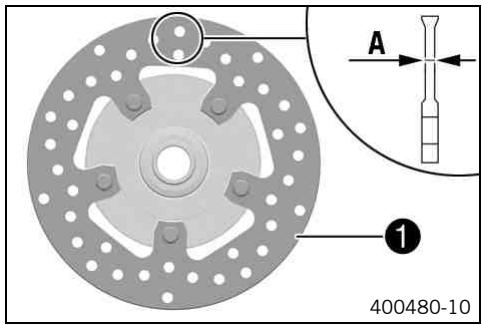
- Check the thickness of the brake disc in several places to see if it conforms to measurement ④.
Info
Wear reduces the thickness of the brake disc in area ① of the brake linings.
| Brake disc - wear limit | |
| Rear | 4.5 mm (0.177 in) |
If the brake disc thickness is less than the specified value:
- Change the brake disc.
Adjusting the basic position of the handbrake lever
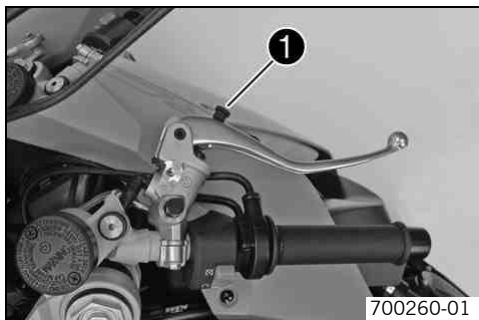
Pull the brake lever forwards.
- Adjust the neutral position of the handbrake lever to your hand position by turning the adjusting screw ①.
Do not make any adjustments while riding!
Checking brake fluid level of front brake

Warning
Danger of accidents Failure of brake system.
If the brake fluid level falls below the MIN mark, there may be a leak in the brake system or the brake linings are completely worn out. Have the brake system checked in an authorized KTM-RC8 workshop before continuing your journey.

Warning
Danger of accidents Reduced braking effect caused by old brake fluid.
- Have the brake fluid of the front and rear brakes changed according to the service plan in an authorized KTM-RC8 workshop.
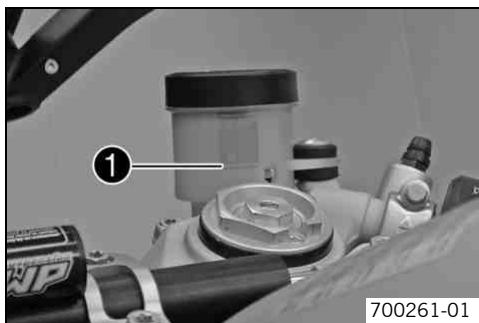
- The brake fluid level must not fall below the MIN marking ① when the brake fluid reservoir is vertical.
If the brake fluid is below the MIN marking:
- Top up the brake fluid of the front brake. (p. 138)
Topping up brake fluid of front brake

Warning
Danger of accidents Failure of brake system.
If the brake fluid level falls below the MIN mark, there may be a leak in the brake system or the brake linings are completely worn out. Have the brake system checked in an authorized KTM-RC8 workshop before continuing your journey.

Warning
Skin irritations Brake fluid can cause skin irritation on contact.
- Avoid contact with skin and eyes, and keep out of the reach of children.
If brake fluid gets into your eyes, rinse thoroughly with water and contact a doctor immediately.

Warning
Danger of accidents Reduced braking effect caused by old brake fluid.
Have the brake fluid of the front and rear brakes changed according to the service plan in an authorized KTM-RC8 workshop.

Warning
Environmental hazard Problem materials cause environmental damage.
- Dispose of oil, grease, filters, fuel, cleaning substances, brake fluid, batteries, etc. according to regulations.

Info
Never user DOT 5 brake fluid! This is based on silicone oil and is colored purple. Oil seals and brake lines are not designed for DOT 5 brake fluid.
Avoid contact between brake fluid and painted parts. Brake fluid attacks paint!
Use only clean brake fluid from a sealed container!
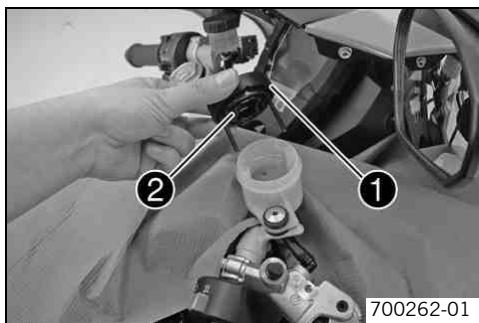
- Loosen screw.
- Remove cover ① with membrane ②.
Top up the brake fluid to MAX level.
Brake fluid DOT 4 / DOT 5.1 (p. 234)
- Position the cover with the membrane. Mount and tighten the screws.
Info
Clean up overflowed or spilt brake fluid immediately with water.
Brake linings
The brake linings fitted by KTM have been tested over long periods and guarantee optimal braking characteristics. The type names of the brake linings are entered in the homologation documents.

Info
Brake linings available in accessories shops are often untested and unapproved for use on KTM vehicles. The structure and friction coefficient of the brake linings, and therefore the brake power, can vary considerably from the original KTM brake linings. If brake linings other than those supplied as originals are used, there is no guarantee that they correspond to the original homologation. The vehicle then no longer corresponds to the condition at delivery and the guarantee is no longer valid.
Checking the front brake linings

Warning
Danger of accidents Reduced braking caused by worn brake linings.
- Have worn brake linings replaced immediately in an authorized KTM-RC8 workshop.
Note
Danger of accidents Reduced braking due to damaged brake discs.
- If the brake linings are not changed in time, the steel brake lining carriers grind on the brake disc. The braking effect is greatly reduced and the brake discs are destroyed.
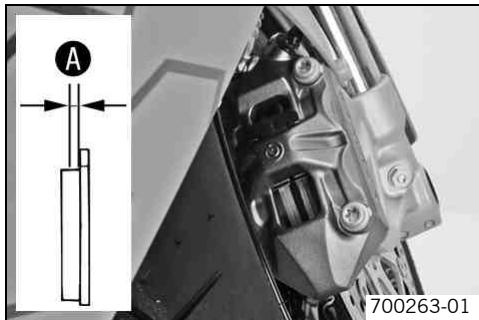
- Check the brake linings for minimum thickness A .
Minimum thickness A
≥ 1 ~mm (≥ 0.04 in)
If the minimum thickness is less than specified:
- Change the front brake linings.
Checking rear brake fluid level

Warning
Danger of accidents Failure of brake system.
If the brake fluid level falls below the MIN mark, there may be a leak in the brake system or the brake linings are completely worn out. Have the brake system checked in an authorized KTM-RC8 workshop before continuing your journey.

Warning
Danger of accidents Reduced braking effect caused by old brake fluid.
Have the brake fluid of the front and rear brakes changed according to the service plan in an authorized KTM-RC8 workshop.
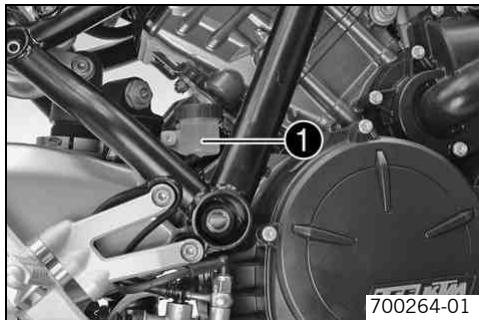
- Stand the vehicle upright.
- Check the brake fluid level of the brake fluid reservoir.
If the fluid level reaches the MIN mark 1:
- Top up the rear brake fluid. (p. 142)
Topping up rear brake fluid

Warning
Danger of accidents Failure of brake system.
If the brake fluid level falls below the MIN mark, there may be a leak in the brake system or the brake linings are completely worn out. Have the brake system checked in an authorized KTM-RC8 workshop before continuing your journey.

Warning
Skin irritations Brake fluid can cause skin irritation on contact.
- Avoid contact with skin and eyes, and keep out of the reach of children.
If brake fluid gets into your eyes, rinse thoroughly with water and contact a doctor immediately.

Warning
Danger of accidents Reduced braking effect caused by old brake fluid.
Have the brake fluid of the front and rear brakes changed according to the service plan in an authorized KTM-RC8 workshop.

Warning
Environmental hazard Problem materials cause environmental damage.
- Dispos of oil, grease, filters, fuel, cleaning substances, brake fluid, batteries, etc. according to regulations.

Info
Never user DOT 5 brake fluid! This is based on silicone oil and is colored purple. Oil seals and brake lines are not designed for DOT 5 brake fluid.
Avoid contact between brake fluid and painted parts. Brake fluid attacks paint! Use only clean brake fluid from a sealed container!
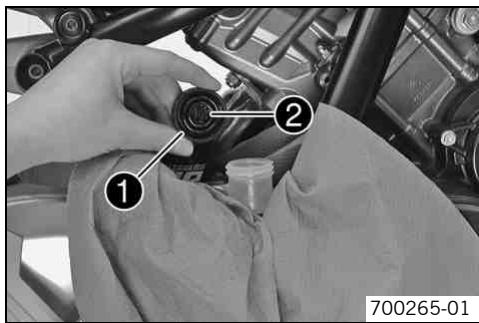
- Stand the vehicle upright.
- Remove screw cover ① with membrane ②.
Top up the brake fluid to MAX level.
Brake fluid DOT 4 / DOT 5.1 (p. 234)
- Refit screw with membrane.

Info
Clean up overflowed or spilt brake fluid immediately with water.
Checking the rear brake linings

Warning
Danger of accidents Reduced braking caused by worn brake linings.
- Have worn brake linings replaced immediately in an authorized KTM-RC8 workshop.
Note
Danger of accidents Reduced braking due to damaged brake discs.
- If the brake linings are not changed in time, the steel brake lining carriers grind on the brake disc. The braking effect is greatly reduced and the brake discs are destroyed.
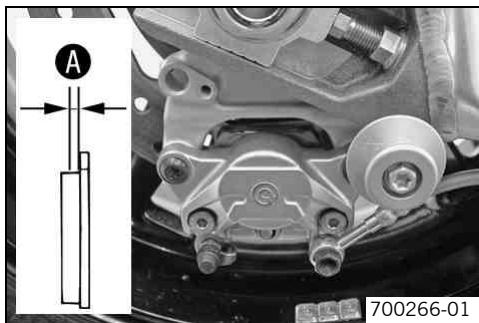
- Check the brake linings for minimum thickness A .
Minimum thickness A
≥ 1 mm (≥ 0.04 in)
If the minimum thickness is less than specified:
- Change the rear brake linings.
Removing front wheel
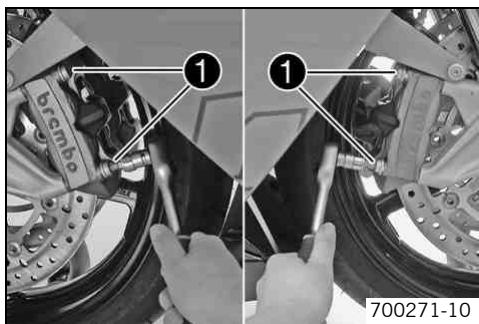
Jack up the motorcycle rear end. (p. 104)
- Jack up the motorcycle at the front. (p. 103)
- Remove the screws ① from both brake calipers.
Press back the brake linings with a light lateral tilting of the brake calipers on the brake disc. Pull the brake caliper carefully back from the brake disc and hang it to one side.
Info Do r
Do not pull the handbrake lever when the brake calipers are removed.
MAINTENANCE WORK ON CHASSIS AND ENGINE
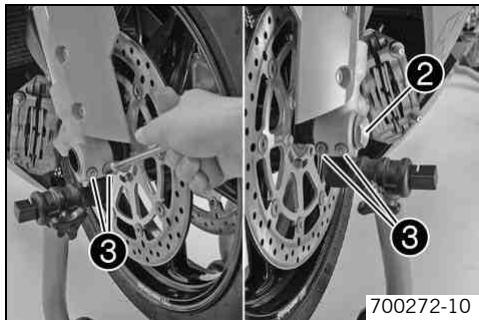
- Loosen screws ② and ③.
- Unscrew screw ② about 6 turns, press your hand on the screw to push the wheel spindle out of the fork stub. Remove screw ②.

Warning
Danger of accidents Reduced braking effect caused by damaged brake discs.
-
Always lay the wheel down in such a way that the brake discs are not damaged.
-
Holding the front wheel, withdraw the wheel spindle. Take the front wheel out of the fork.
Fitting front wheel
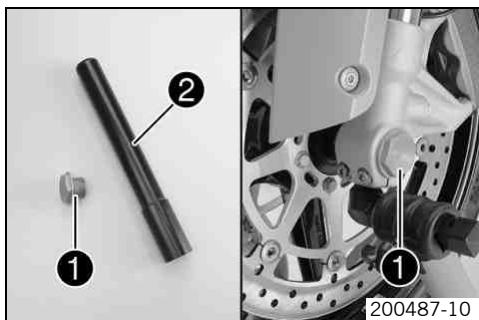

Warning
Danger of accidents Reduced braking due to oil or grease on the brake discs.
- Always keep the brake discs free of oil and grease, and clean them with brake cleaner when necessary.
Clean screw 1 and wheel spindle 2.
- Lift the front wheel into the fork, position it, and insert the wheel spindle.
Mount and tighten screw 1.
Guideline
| Screw, front wheel spindle | M25x1.5 | 45 Nm (33.2 lbf ft) |
MAINTENANCE WORK ON CHASSIS AND ENGINE
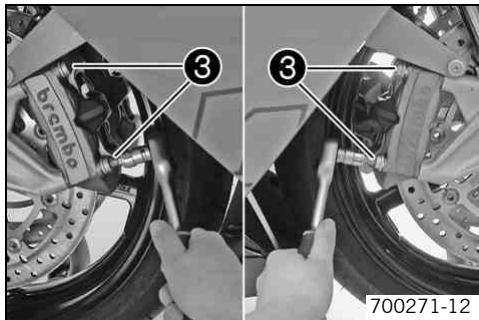
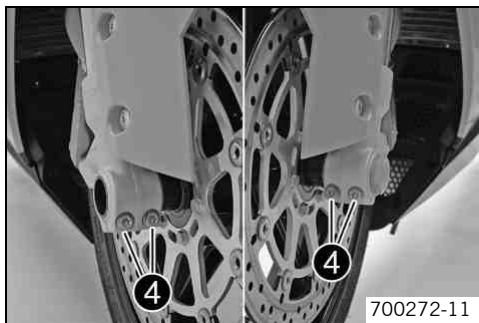
Position the brake calipers and check that the brake linings are seated correctly.
Mount and tighten screws ③.
Guideline
| Screw, front brake caliper | M10x1.25 | 45 Nm (33.2 lbf ft) | Loctite® 243TM |
- Operate the hand brake lever several times until the brake pads are lying correctly on the brake disc.
Take the front of the motorcycle off the work stand. (p. 103)
Take the rear of the motorcycle off the work stand. (p. 104)
Pull the front brake and compress the fork powerfully a few times.
The fork legs straighten.
- Fully tighten screws 4.
Guideline
| Screw, fork stub | M8 | 15 Nm (11.1 lbf ft) |
Removing rear wheel
- Jack up the motorcycle rear end. (p. 104)
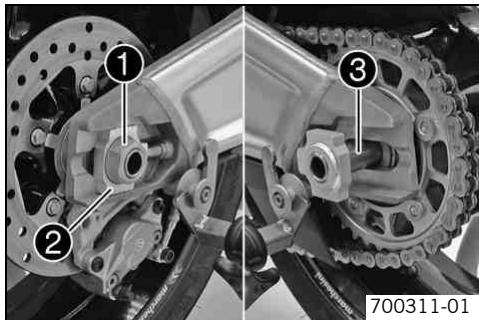
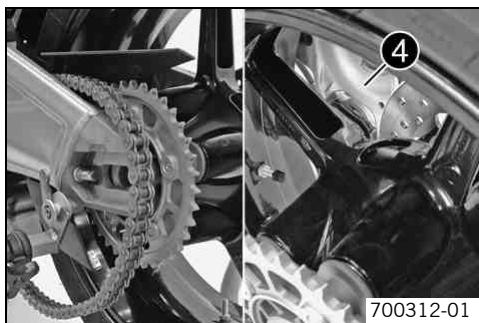
-
Remove nut ①. Remove chain adjuster ②. Withdraw the wheel spindle ③.
-
Push the rear wheel forward as far as possible and take the chain off the rear sprocket.
- Pull the rear wheel backward until brake caliper support 4 hangs free between the brake disc and the wheel rim.
Reduced braking effect caused by damaged brake discs.
- Always lay the wheel down in such a way that the brake discs are not damaged.
Take the rear wheel carefully out of the swingarm without damaging the rim and/or brake disc.
Do not operate the foot brake when the rear wheel is removed.
Installing the rear wheel

Warning
Danger of accidents Reduced braking due to oil or grease on the brake discs.
Always keep the brake discs free of oil and grease, and clean them with brake cleaner when necessary.

Warning
Danger of accidents No braking effect when operating the rear brake.
-
After installing the rear wheel, always operate the footbrake until the pressure point is reached.
-
Check the rear hub shock absorbers. (p. 151)
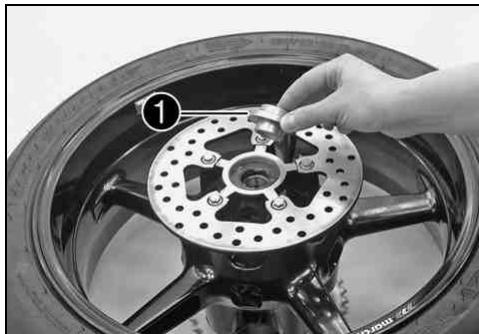
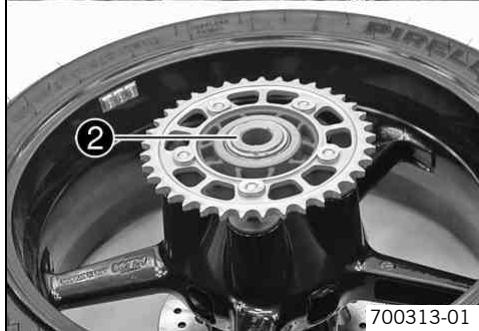
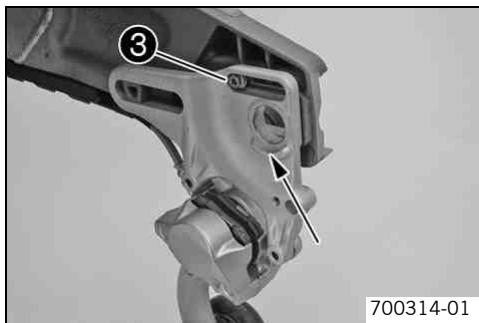
- Remove bushing ① and bushing ②. Clean and grease the roll surfaces of the bushing and the shaft seal rings.
Long-life grease (p. 237)
- Fit the bushings.
Clean the thread of the wheel spindle and nut. -
Clean the contact areas of the brake caliper support and swingarm.
-
Push the brake caliper support ③ completely to the rear.
- Position the rear wheel, and position the brake caliper support between the rim and the brake disc.
Position the brake caliper on the brake disc.
Position the rear wheel on the bearing surfaces in the swingarm.
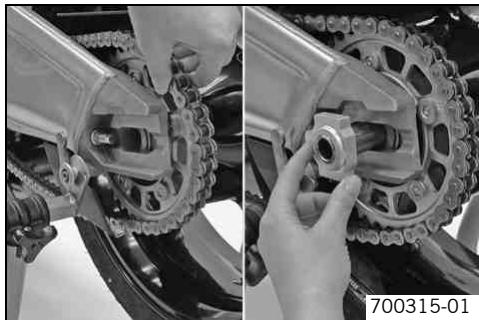
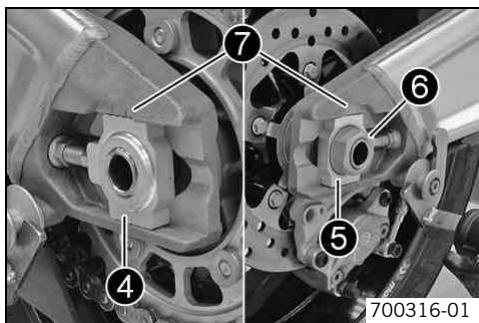
- Push the rear wheel forward as far as possible and place the chain on the rear sprocket.
Pull the rear wheel back and push in the wheel spindle.
Lay the chain adjuster 4 on the tensioning screw.
Position the chain adjuster ⑤ and place it on the tensioning screw.
- Tighten nut ⑥. Guideline
| In order for the rear wheel to be correctly aligned, the markings on the left and right chain adjusters must be in the same position relative to the reference marks ⑦. |
| Nut, rear wheel spindle | M25x1.5 | 90 Nm (66.4 lbf ft) | Thread greased |
- Operate the foot brake lever repeatedly until the brake linings lie on the brake disc and there is a pressure point.
Take the rear of the motorcycle off the work stand. (p. 104) - Check the chain tension. (p. 131)
Checking rear hub shock absorbers

Info
The engine power is transmitted by the rear sprocket to the rear wheel through 5 shock absorbers. They are subject to wear during operation. If the shock absorbers are not changed in time, the rear sprocket carrier and the rear hub are damaged.
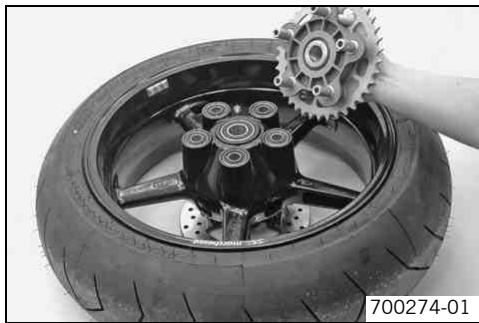
- Remove the rear wheel. (p. 146)
- Remove the rear sprocket carrier.
- Check the rear hub for damage and wear.
If the rear hub shock absorbers are damaged or worn:
- Change the shock absorber.
Position the rear sprocket carrier.
A set of bolts and shock absorbers with as little free play as possible increases the service life of the shock absorbers.
Install the rear wheel. (p. 148)
Tire condition checking

Warning
Danger of accidents Uncontrollable handling behavior caused by a flat tire.
- For your own safety, have damaged tires changed immediately.

Warning
Danger of crashing Impairment of riding behavior due to different tire tread patterns on front and rear wheels.
- The front and rear wheels must be fitted with tires with similar tread patterns to prevent loss of control over the vehicle.
MAINTENANCE WORK ON CHASSIS AND ENGINE

Warning
Danger of accidents Uncontrollable handling characteristics due to non-approved and/or non-recommended tires/wheels.
- Only tires/wheels approved by KTM and with the corresponding speed index should be used.

Warning
Danger of accidents Reduced road grip with new tires.
- New tires have a smooth roll surface and therefore cannot provide full road grip. The entire roll surface must be roughened in the first 200 kilometers (124.3 miles) by moderate driving at alternating angles. The full grip is not reached until the vehicle has been run in.

Info
The type, condition and air pressure of the tires all have an important impact on the riding behavior of the motorcycle. Worn tires have a negative effect on riding behavior, especially on wet surfaces.
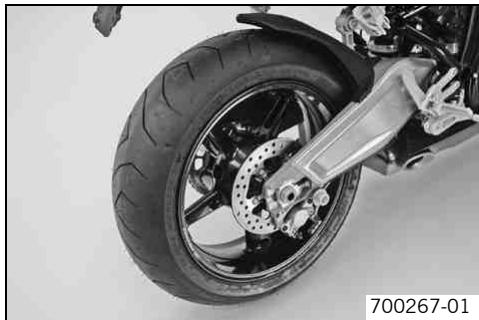
- Check the front and rear tire for cuts, penetrations and other damage.
If the tires exhibit cuts, penetrations or other damage: - Change the tires.
- Check the depth of the tread.
Note local national regulations concerning the minimum tread depth.
Minimum tread depth
≥ 2 ~mm (≥ 0.08 in)
Checking tire air pressure

Info
Low tire air pressure leads to abnormal wear and overheating of the tire.
Correct tire air pressure ensures optimal riding comfort and maximum tire service life.
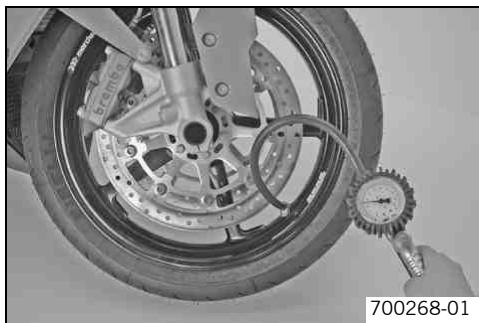
- Remove dust cap.
- Check tire air pressure when tires are cold.
| Tire air pressure, Solo | |
| Front | 2.5 bar (36 psi) |
| Rear | 2.5 bar (36 psi) |
| Tire air pressure with passenger / full payload | |
| Front | 2.5 bar (36 psi) |
| Rear | 2.9 bar (42 psi) |
If the tire pressure does not meet specifications:
-
Correct tire pressure.
-
Mount dust cap.
The rubber seal in the dust cap prevents air leaking out of the tire if the valve is defective.
Removing the seat
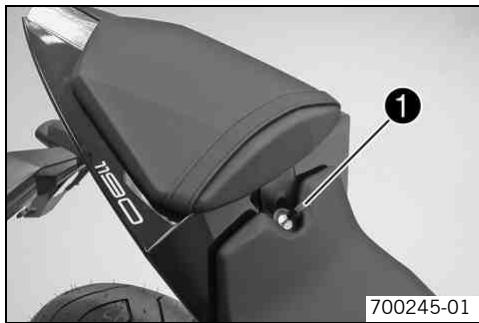
- Insert the ignition key in the seat lock and turn it counterclockwise.
- Raise the rear of the seat, push it towards the rear, and remove it upwards.
Fitting the seat
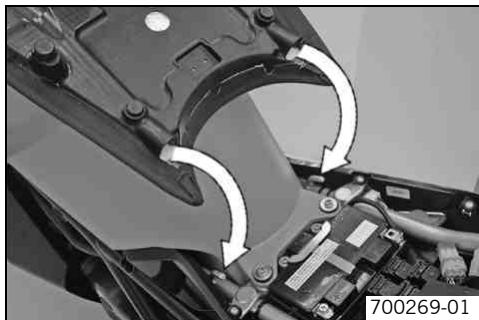
- Position the recesses of the seat to the lugs on the frame, lower the rear end and simultaneously push it forward.
Lock the seat by turning the ignition key in the seat lock. - Remove the ignition key from the seat lock.
- Finally, check that the seat is correctly mounted.
Removing passenger seat
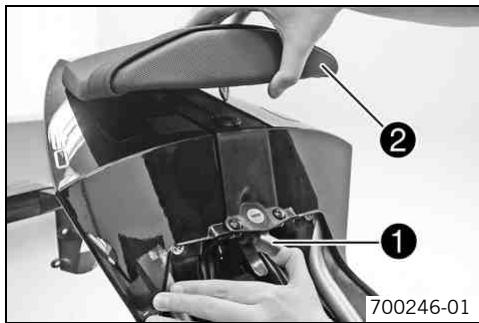
- Remove the seat. (p. 154)
- Operativelever 1
Take off the passenger seat 2 toward the top.
Fitting the passenger seat
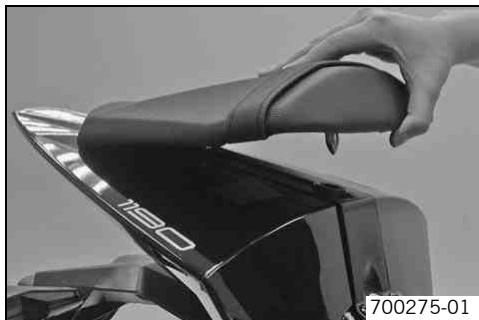
Position the passenger seat in the space provided.
- Press down the passenger seat until it clicks into place.
- Finally, check that the passenger seat is correctly mounted.
Mounting helmet lock on vehicle
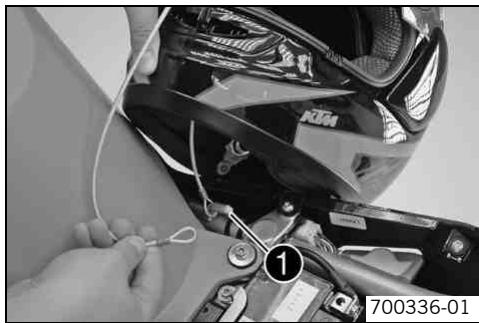
- Remove the seat. (p. 154)
Position the steel cable from the toolset with one loop on the lug 1.
Steel cable (60012015000)
Guide the steel cable through the helmet opening.
- Then position the free loop of the steel cable on the lug.
Position the helmet carefully on the side of the motorcycle.
- Fit the seat. (p. 154)
Removing the battery

Warning
Risk of injury Battery acid and battery gases cause serious chemical burns.
- Keep batteries out of the reach of children.
- Wear suitable protective clothing and goggles.
- Avoid contact with battery acid and battery gases.
-
Keep the battery away from sparks or open fire. Charge only in well-ventilated rooms.
In the event of skin contact, rinse with large amounts of water. If battery acid gets in the eyes, rinse with water for at least 15 minutes and contact a physician. -
Switch off all power-consuming components and switch off the engine.
- Remove the seat. (p. 154)
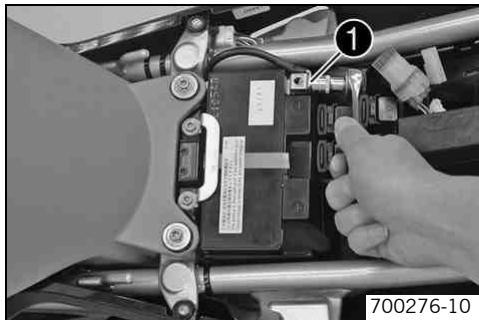
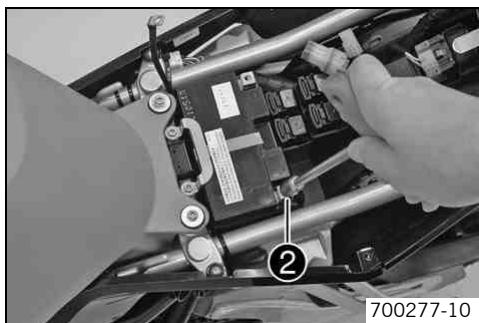
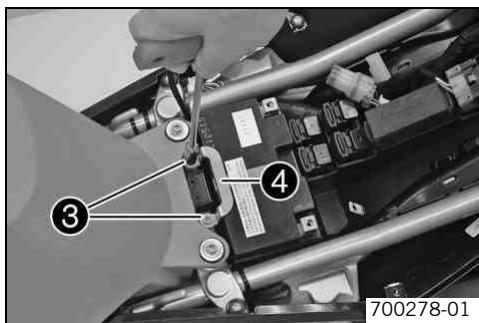
-
Disconnect the negative (minus) cable of the battery.
-
Remove the plus pole cover.
-
Disconnect the positive (plus) ② cable of the battery.
-
Remove screws ③.
- Removing the securing bracket ①.
Pull the battery upwards out of the battery rack.
Never operate the motorcycle with a discharged battery or without a battery. In both cases, electrical components and safety equipment can be damaged. The vehicle is then no longer safe to ride.
Installing the battery
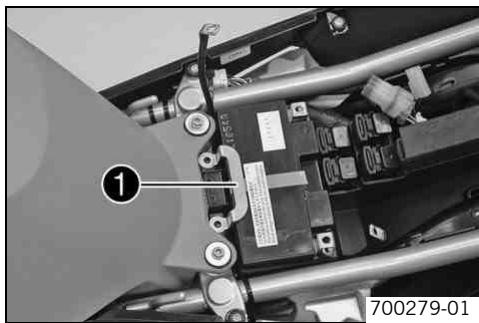
Position the battery in the battery rack.
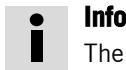
The poles of the battery must face the rear of the vehicle.
Position the bracket 1.
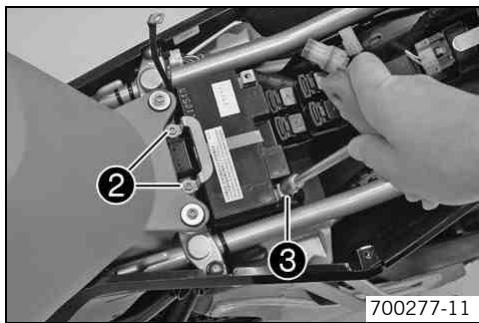
Mount and tighten screws ②.
Guideline
| Remaining chassis screws | M6 | 10 Nm (7.4 lbf ft) |
- Reconnect the positive (plus) ③ cable of the battery.
Position positive terminal cover.
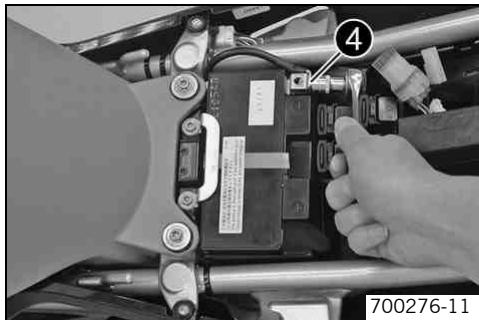
- Reconnect the negative (minus) cable ④ of the battery.
- Fit the seat. (p. 154)
Recharging the battery

Warning
Risk of injury Battery acid and battery gases cause serious chemical burns.
- Keep batteries out of the reach of children.
- Wear suitable protective clothing and goggles.
- Avoid contact with battery acid and battery gases.
- Keep the battery away from sparks or open fire. Charge only in well-ventilated rooms.
In the event of skin contact, rinse with large amounts of water. If battery acid gets in the eyes, rinse with water for at least 15 minutes and contact a physician.

Warning
Environmental hazard Components and battery acid are a danger to the environment.
- Do not dispose of batteries in normal household waste. Take defective or used batteries to a battery recycling operator.

Warning
Environmental hazard Problem materials cause environmental damage.
- Dispos of oil, grease, filters, fuel, cleaning substances, brake fluid, batteries, etc. according to regulations.

Info
Even if there is no load on the battery, it loses power every day.
The charge state and the type of charge are very important for the service life of the battery.
Fast recharging with a high charge current shortens the battery's service life.
If the charge current, the charge voltage and the charge time are exceeded, electrolyte escapes through the breathing holes. The battery capacity is then reduced.
If the battery becomes discharged from starting, it must be recharged immediately.
If the battery rests for an extended time in a discharged state, it becomes over-discharged and sulfated, which will result in its destruction.
The battery is maintenance-free, i.e., the acid level does not have to be checked.
- Switch off all power-consuming components and switch off the engine.
- Remove the seat. (p. 154)
- Disconnect the negative (minus) cable of the battery to prevent damage to the vehicle's electronics.
MAINTENANCE WORK ON CHASSIS AND ENGINE
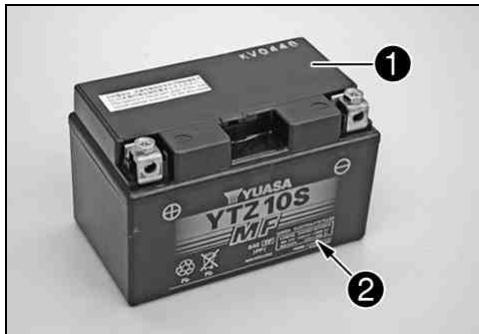
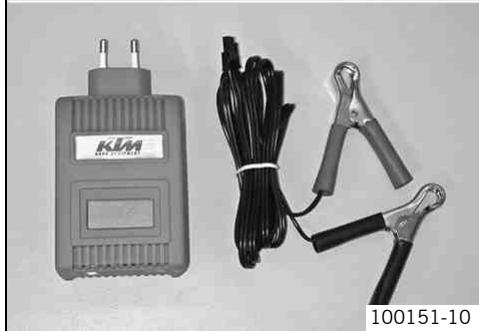
- Connect the battery charger to the battery. Switch on the battery charger.
Battery charger (58429074000)
You can also use the battery charger to test rest potential and start potential of the battery, and to test the generator. With this device, you cannot overcharge the battery.
Info Never remove the lid 1.
Charge the battery according to the instructions 2 on the battery casing.
After charging the battery, switch off the battery charger. Reconnect the battery. Guideline
| The charge current, charge voltage and charge time must not be exceeded. | |
| Charge the battery regularly when the motorcycle is not in use. | 3 months |
- Fit the seat. (p. 154)
Changing the main fuse

Warning
Fire hazard The electrical system can be overloaded by the use of incorrect fuses.
- Use only fuses with the prescribed amperage. Never by-pass or repair fuses.
Info The
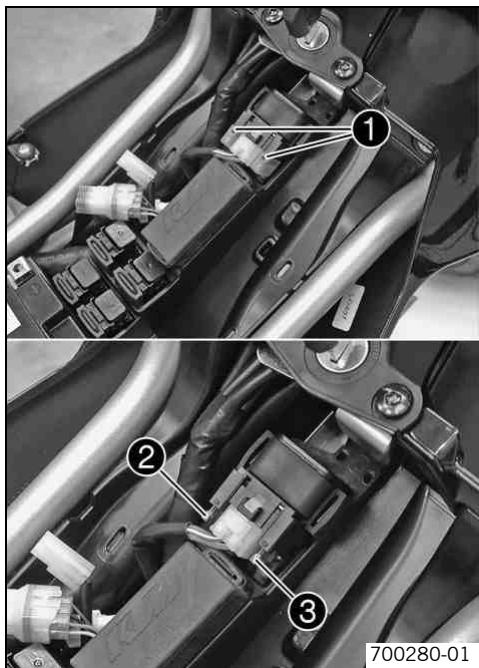
- Switch off all power-consuming components and switch off the engine.
- Remove the seat. (p. 154)
- Remove protection covers 1.
- Remove a defective main fuse ② with a needle nose plier.
Info A re:
A reserve fuse ③ is located in the starter relay.
- Fit a new main fuse.
Fuse (58011109130) (p. 226)
Info If th
If the new fuse burns out, contact an authorized KTM-RC8 workshop.
- Attach the protection covers 1.
- Fit the seat. (p. 154)
Changing the fuses of individual power consumers

Warning
Fire hazard The electrical system can be overloaded by the use of incorrect fuses.
- Use only fuses with the prescribed amperage. Never by-pass or repair fuses.

Info
The fuse box containing the fuses of individual power consumers is located under the seat.
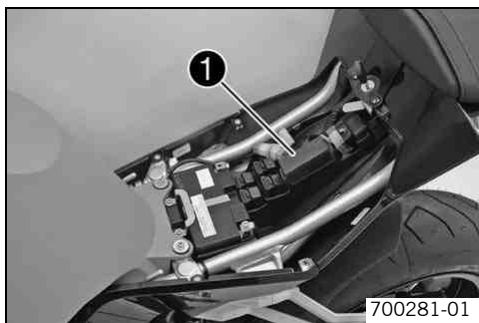
- Switch off all power-consuming components and switch off the engine.
- Remove the seat. (p. 154)
- Open fuse box cover ①.
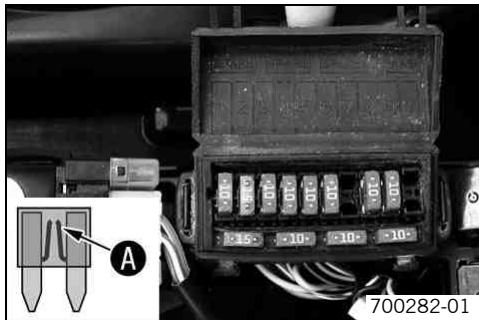
- Check the fuses.
Info A defective fuse is shown by a burned-out fuse wire
- Remove the defective fuse.
Guideline
| Fuse 1 - 10A - ignition, combination instrument, immobilizer, alarm system (optional) |
| Fuse 2 - 15A - high beam, low beam, parking light, tail light, license plate lamp |
| Fuse 3 - 10A - horn, brake light |
| Fuse 4 - 10A - radiator fan |
| Fuse 5 - 10A - fuel pump |
| Fuse 6 - 10A - ignition/fuel injection |
| Fuse 7 - not used |
| Fuse 8 - 10A - for supplementary equipment (standard accessories) |
| Fuse 9 - 10A - for supplementary equipment (accessories connected to the ignition switch) |
| Fuse 10 - not used |
| Fuse SPARE - 10A/15A - spare fuses |
Use spare fuses with the correct rating only.
Fuse (75011088010) (p. 226)
Fuse (75011088015) (p. 226)
Info
If the new fuse burns out after it is inserted, it is important that you contact an authorized KTM-RC8 workshop.

Tip
Replace the spare fuse in the fuse box so that it is available if needed.
- Close the fuse box cover.
- Fit the seat. (p. 154)
Changing the low beam bulb
Note
Damage to reflector Keep the glass of the bulb free of grease.
Clean the glass bulb with a clean cloth before mounting. Any grease on the glass will evaporate by the heat and be deposited on the reflector.
- Switch off all power-consuming components and switch off the engine.
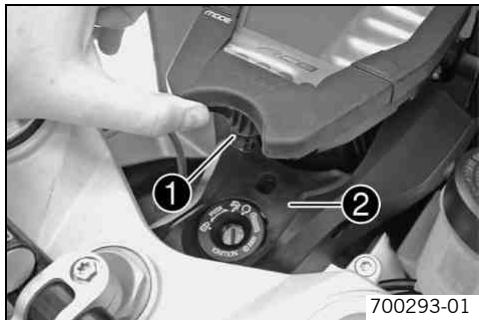
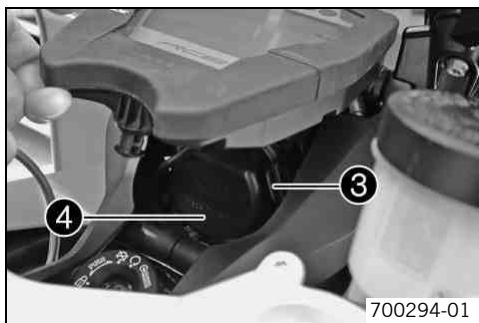
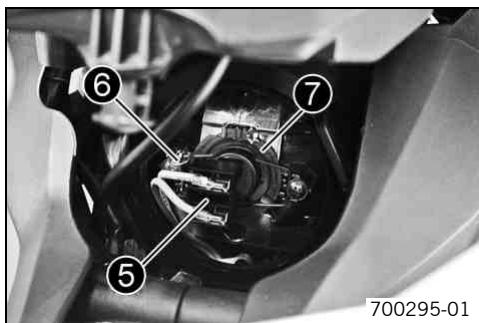
- Fold up the combination instrument. Pull the lug ① out of the rubber holder ②.
-
Remove the rubber holder.
-
Release the latch ③.
-
Remove the lamp cover 4.
-
Disconnect plug-in connector ⑤.
- Push off the retaining clamp ⑥ on both sides, squeeze and fold to the side.
- Remove headlight bulb ⑦.
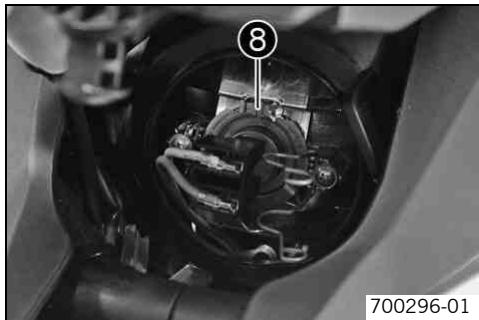
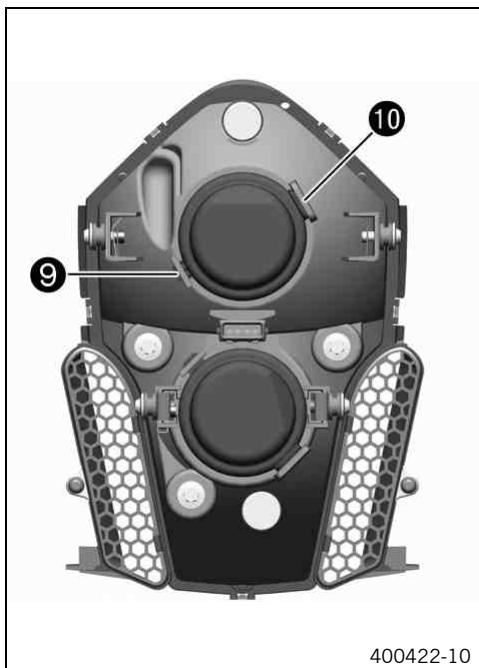
Position the new headlight bulb in the headlight housing.
Low beam / high beam (H7) (p. 226)
Insert the headlight bulb so that the lug is positioned in the cut-out.
Position the retaining clamp.
Position the plug-in connector.
Position the lug 9 of the lamp cover in the notch. Engage the latch 10.
- Check lighting function.
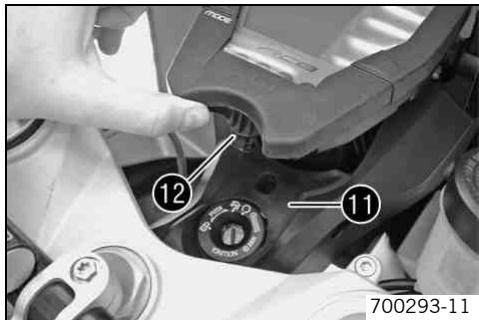
Position the rubber holder 1
- Fold down the combination instrument. Position the lug in the rubber holder.
Changing the high beam bulb
Note
Damage to reflector Keep the glass of the bulb free of grease.
Clean the glass bulb with a clean cloth before mounting. Any grease on the glass will evaporate by the heat and be deposited on the reflector.
- Switch off all power-consuming components and switch off the engine.
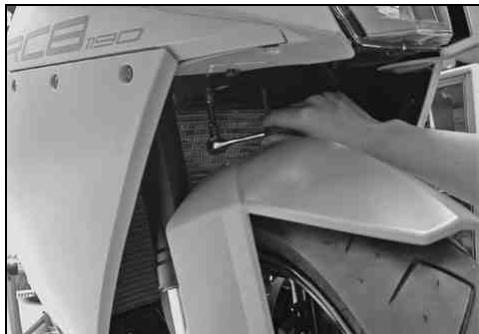
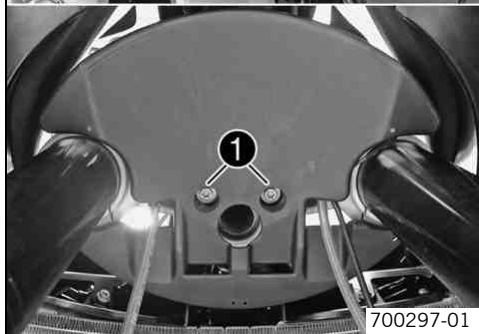
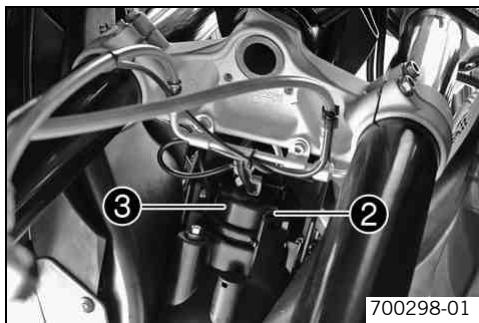
-
Remove screws 1. Remove cover.
-
Release the latch ②.
- Remove the lamp cover ③.
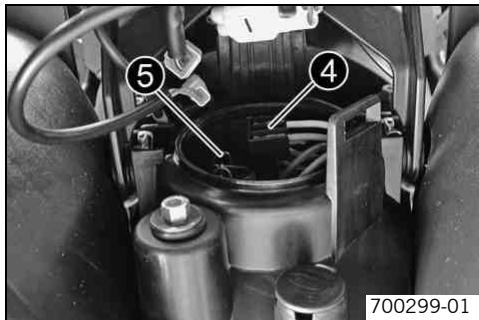
- Disconnect plug-in connector 4.
- Push off the retaining clamp ⑤ on both sides, squeeze and fold to the side.
- Remove headlight bulb.
Position the new headlight bulb in the headlight housing.
Low beam / high beam (H7) (p. 226)
Insert the headlight bulb so that the lug is positioned in the cut-out.
Position the retaining clamp.
Position the plug-in connector.
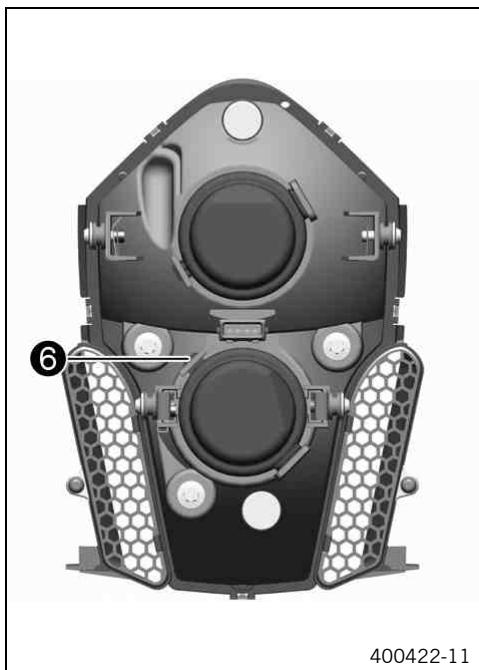
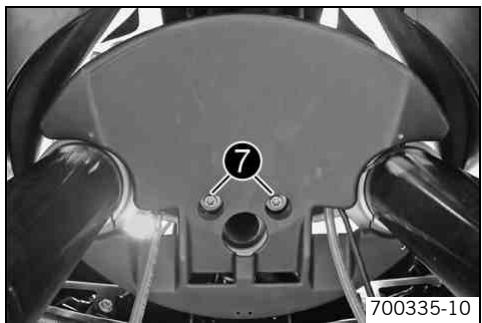
Position the lug ⑥ of the lamp cover in the notch. Engage the latch.
- Check lighting function.
Position cover.
Info Check for correct positioning and freedom of movement of the brake lines.
- Mount and tighten screws 7.
Guideline
| Remaining chassis screws | M6 | 10 Nm (7.4 lbf ft) |
Changing the parking light bulb
Note
Damage to reflector Keep the glass of the bulb free of grease.
Clean the glass bulb with a clean cloth before mounting. Any grease on the glass will evaporate by the heat and be deposited on the reflector.

- Switch off all power-consuming components and switch off the engine.
- Remove screws ①. Remove cover.
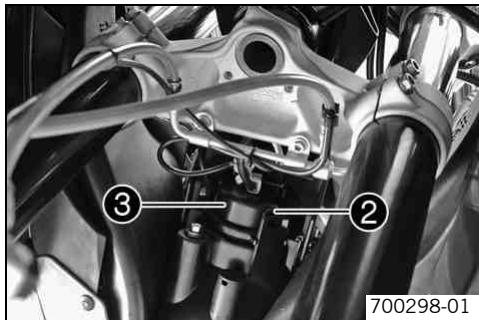
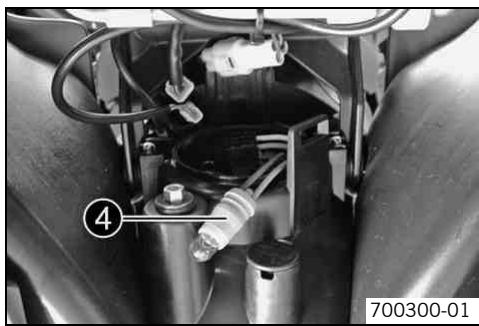
- Release the latch ②.
- Remove the lamp cover ③.
Pull the parking light 4 carefully out of the holder.
- Remove the light bulb.
Position a new light bulb in the holder.
Parking light (W2,1x9,5d) (p. 226)
- Carefully position the holder with the bulb in the holder in the headlight.
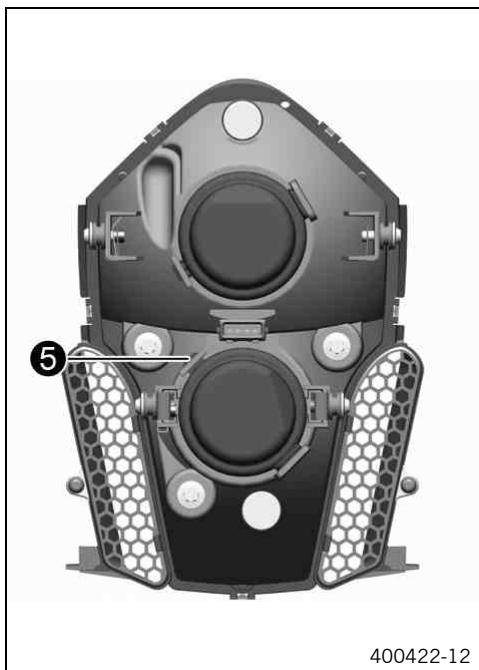
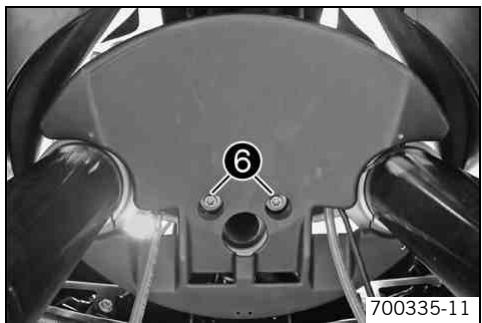
Position the lug ⑤ of the lamp cover in the notch. Engage the latch.
- Check lighting function.
Position cover.
Info Check for correct positioning and freedom of movement of the brake lines.
- Mount and tighten screws ⑥.
Guideline
| Remaining chassis screws | M6 | 10 Nm (7.4 lbf ft) |
Checking headlight adjustment
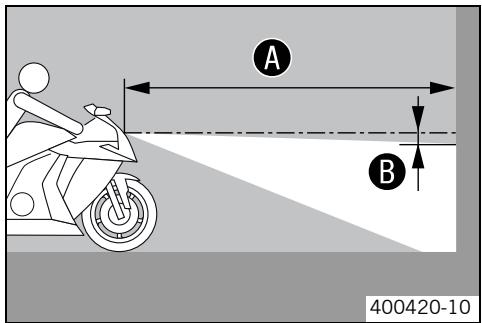
- On a light-colored wall behind a horizontal area, make a mark as high as the center of the low beam headlight.
- Make another mark at a distance of under the first mark.
Guideline
| Distance ③ | 5 cm (2 in) |
- Stand the motorcycle at distance A in from of the wall and switch on the ignition and the low beam.
Guideline
| Distance A | 5 m (16 ft) |
- Check the headlight adjustment.
The border between light and dark must be exactly at mark ③ when the motorcycle is operational and complete with rider.
If the boundary between light and dark does not meet specifications:
- Adjust the headlamp range. (p. 175)
Adjusting headlamp range
- Check the headlight adjustment. (p. 175)
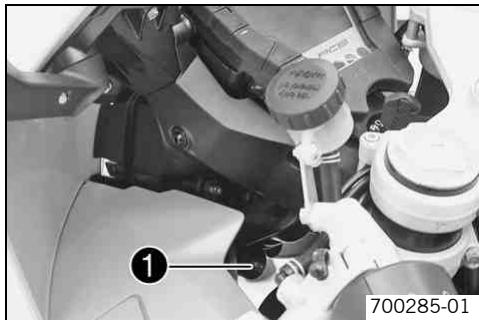
- Adjust the beam distance of the headlight by turning screw ①.
Guideline
The boundary between light and dark must be exactly on the lower mark for a motor-cycle with a rider (mark is applied under: Checking headlight adjustment).
Info
Turn clockwise to increase the light range, turn counterclockwise to reduce the light range.
If you have a payload, you may have to correct the headlight range.
Activating/deactivating ignition key

Info
The orange programming key must only be used for activating and deactivating!
If a black ignition key is lost or replaced, the black ignition keys must be activated/deactivated using the orange programming key. You can activate or deactivate up to four black ignition keys. Only the black ignition keys trained during an activation procedure are valid. All black ignition keys not trained in the activation procedure are invalid, but can be retrained in a further activation procedure.
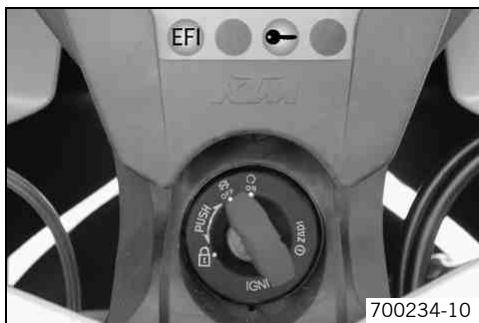
Loss of a black ignition key (second black ignition key available):
- Press the emergency OFF switch into the position .
- Insert the orange programming key in the ignition lock.
- Switch on the ignition by turning the orange programming key to the position .
EFI warning lamp (MIL) lights up, switches off, and then starts to flash.
The immobilizer indicator lamp lights up.
- Switch off the ignition by turning the orange programming key to the position 量
Pull out the orange programming key. -
Insert the black ignition key in the ignition lock.
-
Switch on the ignition by turning the black ignition key to the position .
EFI warning lamp (MIL) lights up, switches off, and then starts to flash.
- The immobilizer indicator lamp lights up, switches off briefly, and switches on again.
- Switch off the ignition by turning the black ignition key to the position _开 .
- Remove the black ignition key.
- Insert the orange programming key in the ignition lock.
- Switch on the ignition by turning the orange programming key to the position .
EFI warning lamp (MIL) lights up, switches off, and then starts to flash.
The immobilizer indicator lamp lights up, switches off briefly, and flashes according to the number of functioning black ignition keys including the orange programming key. In this case, twice.
- Switch off the ignition by turning the orange programming key to the position 业
Pull out the orange programming key.
The lost black ignition key is deactivated.
The existing black ignition key is reactivated.
Loss of both black ignition keys (no black ignition key available):
- Press the emergency OFF switch into the position .
- Insert the orange programming key in the ignition lock.
- Switch on the ignition by turning the orange programming key to the position .
EFI warning lamp (MIL) lights up, switches off, and then starts to flash.
The immobilizer indicator lamp lights up.
-
Switch off the ignition by turning the orange programming key to the position t .
-
Switch on the ignition by turning the orange programming key to the position .
EFI warning lamp (MIL) lights up, switches off, and then starts to flash.
- The immobilizer indicator lamp lights up, switches off briefly, and flashes according to the number of functioning black ignition keys including the orange programming key. In this case once, since all black ignition keys are deactivated.
- Switch off the ignition by turning the orange programming key to the position 业
Pull out the orange programming key.
All black ignition keys are deactivated.
- Order a new black ignition key according to the key number on the KEYCODECARD and activate it.
Activating ignition key:
- Press the emergency OFF switch into the position .
- Insert the orange programming key in the ignition lock.
- Switch on the ignition by turning the orange programming key to the position .
EFI warning lamp (MIL) lights up, switches off, and then starts to flash.
The immobilizer indicator lamp lights up.
- Switch off the ignition by turning the orange programming key to the position 业
Pull out the orange programming key. - Insert the black ignition key in the ignition lock.
- Switch on the ignition by turning the black ignition key to the position .
EFI warning lamp (MIL) lights up, switches off, and then starts to flash.
- The immobilizer indicator lamp lights up, switches off briefly, and switches on again.
- Switch off the ignition by turning the black ignition key to the position 岛
-
Remove the black ignition key.
-
To activate further ignition keys, repeat the last 4 steps with the respective ignition key.
- Insert the orange programming key in the ignition lock.
- Switch on the ignition by turning the orange programming key to the position _on
EFI warning lamp (MIL) lights up, switches off, and then starts to flash.
- The immobilizer indicator lamp lights up, switches off briefly, and flashes according to the number of functioning black ignition keys including the orange programming key.
- Switch off the ignition by turning the orange programming key to the position 品
Pull out the orange programming key.
✓ All black ignition keys are activated included in this job sequence are activated.
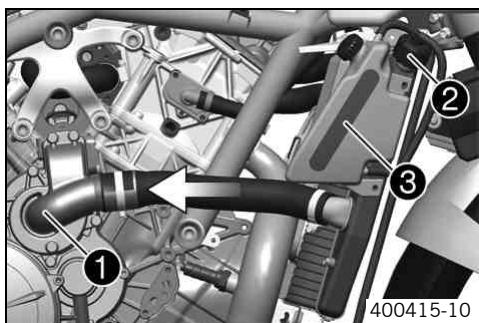
Cooling system
The water pump with a 3D water pump wheel in the engine ensures forced circulation of the coolant. The heat exchanger enables faster warming of the engine oil at the start of a journey and better heat dissipation for the engine oil during the journey.
The pressure in the cooling system resulting from heat is regulated by a valve in the radiator cap ②. The heat expansion causes the surplus coolant to flow into the compensating tank ③. When the temperature falls, this surplus coolant is sucked back into the cooling system.
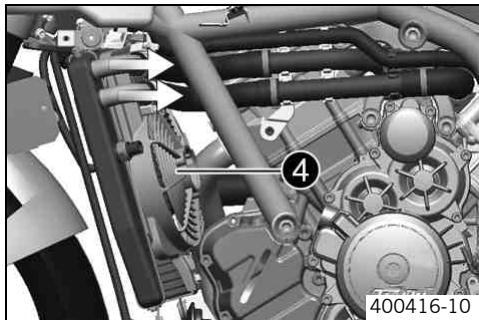
Cooling takes place by means of the air stream and a radiator fan 4, which is controlled by a thermoswitch.
The lower the speed, the less the cooling effect. Dirty cooling fins also reduce the cooling effect.
Checking the coolant level

Warning
Danger of scalding The coolant gets very hot when the motorcycle is driven and is under high pressure.
- Do not open the radiator, radiator hoses or other cooling system components when the engine is hot. Allow the engine and cooling system to cool down. If you scald yourself, hold the affected area under cold water immediately.
Condition
The engine is cold.
- Rest the motorcycle on its side stand on a horizontal surface.
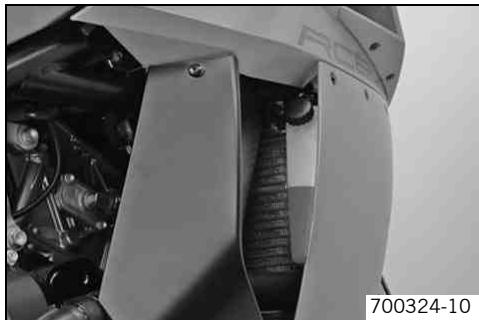
- Check the coolant level in the compensating tank.
The coolant level must be between MIN and MAX.
If there is no coolant in the compensating tank:
- Check the cooling system for leaks.
Info
Do not operate the motorcycle!
- Add coolant/bleed the cooling system.
If the coolant level in the compensating tank does not meet specifications, but the tank is not empty:
- Check the cooling system for leaks.
- Fill the cooling system compensating tank. (p. 181)
Filling the cooling system compensating tank

Warning
Danger of scalding The coolant gets very hot when the motorcycle is driven and is under high pressure.
- Do not open the radiator, radiator hoses or other cooling system components when the engine is hot. Allow the engine and cooling system to cool down. If you scald yourself, hold the affected area under cold water immediately.

Warning
Danger of poisoning Coolants are poisonous and a health hazard.
- Avoid contact between coolants and skin, eyes and clothing. If fuel gets into your eyes, rinse immediately with water and contact a doctor. Wash affected skin areas immediately with soap and water. If coolant is swallowed, contact a doctor immediately. Change clothes that have come into contact with coolants. Keep coolants out of the reach of children.
Note
Engine damage After draining coolant and refilling the cooling system, the motorcycle must be raised at the front according to the model type. This is the only way of ensuring that the cooling system is filled without air bubbles. Air in the cooling system can lead to engine failure.
- Have the coolant changed by an authorized KTM-RC8 workshop.
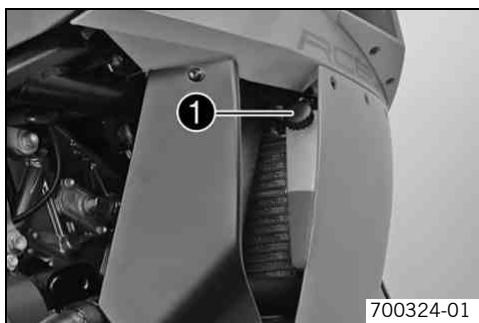
- Check the coolant level. (p. 180)
- Remove the cap ① of the compensating tank.
- Top up with coolant until the specified coolant level is reached.
Guideline
The coolant level must be between MIN and MAX.
Alternative 1
Coolant (p. 234)
Alternative 2
Coolant (mixed ready to use) (p. 234)
Mount the cap of the compensating tank.
Adjusting basic position of clutch lever
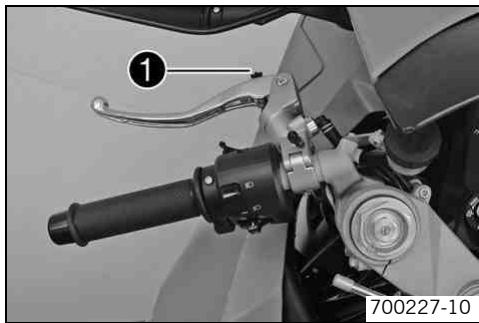
- Adjust the basic setting of the clutch lever to your hand size by turning adjusting screw .
Info Turn
Turn the adjusting screw clockwise to increase the distance between the clutch lever and the handlebar.
Turn the adjusting screw counterclockwise to decrease the distance between the clutch lever and the handlebar.
The range of adjustment is limited.
Turn the adjusting screw by hand only, and do not apply any force.
Do not make any adjustments while riding!
Checking fluid level of hydraulic clutch

Info
The fluid level rises with increasing wear of the clutch lining disc.
Do not use brake fluid.
- Move the clutch fluid reservoir mounted on the handlebar to a horizontal position.
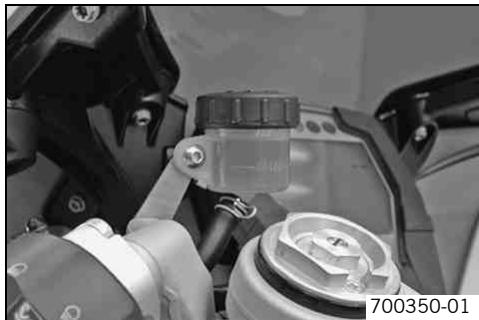
- Check the fluid level.
The fluid level must be between the MIN and MAX markings.
If the fluid level does not meet specifications:
- Correct the fluid level of the hydraulic clutch. (p. 184)
Correcting fluid level of hydraulic clutch

Info
The fluid level rises with increasing wear of the clutch lining disc.
Do not use brake fluid.
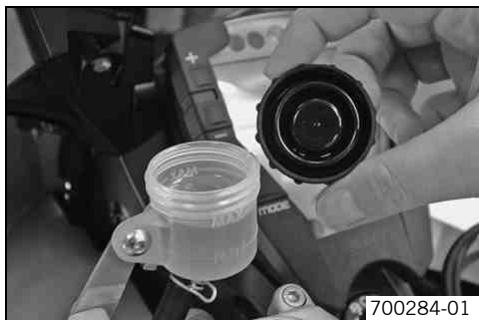
- Move the clutch fluid reservoir mounted on the handlebar to a horizontal position.
- Remove screw cover with membrane.
- Correct the fuel level.
Guideline
The fluid level must be between the MIN and MAX markings.
Hydraulic fluid (15) (p. 236)
- Refit screw with membrane.
Adjusting gas Bowden cable
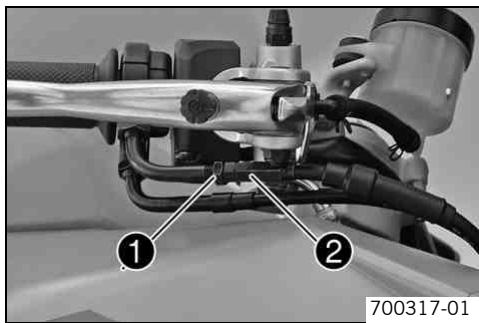
- Move the handlebar to the straight-ahead position.
- With the diagnostics tool KTM DIA, place the control motor for the throttle valve position into the neutral position.
- Loosen the counter nut 1.
- Adjust the gas Bowden cable with the adjusting screw ②.
Guideline
| Play in gas Bowden cable | 3... 5 mm (0.12... 0.2 in) |
- Tighten the counter nut ①.
Handlebar height
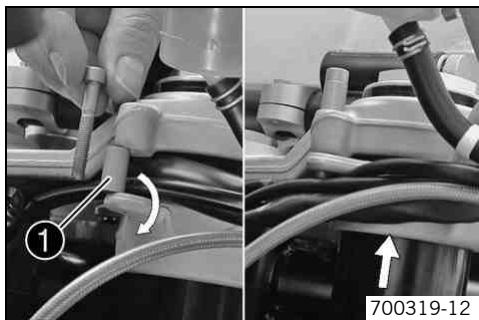
By removing or inserting the spacing sleeves ①, you can set the handlebar height at two different positions.
| Long distance sleeve ➀ | 15 mm (0.59 in) |
| With distance sleeves, the handlebar stub is positioned low for sports use. Removing the distance sleeves gives a more upright sitting position. | |
| Standard | Low position with distance sleeve |
Adjusting the handlebar height

Info
The handlebar stub position must be identical on the left and right of the vehicle.
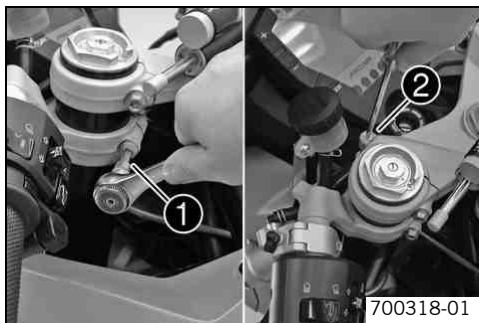
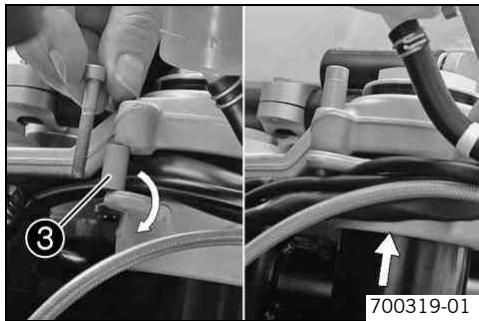
Adjusting the high position of the handlebar stubs:
- Loosen screw 1.

Info
Loosen the screw several turns to prevent damage to the fork lacquer when moving the handlebar stub.
-
Remove screw ②.
-
Remove distance sleeve ③
- All cables routed under the upper triple clamp must now be routed under the handlebar stub.
- Push the handlebar stub carefully up to the upper triple clamp.
Position the distance sleeve above the triple clamp.
Mount and tighten the screw.
Guideline
| Remaining chassis screws | M5 | 5 Nm (3.7 lbf ft) |
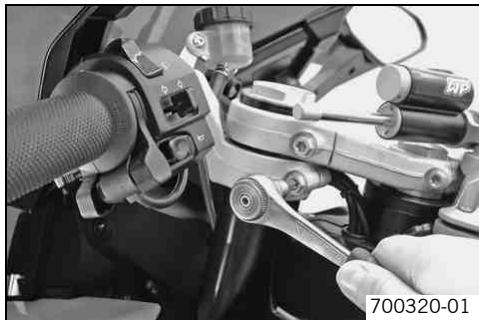
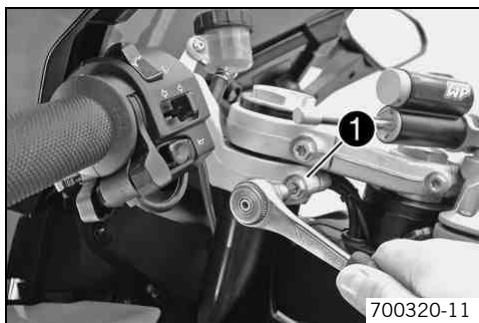
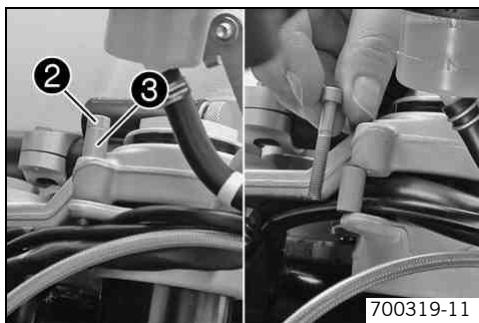
- Tighten the screw.
Guideline
| Screw, handlebar stub | M8 | 20 Nm (14.8 lbf ft) |
- Repeat the adjustments on the other handlebar stub.
- Move the handlebar to and fro over the entire steering range.
If the cables restrict the freedom of movement of the steering:
- Correct the cable routing.
Adjusting the low position of the handlebar stubs:
- Loosen screw 1.

Info
Loosen the screw several turns to prevent damage to the fork lacquer when moving the handlebar stub.
- Remove screw ② with distance sleeve ③.
- Carefully shift the handlebar stub by the length of the distance sleeve. Guideline
Long distance sleeve
15 mm (0.59 in)
- Lay all cables between the upper triple clamp and the handlebar stub.
Position the distance sleeves.
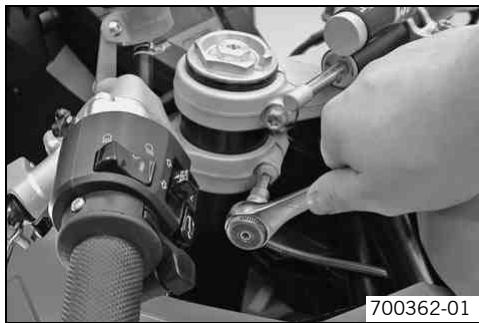
Mount and tighten the screw.
Guideline
| Remaining chassis screws | M5 | 5 Nm (3.7 lbf ft) |
- Tighten the screw.
Guideline
| Screw, handlebar stub | M8 | 20 Nm (14.8 lbf ft) |
Repeat the adjustments on the other handlebar stub.
- Move the handlebar to and fro over the entire steering range.
If the cables restrict the freedom of movement of the steering:
- Correct the cable routing.
Rear frame position
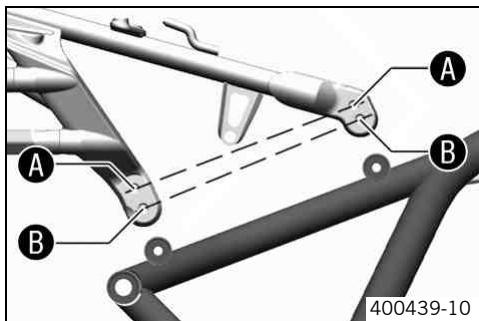
The frame rear height can be set to two different positions, enabling ergonomic adjustment of the seat height.
| Seat height A (standard) | 805 mm (31.69 in) |
| Seat height B | 825 mm (32.48 in) |
Adjusting the rear frame position

Warning
Danger of accidents Modifications to the chassis can seriously alter the vehicle's handling characteristics.
- Following modifications, ride slowly at first to get the feel of the new handling characteristics.
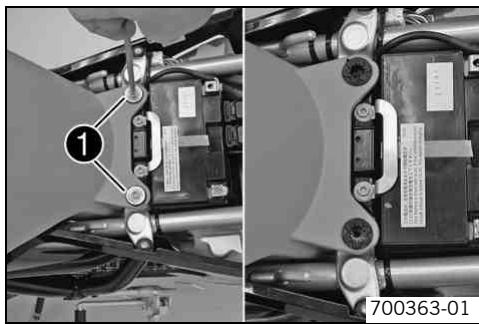
- Remove the seat. (p. 154)
- Remove screws ① with the bushings.
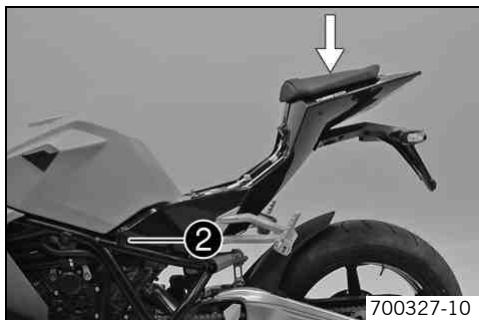
Setting a higher seat position:
- Remove screw ② with washer on the left and right sides of the vehicle.
- Push the rear end down until the drill holes of the frame are level with the lower front drill holes of the rear.
MAINTENANCE WORK ON CHASSIS AND ENGINE
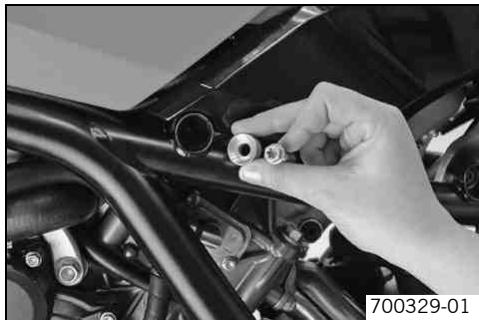
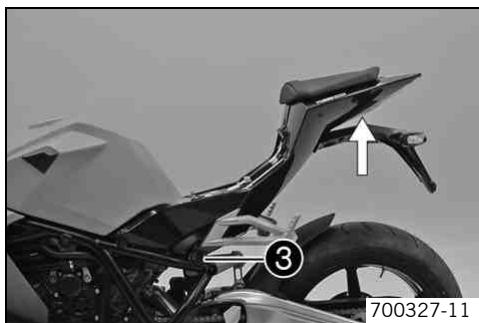
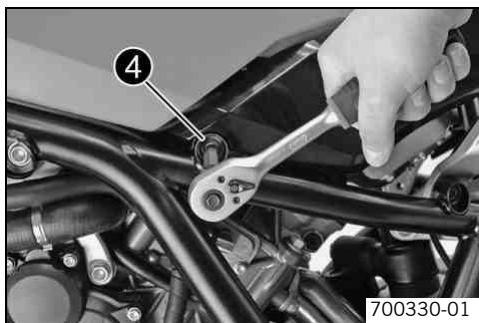
-
Mount the screw and washer on the left and right sides of the vehicle, but do not tighten.
-
Remove screw ③ with washer on the left and right sides of the vehicle.
- Push the rear end up until the drill holes of the frame are level with the lower rear drill holes of the rear.
Mount the screw and washer on the left and right sides of the vehicle, and tighten. Guideline
| Screw, subframe | M8 | 25 Nm (18.4 lbf ft) | Loctite® 243TM |
- Tighten screw 4 on the left and right sides of the vehicle.
Guideline
| Screw, subframe | M8 | 25 Nm (18.4 lbf ft) | Loctite® 243TM |
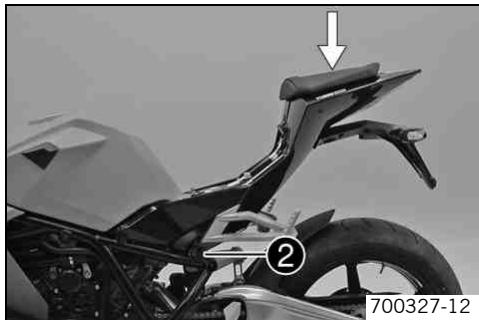
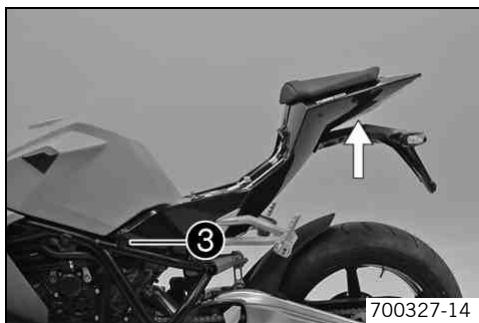
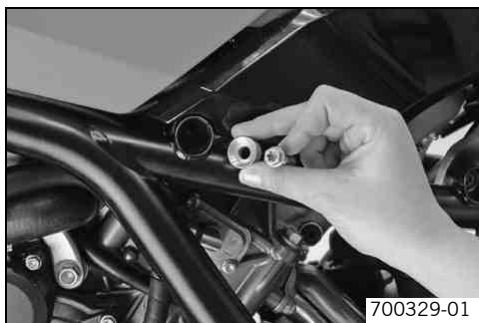
Setting a lower seat position:
- Remove screw ② with washer on the left and right sides of the vehicle.
- Push the rear end down until the drill holes of the frame are level with the upper rear drill holes of the rear.
-
Mount the screw and washer on the left and right sides of the vehicle, but do not tighten.
-
Remove screw ⑥ with washer on the left and right sides of the vehicle.
-
Push the rear end up until the drill holes of the frame are level with the upper front drill holes of the rear.
-
Mount the screw and washer on the left and right sides of the vehicle, and tighten. Guideline
| Screw, subframe | M8 | 25 Nm (18.4 lbf ft) | Loctite® 243TM |
MAINTENANCE WORK ON CHASSIS AND ENGINE
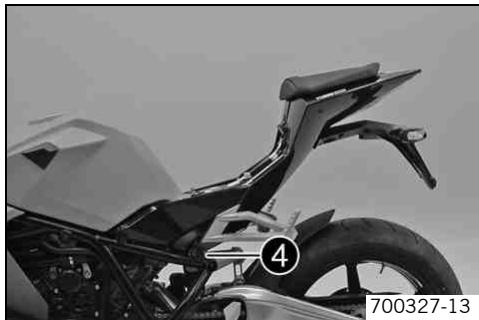
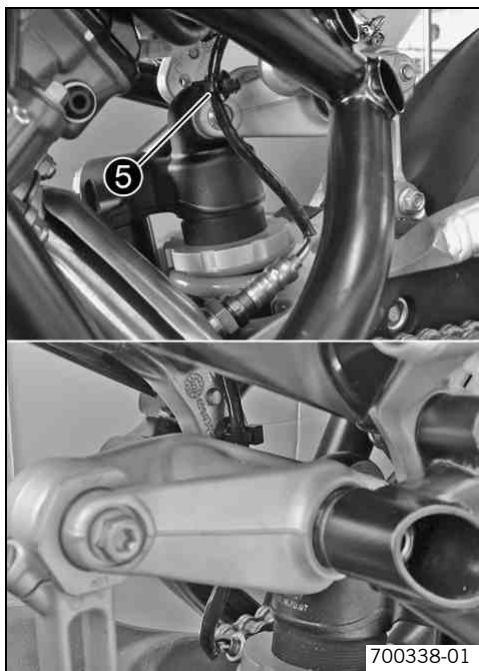
- Tighten screw 4 on the left and right sides of the vehicle.
Guideline
| Screw, subframe | M8 | 25 Nm (18.4 lbf ft) | Loctite® 243TM |
- When you screw in the rear left fixing screw, the plug-in cable binder ⑤ is pushed out of the thread. To reposition the cable of the lambda probe, fix the plug-in cable binder in the remaining free drill hole.
Check the cable routing. The cable of the lambda probe should not be taut.
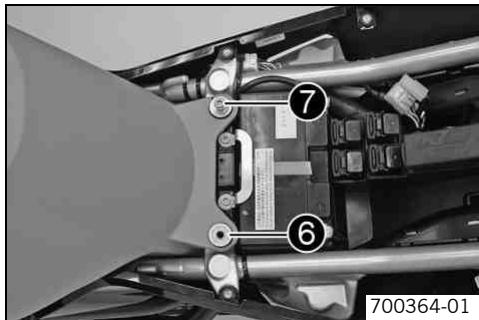
Position bushings ⑥.
- Mount and tighten screws 7.
Guideline
| Remaining chassis screws | M6 | 10 Nm (7.4 lbf ft) |
- Fit the seat. (p. 154)
Checking engine oil level

Info
The engine oil level must be checked at normal engine operating temperature.
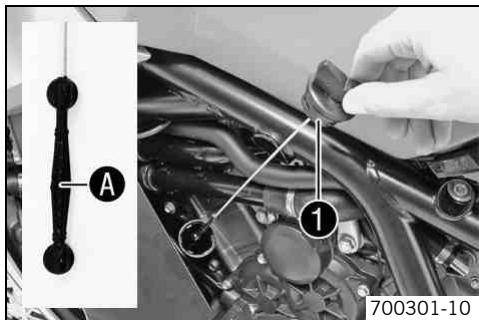
- Stand the motorcycle upright on a horizontal surface.
- Remove oil dipstick ①. Check the engine oil level in the measurement range.
I Info After switching off the engine, wait one minute before checking the level.
The engine oil level must be in the middle A of the measurement range of the oil dipstick.
If the engine oil level is outside the specified range:
- Top up the engine oil. (p. 201)
Replace the oil dipstick.
Changing engine oil and filter, cleaning oil screen
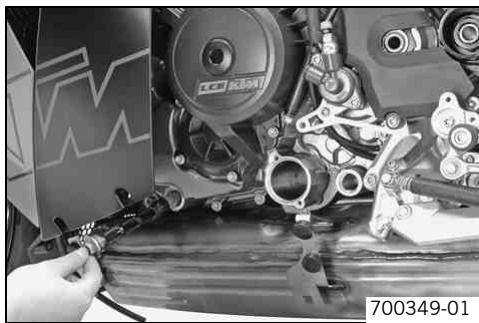
- Drain the engine oil and clean the oil screens. (p. 194)
Fill up with engine oil. (p. 199)
Draining engine oil, cleaning oil screens

Warning
Danger of scalding Engine oil and gear oil get very hot when the motorcycle is driven.
- Wear suitable protective clothing and gloves. If you scald yourself, hold the affected area under cold water immediately.

Warning
Environmental hazard Problem materials cause environmental damage.
- Dispose of oil, grease, filters, fuel, cleaning substances, brake fluid, batteries, etc. according to regulations.

Info
Drain the engine oil only when the engine is warm.
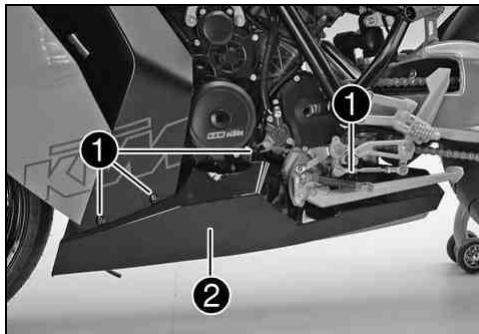
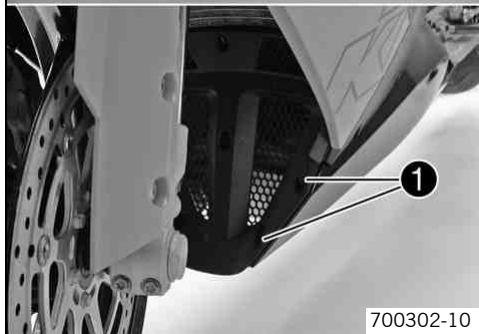
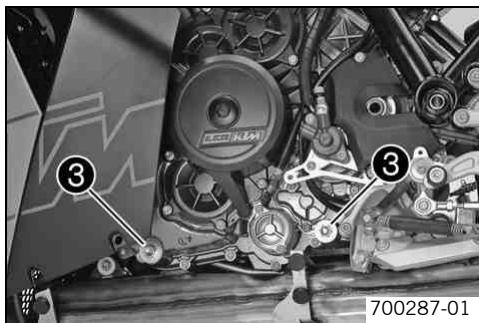
-
Remove screws 1.
Take off the left exhaust cover ②. -
Stand the motorcycle on its side stand on a horizontal surface.
- Place a suitable container under the engine.
- Remove the oil drain plug ③ with the magnet, O-rings and oil screen.
- Remove the oil filter. (p. 197)
- Completely drain the engine oil.
MAINTENANCE WORK ON CHASSIS AND ENGINE
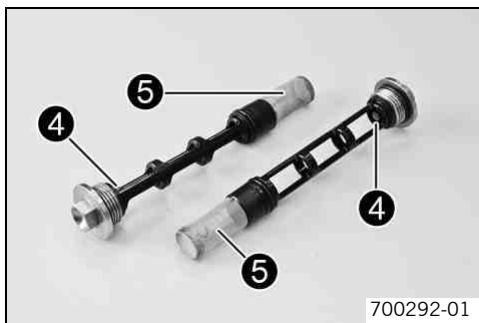
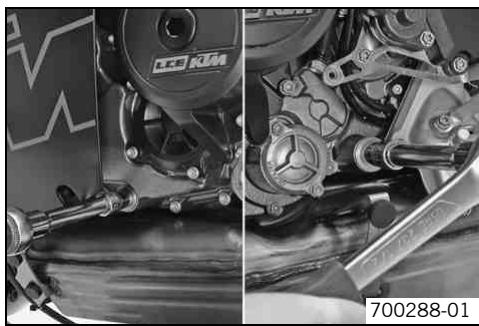
Thoroughly clean the magnet 4 and oil screen 5 of the oil drain plug.
- Fit and tighten the oil drain plug with the magnet, O-rings and oil screen. Guideline
| Oil drain plug | M20x1.5 | 20 Nm (14.8 lbf ft) |
- Fit the oil filter. (p. 199)
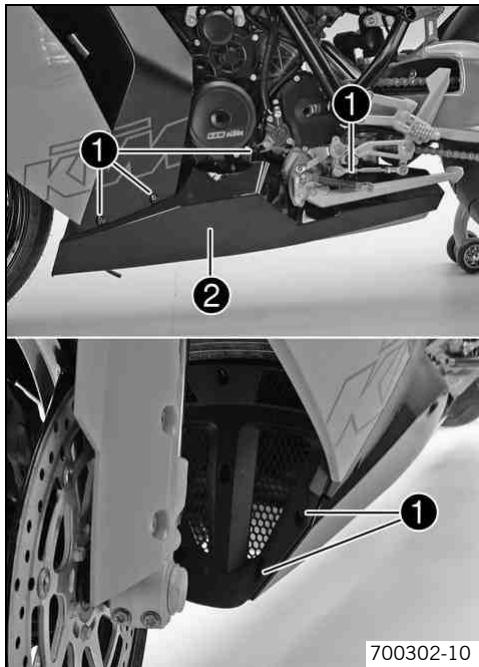
Position the left exhaust cover ②.
Mount and tighten screws 1.
Guideline
| Remaining chassis screws | M5 | 5 Nm (3.7 lbf ft) |
Removing oil filter

Warning
Danger of scalding Engine oil and gear oil get very hot when the motorcycle is driven.
- Wear suitable protective clothing and gloves. If you scald yourself, hold the affected area under cold water immediately.

Warning
Environmental hazard Problem materials cause environmental damage.
- Dispos of oil, grease, filters, fuel, cleaning substances, brake fluid, batteries, etc. according to regulations.
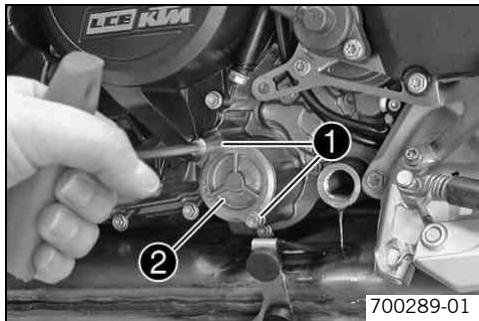
- Place a suitable container under the engine.
- Remove screws ①. Remove the oil filter cover ② with the O-ring.
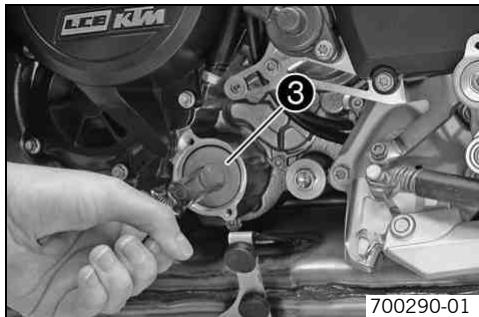
Pull the oil filter element out of the oil filter case.
Circlip pliers reverse (51012011000)
- Completely drain the engine oil.
Clean the parts and the sealing area thoroughly.
Fitting oil filter
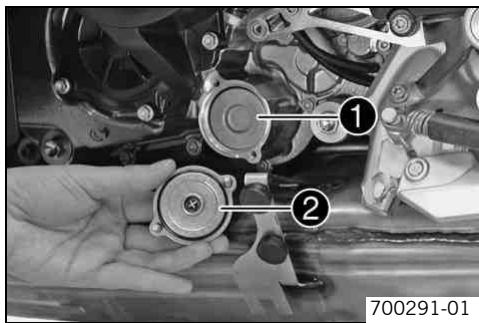
Insert the oil filter 1.
Lubricate the O-ring of the oil filter cover. Fit the oil filter cover ②.
Mount and tighten screws. Guideline
| Remaining engine screws | M5 | 6 Nm (4.4 lbf ft) |
Filling up with engine oil

Info
Too little engine oil or poor-quality engine oil results in premature wear to the engine.
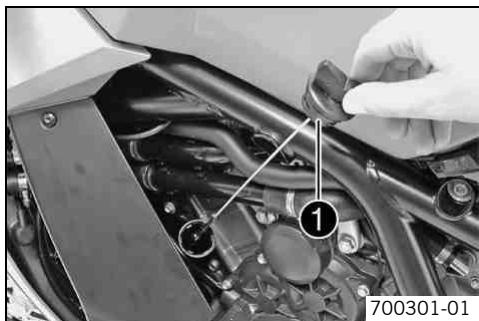
- The oil must be topped up in two steps.
| Engine oil | 3.60 l (3.8 qt.) | External temperature: ≥ 0 °C (≥ 32 °F) | Engine oil (SAE 10W/50) (p. 235) |
| External temperature: < 0 °C (< 32 °F) | Engine oil (SAE 5W/40) (p. 235) |
- Remove the dipstick 1 and top up the engine oil.
| Engine oil (1st quantity) | 3.00 l (3.17 qt.) | External temperature: ≥ 0 °C (≥ 32 °F) | Engine oil (SAE 10W/50) (p. 235) |
| External temperature: < 0 °C (< 32 °F) | Engine oil (SAE 5W/40) (p. 235) |
Replace the oil dipstick 1.

Danger
Danger of poisoning Exhaust gases are poisonous and can result in unconsciousness and/or death.
-
When running the engine, always make sure there is sufficient ventilation, and do not start or run the engine in a closed space.
-
Start the engine and check that it is oil-tight.
- Remove the dipstick ① and pour in the remaining engine oil.
| Engine oil (2nd quantity) | 0.60 l (0.63 qt.) | External temperature: ≥ 0 °C (≥ 32 °F) | Engine oil (SAE 10W/50) (p. 235) |
| External temperature: < 0 °C (< 32 °F) | Engine oil (SAE 5W/40) (p. 235) |
Replace the oil dipstick 1.

Danger
Danger of poisoning Exhaust gases are poisonous and can result in unconsciousness and/or death.
-
When running the engine, always make sure there is sufficient ventilation, and do not start or run the engine in a closed space.
-
Start the engine and check that it is oil-tight.
- Check the engine oil level. (p. 193)
Topping up engine oil

Info
Too little engine oil or poor-quality engine oil results in premature wear to the engine.
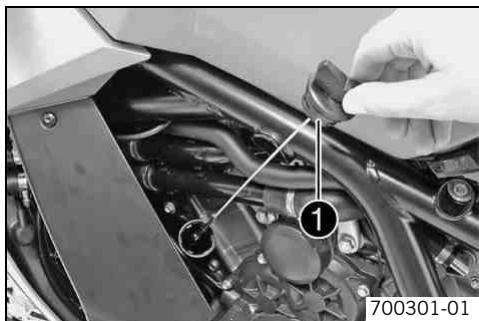
- Check the engine oil level. (p. 193)
Engine oil (SAE 10W/50) (p. 235)
- Remove the dipstick 1 and top up the engine oil.
Condition
External temperature: ≥ 0^ ( ≥ 32^ )
Engine oil (SAE 10W/50) (p. 235)
Condition
External temperature: < 0^ ( < 32^ )
Engine oil (SAE 5W/40) (p. 235)

Info
For optimal performance of the engine oil, do not mix different types of engine oil.
If appropriate, change the engine oil.
Replace the oil dipstick 1.

Danger
Danger of poisoning Exhaust gases are poisonous and can result in unconsciousness and/or death.
-
When running the engine, always make sure there is sufficient ventilation, and do not start or run the engine in a closed space.
-
Start the engine and check that it is oil-tight.
- Check the engine oil level. (p. 193)
| Faults | Possible cause | Action |
| Engine doesn't crank when the electric starter button is pressed | Operating error | - Carry out the steps for starting. (▼ p. 90) |
| Battery discharged | - Recharge the battery. (▼ p. 159) - Check closed-circuit current. | |
| Fuse 1, or 6 blown | - Change the fuses of individual power consumers. (▼ p. 163) | |
| Main fuse blown | - Change the main fuse. (▼ p. 161) | |
| Ignition/steering lock or emergency OFF switch defective | - Check the ignition/steering lock. - Check the emergency OFF switch. | |
| Safety start system defective | - Check the safety start system. | |
| Immobilizer active | - Read flash code of immobilizer. | |
| EFI control unit not activated | - Activate the EFI control unit. | |
| Malfunction of CAN-Bus communica-tion | - Check the CAN-Bus communication. | |
| Combination instrument defective | - Check the combination instrument. | |
| Engine cranks only if the clutch lever is pulled | A gear is engaged | - Shift into neutral. |
| Safety start system defective | - Check the safety start system. | |
| Engine cranks although it is in gear | Safety start system defective | - Check the safety start system. |
| Engine cranks but doesn't start | Fuse 5 blown | - Change the fuses of individual power consumers. (▼ p. 163) |
| Coupling of fuel hose connection not joined together | - Join coupling of fuel hose connection together. | |
| Plug connector of wiring harness oxi-dized | - Clean plug connector and treat with contact spray. | |
| Fault in fuel injection system | - Read the fault memory with KTM DIA. | |
| Engine cranks but doesn't start | Fuel pump control defective | - Check fuel pump control. |
| Fuel quality insufficient | - Add suitable fuel. | |
| Engine has too little power | Air filter very dirty | - Change the air filter. |
| Fuel filter very dirty | - Chang the fuel filter. | |
| Fault in fuel injection system | - Read the fault memory with KTM DIA. | |
| Engine overheats HIGH TEMP | Too little coolant in cooling system | - Check the cooling system for leaks. |
| - Check the coolant level. (p. 180) | ||
| Cooling fins very dirty | - Clean cooling fins. | |
| Kinked or damaged radiator hose | - Change the coolant hose. | |
| Thermostat defective | - Check the thermostat. | |
| Fuse 4 blown | - Change the fuses of individual power consumers. (p. 163) | |
| Defect in radiator fan system | - Check the radiator fan system. | |
| Air in cooling system | - Add coolant/bleed the cooling system. | |
| EFI warning lamp (MIL) lights up / flashes | Fault in fuel injection system | - Read the fault memory with KTM DIA. |
| Engine dies during the journey | Lack of fuel | - Fill up with fuel. (p. 97) |
| Fuse 1, 5 or 6 blown | - Change the fuses of individual power consumers. (p. 163) | |
| High oil consumption | Engine oil level too high | - Check the engine oil level. (p. 193) |
| Engine oil too thin (viscosity) | - Change the engine oil and filter, clean the oil screen. (p. 194) | |
| Headlight and parking light do not work | Fuse 2 blown | - Change the fuses of individual power consumers. (p. 163) |
| Brake light and horn do not work | Fuse 3 blown | - Change the fuses of individual power consumers. (▼ p. 163) |
| Battery discharged | Ignition not switched off when vehicle parked | - Recharge the battery. (▼ p. 159) |
| Battery is not charged by the generator | - Check charging voltage. | |
| Combination instrument shows nothing in display | Fuse 1 blown | - Change the fuses of individual power consumers. (▼ p. 163) |
| Speedometer in combination instru- ment doesn't work | Wiring harness of wheel revelation counter damaged or plug-in connector oxidized | - Check the wheel speed sensor. |
| Flash code of immobilizer indicator lamp | 12 Immobilizer indicator lamp flashes 1x short, 1 second pause, 2x short |
| Possible cause | Action |
| All ignition keys inactive | - Activate/deactivate the ignition key. (p. 176) |
| Flash code of immobilizer indicator lamp | 13 Immobilizer indicator lamp flashes 1x short, 1 second pause, 3x short |
| Possible cause | Action |
| Malfunction, antenna of immobilizer control unit | - Check the antenna of the immobilizer control unit. |
| Flash code of immobilizer indicator lamp | 14 Immobilizer indicator lamp flashes 1x short, 1 second pause, 4x short |
| Possible cause | Action |
| Malfunction in transponder of black ignition key | - Use spare black ignition key. - Order new spare key. - Activate/deactivate the ignition key. (p. 176) |
| Flash code of immobilizer indicator lamp | 15 Immobilizer indicator lamp flashes 1x short, 1 second pause, 5x short |
| Possible cause | Action |
| Black ignition key inactive | - Activate/deactivate the ignition key. (p. 176) |
| Flash code of immobilizer indicator lamp | 16 Immobilizer indicator lamp flashes 1x short, 1 second pause, 6x short |
| Possible cause | Action |
| Malfunction, encryption, immobilizer control unit to black ignition key | - Use the black ignition key belonging to the vehicle. |
| Flash code of immobilizer indicator lamp | 21 Immobilizer indicator lamp flashes 2x short, 1 second pause, 1x short |
| Possible cause | Action |
| Immobilizer control unit not activated | - Activate the immobilizer control unit. |
| Flash code of immobilizer indicator lamp | 31 Immobilizer indicator lamp flashes 3x short, 1 second pause, 1x short |
| Possible cause | Action |
| Malfunction, encryption query from EFI control unit to immobilizer control unit | - Activate the EFI control unit. |
| Flash code of immobilizer indicator lamp | 32 Immobilizer indicator lamp flashes 3x short, 1 second pause, 2x short |
| Possible cause | Action |
| Malfunction of CAN-Bus communication | - Check the CAN-Bus communication. |
| Flash code of immobilizer indicator lamp | 60 Immobilizer indicator lamp flashes 6x short |
| Possible cause | Action |
| E2PROM malfunction | - Change the immobilizer control unit. |
| Flash code EFI Warning lamp (MIL) | 02 EFI Warning lamp (MIL) flashes 2x short |
| Possible cause | Action |
| Malfunction in ignition pulse generator circuit | - Check the ignition pulse generator. |
| Flash code EFI Warning lamp (MIL) | 06 EFI Warning lamp (MIL) flashes 6x short |
| Possible cause | Action |
| Input signal of throttle valve position generator circuit A too low | - Check circuit A of throttle valve position generator. |
| Input signal of throttle valve position generator circuit A too high | - Check circuit A of throttle valve position generator. |
| Flash code EFI Warning lamp (MIL) | 07 EFI Warning lamp (MIL) flashes 7x short |
| Possible cause | Action |
| Input signal of throttle valve position generator circuit B too low | - Check circuit B of throttle valve position generator. |
| Input signal of throttle valve position generator circuit B too high | - Check circuit B of throttle valve position generator. |
| Flash code EFI Warning lamp (MIL) | 09 EFI Warning lamp (MIL) flashes 9x short |
| Possible cause | Action |
| Input signal from pressure sensor, induction manifold (cylin- der 1) too low | - Check pressure sensor, induction manifold (cylinder 1). |
| Input signal from pressure sen- sor, induction manifold (cylin- der 1) too high | - Check pressure sensor, induction manifold (cylinder 1). |
| Flash code EFI Warning lamp (MIL) | 11 EFI Warning lamp (MIL) flashes 1x long, 1x short |
| Possible cause | Action |
| Input signal from pressure sen- sor, induction manifold (cylin- der 2) too low | - Check pressure sensor, induction manifold (cylinder 2). |
| Input signal from pressure sen- sor, induction manifold (cylin- der 2) too high | - Check pressure sensor, induction manifold (cylinder 2). |
| Flash code EFI Warning lamp (MIL) | 13 EFI Warning lamp (MIL) flashes 1x long, 3x short |
| Possible cause | Action |
| Input signal from intake air temperatur sensor too low | - Check the intake air temperature sensor. |
| Input signal from intake air temperatur sensor too high | - Check the intake air temperature sensor. |
| Flash code EFI Warning lamp (MIL) | 14 EFI Warning lamp (MIL) flashes 1x long, 4x short |
| Possible cause | Action |
| Input signal of pressure sensor ambient air too low | - Check pressure sensor, ambient air. |
| Input signal of pressure sensor ambient air too high | - Check pressure sensor, ambient air. |
| Flash code EFI Warning lamp (MIL) | 15 EFI Warning lamp (MIL) flashes 1x long, 5x short |
| Possible cause | Action |
| Input signal from roll angle sen- sor too low | - Check the roll angle sensor. |
| Input signal from roll angle sen- sor too high | - Check the roll angle sensor. |
| Flash code EFI Warning lamp (MIL) | 17 EFI Warning lamp (MIL) flashes 1x long, 7x short |
| Possible cause | Action |
| Malfunction in lambda probe circuit (cylinder 1) | - Check lambda probe (cylinder 1). |
| Flash code EFI Warning lamp (MIL) | 18 EFI Warning lamp (MIL) flashes 1x long, 8x short |
| Possible cause | Action |
| Malfunction in lambda probe circuit (cylinder 2) | - Check lambda probe (cylinder 2). |
| Flash code EFI Warning lamp (MIL) | 24 EFI Warning lamp (MIL) flashes 2x long, 4x short |
| Possible cause | Action |
| Malfunction in voltage supply circuit to EFI control unit | - Check voltage supply to EFI control unit. |
| Flash code EFI Warning lamp (MIL) | 25 EFI Warning lamp (MIL) flashes 2x long, 5x short |
| Possible cause | Action |
ENGINE CONTROL FLASH CODE
| Malfunction in sidestand switch circuit | - Check the sidestand switch. |
| Flash code EFI Warning lamp (MIL) | 33 EFI Warning lamp (MIL) flashes 3x long, 3x short |
| Possible cause | Action |
| Malfunction in injection valve circuit (cylinder 1) | - Check injection valve (cylinder 1). |
| Flash code EFI Warning lamp (MIL) | 34 EFI Warning lamp (MIL) flashes 3x long, 4x short |
| Possible cause | Action |
| Malfunction in injection valve circuit (cylinder 2) | - Check injection valve (cylinder 2). |
| Flash code EFI Warning lamp (MIL) | 37 EFI Warning lamp (MIL) flashes 3x long, 7x short |
| Possible cause | Action |
| Malfunction in ignition coil circuit (cylinder 1) | - Check the ignition coil (cylinder 1). |
| Flash code EFI Warning lamp (MIL) | 38 EFI Warning lamp (MIL) flashes 3x long, 8x short |
| Possible cause | Action |
| Malfunction in ignition coil circuit (cylinder 2) | - Check the ignition coil (cylinder 2). |
| Flash code EFI Warning lamp (MIL) | 41 EFI Warning lamp (MIL) flashes 4x long, 1x short |
| Possible cause | Action |
| Interruption/short-circuit to ground in fuel pump control circuit | - Check fuel pump control. |
ENGINE CONTROL FLASH CODE
| Short-circuit to plus in fuel pump control circuit | - Check fuel pump control. |
| Flash code EFI Warning lamp (MIL) | 45 EFI Warning lamp (MIL) flashes 4x long, 5x short |
| Possible cause | Action |
| Malfunction or short circuit to ground in lambda probe heating circuit (cylinder 1) | - Check heating of lambda probe (cylinder 1). |
| Malfunction or short circuit to plus in lambda probe heating circuit (cylinder 1) | - Check heating of lambda probe (cylinder 1). |
| Flash code EFI Warning lamp (MIL) | 46 EFI Warning lamp (MIL) flashes 4x long, 6x short |
| Possible cause | Action |
| Malfunction or short circuit to ground in lambda probe heating circuit (cylinder 2) | - Check heating of lambda probe (cylinder 2). |
| Malfunction or short circuit to plus in lambda probe heating circuit (cylinder 2) | - Check heating of lambda probe (cylinder 2). |
| Flash code EFI Warning lamp (MIL) | 49 EFI Warning lamp (MIL) flashes 4x long, 9x short |
| Possible cause | Action |
| Malfunction in idling control system circuit | - Check idle speed control. |
| Flash code EFI Warning lamp (MIL) | 50 EFI Warning lamp (MIL) flashes 5x long |
| Possible cause | Action |
| Malfunction in throttle valve stepper circuit, circuit B | - Check circuit B of throttle stepper motor. |
| Flash code EFI Warning lamp (MIL) | 53 EFI Warning lamp (MIL) flashes 5x long, 3x short |
| Possible cause | Action |
| Interruption/short circuit to ground in the fuel evaporation valve control circuit | - Check the fuel evaporation valve. |
| Short circuit to plus in the fuel evaporation valve control circuit | - Check the fuel evaporation valve. |
| Flash code EFI Warning lamp (MIL) | 54 EFI Warning lamp (MIL) flashes 5x long, 4x short |
| Possible cause | Action |
| Interruption/short-circuit to ground in secondary air valve circuit | - Check the secondary air valve. |
| Short-circuit to plus in secondary air valve circuit | - Check the secondary air valve. |
| Flash code EFI Warning lamp (MIL) | 61 EFI Warning lamp (MIL) flashes 6x long, 1x short |
| Possible cause | Action |
| Malfunction in idling control system basic setting | - Check idle speed control. |
| Flash code EFI Warning lamp (MIL) | 62 EFI Warning lamp (MIL) flashes 6x long, 2x short |
| Possible cause | Action |
| Malfunction in idling control system | - Check idle speed control. |
| Flash code EFI Warning lamp (MIL) | 68 EFI Warning lamp (MIL) flashes 6x long, 8x short |
| Possible cause | Action |
| Connection of pressure sensor, induction manifold (cylinder 1) leaky | - Check pressure sensor, induction manifold (cylinder 1). |
| Flash code EFI Warning lamp (MIL) | 69 EFI Warning lamp (MIL) flashes 6x long, 9x short |
| Possible cause | Action |
| Connection of pressure sensor, induction manifold (cylinder 2) leaky | - Check pressure sensor, induction manifold (cylinder 2). |
| Flash code EFI Warning lamp (MIL) | 72 EFI Warning lamp (MIL) flashes 7x long, 2x short |
| Possible cause | Action |
| Malfunction of throttle valve stepper, circuit B | - Check circuit B of throttle stepper motor. |
| Flash code EFI Warning lamp (MIL) | 91 EFI Warning lamp (MIL) flashes 9x long, 1x short |
| Possible cause | Action |
| Malfunction of CAN-Bus com-munication | - Check the CAN-Bus communication. |
Cleaning motorcycle
Note
Material damage Damage and destruction of components by high-pressure cleaning equipment.
- Never clean the vehicle with high-pressure cleaning equipment or a strong water-jet. The excessive pressure can penetrate electrical components, connects, Bowden cables, and bearings, etc., and can damage or destroy these parts.

Warning
Environmental hazard Problem materials cause environmental damage.
- Dispose of oil, grease, filters, fuel, cleaning substances, brake fluid, batteries, etc. according to regulations.

Info
To maintain the value and appearance of the motorcycle over a long period, clean it regularly. Avoid direct sunshine when cleaning the motorcycle.
Before cleaning, seal the exhaust system to prevent water from entering.
- Remove loose dirt first with a soft jet of water.
Spray very dirty parts with a normal commercial engine cleaner and then brush off with a soft brush.
Motorcycle cleaner (p. 238)

Info
Use warm water mixed with a normal commercial engine cleaner and a soft sponge.
If the vehicle has been used on salted roads, clean it with cold water. Warm water intensifies the effects of salt.
After cleaning the motorcycle thoroughly with a soft jet of water, dry it with compressed air and a cloth.

Warning
Danger of accidents Reduced braking due to wet or dirty brakes.
- Clean or dry dirty or wet brakes by riding and braking gently.
After cleaning, ride a short distance until operating temperature is reached, and apply the brakes.

Info
The heat causes water to evaporate from inaccessible parts of the engine and brakes.
After the engine has cooled down, lubricate or grease all moving parts and bearings.
Clean the chain. (p. 130)
Treat bare metal (except for brake discs and the exhaust system) with an anticorrosive.
Cleaning and polishing materials for metal, rubber and plastic (p. 237)
Treat all painted parts with a mild lacquer care spray.
High-luster polish for paint (p. 237)
- Oil the ignition/steering lock, tank lock, and seat lock.
Universal oil spray (p. 238)
Conservation for winter operation

Info
If you use the motorcycle in the winter, you have to expect salt on the roads. You therefore have to take precautions against the aggressive road salt.
If the vehicle has been used on salted roads, clean it with cold water. Warm water intensifies the effects of salt.
Clean the motorcycle. (p. 215)
Treat the engine, swingarm and all other bare or galvanized parts (except the brake discs) with a wax-based anticorrosive.

Info
Avoid getting anticorrosive on the brake discs: this would badly affect the braking.
After riding on salted roads, thoroughly wash the motorcycle with cold water and dry it well.
Clean the chain. (p. 130)
Storage

Info
If you want to garage the motorcycle for a longer period, take the following actions.
Before storing the motorcycle, check all parts for function and wear. If service, repairs or replacements are necessary, you should do this during the storage period (less workshop overload). In this way, you can avoid long workshop waiting times at the start of the new season.
- Make sure the tank is as empty as possible so that you can fill up with fresh fuel when you put the motorcycle back into operation.
Clean the motorcycle. (p. 215) - Change the engine oil and filter, clean the oil screen. (p. 194)
- Check the coolant level. (p. 180)
- Check the antifreeze.
- Check the tire air pressure. (p. 153)
- Remove the battery. (p. 156)
- Recharge the battery. (p. 159)
Guideline
Storage temperature of battery without direct sunshine.
0...35°C (32...95°F)
- The storage place should be dry and not subject to large temperature differences.
Info KTM recommends jacking up the motorcycle.
- Jack up the motorcycle rear end. (p. 104)
- Jack up the motorcycle at the front. (p. 103)
Cover the motorcycle with a porous sheet or blanket.

Info
Do not use non-porous materials since they prevent humidity from escaping, thus causing corrosion.
Avoid running the engine for a short time only. Since the engine cannot warm up properly, the water vapor produced during combustion condenses and causes valves and exhaust system to rust.
Putting into operation after storage
Take the front of the motorcycle off the work stand. (p. 103)
Take the rear of the motorcycle off the work stand. (p. 104)
- Recharge the battery. (p. 159)
Install the battery. (p. 158)
- Set the clock with SET CLOCK. (p. 70)
- Fill up with fuel. (p. 97)
- Make checks before putting into operation. (p. 89)
- Make a test ride.
| Design | 2-cylinder 4-stroke Otto motor, 75° V arrangement, water-cooled |
| Displacement | 1,150 cm³ (70.18 cu in) |
| Stroke | 69 mm (2.72 in) |
| Bore | 103 mm (4.06 in) |
| Compression ratio | 12,5:1 |
| Control | DOHC, 4 valves per cylinder, chain-driven |
| Valve - valve stem diameter | |
| Intake | 42 mm (1.65 in) |
| Exhaust | 34 mm (1.34 in) |
| Valve clearance | |
| Exhaust at: 20 °C (68 °F) | 0.25... 0.30 mm (0.0098... 0.0118 in) |
| Intake at: 20 °C (68 °F) | 0.10... 0.15 mm (0.0039... 0.0059 in) |
| Crankshaft bearing | Sleeve bearing |
| Conrod bearing | Sleeve bearing |
| Piston pin bearing | No bearing bushes - DLC-coated piston pins |
| Piston | Forged light alloy |
| Piston ring | 1 L-ring, 1 tapered compression piston ring, 1 oil scraper ring |
| Engine lubrication | Pressure circulation lubrication with 3 rotor pumps |
| Primary transmission | 40:76 |
| Clutch | Multi-disc clutch in oilbath / hydraulically operated |
| Transmission | 6-speed claw gears |
| Transmission ratio | |
| 1st gear | 14:36 |
| 2nd gear | 16:30 |
| 3rd gear | 20:30 |
| 4th gear | 21:27 |
| 5th gear | 23:26 |
| 6th gear | 25:26 |
| Mixture preparation | Electronically controlled fuel injection |
| Ignition system | Contactless controlled fully electronic ignition with digital ignition adjustment |
| Generator | 12 V, 390 W |
| Spark plug | NGK LKAR9BI9 |
| Electrode gap, spark plug | 0.8... 0.9 mm (0.031... 0.035 in) |
| Cooling | Water cooling, permanent circulation of coolant by water pump |
| Cold start device | Electric starter |
Capacity- engine oil
| Engine oil | 3.60 l (3.8 qt.) | External temperature: ≥ 0 °C (≥ 32 °F) | Engine oil (SAE 10W/50) (p. 235) |
| External temperature: < 0 °C (< 32 °F) | Engine oil (SAE 5W/40) (p. 235) |
Capacity - coolant
| Coolant | 2.60 l (2.75 qt.) | Coolant (● p. 234) |
| Coolant (mixed ready to use) (● p. 234) |
TECHNICAL DATA - ENGINE TIGHTENING TORQUES
| Hose clip, intake flange | M4 | 1.5 Nm (1.11 lbf ft) | - |
| Screw, gear sensor | M5 | 3 Nm (2.2 lbf ft) | Loctite® 243TM |
| Screw, pulse generator | M5 | 10 Nm (7.4 lbf ft) | Loctite® 243TM |
| Screw, bearing retainer | M5 | 6 Nm (4.4 lbf ft) | Loctite® 243TM |
| Remaining engine screws | M5 | 6 Nm (4.4 lbf ft) | - |
| Oil jet | M6x0.75 | 4 Nm (3 lbf ft) | Loctite® 243TM |
| Nut, cylinder head | M6 | 10 Nm (7.4 lbf ft) | - |
| Screw, locking lever | M6 | 10 Nm (7.4 lbf ft) | Loctite® 243TM |
| Screw, freewheel holder | M6 | 10 Nm (7.4 lbf ft) | Loctite® 243TM |
| Screw, freewheel ring | M6 | 13 Nm (9.6 lbf ft) | Loctite® 648TM |
| Screw, generator cover | M6 | 10 Nm (7.4 lbf ft) | - |
| Stud, chain shaft | M6 | 8 Nm (5.9 lbf ft) | - |
| Screw, coolant connection on cylinder head | M6 | 10 Nm (7.4 lbf ft) | - |
| Screw, clutch cover | M6 | 10 Nm (7.4 lbf ft) | - |
| Screw, clutch spring | M6 | 12 Nm (8.9 lbf ft) | Loctite® 243TM |
| Screw, engine housing | M6x60 | 10 Nm (7.4 lbf ft) | - |
| Screw, engine housing | M6x80 | 10 Nm (7.4 lbf ft) | - |
| Screw, engine housing | M6x90 | 10 Nm (7.4 lbf ft) | - |
| Screw, camshaft bearing support | M6 | 10 Nm (7.4 lbf ft) | - |
| Screw, oil pump cover | M6 | 10 Nm (7.4 lbf ft) | Loctite® 243TM |
| Screw, shift drum locating | M6 | 10 Nm (7.4 lbf ft) | Loctite® 243TM |
| Screw, shift lever | M6 | 10 Nm (7.4 lbf ft) | Loctite® 243TM |
| Screw, starter motor | M6 | 10 Nm (7.4 lbf ft) | - |
TECHNICAL DATA - ENGINE TIGHTENING TORQUES
| Screw, stator clamp | M6 | 10 Nm (7.4 lbf ft) | Loctite® 243TM |
| Plug, vacuum connection | M6 | 5 Nm (3.7 lbf ft) | Loctite® 243TM |
| Screw, valve cover | M6 | 10 Nm (7.4 lbf ft) | - |
| Screw, water pump cover | M6 | 10 Nm (7.4 lbf ft) | - |
| Screw, water pump wheel | M6 | 10 Nm (7.4 lbf ft) | Loctite® 243TM |
| Remaining engine screws | M6 | 10 Nm (7.4 lbf ft) | - |
| Vacuum connection | M6 | 5 Nm (3.7 lbf ft) | Loctite® 243TM |
| Stud, exhaust flange | M8 | 10 Nm (7.4 lbf ft) | - |
| Screw, timing chain guide rail | M8 | 15 Nm (11.1 lbf ft) | Loctite® 243TM |
| Plug, crankshaft retainer | M8 | 15 Nm (11.1 lbf ft) | - |
| Screw, engine housing | M8 | 18 Nm (13.3 lbf ft) | - |
| Screw, engine console | M8 | 20 Nm (14.8 lbf ft) | Loctite® 243TM |
| Screw, camshaft bearing support | M8 | Step 1 10 Nm (7.4 lbf ft) Step 2 18 Nm (13.3 lbf ft) | - |
| Screw, camshaft bearing support | M8 | Step 1 8.5 Nm (6.27 lbf ft) Step 2 14.5 Nm (10.7 lbf ft) | Only applies when using: Hex key bit (61229025000) |
| Screw, timing chain tensioning rail | M8 | 15 Nm (11.1 lbf ft) | Loctite® 243TM |
| Screw, heat exchanger | M8 | 15 Nm (11.1 lbf ft) | - |
| Oil pressure sensor | M10x1 | 10 Nm (7.4 lbf ft) | - |
| Screw, timing chain tensioner release | M10x1 | 10 Nm (7.4 lbf ft) | - |
| Plug, clutch lubrication | M10x1 | 15 Nm (11.1 lbf ft) | - |
TECHNICAL DATA - ENGINE TIGHTENING TORQUES
| Screw, conrod bearing | M10x1 | Step 1 25 Nm (18.4 lbf ft) Step 2 30 Nm (22.1 lbf ft) Step 3 90° | - |
| Plug, cam lever axis | M10x1 | 15 Nm (11.1 lbf ft) | - |
| Cylinder head screw | M11x1.5 | Tightening sequence: Using a crisscross pattern Step 1 15 Nm (11.1 lbf ft) Step 2 30 Nm (22.1 lbf ft) Step 3 90° Step 4 90° | lubricated with engine oil |
| Coolant temperature sensor | M12x1.5 | 12 Nm (8.9 lbf ft) | - |
| Rotor screw | M12x1.5 | 90 Nm (66.4 lbf ft) | - |
| Spark plug | M12x1.5 | 12 Nm (8.9 lbf ft) | - |
| Oil drain plug | M20x1.5 | 20 Nm (14.8 lbf ft) | - |
| Nut, inner clutch hub | M22x1.5 | 130 Nm (95.9 lbf ft) | Loctite® 243TM |
| Screw in generator cover | M24x1.5 | 8 Nm (5.9 lbf ft) | - |
| Plug, timing-chain tensioner | M24x1.5 | 25 Nm (18.4 lbf ft) | - |
| Nut, primary gear | M33LHx1.5 | 130 Nm (95.9 lbf ft) | Loctite® 243TM |
| Frame | Lattice frame made of chromium molybdenum steel tubing, powder-coated |
| Fork | WP Suspension Up Side Down 4354 |
| Shock absorber | WP Suspension 4014 VP |
| Suspension travel | |
| Front | 120 mm (4.72 in) |
| Rear | 125 mm (4.92 in) |
| Brake system | |
| Front | Double disc brake with radially screwed four-piston brake calipers, float-mounted brake discs |
| Rear | Single disc brake with dual-piston brake caliper, rigid-mounted brake disc |
| Brake discs - diameter | |
| Front | 320 mm (12.6 in) |
| Rear | 220 mm (8.66 in) |
| Brake discs - wear limit | |
| Front | 4.0 mm (0.157 in) |
| Brake disc - wear limit | |
| Rear | 4.5 mm (0.177 in) |
| Tire air pressure, Solo | |
| Front | 2.5 bar (36 psi) |
| Rear | 2.5 bar (36 psi) |
| Tire air pressure with passenger / full payload | |
| Front | 2.5 bar (36 psi) |
| Rear | 2.9 bar (42 psi) |
| Secondary drive | 17:37 |
| Chain | 5/8 x 5/16” X-ring |
| Steering head angle | 66.7° |
| Wheelbase | 1,435 mm (56.5 in) |
| Seat height, unloaded | |
| Lower frame rear position | 805 mm (31.69 in) |
| Upper frame rear position | 825 mm (32.48 in) |
| Ground clearance, unloaded | 110 mm (4.33 in) |
| Weight without fuel approx. | 184 kg (406 lb.) |
| Maximum permissible front axle load | 200 kg (441 lb.) |
| Maximum permissible rear axle load | 220 kg (485 lb.) |
| Maximum permissible total weight | 380 kg (838 lb.) |
| Battery | YTZ14S | Battery voltage: 12 V Nominal capacity: 11 Ah maintenance-free |
| Fuse | 58011109130 | 30 A |
| Fuse | 75011088015 | 15 A |
| Fuse | 75011088010 | 10 A |
Lighting equipment
| Low beam / high beam | H7 | 12 V 55 W |
| Parking light | W2,1x9,5d | 12 V 5 W |
| Instrument lights and control lamps | LED | |
| Flasher light | LED | |
| Brake/tail light | LED | |
| License plate lamp | W2,1x9,5d | 12 V 5 W |
| Front tire | Rear tire |
| 120/70 ZR 17 M/C 58W TL Pirelli Dragon Supercorsa Pro | 190/55 ZR 17 M/C 75W TL Pirelli Dragon Supercorsa Pro |
| For further information, see the Service section under: http://www.ktm.com | |
Capacity - fuel
| Total fuel tank capacity, approx. | 16.5 l (4.36 US gal) | Super unleaded (ROZ 95 / RON 95 / PON 91) (p. 236) |
| Fuel reserve, approx. | 3.5 l (3.7 qt.) | |
| Fork part number | 05.18.7D.07 | |
| Fork | WP Suspension Up Side Down 4354 | |
| Compression damping | ||
| Comfort | 15 clicks | |
| Standard | 10 clicks | |
| Sport | 5 clicks | |
| Full payload | 5 clicks | |
| Rebound damping | ||
| Comfort | 15 clicks | |
| Standard | 10 clicks | |
| Sport | 5 clicks | |
| Full payload | 5 clicks | |
| Spring preload - Preload Adjuster | ||
| Comfort | 5 turns | |
| Standard | 5 turns | |
| Sport | 3 turns | |
| full payload | 3 turns | |
| Spring length with preload spacer(s) | 405 mm (15.94 in) | |
| Spring rate | ||
| Weight of rider: 75... 85 kg (165... 187 lb.) | 10 N/mm (57 lb/in) | |
| Air chamber length | 80+20-10mm (3.15+0.79in)-0.39in) | |
| Fork length | 735 mm (28.94 in) | |
| Fork oil (p. 236) | SAE 5 | |
| Shock absorber part number | 17.18.7D.07 | |
| Shock absorber | WP Suspension 4014 VP | |
| Compression damping, high-speed | ||
| Comfort | 2 turns | |
| Standard | 1.5 turns | |
| Sport | 1 turn | |
| full payload | 1 turn | |
| Compression damping, low-speed | ||
| Comfort | 20 clicks | |
| Standard | 15 clicks | |
| Sport | 10 clicks | |
| Full payload | 10 clicks | |
| Rebound damping | ||
| Comfort | 15 clicks | |
| Standard | 10 clicks | |
| Sport | 5 clicks | |
| full payload | 10 clicks | |
| Spring preload | ||
| Comfort | 6 mm (0.24 in) | |
| Standard | 6 mm (0.24 in) | |
| Sport | 8 mm (0.31 in) | |
| full payload | 8 mm (0.31 in) | |
| Spring rate | ||
| Weight of rider: 75... 85 kg (165... 187 lb.) | 110 N/mm (628 lb/in) | |
| Spring length | 160 mm (6.3 in) | |
| Gas pressure | 10 bar (145 psi) | |
| Static sag | 15 mm (0.59 in) | |
| Riding sag | 30 mm (1.18 in) | |
| Inbuilt length | 290 mm (11.42 in) | |
TECHNICAL DATA - CHASSIS TIGHTENING TORQUES
| Screw, side stand switch | M4 | 2 Nm (1.5 lbf ft) | Loctite® 243TM |
| Screw, brake fluid reservoir of rear brake | M5 | 5 Nm (3.7 lbf ft) | Loctite® 243TM |
| Screw, brake line holder | M5 | 5 Nm (3.7 lbf ft) | - |
| Screw, chain sliding piece | M5 | 5 Nm (3.7 lbf ft) | - |
| Screw, chain guard | M5 | 5 Nm (3.7 lbf ft) | - |
| Screw, fuel level indicator | M5 | 3 Nm (2.2 lbf ft) | - |
| Screw, fuel tank guard | M5x17 | 3 Nm (2.2 lbf ft) | - |
| Screw, steering damper fixing bracket | M5 | 5 Nm (3.7 lbf ft) | Loctite® 243TM |
| Remaining chassis screws | M5 | 5 Nm (3.7 lbf ft) | - |
| Remaining chassis nuts | M6 | 15 Nm (11.1 lbf ft) | - |
| Screw, exhaust heat shield | M6 | 15 Nm (11.1 lbf ft) | - |
| Screw, exhaust clamp | M6 | 8 Nm (5.9 lbf ft) | - |
| Screw, foot brake pedal | M6 | 15 Nm (11.1 lbf ft) | Loctite® 243TM |
| Screw, footbrake pedal stub | M6 | 10 Nm (7.4 lbf ft) | Loctite® 243TM |
| Screw, footbrake cylinder | M6 | 10 Nm (7.4 lbf ft) | Loctite® 243TM |
| Screw, fuel pump | M6 | 6 Nm (4.4 lbf ft) | - |
| Screw, shift lever stub | M6 | 10 Nm (7.4 lbf ft) | Loctite® 243TM |
| Screw, shift rod | M6 | 12 Nm (8.9 lbf ft) | Loctite® 243TM |
| Screw, shift shaft deflector on chain securing guide | M6 | 10 Nm (7.4 lbf ft) | Loctite® 243TM |
| Screw, shift shaft deflector on shift shaft | M6 | 18 Nm (13.3 lbf ft) | Loctite® 243TM |
| Remaining chassis screws | M6 | 10 Nm (7.4 lbf ft) | - |
| Remaining chassis nuts | M8 | 30 Nm (22.1 lbf ft) | - |
| Nut, forked bracket on footbrake pedal | M8 | 30 Nm (22.1 lbf ft) | Loctite® 243TM |
TECHNICAL DATA - CHASSIS TIGHTENING TORQUES
| Screw, rear brake disc | M8 | 30 Nm (22.1 lbf ft) | Loctite® 243TM |
| Screw, front brake disc | M8 | 30 Nm (22.1 lbf ft) | Loctite® 243TM |
| Screw of rear brake caliper | M8 | 22 Nm (16.2 lbf ft) | Loctite® 243TM |
| Screw, spring holder on side stand bracket | M8 | 15 Nm (11.1 lbf ft) | Loctite® 243TM |
| Screw, rear footrest bracket | M8 | 25 Nm (18.4 lbf ft) | - |
| Screw, front footrest bracket | M8 | 25 Nm (18.4 lbf ft) | Loctite® 243TM |
| Screw, top triple clamp | M8 | 17 Nm (12.5 lbf ft) | - |
| Screw, bottom triple clamp | M8 | 15 Nm (11.1 lbf ft) | - |
| Screw, fork stub | M8 | 15 Nm (11.1 lbf ft) | - |
| Screw, steering stem | M8 | 20 Nm (14.8 lbf ft) | - |
| Screw, handlebar stub | M8 | 20 Nm (14.8 lbf ft) | - |
| Screw, steering damper fixing bracket | M8 | 20 Nm (14.8 lbf ft) | Loctite® 243TM |
| Screw, steering damper clamp on console | M8 | 20 Nm (14.8 lbf ft) | Loctite® 243TM |
| Screw, work stand adapter | M8 | 25 Nm (18.4 lbf ft) | Loctite® 243TM |
| Screw, subframe | M8 | 25 Nm (18.4 lbf ft) | Loctite® 243TM |
| Screw, shift lever | M8 | 25 Nm (18.4 lbf ft) | Loctite® 243TM |
| Screw, side stand bracket | M8 | 25 Nm (18.4 lbf ft) | Loctite® 243TM |
| Screw, ignition lock (ratchet screw) | M8 | Loctite® 243TM | |
| Remaining chassis screws | M8 | 25 Nm (18.4 lbf ft) | - |
| Remaining chassis nuts | M10 | 50 Nm (36.9 lbf ft) | - |
| Rear sprocket bolt | M10x1.25 | 50 Nm (36.9 lbf ft) | Loctite® 243TM |
| Screw, front brake caliper | M10x1.25 | 45 Nm (33.2 lbf ft) | Loctite® 243TM |
| Screw, shock absorber | M10 | 45 Nm (33.2 lbf ft) | Loctite® 243TM |
TECHNICAL DATA - CHASSIS TIGHTENING TORQUES
| Screw, engine bearer | M10 | 45 Nm (33.2 lbf ft) | - |
| Screw, sidestand | M10 | 35 Nm (25.8 lbf ft) | Loctite® 243™ |
| Screw, connecting lever, shock absorber deflector | M10 | 45 Nm (33.2 lbf ft) | Loctite® 243™ |
| Remaining chassis screws | M10 | 45 Nm (33.2 lbf ft) | - |
| Nut of bell crank on frame | M14x1.5 | 100 Nm (73.8 lbf ft) | - |
| Lambda probe | M18x1.5 | 45 Nm (33.2 lbf ft) | - |
| Nut, swingarm pivot | M19x1.5 | 130 Nm (95.9 lbf ft) | Thread greased |
| Screw, seat lock | M22x1.5 | 8 Nm (5.9 lbf ft) | - |
| Nut, rear wheel spindle | M25x1.5 | 90 Nm (66.4 lbf ft) | Thread greased |
| Screw, front wheel spindle | M25x1.5 | 45 Nm (33.2 lbf ft) | - |
| Screw, steering head | M25x1.5 | 18 Nm (13.3 lbf ft) | - |
Brake fluid DOT 4 / DOT 5.1
According to
- DOT
Guideline
- Use only brake fluid that complies with the specified standards (see specifications on the container) and that possesses the corresponding properties. KTM recommends Castrol and Motorex® products.
Supplier
Castrol
- Use only suitable coolant (even in countries with high temperatures). Using inferior antifreeze can result in corrosion and foaming. KTM recommends Motorex® products.
Mixture ratio
| Antifreeze: -25... -45 °C (-13... -49 °F) | 50 % Anti-corrosion/antifreeze 50 % distilled water |
Coolant (mixed ready to use)
| Antifreeze | -40 °C (-40 °F) |
Supplier
Motorex®
Anti Freeze
Engine oil (SAE 10W/50)
According to
- Use only engine oils that comply with the specified standards (see specifications on the container) and that possess the corresponding properties. KTM recommends Motorex® products.
fully synthetic engine oil
Supplier
Motorex®
Power Synt 4T
Engine oil (SAE 5W/40)
According to
- Use only engine oils that comply with the specified standards (see specifications on the container) and that possess the corresponding properties. KTM recommends Motorex® products.
Synthetic engine oil
Supplier
Motorex®
Power Synt 4T
Fork oil (SAE 5)
According to
SAE (p. 239) (SAE 5)
Guideline
- Use only oils that comply with the specified standards (see specifications on the container) and that possesses the corresponding properties. KTM recommends Motorex® products.
Supplier
Motorex®
Racing Fork Oil
Hydraulic fluid (15)
According to
ISOVG(15)
Guideline
- Use only hydraulic fluid that complies with the specified standards (see specifications on the container) and that possesses the corresponding properties. KTM recommends Motorex® products.
Supplier
Motorex®
Hydraulic Fluid 75
Super unleaded (ROZ 95 / RON 95 / PON 91)
According to
-DIN EN 228 (ROZ 95 / RON 95 / PON 91)
Chain cleaner
Specification
- KTM recommends Motorex® products.
Supplier
Motorex®
- Chain Clean 611
Cleaning and polishing materials for metal, rubber and plastic
Specification
- KTM recommends Motorex® products.
Supplier
Motorex®
Protect & Shine 645
High-luster polish for paint
Specification
- KTM recommends Motorex® products.
Supplier
Motorex®
Moto Polish
Long-life grease
Specification
- KTM recommends Motorex® products.
Supplier
Motorex®
Fett 2000
Motorcycle cleaner
Specification
- KTM recommends Motorex® products.
Supplier
Motorex®
Moto Clean 900
Onroad chain spray
Specification
- KTM recommends Motorex® products.
Supplier
Motorex®
- Chain Lube 622 Strong
Universal oil spray
Specification
- KTM recommends Motorex® products.
Supplier
Motorex®
Joker 440 Universal
JASO T903 MA
Different technical development directions required a new specification for 4-stroke motorcycles – the JASO T903 MA Standard. Earlier, engine oils from the automobile industry were used for 4-stroke motorcycles because there was no separate motorcycle specification. Whereas long service intervals are demanded for automobile engines, high performance at high engine speeds are in the foreground for motorcycle and ATV engines. With most motorcycles and ATVs, the gearbox and the clutch are lubricated with the same oil as the engine. The JASO MA Standard meets these special requirements.
SAE
The SAE viscosity classes were defined by the Society of Automotive Engineers and are used for classifying oils according to their viscosity. The viscosity describes only one property of oil and says nothing about quality.
B
Battery
fitting 158
recharging 159
removing 156
Blank time of the LAP button LAP BLANK T
setting 72
Brake disc of tear brake
checking 137
Brake discs, front
checking 136
Brake fluid
front brake, topping up 138
rear brake, topping up 142
Brake fluid level
of front brake, checking 138
of rear brake, checking 141
Brake linings 140
of front brake, checking 140
of rear brake, checking 143
Brakes 95
Braking 95
C
Chain
checking for dirt 129
checking for wear 135
cleaning 130
Chain sliding guard
checking 136
Chain tension
adjusting 132
checking 131
Chassis number
Cleaning
Clutch
checking fluid level 183
correcting fuel level 184
Clutch lever 27
adjusting basic position 183
Combination instrument
activation and test 34
display 35
function buttons, handlebar 33
indicator lamps 37
info display 36
notes/warnings 38
Conservation for winter operation 217
Coolant level
checking 180
Cooling system 179
filling compensating tank 181
E
Electric starter button 31
Emergency OFF switch 30
Engine
running in 86
Engine number 25
Engine oil
changing 194
draining 194
refilling 199
topping up 201
Engine oil level
checking 193
Environment 9
External temperature display
switching on/off 77
F
Fillercap
closing 80
opening 79
Filling up
fuel 97
Flash code
engine control 208-214
immobilizer 206-207
Flasherswitch 29
Foot brake pedal 83
adjusting 129
Footbrake pedal stub
adjusting 128
Footrest position 122
adjusting 122
Fork 105
compression damping, adjusting 105
fork legs, bleeding 108
rebound, adjusting 106
spring preload, adjusting 107
Fork part number 25
Front wheel
fitting 145
removing 144
Fuel reserve display TRIP F RESET
setting 75
Fuse
individual power consumers, changing 163
H
Hand brake lever 27
adjusting basic position 137
Handlebar height 185
adjusting 186
Headlight adjustment
adjusting 175
checking 175
Headlight flasher switch 28
Helmet lock 81
fitting to vehicle 156
High beam bulb changing 168
Horn button 29
1
Ignition key activating/deactivating 176
Ignition lock 30
K
Key number 24
Kilometers/miles SET KM/MILES setting 76
L
Lap times displaying 68
Light switch 28
Loading the vehicle 87
Low beam bulb changing 165
Luggage 87
M
Main fuse changing 161
Maintenance 8
Materials 8
Maximum speed displaying 69
Motorcycle cleaning 215
jacking up front 103
jacking up rear 104
taking front off work stand 103
taking rear off work stand 104
N
Number of laps SET NUM LAPS setting 74
0
Oil filter changing 194 fitting . 199 removing . 197
Oil screen cleaning 194
Operating instructions basics 16
P
Parking 96
Parking light bulb
changing 172
Passenger footrests 82
Passenger seat
mounting 155
removing 155
Play in gas Bowden cable
adjusting 185
Putting into operation
advice on first use 85
after storage 219
checks to be made before putting into operation 89
R
RACE mode
setting 70
Rear frame position 188
adjusting 189
Rear hub shock absorber
checking 151
Rear sprocket / engine sprocket
checking for wear 134
Rear wheel
fitting 148
removing 146
Riding 92
starting up 91
ROAD mode
setting 70
s
Seat
fitting 154
removing 154
Seat lock 81
Service schedule 99-102
SET ^ C / ^ F temperature unit
setting 77
SET CLOCK
setting 70
Shift lever 82
adjusting 124
Shift lever stub
adjusting 124
Shift speed RPM1/2
adjusting 71
Shifting 92
Shock absorber 105
compression damping, general 109
compression damping, high-speed, adjusting 111
compression damping, low-speed, adjusting 109
rebound damping, adjusting 112
spring preload, adjusting 112
Shock absorber part number 26
Side stand 84
Spare parts, accessories 8
Starting 90
Steering damper 115
adjusting 115
Steering damper part number 26
Steering lock 30
Stopping 96
Storage 218
Supporting strap 80
T
Technical data
chassis 225-227
chassis tightening torques 231-233
engine 220-221
engine tightening torques 222-224
fork 228
shock absorber 229-230
Tire air pressure
checking 153
Tire condition
checking 151
Transport 9
Troubleshooting 203-205
Type label 24
V
Vehicle level 117
front, adjusting 118
rear, adjusting 120
View of vehicle
front left 20
rear right 22
W
Warranty 8
Work rules 9

3211307en
- Symbols used
- Formats used
- Use definition
- Info
- Maintenance
- Warranty
- Materials
- Spare parts, accessories
- Work rules
- Transport
- Note
- Environment
- Overview of labels
- ACHTUNG
- ATTENZIONE
- Notes/warnings
- Grades of risks
- Danger
- Warning
- Operating instructions
- Reporting safety defects
- Noise emission warranty
- Tampering warning
- Operating noise warning
- Consumer rights
- View of vehicle, front left side
- VIEW OF VEHICLE
- Chassis number/type label
- Key number
- Engine number
- Fork part number
- Shock absorber part number
- Steering damper part number
- Clutch lever
- Hand brake lever
- Light switch
- Possible states
- Headlight flasher switch
- Flasher switch
- Horn button
- Ignition/steering lock
- Emergency OFF switch
- Electric starter button
- Combination instrument - overview
- Combination instrument - function buttons on handlebar
- Combination instrument - activation and test
- Activation
- Test
- Display
- Info display
- Indicator lamps
- Notes/warnings on the combination instrument
- ODO menu
- Condition
- FUELDISTANCE menu
- FUELRANGE menu
- DISTANCE TO Next Service menu
- LAPSTOGO menu
- TOPSPEED menu
- Best!
- LAP/BESTLAP/LastLap menu
- LAP/BESTLAP/TopSpeed menu
- Total distance menu in Race mode RACEODO
- SET-UP menu
- CHANGE MODE menu
- SET CLOCK menu
- SETTINGSMenu
- SHIFT RPMS menu
- LAP menu, LAP BLANK T button
- SET NUM LAPS menu
- TRIP F RESET menu
- UNITS menu
- SET KM/MILES menu
- SET ° C / ° F menu
- OPTIONS menu
- TPMS menu
- OUTERTEMP menu
- Displaying lap times
- Displaying maximum speed
- Setting ROAD or RACE mode
- Setting the clock with SET CLOCK
- Adjusting shift speed RPM1/2
- Info At d
- Setting the blank time of the LAP button LAP BLANK T
- Setting the number of laps SET NUM LAPS
- Setting the fuel reserve display TRIPF RESET
- Setting the kilometers/miles SET KM/MILES
- Setting the temperature unit SET ° C / ° F
- Switching the external temperature display on/off
- Opening the filler cap
- Closing the filler cap
- Supporting strap
- Seat lock
- Helmet lock
- Passenger footrests
- Shift lever
- Foot brake pedal
- Side stand
- Advice on first use
- Running the engine in
- Loading the vehicle
- Checks to be made before putting into operation
- Starting
- Info Do r
- Starting up
- Shifting, riding
- Braking
- Stopping, parking
- Refueling
- Jacking up motorcycle front
- Taking front of motorcycle off work stand
- Jacking up motorcycle rear
- Taking rear of motorcycle off work stand
- Fork/shock absorber
- Adjusting compression damping of fork
- Adjusting rebound damping of fork
- Adjusting spring preload of fork
- Bleeding fork legs
- Compression damping of the shock absorber
- Adjusting the low-speed compression damping of the shock absorber
- Adjusting high-speed compression damping of the shock absorber
- Adjusting rebound damping of the shock absorber
- Adjusting spring preload of shock absorber
- MAINTENANCE WORK ON CHASSIS AND ENGINE
- Steering damper
- Adjusting the steering damper
- Vehicle level
- Adjusting front vehicle level
- Info Loos
- Adjusting the vehicle level at the rear
- Footrest position
- Adjusting footrest position
- Adjusting shift lever stub
- Adjusting shift lever
- Adjusting the footbrake pedal stub
- Adjusting the footbrake pedal
- Checking for chain dirt
- Cleaning the chain
- Checking the chain tension
- Adjusting the chain tension
- Checking rear sprocket / engine sprocket for wear
- Checking chain wear
- Checking chain sliding guard
- Checking the front brake discs
- Checking the rear brake disc
- Adjusting the basic position of the handbrake lever
- Checking brake fluid level of front brake
- Topping up brake fluid of front brake
- Brake linings
- Checking the front brake linings
- Checking rear brake fluid level
- Topping up rear brake fluid
- Checking the rear brake linings
- Removing front wheel
- Fitting front wheel
- Installing the rear wheel
- Checking rear hub shock absorbers
- Tire condition checking
- Checking tire air pressure
- Removing the seat
- Fitting the seat
- Removing passenger seat
- Fitting the passenger seat
- Mounting helmet lock on vehicle
- Removing the battery
- Installing the battery
- Recharging the battery
- Changing the main fuse
- Info The
- Info A re:
- Info If th
- Changing the fuses of individual power consumers
- Tip
- Changing the low beam bulb
- Changing the high beam bulb
- Changing the parking light bulb
- Checking headlight adjustment
- Adjusting headlamp range
- Activating/deactivating ignition key
- Loss of a black ignition key (second black ignition key available):
- Loss of both black ignition keys (no black ignition key available):
- Activating ignition key:
- Checking the coolant level
- Filling the cooling system compensating tank
- Alternative 1
- Alternative 2
- Adjusting basic position of clutch lever
- Info Turn
- Checking fluid level of hydraulic clutch
- Correcting fluid level of hydraulic clutch
- Adjusting gas Bowden cable
- Handlebar height
- Adjusting the handlebar height
- Adjusting the high position of the handlebar stubs:
- Adjusting the low position of the handlebar stubs:
- Rear frame position
- Adjusting the rear frame position
- Setting a higher seat position:
- Setting a lower seat position:
- Checking engine oil level
- Changing engine oil and filter, cleaning oil screen
- Draining engine oil, cleaning oil screens
- Removing oil filter
- Fitting oil filter
- Filling up with engine oil
- Topping up engine oil
- ENGINE CONTROL FLASH CODE
- Cleaning motorcycle
- Conservation for winter operation
- Storage
- Putting into operation after storage
- TECHNICAL DATA - ENGINE TIGHTENING TORQUES
- Capacity - fuel
- TECHNICAL DATA - CHASSIS TIGHTENING TORQUES
- Brake fluid DOT 4 / DOT 5.1
- According to
- Guideline
- Supplier
- Castrol
- Mixture ratio
- Coolant (mixed ready to use)
- Motorex®
- Engine oil (SAE 10W/50)
- Engine oil (SAE 5W/40)
- Fork oil (SAE 5)
- Hydraulic fluid (15)
- Super unleaded (ROZ 95 / RON 95 / PON 91)
- Chain cleaner
- Specification
- Cleaning and polishing materials for metal, rubber and plastic
- High-luster polish for paint
- Long-life grease
- Motorcycle cleaner
- Onroad chain spray
- Universal oil spray
- JASO T903 MA
- SAE
- B
- Battery
- Blank time of the LAP button LAP BLANK T
- Brake disc of tear brake
- Brake discs, front
- Brake fluid
- Brake fluid level
- Brake linings 140
- Brakes 95
- Braking 95
- C
- Chain
- Chain sliding guard
- Chain tension
- Chassis number
- Cleaning
- Clutch
- Clutch lever 27
- Combination instrument
- Conservation for winter operation 217
- Coolant level
- Cooling system 179
- E
- F
- Fuse
- H
- P
- R
- s
- T
- Technical data
- Tire air pressure
- Tire condition
- V
- W
Brand : KTM
Model : 1190 RC8
Category : Sport Motorcycle