POMS5000 - Slicer Point - Free user manual and instructions
Find the device manual for free POMS5000 Point in PDF.


| Product Type | Electric Meat Slicer |
| Brand | Point |
| Model | POMS5000 |
| Blade Diameter | 9.5 inches (approx.) |
| Maximum Cut Thickness | 15 mm |
| Material | Stainless steel blade, aluminum housing |
| Power Supply | 120 V, 60 Hz, 150 W |
| Dimensions (L x W x H) | 22 x 16 x 14 inches |
| Weight | 18 lbs |
| Functions | Adjustable thickness control, continuous slicing |
| Safety Features | Blade guard, non-slip feet, safety switch |
| Cleaning | Removable carriage and blade for easy cleaning |
| Maintenance | Periodic blade sharpening required |
| Accessories Included | Food pusher, sharpener |
| Certifications | ETL, CE compliant |
| Warranty | 1 year limited warranty |
Frequently Asked Questions - POMS5000 Point
User questions about POMS5000 Point
0 question about this device. Answer the ones you know or ask your own.
Ask a new question about this device
Download the instructions for your Slicer in PDF format for free! Find your manual POMS5000 - Point and take your electronic device back in hand. On this page are published all the documents necessary for the use of your device. POMS5000 by Point.
USER MANUAL POMS5000 Point
Thank you for purchasing your new POINT Mandoline Slicer. These operating instructions will help you use it properly and safely. We recommend that you spend some time reading this instruction manual in order that you fully understand all the operational features it offers. Read all the safety instructions carefully before use and keep this instruction manual for future reference.
Before using the electrical appliance, basic precautions should always be followed, including the following:
- Read all the instructions.
- Before use, ensure that the voltage of your wall outlet matches the one on the rating plate, which is on the bottom of the appliance.
- Always unplug the appliance from the wall socket if you leave it unattended and before assembling, disassembling or cleaning.
- This appliance can be used by persons (including children) with reduced physical, sensory or mental capabilities, or lack of experience and knowledge if they are supervised or have been instructed on the safe use of the appliance by a person responsible for their safety.
- Children should be supervised to ensure that they do not play with the appliance.
- Keep the appliance and its cord out of reach of children.
- Do not operate the appliance with a damaged cord or plug, if the appliance malfunctions, or if it is dropped or damaged in any manner. Return the appliance to the nearest authorized service center for examination, repair or electrical or mechanical adjustment.
- Do not leave the appliance unattended while it is operating.
- Do not touch the moving parts or disassemble the machine when it is working.
- Do not let the cord hang over the edge of a table or counter or touch hot surfaces.
- To protect against the risk of electrical shock, do not put the appliance in water or other liquids and do not put it in a dishwasher. This may cause personal injury or damage to the product.
- Close supervision is necessary when your appliance is being used near children or persons with reduced capabilities.
- This appliance shall not be used by children.
- Do not place the appliance on or near a hot gas stove or in a heated oven, a microwave oven, or refrigerator to avoid product damage.
- This machine cannot be used to process hard ingredients, such as frozen ingredients and similar ingredients.
- Do not operate the appliance for other than its intended use.
- The appliance is intended for household use.
- Do not use the product outdoors.
- Do not use attachments or accessories which are not recommended by the manufacturer. They may cause malfunction or injury.
- The blades are sharp. Please handle with care.
- After 3 minutes of continuous work, it is recommended to let it rest for 5 minutes before reuse. After 3 cycles of continuous work, allow the product to cool for 30 minutes before reusing it to ensure product longevity.
- Cleaning and user maintenance shall not be carried out by children without supervision.
- Keep these instructions for future reference.
PRODUCT OVERVIEW
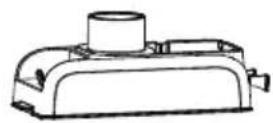
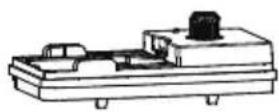

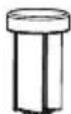
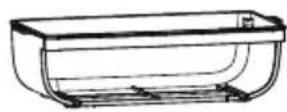

Main engine
Pusher/Blade holder/Fee
Container shell
Container
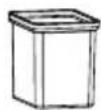


Potato waffle/wave

6×9mm potato chip

2.5mm slicer
Blade storage box

3.5mm slicer
Cleaning brush

4.5×5mm julienne
Before first use
- Carefully unpack your mandoline slicer and remove all packaging materials.
- Clean the appliance according to the "Cleaning and maintenance" section.
- Important: Blades are very sharp. Handle with care. Ensure the mandoline slicer is unplugged before assembling or removing attachments.
Assembling the product
Ensure the product is placed on a flat surface.
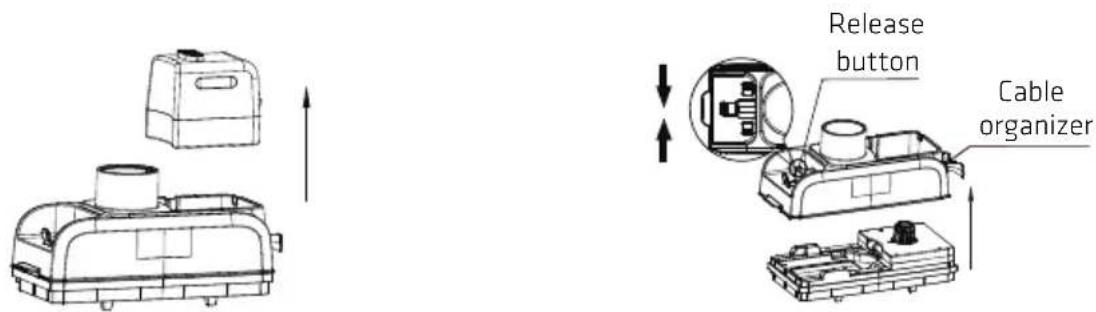
- Remove the main engine. 2. Pinch the two release buttons on the feed
port inward, then lift the feed port out with the other hand to detach it from the blade holder.
(Note: The appliance defaults to the "waffle" mode.)

- Follow the instructions next to the rotation button. Rotate the button until the two triangular marks align. Place the desired blade into the blade groove and secure it.
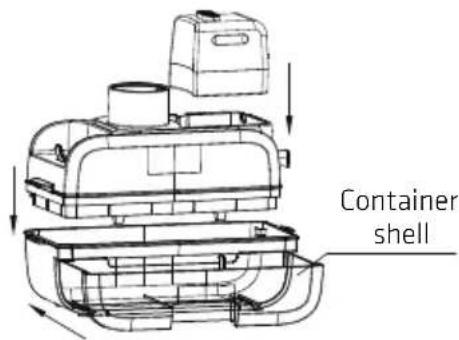
- Place the entire assembled module from the previous steps onto the container shell. Then, insert the main engine into the slot on the feed port. (Note: The container must be secured for the appliance to enter standby mode.)
Disassembling the product

- Remove the main engine and pusher.
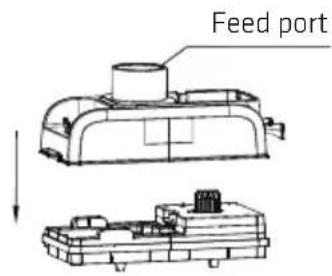
- Attach the feed port to the blade holder until you hear a click, indicating the installation is complete.

- Place the prepared ingredients into the feed port. Press and hold the switch button while using the pusher to cut the ingredients. After cutting, release the switch button, pull out the container, and remove the processed ingredients. (Note: You must press and hold the pusher to achieve the waffle effect.)

- Pinch the two release buttons on the feed port inward, then lift it out with the other hand to detach it from the blade holder.

- Rotate the button on the blade holder to align the two triangle marks. Remove the blade by pinching the slot on each side of the blade holder upward with two fingers. (Note: The blade is sharp, do not touch the blade directly.)

- Pull the container out of the container shell.
OPERATION
- Select the desired blades and prepare the appliance as described in the "Assembling the product" section.
- Prepare the required ingredients. Wash and cut them into appropriate sizes, ensuring they fit the feed port to avoid jamming.
- Press and hold the switch button while pressing the pusher to start cutting.
- Processed ingredients will drop into the container.
- Release the power switch to stop the appliance.
Note:
- Turn on the product and test it to ensure it operates normally, without abnormal noise or vibration, before processing food.
- If any abnormality is found, stop using it immediately and inspect.
Blade holder mode operation
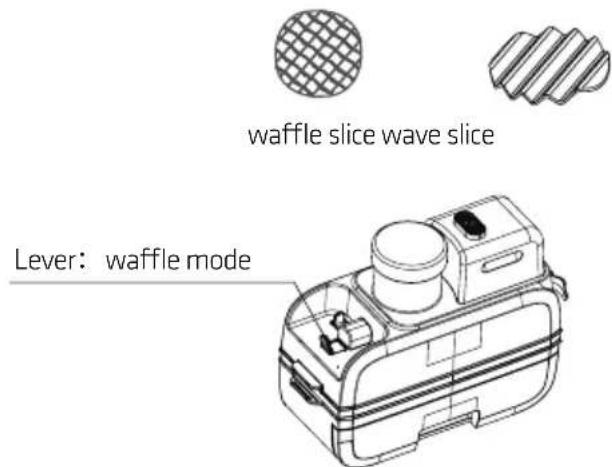
Two modes are available: "Waffle" and "Others." Push the lever to select the desired mode for processing ingredients.
Note:
- Use the waffle blade only in "Waffle" mode. Other blades may not cut effectively.
- Do not change modes while the product is operating; switch modes only when the product is in standby.
- Ensure that all parts are securely installed. (1) The blade should be properly inserted into the blade holder slot. (2) The feed port and blade holder should be properly installed.
- Do not overload the product to avoid damage.
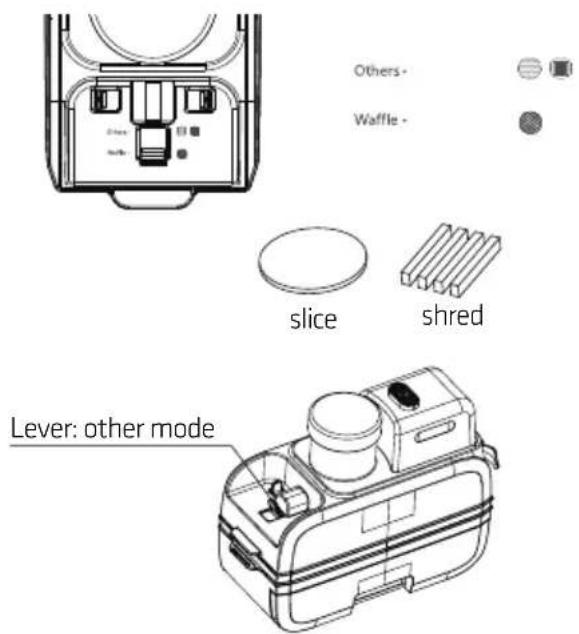
- Slicing: To slice ingredients, install the 2.5mm or 3.5mm slicing blade and set the lever to "Others" mode.
- Shredding: To shred ingredients, install the 6×9mm potato chip blade or the 4.5×5mm julienne blade and set the lever to "Others" mode.
Note:
- Do not operate the product with wet hands and ensure the environment is dry.
- Avoid shaking or moving the product during operation to prevent instability and safety hazards.
- The blade is very sharp. When removing the blade holder, avoid direct contact with the blade to prevent injury.
- When cutting ingredients, ensure that the size is suitable for the feed port to avoid jams.
- Clean the container after processing 3 to 5 ingredients to prevent blockage.
- Use the machine intermittently to prolong its working life.
Cleaning and Maintenance
- Unplug the appliance when it's not in use and before cleaning.
- Clean the appliance immediately after each use.
- Do not use any aggressive or abrasive cleaning agents of solvents or steel wool to clean the appliance.
- Do not scrape off stubborn dirt with hard items.
- Clean the accessories with warm water using a small amount of washing-up liquid or put them in a dishwasher.
- The accessory attachments are very sharp, so handle them carefully when cleaning them.
- Wipe the outside of the motor unit with a soft, damp cloth after each use.
- Dry all parts before reusing or storing them in a cool and dry place.
Note:
- Do not immerse the motor unit in water or other liquids, and do not put it in the dishwasher.
- Each blade can be cleaned with a brush to ensure that the holes remain unobstructed, preventing any blockage that may affect the cutting performance.
- It is strictly prohibited to perform high-temperature sterilization on any part of this product.
TROUBLESHOOTING
| If you experience any of the following faults during the use of the product,please check and deal with them according to the following table. | ||
| Problem | Cause | Treatment |
| The appliance does not work. | Poor contact between the power plug and the socket. | 1. Re-plug the power cord.2. Try a different power socket and try again. |
| The appliance suddenly stops operating. | Excessive amount of ingredients or extended use time. | Disconnect from the power supply.Remove the excess and try again.Let the product cool for 20-30 minutes before use. |
| Product won’t start after pressing switch button. | The container is not in place. | Clean up ingredient residues in the container to ensure safety switch can be activated. |
| Failure to switch from the “others” mode to the “waffle” mode. | The internal clutch is stuck and cannot be reset. | Gently tap on the feed port to reset internal spring. |
| Uneven thickness and irregular slices occur when cutting ingredients in "waffle" mode. | Lack of continuous pressure on the pusher. | Press and hold the pusher to drive ingredients for cutting. |
| ENERGY CONSUMPTION | |
| Information on power consumption and the maximum time to reach the applicable low power condition: | |
| Power consumption in off mode: | <0.1 W |
| The maximum time needed to reach off mode: | Immediate after the power switch is turned to OFF |
SPECIFICATIONS
Model: POMS5000
Rated voltage: 220-240V ~ 50/60Hz
Rated power: 100W
ENVIRONMENTALLY FRIENDLY DISPOSAL
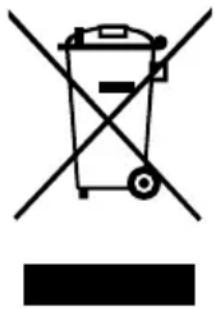
This symbol on the product or in the instructions means that your electrical and electronic equipment should be disposed at the end of its life separately from your household waste. There are separate collection systems for recycling in the EU. For more information, please contact the local authority or your retailer where you purchased the product.
Power International AS,
PO Box 523, N-1471 Lørenskog, Norway
Power Norge:
https://www.power.no/kundeservice/
T: 21 00 40 00
Expert Danmark:
https://www.expert.dk/kundeservice/
T: 70 70 17 07
Power Danmark:
https://www.power.dk/kundeservice/
T: 70 33 80 80
Punkt 1 Danmark:
https://www.punkt1.dk/kundeservice/
T: 70 70 17 07
Power Finland:

- Pull the tank out of the tank body.
USE
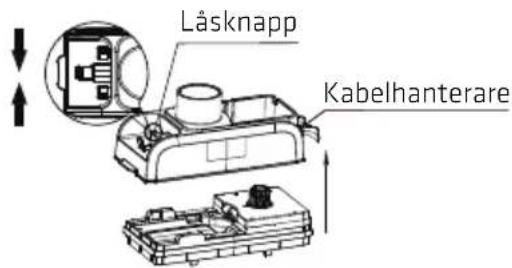
- Follow the instructions next to the rotation button. Rotate the button until the two triangular marks align. Place the desired blade into the blade groove and secure it.






Brand : Point
Model : POMS5000
Category : Slicer