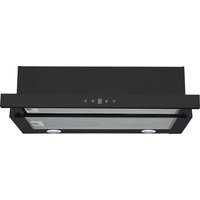
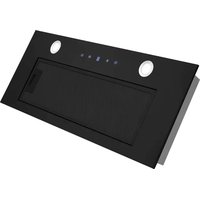
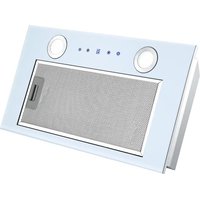
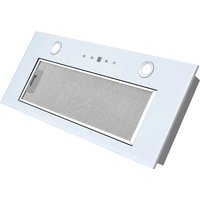
POHO5160TELB5 - Range hood Point - Free user manual and instructions
Find the device manual for free POHO5160TELB5 Point in PDF.


| Product Type | Range Hood |
| Brand | Point |
| Model | POHO5160TELB5 |
| Dimensions (W x D x H) | 60 cm x 50 cm x 15 cm (approximate) |
| Weight | 12 kg (approximate) |
| Power Supply | 220-240 V, 50 Hz |
| Total Power Consumption | 250 W (approximate) |
| Motor Power | 200 W (approximate) |
| Number of Speeds | 3 |
| Max Extraction Rate | 650 m³/h (approximate) |
| Noise Level | 55 dB (maximum speed, approximate) |
| Lighting | LED, 2 x 1.5 W |
| Grease Filter Type | Aluminum mesh, washable |
| Charcoal Filter | Replaceable (in recirculation mode) |
| Functions | Extraction / Recirculation, Touch Controls, Timer |
| Installation | Under cabinet or wall-mounted |
| Energy Class | A+ (approximate) |
| Safety Features | Thermal cut-out, auto shut-off (timer) |
| Spare Parts Available | Filters, LED bulbs, motor, control board |
| Maintenance | Clean grease filters every 2 months; replace charcoal filter every 6-12 months |
| Manual Languages | English, Finnish, Norwegian, Swedish, Danish, and more |
Frequently Asked Questions - POHO5160TELB5 Point
User questions about POHO5160TELB5 Point
0 question about this device. Answer the ones you know or ask your own.
Ask a new question about this device
Download the instructions for your Range hood in PDF format for free! Find your manual POHO5160TELB5 - Point and take your electronic device back in hand. On this page are published all the documents necessary for the use of your device. POHO5160TELB5 by Point.
USER MANUAL POHO5160TELB5 Point
Thank you for purchasing your new Point Cooker Hood.
These operating instructions will help you use it properly and safely. We recommend that you spend some time reading this instruction manual in order that you fully understand all the operational features it offers. Read all the safety instructions carefully before use and keep this instruction manual for future reference.
NO
- Never let children operate the machine.
- The cooker hood is for home use only; it is not suitable for barbecues, roast shops, or other commercial purposes.
- The cooker hood and its filter should be cleaned regularly in order to keep in good working condition.
- Clean the cooker hood according to the instruction manual and keep the unit from danger of burning. There is a fire risk if cleaning is not carried out in accordance with the instructions.
- Do not bake or grill food directly over a gas burner under the cooker hood.
- Ensure that the kitchen room is well-ventilated to promote proper airflow.
- If the supply cord is damaged, do not attempt to repair it yourself. Contact the manufacturer, its service agent, or a similarly qualified person for replacement and avoid any potential hazards.
- Use the range hood in an area with adequate ventilation when using other appliances that burn gas or other fuels.
- Do not discharge the air into a flue that is used for exhausting fumes from appliances burning gas or other fuels.
- Comply with regulations for the discharge of air.
- This appliance can be used by children aged 8 years and above and persons with reduced physical, sensory, or mental capabilities or lack of experience and knowledge if they have been given proper supervision or instruction on how to use the appliance safely and understand the hazards involved. Children should be supervised to ensure that they do not play with the appliance.
- Cleaning and user maintenance shall not be done by children without supervision.
- Do not use an open flame under the range hood.
- CAUTION: Accessible parts may become hot when used with cooking appliances.
Electrical Shock Hazard
- Only plug this unit into a properly earthed outlet. If in doubt, seek advice from a qualified engineer.
- Failure to follow these instructions can result in death, fire, or electrical shock.
COMPONENTS

Part 1: Screw Plug X 6
Part 2: 4*30mm Screws X 6
Part 3: 4*8mm Screws X 2
Part 4: Manual X 1
Part 5: Cooker Hood X 1
Part 6: Back bracket X 1
INSTALLATION
Prepare for installation:
A. If you have an outlet that leads outside, it is possible to connect your cooker hood to an extraction duct using materials such as enamel, aluminum, flexible pipe, or inflammable material with an interior diameter of 150mm, as shown in the picture below.

B. Before installation, turn the unit off and unplug it from the outlet.
C. The cooker hood should be placed at a distance of 65~75cm above the cooking plate for the best effect.


Attention! Observe the warning in the instruction sheet concerning the operation of the appliance when air is discharged from the room.
Way one:
- To install onto the wall, drill 2 holes of ∅8mm on a suitable place according to the centre distance of hole in the back of the cooker hood.
- Insert the screw plugs into the holes. Insert the 4*30mm screws into the screw plugs, do not lock too tight them first. Then put the cooker hood onto the two screws and lock the screws tight.
Remark: If the cooker hood is installed at the bottom of the cabinet, please follow Way 2 below.
Way Two:
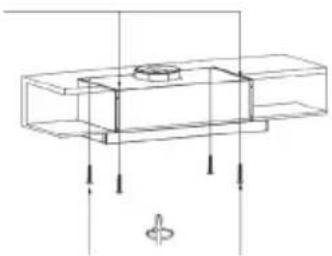
- Use four 4 * 30mm screws to lock into the corresponding position of the cabinet to fix the cook hood.

- If there is a gap between the hood and the wall, you can install the Back Bracket, as shown in the figure, use two 4*8 screws to fix the back Bracket on the hood, and adjust the position of the back Bracket to the wall according to the actual situation.
Note:
- The extensible pipe is an optional accessory, not supplied.
- Make sure you remove the tape on the air flow and check if the air flow opens and closes freely, otherwise it makes noises, and the cooker hood will be shaking.

Carbon filter replacement
- Carbon filters can be used to trap odors. In order to install the carbon filter, the aluminum filter should be detached first. Press the lock and pull it down.

- Place the carbon filter into the unit and turn it anti-clockwise to lock it in place.

- If the carbon filter needs to be replaced, please turn it in the clockwise direction.
Note:
- The carbon filter is an optional accessory, not supplied.
- Make sure the carbon filter is securely locked.
- When the carbon filter is installed, suction ability will be reduced.
- The carbon filter should be changed every 2-4 months, depending on the conditions of use.
LED REPLACEMENT
CAUTION:
To prevent electric shock, injury to the body, and even potential risks to life, it is essential to shut down the power before cleaning, repairing, or replacing any accessories. Please ensure that the power is switched off before proceeding with any operation.
- Turn off the hood and unplug the power outlet. Detach the aluminum filters in order for you to replace the LED bulb.
- Remove the aluminum filters.
- Use a straight screwdriver to pry out the LED light.
- Take out the LED light and disconnect the wire terminals.
- Replace with the same power LED light.
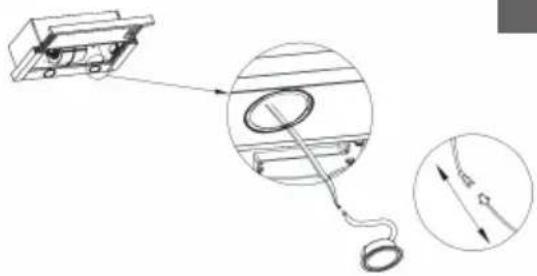
LED light specification
LED light power: 2 x 1.5W
Voltage range: DC 12V
OPERATION
Touch control 1


On/Off button
It's used for turning on/off the fan.

Speed plus button
For increasing the speed of the fan.

Speed decrease button
For decreasing the speed of the fan.

Light button
Press once to turn on the LED light, press again to turn off the LED light.

Digital display
Fan speed display: "1" for Low speed, "2" for Medium speed, "3" for High speed.
MAINTENANCE
Before cleaning, switch the unit off and pull out the plug.
I. Regular Cleaning
When cleaning the unit, it is recommended to use a soft cloth that has been moistened with warm soapy water or household cleaning detergent. Avoid using metal pads, chemical cleaners, abrasive materials, or stiff brushes, as these can damage the unit.
II. Monthly Cleaning of Aluminum filter
ESSENTIAL: Clean the aluminum filters every month will help prevent the risk of fire.
The filter collects grease, smoke and dust, so the filter directly affects the cooker hood's efficiency. The grease residue (potential flammable) will saturate on the filter if not cleaned.
Clean it with household cleaning detergent.
III. Carbon Filter
The carbon filter should be changed every 2-4 months, depending on the conditions of use. Replace more often if your cooking style generates lots of grease, such as stir-frying. These filters are not washable and cannot be reused. Refer to "Carbon filter replacement" part for the replacement method.
TROUBLESHOOTING
| Fault | Cause | Solution |
| Light on, but fan does not work | The fan blade is jammed. | Switch off the unit and have it repaired by qualified service personnel only. |
| The motor is damaged. | ||
| Both light and fan do not work | Light bulb burned. | Replace the bulb with correct rating. |
| Power cord loose. | Plug into the power supply again. | |
| Serious Vibration of the unit | The fan blade is damaged. | Switch off and have it repaired by qualified service personnel only. |
| The fan motor is not fixed tightly. | Switch off and have it repaired by qualified service personnel only. | |
| The unit is not hung properly on the bracket. | Take down the unit and check whether the bracket is in proper location. | |
| Suction performance not good | Too long distance between the unit and the cooking plane. | Readjust the distance to 65-75 cm. |
| Cooker hood | Data sheet | ||
| Brand name POINT | |||
| Model | POH05160TELB5 | ||
| Annual Energy Consumption | AEChood | 10.9 | kWh/a |
| Fluid Dynamic Efficiency | FDEhood | 26 | - |
| Energy Efficiency Index | EEIhood | 37.8 | - |
| Measured air flow rate at best efficiency point | QBEP | 155.8 m3/h | |
| Measured air pressure at best efficiency point | PBEP | 130 | Pa |
| Maximum air flow at boost position | - | / | m3/h |
| Maximum air flow at highest setting | Qmax | 359.6 | m3/h |
| Maximum air flow at Lowest setting | - | 214.6 | m3/h |
| Measured electric power input at best efficiency point | WBEP | 21.6 | W |
| Nominal power of the lighting system | WL | 3 | W |
| Average illumination of the lighting system on the cooking surface | Emiddle | 62 | lux |
| Lighting Efficiency | LEhood | 21 | lux/W |
| Grease filtering Efficiency | GFEhood | 65.7 | - |
| Measured power consumption in standby mode | Ps | / | W |
| Measured power consumption off mode | Po | 0.3 | W |
| Sound power level L | WA | Highest setting: 62Lowest setting: 50 | dB |
SPECIFICATION
Model No.: POH05160TEL85
Rated Voltage: AC220-240V 50Hz
Rated motor power: 40W
Lamp power: 2 x 1.5W
Total power: 43W
This symbol on the product or in the instructions means that your electrical and electronic equipment should be disposed at the end of its life separately from your household waste. There are separate collection systems for recycling in the EU. For more information, please contact the local authority or your retailer where you purchased the product.
Power International AS, PO Box 523, N-1471 Lørenskog, Norway
Power Norge:
https://www.power.no/kundeservice/
T: 21 00 40 00
Power Danmark:
https://www.power.dk/kundeservice/
T: 70 33 80 80
Punkt 1 Danmark:
https://www.punkt1.dk/kundeservice/
T: 70 70 17 07
Power Finland:
Part 1: Screw Plug X 6
Part 2: 4*30mm Screws X 6
Part 3: 4*8mm Screws X 2
Part 4: Manual X1
Part 5: Cooker Hood X1
Part 6: Back Bracket x 1
INSTALLATION

Replacing the carbon filter

Part 1: Screw Plug X 6
Part 2: 4*30mm Screws X 6
Part 3: 4*8mm Screws X 2
Part 4: Manual X1


LED light specification
LED light power: 2 x 1.5 W
Voltage range: DC 12V
OPERATION
Touch control 1


On/Off button
Part 1: Rawlplugs X 6
Part 2: 4*30 mm screws X 6
Part 3: 4*8 mm screws X 2
Part 4: User manual X 1
Part 5: Range hood X 1
Part 6: Rear mounting bracket X1
INSTALLATION

Part 1: Wall plugs x 6
Part 2: 4*30 mm screws x 6
Part 3: 4*8 mm screws x 2
Part 4: Manual x1
Part 5: Range hood x1

Replacing the carbon filter
- If the carbon filter needs to be replaced, please turn it in the clockwise direction.
Note:
USAGE
Touch control 1


Power switch
Speed, plus button
Speed, plus button

- NO
- ELECTRICAL SHOCK HAZARD
- COMPONENTS
- INSTALLATION
- PREPARE FOR INSTALLATION
- ATTENTION! OBSERVE THE WARNING IN THE INSTRUCTION SHEET CONCERNING THE OPERATION OF THE APPLIANCE WHEN AIR IS DISCHARGED FROM THE ROOM
- WAY ONE
- WAY TWO
- NOTE
- CARBON FILTER REPLACEMENT
- LED REPLACEMENT
- CAUTION
- LED LIGHT SPECIFICATION
- OPERATION
- TOUCH CONTROL
- ON/OFF BUTTON
- SPEED PLUS BUTTON
- SPEED DECREASE BUTTON
- LIGHT BUTTON
- DIGITAL DISPLAY
- MAINTENANCE
- REGULAR CLEANING
- MONTHLY CLEANING OF ALUMINUM FILTER
- CARBON FILTER
- SPECIFICATION
- REPLACING THE CARBON FILTER
- USAGE
- POWER SWITCH
- SPEED, PLUS BUTTON
Brand : Point
Model : POHO5160TELB5
Category : Range hood