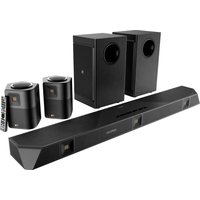
Dragon 11.4.6 - Loudspeaker NAKAMICHI - Free user manual and instructions
Find the device manual for free Dragon 11.4.6 NAKAMICHI in PDF.


| Product Type | Soundbar System |
| Brand | Nakamichi |
| Model | Dragon 11.4.6 |
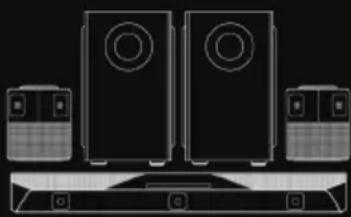
| Channels | 11.4.6 (11 front, 4 subwoofers, 6 up-firing) |
| Total Power Output | 3000W RMS |
| Main Soundbar Dimensions (W x H x D) | 60 x 4.5 x 4.5 inches |
| Subwoofer Type | Wireless, 4 x 10-inch drivers |
| Surround Speakers | Wireless with up-firing drivers |
| Audio Formats | Dolby Atmos, DTS:X |
| Connectivity | HDMI eARC, Optical, Bluetooth 5.0, Wi-Fi |
| Control Methods | Remote control, Nakamichi app |
| Frequency Response | 20Hz – 20kHz |
| Weight (System) | Approximately 120 lbs |
| Power Supply | AC 100-240V, 50/60Hz |
| Warranty | 1 year limited |
| Cleaning Instructions | Wipe with a soft, dry cloth. Do not use liquid cleaners. |
| Safety Precautions | Keep away from moisture, heat sources, and direct sunlight. Do not block ventilation. |
| Spare Parts Availability | Contact Nakamichi customer support for replacement parts. |
| Repair Service | Authorized service centers available; refer to manual for details. |
| General Information | Flagship home theater system for immersive audio experience. |
Frequently Asked Questions - Dragon 11.4.6 NAKAMICHI
User questions about Dragon 11.4.6 NAKAMICHI
0 question about this device. Answer the ones you know or ask your own.
Ask a new question about this device
Download the instructions for your Loudspeaker in PDF format for free! Find your manual Dragon 11.4.6 - NAKAMICHI and take your electronic device back in hand. On this page are published all the documents necessary for the use of your device. Dragon 11.4.6 by NAKAMICHI.
USER MANUAL Dragon 11.4.6 NAKAMICHI
Owner's Manual

Dolby
ATMOS

AHD
IMPORTANT SAFETY INSTRUCTIONS
DRAGON is designed and manufactured to operate within defined design limits, and misuse may result in electric shock or fire. To prevent DRAGON from being damaged, the following rules should be observed for its installation, use and maintenance. Please read the following safety instructions before operating DRAGON. Keep these instructions in a safe place for future reference.
- Read, keep and follow all instructions.
■ Heed all warnings.
■ Do not use DRAGON near water.
■ Clean only with a dry cloth.
■ Do not block any ventilation openings. Install in accordance with the
■ manufacturer's instructions.
■ Do not install near any heat sources such as radiators, heat registers, stoves, or other apparatus (including amplifiers) that produce heat. - Do not defeat the safety purpose of the polarized or grounding-type plug. A polarized plug has two blades with one wider than the other. A grounding type plug has two blades and a third grounding prong. The wide blade or the third prong are provided for your safety. If the provided plug does not fit into your outlet, consult an electrician for replacement of the obsolete outlet.
- Protect the power cord from being walked on or pinched, particularly at plugs, convenience receptacles, and the point where they exit from DRAGON.
■ Only use attachments / accessories specified by the manufacturer.
■ Use only with the cart, stand, tripod, bracket, or table specified by the manufacturer, or sold with DRAGON. When a cart is used, use caution when moving the cart / DRAGON combination to avoid injury from tipover.
■ Unplug DRAGON during lightning storms or when unused for long periods of time.
■ Refer all servicing to qualified service personnel. Servicing is required when DRAGON has been damaged in any way, such as when the power supply cord or plug is damaged, liquid has been spilled or objects have fallen into DRAGON, DRAGON has been exposed to rain or moisture, does not operate normally, or has been dropped.
■ To reduce the risk of electric shock or component damage, switch off the power before connecting other components to DRAGON.
■ Unplug the power cord before cleaning DRAGON. A damp cloth is sufficient for cleaning. Do not use a liquid or a spray cleaner on DRAGON. Do not use abrasive cleaners.
■ Always use the accessories recommended by the manufacturer to ensure compatibility. - When moving DRAGON from an area of low temperature to an area of high temperature, condensation may form in the housing. Wait before turning on DRAGON to avoid causing fire, electric shock, or component damage.
■ Slots and openings in the back and bottom of the cabinet are provided for ventilation. To ensure reliable operation of DRAGON and to protect it from overheating, be sure these openings are not blocked or covered. Do not place DRAGON in a bookcase or cabinet unless proper ventilation is provided. - Never push any objects into the slots and openings on DRAGON's enclosure. Do not place any objects on the top of DRAGON. Doing so could short circuit parts causing a fire or electric shock. Never spill liquids on DRAGON.
■ When connected to a power outlet, power is always flowing into DRAGON. To totally disconnect power, unplug the power cord.
- Do not overload power strips and extension cords. Overloading can result in fire or electric shock.
■ The wall socket should be located near DRAGON and be easily accessible.
- Keep DRAGON away from moisture. Do not expose DRAGON to rain or moisture. If water penetrates into DRAGON, unplug the power cord and contact your dealer. Continuous use in this case may result in fire or electric shock.
- Do not use DRAGON if an abnormality occurs. If any smoke or odor becomes apparent, unplug the power cord and contact your dealer immediately. Do not try to repair DRAGON yourself.
- Avoid using dropped or damaged appliances. If DRAGON is dropped and the housing is damaged, the internal components may function abnormally. Unplug the power cord immediately and contact your dealer for repair.
■ Continued use of DRAGON may cause fire or electric shock.
■ Do not install DRAGON in an area with heavy dust or high humidity.
■ Operating DRAGON in environments with heavy dust or high humidity may cause fire or electric shock.
■ Ensure that the power cord and any other cables are unplugged before moving DRAGON.
■ When unplugging DRAGON, hold the power plug, not the cord. Pulling on the power cord may damage the wires inside the cord and cause fire or electric shock. When DRAGON will not be used for an extended period of time, unplug the power cord.
■ To reduce risk of electric shock, do not touch the connector with wet hands.
■ Insert the remote control batteries in accordance with instructions.
■ Incorrect polarity may cause the battery to leak which can damage the remote control or injure the operator.
■ The marking label of the subwoofer was located on the external bottom enclosure of the product.
■ The equipment shall be used at maximum 95F ambient temperature. See the important note and rating located on the back of the unit.
■ WARNING - This equipment is not waterproof. To prevent a fire or shock hazard, do not place any container filled with liquid near the equipment (such as a vase or flower pot) or expose it to dripping, splashing, rain or moisture.
■ To prevent injury, DRAGON must be securely attached to the floor / wall in accordance with the installation instructions.
■ CAUTION - Danger of explosion or fire if batteries are mistreated.
■ Replace only with the same or specified type.
- Do not leave the batteries exposed to direct sunlight for a long period of time with doors and windows closed. Do not disassemble the batteries or dispose of it in fire.
■ Where the MAINS plug or appliance coupler is used as the disconnect device, the disconnect device shall remain readily operable.
WARNING: To reduce the risk of fire or electric shock, do not expose DRAGON to rain or moisture.


This lightning flash with arrowhead symbol within an equilateral triangle is intended to alert user to the presence of not isolated dangerous voltage within the product that may be sufficient magnitude to constitute a risk of shock to persons.

The exclamation point within the equilateral triangle is to alert the user to the presence of important operating and servicing instructions in the literature accompanying the appliance.

Warning: This equipment is a Class II or double insulated electrical appliances. It has been designed in such way that it does not require a safety connection to electrical earth.
Table of Contents
1. Meet DRAGON
Package Contents 5
Controls & Connections 6
2. Set Up
Main Unit and Subwoofers 12
Surround Speakers 13
PerfectHeight Mechanism 14
3. Connect
Power on DRAGON 17
Set up HDMI ARC/eARC with your TV 18
Recommended Device Audio Settings 21
Configure your TV for 4K120/8K60 22
Video Passthrough
Using Bluetooth ® Wireless Audio 23
4. Control
Remote Functions 25
Surround, Equalizer (EQ) & Night Mode (DRC) 27
5. Personalize
BASS and Treble 32
Channel Configuration 33
Subwoofer Adjustments 34
Channel Volume Adjustments 35
Height Channel Volume 36
Adaptive Height Dispersion 37
Save your Favorite Settings 38
Using the INFO button 39
6. On-Screen Display
Using the OSD 42
Audio Settings 43
Video Settings 44
Calibration Settings 45
System Settings 49
7. Surround Demo & Channel Test Tracks 53
8. Mobile Application
Installation 55
Functions
9. Firmware Upgrade
Check the Firmware Version 57
Perform a Firmware Upgrade 57
10. Reconnect Components
Check Wireless Components 60
Connection Status
Re-pairing Subwoofers 61
Re-pairing Surround Speakers 63
11. Product Information
Specifications 67
Glossary 70
Legal and Compliance 72
12. Support
Warranty Information 75
Sound Optimization Tips 76
Help & Troubleshooting 78
Learn more about DRAGON's advanced functions by scanning the QR Code or visiting: bit.ly/dragon-advanced-guide
13.1 CONNECTING YOUR TV VIA DIGITAL OPTICAL / AUX IN
13.2 EXTERNAL AUDIO OUTPUT
13.3 INTEGRATE DRAGON WITH LEARNING UNIVERSAL REMOTES

SECTION 1
MEET DRAGON
1.1 Package Contents

DRAGON main unit x 1

Dual 8" Wireless Subwoofers x 2 Omni-Motion
Reference Surrounds x 2

Remote Control w/ Batteries x 1

HDMI 2.1 Cable x 1
(Length: 6.5 ft)

Surround Speaker Power Cables x 2
Subwoofer Power Cables x 2
(Length: 10 ft each)

Main Unit
Power Cable x 1
(Length: 5 ft)

Main Unit Power Adapter x 1
(Length: 5 ft)
1.2 Controls & Connections
A. Main Unit
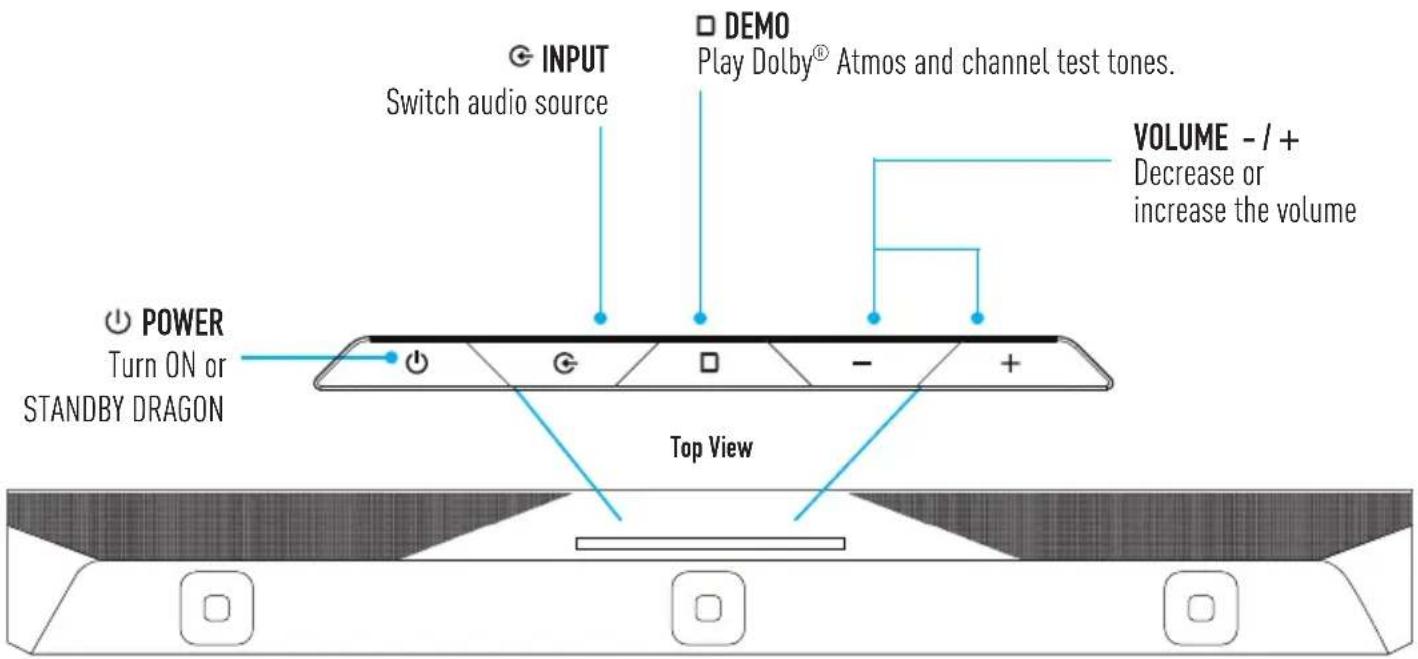
Bottom View
![HOMI IN[4] HOMI IN[3] HOMI IN[2] HOMI OUT (TV) (oARC/ARC)[1] AUX OUT OPT OUT AUX IN OPT IN USB DC IN](/content/2026/07/1459730/images/9db8a0b5ebac653b064e3ceecbf0963bbbbc5418e54b12ab059a656090f2fb86.jpg)
BEST
| HDMI IN[2] / [3] / [4]: | HDMI 2.1 input* |
| HDMIOut (TV) [1]: | HDMI 2.1 output with ARC/eARC* |
*All the HDMI inputs and output support 4K120, 8K60, Dolby Vision, 4K HDR Passthrough, HDCP 2.3, VRR, ALLM, QFT
| Aux Out | 3.5mm stereo analog audio output |
| Opt Out | Optical audio output |
| Aux In | 3.5mm stereo analog audio input |
| Opt In | Optical audio input |
| USB | For firmware upgrade only |
| DC IN | Power Supply |
1.2 Controls & Connections
B. Quad Subwoofers
Back of Subwoofers

Left Subwoofer Right Subwoofer
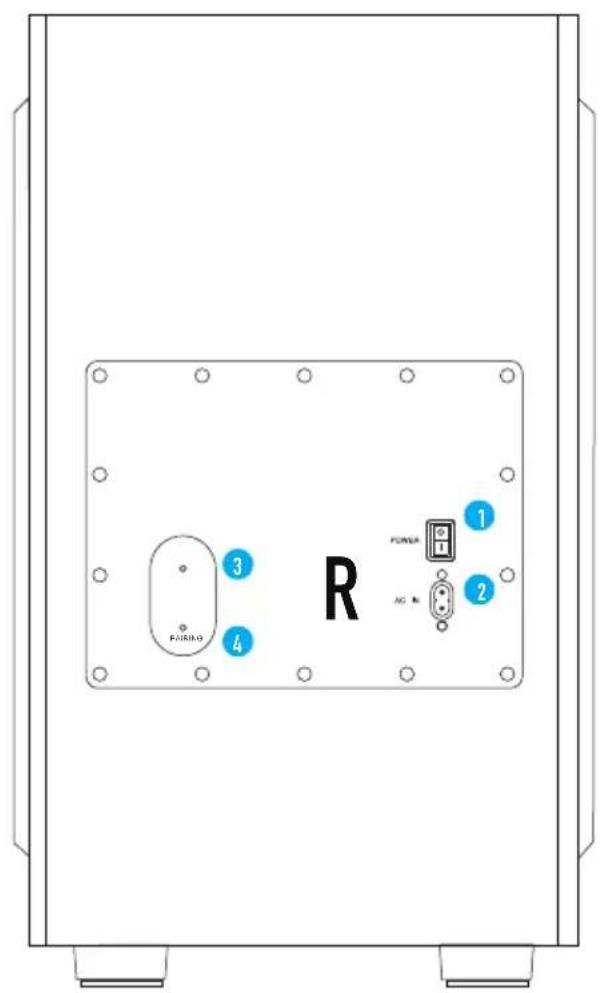
1 Power Switch
2 Power Port
3 Pairing Status Indicator
4 Pairing Button
1.2 Controls & Connections
C. Omni-Motion Reference Surrounds
Back of Surround Speakers

Top of Surround Speaker
Pairing Button with Status Indicator
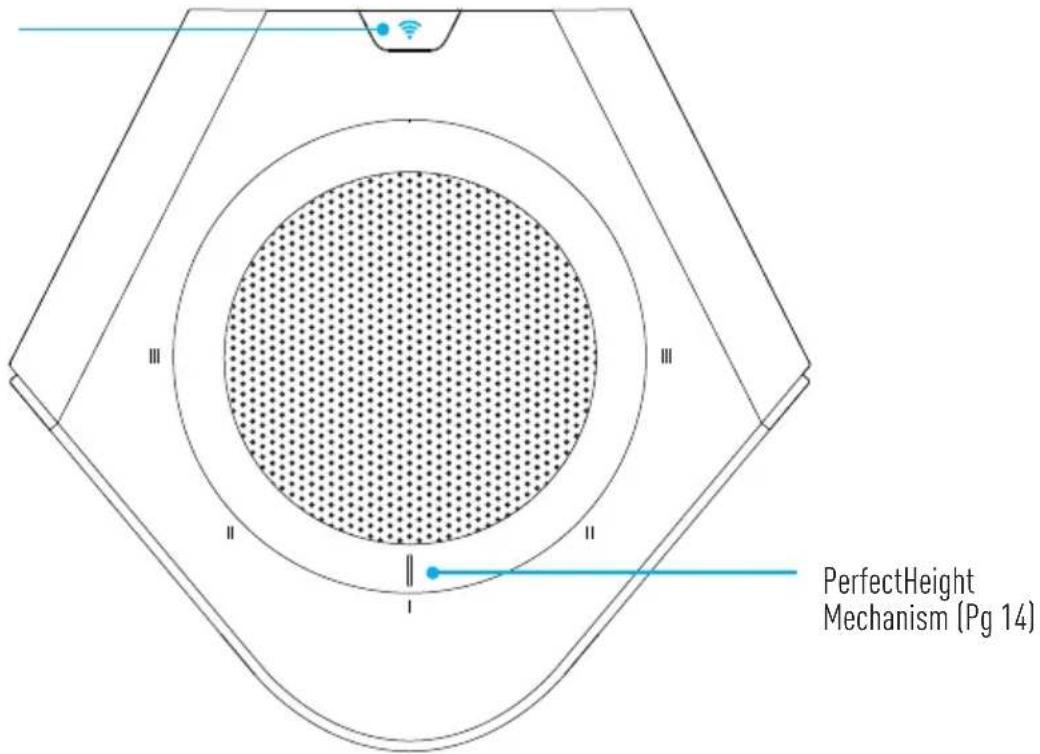
1.2 Controls & Connections
D. Remote Control
Insert Batteries before using the Remote Control (AAA Batteries x 2)
- Gently slide the back cover in the direction indicated by the arrow until it is fully detached.
- Insert 2 x AAA Batteries and gently push the cover back into place.
Back of Remote Control
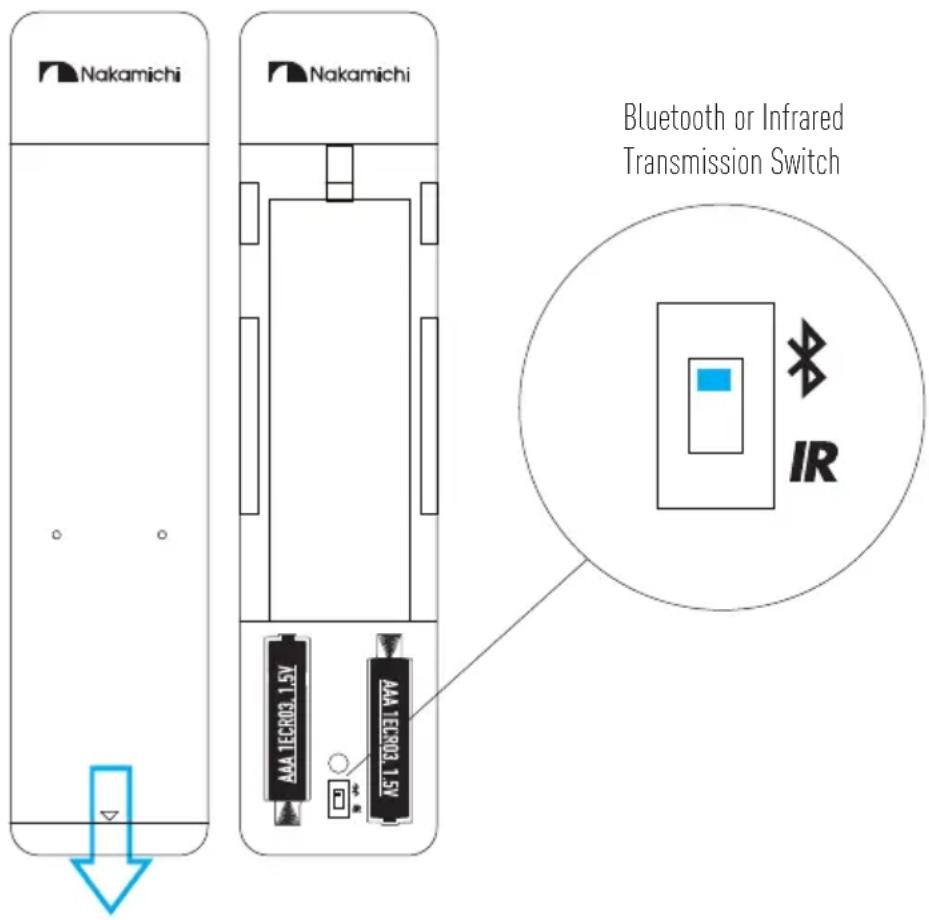
Bluetooth or Infrared Transmission Switch
Switch the remote control's transmission mode with DRAGON between Bluetooth or Infrared.

- Bluetooth: The default mode (recommended). Allows remote control to communicate with DRAGON without line of sight with main unit
- Infrared: Use only when programming a universal remote to work with DRAGON
Once TV HDMI connection is established, use your TV / content device's remote control to power ON the entire system. Always use your TV's remote control to power OFF the entire system.
Infrared Transmission Mode allows Learning Universal Remotes to control DRAGON. Scan QR code to access Section 13.3 for more info.

1.2 Controls & Connections
E. Optional Accessories
Pair DRAGON's main unit and surround speakers with optional mounting accessories from Nakamichi.
Wall Mounts (Sold Separately)

Main Unit Wall Mount Bracket

Surround Speaker Wall Mount Bracket
Purchase your main unit wall mount here: https://bit.ly/main-unit-mount

Purchase your surround speakers wall mount here: https://bit.ly/surround-speakers-mount


If you are unfamiliar with power tools, installation, or the layout of electrical wiring in the walls of your home, consult a professional installer.
Speaker Stands (Sold Separately)
Nakamichi recommends using DRAGON speaker stands for best fit with the surround speakers.

Purchase your Speaker Stands here: bit.ly/dragon-speaker-stands

Optional Nakamichi DRAGON Surround Speakers stands.
SECTION 2
SET UP
2.1 Main Unit & Subwoofers
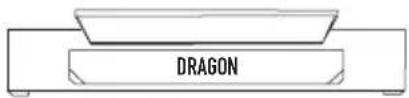
Wireless subwoofers and surround speakers provide ultimate placement flexibility that suits your listening environment.

Refer to the back of each subwoofer to check if it is the Left or Right subwoofer.
BEST
i. Front corners of the room (Recommended)

Allows bass frequencies to blend with front channels.
Corner placement maximizes bass performance.
ii. Center

Left
Sub
Right
Sub

If placement (i) is not possible, move the subwoofers to other locations
along the front stage, or closer to the center of the room.
BETTER
iii. Diagonal

iv. Back of Room
Left
Sub

Right
Sub
Recommended if placement (i) or (ii) are not possible in your room.

- DRAGON's main unit can be wall mounted with our optional, custom designed wall bracket. See Section 1.2E, pg 10.
- Do not block the vents at the rear and bottom of the Main Unit. These vents are essential for performance. Leave a minimum of an inch of gap around these ventilation holes.
- Wireless antennas are built into the main unit and wireless subwoofers. Keep all speaker units away from water and metal objects.
- For optimal bass performance, leave a few inches of gap around the subwoofer ports and grilles.
- If bass performance seems too strong/overpowering, or you have a room with uneven wall distances, refer to Section 12.2, pg 76 to optimize DRAGON for your room acoustics.
2.2 Surround Speakers

Refer to the back of each surround speaker to check if it is the Left or Right surround speaker.




Note: Illustration is not to scale. Speaker stands are not included.

- The bottom speaker driver of the surround speakers should be at ear level.
- For optimal performance, position the surround speaker such that the back surrounds are pointed directly at the listener's seating area.
- Wireless antennas are built into each wireless speaker. Keep all speakers away from fish tanks, water and metal objects.
Purchase optional speaker stands
and wall mounts customized for
DRAGON here:
bit.ly/dragon-speaker-stands

2.3 PerfectHeight Mechanism
A. Setting PerfectHeight
The PerfectHeight Mechanism is an innovation developed by Nakamichi that allows height effects to be directed towards the listener, regardless of placement, room shape or seating position.
Setting PerfectHeight
Rotate the adjustable PerfectHeight Mechanism so that the position marker points towards with the listening area.

2.3 PerfectHeight Mechanism
B. Reference Placement
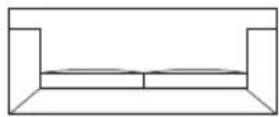
Placement 1: Back of Couch
Recommended position marker: Position II Recomme

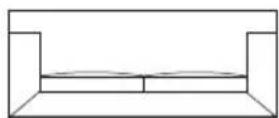
Placement 2: Side of Couch
nded position marker: Position I
(Default)


The PerfectHeight Mechanism is designed to be rotated up to 90° from its default position. Do not force or twist the mechanism beyond its designed range of movement.

Does your room have uneven ceilings? Optimize height channel balance by referring to Section 12.2, pg 77.
SECTION 3
CONNECT
3.1 Power On DRAGON
- Connect power to the subwoofer. Toggle the power switch to "ON" position.

(Applies for right subwoofer)

- Connect power to the surround speakers.
Note: No power switch for surround speakers.

(Applies for left surround speaker)
- Connect power to the main unit (Bottom)
![HOMI IN[4] HOMI IN[3] HOMI IN[2] HOMI OUT (TV) (HARC/ARC)[1] AUX OUT OPT OUT AUX IN OPT IN USB DC IN ① ②](/content/2026/07/1459730/images/c05a2b03caeb5007a3679e57179d2f01dd713b85a3030e72d2c28a84d6d08644.jpg)
- The Subwoofer and Surround Speakers are automatically connected when the main unit is turned on.

Once the main unit is powered off, the subwoofers and surround speakers will go into standby mode. You do not need to turn off the subwoofers and surround speakers after each use.
3.2 Set up HDMI ARC/eARC with your TV
A. Establishing a Connection
Using the Nakamichi HDMI 2.1 cable, connect DRAGON to your TV's HDMI IN (ARC/eARC) port.
![Connect to the HDMI TV (ARC/eARC) port of theTV. Side/Back of TV HDMI ARC / EARC Connect to the HDMI TV (ARC/eARC) port of the main unit. Side of main unit HDMI Cable HDMI OUT (TV) (eARC/ARC)[1]](/content/2026/07/1459730/images/f70c6adb323e82e8e8490aca08940a0026b554202a2b456c1f10eae27f37e257.jpg)

HDMI Audio Return Channel (ARC)/enhanced Audio Return Channel (eARC) offers two-way communication between your audio system and TV over a single HDMI connection. Essentially, HDMI ARC/eARC enables a single TV's HDMI port to function as both a video input and audio output.

eARC supports advanced audio formats, including Dolby Atmos TrueHD and Dolby Atmos Digital Plus™.

Do not connect DRAGON to a TV via Bluetooth. Bluetooth audio connections are unable to deliver surround sound to sound systems and will degrade overall sound quality.
3.2 Set up HDMI ARC/eARC with your TV
B. Audio Settings for TV
Configure your TV's audio settings for optimal surround sound output to DRAGON.
Setting the audio output:
- Go to Settings > Sound.
- Select Speaker Settings. Set to HDMI Audio Out.
- For eARC equipped TVs, check your TV settings and turn on eARC mode if available. This might be found under the advanced/expert options of your TV.
Setting the audio format:
- Go to Settings > Sound > Additional Settings.
- Select Speaker Audio Format.
- Set as Dolby Digital / DTS / Bitstream (whichever is available).

For brand specific TV audio settings, scan QR code or visit: bit.ly/dragon-best-sound
C. Set Up Control Communication Between DRAGON and TV
CEC is an HDMI protocol that allows the TV to control DRAGON's functions (e.g. power, volume, source selection) via a single TV remote.
Requirements
- Your TV is CEC enabled. (Check with your TV manufacturer for more information)
- DRAGON and TV are connected via a HDMI cable through the ARC/eARC ports.
Enabling CEC
- From the TV's SYSTEM menu, enable CEC^ and ARC^ functions.
- From the CEC menu, select Device Discovery to register DRAGON with the TV.
- Enable CEC for TV only. Do not enable CEC for other device sources or inputs may switch randomly.
- To disable CEC on DRAGON, see pg 44 (Disabling HDMI CEC One Touch Play).
* Steps may differ based on TV brand. Refer to your TV's user manual for more information.
^ HDMI-CEC TV trade names: Samsung (Anynet+), LG (SIMPLINK), Vizio (CEC), Sony (Bravia Sync), TCL (CEC), Hisense (CEC), Philips (EasyLink), Sharp (Aquos Link), Panasonic (HDAVI Control / EZ Sync / Viera Link). Naming may differ based on TV brand. Refer to your TV's user manual for more information.
Disclaimer: All brand names on this page belong to their respective copyright holders, and used for non-profit, informational purposes only.
Visit bit.ly/dragon-best-sound for expanded list of TVs' audio settings instructions. Visit bit.ly/dragon-hdmi-cec-settings or scan QR Code for HDMI-CEC setup instructions by device.
If your devices are not listed on our website, please check with the device manufacturer's manual.

3.2 Set up HDMI ARC/eARC with your TV
D. Connecting Content Devices
Use our Perfect Device Matching Tool to create a custom setup guide based on your TV and devices. Scan QR code or visit bit.ly/dragon-perfect-device-matching

Using a TV without HDMI eARC/ARC? Scan this QR code to learn how to connect your TV to DRAGON. bit.ly/dragon-optical

![graph TD A["TV"] --> B["Connect TV HDMI ARC / eARC to DRAGON HDMI 1 eARC"] C["HDMI"] --> D["Connect these devices directly to your TV via HDMI"] E["Satellite TV Box"] --> F["Satellite TV Box"] G["Cable TV Box"] --> H["Cable TV Box"] I["Streaming Devices"] --> J["Gaming (Xbox Series X, Playstation 5,…](/content/2026/07/1459730/images/5a84b775ff138b5446b8c60d8f5ebb1f3d82d1ede79b588a804e317e69fe0006.jpg)
Disclaimer: All brand names on this page belong to their respective copyright holders, and used for non-profit, informational purposes only.

HDMI cables transmit both audio and video. To view video from devices connected to the audio system, turn DRAGON on, then set the audio system input to HDMI 2, 3 or 4. Set your TV input to the HDMI ARC / eARC port which DRAGON is connected to.
Switch the DRAGON's source to TV when playing from the TV's built in streaming apps, or audio from devices connected to the TV. Audio is passthrough using TV's ARC/eARC connection. Dolby Atmos and DTS:X audio are not supported on ARC connection.
Connect devices with the same HDCP standards for seamless switching between sources. If there are devices with different HDCP standards, connect all HDCP 2.3 devices to DRAGON while connecting HDCP 1.4 devices to TV to avoid audio and video instability.
3.4 Recommended Device Audio Settings
With new devices constantly emerging and device configurations continuously evolving, access our recommended settings for each device by scanning the QR codes below.
| Device QR Code Device QR Code | |||
| Apple TV |  | Amazon Fire Stick / Fire Cube Streaming Devices |  |
| Roku Premiere |  | Roku Ultra 4K |  |
| Nvidia SHIELD PRO 4K |  | PlayStation 5 |  |
| XBOX Series X |  | Nintendo Switch |  |
| Sony Blu-ray Player |  | DIRECTVTM |  |
| DISH NETWORK |  | Xfinity TV Box |  |
For other devices, scan the QR code or visit:
bit.ly/dragon-best-sound

3.5 Configure your TV for 4K120/8K60 Video Passthrough
Proceed with this only if a HDMI device that supports 4K120/8K60 (e.g. Gaming Console) is connected to DRAGON.
Tip: 4K120Hz/8K60 video passthrough typically needs to be activated manually through your TV's video settings. Visit our Helpdesk to discover and apply optimized settings for your TV.

General guide to enable 4K120/8K60 video passthrough on your TV*
- Go to Settings > Video.
- Select External Inputs > HDMI Signal Format.
- For the HDMI eARC port which DRAGON is connected to, either change the setting to "HDMI 2.1" or "Enhanced". Alternatively, look for "Game Mode" on the TV and switch it to "Auto/On".
*Feature is only available on select TVs that support 4K120/8K60 input.
3.6 Using Bluetooth ® Wireless Audio
A. Bluetooth 5.0 with APTX TM HD
Stream music wirelessly from your favorite devices via Bluetooth ( * /BT) with Qualcomm aptX TM HD. aptX TM HD enables Bluetooth to transmit audio at a maximum bitrate up to 1.8× higher than standard Bluetooth codecs, enabling 24-bit high-resolution audio to be transmitted wirelessly.
Bluetooth 5.0 also brings meaningful improvements to wireless stability, allowing your favorite devices to stream audio content to DRAGON at further distances than previous Bluetooth protocols.
Best Transmission: If you hear any break-up or disconnect while streaming music from your device, move the source device closer to DRAGON.
Note: DRAGON will automatically be switched to ALL CHANNEL STEREO mode and Music 1 EQ when in Bluetooth mode.
B. Bluetooth Connection
Switch DRAGON to Bluetooth mode:
Press the Bluetooth (*) button once.
Pairing DRAGON with a Bluetooth device:
- Set your Bluetooth device into Bluetooth pairing mode (to make it discoverable).
- Press and hold the Bluetooth (✗) button on the remote control until the LED display on the main unit shows "PAIRING".
- "BT" will start flashing on DRAGON's display. You can now search for DRAGON on your Bluetooth device, and pair/connect to it. For more information, refer to the user documentation of your device. "BT" will stop flashing and display constantly on the main unit display when successful connection has been established.
- Play audio from your Bluetooth device. Volume can be controlled via your source device or DRAGON's remote control.
Note: Whenever DRAGON is switched to Bluetooth mode, it will attempt to reconnect with the last device it was paired to.
To disconnect DRAGON from a paired Bluetooth device:
- Press and hold the ✝ button on the remote control until "PAIRING" is shown on DRAGON's LED display.
- Then, "BT" will start flashing on DRAGON's display. DRAGON is now ready to pair with a new device.

DRAGON is not equipped with a microphone, so it cannot operate as a hands-free device.

Reduce the volume levels on DRAGON and your devices before playing audio content. High volume levels can damage your hearing.
To pair DRAGON with voice assistants like Google Home or Amazon Alexa, scan QR code on the right or visit the link: bit.ly/dragon-va-pairing

SECTION 4
CONTROL
4.1 Remote Functions
A. Remote Functions at a Glance
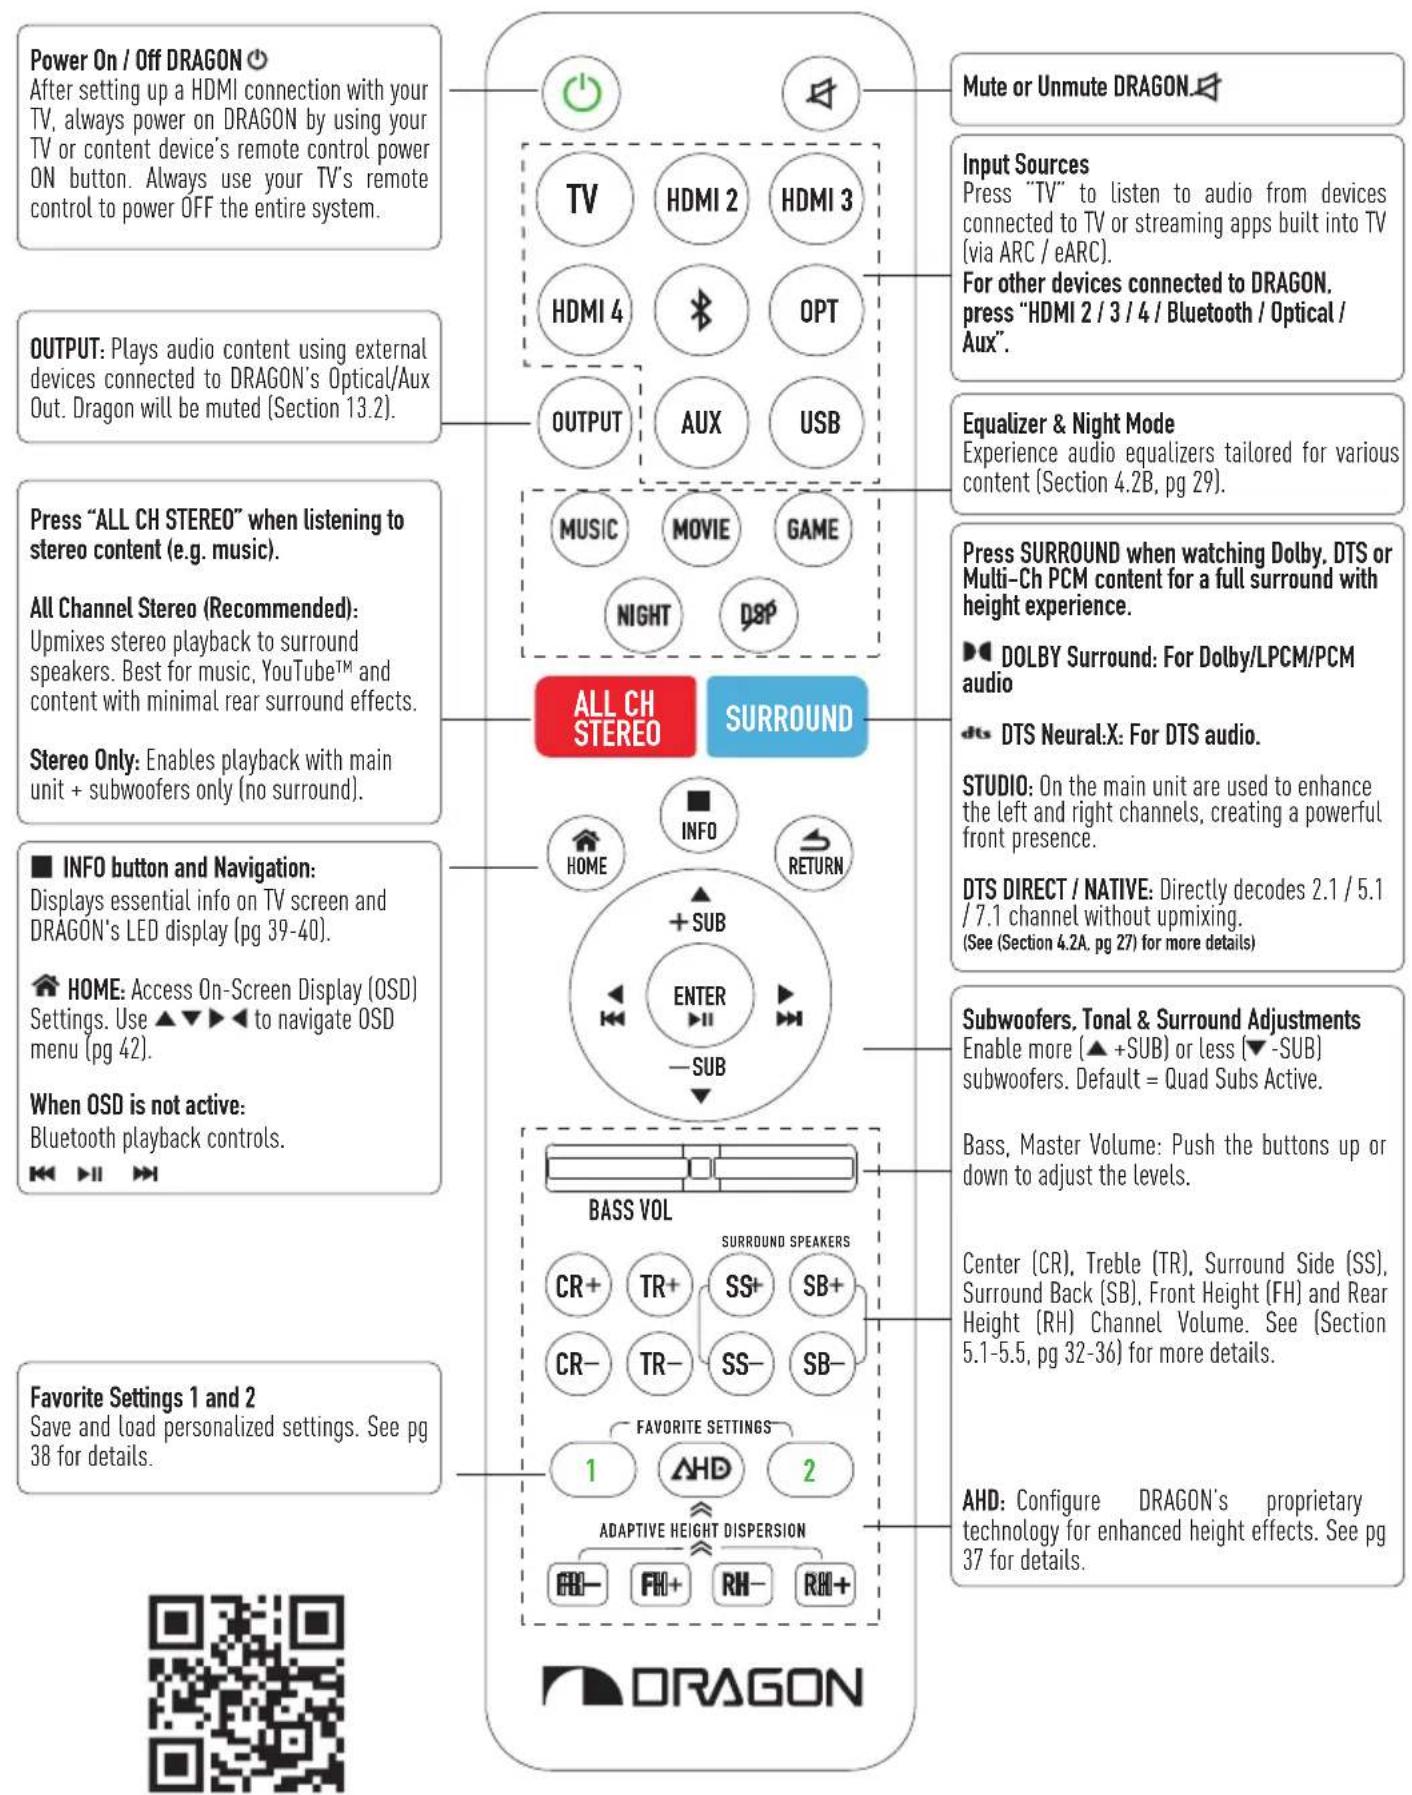
4.1 Remote Functions
B. Selecting Different Input Sources
Press one of these buttons to select an input source.
Each input source will be displayed on the main unit's front LED display.
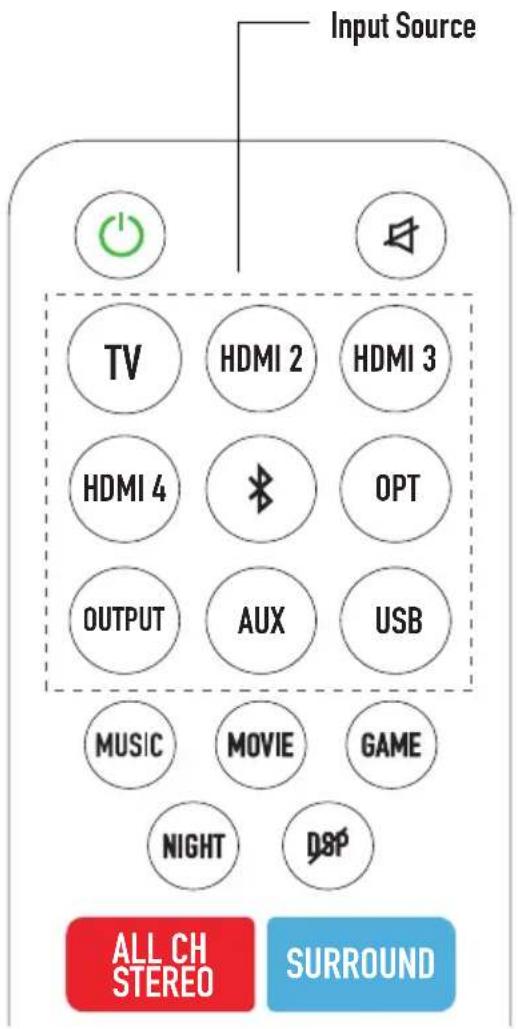
| Button | LED Display |
| TV | TV |
| HDMI 2 | HDMI 2 |
| HDMI 3 | HDMI 3 |
| HDMI 4 | HDMI 4 |
| OPT (Optical) | OPTICAL |
| Bluetooth | BT |
| AUX(Auxiliary / 3.5mm Stereo input) | AUX |
4.2 Surround, Equalizer (EQ) & Night Mode (DRC)
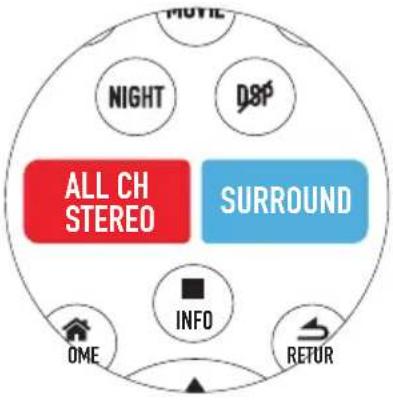
A. Surround Mode
Channel mapping / upmixing is essential because most content is not encoded in 11.4.6 channels. DRAGON utilizes different channel mapping methods to optimize your listening experience. Dolby and DTS employ their proprietary upmixing technologies to decode and optimize content.
SURROUND Button
Dolby Upmixing (for Dolby Digital / Dolby Digital Plus / Dolby TrueHD / Dolby Atmos and LPCM 7.1 / LPCM 5.1 / PCM content)
| Upmixing Description | ||
| Dolby Surround (Default) | Dolby technology will upmix audio content to all audio channels with vertical surround effects. |  DOLBY SURROUND DOLBY SURROUND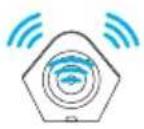  |
| Native** | Dolby/PCM/LPCM content are directly decoded without audio upmixing. | |
dts Upmixing (for DTS / DTS-HD / DTS-HD MA / DTS:X content)
Note: When playing Dolby or PCM content, it is not possible to select DTS modes.
| DTS Neural:X (Default) | DTS Neural:X technology will upmix most DTS encoded audio content to all audio channels with vertical surround effects*.DTS:X content will be decoded and upmixed to DTS:X PRO. |  DTS NEURAL:X DTS NEURAL:X  |
| DTS Direct / Native** | DTS content are directly decoded without audio upmixing. | |
*For more information about DTS Neural:X, view the Glossary (Section 11.2, Pg 70)
**In Native mode, some channels will not produce sound.
4.2 Surround, Equalizer (EQ) & Night Mode (DRC)
A. Surround Mode
Studio Mode
| Studio | Studio mode uses the same channel upmixing fundamentals as Dolby Surround and DTS Neural:X.The only difference is that the side surround speakers in the main unit are repurposed into Left and Right channels. In this mode, the Left and Right channels are powered by 4 speaker drivers and an AMT tweeter on each side, creating a powerful front soundstage. |  Front Left Front RightSTUDIO Front Left Front RightSTUDIO 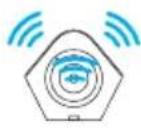 |
ALL CH STEREO
Button
| All Channel Stereo | Left, Right and Center channel signals (if available) are upmixed and transmitted to the surround speakers to boost rear surround output. |  Front Left Front RightALL CHANNEL STEREOFRONT LEFT / RIGHT+ Front Left Front RightALL CHANNEL STEREOFRONT LEFT / RIGHT+  —— CENTER, SURROUND & —— —— CENTER, SURROUND & ——  HEIGHT CHANNELS HEIGHT CHANNELS |
| Stereo | Enables stereo playback using all speakers in the main unit. |  Front Left Front RightSTEREO Front Left Front RightSTEREO —— NO SOUND —— —— NO SOUND ——  |
4.2 Surround, Equalizer (EQ) & Night Mode (DRC)
B. Equalizer (Audio Presets and Night Mode)
EQ (EQUALIZER)
Press these EQ buttons on your remote to select your desired settings. The system will remember the last setting.

| Button | Equalizer Mode(Shown on Display/OSD) | Description |
| Music(Default: Music 1) | Music 1 | Front-row concert listening experience. Enjoy maximum punch and sound pressure level (loudness). |
| Music 2 | Optimizes between sound pressure level (loudness) and dynamic range. | |
| Music 3 | Prioritize music details and dynamic range over volume. More vibrant, spacious and natural sounding. | |
| Movie(Default: Movie 2) | Movie 1 | Experience a thrilling environment that puts you in the center of the action. Enjoy maximum intensity and sound pressure level (loudness). |
| Movie 2 | Optimizes between sound pressure level (loudness) and dynamic range. Feel greater immersion, depth and clarity. | |
| Movie 3 | Prioritize movie details and dynamic range over volume. More vibrant, spacious and natural sounding. | |
| Game | Game | Experience enhanced depth and spaciousness from surround sound effects of all game genres. |
| News | Feel like you are seated at the front row of a live talk show. Hear crystal clear dialog. | |
| Sports | Experience the energetic environment of live sports broadcasts. Hear the commentator's voice take center stage, while sounds that fill the stadium surround you. | |
| DSP OFF | DSP OFF | Audio playback without using any predefined Nakamichi EQ setting. |
4.2 Surround, Equalizer (EQ) & Night Mode (DRC)
B. Equalizer (Audio Presets and Night Mode)
EQ (EQUALIZER)
Press these EQ buttons on your remote to select your desired settings. The system will remember the last setting.
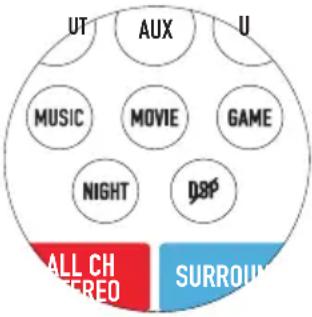
Night Mode / Dynamic Range Compress (DRC)
This function allows you to retain a theater-like environment at low volume levels. When watching a movie late at night, you will be able to hear the dialog clearly even at a low volume level. Available with DTS and DOLBY encoded content on HDMI, HDMI ARC / eARC and Optical inputs.
| Button | OSD Display Description LED Display | ||
| Night | Night Mode OFF (Default) | Volume normalization OFF (default). | NIGHT OFF |
| NIGHT Mode 50% | 50% of volume normalization. | NIGHT 50% | |
| NIGHT Mode 100% | 100% of volume normalization, recommended for nighttime listening. | NIGHT 100% | |
| NIGHT Mode AUTO | Automatic contextual volume normalization (DOLBY content only). | NIGHT AUTO | |
SECTION 5
PERSONALIZE
5.1 BASS and Treble
DRAGON comes with a variety of tonal adjustments that allow you to personalize the listening experience. Tone controls can be adjusted from 1 to 10 steps.

| Button OSD Display Description LED Display | ||||
| BASS | Bass__ | Adjusts the overall volume of low-frequency notes.Push the buttons up or down to adjust the level. |  | BASS__ |
| TR +/- | Treble__ TREBLE | Adjusts the volume of high-frequency notes.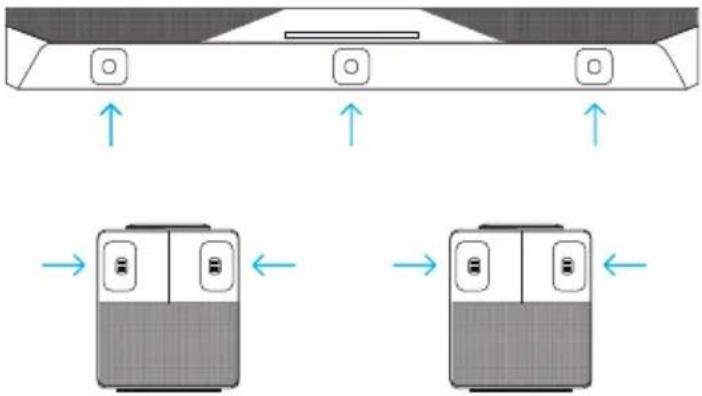 | ||
5.2 Channel Configuration
Main Unit

Left Subwoofer Right Subwoofer

Left Surround Speaker Right Surround Speaker
5.3 Subwoofer Adjustments
Enable/Disable the desirable number of subwoofers to suit your listening preferences.
Press ▲/▼ on the remote when the OSD is not being displayed.
![graph TD A["INFO"] --> B["+ SUB"] C["HOME"] --> B D["RETUR"] --> E["ENTER"] F["-SUB"] --> E G["Directional Arrow"] --> H["→"] I["Directional Arrow"] --> J["→"]](/content/2026/07/1459730/images/330e9d97a80b36d01dd0cbe7c579abde5efac5dcb276c7396b26ab588f474a28.jpg)
Settings Available
QUAD SUBS (LL, LR, RL, RR) TRIPLE SUBS (LL, LR, RR)

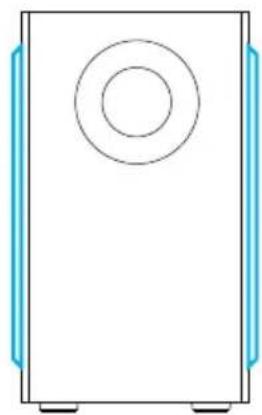


DUAL SUBS (LL, RR) SINGLE SUB (LL)


Left Subwoofer Right Subwoofer Left Subwoofer Right Subwoofer
5.4 Channel Volume Adjustments
Channel Volume controls can be adjusted from 1 to 10 steps.
| Button OSD Display Description LED Display | |||
| CR +/- | Center__ | Adjusts the volume of the Center channel in the main unit (delivers most of the dialog for video content).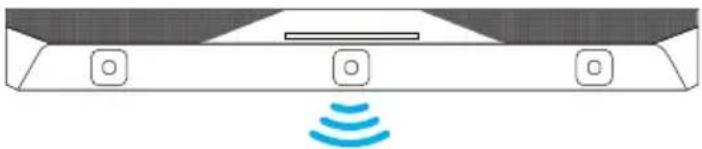 | CENTER__ |
| SS +/- | Sur Speakers Side__ | Adjusts the volume of the Side channels in the Surround Speakers.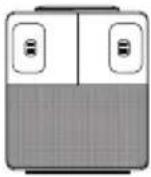  | REAR S__ |
| SB +/- | Sur Speakers Back__ | Adjusts the volume of the Back channels in the Surround Speakers.  | REAR B__ |
5.5 Height Channel Volume
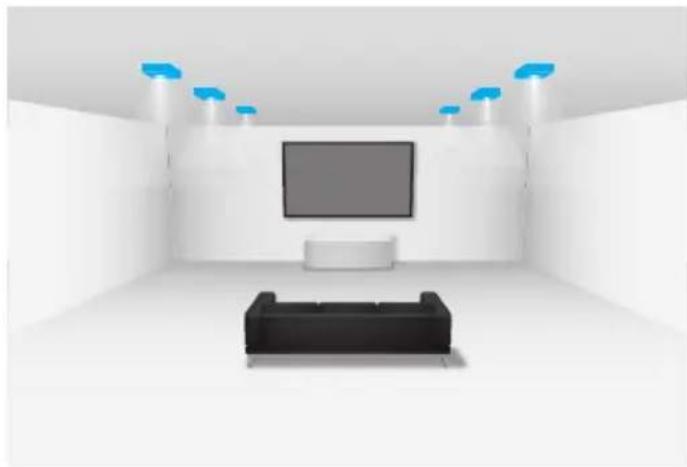
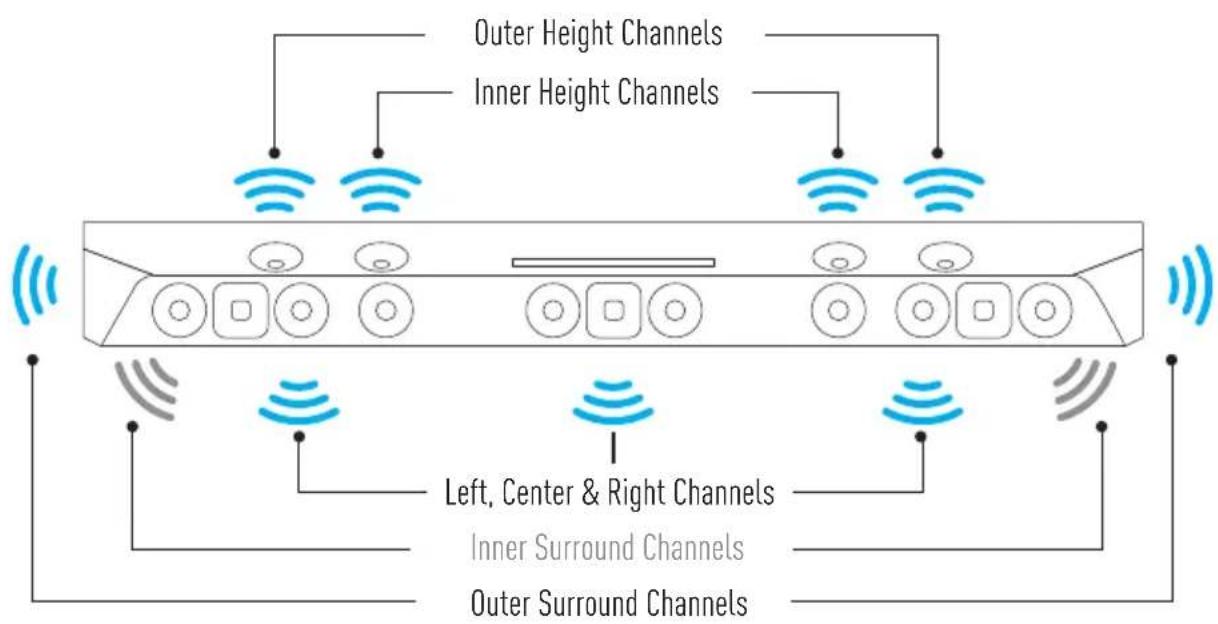
DRAGON has a total of 6 up-firing speakers. The main unit features 4 up-firing speakers positioned at 10° and 20° angles (also known as outer and inner heights). The remaining 2 up-firing speakers are in the surround speakers and can be rotated towards the listening area.
Adjusting the height channel volume
![graph TD A["1"] --> B["AHD"] C["2"] --> B B --> D["ADAPTIVE HEIGHT DISPERSION"] D --> E["FH-"] D --> F["FH+"] D --> G["RH-"] D --> H["RH+"] style A fill:#f9f,stroke:#333 style C fill:#f9f,stroke:#333 style D fill:#ccf,stroke:#333 style E fill:#cff,stroke:#333 style F fill:#cff,stroke:#333 style G fi…](/content/2026/07/1459730/images/388a7f5f8520353cb3281418e682ca29fb03d27108652b4d6e5cbb3b1ac68f57.jpg)
| Button OSD Display Description LED Display | |||
| FH +/- | Main Height:Inner__Outer__ | Adjusts the volume of inner and outer height channels | F HGHT__ |
| RH +/- | SurSpeakersHeight__ | Adjusts the volume of rear height channels  | R HGHT__ |

- The volume of inner and outer height speakers in the main unit can be configured independently via the OSD. Simply Press "HOME", then navigate to Audio Setup > Channel Volume Level Setup.
- If the inner and outer height channels have different volume levels, the LED display will show the highest number between either channels.
- Does your room have uneven ceilings? Optimize height channel balance by referring to Section 12.2, pg 77.
5.6 Adaptive Height Dispersion
Get the most immersive height surround performance based on the acoustics of your listening environment with Nakamichi's proprietary Adaptive Height Dispersion (AHD) processing technology.
![graph TD A["1"] --> B["AHD"] C["2"] --> B B --> D["ADAPTIVE HEIGHT DISPERSION"] D --> E["AH-"] D --> F["AH+"] D --> G["RH-"] D --> H["RH+"] style A fill:#f9f,stroke:#333 style C fill:#f9f,stroke:#333 style D fill:#ccf,stroke:#333 style E fill:#cff,stroke:#333 style F fill:#cff,stroke:#333 style G fi…](/content/2026/07/1459730/images/8ad16338755f13b476893da7bc8105c1aece1c55eb2347612551fc8f205c8b3d.jpg)
| AHD Modes/ OSD Display | Function |
| AHD OFF | Delivers height performance like the movie director intended. |
| AHD FOCAL | Optimizes height delivery for a center focused 3D soundstage. Most height action happens in a narrow field of view. |
| AHD WIDE | Delivers height effects above and around you, creating an expansive sense of height effects happening in a wider field of view. |
| AHD MAX (Default) | Maximum height effects, regardless of content type. |
Scan the QR Code to visualize how AHD optimizes your content with each mode.
Alternatively, visit bit.ly/dragon-ahd-visualized

5.7 Save Your Favorite Settings
2 sets of audio settings can be saved onto DRAGON's memory, allowing quick access to your favorite audio preferences for different content (e.g. movies and music).
A. Saving Settings to System Memory
- Personalize your settings.
- Press and hold the "FAVORITE SETTINGS 1 / 2" button on the remote.
- The following will be displayed when settings have been successfully saved:
![graph TD A["TR-"] --> B["1"] C["SS-"] --> D["AHD"] E["SD"] --> F["2"] G["R-"] --> H["FAVORITE SETTINGS"] I["FH+"] --> J["ADAPTIVE HEIGHT DISPERSION"] K["RH-"] --> J style A fill:#fff,stroke:#000 style C fill:#fff,stroke:#000 style E fill:#fff,stroke:#000 style G fill:#fff,stroke:#000 style I fill:#f…](/content/2026/07/1459730/images/01251fe42c0fce00fffd90e7e568a296ad2a2b2c6e769512bf2e0fbd7cd95ef1.jpg)
| Button | OSD Display/Function Main Unit Display | |
| 1 | ved | FAV1 SAVED |
| 2 | Favorite 2 Saved | FAV2 SAVED |

Use the OSD to save audio settings to system memory.
Press "HOME" button on the remote and navigate to "Audio Setup".
Personalize your settings. Once completed, press and hold "FAVORITE SETTINGS 1 / 2".
The main unit display will show "FAV 1 / 2 SAVED".

The following audio settings can be saved and loaded as your favorite settings:
- Master Volume
- Equalizer
- Surround Mode
- Bass and Treble
- Channel Volume and Balance for all channels (including center, surround and height)
- AHD Option
- Subwoofer drivers that are active
B. Loading Favorite Settings
- Press the "FAVORITE SETTINGS 1 / 2" button once. The corresponding settings will be loaded.
- The following will be displayed when all settings are loaded.
| Button | OSD Display/Function Main Unit Display | |
| 1 | aded | FAV1 |
| 2 | Favorite 2 Loaded | FAV2 |

If no settings have been saved to either button, a pop-up OSD will indicate: "Favorite _ not set". The main unit display will show "FAV _ NOT SET".
5.8 Using the INFO Button (eARC/ARC)
In TV ARC/eARC mode, each click of the INFO button unveils below details on the soundbar display:
- Source audio format
- Surround mode
- Equalizer
- AHD mode
- Number of active subwoofers

You can exit INFO screen by pressing any key on the remote.
Source Audio Format
| LED Display Content Format / Codec | |
| DOLBY ATMOS TRUEHD | Dolby Atmos encoded in Dolby TrueHD |
| DOLBY ATMOS DD+ | Dolby Atmos encoded in Dolby Digital Plus |
| DOLBY ATMOS MAT | Dolby Atmos metadata into lossless pulse-code modulation** ** XBOX SERIES X / One X/S and Apple TV 4K come with a Dolby Atmos MAT encoder, which is designed to encode, decode and incorporate Dolby Atmos metadata into lossless pulse-code modulation (LPCM) audio. |
| DOLBY TRUEHD | Dolby TrueHD content |
| DOLBY D+ | Dolby Digital Plus content |
| DOLBY DIGITAL | Dolby Digital content |
| DTS:X MA | DTS:X Master Audio content rendered with DTS:X PRO |
| DTS:X | DTS:X content rendered with DTS:X PRO |
| DTS-HD MA | DTS HD Master Audio |
| DTS-HD | DTS High-Definition Audio |
| DTS | DTS Digital |
| LPCM 7.1 | Linear Pulse Code Modulation 7.1 |
| LPCM 5.1 | Linear Pulse Code Modulation 5.1 |
| PCM 2.0 | Pulse-Code Modulation |
5.8 Using the INFO Button (HDMI 2, 3 & 4 inputs)
Information displayed via OSD on TV
When using DRAGON's HDMI inputs, on-screen display provides information about audio format, video format, audio processing modes and more. See table below for full details. Adjust the pop-up INFO screen duration by following the instructions on pg 51, under "Popup duration".

Disclaimer: Diagrams included in the manual are for illustration purposes only. Actual screen text may vary.
| Information Displayed Description | |
| Source | Displays current HDMI input. |
| Audio | Displays the type of audio content being received by source device. |
| Video | Displays the video resolution and indicates if HDR content is being received by the source device* (e.g 3840 x 2160 Dolby Vision). |
| Surround Mode | Displays the currently selected upmixing mode.(Dolby Surround, DTS Neural:X, DTS Direct, Studio, Native, All Channel Stereo, Stereo) |
| Equalizer | Displays the currently selected Equalizer mode.(Movie 1/2/3, Music 1/2/3, Game, News, Sports, DSP OFF) |
| AHD Mode | Displays the Adaptive Height Dispersion Mode. (Off, Focal, Wide, Max) |
| Master Volume | Shows the current system volume. (0 to 100) |
| Active Subwoofers | Displays the subwoofer drivers that are active^. (LL, LR, RL, RR) |
| Surround Speakers | Shows if surround speakers are turned on or off. |
* Information is only accurate when viewing content from HDMI devices connected to main unit.
^LL and LR refer to the left and right drivers in the left subwoofer.
RL and RR refer to the left and right drivers in the right subwoofer.
SECTION 6
ON-SCREEN DISPLAY
6.1 Using the OSD
The Nakamichi DRAGON is equipped with On-Screen Display (OSD) capabilities. Access advanced settings or view playback information with ease.
A. Accessing the OSD
- Power on your TV and DRAGON.
- Press the "HOME" Button to enable or disable the OSD screen.

Disclaimer: Diagrams included in the manual are for illustration purposes only. Actual screen text may vary.
B. Navigating the OSD
- Use ▲▼▶◀ on your remote to browse the OSD menu.
- For sub-menus, press "ENTER" to access additional options.
- Press the return button to quit the current action/exit the sub-menu, and go back to the previous list of settings.
- To exit the OSD press the "HOME" button.
C. Additional Information
• There are 4 setting tabs: Audio, Video, Calibration and System.
- Use ▲▼▶◀, "ENTER" and ≅ return buttons on your remote to navigate.
- Helpful information about each setting will be shown on screen when selected.
• System Default = Orange text
Benefit = Green text
Instructions = Cyan text
Warning = Red text
![graph TD A["INFO"] --> B["+ SUB"] C["HOME"] --> B D["RETURN"] --> B E["ENTER"] --> F["SUB"] G["←"] --> H["←"] I["→"] --> J["→"] K["←"] --> L["←"]](/content/2026/07/1459730/images/9e881dc20aa584863bd646e35d51ac1036dc18ec196c3a7953361ac21493e47f.jpg)
6.2 Audio Settings
| LED Display Content Format / Codec | |
| Surround ModeHDMI: Dolby SurroundBluetooth: All Channel Stereo | Select from different channel mapping options.(Options: Dolby Surround, DTS Neural:X, DTS Direct, Studio, Native, All Channel Stereo, Stereo) |
| EqualizerHDMI: Movie 2Bluetooth: Music 1 | Optimize playback for your content with Nakamichi audio presets.(Options: Movie 1/2/3, Music 1/2/3, Game, News, Sports, DSP OFF) |
| Audio SetupDefault settings are highlighted in orange | Channel Level Volume Setup: Fine-tune each channel's volume and balance to best fit your room.Quad Subwoofers Setup: Enable the desired number of active subwoofers and output balance between left and right subwoofers.Height Effects Setup: Select Adaptive Height Dispersion (AHD) mode, height channel volume and balance.Master volume, bass, treble and equalizer can also be adjusted here. |
| Advanced Audio SettingsDefault:Night Mode: OFFSurround Speakers: ONLip Sync Adjustment: OmsSubwoofer Crossover: 200HzDTS:X DIALOG Control: 3 | Night Mode (Dynamic Range Compression): Decrease the volume difference between loud and quiet passages when turned on. See pg 30. (Options: OFF, 50%, 100%, Auto)Surround Speakers: Enable/Disable audio playback from the rear speakers.Lip Sync Adjustments: When TV video appears slower than the audio produced by DRAGON, adjust this until both are in sync. (Options: Oms - 200ms)Subwoofer Crossover: Set the highest bass frequencies the subwoofer will play.(Options: 120 - 200Hz, in 10 Hz increments)DTS:X Dialog Control: Increase dialog levels in contrast with background sound and boost vocals separately (For select DTS:X Blu-Ray disc content). If the content does not support it, the option will be grayed out and inaccessible. (Options: Level 1 - 6) |
*Highlighted texts in orange denote system default
6.3 Video Settings
| LED Display Content Format / Codec | |
| HDMI CECOne Touch Play^Default: On | Enable/Disable HDMI CEC commands between DRAGON and external CEC-enabled source devices (e.g. TV), allowing the device to turn on the TV and switch its HDMI port automatically.(Options: On, Off) |
| Video UpscalingDefault: Auto | Upscale 1080p content up to 4K resolution.(Options: Auto, Off) |
| Personalized Source Name | Customize the name of each HDMI device connected to DRAGON. |
^HDMI CEC ONE TOUCH PLAY: When you start playback on your source device, it will switch the TV and DRAGON to the HDMI input that the device is using. For example, when you play a disc on your Blu-ray player, the TV and DRAGON will switch to the corresponding HDMI input automatically.
*Highlighted texts in orange denote system default
6.4 Calibration Settings
A. Easy Sound Setup
The Calibration tab provides the option to customize DRAGON's playback to better suit your listening environment. Easy sound setup customizes and delivers instant room calibration for most rooms.
Adjust room size
- Under easy sound setup, use ◀/▶ to select the option closest to your actual room size.
- Press ENTER to apply.
Small Medium
![graph TD A["Left Sub"] --> B["5ft"] B --> C["DRAGON"] C --> D["5ft"] D --> E["Right Sub"] F["6ft6ft"] --> G["Central Component"] style A fill:#f9f,stroke:#333 style E fill:#f9f,stroke:#333 style F fill:#ccf,stroke:#333 style G fill:#cfc,stroke:#333](/content/2026/07/1459730/images/51043b1bdf3abb820ba5ad3a91eb73dc17a73d46b646571a0385c1889a0220b5.jpg)
![graph TD A["Left Sub"] --> B["DRAGON"] C["Right Sub"] --> B B --> D["Screen Setup"] style B fill:#f9f,stroke:#333 note right of B "13ft" note bottom of D "8ft8ft" note left of B "8ft" note right of C "8ft" note bottom of D "8ft8ft"](/content/2026/07/1459730/images/7cb6a172fae4f7e34e7081bdd3cc382c359dec317f81460b42fee701eef4ad24.jpg)
Large

6.4 Calibration Settings
B. Room Size Calibration
Advanced users can access a wide range of calibration options to optimize DRAGON's output to their listening environment.
This sub-category allows you to manually input the distances based on your room environment.
Configure your setup
- Use ▲▼▶◀ to enter your room size.
Save your setup
- Scroll down to "Save Custom Room Size". Scroll right "▶" to select "Yes".
- Press ENTER to save your custom room size configuration.
| Speaker Unit Distance to | Range / Placement | |
| Main Unit | Listening Area | 5 - 25 ft+ |
| Side Wall (Left / Right) | 1 - 15 ft+ | |
| Ceiling | 2 - 20 ft+ | |
| Surround Speakers | 5 - 30 ft+ | |
| Quad Subwoofers | Listening Area (Left Subwoofer) | 2 - 25 ft+ |
| Listening Area (Right Subwoofer) | 2 - 25 ft+ | |
| Location in the Room | Front, Back, Center, Diagonal | |
| Surround Speakers | Listening Area (Left) | 2 - 15 ft+ |
| Listening Area (Right) | 2 - 15 ft+ | |

- You can also adjust using metric units (meters). Go to the "System" tab to change measurement units. (See Section 6.5C, pg 51).
- You can also restore default room size settings (last option in this sub-menu). When this option is selected, the distances appropriate for a medium room will be applied.
6.4 Calibration Settings
C. Volume Level Calibration
Use this function to calibrate the volume balance between each speaker.
Pink Noise Calibration
To aid with the calibration process, DRAGON has 3 pink noise playback options that users can select from:

Protect your hearing. Ensure the volume is at a comfortable level before attempting the calibration process.
| Test Tone Options Description | |
| Off | Default |
| Individual | Plays pink noise only on selected channels |
| All | Plays pink noise across ALL channels |
Main Unit
6.4 Calibration Settings
C. Volume Level Calibration
![graph TD A["Back Channels"] --> B["Speaker with Wi-Fi"] C["Height Channels"] --> D["Speaker with Wi-Fi"] E["Side Channels"] --> F["Speaker with Wi-Fi"]](/content/2026/07/1459730/images/bfcd5837799aa09093ec1bd800f5b38e4aef0abbbabb56a3d9e56503914ebcfa.jpg)
Left Surround Speaker Right Surround Speaker
Quad Subwoofers

6.5 System Settings
A. Wireless Settings
The System tab provides access to essential general operation settings.
By default, DRAGON utilizes an auto-switching 5GHz wireless frequency to communicate with its wireless subwoofers and surround speakers. In rare instances, nearby wireless networks (e.g. Home Wi-Fi) may conflict with DRAGON's wireless transmission, resulting in audio interruptions from the surround speakers and/or subwoofers.
You can change the following settings to optimize DRAGON's wireless capabilities for your home's environment.

These settings should only be changed if you are facing audio interruptions from DRAGON's wireless surround speakers or subwoofers.
Scan the QR Code or visit bit.ly/dragon-wireless-optimization for recommendations tailored to your home.

Setting Description
| Subs + Surr Wireless Freq (Step 1) | Subwoofer + Surround Speaker Wireless FrequencyDefault: DRAGON communicates using the 5.8GHz bandwidthAuto 1: DRAGON communicates using the 5.2GHz bandwidth |
| Wireless Freq Strength (Step 2)Default: 2 | Wireless Frequency Strength ⚠️Varying degrees of wireless communication strength (1, 2, 3, 3+). Use the setting that enables smooth wireless communication between DRAGON’s system components. |
6.5 System Settings
B. Subwoofer and Surround Speakers Manual Pairing
The following options are available to check the connection status and facilitate manual pairing of DRAGON's components.
Manual Pairing
| Setting Description | |
| Subwoofer Manual Pairing | If a surround speaker or subwoofer is disconnected,instructionsto connect the missing speaker or remote will be shown on OSD screen. See pg 60 for more instructions |
| Surrounds Manual Pairing | |
6.5 System Settings
C. Miscellaneous Options
Main Unit Display
| Setting Description | |
| Brightness | Increase or reduce the brightness of DRAGON's main unit display. |
| Default: +3 | (Options: 0, +1, +2, +3: Changes the LED display brightness.)At 0, main unit display auto-turns off after a few seconds. Press any key to wake it up. |
Miscellaneous
| Setting Description | |
| Popup LocationDefault: Bottom Left | Select the location of On-Screen display when adjustments are made.(Options: Bottom left, Bottom center, Bottom right, Top left, Top center, Top right) |
| Popup Duration | Adjusts the On-Screen Display fade out time. This affects both popup and INFO screen.(Options: 3 - 15 Seconds) |
System Operation
| Setting Description | |
| Energy Saving ModeDefault: 30 Minutes | Select the period of time before DRAGON goes into standby mode when no signal is detected.(Options: After 30/90/120 Minutes, OFF (Disables energy savings mode)) |
| Firmware Upgrade | The firmware version for DRAGON is displayed.See pg 57 to learn how to upgrade firmware. |
| Restore Factory Settings | Refresh DRAGON's software and restore factory default settings.Options: Fav + Name + Room: Reset all settings without erasing "Favorite Settings", "User Defined Input Names" and "Custom Room Calibration Values" Yes ALL: Reset All SettingsScroll right "►" to select "Yes". Press "ENTER" to perform factory reset.System will power off when factory reset is completed. |
| UnitsDefault: Feet (Imperial) | Select your preferred unit measurement.(Options: Feet (Imperial) or Meters (Metric) |
*Highlighted texts in orange denote system default
SECTION 7
7 Surround Demo & Channel Test Tracks
Showcase DRAGON with on-board surround soundtracks.
Playing the Demo:
- Power on the main unit.
- Press □ at the top of the main unit.
- To skip a track, press <</▶ on your remote, or press □ again.
- Press "→RETURN" on remote to end Demo at anytime.
The following tracks will be played.
| Main Unit Display Description | |
| Demo 1 | Plays Dolby Atmos Amaze surround soundtrack. |
| Demo 2 | Plays Dolby Atmos 747 surround soundtrack. |
| Name of Channel being played:Starting from LEFT CH | Plays channel test tones across each channel, using the following sequence: 12. L REAR HEIGHT CH13. R REAR HEIGHT CH10. L REAR BACK SUR CH 12. L REAR HEIGHT CH13. R REAR HEIGHT CH10. L REAR BACK SUR CH 8. L REAR SIDE SUR CH9. R REAR SIDE SUR CH 8. L REAR SIDE SUR CH9. R REAR SIDE SUR CH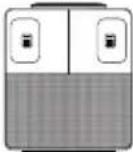 11. R REAR BACK SUR CH14. LEFT SUBWOOFERS 11. R REAR BACK SUR CH14. LEFT SUBWOOFERS 16. QUAD SUBWOOFERS 16. QUAD SUBWOOFERS 15. RIGHT SUBWOOFERS 15. RIGHT SUBWOOFERS |
SECTION 8
MOBILE APPLICATION
8.1 Installation
You can use your smartphone as a remote control to control DRAGON.
Scan the QR Code below to download the mobile application:




Open the mobile application. Follow the instructions to connect your smartphone to DRAGON.
8.2 Functions
The mobile app comes with the following functions:
- Turn your phone into a virtual remote control for DRAGON. All remote functionalities can be accessed via the mobile app.
- Register your warranty.
- Access to Quick Start Guide or manual.
- Access to DRAGON Concierge.

Registering DRAGON's warranty takes only a few minutes. Register yours through the mobile app today!
SECTION 9
FIRMWARE UPGRADE
9.1 Check the Firmware Version
Periodically, firmware upgrades are released to offer additional features and enhance performance. For more information, visit bit.ly/dragon-firmware.
- Press "HOME" on remote. The OSD will be shown on screen.
- Navigate to "System".
- Firmware version will be displayed under the "Firmware Upgrade" option.
Watch this video to learn how to perform a firmware upgrade:


Use only official Nakamichi firmware files designed for your surround system to prevent voiding the warranty or damaging your system.

Ensure Surround Speakers, Subwoofers and Bluetooth Remote Control are connected before running a firmware upgrade. These components will be upgraded wirelessly.
9.2 Perform a Firmware Upgrade
Use a USB 2.0/3.0 Flash Drive. Maximum drive size: 128GB, formatted with FAT32 or exFAT.

DO NOT INTERRUPT THE FIRMWARE UPGRADE PROCESS by turning off, restarting any of DRAGON's speakers or pressing remote control buttons; even if the LED display shows no progress. Such actions may damage the unit, and void the warranty. Doing so could result in a damaged unit not covered by warranty. The upgrading process can take up to 25 minutes.
Method 1: Perform a firmware upgrade without the OSD (Recommended)
- Power DRAGON on.
- Press "USB" on your remote.
- Insert a USB Drive with the latest firmware (.upd file extension).
- DRAGON will scan your USB Drive for firmware files. If upgrade files are found, the LED display will show:
FW UPGRADE. PRESS ENTER TO CONTINUE.
- Press "ENTER".
-
The firmware upgrade process will begin. Please allow the firmware upgrade process to finish. During this time, you may observe the pairing lights on DRAGON's components flashing, which is a normal occurrence. Once the upgrade is completed, the main unit will restart automatically within 15 seconds.
-
When the system is turned on, initiate a factory reset by pressing and holding ⏻ on the main unit, until the LED display shows
FACTORY RESET
and powers off.
- Wait a few seconds. Power DRAGON on. Firmware upgrade is complete!

If DRAGON is running the same firmware version as the file on your USB drive, the LED display will show "FIRMWARE UP TO DATE". The upgrade will not be executed.
9.2 Perform a Firmware Upgrade
Method 2. Performing a firmware upgrade with the OSD (Follow this if Method 1 does not work)
- Insert a USB Drive with DRAGON's firmware.
- Power DRAGON on.
- Press "♠". The OSD will be shown on screen.
- Navigate to System > Firmware Upgrade.
- Scroll right "▶" on your remote to navigate to "Upgrade Info".
- Press "ENTER" to start the firmware upgrade process.
- Please allow the firmware upgrade process to finish. During this time, you may observe the pairing lights on DRAGON's components flashing, which is a normal occurrence.
- The firmware upgrade process will be displayed on the LED screen. Once the upgrade is completed, the main unit will restart automatically within 15 seconds.
- When the system is turned on, initiate a factory reset by pressing and holding ⏻ on the main unit, until the LED display shows
FACTORY RESET
and powers off.
- Wait a few seconds. Power DRAGON on. Firmware upgrade is complete!

If DRAGON is running the same firmware version as the file on your USB drive, the LED display will show "FIRMWARE UP TO DATE". The upgrade will not be executed.
SECTION 10
RECONNECTING COMPONENTS
10.1 Check Wireless Components Connection Status
Method 1: Check LED Light on the subwoofers/surround speakers
The subwoofer has a LED light on its back panel. The surround speaker has a LED light at the top of the speaker. These LED lights indicate the connection status of the wireless components.
| LED Indicator Status | |
| Solid blue | Connected to DRAGON |
| Blinking Blue Light | Subwoofer/Surround speaker is turned on, looking for main unit to pair with |
| Off | Subwoofer/Surround speaker is on standby mode |
| Rapidly blinking Blue Light | Subwoofer/Surround speaker in pairing mode, searching for main unit to connect to |
Method 2: Via the OSD
- Press "HOME" button to open OSD menu.
- Navigate to System > Subwoofers/Surrounds Manual Pairing. Press "ENTER".
- The state of connection for each component will be indicated.

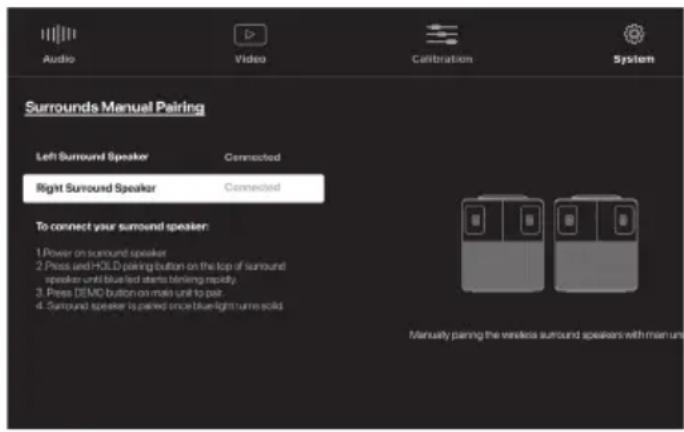
Disclaimer: Diagrams included in the manual are for illustration purposes only. Actual screen text may vary.
10.2 Re-Pairing Subwoofers
- Connect the subwoofers to power. Toggle the switch to "ON".

Applies to right subwoofer.

- Press and hold the pairing button behind the subwoofers until the blue LED blinks rapidly.


The subwoofers will stay in pairing mode for 120 seconds. Complete the remaining steps within this timeframe.
- Press and hold Ⓧ on top of the main unit for 8 seconds while system is on. The pairing process will begin automatically.

- If the subwoofer fails to connect to DRAGON, the main unit display will show:
WIRELESS PAIR
and continue to search for a wireless subwoofer to connect to.
10.2 Re-Pairing Subwoofers
- Once the wireless subwoofer is successfully paired with the main unit, the display will show the corresponding status

A solid blue LED light on the subwoofer will indicate successful pairing with the main unit.

L SUR (LS) and R SUR (RS) represents the Left and Right Surround Speakers.
L SUB (LW) and R SUB (RW) represents the Left and Right Subwoofers.
- If a wireless subwoofer is not paired successfully, the affected speaker will be represented with a “-” sign. In the example below, right subwoofer is not paired, retry steps 2-5.


If the above steps do not result in successful pairing,
- Temporarily relocate the subwoofer that fails to pair closer to the main unit. Retry steps 2-5.
- Adjust the wireless frequency and/or increase wireless strength, then retry steps 2-5. See pg 49.
10.3 Re-pairing Surround Speakers
- Connect the surround speakers to power. 2. Press and hold the pairing button on the top
of the surround speaker until the blue LED blinks rapidly.

Bottom of the Left and Right surround speaker.


The surround speakers will stay in pairing mode for 120 seconds. Complete the remaining steps within this timeframe.
- Press and hold ⬤ on top of the main unit for 8 seconds while system is on.

- If a surround speaker fails to connect to DRAGON, the main unit display will show
WIRELESS PAIR
and continue to search for a wireless speaker to connect to.
10.3 Re-pairing Surround Speakers
- When the wireless speaker is successfully paired with the main unit, the display will show

A solid blue LED light on the speaker will indicate successful pairing with the main unit.

L SUR (LS) and R SUR (RS) represents the Left and Right Surround Speakers.
L SUB (LW) and R SUB (RW) represents the Left and Right Subwoofers.
- If a surround speaker is not paired successfully, the affected speaker will be represented with a “-” sign. In the example below, left surround speaker is not paired, retry steps 2-5.


If the above steps do not result in successful pairing,
- Temporarily relocate the surround speaker that fails to pair closer to the main unit. Retry steps 2-5.
- Adjust the wireless frequency and/or increase wireless strength, then retry steps 2-5. See pg 49.
10.4 Re-Pairing Bluetooth Remote Control
DRAGON remote that is on infrared transmission can be used immediately without going through the pairing process. You will only need to perform the pairing instructions below when the remote is on Bluetooth transmission.
Unpair Bluetooth Remote
- Power on DRAGON via the main unit's touch panel.
- Press and hold □ on the main unit for 8 seconds.
- DRAGON will disconnect and forget its Bluetooth connection with the current remote. The main unit display will show the following:
BT REMOTE DISCONNECTED

Performing this action will cause DRAGON to "forget" the previous remote. You will need to follow the instructions below to connect a remote using Bluetooth.
Pair Bluetooth remote control:
- After disconnecting from the previous remote, DRAGON will search for a new Bluetooth remote.
SEARCHING... BT REMOTE
- Remove and reinsert the batteries in the remote. Then, press and hold the "â" and "∆ RETURN" buttons simultaneously for 5 seconds. The backlit keys on the remote will begin to flash, indicating that it has entered pairing mode.
- Wait for DRAGON to search and pair with the remote. Upon successful connection, DRAGON will display the following:
BT REMOTE CONNECTED

If DRAGON shows "BT REMOTE NOT FOUND/UNABLE TO PAIR", press and hold □ for 8 seconds to reactivate the Bluetooth remote pairing function on the main unit. Then, follow the steps again to pair your Bluetooth remote control.
If you have issues with Bluetooth remote connectivity, as a temporary solution, switch to Infrared Mode by toggling a switch hidden by the battery cover (Pg 9). Then, contact DRAGON Concierge for a solution.
SECTION 11
PRODUCT INFORMATION
11.1 Specifications
| Speaker Driver and Power Specifications | |
| Main Unit | 58" chassis with dedicated chambers for each channel, containing:10 x 3" Drivers4 x 3" Dual-Angled Up-firing Speakers3 x 1.5" Air Motion TweetersPeak Power: 1500W |
| Wireless Subwoofers(2 Modules) | 2 x 8" Subwoofer drivers eachPeak Power: 500W per subwoofer module |
| Wireless Omni-MotionReference Surrounds(2 Modules) | 2 x 1.5" Air Motion Tweeters each2 x 3.5" Drivers each1 x 3" Rotatable Up-firing driver eachPeak Power: 250W per surround speaker module |
| Total Channels | 11.4.6 |
| Total Peak Power | 3000W |
| Total Loudness | Up to 125dB |
| Overall Frequency Response | 20Hz - 40kHz |
| Inputs and Outputs | |
| HDMI Connectivity | 3 x HDMI 2.1 Inputs1 x HDMI Out (eARC to TV) (HDCP 2.3)Up to 4K120Hz/8K60Hz with VRR/ALLM/FRL, Dolby Vision passthrough support with video upscaling functionality |
| Other Inputs | 1 × Optical Input1 × Aux Audio InputBluetooth 5.0 with aptXTM HD1 × USB (For Firmware Upgrade Only) |
| Audio Outputs(Stereo Only) | 1 × Optical Output1 × Aux Audio Output |
11.1 Specifications
| Core Features | |
| Codecs and Formats Supported | Dolby Atmos SupportedCodecs: Dolby TrueHD, Dolby MAT, Dolby Digital Plus, Dolby Digital |
| DTS:X PRO CertifiedCodecs: DTS-HD Master Audio, DTS-HD High Resolution Audio,DTS Digital Surround | |
| LPCM 7.1, LPCM 5.1, PCM | |
| Audio Enhancements | 10 EQ Modes:Movie 1/2/3, Music 1/2/3, Game, News, Sports, No EQ |
| Night mode | |
| Adaptive Height Dispersion (AHD) Technology | |
| Channel Volume Control, Quad Subwoofer and Height Effects setup | |
| Channel Level and Room Size Calibration | |
| Surround Modes: Dolby Surround, DTS Neural:X, DTS Direct, Studio, Native, All Channel Stereo, Stereo Only | |
| Miscellaneous | |
| Display Functionality | On-Screen DisplayDot-Matrix LED display (on main unit) |
| Remote Control | 45-Key - backlit LED with brushed aluminum finishBluetooth and IR CompatibleSmartphone remote application supported |
| Power Input | 110 - 240V, 50 / 60Hz |
| Dimensions and Weight | Dimensions Weight | |
| Main Unit | 58.1 x 7.7 x 4.4 inch | 32.2lbs each |
| Subwoofer | 12.5 x 11.2 x 20.9 inch | 34.4lbs each |
| Surround Speakers | 9.0 x 8.3 x 10.7 inch | 8.8lbs each |
11.1 Specifications
DRAGON is compatible with the following audio codecs and formats:
HDMI inputs/ARC/eARC
| Audio Signal Types Audio Signal Formats Compatible Inputs | ||
| 2 Ch Linear PCM 2 Ch, 32-192kHz, 16/24-bit TV HDMI ARC/eARC, HDMI Inputs | ||
| Multi-Ch Linear PCM 7.1 Ch, 32-192kHz, 16/24-bit TV HDMI ARC/eARC, HDMI Inputs | ||
| Bitstream (SD) - 5.1ch Dolby Digital, DTS, AAC TV HDMI ARC/eARC, HDMI Inputs | ||
| Bitstream (HD Audio) Dolby Digital Plus, Dolby Atmos Digital Plus TV HDMI ARC/eARC, HDMI Inputs | ||
| Bitstream (HD Audio) Dolby TrueHD, Dolby Atmos TrueHD, Dolby Atmos MAT, DTS-HD High Resolution Audio, DTS-HD Master Audio, DTS:X | TV HDMI eARC, HDMI Inputs | |
Digital Audio Signal (Optical)
Recommended for: CD / DVD playback and devices without HDMI output.
| Audio Signal Types Audio Signal Formats | |
| 2 Ch Linear PCM | 2 Ch, 32-192kHz, 16 / 24-bit |
| Bitstream (5.1ch) | Dolby Digital, DTS, AAC |
• Refer to documentation supplied with the playback device, and set the device appropriately.
- To decode audio bitstream signals on this unit, set the input source device appropriately so that the device outputs bitstream audio signals. Refer to documentation supplied with the device for details.
11.2 Glossary
This section explains the technical terms used in this user manual.
Adaptive Height Dispersion (AHD)
Nakamichi's exclusive height processing technology that unlocks the maximum potential of height effects for different content types and listening preferences.
Dolby Atmos object-based audio
Dolby Atmos is an object-based audio format with the capability to reproduce up to 128 simultaneous objects. Every sound in a scene can be represented as a separate audio object that can be positioned and moved throughout the 3D space. For more information, visit https://www.dolby.com/us/en/brands/dolby-atmos.html
Dolby Digital
Dolby Digital is a compressed digital audio format developed by Dolby Laboratories, Inc. that supports 5.1-channel audio. This technology is used for audio on most DVD discs.
Dolby Digital Plus
Dolby Digital Plus, also known as Enhanced AC-3 is a digital audio compression scheme developed by Dolby Labs for transport and storage of multi-channel digital audio. This format is commonly found on many streaming services, including Netflix, Amazon Prime, Disney+, HBO Max and many more.
Dolby MAT
Dolby MAT is used by live TV broadcasts, certain streaming devices and game consoles for on-the-fly encoding, and can include Dolby Atmos Metadata.
Dolby Surround
Dolby Surround expands on stereo to deliver sound from the sides, behind, and even above you, creating a natural, multidimensional sonic environment based on the science of how humans hear. Dolby audio in your home theater improves the power, clarity, and realism of sound by upmixing content into 11.4.6 channels.
Dolby TrueHD
Dolby TrueHD is a lossless multi-channel audio codec developed by Dolby Laboratories which is used in home-entertainment equipment such as Blu-ray disc players and home theater systems. It competes with DTS-HD Master Audio, a lossless codec from DTS.
Dolby Vision
Dolby Vision transforms your TV experience with dramatic imaging with incredible brightness, contrast, color, details and dimensionality. And with the advanced capabilities in Dolby Vision, you'll see there's more to the story that generic HDR cannot reveal.
DTS Digital Surround
DTS Digital Surround is a compressed digital audio format developed by DTS that supports 5.1-channel audio. This technology is used for audio on most DVD discs.
DTS-HD High Resolution Audio
DTS-HD High Resolution Audio is a compressed digital audio format that supports 7.1-channel and up to 96kHz / 24-bit audio. It remains fully compatible with the existing DTS multichannel audio systems.
DTS-HD Master Audio
DTS-HD Master Audio is an advanced lossless audio format developed to offer a high-definition home theater experience by DTS, Inc. It is commonly found on Blu-ray discs and it can carry up to eight channels of 96kHz / 24-bit audio (up to six channels of 192kHz / 24-bit audio) simultaneously.
DTS NEURAL:X
DTS Neural:X* is the latest down-mixing / up-mixing and spatial remapping technology from DTS. It is built in to DTS:X PRO to provide upmix of Neural:X-encoded data. DTS Neural:X will upmix DTS content into 11.4.6 channels to match the capabilities of DRAGON.
*Note: When Neural:X is selected, channel based DTS content with a sampling rate above 48kHz will be processed natively without further upmixing. This is an inherent limitation of the upmixing technology.
DTS:X Dialog Control
DTS:X Dialog Control allows you to boost the volume of dialog, increasing its intelligibility. People with impaired hearing may also benefit. Note: Content creators may disable the use of this feature on their content, so this feature may not always be available.
DTS:X Master Audio
DTS:X Master Audio offers 24-bit lossless and discrete immersive audio for Blu-ray, Ultra HD Blu-ray and other digital formats. It supports both high-channel count and multi-dimensional object-based audio coding, while maintaining full backward compatibility with legacy DTS-HD and DTS Digital Surround devices, all within a single bitstream.
DTS:X object-based audio
DTS:X uses a technology called object-based audio that processes each sound contained in an audio source as an "object" and memorizes each object's sound changes and positional changes in a sound field to control these changes during playback. For more information, visit https://dts.com/dtsx
DTS:X PRO
DTS:X PRO is a premium home cinema technology that is an evolution of DTS:X, rendering object-based audio information for up to 32 connected speakers, enabling greater spatial resolution and realism. It is a substantial upgrade compared to the standard home theater DTS:X renderer that natively supports rendering of up to 12 speakers.
Dynamic Range Compression (DRC)
DRC is an audio signal processing operation that reduces the volume of loud sounds, while amplifying quiet sounds. This reduces (or compresses) an audio signal's dynamic range. DRC is also known as volume normalization.
Energy Saving Mode
Automatically switches off the system after a period of inactivity to promote eco-friendliness.
11.2 Glossary
HDMI
HDMI (High-Definition Multimedia Interface) is the world-wide standard interface for digital audio/video signal transmission. This interface transmits both digital audio and digital video signals using a single cable without any loss. HDMI complies with HDCP (High-bandwidth Digital Content Protection) and provides a secure audio/video interface. For further information on HDMI, visit the HDMI website at "http://www.hdmi.org/".
HDMI ARC / eARC
HDMI Audio Return Channel (ARC) / enhanced Audio Return Channel (eARC) offers two-way communication between DRAGON and TV over a single HDMI connection. Essentially, the HDMI ARC port lets you use HDMI as both an input and an audio output.
HDMI-CEC CONTROL
HDMI-CEC Control allows you to operate external devices via HDMI. If you connect a TV that supports HDMI CEC to DRAGON, you can control DRAGON with your TV's remote control. Functions supported include:
• Standby synchronization.
• Volume control, including mute.
HDMI Passthrough
HDMI Passthrough allows DRAGON to send video/audio content from a selected HDMI input on the main unit to the TV, even during standby.
HDCP
HDCP (High-bandwidth Digital Content Protection) is a digital copy protection form that prevents copying of digital contents as it travels across connections (such as HDMI).
Lip Sync
Video output sometimes lags behind audio output due to the complexity of signal processing caused by an increase in video signal capacity and internet streaming delay. Lip Sync is a technique to compensate the timing lag between audio and video output.
LPCM
Linear Pulse-Code Modulation is a method of digitally encoding uncompressed (lossless) audio information, generally used for transmitting uncompressed 5.1 or 7.1 channel audio.
On Screen Display (OSD)
An OSD allows you to control the surround system with ease, displaying all settings on a user-friendly interface. DRAGON's OSD includes helpful visuals to aid with each adjustment option.
PCM (Pulse Code Modulation)
Pulse-Code Modulation is a digital representation of uncompressed (lossless) analog audio signals.
PerfectHeight Mechanism
A patented innovation developed by Nakamichi that allows for the up-firing drivers on the Omni-Motion Reference Surrounds to be rotated up to 180 degrees to accommodate any environment and seating position.
Qualcomm aptX™ HD
Qualcomm ® aptX TM HD was designed to answer the growing demand for high resolution audio. This enhanced codec supports 24-bit music quality over Bluetooth. This allows listeners to hear even the smallest details in their music.
Room Calibration
Room Calibration optimizes the level and timing of different sonic frequency ranges to your room placement. Easy sound setup is recommended for basic users. Advanced room calibration is also available for prosumers.
Smart Home
Smart Home systems allow homeowners to control their appliances and home theater systems remotely using an internet-connected hub, either through a smartphone, tablet or voice commands.
Subwoofer Crossover Frequency
The subwoofer crossover frequency is the frequency at which your speakers start to roll off and your subwoofer kicks in with low frequency effects and bass notes.
Video Upscaling
Video upscaling enhances and sharpens lower resolution content for optimized viewing on today's 4K or 8K screens.
Volume Level Calibration
Volume Level Calibration allows advanced users to use a sound pressure level meter at their primary listening position to calibrate each speaker to their room for theater-like sound.
Universal Remote
A universal remote can be programmed to operate one or more types of consumer electronics from various brands.
11.3 Legal and Compliance
Model No.: Nakamichi Dragon 11.4.6 Home Surround Sound System
FCC Compliance Statement:
This device complies with Part 15 of the FCC Rules. Operation is subject to the following two conditions:
(1) this device may not cause harmful interference, and
(2) this device must accept any interference received, including interference that may cause undesired operation.
Changes or modifications not expressly approved by the party responsible for compliance could void the user's authority to operate the equipment.
This equipment has been tested and found to comply with the limits for a Class B digital device, pursuant to part 15 of the FCC Rules. These limits are designed to provide reasonable protection against harmful interference in a residential installation. This equipment generates, uses and can radiate radio frequency energy and, if not installed and used in accordance with the instructions, may cause harmful interference to radio communications. However, there is no guarantee that interference will not occur in a particular installation. If this equipment does cause harmful interference to radio or television reception, which can be determined by turning the equipment off and on, the user is encouraged to try to correct the interference by one or more of the following measures:
- Reorient or relocate the receiving antenna.
- Increase the separation between the equipment and receiver.
- Connect the equipment into an outlet on a circuit different from that to which the receiver is connected.
- Consult the dealer or an experienced radio/TV technician for help.
This equipment must be installed and operated in accordance with provided instructions and the antenna(s) used for this transmitter must be installed to provide a separation distance of at least 20 cm from all persons and must not be co-located or operating in conjunction with any other antenna or transmitter. End-users and installers must be provided with antenna installation instructions and transmitter operating conditions for satisfying RF exposure compliance.
Class B FCC Statement
This equipment has been tested and found to comply with the limits for a Class B digital device, pursuant to Part 15 of the FCC Rules. These limits are designed to provide reasonable protection against harmful interference in a residential installation. This equipment generates, uses and can radiate radio frequency energy and, if not installed and used in accordance with the instructions, may cause harmful interference to radio communications. However, there is no guarantee that interference will not occur in a particular installation. If this equipment does cause harmful interference to radio or television reception, which can be determined by turning the equipment off and on, the user is encouraged to try to correct the interference by one of the following measures:
- Reorienting or relocating the receiving antenna.
- Increasing the separation between the equipment and receiver.
- Connecting the equipment to an outlet that is on a different circuit than the radio or TV.
- Consulting the dealer or an experienced radio/TV technician for help.
11.3 Legal and Compliance
| COMPATIBLE WITH ATMOS Dolby Vision | Dolby, Dolby Vision, Dolby Atmos, and the double-D symbol are registered trademarks of Dolby Laboratories Licensing Corporation. Manufactured under license from Dolby Laboratories. Confidential unpublished works. Copyright © 2012–2023 Dolby Laboratories. All rights reserved. |
  | For DTS patents, see http://patents.dts.com. Manufactured under license from DTS Licensing Limited. DTS, the Symbol, DTS in combination with the Symbol, DTS:X, and the DTS:X logo are registered trademarks or trademarks of DTS, Inc. in the United States and/or other countries. ®DTS, Inc. All Rights Reserved. |
 | The terms HDMI and HDMI High-Definition Multimedia Interface, and the HDMI Logo are trademarks or registered trademarks of HDMI Licensing Administrator, Inc. in the United States and other countries. |
 | The Bluetooth® word mark and logos are registered trademarks owned by Bluetooth SIG, Inc. and any use of such marks by Nakamichi LLC is under license. Other trademarks and trade names are those of their respective owners. |
 | Qualcomm® aptXTM HD is a product of Qualcomm Technologies, Inc. and/or its subsidiaries. Qualcomm is a trademark of Qualcomm Incorporated, registered in the United States and other countries. aptXTM is a trademark of Qualcomm Technologies International, Ltd., registered in the United States and other countries. |
SECTION 12
SUPPORT
12.1 Warranty Information
LIMITED WARRANTY (U.S. Only)
Nakamichi LLC (“Nakamichi”) warrants this product against defects in material or workmanship for the time periods and set forth below. Pursuant to this Limited Warranty, Nakamichi will, at its option, (i) repair the product using new or refurbished parts or (ii) replace the product with a new or refurbished product. For purposes of this Limited Warranty, “refurbished” means a product or part that has been returned to its original specifications. In the event of a defect, these are your exclusive remedies.
Labor: For a period of one (1) year from the original date of purchase of the product ("Labor Warranty"), Nakamichi will, at its option, repair or replace with new or refurbished product, product determined to be defective. If Nakamichi elects to replace the product after this Labor Warranty has expired but while the Parts Warranty below is still in effect, it will do so for the applicable labor charge.
Parts: For a period of one (1) year from the original date of purchase of product ("Parts Warranty"), Nakamichi will supply new or refurbished replacement parts in exchange for parts determined to be defective.
This Limited Warranty covers only the hardware components packaged with the Product. It does not cover technical assistance for hardware or software usage and it does not cover any software products whether or not contained in the Product; any such software is provided "AS IS" unless expressly provided for in any enclosed software Limited Warranty. Please refer to the End User License Agreements included with the Product for your rights and obligations with respect to the software.
Instructions: To obtain warranty service, you must deliver the product, freight prepaid by product owner, in either its original packaging or packaging affording an equal degree of protection to the Nakamichi authorized service facility specified. It is your responsibility to backup any data, software or other materials you may have stored or preserved on DRAGON. It is likely that such data, software, or other materials will be lost or reformatted during service and Nakamichi will not be responsible for any such damage or loss. A dated purchase receipt is required.
Repair / Replacement Warranty: This Limited Warranty shall apply to any repair, replacement part or replacement product for the remainder of the original Limited Warranty period or for ninety (90) days, whichever is longer. Any parts or product replaced under this Limited Warranty will become the property of Nakamichi.
This Limited Warranty only covers product issues caused by defects in material or workmanship during ordinary consumer use; it does not cover product issues caused by any other reason, including but not limited to product issues due to commercial use, acts of God, misuse, limitations of technology, or modification of or to any part of the Nakamichi product. This Limited Warranty does not cover Nakamichi products sold AS IS or WITH ALL FAULTS or consumables (such as fuses or batteries). This Limited Warranty is invalid if the factory-applied serial number has been altered or removed from the product.
This Limited Warranty is valid only in the United States. This Limited Warranty is valid only for Nakamichi products purchased from the following authorized retailers with a valid receipt stating date, product description and purchase price:
- Amazon.com (under seller "Nakamichi LLC")
- Best Buy
- Ebay (under seller "nakamichi-usa")
- B&H Photo Video
- Nakamichi Online Store (nakamichi-usa.com)
LIMITATION ON DAMAGES: NAKAMICHI SHALL NOT BE LIABLE FOR ANY INCIDENTAL OR CONSEQUENTIAL DAMAGES FOR BREACH OF ANY EXPRESS OR IMPLIED WARRANTY ON THIS PRODUCT.
DURATION OF IMPLIED WARRANTIES: EXCEPT TO THE EXTENT PROHIBITED BY APPLICABLE LAW, ANY IMPLIED WARRANTY OF MERCHANTABILITY OR FITNESS FOR A PARTICULAR PURPOSE ON THIS PRODUCT IS LIMITED IN DURATION TO THE DURATION OF THIS WARRANTY.
Some states do not allow the exclusion or limitation of incidental or consequential damages, or allow limitations on how long an implied warranty lasts, so the above limitations or exclusions may not apply to you. This Limited Warranty gives you specific legal rights any you may have other rights which vary from state to state.
DRAGON CONCIERGE
If you have any questions or comments, you may reach us at the following:
Visit our website at www.dragon.nakamichi-usa.com
Email us at dragonvip@nakamichi-usa.com
Phone Support: +1 (415) 888 9626 (Weekdays 10am - 6:45pm PST; Saturday 10am - 4:45pm PST)
Join our Community: community.nakamichi-usa.com
12.2 Sound Optimization Tips
Room acoustics can significantly affect your overall experience. Try these tips to maximize performance.
| Symptom Remedy | |
| Bass too strong/overpowering | 1. Lower volume of left and right subwoofersa. On the remote control, lower the bass volume level.2. Reduce the number of active subwoofers. See Section 5.3, pg 34.3. Change EQ to Movie/Music 2 or 3. See Section 4.2B, pg 29.4. lower subwoofer crossovera. Press “HOME” to access the OSD.b. Under the “Audio” tab, select “Advanced Audio Settings”. Lower the subwoofer crossover (default is 200Hz).5. If bass seems to be louder on either side,a. Press “HOME” to access the OSD.b. Under the “Audio” tab, go to Audio Setup > Quad Subwoofers Setup.c. Adjust “Quad Subs Balance” to even out bass distribution. |
| Surround channels too loud | 1. Press “SURROUND” button on your remote to switch to “Dolby Surround” (or “Neural X”, for DTS Content only). Avoid using “All Channel Stereo” when watching content with surround sound.2. Decrease the volume of side and back surrounds. Press “SS-” and “SB-” on your remote.3. Adjust surround channel volumea. Press “HOME”. Go to Calibration > Advanced Sound Setup > Volume Level Calibrationb. Increase the volume of “Left + Right” and “Center” channel. |
| Surround channels too soft | Ensure content being played has surround sound (e.g. 5.1ch or Dolby Atmos). When playing content with weak/no surround effects, Press “All Channel Stereo” on your remote. Front channels will be upmixed to the surround speakers. |
12.2 Sound Optimization Tips
| Symptom Remedy | |
| Either surround channel (left or right) louder than the other | 1. If your room only has one side wall (either side),a. Press “HOME”. Under the “Audio” tab, go to Audio setup > Channel Level Volume Setup.b. Adjust “Front Surround Balance” to project more sound towards area with no side wall.2. If surround speakers are not placed at equal distances from listening position,a. Press “HOME” to access the OSD.b. Under the “Audio” tab, go to Audio setup > Channel Level Volume Setup.c. Adjust “Surround Speaker Balance” to increase output of the surround speaker that is placed further away.3. Calibrate DRAGON to your room sizea. Go to “HOME” > “Calibration” > Easy Sound Setup. Switch between Small, Medium or Large rooms.b. For more precise calibration, go to Advanced Sound Setup > Room Size Calibration to manually set distances of each speaker to listening position. |
| Height channels too soft | 1. Adjust AHD settinga. Press “AHD” on your remote. Set AHD to “Max”.2. Adjust Height Channel Volumea. Press “FH+” and “RH+” on your remote to increase height channel volume. |
| Either height channel (left or right) louder than the other | 1. Adjust rear height balancea. Press “HOME” to access the OSD.b. Go to the “Audio” Tab. Select Audio Setup > Height Effects Setup.c. Adjust the rear height speaker balance. |
12.3 Help and Troubleshooting
1. HDMI eARC / ARC - No sound or video / System switching sources erratically
Restore DRAGON's factory settings to refresh HDMI settings
A. Restoring Factory Settings ("Soft Reset")
Method 1: Without OSD
i. Power ON DRAGON.
ii. Press and hold ⏻ on the main unit for 8 seconds. The factory settings will be restored. The main unit will turn off when reset is complete.
iii. After a few seconds, press ⏻ to power ON DRAGON. DRAGON will go to TV (ARC/eARC) by default.
Method 2: Via On-Screen Display (OSD)
i. Press "HOME". Navigate to the "System" tab.
ii. Scroll down to "Restore Factory Settings". Press "▶" to scroll to "Fav+Name+Room"
iii. Press "ENTER". Factory settings will be reapplied. The main unit will power off when reset is complete.
iv. After a few seconds, press ⏻ to power ON DRAGON. DRAGON will go to TV (ARC/eARC) by default.
If your TV was connected to another sound system via HDMI previously, perform a hard reset by following these steps to establish a new HDMI handshake.
B. DRAGON & TV Hard Reset + HDMI Connection Refresh
i. While all source devices are on, disconnect all HDMI cables connected to the TV and DRAGON (including the cable that links the TV to DRAGON).
ii. Power OFF TV, DRAGON and all source devices.
iii. Unplug all devices from the AC outlets.
iv. Wait for 5 minutes before plugging the TV, DRAGON and source devices back to the AC outlets.
v. Power ON DRAGON, TV and all source devices.
vi. While they are on, connect the TV and DRAGON via HDMI eARC/ARC.
Once the connection is established, connect other source devices one at a time.
Then, use the Perfect Device Matching Tool on the right to optimize audio settings.

2. No sound from entire DRAGON system
i. Press the "OUTPUT" button on your remote. Ensure external output is set to "EXT OFF".
ii. Ensure DRAGON's volume is set to an audible level. Press □ on the main unit. If sound is output from all speakers, the issue may be with the device connected to DRAGON.
iii. Check the volume of your external device.
iv. Check all cable connections connecting your device to DRAGON.
v. Try a soft reset, followed by a hard reset + HDMI Connection Refresh (See Section 1).
12.3 Help and Troubleshooting
3. TV is not sending sound from streaming apps/devices connected to it to DRAGON
i. Ensure DRAGON is connected to the TV via the designated HDMI eARC/ARC ports on both devices. Use the HDMI 2.1 cable included in box.
ii. HDMI eARC and HDMI - CEC may need to be enabled from your TV settings. Check your TV documentation or visit the website provided on the right to view recommended audio settings for your TV.
For brand specific TV audio settings, scan the QR code or visit: bit.ly/dragon-best-sound

4. Intermittent audio cut out or no sound
i. Perform a soft reset. See 1A (above).
ii. Disconnect the source device that is having issues from the main unit or TV. Unplug the source device from the AC outlet for 5 minutes before powering it back on.
iii. While the source device is on, connect it to the main unit or TV.
iv. Get the best audio performance using recommended audio settings (bit.ly/dragon-audio-settings).
5. No sound from wireless subwoofers or surround speakers
A. Ensure power is connected
Check that the power cord is inserted firmly into the speaker/adapter power sockets and AC outlet, and that power is being sent to all speakers. Ensure that the subwoofer's physical power switch is toggled to "ON". Then, power on the main unit.
B. Check wireless connection
i. With the main unit powered on, check if the LED indicator on the rear of the subwoofer and surround speakers are lit with solid blue light. If the LED indicator for any wireless speaker is flashing or turned off, Perform the pairing procedure in Section 10.2 or 10.3, pg 61 to 64.
ii. If a wireless speaker fails to power on or connect, disconnect power to the affected wireless speakers for 5 minutes, and retry this procedure.
C. Soundcheck
If all wireless speakers have a solid blue light while DRAGON is powered on, press □ (Demo) on the main unit. If sound is being output from all speakers, there are no issues with the wireless connection between the speakers.
If the sound is intermittent, see steps in the next section.
12.3 Help and Troubleshooting
6. Subwoofer or surround speakers sound abnormalities
Cut out / crackling / popping / distortion: When there is a 5.8Ghz wireless device in close range to DRAGON that is using the same frequency (e.g. Home Wi-Fi router), the main unit's wireless connection to the subwoofer and surround speakers may be affected. This can be resolved by adjusting the following settings:
A. Remove any obstructions or potential sources of interference.
i. Remove any obstacles between the main unit and the affected wireless component.
ii. Other devices sending radio frequency signals in proximity may interrupt the connection. Where possible, keep your speakers away from such devices.
iii. Bring the subwoofers and surround speakers closer to the main unit. See Section 2.1 - 2.2 for recommended speaker placement.
B. Change DRAGON's wireless channel
i. Press the "HOME" button on your remote. Navigate to the "System" tab.
ii. Go to "Subs + Surr Wireless Freq", and change to either of the following:
| Selection Wireless Frequency (GHz) Frequencies Occupied | 3 |
| Default 5.8 GHz Channels 149 - 163 | |
| Auto 1 5.2 GHz Channels 32 - 50 |
Notes:
- The default channel is optimized for avoiding wireless interference from external devices. If there is no audio popping /crackling /cut out from subwoofer(s) or surround speakers, it is recommended to keep using the default channel.
- Changing the radio frequency channel and strength may affect the performance of other near wireless devices (e.g. wireless LAN) using the same frequency bandwidth.
- DRAGON's wireless transmission will automatically analyze and use smaller range of frequency channels mentioned for the best wireless performance.
C. Adjusting your home's wireless router
Visit our helpdesk to view recommended settings for your Wi-Fi router and optimize the performance of DRAGON's wireless communication. Scan the QR code on the right.
Optimize your Home Wi-Fi for wireless surround systems

D. Change DRAGON's wireless strength
i. Press the "HOME" button on your remote. Navigate to the "System" tab.
ii. Go to "Wireless Freq Strength", change ""2: Default" to 3 or 3+. (See Section 6.5A, pg 49)
iii. Play content. Audio playback from subwoofer and surround speakers should be optimized.
12.3 Help and Troubleshooting
7. No surround sound or surround sound volume is lower than expected
i. Ensure your device is sending surround sound to DRAGON. Only devices connected via HDMI or optical can send surround sound to DRAGON. Bluetooth transmissions are limited to stereo sound.
ii. When using Bluetooth or Aux-In to play stereo content, press "All Channel Stereo" to send stereo sound to the surround speakers.
iii. Press SS+/SB+ on your remote to increase the volume of surround effects.
8. Bass seems weaker than expected
i. Verify the power connections of both subwoofer units. Power on the system. Ensure the LED indicators on both subwoofers are lit with a solid blue light.
- If any subwoofer displays a continuously flashing blue LED, perform the subwoofer pairing procedure (Section 10.2, Pg 61).
- If the bass output from any subwoofer is intermittently cutting out, adjust the wireless frequency channel or strength settings (Section 6.5A, Pg 49).
ii. Press SUB+ on your remote, until "Quad Subs" is shown on the main unit display. Push up the Bass button on your remote to increase bass output.
iii. Press “Home” to open DRAGON's OSD. Navigate to Calibration > Volume Level Calibration. Scroll down and ensure the subwoofer level for both subwoofers are set to at least 5 (default).
iv. Certain content may be recorded with weak bass effects. Try playing content that is encoded with 5.1 channels or above.
v. Experiment with subwoofer placement (See recommendations in Section 2.1, pg 12).
9. Remote does not work
i. Replace the batteries with new ones.
ii. Try re-pairing the remote control to the main unit (Section 10.4, pg 65).
iii. Use the remote within reasonable proximity to the main unit.
iv. Ensure that the remote is using Bluetooth mode. When operating in infrared mode, it is important to point the remote directly at the main unit for optimal response.
12.3 Help and Troubleshooting
10. My Device cannot connect to DRAGON via Bluetooth
i. DRAGON is only able to playback content from a connected device when it is set to BT Mode. Press ✝ on your remote to switch to it.
ii. If DRAGON's LED display shows BT without blinking, this indicates that another device is connected to DRAGON. Press and hold ✝ until BT starts flashing. DRAGON is now ready to pair with a new device.
iii. If your device is still unable to connect to DRAGON, instruct the source device to forget the connection "DRAGON". Restart the device and try pairing it to DRAGON again.
11. Sound drops out when connected via Bluetooth
i. Some devices can cause radio interference if they are located too close to the main unit. e.g. microwaves, wireless routers, telephones, computer peripherals etc.
ii. When your Bluetooth-connected device moves too far away from the main unit, it can result in audio dropouts.
iii. If the main unit is located near metal furniture or has obstructions between it and your device, the sound may drop out. Check your installation environment.
SECTION 13
ADVANCED SETTINGS
13.1 Connecting your TV Via Digital Optical [BETTER], AUX-IN
Using a TV without ARC/eARC?
Scan this QR Code to learn how to connect your TV to Dragon.
bit.ly/dragon-optical

Bottom View of main unit


Note:
- Be sure to connect to a TV's audio output port, not an audio input port.
- Ensure that the optical/aux cable is connected to DRAGON's Optical/Aux In port.
- Note: Dolby Digital Plus, Dolby TrueHD, Dolby Atmos, DTS-HD MA, DTS-HD and DTS:X PRO are not supported on Optical and Aux connections.
- Not all TVs have the audio outputs shown above. To connect the main unit directly to your other devices (e.g. Blu-ray player, game consoles, etc.), see pg 20, 3.2D Connecting Content Devices
*If there is no audio after setup, see pg 78 for Help & Troubleshooting
**Optical/Aux In cables are not included.
13.2 Connecting External Devices to DRAGON
DRAGON comes with Optical Out and Aux Out ports. Use this function to connect external devices such as Bluetooth transmitters. Bluetooth transmitters allow you to connect Bluetooth headphones wirelessly to DRAGON, for nighttime listening.
- Power down DRAGON. Ensure the external device (e.g. speaker) is turned off.
- Connect external devices to DRAGON via Aux-Out and/or Optical-Out.
- Power on DRAGON and external device.
- Press "OUTPUT" on DRAGON's remote to toggle between these options.

| Setting OSD Display | Description | |
| EXT OFF | External Audio Out: OFF | External Off (Default): Plays audio from DRAGON only.No sound is sent to external devices. |
| OPT + AUX EXT OUT | External Output: Optical + AuxOptical | Aux External Out: Plays audio on both external outputs.No audio output from DRAGON. |
| OPTICAL EXT OUT | External Output: OpticalOptical External | Out: Plays audio via optical out only.No audio from DRAGONand AUX Out. |
| AUX EXT OUT | External Output: Aux | Aux External Out: Plays audio via aux out only.No audio from DRAGON and Optical Out. |

Ensure external devices are connected to the right ports (Aux-Out / Optical-Out). Both ports deliver stereo output.

Protect your hearing. Always set the volume at comfortable audio levels before playing content. High volume levels can damage your hearing.
13.3 Integrate DRAGON With Universal Remotes
By default, DRAGON utilizes Bluetooth to communicate with its remote control, allowing users to control the system from further distances, even when the remote is not directly pointed at the unit.
DRAGON is compatible with universal remotes as it supports infrared (IR) signal control. The remote features a switch to transform it into a traditional remote, allowing universal remotes to learn the required codes for operating DRAGON.
A. Switching DRAGON's remote to IR Mode
- Slide open the battery cover of DRAGON's remote.
- Locate the switch at the bottom of remote. Use a pointed object to push the switch down, from ✝ to IR Mode

B. General guide to teach DRAGON's IR Codes to universal remotes
Note: These steps are based on the Logitech Harmony remote control.
- Connect your universal remote to a computer or smartphone (if applicable).
- Open your universal remote controller's management application.
- Add a new device category for DRAGON's remote codes.
- Select "Add a command manually".
- When instructed, point the infrared sensor of DRAGON's remote control (situated at the top) to the infrared input sensor on your universal remote or smart hub controller. The remotes should be approximately 3 inches (8 cm) apart.
- On DRAGON's remote control, press and hold the button that you would like the universal remote or smart hub controller to learn for 1 to 2 seconds. The management application should inform you when the command is captured successfully.
- Repeat the process for each button that you would like for your universal remote/smart hub controller to learn and control DRAGON.

For best performance, switch DRAGON's remote back to ✗ mode after teaching the IR commands to your universal remote/smart home controller.
HELPDESK
bit.ly/dragon-helpdesk

SPEAK TO OUR DRAGON CONCIERGE BASED IN CALIFORNIA
dragonvip@nakamichi-usa.com
(415) 888 9626


(Weekdays 10am - 6:45pm PST; Saturday 10am - 4:45pm PST)
NAKAMICHI USA. ALL RIGHTS RESERVED.


- IMPORTANT SAFETY INSTRUCTIONS
- TABLE OF CONTENTS
- MEET DRAGON
- SET UP
- CONNECT
- CONTROL
- PERSONALIZE
- ON-SCREEN DISPLAY
- SURROUND DEMO & CHANNEL TEST TRACKS 53
- MOBILE APPLICATION
- FIRMWARE UPGRADE
- RECONNECT COMPONENTS
- PRODUCT INFORMATION
- SUPPORT
- SECTION 1
- 1.1 PACKAGE CONTENTS
- 1.2 CONTROLS & CONNECTIONS
- MAIN UNIT
- QUAD SUBWOOFERS
- OMNI-MOTION REFERENCE SURROUNDS
- REMOTE CONTROL
- INSERT BATTERIES BEFORE USING THE REMOTE CONTROL (AAA BATTERIES X 2)
- BLUETOOTH OR INFRARED TRANSMISSION SWITCH
- OPTIONAL ACCESSORIES
- SPEAKER STANDS (SOLD SEPARATELY)
- SECTION 2
- 2.1 MAIN UNIT & SUBWOOFERS
- BEST
- BETTER
- 2.2 SURROUND SPEAKERS
- 2.3 PERFECTHEIGHT MECHANISM
- SETTING PERFECTHEIGHT
- REFERENCE PLACEMENT
- SECTION 3
- 3.1 POWER ON DRAGON
- 3.2 SET UP HDMI ARC/EARC WITH YOUR TV
- ESTABLISHING A CONNECTION
- AUDIO SETTINGS FOR TV
- SETTING THE AUDIO OUTPUT
- SETTING THE AUDIO FORMAT
- SET UP CONTROL COMMUNICATION BETWEEN DRAGON AND TV
- REQUIREMENTS
- ENABLING CEC
- CONNECTING CONTENT DEVICES
- 3.4 RECOMMENDED DEVICE AUDIO SETTINGS
- 3.5 CONFIGURE YOUR TV FOR 4K120/8K60 VIDEO PASSTHROUGH
- GENERAL GUIDE TO ENABLE 4K120/8K60 VIDEO PASSTHROUGH ON YOUR TV
- 3.6 USING BLUETOOTH ® WIRELESS AUDIO
- BLUETOOTH 5.0 WITH APTX TM HD
- BLUETOOTH CONNECTION
- PAIRING DRAGON WITH A BLUETOOTH DEVICE
- TO DISCONNECT DRAGON FROM A PAIRED BLUETOOTH DEVICE
- SECTION 4
- 4.1 REMOTE FUNCTIONS
- REMOTE FUNCTIONS AT A GLANCE
- SELECTING DIFFERENT INPUT SOURCES
- 4.2 SURROUND, EQUALIZER (EQ) & NIGHT MODE (DRC)
- SURROUND MODE
- SURROUND BUTTON
- DTS UPMIXING (FOR DTS / DTS-HD / DTS-HD MA / DTS:X CONTENT)
- EQUALIZER (AUDIO PRESETS AND NIGHT MODE)
- EQ (EQUALIZER)
- NIGHT MODE / DYNAMIC RANGE COMPRESS (DRC)
- SECTION 5
- 5.1 BASS AND TREBLE
- 5.2 CHANNEL CONFIGURATION
- 5.3 SUBWOOFER ADJUSTMENTS
- 5.4 CHANNEL VOLUME ADJUSTMENTS
- 5.5 HEIGHT CHANNEL VOLUME
- 5.6 ADAPTIVE HEIGHT DISPERSION
- 5.7 SAVE YOUR FAVORITE SETTINGS
- SAVING SETTINGS TO SYSTEM MEMORY
- LOADING FAVORITE SETTINGS
- 5.8 USING THE INFO BUTTON (EARC/ARC)
- 5.8 USING THE INFO BUTTON (HDMI 2, 3 & 4 INPUTS)
- INFORMATION DISPLAYED VIA OSD ON TV
- SECTION 6
- 6.1 USING THE OSD
- ACCESSING THE OSD
- NAVIGATING THE OSD
- ADDITIONAL INFORMATION
- 6.2 AUDIO SETTINGS
- 6.3 VIDEO SETTINGS
- 6.4 CALIBRATION SETTINGS
- EASY SOUND SETUP
- ADJUST ROOM SIZE
- ROOM SIZE CALIBRATION
- CONFIGURE YOUR SETUP
- SAVE YOUR SETUP
- VOLUME LEVEL CALIBRATION
- PINK NOISE CALIBRATION
- 6.5 SYSTEM SETTINGS
- WIRELESS SETTINGS
- SUBWOOFER AND SURROUND SPEAKERS MANUAL PAIRING
- MISCELLANEOUS OPTIONS
- SECTION 7
- 7 SURROUND DEMO & CHANNEL TEST TRACKS
- PLAYING THE DEMO
- SECTION 8
- 8.1 INSTALLATION
- 8.2 FUNCTIONS
- SECTION 9
- 9.1 CHECK THE FIRMWARE VERSION
- 9.2 PERFORM A FIRMWARE UPGRADE
- METHOD 1: PERFORM A FIRMWARE UPGRADE WITHOUT THE OSD (RECOMMENDED)
- FW UPGRADE. PRESS ENTER TO CONTINUE
- FACTORY RESET
- SECTION 10
- RECONNECTING COMPONENTS
- 10.1 CHECK WIRELESS COMPONENTS CONNECTION STATUS
- METHOD 2: VIA THE OSD
- 10.2 RE-PAIRING SUBWOOFERS
- WIRELESS PAIR
- 10.3 RE-PAIRING SURROUND SPEAKERS
- 10.4 RE-PAIRING BLUETOOTH REMOTE CONTROL
- UNPAIR BLUETOOTH REMOTE
- BT REMOTE DISCONNECTED
- PAIR BLUETOOTH REMOTE CONTROL
- SEARCHING... BT REMOTE
- BT REMOTE CONNECTED
- SECTION 11
- 11.1 SPECIFICATIONS
- DIGITAL AUDIO SIGNAL (OPTICAL)
- 11.2 GLOSSARY
- ADAPTIVE HEIGHT DISPERSION (AHD)
- DOLBY ATMOS OBJECT-BASED AUDIO
- DOLBY DIGITAL
- DOLBY DIGITAL PLUS
- DOLBY MAT
- DOLBY SURROUND
- DOLBY TRUEHD
- DOLBY VISION
- DTS DIGITAL SURROUND
- DTS-HD HIGH RESOLUTION AUDIO
- DTS-HD MASTER AUDIO
- DTS NEURAL:X
- DTS:X DIALOG CONTROL
- DTS:X MASTER AUDIO
- DTS:X OBJECT-BASED AUDIO
- DTS:X PRO
- DYNAMIC RANGE COMPRESSION (DRC)
- ENERGY SAVING MODE
- HDMI
- HDMI ARC / EARC
- HDMI-CEC CONTROL
- HDMI PASSTHROUGH
- HDCP
- LIP SYNC
- LPCM
- ON SCREEN DISPLAY (OSD)
- PCM (PULSE CODE MODULATION)
- PERFECTHEIGHT MECHANISM
- QUALCOMM APTX™ HD
- ROOM CALIBRATION
- SMART HOME
- SUBWOOFER CROSSOVER FREQUENCY
- VIDEO UPSCALING
- UNIVERSAL REMOTE
- 11.3 LEGAL AND COMPLIANCE
- MODEL NO.: NAKAMICHI DRAGON 11.4.6 HOME SURROUND SOUND SYSTEM
- FCC COMPLIANCE STATEMENT
- CLASS B FCC STATEMENT
- SECTION 12
- 12.1 WARRANTY INFORMATION
- LIMITED WARRANTY (U.S. ONLY)
- DRAGON CONCIERGE
- 12.2 SOUND OPTIMIZATION TIPS
- 12.3 HELP AND TROUBLESHOOTING
- HDMI EARC / ARC - NO SOUND OR VIDEO / SYSTEM SWITCHING SOURCES ERRATICALLY
- RESTORE DRAGON'S FACTORY SETTINGS TO REFRESH HDMI SETTINGS
- METHOD 1: WITHOUT OSD
- METHOD 2: VIA ON-SCREEN DISPLAY (OSD)
- IF YOUR TV WAS CONNECTED TO ANOTHER SOUND SYSTEM VIA HDMI PREVIOUSLY, PERFORM A HARD RESET BY FOLLOWING THESE STEPS TO ESTABLISH A NEW HDMI HANDSHAKE
- DRAGON & TV HARD RESET + HDMI CONNECTION REFRESH
- NO SOUND FROM ENTIRE DRAGON SYSTEM
- TV IS NOT SENDING SOUND FROM STREAMING APPS/DEVICES CONNECTED TO IT TO DRAGON
- INTERMITTENT AUDIO CUT OUT OR NO SOUND
- NO SOUND FROM WIRELESS SUBWOOFERS OR SURROUND SPEAKERS
- SUBWOOFER OR SURROUND SPEAKERS SOUND ABNORMALITIES
- NOTES
- NO SURROUND SOUND OR SURROUND SOUND VOLUME IS LOWER THAN EXPECTED
- BASS SEEMS WEAKER THAN EXPECTED
- REMOTE DOES NOT WORK
- MY DEVICE CANNOT CONNECT TO DRAGON VIA BLUETOOTH
- SOUND DROPS OUT WHEN CONNECTED VIA BLUETOOTH
- SECTION 13
- ADVANCED SETTINGS
- 13.1 CONNECTING YOUR TV VIA DIGITAL OPTICAL [BETTER], AUX-IN
- NOTE
- 13.2 CONNECTING EXTERNAL DEVICES TO DRAGON
- 13.3 INTEGRATE DRAGON WITH UNIVERSAL REMOTES
- SWITCHING DRAGON'S REMOTE TO IR MODE
- GENERAL GUIDE TO TEACH DRAGON'S IR CODES TO UNIVERSAL REMOTES
Brand : NAKAMICHI
Model : Dragon 11.4.6
Category : Loudspeaker