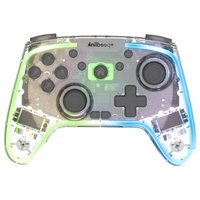
Rait NX SL-650115 - Game controller Speed-Link - Free user manual and instructions
Find the device manual for free Rait NX SL-650115 Speed-Link in PDF.


| Product Type | Gaming Mouse |
| Model | Rait NX SL-650115 |
| Brand | Speed-Link |
| Connection Type | Wired USB 2.0 |
| Cable Length | 1.8 m |
| Sensor Type | Optical |
| DPI Range | 1000 - 6400 DPI |
| Number of Buttons | 6 programmable |
| Scroll Wheel | Yes, with tilt |
| Backlight | RGB 16.8 million colors |
| Software Support | Speed-Link Configuration Software |
| Dimensions (L x W x H) | 125 x 70 x 40 mm |
| Weight | 120 g (with cable) |
| Compatible Operating Systems | Windows 7 or later, macOS 10.12 or later |
| Polling Rate | 1000 Hz |
| Maintenance & Cleaning | Wipe with dry cloth; avoid liquids and compressed air |
| Safety Precautions | Keep away from water, heat sources, and children under 3 years |
| Spare Parts Availability | Replacement mouse feet and cable available via Speed-Link support |
| Warranty | 2 years limited hardware warranty |
| Package Contents | Mouse, user manual, quick start guide |
Frequently Asked Questions - Rait NX SL-650115 Speed-Link
User questions about Rait NX SL-650115 Speed-Link
0 question about this device. Answer the ones you know or ask your own.
Ask a new question about this device
Download the instructions for your Game controller in PDF format for free! Find your manual Rait NX SL-650115 - Speed-Link and take your electronic device back in hand. On this page are published all the documents necessary for the use of your device. Rait NX SL-650115 by Speed-Link.
USER MANUAL Rait NX SL-650115 Speed-Link
SL-650115-CR
USER GUIDE
RAIT NX
WIRELESS RGB GAMEPAD
CONTENT | INHALT
EN
1. CONNECTION METHODS
1.1. Nintendo Switch*
1.2. Android* / PC D-Input
1.3. Windows* PC
1.4. Mac OS* (Bluetooth* only)
1.5. IOS 13*
1.6. PS3*
1.7. RESET
-
RECONNECTION & WAKE-UP
-
CHARGING
-
SOFTWARE INSTALLATION for DirectInput* in Windows*
-
TURBO FUNCTION
-
ILLUMINATION
-
VIBRATION
-
PROGRAMMING BUTTONS M1 and M2 (on bottom)
-
SPECIAL FEATURES
DE
1. CONNECTION METHODS
1.1. Nintendo Switch*:
Bluetooth*:
From the HOME menu of the console select “Controllers” and then “Change Grip/Order”. Press and hold the HOME button of the gamepad for 3 seconds; the LED quickly flashes green to indicate that the controller is in pairing mode. Press the R + L button of the controller. When the LED stops blinking and lights up green permanently, the connection was successful.
Note: The controller will stay in pairing for 2.5 minutes and switch off after.
Wired connection:
Connect the controller to the Switch* docking station using the USB cable. Once connected, the HOME button will light up green.

1.2. Android* / PC D-Input:
Bluetooth*:
Enter the setting/Bluetooth* menu from your
Android* device and scan for new devices.
Press and hold the HOME button + X button for 3 seconds, the LED flashes quickly red to indicate that the controller is in pairing mode. Select the device “Gamepad”. When the LED stops blinking and lights up red permanently, the connection was successful.

1.3. Windows* PC:
Bluetooth*:
There are 3 different modes available for the PC when connecting via Bluetooth*. Open the Bluetooth* menu of Windows. Select “Add device”. Activate one of the following modes. A rapidly blinking LED indicates the controller is in pairing mode:
XInput mode:
Press and hold HOME + Y together for 3 seconds → LED rapidly blinks yellow → “Xbox Wireless Controller” appears in the device list. → After choosing the device LED lights up constantly.
DirectInput* mode:
Press and hold HOME + X together for 3 seconds → LED rapidly blinks red → “Gamepad” appears in the device list. → After choosing the device LED lights up constantly.
Pro-Controller mode:
Press and hold HOME for 3 seconds → LED rapidly blinks green → “Pro Controller” appears in the device list. → After choosing the device LED lights up constantly.
Note: When changing back to a previously used BT controller mode, it is required to remove the device before attempting a new connection.
PC wired connection:
Use the USB cable to connect the controller with your PC.
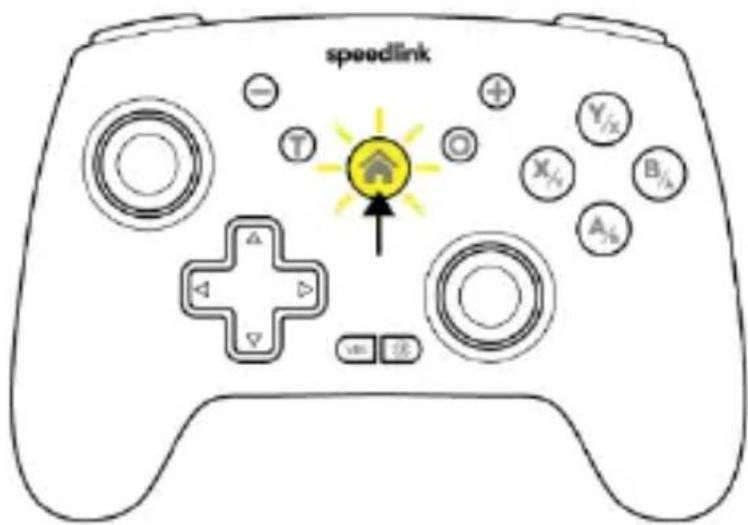
After Windows* recognized the connected device, the HOME button lights up yellow permanently (default mode after connecting the cable is XInput mode). To change to the DirectInput* mode press and hold “+” and “-” keys for 3 seconds. The LED color will change to Red.
PC wireless 2.4GHz connection:
Press and hold the HOME button for 3 seconds,
the LED flashes quickly. Plug the USB receiver into a free USB-port of the PC.
The HOME button LED lights up permanently. Press and hold “+” and “-” keys for 3 seconds to switch between DirectInput* and XInput mode.
DirectInput*: LED is red.
XInput: LED is yellow.
1.4. Mac OS* (Bluetooth* only):
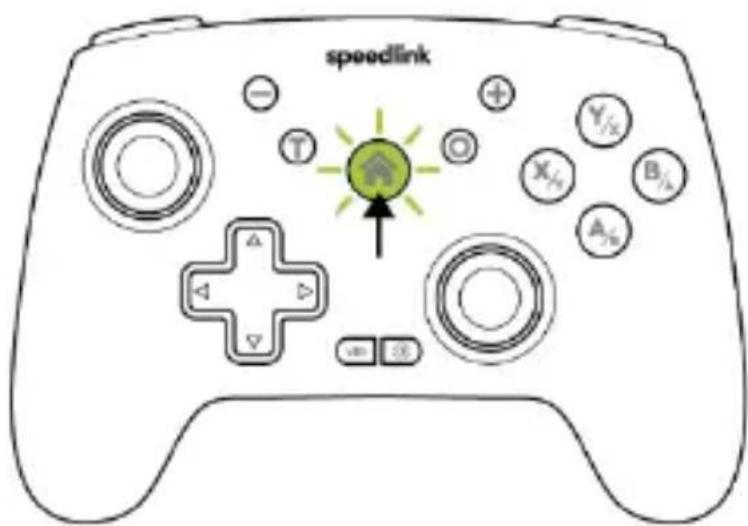
Press and hold the HOME button for 3 seconds, the LED flashes green quickly to indicate that the controller is in pairing mode. Select “Pro Controller” from the listed devices. After a successful connection, the LED stops blinking and lights up green permanently.
1.5. IOS 13*:
Bluetooth*:
Open the Bluetooth* menu in the settings app. Press and hold the HOME + B button for 3 seconds, the LED flashes white quickly to indicate that the controller is in pairing mode. Select “Xbox* Wireless Controller” from the listed devices. After a successful connection, the LED stops blinking and lights up white permanently.

1.6. PS3*:
Wired connection:
Use the USB cable to connect the controller with your PS3* console. The HOME button LED lights up magenta permanently.

Wireless 2.4GHz connection:
Press and hold the HOME button for 3 seconds, the LED flashes green quickly. Plug the USB receiver into a free USB-port of the PS3* console. When the LED stops blinking and lights up green permanently, the connection was successful.

1.7. Reset to factory settings:
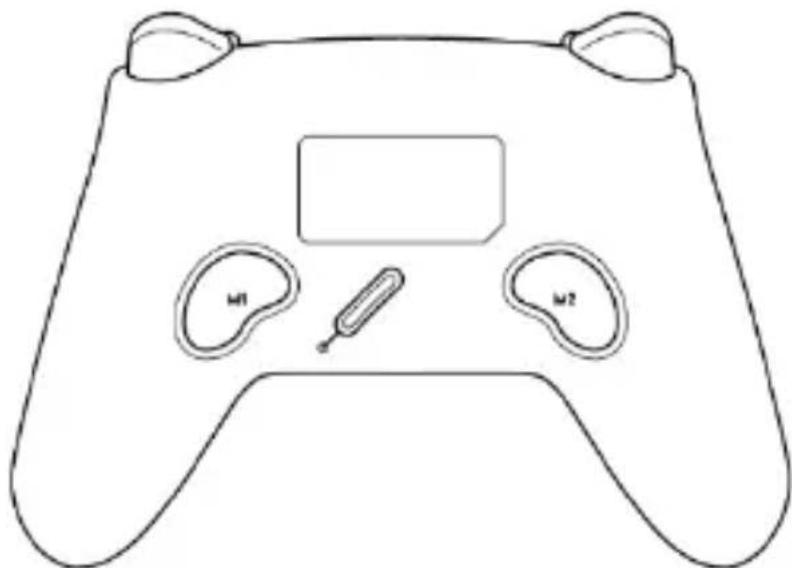
When changing to another device/console or If the controller is not functioning properly, it might be necessary to reset the controller by pressing a paperclip or similar object into the small hole on the underside of the gamepad.
2. RECONNECTION & WAKE-UP
2.1. Reconnection:
When the controller is in sleep mode, short press any button until LED flashes and controller automatically reconnects to the console/PC.
2.2. Sleep mode:
The console screen turns off and the controller automatically falls asleep.
Note: If no button is pressed within 5 minutes, it will automatically go to sleep (including if the sensor does not move).
2.3. Disconnecting:
Press the HOME button for 5 seconds in wireless connection mode to switch off the controller.
3. CHARGING
If the battery voltage is low (<3.55V), the current channel indicator light will flash quickly to indicate low voltage.
If the battery voltage is < 3.45V, the controller will automatically go into sleep mode.
3.1.
When the controller is turned off the orange LED under the HOME button flashes slowly during charging; The LED turns off when fully charged.
3.2.
While charging the controller in a connected state, the current channel indicator light flashes slowly. It stays on when fully charged. Charging takes up to 2 hours. Initial charge may take longer.
3.3.
While pairing or reconnecting during charging or with
low battery, the pairing LED indicator takes priority.
4. SOFTWARE INSTALLATION for DirectInput* in Windows*
Download the latest driver software at www.speedlink.com for optimal performance and vibration function with some games.
5. TURBO FUNCTION
The “turbo fire function” will activate a key several times in rapid succession.
5.1. Manual "turbo fire function":
Press one or several buttons (A / B / X / Y / L / ZL / R / ZR), then press the TURBO button once.
5.2. Automatic "turbo fire function":
Press one or several buttons (A / B / X / Y / L / ZL / R / ZR), then press the TURBO button twice.
5.3. Clear "turbo fire function":
Press the button with the “turbo fire function” and press the TURBO button once or twice to clear the turbo fire function.
5.4. Clear all:
Press the TURBO button for more than 3 seconds and then press the “-” key to clear the “turbo fire function” of all buttons.
5.5. "Turbo fire speed" adjustment:
There are three speed steps: slow (8Hz), medium (12Hz) and fast (15Hz). Default is medium. Press the TURBO button and D-Pad up to speed up. Press the TURBO button and D-Pad down to speed down.

6. ILLUMINATION
Double-click the button to switch between two different gradient modes and off.
Single press the button to switch between various single colors.
The light does not have a memory function after powering off.

7. VIBRATION
When the controller is connected press the vibration adjustment button (VIB) to adjust the vibration intensity (The controller will vibrate once, each time it is adjusted).
Vibration has four levels:
strong (100%, default), medium (75%), weak (50%) and stop (0%.)

8. PROGRAMMING BUTTONS
M1 and M2 (on bottom)

Programmable buttons:
- A; B; X; Y
- D-Pad (up; down; left; right)
- Left joystick L3
- Right joystick R3
- L-button
- Left Trigger ZL
- R-button
- Right Trigger ZR
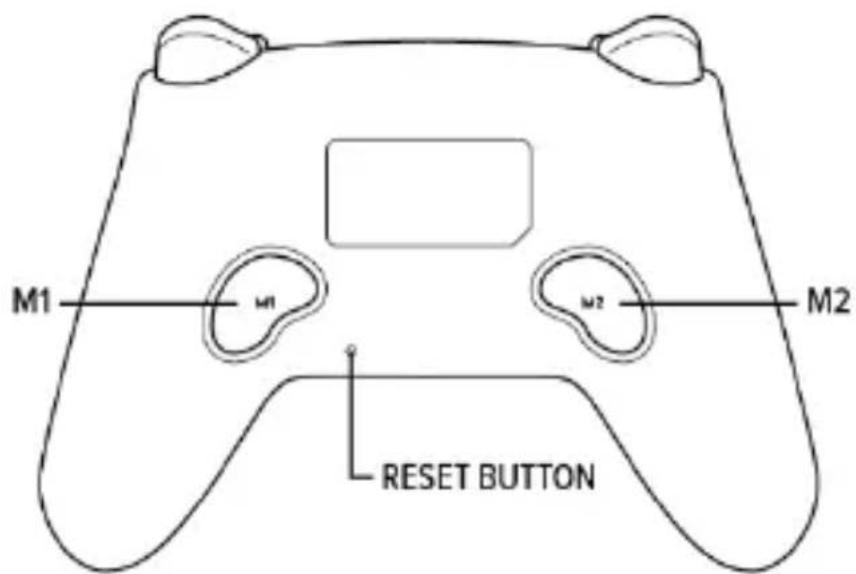
Setting Method:
Press the M-button; then press the "+" button.
The HOME button light will flash. Release the “+” button to set the programming.
Then press one or several buttons you want to set (1 - 8). Press the M-button to save the setting.
Example: Press M1 and press “+” to start the programming (HOME button light flashes). Press A and M1 to save the setting. Now M1 corresponds to the A button function. Press M-button and the “+” button. The HOME button light flashes once. Press again the M-button. Now the programming is cleared.
Note: In programming, if no programmable button is pressed, the original function will be cleared.
9. SPECIAL FEATURES
The Nintendo* Pro controller mode is only available on PC in Bluetooth* mode. This includes support for HD rumble and gyroscopic motion controls.
Support depends on the game or platform, such as Steam*.
On the Switch* you can make screenshots by pressing this button:

DE
1.2. Android / PC D-Input:
Bluetooth*:
1.4. Mac OS (nur Bluetooth*):
1.5. IOS 13*:
Bluetooth*:
6. BELEUCHTUNG
All rights reserved. Speedlink, the Speedlink word mark and the Speedlink swoosh are registered trademarks of Zeitfracht Medien GmbH.
* PS3 is a registered trademark of Sony Computer Entertainment Inc. Windows and DirectInput are
registered trademarks of Microsoft Corporation in the United States and other countries. Android is a registered trademark of Google Inc..Nintendo and Nintendo Switch/OLED/Lite are registered trademarks of Nintendo Co., Ltd. Bluetooth is a registered trademark owned by Bluetooth SIG, Inc. Amiibo is a registered trademark of Nintendo Co., Ltd. Nintendo and Amiibo are trademarks of Nintendo.
Steam is a trademark of Valve Corporation. Steam and the Steam logo are trademarks and/or registered trademarks of Valve Corporation in the U.S. and/or other countries.
The Instagram logo is a registered trademark/service mark of Instagram LLC. The Facebook logo is a registered trademark of Facebook Inc. The TikTok logo is a registered trademark of ByteDance. All trademarks are the property of their respective owner. Technical specifications are subject to change. Information contained herein is subject to change without prior notice. Zeitfracht Medien GmbH shall not be made liable for any errors that may appear. Please keep this information for later reference.


- CONTENT | INHALT
- EN
- CONNECTION METHODS
- DE
- NINTENDO SWITCH
- ANDROID* / PC D-INPUT
- WINDOWS* PC
- MAC OS* (BLUETOOTH* ONLY)
- IOS 13
- PS3
- RESET TO FACTORY SETTINGS
- RECONNECTION & WAKE-UP
- RECONNECTION
- SLEEP MODE
- DISCONNECTING
- CHARGING
- 3.1
- 3.2
- 3.3
- SOFTWARE INSTALLATION FOR DIRECTINPUT* IN WINDOWS
- TURBO FUNCTION
- MANUAL "TURBO FIRE FUNCTION
- AUTOMATIC "TURBO FIRE FUNCTION
- CLEAR "TURBO FIRE FUNCTION
- CLEAR ALL
- TURBO FIRE SPEED" ADJUSTMENT
- ILLUMINATION
- VIBRATION
- PROGRAMMING BUTTONS
- M1 AND M2 (ON BOTTOM)
- PROGRAMMABLE BUTTONS
- SETTING METHOD
- SPECIAL FEATURES
- ANDROID / PC D-INPUT
- BLUETOOTH
- MAC OS (NUR BLUETOOTH*)
- BELEUCHTUNG
Brand : Speed-Link
Model : Rait NX SL-650115
Category : Game controller