
Flashstor 12 Pro Gen2 - Server Asustor - Free user manual and instructions
Find the device manual for free Flashstor 12 Pro Gen2 Asustor in PDF.


| Product Type | 12-Bay All-Flash NAS Server |
| Drive Bays | 12 x M.2 NVMe SSD slots (2280 form factor) |
| Processor | Intel Core i5-12400 (6 cores, 12 threads, up to 4.4 GHz) |
| Memory | 32 GB DDR4-3200 (expandable up to 64 GB) |
| Networking | 2 x 2.5GbE RJ-45, 1 x 10GbE SFP+ |
| USB Ports | 2 x USB 3.2 Gen2 Type-A, 1 x USB 3.2 Gen2 Type-C |
| Dimensions (H x W x D) | 185 x 295 x 240 mm |
| Weight | 5.2 kg (without drives) |
| Power Supply | 250W external power adapter |
| Power Consumption | 85 W (typical operation) |
| File System Support | EXT4, Btrfs, XFS |
| RAID Levels | JBOD, RAID 0, 1, 5, 6, 10, 50, 60 |
| Max Storage Capacity | Up to 144 TB (with 12 x 12TB SSDs) |
| Cooling | 2 x 120mm quiet fans |
| Operating Temperature | 0°C to 40°C |
| Certifications | CE, FCC, BSMI, VCCI |
| Operating System | ADM (Asustor Data Master) |
| Key Features | All-flash performance, up to 6 GB/s read, dual M.2 for cache, hot-swappable SSDs |
| Maintenance & Cleaning | Use a dry soft cloth; avoid liquids. Clean dust filters regularly. |
| Safety | Operating voltage: 100-240V AC; ensure proper grounding; do not block ventilation. |
| Spare Parts & Repairability | User-replaceable: SSD covers, fan module, PSU. Contact Asustor support for internal parts. |
| Warranty | 3 years limited hardware warranty |
Frequently Asked Questions - Flashstor 12 Pro Gen2 Asustor
User questions about Flashstor 12 Pro Gen2 Asustor
0 question about this device. Answer the ones you know or ask your own.
Ask a new question about this device
Download the instructions for your Server in PDF format for free! Find your manual Flashstor 12 Pro Gen2 - Asustor and take your electronic device back in hand. On this page are published all the documents necessary for the use of your device. Flashstor 12 Pro Gen2 by Asustor.
USER MANUAL Flashstor 12 Pro Gen2 Asustor
For Network Attached Storage
Ver. 4.2.3.0920 (For ADM 4)
Introduction 5
Getting Started with ASUSTOR Data Master (ADM) 8
Installing ASUSTOR NAS and ADM 8
Logging in to ASUSTOR Data Master 8
Taskbar 9
Pre-Installed Apps....16
Settings....16
General....16
Network 21
Regional Options 24
Hardware 25
Notification....30
Certificate Manager 32
Network Recycle Bin....32
Scheduling 33
EZ-Connect 34
Manually Connect 35
ADM Maintenance 37
Registration 38
Services 38
SMB 38
AFP 41
NFS 42
FTP Server 42
WebDAV 45
Terminal 45
Rsync Server 46
TFTP Server 47
SNMP 48
SFTP 49
Reverse Proxy 50
Web Center....51
Overview 51
Web Server 51
Virtual Host....52
Implementation 53
Storage Manager....54
Overview 54
Volume....54
Drive 60
iSCSI 64
iSCSI LUN 65
Snapshot Center 65
Overview 65
Volume 66
iSCSI LUN 69
EZ Sync Manager 72
EZ Sync Manager for ADM 72
Connection 75
Log 76
Information 76
Settings 77
Recycle Bin 78
Access Control 78
Local Users 78
Local Groups 80
AD/LDAP 81
You can enable the LDAP client here. 82
AD/LDAP Users 82
AD/LDAP Groups 83
Shared Folders 83
App Privileges 88
Permission Mapping Table 89
Backup Central....90
Remote Sync....90
SMB Backup....91
FTP Backup 93
Internal Backup....93
External Backup 95
One Touch Backup 96
External Devices....99
Overview 99
Hard Drives 99
Printer 100
Wi-Fi 100
UPS....101
Bluetooth Devices 102
External Optical Drive....103
System Information....103
About This NAS 103
Network 104
Log 105
Online Users 105
Dr. ASUSTOR....106
Activity Monitor....106
File Explorer 107
From App Central 111
ASUSTOR Live....112
Download Center....112
MariaDB 115
Surveillance Center....116
UPnP Media Server 116
SoundsGood 118
LooksGood....119
Photo Gallery 3....120
VPN Server....120
Takeasy 121
ASUSTOR Portal....122
Antivirus Protection....123
Mail Server 123
Syslog Server 124
DataSync Center 125
HiDrive Backup 126
Cloud Backup Center 126
Utilities 128
ACC (ASUSTOR Control Center) 128
AEC (ASUSTOR EZ Connect) 128
ABP (ASUSTOR Backup Plan) 129
AES (ASUSTOR EZ Sync) 129
Mobile Apps 131
AiData 131
AiMaster 132
AiRemote 132
AiDownload 133
AiMusic 133
AiFoto3 134
AiVideos 134
AiSecure 135
Introduction

Thank you for choosing ASUSTOR network attached storage (NAS).
From cross-platform file sharing to multimedia server applications to App Central, ASUSTOR NAS provides you with a rich assortment of features, allowing you to explore the unlimited potential of NAS.
ASUSTOR Data Master (ADM): The Amazing Starts Here
Your NAS comes preloaded with ASUSTOR Data Master (ADM), an operating system developed by ASUSTOR. Designed around the use of Apps, ADM's intuitive web-based interface allows for easy organization and a user-friendly experience. This user manual will introduce you to all the rich assortment of preloaded applications (Apps) on your NAS.
Your Ideal Private Cloud
ASUSTOR's exclusive EZ ConnectTM technology lets you access your NAS from almost anywhere on the planet. Whether by computer or mobile device you need only an Internet connection to access your NAS from anywhere and at any time.
Cross-Platform File Sharing
ASUSTOR NAS provides flawless cross-platform file sharing. No matter what operating system you are using, you can still effortlessly connect to your NAS and access your data.
Embrace the Cloud, Enjoy Peace of Mind
Experience the convenience of cloud computing in a stress free environment. ASUSTOR's ADM Defender and support for encryption provide the highest standard of security for your system.
Your Data is Safe with Us
ASUSTOR NAS offers a complete host of data protection and backup solutions. Features such as RAID and two-way transfer support offer bullet-proof protection and flexible application. Savor a stress free and liberating user experience.
The Hub of Your Home Entertainment
Make ASUSTOR NAS the hub of your home entertainment and enjoy digital entertainment like you never have before. Countless Apps such as ASUSTOR Portal, LooksGood, SoundsGood, Photo Gallery and UPnP Multimedia Server allow you to enjoy digital entertainment in every corner of your home.
Vigilant Security
ASUSTOR's Surveillance Center lets you collectively manage an array of IP cameras, helping you keep an eye on your most valued assets. You can even take snapshots and control the pan, tilt and zoom functions of all cameras. In the event of any disruptions, Surveillance Center will notify you at once, giving you complete peace of mind.
iSCSI and Virtualization
Seamlessly integrate with any existing IT environments. Enjoy flexible and cost-efficient shared storage. ASUSTOR NAS supports the use of iSCSI and NFS in addition to being verified as, Citrix and Hyper-V ready.
Protect Our Planet with ASUSTOR
It is our mission to continue to develop exceptionally energy efficient products. From their inception, all ASUTOR NAS products are designed and developed around ecologically friendly concepts. Features such as, Night Mode, disk hibernation, power scheduling and fan control all help you to save power. Furthermore, each ASUTOR NAS is fully compliant with EuP standards (EuP 2.0).
Unnoticeable quiet
For products like NAS that need to run for a long time, if the noise is very loud during operation, many users will be unbearable. ASUSTOR NAS's exclusive low-noise design makes the operation sound almost unnoticeable, satisfying your high-quality requirements of the living environment.
Enrich Your Mobile Life
Imagine having your photos, media files and important documents always at your fingertips. ASUSTOR offers an array of mobile applications to make your digital lifestyle complete.
App Central: Unleash the Unlimited Potential of NAS
The Apps that come pre-installed with ASUSTOR NAS are just the beginning. At your convenience, browse through and download any additional Apps that peak your interest from App Central. Explore the unlimited potential of ASUSTOR NAS while creating a personalized NAS for yourself.
Online Resources
Terms of Use
All ASUSTOR products have undergone stringent and comprehensive testing. Under normal user operation and within the warranty period, ASUSTOR will assume responsibility for any hardware failures. Before using this product, please read the End-User License Agreement (EULA) located at the end of this user manual.
Getting Started with ASUSTOR Data Master (ADM)
This section will introduce you to the process of logging in, using Searchlight and using the taskbar in ASUSTOR Data Master (ADM).
Installing ASUSTOR NAS and ADM
Before you begin using your NAS, please make sure that you have installed hard disks, connected the NAS and have properly initialized it. For detailed instructions on setting up your ASUSTOR NAS and installing ADM, please see the Quick Installation Guide for your ASUSTOR NAS model.
Quick Installation Guide https://www.asustor.com/service/downloads
Logging in to ASUSTOR Data Master
After installation and initialization, you can use the following methods to log in to your ASUSTOR NAS:
Connection within the local network (LAN)
Method 1 : Use ASUSTOR Control Center (ACC) to scan your local area network for ASUSTOR NAS devices. Select your NAS and then click on the "Open" button to go to bring up the login screen. ACC can be downloaded from Downloads
Method 2 : If you already know the IP address for your ASUSTOR NAS on your local area network, you can directly enter it into your web browser to connect to your NAS. For example: http://172.16.1.69:8000/ (The 8000 in the image is the default port)

Connection outside the local network (WAN)
Method 3 : If you are connecting to your ASUSTOR NAS remotely, you can enter
Enter CloudID.ezconnect.to or CloudID.myasustor.com into your web browser to connect to your
NAS. For example: http://john.ezconnect.to or http://john.myasustor.com:8000

Reminder: When connecting remotely, please remember to register your NAS and then enable EZ Connect under [Settings] → [EZ-Connect] → [Enable EZ-Connect Service]. After configuring a Cloud ID for your NAS, you will be able to connect to it remotely using your customized hostname.

Taskbar
The taskbar is located at the top of ADM and includes the following items and functions:

- Show desktop: Minimizes all windows.
- Searchlight: Easily find apps and files without extra indexing. Instantly preview files, file information and location with ASUSTOR Searchlight. Click one of the search results on the left to show image previews while more information is found on the right. Use the keyboard's up and down arrow keys to view different results. Double click or press Enter to open a result.
3. App Icons:
Open apps: Open apps appear here and can be pinned, restored, minimized or closed.
Pin to taskbar: Right click an app in the taskbar to bring up a context menu where the app can be pinned.
Unpin from taskbar: Right click an app in the taskbar to bring up a context menu where the app can be unpinned.
4. EZ Connect.to Relay Service:
This icon means that you are connecting using the EZ-connect.to relay service. Connections using EZ-Connect.to will be slower and download abilities will be limited.
- Task Monitor: Check and monitor different background tasks like uploading, copying and moving files.
- Account Options: Displays options for account settings, sleeping, restarting, shutting down and signing out.
Settings: Selecting Settings provides you with tabs options for account settings, volume usage and themes.
Personal:
Configure account password, email address, description and UI language. If using an administrator account, two-step verification can be enabled. Desktop settings arranges app icon in several ways, including 5x3, 6x3 or 7x4.

Volume Usage:
Here, you can view information regarding your hard disk storage volumes such as usage and storage quota.

Theme:
Appearance: Options for auto, light or dark modes.
Title Bar theme: Options for changing the appearance of the title bar.
More themes:
Options for additional themes that include changing the background, text colors, icons and window colors. You can also upload images to the NAS or select an image already on the NAS to set a custom wallpaper.


7. System Announcement:

System announcements are displayed here. Customize system announcements by going to Sign In Page Style under General in Settings. System announcements are like bulletin boards that convey information to those using the NAS, for example, to notify employees of downtime or maintenance.
- Tools: Click plus to add information from Storage Manager, Activity Monitor, Online Users, and Important Logs for quick viewing.

- Preferences: ADM settings are now in an easy-to-use central location, making finding the right settings even easier. One click is all that is needed to browse and change settings.
Preferences is now found on the taskbar on the top right.

Pre-Installed Apps
Pre-installed Apps include the configuration of function and service settings for hard disks and hardware. You can configure everything from system related settings to user access rights.

Settings
General
Here you can manage the system HTTP port and auto logout settings. Auto logout will logout users if they remain idle past the specified period of time.

(1) Management
System HTTP Port:
This is used to specify the port you wish to use to connect to ADM's web based user interface. You can access your NAS by opening a web browser and entering your IP address followed by a colon and the specified port number.
For example: http://192.168.1.168:8000
Enable HTTP Secure (HTTPS):
HTTP Secure functionality uses a dedicated, yet separate, secure communications port to connect to ADM's interface to enable safer data transfer. All that is needed is to open a web browser, enter the IP address of the NAS followed by a colon and the HTTPS port number to connect to ADM. (Example: https://192.168.1.168:8001). ADM has options for importing SSL certificates or keys in Certificate Manager and to make HTTPS connections mandatory.
Timeout timer:
For security reasons, users who remain idle for longer than the specified period after logging in will be automatically logged off.
(2) Media mode
Media mode improves multimedia streaming and transcoding performance by reserving 512 MB of RAM on some ASUSTOR models.

(3) Sign In Page Style
Under Sign In Page Style, you can configure the following:

Login Page Appearance:
Background Image: Changes the wallpaper. Supports JPEG images.
Fit: Fill, tile, or stretch the wallpaper.
Custom Image: Enables or disables a custom image on the sign-in page, and lets you choose either a rectangular or circular image. Cropping can also be done to adjust the position and focus of an image. Supports JPEG images.
Appearance: Options for light, dark, or automatic modes.
Layout: Options for adjusting the layout of the sign-in page.
Display Settings:
Here you can change display settings such as [Show time], [Show hostname], [Show NAS], and [App shortcuts].
System announcement:
Displays announcements on the login page and specify announcement content as well as display time.

(4) Video
Converts unplayable videos to a playable format in File Explorer or Photo Gallery 3.

Here you can configure the server name, LAN and Wi-Fi settings. Other settings include IP address, DNS server and default gateway.
Note: This function may differ depending on the NAS model in use.

(1) General
Server Name: An online name for your NAS.
Default Gateway: The default gateway that you wish to use.
DNS Server:
Here you can set the DNS server that you wish to use. Should you choose to obtain your IP address via DHCP, the system will automatically obtain the available DNS servers for you. (Network interface -> LAN -> Configure -> Obtain IP address automatically) If you choose to manually enter an IP address, then you will have to manually enter a DNS server as well. (Network interface -> LAN -> Configure -> Set up IP address manually)
Reminder: Using an invalid DNS server will affect some network related functions (i.e., Download Center). If you are uncertain about how to proceed, please choose to obtain your IP address automatically.
(2) Network interface

Add: Create VPN or Create Link Aggregation
Create VPN:
Here you can let your ASUSTOR NAS become a VPN client, and via PPTP or OpenVPN, connect to a VPN server to access a virtual private network. ASUSTOR NAS supports the use of different connection settings files, allowing you to connect to the VPN server of your choice. The ASUSTOR VPN client currently supports the two most common connection protocols: PPTP, OpenVPN, and Wireguard VPN.
Reminder: The VPN client cannot be used simultaneously with the VPN Server. If you need to use the VPN client, please first stop any use of the VPN server.
Create Link Aggregation:
Link aggregation (a.k.a. trunking, bonding or teaming) combines two or more network connections into one. To use link aggregation, your Ethernet cables must be connected to the same network switch and your network switch must support link aggregation.
Configure: Here you can set up IPv4 or IPv6 related settings. You can also obtain IP address automatically or set up IP address manually.
Action: Once you set up a VPN client, you can select that VPN client and click [Action] to manage the use.
DHCP Server Settings:
You can configure the DHCP settings only if the IP address was configured manually.
- Lease time (hr): Enter a value (1-720) to set the DHCP lease time (in hours) for IP addresses assigned to DHCP clients.
- Primary/Secondary DNS: Enter the Primary/Secondary DNS address for DHCP clients.
- Domain Name: Set the domain name for the DHCP server.
- Subnet List: You can add subnets here.
- DHCP Client List: Here you can check the list of DHCP clients and their network configurations (e.g. MAC address, IP address, hostname, and the amount of time left before the DHCP lease expires).
- DHCP Reservations: If you want a client to always receive the same IP address during DHCP lease renewal, you can add the client to the DHCP reservation list.
PPPoE:
If you are using DSL or a cable modem to connect to the Internet and your Internet service provider uses PPPoE (Point to Point Protocol over Ethernet), you can go to [Settings] > [Network] > [PPPoE] and enter your account information to allow the system to connect to the Internet without having to go through a router. If you wish to get more information about PPPoE, please contact your Internet service provider or network administrator.
(3) Proxy:
Here you can enable proxy server connections, allowing the NAS to connect to the internet via a proxy server.
- Proxy Server: The address of the proxy server you wish to connect to. (Supports HTTP and HTTPS)
- Port: The communications port of the proxy server.
- Authentication: If the proxy server you are using requires authentication, you can enable it here and then enter your username and password.

See More
NAS 105 – Networking: A Beginner's Guide
NAS 307 – Networking: Link Aggregation
NAS 322 - Connecting Your NAS to a VPN
Regional Options
Here you can adjust the settings for date and time, display format, time zone and daylight saving time.

Codepage: In order to avoid garbled characters in the file name when using the app in some cases, it is recommended that you set the language code here according to your personal common language, so that the correct file name can be displayed while using the app.

Hardware
Here you can configure settings for the LED indicators, buzzer, hard disk hibernation, power usage, fan speed and LCD display panel.
Note: This function may differ depending on the NAS model in use.
System:
Here you can choose to disable any of the LED indicators to save power. By selecting "night mode", only the system power LED indicator will be enabled. It will flash an orange light every 10 seconds. "Night mode scheduling" will allow you to configure the start time and duration of night mode. You can also configure settings for the buzzer, reset button and infrared receiver here. In certain Rackmount models, we provide a Service LED which allows you to easily find the NAS location among a lot of machines.

Energy Control:
- Disk Hibernation: Your hard disks will enter hibernation mode when left idle for the period of time specified here. Once in hibernation, the hard disk LED indicator on the front of the disk tray will flash once every 10 seconds to indicate that the disk is hibernating. If an access error is detected on a hard disk, the LED indicator on the front of the disk tray will be lit red.
- Sleep Mode: Here you can configure the time period the NAS will remain idle before automatically entering Sleep Mode (S3). In addition to RAM, all of the NAS's hardware will stop running in order to conserve energy.
- Diagnostic Tool: If the hard disk or system has not yet entered sleep mode during the specified time, you can click on "Diagnostic Tool" to find out which services and applications are still accessing the hard disk.

Why won't my ASUSTOR NAS enter into Sleep Mode (S3)?
The following services will affect the NAS's ability to enter into Sleep Mode (S3) as they require hard disk access while running:
- Download Center, Takeasy download tasks, RSS scheduled downloads, unable to enter Sleep Mode (S3) when subscription downloads from multimedia websites are in progress.
- Unable to enter into Sleep Mode (S3) when Photo Gallery 3 or Looksgood is doing media file conversion or Surveillance Center is recording video.
- Unable to enter into Sleep Mode (S3) when the following Apps are syncing: DataSync Center, ASUS WebStorage.
- Unable to enter into Sleep Mode (S3) when the following Apps are executing backup tasks: Cloud Backup Center, HiDrive, RALUS, WonderBox.
- Unable to enter into Sleep Mode (S3) when the following Apps are doing background tasks: Plex, UPnP server, Owncloud, Docker-ce related apps.
- Unable to enter into Sleep Mode (S3) when using Windows services: Join your NAS to a domain (AD) or become a Local Master browser.
- PC\MAC mounts the NAS folder as a network drive.
- ASUSTOR Control Center, Backup Plan, and Download Assistant will check the connection settings with the NAS at any time when using it. This may also cause the NAS hard drive to fail to enter hibernation.
You can also use the previously mentioned Diagnostic Tools to check whether there are service programs not mentioned above that cause the NAS to fail to enter sleep mode.
Power: Here you can manage power usage settings such as EuP, Wake-On-LAN (WOL) / Wake-On-WAN (WOW), and power scheduling.

Fan Control: Here you can set the rotation speed for the fan. If you are not sure about which speed to select, you can simply select Auto. This will automatically adjust the fan speed in accordance with the temperature of the system.

LCD Panel: You can have the LCD panel display a customized scrolling message. This function is only available on models with an LCD panel.

Note: Reset Button
If for some reason you cannot connect to your NAS, this button can be used to return a portion of the settings to their default values. The data stored inside will not be affected.

- The system administrator account (admin) password will be reset back to "admin".
- The system HTTP and HTTPS ports will be reset back to 8000 and 8001 respectively.
- The system will revert to automatically obtaining an IP address. You can then use ASUSTOR Control Center to search for your NAS.
- ADM Defender will be reset and will allow all connections.
Reminder: You must hold the reset button down until you hear a "beep" for the settings mentioned above to be reset.
Notification
You can configure this setting to send you a notification immediately in the event that the system encounters any problems.
E-mail:
Accounts that will be used for sending e-mail notifications can be set here. Google, Microsoft, or another SMTP server email address can be used to send notifications. Multiple accounts can be set up, but only one may be used as the primary account. While configuring accounts to receive e-mail notifications, the types of system notifications that will be received by these accounts can also be customized.
SMS:
Accounts of the SMS service provider that will be used for sending SMS notifications can be set here. While configuring a mobile phone number to receive SMS notifications, it is also possible to set the type of system notifications that will be received by these recipients.
Push Notification:
Here you can enable the push notification setting for the AiMaster mobile app which can be downloaded from the Apple App Store or Google Play. When designated system events occur, your ASUSTOR NAS will immediately send notification to the Apple/Google push notification server which will then forward it to your mobile device.
Advanced:
Custom rules for the event notifications can be set here. ADM event notifications can now be filtered by keywords. With support for daily, weekly, and monthly summaries, it’s easy to regularly review all important events in one email thread. Different rules can be set for different notification recipients and allows the correct owners to handle important events more efficiently.
You can click add to configure the push notification via the push services provider: Pushbullet or Pushover. Please refer to NAS 201-Configuring Push Notifications
You can click edit. Here you can enable the push notification setting for the AiMaster mobile app which can be downloaded from the Apple App Store or Google Play. When designated system events occur, your ASUSTOR NAS will immediately send notification to the Apple/Google push notification server which will then forward it to your mobile device. Supports iOS 10.0 and onwards/Supports Android 6 and onwards.
Available on the iPhone App Store
ANDROID APP ON Google play
Warning: Push notifications are transmitted to your device from Apple/Google's push notification servers. A poor Internet connection or abnormalities in Apple/Google's push notification service could potentially prevent AiMaster from correctly receiving notifications.
Certificate Manager
Using Certificate Manager, you can import a valid certificate to establish an SSL connection. All communication data (including identity credentials and transmitted information) among your NAS and all clients will be automatically encrypted over the SSL connection. This helps prevent the data from being eavesdropped on or modified over Internet. SSL applicable services on ASUSTOR NAS include:
ADM management connections (HTTPS)
Web server connections (HTTPS)
FTP server connections (FTPS)
Mail server connections (POP3s, IMAPs)

The Certificate Manager in ASUSTOR NAS can directly connect to Let's Encrypt to generate a valid certificate and install it automatically. This helps you to enhance NAS security with an SSL connection in a fast and easy way at zero cost. Moreover, before the Let's Encrypt issued certificate expires, Certificate Manager can be configured to perform an automatic renewal.
See More
NAS 324 - Using HTTPS to Secure NAS Communication
Network Recycle Bin
In order to enable the Network Recycle Bin for specific shared folders, please select "Access Control" > "Shared Folders", and then select the desired shared folder. Next, click on the "Edit" button to configure it.
The configurations made on the "Recycle Bin" and "Empty Recycle Bin" tabs will be applied to all enabled Network Recycle Bins.
After enabling Network Recycle Bin, all files deleted via the following protocols will be moved to the Recycle Bin:
• SMB File Service (CIFS/SAMBA) • Apple Filing Protocol (AFP) • File Transfer Protocol (FTP) - File Explorer - WebDAV

Scheduling
(1) Thumbnails:
Schedules times when background processes can do work and utilize CPU resources.

(2) Automatic Drive Information Updates:
Updates drive usage information across volumes at specific intervals. Can cause hard drive usage to spike.

EZ-Connect
Here you can configure all the necessary settings for remote access.
Enable EZ-Connect Service: Here you can obtain a Cloud ID for your NAS. By entering the Cloud ID into ASUSTOR client applications or Cloud ID.ezconnect.to into browser, you can access your NAS without having to enter the host/IP information.

Manually Connect
DDNS:
Here you can create or configure your DDNS account. DDNS allows you to use a persistent host name (i.e., nas.asustor.com) to connect to your NAS. You won't have to worry about remembering your NAS's IP address. This feature is often used in dynamic IP environments.

EZ-Router:
Here you can set up your network router automatically for direct NAS access from any device with Internet access.

Reminder: Your router must support UPnP/NAT-PMP. Please note that not all routers support automatic configuration. Please see the hardware compatibility list found on the ASUSTOR
website for more information. To know the network ports list used by ASUSTOR services, please refer to: What network ports are used by asustor services
See More:
NAS 227 - Introduction to AEC (ASUSTOR EZ Connect) NAS 224 - Remote Access - Manual Connect Compatibility - EZ-Router
Related:
ADM Maintenance
ADM Update:
Here you can obtain the latest version of ADM to ensure system stability and to upgrade software features.
Live Update: After enabling Live Update, the system will notify you of any available updates when you log in to ADM.
Set automatic scheduled updates: After enabling this option, the system will automatically check for available updates during the configured time. If updates are available, the system will automatically proceed to download and install them.
Note: If, during ASUSTOR App upgrades, the system shuts down or the upgrades are interrupted due to unknown causes, the system will attempt the upgrades again at the next scheduled time.
Manual Update: You can go to ASUSTOR's official website to download the latest version of ADM.
Factory Reset:
Here you can restore the system back to its factory default settings. After this, the system will return to its pre-initialized state. For security reasons, you will be asked to enter the administrator password before performing this operation. You can then initialize the system again through ASUSTOR Control Center or by logging into ADM.
Note:
After the system is restored to its factory default settings, all previous settings and files will be permanently deleted. You will not be able to recover these settings and files. Please ensure that you have backed up the data on your NAS before you begin this operation.
It is not possible for anyone to reinitialize a NAS that contains a WORM shared folder set to compliance mode. This means that the NAS cannot be restored to factory settings.
Settings Backup:
Here you can export or restore system settings in .bak format (file extension). This feature also supports scheduled backup, which means that you can create scheduled backup jobs and then export the settings to a specified location on your NAS.
Registration
Here you can sign up for a personal account (ASUSTOR ID) and register your product. Once the product has been registered, your ASUSTOR ID will be automatically enabled.


Services
Here you can configure network related services such as FTP server and TFTP server.
SMB
SAMBA is the open source implementation for SMB and works with most major operating systems. This also enables your NAS to join an Active Directory, also known as AD, which enables access rights for domain users, groups and shared folders on Windows when accessing the NAS.

Workgroup:
This is the workgroup on your local area network that your NAS belongs to.
WINS Server:
Microsoft Windows Internet Name Service (WINS) is a NetBIOS name-to-IP-address mapping service. Window users will locate the system more easily on TCP/IP networks if the system has been configured to register with a WINS server.
Max/Min SMB protocol:
Sets highest and lowest SMB levels.
- SMB 3: SMB 3 has been supported since Windows 8 and Windows Server 2012. It is the enhanced version of SMB 2.
- SMB 2: SMB (Server Message Block) 2 has been supported since Windows Vista and is the enhanced version of SMB. SMB 2 adds the ability to compound multiple SMB actions into a single request to reduce the number of network packets and enhance performance.
Enable SMB Multichannel:
SMB Multichannel allows you to combine the speed of multiple Ethernet ports for speeds up to and above double performance depending on network conditions and number of Ethernet ports used. This feature only allows for combining the Ethernet ports of the same speed and type.
Example: 2.5GbE and 10GbE ports cannot be combined.
Enable Local Master Browser:
After enabling this option, your NAS will, from your local area network, collect the names of all other computers in its workgroup.
Reminder: Enabling this feature may prevent your hard disk(s) from going into hibernation.
Allow only NTLMv2 authentication:
NTLMv2 stands for NT LAN Manager version 2. When this option is enabled, login to the shared folders by Microsoft Networking will only be allowed using NTLMv2 authentication. If the option is disabled, NTLM (NT LAN Manager) will be used by default and NTLMv2 can be negotiated by the client. The default setting is disabled.
Enable Samba VFS modules to enhance macOS compatibility:
This option enables the catia, fruit and streams_xattr modules on Samba. These modules increase compatibility for macOS Finder on Samba for features that include but are not limited to special characters and metadata. If you are experiencing difficulty accessing SMB volumes with macOS with certain apps, enabling this option may resolve these issues.
Disable Opportunistic Locking:
For networks that require multiple users concurrently accessing the same file such as database, it is suggested to disable Opportunistic Locking. To prevent one file being edited by multiple users simultaneously, such mechanism should be implemented in the document processing software (for example, Microsoft Office programs).
Enable debug logging:
When this option is enabled, detailed logs will be stored for debugging purposes. Enabling this option affects system performance.
- Note
Enable Time Machine in AFP to use Time Machine with your NAS.
Enable WS-Discovery:
WS-Discovery makes your NAS visible to your Windows PC on your local network. To find and browse the contents of your NAS, open the network browser, named "Network" in Windows File
Explorer and navigate to the collapsible item named "Computer". These instructions may vary based on your view settings.
SEE MORE
NAS 102 - Introduction to File Transfer Protocols NAS 106 – Using NAS with Microsoft Windows NAS 206 – Using NAS with Windows Active Directory
AFP
Enables access by legacy Apple devices using Apple Filing Protocol.

Using the Apple Filing Protocol (AFP):
AFP is used for transferring files between legacy macOS devices and local area networks.
In Finder, click on Connect to Server under Go. Enter afp://nas-IP to connect. For example: afp://192.168.1.168
Advertise AFP service over Bonjour:
Bonjour, also known as zero-configuration networking, has been widely used in Apple related products. It will scan your vicinity for other Apple devices and then let you directly connect to them without having to know their actual IP addresses.
After enabling this service, you will be able to see your NAS in the left hand panel of the Finder under "Shared". Simply click on your NAS to connect to it.
Service name is the name of the NAS in Finder.
Enable Time Machine Support:
ASUSTOR NAS devices support Time Machine and can back up almost any mac. Quotas can be set to ensure that NAS drives are not filled up. See NAS 159 – Time Machine: Best Practice for guidance. for further guidance when dealing with multiple mac devices.
See more
NAS 102 - Introduction to File Transfer Protocols
NAS 108 - Using NAS with Apple macOS
NAS 159 - Time Machine: Best Practice
NFS
After enabling NFS, you will be able to access your NAS via UNIX or Linux operating systems.
After enabling NFS service, you can configure access rights using the Shared Folders setting found in the Access Control system app (see section Access Control). This option will be hidden if NFS service has not been enabled.

See more
NAS 102 - Introduction to File Transfer Protocols
NAS 109 - Using NAS with Linux
FTP Server
After enabling the FTP server setting, you will be able to access your NAS via any FTP client program (i.e., FileZilla). FTP server access rights are the same as those for the system (ADM). Should you wish to change or configure these access rights, you may do so using the shared folders setting found in the Access Control system app (see section Access Control.)

Unicode support:
Please enable this option if your FTP client program supports Unicode.
Enable anonymous:
Enabling this option will allow FTP client programs to access your NAS anonymously, without the need for a username or password. For security reasons, this is not recommended.
Enable SSL/TLS: Enable encryption for FTP connections.
Enable FXP:
FXP stands for File eXchange Protocol. By enabling this option, FTP service will support server-to-server file transfer function.
Maximum number of all FTP connections:
The maximum number of simultaneous FTP connections allowed.
Maximum number of connections per IP:
The maximum number of connections allowed per IP or system.
Max upload rate:
The maximum upload speed per connection. 0 represents no limitation.
Max download rate:
The maximum download speed per connection. 0 represents no limitation.
Passive FTP:
To minimize the security concerns of connecting from a server to a client, a type of connection mode called Passive Mode (PASV) was developed. When a client program starts to connect, it will notify the server to activate Passive Mode.
Respond with External IP:
By enabling this option, the server will report its external IP address to FTP clients. This option only works when the ASUSTOR NAS is behind a NAT, and the FTP clients belong to a different subnet than the ASUSTOR NAS does. In most cases, this option is unnecessary, but if FTP clients fail to connect to the ASUSTOR NAS, then you can enable this option and try again.


Note: About Passive FTP
Passive mode FTP can be used to overcome the problem of active mode FTP being blocked by firewalls. Passive FTP makes the FTP client establish all connections to the FTP server, as opposed to the web host supplying the return port. Firewalls typically allow passive FTP connections without requiring additional configuration information.
See More
File Transfer Protocol - Wikipedia
NAS 102-Introduction to File Transfer Protocols
WebDAV
After enabling WebDAV you can access your NAS via HTTP or HTTPS protocol by using a Web browser or other client programs.

See More
NAS 102 - Introduction to File Transfer Protocols
NAS 208 – WebDAV: A Secure File Sharing Alternative to FTP
Terminal
You can enable SSH service if you wish to manage your NAS over Secure Shell (SSH). If you wish to transfer data to your NAS through SFTP (Secure FTP) you can enable that here as well.

Note: For security reasons, SSH only allows the "admin" account or the "root" account to log in. The passwords for both these accounts are identical.
Rsync Server
After enabling Rsync server, your NAS will become a backup server and will allow remote backup from another ASUSTOR NAS or any other Rsync-compatible servers.
Enable Rsync server:
If you wish to permit encrypted backup for clients, please enable support for encrypted transmission via SSH. If you enable this feature, the system will then automatically enable the SSH service (Terminal).
Manage Rsync User:
If you wish to create restrictions on the Rsync connections that can back up to your NAS, please click on Manage Users to create different Rsync user accounts. (Reminder: Rsync accounts are different and independent from system accounts.)
Add New Backup Modules:
Click on Add to create a new backup module. Each backup module will then correspond to a physical path within the system. When an Rsync client connects to your NAS, it will be able to select a backup module. Data will then be backed up to the module's corresponding physical path.
See More:
NAS 259 – Using Remote Sync (Rsync) to Protect Your Data NAS 351 – Remote Sync (Rsync): Best Practice
TFTP Server
TFTP (Trivial File Transfer Protocol) is a simple type of file transfer protocol that is used to transfer configurations or small files, providing no authentication.

TFTP root folder:
Specifies the folder on the ASUSTOR NAS that TFTP clients can access.
TFTP client permission:
Specifies the permissions for TFTP clients. If you select "Read Only", TFTP clients will only be able to view the contents of the TFTP root folder. If you select "Read & Write", TFTP clients will be able to modify the contents of the TFTP root folder.
Client connections allowed:
Selecting "All Connections" will allow all TFTP clients to connect to the NAS. You can also choose to limit connections to TFTP clients from a specified range of IP addresses.
Timeout:
Here you can specify the timeout time which is used to terminate idle connections, providing an additional layer of security.
SNMP
Enabling SNMP allows users to use network management software to monitor the status of their ASUSTOR NAS.

SNMP trap level:
Here, you can configure SNMP trap to actively provide warning messages. Warning event types include: Critical, Error, Warning and Information.
Trap Address:
After configuring the SNMP trap level, please input the IP address of the network management station (NMS) here.
SNMP V1 / SNMP V2 service:
Selecting this checkbox will enable SNMP V1 / V2 service.
Community:
Enter a community name here. Community names must include 1 to 64 displayable characters and may not include the following characters: "'" and blank spaces.
SNMP V3 service:
Selecting this checkbox will enable SNMP V3 service.
Username:
Please input the SNMP V3 username here. This username must include 1 to 64 displayable characters and may not include the following characters: " \ and blank spaces.
Password:
Please input the corresponding password for the SNMP V3 username in the field above. Letters in the password are case-sensitive. You may input 8 to 127 displayable characters including letters from the English alphabet, numbers and symbols. The password may not include the following characters: " ' \ and blank spaces.
See More:
NAS 271 - ASUSTOR NAS MIB Guide
SFTP
Secure File Transfer Protocol, or SFTP) is a network protocol that provides file access, file transfer, and file management over any reliable data stream. Enabling this function will allow all ADM users to access shared folders via SFTP along with providing support for connections by the ASUSTOR EZ-Connect App and other Apps.

Reverse Proxy
Protect Multiple NAS Devices with HTTPS Security
Reverse proxy servers help retrieve resources on behalf of a client and secure the data transmitted. This enables other NAS devices containing sensitive information that may be vulnerable in an attack to remain offline and away from the internet to retrieve internet data with HTTPS security from the reverse proxy.
Note: Reverse proxy is currently not supported for apps requiring separate logins.

Improve App Connection Security
Apps that don't use HTTPS can use a reverse proxy server to enable HTTP Secure connections. Some Portainer implementations do not use HTTPS. A reverse proxy connection can direct a local Portainer HTTP connection to the reverse proxy server and retrieve data from the proxy server through a secure tunnel, increasing security.
Note: Some apps already use a reverse proxy server for connection security. Please refer to the relevant documentation for each app.

Web Center
Overview
Viewing Web Server, PHP and Virtual Host status and related information.

Web Server
Web servers are used to host a website. Web Center creates a shared folder named Web that serves as the root directory for the web server and does not interfere with other data stored on the NAS. Various web server software packages can be installed like Apache, Nginx and PHP and is easily customizable.
Enable personal website:
After enabling this, each NAS user can have their own dedicated personal website. Before using this, you must first create a www folder within the Home folder and then upload the associated files for your personal website to the www folder. Afterwards, you will be able to connect to the site using the NAS IP (or DDNS URL) followed by adding \~username. For example:
http://192.168.1.100/\~admin or cloudid.myasustor.com/\~admin.
Enable PHP cache: Enabling PHP cache could enhance the PHP performance. However, it may not take effect under some circumstances.

Virtual Host
You can use this feature to simultaneously host several websites on your NAS.

Implementation
Displays web server versions and status as well as update notifications. Updates are also found at App Central.

Overview
Here you can see the storage status.
Note: This function may differ depending on the NAS model in use.

Volume

Storage space on your NAS consists of logical volumes which are made up of a single disk or multiple disks combined together. Here you can set up new storage space for your NAS and,
according to your data protection needs, select the most suitable RAID level. In order to maintain data integrity, you may only use internal disks when creating storage space for your NAS. ADM does not support the use of external disks for storage space.
Reminder: The RAID levels that you may employ will depend on your NAS product model and the number of disks that you are using.
(1) Create: When setting up new storage space, ADM offers the following two options:
Quick Setup:
You need only specify the requirements for the storage space (i.e., you wish to have a higher level of data protection). Based on this and the number of disks you have, ADM will automatically create a storage volume and select an appropriate RAID level for it.
Advanced Setup:
Based on the current number of disks, you can manually select a RAID level or set up a spare disk.
Reminder: In order to optimize disk space utilization, it is recommended that you use disks of the same size when creating storage space.
MyArchive :
MyArchive is a function designed especially for data management and sharing, giving you added flexibility when using multiple hard disks for data backup or exchange. When MyArchive hard disks have been inserted into the MyArchive disk bay, you will immediately be able to access the data on the hard disk.
Note: This function may differ depending on the NAS model in use.
![graph LR A["Server Rack"] --> B["MyArchive"] C["Server Rack"] --> B D["Server Rack"] --> B B --> E["MyArchive"] style B fill:#f9f,stroke:#333,stroke-width:2px note_right_of_B["N-1"] note_right_of_B["MyArchive"]](/content/2026/07/1442873/images/1b25846ae558fa06038dcef75196ef6605b9627fc462fad6fd793e1d68b2d3ab.jpg)
MyArchive Hard Disk:
Users will need to first convert hard disks into MyArchive hard disks before being able to use the MyArchive function.
File System: Supported file systems are as follows:
- EXT4, Btrfs: for use with Linux
- NTFS: for use with Windows
- HFS+: for use with macOS
- exFAT: for use with Linux, macOS, Windows.
Reminder: Btrfs for MyArchive supports snapshots and version history to help protect against accidental deletions or modifications. MyArchive drives run independently of internal NAS volumes, ensuring that snapshots are supported even when internal NAS volumes do not support snapshots.
Alias name:
Here you can define tags for MyArchive disks. This allows users to quickly determine the contents of MyArchive disks from within ADM File Explorer when multiple disks are mounted simultaneously.
MyArchive Encryption:
Here you can choose whether or not you want to encrypt this MyArchive and whether or not you want to auto-mount it at system startup. Should you choose to encrypt this MyArchive, after the system restarts, you will have to manually enter the password for the MyArchive in order to access it. Encrypted MyArchives are normally used for the storage of critical or confidential data. Should you lose your NAS you still needn't worry about your data leaking out and falling into the wrong hands.
Reminder: The MyArchive encryption function only supports the EXT4 / Btrfs file system.
Automatically mount MyArchive 1 before starting a backup, and eject when complete
When enabling this option, ADM will automatically mount a connected MyArchive drive when a backup begins and automatically eject a MyArchive drive upon completion.
See More:
NAS 255 – Using MyArchive
Video - MyArchive
Related:
Accessories: Hard Disk Tray
(2) Management:
Here you can do RAID management (RAID Scrubbing, RAID upgrade, online capacity expansion) and create SSD caching or file system Scrubbing.


About RAID
In order to provide optimal storage space utilization and data protection, ADM supports multiple RAID levels allowing you to select the appropriate level for your needs. The following volume types levels are all supported by ADM:
Non-RAID Volume Types
Single:
Only uses a single disk in the creation of storage space. This configuration does not offer any type of data protection.
JBOD:
An acronym for “just a bunch of disks”, JBOD uses a combination of two or more disks to create storage space. The total storage capacity is the capacities of all the disks added together. The advantage of this configuration is that it allows you to use different sized disks together and provides a large amount of storage space. The downside is that it does not offer any sort of data protection.
RAID Volume Types
RAID 0:
Uses a combination of two or more disks to create storage space. The total storage capacity is the capacities of all the disks added together. The advantage of this configuration is that it allows you to use different sized disks together and provides a large amount of storage space. Also, data in RAID 0 volumes is accessed in parallel which provides improved performance. The downside is that RAID 0 does not offer any sort of data protection.
RAID 1:
In RAID 1 your data is written identically on two disks, thereby producing a "mirrored set". Exactly the same data is stored on the two disks at all times. RAID 1 protects your data from loss should one of your disks fail. RAID 1's advantage is that it offers protection for your data by providing data redundancy. The downside of this configuration is that when combining two disks of differing sizes, the total storage space will be equal to the size of the smaller disk. Therefore, you will be unable to use a portion of the larger disk.
Total available storage space = (size of smaller disk) * (1)
RAID 5:
Combines three or more disks to create a storage space that is able to support one failed disk. Should one of your disks fail, your data will still be protected from loss. In the event of disk failure, simply replace the failed disk with a new one. The new disk will automatically be accommodated into the RAID 5 configuration. The advantage of using RAID 5 is that it provides data protection through data redundancy. The downside to using RAID 5 is that when combining disks of differing sizes, the total storage space will be calculated based on the size of the smallest disk.
Total available storage space = (size of smallest disk) * (total number of disks - 1)
RAID 6:
Combines four or more disks to create a storage space that is able to support two failed disks. Should two of your disks fail, your data will still be protected from loss. In the event of disk failure, simply replace the failed disks with new ones. The new disks will automatically be accommodated into the RAID 6 configuration. The advantage of using RAID 6 is that it is able to provide superior data protection through data redundancy. The downside to using RAID 6 is that when combining disks of differing sizes, the total storage space will be calculated based on the size of the smallest disk.
Total available storage space = (size of smallest disk) * (total number of disks - 2)
RAID 10 (1+0):
Combines four or more disks to create a storage space that is able to support multiple failed disks (as long as the failed disks do not belong to the same "mirrored set"). RAID 10 provides the
data protection of RAID 1 along with the access efficiency of RAID 0. With respect to data protection, RAID 10 uses the RAID 1 method of having the exact same data written identically on two disks, producing “mirrored sets”. These “mirrored sets” are then combined together in a RAID 0 configuration. RAID 10 requires an even number of four or more disks. When combining disks of differing sizes, the total storage space will be calculated based on the size of the smallest disk.
Total available storage space = (size of smallest disk) * (total number of disks / 2)

About RAID Scrubbing
RAID Scrubbing: RAID Scrubbing detects the integrity and consistency of RAID 5 and RAID 6 drive data. Regular use of this feature can help you confirm the integrity of your data and fix inconsistencies. If a problem that cannot be repaired is found, your NAS will immediately warn you so that you can respond to unexpected issues early. If the system is shut down, RAID Scrubbing will be disabled.

About SSD Trim
Enable SSD Trim allows the SSDs installed on the NAS to maintain stable read/write performance while simultaneously controlling the frequency of overwriting to specific blocks, extending the life of SSDs.

About SSD Cache
Traditional hard drives are not as fast as SSDs, but their capacity and durability are not as good as traditional hard drives. The best way to combine the best of both worlds is with SSD caching. The SSD cache feature saves frequently accessed file data on a hard disk and stores it on an SSD, thereby optimizing the response time and transfer rates of users when accessing data. ASUSTOR NAS* supports read-only access and read-write cache mode. After following the installation wizard, you will be able to easily access your storage spaces and achieve the best balance of capacity and performance.
* Supported Models: AS31/32/50/51/52/53/61/62/63/64/65/66/70/71 series
Note:
- For models with M.2 slots, you are now able to choose M.2 SSD for caching or storage. To maintain optimal performance and quality, M.2 drives may only be paired with other M.2 drives in a RAID array.
- Btrfs and Volume snapshot is only supported on: AS31, 32, 40, 50, 51, 52, 53, 61, 62, 63, 64, 70, Lockerstor and Lockerstor Pro.
See More:
NAS 202 - Using SSD Caching on an ASUSTOR NAS
Drive
Here you can check on the status of all your disks. You can also inspect their S.M.A.R.T. information and conduct tests on your disks.

Disk Doctor:
Here you can check your disks for bad sectors or conduct S.M.A.R.T. tests.

IronWolf Health Management:
The Seagate IronWolf Health Management function can provide more detailed detection information for IronWolf series hard disks. Before the possibility of a hard disk error occurring, a notification or warning message will be issued.
Reminder: You need to search and install IronWolf Health Management in App Central before enabling this feature.
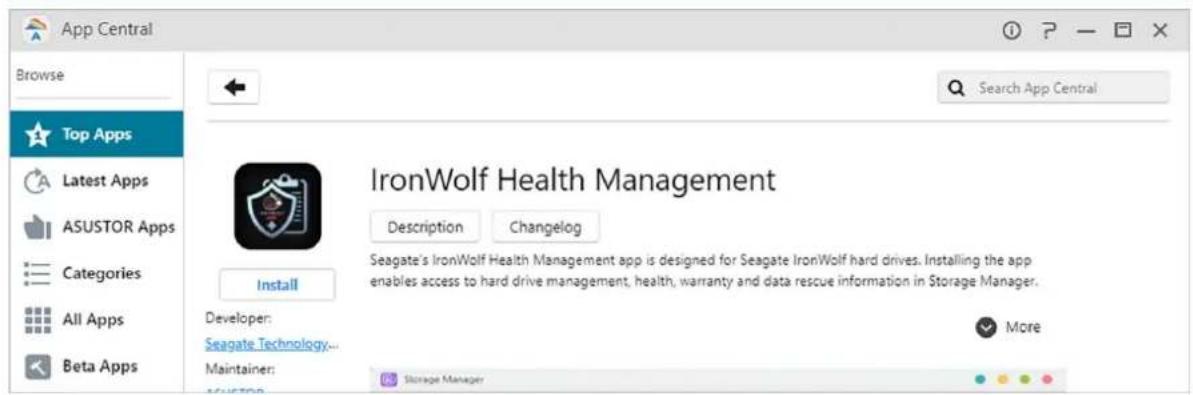
- If you are using a Seagate IronWolf or IronWolf Pro series hard disk with a capacity of over or equal to 4TB, you only need to navigate to [Storage Manager] → [Disk] → [Disk Doctor] and the [IronWolf Health Management] window will appear. You can use this function to schedule or immediately carry out a scan.
- After using IronWolf Health Management to scan your hard disks, the results will either be shown as “healthy” or a numerical output code. Please see the chart below to see the suggestions represented by the codes.
| Output Codes from IronWolf Health Management | IronWolf Health Test Result | Suggestion |
| 100 | Notification | Abnormally high operating temperature has been detected. Please ensure rear ventilation ports are not blocked, and try to lower the ambient temperature. Alternatively, go to Settings > Hardware > Fan Control to increase fan speed. If issue persists, please contact the ASUSTOR Support Team. |
| 101 | Notification | Connection issue on your ASUSTOR NAS and hard drive interface has been detected. Please ensure the hard drive is properly installed in the chassis or drive tray, and that the tray is properly installed in your ASUSTOR NAS. If issue persists, please contact the ASUSTOR Support Team. |
| 102 | Notification | Excessive physical shock to the hard drive has been detected. Please ensure your hard drive and ASUSTOR NAS are placed on a stable surface. If issue persists, please contact the ASUSTOR Support Team. |
| 105 | Notification | Excessive vibration has been detected. Please ensure your ASUSTOR NAS is placed on a stable surface. If issue persists, please contact the ASUSTOR Support Team. |
| 106 | Notification | Excessive host resets have been detected. Please ensure the hard drive is properly installed in the chassis or drive tray, and perform a power cycle. If issue persists, please contact the ASUSTOR Support Team. |
| >=200 | Warning | IHM has spotted some errors and a full SMART scan has been automatically triggered for your convenience. If the scan fails, please contact Seagate |
Apacer S.M.A.R.T Tool:
The Apacer S.M.A.R.T Tool function can provide more detailed detection information for Apacer series SSDs, and send reminders or warning messages before the hard disk may fail.
Reminder: You need to search and install Apacer S.M.A.R.T Tool in App Central before enabling this feature.
S.M.A.R.T. Info:
S.M.A.R.T. is an acronym for Self-Monitoring Analysis and Report Technology. It is a type of self-monitoring mechanism for disks that detects and reports on various indicators of reliability, with the hope of anticipating failures.

iSCSI is a type of network storage technology that offers high expandability and low implementation costs. Through existing network infrastructure and iSCSI you can use your NAS to expand existing storage space or have it act as a backup destination. iSCSI consists of two ends, a target and an initiator. The initiator is used to search for iSCSI hosts and to set up targets.

IQN:
IQN (iSCSI Qualified Name) is the unique name for each iSCSI target. This name should not be the same as any of the other target IQNs on other hosts.
CRC / Checksum: Enable to check errors during data transmission.
CHAP Authentication:
CHAP authentication can be used to verify a user's identity. If you choose to use CHAP authentication, a CHAP password must first be entered from the initiator for verification before it can connect to the target.
Note: When enabling mutual CHAP authentication, the authentication password used by the server and client cannot be the same.
Mutual CHAP Authentication:
Mutual CHAP authentication requires both the target and the initiator to have usernames and passwords. When establishing a connection, the target and the initiator will have to authenticate each other using their respective credentials.
LUN Pool:
Here you can check on the status of all iSCSI LUNs and assign corresponding iSCSI targets.
iSNS Server:
iSNS (Internet Storage Name Service) iSCSI management. Here, you can register iSCSI targets with the iSNS Server, for convenient centralized management.

See More: NAS 308 – Introduction to iSCSI
iSCSI LUN
This tab allows you to create/remove, mount/unmount iSCSI LUNs, and create/manage LUN snapshots.


Snapshot Center
Overview
Overview for Btrfs Volume and iSCSI LUN snapshots.
Note: Models that don't support Btrfs will not display Volume snapshots information.

History:
Search snapshots by its created date.
Scheduled Tasks:
List the scheduled tasks information.
Volume
Display Btrfs volume snapshots information.

Manual creation:
Click the icon to create a snapshot.
Scheduling:
Click the icon to schedule snapshots to run regularly. Scheduled snapshots will be named using the date and time created.
- Once: Users can create a snapshot at a specific date and time. • Daily: Users can set a minimum of 5 minutes or up to 12 hours to create a snapshot.
- Weekly: One or more days of the week can be set to create snapshots, with options for daily included.
Snapshots can be locked and retention rules can be set. Snapshot Center limits saved snapshots to 256. Upon reaching the limit, schedules can be terminated or Snapshot Center will automatically remove the oldest unlocked snapshot. When a snapshot is locked, it will not be removed automatically.
Restore:
Before the snapshot is restored, users can create a new snapshot before the restore and choose whether to keep the snapshot after the restore.

Edit:
Edit the information of the snapshot.

Remove:
Remove selected snapshot. With the Shift key, you can select multiple snapshots to remove.
Note: ADM will stop creating snapshots if a new snapshot exceeds the maximum amount of snapshots while all previous snapshots are locked. Users need to manually remove the locked snapshots and then can create snapshots again.
Preview:
The volume snapshots can activate to preview in ADM File Explorer.

Preview files from snapshots in File Explorer, users can copy or download files contained within snapshots to restore the event of corruption or other forms of data loss.

iSCSI LUN
Display iSCSI LUN snapshots information.

Manual creation:
Click the icon to create a snapshot.
Scheduling:

Click the icon to schedule snapshots to run regularly. Scheduled snapshots will be named using the date and time created.
- Once: Users can create a snapshot at a specific date and time. • Daily: Users can set a minimum of 5 minutes or up to 12 hours to create a snapshot.
- Weekly: One or more days of the week can be set to create snapshots with options for daily included.
Restore:
Select one iSCSI LUN snapshot to restore.

Edit:
Edit the information of the snapshot.

Remove:
Remove selected snapshot. With the Shift key, you can select multiple snapshots to remove.
Note: ADM will stop creating snapshots if a new snapshot exceeds the maximum amount of snapshots while all previous snapshots are locked. Users need to manually remove the locked snapshots and then can create snapshots again.

EZ Sync Manager
Introducing ASUSTOR EZ Sync
ASUSTOR EZ Sync is a new feature on ADM 3.2. It is for synchronizing data between computers and your NAS. Turning your NAS into a personal cloud space like Dropbox™ with ample capacity at your fingertips with historical version management. If a file is unintentionally overwritten with the wrong information, it can be restored using a previously saved backup copy. ASUSTOR EZ Sync includes two parts: EZ Sync Manager, which is preinstalled on every NAS, and ASUSTOR EZ Sync, which can be installed on your PC.
Note: It is recommended to turn on the EZ Connect option while using ASUSTOR EZ Sync.
EZ Sync Manager for ADM


ASUSTOR EZ Sync (AES) – PC sync tool
How to obtain: Please download from EZ Sync Manager or from the ASUSTOR official website.

Note: ASUSTOR EZ Sync currently only supports Windows.
Introducing EZ Sync Manager
File:

- Note: The above is the toolbar that will pop up after clicking the File
| 1. Create Folder | 2. Upload | 3. Download | 4 Import to EZ Sync |
| 5. Export to Shared Folder | 6. File History | 7. Move | 8. Rename |
| 9. Delete | 10. Share | 11. Refresh |
- To set different sync folders on your computer separate from the default folder, please create a new folder in EZ Sync Manager.

- Sorting is easy in EZ Sync Manager. Columns can be enabled and disabled and files can be sorted under these categories.

- "File History" allows you to restore files to their original versions or update to a newer version.

- Pressing Share allows you to create a Share Link. After pressing OK, the Share Link can be copied and mailed as shown below.

Connection
This option allows the user to view connected computers, IP addresses and the last time a computer made a connection to EZ Sync.

Log
View logs here!
![EZ Sync Manager File Connection Log Information Settings Recycle Bin Event Device Time + Added folder [TEST] to [EZ Sync]. Windows NT 10.0 03/23/2021 PM 05:24 + Added file [68.PNG] to [EZ Sync]. Windows NT 10.0 03/23/2021 PM 05:24](/content/2026/07/1442873/images/c15307aead9bbd83925358a5098798cde24b0c2c8c0d3f9eaf26f8d05f68905d.jpg)
Information
View NAS connection information, usage status, and more.

General:
File History can save up to 64 versions of a file, and will automatically delete the oldest version when the amount set has been exceeded.

Recycle Bin Rules: Enable or disable Recycle Bin and set automatic deletion rules.

Advanced:
Choose which volume data will be synchronized.

Recycle Bin

- Restore: Restores file(s) to their original location.
- Download: Transfer file to computer.
- Delete: Deletes file(s) permanently.
- Empty: Deletes all files permanently.

Access Control
Local Users
Here you can manage (add, edit or remove) the local users in the system and assign their access rights to shared folders.
Within ADM, a single user's access rights with regards to shared folders will depend on the user's existing access rights and on the access rights of the group that the user belongs to. Both sets of access rights will be checked against each other in order to determine priority (please see). For convenience, the system provides a preview mode which allows you to first preview any changes that you make to access rights.

(1) Add: You can decide to add users in a single or batches according to the number of users.
Import users:
You can batch create user accounts by importing a users list file.
Method 1. Use a Text Editor:
- Open a new file with a text editor.
- Enter a user's information in the following order and separate them by semicolon (;)
- Username
- Password
- Description
- Quota (GB) (this setting will be applied to all existing volumes)
- Group (if you want to add the user to multiple groups, use comma to separate the group names)
- Go to the next line and repeat step 2 until you have input all the users. Each line indicates one user's information.
- Save the file in UTF-8 encoding.
Method 2. Use Microsoft Excel:
- Open a new file with Excel.
- Enter users' information in the following order and separate them by column in a single row:
- Username
- Password
- Description
- Quota (GB) (this setting will be applied to all existing volumes)
- Group (if you want to add the user to multiple groups, use comma to separate the group names)
- Go to the next row and repeat step 2 until you have input all the users. Each row indicates one user's information.
- Save the file in UTF-8 encoding and in csv format.
Note:
- All fields are optional except username and password.
- Uploaded file cannot exceed 1MB
- Uploaded file content cannot be null
- The maximum number of rows in the uploaded file cannot exceed 4000.
(2) Edit:
- Information: You can set account-related information (for example, enable two-step verification).
- Groups: Here you can select the group that the user wants to join, and the access permissions of different groups can be set by yourself.
- Folder - Access Rights: Here you can set access permissions for different folders for this user.

About Local Users
After initialization, the system will automatically create user accounts for “admin” and “guest”. “admin” is the default administrator account and possesses a majority of the access rights. If you wish, you can change the access rights and password for this account. “guest” is the default guest account which is only suitable for use with CIFS/SAMBA and AFP. This account does not possess login and authentication rights, so you cannot change its password.
Local Groups
Here you can manage (add, edit or remove) the local groups in the system and assign access rights for shared folders.

Reminder: If you have a relatively large number of users on the system, you can conveniently assign access rights by user group instead of assigning access rights for each user one by one.
Within ADM, a single user's access rights with regards to shared folders will depend on the user's existing access rights and on the access rights of the group that the user belongs to. Both sets of access rights will be checked against each other in order to determine (please see). For convenience, the system provides a preview mode which allows you to first preview any changes that you make to access rights.

About Local Groups
After initialization, the system will automatically create two user groups, “administrators” and “users”. “administrators” is the default administrator group. If a user is added to this group, they will possess a majority of the administrator access rights. The “admin” account belongs to the “administrators” group by default and cannot be removed from it.
AD/ LDAP
AD : The full name is Windows Active Directory, which is a directory service launched by Microsoft that allows IT managers to efficiently and centrally manage all resources in the domain, and is widely adopted by major enterprises.
LDAP: LDAP, also known as Lightweight Directory Access Protocol, is mainly used for unified management of accounts and passwords. Using LDAP can more efficiently manage user authentication or computer resource permissions across the enterprise. Users can easily add an ASUSTOR NAS to their existing LDAP server, providing easier ways to help manage productivity.
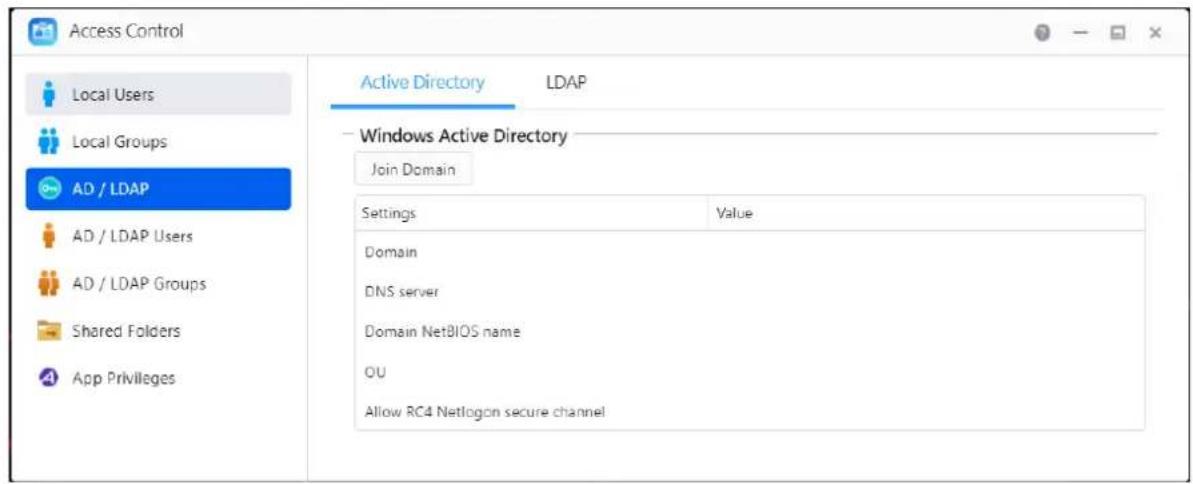
Active Directory
You can click Join Domain here to join Windows Active Directory.
LDAP
You can enable the LDAP client here.
AD/LDAP Users
Here you can view all AD/LDAP user accounts and manage their access rights to shared folders once your NAS has been successfully added to an AD/LDAP domain.
ASUSTOR NAS can support more than 200,000 AD users and groups. When joining an AD domain for the first time, depending on the number of users and groups, it may take a while for all of them to become visible.

See More:
NAS 206 - Using NAS with Windows Active Directory
AD/LDAP Groups
Here you can view all AD/LDAP user groups and manage their access rights to shared folders once your NAS has been successfully added to an AD/LDAP domain.

Shared Folders
Here you can manage your shared folders and set up their access rights in relation to users and user groups. Shared folders allow your NAS to become a file server. They are fundamental in sharing files with the outside world. Consequently, correctly setting up their access rights is very important in the management of your data.

(1) Shared Folders:
Add: You can create a shared folder here and set the volume in which the folder is stored.
Edit:
Invisible in "Network" or "My Network Places": This setting only applies if you are using Microsoft Windows. When you enable this setting, your NAS will cease to automatically
appear in "Network" or in "My Network Places". Please note that enabling this setting will not affect the connection to your NAS in any way.

Empty Recycle Bin:
Click this button to empty all contents in this shared folder's Recycle Bin immediately.
Encrypt this shared folder:
Here you can choose whether or not you want to encrypt your shared folder and whether or not you want to auto-mount it at system startup. Should you choose to encrypt your folder, after the system restarts, you will have to manually enter the password or import the encryption key for the folder in order to access it. Encrypted folders are normally used for the storage of critical or confidential data. Should you lose your NAS you still needn't worry about your data leaking out and falling into the wrong hands.

Warning: When choosing to use encrypted shared folders, please make it a point to remember your password. Should you forget your password, the data in the shared folder will become unrecoverable.
Export/import encrypted key:
Selecting "Export encrypted key" will download the encrypted key to your computer. When you need to mount an encrypted folder, you can select "Enter Password" or "Import encrypted key" to mount the shared folder and begin accessing it.
NFS Privileges:
Here you can set NFS privileges for individual folders after first enabling NFS service.


About Shared Folders [Public]
After initialization, the system will automatically create a shared folder "public". By default, all users can access the files in this folder. Additionally, the system will automatically create a personal folder for each user (using the user's account name) that by default, can only be accessed by the mentioned user.
Windows ACL:
• Here you can choose to enable or disable Windows ACL for specified shared folders.

- After enabling Windows ACL for a shared folder, the shared folder and all subfolders and files contained within it can be assigned user or group permissions.
- The following shared folders do not support Windows ACL permissions: Home, User Homes, PhotoGallery, Web, Surveillance, MyArchive, Network Recycle Bin, virtual devices, external devices (USB hard drives, optical drives).
- After enabling Windows ACL you will be able to use ADM's File Explorer or Microsoft Windows Explorer to configure permissions. After disabling Windows ACL you will only be able to configure permissions from within ADM's File Explorer.
- If you enable Windows ACL and then later decide to disable it, all files and folders will be re-assigned with Read & Write permissions for all users.
- No matter if you are using Windows ACL or not, users will still require shared folder and file permissions in order to access files.
Folder – Access Rights:
- Shared folders access rights are the first level of access rights that will be examined. You can edit them here.

(2) Virtual Drive:
You can mount an ISO image file (.iso file) as a virtual drive and directly browse the content of the ISO image file. ADM's virtual drive function also provides simplified access control settings allowing you to either configure access for all users or limit access to only administrators.

• Additional information: ISO Mounting
You no longer need to burn ISO files onto CDs in order to read them. Now you can select ISO files from your NAS and directly mount them to shared folders ("read only" access rights). You can then use your computer to access and read them. Later, when you are finished with the files, simply unmount them.
(3) CIFS Folder:
Here, you can mount remote folders as shared CIFS folders and configure their usage permissions according to users or user groups.

- Auto-mount at system startup:
You can select whether to auto-mount on system startup. If you have not enabled this item, the CIFS folder will be automatically removed the next time the system starts up.
- Invisible in "Network" or "My Network Places":
This setting only applies if you are using Microsoft Windows. When you enable this setting, your NAS will cease to automatically appear in "Network" or in "My Network Places". Please note that enabling this setting will not affect the connection to your NAS in any way.
App Privileges
Here you can configure the users' or user groups' access rights to apps. For example, if a particular user's account is denied access to the Surveillance Center app, once he/she logs in, he/she will not be able to see the Surveillance Center app icon on their ADM home screen. The
user will have no way of opening or accessing the app.

- Note: Web applications may be public in nature (i.e., WordPress) or have their own account management systems (i.e., Joomla). Therefore, there is no way to restrict access to them through ADM.
Permission Mapping Table
| X Y | Deny | Read & Write | Read Only | No Settings |
| Deny | Deny | Deny | Deny | Deny |
| Read & Write | Deny | Read & Write | Read & Write | Read & Write |
| Read Only | Deny | Read & Write | Read Only | Read Only |
| No Settings | Deny | Read & Write | Read Only | Deny |
X: User access rights for shared folders
Y: Group access rights for shared folders
Priority of access rights: Deny Access > Read & Write > Read Only > No Settings
Remote Sync

Remote Sync (Rsync) can allow your NAS to be used as a backup destination or backup source. When using your NAS as a backup source, you can choose to back up the data from your NAS onto another remote ASUSTOR NAS or Rsync compatible server. When your NAS acts as a backup destination, you can back up the data from another remote ASUSTOR NAS or Rsync compatible server onto your NAS.
During the setting process, according to your personal needs, you may need to set the following options:
Use encrypted transmission:
If you choose to use encrypted transmission, you will have to enter the other host's SSH connection information in addition to your Rsync account information.
Use 1 on 1 folder synchronization:
If you decide to use 1 on 1 folder synchronization, all the data in the designated destination folder will be synchronized with the data in your source folder (you may only select one folder). The contents of both folders will be exactly the same. If you decide not to use this feature, all your chosen source folders (you may select multiple folders) will be copied one by one to the destination folder.
Archive mode (incremental backup):
After enabling this feature, successive backup jobs (after your first backup job) will only copy the data that has changed since your last backup job (block level). For example, if you have made some small changes to a 10 MB file, incremental backup will only copy the portions that you have made changes to. This can significantly reduce bandwidth usage.
Compress data during the transfer:
During backup you can compress the data that is being transferred thereby lowering bandwidth usage.
Keep file metadata:
When you enable this option, certain file properties (permissions, extensions, attributes, owner, groups, etc.) will be sent along with the file to the destination.
Support sparse files replication:
You will only need to enable this option when the data that you wish to back up contains sparse files. Normally, you will not have to enable this option.
Mission Mode:
Sometimes backup jobs may be stopped because of various connection problems with a busy server on the other end. ASUSTOR's Mission Mode option allows you to configure the number of connection attempts and time interval for connection attempts, ensuring for the successful completion of your backup job. This also gives IT administrators a significant amount of flexibility when configuring backup jobs.
Reminder: If you wish to use Remote Sync while using your NAS in conjunction with another remote ASUSTOR NAS, please remember to enable the Rsync server feature on the remote NAS (Services -> Rsync Server). For more information please see Rsync Server.
See More:
NAS 259 – Using Remote Sync (Rsync) to Protect Your Data NAS 351 – Remote Sync (Rsync): Best Practice
SMB Backup
SMB Backup in Backup and Restore uses SMB to back up data to and from your NAS. When using your NAS as a backup source, you can choose to back up data from your NAS onto another ASUSTOR NAS or SMB compatible server in a local network. When your NAS acts as a backup destination, you can pull data from another ASUSTOR NAS or SMB compatible server onto your NAS.

When using SMB Backup, ensure that SMB is enabled on both the source and destination to ensure backups complete successfully. Please refer to [Services] [SMB].
Use 1 on 1 folder synchronization:
If you decide to use 1 on 1 folder synchronization, all the data in the designated destination folder will be synchronized with the data in your source folder (you may only select one folder). The contents of both folders will be exactly the same. If you decide not to use this feature, all your chosen source folders (you may select multiple folders) will be copied one by one to the destination folder.
Keep extra files at the destination: Once the copying and synchronization of files is completed, the data at the source and destination should be exactly the same. However, sometimes there are extra files present at the destination. These files are only present at the destination but not at the source. By enabling this option, these extra files will be kept at the destination and will remain untouched.
Skip existing file if not modified:
When enabling this option, existing files that have not been modified will be skipped to save time backing up.
Mission Mode:
Sometimes backup jobs may be stopped because of various connection problems with a busy server on the other end. ASUSTOR's Mission Mode option allows you to configure the number of connection attempts and time interval for connection attempts, ensuring for the successful completion of your backup job. This also gives IT administrators a significant amount of flexibility when configuring backup jobs.
See More:
FTP Backup
FTP backup can allow for your NAS to be used as a backup destination or backup source. When using your NAS as a backup source, you can choose to back up the data from your NAS onto another remote ASUSTOR NAS or FTP server. When your NAS acts as a backup destination, you can back up the data from another remote ASUSTOR NAS or FTP server onto your NAS.

During the setting process, according to your personal needs, you may need to set the following options:
Mission Mode:
Sometimes backup jobs may be stopped because of various connection problems with a busy server on the other end. ASUSTOR's Mission Mode option allows you to configure the number of connection attempts and time interval for connection attempts, ensuring for the successful completion of your backup job.
Reminder:
If you wish to use FTP backup while using your NAS in conjunction with another remote ASUSTOR NAS, please remember to enable the FTP server feature on the remote NAS (Services - > FTP Server). For more information please see FTP Server.
See More:
NAS 257 - FTP Backup
Internal Backup
Internal Backup allows you to backup data from NAS to local shared folders. Using Internal Backup with MyArchive disks creates a perfect off-site backup solution.

During the setting process, according to your personal needs, you may need to set the following options:
Use 1 on 1 folder synchronization:
If you decide to use 1 on 1 folder synchronization, all the data in the designated destination folder will be synchronized with the data in your source folder (you may only select one folder). The contents of both folders will be exactly the same. If you decide not to use this feature, all your chosen source folders (you may select multiple folders) will be copied one by one to the destination folder.
Support sparse files replication:
You will only need to enable this option when the data that you wish to back up contains sparse files. Normally, you will not have to enable this option.
Supports symbolic link replication:
You will only need to enable this option when the data that you wish to back up contains symbolic link files. Normally, you will not have to enable this option.
A symbolic link (also symlink or soft link) is a term for any file that contains a reference to another file or directory in the form of an absolute or relative path and that affects pathname resolution.
Preferred file permission for all users at the destination:
If the ACL status of the source and destination are not the same, this permission setting will be applied to the files at the destination.
Keep owner:
By default, the owner of the files at the destination will be the user who created the backup job. Enabling this option can allow you to maintain the original ownership of the files at the destination.
External Backup
Here you can choose to backup data from USB or eSATA external hard disks to your NAS or backup data from your NAS to these external hard disks. In addition to supporting two-way backup, this feature also supports scheduled backups, making sure that your data is always backed up.

During the setting process, according to your personal needs, you may need to set the following options:
Mission Mode:
Sometimes backup jobs may be stopped because of various connection problems with a busy server on the other end. ASUSTOR's Mission Mode option for external backup allows you to configure the time interval for connection attempts, ensuring for the successful completion of your backup job. This also gives IT administrators a significant amount of flexibility when configuring backup jobs.
Archive mode (incremental backup):
After enabling this feature, successive backup jobs (after your first backup job) will only copy the data that has changed since your last backup job (block level). For example, if you have made some small changes to a 10 MB file, incremental backup will only copy the portions that you have made changes to. This can significantly reduce bandwidth usage.
Support sparse files replication:
You will only need to enable this option when the data that you wish to back up contains sparse files. Normally, you will not have to enable this option.
Supports symbolic link replication:
You will only need to enable this option when the data that you wish to back up contains symbolic link files. Normally, you will not have to enable this option.
A symbolic link (also symlink or soft link) is a term for any file that contains a reference to another file or directory in the form of an absolute or relative path and that affects pathname resolution.
One Touch Backup
One Touch Backup allows you to preset the function of the USB backup button found on the front of your NAS. Here you can designate your preferred backup direction and directory. After setting up One Touch Backup and plugging in an external USB drive to your NAS, you will only have to push the USB backup button to execute your backup job. Once the USB backup button is held down for 1.5 seconds, One Touch Backup will be triggered. During the backup process, the USB backup LED indicator light will blink continuously. After the backup process has finished, the light will cease to blink and will then return to its previous state. If you wish to disable One Touch Backup, you can adjust the settings accordingly.
Note: This function may differ depending on the NAS model in use.
Transfer Modes:
- From USB device to NAS: The system will back up the entire contents of the USB drive, based on the existing directory structure, to the NAS folder path that you set.
- From NAS to USB device: The system will take the contents of the specified NAS directory and, based on the existing directory structure, back it up to the USB drive's root directory.
Backup Methods:
- Copy: If you select this method, your system will copy your data from the back up source to the destination, be it the USB device or your NAS. Files or folders of the same name will be replaced and extra files at the destination will be kept. This method is suitable for one time backups.
- Synchronization: If you select this method, all the data in the designated destination folder will be synchronized with the data in your source folder. The contents of both folders will be exactly the same. Extra files at the destination will be automatically deleted. This method is suitable for ensuring your most recent data is backed up and for scheduled weekly backups. For example, you may choose to have regularly scheduled backups of your NAS's data so you always keep a USB drive plugged into your NAS for this purpose.
- Save in new folder: After selecting this method, you will then have to specify a naming format for the new folder. Every time you run a backup job the system will create a new folder according to this format and then proceed to back up your data into the folder. This method is suitable for those who wish to keep complete copies of each backup job, or those who just wish to back up their regular data from external devices onto their NAS. For example, you may
back up the data from your work computer onto your USB drive and then proceed to back up the data from your USB drive onto your NAS at home.


App Central
You can use App Central to download apps that are suitable for use with your NAS. App Central provides you with a rich variety of applications, allowing you to install software that is uniquely suited to your needs. Whether your interests lie in digital entertainment, e-commerce, blogging or website construction, App Central has it all.
Note: This function may differ depending on the NAS model in use.

- All newly installed apps will be immediately enabled after installation has finished.
- Set automatic scheduled updates: After enabling this option, all associated ASUSTOR Apps will be automatically upgraded when ADM is upgraded. This will allow your ASUSTOR NAS Apps to operate under optimal conditions.
- Should you choose to remove an app, all settings and information relating to the app will be removed as well. If you wish to reinstall the app at a later date, the system will not be able to return the app to its previous state with all of its previous settings and information still intact.

Additional information:
App Central may contain applications developed by ASUSTOR, open source software and software by third-party developers. For applications that have been officially verified, ASUSTOR provides a limited warranty with regards to its installation and execution. If you have any questions regarding a particular application, please contact the developer directly.
ASUSTOR cannot guarantee the stability of your system if you choose to install applications that have not been officially verified. Should you choose to do this, you will have to assume responsibility for all risks. Before you start using App Central you must first read and agree to the Terms of Use.
When upgrading ADM, also upgrade active ASUSTOR Apps that become incompatible: When upgrading ADM, it is recommended that you also simultaneously upgrade all ASUSTOR Apps as
well in order to maintain compatibility with the latest version of ADM. This will allow your ASUSTOR NAS to operate under optimal conditions.

External Devices
Overview
You can view the connected external devices and their information here.

Hard Drives
Here you can view and format all USB or eSATA external hard disks that are connected to your NAS. Supported file systems are as follows:
Reminder: If your device cannot be detected, please try connecting again using another cable or port.
FAT32:
for use with Windows and macOS
NTFS:
for use with Windows
HFS+:
for use with macOS
EXT4:
for use with Linux
exFAT:
for use with Linux, macOS, Windows.

See More: Compatibility – Hard Disk
Printer
Here you can view all the USB printers that are connected to your NAS and their respective printing logs. Additionally, ASUSTOR NAS also supports Apple AirPrint.
Reminder: ASUSTOR NAS supports up to three USB printers.

See More: Compatibility – USB Printer
Wi-Fi
After connecting your USB Wi-Fi adapter to your NAS, you can view its detailed information here.
If you wish to use Wi-Fi with your NAS, please take a look at the compatibility list on the ASUSTOR website before purchasing a Wi-Fi adapter. Wi-Fi signal strength and stability will vary according to the hardware that you are using (e.g., Wi-Fi network card and wireless access point) and any physical barriers that are present. Therefore, ASUSTOR has no way of guaranteeing Wi-Fi signal strength or stability. For best results, a wired Ethernet connection is recommended.

See More:
Compatibility – USB WiFi Dongle
UPS
A UPS can provide backup power to your NAS in the event of a power outage. Using a UPS can protect your data and NAS from sudden shutdown or service interruptions.
Network UPS:
Here you can setup your NAS to be the network UPS server (Master mode) and set its IP address, when the UPS's USB cable is connected to your NAS. Other devices that are in the same local area network will be then set to slave mode. In the event of a power outage, the master and slave devices will immediately detect this stoppage in power and then determine whether or not to commence shutdown procedures based on the time period that has been set.
Shut down:
When the NAS receives notification of a power outage from the UPS, it will begin normal shutdown procedures.
Safe mode:
When the NAS receives notification of a power outage from the UPS, it will stop all services in accordance with normal procedures and unmount all storage volumes. If you have enabled the
"In the event of a power outage, enable the NAS to return to its previous state once power has been restored" setting (configurable via Settings → Hardware → Power), once the NAS has been shut down under safe mode, it will automatically turn on once power has been restored. (This function is available for use with AS-6/7 series devices).

Reminder: When the NAS is configured as the network UPS server (Master mode), the default username is "admin" and the password is "11111" when connecting to the network UPS server.
See More:
Compatibility - UPS
Bluetooth Devices
After you have connected your Bluetooth device to the NAS, you will be able to view its detailed information here.
If you wish to use Bluetooth devices with the NAS, please check ASUSTOR's online compatibility list before purchasing. The signal strength and stability will vary according to the hardware that you are using and any physical barriers that are present. Therefore, ASUSTOR has no way of guaranteeing Bluetooth signal strength or stability. It is recommended that you connect your Bluetooth device within the maximum effective range (around 10 meters).
You can directly stream music from the NAS using SoundsGood via Bluetooth speakers.

See More:
Compatibility – Bluetooth
External Optical Drive
After connecting an external optical drive (CD, DVD, Blu-ray) to your NAS via USB, you can use File Explorer to directly access any files that you have backed up to optical media and even transfer files from your optical media to your NAS via drag and drop for future access.

See More:
Compatibility – External Optical Drive
i System Information
About This NAS
Here you can view general information about your NAS such as the hardware model number, software version, BIOS version and present state of the system.

Network
Here you can review information about your network settings (i.e., IP address and MAC address).
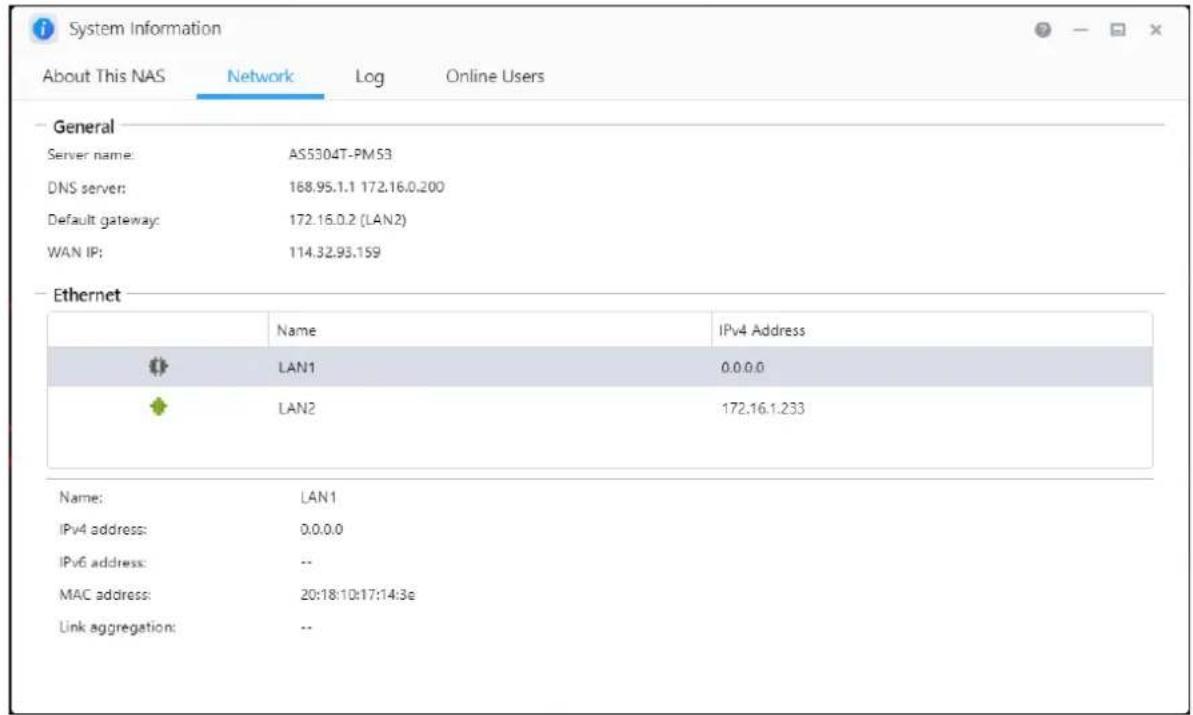
Here you can review logs of all system events. These logs include the system log, connection log and file access log. ASUSTOR NAS also supports Syslog. This can allow you to employ centralized management by sending your system event information to a Syslog server.
System log:
All log entries about system events
Connection log:
All log entries about system connections.
File access log:
All log entries about file access.
![System Information. About This NAS, Network, Log, Online Users. System Log: Refresh, Save, Clear, Preferences, Syslog. Type, Time, User, Event. 09/06/2024 PM 04:30:00 SYSTEM [Internal Backup] Task "InternalBackup1" is finished. 09/06/2024 PM 04:30:00 SYSTEM [Internal Backup] Task "InternalBackup1" h…](/content/2026/07/1442873/images/e4e09f387f282a96dc34110d808063daca236b1d244a1952faac7b909a22bf9e.jpg)
Online Users
Here you can view the users that are currently logged in to ADM or any users that are using other transfer protocols to connect to your NAS.

ADM is able to display any users who connect to your NAS using the following methods:
- SMB (CIFS/SAMBA) • Apple Filing Protocol (AFP)
- File Transfer Protocol (FTP)
- Secure Shell (SSH)
- iSCSI
• ADM system login (HTTP & HTTPS)

Dr. ASUSTOR
Dr. ASUSTOR performs checkups based on the current state of your system, settings, and connectivity. After performing these checkups, Dr. ASUSTOR will diagnose any problems and provide you with appropriate recommendations. Additionally, you can also export a health record for your NAS in order to help ASUSTOR engineers quickly identify the causes of any problems. The health record contains information pertaining to the NAS's system event logs, core information, and basic configuration files.


Activity Monitor
Activity Monitor dynamically monitors your NAS. Here you can view current usage information such as:
CPU Usage
Memory (RAM) Usage
Network Traffic
Storage Space Usage
Resources Being Used by System Programs
You can also set up the detection frequency of resource monitoring and whether to enable event notification in the Settings.
Note: This function may differ depending on the NAS model in use.


File Explorer
File Explorer comes pre-installed with ADM and can be used to browse and manage the files on your NAS. File Explorer displays accessible directories to users based on the access rights that are assigned to them. Additionally, ADM supports three simultaneously open File Explorer windows. You can easily make copies of files by dragging and dropping them into a different File Explorer window. ADM File Explorer can also use the right mouse button or keyboard shortcuts to copy, cut, paste, select all, delete and rename files and folders.

1. ADM
Create Share Link:
You can use Share Links to share files with people who don't have accounts on your NAS. Share Links allow you to instantly create download links for designated files that you want to share.
Expiry dates can also be set for each Share Link that you create, allowing for safe and flexible management.
- Share Links for downloads
- Share Links for uploads.
- Share Links for downloads and uploads.
Permissions:
Right-clicking on a file or folder and then selecting "Properties" followed by the
"Permissions" tab will allow you to configure detailed access permissions for the file or folder.
If the top-level shared folder does not have Windows ACL enabled, the options for configuring permissions will be:
- Owner: The owner of the folder or file
- Group: The group that has been assigned to the folder or file
- Others: All other users on the system or network that are not owners or part of the group that has been assigned to the folder or file.
The permission types that you will be able to configure are: RW (Read & Write), RO (Read Only) and DA (Deny Access).
- If the top-level shared folder has Windows ACL enabled, you will be able to configure file permissions for all users and groups. In total, there will be 13 types of configurable permissions. These types of permissions are as follows:
| Traverse folder / execute file |
| List folder / read data |
| Read attributes |
| Read extended attributes |
| Create files / write data |
| Create folders / append data |
| Write attributes |
| Write extended attributes |
| Delete |
| Delete subfolders and files |
| Read permissions |
| Change permissions |
| Take ownership |
Reminder: An individual file or folder can utilize up to a maximum of 250 Windows ACL permissions (including inherited permissions).
Include inheritable permissions from this object's parent:
This option is enabled by default. The system will automatically configure sub folders and files to inherit permissions from the object above it. Disabling this option will reject all inheritable permissions and only keep newly added permissions.
Replace all child object permissions with inheritable permissions from this object:
Enabling this option will replace all sub folder and file permissions with ones from the parent object.
Effective Permissions:
Clicking on this button and then selecting a user from the list will allow you to view the user's effective permissions with regards to the specified folder or file.
- External Devices: Here you can view and format all USB or eSATA external hard disks that are connected to your NAS. Please refer to here.
- Virtual Drive:
You can mount an ISO image file (.iso file) as a virtual drive and directly browse the content of the ISO image file. ADM's virtual drive function also provides simplified access control settings allowing you to either configure access for all users or limit access to only administrators. Please refer to here.
- CIFS Folder:
Here, you will be able to view all CIFS folders (including personal CIFS folders you have mounted and shared CIFS folders mounted by administrators). Please refer to here.
- If you are a regular user that requires use of the CIFS folder mounting service, please contact the system administrator to grant the associated permissions.
- When a remote server supports the CIFS protocol, the server's remote folders can be mounted.
- The maximum number of simultaneously mounted CIFS folders is 50.
- Network Recycle Bin: Here you can access the enabled Network Recycle Bins of all shared folders.
From App Central
In addition to the built-in apps that come with ADM, every ASUSTOR NAS comes with several pre-installed apps. You can choose whether you want to keep or remove these apps. At your convenience, you can also browse through and download any additional apps that peak your interest from App Central.


ASUSTOR Live
ASUSTOR Live gives you more control over your live streams than ever before. Store, stream and broadcast with ASUSTOR Live.
![graph TD A["STEP 01"] -->|STEP 02| B["STEP 03"] B --> C["Live"] B --> D["Live"] B --> E["Live"] B --> F["Live"] B --> G["Live"] B --> H["Live"] B --> I["Live"] B --> J["Live"]](/content/2026/07/1442873/images/cc02259bd54a06864b5fe1f6d058064aac60c8af6be57382fb8bfdff626f9507.jpg)
- Setting up ASUSTOR Live only requires three steps to turn your ASUSTOR NAS into the ultimate companion for live streamers in a way that functions similarly to Restream.io. Unlike Restream.io, ASUSTOR Live is free and broadcasts to a variety of platforms from your phone, tablet or computer. ASUSTOR Live supports Twitch, YouTube, Facebook, Instagram, Restream and any RTMP supported streaming platform. Since ASUSTOR Live can simultaneously broadcast to multiple platforms, it is not necessary to have multiple streams open at once. This saves computer resources, such as CPU and memory resources as well as saving money.
- ASUSTOR Live also supports simultaneous recordings of your broadcast. Store the entire video on your NAS while you are streaming for future sharing and/or editing.
- See More
NAS-131-Using ASUSTOR Live to Back Up and Save Live Streams

Download Center
Download Center allows you to easily download and save files to your NAS. Your NAS can effectively replace your computer in helping you with any download jobs. This provides you with data protection and energy saving benefits. An ASUSTOR NAS consumes far less power during operation than a normal computer does. No longer will you have to leave your computer on for long periods of time while downloading files. Download Center supports HTTP, FTP, and BitTorrent downloads along with the scheduling of download tasks and the limiting of download and upload speeds.
Furthermore, Download Center supports selective downloading with respect to BitTorrent downloads. This gives you the ability to select and download only the files that you wish to from
within a torrent. You no longer need to waste bandwidth and storage space downloading unnecessary files that you don't want. Finally, you can remotely control Download Center using our exclusive mobile app (Android).

BitTorrent Downloads:
When you upload torrent files to Download Center, the system will automatically create a new download task and then proceed to add this task to the download list. Download Center also supports directly inputting the torrent's download link as well as the use of magnet links.
HTTP/FTP Downloads:
Download Center supports HTTP and FTP downloads. You only need to paste or enter the link of your choice. The system will then immediately begin your download.
RSS Subscriptions and Downloads:
RSS downloading (also known as Broadcatching) is a type of technology that allows you to select the items you wish to download from within the contents of RSS feeds. Additionally, Download Center also offers an RSS automatic downloader. In accordance with your settings, the system will regularly update RSS feeds and then proceed to download items based on your set keywords and preferences. This is frequently used with items that require regular downloading. For example, weekly TV shows.
Search:
Download Center allows you to use keywords to search for files that you wish to download.
See More
NAS 162 - Introduction to Download Center
NAS 265 – Automating Download Center

FTP Explorer
FTP Explorer is ADM's FTP client. It can be used to connect to different FTP servers and execute direct file transfers. This increases transfer efficiency as the file transfer process does not require the use of any computers.
FTP Explorer supports the following functions:

Site management, allowing you to configure multiple sets of FTP server connection information
Drag and drop file transfers
Encrypted transmission protocols (SSL/TLS)
Resuming downloads
Custom transfer speeds
See More
NAS 225 - Introduction to FTP Explorer

MariaDB
You can use it as your website database which can be downloaded and installed through App Central. You can manage your MariaDB server with phpMyAdmin which can be downloaded and installed from App Central.

Port number:
The default port of MariaDB server can be modified to other customized ports.
Enable MariaDB remote access:
Enabling this setting will allow remote access to the MariaDB server. For security reasons, if you enable remote access, you must change the root password. It is also recommended to change the default port.
Reset Password:
If you happen to forget your MariaDB login password, you can reset the password for the "root" account (the default password is "admin"). This is also the default administrator account.
Reminder: For the MariaDB administrator account, the default username is "root" and the default password is "admin". For security reasons, please remember to change the password for this account.
Reinitialize Database:
Here you can reinitialize your entire MariaDB database. Upon reinitialization, all of your MariaDB databases will be erased.

Surveillance Center allows you to manage an array of IP cameras and features Live View and Playback functions. All video recorded from IP cameras can be directly and safely stored on the NAS. Using Surveillance Center's exclusive playback interface you can review previously recorded video at any time.
Surveillance Center also supports several different recording modes such as schedule, motion detection and alarm trigger. Additionally, you also have the option of receiving notification in response to specific events. Notifications are sent by either SMS or e-mail.
See More
NAS 161 – Introduction to Surveillance Center NAS 261 – Advanced Setup for Surveillance Center NAS 262 – Managing Surveillance Center Camera Licenses NAS 263 – Creating and Using Maps with Surveillance Center
Related
Compatibility – IP Camera

UPnP Media Server
The UPnP Media Server app can turn your NAS into your home’s multimedia streaming server. As long as you have devices that support UPnP or DLNA (for example, SONY BRAVIA TV or PlayStation5®), you can directly browse and stream the pictures, music and videos stored on your NAS.
Additionally, you can use UPnP/DLNA compatible applications on your mobile device (for example, a notebook, iPhone or iPad) to stream multimedia files from your NAS.

You only need to have your multimedia files stored in the shared folders "Media" or "Music" to be able to broadcast them. UPnP Multimedia Server will automatically scan designated directories for supported multimedia files.
UPnP Multimedia Server currently only supports on-the-fly transcoding for photos and music.
Reminder: The media formats that are playable may vary between devices.

About UPnP Multimedia Server
UPnP Multimedia Server supports the following file formats:
- Video: 3GP, 3G2, ASF, AVI, DAT, FLV, ISO, M2T, M2V, M2TS, M4V, MKV, MPv4, MPEG1, MPEG2, MPEG4, MTS, MOV, QT, SWF, TP, TRP, TS, VOB, WMV, RMVB, VDR, MPE
- Audio: 3GP, AAC, AIFC, AIFF, AMR, APE, AU, AWB, FLAC 1 , M4A, M4R, MP2, MP3, OGG Vorbis 1 , PCM, WAV, WMA
- Photo: BMP, GIF, ICO, JPG, PNG, PSD, TIF, RAW Image 1 (3FR, ARW, CR2, CRW, DCR, DNG, ERF, KDC, MEF, MOS, MRW, NEF, NRW, ORF, PEF, PPM, RAF, RAW, RW2, SR2, X3F)
1 You must first enable real time transcoding for these files in order to play them.

SoundsGood
SoundsGood is a Web music player that allows you to listen to all the music stored on your NAS via a Web browser in addition to browsing through and managing your entire music collection.

- Personalized settings: SoundsGood provides personalized music collections and playlists. You can configure any folder on the NAS as SoundsGood's media source and can further configure the media source as personal or shared.
- Music collection editing: SoundsGood has a built-in ID3 tag editor, letting you immediately edit the ID3 tags in your music collection.

About SoundsGood
SoundsGood supports the following file formats:
• Supported audio formats for browser: MP3, WAV, Ogg • Supported audio formats for transcoding through browser: AIFF, Flac • Supported audio formats for local speaker: MP3, WAV, Ogg, AIFF, Flac - Local audio output support: HDMI, USB, Audio Jack*
*Suitable for use with AS-302T/AS-304T/AS-202TE/AS-204TE models
Related:
Compatibility – USB DAC

LooksGood
LooksGood is a dedicated management center for video files and a Web-based video player for content on your NAS. Compatible with the most popular web browsers, users only need to enable the LooksGood App from within ADM to begin playing 1080p high definition videos. LooksGood features a stylish and modern interface that displays video collections via thumbnails and a poster wall layout for easy browsing. Furthermore, enhanced smart database management now makes global searches to be faster and more efficient for users.
LooksGood also features real-time transcoding and media conversions that help provide users with a smooth and stress-free playback experience. Additionally, you could stream videos from your NAS via Chromecast or DLNA with LooksGood, allowing you to enjoy your videos on a larger TV.
Additionally, AiVideos allows you to stream videos via Chromecast or DLNA, so you can enjoy your videos on a larger TV.

Formats supported by LooksGood are as follows:
• Supported Web Browsers: Windows Edge / Chrome / Firefox, Mac Safari • Supported Video Formats: avi, flv, mov, mp4, mkv, mka, ts, mpg, ra, ram, rm, rv, rmvb - Supported Video Codecs: aac_latm, aac, dca, H.264 (AVC), H.265 (HEVC), mlp, mp1, mp2, mp3, mpeg2video, mpeg4, vc1, wma v2, wmv3 • Supported External Subtitle Formats (UTF-8): srt, ass, ssa - Supported Image Formats: jpg, jpeg, bmp, png, gif, tif
- Hardware Transcoding Support: Please click here
See More
NAS 138 – Introduction to LooksGood
NAS 139 – LooksGood: Introduction to Media Converter

Photo Gallery 3
The all-new Photo Gallery 3 and AiFoto 3 have been revamped and bring a variety of new features to make photo organization easier than ever. New features for Photo Gallery 3 include, but are not limited to, custom folder selection, timelines, smart albums, deduplication, and new photo modes. Easily blow up photos to up to twice their size, play songs on slideshows, performance enhancements, and customized share links make for an even better photo viewing and sharing experience.


VPN Server
ASUSTOR's VPN Server supports PPTP, OpenVPN, and L2TP/IPsec protocols, turning your NAS into a VPN Server and allowing you to connect remotely to your NAS and safely access resources from your internal network.

Configuring the ASUSTOR NAS as a VPN server:
Log in to ADM and then open App Central. Select "ASUSTOR Apps" from the left-hand panel and then search for and install "VPN Server".
Connecting the ASUSTOR NAS to a VPN server:
Log in to ADM and then click on Settings and then select "VPN".
Reminder: The VPN client cannot be used simultaneously with the VPN Server. If you need to use the VPN client, please first stop any use of the VPN server.
See More:
NAS 322 – Connecting Your NAS to a VPN NAS 323 - Using Your NAS as VPN Server

Takeasy
Takeasy allows you to conveniently download online videos and playlists, giving you options to select the type of video file and video quality you want.

- Integrated Twitch channel subscriptions allow your NAS to automatically download the newest content from your favorite YouTube channels.
- Online media playback support allows you to preview any downloads in progress and also playback already downloaded videos.
- To install Takeasy, log in to ADM, open App Central and then search for "Takeasy". • Supported websites include: Takeasy supported websites
Reminder: The quality of downloaded videos will depend on the quality of the uploaded video. For example: an uploaded video with a quality of 1080p will allow you to download a video of 1080p.

ASUSTOR Portal
With ASUSTOR Portal there's no need to turn on your computer when you want to play videos or browse the internet. You need only simply connect your NAS to any HDMI ready display. Within ASUSTOR Portal integrates the Firefox browser, YouTube channels, Netflix and monitoring of live video feeds from Surveillance Center.

- ASUSTOR Portal provides customizable display information including: IP address, server name, time, ADM, Firefox, YouTube
- You can configure a default start app on ASUSTOR Portal (For example: ASUSTOR Portal, ADM, YouTube, Surveillance Center). Once configured, the App will automatically launch when you open ASUSTOR Portal without having to be launched via the main ASUSTOR Portal interface.
- You can also configure the desktop wallpaper, shortcuts to favorite websites, resolution, overscan and screensaver for ASUSTOR Portal.
- To install ASUSTOR Portal, log in to ADM, open App Central and then search for and install "ASUSTOR Portal" under "ASUSTOR Apps".
Note:
- ASUSTOR Portal only provides browser shortcuts to streaming websites such as Netflix, YouTube, Amazon Prime, or Disney+ to make opening each service's webpage easier and faster.
- ASUSTOR does not provide any warranty for the user experience or content hosted on third party sites. Your mileage may vary when using third party websites.
See More:
NAS 135 - Introduction ASUSTOR Portal
NAS 136 - Controlling ASUSTOR Portal
Video - ASUSTOR College Episode 3 - ASUSTOR Portal
Compatibility - HDTV
Accessories: Remote Control

Antivirus Protection
ASUSTOR NAS provides antivirus protection, effectively protecting your NAS's critical data and preventing malware from spreading.


Mail Server
ASUSTOR's Mail Server offers a comprehensive and cost-effective solution that allows any business to easily maintain their own dedicated mail server.
Note: ASUSTOR Mail Server is recommended for 5 people max. ASUSTOR Mail Server provides a simple mail delivery management service and includes simple antivirus and antispam processing. You bear the risks of using the product if you are involved in a dispute with your internet service provider, including, but not limited to ISP restrictions and domain name related issues.

See More: NAS-269-Introduction to Mail Server

Syslog Server
Syslog Server supports standard Syslog protocols and can centrally aggregate system logs that are spread out over various network devices for storage and management. Furthermore, Syslog Server integrates with the NAS's Instant Notification function, allowing administrators to receive e-mails or SMS notifications when specified events occur, in order to quickly employ appropriate measures.
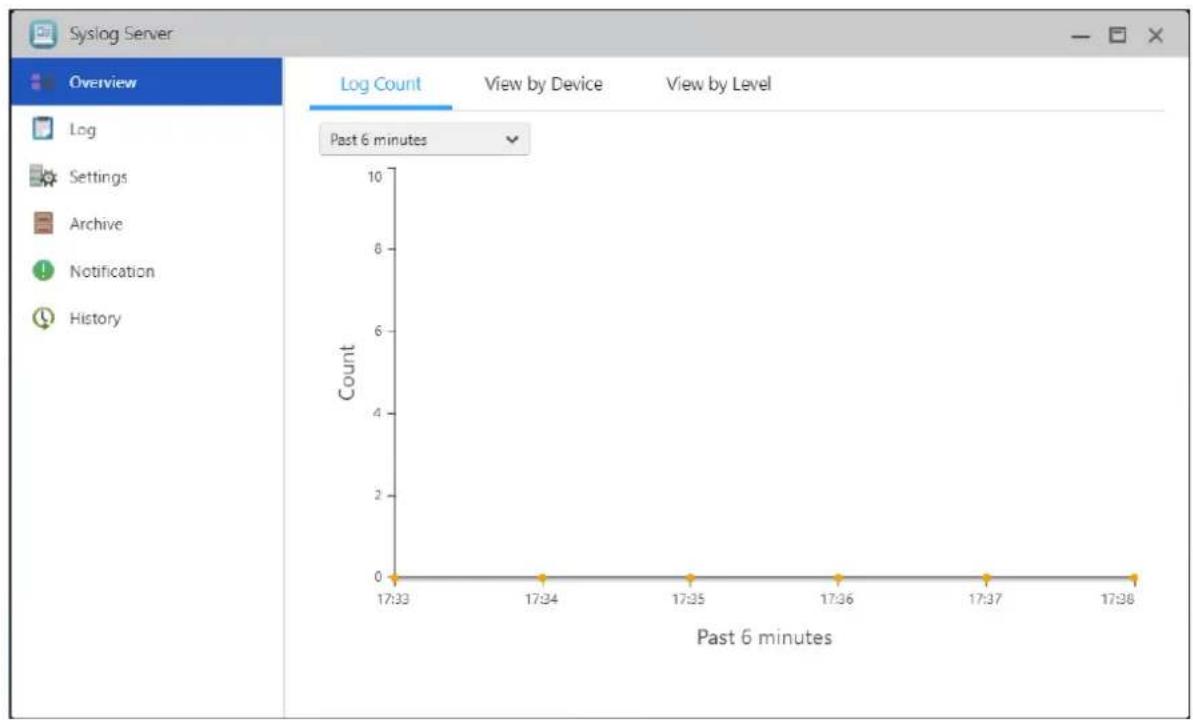
See More

NAS 272 – Using Your NAS as a Syslog Server
DataSync
Center
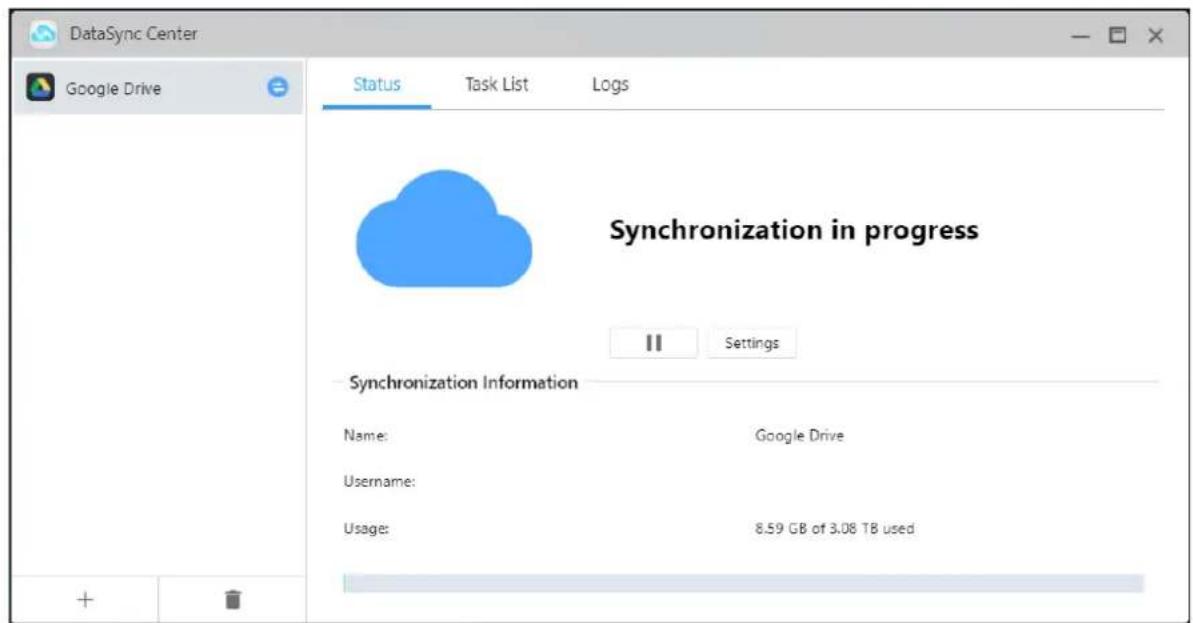
DataSync Center combines multiple cloud services into a single app. DataSync Center includes, but is not limited to Google Drive, Dropbox, OneDrive, ASUSTOR NAS (EZ Sync), Baidu Netdisk, Yandex and supports multitasking as well as multiple accounts. Control your data with
instant and scheduled backups as well as using Cloud Backup Center to create a hybrid cloud that keeps your data online and offline, keeping your data protected.
HiDrive Backup
![graph TD A["Public Cloud"] --> B["Cloud Icon"] C["Private Cloud"] --> D["Cloud Icon"] E["HiDrive"] --> F["Cloud Icon"] G["Google Drive"] --> H["Cloud Icon"] I["Amazon Web Services™"] --> J["Cloud Icon"] K["Laptop"] --> L["Smartphone"] M["Mobile Device"] --> N["Smartphone"] O["Wi-Fi"] --> P["Smartpho…](/content/2026/07/1442873/images/c474d3fe4f6c69c33aef21e93851899bf2151c76fc63b37eaab0d1c0f813718e.jpg)
Strato HiDrive is a popular cloud storage platform that is widely used in Europe. Now you can integrate your ASUSTOR NAS with HiDrive, to create more flexible data applications. HiDrive's supported data transfer methods include Rsync, FTP, FTPS and SFTP.
Note: Only HiDrive paid accounts are able to use Rsync, FTP, FTPS and SFTP transfer services.

Cloud Backup Center
Cloud Backup Center brings support for various business cloud services including, but not limited to Amazon S3, Backblaze B2, Microsoft Azure Blob Storage, Baidu Cloud, IBM Cloud, Rackspace Cloud Files, Alibaba Cloud, box, Google Cloud storage, hicloud, Lyve Cloud, WebDAV, and SFTP. Control your data with instant and scheduled backups as well as using Cloud Backup Center to create a hybrid cloud that keeps your data online and offline, keeping your data protected.

Utilities
ASUSTOR's utilities currently include ACC (ASUSTOR Control Center), AEC (ASUSTOR EZ Connect), ABP (ASUSTOR Backup Plan), AES (ASUSTOR EZ Sync) which allows you to use your PC/Mac to more conveniently manage your NAS, backup your PC/Mac data to your NAS.
Note: Mac only support ACC
ACC (ASUSTOR Control Center)
Control Center can conveniently locate and configure any ASUSTOR NAS in your local area network. You can also manage your NAS without having to log in to ADM. You can download the latest version of Control Center from the ASUSTOR Website

AEC (ASUSTOR EZ Connect)
ASUSTOR EZ Connect (AEC) is a dedicated utility designed for ASUSTOR NAS (with ADM3.0 and up). Users no longer need to do any complicated configurations when connecting to their NAS. They only need to enable ADM's EZ-Connect function, configure a Cloud ID and they can connect to their NAS in their home or local network from anywhere and at any time.
AEC can be downloaded from Downloads.

ABP (ASUSTOR Backup Plan)
Backup Plan can help you to back up the data from your Windows PC/server to an ASUSTOR NAS, FTP site, Local PC or other network location. You will also be able to quickly restore any data you back up from your Windows PC/server.
ABP can be downloaded from Downloads.

AES (ASUSTOR EZ Sync)
ASUSTOR EZ Sync is for synchronizing data between computers and your NAS. Turning your NAS into a personal cloud space like Dropbox™ with ample capacity at your fingertips with historical version management. If a file is unintentionally overwritten with the wrong information, it can be restored using a previously saved backup copy. ASUSTOR EZ Sync includes
two parts, EZ Sync Manager which is preinstalled on every NAS and ASUSTOR EZ Sync which can be installed on your PC.
AES can be downloaded from Downloads.

Mobile Apps

ASUSTOR's mobile apps currently include: AiData, AiMaster, AiRemote, AiDownload, AiMusic, AiFoto3, AiVideos and AiSecure. You can download these apps by scanning the provided QR codes below.
AiData
AiData allows you to intuitively browse and manage the files on your NAS from the convenience of your mobile device. More Information.
AiData for iOS
AiData for Android
AiMaster
AiMaster is ASUSTOR's dedicated NAS management app for mobile devices. It allows everyday users and IT professionals to easily manage functions on multiple ASUSTOR NAS devices. More Information
AiMaster for iOS
AiMaster for Android


NAS 242 - Using AiMaster on Your Mobile Devices
AiRemote
AiRemote allows you to control all types of functionality on ASUSTOR Portal, from the basic up, down, left, right controls used with ASUSTOR Portal interfaces to the play, pause, rewind, fast forward and volume controls used when playing videos. Furthermore, when using the Firefox web browser in ASUSTOR Portal, AiRemote provides a Touchpad Mode giving you intuitive control over your web browsing.
More Information
| AiRemote for iOS | AiRemote for Android |


NAS 136 – Controlling ASUSTOR Portal
AiDownload
AiDownload is a mobile app that interfaces with ASUSTOR's Download Center to provide you with mobile download management. AiDownload allows you to search, download, configure settings and monitor your downloads.
More Information
AiDownload for Android

AiMusic
AiMusic allows you to stream music from your NAS to your mobile device, letting you enjoy your entire music collection while on the go. Reminder: In order to use AiMusic, SoundsGood must first be installed on the NAS.
More information.
AiMusic for iOS
AiMusic for Android


AiFoto3
AiFoto3 is ASUSTOR's photo management mobile app that interfaces with Photo Gallery3 on ASUSTOR NAS devices. New AiFoto3 features include, but are not limited to, timelines and smart albums. It allows users to easily upload, browse, and manage photos on their NAS.
Reminder: In order to use AiFoto3, Photo Gallery 3 must first be installed on the NAS.
More information: AiFoto 3 for iOS, AiFoto 3 for Android

AiVideos
AiVideos brings you the smoothest mobile video viewing experience around. Browse through the video collection on your NAS without the need to wait for long downloads. Enjoy high-definition 1080p streaming video with just one click. You can even select multilingual subtitles and different audio channels to enjoy films in different languages, bringing the movie theater to your mobile device. Additionally, AiVideos allows you to stream videos via Chromecast or DLNA, so you can enjoy your videos on a larger TV.
Reminder: In order to use AiVideos, LooksGood must first be installed on the NAS.
AiVideos for iOS
AiVideos for Android


See More
NAS 246 – Introduction to AiVideos
NAS 247 – Configuring AiVideos and MX Player Decoder
AiSecure
AiSecure is ASUSTOR's Surveillance Center mobile app that makes it easy to monitor the things you care about most. After connecting with Surveillance Center, you will be able to watch live video, receive customized alerts, and check events while on the go.
More Information
Reminder: In order to use AiSecure, Surveillance Center must first be installed on the NAS.
AiSecure for iOS
AiSecure for Android


EULA
END-USER LICENSE AGREEMENT FOR ASUSTOR DATA MASTER ("ADM") IMPORTANT PLEASE READ THE TERMS AND CONDITIONS OF THIS LICENSE AGREEMENT CAREFULLY BEFORE CONTINUING WITH THIS PROGRAM INSTALLATION: ASUSTOR End-User License Agreement ("EULA") is a legal agreement between you and ASUSTOR Inc. for the ASUSTOR software product(s) identified above which may include associated software components, media, printed materials, and "online" or electronic documentation ("SOFTWARE PRODUCT"). By installing, copying, or otherwise using the SOFTWARE PRODUCT, you agree to be bound by the terms of this EULA. This license agreement represents the entire agreement concerning the program between you and ASUSTOR Inc., (referred to as "licenser"), and it supersedes any prior proposal, representation, or understanding between the parties. If you do not agree to the terms of this EULA, do not install or use the SOFTWARE PRODUCT.
The SOFTWARE PRODUCT is protected by copyright laws and international copyright treaties, as well as other intellectual property laws and treaties. The SOFTWARE PRODUCT is licensed, not sold.
1. GRANT OF LICENSE.
The SOFTWARE PRODUCT is licensed as follows:
Installation and Use.
ASUSTOR Inc. grants you the right to install and use copies of the SOFTWARE PRODUCT on your computer running a validly licensed copy of the operating system for which the SOFTWARE PRODUCT was designed [e.g., Microsoft Windows 7 and Mac OS X].
2. DESCRIPTION OF OTHER RIGHTS AND LIMITATIONS.
(a) Maintenance of Copyright Notices.
You must not remove or alter any copyright notices on any and all copies of the SOFTWARE PRODUCT.
(b) Distribution.
You may not distribute registered copies of the SOFTWARE PRODUCT to third parties. Official versions available for download from ASUSTOR's websites may be freely distributed.
(c) Prohibition on Reverse Engineering, Decompilation, and Disassembly.
You may not reverse engineer, decompile, or disassemble the SOFTWARE PRODUCT, except and only to the extent that such activity is expressly permitted by applicable law notwithstanding this
limitation.
ASUSTOR may provide you with support services related to the SOFTWARE PRODUCT ("Support Services"). Any supplemental software code provided to you as part of the Support Services shall be considered part of the SOFTWARE PRODUCT and subject to the terms and conditions of this EULA.
(e) Compliance with Applicable Laws.
You must comply with all applicable laws regarding use of the SOFTWARE PRODUCT.
3. TERMINATION
Without prejudice to any other rights, ASUSTOR may terminate this EULA if you fail to comply with the terms and conditions of this EULA. In such event, you must destroy all copies of the SOFTWARE PRODUCT in your possession.
4. COPYRIGHT
All title, including but not limited to copyrights, in and to the SOFTWARE PRODUCT and any copies thereof are owned by ASUSTOR or its suppliers. All title and intellectual property rights in and to the content which may be accessed through use of the SOFTWARE PRODUCT is the property of the respective content owner and may be protected by applicable copyright or other intellectual property laws and treaties. This EULA grants you no rights to use such content. All rights not expressly granted are reserved by ASUSTOR.
5. LIMITED WARRANTY
ASUSTOR offers limited warranty for the SOFTWARE PRODUCT, and the warranty does not apply if the software (a) has been customized, modified, or altered by anyone other than ASUSTOR, (b) has not been installed, operated, or maintained in accordance with instructions provided by ASUSTOR, (c) is used in ultra-hazardous activities.
6. LIMITATION OF LIABILITY
In no event shall ASUSTOR be liable for any damages (including, without limitation, lost profits, business interruption, or lost information) rising out of 'Authorized Users' use of or inability to use the SOFTWARE PRODUCT, even if ASUSTOR has been advised of the possibility of such damages. In no event will ASUSTOR be liable for loss of data or for indirect, special, incidental, consequential (including lost profit), or other damages based in contract, tort or otherwise. ASUSTOR shall have no liability with respect to the content of the SOFTWARE PRODUCT or any part thereof, including but not limited to errors or omissions contained therein, libel, infringements of rights of publicity, privacy, trademark rights, business interruption, personal injury, loss of privacy, moral rights or the disclosure of confidential information.
GNU General Public License
GNU GENERAL PUBLIC LICENSE
Version 3, 29 June 2007
Copyright (C) 2007 Free Software Foundation, Inc. http://fsf.org/ Everyone is permitted to copy and distribute verbatim copies of this license document, but changing it is not allowed.
Preamble
The GNU General Public License is a free, copyleft license for software and other kinds of works.
The licenses for most software and other practical works are designed to take away your freedom to share and change the works. By contrast, the GNU General Public License is intended to guarantee your freedom to share and change all versions of a program--to make sure it remains free software for all its users. We, the Free Software Foundation, use the GNU General Public License for most of our software; it applies also to any other work released this way by its authors. You can apply it to your programs, too.
When we speak of free software, we are referring to freedom, not price. Our General Public Licenses are designed to make sure that you have the freedom to distribute copies of free software (and charge for them if you wish), that you receive source code or can get it if you want it, that you can change the software or use pieces of it in new free programs, and that you know you can do these things.
To protect your rights, we need to prevent others from denying you these rights or asking you to surrender the rights. Therefore, you have certain responsibilities if you distribute copies of the software, or if you modify it: responsibilities to respect the freedom of others.
For example, if you distribute copies of such a program, whether gratis or for a fee, you must pass on to the recipients the same freedoms that you received. You must make sure that they, too, receive or can get the source code. And you must show them these terms so they know their rights.
Developers that use the GNU GPL protect your rights with two steps:
(1) assert copyright on the software, and (2) offer you this License giving you legal permission to copy, distribute and/or modify it.
For the developers' and authors' protection, the GPL clearly explains that there is no warranty for this free software. For both users' and authors' sake, the GPL requires that modified versions be
marked as changed, so that their problems will not be attributed erroneously to authors of previous versions.
Some devices are designed to deny users access to install or run modified versions of the software inside them, although the manufacturer can do so. This is fundamentally incompatible with the aim of protecting users' freedom to change the software. The systematic pattern of such abuse occurs in the area of products for individuals to use, which is precisely where it is most unacceptable. Therefore, we have designed this version of the GPL to prohibit the practice for those products. If such problems arise substantially in other domains, we stand ready to extend this provision to those domains in future versions of the GPL, as needed to protect the freedom of users.
Finally, every program is threatened constantly by software patents. States should not allow patents to restrict development and use of software on general-purpose computers, but in those that do; we wish to avoid the special danger that patents applied to a free program could make it effectively proprietary. To prevent this, the GPL assures that patents cannot be used to render the program non-free.
The precise terms and conditions for copying, distribution and modification follow.
TERMS AND CONDITIONS
- Definitions.
"This License" refers to version 3 of the GNU General Public License.
"Copyright" also means copyright-like laws that apply to other kinds of works, such as semiconductor masks.
"The Program" refers to any copyrightable work licensed under this License. Each licensee is addressed as "you". "Licensees" and "recipients" may be individuals or organizations.
To "modify" a work means to copy from or adapt all or part of the work in a fashion requiring copyright permission, other than the making of an exact copy. The resulting work is called a "modified version" of the earlier work or a work "based on" the earlier work.
A "covered work" means either the unmodified Program or a work based on the Program.
To "propagate" a work means to do anything with it that, without permission, would make you directly or secondarily liable for infringement under applicable copyright law, except executing it on a computer or modifying a private copy. Propagation includes copying, distribution (with or without modification), making available to the public, and in some countries other activities as well.
To "convey" a work means any kind of propagation that enables other parties to make or receive copies. Mere interaction with a user through a computer network, with no transfer of a copy, is not conveying.
An interactive user interface displays "Appropriate Legal Notices" to the extent that it includes a convenient and prominently visible feature that (1) displays an appropriate copyright notice, and (2) tells the user that there is no warranty for the work (except to the extent that warranties are provided), that licensees may convey the work under this License, and how to view a copy of this License. If the interface presents a list of user commands or options, such as a menu, a prominent item in the list meets this criterion.
1. Source Code.
The "source code" for a work means the preferred form of the work for making modifications to it. "Object code" means any non-source form of a work.
A "Standard Interface" means an interface that either is an official standard defined by a recognized standards body, or, in the case of interfaces specified for a particular programming language, one that is widely used among developers working in that language.
The "System Libraries" of an executable work include anything, other than the work as a whole, that (a) is included in the normal form of packaging a Major Component, but which is not part of that Major Component, and (b) serves only to enable use of the work with that Major Component, or to implement a Standard Interface for which an implementation is available to the public in source code form. A "Major Component", in this context, means a major essential component (kernel, window system, and so on) of the specific operating system (if any) on which the executable work runs, or a compiler used to produce the work, or an object code interpreter used to run it.
The "Corresponding Source" for a work in object code form means all the source code needed to generate, install, and (for an executable work) run the object code and to modify the work, including scripts to control those activities. However, it does not include the work's System Libraries, or general-purpose tools or generally available free programs which are used unmodified in performing those activities but which are not part of the work. For example, Corresponding Source includes interface definition files associated with source files for the work, and the source code for shared libraries and dynamically linked subprograms that the work is specifically designed to require, such as by intimate data communication or control flow between those subprograms and other parts of the work.
The Corresponding Source need not include anything that users can regenerate automatically from other parts of the Corresponding Source.
The Corresponding Source for a work in source code form is that same work.
2. Basic Permissions.
All rights granted under this License are granted for the term of copyright on the Program, and are irrevocable provided the stated conditions are met. This License explicitly affirms your unlimited permission to run the unmodified Program. The output from running a covered work
is covered by this License only if the output, given its content, constitutes a covered work. This License acknowledges your rights of fair use or other equivalent, as provided by copyright law.
You may make, run and propagate covered works that you do not convey, without conditions so long as your license otherwise remains in force. You may convey covered works to others for the sole purpose of having them make modifications exclusively for you, or provide you with facilities for running those works, provided that you comply with the terms of this License in conveying all material for which you do not control copyright. Those thus making or running the covered works for you must do so exclusively on your behalf, under your direction and control, on terms that prohibit them from making any copies of your copyrighted material outside their relationship with you.
Conveying under any other circumstances is permitted solely under the conditions stated below. Sublicensing is not allowed; section 10 makes it unnecessary.
- Protecting Users' Legal Rights From Anti-Circumvention Law.
No covered work shall be deemed part of an effective technological measure under any applicable law fulfilling obligations under article 11 of the WIPO copyright treaty adopted on 20 December 1996, or similar laws prohibiting or restricting circumvention of such measures.
When you convey a covered work, you waive any legal power to forbid circumvention of technological measures to the extent such circumvention is effected by exercising rights under this License with respect to the covered work, and you disclaim any intention to limit operation or modification of the work as a means of enforcing, against the work's users, your or third parties' legal rights to forbid circumvention of technological measures.
- Conveying Verbatim Copies.
You may convey verbatim copies of the Program's source code as you receive it, in any medium, provided that you conspicuously and appropriately publish on each copy an appropriate copyright notice; keep intact all notices stating that this License and any non-permissive terms added in accord with section 7 apply to the code; keep intact all notices of the absence of any warranty; and give all recipients a copy of this License along with the Program.
You may charge any price or no price for each copy that you convey, and you may offer support or warranty protection for a fee.
- Conveying Modified Source Versions.
You may convey a work based on the Program, or the modifications to produce it from the Program, in the form of source code under the terms of section 4, provided that you also meet all of these conditions:
a) The work must carry prominent notices stating that you modified it, and giving a relevant date.
b) The work must carry prominent notices stating that it is released under this License and any conditions added under section 7. This requirement modifies the requirement in section 4 to "keep intact all notices". c) You must license the entire work, as a whole, under this License to anyone who comes into possession of a copy. This License will therefore apply, along with any applicable section 7 additional terms, to the whole of the work, and all its parts, regardless of how they are packaged. This License gives no permission to license the work in any other way, but it does not invalidate such permission if you have separately received it. d) If the work has interactive user interfaces, each must display Appropriate Legal Notices; however, if the Program has interactive interfaces that do not display Appropriate Legal Notices, your work need not make them do so.
A compilation of a covered work with other separate and independent works, which are not by their nature extensions of the covered work, and which are not combined with it such as to form a larger program, in or on a volume of a storage or distribution medium, is called an "aggregate" if the compilation and its resulting copyright are not used to limit the access or legal rights of the compilation's users beyond what the individual works permit. Inclusion of a covered work in an aggregate does not cause this License to apply to the other parts of the aggregate.
6. Conveying Non-Source Forms.
You may convey a covered work in object code form under the terms of sections 4 and 5, provided that you also convey the machine-readable Corresponding Source under the terms of this License, in one of these ways:
a) Convey the object code in, or embodied in, a physical product (including a physical distribution medium), accompanied by the Corresponding Source fixed on a durable physical medium customarily used for software interchange. b) Convey the object code in, or embodied in, a physical product (including a physical distribution medium), accompanied by a written offer, valid for at least three years and valid for as long as you offer spare parts or customer support for that product model, to give anyone who possesses the object code either (1) a copy of the Corresponding Source for all the software in the product that is covered by this License, on a durable physical medium customarily used for software interchange, for a price no more than your reasonable cost of physically performing this conveying of source, or (2) access to copy the Corresponding Source from a network server at no charge. c) Convey individual copies of the object code with a copy of the written offer to provide the Corresponding Source. This alternative is allowed only occasionally and noncommercially, and only if you received the object code with such an offer, in accord with subsection 6b. d) Convey the object code by offering access from a designated place (gratis or for a charge), and offer equivalent access to the Corresponding Source in the same way through the same
place at no further charge. You need not require recipients to copy the Corresponding Source along with the object code. If the place to copy the object code is a network server, the Corresponding Source may be on a different server (operated by you or a third party) that supports equivalent copying facilities, provided you maintain clear directions next to the object code saying where to find the Corresponding Source. Regardless of what server hosts the Corresponding Source, you remain obligated to ensure that it is available for as long as needed to satisfy these requirements.
e) Convey the object code using peer-to-peer transmission, provided you inform other peers where the object code and Corresponding Source of the work are being offered to the general public at no charge under subsection 6d.
A separable portion of the object code, whose source code is excluded from the Corresponding Source as a System Library, need not be included in conveying the object code work.
A "User Product" is either (1) a "consumer product", which means any tangible personal property which is normally used for personal, family, or household purposes, or (2) anything designed or sold for incorporation into a dwelling. In determining whether a product is a consumer product, doubtful cases shall be resolved in favor of coverage. For a particular product received by a particular user, "normally used" refers to a typical or common use of that class of product, regardless of the status of the particular user or of the way in which the particular user actually uses, or expects or is expected to use, the product. A product is a consumer product regardless of whether the product has substantial commercial, industrial or non-consumer uses, unless such uses represent the only significant mode of use of the product.
"Installation Information" for a User Product means any methods, procedures, authorization keys, or other information required to install and execute modified versions of a covered work in that User Product from a modified version of its Corresponding Source. The information must suffice to ensure that the continued functioning of the modified object code is in no case prevented or interfered with solely because modification has been made.
If you convey an object code work under this section in, or with, or specifically for use in, a User Product, and the conveying occurs as part of a transaction in which the right of possession and use of the User Product is transferred to the recipient in perpetuity or for a fixed term (regardless of how the transaction is characterized), the Corresponding Source conveyed under this section must be accompanied by the Installation Information. But this requirement does not apply if neither you nor any third party retains the ability to install modified object code on the User Product (for example, the work has been installed in ROM).
The requirement to provide Installation Information does not include a requirement to continue to provide support service, warranty, or updates for a work that has been modified or installed by the recipient, or for the User Product in which it has been modified or installed. Access to a network may be denied when the modification itself materially and adversely affects the
operation of the network or violates the rules and protocols for communication across the network.
Corresponding Source conveyed, and Installation Information provided, in accord with this section must be in a format that is publicly documented (and with an implementation available to the public in source code form), and must require no special password or key for unpacking, reading or copying.
7. Additional Terms.
"Additional permissions" are terms that supplement the terms of this License by making exceptions from one or more of its conditions. Additional permissions that are applicable to the entire Program shall be treated as though they were included in this License, to the extent that they are valid under applicable law. If additional permissions apply only to part of the Program, that part may be used separately under those permissions, but the entire Program remains governed by this License without regard to the additional permissions.
When you convey a copy of a covered work, you may at your option remove any additional permissions from that copy, or from any part of it. (Additional permissions may be written to require their own removal in certain cases when you modify the work.) You may place additional permissions on material, added by you to a covered work, for which you have or can give appropriate copyright permission.
Notwithstanding any other provision of this License, for material you add to a covered work, you may (if authorized by the copyright holders of that material) supplement the terms of this License with terms:
a) Disclaiming warranty or limiting liability differently from the terms of sections 15 and 16 of this License; or b) Requiring preservation of specified reasonable legal notices or author attributions in that material or in the Appropriate Legal Notices displayed by works containing it; or c) Prohibiting misrepresentation of the origin of that material, or requiring that modified versions of such material be marked in reasonable ways as different from the original version; or d) Limiting the use for publicity purposes of names of licensors or authors of the material; or e) Declining to grant rights under trademark law for use of some trade names, trademarks, or service marks; or f) Requiring indemnification of licensors and authors of that material by anyone who conveys the material (or modified versions of it) with contractual assumptions of liability to the recipient, for any liability that these contractual assumptions directly impose on those licensors and authors.
All other non-permissive additional terms are considered "further restrictions" within the meaning of section 10. If the Program as you received it, or any part of it, contains a notice stating that it is governed by this License along with a term that is a further restriction, you may
remove that term. If a license document contains a further restriction but permits relicensing or conveying under this License, you may add to a covered work material governed by the terms of that license document, provided that the further restriction does not survive such relicensing or conveying.
If you add terms to a covered work in accordance with this section, you must place, in the relevant source files, a statement of the additional terms that apply to those files, or a notice indicating where to find the applicable terms. Additional terms, permissive or non-permissive, may be stated in the form of a separately written license, or stated as exceptions; the above requirements apply either way.
8. Termination.
You may not propagate or modify a covered work except as expressly provided under this License. Any attempt otherwise to propagate or modify it is void, and will automatically terminate your rights under this License (including any patent licenses granted under the third paragraph of section 11).
However, if you cease all violation of this License, then your license from a particular copyright holder is reinstated (a) provisionally, unless and until the copyright holder explicitly and finally terminates your license, and (b) permanently, if the copyright holder fails to notify you of the violation by some reasonable means prior to 60 days after the cessation.
Moreover, your license from a particular copyright holder is reinstated permanently if the copyright holder notifies you of the violation by some reasonable means, this is the first time you have received notice of violation of this License (for any work) from that copyright holder, and you cure the violation prior to 30 days after your receipt of the notice.
Termination of your rights under this section does not terminate the licenses of parties who have received copies or rights from you under this License. If your rights have been terminated and not permanently reinstated, you do not qualify to receive new licenses for the same material under section 10.
9. Acceptance Not Required for Having Copies.
You are not required to accept this License in order to receive or run a copy of the Program. Ancillary propagation of a covered work occurring solely as a consequence of using peer-to-peer transmission to receive a copy likewise does not require acceptance. However, nothing other than this License grants you permission to propagate or modify any covered work. These actions infringe copyright if you do not accept this License. Therefore, by modifying or propagating a covered work, you indicate your acceptance of this License to do so.
10. Automatic Licensing of Downstream Recipients.
Each time you convey a covered work, the recipient automatically receives a license from the original licensors, to run, modify and propagate that work, subject to this License. You are not responsible for enforcing compliance by third parties with this License.
An "entity transaction" is a transaction transferring control of an organization, or substantially all assets of one, or subdividing an organization, or merging organizations. If propagation of a covered work results from an entity transaction, each party to that transaction who receives a copy of the work also receives whatever licenses to the work the party's predecessor in interest had or could give under the previous paragraph, plus a right to possession of the Corresponding Source of the work from the predecessor in interest, if the predecessor has it or can get it with reasonable efforts.
You may not impose any further restrictions on the exercise of the rights granted or affirmed under this License. For example, you may not impose a license fee, royalty, or other charge for exercise of rights granted under this License, and you may not initiate litigation (including a cross-claim or counterclaim in a lawsuit) alleging that any patent claim is infringed by making, using, selling, offering for sale, or importing the Program or any portion of it.
11. Patents.
A "contributor" is a copyright holder who authorizes use under this License of the Program or a work on which the Program is based. The work thus licensed is called the contributor's "contributor version".
A contributor's "essential patent claims" are all patent claims owned or controlled by the contributor, whether already acquired or hereafter acquired, that would be infringed by some manner, permitted by this License, of making, using, or selling its contributor version, but do not include claims that would be infringed only as a consequence of further modification of the contributor version. For purposes of this definition, "control" includes the right to grant patent sublicenses in a manner consistent with the requirements of this License.
Each contributor grants you a non-exclusive, worldwide, royalty-free patent license under the contributor's essential patent claims, to make, use, sell, offer for sale, import and otherwise run, modify and propagate the contents of its contributor version.
In the following three paragraphs, a "patent license" is any express agreement or commitment, however denominated, not to enforce a patent (such as an express permission to practice a patent or covenant not to sue for patent infringement). To "grant" such a patent license to a party means to make such an agreement or commitment not to enforce a patent against the party.
If you convey a covered work, knowingly relying on a patent license, and the Corresponding Source of the work is not available for anyone to copy, free of charge and under the terms of this License, through a publicly available network server or other readily accessible means, then you must either (1) cause the Corresponding Source to be so available, or (2) arrange to deprive
yourself of the benefit of the patent license for this particular work, or (3) arrange, in a manner consistent with the requirements of this License, to extend the patent license to downstream recipients. "Knowingly relying" means you have actual knowledge that, but for the patent license, your conveying the covered work in a country, or your recipient's use of the covered work in a country, would infringe one or more identifiable patents in that country that you have reason to believe are valid.
If, pursuant to or in connection with a single transaction or arrangement, you convey, or propagate by procuring conveyance of, a covered work, and grant a patent license to some of the parties receiving the covered work authorizing them to use, propagate, modify or convey a specific copy of the covered work, then the patent license you grant is automatically extended to all recipients of the covered work and works based on it.
A patent license is "discriminatory" if it does not include within the scope of its coverage, prohibits the exercise of, or is conditioned on the non-exercise of one or more of the rights that are specifically granted under this License. You may not convey a covered work if you are a party to an arrangement with a third party that is in the business of distributing software, under which you make payment to the third party based on the extent of your activity of conveying the work, and under which the third party grants, to any of the parties who would receive the covered work from you, a discriminatory patent license (a) in connection with copies of the covered work conveyed by you (or copies made from those copies), or (b) primarily for and in connection with specific products or compilations that contain the covered work, unless you entered into that arrangement, or that patent license was granted, prior to 28 March 2007.
Nothing in this License shall be construed as excluding or limiting any implied license or other defenses to infringement that may otherwise be available to you under applicable patent law.
- No Surrender of Others' Freedom.
If conditions are imposed on you (whether by court order, agreement or otherwise) that contradict the conditions of this License, they do not excuse you from the conditions of this License. If you cannot convey a covered work so as to satisfy simultaneously your obligations under this License and any other pertinent obligations, then as a consequence you may not convey it at all. For example, if you agree to terms that obligate you to collect a royalty for further conveying from those to whom you convey the Program, the only way you could satisfy both those terms and this License would be to refrain entirely from conveying the Program.
- Use with the GNU Affero General Public License.
Notwithstanding any other provision of this License, you have permission to link or combine any covered work with a work licensed under version 3 of the GNU Affero General Public License into a single combined work, and to convey the resulting work. The terms of this License will continue to apply to the part which is the covered work, but the special requirements of the GNU Affero General Public License, section 13, concerning interaction through a network will apply to the combination as such.
- Revised Versions of this License.
The Free Software Foundation may publish revised and/or new versions of the GNU General Public License from time to time. Such new versions will be similar in spirit to the present version, but may differ in detail to address new problems or concerns.
Each version is given a distinguishing version number. If the Program specifies that a certain numbered version of the GNU General Public License "or any later version" applies to it, you have the option of following the terms and conditions either of that numbered version or of any later version published by the Free Software Foundation. If the Program does not specify a version number of the GNU General Public License, you may choose any version ever published by the Free Software Foundation.
If the Program specifies that a proxy can decide which future versions of the GNU General Public License can be used, that proxy's public statement of acceptance of a version permanently authorizes you to choose that version for the Program.
Later license versions may give you additional or different permissions. However, no additional obligations are imposed on any author or copyright holder as a result of your choosing to follow a
later version.
- Disclaimer of Warranty.
THERE IS NO WARRANTY FOR THE PROGRAM, TO THE EXTENT PERMITTED BY APPLICABLE LAW. EXCEPT WHEN OTHERWISE STATED IN WRITING THE COPYRIGHT HOLDERS AND/OR OTHER PARTIES PROVIDE THE PROGRAM "AS IS" WITHOUT WARRANTY OF ANY KIND, EITHER EXPRESSED OR IMPLIED, INCLUDING, BUT NOT LIMITED TO, THE IMPLIED WARRANTIES OF MERCHANTABILITY AND FITNESS FOR A PARTICULAR PURPOSE. THE ENTIRE RISK AS TO THE QUALITY AND PERFORMANCE OF THE PROGRAM IS WITH YOU. SHOULD THE PROGRAM PROVE DEFECTIVE, YOU ASSUME THE COST OF ALL NECESSARY SERVICING, REPAIR OR CORRECTION.
- Limitation of Liability.
IN NO EVENT UNLESS REQUIRED BY APPLICABLE LAW OR AGREED TO IN WRITING WILL ANY COPYRIGHT HOLDER, OR ANY OTHER PARTY WHO MODIFIES AND/OR CONVEYS THE PROGRAM AS PERMITTED ABOVE, BE LIABLE TO YOU FOR DAMAGES, INCLUDING ANY GENERAL, SPECIAL, INCIDENTAL OR CONSEQUENTIAL DAMAGES ARISING OUT OF THE USE OR INABILITY TO USE THE PROGRAM (INCLUDING BUT NOT LIMITED TO LOSS OF DATA OR DATA BEING RENDERED INACCURATE OR LOSSES SUSTAINED BY YOU OR THIRD PARTIES OR A FAILURE OF THE PROGRAM TO OPERATE WITH ANY OTHER PROGRAMS), EVEN IF SUCH HOLDER OR OTHER PARTY HAS BEEN ADVISED OF THE POSSIBILITY OF SUCH DAMAGES.
- Interpretation of Sections 15 and 16.
If the disclaimer of warranty and limitation of liability provided above cannot be given local legal effect according to their terms, reviewing courts shall apply local law that most closely approximates an absolute waiver of all civil liability in connection with the Program, unless a warranty or assumption of liability accompanies a copy of the Program in return for a fee.
END OF TERMS AND CONDITIONS


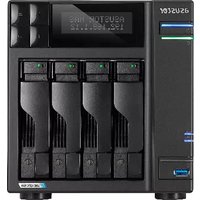
- INTRODUCTION
- GETTING STARTED WITH ASUSTOR DATA MASTER (ADM)
- INSTALLING ASUSTOR NAS AND ADM
- LOGGING IN TO ASUSTOR DATA MASTER
- TASKBAR
- PRE-INSTALLED APPS
- SETTINGS
- GENERAL
- NETWORK
- REGIONAL OPTIONS
- HARDWARE
- NOTIFICATION
- CERTIFICATE MANAGER
- NETWORK RECYCLE BIN
- SCHEDULING
- EZ-CONNECT
- MANUALLY CONNECT
- ADM MAINTENANCE
- REGISTRATION
- SERVICES
- SMB
- AFP
- NFS
- FTP SERVER
- WEBDAV
- TERMINAL
- RSYNC SERVER
- TFTP SERVER
- SNMP
- SFTP
- REVERSE PROXY
- WEB CENTER
- OVERVIEW
- WEB SERVER
- VIRTUAL HOST
- IMPLEMENTATION
- STORAGE MANAGER
- VOLUME
- DRIVE
- ISCSI
- ISCSI LUN
- SNAPSHOT CENTER
- EZ SYNC MANAGER
- ACCESS CONTROL
- BACKUP CENTRAL
- SYSTEM INFORMATION
- DR. ASUSTOR
- ACTIVITY MONITOR
- FILE EXPLORER
- FROM APP CENTRAL
- UTILITIES
- MOBILE APPS
- THANK YOU FOR CHOOSING ASUSTOR NETWORK ATTACHED STORAGE (NAS)
- ASUSTOR DATA MASTER (ADM): THE AMAZING STARTS HERE
- YOUR IDEAL PRIVATE CLOUD
- CROSS-PLATFORM FILE SHARING
- EMBRACE THE CLOUD, ENJOY PEACE OF MIND
- YOUR DATA IS SAFE WITH US
- THE HUB OF YOUR HOME ENTERTAINMENT
- VIGILANT SECURITY
- ISCSI AND VIRTUALIZATION
- PROTECT OUR PLANET WITH ASUSTOR
- UNNOTICEABLE QUIET
- ENRICH YOUR MOBILE LIFE
- APP CENTRAL: UNLEASH THE UNLIMITED POTENTIAL OF NAS
- ONLINE RESOURCES
- TERMS OF USE
- CONNECTION OUTSIDE THE LOCAL NETWORK (WAN)
- APP ICONS
- EZ CONNECT.TO RELAY SERVICE
- PERSONAL
- VOLUME USAGE
- THEME
- SYSTEM ANNOUNCEMENT
- MANAGEMENT
- SYSTEM HTTP PORT
- ENABLE HTTP SECURE (HTTPS)
- TIMEOUT TIMER
- MEDIA MODE
- SIGN IN PAGE STYLE
- LOGIN PAGE APPEARANCE
- DISPLAY SETTINGS
- VIDEO
- DNS SERVER
- NETWORK INTERFACE
- ADD: CREATE VPN OR CREATE LINK AGGREGATION
- CREATE VPN
- CREATE LINK AGGREGATION
- DHCP SERVER SETTINGS
- PPPOE
- PROXY
- SEE MORE
- SYSTEM
- ENERGY CONTROL
- WHY WON'T MY ASUSTOR NAS ENTER INTO SLEEP MODE (S3)
- NOTE: RESET BUTTON
- SMS
- THUMBNAILS
- AUTOMATIC DRIVE INFORMATION UPDATES
- DDNS
- EZ-ROUTER
- RELATED
- WORKGROUP
- WINS SERVER
- MAX/MIN SMB PROTOCOL
- ENABLE SMB MULTICHANNEL
- ENABLE LOCAL MASTER BROWSER
- ALLOW ONLY NTLMV2 AUTHENTICATION
- ENABLE SAMBA VFS MODULES TO ENHANCE MACOS COMPATIBILITY
- DISABLE OPPORTUNISTIC LOCKING
- ENABLE DEBUG LOGGING
- ENABLE WS-DISCOVERY
- USING THE APPLE FILING PROTOCOL (AFP)
- ENABLE TIME MACHINE SUPPORT
- UNICODE SUPPORT
- ENABLE ANONYMOUS
- ENABLE SSL/TLS: ENABLE ENCRYPTION FOR FTP CONNECTIONS
- ENABLE FXP
- MAXIMUM NUMBER OF ALL FTP CONNECTIONS
- MAXIMUM NUMBER OF CONNECTIONS PER IP
- MAX UPLOAD RATE
- MAX DOWNLOAD RATE
- PASSIVE FTP
- RESPOND WITH EXTERNAL IP
- MANAGE RSYNC USER
- ADD NEW BACKUP MODULES
- TFTP ROOT FOLDER
- TFTP CLIENT PERMISSION
- CLIENT CONNECTIONS ALLOWED
- TIMEOUT
- SNMP TRAP LEVEL
- TRAP ADDRESS
- SNMP V1 / SNMP V2 SERVICE
- COMMUNITY
- SNMP V3 SERVICE
- USERNAME
- PASSWORD
- PROTECT MULTIPLE NAS DEVICES WITH HTTPS SECURITY
- IMPROVE APP CONNECTION SECURITY
- QUICK SETUP
- ADVANCED SETUP
- MYARCHIVE
- MYARCHIVE HARD DISK
- FILE SYSTEM: SUPPORTED FILE SYSTEMS ARE AS FOLLOWS
- ALIAS NAME
- MYARCHIVE ENCRYPTION
- AUTOMATICALLY MOUNT MYARCHIVE 1 BEFORE STARTING A BACKUP, AND EJECT WHEN COMPLETE
- ACCESSORIES: HARD DISK TRAY
- ABOUT RAID
- NON-RAID VOLUME TYPES
- SINGLE
- JBOD
- RAID VOLUME TYPES
- RAID
- RAID 10 (1+0)
- ABOUT RAID SCRUBBING
- ABOUT SSD TRIM
- ABOUT SSD CACHE
- DISK DOCTOR
- IRONWOLF HEALTH MANAGEMENT
- APACER S.M.A.R.T TOOL
- S.M.A.R.T. INFO
- IQN
- CHAP AUTHENTICATION
- MUTUAL CHAP AUTHENTICATION
- LUN POOL
- ISNS SERVER
- HISTORY
- SCHEDULED TASKS
- MANUAL CREATION
- RESTORE
- EDIT
- REMOVE
- PREVIEW
- INTRODUCING ASUSTOR EZ SYNC
- EZ SYNC MANAGER FOR ADM
- ASUSTOR EZ SYNC (AES) – PC SYNC TOOL
- INTRODUCING EZ SYNC MANAGER
- FILE
- CONNECTION
- LOG
- INFORMATION
- ADVANCED
- RECYCLE BIN
- LOCAL USERS
- IMPORT USERS
- METHOD 1. USE A TEXT EDITOR
- METHOD 2. USE MICROSOFT EXCEL
- NOTE
- ABOUT LOCAL USERS
- LOCAL GROUPS
- ABOUT LOCAL GROUPS
- AD/ LDAP
- ACTIVE DIRECTORY
- LDAP
- AD/LDAP USERS
- AD/LDAP GROUPS
- SHARED FOLDERS
- EMPTY RECYCLE BIN
- ENCRYPT THIS SHARED FOLDER
- EXPORT/IMPORT ENCRYPTED KEY
- NFS PRIVILEGES
- ABOUT SHARED FOLDERS [PUBLIC]
- WINDOWS ACL
- FOLDER – ACCESS RIGHTS
- VIRTUAL DRIVE
- CIFS FOLDER
- APP PRIVILEGES
- PERMISSION MAPPING TABLE
- REMOTE SYNC
- USE ENCRYPTED TRANSMISSION
- USE 1 ON 1 FOLDER SYNCHRONIZATION
- ARCHIVE MODE (INCREMENTAL BACKUP)
- COMPRESS DATA DURING THE TRANSFER
- KEEP FILE METADATA
- SUPPORT SPARSE FILES REPLICATION
- MISSION MODE
- SMB BACKUP
- SKIP EXISTING FILE IF NOT MODIFIED
- FTP BACKUP
- REMINDER
- INTERNAL BACKUP
- SUPPORTS SYMBOLIC LINK REPLICATION
- PREFERRED FILE PERMISSION FOR ALL USERS AT THE DESTINATION
- KEEP OWNER
- EXTERNAL BACKUP
- ONE TOUCH BACKUP
- TRANSFER MODES
- BACKUP METHODS
- APP CENTRAL
- ADDITIONAL INFORMATION
- EXTERNAL DEVICES
- HARD DRIVES
- FAT
- NTFS
- HFS
- EXT
- EXFAT
- PRINTER
- WI-FI
- UPS
- NETWORK UPS
- SHUT DOWN
- SAFE MODE
- BLUETOOTH DEVICES
- EXTERNAL OPTICAL DRIVE
- I SYSTEM INFORMATION
- ABOUT THIS NAS
- SYSTEM LOG
- CONNECTION LOG
- FILE ACCESS LOG
- ONLINE USERS
- ADM
- CREATE SHARE LINK
- PERMISSIONS
- INCLUDE INHERITABLE PERMISSIONS FROM THIS OBJECT'S PARENT
- REPLACE ALL CHILD OBJECT PERMISSIONS WITH INHERITABLE PERMISSIONS FROM THIS OBJECT
- EFFECTIVE PERMISSIONS
- ASUSTOR LIVE
- DOWNLOAD CENTER
- BITTORRENT DOWNLOADS
- HTTP/FTP DOWNLOADS
- RSS SUBSCRIPTIONS AND DOWNLOADS
- SEARCH
- FTP EXPLORER
- MARIADB
- PORT NUMBER
- ENABLE MARIADB REMOTE ACCESS
- RESET PASSWORD
- REINITIALIZE DATABASE
- UPNP MEDIA SERVER
- ABOUT UPNP MULTIMEDIA SERVER
- SOUNDSGOOD
- ABOUT SOUNDSGOOD
- LOOKSGOOD
- PHOTO GALLERY
- VPN SERVER
- CONFIGURING THE ASUSTOR NAS AS A VPN SERVER
- CONNECTING THE ASUSTOR NAS TO A VPN SERVER
- TAKEASY
- ASUSTOR PORTAL
- ANTIVIRUS PROTECTION
- MAIL SERVER
- SYSLOG SERVER
- CENTER
- HIDRIVE BACKUP
- CLOUD BACKUP CENTER
- ACC (ASUSTOR CONTROL CENTER)
- AEC (ASUSTOR EZ CONNECT)
- ABP (ASUSTOR BACKUP PLAN)
- AES (ASUSTOR EZ SYNC)
- AIDATA
- AIMASTER
- AIREMOTE
- AIDOWNLOAD
- MORE INFORMATION
- AIMUSIC
- AIFOTO
- AIVIDEOS
- AISECURE
- EULA
- GRANT OF LICENSE
- DESCRIPTION OF OTHER RIGHTS AND LIMITATIONS
- COMPLIANCE WITH APPLICABLE LAWS
- TERMINATION
- COPYRIGHT
- LIMITED WARRANTY
- LIMITATION OF LIABILITY
- GNU GENERAL PUBLIC LICENSE
- PREAMBLE
- SOURCE CODE
- BASIC PERMISSIONS
- CONVEYING NON-SOURCE FORMS
- ADDITIONAL TERMS
- ACCEPTANCE NOT REQUIRED FOR HAVING COPIES
- AUTOMATIC LICENSING OF DOWNSTREAM RECIPIENTS
- PATENTS
Brand : Asustor
Model : Flashstor 12 Pro Gen2
Category : Server