
WMD7O4TB - Microwave WHIRLPOOL - Free user manual and instructions
Find the device manual for free WMD7O4TB WHIRLPOOL in PDF.
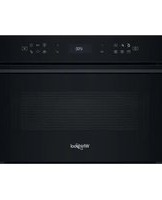


| Brand | Whirlpool |
| Model | WMD7O4TB |
| Product type | Built-in microwave |
| Dimensions (W x H x D) | 59.5 x 38.2 x 38.8 cm |
| Net weight | 20 kg |
| Interior capacity | 25 L |
| Microwave power | 900 W |
| Grill power | 1000 W |
| Power supply voltage | 230 V / 50 Hz |
| Main functions | Automatic cooking, defrosting, grill, keep warm |
| Automatic programs | 8 preset programs (popcorn, pizza, vegetables, etc.) |
| Control type | Touch electronic with digital display |
| Interior lighting | LED |
| Cavity material | Stainless steel |
| Care and cleaning | Clean with a soft, damp cloth. Do not use abrasive products. |
| Safety | Child lock, automatic stop when door opens |
| Spare parts and repairability | Parts available through Whirlpool after-sales service. Repairability index: 7.5/10 |
| General information | Built-in microwave from the Whirlpool range, suitable for domestic use. Delivered with user manual. |
Frequently Asked Questions - WMD7O4TB WHIRLPOOL
User questions about WMD7O4TB WHIRLPOOL
0 question about this device. Answer the ones you know or ask your own.
Ask a new question about this device
Download the instructions for your Microwave in PDF format for free! Find your manual WMD7O4TB - WHIRLPOOL and take your electronic device back in hand. On this page are published all the documents necessary for the use of your device. WMD7O4TB by WHIRLPOOL.
USER MANUAL WMD7O4TB WHIRLPOOL
THANK YOU FOR BUYING A WHIRLPOOL PRODUCT
In order to receive a more complete assistance, please register your product on www.whirlpool.eu/register

Before using the appliance carefully read the Safety Instruction.
PLEASE SCAN THE QR CODE ON YOUR APPLIANCE IN ORDER TO REACH MORE INFORMATION

PRODUCT DESCRIPTION

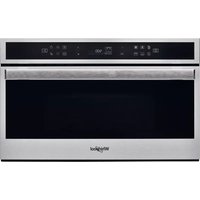
- Control panel
- Identification plate (do not remove)
- Door
- Upper heating element/grill
- Light
- Turntable
CONTROL PANEL DESCRIPTION
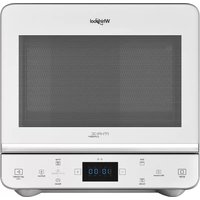
1. ON/OFF
For switching the oven on and off and for stopping an active function.
2. 6TH SENSE MENU / FUNCTIONS DIRECT ACCESS
For quick access to the functions and menu.
3. NAVIGATION BUTTON MINUS
For scrolling through a menu and decreasing the settings or values of a function.
4. BACK
For returning to the previous screen. During cooking, allows settings to be changed.
5. DISPLAY
6. OK
For confirming a selected function or a set value.
7. NAVIGATION BUTTON PLUS
For scrolling through a menu and increasing the settings or values of a function.
8. OPTIONS / FUNCTIONS DIRECT ACCESS
For quick access to the functions, settings and favorites.
9. START
For starting a function using the specified or basic settings.
ACCESSORIES
TURNTABLE

Placed on its support, the glass turntable can be used with all cooking methods.
The turntable must always be used
as a base for other containers or accessories.
TURNTABLE SUPPORT

Only use the support for the glass turntable.
Do not rest other accessories on the support.
WIRE RACK

This allows you to place food closer to the grill, for perfectly browning your dish.
Place the wire rack on the turntable, making sure that it does not come
into contact with other surfaces.
CRISP PLATE

Only for use with the designated functions.
The Crisp plate must always be placed in the centre of the glass turntable and can be pre-heated
when empty, using the special function for this purpose only. Place the food directly on the Crisp plate.
HANDLE FOR CRISP PLATE

Useful for removing the hot Crisp plate from the oven.
The number and type of accessories may vary depending on the model purchased.
There are a number of accessories available on the market. Before you buy, ensure they are suitable for microwave use and resistant to oven temperatures.
Metallic containers for food or drink should never be used during microwave cooking.
STEAMER

To steam foods such as fish or vegetables, place these in the basket (2) and pour drinking
water (100 ml) into the bottom of the steamer (3) to achieve the right amount of steam.
To boil foods such as potatoes, pasta, rice, or cereals, place these directly on the bottom of the steamer (the basket is not
required) and add an appropriate amount of drinking water for the amount you are cooking.
For best results, cover the steamer with the lid (1) provided.
Always place the steamer on the glass turntable and only use it with the appropriate cooking functions, or with microwave function.
The steamer bottom has been designed also to be used in combination with the special Smart clean function.
Other accessories that are not supplied can be purchased separately from the After-sales Service.
Always ensure that foods and accessories do not come into contact with the inside walls of the oven.
Always ensure that the turntable is able to turn freely before starting the oven. Take care not to unseat the turntable whilst inserting or removing other accessories.
FUNCTIONS

6TH SENSE
These functions automatically select the best cooking method for all types of food.

REHEAT
For reheating ready-made food that is either frozen or at room temperature. The oven automatically calculates the settings required to achieve the best results in the shortest amount of time. Place food on a microwave-safe and heatproof dinner plate or dish.
| FOOD WEIGHT (g) | |
| PLATED MEAL 250 - 500 | |
| FROZEN LASAGNA 250 - 500 | |
| WATER 100 - 500 | |
| SOUP 200 - 800 |

CRISP
For quickly reheating and cooking frozen foods and giving them a golden, crunchy top. Only use this function with the crisp plate provided. Turn the food when prompted.
| FOOD WEIGHT (g) | |
| PIZZA [FROZEN] 200 - 800 | |
| BURGER PATTIES 200 - 600 | |
| POTATOES FRIED [FROZEN] 200 - 500 | |
| CHICKEN NUGGETS [FROZEN] 100 - 500 | |
| FISH FINGERS [FROZEN] 100 - 500 |
Required accessories: Crisp plate, handle for crisp plate

COOK
For cooking foods quickly and achieving optimal results. Use a heatproof container suitable for microwave use.
| FOOD WEIGHT (g) | |
| ROAST CHICKEN 800 - 1500 | |
| POTATOES GRATIN 200 - 1000 | |
| STUFFED VEGETABLES 200 - 800 | |
| PORK RIBS | 200 - 800 |
| SCRAMBLED EGGS | 100 - 500 |
| POPCORN | 90 |

STEAM
For steam-cooking foods such as vegetables or fish, using the steamer provided. Distribute the food evenly into the steamer basket and pour drinking water (100 ml) into the bottom of the steamer. The oven automatically calculates the settings required to achieve perfect results. During the initial part of the cooking, microwaves generate steam, bringing the water added into the bottom of the steamer to boil.
| FOOD | WEIGHT (g) | |
| 1 | ROOTS VEGETABLES STEAMED | 150 - 500 |
| 2 | SOFT VEGETABLES STEAMED | 150 - 500 |
| 3 | VEGETABLES STEAMED [FROZEN] | 150 - 500 |
| 4 | FISH FILLETS STEAMED | 150 - 500 |
| 5 | POULTRY BREAST STEAMED | 150 - 500 |

RICE & PASTA
To quickly cook rice or pasta. This function must only be used in combination with the steamer. Set recommended cook time for rice or pasta accordingly.
| FOOD | PORTIONS | WEIGHT (g) |
| RICE | 100 | |
| 200 | ||
| 300 | ||
| 400 | ||
| PASTA BOIL | 70 | |
| 140 | ||
| 210 |
Required accessories: Steamer bottom and lid

MICROWAVE
For quickly cooking and reheating food or drinks.
| 1000 | Quickly reheating drinks or other foods with a high water content. |
| 800 | Cooking vegetables. |
| 650 | Cooking meat and fish. |
| 500 | Cooking meaty sauces, or sauces containing cheese or egg. Finishing off meat pies or pasta bakes. |
| 350 | Slow, gently cooking. Perfect for melting butter or chocolate. |
| 160 | Defrosting frozen foods or softening butter and cheese. |
| 90 | Softening ice cream. |
ACTION FOOD POWER (W) DURATION (min.)
| Reheat 2 cups 1000 1 - 2 | |||
| Reheat | Mashed potatoes(1 kg) | 1000 9 - 11 | |
| Defrost | Minced Meat (500 g) | 160 | 13 - 14 |
| Cook | Sponge cake | 800 | 6 - 7 |
| Cook | Egg custard | 650 | 11 - 12 |
| Cook | Meat loaf | 800 | 18 - 20 |

GRILL
For browning, grilling and gratins. We recommend turning the food during cooking.
| FOOD | DURATION (min.) |
| Toast | 5 - 6 |
| Prawns | 18 - 22 |
Recommended accessories: Wire rack

GRILL+MW
For quickly cooking and gratinating dishes, combining the microwave and grill functions.
| FOOD | POWER (W) | DURATION (min.) |
| Potatoes gratin | 650 | 20 - 22 |
| Roast chicken | 650 | 40 - 45 |
Recommended accessories: Wire rack

CRISP
For perfectly browning a dish, both on the top and bottom of the food. This function must only be used with the special Crisp plate.
| FOOD | DURATION (min.) |
| Leavened cake | 7 - 10 |
| Hamburger | 8 - 10* |
* Turn food halfway through cooking.
Required accessories: Crisp plate, handle for the Crisp plate

6TH SENSE DEFROST
For quickly defrosting various different types of food simply by specifying their weight. Food should be placed directly on the glass turntable. Turn the food when prompted.
| FOOD | WEIGHT (g) | |
| TIMED DEFROST | - | |
| MEAT | 100 - 2000 | |
| POULTRY | 100 - 2500 | |
| FISH | 100 - 1500 | |
| CRISP BREAD DEFROST | 50 - 500 |

POWER (°C/W)
For editing function time values.

TIMER/MINUTE MINDER
For editing function time values.

Hydro Self Clean
The action of the steam released during this special cleaning cycle allows dirt and food residues to be removed with ease. Pour a cup of drinking water into a microwave proof container and activate the function.
FAVORITES
For retrieving the list of 10 favorite functions.

SETTINGS
For adjusting the oven settings.
When "ECO" mode is active the brightness of the display will be reduced to save energy and lamp switches off after 1 minute.
When "DEMO" is "On" all commands are active and menus available but the oven doesn't heat up. To deactivate this mode, access "DEMO" from "SETTINGS" menu and select "Off".
By selecting "FACTORY RESET", the product switches off and then it returns to first switch on. All settings will be deleted.
FIRST TIME USE
1. SELECT THE LANGUAGE
You will need to set the language and the time when you switch on the appliance for the first time: "English" will show on the display.

Press or to scroll through the list of available languages and select the one you require.
Press √ to confirm your selection.
Please note: The language can subsequently be changed by selecting "LANGUAGE" in "SETTINGS" menu, available by pressing
2. SET THE TIME
After selecting the language, you will need to set the current time: The two digits for the hour will flash on the display.

Press or to set the current hour and press: The √ two digits for the minutes will flash on the display.
DAILY USE
1. SELECT A FUNCTION
Press to switch on the oven: the display will show the last running main function or the main menu.
The functions can be selected by pressing the icon for one of the main functions or by scrolling through a menu.
To select a function contained in a menu, press + or — to select the desired one, then press to confirm.
Please note: Once a function has been selected, the display will recommend the most suitable level for each function.
2. SET THE FUNCTION
After having selected the function you require, you can change its settings. The display will show the settings that can be changed in sequence. Pressing ◀ allows you to change the previous setting again.
POWER
![[ ] 800 W MW POWER](/content/2026/07/1439344/images/fa2f469511a38427020e9344138afcf0c7c0852616c87174129c64dafba751aa.jpg)
When the value flashes on the display, press or to change it, then press √ to confirm and continue with the settings that follow (if possible).
Press or to set the minutes and press to confirm.
Please note: You may need to set the time again following lengthy power outages. Select "CLOCK" in "SETTINGS" menu, available by pressing 🔒.
3. CLEAN THE OVEN
A new oven may release odours that have been left behind during manufacturing: this is completely normal. Before starting to cook food, we therefore recommend cleaning the oven with it empty in order to remove any possible odours.
Remove any protective cardboard or transparent film from the oven and remove any accessories from inside it.
Activate the "Smart Clean" function. Follow the instructions for setting the function correctly.
Please note: It is advisable to air the room after using the appliance for the first time.
DURATION
![[ ] - - : - - ^s DURATION](/content/2026/07/1439344/images/8be11a90d07b81e28657a17a1d5e1376c5ac41c1844f2e4a07cb7e2272826606.jpg)
When the icon flashes on the display, press or + — to set the cooking time you require and then press to confirm.
Please note: You can adjust the cooking time that has been set during cooking by pressing ☑: press or to amend it and then press √ to confirm.
In non-microwave functions you do not have to set the cooking time if you want to manage cooking manually (untimed): Press √ or to confirm and start the function.
By selecting this mode, you cannot program a delayed start.
6th Sense
These functions automatically select the best cooking mode, power and duration for all the dishes available. When required, simply indicate the characteristic of food to obtain an optimal result.
WEIGHT / PORTIONS

To set the function correctly, follow the indications on the display. When prompted, press or to set the required value then press √ to confirm.
the display, When prompted, press or to set the required value then press √ to confirm.
In 6th Sense functions it is possible to adjust the doneness level.
In 6th Sense functions it is possible to adjust the doneness level.
![[ ] 6 DONENESS](/content/2026/07/1439344/images/6853ea3ec0e0a854a0c79454f8508799176a76678f536d325855e6a5711d35ce.jpg)
When prompted, press or to select the desired level between Light/Low (-1) and Extra/High (+1). Press √ or to confirm and start the function.
At any time, if the default values are those desired or once you have applied the settings you require, press ▶ to activate the function.
At any time, if the default values are those desired or once you have applied the settings you require, press ▶ to activate the function.
Every time the ▶ is pressed again, the cooking time will be increased by a further 30 seconds.
During the delay phase, pressing ▶ will prompt the oven to ask if you want to skip this phase and start the function immediately.
Please note: At any time you can stop the function that has been activated by pressing ⏻.
If the oven is hot and the function requires a specific maximum temperature, a message will be shown on the display. Press ◀ to return to the previous screen and select a different function, or wait for it to cool completely.
JET START
When the oven is switched off, press ▶ to activate cooking with the microwave function set at full power (1000 W) for 30 seconds.
4. PAUSE COOKING / TURN OR STIR FOOD
PAUSE
By opening the door, the cooking will be temporarily paused through deactivating heating elements.
To resume the cooking, close the door and press ▶.
Please note: During "6 th Sense" functions open the door only when prompted.
TURN OR STIR FOOD
Some 6 th Sense Cook recipes will require the food to turn or stir the food during cooking.
![[ ] 100 180°C TURN FOOD](/content/2026/07/1439344/images/ae989e6fce12cf395dd456a627c7ed0fa0c6e45a45ce310a42780fc348ac91a6.jpg)
An audible signal will sound and the display shows the action to be done.
Open the door, do the action prompted by the display and close the door, then press ▶ to continue cooking.
Please note: When turning or stirring is needed, after 2 minutes, even if no action is performed, the oven will resume the cooking.
5. END OF COOKING
An audible signal will sound and the display will indicate that cooking is complete.
![[ ] - -: - ^ END](/content/2026/07/1439344/images/fb75550fc9983978eb1e1089dcff6231e8ec6f1b78706d4f21e68f50f6917515.jpg)
Press to continue cooking in manual mode adding time in steps of 30 seconds (in microwave functions) or 5 minutes (without microwave) or press + to extend the cooking time by setting a new duration. In both cases, the cooking parameters will be retained.
By pressing √ or the cooking starts again.
. FAVORITES
To make the oven easier to use, it can save up to 10 of your favorite functions.
Once cooking is complete the display will prompt you to save the function in a number between 1 and 10 on your list of favorites.
![[●●] _ _ _ _ ^s ADD FAVORITE?](/content/2026/07/1439344/images/f3061935b880ae5750bcd15874afc6fd4ecaf36a821c91861e5123a5b94f482b.jpg)
If you would like to save a function as a favorite and store the current settings for future use, press √ otherwise, to ignore the request press .
Once √ has been pressed, press or to select the number position, then press √ to confirm.
Please note: If the memory is full or the number chosen has already been taken, the oven will ask you to confirm overwriting the previous function.
To call up the functions you have saved at a later time, press ♥: The display will show your list of favorite functions.

Press or to select the function, confirm by pressing √, and then press to activate.
. SMART CLEAN
Remove all accessories (with the exception of the glass turntable) from the microwave oven before activating the function.
Press 📋 to access the "Smart Clean" function.

Press to activate the cleaning function: the display will prompt in sequence actions to be performed before starting the cleaning. Press √ anytime when done.
When required, pour a cup of drinking water into the supplied steamer bottom or in a microwave resistant container, then close the door.
After the last confirmation, press ▶ to start the cleaning cycle.
Once finished, remove the container, finish the cleaning with the help of a smooth cloth and then dry the oven cavity using a damp microfibre cloth.
. MINUTEMINDER
When the oven is switched off, the display can be used as a timer. To activate this function, make sure that the oven is switched off and press + or : The icon will flash on the display.
Press + or to set the length of time you require and then press √ to activate the timer.
An audible signal will sound and the display will indicate once the minuteminder has finished counting down the selected time.

Once the minuteminder has been activated, you can also select and activate a function. Press ☐ to switch on the oven and then select the function you require.
Once the function has started, the timer will continue to count down independently without interfering with the function itself.
During this phase, it isn't possible to see the minuteminder (only the ⏻ icon will be displayed), that will continue counting down in background. To retrieve the minuteminder screen press ⏻ to stop the function that is currently active.
. KEYLOCK
To lock the keypad, press and hold for at least five seconds. Do this again to unlock the keypad.
![[●] 0:30 180°C KEYLOCK](/content/2026/07/1439344/images/6e4b53b50489288e7a012c81f2ac25e098fb804d3bc7ae0344d5f462d0d869f4.jpg)
Please note: This function can also be activated during cooking. For safety reasons, the oven can be switched off at any time by pressing ☐.
CLEANING
Make sure that the appliance has cooled down before carrying out any maintenance or cleaning.
Never use steam cleaning equipment.
Do not use wire wool, abrasive scourers or abrasive/corrosive cleaning agents, as these could damage the surfaces of the appliance.
INTERIOR AND EXTERIOR SURFACES
- Clean the surfaces with a damp microfibre cloth. If they are very dirty, add a few drops of pH-neutral detergent. Finish off with a dry cloth.
- Clean the glass in the door with a suitable liquid detergent.
- At regular intervals, or in case of spills, remove the turntable and its support to clean the bottom of the oven, removing all food residue.
- Activate the "Smart clean" function for an optimum cleaning of the internal surfaces.
- The grill does not need to be cleaned as the intense heat burns away any dirt. Use this function on a regular basis.
ACCESSORIES
All accessories are dishwasher safe with the exception of the Crisp plate.
The Crisp plate should be cleaned using water and a mild detergent. For stubborn dirt, rub gently with a cloth. Always leave the Crisp plate to cool down before cleaning.
TROUBLESHOOTING
| Problem Possible cause Solution | ||
| The oven is not working. | Power cut.Disconnection from the mains. | Check for the presence of mains electrical power and whether the oven is connected to the electricity supply.Turn off the oven and restart it to see if the fault persists. |
| The oven makes noises, even when it is switched off. | Cooling fan active. | Open the door or hold or wait until the cooling process has finished. |
| The display shows the letter “F” followed by a number. | Software fault. | Contact you nearest Client After-sales Service Centre and state the number following the letter “F”. |
Policies, standard documentation and additional product information can be found by:
• Using the QR on your product • Visiting our website docs.whirlpool.eu • Alternatively, contact our After-sales Service (See phone number in the warranty booklet). When contacting our After-sales Service, please state the codes provided on your product's identification plate.


THANK YOU FOR CHOOSING A WHIRLPOOL PRODUCT
THANK YOU FOR CHOOSING A WHIRLPOOL PRODUCT
3. NAVIGATION KEY MIN
1. ON/OFF
8. SELECTING / DIRECT ACCESS TO FUNCTIONS
1. ON/OFF
THANK YOU FOR PURCHASING A WHIRLPOOL PRODUCT
To receive more complete assistance,
please register your product at
www.whirlpool.eu/register

Before using the appliance, please read
1. ON/OFF
THANK YOU FOR PURCHASING A WHIRLPOOL PRODUCT
1. ON/OFF
To store food
THANK YOU FOR PURCHASING A WHIRLPOOL PRODUCT


- PRODUCT DESCRIPTION
- ON/OFF
- TH SENSE MENU / FUNCTIONS DIRECT ACCESS
- NAVIGATION BUTTON MINUS
- BACK
- DISPLAY
- OK
- NAVIGATION BUTTON PLUS
- OPTIONS / FUNCTIONS DIRECT ACCESS
- START
- ACCESSORIES
- TURNTABLE
- TURNTABLE SUPPORT
- WIRE RACK
- CRISP PLATE
- HANDLE FOR CRISP PLATE
- STEAMER
- FUNCTIONS
- TH SENSE
- REHEAT
- CRISP
- COOK
- STEAM
- RICE & PASTA
- MICROWAVE
- GRILL
- GRILL+MW
- TH SENSE DEFROST
- POWER (°C/W)
- TIMER/MINUTE MINDER
- HYDRO SELF CLEAN
- FAVORITES
- SETTINGS
- FIRST TIME USE
- SELECT THE LANGUAGE
- SET THE TIME
- DAILY USE
- SELECT A FUNCTION
- SET THE FUNCTION
- POWER
- CLEAN THE OVEN
- DURATION
- WEIGHT / PORTIONS
- IN 6TH SENSE FUNCTIONS IT IS POSSIBLE TO ADJUST THE DONENESS LEVEL
- AT ANY TIME, IF THE DEFAULT VALUES ARE THOSE DESIRED OR ONCE YOU HAVE APPLIED THE SETTINGS YOU REQUIRE, PRESS ▶ TO ACTIVATE THE FUNCTION
- JET START
- PAUSE COOKING / TURN OR STIR FOOD
- PAUSE
- TURN OR STIR FOOD
- END OF COOKING
- SMART CLEAN
- MINUTEMINDER
- KEYLOCK
- CLEANING
- INTERIOR AND EXTERIOR SURFACES
- THANK YOU FOR CHOOSING A WHIRLPOOL PRODUCT
- NAVIGATION KEY MIN
- SELECTING / DIRECT ACCESS TO FUNCTIONS
- THANK YOU FOR PURCHASING A WHIRLPOOL PRODUCT
Brand : WHIRLPOOL
Model : WMD7O4TB
Category : Microwave