
Microfilm Scanner 350II - Scanner CANON - Free user manual and instructions
Find the device manual for free Microfilm Scanner 350II CANON in PDF.
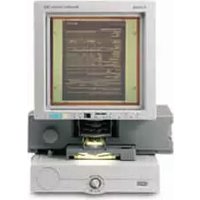


| Product Type | Microfilm Scanner |
| Brand | Canon |
| Model | Microfilm Scanner 350II |
| Scanning Element | CMOS or CCD (typical) |
| Film Formats Supported | 16mm and 35mm roll film, microfiche, aperture cards |
| Optical Resolution | Up to 600 dpi (common for this class) |
| Scan Speed | About 2-3 seconds per frame at 200 dpi |
| Interface | USB 2.0 or 3.0 |
| Power Requirements | 100-240 VAC, 50/60 Hz |
| Power Consumption | Approximately 30 W (scanning), 5 W (standby) |
| Dimensions (W x D x H) | 490 x 320 x 240 mm (typical) |
| Weight | Approximately 8 kg |
| Compatible Operating Systems | Windows 10/11, macOS (via drivers) |
| Software Included | Capture software for image enhancement and export |
| Safety Certifications | CE, FCC, UL |
| Maintenance | Clean lenses and rollers periodically; use compressed air |
| Repairability | Canon authorized service centers; spare parts available |
| Warranty | One year limited warranty (check local) |
Frequently Asked Questions - Microfilm Scanner 350II CANON
User questions about Microfilm Scanner 350II CANON
0 question about this device. Answer the ones you know or ask your own.
Ask a new question about this device
Download the instructions for your Scanner in PDF format for free! Find your manual Microfilm Scanner 350II - CANON and take your electronic device back in hand. On this page are published all the documents necessary for the use of your device. Microfilm Scanner 350II by CANON.
USER MANUAL Microfilm Scanner 350II CANON
Be sure to read these instructions before using the equipment.
Keep these instructions on hand for reference to ensure optimum performance.
European Union (and EEA) only.

This symbol indicates that this product is not to be disposed of with your household waste, according to the WEEE Directive (2002/96/EC) and your national law. This product should be handed over to a designated collection point, e.g., on an authorized one-for-one basis when you buy a new similar product or to an authorized collection site for recycling waste electrical and electronic equipment (EEE). Improper handling of this type of waste could have a possible negative impact on the environment and human health due to potentially hazardous substances that are generally associated with EEE. At the same time, your cooperation in the correct disposal of this product will contribute to the effective usage of natural resources. For more information about where you can drop off your waste equipment for recycling, please contact your local city office, waste authority, approved WEEE scheme or your household waste disposal service. For more information regarding return and recycling of WEEE products, please visit www.canon-europe.com/environment.
(EEA: Norway, Iceland and Liechtenstein)
MODEL NAMES
The following names may be provided for the safety regulations in each sales region of this Microfilm Scanner.
Model Microfilm Scanner 350II is identical to model M31025.
Model Microfilm Scanner 350II is the sales name of model M31025.
Copyright
Copyright © 2007 by Canon Electronics Inc. All rights reserved. No part of this publication may be reproduced, transmitted, transcribed, stored in a retrieval system, or translated into any language or computer language in any form or by any means, electronic, mechanical, magnetic, optical, chemical, manual, or otherwise, without the prior written permission of Canon Electronics Inc.
Trademarks
- Microsoft and Windows are registered trademarks of Microsoft Corporation in the United States and other countries.
• ISIS is a trademark of EMC Corporation, in the United States.
- Kodak is a trademark of Eastman Kodak Company.
- 3M is a trademark of Minnesota Mining Manufacturing Company.
• TUSCAN is a trademark of the TUSCAN Corporation.
Other brand and product names may be trademarks or registered trademarks of their respective companies.



INTRODUCTION
These instructions describe the operating procedures for the Canon Microfilm Scanner 350II. After you set up the unit, keep this manual in a convenient location so you can find it when you need it.


Conventions
A few symbols and notations alert you to additional information that will make operation of the scanner more efficient, trouble free, and safe.
(→P.13)
A number preceded by an arrow and enclosed in parentheses shows you the page number that contains more information about the previous statement or paragraph.

WARNING
Warnings are provided for your safety and contain extremely important information. Failure to observe the instructions provided in a warning could result in death or serious injury to yourself or your co-workers.

CAUTION
Caution notices are also provided for your safety and contain important information. Failure to observe the instructions provided in a caution notice could result in serious injury to yourself or your co-workers or damage to the equipment.

HEAT CAUTION
There will be cautions for heat injury caused by hot sections. For your safety, be sure to follow instructions given in these cautions.

Important
These important notes contain important information on procedures that must be followed or actions that must be avoided. Failure to observe a request could result in damage to the equipment or a malfunction.

Notes
Notes provide additional tips or advice that can save your time and effort in using the scanner.
CONTENTS
INTRODUCTION....1
Conventions 2
BEFORE YOU BEGIN 5
⚠ Work Safety! 5
Choosing a safe location 5
Power supply 7
Daily handling 8
Features of the Microfilm Scanner 350II 10
About operation modes 11
Unpacking: What's in the box? 12
Options....13
Important parts and their functions 14
Operation panel and keyboard keys 15
Operation panel keys 15
Keyboard keys.... 16
Preparing the carrier 17
Preparing the lens 18
Fixed lens 18
Zoom lenses 18
Switching the lens 18
Preparing optional printer (for the DMP mode) 20
Preparing the computer (scanner mode) 21
Turning the power on 24
Turning the power off 24
Scanner recognition 25
ABOUT THE SOFTWARE....29
Installing the ISIS/TWAIN driver 29
Installing CapturePerfect 30
Using the software 31
Using the ISIS/TWAIN Driver 31
Using CapturePerfect 31
About the Reader-Printer mode 32
Starting up Reader-Printer mode 32
Uninstalling the software 34
SETTING THE SCANNER 35
Loading the film....35
Adjusting the image 35
Selecting the polarity....36
Brightness adjustment 36
Automatic adjustment.... 36
Manual adjustment 36
Trimming/border removal settings.... 37
Trimming 37
Border removal 38
Using auto rotation.... 39
Setting the function keys (DMP mode) 39
Date stamp feature 39
Note feature 41
Entering the note 41
Setting the print mode 42
Switching the operation modes 42
Printing (DMP mode).... 43
USER MODE 45
User mode setting 45
User mode setting functions 46
Power saver mode 46
Hi-speed scanning.... 46
Scanning resolution 46
Cleaning mode 47
Switching the operation modes 47
Setting the function keys 47
ENTERING THE DEFAULT VALUES.... 48
Entering the default values 48
Registering the zoom values.... 48
MAINTENANCE AND TROUBLESHOOTING.... 49
Replacing the lamp 49
Routine cleaning 51
Cleaning the screen and main unit 51
Cleaning the lens 51
Cleaning mode 52
Cleaning the Fixing Rollers 52
Troubleshooting 53
User call errors....54
Scanner mode 54
DMP mode 54
Service Call Errors 55
SPECIFICATIONS....56
INDEX 57



■ BEFORE YOU BEGIN ... ■
BEFORE YOU BEGIN ...
To ensure safe, efficient operation, read the following precautions and recommendations before you choose a location and set up the system.
⚠ Work Safety!
Choosing a safe location
■ To ensure adequate space for ventilation, operation, and maintenance, make sure there is enough space around the system on all sides. To prevent overheating, never block the ventilation slots.

■ Avoid exposure to direct sunlight. When exposure to sunlight is unavoidable, install curtains to protect the unit.

Avoid a dusty location. Dust can adversely affect the internal parts of the unit.

Do not set up and use the unit in a location where the unit is exposed to water, steam, or high humidity. Keep all liquids away from the unit.


Avoid areas like laboratories where fumes from ammonia, acetone, or other volatile chemicals are present. Never use any kind of volatile, flammable spray near the unit.
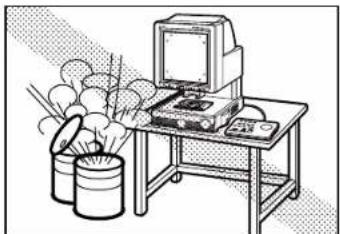
Never set up the unit in an area where flammable substances like alcohol, thinner, or other organic chemicals are present.
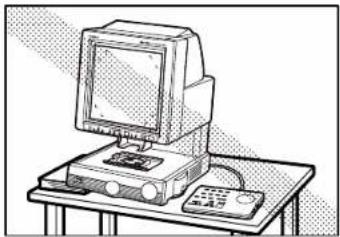
Select a flat, stable surface that can support the 26 kg (57.2 lb) weight of the unit.

Choose a location that is free of excessive vibration.

Avoid a location subject to sudden or wide changes in temperature. Condensation inside the unit can cause poor image quality. Use the unit in a location within these ranges for temperature and humidity.

Temperature 10°C to 32.5°C (50°F to 90.5°F) Humidity 10% to 80% RH
Use Fileprint in a work environment that is suitable for Fileprint.
Do not place the unit near large speakers, a radio, a television, or any other type of equipment that can generate a strong magnetic field.


Power supply

If you have any questions about the power source at your work site, contact your supplier or the power company.

The unit should have an independent power source that is not shared with any other electrical device. If you have to use an extension cord or power strip, make sure the total ampere rating for all the equipment does not exceed the ampere rating of the extension cord.

Do not place anything on the power cord, and do not locate the unit where people working around the unit will walk on the cord.

Do not bundle the power cord or wrap it around an object like a table or chair leg. The area around the unit should be clear of all obstacles. In case of an emergency, you should be able to reach the power source quickly to unplug the cord.
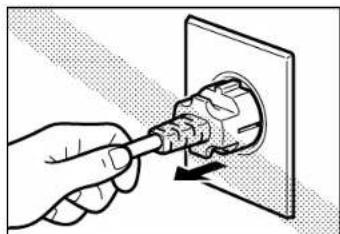
To remove the power cord from the power outlet, grasp the head of the plug firmly to remove it. Never pull on the cord to remove the plug from the power outlet. Never touch the power cord with wet hands.
BEFORE YOU BEGIN ...
Daily handling
Before using the equipment, make sure you and your co-workers read the following warnings about using this equipment.

PAY ATTENTION TO THESE WARNINGS! FAILURE TO FOLLOW THESE WARNINGS COULD RESULT IN INJURY FROM FIRE OR ELECTRICAL SHOCK!

WARNING
Always observe these warnings when using the scanner. Failure to follow these warnings could result in injury due to fire or electric shock. Do not set up the scanner in a location close to flammable solvents such as alcohol and paint thinners. Do not cut, damage or modify the power cord, do not pull or bend the power cord excessively, and do not place heavy objects on the power cord. Never plug in or unplug the power cord with wet hands. Do not place objects on top of the scanner as such objects could fall and cause injury. Do not plug the scanner into a multi-socket adapter. Do not knot or bundle the power cord, and ensure that the plug is pushed fully into the power outlet. Use only the power cord supplied with the scanner. Do not attempt to disassemble or modify the scanner. There are no user-serviceable parts inside the scanner. Do not use flammable sprays or aerosols near the scanner. Switch the scanner off and unplug the power cord before cleaning the scanner. To clean the unit, use a cloth lightly dampened with water or a mild detergent. If the scanner emits an unusual noise, odor, smoke or sparks, or if the scanner will not function when switched on, immediately switch the scanner off, unplug the power cord and contact an authorized Canon dealer or service center. Before you move the scanner even a short distance, switch the scanner off and unplug the power cord.

CAUTIONS
Do not set up the scanner on sloping, wobbly or otherwise unstable surfaces or in locations affected by excessive vibration. The scanner could cause injury if it falls over or slides off the surface. Do not block the ventilation slots as this could result in a fire due to the build up of heat inside the scanner. Do not place vessels containing liquids (cups, vases, etc.) or small metal objects (paper clips, staples, necklaces, etc.) on top of the scanner. Liquids or metal objects falling into the scanner could cause an electric shock or fire. If any liquids or metal objects fall into the scanner, immediately switch the scanner off, unplug the power cord and contact an authorized Canon dealer or service center. Do not set up the scanner in dusty or humid locations as this could result in an electric shock or fire. Do not place heavy objects on top of the scanner as such objects could fall and cause injury.
Use only a power supply having the rated voltage. The use of other voltages could result in a fire or electric shock. Always unplug the power cord by grasping the plug itself. Pulling on the power cord can damage the cord so that the core wires are exposed or snapped and could cause a fire or electric shock. Do not use an extension power cord as this could cause a fire or electric shock. Keep the area around the power outlet free of obstacles to ensure that the scanner can be unplugged quickly in the event of an emergency. Take care not to tip water or flammable solvents such as alcohol, thinners or benzene into the scanner as this could result in a fire or electric shock. If the scanner will be left unused for a lengthy period, always unplug the scanner as a safety measure. Avoid touching internal scanner components when you perform routine cleaning or maintenance such as changing the lamp. Some internal components generate high temperatures or high voltages. To avoid injury such as burns or electric shocks, take care also that metal objects such as necklaces or bracelets do not come into contact with internal scanner components. To avoid injury when you are moving the scanner, take care not to put your hands on the metal protrusions on the underside of the scanner unit.

HEAT CAUTIONS
Avoid touching internal scanner components when you perform routine cleaning or maintenance such as changing the lamp. Some internal components generate high temperatures or high voltages.
BEFORE YOU BEGIN ...
Features of the Microfilm Scanner 350II
Space saving
The economical design of this compact film scanner requires less space on your desk or work table.
Internal SCSI-USB converter
SCSI-USB converter is built-in, so you can use both SCSI and USB interfaces. See "Preparing the computer (scanner mode)" (→ P.21)
Automatic film polarity detection
The unit automatically detects the presence of negative film or positive film and sets itself accordingly.
Uses a variety of film formats
A wide variety of roll/fiche carriers or auto carriers can be installed so you can use several film formats like microfiche, aperture card, and roll film.
□ Easy operation
Operations like border removal and image trimming can be performed at the press of a few keys before scanning.
☐ Reader-Printer mode (CapturePerfect)
This is a mode which enables the scanner to perform the same Reader-Printer functions as a Microfilm printer does. Scanned images can be printed out directly through a designated printer.
□ Expandability
By adding the optional DMP board, sold separately, in the Microfilm Scanner 350II, the scanner can be used as a Digital Microfilm Printer (DMP).
Before you use the equipment, make sure you and your co-workers read the following warnings about using this equipment.


■ BEFORE YOU BEGIN ... ■
About operation modes
The following operating modes are available with this scanner. Select one of the following modes according to your system environment before using the scanner. For details, contact your service representative.
□ Scanner mode
Using this scanner in connection with a personal computer, the image projected on the scanner's screen can be saved in the PC as image data, or printed out through a printer connected to the PC.
□ DMP mode
By installing the optional DMP board in the scanner and connecting it to a DMP-dedicated printer, the MS350II can be used as a digital microfilm printer (DMP). The image projected on the scanner's screen can be printed out through the DMP-dedicated printer. In this case, no personal computer is required.
□ Reader-printer mode
Using the CapturePerfect bundled with the MS350II, the scanner that is set to the Scanner mode will operate as if it is set to the DMP mode. The image projected on the scanner's screen can be printed out directly through a printer connected to the personal computer. In this case, however, the image cannot be saved in the PC as image data.

When the DMP board is installed in this scanner, switch the "DMP mode" and "scanner mode" in the user mode before use. (→P.45 "USER MODE")

If the computer is connected with the user mode set to "DMP mode" when the DMP board is installed in this scanner and the MS350II is used as a scanner, the operation panel may not be operable or other problems may occur.


■ BEFORE YOU BEGIN ... ■
Unpacking: What's in the box?
When you unpack the box, use the checklist below to make sure that you have everything. If anything is missing, contact your supplier.

■ Microfilm Scanner 350II ■ Keyboard
■ Lens holder

■ Setup CD ISIS/TWAIN Driver CapturePerfect

USB cable

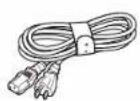
■ Power cord
■ Function Key label (→P.39 "Setting the function keys (DMP mode)")

■ Instructions (This manual) ■ Canon Software License Agreement ■ Warranty Card (U.S.A. and Canada only)
Options
In addition to the accessories provided in the product package, a number of optional accessories that are required for using the scanner, such as carriers and lenses, are also sold, as well as other optional accessories that can be purchased as needed. Contact your nearest authorized Canon Dealer for details.
■ Carriers (→P.17 "Preparing the carrier")
Multiple carriers can be used for all types of film, including cartridge film, microfiche, jacket film and aperture cards.
Since the scanner does not come with a carrier, purchase the carrier best suited to your needs.
■ Installation Kit (→P.17 "Preparing the carrier")
Some carriers require an Installation Kit. Contact your nearest authorized Canon service outlet for details.
■ Lenses (→P.18 "Preparing the lens")
One fixed-focus lens and five zoom lenses are available for the Microfilm Scanner 350II. Since the scanner does not come with a lens, purchase the lenses best suited to your needs.
■ DMP board
This optional board is required to use the scanner in the DMP mode.
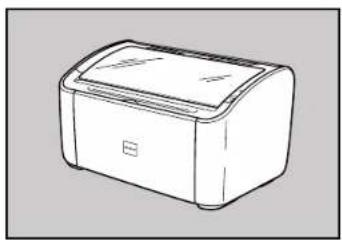
■ Fileprint 270/470 (→P.20 "Preparing optional printer (for the DMP mode)")
These printers are DMP-dedicated printers that support the scanner when used in the DMP mode.
■ Framing Kit (→P.37 "Trimming")
This optional unit allows you to selectively scan a portion of the image projected onto the screen. This Framing Kit is required in order to use the Trimming function provided by the scanner.
■ Foot switch
This is an underfoot switch that provides the same function as the Start key on the operational panel.



BEFORE YOU BEGIN
Important parts and their functions
Before you use the unit, take a few minutes to become familiar with the names of the important parts.

Operation panel and keyboard keys
Operation panel keys
This is a summary of the keys on the operation panel.

① Negative/Positive key: Three settings are available:
(☐ In negative film mode, produces positive output from negative film images. (☐ In positive film mode, produces positive output from positive images. (A) In automatic mode, selects the mode based on the type of film detected. (→P.36)
② Trimming/Border key
Use this key to trim the image to be scanned or to remove the black border around the image. (→P.37)
③ Brightness indicator
Shows the brightness adjusted using the brightness adjustment key.
④ Brightness adjustment keys
Use the ◀ or ▶ key to adjust brightness of the image manually, or use the AE key to adjust it automatically. In the DMP mode, this applies to brightness for printing.
⑤ Print/Error Display
Displays the number of prints (01 to 99) in Reader-Printer mode. Also displays error messages (user and service related).
⑥ Print number setting key
Use these keys to set the number of prints for each image in Reader-Printer mode or DMP mode (→ P.11). Also used to set various settings or confirm the scanner's SCSI ID.
⑦ Clear/Stop key
Stops scanning or resets the number of prints. Also defines an area for trimming, or sets a specified time for power saver mode.
When the scanner is connected to the Fileprint 470 and used in DMP mode, this key is also used to switch to cassette select mode (→ P.43).
⑧ Start key
In Scanner mode: press this key to start scanning when "Panel Start" is set to on in the application, or to start scanning in Reader-Printer mode (→ P.11).
In DMP mode: press this key to start printing. The Print/Error display blinks from the time the key is pressed until scanning begins.
■ BEFORE YOU BEGIN ... ■
Keyboard keys
This is a summary of the keyboard keys.
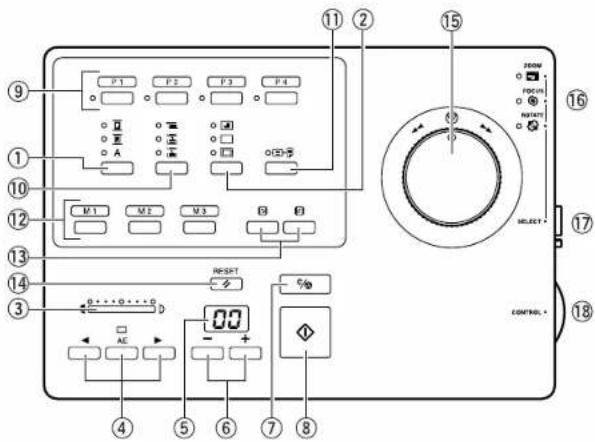
⑨ Function keys
The following functions are assigned to the respective keys before factory shipping. For details, refer to P.39 "Setting the function keys (DMP mode)."
P1: DATE
P2: NOTE
P3: PICTURE
P4: SHARPNESS
⑩ Cassette Select key
Selects paper cassette for printing when the scanner is connected with the Fileprint 470.
⑪ Auto Rotate key Rotates the image 90 degrees for printing.
⑫ Zoom keys
Use these keys to register zoom settings. During normal operation, you can immediately switch to one of the registered settings by pressing the key.
⑬ Rotate keys
Press this key to rotate the image left or right by 90 degrees.
⑭ Reset key
Use this key to restore or change default settings.
⑮ Film Control knob (optional)
Transports film through a motorized carrier. Turn the knob right to advance the film forward, or left to rewind it. (Note that this knob cannot be used with the FS Controller I.)
⑯ Adjust Mode indicators
The illuminated lamp identifies the type of image adjustment you can make. You can switch the adjustment type by pressing the Image Adjust Select key.
⑰ Image Adjust Select key
Selects the type of adjustment you can make: Zoom magnification, Focus, or Rotation.
⑱ Image Adjust Control dial
Use this dial to adjust the magnification, focus or rotation.



■ BEFORE YOU BEGIN ... ■
Preparing the carrier
This is a list of all the carriers that can be installed and used with the Microfilm Scanner 350II. For more details about these options, contact your supplier. For details about installation and operation, refer to the instructions provided with each auto carrier.

Some carriers require an optional Installation Kit.
■ Fiche Carrier 190RII
A microfiche carrier which allows viewing of fiche, jackets, or aperture cards up to 105 mm x 190 mm.
■ Autocarrier 100C (AC100C)
A motorized auto carrier for 16 mm cartridge films (ANSI, ANSI ENCLOSED *1 , Kodak Ektamate, 3M) that features fast autoloading and high speed film transport.
■ FS Controller I
A motorized auto carrier for 16 mm cartridge films (ANSI, Kodak Ektamate, 3M). This carrier is required for reading film marked with blips for automated image search and retrieval.
A motorized fiche auto carrier for either fiche, jacket, or aperture card format film, 16mm/35mm film standard open reels or 3M, TUSCAN M-Type*2 cartridges.
1 ANSI ENCLOSED cartridge is defined as ANSI MS-15. 2 TUSCAN M-Type is a TUSCAN cartridge with a 3M-type core.

■ BEFORE YOU BEGIN ... ■


Preparing the lens
The following types of lenses are available.
Fixed lens
HX7 (x7)


Zoom lenses
HZ01 (x9.5 to x16)
HZ02 (x16 to x32)
HZ03 (x30 to x55)
HZ04 (x20 to x48)
HZ05 (x10 to x24)


Switching the lens
Follow the procedure below to install or exchange lenses.
- If a lens is already installed, grasp the edge of the holder and slide it out of the unit.
- Gently pull the lens holder all the way out.
- Use one hand to support the base of the holder, and the other to lift and remove the lens. Proceed carefully, making sure that the lens does not fall out.




- Turn the light adjustment dial to the left or right to adjust the light intensity of the screen. Adjust the light intensity to the type of lens installed.

Do not touch the contact area with your hands.

- Slide the lens holder back into the unit. Support the holder carefully so that the lens does not fall out.
- Push the holder in until it clicks into place.

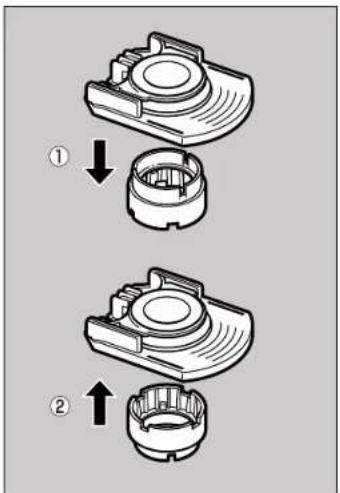
If you are using the FS Controller I, remove the lower part of the lens ① then reverse it and attach it again ②.


■ BEFORE YOU BEGIN ... ■
Canon Fileprint 270
Preparing optional printer (for the DMP mode)
This is a list of all the optional printers that can be installed and used with the Microfilm Scanner 350II. For more details about these options, contact your supplier. For details about installation and operation, refer to the instructions provided with each printer.

- Connecting a printer to the scanner should be performed by a service representative.
- For preparation of the printer, refer to the Fileprint 270 or the Fileprint 470 user's guides.
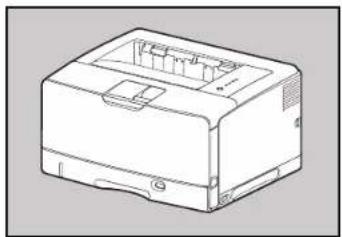
Canon Fileprint 470
Preparing the computer (scanner mode)
In addition to the accessories provided in the product package, the following are required to use the scanner in scanner mode.
■ Hardware requirements
• CPU: Intel Celeron 733MHz or better • Main memory: minimum of 256MB • Hard disc space: minimum of 400MB - SCSI card and SCSI cable, or Hi-speed USB2.0 interface port • Display: Minimum screen resolution of 1024 x 768 (XGA)

- If you are not sure about the system requirements, contact an authorized Canon dealer or your computer manufacturer's support center.
- If your CPU, memory or SCSI board does not meet the recommended specifications, you may experience problems such as slow scanning or a slow data transfer rate.
- Even if your computer meets the above requirements, slow scanning may occur depending on the scanner settings.
■ Operating system requirements
Depending on the connection, operating system requirements differ as follows:
- When using a SCSI card:
• Microsoft Windows 98SE • Microsoft Windows Me • Microsoft Windows 2000 Professional SP4 or later • Microsoft Windows XP Professional SP2 or later • Microsoft Windows XP Home Edition SP2 or later
- When using a USB connection:
• Microsoft Windows 2000 Professional SP4 or later • Microsoft Windows XP Professional SP2 or later • Microsoft Windows XP Home Edition SP2 or later

The scanner does not support USB connectivity with Windows 98SE and Windows Me. Use a SCSI connection instead.
■ BEFORE YOU BEGIN ... ■
■ Connecting via SCSI
When connecting the scanner to a computer using a SCSI card, use the following SCSI cards and cables.
• SCSI card
Use one of the following recommended SCSI cards: Adaptec SCSI card (for PCI bus)
• AHA-2930U • AHA-2940AU • ASC-19160 • ASC-29160
When installing a SCSI card on your computer, follow the directions in both the manual for the SCSI card and the computer.
- SCSI cable
- The SCSI connector on the scanner is a half-pitch 50-pin connector (pin-type). No SCSI cable is supplied with the scanner. To connect the scanner to a computer, obtain a SCSI cable with the correct connectors for the scanner and the SCSI card installed in the computer.
- The maximum length of SCSI cables are defined by the SCSI standard. For details, see the user manual for your SCSI card.

- Only one SCSI port can be used on the scanner and terminator setting is fixed to ON. You cannot daisy chain multiple MS350II scanners.
- The SCSI ID for the scanner can be set from ID0 to ID5. By default, the SCSI ID for the scanner is set to SCSI ID=2. When changing the SCSI ID setting, make sure to contact an authorized Canon dealer or service professional.
- When daisy chaining the scanner with the other SCSI devices, note the following:
- Change the ID of the other SCSI devices so they do not to overlap.
- Make sure that the scanner is at the end of the chain and the terminate setting of the other devices is OFF.
■ Connecting via USB
USB connectivity is achieved through the use of a SCSI-USB converter connected to the scanner's SCSI port. Connecting via USB means that scanning speeds are slightly slower than when using the SCSI port.
- USB port
- Use the Hi-Speed USB 2.0 port that is equipped normally to the computer. • Install the latest Microsoft USB 2.0 drivers. For details, contact an authorized Canon dealer.
- Complete functionality using the USB interface is not guaranteed. For details, contact an authorized Canon dealer.
- USB cable
Use the supplied USB cable or a Hi-Speed USB 2.0 cable.
■ Connecting to a Computer
Setup, configuration, and connection of the scanner to the computer should be done by the supervising service personnel. To change the connection or settings, contact an authorized Canon dealer or service professional.

- The interface cable for connecting to the computer should match the interface used during setup.
- You cannot use a SCSI and a USB connection at the same time. Before changing the interface, make sure to contact an authorized Canon dealer or service professional.
■ Other
- Software
- The ISIS-compatible application software or TWAIN-compatible application software that operate normally on the operation system described above.
- The ISIS/TWAIN driver provided with the scanner is not necessarily compatible with all ISIS-compatible or TWAIN-compatible application software. For details, contact your application software dealer.
- Printer
The printer that operates normally under your operation system.
Follow the procedures described below when turning the power on and off.
Turning the power on
Follow the procedure below to turn the unit on.
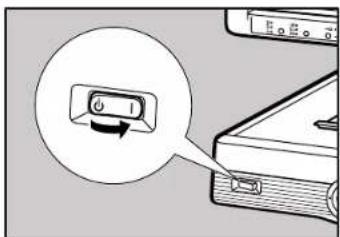
- On the front of the main unit, locate the power switch on the lower left corner then press the I side of the switch to turn the power on.
- Turn on the power switch of the computer and printer.

- Switch on the scanner before you switch on the computer.
- The USB port on this scanner uses a SCSI-USB converter to convert the SCSI port to a USB port. Even when connecting via a USB port, switch on the scanner before you switch on the computer.
Turning the power off
Follow the procedure below to turn the unit off.
- Turn the computer off.
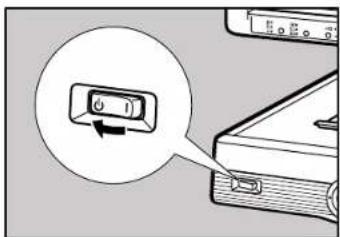
- To turn the unit off, press the side of the power switch.

- Switch off the computer first before switching off the scanner.
- The USB port on this scanner uses a SCSI-USB converter to convert the SCSI port to a USB port. Do not switch off the scanner while the computer is on. Do not plug in or unplug the USB cable when the computer is on.
- If the scanner will not be used for a lengthy period, unplug the power cord as a safety measure.
If you are using Windows 98/Me/2000 or Windows XP, then the first time that you turn on your computer after connecting this scanner to your computer, Windows Plug and Play automatically displays a screen prompting you to install the scanner driver. Follow the instructions on the screen to proceed with the installation.

- The device that is detected differs depending on the connection (SCSI or USB).
- When the scanner is recognized normally, the scanner is recognized by the device manager as "CANON MS350 SCSI" regardless of the connection used.
- When the connection to the computer is changed, the scanner recognition may be required.
■ In the case of Windows 98/Me
When you are using Windows 98/Me, only a SCSI connection can be used. Follow the procedure below to install the scanner driver.
- When you are using Windows 98, "CANON MS350 SCSI Scanner Device" is detected and "Add New Hardware Wizard" dialog appears.
- Click the Next button.
- Select "Search for the best driver for your device. (Recommended)." and then click the Next button.
- Load the setup disc into the computer's CD-ROM drive.
- Select "Specify a location", specify the following folder and then click the Next button. D:\INF (where "D" is the drive letter assigned to your CD-ROM drive)
- Click the Next button.
- Click the Finish button.
- When you are using Windows Me, "CANON MS350 SCSI Scanner Device" is detected and "Add New Hardware Wizard" dialog appears.
- Select "Specify the location of the driver (Advanced)" and then click the Next button.
- Load the setup disc into the computer's CD-ROM drive.
- Select "Specify a location", specify the following folder and then click the Next button. D:\INF (where "D" is the drive letter assigned to your CD-ROM drive)
- Click the Next button.
- Click the Finish button.
When you are using Windows 2000 or XP, you can use both SCSI and USB connection.
SCSI connection
Only "CANON MS350 SCSI Scanner Device" is detected.
When using a USB connection, the following devices are detected in due order.
CANON USB Adapter for MS
↓ CANON USB MassStorage Device ↓ CANON MS350 SCSI Scanner Device

Perform the procedures for each connection and reboot the computer when all installation are completed.
- If you are using Windows 2000 Professional, "Found New Hardware Wizard" dialog appears when new device is detected.
CANON USB Adapter for MS (only when connecting via a USB port)
- Click the Next button to proceed to the "Install Hardware Device Drivers" screen.
- Select "Search for a suitable driver for my device (recommended)" and then click the Next button to proceed to the "Locate Driver Files" screen.
- Select "Specify a location" and then click the Next button.
- Load the setup disc into the computer's CD-ROM drive.
- Specify the following folder and then click the OK button. D:\USB Driver (where "D" is the drive letter assigned to your CD-ROM drive)
- Click the Next button.
- In the "Driver Files Search Results" screen, click the Next button.
- On the "Completing the Found New Hardware Wizard" screen, click the Finish button.
CANON USB MassStorage Device (only when connecting via a USB port)
- Click the Next button to proceed to the "Install Hardware Device Drivers" screen.
- Select "Search for a suitable driver for my device (recommended)" and then click the Next button to proceed to the "Locate Driver Files" screen.
- Select "Specify a location" and then click the Next button.
- Load the setup disc into the computer's CD-ROM drive.
- Specify the following folder and then click the OK button. D:\USB Driver (where "D" is the drive letter assigned to your CD-ROM drive)
- Click the Next button.
- In the "Driver Files Search Results" screen, click the Next button.
- If the message "Digital Signature Not Found" appears, simply click Yes to continue installation.
- On the "Completing the Found New Hardware Wizard" screen, click the Finish button.
CANON MS350 SCSI Scanner Device
- Click the Next button to proceed to the "Install Hardware Device Drivers" screen.
- Select "Search for a suitable driver for my device (recommended)" and then click the Next button to proceed to the "Locate Driver Files" screen.
- Select "Specify a location" and then click the Next button.
- Load the setup disc into the computer's CD-ROM drive.
- Specify the following folder and then click the OK button. D:\INF (where "D" is the drive letter assigned to your CD-ROM drive)
- Click the Next button.
- In the "Driver Files Search Results" screen, click the Next button.
- If the message "Digital Signature Not Found" appears, simply click Yes to continue installation.
- On the "Completing the Found New Hardware Wizard" screen, click the Finish button.
- If you are using Windows XP, "Found New Hardware Wizard" dialog appears when new device is detected.
CANON USB Adapter for MS (only when connecting via a USB port)
- On the dialog asking you a permission to connect to the Windows Update search site, Select "No, not this time", then click the Next button.
- Load the setup disc into the computer's CD-ROM drive.
- In the "Welcome to the Found New Hardware Wizard" screen, select "Install from a list or specific location (Advanced)", and then click the Next button.
- Select "Search for the best driver in these locations", and then clear the "Search removable media (floppy, CD-ROM...)" check box. Select "Include this location in the search", specify the following folder and then click the OK button. D:\USB Driver (where "D" is the drive letter assigned to your CD-ROM drive)
- Click the Next button.
- Click the Continue Anyway button in the "Hardware Installation" dialog box.
- Click the Finish button in the "Completing the Found New Hardware Wizard" screen.
CANON USB MassStorage Device (only when connecting via a USB port)
- On the dialog asking you a permission to connect to the Windows Update search site, Select "No, not this time", then click the Next button.
- Load the setup disc into the computer's CD-ROM drive.
- In the "Welcome to the Found New Hardware Wizard" screen, select "Install from a list or specific location (Advanced)", and then click the Next button.
- Select "Search for the best driver in these locations", and then clear the "Search removable media (floppy, CD-ROM...)" check box. Select "Include this location in the search", specify the following folder and then click the OK button. D:\USB Driver (where "D" is the drive letter assigned to your CD-ROM drive)
- Click the Next button.
- Click the Continue Anyway button in the "Hardware Installation" dialog box.

Although a message appears indicating that the driver "has not passed Windows logo testing", simply continue operation.
- Click the Finish button in the "Completing the Found New Hardware Wizard" screen.
CANON MS350 SCSI Scanner Device
- On the dialog asking you a permission to connect to the Windows Update search site, Select "No, not this time", then click the Next button.
- Load the setup disc into the computer's CD-ROM drive.
- In the "Welcome to the Found New Hardware Wizard" screen, select "Install from a list or specific location (Advanced)", and then click the Next button.
- Select "Search for the best driver in these locations", and then clear the "Search removable media (floppy, CD-ROM...)" check box. Select "Include this location in the search", specify the following folder and then click the OK button. D:\INF (where "D" is the drive letter assigned to your CD-ROM drive)
- Click the Next button.
- Click the Continue Anyway button in the "Hardware Installation" dialog box.

Although a message appears indicating that the driver "has not passed Windows logo testing", simply continue operation.
- Click the Finish button in the "Completing the Found New Hardware Wizard" screen.
ABOUT THE SOFTWARE

Before installing the software, be sure to open and read the Readme.txt file on the setup disc.
The setup disc included with the scanner contains the following software:
ISIS/TWAIN driver
This driver allows this scanner to be used with ISIS-compatible application software or TWAIN-compatible application software. The driver must be installed in order to be able to use the scanner.
■ CapturePerfect
This is a TWAIN-compatible scanning software application. Install this application if necessary.
Installing the ISIS/TWAIN driver
Follow the procedure described below to install the ISIS/TWAIN driver.

If another ISIS-compatible driver is already installed in your computer, you must back up the files listed below. These files may be overwritten when you install this ISIS/TWAIN driver.
C:\Windows\System\pix*.dll
C:\Windows\PixTran*.*

The name of the "\Windows" and "\Windows\System" folder varies, depending on which version of Windows you are using. Substitute accordingly in the above folder names with the folder names for Windows used in your system.
- Turn on your computer. Windows starts.

If you are using Windows 2000 Professional, or Windows XP, be sure to log on as a user with administrator privileges.
- Load the setup disc in the computer's CD-ROM drive.
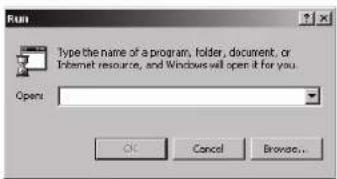
- On the Start menu, Click Run.
The Run dialog box appears.


ABOUT THE SOFTWARE
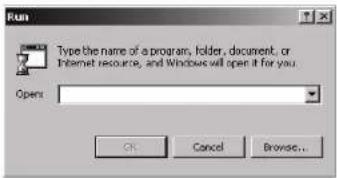
- In the Open box, type "D:\Driver\Setup.exe" (where "D" is the drive letter assigned to your CD-ROM drive) and then click the OK button.
The Installer starts.
- Follow the instructions on the screen and complete the installation process.
Installing CapturePerfect
Follow the procedure described below to install CapturePerfect.
- Turn on your computer. Windows starts.

If you are using Windows 2000 Professional, or Windows XP, be sure to log on as a user with administrator privileges.
- Load the setup disc in the computer's CD-ROM drive.
- On the Start menu, click Run.
The Run dialog box appears.
- In the Open box, type "D:\CapturePerfect1.0\Setup.exe" (where "D" is the drive letter assigned to your CD-ROM drive) and then click the OK button.
The Installer starts.
- Follow the instructions on the screen and complete the installation process.

Selectable languages are "English" or "Japanese."

Using the software
Using the ISIS/TWAIN Driver
The ISIS/TWAIN driver help menu describes how to use the ISIS/TWAIN driver. To access the ISIS/TWAIN driver help, click Start - Programs (when using Windows XP, click All Programs) - Canon Document Scanner - Canon MS300/350 Help, or click the Help button displayed in the dialog box.
Using CapturePerfect
Follow the procedure described below to start and close CapturePerfect.

The basic method for scanning using CapturePerfect is described in the CapturePerfect help. From the Help menu on the CapturePerfect menu bar, click Help, then refer to the explanation of how to use CapturePerfect.

■ Starting CapturePerfect
- Turn on the scanner.
- Turn on your computer. Windows starts.
- Click the "Start" button, and then click "Programs" (when using Windows XP, "All programs") - "CapturePerfect 1.0" - "CapturePerfect 1.0."

"Multi Scan Setting" and "Multi Scan Start" are functions for users who connect the Microfilm Scanner 350 via SCSI at the end of a Microfilm Scanner 350 chain to use it as a multi scanner. For details, refer to the Microfilm Scanner 350 Instructions.
"CapturePerfect 1.0" starts up.

To start CapturePerfect 1.0 Help, click "Help" from the Help menu on the CapturePerfect menu bar. Refer to CapturePerfect 1.0 Help on how to use CapturePerfect 1.0.


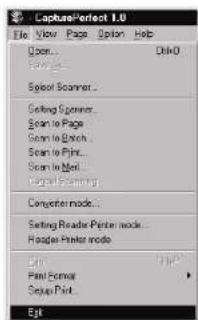
■ Closing CapturePerfect
- On the File menu, click Exit.
CapturePerfect closes.

When the scanner is scanning or some operation is pending after scanning has been started (such as when scanning has been interrupted), the mouse pointer changes to an hourglass. If the mouse pointer appears as an hourglass while the scanner is not scanning, the previous scanning operation has not been completed. On the File menu, click Cancel Scanning to cancel hourglass display, then close CapturePerfect.
■ ABOUT THE SOFTWARE ■
About the Reader-Printer mode
When the scanner is set to the Reader-Printer mode, all the settings and operation of the scanner must be performed through the operation panel on the main body. For how to operate the scanner, see “SETTING THE SCANNER” (→P.35).

The Reader-Printer mode is a mode in which the scanner can perform the same functions as an analog Reader-Printer does. In the Reader-Printer mode, images scanned by the scanner can be directly printed out through a printer that is designated by the CapturePerfect. (Note, however, that the scanned images will not be saved.)
Starting up Reader-Printer mode
The Reader-Printer Emulation mode is started up from the CapturePerfect 1.0 menu.

■ Setting the Reader-Printer mode
- Select "Reader-Printer Mode Settings" in the "File" menu and display the "Reader-Printer Mode Settings" dialog.

For the Reader-Printer Mode Settings, refer to the CapturePerfect Help.
- Click "OK" when settings are completed.
■ Starting up the Reader-Printer mode
- Select "Reader-Printer Mode" in the "File" menu to start up the Reader-Printer mode.


- When the Reader-Printer mode once starts up, the CapturePerfect main screen is going to reside in the task tray as the icon.
- The number appearing on the icon indicates the SCSI ID that the scanner is connected to.
- All settings and operation of the scanner can mostly be performed through the operation panel on the main body.



ABOUT THE SOFTWARE
Exiting the Reader-Printer mode
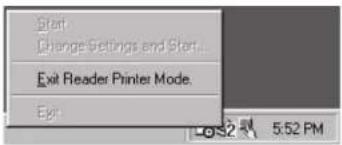
- To change settings of the Reader-Printer mode, click the "Up" icon in the task tray with the right mouse button, then click "Exit Reader-Printer mode."

- Again, click the 📋 icon in the task tray with the right mouse button, then click "Exit application."

To restart the Reader-Printer mode, click "Start," and to change settings, click "Change settings and start."
ABOUT THE SOFTWARE
Uninstalling the software
Follow the procedure described below to uninstall the ISIS/TWAIN driver and CapturePerfect.

If you are using Windows 2000 Professional, or Windows XP, be sure to log on as a user with administrator privileges.
- On the Start menu, point to Settings and click Control Panel.

If you are using Windows XP, on the Start menu, click Control Panel.
The "Control Panel" window is displayed.
- Double-click the "Add/Remove Programs" icon.

If you are using Windows XP, click the "Add or Remove Programs" icon.
The "Add/Remove Programs Properties" dialog box is displayed.

If you are using Windows XP, the "Add or Remove Programs" dialog box is displayed.
- Select "Canon MS300/350" or "CapturePerfect 1.0" from the list, and then click the Add/Remove button.

If you are using Windows XP, click the Change/Remove button.
The "Confirm File Deletion" dialog box is displayed.
- Click the Yes button to start the uninstaller.
Follow the instructions on the screen and complete the uninstallation process.



■ SETTING THE SCANNER ■
SETTING THE SCANNER
In the Scanner mode, the image projected on the scanner's screen can be saved by the connected personal computer, or printed out through a printer connected to the PC. Actual settings and operations for scanning differ depending on the application you use. In the DMP mode, the image projected on the scanner's screen can be printed out through a printer connected to the scanner. Here below explained are various functions that can be set on the scanner main unit.
Loading the film
Load the auto carrier with the film you want to view. For details about the auto carrier installation, see the instructions you received with the auto carrier.
Adjusting the image
Follow the procedure below to adjust the image on the screen. Read and perform this procedure correctly to attain a crisp image on the screen and a clear scanned image.
■ Enlarging and reducing image size
- Press the Image Adjust Select key on the operation keyboard to illuminate the [ZOOM] lamp.
- Turn the Image Adjust Control dial to adjust the image size. Turn the dial right to enlarge the image, or left to reduce it.

You can register zoom settings to the Memory keys on the operation keyboard. You can then use these keys to recall the registered zoom settings at any time (→ P.48, "Registering the zoom values").
■ Focusing the image
- Press the Image Adjust Select key on the operation keyboard to illuminate the [FOCUS] lamp.
- Turn the Image Adjust Control dial left or right to obtain proper focus.
■ Arbitrary rotation
- Press the Image Adjust Select key on the operation keyboard to illuminate the [ROTATE] lamp.
- Turn the Image Adjust Control dial to rotate the image. Turn the dial right to rotate the image to the right, left to rotate it to the left.
■ 90 degree rotation
- Press the rotation key, either left or right, on the operation keyboard so that the image can be rotated 90 degrees in the direction shown by the arrow on the key.

■ SETTING THE SCANNER ■


Selecting the polarity
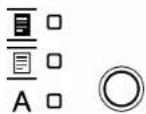
This setting selects the film polarity (positive or negative). Press the Negative/Positive key on the operation panel to select the film polarity.
☑ Negative Prints positive from negative film.
Positive Prints positive from positive film.
Auto automatically detects the type of film in use and prints a positive image. If you select Auto, the Negative or Positive lamp blinks to tell you which type of film has been detected.
The HZ-05 zoom lens has no function to automatically switch between Negative and Positive. When using the HZ-05 zoom lens, always use the Negative/Positive switching key to select ( ) Negative or ( ) Positive.
Do not use Auto for an image with a grey or light border (where black and white may be difficult to distinguish), or if you intend to remove the border from the image, trim the image, or define the area on the image with the other keys. If you intend to use these special functions, set Negative or Positive manually.
Brightness adjustment
Adjust the brightness of the image during scanning. The brightness can be adjusted automatically (AE) or manually.
Switching the operation modes can be also set in the user mode.
Automatic adjustment
Press the AE key on the operation panel. The AE key lights and the image brightness is adjusted automatically during scanning.
When automatic adjustment is selected, you can make fine adjustment to the brightness through 17 levels by pressing the brightness adjustment key (or ▶ Moving the indicator to the right brightens the image by fine increments, and moving it to the left darkens the image by fine increments.
Manual adjustment
When the AE key is lit, you can use the brightness adjustment key (or to adjust the brightness of the scanned image. Moving the indicator to the right brightens the scanned image and moving it to the left darkens the scanned image.
In manual adjustment, the brightness can be adjusted through 33 levels, as shown in the figure at left.


36


■ SETTING THE SCANNER ■

Trimming/border removal settings
When an image on negative film is scanned and projected onto the scanner screen, the area outside the image appears as a black border around the image. The Automatic Border Removal function can be used to remove this black border around the scanned image.
Trimming allows you to restrict scanning to a specified area of the image.
Border removal allows you either to remove all the black border around the image or to leave a narrow black margin around the image.
- If Positive (☑) is selected as polarity, the Automatic Border Removal function cannot be carried out.
- In the ISIS/TWAIN Driver or CapturePerfect, "Trimming" is called "Framing", and "Automatic Border Removal" is called "Auto-detection".

Trimming
Press the border key on the operation panel until the ( indicator lights and then scan the image. Follow the procedure below to define the area to the image to be scanned.
Adjustment or modifications to the trimming area should be made from the application software before scanning begins or while scanning is paused.
■ Defining an area for trimming
- Press and hold down the Trimming/Border key for approximately 2 seconds until the lamp for trimming (starts blinking.
The current area setting is shown in the display.
- To adjust the area setting, press the Print Number Setting keys. The starting point or origin for defining the screen area is the lower right corner of the screen.
Plus key: Press to move in the vertical direction. The number in the Print display shows the current screen vertical coordinate.
Minus key: Press to move in the horizontal direction. The number in the Print display shows the current horizontal coordinate.



■ SETTING THE SCANNER ■

For example, the illustration shows the vertical set for 4 and the horizontal set for 7. The shaded area is the area trimmed and selected for scanning.
- To save the setting, press the Border Button. The setting remains in effect even after the power is turned off and turned again.

■ Using the area setting cursors (optional)
With the optional Framing kit installed, you can set an area for printing, using the guides on the right side and the bottom of the screen. The area framed by 4 cursors will be scanned.
Border removal
Border removal allows you either to remove all the black border around the image or to leave a narrow black margin around the image.
■ Removing the entire border
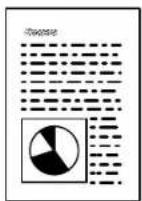
Press the border key on the operation panel until the (1) indicator lights and then scan the image.

■ Leaving a margin around the image
Press the border key on the operation panel until the indicator lights and then scan the image. The margin is specified in the application software.

- Border removal may not operate correctly for images with ill-defined borders.
- This function cannot be used when any part of the image is outside the specified range.
- If multiple images are displayed on the screen at the same time, the wrong image may be scanned.
- This function can only operate if there is a clear area of at least 5 mm around the image.



■ SETTING THE SCANNER ■


Using auto rotation
This function lets you rotate the image 90 degrees for printing.
To enable the auto rotation print feature, press the Auto Rotation key to illuminate the Clamp. To reset it, press the Auto Rotation key once again to turn the Clamp off.
Setting the function keys (DMP mode)
The following features are assigned to the respective function keys (P1 to P4) before factory shipping.
KEY Feature
| P1 | Printing the date. |
| P2 | Printing the preset note. |
| P3 | Picture mode |
| P4 | Sharpness |
To use any of the assigned features, press and illuminate the key that a specific feature is assigned to before you start printing. To reset the feature, press the same key once again to turn the lamp off.
- The features assigned to the function keys can be changed in the user mode. (→P.47, "Setting the function keys")
- Please use the function key labels bundled with the scanner, pasting them on the respective keys.

Date stamp feature
In the DMP mode, the date can be printed on image printouts.
■ Setting the date stamp feature
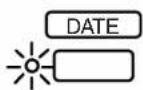
- Hold down the [DATE] key for about 2 seconds.
As the [DATE] lamp, Brightness display and Print/Error display begin to blink, you can now begin to set various DATE settings.
- Press the Brightness Adjustment (◀r) key to illuminate the corresponding LED to a mode to set.



SETTING THE SCANNER
DATE / TIME

Year

Month

Day

Hour

Min.

Sec.
Stamp Location
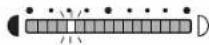
- Press the Print Number Setting key (+ or -) to set the [DATE, TIME].
Item Display Setting
Year 51 to 99 1999
00 to 50 2001 to 2050
Month 01 to 12 January to December
Day 01 to 31 1st to 31st
Hour 00 to 23 0 to 23
Minutes 00 to 59 0 to 59
Seconds 00 to 59 0 to 59
- Press the Print Number Setting key (+ or -) to set the [Stamp Location].
Display Setting
| Top left | |
| Top center | |
| Top right | |
| Bottom left | |
| Bottom center | |
| Bottom right |
Stamp Format

- Press the Print Number Setting key (+ or -) to set the [Stamp Format].
Display Format Print Example
| 00 | Year/Month/Day 2002/08/31 |
| 01 | Year/Month/Day IIr:Min 2002/08/30 21:15 |
| 02 | Month/Day/Year 08/31/2002 |
| 03 | Month/Day/Year Hr:Min 08/31/2002 21:15 |
| 04 | Day/Month/Year 31/08/2002 |
| 05 | Day/Month/Year Hr:Min 31/08/2002 21:15 |
| 06 | Month Day Year Aug 31 2002 |
| 07 | Month Day Year Hr:Min Aug 31 2002 21:15 |
| 08 | Day-name Month Day Year Thu Aug 31 2002 |
| 09 | Day-name Month Day Year Hr:Min Thu Aug 31 2002 21:15 |
- When you have completed all settings, press the Clear/Stop key. The MS350II registers the new values, and returns to normal operating mode.

If you want to make a change in the setting, press the Brightness Adjustment (◀) key to go back to a setting you want to change, and then change the setting.

Note feature
This feature lets you include a short note on your print. You must enter the note into memory before making the print, as described below. The note can be changed later on.
• Maximum note length is 33 characters.
- The note is printed in the same location for the date. If you choose to print both the date and the note, the date appears first, then a space, and then the note.
Entering the note
The procedure below explains how to enter a note. The MS350II saves the note in non-volatile memory that is retained even while power is off.
The following table shows the characters that you can use for your note. You select each character by inputting the corresponding code value.
- Hold down the NOTE key for about 2 seconds.
The [NOTE] lamp, Brightness display and Print/Error display begin to blink, indicating that you can now enter the note.
- Confirm that the leftmost lamp on the brightness display is blinking.
- Referring to the table of character codes shown below, press the Print Number Setting key (+ or -) to select and display a character on the Print/Error display.
To select the letter A, for example, you would enter the code value 41.
| Code | 20 | 21 | 22 | 23 | 24 | 25 | 26 | 27 | 28 | 29 | 2A | 2B | 2C | 2D | 2E | 2F | Code 20 sets blank | ||||||||||||||||
| Character | ! | " | # | S | % | & | ' | ( | )* | + | , | - | 。 | / | |||||||||||||||||||
| Code 30 | 31 | 32 | 33 | 34 | 35 | 36 | 37 | 38 | 39 | 3A | 3B | 3C | 3D | 3E | 3F | ||||||||||||||||||
| Character | 0 | 1 | 2 | 3 | 4 | 5 | 6 | 7 | 8 | 9 | : | ; | < | = | > | ? | |||||||||||||||||
| Code 40 | 41 | 42 | 43 | 44 | 45 | 46 | 47 | 48 | 49 | 4A | 4B | 4C | 4D | 4E | 4F | 50 | 51 | 52 | 53 | 54 | 55 | 56 | 57 | 58 | 59 | 5A | |||||||
| Character | @ | A | B | C | D | E | F | G | H | I | J | K | L | M | N | O | P | Q | R | S | T | U | V | W | X | Y | Z | ||||||
| Code 60 | 61 | 62 | 63 | 64 | 65 | 66 | 67 | 68 | 69 | 6A | 6B | 6C | 6D | 6E | 6F | 70 | 71 | 72 | 73 | 74 | 75 | 76 | 77 | 78 | 79 | 7A | |||||||
| Character | ` | a | b | c | d | e | f | g | h | i | j | k | l | m | n | o | p | q | r | s | t | u | v | w | x | y | z | ||||||
| Code 5B | 5C | 5D | 5E | 5F | 7B | 7C | 7D | 7E | 7F | ||||||||||||||||||||||||
| Character | [ | \ | ] | ^ | - | { | | | } | ~ | △ | |||||||||||||||||||||||
- Press the Brightness Adjustment (▶) key once to move to the second letter of the note. Enter the letter code for the second letter, again using the plus (+) or minus (−) key.
- Continue as described above until you have entered all the letters for your note.



■ SETTING THE SCANNER ■

1st character

2nd character

3rd character

4th character

32nd character

33rd character

• Maximum note length is 33 characters including spaces. - The Brightness display shows your current location within the note, as described on the left.
- When you have finished entering the note, press the Clear/Stop key to save it. The MS350II writes the note into memory and returns to normal operating mode.
If you want to make a change in the setting, press the Brightness Adjustment (◀) key to go back to a setting you want to change, and then change the setting.
Setting the print mode
This section describes various print settings that you can use to control the quality and format of the printouts. Make the appropriate settings before you start printing.

■ Picture mode
Use this mode for accurate printing of halftone graphic images. You can switch the mode on or off by pressing the Picture key on the operation keyboard. The lamp to the left of the key comes on to indicate that the scanner is in the Picture mode. To reset it, press the Picture key again to turn off the "Picture" lamp.
Automatic density adjustment (AE) does not function while the scanner is in the Picture mode.

■ Sharpness adjustment
Follow the procedure described below when you need to sharpen or soften the image.
- Press the SHARPNESS key on the operation keyboard so that the [SHARPNESS] lamp begins to blink.
- Press the right or left Brightness Adjustment key to sharpen or soften the image. You can set the sharpness to one of five levels. The Brightness display moves to reflect your new setting.
- Press the SHARPNESS key once again to register the new setting.
Switching the operation modes
You can switch the operation mode (DMP mode or Scanner mode) of the scanner. Press the function key assigned as the [DMP] key so that the lamp comes on to switch to the DMP mode.



Printing (DMP mode)
Printing (DMP mode)
The following describes the printing procedure in the DMP mode.
- Make necessary settings on the main unit.
- Select the paper size that you want to print on.
Using the Fileprint 270
If using the Fileprint 270, select paper size set on the multi-purpose tray.
(1) Press the Cassette Select key or the Clear/Stop key for about 3 seconds to enter the paper size setting mode. The current paper size then appears on the Print/Error display.
Display Setting
| A4 | A4 |
| 11 | Letter |
| 65 | B5 |
| 14 | Legal |


(2) When you press the plus (+) key of the Print Number Setting key, the display changes as A4→11→b5→14 in due order, and if you press the minus (−) key, 14→b5→11→A4 in due order. (3) Press the Clear/Stop key to define the paper size that you want to use.
■ Using the Fileprint 470
If using the Fileprint 470, select a paper cassette or the multi-purpose tray to use.
(1) Press the Clear/Stop key for about 5 seconds to enter the paper cassette select mode. The current paper cassette then appears on the Print/Error display.
| Keyboard Display Print/Error Display | Tray selection | |
| CO | Multi-purpose tray selected | |
| C1 | Upper cassette selected | |
| C2 | Lower cassette selected | |
(2) When you press the plus (+) key on the Print Number Setting key, the display changes as C0→C1→C2→C0 in due order, and if you press the minus (−) key, C0→C2→C1→C0 in due order. (3) Press the Clear/Stop key to define the paper size that you want to use. The Print/Error display then returns to "01."

■ Printing (DMP mode) ■


If using the multi-purpose tray, set paper size of the multi-purpose tray.
(1) Press the Cassette Select key for about 2 seconds to enter the paper cassette select mode. When the multi-purpose tray lamp begins to blink, you can now set paper size. At that time, the current paper size appears on the Print/Error display. (2) Press the Print Number Setting key (+ or -) to set the appropriate paper size. The size indicator will be displayed on the Print/Error display as follows:
Display Setting
| A4 | A4 |
| 11 | Letter |
| 65 | B5 |
| 14 | Legal |
(3) Press the Cassette Select key to complete the setting.
- Set the number of prints that you want to make (1 to 99).
Press the Print Number Setting key on the operation panel or the operation keyboard to set the number of prints. If you press the plus (+) key, the number increases, and if you press the minus (−) it decreases.
If you want to change the number you have already set, press the Clear/Stop key (C) to reset the number to 1, and then set the number of prints you want to make once again.
- Make the Print mode settings if required.
- Press the Start key on the operation panel or the operation keyboard to start printing. You can cancel printing at any time by pressing the Stop/Clear key (C/☑)


■ USER MODE ■
USER MODE
In the user mode, you can arbitrarily change the settings of the following features:
• Power saver mode • Hi-speed scanning mode - Scanning resolution - Cleaning mode - Switching the operation modes (DMP mode/Scanner mode) - Setting the function keys
User mode setting

- Press the AE key for about 2 seconds.
The LED of the AE key and the Print/Error display blink. The power saving mode currently set will be displayed on the Print/Error display.
- Press the Brightness Adjustment key (◀ or ▶) to move the blinking LED up to the point where a mode, of which settings you want to change, is located.
D Power saver mode D Hi-speed scanning mode D Scanning resolution D Cleaning mode Switching the operation modes (DMP mode/Scanner mode) Setting the function keys (P1) Setting the function keys (P2) Setting the function keys (P3) Setting the function keys (P4)

- Press the Print Number Setting key (+ or -) to select the setting of each mode.
- Press the Clear key to define the setting.

■ USER MODE ■
User mode setting functions
Power saver mode
When the MS350II has not been operated for a specified length of time, the scanner switches into standby mode and stops projecting the image on the screen to save power consumption.
-0 : Does not switch into the power saver mode. -1: Switches into the power saver mode if not operated more than 15 minutes. (set at the factory before shipping) -2: Switches into the power saver mode if not operated more than 60 minutes.
- Default of the power saver mode at factory shipping is set to -SD that the unit switches into the power saver mode if not operated more than 15 minutes.
- The power saver mode can be canceled by any key operation.
- When the FS Controller I is attached, the unit cannot switch into the power saver mode.
Hi-speed scanning
This feature is available in the DMP mode and enables you to speed up scanning by simplifying the startup operation.
-0 : Normal mode (set at the factory before shipping) -1: Hi-speed scanning mode
In the hi-speed scanning mode, the scanner delivers printouts of the images upside down.
Scanning resolution
When using the DMP mode, you can select one of the following scanning resolutions.
-0 : 600DPI -1:300DPI (set at the factory before shipping)
In the case of 600DPI resolution, "Picture mode" is disabled even if selected. (→ P.42 "Setting the Print mode")


■ USER MODE ■
Cleaning mode
This mode is enabled when the scanner is connected to the Fileprint 470 and used in the DMP mode so as to clean the fixing rollers of the printer. (→ P.52 "Cleaning mode")
- : Normal mode (set at the factory before shipping) R4 : Cleaning mode (Cleaning paper: A4 sized) 11: Cleaning mode (Cleaning paper: Letter sized)

You need to prepare a sheet of paper of the size selected for cleaning and print the cleaning pattern on the paper before you start cleaning the fixing rollers.
Switching the operation modes
This feature is enabled when the optional DMP board is installed in the scanner so as to switch to either of the following modes.
-0 : Scanner mode
-1 : DMP mode (set at the factory before shipping)

The MS350II can be used as a scanner even if the operation mode is set to the [DMP mode]; however, the Reader-Printer mode will be disabled in this case. To enable the Reader-Printer mode, be sure to switch to the [Scanner mode].
Setting the function keys
You can make setting of the features assigned to the function keys on the operation keyboard. (→ P.39 "Setting the function keys (DMP mode)")
-0: DISABLED -1:DATE -2 : NOTE -3:PICTURE -4: SHARPNESS -5 : DMP MODE
■ ENTERING THE DEFAULT VALUES ■


The MS350II lets you save your own default settings for the Print mode and such. Once you have recorded the defaults, you can recall them at any time by pressing the [RESET] key on the operation keyboard.
Entering the default values
- Press the Reset key for about 2 seconds to enter the setting mode. In the setting mode, the respective lamps on both the operation panel and the operation keyboard begin to blink.
- Press a key to select the mode that you want to enter your default value for. In the setting mode, you can also register arbitrary zoom values to the zoom keys besides default values for the Print mode.
- Press the Clear key to return to normal operating mode.
Registering the zoom values
This feature allows you to register arbitrary zoom values to the zoom keys (M1, M2 or M3) on the operation keyboard.
You can then use these keys during normal operating mode to switch the zoom to the registered value.
- The zoom keys work when the zoom value has been registered for the lens that is attached.
- The zoom keys do not work, even if you press them, if the zoom value for the lens that is attached has not been registered.
- Press the [RESET] key for about 2 seconds to enter the setting mode.
- Press the select button so that the [Zoom] lamp begins to blink.
- Watching the screen, turn the Image Adjustment Control dial to adjust the zoom.
- Press one of the zoom keys (M1, M2 or M3) to register the zoom. Up to three zoom values can be registered.
- Press the Clear key to return to normal operating mode.
■ MAINTENANCE AND TROUBLESHOOTING ■
MAINTENANCE AND TROUBLESHOOTING
This part of the manual describes how to replace the halogen lamp, clean the scanner, and deal with errors. Regular scanner maintenance is essential to ensure optimum performance and a long service life from your scanner.
Replacing the lamp
The lamp projects the film image onto the screen. The procedure for replacing the lamp is described below, along with some precautions to be observed when handling the lamp unit. If the lamp burns out, use the procedure below to replace it.
When the lamp burns out, "LP" appears on the Print/Error display.

HEAT CAUTION
Immediately after the lamp burns out, the lamp and the metal components of the lamp unit are very hot. To avoid being burned, allow the lamp ample time to cool down before touching it. The lamp will cool down more quickly if you leave the scanner switched on for some minutes with "LP" displayed. After checking that the lamp and the metal components have cooled down, proceed with lamp replacement.
- When the lamp burns out, leave the scanner switched on for several minutes until the lamp has cooled down.

After waiting at least 5 minutes, check that the lamp has cooled down and then switch the scanner off.
- Firmly grip the lamp unit on the right side of the main unit and slowly pull the lamp unit out.

When you remove the lamp unit, "L5" appears in the Print/Error display.

CAUTION
To avoid injury, do not touch the interior of the main unit after you have removed the lamp unit.
- Push the lever on the side of the lamp and remove the burned out lamp.

HEAT CAUTION
Immediately after the lamp burns out, the lamp and the metal components of the lamp unit are very hot. Never handle the lamp or lamp unit while they are still hot.
MAINTENANCE AND TROUBLESHOOTING


- Fit the new lamp so that the manufacturer's mark is facing upwards and check that the lamp is fully inserted into the socket so that there is no gap between the lamp and the lamp socket.

- Use only Canon-specified lamps as replacements. • Take care not to touch the bulb in the new lamp. Soiling or fingermarks on the bulb can adversely affect image quality and shorten the service life of the bulb. • Always check that there is no gap between the lamp and the lamp socket. Any gap between the lamp and the lamp socket will result in damage to the lamp holder.
- Insert the lamp unit into the main unit with firm, even pressure until it locks into place.


MAINTENANCE AND TROUBLESHOOTING

Routine cleaning
Use the routine cleaning procedures described below to keep the scanner components clean and ensure optimum performance.
Cleaning the screen and main unit
Use a cloth slightly dampened with water or mild detergent to clean any soiling off the scanner screen and casing. Then wipe the scanner with a clean dry cloth.

To avoid damaging the casing of the main unit, never clean the unit with an organic solvent such as thinners.

Field lens
Cleaning the lens
- Switch off the scanner and remove the carrier and lens unit.
- Gently wipe off the field lens with a clean soft cloth.
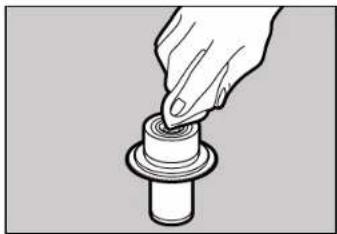
- Carefully remove the lens from the lens unit and wipe the upper and lower surfaces of the lens with a clean dry cloth.
■ MAINTENANCE AND TROUBLESHOOTING ■
Cleaning mode
Cleaning mode is a mode for cleaning the Fileprint 470's fixing rollers. Clean the fixing rollers in the Fileprint 470 if black spots appear on the front or back of the paper that is printed out. The following describes the procedure for cleaning the fixing rollers. Refer to the user's guide for the Fileprint 470 for information about taking care of the Fileprint 470.
Cleaning the Fixing Rollers
- Select the Cleaning mode in the user mode settings.
The paper size currently selected will be displayed on the Print/Error display.
- Open the multi-purpose tray of the Fileprint 470 and set a sheet of paper of the selected size on it.
- Press the Start key. The cleaning paper will be printed out and [CL] will be displayed on the printing count indicator.
Cleaning paper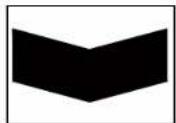

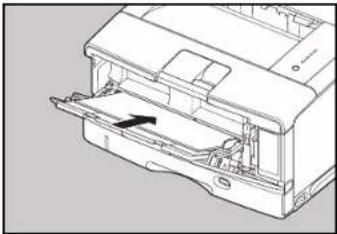


To reset the Cleaning mode midway, press the Clear/Stop key before pressing the Start key. Once the cleaning paper is printed out, you cannot reset the Cleaning mode midway; therefore, you must go through the entire cleaning procedure for the fixing rollers till the end.
- Set the cleaning paper on the multi-purpose tray with the printed side facing down and the arrow pointing inward.
- Press the Start key to begin cleaning the fixing rollers.

Cleaning the fixing rollers takes about 75 seconds. Other operations cannot be performed while the fixing rollers are being cleaned, so do not touch anything.
- When cleaning is complete, the Print/Error display will return to normal.

If black spots still appear on the front or back of the printouts after cleaning the fixing rollers, instead of using printed cleaning sheets, place blank A4 paper in the multi-purpose tray and clean them again.
■ MAINTENANCE AND TROUBLESHOOTING ■
Troubleshooting
If you detect a problem during operation of the main unit, check the list of problems and possible solutions below.
Problem Solution
| Screen does not come on, even after turning • Check that the lamp unit is properly fitted into the main unit.on the power switch. • Check whether the lamp has burned out. When the lamp isburned out, “LP” appears on the Error/User Mode display. If thelamp has burned out, fit a new lamp. (→P.49 “Replacing thelamp”) | |
| The screen brightness is uneven or thescreen is too dark. ing”) | • Check the lens and make sure it is clean. (→P.51 “Routine clean-• Check the lens and make sure it is securely installed. (→P.18“Preparing the lens”)• Check the lamp and lamp unit and make sure both are installedsecurely. (→P.49 “Replacing the lamp”)• Check the setting of the Light Adjustment dial and make sure itis set correctly for the type of lens installed. (→P.18 “Preparingthe lens”) |
| Image is out of focus. • Adjust the focus with the Image Adjust Control dial.(→P.35 “Adjusting the image”)• Check the lens and make sure that it is installed correctly.• Check the carrier and make sure that it is installed correctly. Fordetails, read the instructions you received with the carrier.• Check the lens and lamp and make sure they are clean. If required, clean the lens or lamp. | |
| Image is skewed. • Adjust the rotation using the Image Adjust Control dial.(→P.35 “Adjusting the image”)• Check the carrier and make sure that it is installed correctly. Fordetails, read the instructions you received with the carrier. | |
| Splices are seen on the image after a few scans. • This is one of the specifications to complement insufficient performance of a currently connected computer. Upgrade the computer performance to ease this phenomenon.• System resource or work memory of the computer is insufficient.Close all applications and reboot the computer. When using theMS350II, it is recommended that all other applications be closed. | |
| After pressing the start key, scan will not start. • Check that the computer is switched on and has started upcorrectly.• If the display shows a User Call Error, look it up in the table.(→P.54 “User call errors”)• If the display shows a Service Call Error, look it up in the table.(→P.55 “Service Call Errors”) | |
■ MAINTENANCE AND TROUBLESHOOTING ■
User call errors
Here is a list of User Call Errors. If you see a User Call Error in the Print display, look it up in the table below.
Scanner mode
| Error Number Meaning | Solution |
| LP The lamp installed in the scanner has burned out. | Replace the new lamp. (→P.49 “Replacing the lamp”) |
| L5 The lamp unit is not correctly installed in the scanner. | Check the lamp installation and make sure it locks in place.If the error occurs again, replace the halogen lamp.(→P.49 “Replacing the lamp”) |
DMP mode
| Error Number Meaning | Solution |
| P0 After removing a piece of jammed paper, a sheet of paper is still jammed in the printer. | Remove the jammed sheet from the printer. For details, refer to the printer manual. |
| P1, P2 A sheet of paper has jammed inside the printer. | Remove the jammed sheet from the printer. For details, refer to the printer manual. |
| LP The lamp installed in the scanner has burned out. | Replace the new lamp. (→P.49 “Replacing the lamp”) |
| L1 Paper is not set in the printer. | Supply paper to the paper cassette of the printer. For details, refer to the printer manual. |
| L2 Toner in the toner cartridge is low, or the toner cartridge is not installed correctly. | Remove the toner cartridge and install it again. If the message appears again, replace the toner cartridge. For details, refer to the printer manual. |
| L4 The printer cover is open. | Close the printer cover and make sure it locks in place. For details, refer to the printer manual. |
| L5 The lamp unit is not correctly installed in the scanner. | Check the lamp installation and make sure it locks in place. If the error occurs again, replace the halogen lamp. (→P.49 “Replacing the lamp”) |
| L8 Wrong paper size in printer multi-purpose tray. | Re-load the tray with the correct paper size, or change the paper size of the paper tray. (→P.43“Printing (DMP mode”) |
| L9 The printer is not turned on, or a test print is being done. | Turn on the power. Wait until the test print finishes and then do the operation. For details, refer to the printer manual. |

If "L1" is displayed while Fileprint 270 is printing, after the paper stops feeding press the Clear/Stop key to clear the error display and then press the Start key to start printing again.
■ MAINTENANCE AND TROUBLESHOOTING ■
Service Call Errors
Every time you turn on the main unit, the unit automatically performs a self-diagnostic test. If the unit detects a problem at power on, or at any other time during operation, it will display a Service Call Error message in the display. A Service Call Error is indicated by an error code consisting of an "E" followed by three digits ("Ennn" where "n" indicates a number). This code is displayed in 2 parts as "En" followed by "nn". (Eg. "E123" is displayed as "E1" followed by "23".)
Follow the procedure below when a Service Call Error occurs.
- Immediately switch off the scanner and wait several minutes.
- Switch the scanner on again and check the scanner status.

When a service call error occurs, it is sometimes possible to resolve the problem simply by switching the scanner off for a while and then switching it on again.
■ If the "E000" (fixer error) is displayed
The service call error "E000" is a printer fixer error. Switch off the scanner and any peripheral units such as the carrier, unplug the power cord and contact an authorized Canon service technician.
■ When you cannot clear a service call error
Make a note of the error code and the nature of the problem. Then switch off the scanner and any peripheral units such as the carrier, unplug the power cord and contact an authorized Canon service technician.
SPECIFICATIONS
Microfilm Scanner 350II
| Main Unit | |
| Type Desktop digital microfilm scannerScreen 300 mm x 300 mmScanning method 600 dpi digital scanningFilm Negative, Positive, Negative/Positive auto switchingLens magnification x7,x9.5-x16, x16-x32, x30-x55, x10-x24, x20-x48Light source Halogen lamp (20V 150W) | |
| Film | |
| Type Silver film, Diazo film, (blue/black)Base density 0.6 to 1.4 for negative, 0.3 or less for positive | |
| Image Adjustment | |
| Focus/zoom ManualRotation 360° manual, 90° automatic | |
| Scanning | |
| Scan size (USA or Canada) A4, Letter, LegalScan size (other areas) A4Density control AE, ManualScan options Automatic border deletion, Trimming | |
| Printing | |
| Print Size (USA, Canada) A4, Letter, LegalPrint Size (other areas) A4Density control AE, manualContinuous printing 1 to 99Print options Automatic border deletion, Sharpness adjustment, Picture mode,TrimmingOther functions Date stamp (Year/month/day/time formats)Note stamp (Up to 33 characters), Reset, Zoom memory | |
| General | |
| Power consumption AC 120V 60Hz, 2AAC 220-240V 50/60Hz, 1.2AAcoustic noise level Less than 66 dBWork environment Room temperature: 10°C to 32.5°C (50°F to 90.5°F)Humidity: 10% to 80%RH (without condensation)Dimensions Main unit: 668 x 442 x 541 mm (H x W x D)Keyboard: 41 x 260 x 180 mm (H x W x D)Weight Main unit: Approx. 26 kgKeyboard: Approx. 0.8 kg | |
| Options | |
| Fixed lens HX7 (x7)Zoom lenses HZ01 (x9.5-x16), HZ02 (x16-x32), HZ03 (x30-x55), HZ04 (x20-x48)HZ05 (x10-x24)Carriers FC 190 RII, AC 100C, FS Controller I, Roll Fiche Carrier 200Installation KitFraming KitFoot switchPrinter Fileprint 270, Fileprint 470 |
Specifications are subject to change without notice.
INDEX
A
Adjusting 35
AE 36
Arbitrary rotation 35
Auto 36
Auto rotation....39
B
Border removal 37, 38
Brightness 36
C
CapturePerfect 10
Carrier
Autocarrier 100C 17
Fileprint 470 20, 43, 52
Film....35
Focusing 35
Framing Kit 13
Function key 39
Function key label 12,39
|
Installation Kit 13, 17
ISIS/TWAIN Driver 29,31
K
Keyboard 12, 14, 16
L
lamp 49
lamp socket 50
Lamp unit.... 14, 49, 53
Lens 13
lens
Fixed lens.... 18
Zoom lens 18
Lens holder 12, 14
Light adjustment dial 53
N
Negative 36
Note feature 41
0
Operation mode 11
Operation panel 14.15
P
Polarity 36
Positive 36,37
POWER ON/OFF 24
Power supply 7
Power switch 14
Print mode 42
Printing 43
R
Reader-Printer mode 10,32
Routine cleaning 51
S
Scanner mode 11
Scanner recognition 25
Screen 14,51
SCSI cable 22
SCSI ID 22
Setup CD 12
Start key 15
T
Trimming 37
Troubleshooting 53
U
User mode....45
User mode setting 45
W
Work Safely 5
Z
Zoom key 48
Zoom lens 36




58
MS350 English 07.5.15, 9:52 58

- EUROPEAN UNION (AND EEA) ONLY
- MODEL NAMES
- COPYRIGHT
- TRADEMARKS
- INTRODUCTION
- CONVENTIONS
- (→P.13)
- WARNING
- CAUTION
- HEAT CAUTION
- IMPORTANT
- NOTES
- CONTENTS
- BEFORE YOU BEGIN
- ABOUT THE SOFTWARE
- SETTING THE SCANNER
- ⚠ WORK SAFETY
- CHOOSING A SAFE LOCATION
- POWER SUPPLY
- DAILY HANDLING
- CAUTIONS
- HEAT CAUTIONS
- FEATURES OF THE MICROFILM SCANNER 350II
- SPACE SAVING
- INTERNAL SCSI-USB CONVERTER
- AUTOMATIC FILM POLARITY DETECTION
- USES A VARIETY OF FILM FORMATS
- EASY OPERATION
- ☐ READER-PRINTER MODE (CAPTUREPERFECT)
- EXPANDABILITY
- ABOUT OPERATION MODES
- SCANNER MODE
- DMP MODE
- READER-PRINTER MODE
- UNPACKING: WHAT'S IN THE BOX
- OPTIONS
- IMPORTANT PARTS AND THEIR FUNCTIONS
- OPERATION PANEL AND KEYBOARD KEYS
- OPERATION PANEL KEYS
- KEYBOARD KEYS
- PREPARING THE CARRIER
- FICHE CARRIER 190RII
- AUTOCARRIER 100C (AC100C)
- FS CONTROLLER I
- PREPARING THE LENS
- FIXED LENS
- ZOOM LENSES
- SWITCHING THE LENS
- PREPARING OPTIONAL PRINTER (FOR THE DMP MODE)
- PREPARING THE COMPUTER (SCANNER MODE)
- HARDWARE REQUIREMENTS
- OPERATING SYSTEM REQUIREMENTS
- WHEN USING A SCSI CARD
- WHEN USING A USB CONNECTION
- CONNECTING VIA SCSI
- SCSI CARD
- SCSI CABLE
- CONNECTING VIA USB
- USB PORT
- USB CABLE
- CONNECTING TO A COMPUTER
- OTHER
- SOFTWARE
- PRINTER
- TURNING THE POWER ON
- TURNING THE POWER OFF
- IN THE CASE OF WINDOWS 98/ME
- WHEN YOU ARE USING WINDOWS 98, "CANON MS350 SCSI SCANNER DEVICE" IS DETECTED AND "ADD NEW HARDWARE WIZARD" DIALOG APPEARS
- WHEN YOU ARE USING WINDOWS ME, "CANON MS350 SCSI SCANNER DEVICE" IS DETECTED AND "ADD NEW HARDWARE WIZARD" DIALOG APPEARS
- CANON MS350 SCSI SCANNER DEVICE
- IF YOU ARE USING WINDOWS XP, "FOUND NEW HARDWARE WIZARD" DIALOG APPEARS WHEN NEW DEVICE IS DETECTED
- ISIS/TWAIN DRIVER
- CAPTUREPERFECT
- INSTALLING THE ISIS/TWAIN DRIVER
- INSTALLING CAPTUREPERFECT
- USING THE SOFTWARE
- USING THE ISIS/TWAIN DRIVER
- USING CAPTUREPERFECT
- STARTING CAPTUREPERFECT
- CLOSING CAPTUREPERFECT
- ABOUT THE READER-PRINTER MODE
- STARTING UP READER-PRINTER MODE
- SETTING THE READER-PRINTER MODE
- STARTING UP THE READER-PRINTER MODE
- EXITING THE READER-PRINTER MODE
- UNINSTALLING THE SOFTWARE
- LOADING THE FILM
- ADJUSTING THE IMAGE
- ENLARGING AND REDUCING IMAGE SIZE
- FOCUSING THE IMAGE
- ARBITRARY ROTATION
- DEGREE ROTATION
- SELECTING THE POLARITY
- BRIGHTNESS ADJUSTMENT
- AUTOMATIC ADJUSTMENT
- MANUAL ADJUSTMENT
- TRIMMING/BORDER REMOVAL SETTINGS
- TRIMMING
- DEFINING AN AREA FOR TRIMMING
- USING THE AREA SETTING CURSORS (OPTIONAL)
- BORDER REMOVAL
- REMOVING THE ENTIRE BORDER
- LEAVING A MARGIN AROUND THE IMAGE
- USING AUTO ROTATION
- SETTING THE FUNCTION KEYS (DMP MODE)
- DATE STAMP FEATURE
- SETTING THE DATE STAMP FEATURE
- DATE / TIME
- STAMP LOCATION
- ITEM DISPLAY SETTING
- STAMP FORMAT
- NOTE FEATURE
- ENTERING THE NOTE
- SETTING THE PRINT MODE
- PICTURE MODE
- SHARPNESS ADJUSTMENT
- SWITCHING THE OPERATION MODES
- PRINTING (DMP MODE)
- USING THE FILEPRINT
- USER MODE
- USER MODE SETTING
- USER MODE SETTING FUNCTIONS
- POWER SAVER MODE
- HI-SPEED SCANNING
- SCANNING RESOLUTION
- CLEANING MODE
- SETTING THE FUNCTION KEYS
- ENTERING THE DEFAULT VALUES
- REGISTERING THE ZOOM VALUES
- MAINTENANCE AND TROUBLESHOOTING
- REPLACING THE LAMP
- ROUTINE CLEANING
- CLEANING THE SCREEN AND MAIN UNIT
- CLEANING THE LENS
- CLEANING THE FIXING ROLLERS
- TROUBLESHOOTING
- USER CALL ERRORS
- SERVICE CALL ERRORS
- IF THE "E000" (FIXER ERROR) IS DISPLAYED
- WHEN YOU CANNOT CLEAR A SERVICE CALL ERROR
- SPECIFICATIONS
- INDEX
- A
- B
- C
- K
- L
- N
- P
- R
- S
- T
- U
- W
- Z
Brand : CANON
Model : Microfilm Scanner 350II
Category : Scanner