
Octo Mk2 - Lighting Enttec - Free user manual and instructions
Find the device manual for free Octo Mk2 Enttec in PDF.


| Product Type | 8-Port DMX Isolated Splitter |
| Model | Octo Mk2 |
| Brand | Enttec |
| DMX Standard | DMX512-A |
| Number of Outputs | 8 |
| Input Connector | 5-Pin XLR Female |
| Output Connectors | 8x 5-Pin XLR Male |
| Galvanic Isolation | 2000V RMS per output |
| Power Supply | 9-24V DC, 500mA (power supply not included) |
| Power Connector | 2.1mm barrel jack (center positive) |
| Dimensions (W x D x H) | 482 x 130 x 44 mm (19" rack mount, 1U) |
| Weight | 1.2 kg |
| Housing Material | Steel chassis with black anodized aluminum front |
| Indicators | Power & Signal LEDs per output |
| Operating Temperature | 0°C to 40°C |
| Protocol Support | DMX512, RDM |
| Data Rate | 250 kbps |
| Maintenance | Clean with dry cloth; no user-serviceable parts inside |
| Safety | Use only with SELV power supply; avoid moisture; disconnect when not in use |
| Spare Parts & Repairability | Contact Enttec for authorized service; no user-replaceable parts |
Frequently Asked Questions - Octo Mk2 Enttec
User questions about Octo Mk2 Enttec
0 question about this device. Answer the ones you know or ask your own.
Ask a new question about this device
Download the instructions for your Lighting in PDF format for free! Find your manual Octo Mk2 - Enttec and take your electronic device back in hand. On this page are published all the documents necessary for the use of your device. Octo Mk2 by Enttec.
USER MANUAL Octo Mk2 Enttec
8 universes eDMX to LED pixel smart controller with network chaining in a complex 4-module DIN-rail form factor.
Content
Safety 3
Electrical Safety 3
System Planning and Specification .... 3
Protection from Injury During Installation 4
Installation Safety Guidelines....4
Physical Dimensions....4
Wiring Diagrams....5
Mounting Options....6
Functional Features....7
Hardware Features 7
LED Status Indicator....7
Identify/Reset Button....8
Out of the Box 8
Networking 8
Web Interface 8
Top Menu 9
Home 9
Settings 10
Network Stats 12
Help 13
Updating Firmware 13
Reset to Factory Defaults 13
Resetting via Web Interface 14
Resetting by Reset Button 14
Frequently Asked Questions 14
I'm unable to connect to the OCTO MK2 web interface. 14
What if my LED strip protocol is not in drop down list? How to add new LED strip protocol to OCTO MK2? 15
What is the minimum DC voltage for powering the OCTO MK2? 15
Servicing, Inspection & Maintenance....15
Cleaning....15
Package Contents....16
Revision History 16
Ordering Information 16
Safety

Ensure you are familiarised with all key information within this guide and other relevant ENTTEC documentation before specifying, installing, or operating an ENTTEC device. If you are in any doubt about system safety, or you plan to install an ENTTEC device in a configuration that is not covered within this guide, contact ENTTEC or your ENTTEC supplier for assistance.
ENTTEC's return to base warranty for this product does not cover damage caused by inappropriate use, application, or modification to the product.
Electrical Safety

This product must be installed in accordance with applicable national and local electrical and construction codes by a person familiar with the construction and operation of the product and the hazards involved. Failure to comply with the following installation instructions may result in death or serious injury. ■ Do not exceed the ratings and limitations defined in the product datasheet or this document. Exceeding can cause damage to the device, risk of fire and electrical faults. ■ Ensure that no part of the installation is or can be connected to power until all connections and work is complete. ■ Before applying power to your installation, ensure your installation follows the guidance within this document. Including checking that all power distribution equipment and cables are in perfect condition and rated for the current requirements of all connected devices and factor in overhead as well as verifying that it is appropriately fused and voltage is compatible. ■ Remove power from your installation immediately if accessories power cables or connectors is in any way damaged, defective, shows signs of overheating or are wet. ■ Provide a means of locking out power to your installation for system servicing, cleaning, and maintenance. Remove power from this product when it is not in use. ■ Ensure your installation is protected from short circuits and overcurrent. Loose wires around this device whilst in operation, this could result in short circuiting. - Do not over stretch cabling to the device's connectors and ensure that cabling does not exert force on the PCB. - Do not 'hot swap' or 'hot plug' power to the device or its accessories. - Do not connect any of this device's V- (GND) connectors to earth. ■ Do not connect this device to a dimmer pack or mains electricity.
System Planning and Specification

■ To contribute to an optimal operating temperature, where possible keep this device out of direct sunlight. - Pixel data is unidirectional. Ensure that your OCTO MK2 is connected to your pixel dots or tape in a way that ensures data is flowing from the OCTO MK2 to the 'Data IN' connection of your pixels. The maximum recommended cable distance between the OCTO MK2's data output and first pixel is 3m (9.84ft). ENTTEC advises against running data cabling close to sources of electromagnetic interference (EMF) i.e., mains power cabling / air conditioning units. ■ This device has an IP20 rating and is not designed to be exposed to moisture or condensing humidity. Ensure this device is operated within the specified ranges within its product datasheet.
Protection from Injury During Installation

■ Installation of this product must be performed by qualified personnel. If ever unsure always consult a professional. ■ Always work with a plan of the installation that respects all system limitations as defined within this guide and product datasheet. - Keep the OCTO MK2 and its accessories in its protective packaging until final installation. ■ Note the serial number of each OCTO MK2 and add it to your layout plan for future reference when servicing. ■ All network cabling should be terminated with an RJ45 connector in accordance with the T-568B standard. ■ Always use suitable personal protective equipment when installing ENTTEC products. ■ Once installation is completed, check that all hardware and components are securely in place and fastened to supporting structures if applicable.
Installation Safety Guidelines

■ The device is convection cooled, ensure it receives sufficient airflow so heat can be dissipated. ■ Do not cover the device with insulating material of any kind. ■ Do not operate the device if the ambient temperature exceeds that stated in the device specifications. ■ Do not cover or enclose the device without a suitable and proven method of dissipating heat. ■ Do not install the device in damp or wet environments. ■ Do not modify the device hardware in any way. ■ Do not use the device if you see any signs of damage. ■ Do not handle the device in an energized state. ■ Do not crush or clamp the device during installation. ■ Do not sign off a system without ensuring all cabling to the device and accessories has been appropriately restrained, secured and is not under tension.
Physical Dimensions
![FRONT VIEW 100.5mm [3.96in] 92.98mm [3.86in]](/content/2026/07/1433377/images/bbb12804a35febc582412ba8987390960283f43deefdbf41032282ca39860876.jpg)
![BACK VIEW 40mm [1.57in] 19.75mm [0.78in]](/content/2026/07/1433377/images/99c4f715746faaabbad3ea3aaeb72d26ee880890084e5829c7700505fd4d8a5c.jpg)

![BOTTOM VIEW 31mm [1.22in] 37.1mm [1.48in] 25mm [0.98in]](/content/2026/07/1433377/images/8794a65b4a8312a9bc8f70c057b206df4846e635941e257381f87adedb1f325a.jpg)
![TOP VIEW 32.4mm [1.28in] 77.9mm [3.07in]](/content/2026/07/1433377/images/2ea48b4e4ca7356d6cf63302bd5f16226b2f2e2283737a54595705ebf9791e9b.jpg)
![SIDE VIEW 48mm [1.89in]](/content/2026/07/1433377/images/a96ec24a9c2284bd42fe4e679dd5694bb658282db55657e872e424ac0ca74ca3.jpg)
Wiring Diagrams

- Locate the OCTO MK2 and PSU as close as possible to the first pixel in your chain to reduce the impact of voltage drop. ■ To reduce the likelihood of voltage or Electro Magnetic Interference (EMI) being induced on the control signal lines, where possible, run control cabling away from mains electricity or devices that produce high EMI, (i.e., air conditioning units). ENTTEC recommends a maximum data cable distance of 3 meters. The lower the cable distance, the lower the impact of voltage drop. ■ To ensure a reliable connection, ENTTEC recommends the use of cable ferrules for all stranded cables connected to the OCTO MK2's screw terminals.


![graph LR A["ONECTO OCTO"] -->|Terminal SPLITTER (VCC)| B["DC POWER SUPPLY"] A -->|Terminal SPLITTER (V-)| B B --> C["This power supply is providing power to the OCTO"]](/content/2026/07/1433377/images/51a1f23e6bdd7101d78b509cf32097a4c5742ad5363e166cdc3317f515a6ce7e.jpg)
![graph LR A["Device"] -->|DC POWER SUPPLY| B["Power Connection Using VCC"] B --> C["DC POWER SUPPLY"] C --> D["This Power Supply is Providing Power to the OCTO"]](/content/2026/07/1433377/images/017912f37d2209edaea27c113732976ab21b4d410e8a8085f1529eaa1b0546da.jpg)

![graph LR A["ENTEC OCTO MODE"] --> B["DC POWER SUPPLY"] B --> C["DC POWER SUPPLY"] C --> D["DC POWER SUPPLY"] D --> E["DC POWER SUPPLY"] E --> F["DC POWER SUPPLY"] F --> G["DC POWER SUPPLY"] G --> H["DC POWER SUPPLY"] H --> I["DC POWER SUPPLY"] I --> J["DC POWER SUPPLY"] J --> K["DC POWER SUPPLY"] K…](/content/2026/07/1433377/images/c18e3a2767e5cdf89c496680dddc8706e5d47f81005334af476028d58032a779.jpg)
Mounting Options
![MOUNTING METHOD 1: DIN RAIL MOUNT ATTACH DIN RAIL CLIP USING THE 2 SCREWS PROVIDED WITHIN THE PRODUCT PACKAGING. ATTACH UNIT TO A SUITABLE TS35 RAIL. 40mm [1.57in] MOUNTING METHOD 2: WALL/PANEL MOUNT REMOVE DIN CLIP IF ATTACHED SPACE 2X M3 SCREWS 40MM APART HORIZONTALLY AND ATTACH TO TARGET SURFACE…](/content/2026/07/1433377/images/d8014589dbcb1651c662f2110640ed33fc69e707e8113cb2995eb2712b990467.jpg)
Note: The surface mount tabs have been designed to hold the weight of the OCTO MK2 only, excess force by cable strain can cause damage.
Functional Features
■ The OCTO MK2 supports the following eDMX protocols:
Art-Net - Streaming ACN (sACN) ■ ESP ■ KiNET
■ Compatible with multiple synchronous and asynchronous pixel output protocols as well as custom voltage timing. - Allows creation of custom pixel protocols. (Criteria apply, see 'OCTO MK2 Custom Protocol Creation Guide' document) ■ DHCP or Static IP address supported. ■ Grouping functionality to reduce input channel count. ■ Supports colour order options for RGB, RGBW and White Pixel.
Hardware Features
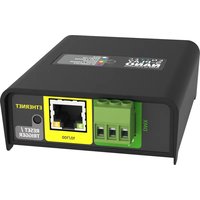
■ Electrically insulated ABS plastic housing. ■ Forward facing LED status indicator. ■ Identify/Reset button. ■ Pluggable terminal blocks. ■ Link & Activity LED indicator built into both RJ45 ports. - Easily extendable daisy chain network – up to 8 units for optimum performance between outputs. ■ Surface mount or TS35 DIN mount (using provided DIN Clip accessory). ■ Flexible wiring configuration. ■ 35mm DIN rail accessory (included in packaging).
LED Status Indicator
The LED status indicator is used to determine the OCTO MK2's current state.
Each state is as follows:
| LED Colour | OCTO MK2 Status |
| White (Static) | Idle |
| Flashing Green | Data receiving |
| Blue (Static) | Device starting up |
| Flashing Blue | Identifying output |
| Cyan (Static) | Multiple merge sources |
| Purple (Static) | IP conflict |
| Red (Static) | Device in boot / error |

Identify/Reset Button
The Identify/Reset button on the OCTO MK2 can be used to either:
■ Identify pixels connection
When the button is pressed in standard operation, all 8 output universes are set to output the highest value (255) for 10 seconds before resuming their previous state. This is a good practical test to ensure all outputs are connected and working as intended. This function can also be achieved from our intuitive web interface under Home Tab.
■ Reset the OCTO MK2 (Refer to the 'Reset to Factory Defaults' section of this document).
Out of the Box
The OCTO MK2 will be set to a DHCP IP address as default. If the DHCP server is slow to respond, or your network does not have a DHCP server, the OCTO MK2 will fall back to 192.168.0.10 as default. By default, the OCTO MK2 will convert 4 universes of Art-Net to the WS2812B protocol on each of the OCTO MK2's Phoenix Connector ports. Both ports will output Art-Net universes 0 to 3.
Networking
The OCTO MK2 can either be configured to be a DHCP or Static IP address.
DHCP: On power up and with DHCP enabled, if the OCTO MK2 is on a network with a device/router with a DHCP server, the OCTO MK2 will request an IP address from the server. If the DHCP server is slow to respond, or your network does not have a DHCP server, the OCTO MK2 will fall back to the IP address 192.168.0.10 and netmask 255.255.255.0. If a DHCP address is provided, this can be used to communicate with the OCTO MK2.
Static IP: By default (out of the box) the Static IP address will be 192.168.0.10. If the OCTO MK2 has DHCP disabled, the Static IP address given to the device will become the IP address to communicate with the OCTO MK2. The Static IP address will change from the default once it's modified in the web interface. Please note down the Static IP address after setting.

Note: When configuring multiple OCTO MK2's on a Static network; to avoid IP conflicts, ENTTEC recommends connecting one device at a time to the network and configuring an IP.
If using DHCP as your IP addressing method, ENTTEC recommends the use of the sACN Multicast, or ArtNet Broadcast. This will ensure that your OCTO MK2 continues to receive data if the DHCP server changes it's IP address.
■ ENTTEC does not recommend unicasting data to a device with its IP address set through DHCP server on long term installations.
Web Interface
Configuring the OCTO MK2 is done through a web interface which can be brought up on any modern web browser.
Note: A Chromium based browser (i.e. Google Chrome) is recommended for accessing the OCTO MK2's web interface.
Note: As the OCTO MK2 is hosting a web server on the local network and does not feature an SSL Certificate (used to secure online content), the web browser will display the 'Not secure' warning, this is to be expected.
Identified IP address: If you are aware of the OCTO MK2's IP address (either DHCP or Static), then the address can be typed directly into the web browser's URL field.
Unidentified IP address: If you are not aware of the OCTO MK2's IP address (either DHCP or Static), the
following discovery methods can be used on a local network to discover devices:
■ ENTTEC EMU software for Windows and MacOS (support Mac OSX 10.13 or later), which will discover ENTTEC devices on the Local Area Network, displaying their IP addresses before opting to configure the device, opening the Web Interface. ■ An IP scanning software application (i.e. Angry IP Scanner) can be run on the local network to return a list of active devices on a local network. ■ Devices can be discovered using Art Poll (i.e. DMX Workshop if set to use Art-Net). ■ The device default IP address 192.168.0.10 will be printed on the physical label on the rear of the product.

Note: The eDMX protocols, the controller and the device used to configure the OCTO MK2 must be on the same Local Area Network (LAN) and be within the same IP address range as the OCTO MK2. For example, if your OCTO MK2 is on Static IP address 192.168.0.10 (Default), then your computer should be set to something such as 192.168.0.20. It is also recommended that all devices' Subnet Mask are the same across your network.
Top Menu
The top menu allows all the OCTO MK2 web pages to be accessed. Menu option is highlighted blue to indicate which page the user is on. The 'Light' switch on the right-hand side enables dark mode providing flexible viewing experience.
ENTTEC
Home
Settings
Network Stats
Help
Update Firmware


Home
The Home tab displays the following information:
Network Information:
■ DHCP status – (either enabled or disabled). IP address Netmask ■ Gateway ■ Mac Address ■ Link Speed
System Information:
Node Name ■ Firmware version on device ■ System uptime ■ Input protocol set on device ■ Output LED protocol set on device Personality
Identification:
■ Identify
Octo - Main
| Network Information 1 | |
| DHCP | Enabled |
| IP Address | 10.10.3.31 |
| NetMask | 255.255.255.0 |
| Gateway | 10.10.3.254 |
| Mac Address | 00:30:a7:55:66:33 |
| Link Speed | 100 Mbps |
| System Information 1 | |
| Node Name: | Octo |
| Firmware Version: | ENTTEC Octo Firmware V4.0 |
| System uptime | 22 mins, 46 secs |
| Input Protocol: | Art-Net |
| Output Protocol: | 1 : WS2012B , 2 : WS2012B |
| Personality: | Direct |
| Identification |
| Identity |
Same as the physical Identify/Reset button on the device. This button on the webpage identifies pixels connected to a specific OCTO MK2 without the need to provide control data.
Note: The timer will not restart when pressed consecutively.


Settings
The OCTO MK2 settings can be configured within the Settings tab. Changes will only take affect after being saved; any unsaved changes will be discarded.
Node Name: Change Node Name for identification.
DHCP: Enabled by default. When enabled, the DHCP server on the network is expected to automatically provide the IP address to the OCTO MK2. When DHCP enabled but there is no DHCP server or slow to response, the OCTO MK2 will fall back to 192.168.0.10.
IP Address / NetMask / Gateway: These are used to set when DHCP is disabled. These options set the Static IP address, Netmask and Gateway IP settings which should be compatible with other devices on the network.
LED Protocol: Select the SPI protocol from the drop-down list or set a custom value that matches the Pixels which the OCTO MK2 will control.
The OCTO MK2 provides more than 20 output pixel protocols listed below.
■ APA 102, APA 104 ■ SPXL (16bit & 8bit) ■ SK6812 ■ TM1804, TM1812, TM1814 ■ UCS1903, UCS2903, UCS2904, UCS8903 (16bit & 8bit), UCS8904 (16bit & 8bit) ■ WS2811, WS2812, WS2812B, WS2813, WS2815, WS2818 ■ 9PDOT (16bit & 8bit)
Each port can have a different pixel output protocol. The pixel protocols selected can be output directly to your pixel fixtures.
The OCTO MK2 also features custom voltage timing to most of the pixel protocols configurable in each port settings individually. The custom voltage timing of the chosen pixel protocol can be adjusted according to its datasheet. Visit ENTTEC website to view the 'OCTO MK2 Custom Protocol Creation Guide' document if your SPI protocol is not listed.
The adjustable custom values are:
■ Bit 0 High Time: The voltage high time required to indicate code 0, also known as TOH. ■ Bit 1 High Time: The voltage high time required to indicate code 1, also known as T1H. ■ Overall Bit Time: The total voltage time for a single bit which can be calculated from TH+TL. ■ Reset Time: The total voltage low time required to reset the data transmission between each data batch.
Octo - Settings


- Example: The information required from WS2812B datasheet is the Data Transfer Time as below:

* Please test on your pixel fixture for the optimal transmission time among the range according to the datasheet.
- Note: APA102 and 9PDOT are not compatible with Custom Timing due to protocol data and timing structure.
Colour Order: Configure how RGBW colours are mapped to pixels.
Mapped Pixels: Define the number of mapped pixels.
Global Brightness: This is a function of protocols TM1814 and APA-102 that sets their maximum brightness for the tape without hindering the DMX range available.
DMX Protocol (Input): Choose between Art-Net, sACN, ESP and KiNet as the input eDMX protocol.
Output Universes
The OCTO MK2 converts up to four universes of DMX over Ethernet to pixel data per output. Both outputs can be specified to use the same universes, e.g., both outputs use universe 1, 2, 3 and 4.
Each output can also be specified to use its own individual group of universes, e.g., output 1 uses universes 100, 101, 102 and 103 however output 2 uses 1, 2, 3 and 4.
Only the first universe can be specified; the remaining universes, second, third and fourth are automatically assigned subsequent universes to the first one.
- Example: If the first universe is assigned 9, the second, third and fourth universes will be automatically assigned 10, 11 and 12. ■ Art-Net: Supports Art-NET 1/2/3/4. Each output port can be assigned a universe number in the range 0 to 32767. ■ sACN: Outputs can be assigned a universe number in the range 1-63999. Please note the OCTO MK2 supports a maximum of 1 multicast universe with sACN sync. (i.e., all universes set to the same value) ■ ESP: Outputs can be assigned a universe number in the range 0-255. More details of the ESP protocol can be found at www.enttec.com.
- KiNet: Outputs can be assigned a universe number in the range 0-65535. Further KiNet configuration can be achieved through ENTTEC ELM Software.
Group Pixels
This setting allows multiple pixels to be controlled as one 'virtual pixel'. This reduces the overall amount of input channels required to control pixel strip or dots.
- Example: When Group Pixels is set to 10 on an OCTO MK2 connected to a length of RGB pixel strip, by patching a single RGB pixel within your control software and sending the values to the OCTO MK2, the first 10 LED pixels would respond to it.
- Note: The maximum number of physical LED pixels that can be connected to each port is 680 (RGB) or 512 (RGBW). When grouping pixels, the number of control channels required is reduced, this function does not increase the number of physical LED pixels each OCTO MK2 can control.
DMX Start Address (DSA)
Assigns the first DMX channel, this is where the OCTO MK2 will start listening for DMX values within the universe. When the universes/output is more than one, the DMX start address only applies to the first universe.
However, where it applies, a start address offset may result in the split of a pixel. e.g., R channel in first
universe and GB channels in the seconds universe for a RGB LED.
For ease of pixel mapping, ENTTEC recommend offsetting the DMX start address to a number divisible by the number of channels per pixel. i.e.:
■ Increments of 3 for RGB (i.e., 1, 4, 7, 10) ■ Increments of 4 for RGBW (i.e., 1, 5, 9, 13) ■ Increments of 6 for RGB-16 bit (i.e., 1, 7, 13, 19) ■ Increments of 8 for RGBW-16 bits (i.e., 1, 9, 17, 25)
Save Settings: All changes must be saved to take effect. The OCTO MK2 takes up to 10 seconds to save.
Reset to Defaults: This button allows the OCTO MK2 to reset back to factory defaults via the web interface. Please refer to the 'Reset to Factory Defaults' section of this document.
Reboot: Please allow up to 10 seconds for the device to reboot. When the web interface page refreshes, the OCTO MK2 is ready.
Network Stats
The Network Stats page shows statistics for the input DMX protocol selected.
Art-Net
The information provided is:
■ Poll packets received ■ Data packets received ■ Sync packets received ■ Last IP where Art-Net packets were received from ■ Last port data received from
ESP
The information provided is:
■ Poll packets received ■ Data packets received ■ Last IP where ESP packets were received from ■ Last port data received from
sACN
The information provided is:
■ Data packets received ■ Sync packets received ■ Last IP packets were received from ■ Last port data received from


KiNET
The information provided is:
■ Total packets received ■ Discover supply packets received ■ Discover ports packets received ■ DMXOUT packets ■ KTYPE_GET packets received ■ KTYPE_SET packets received ■ PORTOUT packets received ■ PORTOUT Sync packets received ■ Set device ID packets received ■ Set device IP Address packets received ■ Set Universe packets received ■ Last IP received from ■ Last port data received from

Help
The Help page gives convenient access to quick information about the LED status indicator and wiring diagram.
Updating Firmware
When selecting the Update Firmware tab, the OCTO MK2 will stop outputting and the web interface boots into the Update Firmware mode. It may take a while depending on the network setting.
This mode will display basic information regarding the device including current Firmware Version, Mac Address, and IP address information.
The latest firmware can be downloaded from www.enttec.com. Use the Browse button to select an OCTO MK2 firmware from your computer. OCTO MK2 firmware files have a .bin extension.
Next, click on the Update Firmware button to begin updating.
After the update has completed, the web interface will load the Home tab, where you can check the update was successful under Firmware Version. Once the Home tab has loaded, the OCTO MK2 will resume operation.

Reset to Factory Defaults
The OCTO MK2 can be reset by either the web interface or the reset button on the device. Factory resetting the OCTO MK2 results in the following:
■ Resets the device name to OCTO ■ Enables DHCP ■ Static IP Address reset (IP address = 192.168.0.10) ■ Gateway IP address reset to default 192.168.0.254
■ Netmask is set to 255.255.255.0 ■ Input protocol is set to Art-Net ■ Output pixel protocol is set as WS2812B ■ Pixel colour is set to RGB ■ Mapped pixels value is set to 680 pixels ■ DMX start address is set to 1
■ Both ports are set to output 4 universes. The start universe for output 1 & output 2 is set as 0
■ APA-102 and TM1814 global intensity set to maximum
Resetting via Web Interface
The ‘Reset to Defaults’ command can be found under the Settings tab of the OCTO MK2’s local hosted web interface.

Once the command is pressed, a pop-up would appear as shown in the image below:

Resetting by Reset Button
The reset button on the device restores the network configuration of the OCTO MK2 to factory defaults. To reset to factory defaults, the following procedure must be performed:
- Power off the unit.
- Press and hold the Reset button.
- While holding the Reset button, power up the unit, and keep holding the button for approximately 3 seconds until the LED starts blinking red.
- Release the Reset button.
- Power cycle the unit.
Frequently Asked Questions
I'm unable to connect to the OCTO MK2 web interface.
Ensure that the OCTO MK2 and your computer are on the same subnet.
To troubleshoot:
- Connect the OCTO MK2 directly to your computer using a Cat5 cable and power it on.
- Give your computer a static IP address (e.g., 192.168.0.20).
- Change the computer's netmask to 255.255.255.0.
- Open the ENTTEC EMU software.
- Once EMU finds the OCTO, you will be able to open the device webpage and configure it.
Factory reset the device using the reset button if the above steps do not resolve the issue.
The OCTO MK2's factory default resets the OCTO MK2 to static IP address 192.168.0.10 and netmask 255.255.255.0 with DHCP enabled.
When the OCTO MK2 has DHCP enabled but the DHCP server is unavailable (e.g., the device is connected to a computer without a DHCP server), the IP address will fall back to 192.168.0.10 with netmask 255.255.255.0.
What if my LED strip protocol is not in the drop-down list? How do I add a new LED strip protocol to the OCTO MK2?
The OCTO MK2 allows the user to choose a pixel output protocol even if it is not found in the drop-down list.
Visit the ENTTEC website to view the 'OCTO MK2 Custom Protocol Creation Guide' document for more information about the key criteria and the step-by-step custom protocol creation guide.
What is the minimum DC voltage for powering the OCTO MK2?
The minimum DC voltage the OCTO MK2 requires to run is 5V.
Servicing, Inspection & Maintenance


■ The device has no user serviceable parts. If your installation has become damaged, the device should be replaced. ■ Power down the device and ensure a method is in place to stop the system from becoming energized during servicing, inspection & maintenance.
Key areas to examine during inspection:
■ Ensure all connectors are mated securely and show no sign of damage or corrosion. ■ Ensure all cabling has not obtained physical damage or been crushed. ■ Check for dust or dirt build up on the device and schedule cleaning if necessary. ■ Dirt or dust build-up can limit the ability for a device to dissipate heat and can lead to damage.
The replacement device should be installed in accordance with all steps within the installation guide.
To order replacement devices or accessories, contact your reseller or message ENTTEC directly.
Cleaning
Dust and dirt build up can limit the ability for the device to dissipate heat, resulting in damage. It's important that the device is cleaned on a schedule fit for the environment it is installed within to ensure maximum product longevity.
Cleaning schedules will vary greatly depending on the operating environment. Generally, the more extreme the environment, the shorter the interval between cleaning.

■ Before cleaning, power down your system and ensure a method is in place to stop the system from becoming energized until cleaning is complete.

■ Do not use abrasive, corrosive, or solvent-based cleaning products on a device. ■ Do not spray the device or accessories. The device is an IP20 product.
To clean an ENTTEC device, use low-pressure compressed air to remove dust, dirt, and loose particles. If deemed necessary, wipe the device with a damp microfiber cloth.
A selection of environmental factors that may increase the need for frequent cleaning include:
■ Use of stage fog, smoke, or atmospheric devices. ■ High airflow rates (i.e., in close proximity to air conditioning vents). ■ High pollution levels or cigarette smoke. ■ Airborne dust (from building work, the natural environment, or pyrotechnic effects).
If any of these factors are present, inspect all elements of the system soon after installation to see whether cleaning is necessary, then check again at frequent intervals. This procedure will allow you to determine a reliable cleaning schedule for your installation.
Package Content
■ OCTO MK2 ■ 2* WAGO connectors ■ 1 * Din mounting clip & screws ■ 1 * ELM Promo Code (8 Universes) on device's sticker.
Revision History
Due to electronic design, please check your serial number and artwork on your device for support:
■ OCTO MK1 (SKU: 71520) last SN: 2318130, Please load firmware up to V1.6. ■ OCTO MK2 (SKU: 71521) SN: 2318635 to 2323030, please load firmware up to V2.1. MK1 firmware is not compatible with OCTO MK2. ■ OCTO MK2 (SKU: 71521) SN 2341008 to 2350677, please load firmware V3.0 up to V3.1 only. ■ OCTO MK2 (SKU: 71521) released after SN: 2374307, please load firmware version V4.0 onwards only. Use the Serial Number to claim free license for ELM software unless there is a Promo Code on the device's sticker. The ELM Promo code on sticker is implemented from OCTO MK2 (SKU: 71521) SN: 2374307 onwards.
Ordering Information
For further support and to browse ENTTEC's range of products visit the ENTTEC website.
| Item | SKU |
| OCTO MK2 | 71521 |
enttec.com
MELBOURNE AUS / LONDON UK / RALEIGH-DURHAM USA
Due to constant innovation, information within this document is subject to change.


- CONTENT
- SAFETY
- ELECTRICAL SAFETY
- SYSTEM PLANNING AND SPECIFICATION
- PROTECTION FROM INJURY DURING INSTALLATION
- INSTALLATION SAFETY GUIDELINES
- PHYSICAL DIMENSIONS
- WIRING DIAGRAMS
- MOUNTING OPTIONS
- FUNCTIONAL FEATURES
- HARDWARE FEATURES
- LED STATUS INDICATOR
- IDENTIFY/RESET BUTTON
- IDENTIFY PIXELS CONNECTION
- OUT OF THE BOX
- NETWORKING
- WEB INTERFACE
- TOP MENU
- HOME
- NETWORK INFORMATION
- SYSTEM INFORMATION
- IDENTIFICATION
- SETTINGS
- OUTPUT UNIVERSES
- GROUP PIXELS
- DMX START ADDRESS (DSA)
- NETWORK STATS
- ART-NET
- ESP
- SACN
- KINET
- HELP
- UPDATING FIRMWARE
- RESET TO FACTORY DEFAULTS
- RESETTING VIA WEB INTERFACE
- RESETTING BY RESET BUTTON
- FREQUENTLY ASKED QUESTIONS
- I'M UNABLE TO CONNECT TO THE OCTO MK2 WEB INTERFACE
- WHAT IF MY LED STRIP PROTOCOL IS NOT IN THE DROP-DOWN LIST? HOW DO I ADD A NEW LED STRIP PROTOCOL TO THE OCTO MK
- WHAT IS THE MINIMUM DC VOLTAGE FOR POWERING THE OCTO MK
- SERVICING, INSPECTION & MAINTENANCE
- CLEANING
- PACKAGE CONTENT
- REVISION HISTORY
- ORDERING INFORMATION
- ENTTEC.COM
Brand : Enttec
Model : Octo Mk2
Category : Lighting