
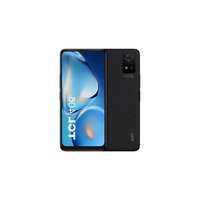
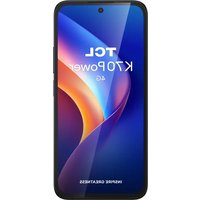
60 SE NXTPAPER 5G - Smartphone TCL - Free user manual and instructions
Find the device manual for free 60 SE NXTPAPER 5G TCL in PDF.


| Product Type | Smartphone |
| Brand | TCL |
| Model | 60 SE NXTPAPER 5G |
| Dimensions | 164.7 x 76.0 x 8.5 mm |
| Weight | 193 g |
| Display Size | 6.6 inches |
| Display Type | NXTPAPER 120Hz IPS LCD |
| Resolution | 1080 x 2400 pixels |
| Processor | MediaTek Dimensity 6020 |
| RAM | 6 GB |
| Internal Storage | 128 GB (expandable via microSD) |
| Rear Camera | 50 MP (main) + 2 MP (depth) + 2 MP (macro) |
| Front Camera | 8 MP |
| Battery Capacity | 5000 mAh |
| Charging | USB-C, 15W wired charging |
| Operating System | Android 13 |
| Connectivity | 5G, Wi-Fi 6, Bluetooth 5.1, NFC |
| Maintenance & Cleaning | Wipe with a soft, dry cloth; avoid contact with liquids |
| Safety | Use certified charger and cable; avoid extreme temperatures |
| Spare Parts & Repairability | Battery and screen can be replaced by authorized service centers |
Frequently Asked Questions - 60 SE NXTPAPER 5G TCL
User questions about 60 SE NXTPAPER 5G TCL
0 question about this device. Answer the ones you know or ask your own.
Ask a new question about this device
Download the instructions for your Smartphone in PDF format for free! Find your manual 60 SE NXTPAPER 5G - TCL and take your electronic device back in hand. On this page are published all the documents necessary for the use of your device. 60 SE NXTPAPER 5G by TCL.
USER MANUAL 60 SE NXTPAPER 5G TCL
This manual is intended ONLY for professional repairers who perform repair and professional maintenance of mobile phones.
This manual is available in English only.
Notice:
A. Read the entire manual before any repairs. If you are not comfortable performing the repairs as instructed in this manual, please do not proceed. B. All features, functions, specifications, and other product information in this document, including but not limited to the price, components, performance, availability, and capacity of the product, are subject to change without notice. C. This repair manual is provided only for out-of-warranty repair. If the product is under warranty, contact customer service before repairing it yourself or ordering a replacement part. Modification, customization, or alteration of software or hardware by anyone not authorized by the manufacturer will void the warranty. D. TCL is not liable for any damage to the product, any injury, or any other product safety issue caused by a repair attempt that does not follow the instructions or caused by any misunderstanding or wrong manipulation/utilization of any tools or installations. TCL is not liable for any damage to the product, any injury, or any other product safety issue caused by a repair attempt using any tools or installations not supplied or set up by TCL.
Rev.: 1.0
TCL 60 SE NXTPAPER 5G T521K Service Manual V1.0
Page: 1/36
Confidential and proprietary information contained in this repair guide is subject to change without notice. Distribution, transfer, or copy of any content or data in this document without the written permission of TCL is strictly prohibited.
Content
1 Precautions.... 3 2 Instructional Icons and Notes...... 4 3 ESD (Electrostatic Discharge) Safety...... 4
What is ESD?......4
How do you prevent electrostatic discharge? 4
4 Broken Glass Safety 4 5 Battery Safety 5
5.1 Best Practices to handle batteries .... 5 5.2 How to handle a battery thermal event? 6
6 Factory Reset 7
6.1 Remove Google account before doing factory reset 7 6.2 Factory Reset....7
7 Software Update....8
7.1 Software update by FOTA....8 7.2 Software update by Mobile Upgrade tool....8
8 Function Test with MMI.... 8
9
9 Basic Troubleshooting 12 10 Contact of TCL hotline and service centers 12 11 Disassembly and reassembly.... 13
11.1 Basic tools.... 13 11.2 Disassembly for replacement.... 14
Before disassembling: 14
For all cases of broken glass.... 14
SIM Tray and Memory Card Tray 15
Back Cover Assembly 15
Battery, Main Camera 17
Speakers, Type C Connector, Microphone, Audio Jack, Buttons FPC Assembly, Display
Assembly 21
11.3 Reassembly process.... 25
12 Exploded View 34 13 Electric Diagram Block.... 35
| Rev.: 1.0 | TCL 60 SE NXTPAPER 5G_T521K Service Manual V1.0 | Page: 2/36 |
| Confidential and proprietary information contained in this repair guide is subject to change without notice.Distribution, transfer, copy of any content or data in this document without the written permission of TCL is strictly prohibited. | ||
1 Precautions
- Use only demagnetized tools specifically designed for small electronic repairs, as most electronic parts are sensitive to electromagnetic forces.
- Use only high-quality screwdrivers when repairing products. Poor-quality screwdrivers can easily damage the heads of the screws.
- Always use genuine spare parts. Parts from third-party sources may not function properly or could even cause damage or accidents.
- The parts below may require calibration to ensure proper function after disassembly or repair. Contact TCL authorized Repair Center if needed: Sensors (proximity, fingerprint), rear camera, touch screen module, speaker, motherboard.
- The performance of the device's water resistance and dust resistance cannot be guaranteed in the event of an unqualified repair.
- If the device suffered from water/liquid damage, the cost of repairing the device may exceed the value of the device, depending on the level of damage.
- Be careful not to damage the battery, such as by heating, denting, short-circuiting, or disassembling it.
• Before any repair, back up personal information and important data.
- An Electrostatic Protected Area (EPA) is required to avoid electrostatic discharge that can cause unrecoverable damage to the device and parts during the repair.
• Before repairing the device, please ensure that the device is fully discharged and turned off.
- Prepare and wear appropriate safety equipment before carrying out repairs. Ensure the workspace is free from flammable materials, foreign objects, and sharp materials. Equip the area with necessary safety equipment such as fire extinguishers and protective gear.
- When removing the back cover, be careful not to damage the product parts and the battery.
- Before assembly, please ensure that there are no screws or foreign objects inside the device and around the battery.
• Before assembly, please ensure that there are no abnormalities before reattaching the back cover.
- When purchasing the product, the packing box is provided with user manual, quick guide, and other information. For more information about the product, please visit www.tcl.com.
| Rev.: 1.0 | TCL 60 SE NXTPAPER 5G_T521K Service Manual V1.0 | Page: 3/36 |
| Confidential and proprietary information contained in this repair guide is subject to change without notice.Distribution, transfer, copy of any content or data in this document without the written permission of TCL is strictly prohibited. | ||
2 Instructional Icons and Notes
Failure to follow instructional notes could result in fire, injury, data loss, or damage to the device, parts, or other property.
Warning – highlights instructions to reduce risk of safety issues or personal injury, failure to follow the warning instructions may cause fire or other safety issues and lead to personal injury or death.
Always prioritize safety over cost savings. If uncertain, contact TCL https://www.tcl.com/mobile-support.
Caution – highlights instructions to reduce the risk of data loss or damage to the device or other equipment.
Notice – Other instructional information, tips, notes for successfully completing procedures.
3 ESD (Electrostatic Discharge) Safety
What is ESD?
ESD (Electrostatic Discharge) is the rapid, spontaneous transfer of current (in another word, electrostatic charge) induced by a high electrostatic field. It can damage electronic components.
ESD damage may be a latent defect that may escape immediate detection, but may cause the device to fail prematurely.
How do you prevent electrostatic discharge?
All conductors in the environment, including personnel, shall be bonded or electrically connected and attached to a known ground or contrived ground.
Using ESD safety (Anti-static) equipment such as an anti-static wrist strap and gloves, anti-static tools and ESD safe mat when repairing the device can mitigate the risk of ESD event.
4 Broken Glass Safety
The display and back cover of the device utilize glass materials, which may fracture if subjected to:
- Drops onto hard surfaces ● Crushing, bending, or deformation ● Other types of hard impact
Warning – Avoid handling broken glass or sharp glass shards without proper protective equipment (e.g., cut-resistant gloves and safety goggles), as sharp edges pose safety risks.
| Rev.: 1.0 | TCL 60 SE NXTPAPER 5G_T521K Service Manual V1.0 | Page: 4/36 |
| Confidential and proprietary information contained in this repair guide is subject to change without notice.Distribution, transfer, copy of any content or data in this document without the written permission of TCL is strictly prohibited. | ||
5 Battery Safety

This device contains a built-in lithium-ion battery with soft battery cells. Battery safety is a primary concern when repairing a device with a built-in lithium-ion battery.
Only technicians with the appropriate knowledge, experience, and specialized tools should attempt to replace or repair built-in lithium-ion batteries.
Only install a new, genuine battery. Used batteries can become damaged during the removal process, increasing the risk of hazardous events. DO NOT attempt to reuse a battery.
Improper handling of the battery can lead to battery overheating, swelling, venting, leaking, or a battery thermal event, which may result in fire, injury, death, data loss, or damage to the device, parts, and surrounding property.
5.1 Best Practices to Handle Batteries

Warning: To prevent harmful incidents when handling batteries, adhere to safety guidelines and maintain a safety-focused workspace.
• Workspace Safety:
Ensure the workspace is free from flammable materials, foreign objects, and sharp materials. Equip the area with necessary safety equipment such as fire extinguishers and protective gear.
- Avoid Physical Damage:
Be careful when using sharp tools near the battery. Don't throw, drop, puncture, crush, or damage the battery cells to prevent triggering a battery thermal event or the release of noxious fumes.
- Prevent Short Circuits:
Don't use tools that conduct electricity and ensure battery terminals do not come into contact with metal objects or conductive surfaces during handling.
• Temperature Control:
Keep the ambient temperature within the battery's operating range.
Provide adequate ventilation to prevent overheating.
• Assembly Precautions:
Don't leave any abnormal objects (e.g., debris, loose screws, extra screws, etc.) inside the device before reassembling.
• Proper Disposal:
Dispose of or recycle waste batteries in accordance with local environmental laws and guidelines.
| Rev.: 1.0 | TCL 60 SE NXTPAPER 5G_T521K Service Manual V1.0 | Page: 5/36 |
| Confidential and proprietary information contained in this repair guide is subject to change without notice.Distribution, transfer, copy of any content or data in this document without the written permission of TCL is strictly prohibited. | ||
5.2 How to handle a battery thermal event?

Warning
A battery thermal event is a sudden chemical reaction inside a lithium-ion battery that
releases stored energy rapidly, potentially causing outgassing and fire. This can result from physical damage, improper handling or replacement, or exposure to temperatures outside the battery's safe operating range.
Act immediately when you notice any signs of a battery thermal events to ensure personal and environmental safety.
Signs of a Battery Thermal Event:
1) Smoking, sparking, or soot emission from the battery or device. 2) The battery pouch rapidly swelling or puffing out. 3) Hissing or popping sounds emanating from the battery or device.
Immediate Actions to Take:
1) Smother the Fire: Quickly cover the battery or device with plenty of clean, dry sand to contain the reaction. 2) Contact Authorities: Call local fire services for additional assistance. 3) Evacuate and Ventilate: Leave the area for 30 minutes to allow smoke to dissipate and ensure the environment is safe. 4) Handle with Protection: After 30 minutes, wear heat-resistant gloves and safety glasses with side shields before removing the device from the sand. 5) Clean the Area: First wipe the affected area with water, then use an ESD-safe cleaning solution to ensure safety. 6) Proper Disposal: Dispose of the damaged battery or device and any debris in accordance with local environmental laws and guidelines.
| Rev.: 1.0 | TCL 60 SE NXTPAPER 5G_T521K Service Manual V1.0 | Page: 6/36 |
| Confidential and proprietary information contained in this repair guide is subject to change without notice.Distribution, transfer, copy of any content or data in this document without the written permission of TCL is strictly prohibited. | ||
6 Factory Reset

Caution: Factory reset will format the device to restore the device to its factory default settings.
This will erase all user data including but not limited to files and downloaded apps in the device. Before performing factory reset, remember to back up all important data stored in the device. TCL is not responsible for the loss of data stored in the device.
6.1 Remove Google account before doing factory reset
If you need to setup the device with another Google account at the initial setup after factory reset, Google account need to be removed before doing the factory reset, otherwise it will require you to login the previous signed-in Google account. You can follow the below steps to remove the Google account from the device.
Launch Settings app -> Accounts -> tap on the google account-> Remove account -> tap on REMOVE ACCOUNT.
6.2 Factory Reset
You can follow the below steps to perform factory reset if the phone can be powered on.
Go to main menu -> "Settings"--> "System"--> "Reset options"--> "Erase all data (factory reset)"->Touch "Erase all data" in the open window -> "Erase all data".
| Rev.: 1.0 | TCL 60 SE NXTPAPER 5G_T521K Service Manual V1.0 | Page: 7/36 |
| Confidential and proprietary information contained in this repair guide is subject to change without notice.Distribution, transfer, copy of any content or data in this document without the written permission of TCL is strictly prohibited. | ||
7 Software Update
It is suggested to upgrade the handset software to latest version for better performance.
Before upgrade, please remember to back up the data and keep the phone fully charged.
7.1 Software update by FOTA
Firmware-Over-The-Air ("FOTA") is a way in which the firmware of a mobile device is updated wirelessly by the device's manufacturer. Firmware runs in the background without any input from the user, to make sure that the device's hardware runs properly.
Launch the device's "Settings" app and tap on "System" -> "System Update" -> "CHECK FOR UPDATES".
7.2 Software update by Mobile Upgrade tool
1) On the computer, download the corresponding Mobile Upgrade tool from TCL website https://www.tcl.com/mobile-support -> choose your product on the page -> click on Download under the corresponding Software tag. 2) Read and agree to the terms and conditions, and follow the on-screen instructions to install the tool on the computer. 3) Restart the computer after the tool installation. 4) Launch the tool and select the device model in the dropdown list. 5) Read the on-screen instructions and precautions to click through "Start" -> "Next" -> "Yes". 6) Power off the device and connect it to computer via USB cable 7) The software update will start. 8) Click "OK" and disconnect the device from USB cable when the tool pops up the prompt "Please disconnect your device from the USB cable to proceed". 9) Click "Upgrade device" and connect your powered off device to computer, waiting for upgrade.

Caution: Do not disconnect the device from the computer during the upgrade process unless there is pop up message from the tool.
10) When upgrade is completed, it will pop up a message window saying "Elapsed time: XX:XX:XX. Thanks for using Mobile Upgrade tool. Your device has been successfully upgraded."
8 Function Test with MMI
1) Type *#*#8257253#*#* in the phone dial pad to enter MMI test mode.
| Rev.: 1.0 | TCL 60 SE NXTPAPER 5G_T521K Service Manual V1.0 | Page: 8/36 |
| Confidential and proprietary information contained in this repair guide is subject to change without notice.Distribution, transfer, copy of any content or data in this document without the written permission of TCL is strictly prohibited. | ||
2) Select "MANU" to do the MMI test manually. 3) For instructions of general test item, please refer to . 4) Follow the on-screen instruction and procedures to finish all test items.
Basic tool preparation:
Headset, data cable and original charger that come in the box, SIM card and SIM-eject Pin, SD card, NFC card.
MMI test items:
- Bluetooth test: it will search for bluetooth signals around you and display searched result on the screen if it function well, "Pass" button will be available.
- WIFI2.4G test: it will search for WIFI hotspot (2.4G) around you and display searched result on the screen if it function well, "Pass" button will be available.
- WiFi 5G test: it will search for WiFi hotspots (5G) around you and display the search results on the screen. If it functions well, the "Pass" button will be available.
- Fingerprint test: press your finger on the fingerprint button. It will test automatically and display pass if it functions well.
- Touch Panel Horizontal test: please draw the line in the yellow area. It will automatically judge the results.
- Touch Panel Vertical test: please draw the line in the yellow area. It will automatically judge the results.
- TP Lock test: please press the power key. The "Pass" button will be available if it functions well.
- LCD RGB/ LCD Black/ LCD Grey/ LCD GrayLevel/ LCD White tests: you can check the LCD three primary colors, RED, GREEN, BLUE are clearly visible/ the whole screen is black/ the whole screen is grey/ screen shows a distinct grayscale transition displayed from black to white/ the whole screen is white. LCD display should have no spots, lines, light leakage, or dead pixels. The test result buttons "PASS" or "FAIL" will not be displayed on the screen, but the buttons exist at the bottom of the screen, with "PASS" on the left and "FAIL" on the right. Please click according to the test result.
- Keyboard test: please press the "volume up" key, "volume down" key, and "power" key, and switch up and down the "nxtpaper key". The "Pass" button will be available if all the keys function well.
| Rev.: 1.0 | TCL 60 SE NXTPAPER 5G_T521K Service Manual V1.0 | Page: 9/36 |
| Confidential and proprietary information contained in this repair guide is subject to change without notice.Distribution, transfer, copy of any content or data in this document without the written permission of TCL is strictly prohibited. | ||
LCD Backlight test: the LCD backlight will flash if it functions well. If it is long bright or long dark, without bright and dark alternation, it should be judged as bad.
Front Camera test: fixed focal. A preview screen should show a clear photo, with no mirror dust if it functions well.
- Main Camera test: auto focus. A preview screen should show normal focus, a clear photo, and no mirror dust if it functions well.
- Ultra-wide Camera test: fixed focal. A preview screen should show a clear photo, with no mirror dust if it functions well.
- Macro Camera test: fixed focal. A preview screen should show a clear photo, with no mirror dust if it functions well.
- Camera OTP test: information check item. Touch "Pass" if all of the camera items are "OK".
- Camera LED-2 test: check the camera LED brightness condition and select the bright option accordingly. The "Pass" option will be available if it functions well.
- Main Receiver-2 test: you will hear a voice prompt and a number from the top receiver if it functions well. Check whether there is some voice or if the voice is low. Select the number from 0 to 5 which you hear at the end of the voice. The "Pass" button will be available if you select the right number.
- Sub Speaker-2 test: you will hear a voice prompt and a number from the top speaker if it functions well. Check whether there is some noise or the voice is low. Select the number from 0 to 5 which you hear at the end of the voice. The "Pass" button will be available if you select the right number.
- Main Speaker-2 test: you will hear a voice prompt and a number from the bottom speaker if it functions well. Check whether there is some noise or the voice is low. Select the number from 0 to 5 which you hear at the end of the voice. The "Pass" button will be available if you select the right number.
- Main MIC Record test: make a noise near the MIC (on the bottom of the device). You will hear it from the Speaker and Receiver if it functions well.
- Vibrator-2 test: you can feel the device's vibrating if it functions well. Select the vibration condition accordingly. The "Pass" button will be available if you select the right condition.
- NFC test: put an NFC card or NFC device near the center of the camera lens. The screen will display "NFC detected" if it functions well.
- Charger test: connect the device with the original TCL charger that came from the box (18W charger if no original). Wait for a moment until the current rises to the range 2500mA to 4500mA. Disconnect the
USB port from the device and insert it with the other USB side. Wait for a moment until the current rises to the range 2500mA to 4500mA. The "Pass" button will be available if it functions well.
Headset-2 test: insert a headset into the device.
a) You will hear a voice prompt which introduces an emergency call number through the headset left. Check whether there is some noise or the voice is low. And select the number from 0 to 5 which you hear at the end of the voice. The "Pass" button will be available if you select the right number.
b) You will hear a voice prompt which introduces an emergency call number through the headset right. Check whether there is some noise or the voice is low. And select the number from 0 to 5 which you hear at the end of the voice. The "Pass" button will be available if you select the right number.
c) Make a noise near the headset MIC. You will hear it from the headset if it functions well.
- FM test: insert a headset into the device, and you will hear FM playing through the headset if it functions properly.
- Compass test: move away from any interference and re-calibrate by moving the phone in a figure 8 motion.
- G-Sensor test: place the device according to the on-screen instructions (towards up, towards left, towards right, towards down, face down, face up), and the instruction will disappear if it functions properly.
- Light Sensor test: cover the light sensor (near the front camera) with your hand to test it. It will display the ambient light value and "dark/bright OK" if it functions properly.
- SIM card test: insert a SIM card and the device will detect it if it functions properly.
- Memory card test: insert an SD card and the device will detect it if it functions properly.
- Battery Temperature test: you can see information about the battery, such as temperature, voltage, etc.
- Proximity Sensor test: cover the proximity sensor (near the front camera) with your hand to test it. The value beside "near/far" will change when you cover and uncover the light sensor if it functions properly.
- GPS test: it will run GPS and search for satellites, and then it will display the satellites' number, PRN, and SNR if it functions properly. The "Pass" button will be available.
Note: it is better to do this test in an open place.
EXIT: touch to exit the MMI test.
| Rev.: 1.0 | TCL 60 SE NXTPAPER 5G_T521K Service Manual V1.0 | Page: 11/36 |
| Confidential and proprietary information contained in this repair guide is subject to change without notice.Distribution, transfer, copy of any content or data in this document without the written permission of TCL is strictly prohibited. | ||
9 Basic Troubleshooting
You can use our troubleshooting on the TCL official website as a reference for some frequently encountered issues.
① Visit https://www.tcl.com/mobile-support ② Scroll down to the "Troubleshooting" section and click on "View more" ③ Select the type of product and follow the step-by-step checking questions and options.
Notice: If the previously described options do not help, you can contact our hotline or repair center to get more professional technical assistance. Find the hotline or repair center information on the TCL website.
10 Contact of TCL hotline and service centers
If you are looking for official professional repair from TCL, please visit HOTLINE & SERVICE CENTERS to search for the contact in your country/region.
| Rev.: 1.0 | TCL 60 SE NXTPAPER 5G_T521K Service Manual V1.0 | Page: 12/36 |
| Confidential and proprietary information contained in this repair guide is subject to change without notice.Distribution, transfer, copy of any content or data in this document without the written permission of TCL is strictly prohibited. | ||
11 Disassembly and reassembly
11.1 Basic tools

Warning:
Wear proper protective equipment for your safety when repairing devices. In the disassembly and assembly steps, additional tools may be required. Refer to specific steps for details.
| Tool/ Equipment | Description | Example Image |
| Safety glasses with side shields | Prevents accidents during repair (protective equipment) |  |
| Cut-resistant Gloves | Prevents accidents during repair (protective equipment) |  |
| Safety Mask | Prevents accidents during repair (protective equipment) |  |
| ESD wrist strap | Mitigate the risk of ESD event (recommended) |  |
| ESD Safe Mat | Mitigate the risk of ESD event (recommended) |  |
| SIM-eject Pin | To eject SIM tray |  |
| Plastic Plectrum | To disassemble back cover and other parts |  |
| Rev.: 1.0 | TCL 60 SE NXTPAPER 5G_T521K Service Manual V1.0 | Page: 13/36 |
| Confidential and proprietary information contained in this repair guide is subject to change without notice.Distribution, transfer, copy of any content or data in this document without the written permission of TCL is strictly prohibited. | ||
| Anti ESD Tweezers | To disconnect connectors, cables, and other parts. Notice: Use tweezers made of plastic or rubber material when parts may be easy to be damaged by sharp tool. |  |
| Cross-head Screwdriver | To remove cross-head screws. Size: PH0 |  |
| Hot air gun | To remove surface mounted components such as microphone |  |
11.2 Disassembly for replacement
Before disassembling:
Always perform the following steps before starting a repair:
1) Back up the device's data. 2) Discharge the battery fully. 3) Turn off the device. 4) Disconnect all cables. 5) Remove all cases and covers. 6) Clear and clean your workspace. 7) Put on an ESD wrist strap and attach it to a properly grounded ESD mat. 8) The product's composition may vary depending on the country, region, or carrier.
For all cases of broken glass
Please refer to "4 Broken Glass Safety" first.
To prevent broken glass scattering, attach an acrylic protective cover to the screen.
Screen glass cannot be separated alone from the screen module. If the glass is broken, the whole screen module must be replaced.
If you are having difficulty doing the repair, take the device to TCL authorized repair center for help.
| Rev.: 1.0 | TCL 60 SE NXTPAPER 5G_T521K Service Manual V1.0 | Page: 14/36 |
| Confidential and proprietary information contained in this repair guide is subject to change without notice.Distribution, transfer, copy of any content or data in this document without the written permission of TCL is strictly prohibited. | ||
SIM Tray and Memory Card Tray
To pop remove the SIM tray, insert a SIM-eject pin into the hole beside the tray. Push in towards the device, but don't force it.
![graph LR A["Device with left switch"] --> B["Switch state change"] B --> C["Device with right switch"] C --> D["Screen state change"]](/content/2026/07/1422433/images/919df1e3c413726199f505dbcaa5e3d52d1db3d9f724c46f7b3f29f40df6f1b2.jpg)
Back Cover Assembly
Remove SIM Tray and Memory Card Tray before you begin.
| Insert the tip of an opening pick between the back cover and frame at the SIM card tray side.Slide the opening pick along the left edge to begin unclipping the back cover according to below figure's arrow direction until the back cover is fully unclipped.Caution: Be careful not to damage the side buttons. |  |
| Rev.: 1.0 | TCL 60 SE NXTPAPER 5G_T521K Service Manual V1.0 | Page: 15/36 |
| Confidential and proprietary information contained in this repair guide is subject to change without notice.Distribution, transfer, copy of any content or data in this document without the written permission of TCL is strictly prohibited. | ||
| Lift the back cover off the frame and flip it over the left edge of the phone. ⚠Caution: Be careful not to not to strain the back cover's cable of power and fingerprint reader button. |   |
| Laying the cover flat on your work surface. |  |
| Rev.: 1.0 | TCL 60 SE NXTPAPER 5G_T521K Service Manual V1.0 | Page: 16/36 |
| Confidential and proprietary information contained in this repair guide is subject to change without notice.Distribution, transfer, copy of any content or data in this document without the written permission of TCL is strictly prohibited. | ||
| Push the buttons towards the cover, then use the tweezer to take off the power and fingerprint button from the cover, but don’t force it. |  |
| Back cover assembly is removed. |  |
Battery, Main Camera
Remove the following parts before you begin.
SIM Tray and Memory Card Tray
Back Cover Assembly

Warning:
Please read the 5 Battery Safety section first before proceeding. If you are having difficulty doing the repair, take the device to TCL authorized repair center for help.
| Rev.: 1.0 | TCL 60 SE NXTPAPER 5G_T521K Service Manual V1.0 | Page: 17/36 |
| Confidential and proprietary information contained in this repair guide is subject to change without notice.Distribution, transfer, copy of any content or data in this document without the written permission of TCL is strictly prohibited. | ||
| Remove the Top bracket waterproof Mylar. |  |  |
| Remove cross-head screws. !Caution: Do not mix the type of screws. |  |  PN: BMA1630250C3Qty:10Torque: 0.8±0.03kgf.cm PN: BMA1630250C3Qty:10Torque: 0.8±0.03kgf.cm |
| 1Remove the 5M CAM Rubber2Remove the Furnished TOP Support |  | |
| After removal of the Furnished TOP Support. |  |  |
| Rev.: 1.0 | TCL 60 SE NXTPAPER 5G_T521K Service Manual V1.0 | Page: 18/36 |
| Confidential and proprietary information contained in this repair guide is subject to change without notice.Distribution, transfer, copy of any content or data in this document without the written permission of TCL is strictly prohibited. | ||
| Disconnect below connectors and cables:1 Battery connector (must be first)2 Display connector3 RF cablesCaution: be careful not to tear up the flexible printed circuit or cables. |  |  |
| Remove main camera and mylar.1 Main camera2 Mylar |  |  |
| Remove main PCBA.Caution: be careful not to tear up the flexible printed circuit or cables. |  | |
| Main PCBA removal. |  | |
| Rev.: 1.0 | TCL 60 SE NXTPAPER 5G_T521K Service Manual V1.0 | Page: 19/36 |
| Confidential and proprietary information contained in this repair guide is subject to change without notice.Distribution, transfer, copy of any content or data in this document without the written permission of TCL is strictly prohibited. | ||
| After main PCBA removal, peel off the battery three parts of adhesive tape to the other side respectively according to the picture's arrow direction.Warning:please be careful not to cut or tear up the tape. |  |
| Press and hold on the tape marked in picture as yellow in one hand to the back of the device.Pull the middle tape up (marked in picture as green) to remove the battery with the other hand.Warning:Please be careful not to press or squeeze on the battery by force. If you're having difficulty doing the repair, take your device to TCL authorized repair center for help. |  |
| Rev.: 1.0 | TCL 60 SE NXTPAPER 5G_T521K Service Manual V1.0 | Page: 20/36 |
| Confidential and proprietary information contained in this repair guide is subject to change without notice.Distribution, transfer, copy of any content or data in this document without the written permission of TCL is strictly prohibited. | ||
Battery removal completed.
Peel off the used tape accordingly by the direction.

Warning:
Please use new battery film for re-assembly.
Battery film PN:

Speakers, Type C Connector, Microphone, Audio Jack, Buttons FPC Assembly, Display Assembly
Remove the following parts before you begin.
SIM Tray and Memory Card Tray
Back Cover Assembly
Battery

Warning: When replacing display assembly, battery and battery film must be replaced with new one. Please read the section 5 Battery Safety section first before proceeding. If you are having difficulty doing the repair, take the device to TCL authorized repair center for help.
| Remove cross-head screws.Remove the Next Key FPC Support. !Caution: Do not mix the type of screws. |  |  PN: BMA1630250C3Qty:8Torque: 0.8±0.03kgf.cm PN: BMA1630250C3Qty:8Torque: 0.8±0.03kgf.cm |
 PN: BMA1225230C3Qty:1 PN: BMA1225230C3Qty:1 |
| Rev.: 1.0 | TCL 60 SE NXTPAPER 5G_T521K Service Manual V1.0 | Page: 21/36 |
| Confidential and proprietary information contained in this repair guide is subject to change without notice.Distribution, transfer, copy of any content or data in this document without the written permission of TCL is strictly prohibited. | ||
| Torque: 0.6±0.03 kgf.cm | ||
 | ||
| Insert and slide the opening pick along the left edge to bottom frame according to below figure's arrow direction. !Caution: Be careful not to damage the flexible cable atmarkedlocation. |  | |
| Disconnect below connector, cables, screw.1 Sub PCBA connector2 RF cable23 RF cable34 Sub PCBA screw !Caution: Do not mix the type of screws. |  |  PN: BMA1425254C3Qty:1Torque:0.7±0.03kgf.cm PN: BMA1425254C3Qty:1Torque:0.7±0.03kgf.cm |
| Pry up the Sub PCBA. |  | |
| Rev.: 1.0 | TCL 60 SE NXTPAPER 5G_T521K Service Manual V1.0 | Page: 22/36 |
| Confidential and proprietary information contained in this repair guide is subject to change without notice.Distribution, transfer, copy of any content or data in this document without the written permission of TCL is strictly prohibited. | ||
Remove below components by using plastic tweezer. Please follow the steps' number and arrow direction, be careful and don't force it.
① Up Speaker ② Side Key Furnished FPC ③ RF Cable 2, white ④ RF Cable 3, black ⑤ LCD FPC Hole Mylar ⑥ GND PCBA ⑦ Coin Vibrator

Caution:
Avoid using sharp tweezer. Be careful not to damage the flexible cables and FPCs.

Display assembly removal completed.

Warning:
Please use new battery and tape/film for re-assembly.
Battery PN:
Battery film PN:
BNH2LW0003C0

Rev.: 1.0
TCL 60 SE NXTPAPER 5G_T521K Service Manual V1.0
| Remove the cameras from Main PCBA.1 Front Camera2 Rear CameraCaution: Do not mix the type of cameras. |  | 1  2 2  |
| Remove the rubbers from Main PCBA.1 Front Cam BTB Rubber2 P-SENSOR Rubber |  | 1  2 2  |
| Remove the Down Speaker from Furnished Bottom Support.Caution: Do not mix the type of speakers. |  |  |
| Remove the Audio Jack Rubber Cover and USB Rubber. |  |  |
| Use hot air gun to take off the below components.1 Type C Connector2 Microphone3 Audio Jack |  | |
| Rev.: 1.0 | TCL 60 SE NXTPAPER 5G_T521K Service Manual V1.0 | Page: 24/36 |
| Confidential and proprietary information contained in this repair guide is subject to change without notice.Distribution, transfer, copy of any content or data in this document without the written permission of TCL is strictly prohibited. | ||
Remove the Battery BTB Support and Flash light PCBA.

11.3 Reassembly process.
To reassemble the device, follow above disassembly instructions in reverse order.
There are some important notes listed below for some steps.
1) Double-side sponge tape, all types of adhesive on battery or battery cover must be replaced with new ones once it is disassembled.
Conductive tapes and copper tapes are selectively replaced, depend on breakage, stickiness conditions.
2) Pay attention to the directions and positions of 2 speakers.
Up Speaker
| Rev.: 1.0 | TCL 60 SE NXTPAPER 5G_T521K Service Manual V1.0 | Page: 25/36 |
| Confidential and proprietary information contained in this repair guide is subject to change without notice.Distribution, transfer, copy of any content or data in this document without the written permission of TCL is strictly prohibited. | ||
Down Speaker
3) Remember to assemble the LCD FPC Hole Mylar.
4) There is "thermal gel" between the main PCBA and the display assembly. If a new display assembly is replaced or the main board is disassembled and the thermal gel has dried out, new thermal gel should be applied. Otherwise, it will affect the device's heat dissipation performance.
| Rev.: 1.0 | TCL 60 SE NXTPAPER 5G_T521K Service Manual V1.0 | Page: 26/36 |
| Confidential and proprietary information contained in this repair guide is subject to change without notice.Distribution, transfer, copy of any content or data in this document without the written permission of TCL is strictly prohibited. | ||

Note:
① New thermal gel should be applied when the display assembly is replaced. ② Clean the original thermal gel if it has dried out. ③ Prepare the "Thermal Gel" locally due to shipping restrictions.
| Part Name | Specification | Picture Example |
| Thermal Gel(Prepare locally) | Thermal conductivity higher than 3.5W |  |
④ It is suggested to apply approximately 420 ± 20 mg of new thermal gel on the display assembly, and then assemble the main PCBA into the display assembly.

5) There are three kinds of screws; please pay attention to the position and torque. The screws can be reused. 6) Assemble the cameras to the main PCBA according to the following picture.
| Rev.: 1.0 | TCL 60 SE NXTPAPER 5G_T521K Service Manual V1.0 | Page: 27/36 |
| Confidential and proprietary information contained in this repair guide is subject to change without notice.Distribution, transfer, copy of any content or data in this document without the written permission of TCL is strictly prohibited. | ||

Main Camera
| Camera Type | Camera description | Sample pic |
| Main Camera | Camera,50M,AF,9.9×9.9×3.8 mm |  |
| Rear Camera | Camera,5M,FF,6.5×6.5×4.61 mm |  |
| Front Camera | Front Camera,8M,FF,6.5×6.5×4.48 mm |  |
| Rev.: 1.0 | TCL 60 SE NXTPAPER 5G_T521K Service Manual V1.0 | Page: 28/36 |
| Confidential and proprietary information contained in this repair guide is subject to change without notice.Distribution, transfer, copy of any content or data in this document without the written permission of TCL is strictly prohibited. | ||
7) Pay attention to the direction of the Front CAM Rubber when assembling it on the front camera.

8) Pay attention to the assembly method of RF Cable 3.

9) For battery re-assembly, please follow the steps below carefully.

Warning:
Please read the Battery Safety section (section 5) first before proceeding. If you are having difficulty doing the repair, take the device to a TCL authorized repair center for help.
| Rev.: 1.0 | TCL 60 SE NXTPAPER 5G_T521K Service Manual V1.0 | Page: 29/36 |
| Confidential and proprietary information contained in this repair guide is subject to change without notice.Distribution, transfer, copy of any content or data in this document without the written permission of TCL is strictly prohibited. | ||
① Place the battery film in the correct direction.

Warning:
Pay attention to the top side (sticky when the upper film is removed) and the bottom side of the battery film, so that the upper film (which is not sticky) can be peeled off when the battery film is placed onto the frame.
The sticky side needs to be wrapped onto the battery.

Battery film

② Wipe to stick the tape against the display assembly frame. Ensure it is firmly attached.
③ Peel off the upper film #1.

| Rev.: 1.0 | TCL 60 SE NXTPAPER 5G_T521K Service Manual V1.0 | Page: 30/36 |
| Confidential and proprietary information contained in this repair guide is subject to change without notice.Distribution, transfer, copy of any content or data in this document without the written permission of TCL is strictly prohibited. | ||
| 4 Peel off the upper film#2. |  |
| 5 Align new battery into the display assembly frame accordingly.Warning:Don't leave any abnormal objects (i.e. debris, loose screws, extra screws, etc.) inside the device before re-assembling. |  |
| Rev.: 1.0 | TCL 60 SE NXTPAPER 5G_T521K Service Manual V1.0 | Page: 31/36 |
| Confidential and proprietary information contained in this repair guide is subject to change without notice.Distribution, transfer, copy of any content or data in this document without the written permission of TCL is strictly prohibited. | ||
| 6 Slightly swipe to stick the battery against the frame by hand, but don't force it or punch it. |  |
| 7 Wrap the rest part of the battery film onto the battery surface. |  |
| Rev.: 1.0 | TCL 60 SE NXTPAPER 5G_T521K Service Manual V1.0 | Page: 32/36 |
| Confidential and proprietary information contained in this repair guide is subject to change without notice.Distribution, transfer, copy of any content or data in this document without the written permission of TCL is strictly prohibited. | ||
| 8 Peel off the upper film#3. |  |
| 9 Slightly swipe to stick the battery film against the battery by hand, but don't force it or punch it, ensure it is attached firmly.10 Connect the battery connect back on to the main PCBA. |  |
10) Do not leave any abnormal objects (i.e., debris, loose screws, extra screws, etc.) inside the device before re-assembling.
| Rev.: 1.0 | TCL 60 SE NXTPAPER 5G_T521K Service Manual V1.0 | Page: 33/36 |
| Confidential and proprietary information contained in this repair guide is subject to change without notice.Distribution, transfer, copy of any content or data in this document without the written permission of TCL is strictly prohibited. | ||
12 Exploded View
| Rev.: 1.0 | TCL 60 SE NXTPAPER 5G_T521K Service Manual V1.0 | Page: 34/36 |
| Confidential and proprietary information contained in this repair guide is subject to change without notice.Distribution, transfer, copy of any content or data in this document without the written permission of TCL is strictly prohibited. | ||
13 Electrical Diagram Block
![graph TD subgraph MT6835 A["MT6831"] --> B["Micro SD + hot-pig"] B --> C["SIMI SIMI"] C --> D["LSTM"] D --> E["AMCI"] E --> F["NODE 4-Link"] F --> G["MDC1"] G --> H["SIMI SIMO"] H --> I["NIM1 SIMO"] I --> J["CONN IF"] J --> K["I/Q"] K --> L["CONN IF"] L --> M["LCD module"] M --> N["Camera Module"] N…](/content/2026/07/1422433/images/8b8a16509b78799cde11466d181903595555d06e316a67bf6092160fac802d0f.jpg)
| Rev.: 1.0 | TCL 60 SE NXTPAPER 5G_T521K Service Manual V1.0 | Page: 35/36 |
| Confidential and proprietary information contained in this repair guide is subject to change without notice.Distribution, transfer, copy of any content or data in this document without the written permission of TCL is strictly prohibited. | ||
-END OF DOCUMENT-
| Rev.: 1.0 | TCL 60 SE NXTPAPER 5G_T521K Service Manual V1.0 | Page: 36/36 |
| Confidential and proprietary information contained in this repair guide is subject to change without notice.Distribution, transfer, copy of any content or data in this document without the written permission of TCL is strictly prohibited. | ||
- NOTICE
- CONTENT
- PRECAUTIONS
- INSTRUCTIONAL ICONS AND NOTES
- ESD (ELECTROSTATIC DISCHARGE) SAFETY
- WHAT IS ESD
- HOW DO YOU PREVENT ELECTROSTATIC DISCHARGE
- BROKEN GLASS SAFETY
- BATTERY SAFETY
- BEST PRACTICES TO HANDLE BATTERIES
- HOW TO HANDLE A BATTERY THERMAL EVENT
- WARNING
- SIGNS OF A BATTERY THERMAL EVENT
- IMMEDIATE ACTIONS TO TAKE
- FACTORY RESET
- REMOVE GOOGLE ACCOUNT BEFORE DOING FACTORY RESET
- SOFTWARE UPDATE
- SOFTWARE UPDATE BY FOTA
- SOFTWARE UPDATE BY MOBILE UPGRADE TOOL
- FUNCTION TEST WITH MMI
- BASIC TOOL PREPARATION
- MMI TEST ITEMS
- BASIC TROUBLESHOOTING
- CONTACT OF TCL HOTLINE AND SERVICE CENTERS
- DISASSEMBLY AND REASSEMBLY
- BASIC TOOLS
- DISASSEMBLY FOR REPLACEMENT
- BEFORE DISASSEMBLING
- FOR ALL CASES OF BROKEN GLASS
- SIM TRAY AND MEMORY CARD TRAY
- BACK COVER ASSEMBLY
- BATTERY, MAIN CAMERA
- SPEAKERS, TYPE C CONNECTOR, MICROPHONE, AUDIO JACK, BUTTONS FPC ASSEMBLY, DISPLAY ASSEMBLY
- CAUTION
- REASSEMBLY PROCESS
- ELECTRICAL DIAGRAM BLOCK
Brand : TCL
Model : 60 SE NXTPAPER 5G
Category : Smartphone