POSDH8020 - Humidifier Point - Free user manual and instructions
Find the device manual for free POSDH8020 Point in PDF.


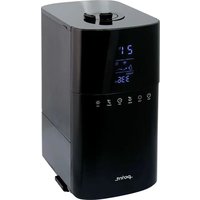
| Product Type | Ultrasonic Humidifier |
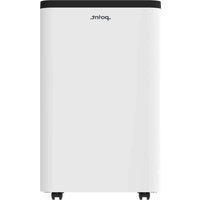
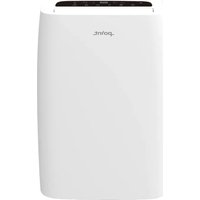
| Brand | Point |
| Model | POSDH8020 |
| Dimensions (L x W x H) | Approx. 20 x 15 x 30 cm |
| Weight | Approx. 1.2 kg |
| Power Supply | AC 220-240V, 50/60Hz |
| Power Consumption | 25 W |
| Water Tank Capacity | 2.5 L |
| Humidification Capacity | Up to 250 ml/h |
| Coverage Area | Up to 25 m² |
| Noise Level | < 35 dB |
| Functions | Ultrasonic humidification, auto shut-off, timer, adjustable mist output |
| Filter Type | None (demineralization cartridge recommended) |
| Control Type | Touch panel with LED display |
| Safety Features | Water shortage auto shut-off, overheat protection |
| Cleaning & Maintenance | Clean weekly with vinegar solution; replace cartridge every 3 months |
| Spare Parts | Demineralization cartridge (model XC-01) |
| Repair Service | Contact Point customer support or authorized service centers |
| Warranty | 2 years from purchase date |
| Package Content | Humidifier, user manual, demineralization cartridge, cleaning brush |
Frequently Asked Questions - POSDH8020 Point
User questions about POSDH8020 Point
0 question about this device. Answer the ones you know or ask your own.
Ask a new question about this device
Download the instructions for your Humidifier in PDF format for free! Find your manual POSDH8020 - Point and take your electronic device back in hand. On this page are published all the documents necessary for the use of your device. POSDH8020 by Point.
USER MANUAL POSDH8020 Point
Thank you for purchasing your new POINT PRO Series Dehumidifier. These operating instructions will help you use it properly and safely. We recommend that you spend some time reading this instruction manual in order that you fully understand all the operational features it offers. Read all the safety instructions carefully before use and keep this instruction manual for future reference.
NO
- Disconnect the appliance from its power source during service and when replacing parts and cleaning.
- Check the nameplate for the type of refrigerant gas used in your appliance.
- Specific information regarding appliances with refrigerant gas. The appliance is recommended not to pierce the cooling circuit of the machine. At the end of its useful life, deliver the appliance to a special waste collection centre for disposal. GWP (Global Warming Potential): R410A: 2088, R134a: 1430, R290: 3, R32: 675.
- This hermetically sealed system contains fluoridated greenhouse gases.
- ENVIRONMENTAL INFORMATION: This unit contains fluoridated greenhouse gases covered by the Kyoto Protocol.
- Do not use this unit for functions other than those described in this instruction manual.
- Make sure the plug is plugged firmly and completely inserted into the mains power outlet. It can result in the risk of electric shock or fire.
- Do not plug other appliances into the same outlet, it can result in the risk of electric shock.
- Do not disassemble or modify the appliance or the mains power cable, it can result in the risk of electric shock or fire. All other services should be referred to a qualified technician.
- Do not place the mains power cable or appliance near a heater, radiator, or other heat source. It can result in the risk of electric shock or fire.
- This unit is equipped with a mains power cable that has a earthed wire connected to an earthed pin or grounding tab. The plug must be plugged into a mains power socket that is properly installed and earthed. Do not under any circumstances cut or remove the earthed pin or grounding tab from this plug.
- The unit should be used or store in such a way that it is protected from moisture e.g. condensation, splashed water, etc. Unplug the unit immediately if this occurs.
- Always transport your appliance in a vertical position and place it on a stable, level surface during use. If the unit is transported laying on its side, it should be stood up and left unplugged for 6 hours.
- Always use the switch on the control panel or remote controller to turn the unit off, and do not start or stop operation by plugging in or unplugging the mains power cable. This can result in the risk of electric shock.
- Do not touch the buttons on the control panel with wet or damp fingers.
- Do not use hazardous chemicals to clean or come into contact with the unit. To prevent damage to the surface finish, use only a soft cloth to clean the appliance. Do not use wax, thinner, or a strong detergent. Do not use the unit in the presence of inflammable substances or vapors such as alcohol, insecticides, gasoline, etc.
- If the appliance is making unusual sounds or is emitting smoke or an unusual odor, unplug it immediately.
- Do not clean the unit with water. Water can enter the unit and damage the insulation, creating a shock hazard. If water enters the unit, unplug it immediately and contact Customer Service.
- Use two or more people to lift and install the unit.
- Always grasp the plug when plugging in or unplugging the appliance. Never unplug by pulling on the cord. This can result in the risk of electrical shock and damage.
- Install the appliance on a sturdy, level floor capable of supporting up to 110 lbs (50 kg). Installation on a weak or unlevel floor can result in the risk of property damage and personal injury.
- The appliance is compliant with the RE Directive (2014/53/EU).
If the appliance has the Wi-Fi function, the transmission power is less than 20 dBm, and the radio frequency range is 2412 MHz - 2472 MHz.
According to the EN standard:
- This appliance can be used by children aged 8 years and above and persons with reduced physical, sensory, or mental capabilities or lack of experience and knowledge if they have been given supervision or instruction concerning use of the appliance in a safe way and understand the hazards involved.
- Children shall not play with the appliance.
- Cleaning and user maintenance shall not be made by children without supervision.
- If the mains power cable is damaged, it must be replaced by the manufacturer, its service agent or a similarly qualified person in order to avoid a hazard.
- The appliance shall be installed in accordance with national wiring regulations.
- When the fuse is blown/circuit breaker is tripped, check the house fuse/circuit breaker box and replace fuse or reset breaker ● Details of type and rating of fuses : T; 3.15A; 250VAC.
IMPORTANT - GROUNDING METHOD
This product is factory equipped with a power supply cord mains power cable that has a three-pronged grounded plug. It must be plugged into a mating grounding type receptacle in accordance with the National Electrical Code and applicable local codes and ordinances. If the circuit does not have a grounding type receptacle, it is the responsibility and obligation of the customer to exchange the existing receptacle in accordance with the National Electrical Code and applicable local codes and ordinances. The third ground prong should not, under any circumstances, be cut or removed. Never use the cord mains power cable, the plug or the appliance when they show any sign of damage. Do not use your appliance with an extension cord unless it has been checked and tested by a qualified electrical supplier. Improper connection of the grounding plug can result in risk of fire, electric shock and/or injury to persons associated with the appliance. Check with a qualified service representative if in doubt that the appliance is properly grounded.
ELECTRICAL CONNECTIONS
Before plugging the appliance into the mains socket, check that:
- The mains power supply corresponds to the value indicated on the rating plate on the back of the appliance.
- The power socket and electrical circuit are adequate for the appliance.
- The mains socket matches the plug. If this is not the case, have the plug replaced.
- The mains socket is adequately earthed. Failure to follow these important safety instructions absolves the manufacturer of all liability.
SOME NOTIONS ON HUMIDITY
Air always contains a certain amount of water in the form of vapour. This determines the level of humidity in an atmosphere. The capacity of the air to hold water vapour increases with temperature. This is why in our homes, as soon as the temperature decreases, the vapour contained in the air condenses, as is evident on the colder surfaces in the room, such as the windows, walls etc. The purpose of a dehumidifier is to remove the excess moisture from the air, avoiding the damage caused by condensation
Experts have established that the optimum environmental conditions for our well-being and for the home are obtained between 40% and 60% relative humidity. With very low temperatures, you are recommended to heat the room even minimally. This considerably increases the dehumidifying power of the appliance. With heating, the condensation formed by the water vapour on windows and other cold surfaces evaporates into the air to be collected by the dehumidifier. Air leaving the dehumidifier is usually about 1°C-2°C warmer than room temperature.
Preparation Identification of parts


Component Description
- Control panel
- Air outlet
- Tank
- Water level view window
- Handle
- Air intake grille
- Mains power cable
- Drain pipe
Note: All the illustrations in this manual are for explanatory purposes only. Your appliance may be slightly different.
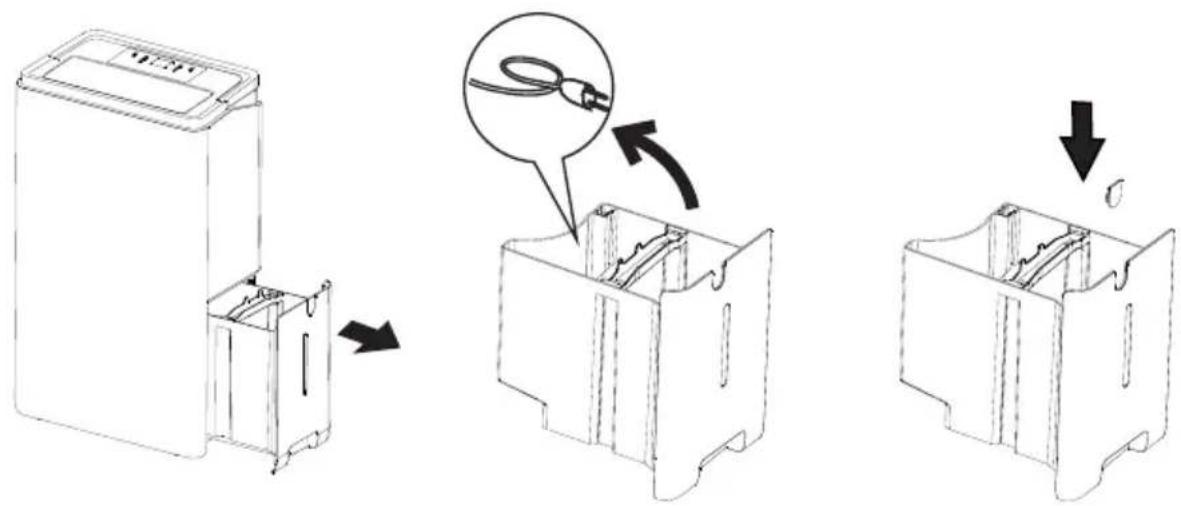
Before use, remove the accessory from the tank
- Remove the tank from the appliance.
- Take out the plug and other accessories.
- Correctly put the tank back into the appliance.

The accessories are:
(Note: If an accessory is not in the tank, you will find it elsewhere in the packaging.)
| Chip of tank | 1 set | |
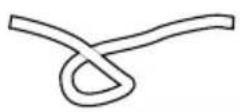 | Drain pipe | 1 set |
Installation
Take out the mains power cable from the tank.
Take out the tank, remove the mains power cable and accessories from it. Install the chip on the tank.
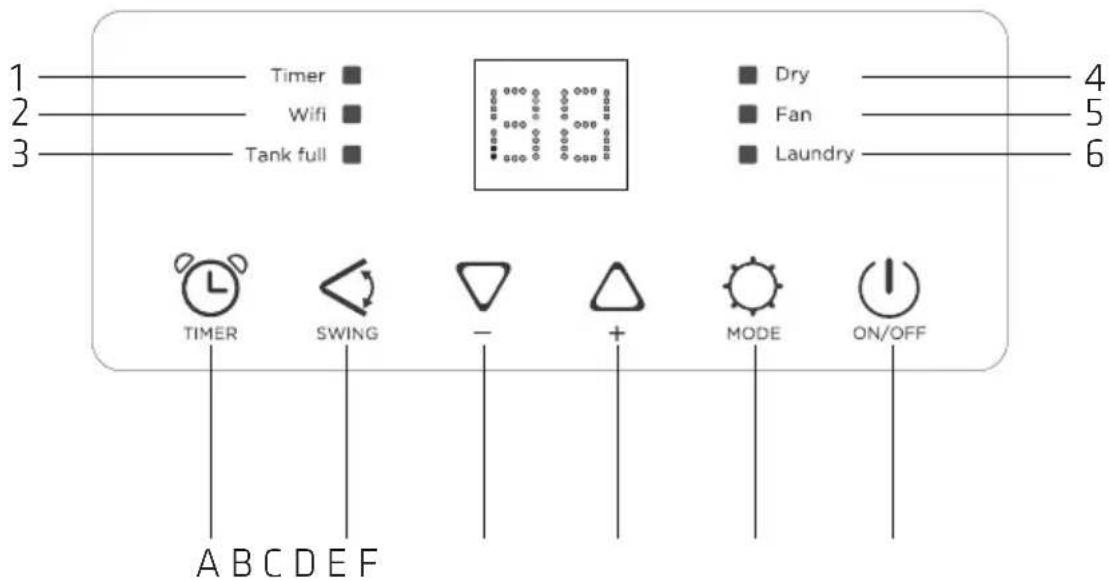
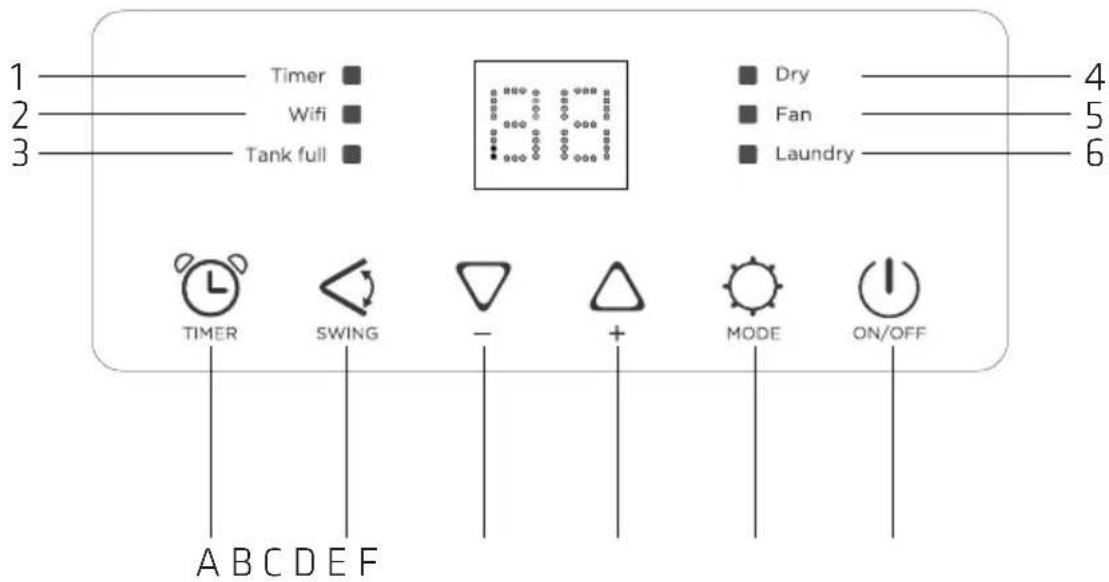
CONTROL PANEL

- Timer symbol
- Wi-Fi symbol
- Tank full symbol
- Dry symbol
- Fan symbol
- Laundry symbol
A. Timer button B. Swing button C. Decrease button D. Increase button E. Mode button F. ON/OFF button
• "ON/OFF" button: Turns the power supply on or off, used to control the start-up or shutdown of the appliance. • Decrease/Increase button
Press "△" / "▽" to select the indoor humidity level you expect to achieve, or set the time.
- "🔊" button:
Press the "○" button to turn on the appliance, and press the "○" button to choose different modes.
- Dehumidifying mode
Press the "MODE" button until the "DRY" symbol illuminates.
- Press the "△" or "▽" to choose the desired humidity. The humidity adjustable range is 35%RH–80%RH. The screen will display the set humidity, and after a few seconds, it will switch to display the ambient humidity.
- When the ambient humidity is lower than the set humidity, the compressor stops running, and after a few minutes the fan stops running.
- Continuous mode
Under dehumidify mode, press the "▽" button until the "CO" indicator illuminates, then the unit will run continuously.
- Fan mode (only applies to units with Fan function)
When the appliance is running, press the "MODE" button until the "Fan" symbol illuminates.
You can start or stop the fan function by pressing the "MODE" button.
The screen displays the following:
![graph LR A["..."] --> B["..."] B --> C["..."] C --> D["..."] D --> E["..."] E --> F["..."]](/content/2026/07/1421787/images/216fcdaa53fc73f2ac128e423bf5063fff59ef81af5dd7119f552a5676ce391c.jpg)
In this function, the compressor is not working, and the appliance is not dehumidifying.
- Laundry mode
Press the "MODE" button until the "LAUNDRY" symbol illuminates.
In this mode, humidity cannot be adjusted, and the screen displays ambient humidity.
After running for 24 hours, the appliance quits laundry mode, turns to dehumidifying mode, and sets humidity to 60%RH.
• Dehumidifying + Fan mode
Press the "MODE" button until the "DRY" and "Fan" symbols both illuminate. In this mode, the humidity can be set like in dehumidifying mode, and when the ambient humidity is lower than the setting, the fan will run continuously.
- "◀" button
Press the "◀" button to control the angle of the inner deflector.
• "TIMES" button
This timer can be used to delay the appliance start-up or shutdown, which avoids wasting electricity by optimizing operating periods.
Programming start up
- Turn on the appliance, choose the mode you want, for example Dehumidify mode. Turn off the appliance.
- Press the button, the "Timer" symbol starts to flash, press the "/" to adjust the set time from 0.5-24 hours.
- If there is no operation within 5 seconds, the timer start function is activated.
- Press the "ℓ" button again to cancel the Timer.
Programming shut down
- When the appliance is running, press the ⏻ button. The "ℓ" symbol starts to flash. Press the "△" / "▽" buttons to adjust the set time from 0.5 to 24 hours.
- If there is no operation within 5 seconds, the timer start function activates.
- Press the "ℓ" button again to cancel the Timer.
Alarm of Tank full
- When the tank is full, the compressor and fan will shut off, the "TANK FULL" symbol will flash. After about 3 minutes, a beeping noise will sound, and after about 6 minutes, it will beep again.
- The unit will not run again until the tank is emptied and properly placed back inside the unit.
- The tank should be cleaned every week to prevent the growth of mold, mildew, and bacteria. Use a mild detergent to clean. Once clean, completely dry the tank and place it back inside the unit.
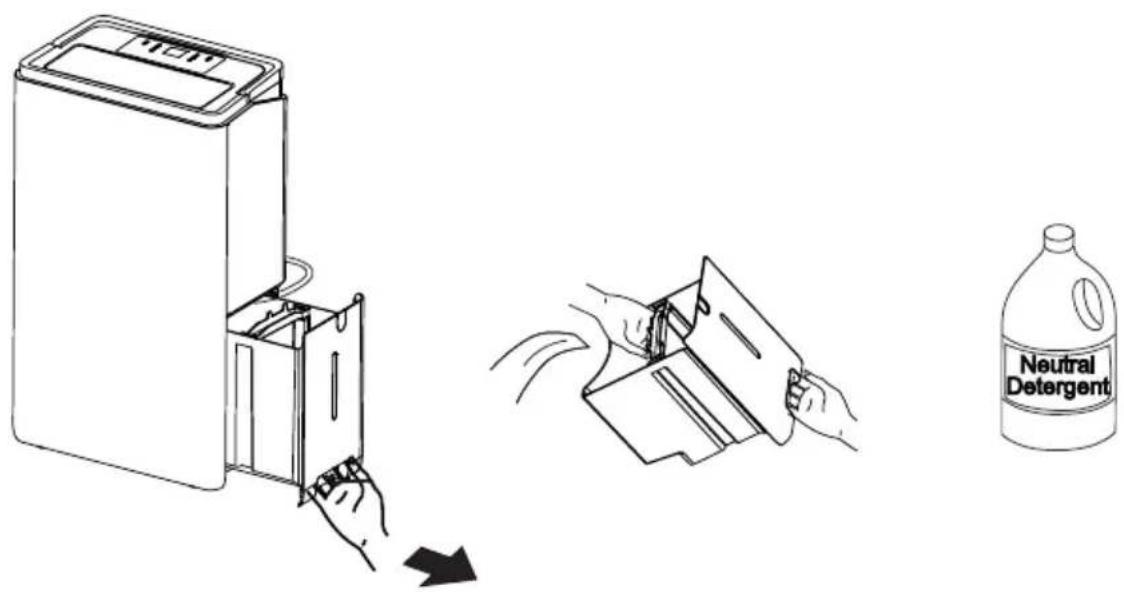
Note: Hold the tank with both hands when emptying.
Note: When the tank is full or removed from the unit, the compressor will turn off but the fan will continue to run for a few minutes. This is completely normal. The unit will not be removing moisture from the air at this time.
Note: During operation, it is normal for the unit to exhaust warm air from the top of the unit.
Caution: Do not place the tank on the floor when it is full as it is uneven on the bottom and water may spill.
Continuous drain
Connect the drain pipe to the hole on the unit, then the unit can run continuously without needing to clean the tank.
1) Place the unit on a level floor, remove the tank, and take out the chip from the tank.
2) Install the pipe onto the drain nozzle.
3) Put the tank back correctly and ensure the drain pipe is positioned in the gap of the tank; do not press on the pipe.
4) Press the "ON/OFF" button to run the unit.
Note: If the continuous drain function is not needed, remove the drain pipe and put the tank back in the unit correctly; then the water will flow into the tank.

Note: Install the drain pipe as shown in the picture below.
Install the drain pipe correctly, otherwise the water cannot drain from the pipe.

Notice: If the unit is placed on an uneven surface or the drain pipe is not installed correctly, the water will fill the tank and the unit will stop running.
If it is not installed correctly, check that the unit is on a flat surface and that the drain pipe is installed properly.
AUTOMATIC DEFROST
When frost builds up on the evaporator coils, the compressor will stop and the fan will continue to run until the frost disappears. When the coils are completely defrosted, the compressor will automatically restart and dehumidification will resume.
Location requirements:
The unit operating in a basement will have little or no effect on drying out an adjacent enclosed storage area, such as a closet, unless there is adequate
circulation of air in and out of the area.
- Do not use outdoors.
- This appliance is intended for indoor use only. Place the appliance on a smooth, level floor surface that is strong enough to support the unit with a full tank of water.
- Allow at least 18" (45 cm) of space around and above the appliance, away from the wall, for efficient operation.
- Place the appliance in an area where the temperature will not fall below 5°C (41°F).

- Use the dehumidifier in cooking, laundry, bathing, and dish-washing areas that have excessive moisture.
- Place the dehumidifier away from a clothes dryer.
- Use the dehumidifier in a basement to help prevent moisture damage.
- The dehumidifier must be operated in an enclosed area to be most effective; close all doors, windows, and other outside openings to the room.
- Do not block the air inlet or outlet of the appliance. Reduced air flow will result in poor performance and could damage the unit.
CLEANING AND MAINTENANCE
Before cleaning or maintenance, turn the appliance off by pressing the "POWER" button on the control panel, wait for a few minutes, then unplug from the mains socket.
CLEANING THE CABINET
You should clean the appliance with a slightly damp cloth, then dry with a dry cloth.
- Never wash the appliance with water; it could be dangerous.
- Never use petrol, alcohol, or solvents to clean the appliance.
- Never spray insecticide liquids or similar.
CLEANING THE FILTER
- To keep your appliance working efficiently, you should clean the filter every week of operation.
- Follow the diagram to remove the filter.
- To avoid possible cuts, avoid contacting the metal parts of the appliance when removing or re-installing the filter. It can result in the risk of personal injury.
- Use a vacuum cleaner to remove dust accumulations from the filter. If it is very dirty, immerse in warm water and rinse a number of times. The water should never be hotter than 40°C (104°F). After washing, leave the filter to dry then attach the intake grille to the appliance.

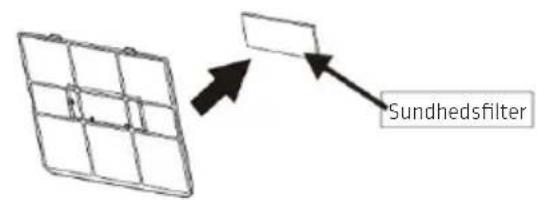
Health filter
Some models have the health filter. Follow the diagrams below to remove it. Clean the filter every three months.
Use the vacuum to clean it. After cleaning the filter, install the filter before using the appliance.

END OF SEASON OPERATIONS
- Unplug from the mains socket, empty the tank, remove the cap.
- Run off all water left inside the appliance. When all the water has been drained, put the cap back in place.
- Clean the filter and dry thoroughly before putting back.
- Cover the appliance to prevent dust.
- Store the appliance upright in a dry location.
START OF SEASON CHECKS
Make sure the mains power cable and plug are undamaged and the earth system is efficient.
Follow the installation instructions precisely.
TROUBLESHOOTING
Occasionally, you may encounter some problems that are of a minor nature and a service call may not be necessary. Use this troubleshooting guide to identify possible problems you may be experiencing.
| Problem Possible Causes Solutions | ||
| Dehumidifier doesnot start | The dehumidifier is unplugged. | Make sure the dehumidifier's plug is pushed completely into the outlet. |
| The fuse is blown/circuit breaker is tripped. | Check the house fuse/circuit breaker box and replace fuse or reset breaker. | |
| Dehumidifier has reached its present level or the tank is full. | The dehumidifier automatically turns off when either condition occurs. Change to a lower setting or empty the water tank and replace properly. | |
| Tank is not in the proper position. | The tank must be in place and securely seated for the dehumidifier to operate. | |
| Power Failure. | There is a protective time delay (up to 3 min.) to prevent tripping of the compressor overload. For this reason, the unit may not start normal dehumidify for 3 min after it is powered back on. | |
| Dehumidifier does not dry the air as it should | Not enough time allowed for unit to remove moisture. | When first installed, allow at least 24 hours to maintain the desired dryness. |
| Airflow is restricted. | Make sure there are no curtains, blinds, or furniture blocking the front or back of the dehumidifier. See the CHOOSING A LOCATION section. | |
| Dehumidifier does not dry the air as it should | Dirty filter. | See the CLEAN FILTER section. |
| The Humidity Control may not be set low enough. | For drier air, press the ▽ button to lower the percent humidity desired in the room,or set the dehumidifier to □ for maximum dehumidify. | |
| Doors and windows may not be closed tightly. | Check that all doors, windows, and other openings are securely closed. | |
| Clothes dryer may be blowing moist air into the room. | Install the dehumidifier away from the dryer.The dryer should be vented outside. | |
| Room temperature is too low. | Moisture removal is best at higher room temperatures.Lower room temperatures will reduce the moisture removal rate. This model is designed to operate at temperatures above 5°C(41°F). | |
| Appliance runs too long | The area is too large | The capacity of the appliance can not meet the area of the room |
| Doors and windows are open | Close the door and window | |
| Frost appears on heat-exchanger | Appliance run recently or the room temperature is too low | It is normal, frost usually disappear in 60 min |
| Fan noise | The air is passing through the appliance | This is normal |
| Water on the floor | The drain connection may be aging or loose | Check the drain connection and the appliance is placed level |
| The drain pipe is connected, but the water is not drained. | If use the tank, remove the drain pipe and put back the drain cover; or install the drain pipe correctly | |
If the following error code appears, contact the after-sales service department for inspection and repair.
| CODE DESCRIPTION | |
| EH | Humidity sensor failure |
| E2 | Temperature sensor failure |
Strictest operation environment: 5°C\~32°C (41°F\~90°F), 30%RH\~90%RH.
SPECIFICATION:
Model: POSDH8020
Rated voltage: 220-240V\~50Hz
Rated power: 445W


Important information for correct disposal of the product in accordance with EC Directive 2012/19/EU.
At the end of its working life, the product must not be disposed of as urban waste. It must be taken to a special local authority differentiated waste collection centre or to a dealer providing this service.
Disposing of a household appliance separately avoids possible negative consequences for the environment and health deriving from inappropriate disposal and enables the constituent materials to be recovered to obtain significant savings in energy and resources. As a reminder of the need to dispose of household appliances separately, the product is marked with a crossed-out wheeled dustbin.
Imported and Exclusively marketed by:
Power International AS,
PO Box 523, N-1471 Lørenskog, Norway
Power Norge:
https://www.power.no/kundeservice/
T: 21 00 40 00
Expert Danmark:
https://www.expert.dk/kundeservice/
T: 70 70 17 07
Power Danmark:
https://www.power.dk/kundeservice/
T: 70 33 80 80
Punkt 1 Danmark:
https://www.punkt1.dk/kundeservice/
T: 70 70 17 07
Expert Finland:
The accessory is:

CONTROL PANEL

- Timer symbol
- Wi-Fi symbol
- Container full symbol
- Dry symbol
- Fan symbol
- Clothes washing symbol
A. Timer button B. Swing button C. Reduce button D. Increase button E. Mode button F. ON/OFF button
- "⏻" button
Container full alarm
Health filter
MEASURES AT END OF SEASON
Accessories are:
CONTROL PANEL

Health filter

CONTROL PANEL
- Timer icon
- Wi-Fi icon
- Full container symbol
- Dry icon
- Fan icon
- Laundry icon
A. Timer button B. Rotary knob C. Decrease button D. Increase button E. Function button F. On/Off button
• "ON/OFF" button
CLEANING THE CABINET
Health filter
WHEN THE SEASON IS OVER

The accessories are:
CONTROL PANEL


Health filter
HANDLING AT THE END OF THE SEASON
- NO
- ACCORDING TO THE EN STANDARD
- IMPORTANT - GROUNDING METHOD
- ELECTRICAL CONNECTIONS
- SOME NOTIONS ON HUMIDITY
- PREPARATION IDENTIFICATION OF PARTS
- COMPONENT DESCRIPTION
- INSTALLATION
- CONTROL PANEL
- PROGRAMMING START UP
- PROGRAMMING SHUT DOWN
- ALARM OF TANK FULL
- CONTINUOUS DRAIN
- AUTOMATIC DEFROST
- LOCATION REQUIREMENTS
- CLEANING AND MAINTENANCE
- CLEANING THE CABINET
- CLEANING THE FILTER
- HEALTH FILTER
- END OF SEASON OPERATIONS
- START OF SEASON CHECKS
- TROUBLESHOOTING
- IMPORTED AND EXCLUSIVELY MARKETED BY
- CONTAINER FULL ALARM
- MEASURES AT END OF SEASON
- WHEN THE SEASON IS OVER
- HANDLING AT THE END OF THE SEASON
Brand : Point
Model : POSDH8020
Category : Humidifier