
Sonicare 6500 Series HX7411 - Toothbrush PHILIPS - Free user manual and instructions
Find the device manual for free Sonicare 6500 Series HX7411 PHILIPS in PDF.

 FR
FR
 AZ
AZ
 BG
BG
 CS
CS
 DA
DA
 DE
DE
 EL
EL
 EN
EN
 ES
ES
 ET
ET
 FI
FI
 HU
HU
 IT
IT
 KY
KY
 LT
LT
 LV
LV
 MK
MK
 NL
NL
 NO
NO
 PL
PL
 PT
PT
 RO
RO
 RU
RU
 SK
SK
 SL
SL
 SQ
SQ
 SV
SV
 TK
TK
 UZ
UZ
| Product Type | Sonic Electric Toothbrush |
| Brand | Philips |
| Model | Sonicare 6500 Series HX7411 |
| Dimensions (handle) | Approx. 25 cm in height, 3 cm in diameter |
| Weight | Approx. 130 g |
| Power | Rechargeable lithium-ion battery |
| Charging time | Approx. 24 hours |
| Battery life | Up to 3 weeks of use (2 min twice a day) |
| Brushing modes | 3 modes: Clean, White, Gum Health |
| Intensities | 3 adjustable intensity levels |
| Built-in timer | 2-minute timer with QuadPacer interval |
| Pressure sensor | Yes, visual alert if brushing too hard |
| Sonic technology | Up to 62,000 movements per minute |
| App connectivity | Compatible with Philips Sonicare app (Bluetooth) |
| Brush type | Compatible brush heads: Philips Sonicare C1, G2, W3, and others |
| Replacement indicator | Yes, reminder to change head every 3 months |
| Water resistance | IPX7 (immersion up to 1 meter for 30 minutes) |
| Care instructions | Clean handle with a damp cloth; do not use abrasive cleaners |
| Spare parts | Brush heads sold separately, specific charger |
| Repairability | Non-replaceable battery; contact Philips service for repair |
| Warranty | 2 years (subject to conditions) |
| Included accessories | 1 handle, 1 brush head, 1 charger |
Frequently Asked Questions - Sonicare 6500 Series HX7411 PHILIPS
User questions about Sonicare 6500 Series HX7411 PHILIPS
0 question about this device. Answer the ones you know or ask your own.
Ask a new question about this device
Download the instructions for your Toothbrush in PDF format for free! Find your manual Sonicare 6500 Series HX7411 - PHILIPS and take your electronic device back in hand. On this page are published all the documents necessary for the use of your device. Sonicare 6500 Series HX7411 by PHILIPS.
USER MANUAL Sonicare 6500 Series HX7411 PHILIPS
Welcome to the Philips Sonicare family! This toothbrush enables you to obtain superior plaque removal, whiter teeth and healthier gums. Using Sonicare's combination of gentle sonic technology and clinically developed and proven features, you can be confident that you're getting the very best clean, every time.
Further support and product registration are available to you at:
www.philips.com/support
Important safety information
Only use the product for its intended purpose. Read this information carefully before you use the product and its batteries and accessories, and save it for future reference. Misuse can lead to hazards or serious injuries.
WARNINGS
- Only use original Philips accessories or consumables. If supplied, only use the original USB cable and USB power supply unit.
- This appliance contains no user-serviceable parts. If the appliance is damaged, stop using it and contact the Consumer Care Center in your country. If the USB cable is damaged, stop using it.
- Keep the chargers and Travel-charger-case away from water.
- After cleaning, make sure the chargers and travel charger cases are completely dry before you connect these.
- This appliance can be used by children and persons with reduced physical, sensory or mental capabilities or lack of experience and knowledge if they have been given supervision or instruction concerning use of the appliance in a safe way and understand the hazards involved. Cleaning and user maintenance shall not be made by children without supervision.
- Children should be supervised to ensure that they do not play with the product.
- Do not clean any part of the product in the dishwasher.
- Do not use adapters and chargers outdoors or near heated surfaces.
- This appliance has only been designed for cleaning teeth, gums and tongue.
- Stop using a brush head with crushed or bent bristles. Replace the brush head every 3 months or sooner if signs of wear appear.
- Avoid direct contact with products that contain essential oils or coconut oil. Contact may result in bristles dislodging.
- The maximum altitude of use is 4500 meters.
MEDICAL WARNINGS
- Stop using the appliance and consult your dentist/doctor if excessive bleeding occurs after use, if bleeding continues to occur after 1 week of use or if you experience discomfort or pain.
- If you have had oral or gum surgery in the previous 2 months, consult your dentist before you use this appliance.
- If you have a pacemaker or other implanted device, contact your doctor or the manufacturer of the implanted device prior to use.
- If you have medical concerns, consult your doctor before you use this appliance.
- This appliance is a personal care device and is not intended for use on multiple patients in a dental practice or institution.
BATTERY SAFETY INSTRUCTIONS
- This appliance contains batteries that are only removable by skilled persons.
- Only use the product for its intended purpose. Read this information carefully before you use the product and its batteries and accessories, and save it for future reference. Misuse can lead to hazards or serious injuries. Accessories supplied may vary for different products.
- Only use original Philips accessories and consumables.
- Keep product and batteries away from fire and do not expose them to direct sunlight or high temperatures.
- If the product becomes abnormally hot or smelly, changes color or if charging takes longer than usual, stop using and charging the product and contact Philips.
- Do not place products and their batteries in microwave ovens or on induction cookers.
- Do not open, modify, pierce, damage or dismantle the product or battery to prevent batteries from heating up or releasing toxic or hazardous substances. Do not short-circuit, overcharge or reverse charge batteries.
- This appliance contains batteries that are non-replaceable. When the battery is at end of life, the appliance shall be properly disposed of, see section on Recycling.
- Charge only with Philips HX6110, HYTCxx or safety approved adapters with input ratings: 4.75-5.25VDC, 1.5W.
- Charge and use the product at a temperature between 0 °C and 40 °C (32°F and 104 °F).
- To avoid accidental short-circuiting of batteries after removal, do not let battery terminals come into contact with metal object (e.g. coins, hairpins, rings). Do not wrap batteries in aluminium foil. Tape battery terminals or put batteries in a plastic bag before you discard them.
- This appliance contains a Lithium-ion rechargeable cell. MUST BE RECYCLED OR DISPOSED OF PROPERLY.
Storage and transportation conditions
Temperature -20°C to +60°C (-4 °F to 140 °F).
Electromagnetic fields (EMF)
This Philips appliance complies with all applicable standards and regulations regarding exposure to electromagnetic fields.
Radio Equipment Directive
Hereby, Philips declares that electric toothbrushes with radio equipment type (Bluetooth, NFC) are in compliance with Directive 2014/53/EU.
- The Bluetooth radio frequency interface in applicable products operates at 2.4 GHz.
- The maximum output power by the Bluetooth appliance is 3 dBm.
- The NFC radio frequency interface in applicable products operates at 13.56 MHz
- The maximum RF power transmitted by the appliance is 30.16 dBm.
The full text of the EU declaration of conformity is available at the following internet address: www.philips.com/support
Note: The features of different models may vary. Some models may not be equipped with Bluetooth or NFC.
SAVE THESE INSTRUCTIONS
The following symbols may appear on the product:

This symbol means read the instructions for use before using the appliance.

This symbol means to use the indicated power supply.
Intended use
Sonicare power toothbrushes are intended to remove adherent plaque and food debris from the teeth to reduce tooth decay and improve and maintain oral health.
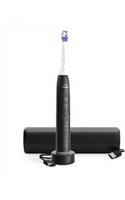
Your Philips Sonicare (Fig. 1)
1 Handle 2 Power on/off button 3 Intensity indicator 4 Mode/intensity button 5 Mode indicator 6 Brush head replacement reminder 7 Battery indicator 8 Light ring
Accessories:
9 Brush head cap
10 Smart brush head(s) 11 BrushSync symbol 12 USB charger (wall adapter not included) 13 Travel case 14 Charging travel case 15 USB cable
Note: Accessories included may vary based on the model purchased.
Sonicare app - Getting started
The Sonicare app pairs with your toothbrush to provide you a connected experience. By connecting your toothbrush to your Sonicare app account, you will be able to:
- Track your brushing progress
- Receive personalized tips and actionable recommendations to improve your oral health
- Access the full range of benefits and receive ongoing upgrades. The app is compatible with a wide range of mobile phones.
To start using the Sonicare app:
1. Download the Sonicare app to your phone. 2. Ensure that Bluetooth for your phone is turned on. 3. Pick up your toothbrush to ensure it is active (lights on). 4. Open the app and follow the steps. 5. Pair your toothbrush with the app. 6. Create your account via the app. Complete firmware update, if prompted, to access the latest improvements and features. 7. Brush regularly with your toothbrush connected to the app. When you regularly sync the toothbrush with the app, you will receive updates to help improve your oral healthcare. 8. Sync regularly. 9. Keep your phone close to your toothbrush for optimal data transfer.
To sync manually: Connect your toothbrush with the app every two weeks to benefit from the app features/capabilities.
To sync automatically: Allow location permission while setting up the app. By allowing location permission, your phone knows when it is in the connection range of your toothbrush and can refresh your brushing data in the app to provide the latest insights and recommendations.
Note: Make sure your phone's Bluetooth is switched on when using the app so that your toothbrush can transfer and update your brushing data in the app. If you have questions about why your brushing data is collected, be sure to review the Sonicare Privacy Statement, available throughout the app setup process.
App features
Your Sonicare power toothbrush is equipped with smart sensors to provide you with feedback about your brushing habits, including:
- Daily brushing sessions
- Time spent during each brushing session
- Applied brushing pressure
- Personalized tips and actionable recommendations
- Brush head replacement reminder (based on actual use)
The Sonicare app collects the data provided by the smart sensors and tracks your brushing habits over time.
Getting started
Attaching the brush head

1 Align the brush head so the bristles point in the same direction as the front of the handle.

2 Firmly press the brush head down onto the metal shaft until it will not go any further.
Note: It is normal to see a slight gap between the brush head and the handle.
Using your Philips Sonicare toothbrush
If you are using your Sonicare toothbrush for the first time, it is normal to feel more vibration than when using a non-electric toothbrush. It is common for first-time users to apply too much pressure. Only apply gentle pressure and let the toothbrush do the brushing for you. Please follow the brushing instructions below for the best experience.
To help you transition to your new Sonicare power toothbrush, use a lower setting for the first 1-2 weeks, then transition to a higher setting.
Brushing instructions

1 Wet the bristles and apply a small amount of toothpaste.

2 Place the toothbrush bristles against the teeth at a slight angle (45 degrees). Pressing firmly to make the bristles reach the gumline or slightly beneath the gumline.
Note: Keep the center of the brush in contact with the teeth at all times.

3 Press the power on/off button to switch on the Philips Sonicare.

4 Gently keep the bristles placed on the teeth and in the gumline. Brush your teeth with small back and forth motion so the bristles reach between the teeth. Continue this motion throughout your brushing cycle.
Note: The bristles should slightly flare. It is not recommended to scrub as you would with a manual toothbrush.
Note: If you apply too much pressure, you will be alerted by a change in vibration of the handle and a flashing purple brushing feedback light.

5 To clean the inside surfaces of the front teeth, tilt the brush handle semi-upright and make several vertical overlapping brushing strokes on each tooth. 6 After you have completed the brushing cycle, you can spend additional time brushing the chewing surfaces of your teeth and areas where staining occurs. You can also brush your tongue, with the toothbrush switched on or off, as you prefer.
Note: Your Philips Sonicare toothbrush is safe to use on braces (brush heads wear out sooner when used on braces) and dental restorations (fillings, crowns, veneers) if they are properly adhered and not compromised.
BrushPacer


To make sure you brush evenly throughout the mouth, divide your mouth into 6 sections using the BrushPacer feature. The BrushPacer divides the brushing time into 6 equal segments and indicates when you should move to the next area. The segments are indicated with a brief pause in vibration. The toothbrush automatically stops at the end of the brushing session.
Note: Additional time may be added when you use the White or Gum Health modes.
Modes
Your power toothbrush is equipped with up to 4 different modes: Clean, Sensitive, White, and Gum Health.
Based on the smart brush head you use, the optimal mode and intensity will be selected automatically by the BrushSync technology.

To manually change the mode, press the mode/intensity button when the toothbrush is off. All brush heads work with each mode.
Clean Sensitive Gum Health White
| Benefit Plaque removal | Extra gentle mode for sensitive teeth and gums | Plaque removal and gum massage | Plaque and surface stains removal |
| Recommended intensity level | High Low* High High | ||
| Total brushing time | 2 minutes 2 minutes 3 minutesand 20 seconds | 2 minutes and 40 seconds |
Clean Sensitive Gum Health White
| How to brush | Brush each segment for 20 seconds. | Brush each segment for 20 seconds | Brush each segment for 20 seconds, | Brush each segment for 20 seconds, |
 |  |  |  | |
 |  |  |  | |
| then brush segments 7,8,9 and 10 for 20 seconds each. | then brush segments 7 and 8 for 20 seconds each. | |||
 |  | |||
 |  |
Intensities
Intensity settings

Your power toothbrush comes with 3 different intensity settings:
- High intensity (three lights)
- Medium intensity (two lights)
- Low intensity (one light)
Note: We recommend high intensity for best results.

To manually select your desired intensity, press the mode/intensity button when the toothbrush is on, to cycle through the options. The intensity setting can only be changed when the toothbrush is on.
BrushSync technology

BrushSync technology enables your brush head to communicate with your handle using a microchip. The symbol at the bottom of the brush head indicates that the brush head is equipped with this technology.
BrushSync technology enables:
- Brush head replacement reminder
- BrushSync mode pairing
Philips Sonicare offers a wide range of smart brush heads, equipped with BrushSync technology. To explore our full range of toothbrush brush heads, and find the brush head that is best for you, go to
www.philips.com/toothbrush-heads for more information.
Features
- Pressure Sensor Feedback
- BrushPacer
- SmarTimer
- EasyStart
- Brush Head Replacement Reminder
- Brush Head Mode Pairing
Pressure Sensor Feedback
Your Sonicare toothbrush measures the pressure you apply while brushing, to protect your gums and teeth from damage.

If you apply excess pressure, the handle changes its sound and vibration while the brushing feedback light flashes purple at the bottom of the handle until you reduce the pressure.
Note: Your product comes with the Pressure Sensor Feedback activated. To deactivate this feature (see 'Activating or deactivating features').
BrushPacer

The BrushPacer is an interval timer that helps you to brush evenly through the mouth by dividing your mouth into 6 sections.
Note: Additional time may be added when you use the White or Gum Health modes.
SmarTimer
The SmarTimer indicates that your brushing cycle is complete by automatically switching off the toothbrush at the end of the brushing cycle.
Dental professionals recommend brushing no less than 2 minutes twice a day.
Note: If you press the power on/off button after you started the brushing cycle, the toothbrush pauses. If you press the on/off button within 30 seconds, the timer resumes to allow you to finish your brushing cycle. After a pause of 30 seconds, the SmarTimer resets.
EasyStart
This Philips Sonicare model comes with the EasyStart feature deactivated. The EasyStart feature gently increases the power over the first 14 brushings to help you get used to brushing with the Philips Sonicare. The EasyStart feature works with all modes.
*Disclaimer
When the Philips Sonicare toothbrush is used in clinical studies, it must be used at high intensity with the handle fully charged and the EasyStart feature deactivated.
To activate EasyStart (see 'Activating or deactivating features').
Brush Head Replacement Reminder
Your Philips Sonicare is equipped with BrushSync technology that tracks the wear of your brush head.
Note: This feature only works with Philips Sonicare smart brush heads with BrushSync technology.
1 When you attach a new smart brush head for the first time, the handle recognizes that you have a Philips brush head with BrushSync technology and begins tracking brush head wear.
2 Over time, based on the pressure you apply and the total time the brush head has been used, the handle tracks brush head wear in order to determine the optimal time to replace your brush head. This feature guarantees the best cleaning and care of your teeth.
![graph TD A["Traffic Light Icon"] --> B["B"] style A fill:#f9f,stroke:#333 style B fill:#ccf,stroke:#333](/content/2026/07/1418041/images/37d13b961aab9fb825bb86228346f8ff077f6e15782d39f3f75bd9cf7e70d1da.jpg)
3 When the Brush Head Replacement Reminder indicator lights up amber, you should replace your brush head.
Note: All smart brush heads come with the brush head replacement reminder feature activated. To deactivate the brush head replacement reminder see 'Activating or deactivating features'.
Brush head mode pairing
Brush heads with BrushSync technology are equipped with a microchip which communicates with the handle and automatically pairs it with the recommended mode and intensity. Most brush heads with BrushSync technology will auto pair to Clean Mode. Brush heads with specific benefits will pair with the corresponding mode (when available), examples include:
- G3 Premium Gum Care: Gum Health Mode
- W3 Premium White or W DiamondClean (NAM) / W OptimalClean (ROW): White Mode
- S2 Sensitive: Sensitive Mode
Note: If you choose to change mode/intensity from the recommended setting, the brush head will remember the your chosen setting for future brushing sessions.
Activating or deactivating features
You can activate or deactivate the following features of your toothbrush:
- EasyStart
- Brush Head replacement reminder
- Pressure Sensor Feedback
Note: The brush head replacement reminder is only compatible with Sonicare smart brush heads. The smart brush head must be attached to the toothbrush in order to activate or deactivate the replacement reminder.
From handle:
Step 1: Place the handle on a plugged-in charger or charging travel case.

Step 2: Press and hold the power on/off button for:
EasyStart Brush Head Replacement Reminder Pressure Sensor Feedback
Up to 3 seconds | Up to 5 seconds | Up to 7 seconds

Step 3: Release the power on/off button when you hear:
1 beep | 1 beep then 2 beeps | 1 beep, 2 beeps, then 3 beeps

Together with:

If you see the left LED for the battery indicator flash green 2 times and hear 3 tones low to high, the feature has been activated.
OR

If you see the left LED for the battery indicator flash amber 1 time and hear 3 tones high to low, the feature has been deactivated.
Charging and battery status
This Philips Sonicare toothbrush is designed to provide on average 42 brushing sessions, each session lasting 2 minutes (21 days if used twice per day) on a fully charged battery. The battery indicator shows the battery status when you complete the 2-minute brushing session, when you pause the toothbrush, or while it is charging.
Note: It can take up to 24 hours to fully charge the battery before first use, but you can use the Philips Sonicare toothbrush before it is fully charged.
Note: Charging your Philips Sonicare toothbrush in the travel case can take up to 48 hours.
Charging
Charging on charger
1 Attach the USB charging cord to a wall adapter, plug the wall adapter into an electrical wall outlet.

2 Place the handle on the charger. 3 Connect the attached USB cable to the 5V DC input power supply unit.
- Charge only with Philips compatible chargers or safety approved adapters with input ratings: 100 - 240V~; 50/60Hz; 3.5W and output ratings 5VDC; 2.5W.
- A UL-listed or certified 1310 Class 2 power supply (NAM only)
4 The battery indicator and light ring illuminate, the handle beeps twice, and all lights on the handle illuminate upward from the bottom of the handle.
5 The flashing light of the battery indicator shows that the toothbrush is charging.
6 When the handle is on the charger and the battery is fully charged, the LED lights of the battery indicator start flashing green. Once the battery is full, the green light remains solid for 30 seconds and then turns off.
Charging with the travel case

Note: Accessories included may vary based on the model purchased.
1 Insert the USB cable to the charging travel case. 2 Connect the attached USB cable to the 5V DC input power supply unit.
- Charge only with Philips compatible chargers or safety approved adapters with input ratings: 100 - 240V~; 50/60Hz; 3.5W and output ratings 5VDC; 2.5W.
- A UL-listed or certified 1310 Class 2 power supply (NAM only).
Important: The wall adapter must be a safe extra low voltage source, compatible with the electrical ratings marked on the bottom of the device.
3 Place the handle in the charging travel case.
- The handle emits 2 short beeps to confirm that the handle is placed properly for charging.
- The flashing light of the battery indicator shows that the toothbrush is charging.
4 The travel case will charge your toothbrush until your toothbrush is fully charged.
- When the handle is fully charged, the battery indicator lights up green for 30 seconds and then switches off.
Note: Charging the handle with the charging travel case may take longer than on the charger.
Battery status
Battery status (handle on plugged-in charger/charging travel case)
When the handle is placed on the charger or in the charging travel case, the battery indicator shows the battery level.
Battery status
Number of flashing LEDs
LED color
Low 1 Flashing green
| Partially full 2 Flashing green | |
| Full 3 Flashing green until full, | then green for 30 seconds and then switches off |
Battery status (when handle is not on plugged-in charger/charging travel case)
When the toothbrush is awake, the battery indicator at the bottom of the handle shows the battery level.
Battery status Number of LEDs LED color
| Full 3 Solid green | |
| Partially full 2 Solid green | |
| Medium low 1 Solid green | |
| Low 1 with 3 beeps after brushing | Flashes amber |
| Empty 1 with 2 beeps after brushing | Flashes amber |
Note: To save energy, the battery indicator will switch off when not in use. Note: When the battery is completely empty, the toothbrush switches off. Place the toothbrush on the charger to charge it. Note: To keep the battery fully charged at all times, you may keep your toothbrush on the charger when not in use.
Cleaning
Toothbrush handle

1 Remove the brush head and rinse the metal shaft area and buttons with warm water. Make sure you remove any residual toothpaste on the handle and around the buttons at least once a week, but preferably after each use.
Caution: Do not push on the rubber seal on the metal shaft or around buttons with sharp objects, as this may cause damage.
2 Wipe the entire surface of the handle with a damp cloth.
Note: Do not tap the handle on the sink to remove excess water.
3 Dry the handle with a soft cloth or towel.
Brush head

1 Rinse the brush head and bristles after each use. 2 Remove the brush head from the handle and rinse the brush head connection with warm water at least once a week. Rinse the travel cap as often as needed and air dry. Use only on a dry brush head.
Note: The brush head cap is used for shipping purposes and is not intended for continued use.
Charger
1 Unplug the charger before you clean it. 2 Wipe the surface of the charger with a damp cloth. 3 Dry the charger with a soft cloth or towel.
Travel case
Rinse with warm water and use a damp cloth to clean the travel case and allow to air dry.
Charging travel case
1. Unplug the charging travel case before cleaning. 2. Use a damp cloth to wipe the surface of the travel case and allow to air dry.
Storage
If you are not going to use the product for an extended period of time, unplug it from the electrical outlet, clean it and store it in a cool and dry place away from direct sunlight.
Replacement
Replace Philips Sonicare brush heads every 3 months to achieve optimal results. Use only Philips Sonicare replacement brush heads.
Locating the model number
Look on the bottom of the Philips Sonicare toothbrush handle for the model number (e.g., HX740x).
Troubleshooting (ROW)
This chapter summarizes the most common problems you could encounter with the appliance. If you are unable to solve the problem with the information below, visit www.philips.com/support and insert your model number for a list of frequently asked questions or contact the Consumer Care Center in your country.
Problem Possible Cause Solution
| I cannot fully attach the brush head. There is a gap between the brush head and handle. | This gap is normal and is needed for the brush head to vibrate appropriately. The brush head must be able to move to create the right amount of vibrations. | |
| My Philips Sonicare toothbrush vibration is less powerful than before. | The brush head is too close to the body of the handle. | Remove the brush head from the handle and re-set it on the metal shaft leaving a small gap.(1-2mm). |
| The toothbrush stops working. | The battery is empty. Charge the toothbrush handle on the charger. | |
| I charged my toothbrush, but it only works for a short time. | The toothbrush handle is not placed vertically on the charger, resulting in no charge. | Place the handle vertically on charger base and make sure the charger is plugged in. |
WARRANTY EXCLUSIONS
What is not covered under warranty:
- In-mouth attachments including brush heads and nozzles.
- Damage caused by use of unauthorized replacement parts or unauthorized brush heads.
- Damage caused by misuse, abuse, neglect, alterations or unauthorized repair.
- Normal wear and tear, including chips, scratches, abrasions, discoloration or fading.
IMPLIED WARRANTIES
ANY IMPLIED WARRANTIES, INCLUDING IMPLIED WARRANTIES OF MERCHANTABILITY AND FITNESS FOR A PARTICULAR PURPOSE, SHALL BE LIMITED TO THE DURATION OF THE EXPRESS WARRANTIES SET FORTH ABOVE. IN SOME STATES LIMITATIONS ON DURATION OF IMPLIED WARRANTIES DO NOT APPLY.
LIMITATION OF REMEDIES
IN NO EVENT SHALL PHILIPS OR ANY OF ITS AFFILIATED OR SUBSIDIARY COMPANIES BE LIABLE FOR ANY SPECIAL, INCIDENTAL OR CONSEQUENTIAL DAMAGES BASED UPON BREACH OF WARRANTY, BREACH OF CONTRACT, NEGLIGENCE, TORT, OR ANY OTHER LEGAL THEORY. SUCH DAMAGES INCLUDE, WITHOUT LIMITATION, LOSS OF SAVINGS OR REVENUE; LOSS OF PROFIT; LOSS OF USE; THE CLAIMS OF THIRD PARTIES INCLUDING, WITHOUT LIMITATION, DENTISTS AND DENTAL HYGIENISTS; AND COST OF ANY SUBSTITUTE EQUIPMENT OR SERVICES. SOME STATES DO NOT ALLOW THE EXCLUSION OR LIMITATION OF INCIDENTAL OR CONSEQUENTIAL DAMAGES.
Warranty and support (ROW)
If you need information or support, please visit www.philips.com/support or read the international warranty leaflet.
Warranty exclusions
What is not covered under warranty:
- In mouth attachments including brush heads and nozzles.
- Damage caused by use of unauthorized replacement parts or unauthorized brush heads.
- Damage caused by misuse, abuse, neglect, alterations or unauthorized repair.
- Normal wear and tear, including chips, scratches, abrasions, discoloration or fading.
Recycling

This symbol means that electrical products and batteries shall not be disposed of with normal household waste.
Follow your country's rules for the separate collection of electrical products and batteries.
The built-in rechargeable battery must be removed by a qualified professional when the product is discarded. Instructions for removal of built-in rechargeable batteries can be found on
www.philips.com/support. Use the Philips support home search bar to enter the toothbrush model number and find your product. The model number begins with "HX" (e.g. HX123A) and can be found on the bottom of your toothbrush. The battery removal instructions are in the Troubleshooting and Repair section of the product's support page.
If batteries are damaged or leaking, avoid contact with the skin or eyes. If this occurs, immediately rinse well with water and seek medical care.
When you handle batteries, make sure that your hands, the product and the batteries are dry.
Introduction
www.philips.com/support
Clean Sensitive Gum Health White
- W3 Premium White or W DiamondClean (NAM) / W OptimalClean (ROW): "White" mode
- S2 Sensitive: Sensitive mode.
www.philips.com/support
Clean Sensitive (Sensitive teeth) Gum Health White
www.philips.com/support
Clean Sensitive Gum Health White
Clean Sensitive Gum Health White
- G3 Premium Gum Care: Gum Health setting
- W3 Premium White or W(c) DiamondClean NAM)/W OptimalClean (ROW): White setting
- S2 Sensitive: Sensitive setting
Clean Sensitive Gum Health White
Clean Sensitive Gum Health White
- G3 Premium Gum Care: Gum Health cleaning program
- W3 Premium White or W DiamondClean (NAM) / W OptimalClean (ROW): White mode
- S2 Sensitive: Sensitive mode
www.philips.com/support
Important safety information
MEDICAL WARNINGS
www.philips.com/support
Clean Sensitive Gum Health White
Clean Sensitive Gum Health White
| Kuidas harjata | Harjake iga segmenti 20 sekundit. | Harjake iga segmenti 20 sekundit | Harjake iga segmenti 20 sekundit, | Harjake iga segmenti 20 sekundit, |
 |  |  |  | |
 |  |  |  | |
| seejärel harjake 7,8,9. ja 10. segmenti mölemat 20 sekundit. | seejärel harjake 7. ja 8. segmenti mölemat 20 sekundit. | |||
 |  |
Speeds
- S2 Sensitive: Modo Sensitive (Suave)
Spanish
IMPLIED WARRANTIES
Clean Sensitive Gum Health White
Clean Sensitive Gum Health White
- G3 Premium Gum Care: Gum Health mode
- W3 Premium White or W DiamondClean (NAM) / W OptimalClean (ROW): White mode
- S2 Sensitive: Sensitive mode
WARRANTY EXCLUSIONS
www.philips.com/support
www.philips.com/support
Note: Features of different models may vary. Some models may not be equipped with Bluetooth or NFC.
SAVE THESE INSTRUCTIONS
The following symbols may appear on the product:

This symbol means that you must read the instructions for use before using the device.

This symbol means that you must use the indicated power supply.
Intended use
Sonicare electric toothbrushes are intended to remove plaque and food debris from teeth to reduce caries and improve and maintain oral health.
Your Philips Sonicare (Fig. 1)
1 Handle 2 On/off button 3 Intensity indicator 4 Mode/intensity button 5 Mode indicator 6 Brush head replacement reminder 7 Battery indicator 8 Light ring
Accessories:
9 Brush head cap
10 Smart brush heads 11 BrushSync feature symbol 12 USB charger (wall adapter not included) 13 Travel case 14 Charging travel case 15 USB cable
Note: The accessories included may vary depending on the model purchased.
Sonicare app – getting started
The Sonicare app pairs with your toothbrush to enable connectivity. By connecting your toothbrush to your Sonicare app account, you will be able to:
- Track your brushing progress
Press the brush head firmly down onto the metal shaft of the handle until it stops.
Note: It is normal to see a slight gap between the brush head and the handle.
Using your Philips Sonicare toothbrush
If you are using a Sonicare toothbrush for the first time, it is normal to feel more vibration than with a non-electric toothbrush. Users often apply too much pressure when first using it. Press gently and let the toothbrush do the brushing. For the best experience, follow the brushing instructions below.
To make it easier to switch to your new Sonicare electric toothbrush, use the lower setting for the first 1-2 weeks, then switch to the higher setting.
Brushing instructions

1 Wet the bristles and apply a small amount of toothpaste.

To manually change the mode, press the mode/intensity button while the toothbrush is turned off. All brush heads work in every mode.
Clean Sensitive Gum Health White
| Prednost uklanjanje naslaga | izuzetno osjetljivi način rada za osjetljive zube i desni | uklanjanje naslaga i masaža desni | uklanjanje naslaga i površinskih mrlja |
| Preporučena razina intenziteta | visoka niska* visoka visoka | ||
| Ukupno vrijeme četkanja | 2 minute 2 minute 3 minute i | 20 sekundi | 2 minute i 40 sekundi |
Clean Sensitive Gum Health White
| Kako četkati Četkajte svaki segment 20šekundi. | Četkajte svaki segment 20šekundi | Četkajte svaki segment 20šekundi, | Četkajte svaki segment 20šekundi, |
|  |  |  |
|  | |  |
| a zatim segmente 7,8,9 i 10 četkajte svakog po 20šekundi. | a zatim segmente 7 i 8 četkajte svakog po 20šekundi. | ||
 |  |
Intensities
Intensity settings

Your electric toothbrush has three different intensity settings:
- High intensity (three lights)
- Medium intensity (two lights)
- Low intensity (one light)
Note: For best results, we recommend high intensity.

BrushSync technology allows the brush head to communicate with the handle via a microchip. The symbol on the bottom of the brush head indicates that the brush head is equipped with this technology.
BrushSync technology enables:
2 Place the handle on the charger.
3 Connect the supplied USB cable to a 5 V DC input power supply. - Charge only with compatible Philips adapters or other adapters approved for safe operation and having the following rated input values: 100 – 240 V~; 50/60 Hz; 3.5 W and rated output values 5 V DC; 2.5 W. - Class 2 power supply (NAM only) with UL marking or certification 1310
4 The battery indicator and light ring will illuminate, the handle will emit two beeps, and the lights on the handle will light up from the bottom to the top.
5 Flashing of the battery indicator shows that the brush is charging.
Note: The supplied accessories may vary depending on the model purchased.
1 Insert the USB cable into the travel charging case. 2 Connect the supplied USB cable to a 5 V DC input power supply. - Charge only with compatible Philips adapters or other adapters approved for safe operation and having the following rated input values: 100 – 240 V~; 50/60 Hz; 3.5 W and rated output values 5 V DC; 2.5 W. - Class 2 power supply (NAM only) with UL marking or certification 1310.
1 Remove the brush head and rinse the area around the metal shaft and buttons with warm water. At least once a week, and preferably after each use, be sure to remove all remaining toothpaste from the handle and around the buttons.
Clean Sensitive Gum Health White
Clean Sensitive Gum Health White
www.philips.com/support
Rinse the brush head and apply a small amount of toothpaste.

Clean Sensitive Gum Health White
Clean Sensitive Gum Health White
| Kā tīrīt tīriet katru segmentu 20 sekundes. | tīriet katru segmentu 20 sekundes. | Tīriet katru segmentu 20 sekundes, | Tīriet katru segmentu 20 sekundes, |
| | | |
| | | |
| pēc tam tīriet 7,8,9. un 10. segment- u — katru 20 sekundes. | pēc tam tīriet 7. un 8. segmentu — katru 20 sekundes. | ||
 |  | ||
 |  |
www.philips.com/support
Important safety information
www.philips.com/support
Clean Sensitive Gum Health White
Clean Sensitive Gum Health White
www.philips.com/support
Clean Sensitive Gum Health White
Clean Sensitive Gum Health White
| Poetsinstruc-ties | Poets elk segment 20 seconden lang. | poets elk segment 20 seconden lang | poets elk segment 20 seconden lang, | poets elk segment 20 seconden lang, |
 |  |  |  | |
 |  |  |  | |
| poets vervolgens segment 7,8,9 en 10 elk 20 seconden lang. | poets vervolgens segment 7 en 8 elk 20 seconden lang. | |||
 |  | |||
 |  |
Intensity
Intensity levels

- G3 Premium Gum Care: Gum Health mode
- W3 Premium White or W DiamondClean (NAM) / W OptimalClean (ROW): White mode
www.philips.com/support
Clean Sensitive Gum Health White
Clean Sensitive Gum Health White
3 When the brush head replacement indicator lights up yellow, you should replace the brush head.
www.philips.com/support
Important safety information
Use the product only for its intended purpose. Before you start using the product, its batteries, and accessories, read this information carefully and keep it for future reference. Incorrect use can lead to hazards or serious injuries.
WARNINGS
- Only use original Philips accessories and consumables. If included in the package, only use the original USB cable and USB power supply.
- The appliance contains no user-serviceable parts. If the appliance is damaged, stop using it and contact the Customer Service Center in your country. If the USB cable is damaged, stop using it.
- Keep chargers and the travel charger case away from water.
- After cleaning, make sure the chargers and travel charger cases are completely dry before connecting them to the mains.
- This appliance can be used by children and persons with reduced physical, sensory, or mental capabilities or lack of experience and knowledge if they have been given supervision or instruction concerning use of the appliance in a safe way and if they understand the hazards involved. Children shall not play with the appliance. Cleaning and user maintenance shall not be made by children without supervision.
- Children should be supervised to ensure they do not play with the product.
- Do not clean any part of the product in a dishwasher.
- Do not use the device outdoors or near heated surfaces.
- The device is designed only for cleaning teeth, gums, and tongue.
- Stop using a brush head with broken or bent bristles. Replace the brush head every 3 months or sooner if signs of wear appear.
- Avoid direct contact with products containing essential oils or coconut oil. Contact may cause the brush to slip.
- Maximum operating altitude: 4500 meters.
MEDICAL WARNINGS
- If excessive bleeding occurs after use, if bleeding continues after 1 week of use, or if you experience discomfort or pain, stop using the device and consult a dentist/physician.
- If you have had oral or gum surgery within the last 2 months, consult a physician before using the device.
- If you have a pacemaker or other implanted device, consult a physician or the manufacturer of the implanted device before use.
- If you have health issues, consult a physician before using this device.
- This device is a personal care device and is not intended for use by multiple patients in a dental clinic or institution.
BATTERY SAFETY INSTRUCTIONS
- This device contains batteries that can only be removed by qualified personnel.
- Use the product only for its intended purpose. Before using the product, its batteries, and accessories, read this information carefully and keep it for future reference. Improper use may lead to hazards or serious injuries. The accessories provided may vary across different products.
- Only use original Philips accessories and consumables.
- Keep the product and batteries away from fire and do not expose them to direct sunlight or high temperatures.
- If the product becomes unusually hot, emits an odor, changes color, or takes longer than usual to charge, stop using and charging it and contact Philips.
- Do not place the product and its batteries in a microwave oven or on an induction hob.
- To prevent batteries from heating up or releasing toxic or hazardous substances, do not open, modify, puncture, damage, or disassemble the device or battery. Do not cause short circuits, overcharging, or reverse charging of rechargeable batteries.
- This device contains non-replaceable batteries. When the battery reaches the end of its service life, the device must be disposed of properly. See the recycling section.
- Only charge with Philips HX6110, HYTCxx, or adapters with safety-approved nominal input power: 4.75-5.25 VDC, 1.5 W.
- Charge and operate the product at temperatures between 0 °C and 40 °C.
- After removing the battery, prevent metal objects (e.g., coins, hairpins, rings) from touching the battery terminals to avoid short circuits. Do not wrap batteries in aluminum foil. Before disposing of the battery, wrap its terminals with tape or place the battery in a bag.
- This device contains a lithium-ion rechargeable battery. IT MUST BE RECYCLED OR DISPOSED OF PROPERLY.
Storage and transport conditions
Temperature from -20°C to +60°C (from -4°F to 140°F).
1. Align the brush head so that the bristles point in the same direction as the front of the handle.

2. Press the brush head firmly onto the metal shaft until it stops.
Note: A small gap between the brush head and the handle is normal.
Using your Philips Sonicare toothpaste
If you are using Sonicare toothpaste for the first time, it is normal to feel more vibration than with a manual toothbrush. First-time users often apply too much pressure. Press gently and let the toothbrush do the cleaning. For best results, follow the brushing instructions.
To help you adjust to your new Sonicare power toothbrush, use it on a lower setting for the first 1-2 weeks, then switch to a higher setting.
Brushing instructions

1. Wet the brush and apply a small amount of toothpaste.

2. Hold the toothbrush at a small (45-degree) angle against the teeth. Press firmly so the bristles reach the gum line or just below it. Note: Keep the center of the brush in constant contact with the teeth.

3. Press the on/off button to turn on the Philips Sonicare device.

4. Hold the brush gently against the teeth and gum line. Clean your teeth by moving the brush head in small back-and-forth motions so the bristles can reach between the teeth. Continue these motions until the brushing cycle is complete.
5. To clean the inner surfaces of the front teeth, hold the handle in a semi-vertical position and clean each tooth individually with several vertical strokes.
To ensure even cleaning, divide your mouth into 6 sections using the BrushPacer feature. BrushPacer divides the brushing time into 6 equal segments and signals when it is time to move to the next area. The segments are indicated by a short pause in the vibration. The toothbrush automatically stops at the end of the brushing session.
Note: Additional time may be added when using the White or Gum Health modes.
Modes
Your power toothbrush is equipped with up to 4 different modes: Clean, Sensitive, White, and Gum Health.
Based on the smart brush head you are using, the optimal mode and intensity are automatically selected by BrushSync technology.

To change the mode manually, press the mode/intensity button while the toothbrush is on. All brush heads work with a separate mode.
Clean Sensitive Gum Health White
| Foydasi Qasmoqlarni ketkazish | Sezuvchan tishlar va milklar uchun juda yumshoq rejim | Qasmoqlarni ketkazish va milklarni uqalash | Qasmoqlarni va yuzadagi dog'larni ketkazish |
| Tavsiya etilgan jadallik darajasi | Yuqori Past* Yuqori Yuqori | ||
| Jami tish tozalash vaqti | 2 daqiga 2 daqiga 3 daqiga va | 20 soniya | 2 daqiga va 40 soniya |
Clean Sensitive Gum Health White
Your power toothbrush is equipped with 3 intensity settings:
- High intensity (three lights)
- Medium intensity (two lights)
- Low intensity (one light)
BrushSync technology allows the brush head to communicate with the handle via a microchip. The ♦ symbol under the brush head indicates that the brush head is equipped with this technology.
BrushSync technology activates the following:
- Brush head replacement reminder function
- BrushSync mode pairing
Philips Sonicare offers a wide range of smart brush heads with BrushSync technology. To explore the full range of brush heads and find the one that suits you best, visit
Visit www.philips.com/toothbrush-heads.
Functions
If you apply too much pressure, the handle will change its sound and vibration until you reduce the pressure, and the brushing indicator light at the bottom of the handle will blink (purple).
Note: Your product is provided with the pressure sensor indicator active. To deactivate this function (see "Activating or deactivating functions").
BrushPacer

3 When the brush head replacement reminder indicator lights up in yellow, you need to replace your brush head.
Note: All smart brush heads are delivered with the brush head replacement reminder function enabled. To deactivate the brush head replacement reminder function, see: "Activating or deactivating functions".
Brush head pairing mode
Brush heads with BrushSync technology are equipped with a microchip that communicates with the handle and pairs it with the recommended mode and intensity. Most brush heads with BrushSync technology automatically pair in Clean mode. Brush heads with specific benefits pair with the corresponding mode (when available), for example:
- G3 Premium Gum Care: Gum Health mode
- W3 Premium White or W DiamondClean (NAM) / W OptimalClean (ROW): White mode
- S2 Sensitive: Sensitive mode
Note: If you choose to change the mode/intensity from the recommended setting, the brush head will remember your chosen setting for future cleaning sessions.
Activating or deactivating functions
2 Place the handle on the charging base.
Connect the attached USB cable to a 5V DC power supply.
- Only charge with Philips-compatible chargers or adapters that have been safety-approved with the following rated input power: 100 - 240V~; 50/60Hz; 3.5W and output voltage 5VDC; 2.5W.
- UL-listed or certified power supply with Class 2 (for NAM only)
4 The battery indicator and light ring will light up, the handle will beep twice, and all lights on the handle will turn on from the top to the bottom. 5 The blinking battery indicator indicates that the toothbrush is charging. 6 When the handle is on the charger and the battery is fully charged, the battery indicator LEDs will start blinking green. When the battery is fully charged, the green light will stay on for 30 seconds and then turn off.
Charging with the travel case

Note: The accessories in the package may vary depending on the model purchased.
1 Insert the USB cable into the travel charger case. 2 Connect the attached USB cable to a 5V DC power supply.
- Only charge with Philips-compatible chargers or adapters that have been safety-approved with the following rated input power: 100 - 240V~; 50/60Hz; 3.5W and output voltage 5VDC; 2.5W.
- UL-listed or certified power supply with Class 2 (for NAM only).
Important: The wall adapter must be a safe source of extra-low voltage that matches the electrical parameters indicated on the device.
1 Remove the brush head and rinse the metal shaft and buttons with warm water. Clean the handle and any toothpaste residue around the buttons at least once a week, but preferably after each use.
Warning: Do not press the rubber seal on the metal shaft or around the buttons with sharp objects, as this may cause damage.
2 Wipe the entire surface of the handle with a damp cloth.
Note: Do not tap the handle against the sink to remove excess water.
3 Dry the handle with a soft cloth or towel.
Brush head

1 Rinse the brush head and brush after each use. 2 Remove the brush head from the handle and rinse the brush head connection part with warm water at least once a week. Wash the travel cap as often as necessary and air dry. Use only on a dry brush head.
- G3 Premium Gum Care: Gum Health mode
- W3 Premium White or W DiamondClean (NAM) / W OptimalClean (ROW): White mode
- S2 Sensitive: Sensitive mode
www.philips.com/support
- S2 Sensitive: Sensitive mode.
Clean Sensitive Gum Health White
Clean Sensitive Gum Health White
- G3 Premium Gum Care: Gum Health mode
- W3 Premium White or W DiamondClean (NAM)/W OptimalClean (ROW): White mode
- S2 Sensitive: Sensitive mode
www.philips.com/support
Clean "Sensitive" Gum Health White
Clean "Sensitive" Gum Health White
- G3 Premium Gum Care: "Gum Health" mode
- "W3 Premium White" or "W DiamondClean (NAM)" / "W OptimalClean (ROW)": "White" mode
- S2 Sensitive: "Sensitive" mode
www.philips.com/support
This symbol means that you must read the instructions for use before using the appliance.

This symbol means that you must use the specified power supply.
Intended use
3 Turn on the Philips Sonicare toothbrush by pressing the on/off button.

www.philips.com/support
www.philips.com/support
This symbol means that you must read the instructions for use before using the device.

4 Gently keep the bristles in place on the teeth and gums. Clean the teeth with short back-and-forth motions so that the bristles reach between the teeth. Repeat this motion throughout the entire cleaning cycle.
BrushSync technology allows the brush head to communicate with the handle via a microchip. The symbol ♿ on the bottom of the brush head means that the brush head is equipped with this technology. BrushSync technology allows:
www.philips.com/support
This symbol indicates that the instruction manual should be read before using the device.

1 Align the brush head so that the bristles face the same direction as the front of the handle.

2 Press the brush head firmly onto the metal shaft until it stops.
1 Wet the bristles and apply a small amount of toothpaste.

2 Place the toothbrush bristles against the teeth at a slight angle (45 degrees). Press firmly so the bristles reach the gum line or slightly below.
To change the mode manually, press the mode/intensity button while the toothbrush is off. All brush heads work in every mode.
Clean Sensitive Gum Health White
| Pogodnost Uklanjanje plaka | Veoma nežan režim za osetljive zube i desni | Uklanjanje plaka i masaža desni | Uklanjanje plaka i mrlja sa površina |
| Preporučeni nivo intenziteta | Visok Nizak* Visok Visok | ||
| Ukupno vreme pranja zuba | 2 minuta 2 minuta 3 minuta i 20 sekundi | 2 minuta i 40 sekundi | |
Clean Sensitive Gum Health White
| Kako se pere Perite svaki segment 20 sekundi. | perite svaki segment 20 sekundi | perite svaki segment 20 sekundi, | perite svaki segment 20 sekundi, |
| | | |
| |  |  |
| a zatim perite segmente 7,8,9 i 10, svaki po 20 sekundi. | a zatim perite segmente 7 i 8, svaki po 20 sekundi. |
Intensities
Intensity settings

The electric toothbrush has 3 different intensity settings:
- High intensity (three lights)
- Medium intensity (two lights)
- Low intensity (one light)
Note: For best results, we recommend high intensity.

To manually select the desired intensity, press the mode/intensity button while the toothbrush is on to cycle through the options. The intensity setting can only be adjusted when the toothbrush is on.
BrushSync Technology

If you press too hard, the handle changes sound and vibration, and the brushing feedback light flashes purple at the bottom of the handle until you reduce the pressure.
Note: The product is delivered with the pressure sensor feedback activated. To deactivate this function (see 'Activating or deactivating functions').
BrushPacer

2 Place the handle on the charger. 3 Connect the supplied USB cable to a 5 V DC input power supply.
Note: Included accessories may vary depending on the model purchased.
1 Insert the USB cable into the travel charging case.
2 Connect the supplied USB cable to a 5 V DC input power supply.
1 Remove the brush head and rinse the area around the metal shaft and buttons with warm water. At least once a week, and preferably after each use, make sure to remove all remaining toothpaste from the handle and around the buttons.
Caution: Do not push the rubber seal on the metal shaft or in the area around the buttons with sharp objects as this may cause damage.
2 Wipe the entire surface of the handle with a damp cloth.
Note: Do not tap the handle against the sink to remove excess water.
1 Rinse the brush head and bristles after each use. 2 At least once a week, remove the brush head from the handle and rinse its connection with warm water. Rinse the travel cap whenever necessary and air dry. Only place it on a dry brush head.
Note: The brush head cover is used during transport and is not intended for permanent use.
Charger
1 Unplug the charger from the electrical outlet before cleaning. 2 Wipe the surface of the charger with a damp cloth. 3 Dry the charger with a soft cloth or towel.
Travel case
Rinse the travel case with warm water and clean it with a damp cloth, then allow it to air dry.
Charging travel case
1 Before cleaning, unplug the charging travel case from the power supply. 2 Wipe the surface of the charger and the travel case with a damp cloth and allow it to air dry.
Storage
If you will not use the product for an extended period, unplug it from the wall outlet, clean it, and store it in a cool, dry place away from direct sunlight.
Replacement
Replace your Philips Sonicare brush heads every 3 months for optimal results. Use only Philips Sonicare replacement brush heads.
www.philips.com/support
Clean Sensitive Gum Health White
Clean Sensitive Gum Health White
- G3 Premium Gum Care: Gum Health mode
- W3 Premium White or W DiamondClean (NAM) / W OptimalClean (ROW): White mode
- S2 Sensitive: Sensitive mode
2 Place the handle on the charger.
www.philips.com/support
www.philips.com/support
Important safety information
Use this product only for its intended purpose. Before using the product and its batteries and accessories, read this information carefully and keep it for future reference. Incorrect use can lead to hazards or serious injuries.
WARNINGS
- Only use genuine Philips accessories or consumables. If provided, only use the original USB cable and USB power supply block.
- This device contains no user-serviceable parts. If the device is damaged, stop using it and contact the Customer Support Center in your country. If the USB cable is damaged, stop using it.
- Keep chargers and travel charging cases away from water.
- After cleaning, make sure the chargers and travel charging cases are completely dry before connecting them.
- This appliance can be used by children and persons with reduced physical, sensory or mental capabilities or lack of experience and knowledge if they have been given supervision or instruction concerning use of the appliance in a safe way and understand the hazards involved. Children shall not play with the appliance. Cleaning and user maintenance shall not be made by children without supervision.
- Children should be supervised to ensure that they do not play with the appliance.
- Do not clean any part of the device in a dishwasher.
- Do not use adapters and chargers outdoors or near heated surfaces.
- This device is designed only for cleaning teeth, gums, and tongue.
- Stop using the brush head if bristles are bent or splayed. Replace the brush head every 3 months or sooner if signs of wear appear.
- Do not come into direct contact with products containing essential oils or coconut oil. Contact may cause bristles to fall out.
- The maximum operating altitude is 4500 meters.
MEDICAL WARNINGS
- If excessive bleeding occurs after use, if bleeding continues after 1 week of use, or if you feel discomfort or pain, stop using the device and consult a dentist/physician.
- If you have had oral or gum surgery in the past 2 months, consult your dentist before using this device.
- If you have a pacemaker or other implanted device, consult your physician or the manufacturer of the implanted device before use.
- If you have any medical concerns, consult your physician before using this device.
- This product is a personal care device and is not intended for use on multiple patients in a dental clinic or office.
BATTERY SAFETY GUIDELINES
This symbol means that you should read the operating instructions before using the product.

This symbol means that the indicated power supply should be used.
Intended use
The Sonicare Prestige electric toothbrush is intended to remove plaque and food debris from teeth to reduce tooth decay and maintain oral health.
Your Philips Sonicare device (Fig. 1.)
Align the brush head so that the bristles face the same direction as the front of the handle.

Press the brush head onto the metal shaft until it stops.
Note: It is normal to see a small gap between the brush head and the handle.
1. Wet the bristles and apply a small amount of toothpaste.

Clean Sensitive Gum Health White
| Yeñillik Daş aýrymak Duýgur dişlerwe diş etleriüçin iňnänmylaýymtertip | Daş aýrymakwe diş etimassaży | Daş we üsttegmilleraýrymak | |
| Maslahatberilýanýygjamlykderejesi | Yokary Pes* Yokary Yokary | ||
| Jemiçotgalamawagty | 2 minut 2 minut 3 minut we | 20 sekunt | 2 minut we40 sekunt |
Clean Sensitive Gum Health White
| Çotgalaÿys usuly | Her segmenti 20 sekunt çotgalaň. | Her segmenti 20 sekunt çotgalaň | Her segmenti 20 sekunt çotgalaň, | Her segmenti 20 sekunt çotgalaň, |
| | | | |
| | | | |
| soñra segment 7,8,9 bilen 10-iň her birini 20 sekunt çotgalaň. | soñra segment 7 bilen 8-iň her birini 20 sekunt çotgalaň. | |||
 |  |
Intensities
Intensity settings

Your electric toothbrush comes with 3 different intensity settings:
- High intensity (three lights)
- High intensity (two lights)
- Low intensity (one light)
Note: For best results, we recommend high intensity.

If you press too hard, the handle will change its sound and vibration until you reduce the pressure, and the brush head indicator light under the handle will flash blue.
The BrushPacer is an interval timer that helps you brush evenly across your entire mouth by dividing it into 6 sections.
Note: When using the White or Gum Health modes, additional time may be added.
Smartimer
- W3 Premium White or W DiamondClean (NAM) / W OptimalClean (ROW): White mode
- S2 Sensitive: Sensitive mode
2 Place the handle on the charger. 3 Connect the USB cable to a 5V DC power source.
Turkmen
- Only charge with Philips-compatible or safety-approved adapters with the following input ratings: 100-240V~; 50/60Hz; 3.5W and output ratings 5V DC; 2.5W.
- Power source that meets UL requirements or is certified to 1310 Class 2 standard (NAM only)
1 Rinse the brush head and bristles after each use. 2 At least once a week, detach the brush head from the handle and rinse the brush head connection with warm water. Rinse the travel cap as often as necessary and let it air dry. Only use a dry brush head.
Note: The brush head cap is for travel and is not intended for continuous use.
Charger
Warranty and support (ROW)
If you need information or support, visit www.philips.com/support or read the international warranty leaflet.
www.philips.com/support
www.philips.com/support
Clean Sensitive Gum Health White
Clean Sensitive Gum Health White
| Кантип | Ар бир | Ар бир | Ар бир | Ар бир |
| тишти | сегментти | сегментти | сегментти | сегментти |
| тазалоо | 20 секунддай | 20 секунддай | 20 секунддай | 20 секунддай |
| керек | тазалаңыз. | тазалаңыз | тазалаңыз, | тазалаңыз, |
|  |  |  | |
|  |  |  | |
| Андан кийин 7,8,9 жана 10-сегментт-ин ар бирин 20 секунддай тазалаңыз. | Андан кийин 7 жана 8-сегменттин ар бирин 20 секунддай тазалаңыз. | |||
 |  | |||
 |  |
Charging
2 Place the handle on the charger. 3 Connect the supplied USB cable to a 5V DC power source.
Macedonian
Clean Sensitive Gum Health White
Clean Sensitive Gum Health White
- IMPORTANT SAFETY INFORMATION
- WARNINGS
- MEDICAL WARNINGS
- BATTERY SAFETY INSTRUCTIONS
- STORAGE AND TRANSPORTATION CONDITIONS
- ELECTROMAGNETIC FIELDS (EMF)
- RADIO EQUIPMENT DIRECTIVE
- SAVE THESE INSTRUCTIONS
- INTENDED USE
- YOUR PHILIPS SONICARE (FIG. 1)
- ACCESSORIES
- SONICARE APP - GETTING STARTED
- APP FEATURES
- GETTING STARTED
- ATTACHING THE BRUSH HEAD
- USING YOUR PHILIPS SONICARE TOOTHBRUSH
- BRUSHING INSTRUCTIONS
- BRUSHPACER
- MODES
- INTENSITIES
- INTENSITY SETTINGS
- BRUSHSYNC TECHNOLOGY
- FEATURES
- PRESSURE SENSOR FEEDBACK
- SMARTIMER
- EASYSTART
- BRUSH HEAD REPLACEMENT REMINDER
- BRUSH HEAD MODE PAIRING
- ACTIVATING OR DEACTIVATING FEATURES
- FROM HANDLE
- OR
- CHARGING AND BATTERY STATUS
- CHARGING
- CHARGING ON CHARGER
- CHARGING WITH THE TRAVEL CASE
- BATTERY STATUS
- BATTERY STATUS (HANDLE ON PLUGGED-IN CHARGER/CHARGING TRAVEL CASE)
- BATTERY STATUS (WHEN HANDLE IS NOT ON PLUGGED-IN CHARGER/CHARGING TRAVEL CASE)
- CLEANING
- TOOTHBRUSH HANDLE
- BRUSH HEAD
- CHARGER
- TRAVEL CASE
- CHARGING TRAVEL CASE
- STORAGE
- REPLACEMENT
- LOCATING THE MODEL NUMBER
- TROUBLESHOOTING (ROW)
- WARRANTY EXCLUSIONS
- IMPLIED WARRANTIES
- LIMITATION OF REMEDIES
- WARRANTY AND SUPPORT (ROW)
- RECYCLING
- INTRODUCTION
- WWW.PHILIPS.COM/SUPPORT
- SPEEDS
- SPANISH
- SONICARE APP – GETTING STARTED
- INTENSITY
- INTENSITY LEVELS
- STORAGE AND TRANSPORT CONDITIONS
- USING YOUR PHILIPS SONICARE TOOTHPASTE
- FUNCTIONS
- BRUSH HEAD PAIRING MODE
- ACTIVATING OR DEACTIVATING FUNCTIONS
- BATTERY SAFETY GUIDELINES
- YOUR PHILIPS SONICARE DEVICE (FIG. 1.)
- TURKMEN
- MACEDONIAN
Brand : PHILIPS
Model : Sonicare 6500 Series HX7411
Category : Toothbrush