
INS 9012 - Freezer INDESIT - Free user manual and instructions
Find the device manual for free INS 9012 INDESIT in PDF.


 FR
FR
 BG
BG
 CS
CS
 DA
DA
 DE
DE
 EL
EL
 EN
EN
 ES
ES
 ET
ET
 FI
FI
 HE
HE
 HU
HU
 HY
HY
 IS
IS
 IT
IT
 KK
KK
 KY
KY
 LT
LT
 LV
LV
 NL
NL
 NO
NO
 PL
PL
 PT
PT
 RO
RO
 RU
RU
 SK
SK
 SL
SL
 SV
SV
 TR
TR
 UK
UK
 ZH
ZH
| Product type | Freezer |
| Brand | Indesit |
| Model | INS 9012 |
| Dimensions (H x W x D) | 85 x 60 x 60 cm |
| Net weight | Approx. 38 kg |
| Net volume | 250 L |
| Climate class | SN-T (from 10°C to 43°C) |
| Energy class | F |
| Annual consumption | Approx. 280 kWh |
| Power supply | 230 V ~ 50 Hz |
| Power | 120 W |
| Noise level | 42 dB |
| Control type | Mechanical |
| Adjustable thermostat | Yes |
| Interior light | No |
| Defrost | Manual |
| Windows | No |
| Adjustable feet | Yes |
| Handle | Integrated |
| Child safety | No |
| Temperature alarm | No |
| Interior material | Plastic |
| Color | White |
| Maintenance | Clean with a soft cloth and soapy water, regular defrosting |
| Repairability | Index 6.5/10 |
| Spare parts | Available on the manufacturer's website |
Frequently Asked Questions - INS 9012 INDESIT
User questions about INS 9012 INDESIT
0 question about this device. Answer the ones you know or ask your own.
Ask a new question about this device
Download the instructions for your Freezer in PDF format for free! Find your manual INS 9012 - INDESIT and take your electronic device back in hand. On this page are published all the documents necessary for the use of your device. INS 9012 by INDESIT.
USER MANUAL INS 9012 INDESIT
User manual
User manual
Table of contents
Drawers
Legend


**
MODERATE ZONE


Instructions for use
INSTRUCTIONS FOR USE
CONTENTS

Bulb type 2)
Shelves
Explanatory notes

**
MODERATE ZONE
Explanations
User guide
USER GUIDE
TABLE OF CONTENTS
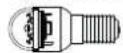
Bulb type 2)
Shelves
Explanation


**
TEMPERED AREA
Explanation
Operating instructions
OPERATING INSTRUCTIONS
INDEX
Light type 2)
Storage surfaces
Legend


**
TEMPERATURE ZONE
Legend
A. FREEZER COMPARTMENT (if present)
User Manual
USER MANUAL
REFRIGERATOR
Shelves
Caption


**
TEMPERATURE ZONE
User Manual
USER MANUAL
INDEX
Use & Care guide 2
Refrigerator light 2
Replacing the LED light bulb (depending on model) 2
Shelves 2
Door 2
How to use the appliance 3
First time use 3
Refrigerator compartment and food storage 3
How to store fresh food and beverages 3
* Freezer compartment food storage (Depending on model) 4
Food shelf life at different temperatures 4
* How to defrost the freezer compartment (Depending on model) 5
Functional sounds 5
Recommendation in case of no use of the appliance 5
Cleaning and maintenance 6
Gasket replacement 7
Refrigerator light
The light system inside the refrigerator compartment uses LED lights, allowing better lighting than traditional light bulbs as well as very low energy consumption. Contact the Technical Assistance Service if you need a replacement. Important: The refrigerator compartment light switches on when the refrigerator door is opened.
Replacing the LED light bulb (depending on model)
Always disconnect the appliance from the power supply before replacing the light bulb. Then follow the instructions based on the type of light bulb for your product. Replace the light bulb with one with the same features, available from the Technical Assistance Service and authorized sellers.
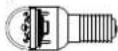
Light type 1)
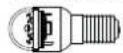
To remove the light bulb, unscrew it in an anti-clockwise direction, as shown in the figure. Wait 5 minutes before reconnecting the appliance.
LED light bulb (max 25W)


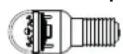
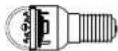
Light type 2)
If the product has LED lights, as demonstrated in the figures below, contact the Technical Assistance Service if you need a replacement. LEDs last longer than traditional light bulbs, improve internal visibility, and are environmentally friendly.

Shelves
All of the drawers, door shelves, and shelves can be removed.
Door
Door reversibility
Note: The direction of door opening can be changed. If this operation is performed by After-sales Service, it is not covered by the warranty. Follow the instructions in the Installation Guide.
How to use the appliance
First time use
Wait at least two hours after installation before connecting the appliance to the power supply. When connected, the appliance starts operating automatically. The ideal storage temperatures for food are preset at the factory.
After turning on the appliance, wait 4-6 hours for the correct storage temperature to be reached for a normally filled appliance. Position the antibacterial anti-odour filter in the fan as demonstrated in the filter packaging (if available). If the audible signal sounds, it means the temperature alarm has been triggered: press the button to switch off the acoustic alarms.
Refrigerator compartment and food storage
The refrigerator compartment allows for the storage of fresh food and drinks. It defrosts completely automatically. The occasional presence of water droplets on the internal back wall is a sign of the automatic defrosting phase. The defrost water is channelled into a drain and then collected in a container, where it evaporates.
Note: the ambient temperature, how often the doors are opened, and the position of the appliance may affect the internal temperatures in the two compartments. Set the temperatures depending on these factors. In very humid conditions, condensation may form in the refrigerator compartment, especially on the glass shelves. In this case, it is recommended to close containers with liquids (e.g., a pot of stock), wrap up food with high water content (e.g., vegetables), and turn on the fan if there is one. All drawers, door shelves, and shelves can be removed.
Air ventilation
The ventilation air allows a better distribution of temperatures inside the compartments and, consequently, better preservation of food and reduction of excess humidity. Do not obstruct the ventilation area.
How to store fresh food and beverages
Foods that give off a large amount of ethylene gas (apples, apricots, pears, peaches, avocado, figs, prunes, blueberries, melons, beans) and those sensitive to this gas, such as fruit vegetables and salad, should always be separated or wrapped so as not to reduce storage life; for example, do not store tomatoes together with kiwi fruits or cabbage. Do not store food too close together to enable sufficient air circulation. Use recyclable plastic, metal, aluminum, and glass containers and cling film to wrap foods.
If you have a small quantity of food to store in the refrigerator, we recommend using the shelves above the crisper for fruits and vegetables since this is the coolest area of the compartment. Always use closed containers for liquids and for food that may give off or be tainted by odor or flavor transfer, or cover them. To avoid bottles falling over, you can use the bottle holder (available on selected models).


TEMPERATE ZONE
Suggested for storage of tropical fruit, cans, drinks, eggs, sauces, pickles, butter, jam
COOL ZONE
Suggested for the storage of cheese, milk, daily food, delicatessen, yogurt.
COOLEST AREA
Suggested for storage of cold cuts, desserts, meat and fish.
FRUIT AND VEGETABLE DRAWER
For models with "0° ZONE" compartment, the "coolest area" is the one highlighted in the legend.
* Freezer compartment food storage (depending on model).
*** The frozen compartment allows long time storage for frozen food. You can only use the "Storage" compartment for maintaining frozen food, but it is NOT CAPABLE OF FREEZING NEW FRESH FOOD.
The freezer compartment allows long time storage of frozen food and freezing of fresh food. The quantity of food that can be frozen in 24 hours is written on the rating plate. Arrange the fresh food in the freezing area inside the freezer compartment, leaving enough space around the food packages to allow air to circulate freely. It is advisable that you do not re-freeze food that has partially defrosted. It is important to wrap the food in a way that prevents the ingress of water, humidity or condensation.
Ice cubes
Fill 2/3 of the ice tray with water and put it back in the freezer compartment. Do not use sharp or pointed objects to remove the ice under any circumstances.
Removing the drawers
Pull the drawers outwards as far as they will go, lift them up and remove them. To get more volume, the freezer compartment can be used without the drawers. Make sure that the door is closed properly after putting the food back on the grilles/shelves.

Legend
A. FREEZER COMPARTMENT (if the refrigerator has one)
Food shelf life at different temperatures
| FROZEN COMPARTMENT | |||
| Product Storage period (-12°C) | Recommended Storage period (-18°C) | Storage period (-24°C) | |
| Butter or margarine 1 month | 6 months 9 months | ||
| Fish 1 month 1-3 months | 6 months | ||
| Fruits (except citrus) & Vegetables | 1 month 8-12 months | 12 months | |
| Meat- Ham- sausage Roasts (beef-pork- lamb) Steaks or chops (beef-lamb-pork) | 1 month 2 months | 8-12 months4 months | 12 months |
| Milk, Fresh fluid, Cheese, Ice cream or sherbet | 1 month 1-3 months | 5 months (not recommended for ice cream) | |
| Poultry (chicken-turkey) | 1 month 5-7 months | 9 months | |
Food shelf life at different temperatures
| UNFROZEN COMPARTMENT | |||
| Product | Storage period 0-3°C | Storage period (3-6°C) | Storage period 6-8°C |
| Cans, drinks, eggs, sauces, pickles, butter, jam | 3-4 weeks | 3-4 weeks | 3-4 weeks |
| Tropical fruit | Not recommended 2-4 weeks | 3-4 weeks | |
| Cheese, milk, dairy food, deli-5 daysfood, yoghurt | 2-5 days | 2-5 days | 2-5 days |
| Cold cuts, desserts, meat and fish and home-cooked food | 3-5 days | 1-2 days | Not recommended |
| Store vegetables and fruits (excluding tropical fruits and citrus) | 15 days | 10-12 days | 4-7 days |
* How to defrost the freezer compartment (Depending on model)
- It is advisable to set the temperature colder or turn on the Fast Freeze/Fast Cool* at least four hours before removing the food from the freezer compartment, to prolong the preservation of the food during the defrosting phase.
- To defrost, turn the appliance off and remove the drawers. Put the frozen food in a cool place. Leave the door open to allow the frost to melt. To prevent the water from escaping during the defrost, it is advised that you place an absorbent cloth on the bottom of the freezer compartment and wring it out regularly.
- Clean the inside of the freezer compartment and dry it carefully.
- Turn the appliance back on and put the food back inside.
Functional sounds
- A buzz generated by the compressor is normal while the product is working.

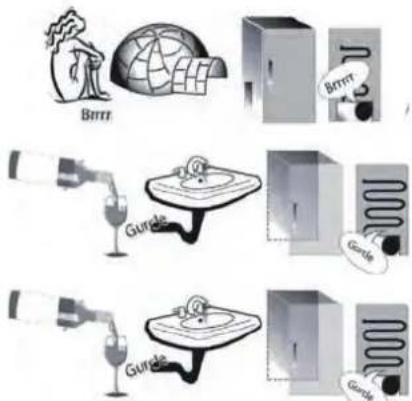
- Gurgling and crackles are generated by the passage of the refrigerant gas inside the cooling circuit, therefore these are normal noises.

- It's possible to "hear" creaks when the compressor is active and inactive: it is a normal sound of the product's structure.

- Check that the balconies on the inside of the refrigerator door, the shelves and the drawers in the refrigerator compartment are attached and positioned properly, to avoid possible vibrations.
- Don't place glass containers (bottles, jars, etc.) in direct contact with each other, to avoid vibrations.
- This device is equipped with a compressor that operates at an optimum speed to minimize energy consumption. So it may happen that in certain situations (in summer or if large quantities of food are introduced) that the increases the speed and therefore it is more noisy than usual.
Recommendation in case of no use of the appliance
In the event of non-use of the appliance
Disconnect the appliance from the power supply, empty it, defrost it (if necessary) and clean it.
Keep the doors slightly ajar to let air circulate inside the compartments. By doing this, you avoid the development of mould and bad odours.
In the event of an interruption to the power supply
Keep the doors closed so the food stays cold for as long as possible. Do not re-freeze food that has partially defrosted. If there is a prolonged power cut, the black out alarm may also activate (in products with electronics).
Cleaning and maintenance
Before any cleaning or maintenance operation, unplug the appliance from the mains or disconnect the electric power supply.
Never use abrasives. Never clean refrigerator parts with flammable fluids.
Do not use steam cleaners.
The buttons and control panel display must not be cleaned with alcohol or alcohol-derived substances, but with a cloth.
Clean the appliance occasionally with a cloth and a solution of warm water and neutral cleaning agents specifically for cleaning the inside of the refrigerator.
To ensure the constant and correct flow of the defrosting water, regularly clean the inside of the drain situated in the back wall of the refrigerator compartment near the fruit and vegetable drawer using the utensil provided.

Gasket replacement


User manual
USER MANUAL
INDEX
Shelves
Legend


**
TEMPERATURE ZONE
User manual
USER MANUAL
REGISTER
Lamp type 2)
Shelves
Description
**
MODERATE ZONE
Description
User manual
USER MANUAL
CONTENTS
Lamp type 2)
Shelves
Legend


**
COOL ZONE
Legend

Lamp type 2)
Shelves
Legend


**
TEMPERATE ZONE
OTD
| הכלה | |||
| 6-8°C ‖ionx ‖n17 | (3-6°C) ‖ionx ‖n17 | 0-3°C ‖ionx ‖n17 | n17 |
| n17 3-4 | n17 3-4 | n17 3-4 | , n17, n17, n17, n17, n17, n17, n17 |
| n17 3-4 | n17 2-4 | n17 2-4 | n17 2-4 |
| n17 2-5 | n17 2-5 | n17 2-5 | , n17, n17, n17, n17, n17, n17 |
| n17 2-7 | n17 1-2 | n17 3-5 | , n17, n17, n17, n17, n17, n17, n17 |
| n17 4-7 | n17 10-12 | n17 15 | n17 (n17, n17, n17, n17, n17, n17, n17) |
.1

.2


Light type 2)
Shelves
All drawers, door shelves and shelves can be removed.
Door
Legend


**
MODERATE ZONE
Recommended for storing tropical fruit, cans, drinks, eggs, sauces, canned vegetables, butter, jam
COLD ZONE
Recommended for storing cheese, milk, dairy products, delicatessen, yogurt
COLDEST ZONE
Recommended for storing cold cuts, desserts, meat and fish
FRUIT AND VEGETABLE CONTAINER
User Manual
USER MANUAL
TABLE OF CONTENTS

Type 2 bulb
Shelves
Legend

MODERATE TEMPERATURE ZONE
Legend


Oqnwnqnpnδnnh δtnGwply
FICBU
Oqunwqnpdduu & h jguwufh nntgngjg 2 Ummfmpm6|LmJn 2 Thujugfuq Luufuq hqu Lunwnqngh dunwphfucd (huqvlud dunk1hg) 2 PwpwlyGtp 2 τmin 2 Bújūtu oqunwqnptl uwpfwnjnpnid p 3 Unwgh ofwnqnprdnuf 3 Uunfumupufh joghly le dplupf h upubkum 3 HgSgtu wqhtl pwnf dptpfu u pswtllhfu 3 * Uungangbghh dphfgh quuhquafunl (huwulud dmpk1hg) 4 Uplpfh whuwuklhaepjndp unnpplp ylpduwwuhfuwddlpnd 4 * 165wto hwltggtl uwngwlughlgl (hwlpulwd dnntllgl) 5 Bnclghhnlw1 hfsjnlclp 5 lnphmipn6tp wwpfwjnpnidp soqnwnqnptlm ntwfnid 5 Uwfpnd h upwhqufdm 6 Ullnauhsh dunvunphlinuf 7
UwnGwpwGh lnJu
Ummgupwgh jyghhj gkpwh yunwjhg hwnwlhpqq lwnwlhpbk p th, upnf wktj jwj yunwlpapnpnjth th wqwhnui nd wqhwpwhg juzhj ydwkph hkan hwnlafwnmud, fhiyuku finl ewn fhs lkbpqwh t h uqnund: Φnwnphhwnf wihpwdeemnpjwh qhyfnd, lwnq hwnwnntf Slphplwwh U,ywhgnlpjwh O'wnwynlpjwh hku:
ln juh mluwq 2)
The present invention relates to a method for controlling the operation of a wind turbine, in particular a wind turbine with a rotor blade pitch adjustment system. The method comprises the following steps: detecting a current operating state of the wind turbine, comparing the current operating state with a predetermined operating state, and adjusting the rotor blade pitch angle based on the comparison.

Background
Wind turbines are known, for example, from the prior art and are used for generating electrical energy.
γn,n
7 and the like
However, the known wind turbines have the disadvantage that they are not optimally adapted to different wind conditions. For example, the rotor blades are often set to a fixed pitch angle, which leads to reduced efficiency in partial load operation. Therefore, there is a need for an improved method for controlling a wind turbine.
Summary of the invention
Object of the invention
It is therefore an object of the present invention to provide a method for controlling a wind turbine which overcomes the disadvantages of the prior art and enables an efficient operation of the wind turbine in different wind conditions.
The object is achieved by a method with the features of claim 1. Further advantageous embodiments are described in the dependent claims.
The method according to the invention comprises the following steps: detecting a current operating state of the wind turbine, comparing the current operating state with a predetermined operating state, and adjusting the rotor blade pitch angle based on the comparison. The comparison is carried out by means of a control unit, which is designed to determine a deviation between the current operating state and the predetermined operating state and to adjust the pitch angle accordingly.
Brief description of the drawings
The invention will be explained in more detail below with reference to the accompanying drawings. The drawings show exemplary embodiments of the invention and are not to be construed as limiting. In the drawings: FIG. 1 shows a schematic view of a wind turbine according to the invention; FIG. 2 shows a flow diagram of the method according to the invention.
1 Wind 2 Turbine 3 Rotor 4 Blade 5 Pitch 6 The present invention relates to a method for controlling a wind turbine, in particular a wind turbine with a rotor blade pitch adjustment system. The method comprises the following steps: detecting a current operating state of the wind turbine, comparing the current operating state with a predetermined operating state, and adjusting the rotor blade pitch angle based on the comparison. The comparison is carried out by means of a control unit, which is designed to determine a deviation between the current operating state and the predetermined operating state and to adjust the pitch angle accordingly. The control unit may be implemented as a digital signal processor (DSP) or a microcontroller (MCU).
The following types of equipment, machinery, and devices (such as pumps, compressors, valves, fittings, pipes, tanks, instruments, and control systems) and the corresponding equipment, their components and accessories, as well as the materials and substances used in their operation, must meet the requirements of the technical regulations. The technical regulations establish the essential requirements for the safety of machinery and equipment: general safety requirements, specific requirements for certain types of machinery and equipment, and requirements for the protection of workers during operation.
The technical regulations apply to machinery and equipment manufactured for the purpose of being placed on the market, as well as to their components and spare parts, if they are subject to the technical regulations. The technical regulations also apply to machinery and equipment that have been put into service before the entry into force of these regulations, if they are subject to the requirements of these regulations. The technical regulations do not apply to machinery and equipment that are intended for export (unless otherwise provided by international treaties of the Russian Federation).


The following types of machinery and equipment are subject to the technical regulations: agricultural machinery, construction machinery, road-building machinery, municipal machinery, forestry machinery, and other similar machinery and equipment.
The technical regulations establish requirements for the safety of machinery and equipment, including requirements for design, manufacturing, installation, commissioning, operation, storage, transportation, and disposal.
The technical regulations apply to machinery and equipment, their components, and spare parts, as well as to the materials and substances used in their operation.
The technical regulations establish requirements for the safety of machinery and equipment, including requirements for the prevention of injuries, protection of workers, and ensuring the safety of the environment.
* The technical regulations do not apply to machinery and equipment intended for export (unless otherwise provided by international treaties of the Russian Federation).
*** The device is intended for use in accordance with the manufacturer's instructions: The manufacturer's instructions are given in the operating manual «Nwhqufu6h» device, FU83 U81St7 ZUUFU4Nf 2k U0b3t6l P-UFV U0bFPC:
* *** The device is intended for use in accordance with the instructions: the user must read the instructions and follow them. The instructions are given in the operating manual 24 hours, including all safety warnings. The instructions must be followed to ensure safe operation of the device. The device must be used only for its intended purpose, and any other use is considered improper. The manufacturer is not liable for damage caused by improper use or failure to follow the instructions.
Device description
The device is supplied with a 2/3-pin plug and the device is connected to the mains. The safety instructions must be observed during installation and operation.
Safety instructions
The device must be used in accordance with the instructions and safety regulations. The user must read the instructions carefully before use. The device is intended for indoor use only. Do not use the device near water or in damp conditions. Keep the device away from children and pets.

Π_{wj} w_{g} w_{l} w_{b} g_{c} w_{d} g_{t}
A. UU08U08H4(kpt uunnfupwifp nufh)
Instructions for connecting the device to the power supply
| UUUH3GUO HSHY | |||
| Upuunqpw6f Nwhquw6fng dwuhtun (-12°C) Unwgwphjnn wwhquw6fng dwuhtun (-18°C) | Nwhquw6fng dwuhtun (-24°C) | ||
| Чуиця hyuú úmpqwphi 1 wúhu 6 wúhu 9 wúhu | |||
| Quiy 1 wúhu 1-3 wúhu 6 wúhu | |||
| Уралр (puqh ghuqnluhg) & Fwugwptnli 1 wúhu 8-12 wúhu 12 wúhu | |||
| Урн- Uwflwnwś úhu- lípplpehly Swwwlwś úhu (wwwlwph-jwnql-qwnuhi) Uptjftp hyuú hyuultw6tp (wwwlwph- qunuhi - lonql) 1 wúhu 2 wúhu 8-12 wúhu 4 wúhu 12 wúhu | |||
| Чур, Фрупú htημh, Μωθμ, Μωηquwnwú hyuú ckrppp 1 wúhu 1-3 wúhu 5 wúhu (lonphuyn sh wpufnu 4 wúhu 12 wúhu | |||
| Фуылмuh (huuú-hünhuhwú) 1 wúhu 5-7 wúhu 9 wúhu | |||
Instructions for connecting the device to the network
| QUUQ3FUO h8f4 | |||
| Upunupmuf Quhupufuf duyltun 0-3°C Quhupufuf duyltun (3-6°C) Quhupufuf duyltun 6-8°C | |||
| Fwglw6tp, puwltpf, dnt, unnu6tp, ppnt, lwpwq, glu | 3-4 cwrnp | 3-4 cwrnp | 3-4 cwrnp |
| Spunhlwulfu uhpq | bnplnrpf yl mplnui | 2-4 cwrnp | 3-4 cwrnp |
| Qw6tp, lwp, lwpfuwptp, nklhlwunku ufmln, umdnli | 2-5 op | 2-5 op | 2-5 op |
| Uwnp lwpf6tp, wnw6tp, dhu la dntl h mufp wwnpwnmifud ufmln | 3-5 op | 1-2 op | bnplnrpf yl mplnui |
| QUU.Nb3FU.T h3h4 | |||
| Upunwnpwif Nuhwugdung dwuhtun 0-3°C Nuhwugdung dwuhtun (3-6°C) Nuhwugdung dwuhtun 6-8°C | |||
| Nuhwugdung puftwupkntfip h upqtpp (pwgwnnppwup unwnhlwhpuf upqtpph g hwnpmuh) | 15 op 10-12 op 4-7 op | ||
* Note: The device is not suitable for outdoor use.
- The device must be installed and used in accordance with the safety regulations. The device is designed for use with a 4-pin connector. The device must be connected to the power supply only after reading the instructions.
- The device must be cleaned regularly with a dry cloth. Do not use abrasive cleaners. The device must be disconnected from the power supply before cleaning. The manufacturer is not liable for damage caused by improper cleaning.
- The device must be stored in a dry place and protected from moisture.
- The device must be disposed of in accordance with local regulations.
- The following safety instructions must be observed during installation and operation:
- All installation and maintenance work must be carried out by qualified personnel, in accordance with the applicable standards and regulations, and with the use of appropriate tools;
- The device must be disconnected from the power supply before any maintenance work. The housing must only be opened by authorized personnel. The device must be protected from moisture and dust.
- In addition, the relevant accident prevention regulations of the employers' liability insurance association must be observed.
- The device must be installed in a location that is easily accessible for maintenance and repair work.
- The device is intended for use in dry indoor areas. It must not be used in potentially explosive atmospheres. The device must be protected from direct sunlight and heat sources. The device must be installed in a way that ensures adequate ventilation.
The device must be installed in a way that ensures adequate ventilation.
Installation and connection
The device must be installed in a way that ensures adequate ventilation. The device must be protected from moisture and dust.
All installation and maintenance work must be carried out by qualified personnel. All work must be carried out in accordance with the applicable standards and regulations.
The device must be disconnected from the power supply before any maintenance work.
User manual
User manual
ATRÍDASKRÁ
Hillur
Legend
TEMPERATURE ZONE
Legend
A. FREEZER (if the refrigerator has one)
User manual
USER MANUAL
INDEX
LED bulb (max 25W)
Legend
**
TEMPERATE ZONE

2-шам түрі)
Текшелер
Шартты белгілер


**
TEMPERATURE ZONE
Legend
Shelves
Legend

TEMPERATE ZONE
Legend

User manual
USER MANUAL
INDEX

2 bulb type
Shelves
Legend
**
MEDIUM TEMPERATURE ZONE

Light type 2)
Shelves
All drawers, door shelves and shelves can be removed.
Doors
Legend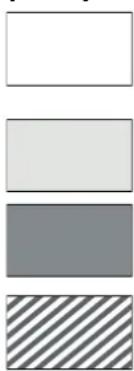
**
TEMPERATE ZONE
Manual
MANUAL
INDEX

Lamp type 2)
Shelves
Legend


**
TEMPERATE ZONE
Legend
User manual
USER HANDBOOK
INDEX

Lamp type 2)
Shelves
Explanation
**
TEMPERATE ZONE
THE COLDEST AREA

Bulb type 2)
Shelves
Legend


**
MODERATE TEMPERATURE ZONE
Legend
User manual
USER MANUAL
INDEX

Lamp type 2)
Shelves
Legend
**
TEMPERATURE ZONE
Recommended for storing tropical fruits, cans, drinks, eggs, sauces, pickles, butter, and jams
FRESH ZONE
Legend
A. FREEZER COMPARTMENT (If the refrigerator has one)
Food shelf life at different temperatures
User manual
USER MANUAL
TABLE OF CONTENTS
Bulb type 2)
Shelves
Legend


**
TEMPERATURE ZONE
Legend


Bulb type 2)
Shelves
Symbols


**
MODERATE ZONE
Symbols


User manual
INSTRUCTIONS FOR USE
CONTENTS
Type of light 2)
Shelves
Legend
**
MODERATE ZONE
Legend
A. FREEZER COMPARTMENT (if the refrigerator is equipped with one)
Instructions for use
INSTRUCTIONS FOR USE
TABLE OF CONTENTS
Shelves
Legend


**
TEMPERATURE ZONE
For storing tropical fruits, preserves, drinks, eggs, sauces, pickles, butter, and jam
REFRIGERATOR COMPARTMENT
User Manual
USER MANUAL
INDEX
Instructions for use and maintenance 2
Refrigerator light 2
Replacing the LED bulb (depending on model) 2
Shelves 2
Doors 2
How to use the appliance 3
First use 3
Refrigerator compartment and food storage 3
How to store fresh food and drinks 3
Shelves
All shelves, door bins and shelves can be removed.
Door
Legend
**
MODERATE ZONE
Recommended for storing tropical fruit, canned goods, drinks, eggs, sauces, pickles, butter, jam
COOLING ZONE
Suggested for storing cheese, milk, dairy products, delicatessen, yogurt
COLDEST ZONE
User manual
USER MANUAL
TABLE OF CONTENTS
Lamp type 2)
Shelves
Explanation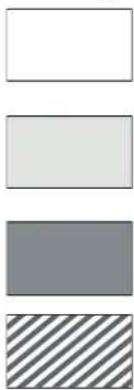
**
TEMPERATE ZONE
Explanation
User Manual
USER MANUAL
INDEX
LED lamp (max. 25W)


Bulb type 2)
Shelves
Legend
TEMPERATE ZONE
Legend
A.
Cleaning and maintenance

Lamp type 2)
Shelves
Legend


**
User manual
User manual
Index
Use & Care Guide
Refrigerator light
Replacing the LED bulb (depending on model)
Shelves
Door
How to use the appliance
First use
Refrigerator compartment and food storage
How to store fresh food and beverages
* Freezer food storage (depending on model)
Shelf life of food at different temperatures
* How to defrost the freezer (depending on model)
Function sounds
Recommendations when not using the appliance
Cleaning and maintenance
Replacing the gasket
Refrigerator light

Bulb type 2)
Shelves
All drawers, door shelves, and storage racks can be removed.
Door
Reversible refrigerator door
Legend
Ambient temperature zone
Cleaning and maintenance
User manual
User manual
Index
Use & Care Guide
Refrigerator lighting
Replacing the LED bulb (depending on model)
Shelves
Door
How to use this appliance
First use
Refrigerator compartment and food storage
Storing fresh food and beverages
* Freezer compartment (depending on model)
Food storage life on shelves at different temperatures
* Freezer defrosting method (depending on model)
Operating sounds
Recommendations when not using this appliance
Cleaning and maintenance
Gasket replacement
Refrigerator lighting
Bulb type 2)
Shelves
All drawers, door shelves, or shelves can be removed.
Doors
Reversing the door opening direction
Diagram

Chill zone
- USER MANUAL
- DRAWERS
- MODERATE ZONE
- INSTRUCTIONS FOR USE
- SHELVES
- EXPLANATIONS
- USER GUIDE
- TABLE OF CONTENTS
- TEMPERED AREA
- EXPLANATION
- OPERATING INSTRUCTIONS
- INDEX
- STORAGE SURFACES
- LEGEND
- TEMPERATURE ZONE
- REFRIGERATOR
- CAPTION
- USE & CARE GUIDE
- REFRIGERATOR LIGHT
- HOW TO USE THE APPLIANCE
- CLEANING AND MAINTENANCE
- GASKET REPLACEMENT
- REPLACING THE LED LIGHT BULB (DEPENDING ON MODEL)
- DOOR
- DOOR REVERSIBILITY
- FIRST TIME USE
- REFRIGERATOR COMPARTMENT AND FOOD STORAGE
- AIR VENTILATION
- HOW TO STORE FRESH FOOD AND BEVERAGES
- TEMPERATE ZONE
- COOL ZONE
- COOLEST AREA
- FRUIT AND VEGETABLE DRAWER
- FREEZER COMPARTMENT FOOD STORAGE (DEPENDING ON MODEL)
- ICE CUBES
- REMOVING THE DRAWERS
- HOW TO DEFROST THE FREEZER COMPARTMENT (DEPENDING ON MODEL)
- FUNCTIONAL SOUNDS
- RECOMMENDATION IN CASE OF NO USE OF THE APPLIANCE
- IN THE EVENT OF NON-USE OF THE APPLIANCE
- IN THE EVENT OF AN INTERRUPTION TO THE POWER SUPPLY
- REGISTER
- DESCRIPTION
- CONTENTS
- OTD
- COLD ZONE
- COLDEST ZONE
- FRUIT AND VEGETABLE CONTAINER
- TYPE 2 BULB
- MODERATE TEMPERATURE ZONE
- FICBU
- UWNGWPWGH LNJU
- BACKGROUND
- N
- SUMMARY OF THE INVENTION
- OBJECT OF THE INVENTION
- BRIEF DESCRIPTION OF THE DRAWINGS
- THE TECHNICAL REGULATIONS DO NOT APPLY TO MACHINERY AND EQUIPMENT INTENDED FOR EXPORT (UNLESS OTHERWISE PROVIDED BY INTERNATIONAL TREATIES OF THE RUSSIAN FEDERATION)
- DEVICE DESCRIPTION
- SAFETY INSTRUCTIONS
- Π_{WJ} W_{G} W_{L} W_{B} G_{C} W_{D} G_{T}
- INSTRUCTIONS FOR CONNECTING THE DEVICE TO THE POWER SUPPLY
- INSTRUCTIONS FOR CONNECTING THE DEVICE TO THE NETWORK
- NOTE: THE DEVICE IS NOT SUITABLE FOR OUTDOOR USE
- THE DEVICE MUST BE INSTALLED IN A WAY THAT ENSURES ADEQUATE VENTILATION
- ATRÍDASKRÁ
- HILLUR
- ТЕКШЕЛЕР
- ШАРТТЫ БЕЛГІЛЕР
- MEDIUM TEMPERATURE ZONE
- DOORS
- MANUAL
- USER HANDBOOK
- THE COLDEST AREA
- FRESH ZONE
- SYMBOLS
- REFRIGERATOR COMPARTMENT
- INSTRUCTIONS FOR USE AND MAINTENANCE
- COOLING ZONE
- AMBIENT TEMPERATURE ZONE
- REFRIGERATOR LIGHTING
- DIAGRAM
- CHILL ZONE
Brand : INDESIT
Model : INS 9012
Category : Freezer