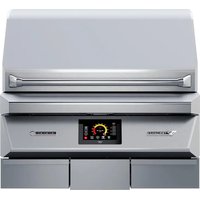
TEPG36G - Barbecue Twin Eagles - Free user manual and instructions
Find the device manual for free TEPG36G Twin Eagles in PDF.


| Product Type | Gas Barbecue |
| Brand | Twin Eagles |
| Model | TEPG36G |
| Overall Width | 36 inches (91.4 cm) |
| Overall Depth | 24 inches (61 cm) |
| Overall Height | 47 inches (119.4 cm) with lid closed |
| Cooking Area | 720 sq in (4,645 sq cm) total, including warming rack |
| Primary Burners | 4 stainless steel burners, 60,000 BTU total |
| Side Burner | 1 side burner, 12,000 BTU |
| Ignition Type | Electronic ignition with battery |
| Fuel Type | Natural gas or propane (convertible) |
| Weight | Approximately 180 lbs (81.6 kg) |
| Material | 304 stainless steel body and cooking grates |
| Temperature Gauge | Built-in lid thermometer |
| Cleaning | Removable drip tray and grease management system |
| Safety Features | Flame failure safety device on burners |
| Warranty | Limited lifetime warranty on stainless steel |
| Spare Parts Availability | Replacement burners, grates, and ignition parts available |
| Installation Type | Built-in or freestanding with optional cart |
Frequently Asked Questions - TEPG36G Twin Eagles
User questions about TEPG36G Twin Eagles
0 question about this device. Answer the ones you know or ask your own.
Ask a new question about this device
Download the instructions for your Barbecue in PDF format for free! Find your manual TEPG36G - Twin Eagles and take your electronic device back in hand. On this page are published all the documents necessary for the use of your device. TEPG36G by Twin Eagles.
USER MANUAL TEPG36G Twin Eagles
natural_image
Silhouette of two birds in flight within a red triangular frame (no text or symbols)TWIN EAGLES
INNOVATION AND INSPIRATION ON FIRE™
natural_image
Exterior view of a modern outdoor grill with open grilles and meat cuts, no visible text or symbolsINSTALLATION, USE & CARE MANUAL
MODELS:
TEPG36G
TEPG36R P/N :17543E
Congratulations on the purchase of your Wood Fired Pellet Grill & Smoker! Our products are engineered for precision and designed for style. Each Twin Eagles grill is manufactured in the USA at our own state of the art facility in California.
This manual will give you easy to follow instructions for installing, operating and maintaining your grill. We recommend reading this manual before your first use to ensure safety, proper care and operation.
At Twin Eagles, we want you to enjoy grilling and spending time together as much as we do – making memories that linger long after the grill cools down.
Thank you and welcome!
Dante Cantal
Owner and Founder

TABLE OF CONTENTS
GETTING STARTED 1
CUT-OUT DIMENSIONS 6
PELLET SMOKER MODE OVERVIEW 7-8
USING YOUR PELLET SMOKER 9-10
CLEANING AND MAINTENANCE 11
PELLET SMOKING GUIDELINES 12
PELLET GRILLING TIMES AND TEMPS 13-14
EXPLODED VIEW 15-16
REPLACEMENT PARTS LIST
WARRANTY
HOW TO OBTAIN SERVICE
CUSTOMER CARE
Please record the product information below and refer to it when contacting Twin Eagles.
This information is found on the data nameplate, located under the right hand Ash Drawer. A second label with model number and serial number is located below the Front Panel above the right Ash Drawer, shown below. Remove the right Ash Drawer to visually access the nameplate from the front of the grill.
SERVICE INFORMATION
MODEL NUMBER
SERIAL NUMBER
DATE OF PURCHASE
PLACE OF PURCHASE

To the Installer:
Please read these instructions completely and give this manual to the owner.
To the Owner:
Keep this manual in a safe place for future reference.
WARNING: CALIFORNIA PROPOSITION 65
This product can expose you to chemicals including carbon monoxide which is known to the State of California to cause cancer and reproductive harm. To minimize exposure to the by-products of the burning fuel or from combustion, always operate this unit according to the use and care manual and provide good ventilation. California law requires businesses to warn customers of potential exposure to such substances. For more information go to www.P65Warnings.ca.gov.
▲ AVERTISSEMENT: PROPOSITION 65 DE L'ETAT DE LA CALIFORNIE
Please read this entire manual before installation and use of this product. Failure to follow these instructions may result in property damage, bodily injury or even death. Contact your local building or fire officials about restrictions and installation inspection requirements in your area.
- Placement and Location
- This grill is designed for outdoor use only.
° This grill is not designed to be installed in or on recreational vehicles and / or boats. - Keep this grill in an area free of combustible materials, gasoline, and other flammable vapors and liquids.
- Do not locate your grill under or near windows or vents that can be opened into your home.
- Grill should be installed on a level firm surface.
• Minimum clearance of 12 inches from the back and sides of the grill to adjacent combustible construction must be maintained. This grill shall not be located under overhead-unprotected combustible construction. - Keep your grill covered when not in use. Grill covers are available and are designed to help keep your grill safe from harmful elements.
- Care should be taken to ensure that no water gets into the pellet hopper as wood pellets, when wet or exposed to high humidity, expand greatly and break apart which can cause blockage of the auger.
- Never use your grill in an excessively windy area.
- Accessible parts of the grill will be very hot, exercise caution around the grill while it's in use.
- Keep young children away while grill is in use. When children are present, adult supervision is recommended.
- Set-up
• To prevent fire and smoke damage, remove all packaging materials before operating the grill.
° It is recommended that before using your grill you wipe the inside clean with soap and water. This is to remove any residual solvents, oil and grease used in the manufacturing process. The grates should also be thoroughly cleaned in the same manner.
This pellet grill is designed and approved for pelletized, all-natural, wood fuel for cooking only. DO NOT use pellets intended to heat rooms, these may have harmful additives, and are not suitable for cooking.
- Use only all natural wood pellets designed for burning in grills. Do not use fuel labeled as having additives.
° This barbecue requires a 110 Volt 60Hz 5amp, 3 prong grounded plug.
• The electrical cord installed on your grill is equipped with a three-prong (grounding) plug for your protection against shock hazard and should be plugged directly into a grounded three-prong receptacle. Do not cut or remove the grounding prong from this plug.
Do not attempt to rewire or alter the wiring of this grill in any way. The grill must be able to either be unplugged or power to the unit must be shut off before any servicing may be performed.
- When the grill is not in use the grill should be powered off.
- If the power cord is damaged, do not operate the grill.
- Keep any electrical wires away from heated surfaces.
• If an external electrical source is utilized, this outdoor cooking appliance, when installed, must be electrically grounded in accordance with the local codes or, in absence of local codes with the following:
• USA:
▪ National Electrical Code, ANSI/NFPA70
• CANADA:
• Canadian Electrical Code, CSA C22.1
- Operation
- Do not use the grill for other than its intended purpose.
- This grill can operate automatically, but it is strongly recommended that the grill is never left unattended when in use.
- Never use the grill if the Ash Drawer is not installed or fully closed.
- Ashes should be placed in a metal container with a tight-fitting lid. The container must be placed on a non-combustible surface well away from all other combustible materials. Ashes are to remain in the container until fully cooled, then disposed of properly.
Do not use charcoal in the burn pot, charcoal is to be used with the Twin Eagles Charcoal Tray accessory only. - Accessible parts of the grill will be very hot, use caution around the grill while it's in use.
- It is strongly recommended that you regularly check the firepot for obstructions to make sure the air flow is properly maintained.
- Never wear loose fitting or hanging garments while using this grill.
- Use heat-resistant barbeque mitts or gloves when operating this grill.
- Never allow clothing, pot holders, or other flammable materials to come into contact with or be close to any grate or hot surface until it has fully cooled.
To avoid chance of serious injury, never lean on or reach over an open grill surface, or place hands or fingers on the front edge of the grill when hot.
- Always operate the grill with the hood in the closed position, unless using a feature that requires the hood in the open position.

FEATURES:
- ON/OFF SWITCH
- PROBE STATION
- CONTROL PANEL
- PELLET HOPPER
- HOOD
- COOKING RACKS
- ASH DRAWERS
- ROTISSERIE SPROCKET
- COOKING GRATES
- FOOD HOOKS
- PELLET HOPPER COVER

natural_image
Close-up of a metallic ventilation grille with grid-patterned insulation (no text or symbols visible)
natural_image
Close-up of a white industrial machine with multiple compartments and ventilation grilles (no visible text or symbols)PELLET HOPPER GUARD REMOVABLE
ALUMINUM ASH TRAYS

natural_image
Close-up of a laboratory instrument with a coiled cable and digital display (no visible text or symbols)
natural_image
Close-up of a stainless steel oven with grating and ventilation slots (no visible text or symbols)HOOD GASKETTEMPERATURE PROBES
- Remove all packaging materials, labels and protective film. DO NOT LEAVE UNIT IN THE SUN WITH PROTECTIVE PLASTIC FILM ON FOR AN EXTENDED PERIOD OF TIME AS IT WILL BECOME DIFFICULT TO REMOVE.
- Check to ensure all grill accessories listed below are included.
- Fill out Warranty Registration Card and mail it to the indicated address, or register Online. See page 20.

natural_image
Interior view of a stainless steel oven with multiple trays and a control panel (no visible text or symbols)
natural_image
Interior view of a microwave oven with a tray holding dark coal, no visible text or symbols
natural_image
Interior view of a stainless steel enclosure with three compartments (no text or symbols visible)BRIQUETTE TRAY CHARCOAL TRAY INDIRECT/VAPORIZER PLATE

natural_image
Close-up of a metallic industrial device with a coiled cable and control panel (no visible text or symbols)
natural_image
Close-up of a metallic rack-mounted device mounted on a metal frame, with a grid-patterned base below (no visible text or symbols)
natural_image
Close-up of a stainless steel storage rack with mesh grating (no text or symbols visible)TEMPERATURE PROBES X3 MEAT FORKS X1 PAIR
&
ROTISSERIE ROD

natural_image
Metallic rectangular food tray with ribbed contents, no visible text or symbols
natural_image
Metal hook-shaped object with a pointed tip, isolated on white background (no text or symbols)REMOVABLE ALUMINUM ASH TRAYS X2 FOOD HOOKS X3
1 | Twin Eagles Technical Support (562) 263-3600
This grill is designed for outdoor use only. Do not locate this grill under overhead unprotected combustible surfaces. When installed under overhead combustible surfaces, a certified ventilating hood wider than the appliance be installed with a minimum distance of 36 inches above the cooking surface.
CAUTION should be taken when grills are used near glass, vinyl siding or other temperature sensitive construction materials. In some cases, it may be necessary to increase the clearance around the grill to avoid damage to vinyl siding. Check with the manufacturer of the siding material for details.
DO NOT operate the grill inside a building, garage, recreation vehicle or any enclosed area. When choosing an area, consider exposure to wind, and proximity to traffic paths. Keep the grill away from windy area but keep the grill in a well-ventilated area. Do not obstruct the flow of combustion and ventilation air around the grill. The supporting edges of the grill must be located level and flat. The counter should also be leveled.
CLEARANCE TO COMBUSTIBLE CONSTRUCTION
A minimum clearance of 12" from the sides and 12" from the back of the grill to adjacent vertical combustible construction must be maintained. For adjacent combustible construction extending above the counter-top surface, the minimum clearance from sides and back of the grill is 18 inches.
CLEARANCE TO NONCOMBUSTIBLE CONSTRUCTION
A minimum clearance of 2 12 " from the back of the grill above cooking surface to non-combustible construction is required to allow the grill hood to open completely.
A minimum of 6" clearance to the sides of the grill above cooking surface to non-combustible construction is recommended. The grill can be installed directly next to non-combustible construction below the cooking surface.
The appliance should only be serviced by a qualified technician, or electrical shock may occur. It is rated at 120V, 60Hz.
REMINDER:
Keep any electrical supply cord away from any heated features.
WARNING
Electrical Grounding Instructions:
Electrical Grounding Instructions: This outdoor cooking appliance is equipped with a three prong (grounding) plug for your protection against shock hazard and should be plugged directly into properly grounded three prong outlets. Do not cut or remove the third prong from this plug.

natural_image
Close-up of a black and silver electrical outlet plug (no text or symbols visible)Electrical equipment provided with the outdoor cooking appliance shall follow these guidelines:
- Do not use an outdoor wood fired appliance for purposes other than intended;
- To protect against electrical shock, do not immerse cord or plugs in water or other liquid;
- Unplug from the outlet when not in use and before cleaning. Allow to cool before putting on or taking off parts;
- Do not operate any outdoor wood fired appliance with a damaged cord, plug, or after the appliance malfunctions or has been damaged in any manner. Contact the manufacturer for repair;
- Do not let cord hang over the edge or touch hot surfaces;
- When connecting, first plug appliance into outlet;
- Use only Ground Fault Interrupter (GFI) protected circuit with this outdoor cooking appliance;
- Never remove the grounding plug or use with an adapter of two prongs; and
- Use only extension cords with three prong grounding plugs, rated for the power of the equipment, and approved for outdoor use with a W-A marking.
Storage:
During shipping the power plug for the Twin Eagles Pellet Grill and Smoker is located in the front right ash drawer.
Your Wood Fired Pellet Grill and Smoker has been designed and engineered to produce smoke that infuses your food with a smoky flavor. The firepot requires air for efficient combustion. This fresh air is pulled through a vent in the front of your grill and the intense hot air and smoke produced by the pellets is expelled through a vent in the rear. If you are using your grill in windy conditions, the wind can disrupt this important airflow.
If the grill is set to a high heat setting and the hood is closed, wind can prevent the hot air from being expelled through the rear vent – forcing heat to the front of the grill. This heat can make the hood handle and front panel extremely hot. In some cases, this heat can damage important components.
To Prevent Overheating:
Install your grill in a location where a prevailing wind is less likely to hit the rear of the grill. If this is not possible, install a windbreak behind your grill.
Damaged components such as wiring, heat probes, etc., and the discoloration of the stainless steel by using the grill in windy conditions is not covered under the product warranty.


INSULATION JACKET WARNING:
Do not build the grill under overhead unprotected combustible construction. If the grill is to be placed into a combustible enclosure, an approved insulating jacket is necessary to prevent fire, property damage and bodily injury. Use only Twin Eagles insulating jacket.
To prevent damage to the power cord use the hole provided in the front right of the Insulating Jacket to thread the power cord through.

NOTE:
THIS IS FOR NON-COMBUSTIBLE ENCLOSURES ONLY. FOR COMBUSTIBLE ENCLOSURES REFER BACK TO THE PREVIOUS PAGE.

START-UP
Your grill utilizes many advances in technology to bring greater control to your finger tips. Making use of these advancements will help you perfect your techniques and get the most flavor and best results every time.
- Every perfect barbecue experience starts with selecting and filling the pellet hopper with your favorite all natural wood cooking pellets. (Ensure they are completely dry)
- Turn ON the switch to the right of the Probe Jacks; the grill will go into "STAND BY" mode.
Once in "STAND BY" mode you are able to set the temperature, recipe, and timer to the desired setting that is optimal for the food you are cooking.

gauge
| Probe | Current Temperature (°F) | | :--- | :--- | | PROBE 1 | 69 | | PROBE 2 | 69 | | PROBE 3 | 69 | | GRILL MODES SEE PG. 8 | 140 |SHUTDOWN
You are finished cooking your food and now it is time to shut down your Wood Fired Pellet Grill and Smoker. To shut down your grill, first press the red stop button. This will shut the auger off and the fan speed will go up to high. A dialog box will appear on the screen notifying you that the grill has gone into Cooldown Mode. Cooldown Mode will proceed until the temperature of the unit reads 175°F internally. Once 175°F has been reached the Cooldown feature has finished and the fan will shut off. It is now safe to turn off your grill. There is an Exit button to manually bypass the Cooldown feature if you intend to continue grilling (it is not recommended to bypass the Cooldown Mode).

GRILLING FEATURES
The Wood Fired Pellet Grill and Smoker has four different grilling features:

- SMOKE - Most grilling/baking/roasting will take place here in the SMOKE feature. In this feature the grill will produce a moderate amount of smoke to infuse into your food.

- SMOKE PLUS - The Smoke Plus feature is for those that want an intense smoke flavor imparted into the food.

- SEAR - Sear sets the grill to very high temperatures to sear the outside of your food sealing in the delicious juices and flavor of your food.

- CHARCOAL - In the Charcoal Feature the firepot is used to start the charcoal in the Charcoal Tray. Once the charcoal is started the fan assist is used to stoke the charcoal to higher temperatures if desired.
ADDITIONAL FEATURES
The Twin Eagles Wood Fired Pellet Grill and Smoker comes equipped with two halogen lights and a Rotisserie.

- Halogen Lights - To turn the lights ON/OFF simply press the lights button.

- Rotisserie - To turn ON/OFF the Rotisserie simply press the "ROTIS" button.
USING THE ROTISSERIE:
- Insert food on rod; secure with forks. If multiple pieces of food are to be cooked at the same time, make sure the food is evenly balanced to ensure the food is cooked evenly.
- Follow directions for using the SMOKE feature up to step 6. (Page 9)
- Insert rod into grill.
- Cook food to desired doneness, then remove from grill.
NOTE: Rotisserie is only to be used with "SMOKE" or "SMOKE PLUS" features.
Using your Wood Fired Pellet Grill and Smoker is easy, and it is packed with features. Here's how to use them:
IMPORTANT
Prior to operating the grill in any capacity, ensure that the firepot is clear of any ash build-up or unburned pellets. Make sure the Firebox is clean of any ash build up or grease. Making sure that the inside of your pellet grill is clean and clear will help with the longevity of your grill, so make sure this process is done regularly.
SMOKE
- Turn on your grill.
- The Control Panel will load the "STAND-BY" screen, which will have "SMOKE" preselected.
- Set your target temp using the temperature adjustment slider or by tapping the arrows on either side of the target temp, or by tapping the target temp and inputting the temperature on the keyboard that appears.
- Choose which probe you want to use. Tap the probe button and select from the menu of preset temperatures/times and press enter. The picture of the selected food preset will appear in the probe button to the left of the temperature slider along with the current temperature in red and target temperature in white.
- Make sure there are no leftover pellets in the firepot from any previous use. Tap the green "GO" button to light the grill, the hood must be in the closed position when lighting the grill (Initially there may be a bit of smoke but that will dissipate).
- Once your grill has reached the target temperature, set up your timer. Tap "Timer" in the top left corner of the control screen and type in the cooking time desired. NOTE: the "Run Time" is the overall time the grill has been running.
- Place your desired food into the grill, insert your probe into the center of the food not touching any bone. If using the rotisserie function of the grill, the probe must be removed after every temperature taken.
- Once your food has finished cooking, tap the red "STOP" button to start the cooldown cycle.
IMPORTANT
Your new grill is a set it and forget it style of grill, no preheating or priming required. When switching types of pellets to cook with purge the pellet hopper using the “PELLET AUGER” button in the “OPTIONS” menu. When the hopper is filled with the new pellets use the “PELLET AUGER” button to fill the auger with the new flavor pellets to prevent misfires.

LOW PELLET ALARM
Your grill has a Low Pellet Alarm to notify you that the pellets in the hopper are insufficient to maintain the target temperature and more pellets will need to be added to the hopper. The alarm appears in the upper right hand corner of the control screen. To silence the alarm, simply press it.

USING YOUR PELLET GRILL & SMOKER - cont.
SEARING
- Turn on your grill.
- Make sure there are no leftover pellets in the firepot from previous use.
- Replace the Indirect/Vaporizer Plate with the Briquette Tray as shown.
- Select SEAR Mode. The grill will set the target temperature to 725irc F and lock it there.
- Tap the green "GO" button and let the grill heat up to the target temp before placing your meat on the grill grates.
- Once finished using the SEAR Mode, hit the red "STOP" to start the cooldown cycle.

natural_image
Interior view of a server rack with multiple white connectors (no visible text or labels)
gauge
| Temperature (°F) | Value | | :--- | :--- | | 88 | 88 | | 725 | 725 | | 600 | 600 | | 550 | 550 | | 500 | 500 | | 450 | 450 | | 400 | 400 | | 350 | 350 | | 300 | 300 | | 250 | 250 | | 200 | 200 | | 140 | 140 | Running Time: 09:00:00; Time: 60:00:00 Settings: 🤊 LIGHTS: 🌢 ROS: 🍼 SMOKE: 🎋 SMOKE PLUS: 🌈 BEAR: 🌒 CHARCOCAL: 📄CHARCOAL
- Turn on your grill.
- Remove the Indirect/Vaporizer Plate assembly from above the firepot. Install in its place the Charcoal Tray Assembly and above that install the Charcoal Tray Body.
- Place a moderate amount of charcoal on the Tray Body, spread out evenly.
-
Press CHARCOAL Mode. A message should appear that reads: "DURING CHARCOAL STARTER MODE, YOU MUST KEEP THE LID OPEN. DO NOT USE CHARCOAL LIGHTER FLUIDS OR SELF LIGHTING CHARCOAL." In order to proceed to starting your charcoal you must tap the "AGREE" button. From there you will see "IN CHARCOAL MODE, YOU MUST OPEN THE LID," along with a "CHARCOAL STARTER," the "FAN HIGH" and "FAN LOW" buttons. You will also notice that there is no temperature slider, in CHARCOAL Mode the fire-pot is used to start the charcoal only. The button "CHARCOAL STARTER" will feed pellets into the firepot to start the charcoal.
-
Once the charcoal has turned mostly ashy gray, it has started.
Cooking with charcoal is a visual and physical experience. The Fan Assist buttons (HIGH/LOW) turn on/off the fan to help increase the temperature of the charcoal.

natural_image
Interior view of a metallic industrial chamber or storage unit (no visible text or symbols)
natural_image
Interior view of a stainless steel heating room filled with coal chunks (no visible text or symbols)
Stainless Steel & General Product Care
To keep your Twin Eagles Pellet Grill and Smoker free of surface corrosion and in good working order, it is important to take additional precautions under certain conditions.
If your Twin Eagles Pellet Grill and Smoker is located in corrosive conditions, such as:
- A coastal environment where corrosive salty air is present.
- Near a swimming pool, hot tub or water feature with exposure to corrosive pool chemicals and/or chlorinated water.
- Areas where muriatic acid (hydrochloric acid) or other corrosive cleaning solutions are used to clean concrete and masonry.
- Areas where corrosive masonry dust and debris are created by cutting stone or mixing cements.
These conditions can create a highly corrosive environment that will cause the corrosion resistant type 304 stainless steel to develop surface oxidation, corrosion or rust.
The Twin Eagles family of products has been tested in saline solutions, highly chlorinated solutions and have been tested against exposure to highly acidic foods. The test results proved the type 304 stainless steel can withstand exposure over prolonged periods of time.
It is recommended that your Twin Eagles products be kept dry and covered when not in use. Use the Probe Jack Inserts to prevent water from getting into the probe jacks. This is even more important when long-term storage is intended.
Do not allow food particles or grease to be left inside your Twin Eagles products. These can attract rodents, which are unsanitary and are likely to cause physical damage by chewing on the wiring, which can cause permanent damage to the electrical components.
If you are located along the coast or in the desert, wind driven sand is extremely abrasive and can pit and scratch the stainless steel. Keep your Twin Eagles products covered when not in use.
With routine cleaning, maintenance and awareness of the conditions outlined above, you can enjoy many years of service from your Twin Eagles Pellet Grill and Smoker.
In the event that surface corrosion has developed on the stainless steel, it is typically not the stainless steel that is corroding but corrosive particles that have been deposited on the surface.
Twin Eagles products are made of all welded 304 stainless steel. It is non-rusting and non-magnetic. Never clean the stainless steel when it is hot. After the initial grilling use, certain areas of the grill may discolor. This is a normal discoloration caused by the intense heat given off by the firepot.
WARNING
To prevent fire, bodily harm, and property damage always ensure that any grease caught in the Ash Drawers is cleaned out. The removable aluminum pans allow for easy removal of any ash or grease.
The art of smoking largely comes down to personal preference and the quality of the meat being smoked. The longer the meat remains in the smoke the more smoke flavor will be infused into the meat. With this knowledge in hand, you will need to decide how much smoke flavor you want.
For best results, we recommend a blended pellet of the variety of flavors you'd like to impart into the meat you wish to smoke. The recommended temperatures for smoking most meats is in the range of 180irc to 400irc F, this will guarantee the correct internal cooking temperature is reached. Please note that the Pellet Smoker can reach temperatures as low as 180irc F but the results from smoking at that temperature are minimal. It should also be noted that the grill can get hot from sitting out in the sun or from being installed in a region of high heat (temperatures in excess of 90irc F), which could prevent your grill from maintaining temperatures close to 180irc F.
The table below shows general guidelines to follow when learning to use your new Twin Eagles Pellet Smoker and Grill. We recommend experimenting with times and temperatures to get the flavor you desire. To speed up the process cook on a higher temperature but be warned that this could result in a less tender product. We recommend that enough time is adequately set aside to get the best results every time.
| ITEM CONTROL SET POINT °F INTERNAL TEMP = °F | |
| BEEF 180°F-400°F 145-165 | |
| HAM 180°F-400°F 140-170 | |
| LAMB 180°F-400°F 145-160 | |
| PORK, FRESH 180°F-400°F 160-180 | |
| VEAL 180°F-400°F 145-160 | |
| VENISON 180°F-400°F 145-160 | |
| CHICKEN 180°F-400°F 160-165 | |
| DUCK or GOOSE 180°F-400°F 180-185 | |
| TURKEY 180°F-400°F 180 AS MEASURED IN THE THIGH |
At Twin Eagles, great grilling comes from knowledge of the right temperatures to use and how long to smoke or grill your meat for. The following suggestions are to help you find the right starting point to begin your perfect grilling experience.
Always be sure that proper safety precautions are observed when your Twin Eagles Pellet Grill and Smoker is in use; adult supervision is required when children are present. Be sure to cook poultry and ground meats thoroughly, check internal temperatures with meat probes to guarantee internal temperatures meet suggested internal cook temperatures. The times and temperatures below are APPROXIMATE, actual length of time and temperature required may vary from user to user.
| ITEM SIZE | CONTROL SET POINT | APPROXIMATE GRILLING TIME | INTERNAL TEMP = °F | |
| BEEF | ||||
| STEAKS 3/4 in THICK 450°-700° | 3 TO 4 MINS/SIDE4 TO 5 MINS/SIDE5 TO 7 MINS/SIDE | MEDIUM RARE 145MEDIUM 160MEDIUM WELL 170 | ||
| KABOBS 1 in CUBES 450°-700° 3 TO 4 MINS/SIDE 145 TO 160 | ||||
| HAMBURGER PATTIES 1/2 in THICK 450°-700° | 3 MIN/SIDE4 TO 5 MINS/SIDE5 TO 7 MINS/SIDE | MEDIUM 160MEDIUM WELL 170WELL DONE 180 | ||
| ROASTROLLED RUMP (INDIRECT HEAT)SIRLOIN TIP (INDIRECT HEAT) | 4 TO 6 lbs.3 1/2 TO 4 lbs. | 350° 18 TO 22 MINS/lb20 TO 25 MINS/lb | 145 TO 160 | |
| TENDERLOIN | HALF, 2 TO 3 lbs.WHOLE, 4 TO 6 lbs. | 350° | 10 TO 12 MINS/SIDE12 TO 15 MINS/SIDE | MEDIUM RARE 145MEDIUM 160 |
| HAM | ||||
| FULLY COOKED (INDIRECT HEAT) ANY SIZE 350°-375° 8 TO 10 MINS/SIDE 140 | ||||
| COOK-BEFORE-EATING (INDIRECTHEAT) | WHOLE, 10 TO 14 lbs.HALF, 5 TO 7 lbs.PORTION, 3 TO 4 lbs. | 350°-375° | 10 TO 15 MINS/lb12 TO 18 MINS/lb30 TO 35 MINS/lb | 160-170 |
| LAMB | ||||
| CHOPS, SHOULDER, LOIN, OR RIB | 1 in THICK | 350°-375° | 5 MINS/SIDE | 145 TO 160 |
| STEAKS, SIRLOIN, OR LEG | 1 in THICK | 350°-375° | 5 MINS/SIDE | 145 TO 160 |
| KABOBS 1 in CUBES 350°-375° 4 MINS/SIDE 145 TO 160 | ||||
| PATTIES, GROUND | 4 oz., 1/2 in THICK | 450°-700° | 3 MINS/SIDE | MEDIUM 160 |
| PORK | ||||
| CHOPS, BONE-IN OR BONELESS | 3/4 in THICK1 1/2 in THICK | 450°-700° | 3 TO 4 MINS/SIDE7 TO 8 MINS/SIDE | MEDIUM 160 |
| TENDERLOIN | 1/2 TO 1 1/2 lbs. | 450°-700° | 15 TO 25 MIN TOTAL | MEDIUM 160 |
| RIBS - SEE SMOKING GUIDELINES FOR PORK RIBS | ||||
| PATTIES, GROUND | 1/2 in THICK 450°-700° 4 TO 5 MINS/SIDE MED UM 160 | |||
| VEAL | ||||
| CHOPS, STEAK | 1 in THICK | 450°-700° 5 TO 7 MINS/SIDE 145 TO 160 | ||
| ROAST, BONELESS (INDIRECT HEAT) | 2 TO 3 lbs. | 350°-375° | 18 TO 20 MINS/lb | 145 TO 160 |
| VENISON | ||||
| ROAST, SADDLE, OR LEG | 6 TO 7 lbs. | 350°-375° | 25 to 30 MINS/lb | 145 to 160 |
TIMES AND TEMPS - cont.
| ITEM SIZE | CONTROL SET POINT | APPROXIMATE GRILLING TIME | INTERNAL TEMP = °F | |
| VENISON | ||||
| STEAKS 3/4 in THICK 450°-700° | 4 TO 5 MINS/SIDE6 TO 7 MINS/SIDE | MEDIUM RARE 145MEDIUM 160 | ||
| CHICKEN | ||||
| WHOLE (INDIRECT HEAT)NOT STUFFEDBROILER FRYERROASTING HENCAPON | 3 TO 4 lbs.5 TO 7 lbs.4 TO 8 lbs.18 TO 24 oz. | 325°F, 160°C | 60 TO 75 MINS18 TO 35 MINS/lb15 TO 20 MINS/lb45 to 55 MINS | 180 AS MEASURED INTHE THIGH |
| BREAST HALVES, BONE-INBONELESS | 6 TO 8 oz. EACH4 oz. EACH | 325°F, 160°C | 10 TO 15 MINS/SIDE6 TO 8 MINS/SIDE | 170 |
| OTHER PARTS: LEGS OR THIGHS DRUMSTICKSWINGS, WINGETTS | 4 TO 8 oz.4 oz.2 TO 3 oz. | 325°F, 160°C | 10 TO 15 MINS/SIDE8 TO 12 MINS/SIDE8 TO 12 MINS/SIDE | 180 |
| DUCK OR GOOSE | ||||
| DUCKLING, WHOLE QUARTERED (INDIRECT HEAT) | 4 1/2 lbs. (NOT STUFFED) | 325°F, 160°C | 2 1/2 HRS1 HR 25 MINS | 180 TO 185 |
| GOOSE, WHOLE (INDIRECT HEAT) 8 TO | 12 lbs. 325°F, 160°C 18 TO | 20 MINS/lb | 180 TO 185 | |
| TURKEY | ||||
| WHOLE TURKEY (INDIRECT HEAT) | 8 TO 12 lbs.12 TO 16 lbs.16 TO 24 lbs. | 325°F, 160°C | 2 TO 3 HRS3 TO 4 HRSNOT RECOMMENDED | 180 AS MEASURED INTHE THIGH |
| BREAST, BONE-INBONELESS | 4 TO 7 lbs.2 3/4 TO 3 1/2 lbs. | 325°F, 160°C | 1 TO 1 3/4 HRSNOT RECOMMENDED | 170 |
| THIGHS, DRUMSTICKS (INDIRECTHEAT) | 8 TO 16 oz. 325°F, | 160°C | 1 1/2 TO 2 HRS8 TO 10 MINS/SIDE | 180 |
| BONELESS TURKEY ROLL (INDIRECTHEAT) | 325°F, 160°C | 1 1/2 TO 2 HRS2 TO 3 1/2 HRS | 170 TO 175 | |
EXPLODED VIEW

| 1 | 2 | 3 | 4 | 5 | 6 | 7 | 8 | 9 | 27 |
EXPLODED VIEW - cont.

 |  |  |  |  |  |  |  |  |  |
| 52 | 55 | 65 | 66 | 67 | 68 | 76 | 78 | 79 | 93 |
REPLACEMENT PARTS LIST
| ITEM NO. | TE PART NO. | DESCRIPTION | TEPG 36G | TEPG 36R |
| 1 S27 | 290Y SPROCKET ASSEMBLY 1 1 | |||
| 2 S26 | 310 SPACER, ROTIS PLATE - 1 | |||
| 3 S14 | 337 SCREW, 10-3 2 X 1, PH, FLT, S/S - 2 | |||
| 4 S14 | 420 ROLLER BEARING - 2 | |||
| 5 S14 | 128 BUMPER 2 2 | |||
| 6 S14 | 340 HOOD SPACER SLEEVE 2 2 | |||
| 7 S14 | 303 SCREW, 1/4-20 X 1 3/4, HEX, S/S 2 2 | |||
| 8 S27 | 285 REAR HOOD PROBE GUARD 1 1 | |||
| 9 S27 | 299 FRONT HOOD GASKET CLAMP 2 2 | |||
| 10 | S27294-36WY FRONT HOOD WELDED ASSEMBLY | 1 | 1 | |
| 11 | S12339 ROUND TUBE, 1 1/4 X 30", S/S 1 1 | |||
| 12 | S27246-36 BRAIDED STEEL, HOOD GASKET 1 1 | |||
| 13 | S27280-36 REAR HOOD LINER | 1 1 | ||
| 14 | S27293-36 REAR HOOD WRAPPER | 1 1 | ||
| 15 | S27250-36WY FIREBOX, WELDED ASSEMBLY | 1 | 1 | |
| 16 | S13928-36 ROD, ROTIS, 36 | - | 1 | |
| 17 | S13865 S/S MEAT FORKS (PAIR) - 1 | |||
| 18 | S27319WY FIREBOX HEAT BAFFLE 1 1 | |||
| 19 | S13955 COOKING RACK 3 3 | |||
| 20 | S27321Y INDIRECT PLATE ASSEMBLY 1 1 | |||
| 21 | S27323 INDIRECT PLATE BAFFLE 1 1 | |||
| 22 | S27248Y BRIQUETTE TRAY ASSEMBLY 1 1 | |||
| 23 | S13295-15 BRIQUETTES (15 PACK) | 1 | 1 | |
| 24 | S27325Y CHARCOAL TRAY ASSEMBLY 1 1 | |||
| 25 | S27328 CHARCOAL TRAY BODY 1 1 | |||
| 26 | S13258 HANDLE, END CAP 2 2 | |||
| 27 | S14368 SET SCREW, 8-32 X 1/4 2 2 | |||
| 28 | S13949 CHAIN 1 1 | |||
| 29 | S27288 COG PLATE COVER | - | 1 | |
| 30 | S27289 PLATE COVER | 1 | - | |
| 31 | S27215 HANDLE COVER PLATE 2 2 | |||
| 32 | S27283 REAR HOOD LOWER SEAL | 2 | 2 | |
| 33 | S27284 REAR HOOD UPPER SEAL 2 2 | |||
| 34 | S27282-L REAR HOOD SIDE, LH | 1 | 1 | |
| 35 | S27282-R REAR HOOD SIDE, RH 1 1 | |||
| 36 | S27281-L REAR HOOD LINER, LH | 1 | 1 | |
| 37 | S27281-R REAR HOOD LINER, RH | 1 1 | ||
| 38 | S13957 FOOD HOOKS 3 3 | |||
| 39 | S27287 SMALL COOKING RACK BRACKET 2 2 | |||
| 40 | S27286 LARGE COOKING RACK BRACKET | 2 | 2 | |
| 41 | S27318 FIREPOT 1 1 | |||
| 42 | S16040 OVEN TEMPERATURE PROBE 1 1 | |||
| 43 | S16240YC HALOGEN LIGHTS | 2 | 2 | |
| 44 | S27278 PELLET FEED SHIELD 1 1 |
| ITEM NO. | TE PART NO. | DESCRIPTION | TEPG 36G | TEPG 36R |
| 45 | S27360 FIREBOX | PROBE BAFFLE 1 1 | ||
| 46 | S27301-36WY | FRONT PANEL WELDED ASSEMBLY | 1 | 1 |
| 47 | S27303Y INNER | FRONT PANEL ASSEMBLY 1 1 | ||
| 48 | S16441 ECU, BOARD | 1 1 | ||
| 49 | S27305Y ECU BR | RACKET ASSEMBLY 1 1 | ||
| 50 | S27304Y DISPLAY | Y SCREEN ASSEMBLY 1 1 | ||
| 51 | S16046 USB CABLE | 1 1 | ||
| 52 | S14365 RUBBER | USB PLUG 1 1 | ||
| 53 | S13293 PROBE | PLATE 1 1 | ||
| 54 | S16431 | WIRE HARNESS, PROBE JACK | 3 | 3 |
| 55 | S14363 | TAPERED ROUND PLUG | 3 | 3 |
| 56 | S16041 FOOD PROBE | 3 3 | ||
| 57 | S13203 EMBLEM, TWIN EAGLES | 1 1 | ||
| 58 | S16365 SWITCH, 110V, BLUE | 1 1 | ||
| 59 | S27307-36Y | LANDING LEDGE HANDLE ASSY. | 1 | 1 |
| 60 | S27309-36Y | BRIDGE CHANNEL ASSEMBLY | 1 | 1 |
| 61 | S14469-LC | CABINET RAIL SLIDE, LH | 1 1 | |
| 62 | S14469-LD | DRAWER RAIL SLIDE, LH | 1 | 1 |
| 63 | S14469-RC | CABINET RAIL SLIDE, RH | 1 | 1 |
| 64 | S14469-RD | DRAWER RAIL SLIDE, RH | 1 | 1 |
| 65 | S12370 SLIDE B | JMPER 2 2 | ||
| 66 | S14472 | STAND OFF | 2 | 2 |
| 67 | S14473 SCREW | M5 X 10mm 2 2 | ||
| 68 | S14360 | SCREW, 10-32 X 1/2 FLAT UC, PH | 8 | 8 |
| 69 | S14468 RECESS | ED PULL HANDLE 1 1 | ||
| 70 | S27277-36Y | HOPPER FRAME ASSEMBLY | 1 1 | |
| 71 | S27324 HOPPER | GRATE 1 1 | ||
| 72 | S27274-36Y | HOPPER ASSEMBLY | 1 1 | |
| 73 | S27355 FIREBOX | INNER BAFFLE 1 1 | ||
| 74 | S27356 FIRE BOX | INNER BAFFLE COVER 1 1 | ||
| 75 | S16440Y AUGER | MOTOR W/ COUPLING 1 1 | ||
| 76 | S14353 AUGER | WASHER 1 1 | ||
| 77 | S13286 AUGER | FLIGHTING W/ SHAFT 1 1 | ||
| 78 | S14357 CLEVIS | PIN W/ HOLE 1 1 | ||
| 79 | S14358 HAIR PIN | COTTER 1 1 | ||
| 80 | S27271Y | AUGER SPACER PLATE ASSEMBLY | 1 | 1 |
| 81 | S27272 AUGER | MOTOR MOUNT 1 1 | ||
| 82 | S27268WY | AUGER SUPPORT WELDED ASSY. | 1 | 1 |
| 83 | S27264Y IGNITE | R HOUSING ASSEMBLY 1 1 | ||
| 84 | S27267Y FAN M | OUNT ASSEMBLY 1 1 | ||
| 85 | S27279 | ROTIS MOTOR MOUNT | - | 1 |
| 86 | S26349 | BOX, MOTOR | - | 1 |
| 87 | S1366Y | ROTIS MOTOR ASSEMBLY | - | 1 |
| 88 | S26351 | COVER, MOTOR BOX | - | 1 |
EXPLODED VIEW - cont.
| ITEM NO. | TE PART NO. | DESCRIPTION | TEPG 36G | TEPG 36R |
| 89 S27 | 7317 CHAIN GUARD - 1 | |||
| 90 S27 | 7358 RIGHT HEAT SHIELD (TEPG36R) - 1 | |||
| 91 S27 | 7261-36Y DRAWER BASE ASSEMBLY 1 1 | |||
| 92 S16 | 433 POWER CORD HARNESS 1 1 | |||
| 93 S16 | 112 STRAIN RELIEF 1 1 | |||
| 94 S27 | 244 FIREBOX FRONT BAFFLE 1 1 | |||
| 95 S27 | 245 BRACKET MOUNT COVER 2 2 | |||
| 96 S27 | 7357 LEFT HEAT SHIELD 1 1 | |||
| 97 S27 | 7310WY AUGER COVER WELDED ASSY. 1 1 | |||
| 98 | S27312-LY DRAWER ASSEMBLY, LH | 1 | 1 | |
| 99 S27 | 7312-RY DRAWER ASSEMBLY, RH 1 1 | |||
| 100 | S14450 18" SLIDES 1 1 | |||
| PARTS NOT SHOWN | ||||
| S16432 WIRE HARNESS, LIGHT 1 1 | ||||
| S16434 WIRE HARNESS, 110V 1 1 | ||||
| S16435 WIRE HARNESS, 110V COMPONENT 1 | 1 | 1 | ||
| S16437 WIRE HARNESS, 12V 1 1 | ||||
| S16465 WIRE HARNESS, ROTIS - 1 | ||||
| S27363 RIGHT HEAT SHIELD (TEPG36G) 1 - | ||||
- LIMITED LIFETIME WARRANTY: Twin Eagles warrants all fabricated stainless steel components, to be free from defects in materials and workmanship under normal residential use for the lifetime of the product. This warranty excludes discoloration, surface scratches, weather and atmospheric related staining, and minor surface rust and oxidation which are normal conditions and are to be expected with any outdoor product. The actual part will be repaired or replaced, free of charge, with the owner paying for all other costs including labor, shipping and handling.
- LIMITED FIVE YEAR WARRANTY: Twin Eagles warrants the stainless steel cooking grates, briquette tray, charcoal tray, indirect/vaporizer plate, burner pot and drip pans to be free from defects in materials and workmanship under normal residential use for a period of five years from the original date of purchase. The actual part will be repaired or replaced, free of charge, with the owner paying for all other costs including labor, shipping and handling.
- LIMITED TWO YEAR WARRANTY: Twin Eagles warrants all other grill components to be free from defects in materials and workmanship under normal residential use for a period of two years from the original date of purchase. The actual part will be repaired or replaced, free of charge, with the owner paying for all other costs including labor, shipping and handling.
- ONE-YEAR FULL WARRANTY: Twin Eagles warrants the outdoor grill and all other components to be free from defects in materials and workmanship under normal residential use for a period of one year from the original date of purchase. Twin Eagles will repair or replace parts found to be defective at no cost to the original purchaser. Warranty service must be performed by a Twin Eagles authorized representative during normal business hours.
- NINETY (90) DAY RESIDENTIAL PLUS WARRANTY: This warranty applies to applications where use of the product extends beyond normal residential use such as bed and breakfast inn and private clubs. The actual part will be repaired or replaced, free of charge, with the owner paying for all other costs including labor, shipping and handling. This warranty excludes all commercial locations such as restaurants and food service locations.
WARRANTY LIMITATIONS & EXCLUSIONS
This warranty shall apply only to the products purchased and located in the continental United States and Canada. Service must be provided in the country where the product is purchased. The warranty coverage begins on the original date of purchase and proof of date of purchase is required. To activate the warranty, we require that you send in the attached warranty registration card. This warranty applies only to the original purchaser and may not be transferred.
This warranty does not apply to damages resulting from negligence, alteration, misuse, abuse, accident, natural disaster, loss of electrical power to the product for any reason, improper installation or improper operation, unauthorized adjustments or calibrations, dings, dents, scratches, or damages due to harsh cleaning chemicals. This warranty does not apply to commercial use, or to products with altered or removed serial numbers. Display models are generally sold “as is” and are subject to the following warranty exclusions: missing components, scratches, dents and other exterior or cosmetic damages, electrical and ignition system. All other warranties (five year and lifetime) will remain in effect). Twin Eagles shall not be liable for incidental, consequential, special or contingent damages resulting from its breach of this written warranty or any implied warranty.
WARRANTY SERVICE & REPLACEMENT PARTS: Call your authorized selling dealer or call Twin Eagles directly at (562) 263-3600. Be prepared to furnish the following information: Purchaser's name, model and serial number of the grill, date of purchase and the accurate description of the problem. Twin Eagles will not pay for service calls for correcting an installation problem. Owner shall be responsible for proper installation, providing normal care and maintenance, providing proof of purchase upon request and making the grill accessible for service. In the event of any warranty replacement, all removal, replacement, installation and shipping costs are the responsibility of the grill owner.
Some states do not allow limitations on how long an implied warranty lasts, or the exclusions of or limitations on consequential damages. This warranty gives you specific legal rights and you may have other rights, which vary from state to state.
For service, please contact your Twin Eagles dealer or call Twin Eagles direct at (562) 263-3600 or (800) 789-2206 or (562) 802-3488 or fax (562) 802-3391
Mailing address:
Twin Eagles, Inc.
13259 East 166th Street
Cerritos, CA 90703
Visit us at www.twineaglesgrills.com
Please provide:
- Model number
- Serial Number (located under the right side of the control panel, below the On/Off switch)
- Date of Purchase
• A description of the problem
CUT HERE

natural_image
Silhouette of two birds in flight within a red triangular frame (no text or symbols)TWIN EAGLES
WARRANTY REGISTRATION
| CUSTOMER NAME MODEL # | |
| ADDRESS SERIAL # | |
| CITY, STATE DATE PURCHASED | |
| ZIP DEALER'S NAME | |
| PHONE # DEALER'S ADDRESS | |
This Warranty Registration card must be returned within thirty days of purchase to properly activate your warranty. This information is for our internal use only.
Or you may register online at http://twineaglesgrills.com/contact/
CUT HERE
PLACE POSTAGE HERE

natural_image
Silhouette of two birds in flight within a red triangular frame (no text or symbols)TWIN EAGLES
CUSTOMER SERVICE
ATTN: Warranty Dept.
13259 East 166th St
Cerritos, CA 90703
Direct line to Service: (562) 263-3600
Fax No. (562) 802-3391


- TWIN EAGLES
- TABLE OF CONTENTS
- CUSTOMER CARE
- SERVICE INFORMATION
- WARNING: CALIFORNIA PROPOSITION 65
- ▲ AVERTISSEMENT: PROPOSITION 65 DE L'ETAT DE LA CALIFORNIE
- - Placement and Location
- - Set-up
- - Operation
- FEATURES:
- CLEARANCE TO COMBUSTIBLE CONSTRUCTION
- CLEARANCE TO NONCOMBUSTIBLE CONSTRUCTION
- REMINDER:
- WARNING
- Electrical Grounding Instructions:
- Storage:
- To Prevent Overheating:
- INSULATION JACKET WARNING:
- START-UP
- SHUTDOWN
- GRILLING FEATURES
- ADDITIONAL FEATURES
- USING THE ROTISSERIE:
- IMPORTANT
- SMOKE
- LOW PELLET ALARM
- USING YOUR PELLET GRILL & SMOKER - cont.
- SEARING
- CHARCOAL
- Stainless Steel & General Product Care
- EXPLODED VIEW
- EXPLODED VIEW - cont.
- WARRANTY LIMITATIONS & EXCLUSIONS
- Please provide:
Brand : Twin Eagles
Model : TEPG36G
Category : Barbecue