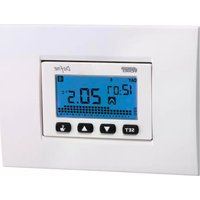
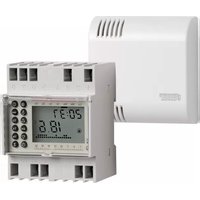
Dafne Wi-Fi - Thermostat Vemer - Free user manual and instructions
Find the device manual for free Dafne Wi-Fi Vemer in PDF.


| Product Type | Programmable Wi-Fi Thermostat |
| Brand | Vemer |
| Model | Dafne Wi-Fi |
| Dimensions (HxWxD) | 86 x 86 x 30 mm |
| Weight | 150 g |
| Power Supply | 230 V ~ 50 Hz |
| Display | LCD with backlight |
| Connectivity | Wi-Fi 802.11 b/g/n 2.4 GHz |
| Thermostat Type | Electronic, room thermostat |
| Temperature Range | 5 °C to 35 °C |
| Temperature Accuracy | ±0.5 °C |
| Programmable | Yes, 7-day |
| Schedule Options | Up to 4 time periods per day |
| Remote Control | Via Vemer app (iOS/Android) |
| Compatibility | Vemer Wi-Fi system, most heating systems |
| Installation | Wall mount, requires neutral wire |
| Maintenance | Wipe with a soft dry cloth |
| Safety | Class II, overheat protection |
| Spare Parts | Not applicable (sealed unit) |
| Warranty | 2 years |
Frequently Asked Questions - Dafne Wi-Fi Vemer
User questions about Dafne Wi-Fi Vemer
0 question about this device. Answer the ones you know or ask your own.
Ask a new question about this device
Download the instructions for your Thermostat in PDF format for free! Find your manual Dafne Wi-Fi - Vemer and take your electronic device back in hand. On this page are published all the documents necessary for the use of your device. Dafne Wi-Fi by Vemer.
USER MANUAL Dafne Wi-Fi Vemer
Digital chronothermostat
Dafne Wi-Fi
User manual
Index
■ Safety warnings Page 4
■ Connection diagrams Page 4
■ Mounting Page 5
■ Technical characteristics Page 13
■ Display and keyboard Page 14
■ Package content Page 15
■ Installation and setup Page 16
■ Remote control configuration Page 18
■ App description Page 20
■ How to do in case of replacement of the access point Page 25
■ How to remove the device from your account Page 25
■ Configuration without remote control Page 26
■ Programming menu Page 28
- Time and date modification Page 28
- Programs modification Page 29
- Temperatures modification T1, T2, T3 Page 30
- Timing setting Page 32
- Advanced functions menu Page 33
■ Manual operation Page 39
■ Off operation Page 40
■ Backlighting management Page 41
■ Minimum and maximum values Page 41
■ Summer time change Page 42
■ Regulation type Page 44
■ Timings: what they are Page 46
■ Winter preset programs Page 48
■ Summer preset programs Page 49
■ Device reset Page 50
■ Reference standards Page 50
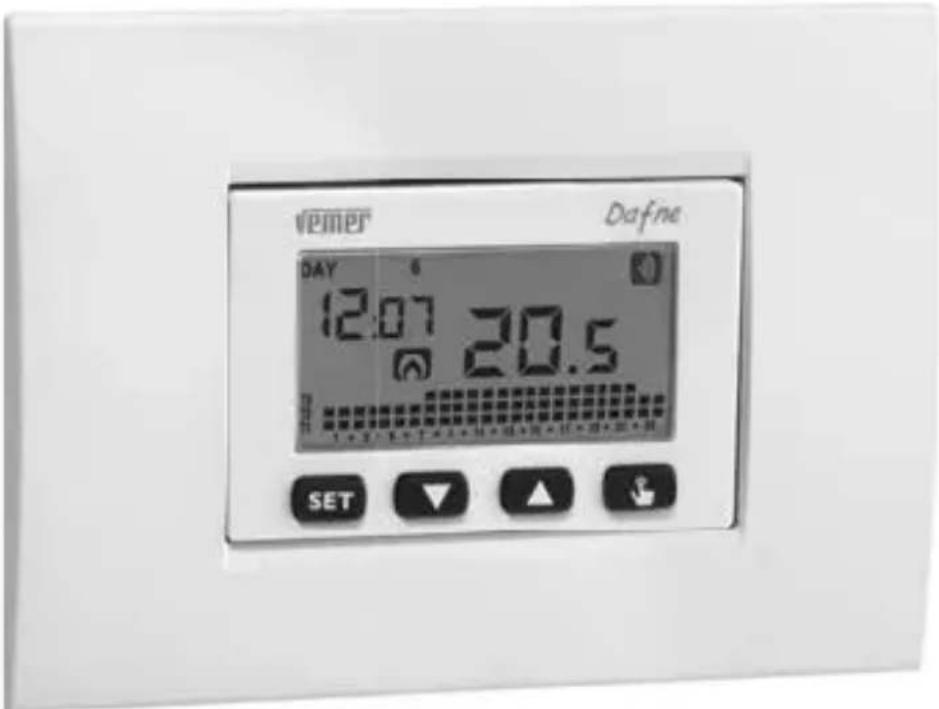
Dafne Wi-Fi digital chronothermostat
Wi-Fi chronothermostat with flush-mounting installation on 3-module box (type 503), powered by electricity (230 V \~), with blue backlighting of the display suitable for controlling heating and air conditioning systems.
The device, through the bistable relay, acts on the control circuit of the burner or the circulation pump (heating), or on the control circuit of the conditioner (air conditioning), in order to guarantee the desired temperature.
The backlight can always be switched off if the device is installed, for example in bedrooms.
The integrated Wi-Fi module allows you to control the device remotely using your smartphone or tablet. It is necessary to connect the device to the home router and install the appropriate app on your smartphone or tablet, available free of charge for iOS and Android devices.

flowchart
graph LR
    A["Dafne Wi-Fi"] --> B["Access Point App"]
    B --> C["Cloud Vemer"]
    C --> D["Mobile App"]
The device connects to the Vemer cloud to check if there are any changes to the configuration and schedule created using the app, and if so, adjusts the temperature according to the new configuration.
This operation occurs approximately once per minute.
These instruments perform actions of 1B type and are intended for operating in environments Pollution degree 2 and Overvoltage Category III (EN 60730-1).
| Code | Model | Description |
| VE792200 | Dafne Wi-Fi | Weekly chronothermostat with Wi-Fi |

• Summer, winter or off operation mode
- White and grey anthracite covers included in the package. Available as an accessory in silver color (VE601100) or compatible with the BTicino Living Now civil series in white, black or sand
• 230V power supply
• 7 programs available for heating operation
7 programs available for cooling operation
- Integrated Wi-Fi module that allows you to remotely control the device using your smartphone or tablet (it is necessary to connect the device to the home router and install the appropriate app on your smartphone or tablet, available free for iOS and Android devices).
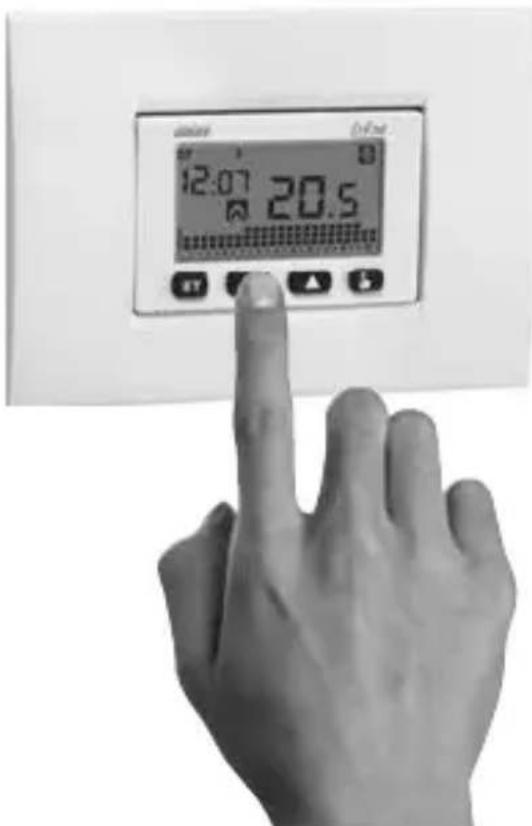
- Flush mounting in three modules box (503 type)
• Weekly programming with 3 settable temperature levels
SAFETY WARNINGS
■ During installation and operation product it is necessary to observe the following instructions:
1) The device must be installed by a qualified person, in strict compliance with the connection diagrams.
2) Do not power or connect the device if any part of it is damaged.
3) After installation, inaccessibility to the connection terminals without appropriate tools must be guaranteed.
4) The device must be installed and activated in compliance with current electric system standards.
5) Before accessing the connection terminals, verify that the leads are not live.
6) In the electrical system of the building where the device must be installed, a protection device from the overcurrents must be present.
CONNECTION DIAGRAMS


Bticino Living series, Light, Light Tech, Livinglight, Axolute Vimar Eikon series, Eikon Evo, Plana Ave S44 series – ABB Mylos series

ABB Chiara series
Vimar Arké series

Bticino Matix series
DAFNE WI-FI MOUNTING

natural_image
Line drawing of a 3D box-like structure with internal compartments and a door (no text or symbols)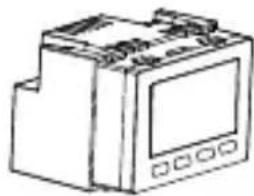
natural_image
Line drawing of a mechanical device with no visible text or symbols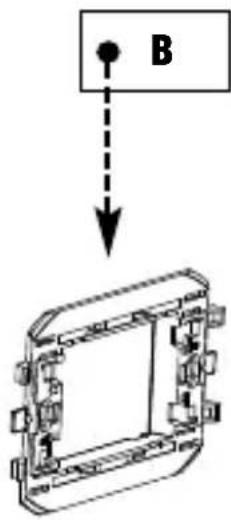
flowchart
graph TD
    A["VI"] --> B["..."]
    style A fill:#fff,stroke:#000
    style B fill:#fff,stroke:#000
natural_image
Simple line drawing of a rectangular frame with no text or symbolsVimar Idea series
DAFNE WI-FI MOUNTING
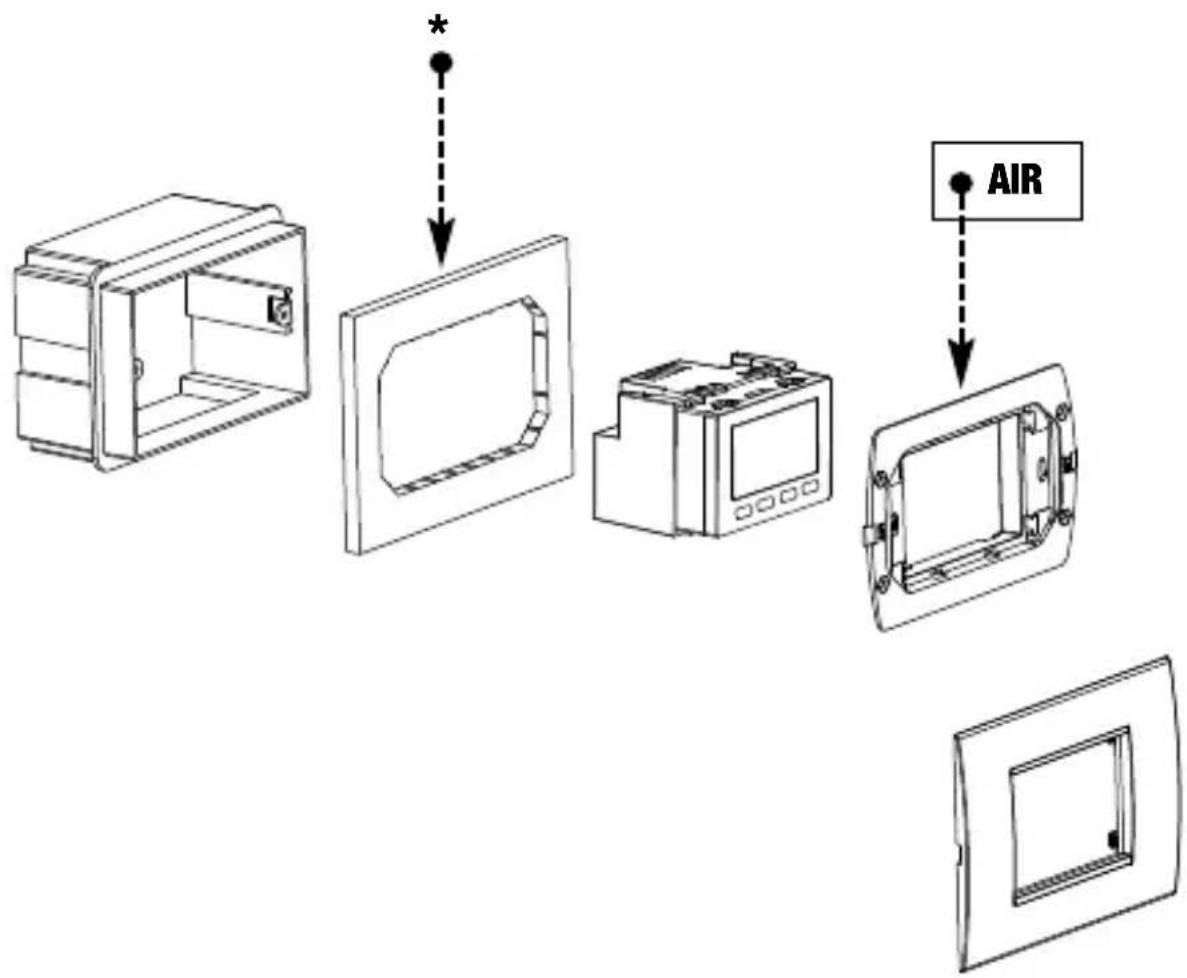
* Note: if the box extension is not present (adapter which increases the depth of the flush-mounting box) we recommend you using the frame for Livinglight AIR installation
Bticino Livinglight AIR series
DAFNE WI-FI MOUNTING

AXO AIR mount not included in the package, purchasable as an accessory.
Bticino Axolute AIR series
DAFNE WI-FI MOUNTING
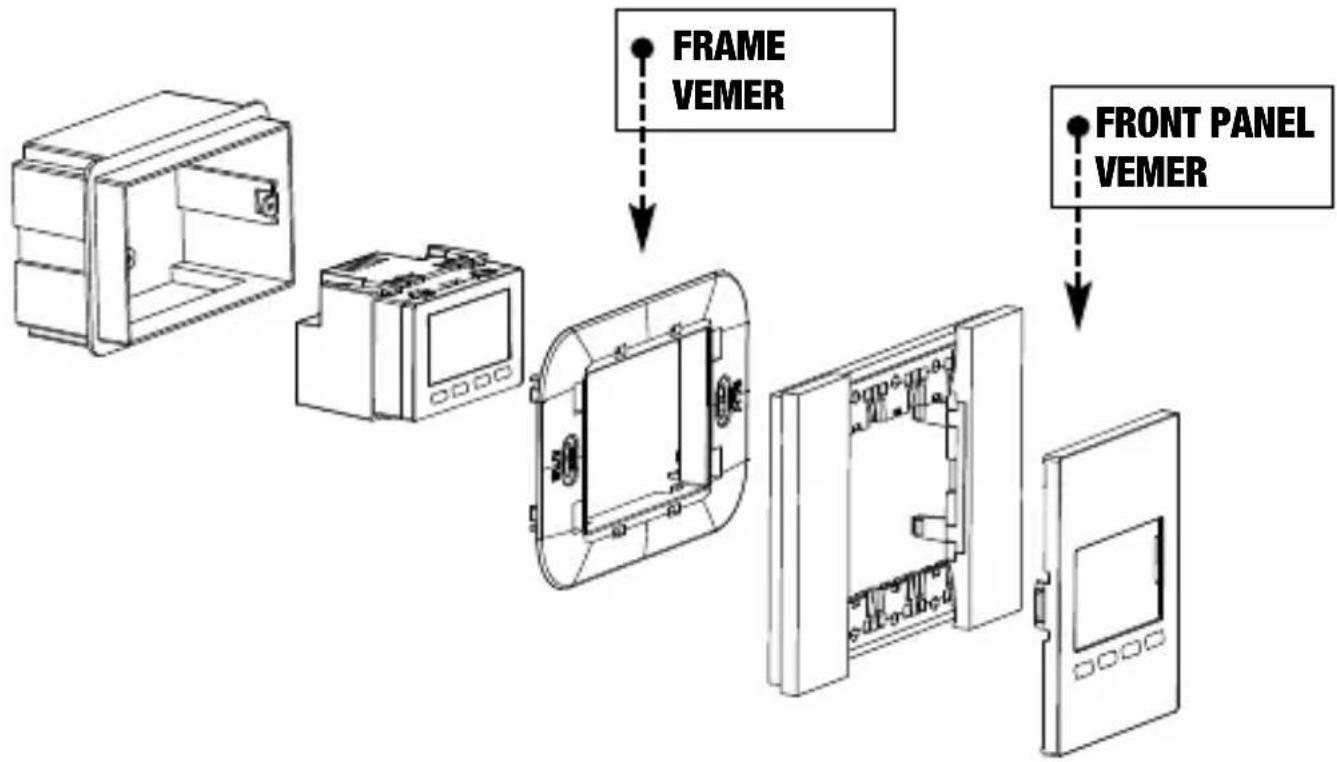
Vemer frame and front panel not included in the package, which can be purchased as accessories with dedicated mounting KIT.
Bticino Living Now series
TECHNICAL CHARACTERISTICS
- Power supply:
- 230 Vac (±15%) 50/60Hz
– maximum consumption: 1 W (2,5 VA)
- Backup battery for time keeping in case of power outages
- Flush-mounting in 3 modules box
- Terminal block:
- 3 terminals for 1.5 mm2 cables for bistable output relay 5A / 250 Vac - 2 terminals for 1.5 mm2 cables for power supply
• Temperature regulation:
- On/Off with settable differential between 0.1°C and 1°C - Proportional with settable band and period
- Summer/Winter/Off operating mode
- Weekly programming (7 programs available for each operating mode)
- Daily resolution: 1 hour (possibility to set delays activation of 15, 30, 45 minutes independent for each hour)
- 5 settable temperatures:
- T1, T2, T3 in automatic operation - Tm in manual operation - Toff in off mode (antifreeze)
• Measured temperature display: 0 ÷ 50\ ircC
• Measurement precision: ±0,5 °C
• Measured temperature resolution: 0,1°C
- Setpoint range: 2 ÷ 50irc C
- Clock precision: ±1 second/day
• Key lock by password
- Backlight display (desactivable)
- Operating frequency band: 2,4 GHz IEEE 802.11 b/g/n
• Maximum radio frequency power transmitted: 20 dBm
- Automatic summer/winter time change (deactivatable with configuration without remote control)
- Operating temperature: 0 ÷ 50irc C
• Storage temperature: -20 ÷ 65 °C
- Operating humidity: 20 ÷ 90% not condensing
- Protection degree: IP40
• Insulation: reinforced among accessible parts (frontal) and all other terminals
DISPLAY AND KEYBOARD

①Day of the week (DAY 1 = Monday)
②Programming menu:
Date/time and summer time setting
PRG Programs modification (for automatic operation)
Temperatures setting T1, T2, T3
Timings menu
ADV Advanced programming menu
Synchronization with Vemer Cloud settings in progress
Active Wi-Fi network connection
③ Time and minutes
④ Load activation in summer/cooling mode
⑤ Program on graphic for the current day (in automatic operation)
⑥ Manual operation activation
⑦ Load activation in winter /heating mode
⑧ Measured environment temperature
⑨ Not used
⑩ Off operation
■ Keyboard
The keys carry out different functions on the basis of the instrument status and they will be described step by step in this user manual.
There are two types of pressure:
- brief pressure
- long pressure, with duration higher than 3 seconds
■ Cleaning the display
To clean the display use a soft, lint-free cloth, without using excess force.
PACKAGE CONTENT

covers and plastic elements are available in white and grey anthracite colours
INSTALLATION AND SETUP
Preliminary operations
If you intend to use the device with remote control, before proceeding with the installation and configuration make sure you have a Vemer account available.
To create a Vemer account, do the following:
- Install and start the Clima Wi-Fi app on your smartphone (or tablet)

- Choose "Register" and fi ll in the "e-mail" and "password" fi elds
Note: for security reasons it is recommended to choose a password different from the one used to access your e-mail box - Check your e-mail box: confirm the activation of the account by clicking on the link contained in the e-mail sent by the system
- Log in by entering the e-mail address and password chosen in the registration process
Installing the device.
- Install the device at a height of about 1.5 m from the floor, in an area that reflects as much as possible the average temperature conditions of the room.
Avoid installation near doors or windows, in niches, behind doors and curtains or in places with excess or total lack of ventilation. - Mount the white or anthracite gray frame according to your preferences by hooking it to the special teeth on the device (with the BTicino Living Now series, do not mount any frame and follow the instructions in the mounting KIT, which can be purchased as an accessory).
- Make the connections in compliance with the diagrams shown in this manual.
- Fix the device inside the 3 modules box in compliance with the assembly diagrams described at the beginning of this manual. The accessories for the installation included in the package allow the mounting of the plates described in the diagram “adjustable plates” and they are:
- mount A
- mount B (according to the needs it could be necessary to remove the side cogs)
- mount AIR
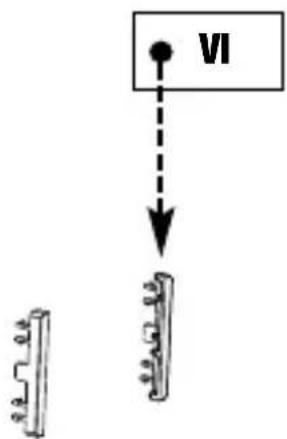
- couple of BM side plastic elements (both of white colour and grey colour)
- couple of VI side plastic elements (both of white colour and grey colour)
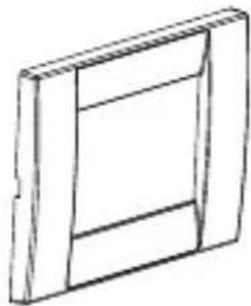
- covers of white colour and anthracite grey colour.
- Power up the device which, upon first start-up (or after a default reset) will turn on all segments of the LCD display for about 3 seconds and the relay will perform the OFF-ON-OFF sequence, after which the screen will appear:

- Proceed with the device configuration described below.
Configuring the remote control device (for Android)
To configure the device after the first power on or after a factory reset using an Android smartphone, proceed as follows:
- While the screen shown on page 17 is displayed, press the ▲ or ▼ key to choose nEt on and the ↓ key to confirm (failure to choose within 30 seconds is equivalent to choosing nEt on).
- Make sure the device displays “conf nEt”. If this is not the case, hold down the 📁 and 📋 keys simultaneously until the display shows conf nEt and the 🔺 icon starts flashing (wait for it to become steady before proceeding with the next point).
- Start the app, choose "Add. Thermostat" and select the Dafne model among those available. The procedure guides the user through the configuration of the Dafne Wi-Fi.
- Select the "iwm..." network to connect to the network generated by the device. Wait for the device display to show the 📁 icon to indicate the successful connection between the app and the device.
- On the next screen, choose the home Wi-Fi network to connect the Dafne Wi-Fi to. Enter the password of the home Wi-Fi network and confirm.
Important: before proceeding make sure that the 📂 on the device display is still on. Otherwise, access the Wi-Fi settings of the smartphone to manually reconnect to the “iwm ...” network. - Enter a name that identifies the Dafne Wi-Fi and choose an icon to help identify the device from those proposed. Confirm with "Save".
The configuration procedure is finished. At this point:
the app displays the list of devices associated with your account among which also the newly associated device must appear.
Dafne Wi-Fi displays the main screen. Check that the icon 🔺 and that the time shown at the top left is correct.
Configuring the remote control device (for Android)
To configure the device after the first power on or after a factory reset using an iPhone, proceed as follows:
-
While the screen shown on page 17 is displayed, press the ▲ or ▼ to choose nEt on and the ↓ to confirm (failure to choose within 30 seconds is equivalent to choosing nEt on).
-
Make sure the device displays "conf nEt". If this is not the case, hold down the 🔊 and keys simultaneously until the display shows conf nEt the 🔔 icon and starts flashing (wait for it to become steady before proceeding with the next point).
-
Start the app, choose "Add. Thermostat" and select the Dafne model among those available. The procedure guides the user through the configuration of the Dafne Wi-Fi.
-
Select the “iwm...” network generated by the device by accessing the iPhone’s Wi-Fi settings. Wait for the Wi-Fi icon to appear on the iPhone (or iPad) display and tap “Next”. Wait for the device display to show the 📁 icon to indicate the successful connection between the app and the device.
-
Enter the full name of the home Wi-Fi network to which to connect the device and the password and click "Next"*
* Important: before proceeding make sure that the 📞 on on the device display is still on. Otherwise, access the Wi-Fi settings of the smartphone to manually reconnect to the “iwm ...”
- Enter a name that identifies the Dafne Wi-Fi and choose an icon to help identify the device from those proposed. Confirm with "Save".
The configuration procedure is finished. At this point:
the app visualizza displays the list of devices associated with your account among which also the newly associated device must appear.
Dafne Wi-Fi displays the main screen.
Check that the icon ⚙ and that the time shown at the top left is correct.
APP DESCRIPTION
Thanks to the app you can control your Dafne Wi-Fi device remotely, easily and intuitively.
Page "Login"

Access using the access credentials (email, password) chosen during registration phase of your account.
Page "Devices list"

Main page
This screen shows the "Dafne Wi-Fi" status:

"Programs List" page
From the "Program List" screen, it is possible to:

Modify a program
To modify an existing program, select the profi le program of the day to be modifi ed. On the screen that opens, assign at any time of day one of the three available tempe- rature T1, T2 and T3 (marked by blue, green and red colours).
Created a program for a day, it's possible to copy it to any other day of the week ("Copy" function).
It is also possible to set a switching delay by tapping on the desired time.
Note: the image refers to the version of the app for smartphone.
On the tablet the whole weekly programming is visible on a single screen.


Confi guration menu
Touch the symbol 📋 on the upper right to access the advanced configuration.

NOTE: the chronothermostat is compatible with Google Home and Amazon Echo. By the association with Google or Amazon account is possible to interact with the device by giving voice commands by speaking to the Voice Assistant via the voice activated speaker.
"Dafne Wi-Fi" settings

Set a holiday period

other
Vacation calendar Save | Month | Mon | Tue | Wed | Thu | Fri | Sat | Sun | |---|---|---|---|---|---|---|---| | Mon | 30 | 31 | 1 | 2 | 3 | 4 | 5 | | Tue | 6 | 7 | 8 | 9 | 10 | 11 | 12 | | Wed | 13 | 14 | 15 | 16 | 17 | 18 | 19 | | Thu | 20 | 21 | 22 | 23 | 24 | 25 | 26 | | Fri | 27 | 28 | 29 | 30 | 1 | 2 | 3 | | Sat | 32 | 33 | 34 | 35 | 1 | 2 | 3 | | Sun | 4 | 5 | 6 | 7 | 8 | 9 | 10 | | Day of Sun: Mon, Tue, Wed, Thu, Fri, Sat, Sun | Date | Mon | Tue | Wed | Thu | Fri | Sat | Sun | | Mon | 30 | 31 | 1 | 2 | 3 | 4 | 5 | | Tue | 6 | 7 | 8 | 9 | 10 | 11 | 12 | | Wed | 13 | 14 | 15 | 16 | 17 | 18 | 19 | | Thu | 20 | 21 | 22 |23 | 24 | 25 | 26 | | Fri | 27 | 28 | 29 | 30 | 1 | 2 | 3 | | Sat | 32 | 33 | 34 | 35 | 1 | 2 | 3 | | Sun | 4 | 5 | 6 | 7 | 8 | 9 | 10 | | Day of Day: Mon, Tue, Wed, Thu, Fri, Sat, Sun | Date | Mon | Tue | Wed | Thu | Fri | Sat | Sun | | Mon | 30 | 31 | 1 | 2 | 3 | 4 | 5 | | Tue | 6 | 7 | 8 | 9 | 10 | 11 | 12 | | Wed | 13 | 14 | 15 & 16 & 17 | Thu: Mon, Tue: Mon, Wed: Tue, Fri: Fri, Sat: Fri, Sun: Sun| | Thu: Mon: Mon, Tue: Tue, Wed: Wed, Fri: Fri, Sat: Fri, Sun: Sun| | Fri: Mon: Mon, Tue: Wed, Wed: Thu: Fri: Fri, Sat: Fri, Sun: Sun: | Mon: Mon, Tue: Mon, Wed: Wed, Thu: Fri: Fri, Sat: Fri, Sun: Sun | | Sat: Mon: Mon, Tue: Wed, Wed: Thu: Fri: Fri, Sat: Fri, Sun: Sun | | Sun: Mon: Mon, Tue: Wed, Wed: Thu: Fri: Fri, Sat: Fri, Sun: Sun | | Day of Day: Mon, Tue, Wed, Thu, Fri, Sat, Sun: Mon: Mon, Tue, Wed, Thu; Sat: Mon; Sun: Sun | Mon: Mon, Tue: Wed, Wed; Thu: Fri: Fri; Sat: Fri; Sun: Sun | | Day of Day: Mon, Tue, Wed, Thu; Fri: Fri; Sat: Fri; Sun: Sun: | Mon: Mon, Tue: Wed, Wed; Thu: Fri: Fri; Sat: Fri; Sun: Sun | | Sat: Mon: Mon, Tue: Wed, Thu; Fri: Fri; Sat: Fri; Sun: Sun | | Sun: Mon: Mon, Tue: Wed, Thu; Fri: Fri; Sat: Fri; Sun: Sun | | Day of Day: Mon, Tue, Wed, Thu; Fri: Fri; Sat: Fri; Sun: Sun: | Mon: Mon, Tue, Wed, Thu; Fri: Fri; Sat: Fri; Sun: Sun | | Sat: Mon: Mon, Tue, Wed, Thu; Fri: Fri; Sat: Fri; Sun: Sun | | Sun: Mon: Mon, Tue, Wed, Thu; Fri: Fri; Sat: Fri; Sun: Sun | | Day of Day: Mon, Tue, Wed, Thu; Fri: Fri; Sat: Fri; Sun: Sun: | Mon: Mon, Tue, Wed, Thu; Fri: Fri; Sat: Fri; Sun: Sun | | Sat: Mon: Mon, Tue, Wed, Thu; Fri: Fri; Sat: Fri; Sun: Sun | | Sun: Mon: Mon, Tue, WedSet vacation days in which the regulation is turned off by selecting them on the calendar.

During the holiday period the operation filed shows VAC
Advanced settings
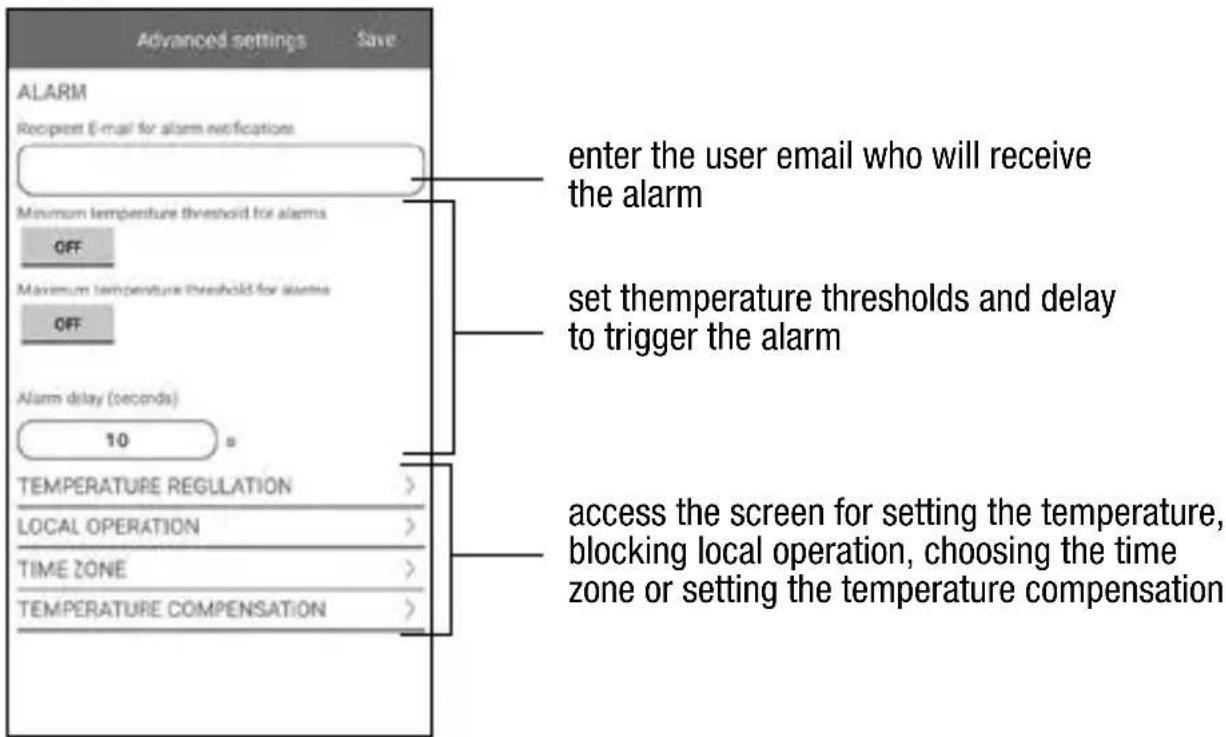
NOTE: LOCAL OPERATION
When the chronothermostat keyboard is operated, the device activates local operation. In this way the device does not check if there are new settings on the cloud and adjusts the temperature according to the settings entered from the keyboard (the programming and configuration on the cloud are not changed).
Local operation is indicated both on the device display by flashing icons and on the app. Local operation can be stopped and / or disabled at any time from the app (but not from the device). If local operation is disabled (useful if you want to have control of the device only from the app), when you try to access the configuration menu using the device keyboard, bLoc will appear for a few seconds on the display.
HOW TO DO IN CASE OF REPLACEMENT OF THE ACCESS POINT
In case of replacement of the router/access point of the home network, it is necessary to connect the device to the new wi-fi network. Proceed as follows:
- On Dafne Wi-Fi:
a. Hold down the keys 🏠 and 📊 simultaneously until the display shows "conf nE" and the 🔺 icon starts flashing (wait for it to become steady before proceeding with the next point).
- On the app:
b. Choose "Add Thermostat" → Dafne → "Next"
c. Select the "iwm..." network to connect to the network generated by the device.
d. In the next screen select the new Wi-Fi network, enter the password and confirm with "Next"
e. Exit the app without entering or saving any data.
HOW TO REMOVE THE DEVICE FROM YOUR ACCOUNT
Sometimes it may be necessary to delete a device from a personal account to move it to another account, for example because the device is installed in a rented home and tenants change.
Proceed as follows:
- Disconnect the device from the old user (using one of the following two alternatives):
a. Access the Wi-Fi signal strength page (ADV → FLD menu, see page 36) and while the 🔊 icon flashes, hold down the ▲ and keys for a long time until the display shows dEL.
b. From the old user's app, on the device list screen, long tap on the icon that identifies the device in question until the request for confirmation of deletion appears.
- Perform the device configuration procedure with the new user account (see page 18).
CONFIGURATION WITHOUT REMOTE CONTROL
To use the device as a normal weekly chronothermostat (without Wi-Fi connection), proceed as follows:
While the screen shown on page 17 is displayed, press the ▲ or ▼ key to choose nEt off and the 🔔 key to confirm (failure to choose within 30 seconds is equivalent to choosing nEt on).
The device asks to enter the date and time, enter the parameters: seconds (only synchronization at value 00), minutes, hours, year, month, day.
Use the ▲ and ▼ keys to increase and decrease the values and the ▼ key to confirm and move to the next parameter. Once all the values have been set, long press (3 seconds) the SET key to exit the clock synchronization menu.

flowchart
graph TD
    A["12:00 01"] --> B["12:00 02"]
    B --> C["12:10 07"]
    D["18:04 12"] --> E["18:04 22"]
    E --> F["12:05 22"]
    style A fill:#f9f,stroke:#333
    style B fill:#f9f,stroke:#333
    style C fill:#f9f,stroke:#333
    style D fill:#f9f,stroke:#333
    style E fill:#f9f,stroke:#333
    style F fill:#f9f,stroke:#333
NOTE: if the device has been configured without remote control and later you want to connect it to the home Wi-Fi network, follow the configuration procedure with remote control described above.
At this point the chronothermostat will begin to operate with the set default parameters (see pag. 50), displaying the day of the week, the time, the environment temperature and the graphic of the program switched on.

Attention: to operate correctly the chronothermostat requires the time and date insertion.
If once you set the device without Wifi remote control (nEt=OFF), no value is set within about half a minute, the chronothermostat starts to operate in the off mode, indicated on the display by the 🔒 icon. The lack of time is indicated by the time fl ashing (12: 00).

The chronothermostat remains in off operation condition until when the hour is not inserted, ensuring in this way the maintenance of the antifreeze temperature (6°C).
PROGRAMMING MENU
With this menu it's possible to modify the following operating parameters:
- Date and time
- Automatic operation programs
- Automatic operation temperatures
- Timings
- Advanced functions.

Time and date modification
To modify the set time and date:
-
From normal operating display, press for a long time the key SET until the symbol starts fl ashing on fi eld (2)
-
Press the key 🖼 to access parameters modification. The seconds fi eld starts fl ashing. Parameters sequence to set is:
seconds* -> minutes -> hours -> year -> month -> day
- Use the keys ▲ and ▼ to modify the values and the key to confirm and move to the next parameter.
(*) for seconds it's possible only the synchronisation at value 00
- Once all parameters are set, to exit and go back to the programming menu, press for a short time the key SET.
To exit and go back to the normal operation (automatic, manual) press for a long time the key SET or wait for the time-out expiration (30 seconds about).
Inside this menu it's also possible to modify the parameters for winter/summer time change. The procedure is described in a detailed way in the chapter "Summer time change" on page 42.
Programs modification

With this menu it's possible to modify the programs of the automatic operation.
The device is configured to perform the program P1 from Monday to Friday and P2 on Saturday and on Sunday (the programs profiles are described at the end of this manual on page 48-49).
If this programming doesn't satisfy the user needs it's possible to change it.
To modify the programming:
-
From the normal operation display, press for a long time the key SET until the symbol 📋 starts flashing on field (2)
-
Press briefly the key ▲ until the symbol ◎shes and press the key to access the parameters modification.
-
The programs page is displayed: the first day of the week (DAY 1) flashing, the current program (for example P1) of the current operation mode (or and the profile that corresponds to the program.
3.1. If the set program is good, move to the next day with the keys ▲ and ▼
3.2. If the set program is not good, press the key ↓. The set program flashes: choose one program different among the 7 available by pressing the keys ▲ and ▼
3.2.1. If no program exactly satisfies the user's needs, choose the program which best meets them and press the key 🖼 to access the modification of the program profile. On field (3) 00:00 appears while on field (8) flashes the temperature level (T1, T2 or T3)

flowchart
graph TD
    A["SET"] --> B["SET"]
    C["SET"] --> D["SET"]
    E["SET"] --> F["SET"]
    G["SET"] --> H["SET"]
    I["SET"] --> J["SET"]
    K["T3/T2/T1"] --> L["T3/T2/T1"]
set for that specific time (00:00). Use the keys ▲ and ▼ change the temperature level and the key 🔒 to move to the next hour. Set in this way the desired level temperature for each hour of the day.
3.2.1.1. For each hour it's also possible to delay the start of the regulation of 15', 30' or 45'. After setting the temperature as described above, press for a long time the key 🖼 to set a delay. The minutes field flashes (field 3): set with the keys ▲ and ▼he delay and press the key 🖼 to move to the next hour.

- When the program satisfies the user's needs, go back to the days page pressing twice the key SET and repeat for the other days of the week the operations just described. When all modifications have been performed, exit the programming menu by pressing for a long time the key SET.
Temperature modification T1, T2, T3

To modify the 3 temperatures of automatic operation:
-
From the normal operation display, press for a long time the key SET until the symbol starts flashing on field (2)
-
Press briefly the key ▲ until the symbol flashes. Press the key ↕ to access the parameters modification.

- The value of the flashing T1 temperature is displayed. Modify the value with the keys ▲ and ▼ and press the key to move to the modification of T2.
- The value of the flashing T2 temperature is displayed. Modify the value with the keys ▲ and ▼ and press the key to move to the modification of T3.
- The value of the flashing T3 temperature is displayed. Modify the value with the keys ▲ and ▼ and press the key to go back to the page of T1 temperature.
- Once all parameters are set, to exit and to o back to the programming menu, press for a short time the key SET. To exit and to go back to the normal operation press for a long time the key SET or wait for the time-out expiration (30 seconds about).
Attention: the set values of temperature must respect the condition: T1≤T2≤T3.
In cooling mode T1 is not settable and equals off system.
Defaults:
| Winter operation | |
| Temperature °C | |
| T1 5.0 | |
| T2 15.0 | |
| T3 18.0 | |
| Tm* | 20.0 |
| Summer operation | |
| Temperature °C | |
| T1 OFF | |
| T2 23.0 | |
| T3 25.0 | |
| Tm* | 24.0 |
* Manual temperature (see Manual operation page 39)
Timing setting

This menu allows the setting of a timing on the current operating mode, expressed in hours or days.
For further information about timings, see the chapter "Timings: what they are" on page 46.
To set a timing:
-
From the normal operation display, press for a long time the key SET until the symbol 📋 starts fl ashing on fi eld (2)
-
Press briefly the key until the symbol fl ashes and press the key to access the parameters modification.
-
The value of the timing currently set fl ashes (00 = no timing). Enter the time delay value (from 15 minutes to 99 days) with the ▲ and ▼ keys and press the 🔔 key to confi rm.
-
Once parameters are set, to exit and go back to the programming menu, press for a short time the key SET. To exit and go back to the normal operation (automatic, manual) press for a long time the key SET or wait for the time-out expiration (30 seconds about).
If a timing is active, the display shows the symbol 📄.
To interrupt a timing, access again the menu and set the value 00.

flowchart
graph TD
    A["00"] --> B["00"]
    B --> C["00"]
With the ADV menu it's possible to modify the following operation parameters:
- operating mode (heating or cooling)
- regulation type (ON-OFF or proportional)
- parameters relative to regulation type
- antifreeze temperature
- adjustment of the measured temperature
- Wi-Fi connection setup
- WiFi menu (if remote control enabled)
- minimum / maximum settable temperature
- password for keylock
- system operation hours

To access the menu ADV:
- From the normal operation display, press for a long time the key SET until the symbol 📋 starts flashing on field (2)
- Press briefly the key ▲ until the symbol ASwarts flashing and press the key to access the parameters modification
- At this point the first parameter of the menu starts flashing: press the keys ▲ and ▼0 modify the parameter and the key to confirm and to move to the next parameter. To exit the parameters modification press the key SET.
Operating mode
This parameter allows to specify the operating mode of the chronothermostat, between winter/heating ( 🔍 ) and summer/cooling ( ✉️)

flowchart
graph TD
    A["r 15C"] --> B[" ramp-up"]
    B --> C["结束"]
    D["ISC"] --> E["返回"]
    F["Next Step"] --> G["返回"]
    H["CO nd"] --> I["返回"]
For further information about the operating mode see the chapter "Regulation type" on page 44.
Regulation type (for heating mode only)
For heating mode it's possible to choose between on/off regulation (rEG 0) or proportional (rEG P).

flowchart
graph TD
    A["rEG"] --> B["↓"]
    B --> C["▲"]
    C --> D["rEG"]
    D --> E["p"]
    style A fill:#f9f,stroke:#333
    style B fill:#ccf,stroke:#333
    style C fill:#cfc,stroke:#333
    style D fill:#fcc,stroke:#333
    style E fill:#cff,stroke:#333
For further information about regulation type see the chapter “Regulation type” on page 44.
Regulation parameters
In case of on/off regulation the only parameter to set is the differential (d IF), which can have values between 0.1°C and 1°C.
In case of proportional regulation the parameters to set are the regulation band (bnd) and the regulation period (PEr).
For further information about how to choose these values see the chapter "Regulation type" on page 44.
But remember that the preset settings are suitable for the most part of the situations: change these settings only if it's really necessary.
Antifreeze temperature (for heating mode only)
For the heating mode it's possible to set a safety temperature (antifreeze temperature - OFF) to maintain also if the chronothermostat is switched off.
It's possible to choose a value between 1°C and 50°C. It's also possible to deactivate the antifreeze function by pressing the key ▼ until the display shows “_ _ _”.
In this case, if the chronothermostat is switched off, no safety temperature is maintained.

Adjustment of the measured temperature
In particular installation conditions, it can happen that the temperature measured by the device deviates from the average temperature in the room.
In this case, enter a temperature adjustment value
with keys ▲ and ▼ and press key to confi rm.
Allowed values: -5ircC ÷ 5ircC .
Factory value: 0°C.

Note: the temperature value shown on the display during normal operation includes any adjustment made.
Wi-Fi connection setup
From this menu it is always possible to choose whether to enable / disable the WiFi remote control mode.
Select On to activate the WiFi remote control or Off to deactivate it using the keys ▲ and ▼ and confirm with the key 🏠

WiFi menu (if remote control enabled)
This submenu consists of 4 screens described below
- the strength of the signal between the device and the access point (FLd).
For values:
- above -60dB: excellent signal quality
- between -60dB and -90dB: good signal quality
- below -90dB: poor signal quality that could compromise the communication between the device and the access point. In this case, move the device closer to the access point

This screen also shows:
- the status of the Wi-Fi connection:
steady on: device connected to the home network
flashing: Wi-Fi network search in progress or test finished
Note: the icon 🔔 is always flashing during the first 20 seconds or so when this screen is displayed.
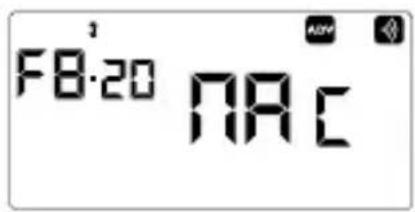
- the device's MAC address.
It is a sequence of characters that uniquely identifies a device within a network, the reading must be done by scrolling through the 3 dedicated pages (in the example: 42-F5-20-1E-F8-20).


Minimum/Maximum settable temperature
Under particular installation conditions, for example in public buildings, hotels, etc., it may be useful to limit the range of values that the temperatures T1 / T2 / T3 and Tm can assume, in order to prevent incorrect settings by the user.
- LO is the lower limit
Allowed values: 2irc C ÷ H Factory value: 2irc C
- H is the upper limit
Allowed values: L0 ÷ 50ircC Factory value: 50ircC


Password for keylock
It's possible to set a keylock if the chronothermostat is installed in public places or if you want to prevent anyone from modifying the operation parameters.
To set a password, enter on field PR5 a value between 001 and 999. To deactivate the password press the key ▼ until “--” appears.

When the keyboard is locked, the chronothermostat performs all its functions using the set regulation parameters.
If the keypad lock is active and any key is pressed, appears on the display for a while according to the inscription bLOC.
To unlock the device, hold down any key until the flashing dashes appear: enter the password to unlock the keyboard, which will remain unlocked for 30 seconds from the last press.
Note: if the password has been forgotten, to unlock the device it is necessary to remove and restore power to the device. When switched on again, the keyboard remains unlocked for 30 seconds, which is sufficient time to access the appropriate menu and consult / deactivate the password.
System operation hours
This page shows the total number of hours of operation of the system (relay ON) for the current mode (identified by the icons 🙏 or 📞)
The hour counter has 5 digits and can be reset by holding down the 🔒 key for a long time until 00000 appears.

NOTE: The maximum storable value is 65535 hours (approximately 7 years).
This data is stored in non-volatile memory (it is not reset when the device is reset)
MANUAL OPERATION
During manual operation the device performs as a normal thermostat, adjusting on the basis of the Tm temperature (manual setpoint), independently from the day and the time where it is.
The manual operation is signalled with the switch on of the symbol 📋 in the field (6).
To move from automatic operation to manual operation:
- Press the 🖱 key twice. In the field (8) the setpoint (Tm) currently set flashes
- set the desired setpoint with the keys ▲ and ▼ and confirm with the key
- at this point on field (8) the value of the environment temperature reappears and the instrument operates in manual.
If you want to change the setpoint (Tm) press the key 🏠 and repeat the points 2 and 3.
To go back to the automatic operation press for a long time the key (3 seconds about).

flowchart
graph TD
    A["Automatic operation"] --> B["Day 1: 08:35 22.8"]
    B --> C["X2"]
    C --> D["Day 2: 08:36 22.8"]
    D --> E["Manual operation"]
    E --> F["3s"]
    F --> G["Manual setpoint (Tm) setting"]
    G --> H["User icon"]
    H --> I["User icon"]
    I --> J["User icon"]
    J --> K["User icon"]
    K --> L["User icon"]
    L --> M["User icon"]
    M --> N["User icon"]
    N --> O["User icon"]
    O --> P["User icon"]
    P --> Q["User icon"]
    Q --> R["User icon"]
    R --> S["User icon"]
    S --> T["User icon"]
    T --> U["User icon"]
    U --> V["User icon"]
    V --> W["User icon"]
    W --> X["User icon"]
    X --> Y["User icon"]
    Y --> Z["User icon"]
OFF OPERATION
In off mode the device doesn't perform any regulation (*) but it continues to display the day, the time and the measured temperature.
(*) In the case of heating/winter operation the device still maintains a minimum temperature - Toff antifreeze temperature - to avoid the freezing of the system and of the environment where the device is installed.
Toff can have values between 1irc C and 50irc C or it can be completely excluded; in this last case the maintenance of minimum temperature is not guaranteed.
The default Toff is 6°C but it's possible to modify this value by accessing the ADV menu (see "Antifreeze temperature" on page 35).
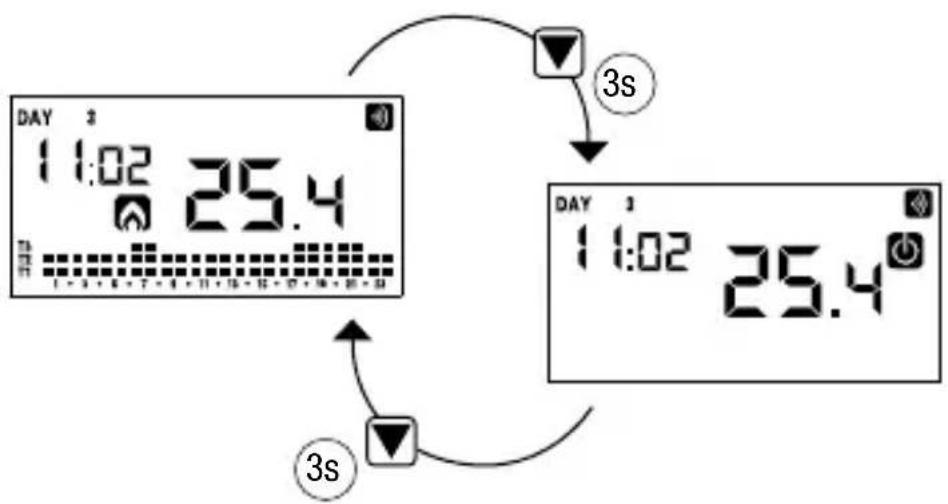
To switch the device off press the key ▼ until the symbol ⏻ displayed (field (9)).
To reactivate the regulation, returning to the operating (automatic or manual) preceding the switching off, press the key ▼ for about 3 seconds.
BACKLIGHTING MANAGEMENT
The chronothermostat have a backlit LED display that is normally on.
If the installation makes it appropriate (for example in bedrooms), the backlight can be turned off. In this condition, the chronothermostat continues to operate normally and the backlight turns on only when the programming menu is entered.
It's possible to turn off the backlighting by pressing the key ▲ for 3 seconds.
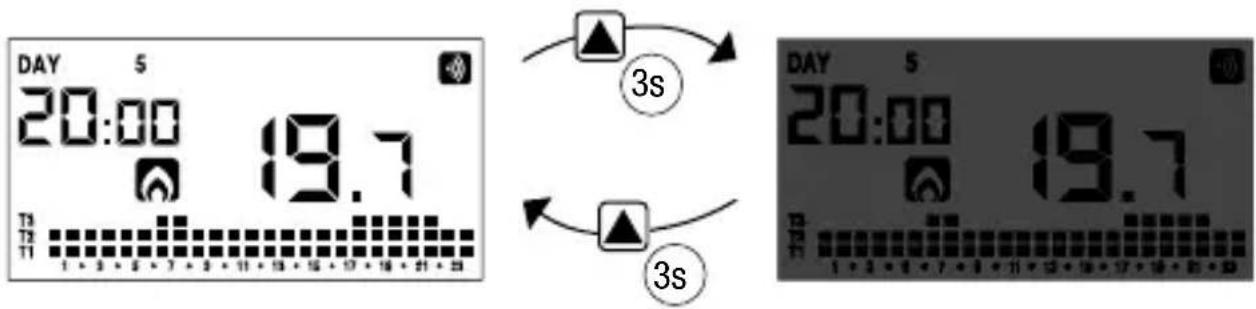
To reactivate the backlighting press the key 📂 or at least 3 seconds.
MINIMUM AND MAXIMUM VALUES
It's possible to display the measured values of minimum and maximum temperature. To display these values press the key ▲ (maximum value H) or ▼ (minimum value L0).
During the display it is possible to reset these values by holding down the (maximum value H I) or or ▼(minimum value L D) key until 2 dashes appear instead of the temperature.
SUMMER TIME CHANGE
Summer time is the convention to step up of one hour the dials of the clocks during the summer period in order to prolong the lighting time in the late afternoon to the loss of the early morning.
In European countries summer time starts the last Sunday of March and ends the last Sunday of October.
The chronothermostat manages the summer / winter time change based on the type of configuration set:
- with remote control configuration, the change of summer / winter time (and synchronization of the date / time) occurs automatically through the WiFi connection.
- with configuration without remote control, the summer / winter time change is managed automatically by the device, increasing by one hour if you switch from solar time to summer time and decreasing by one hour if you switch from summer time to winter time. The device is factory configured to switch to daylight saving time on the last Sunday in March at 02:00 to return to solar time on the last Sunday in October at 03:00, in accordance with what happens in Europe. It is possible to disable the automatic change of summer / winter time or modify the set parameters.
To change settings:
- Access the menu of time and date change, pressing for a long time the key SET until the symbol 🤨 starts flashing.
- Press the key 🖼 to access the time and date modification. At this point, during the modification of any parameter (seconds, minutes, hour, year, month or day) press for a long time the key 🖼 until the display shows the writing RUCO on field (3)

-
Choose with the keys ▲ and ▼ the automatic time change activation (AUTO On) or the deactivation (AUTO OFF) and confirm with the key
-
If OFF you go back to the date/time change; if On the current setting for the passage to summer time is displayed (indicated with the symbol 🌐). In the example:
a. the Sunday (7) of the last week (LR) of March (03) at 2 o'clock (02) b. if it's necessary change the parameters with the keys ▲ and ▼ and move to the next parameter with the key ▼ The sequence requires the insertion of:
i. day (1...7) of the week ii. the week of the month (first, second, third, fourth, last - LR) iii. the month (1...12)
iv. the hour

- Press the key ↓ the current setting for the passage to the winter time is displayed (indicated with the symbol 🔍). In the example: a. the Sunday (7) of the last week (LR) of October (10) at 3 o'clock (03) b. if it's necessary change the parameters with the keys ▲ and ▼ and move to the next parameter with the key 🔍. The sequence requires the insertion of:
i. day (1...7) of the week ii. the week of the month (first, second, third, fourth, last - LR) iii. the month (1...12) iv. the hour
- Once all parameters are set, to exit and go back to the programming menu, press for a short time the key SET. To exit and go back to the normal operation press for a long time the key SET or wait for the time-out expiration (30 seconds about).
REGULATION TYPE
The chronothermostat have two types of regulation:
On/off regulation
During on/off regulation the chronothermostat measures once a minute the environment temperature and it carries out the regulation on the basis of the following logic:
heating mode cooling mode

flowchart
graph LR
    A["relay ON"] --> B["SET-DIFF SET"]
    C["relay OFF"] --> B
    D["Temperature increasing"] --> E["Relay ON"]
    F["Temperature increasing"] --> G["Relay OFF"]
    H["Relay ON"] --> I["SET+DIFFSET"]
    J["Relay OFF"] --> I
    K["Temperature increasing"] --> L["Relay ON"]
    M["Temperature increasing"] --> N["Relay OFF"]
where SET represents the setpoint and DIFF the differential (useful to avoid continuous switches on/switches off dangerous for the system in proximity to the reaching of the setpoint).
Proportional regulation (heating only)
In heating mode, the on/off regulation is available and also the proportional regulation which in some systems allows a more precise regulation to obtain a constant temperature.
This regulation requires to specify two parameters:
- the band, which represents the temperature values within whom to perform the proportional regulation. The band is centered on the setpoint and it can have values between 0.5irc C and 5irc C; outside these values the heating will be always on (if setpoint-band > environment temperature) or always off (if setpoint + band < measured temperature).
- the regulation period which represents the duration of the regulation cycle (activation time + deactivation time of heating) and it can have values of 10, 20 or 30 minutes.
During the operating, at the beginning of the regulation period, the device measures the environment temperature and it compares it with the programmed setpoint; on the basis of this difference the activation time is calculated (and consequently the deactivation time). The more the measured temperature is next to the setpoint value – band, the more the activation time will be predominant in comparison with the deactivation time; on the contrary, the more the measured temperature is next to the setpoint value + band, the more the deactivation time will be predominant in comparison with the activation time).
Once regulation period is passed, the device compares again the environment temperature with the setpoint and it updates the activation and deactivation times for the new period.
The result of the proportional regulation is subordinated to the correct selection of the parameters.
Select the value of the regulation type as follows:
• 10' for low thermal inertia systems (fan-coil)
- 20' for medium thermal inertia systems (aluminium radiators)
- 30' for high thermal inertia systems (cast-iron radiators)
Select the regulation band value as follows:
- broad band (5°C) for systems with high thermal gradient
- narrow band (0.5°C) for systems with low thermal gradient
Attention: the device is default configured to operate in on/off with differential set at 0.3°C. This configuration is suitable for the most part of the situations and for this reason it's advisable to modify it only in particular situations.
To modify the regulation type, the differential value (on/off regulation), band and period (proportional regulation) see chapter “Regulation parameters” on page 35.
Emergency regulation (winter mode only)
The device performs a regulation of emergency if an error occurs during the reading of the probe or in case of time loss.
In case of probe error, if the antifreeze function is not excluded, the device activates the load for 10 minutes every 4 hours. The display shows the writing Err on fi eld (8).
TIMINGS: WHAT THEY ARE
Timings allow to maintain the current operation (automatic, manual, off) for a certain period (hours or days) and once passed the chronothermostat changes the operating mode, as described below.
The timed operations are the following:
Timed automatic
If you set a timing in automatic status, this off status will be maintained until the end of the timing, will then switched to off mode.
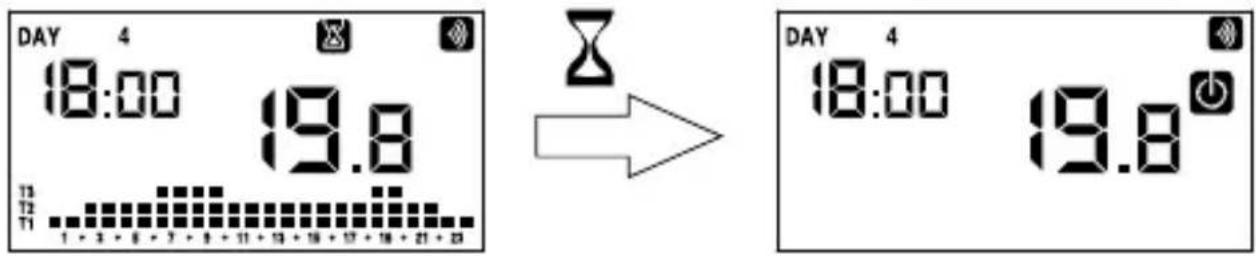
Timed manual
If you set a timing in manual status, this off status will be maintained until the end of the timing, operation will then switched to automatic mode.

Timed off
If you set a timing in off status, this off status will be maintained until the end of the timing, will then switched to the operation that preceded the deactivation (automatic or manual).

If you set a timing, the display shows the symbol 📄.
Attention: the timing is calculated in minutes and for this reason if for example you set a timing of 3 days at 12:15 on Tuesday it will expire at 12:15 on Friday.
Attention: the timings can end before their programmed expiration if one of these actions occur:
- time/date modification (modifi cation of the summer time change included)
- manual modification of the operating mode
- change of the operating logic from winter to summer (or viceversa)
To set a timing, see chapter "Timing setting" on page 32.
WINTER PRESET PROGRAMS
Perform a reset to delete the settings entered and restore the device to the factory values (excluding the network settings for remote control which can be changed as described on pages 18-19).
To reset:
- from the home screen, press and hold the SET key to access the menu configuration. 📋 flashes.
- keep the ▲ and ▼ keys pressed at the same time until the display shows “ rES”.
- when the display shows all the segments, keep the SET key pressed until appears DEF.
Factory values:
| Operation mode | heating (winter) | Adj. ADJ temperature 0 °C | |
| Regulation type on/off | Min. settable temperature 2 °C | ||
| Differential (on/off) 0.3 °C | Max. adjustable temperature 50 °C | ||
| Band (proportional) 0.5 °C | Hour meter operation 🎨/ ✉ | 0 h | |
| Period (proportional) 10 minutes | Automatic summer time change | active (according to EU rules) | |
| Antifreeze temperature OFF 6 °C | Backlighting active | ||
| Key lock password active | |||
NOTE: The factory values of the temperatures are shown on page 31
REFERENCE STANDARDS
EU DECLARATION OF CONFORMITY
Vemer declares that the device complies with the EU directive 2014/53 / EU (RED) with reference to the following standards:
EN 60730-2-7, EN 60730-2-9
ETSI EN 300 328, ETSI EN 301 489-1, ETSI EN 301 489-17
The full text of the EU declaration of conformity is available on the Internet www.vemer.it
information to users pursuant to art. 14 of the directive 2012/19 / EU of the european parliament and of the council of 4 july 2012 on waste electrical and electronic equipment (WEEE)

If the crossed-out bin symbol appears on the equipment or packaging, this means the product must not be included with other general waste at the end of its working life.
The user must take the worn product to a sorted waste center, or return it to the retailer when purchasing a new one.
Products for disposal can be consigned free of charge (without any new purchase obligation) to retailers with a sales area of at least 400 m 2 , if they measure less than 25 cm.
An efficient sorted waste collection for the environmentally friendly disposal of the used device, or its subsequent recycling, helps avoid the potential negative effects on the environment and people's health, and encourages the re-use and/or recycling of the construction materials.

Vemer S.p.A.
I - 32032 Feltre (BL)
Via Camp Lonc, 16
e-mail: info@vemer.it - web site: www.vemer.it
09-2022
- Digital chronothermostat
- Dafne Wi-Fi
- User manual
- Index
- Dafne Wi-Fi digital chronothermostat
- SAFETY WARNINGS
- CONNECTION DIAGRAMS
- ABB Chiara series
- Vimar Arké series
- Bticino Matix series
- DAFNE WI-FI MOUNTING
- Vimar Idea series
- Bticino Livinglight AIR series
- Bticino Axolute AIR series
- Bticino Living Now series
- TECHNICAL CHARACTERISTICS
- DISPLAY AND KEYBOARD
- ■ Keyboard
- ■ Cleaning the display
- INSTALLATION AND SETUP
- Preliminary operations
- Installing the device.
- Configuring the remote control device (for Android)
- APP DESCRIPTION
- Main page
- "Programs List" page
- Modify a program
- Confi guration menu
- "Dafne Wi-Fi" settings
- Set a holiday period
- Advanced settings
- NOTE: LOCAL OPERATION
- HOW TO DO IN CASE OF REPLACEMENT OF THE ACCESS POINT
- HOW TO REMOVE THE DEVICE FROM YOUR ACCOUNT
- Proceed as follows:
- CONFIGURATION WITHOUT REMOTE CONTROL
- PROGRAMMING MENU
- Time and date modification
- Programs modification
- Temperature modification T1, T2, T3
- Attention: the set values of temperature must respect the condition: T1≤T2≤T3.
- Timing setting
- To set a timing:
- Operating mode
- Regulation type (for heating mode only)
- Regulation parameters
- Antifreeze temperature (for heating mode only)
- Adjustment of the measured temperature
- Wi-Fi connection setup
- WiFi menu (if remote control enabled)
- For values:
- Minimum/Maximum settable temperature
- Password for keylock
- System operation hours
- MANUAL OPERATION
- OFF OPERATION
- BACKLIGHTING MANAGEMENT
- MINIMUM AND MAXIMUM VALUES
- SUMMER TIME CHANGE
- To change settings:
- REGULATION TYPE
- On/off regulation
- Proportional regulation (heating only)
- Attention: the device is default configured to operate in on/off with differential set at 0.3°C. This configuration is suitable for the most part of the situations and for this reason it's advisable to modify it only in particular situations.
- Emergency regulation (winter mode only)
- TIMINGS: WHAT THEY ARE
- Timed automatic
- Timed manual
- Timed off
- Attention: the timing is calculated in minutes and for this reason if for example you set a timing of 3 days at 12:15 on Tuesday it will expire at 12:15 on Friday.
- WINTER PRESET PROGRAMS
- To reset:
- REFERENCE STANDARDS
- information to users pursuant to art. 14 of the directive 2012/19 / EU of the european parliament and of the council of 4 july 2012 on waste electrical and electronic equipment (WEEE)
- Vemer S.p.A.
Brand : Vemer
Model : Dafne Wi-Fi
Category : Thermostat