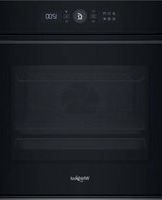
USER MANUAL WOI5S8PM1SBA WHIRLPOOL
THANK YOU FOR BUYING A WHIRLPOOL PRODUCT
In order to receive a more complete assistance, please register your product on www.register10.eu

Before using the appliance carefully read the Safety Instruction.
PLEASE SCAN THE QR CODE ON YOUR APPLIANCE IN ORDER TO REACH MORE INFORMATION

PRODUCT DESCRIPTION

- Control panel
- Fan
- Circular heating element (non-visible)
- Shelf guides
(the level is indicated on the front of the oven)
- Door
- Upper heating element/grill
- Lamp
- Identification plate (do not remove)
- Lower heating element (non-visible)
CONTROL PANEL
1. LEFT HAND DISPLAY
2. LIGHT
For switching the lamp on/off.
3. BACK
For returning to the previous screen. During cooking, allows settings to be changed.
4. ON/OFF
For switching the oven on and off and for stopping an active function at any time.
Turn this to navigate through the functions and adjust all of the cooking parameters. Press to select, set, access or confirm functions or parameters and eventually start the cooking program.
6. START
For starting functions and confirming settings or a set value.
7. TIME
For setting the time as well as setting or adjusting the cooking time.
8. TEMPERATURE
For setting the temperature.
9. RIGHT-HAND DISPLAY
ACCESSORIES
| | | |
| Use to cook food or as a support for pans, cake tins and other ovenproof items of cookware. | Use as an oven tray for cooking meat, fish, vegetables, focaccia, etc. or position underneath the wire shelf to collect cooking juices. | Use for cooking all bread and pastry products, but also for roasts, fish en papillotte, etc. | To facilitate inserting or removing accessories. |
AIR FRY TRAY *
To be used when cooking foods with the Air Fry function, with a baking tray positioned at a lower level to collect possible crumbs and drips. It can be cleaned in the dishwasher.
The number and type of accessories may vary depending on the model purchased. Other accessories can be purchased separately; for orders and information, contact the after-sales service.
* Available only in certain models
INSERTING THE WIRE SHELF AND OTHER ACCESSORIES
Insert the wire shelf horizontally by sliding it across the shelf guides, making sure that the side with the raised edge is facing upwards.
Other accessories, such as the drip tray and the baking tray, are inserted horizontally in the same way as the wire shelf.
REMOVING AND REFITTING THE SHELF GUIDES
• To remove the shelf guides, lift them up and pull the lower parts out of their lodgings: The shelf guides can now be removed. • To refit the shelf guides, first fit them back into their upper seating. Keeping them held up, slide them into the cooking compartment, then lower them into position in the lower seating.
FITTING THE SLIDING RUNNERS (IF PRESENT)

Remove the shelf guides from the oven and remove the protective plastic from the sliding runners.
Fasten the upper clip of the runner to the shelf guide and slide it along as far as it will go. Lower the other clip into position.

To secure the guide, press the lower portion of the clip firmly against the shelf guide. Make sure that the runners can move freely. Repeat these steps on the other shelf guide on the same level.
Please note: The sliding runners can be fitted on any level.
FUNCTIONS

6TH SENSE
These allow automatic selection of the cooking method and the best temperature range for all types of food (Lasagna, Meat, Fish, Vegetables, Cakes & Pastries, Salt cakes, Bread, Pizza). To get the best from this function, follow the indications on the cooking table.

STEAM+
The Steam+ function allows to obtain excellent performances thanks to the presence of steam in the cooking cycle. This function suggests the ideal temperature for cooking a wide range of recipes; The cooking times and the water quantity (100 / 200 ml) of the main dishes are shown in the relative cooking table that you can find online. Always activate the steam function when the oven is cold, and after pouring drinking water into the bottom of the cavity.
Note: The advised water quantity exceeds the cavity embossment capacity, but the bottom of the oven is designed to manage the advised excess water efficiently.

CASSEROLE
This function suggests the best temperature and cooking method for pasta dishes.

MEAT
This function suggests the best temperature and cooking method for meat.

BREAD
This function automatically suggests the best temperature and cooking method for all types of bread.

PIZZA
This function allows you to cook great homemade pizza, in less than 10 minutes like in a restaurant. The dedicated cooking cycle works at temperature level above 300 degree Celsius, delivering pizza soft inside, crunchy on the edges and with a perfectly even browning.
Combining this function with the Pizza Stone WPro accessory and preheating for 30 minutes can bake a pizza in 5-8 min.
For orders and information contact the after sales service or www.whirlpool.eu.

PASTRY
This function suggests the best temperature and cooking method for all types of cake.

CONVENTIONAL
For cooking any kind of dish on one shelf only.

GRILL
For grilling steaks, kebabs and sausages, cooking vegetables au gratin or toasting bread. When grilling meat, we recommend using a drip tray to collect the cooking juices: Position the tray on any of the levels below the wire shelf and add 500 ml of drinking water.

FORCED AIR
For cooking different foods that require the same cooking temperature on several shelves at the same time. This function can be used to cook different foods without odours being transferred from one food to another. Consult the cooking table for correct level combination selection.

CONVECTION BAKE
For cooking meat, baking cakes with fillings on one shelf only.

SPECIAL FUNCTIONS
For preheating the oven quickly.

FAST PREHEAT

TURBO GRILL
For roasting large joints of meat (legs, roast beef, chicken). We recommend using a drip tray to collect the cooking juices: Position the pan on any of the levels below the wire shelf and add 500 ml of drinking water.
• ECO ECO CYCLE *
For cooking stuffed roasting joints and fillets of meat on a single shelf. When this Eco Cycle is in use, the light will remain switched off during cooking. To use the Eco Cycle and therefore optimise power consumption, the oven door should not be opened until the food is completely cooked.
• AIR FRY/CONVECT ROAST
Using dedicated air fry tray (provided with some models) allows you to cook French fries, chicken nuggets and more using less oil, resulting pleasantly crispy. Heating elements cycle to properly heat the cavity, while the fan circulates hot air. Position the food on the Air Fry tray in a single layer and follow Air Fry Cooking Table instructions for best performances. Alternatively, this function can be used to get great roasting results on meat and poultry, potatoes and vegetables, according to the cooking table recommendation. These recipes can be prepared using standard baking tray.
SMART CLEAN
The action of the steam released during this special low-temperature cleaning cycle allows dirt and food residues to be removed with ease. Pour 200 ml of drinking water on the bottom of the oven and only activate the function when the oven is cold.


PYRO
For eliminating cooking spatters using a cycle at very high temperature. Two self cleaning cycles are available: A complete cycle (Pyro) and a shorter cycle (Pyro Eco). We recommend using the complete cycle to experience the best cleaning performance.
FIRST TIME USE
1. SET THE TIME
You will need to set the time when you switch on the oven for the first time.

The two digits for the hour will start flashing: Turn the knob to set the hour and press Ⓞ to confirm.

The two digits for the minutes will start flashing. Turn the knob to set the minutes and press Ⓞ to confirm.
Please note: To change the time at a later point, press and hold ☺ for at least one second while the oven is off and repeat the steps above.
You may need to set the time again following lengthy power outages.
2. SETTINGS
If required, you can change the default unit of rated current (16 A).

Turn the selection knob to select the rated current, then press the confirm button.
Please note: The oven is programmed to consume a level of electrical power that is compatible with a domestic network
* Function used as reference for the energy efficiency declaration in accordance with Regulation (EU) No. 65/2014
that has a rating of more than 3 kW (16 A): If your household uses a lower power, you will need to decrease this value (13 A).
Please note: To change the rated current at a later point, press and hold the settings button for at least five seconds while the oven is off and repeat the steps above.
3. HEAT THE OVEN
A new oven may release odours that have been left behind during manufacturing: This is completely normal.
Before starting to cook food, we therefore recommend heating the oven with it empty in order to remove any possible odours. Remove any protective cardboard or transparent film from the oven and remove any accessories from inside it. Heat the oven to 200 °C for around one hour, ideally using a function with air circulation (e.g. "Forced Air" or "Convection Bake").
Follow the instructions for setting the function correctly.
Please note: It is advisable to air the room after using the appliance for the first time.
DAILY USE
1. SELECT A FUNCTION
When the oven is off, only the time is shown on the display. Press and hold ⏻ to switch the oven on. Turn the rotary knob to view the main functions available on the left-hand display. Select one and press ⏻

To select a sub-function (where available), select the main function and then press to confirm and go to the function menu.


Turn the rotary knob to select from amongst the subfunctions available on the right-hand display and then press ⏻ to confirm.
2. SET THE FUNCTION
After having selected the function you require, you can change its settings. The display will show the settings that can be changed in sequence.
TEMPERATURE / GRILL LEVEL

When the °C icon flashes on the display, turn the knob to change the value, then press to confirm and continue to alter the settings that follow (if possible).
You can also set the grill level (3 = high, 2 = medium, 1 = low) at the same time.

Please note: Once the function has started, you can change the temperature or the grill level by pressing ⏻ or by turning the knob directly.
DURATION

When the icon flashes on the display, use the adjustment knob to set the cooking time you require and then press to confirm.
You do not have to set the cooking time if you want to manage cooking manually: Press ⏻ to confirm and start the function. In this case, you cannot set the end cooking time by programming a delayed start.
Please note: You can adjust the cooking time that has been
set during cooking by pressing ⚙: Turn the knob to change the hour and press ⏻ to confirm.
SETTING THE END COOKING TIME/DELAYED START
In many functions, once you have set a cooking time you can delay starting the function by programming its end time. Where you can change the end time, the display will show the time the function is expected to finish while the C icon flashes.

If necessary, turn the knob to set the time you want cooking to end, then press to confirm and start the function.
Place the food in the oven and close the door: The function will start automatically after the period of time that has been calculated in order for cooking to finish at the time you have set.

Please note: Programming a delayed cooking start time will disable the oven preheating phase: The oven will reach the temperature you require gradually, meaning that cooking times will be slightly longer than those listed in the cooking table.
During the waiting time, you can use the knob to change the programmed end time.
Press 📁 or to change the temperature and cooking time settings. Press ⏱ to confirm when finished.
3. ACTIVATE THE FUNCTION
Once you have applied the settings you require, press ▶ to activate the function.
You can press and hold Ⓞ at any time to pause the function that is currently active.
4. PREHEATING
Some functions have an oven preheating phase: Once the function has started, the display indicates that the preheating phase has been activated.

Once this phase has finished, an audible signal will sound and the display will indicate that the oven has reached the set temperature.

At this point, open the door, place the food in the oven, close the door and start cooking by pressing ▶
Please note: Placing the food in the oven before preheating has finished may have an adverse effect on the final cooking result.
Opening the door during the preheating phase will stop or pause it.
The cooking time does not include a preheating phase.
You can always change the temperature you want the oven to reach using the knob.
5. END OF COOKING
An audible signal will sound and the display will indicate that cooking is complete.

To extend the cooking time without changing the settings, turn the knob to set a new cooking time and press ▶
6. SPECIAL FUNCTIONS
AUTOMATIC CLEANING - PYRO
Do not touch the oven during the Pyro cycle. Keep children and animals away from the oven during and after (until the room has finished airing) running the Pyro cycle.
Remove all accessories - including shelf guides - from the oven before activating the function. If the oven is installed below a hob, make sure that all the burners or electric hotplates are switched off while running the self-cleaning cycle.
For optimum cleaning results, remove the worst soiling with a damp sponge before using the Pyro function. We recommend only running the Pyro function if the appliance contains heavy soiling or
gives off bad odours during cooking.
Access special functions S≡ and turn the knob to select from menu. then press to confirm.
Clean the door and remove all accessories as prompted, then close the door and press ▶ to start immediately the cleaning cycle, or press ☑ to set the end time/start delayed.
The oven will start the cleaning cycle and the door will be locked automatically.
The oven door cannot be opened while pyrolytic cleaning is in progress: It will remain locked until the temperature has returned to an acceptable level. Air the room during and after running the Pyro cycle.
Please note: The duration and temperature of the cleaning cycle cannot be set.
7. KEYLOCK
To lock the keypad, press and hold ◀ for at least five seconds.

Do this again to unlock the keypad.
Please note: This function can also be activated during cooking. For safety reasons, the oven can be switched off at any time by pressing ☐.
NOTES
- Do not cover the inside of the oven with aluminium foil.
- Never drag pots or pans across the bottom of the oven as this could damage the enamel coating.
- Do not place heavy weights on the door and do not hold on to the door.
- Due to the higher temperature of the Pizza cycle, it is expected to experience slightly higher cooling fan noise.
USEFUL TIPS
HOW TO READ THE COOKING TABLE
The table lists the best function, accessories, and level to use to cook different types of food. Cooking times start from the moment food is placed in the oven, excluding preheating (where required). Cooking temperatures and times are approximate and depend on the amount of food and the type of accessory used. Use the lowest recommended settings to begin with and, if the food is not cooked enough, then switch to higher settings. Use the accessories supplied and preferably dark-coloured metal cake tins and baking trays. You can also use Pyrex or stoneware pans and accessories, but bear in mind that cooking times will be slightly longer.
COOKING DIFFERENT FOODS AT THE SAME TIME
Using the "Forced Air" function, you can cook different foods which require the same cooking temperature at the same time (for example: fish and vegetables), using different shelves. Remove the food which requires a shorter cooking time and leave the food which requires a longer cooking time in the oven.
MEAT
Use any kind of oven tray or pyrex dish suited to the size of the piece of meat being cooked. For roast joints, it is best to add some stock to the bottom of the dish, basting the meat during cooking for added flavour. Please note that steam will be generated during this operation. When the roast is ready, let it rest in the oven for another 10-15 minutes, or wrap it in aluminium foil.
When you want to grill meat, choose cuts with an even thickness all over in order to achieve uniform cooking results. Very thick pieces of meat require longer cooking times. To prevent the meat from burning on the outside, lower the position of the wire shelf, keeping the food farther away from the grill. Turn the meat two thirds of the way through cooking. Take care when opening the door as steam will escape.
To collect the cooking juices, we recommend placing a dripping pan filled with half a litre of drinking water directly underneath the wire shelf on which the food is placed. Top-up when necessary.
DESSERTS
Cook delicate desserts with the conventional function on one shelf only.
Use dark-coloured metal baking pans and always place them on the wire shelf supplied. To cook on more than one shelf, select the forced air function and stagger the position of the cake tins on the shelves, aiding optimum circulation of the hot air.
To check whether a leavened cake is cooked, insert a wooden toothpick into the centre of the cake. If the toothpick comes out clean, the cake is ready.
If using non-stick baking pans, do not butter the edges as the cake may not rise evenly around the edges.
If the item "swells" during baking, use a lower temperature next time and consider reducing the amount of liquid you add or stirring the mixture more gently.
For desserts with moist fillings or toppings (such as cheesecake or fruit tarts), use the "Convection bake" function. If the base of the cake is soggy, lower the shelf and sprinkle the bottom of the cake with breadcrumbs or biscuit crumbs before adding the filling.
RISING
It is always best to cover the dough with a damp cloth before placing it in the oven. Dough proving time with this function is reduced by approximately one third compared to proving at room temperature (20-25°C). The rising time for pizza starts at around one hour for 1 kg of dough.
COOKING TABLE
| RECIPE FUNCTION PRE | HEAT TEMPERATURE (°C) COOK TIME (Min.) LEVEL AND ACCESSORIES | |
| Leavened cakes / Sponge cakes | | - 170 30 - 50 | | 2 |
| Yes 160 30 - 50 | | 2 |
| Yes 160 30 - 50 | | 4 1 |
| Filled cakes(cheesecake, strudel, apple pie) | | - 160 - 200 30 - 85 | | 3 |
| Yes 160 - 200 35 - 90 | | 4 1 |
| Cookies / Small cakes | | - 160 - 170 20 - 40 | | 3 |
| Yes 150 - 160 | 20 - 40 | 4 |
| Yes 150 - 160 | 20 - 40 | 4 1 |
| Yes 135 50 - 90 | | 5 4 3 1 |
| Tarts | | Yes 170 | 50 - 80 | 5 4 3 1 |
| Choux buns | | - 180 - 200 30 - 40 | | 3 |
| Yes 180 - 190 | 35 - 45 | 4 1 |
| Yes 180 - 190 | 35 - 45* | 5 3 1 |
| Meringues | | Yes 90 | 110 - 150 | 3 |
| Yes 90 | 130 - 150 | 4 1 |
| Yes 90 | 140 - 160* | 5 3 1 |
| Pizza (Thin, thick, focaccia) | | Yes 310 7-12 | | 2 |
| Yes 220 - 240 20 - 40 | | 4 1 |
| Yes 220 - 240 25 - 50* | | 5 3 1 |
| Yes 210 40 - 60 | | 5 4 3 1 |
| Bread loaf 0,5 kg | | - 180 - 220 50 - 70 | | 2 |
| Small bread | | - 180 - 220 30 - 50 | | 3 |
| Bread | | Yes 180 - 220 30 - 60 | | 4 1 |
| Frozen pizza | | Yes 250 10 - 15 | | 2 |
| Yes 250 10 - 20 | | 4 1 |
| Savoury pies(vegetable pie, quiche) | | Yes 180 - 190 45 - 60 | | 2 |
| Yes 180 - 190 45 - 60 | | 4 1 |
| Yes 180 - 190 | 45 - 70* | 5 3 1 |
| FUNCTIONS | Conventional | Grill | Turbo Grill | Forced Air | Convect Bake | ECO | Air Fry |
| AUTOMATIC FUNCTIONS | Casserole | Meat | Bread | Pizza function | Pastry |
| ACCESSORIES | Wire shelf | Oven tray or cake tray on wire shelf | Drip tray / Baking tray or oven tray on wire shelf | Drip tray / Baking tray | Drip tray with 500 ml of water |
| RECIPE FUNCTION PRE | HEAT TEMPERATURE (°C) COOK TIME (Min.) LEVEL AND ACCESSORIES | |
| Vols-au-vent / Puff pastry crackers | [35KS] | Yes 190 - | 200 20 - 30 | | 3 | |
 | Yes 180 - | 190 20 - 40 | | 4 | 1 |
 | Yes 180 - | 190 20 - 40* | | 5 3 1 | |
| Lasagne / Flans - 190 - 200 40 - 80 |  | | | | 3 | |
| Baked pasta / Cannelloni - 190 - 200 25 |  | | | | 3 | |
| Lamb / Veal / Beef / Pork 1 kg |  | - 190 - 200 60 - 90 | | | 3 | |
| Chicken / Rabbit / Duck 1 kg |  | - | 200 - 230 | 50 - 80 ** | 3 | |
| Turkey / Goose 3 kg |  | - 190 - 200 90 - 150 | | | 2 | |
| Baked fi sh / en papillote (fi llets, whole) |  | Yes 180 - | 200 40 - 60 | | 3 | |
| Stuff ed vegetables (tomatoes, courgettes, aubergines) |  | Yes 180 - | 200 50 - 60 | | 2 | |
| Toast |  | - | 3 (High) | 3 - 6 | 5 | |
| Fish fillets / Steaks |  | - | 2 (Mid) | 20 - 30*** | 4 3 | |
| Sausages / Kebabs / Spare ribs / Hamburgers |  | Yes 200 - | 220 15 - 30*** | | 5 4 | |
| Roast chicken 1-1.3 kg | [6HSZ] | Yes | 200 - 220 | 55 - 70** | 2 1 | |
| Roast beef rare 1 kg |  | - | 2 (Mid) | 35 - 50** | 3 | |
| Leg of lamb / Shanks |  | - | 2 (Mid) | 60 - 90** | 3 | |
| Roast potatoes |  | Yes | 200 - 220 | 35 - 55** | 3 | |
| Vegetable gratin |  | Yes | 200 - 220 | 10 - 25 | 3 | |
| Complete meal: Fruit tart (level 5) / lasagna (level 3) / meat (level 1) |  | Yes | 190 | 40 - 120* | 5 3 1 | |
| Complete meal: Fruit tart (level 5) / roasted vegetables (level 4) / lasagna (level 2) / cuts of meat (level 1) |  | Yes | 190 | 40 - 120* | 5 4 2 | 1 |
| Lasagna & Meat |  | Yes | 200 | 50 - 120* | 4 | 1 |
| Meat & Potatoes |  | Yes | 200 | 45 - 120* | 4 | 1 |
| Fish & Vegetables |  | Yes | 180 | 30 - 50 | 4 1 | |
| Stuff ed roasting joints |  | - | 200 | 80 - 120* | 3 | |
| Cuts of meat (rabbit, chicken, lamb) | [DD78] | - | 200 | 50 - 120* | 3 | |
* Estimated length of time: dishes can be removed from the oven at different times depending on personal preference. ** Turn food two thirds of the way through cooking (if necessary). *** Turn food halfway through cooking.
| FUNCTIONS |  |  |  | ECO |  |
| Conventional | Grill | Turbo Grill | Forced Air | Convect Bake | ECO | Air Fry |
| AUTOMATIC FUNCTIONS |  |  | |  | | [KHSZ] |
| Casserole | Meat | Bread | Pizza function | Pastry |
| ACCESSORIES | |
| Wire shelf | Oven tray or cake tray on wire shelf | Drip tray / Baking tray or oven tray on wire shelf | Drip tray / Baking tray | Drip tray with 500 ml of water |
AIR FRY COOKING TABLE
| RECIPE FUNCTION | | SUGGESTED QUANTITY | PREHEAT | TEMPERATURE (°C) | DURATION (MIN.) | SHELF AND ACCESSORIES |
| FROZEN FOOD | Frozen French Fries 650 - 850g | Yes 20 - 30 | | | | | 4 2 |
| Frozen Chicken Nugget 500g | Yes 20 - 20 | | | | | 4 2 |
| Fish Sticks 500g Yes | 20 - 20 | | | | | 4 2 |
| Onion Rings | | 500g Yes | 200 15 - 20 | | | 4 2 |
| VEGETABLES | Fresh Breaded Zucchini 400g | Yes 20 - 20 | | | | | 4 2 |
| Homemade Fries | | 300 - 800 g | Yes | 200 | 20 - 40 | 4 2 |
| Mixed Vegetables | | 300 - 800 g | Yes | 200 | 20 - 30 | 4 2 |
| MEAT AND FISH | Chicken Breasts | | 1 - 4 cm | Yes | 200 | 20 - 40 | 4 2 |
| Chicken Wings | | 200 - 1500 g | Yes | 220 | 30 - 50 | 4 2 |
| Breaded Cutlet | | 1 - 4 cm | Yes | 220 | 20 - 50 | 4 2 |
| Fish Fillet | | 1 - 4 cm | Yes | 220 | 15 - 25 | 4 2 |
For cooking fresh or homemade foods, spread a thin layer of oil across the food surface. In order to guarantee uniform cooking results, mix food halfway through the recommended cooking time.
| FUNCTIONS |  Air Fry Air Fry |
|
| ACCESSORIES | Air Fry tray Oven tray or cake tray on wire shelf | Drip tray / Baking tray or oven tray on wire shelf |
STEAM+ COOKING TABLE
| FOOD RECIPE | | QUANTITY | TIME(MIN.) | ACCESSORIES WATER | |
| BREAD | Small breads 80-100 g 30 - 45 | | | 3 | 100 ml |
| Sandwich loaf in tin 300-500 g 40 - 60 | | | 3 |
| Bread 500g-2 kg 50 - 100 | | | 3 |
| Baguettes 200-300 g 30 - 45 | | | 3 |
| PASTRIES | Cookies one tray 25 - 35 | | | 3 |
| Muffin | 30-60 g | 25 - 45 | 3 |
| Sponge Cake | 500-700 g 30 - 50 | | 2 |
| Tart | one tray | 35 - 55 | 2 |
| MEAT | Roast | 1 kg | 60 - 110 | 3 | 200 ml |
| Ribs | 500g-1,5 kg | 50 - 75 | 3 |
| Chicken | 1-1,5 kg | 55 - 80 | 3 |
| Chicken/Turkey | 3 kg | 100 - 140 | 3 |
| FISH | Fillet Steak | 0.5-2 cm | 15 - 25 | 3 |
| Fillet Steak | 2-4 cm | 20 - 35 | 3 |
| Whole Fish | 300-600 g | 20 - 30 | 3 |
| Whole Fish | 600 -1200 g | 25 - 45 | 3 |
| VEGETABLES | Roasted Potatoes | 0.5-1.5 kg | 45 - 60 | 3 |
| Stuffed Peppers | 1-2 kg | 35 - 55 | 3 |
| Roasted Broccoli | 0.3-1 kg | 30 - 50 | 3 |
| Roasted Zucchini | 0.5-1.5 kg | 30 - 50 | 3 |
Start the STEAM+ function only when the oven is cold. Opening the door and topping up the water during cooking may have an adverse effect on the final cooking result.
| ACCESSORIES | | | |
| Air Fry tray | Oven tray or cake tray on wire shelf | Drip tray / Baking tray or oven tray on wire shelf |
MAINTENANCE AND CLEANING
Make sure that the oven has cooled down before carrying out any maintenance or cleaning.
Do not use steam cleaners.
Do not use wire wool, abrasive scourers or abrasive/corrosive cleaning agents, as these could damage the surfaces of the appliance.
Wear protective gloves.
The oven must be disconnected from the mains before carrying out any kind of maintenance work.
EXTERIOR SURFACES
- Clean the surfaces with a damp microfibre cloth. If they are very dirty, add a few drops of pH-neutral detergent. Finish off with a dry cloth.
- Do not use corrosive or abrasive detergents. If any of these products inadvertently comes into contact with the surfaces of the appliance, clean immediately with a damp microfibre cloth.
INTERIOR SURFACES
• After every use, leave the oven to cool and then clean it, preferably while it is still warm, to remove any deposits or stains caused by food residues. To dry any condensation that has formed as a result of cooking foods with a high water content, leave the oven to cool completely and then wipe it with a cloth or sponge. - Activate the "Smart Clean" function for optimum cleaning of the internal surfaces. (Only in some models).
- Clean the glass in the door with a suitable liquid detergent.
- The oven door can be removed to facilitate cleaning.
- Dry out the bottom profile below the door of the oven if water residues are present after a cooking cycle.
ACCESSORIES
Soak the accessories in a washing-up liquid solution after use, handling them with oven gloves if they are still hot. Food residues can be removed using a washing-up brush or a sponge.
Do not clean Food Probe and Meat Probe (if present) in the dishwasher. Air Fry tray (if present) can be cleaned in the dishwasher.
CLEANING THE CATALYTIC PANELS
(ONLY IN SOME MODELS)
This oven is equipped with special catalytic panels that facilitate cleaning of the cooking compartment thanks to their special self-cleaning coating, which is highly porous and able to absorb grease and grime. These panels are fitted to the shelf guides: When repositioning and then refitting the shelf guides, make sure that the hooks at the top are slotted into the appropriate holes in the panels.


To make best use of the catalytic panels' self-cleaning properties, we recommend heating the oven to 200 °C for around one hour using the "Convection Bake" function. The oven must be empty during this time. Then leave the appliance to cool down before removing any remaining food residues using a nonabrasive sponge.
Please note: Using corrosive or abrasive cleaning agents, stiff brushes, pan scourers or oven sprays could damage the catalytic surface and compromise its self-cleaning properties.
Please contact our After-sales Service if you require replacement panels.
REPLACING THE LAMP
- Disconnect the oven from the power supply.
- Unscrew the cover from the light, replace the bulb and screw the cover back on the light.
- Reconnect the oven to the power supply.
Please note: 40 W/230 ~ V type G9, T300°C halogen bulbs.
The bulb used in the product is specifically designed for domestic appliances and is not suitable for general room lighting within the home. (EC Regulation 244/2009) Light bulbs are available from our After-sales Service.
If using halogen bulbs, do not handle them with your bare hands as your fingerprints could cause damage. Do not use the oven until the light cover has been refitted.
REMOVING AND REFITTING THE DOOR
- To remove the door, open it fully and lower the catches until they are in the unlock position.

- Close the door as much as you can.
Take a firm hold of the door with both hands – do not hold it by the handle.
Simply remove the door by continuing to close it while pulling it upwards at the same time until it is released from its seating. Put the door to one side, resting it on a soft surface.

- Refit the door by moving it towards the oven, aligning the hooks of the hinges with their seating and securing the upper part onto its seating.
- Lower the door and then open it fully.
Lower the catches into their original position: Make sure that you lower them down completely.

Apply gentle pressure to check that the catches are in the correct position.

- Try closing the door and check to make sure that it lines up with the control panel. If it does not, repeat the steps above: The door could become damaged if it does not work properly.
LOWER THE TOP HEATING ELEMENT
(ONLY IN SOME MODELS)
- Remove the lateral shelf guides.

- Pull the heating element out a little and lower it.


- To reposition the heating element, lift it up, pulling it slightly towards you, making sure it comes to rest on the lateral supports.

TROUBLESHOOTING
| Problem Possible cause Solution | | |
| The oven is not working. | Power cut.Disconnection from the mains. | Check for the presence of mains electrical power and whether the oven is connected to the electricity supply.Turn off the oven and restart it to see if the fault persists. |
| The display shows the letter “F” followed by a number. | Software problem. | Contact the Call Center and state the number following the letter “F”. |
| The display shows unclear text and appears to be broken. | Another language set. Contact the Call Center. |
| Cooking cycle with probe ended without evident cause or error F3E3 is printed on the screen. | Food Probe is not properly connected. | Check connection of the food probe. |
Policies, standard documentation and additional product information can be found by:
• Using the QR code in your appliance
- Visiting our website docs.whirlpool.eu/docs
• Alternatively, contact our After-sales Service (See phone number in the warranty booklet). When contacting our After-sales Service, please state the codes provided on your product's identification plate.
®/TM/© 2025 Whirlpool. Produced under license.


TROUBLESHOOTING
1. LEFT DISPLAY
2. LIGHTING


TEMPERATURE / GRILL LEVEL POWER


TROUBLESHOOTING
1. LEFT DISPLAY
2. LIGHT
GRILL DRIP TRAY GRIDDLE * SLIDING GUIDES *


INSERT GRILL AND OTHER ACCESSORIES


TROUBLESHOOTING
®/TM/© 2025 Whirlpool. Produced under license.


THANK YOU FOR CHOOSING A WHIRLPOOL PRODUCT
1. LEFT DISPLAY
2. LIGHT


TROUBLESHOOTING
1. LEFT SCREEN
2. LIGHT


1. LEFT SCREEN
2. LIGHT

- Gently pull the resistor and lower it.


1. LEFT SCREEN
2. LIGHTING


TROUBLESHOOTING
1. LEFT SCREEN
2. LIGHT
S□- SPECIAL FUNCTIONS
READING THE COOKING TABLE
COOKING DIFFERENT DISHES SIMULTANEOUSLY


TROUBLESHOOTING
THANK YOU FOR CHOOSING A WHIRLPOOL PRODUCT
1. LEFT SCREEN
2. LIGHTING

REPLACING THE BULB

TROUBLESHOOTING
THANK YOU FOR PURCHASING A WHIRLPOOL PRODUCT
To provide you with more complete assistance, register your appliance at www.register10.eu

Carefully read the safety instructions before using the appliance.

PRODUCT DESCRIPTION

1. LEFT SCREEN
2. LIGHT

(IF THE APPLIANCE IS EQUIPPED)
Remove the shelf guides from the oven and remove the protective plastic from the sliding guides.
Attach the upper clip of the guide to the shelf guide and slide it fully into place. Lower the lower clip into position.
Secure the guide by firmly pressing the lower part of the clip onto the shelf guide. Check that the guides can move freely. Repeat these steps on the other shelf guide at the same level.
FUNCTIONS

6TH SENSE
This enables automatic selection of the cooking mode and the best temperature range for all types of food (lasagna, meat, vegetables, cakes and tarts, shortcrust cakes, bread, pizza). To make the best use of this function, follow the instructions in the corresponding cooking table.
STEAM+
Steam+ (steam cooking) allows you to achieve excellent results thanks to the steam in the food preparation cycle. This function suggests the ideal temperature for preparing food according to a large number of recipes; cooking durations and water quantities (100 / 200 ml) for main dishes are shown in the corresponding cooking table, which you can find online. Always activate the steam function when the oven is cold and after pouring drinking water onto the bottom of the interior.
Note: The recommended amount of water exceeds the capacity of the recess in the interior, but the bottom of the oven is designed to successfully handle excess water.
• CASSEROLE
This function suggests the best temperature and cooking mode for pasta dishes.
MEAT
This function suggests the best temperature and cooking mode for meat.
BREAD
This function automatically suggests the best temperature and cooking mode for all types of bread.
PIZZA
This function allows you to make excellent homemade pizza in less than 10 minutes, just like in a restaurant.
The dedicated cooking cycle operates at a temperature above 300 degrees Celsius, making the pizza soft on the inside, crispy on the edges, and perfectly evenly browned.
By combining this function with the Pizza Stone WPro accessory and a 30-minute preheating, you can bake a pizza in 5-8 minutes.
For orders and information, contact after-sales service or visit www.whirlpool.eu.
CAKES
This function suggests the best temperature and cooking method for all types of cakes.
CONVENTIONAL

To make the most of the self-cleaning properties of the catalytic panels, we recommend heating the oven to 200 °C for about one hour using the "Convection baking" function. During this time, the oven must be empty. Then allow the appliance to cool before removing food residues with a non-abrasive sponge.
Note: The use of corrosive or abrasive cleaning agents, rough brushes, scouring pads, or oven cleaning sprays could damage the catalytic surface and destroy its self-cleaning properties.
Contact our after-sales service if you need replacement panels.
REPLACING THE BULB
- Close the door as much as possible.
Firmly grip the door with both hands; do not hold it by the handle.
Simply remove the door by continuing to close it while simultaneously pulling it upwards until it releases from its seat. Place the door to the side, resting it on a soft surface.

- Pull out the heating element and lower it slightly.


- To reposition the heating element, lift it slightly while pulling it towards you and check that it sits on the side supports.

TROUBLESHOOTING


2. LEMPUTÉ
KEPIMAS ORE/KONVEKCINIS KEPSNYS

TRIKČIŲ ŠALINIMAS
1. DISPLEJS KREISAJÄ PUSË
2. APGAISMOJUMS
4. IESLÊGTS/IZSLÊGTS

- Nedaudz izvelciet uz āru sildelementu un nolaidiet to.


PROBLÉMU NOVĚRŠANA


PROBLEEMOPLOSSING
TAKK FOR AT DU KJØPTE ET WHIRLPOOL-PRODUKT
1. VENSTRE DISPLAY
2. LYS


SETTE INN GLIDESKINNENE (HVIS AKTUELT)

TABELL FOR TILBEREDNING MED LUFTSTEKING
| OPPSKRIFT FUNKSJON | | ANBEFALT MENGDE | FORVARM | TEMPERATUR (°C) | VARIGHET (MIN.) | HYLLE OG TILBEH∅R |
| FROSSEN MAT | Frosne pom. frites 650 - 850 g Ja 2001  | | | | | | 4 2 |
Frosne kyllingnuggets 500g Ja 2001  | | | | | | 4 2 |
Fiskepinner 500g Ja 220 15 - 20  | | | | | | 4 2 |
Løkringer 500g Ja 200 15 - 20  | | | | | | 4 2 |
| GR∅NNSAKER | Ferske panerte squash  | 400g Ja 200 15 - 20 | | | | 4 2 |
Hjemmelagde pommes frites  | 300 - 800 g | Ja 200 | 20 - 40 | | | 4 2 |
Blandete grønnsaker  | 300 - 800 g | Ja | 200 | 20 - 30 | | 4 2 |
| K∅TT OG FISK | Kyllingsbryst  | 1 - 4 cm | Ja | 200 | 20 - 40 | | 4 2 |
Kyllingvinger  | 200 - 1500 g | Ja | 220 | 30 - 50 | | 4 2 |
Panert kotelett  | 1 - 4 cm | Ja | 220 | 20 - 50 | | 4 2 |
Fiskefilet  | 1 - 4 cm | Ja | 220 | 15 - 25 | | 4 2 |
Ved tilberedning av fersk eller hjemmelaget mat, smør et tynt lag med olje på overflaten.
MAINTENANCE AND CLEANING
- Pull the heating element out slightly and lower it.


REPLACING THE LAMP
1. LEFT DISPLAY
2. LIGHTING

LOWER THE TOP HEATING ELEMENT
(ONLY IN SOME MODELS)

TROUBLESHOOTING
1. LEFT VISOR
2. LIGHTING
To turn the light on/off.
3. REVERSE

HOW TO INSTALL THE SLIDING RAILS

REMOVING AND REPLACING THE DOOR

THANK YOU FOR PURCHASING A WHIRLPOOL PRODUCT
1. LEFT DISPLAY
2. LIGHT

REPLACING THE BULB
You secure the guide rail by firmly pressing the lower part of the clip against the guide rail. Make sure the runners can move freely. Repeat these steps on the second guide rail at the same level.
Note: The sliding runners can be attached at any level.
FUNCTIONS

6TH SENSE
TEMPERATURE / GRILL LEVEL


TROUBLESHOOTING
1. LEFT CONTROL PANEL
2. LIGHT
To secure the guide rail, firmly press the lower part of the clip onto the oven guide rails. Make sure the sliding rails can move smoothly. Repeat the procedure on the other oven guide rail at the same height.

With gentle pressure, check that the locking levers are in the correct position.

- Slightly pull out the heating element and place it lower.


- To put the heating element back into position, lift it, pull it slightly towards you, and check that it rests on the side supports.

TROUBLESHOOTING
1. LEFT DISPLAY
2. LIGHTING
- RIGHT DISPLAY
ACCESSORIES
| ŽIČANA REŠETKA | PLEH ZA SAKUPLJANJE MASNOĆE | PLEH ZA PEČENJE KLIZNE VOĐICE* |
 |  |  |  |
| Koristi se za pripremu hrane ili kao držač za šerpe, kalupe za kolače i drugo posuđe za pripremu hrane u pećnici. | Koristi se kao pleh za pečenje mesa, ribe, povrća, fokače itd. ili je možete postaviti ispod žičane rešetke ako želite da prikupite saft od pečenja. | Koristi se za pečenje svih vrsta hleba i peciva, kao i pečenja, ribe u sopstvenom soku itd. | Da bi olakšale postavljanje ili uklanjanje dodataka. |
| PLEH ZA PRŽENJE VAZDUHOM | Količina i vrsta dodataka može se razlikovati u zavisnosti od kupljenog modela. Ostali dodaci se mogu kupiti zasebno; za porudžbine i informacije, obratite se postprodajnom servisu.* Dostupno samo na određenim modelima |
 |
| Koristi se za pripremu hrane pomoću funkcije prženja vazduhom, tako što je pleh za pečenje postavljen na niži nivo radi prikupljanja mogućih mrvica ili masnoće. Može se prati u mašini za pranje sudova. |
INSTALLING THE RACKS AND OTHER ACCESSORIES
Remove the guides from the oven and the protective plastic from the sliding guides.
Attach the upper slider clip to the guide and slide it all the way. Lower the lower clip to the desired position.

To attach the guide, attach the lower part of the clip to it. Make sure the sliders move freely. Repeat these steps on the other guide at the same level.
SMART CLEAN
During this special low-temperature cleaning cycle, steam is released which makes it easy to remove all food residues inside the oven. Pour 200 ml of drinking water onto the bottom of the oven and activate the function only when the oven has cooled down.

PYRO

For the best use of the self-cleaning function of the catalytic panels, we recommend heating the oven at 200 °C for about an hour using the "Convection Baking" function. During this process, the oven must be empty. Then let the appliance cool down before removing any food residues with a non-abrasive sponge.
Please note: Using corrosive or abrasive detergents, hard brushes, steel wool, or oven cleaning sprays can damage the catalytic surface and compromise its self-cleaning properties. Contact the after-sales center if panel replacement is needed.
REPLACING THE LAMP
- Disconnect the oven from the power supply.
- Unscrew the lamp cover, replace the bulb, and put the cover back.
- Reconnect the oven to the electrical mains. Please note the following: halogen bulbs of 40 W / 230 V, type G9, T300. The bulb used in this appliance is specially designed for household appliances and is not suitable for room lighting in a household. (EC Regulation 244/2009) Bulbs are available from our after-sales service.
- Close the door as much as possible.
Hold the door firmly with both hands – do not hold it by the handle.
Simply remove the door by continuing to close it while simultaneously pulling it upwards and releasing it from its housing. Lay the door on one side, on a soft surface.

- Refit the door by lifting it towards the oven, aligning the hinge hooks with the housing, and securing the top part into the housing.
- Lower the door, then open it fully. Lower the catches to their original position: Check that you have lowered them completely.

Gently press them to ensure the catches are in the correct position.

- Try to close the door and check that it is flush with the control panel. If not, repeat the steps described above: The door may be damaged if not fitted correctly.
LOWERING THE TOP HEATING ELEMENT
(ONLY ON SOME MODELS)
- Remove the side guides.


- If you wish to change the position of the heating element, pull it slightly towards you, taking care that it rests on the side supports.

TROUBLESHOOTING
| Problem Mogući uzrok Rešenje | | |
| Pećnica ne radi. | Nestanak struje.Isključenje iz električne mreže. | Proverite da li postoji dovod električne energije i da li je pećnica priključena na električnu mrežu.Isključite pećnicu i ponovo je uključite kako biste proverili da li je kvar i dalje prisutan. |
| Na displeju se prikazuje slovo „F“ uz broj. | Problem sa softverom. | Kontakta vårt callcenter och uppge det nummer som följer efter bokstaven “F”. |
| Na displeju se prikazuje nejasan tekst i čini se da je pokvaren. | Podešen je drugi jezik. | Kontaktirajte najbliži postprodajni servisni centar za klijente. |
| Ciklus kuvanja sa sondom se završio bez očiglednog uzroka ili je greška F3E3 odštampana na ekranu. | Sonda za hranu nije pravilno povezana. | Proverite priključak sonde za hranu. |
Guidelines, standard documentation and additional product information can be found at:
THANK YOU FOR PURCHASING A WHIRLPOOL PRODUCT
1. LEFT DISPLAY
2. LIGHT


TROUBLESHOOTING


• Using the QR code in your appliance - Visiting our website docs.whirlpool.eu/docs • Alternatively, contact our After-sales Service (See phone number in the warranty booklet). When contacting our After-sales Service, please state the codes provided on your product's identification plate.
®/TM/© 2025 Whirlpool. Produced under license.


Bride
.2
.2