
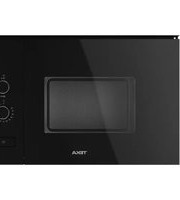
ML 8210 BIS - Microwave TEKA - Free user manual and instructions
Find the device manual for free ML 8210 BIS TEKA in PDF.
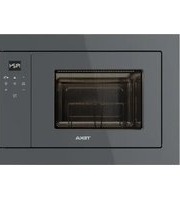


| Brand | Teka |
| Model | ML 8210 BIS |
| Product Type | Built-in Microwave Oven |
| Capacity | Approx. 20 L (estimated) |
| Dimensions (H x W x D) | Approx. 38.2 x 59.5 x 40.0 cm (estimated) |
| Net Weight | Approx. 18 kg (estimated) |
| Power Supply | 220-240 V, ~50 Hz |
| Microwave Power Output | Approx. 800 W (estimated) |
| Grill Power | Approx. 1000 W (estimated) |
| Combination Modes | Microwave + Grill |
| Control Type | Electronic touch control |
| Display | LED digital display |
| Number of Power Levels | 5 (estimated) |
| Defrost Function | Yes, by weight or time |
| Child Lock | Yes |
| Clock Function | Yes |
| Timer | Yes, up to 95 minutes |
| Interior Light | Yes |
| Door Type | Drop-down door |
| Cleaning | Easy-clean enamel interior (estimated) |
| Safety Features | Automatic shut-off, door interlock, overheating protection |
| Spare Parts Availability | Glass turntable, waveguide cover, grill rack (estimated) |
| Repair Index | Replacement parts available through Teka service centers |
Frequently Asked Questions - ML 8210 BIS TEKA
User questions about ML 8210 BIS TEKA
0 question about this device. Answer the ones you know or ask your own.
Ask a new question about this device
Download the instructions for your Microwave in PDF format for free! Find your manual ML 8210 BIS - TEKA and take your electronic device back in hand. On this page are published all the documents necessary for the use of your device. ML 8210 BIS by TEKA.
USER MANUAL ML 8210 BIS TEKA
User Manual
ML 8210 BIS/ MS 6200 BIS
ENESPTAR
ENGLISH

Before using your oven for the first time, please carefully read the installation and maintenance instructions that come with it.
Depending on the model, the accessories included in your oven may vary from those shown in the pictures.
ESPAÑOL

Children and Vulnerable People Safety . 4
General Safety 5
Installation 7
Cleaning and Maintenance 7
Service and Repair 8
Avoid damaging the oven or other dangerous situations by following these instructions 9
Advantages of the microwave oven ..... 10
Microwave oven operating mode ..... 10
Why the food is heated 10
Description of the appliance .... 11
Control Panel 12
Description of functions ...... 12
Basic settings 13
Setting the clock 13
Safety lock 13
Basic functions ...... 14
Microwave 14
Quick Start 14
Function: Grill 14
Microwave + Grill 14
Defrosting by weight (automatic) 15
Defrosting by time (manual) 15
Special functions ...... 16
Special function: Auto1 (cook 500g potatoes) 16
Special function: Auto 2 (slow boiled / stewed dishes) .... 16
Special function: Auto 3 (mashed potato) 16
Memory Function 16
Memory storage procedure 16
Memory use procedure 16
Delete a Memory 16
During operation.... 17
Function interruption 17
End of programme 17
What type of containers may be used? .. 17
Microwave function 17
Test the dishes 17
Grill function 17
Combined function 18
Aluminium containers and foils 18
Lids 18
Table – dishware 18
Cleaning and care 19
Outer surface 19
Inside 19
Door, door-hinges and front of the appliance 20
Mica covers 20
Troubleshooting 20
Technical Features 20
Specifications 21
Environmental protection 21
Energy efficiency 21
Installation instructions 21
Installation 86
Safety Information

Before installing and using the appliance, carefully read the supplied instructions. The manufacturer is not responsible for injuries or damages caused by incorrect installation or use. Always keep the instructions with the appliance for future reference.
Children and Vulnerable People Safety
Warning! Risk of suffocation, injury, or permanent disability.
- This appliance can be used by children aged 8 years and above, and by persons with reduced physical, sensory, or mental capabilities, or lack of experience and knowledge, if they are supervised by an adult or a person responsible for their safety.
- Children should be supervised to ensure that they do not play with the appliance.
- Keep all packaging away from children.
- WARNING: The appliance and its accessible parts become hot during use. Care should be taken to avoid touching heating elements. Children less than 8 years of age shall be kept away unless continuously supervised.
- WARNING: When the appliance is operated in combination mode, children should only use the oven under adult supervision due to the temperatures generated.
- If the appliance has a child safety device, we recommend that you activate it. Children under 3 years must not be left unsupervised in the vicinity of the appliance.
- Cleaning and user maintenance shall not be performed by children without supervision.
General Safety
- This appliance is intended for household use and not for use in hotels, shops, offices, and other similar environments.
- The interior of the appliance becomes hot when in operation. Do not touch the heating elements inside the appliance. Always use oven gloves to remove or insert accessories or ovenware.
- WARNING: Do not heat liquids or other foods in sealed containers. They are liable to explode.
- Only use utensils that are suitable for use in microwave ovens.
- When heating food in plastic or paper containers, keep an eye on the appliance due to the possibility of ignition.
- The appliance is intended for heating food and beverages. Drying of food or clothing and heating of warming pads, slippers, sponges, damp cloth and similar may lead to risk of injury, ignition or fire.
- Warning! The oven cannot be used if:
- The door is not closed correctly;
- The door hinges are damaged;
- The surfaces of the contact between the door and the oven front are damaged;
- The door window glass is damaged;
- There is frequent electrical arcing inside the oven even though there is no metal object inside.
The oven can only be used again after it has been repaired by a Technical Assistance Service technician.
- If smoke is emitted, switch off or unplug the appliance and keep the door closed in order to stifle any flames.
- Microwave heating of beverages can result in delayed eruptive boiling. Care must be taken when handling the container.

• Take care when heating liquids!
When liquids (water, coffee, tea, milk, etc.) are nearly at boiling point inside the oven and are taken out suddenly, they may spurt out of their containers.
DANGER OF INJURIES AND BURNS!
To avoid that type of situation when heating liquids, put a teaspoon or glass rod inside the container.
- WARNING! When removing the container from the microwave, make sure it is not stuck to the turntable to avoid it from falling on the floor.
- The contents of feeding bottles and baby food jars shall be stirred or shaken and the temperature checked before consumption, in order to avoid burns.
- Eggs in their shell and whole hard-boiled eggs should not be heated in the appliance since they may explode, even after microwave heating has ended.
- WARNING! Do not heat pure alcohol or alcoholic drinks in the microwave. FIRE RISK!
- BEWARE! To avoid food overheating or burning it is very important not to select long time periods or power levels that are too high when heating small quantities of food. For example, a bread roll can burn after 3 minutes if the power selected is too high.
- For toasting, use just the grilling function and watch the oven all the time. If you use a combined function to toast bread it will catch fire in a very short time.
- Make sure you never catch the power cables of other electrical appliances in the hot door or the oven. The cable insulation may melt. Danger of short-circuiting!
Installation
- The electrical installation is to be set up so that the appliance can be isolated from the mains with a minimum 3mm all-pole contact separation. Suitable separation devices include e.g. cutouts, RCD's and contactors. This installation must comply with current regulations.
- If the electrical connection is done through a plug and this remains accessible after installation, then it is not necessary to provide the mentioned separation device.
- The installation must comply with current regulations.
- Protection against electric shock must be provided by the electrical installation.
- WARNING! The oven must be earthed.
- WARNING! The appliance is intended to be built in. Please refer to the last pages of this user manual for detailed information on the installation dimensions.
Cleaning and Maintenance
- WARNING! Cut the power supply before cleaning and maintenance.
- The appliance should be cleaned regularly and any food deposits removed.
- Failure to maintain the appliance in a clean condition could lead to deterioration of the surface that could adversely affect the life of the appliance and possibly result in a hazardous situation.
- Do not use harsh abrasive cleaners or sharp metal scrapers to clean the glass door since they can scratch the surface, which may result in shattering of the glass.
- Do not use a steam cleaner to clean the appliance.
- The door contact surfaces (the front of the cavity and the inside part of the doors) must be kept very clean in order to ensure the oven functions correctly.
- Please follow the instructions regarding cleaning in the section "Oven Cleaning and Maintenance".
- WARNING: Ensure that the appliance is switched off before replacing the lamp to avoid the possibility of electric shock. Please refer to the chapter "CHANGING THE OVEN LIGHT BULB".
Service and Repair
- WARNING! Cut the power supply before repair.
- WARNING! Only a competent person can carry out any service or repair operation that involves the removal of a cover which gives protection against exposure to microwave energy.
- WARNING! If the door or door seals are damaged, the appliance must not be operated until it has been repaired by a competent person.
- If the power cable is damaged, it should be replaced by the manufacturer, authorized agents, or qualified technicians to avoid dangerous situations.
- Repair and maintenance work, especially on current-carrying parts, may only be carried out by technicians authorized by the manufacturer.
Avoid damaging the oven or other dangerous situations by following these instructions.
- Never switch on the microwave when it is empty. If there is no food inside, there may be an electrical overcharge and the oven could be damaged. RISK OF DAMAGE!
- For carrying out oven programming tests, put a glass of water inside the oven. The water will absorb the microwaves and the oven will not be damaged.
- Do not cover or obstruct the ventilation openings.
- Do not use metallic dishes and containers during the microwave function. Before using dishes and containers, see the section on types of dishes.
- Never remove the mica cover on the ceiling of the oven interior! This cover stops fat and pieces of food from damaging the microwave generator.
- Do not keep any inflammable object inside the oven as it may burn if the oven is switched on.
- Do not use the oven as a pantry.
- Do not use the oven for frying as it is impossible to control the temperature of oil heated by microwaves.
- The base and the grills can bear a maximum load of 8 kg. To avoid damaging the oven, do not exceed this load.
In a conventional cooker, the heat that is radiated through the resistances or gas burners slowly penetrates the foods from the outside in. Therefore, there is a great loss of energy in heating the air, the oven components, and the containers holding the food.
In the microwave, the heat is generated by the foods themselves, i.e., the heat goes from the inside out. There is no loss of heat to the air, the walls of the cavity, or the containers (as long as they are microwave-safe containers). This means that only the food is heated.
To sum up, microwave ovens have the following advantages:
- Savings in cooking time; in general, there is a 3/4 reduction in time compared to conventional cooking.
- Ultra fast defrosting of foods, thus reducing the danger of bacteria developing.
- Energy-saving.
- Conservation of the nutritional value of foods due to the reduction in cooking time.
Microwave oven operating mode
The microwave oven contains a high voltage valve called a Magnetron, which converts the electrical energy into microwave energy. These electromagnetic waves are channelled towards the inside of the oven by a wave guide and distributed using a metallic disperser or a rotating plate.
Inside the oven, the microwaves are propagated in all directions and reflected by the metallic walls, thus uniformly penetrating the foods.
Why the food is heated
Most foods contain water and the water molecules vibrate with the microwaves.
The friction between the molecules generates heat, which raises the temperature of the foods, defrosting or cooking them or keeping them hot.
Because heat is formed inside the foods:
- The foods may be cooked without any liquids or oils, or with very little of these;
- Defrosting, heating or cooking in the microwave oven is faster than in a conventional oven;
- The vitamins, minerals and nutritious substances are conserved;
- Neither the natural colour nor the aroma are altered.
The microwaves go through porcelain, glass, cardboard or plastic, but not through metal. For this reason, metallic containers or containers with metallic parts should not be used in the microwave oven.
Microwaves are reflected by metal...

...they go through glass and porcelain...

... and are absorbed by the foods.

Description of the appliance

- Glass window on the door 6. Slot for rotating base
- Catch 7. Rotating base
- Quartz grill 8. Turntable support
- Mica covers 9. Rotating plate
- Control panel 10. Grill
Control Panel

Description of functions
| Symbol | Description | Power | Foods |
 | Microwave | P 01 ---- 160W | Slow defrosting for delicate foods, keeping food hot |
| P 02 ---- 320W | Cooking at low heat, boiling riceFast defrosting | ||
| P 03 ---- 480W | Melting butterHeating baby food | ||
| P 04 ---- 640W | Cooking vegetables and other foodsCooking and heating carefully, Heating and cooking small quantitiesHeating delicate foods | ||
| P 05 ---- 750W | Cooking and heating liquids and other foods fast | ||
 | Microwave + Grill | P 01 ---- 95W | Browning toast |
| P 02 ---- 135W | Grilling poultry and meat | ||
| P 03 ---- 170W | Cooking meatloaves and “au gratin” dishes | ||
| P 04 ---- 200W | Preparing meat round | ||
| P 05 ---- 230W | Potatoes “au gratin” | ||
 | Grill | --- | Grill all sorts of foods |
 | Defrosting | --- | Defrosting by time. |
 | --- | Defrosting by weight. | |
 | Automatic cooking | --- | Boiling potatoes. |
 | --- | Fritters and stews | |
 | --- | Mashed potatoes |
Basic settings

Setting the clock
- Press the CLOCK key (5) until the hour numbers start to flash.
- Enter the time value by pressing - or + (7/8).
- Press the CLOCK key (5) again to set the minutes.
- Enter the minute's value by pressing - or + (7/8).
- To finish, press the CLOCK key (5) again.
Safety lock
It is possible to block functioning of the appliance (for example, to prevent it being used by children); to do so:
- Press the STOP / SAFETY BLOCK KEY (6) for 3 seconds. The microwave will beep and the appliance will be locked.
The screen will display four lines and oven operation will be blocked.
- The Clock will continue to be displayed and the Safety block indicator will illuminate on the DISPLAY (10).
Basic functions

Microwave
- Press the PROGRAM KEY «P» (1). The MICROWAVE indicator lights up on the DISPLAY (10). Confirm the function by pressing the PROGRAM KEY «P» (1) again.
- Press the DURATION KEY (2). Enter the desired operating time by pressing - or + (7/8). Confirm by pressing the DURATION KEY (2) again.
- To change the power of the microwave, press the POWER/WEIGHT KEY (3). (If this key is not pressed, the appliance functions at the maximum power.) Enter the desired power by - or + (7/8). Confirm by pressing the POWER/WEIGHT KEY (3) again.
- Press the START KEY (4). The microwave starts to function.
- In order to unlock the microwave, press the STOP / SAFETY BLOCK KEY (6) for 3 seconds. The microwave will beep and the screen will display the clock again.
Quick Start
- In the Standby mode press START (4). The appliance starts immediately to function on the MICROWAVE function at the maximum power for 30 seconds.
- If you would like to increase the functioning time press the START KEY (4) again. Each time the START key (4) is pressed the duration increases in 30 seconds.
Function: Grill
- Press the PROGRAM KEY «P» (1). Select the GRILL function 🐎 by pressing - or + (7/8). Confirm the function by pressing the PROGRAM KEY «P» (1) again.
- Press the DURATION KEY (2). Enter the desired operating time by pressing - or + (7/8). Confirm by pressing the DURATION KEY (2) again.
- Press the START KEY (4). The microwave starts to function.
Microwave + Grill
- Press the PROGRAM KEY «P» (1). Select
the MICROWAVE + GRILL function by pressing - or + (7/8). Confirm the function by pressing the PROGRAM KEY «P» (1) again.
- Press the DURATION KEY (2). Enter the desired operating time by pressing - or + (7/8). Confirm by pressing the DURATION KEY (2) again.
- To change the power of the microwave, press the POWER/WEIGHT KEY (3). (If this key is not pressed, the appliance functions at the maximum power.) Enter the desired power by pressing - or +
(7/8). Confirm by pressing the POWER/WEIGHT KEY (3) again.
- Press the START KEY (4). The microwave starts to function.
Defrosting by weight (automatic)
- Press the PROGRAM KEY «P» (1). Select

the DEFROSTING.BY WEIGHT
function by pressing - or + (7/8). Confirm the function by pressing the PROGRAM KEY «P» (1) again.
- Program « P01 » flashes (by default). Select the food type (program) by pressing - or + (7/8) (see table below). (If no key is pressed, « P01 » is selected by default.) Confirm by pressing the POWER/ WEIGHT KEY (3).
- On the display you will see the weight (ex. « 0.1 » by default) and the weight indicator « kg » flashing. Indicate the weight of the food (ex. «1,2 kg») by pressing - or + (7/8). Confirm by pressing the POWER/ WEIGHT KEY (3). The program you selected before (ex: « P01 ») starts to flash again.
- Press the START KEY (4). The microwave starts to function.
- Turn the foods around at the moment the microwave beeps and starts to flash on the DISPLAY (10): «TURN». Close the door again and press the START key (4).
The following table shows the programmes for the defrosting by weight function, indicating the weight ranges, defrosting and
resting times (to ensure that the food reaches a uniform temperature):
| Prog. | Food | Weight (kg) | Time (Min) | Resting time (Min) |
| P0 1 | Meat | 0,1 – 2,5 | 3 – 75 | 20 – 30 |
| P0 2 | Poultry | 0,1 – 2,5 | 3 – 75 | 20 – 30 |
| P0 3 | Fish | 0,1 – 2,5 | 3:20 – 83 | 20 – 30 |
| P0 4 | Fruit | 0,1 – 1,0 | 2:36 – 26 | 5 – 10 |
| P0 5 | Bread | 0,1 – 1,5 | 2:25 – 36:15 | 5 – 10 |
Defrosting by time (manual)
- Press the PROGRAM KEY «P» (1). Select
the DEFROSTING BY TIME

function by pressing - or + (7/8). Confirm the function by pressing the PROGRAM KEY «P» (1) again.
- Press the DURATION KEY (2). Enter the desired operating time by pressing - or + (7/8). Confirm by pressing the DURATION KEY (2) again.
- Press the START KEY (4). The microwave starts to function.
- When the oven stops and starts to beep, move or turn the foods. To continue, close the door of the microwave and press the start key, to continue the defrosting process.

Special function: Auto1 (cook 500g potatoes)
- Put the potatoes (approx. 500g) with some water in a heat resistant container and place it on the rotating plate in the microwave.
- Press the PROGRAM KEY «P» (1). Select the «AUTO 1» function by pressing - or + (7/8). Confirm the function by pressing the PROGRAM KEY «P» (1) again.
- Press the START key (4). The microwave starts to function, and the screen displays the remaining operating time.
Special function: Auto 2 (slow boiled / stewed dishes)
- Place the ingredients to be slow boiled/stewed (e.g. cabbage, chicken stew) in a bowl, cover the bowl and place on the oven's tray.
- Press the PROGRAM KEY «P» (1). Select the «AUTO 2» function by pressing - or + (7/8). Confirm the function by pressing the PROGRAM KEY «P» (1) again.
- Press the START key (4). The microwave starts to function, and the screen displays the remaining operating time.
- Turn the food around when the microwave beeps and the screen flashes "TURN". Close the door again and press the START key (4).
the screen: «TURN». Close the door again and press the START key (4).
Prepare the mashed potato using 1 kg of raw potatoes. Place the mashed potato in a suitable container (25-26 cm in diameter) and then place it on the microwave tray.
- Prepare the mashed potato using 1 kg of raw potatoes. Place the mashed potato in a suitable container (25-26 cm in diameter) and then place it on the microwave oven tray.
- Press the PROGRAM KEY «P» (1). Select the «AUTO 3» function by pressing - or + (7/8). Confirm the function by pressing the PROGRAM KEY «P» (1) again.
- Press the START key (4). The microwave starts to function, and the screen displays the remaining operating time.
The «MEM» function allows a range of frequently used parameters (time and power) to be stored in the memory. Nevertheless, you may only use it with the main functions:
The «MEM» function allows a range of frequently used parameters (time and power) to be stored in the memory. Nevertheless, you may only use it with the main functions:
Memory storage procedure
Press the PROGRAM KEY «P» (1). Select the desired function (e.g., MICROWAVE) by pressing - or + (7/8). Confirm the function by pressing the PROGRAM KEY «P» (1) again.
- Press the PROGRAM KEY «P» (1). Select the desired function (e.g., MICROWAVE) by pressing - or + (7/8). Confirm the function by pressing the PROGRAM KEY «P» (1) again.
- Set the desired parameters (duration and power) as described in the basic functions.
- Press the PROGRAM KEY «P» (1) until you hear a beep and the DISPLAY (10) displays the word «MEM».
Press the PROGRAM KEY «P» (1). Select the «MEM» function by pressing - or + (7/8). Confirm the function by pressing the PROGRAM KEY «P» (1) again.
- Press the PROGRAM KEY «P» (1). Select the «MEM» function by pressing - or + (7/8). Confirm the function by pressing the PROGRAM KEY «P» (1) again.
- Press the START key (4). The microwave starts to function.
Delete a Memory
- Press the PROGRAM KEY «P» (1). Select the «MEM» function by pressing - or +
(7/8). Confirm the function by pressing the PROGRAM KEY «P» (1) again.
- Press the STOP/ SAFETY BLOCK key (6) until you hear a beep. The oven returns to "Standby" mode.
During operation...
During the cooking process, you may open the door at any moment, as:
- THE PRODUCTION OF MICROWAVES IS IMMEDIATELY INTERRUPTED.
- The grill is deactivated and remains at a high temperature.
- The timer stops and the screen shows the operating time that is left.
If you wish, you may:
- Turn around or move the foods to ensure uniform cooking.
- Change the power of the microwave, using the “−” and “+” keys.
- Select another function, using the function keys.
- Adjust the operating time that is left, by using the “−” and “+” keys.
Close the door again and press the start button. The appliance will start to function again.
Function interruption
To interrupt the programme, press the STOP button or open the door of the appliance.
If you wish to cancel the cooking process, close the door again and press the STOP button. The oven will beep and the screen will display the time.
End of programme
When the programme is finished, the microwave beeps 3 times and the screen displays “End”. The beeps are repeated every 30 seconds, until the door is opened or the “STOP” button is pressed.
What type of containers may be used?
Microwave function
In the microwave function, it is important to remember that the microwaves are reflected by metallic surfaces. Glass, porcelain, ceramic, plastic and paper will allow the microwaves to pass through.
Therefore, metallic pans and dishes for cooking or containers with metallic components or decorations may not be used in the microwave. Glassware and ceramic with metallic decorations or parts (e.g. lead glass) may not be used.
The ideal materials to be used for cooking in a microwave oven are refractory, heat-resistant glass, porcelain or ceramic. Very fine crystal and porcelain should only be used for a short time, to defrost or reheat foods that have already been cooked.
Test the dishes
Place the dish inside the oven at the maximum power level for 20 seconds. If it is cold or not very hot, it is suitable. However, if it gets very hot or causes an electrical arch, it is not suitable.
Hot foods transmit heat to the dish, which may become very hot. Therefore, always use a glove!
Grill function
In the case of the grill function, the dish must be resistant to temperatures of at least 250°C.
Plastic dishes are not suitable.
Combined function
In the combined function, the dishes that are used must be suitable for both microwave and grill cooking.
Aluminium containers and foils
Precooked foods in aluminium containers or wrapped in aluminium foil may be placed in the microwave oven if the following instructions are followed:
- Pay attention to the manufacturer's instructions that are printed on the packaging.
- Aluminium containers should not be higher than 3 cm and they should not come into contact with the walls of the cavity (minimum distance 3 cm). The aluminium lid should be removed.
- Place the aluminium container directly on the rotating plate. If the grille is used, the container should be placed on a porcelain plate. Never put the container directly on the grille!
- The cooking time will be longer because the microwaves only enter the food from above. In case of doubt, only use microwave-safe dishes.
Aluminium foil may be used to reflect the microwaves during the defrosting process. Delicate foods, such as poultry or minced meat, may be protected from excessive heat by covering the respective ends.
Important: the aluminium foil must not come into contact with the walls of the cavity, as this could cause an electrical arch.
Lids
The use of glass or plastic lids or adherent film is recommended, for the following reasons:
- They prevent excessive evaporation (especially in very long cooking periods).
- The cooking process is faster;
- The food does not go dry;
- The aroma is preserved.
The lid should have holes to avoid any type of pressure from building up. Plastic bags should also have openings. Baby bottles and baby food jars and other similar containers must only be heated without the lid, as they might explode if it is left on.
The following table gives general guidelines on the type of dishes that are suitable for each situation.
Table - dishware
| Operating modeType ofdish | Microwave | Grill | Microwave + Grill | |
| Defrost /heat | Cook | |||
| Glass and porcelain 1)Domestic, non fire-resistant, may be washed in dishwasher | yes | yes | no | no |
| Glazed ceramicFire-resistant glass and porcelain | yes | yes | yes | yes |
| Ceramic, earthenware dishesunglazedglazed without metallic decorations | yes | yes | no | no |
| Earthenware dishes | ||||
| glazed | yes | yes | no | no |
| unglazedPlastic dishes 2) | no | no | no | no |
| heat-resistant up to 100°C | yes | no | no | no |
| heat-resistant up to 250°C | yes | yes | no | no |
| Plastic films 3) | ||||
| Cling film | no | no | no | no |
| Cellophane | yes | yes | no | no |
| Paper, cardboard, parchment 4) | yes no no no | |||
| Metal | ||||
| Aluminium foil | yes | no | yes | no |
| Aluminium containers 5) | no | yes | yes | yes |
| Accessories | yes | yes | yes | yes |
- No golden or silver edges and no lead glass.
- Remember the manufacturer's tips!
- Do not use metal clips to close the bags. Perforate the bags. Use films only to cover foods.
- Do not use paper plates.
- Only shallow aluminium containers without lids. The aluminium must not come into contact with the walls of the cavity.
Cleaning and care
BEFORE CLEANING the microwave, ENSURE THAT THE PLUG IS NOT IN THE SOCKET.
After using the appliance, let it cool off. Do not clean the appliance with abrasive cleaning products, scourers that will scratch the surface, or sharp objects.
Outer surface
- Clean the outer surface with a neutral detergent, lukewarm water, and a damp cloth.
- Do not allow water to pass through the outer structure.
Inside
- After each use, clean the inside walls with a damp cloth.
- Do not allow water to enter the ventilation holes of the microwave oven.
- If it has been some time since the last cleaning and the cavity of the microwave oven is dirty, put a glass of water on the tray and connect the microwave at maximum power for 4 minutes. The steam that is released will soften the dirt, which will be easy to clean with a soft cloth.
- Important! The appliance should not be cleaned with steam cleaning machines. The steam may reach the charged parts and cause a short circuit.
- The most soiled stainless steel surfaces may be cleaned using a non-abrasive cleaning product.
- Then they should be rinsed with hot water and dried well.
- Clean accessories after each use. If they are very dirty, steep them first and then use a brush and a sponge. The accessories may be washed in the
dishwasher. Ensure that the rotating plate and respective base are always clean.
Door, door-hinges and front of the appliance
- These parts must always be clean, especially the contact surfaces between the door and the front of the appliance, so that there are no leaks.
- To clean, use a neutral detergent and lukewarm water. Dry with a soft cloth.
Mica covers
Always keep the mica covers clean. Food remaining in the covers may deform it or
Troubleshooting
The appliance does not function properly:
- Is the power plug correctly inserted in the socket?
- Is the door properly closed? The door should make an audible click when it closes.
- Are there any foreign bodies between the door and the ring?
The foods do not heat up or they heat very slowly:
• Did you use a metallic dish by mistake? - Did you select the right operating time and power level? - Did you place a larger or colder amount of food than usual in the microwave?
The food is too hot, dry or burned:
- Did you select the right operating time and power level?
The display shows "HOT"!
- The temperature in the components compartment reached a safety limit. Check the installation conditions.
Technical Features
produce sparks if they go on fire. Therefore, they should be cleaned on a regular basis, but abrasive cleaning products or sharp objects should not be used. Do not remove the covers, to avoid any risk.

There are noises while the appliance is in operation:
- Is there an electrical arch inside the microwave?
- Is the dish coming into contact with the walls of the cavity?
- Are there loose skewers or spoons inside the microwave?
The inside lighting does not come on:
- If all of the functions are operating correctly, the bulb is probably blown. You may continue to use the appliance.
- The light bulb may only be replaced by the Technical Support Service.
The power cable is damaged
- The power cable must be replaced by the manufacturer, authorised agents or technicians that are qualified to perform this task, in order to avoid dangerous situations and because special tools are needed.
If any other type of fault is noticed, contact the Customer Support Service.
All repairs must be performed by specialised technicians.
Specifications
- AC voltage...... (See rating plate)
- Fuse. 8A / 250 V • Power required.... 1200 W
- Grill power.... 1000 W
- Microwave output power. 750 W
- Microwave frequency.... 2450 MHz • Outer dimensions (W×A×D).... 595 × 390 × 350 mm • Cavity dimensions (W×A×D). 305 × 210 × 305 mm
- Oven capacity. 20 l • Weight.... 18,6 kg
Environmental protection
Disposal of the packaging

The packaging bears the Green Point mark.
Dispose of all the packaging materials such as cardboard, expanded polystyrene and plastic wrapping in the appropriate bins. In this way you can be sure that the packaging materials will be re-used.
Disposal of equipment no longer used

According to European Directive 2012/19/EU on the management of waste electrical and electronic equipment (WEEE), home electrical appliances should not be put into the normal systems for disposal of solid urban waste.
Outdated appliances should be collected separately to optimise component material recovery and re-cycling rates and to prevent potential harm to human health and the environment. The symbol of a rubbish container superimposed by a diagonal cross should be put on all such products to remind people of their obligation to have such items collected separately.
Installation instructions
Use the “open” button to open the door and remove all packaging materials. Then clean the inside and the accessories with a damp cloth. Consumers should contact their local authorities or point of sale and request information on the appropriate places to leave their old home electrical appliances.
Before disposing of your appliance, render it non-usable by pulling out the power cable, cutting this and disposing of it.
Energy efficiency
Product information concerning power consumption and the maximum time required to reach the applicable low-power mode.
| Power consumption when the product is off | NA |
| Power consumption in stand-by mode | 0,69 W |
| Time required for the appliance to automatically reach the applicable low-power mode | 5 min. |
cloth and dry them. Do not use abrasive or strong-smelling products.
Ensure that the following parts are in good condition:
- Door and hinges
- Front of the microwave • Inner and outer surfaces of the appliance DO NOT USE THE APPLIANCE if you notice any kind of defect in the aforementioned parts. If this occurs, contact the After Sales Service.
Place the appliance on a stable, flat surface. Fit the rotating base in the centre of the microwave cavity and place the rotating plate on top until it clicks into position. Whenever the microwave is used, both the rotating plate and the respective base must be inside the oven and correctly positioned. The rotating plate turns clockwise and anticlockwise.
![graph TD A["Top Circle"] --> B["Step 1"] B --> C["Step 2"] C --> D["Bottom Circle"]](/content/2026/06/1392272/images/644a7e5953b519b1f203819ee92f0aedc08adf1ef89faa9dfd513ecb54e81991.jpg)
Warning! The microwave oven may be wrapped in a protective film. Before switching it on for the first time, carefully remove this film, starting at the underside.
In order to ensure proper ventilation for the appliance, install the frame in the correct way. Please refer to the following pictures:

Warning: after installing the microwave, it is necessary to guarantee access to the electrical socket.
During installation, ensure that the power cable does not come into contact with the back of the appliance, because the high temperatures may damage the cable.
If you are installing a microwave and a conventional oven in the same column, the microwave must not be placed under the oven, because of the formation of condensation.
The electrical installation is to be set up so that the appliance can be isolated from the mains with a minimum 3mm all-pole contact separation.
Suitable separation devices include e.g. cutouts, fuses (screw fuses are to be taken out of the holder), RCD's and contactors. This installation must comply with current regulations.
If the electrical connection is done through a plug and this remains accessible after installation, then it is not necessary to provide the mentioned separation device.
Protection against electric shock must be provided by the electrical installation
Warning: The oven must be earthed.
The appliance must not be placed in the vicinity of heating elements, radios or television sets.
In case of fault, the manufacturer and the seller will not accept any responsibility if the installation instructions have not been properly followed.
Index

Basic regulations

Clock setting
Microwave
- Door glass 6. Turntable support fitting
- Latch 7. Turntable support
- Quartz grill 8. Motor coupling
- Mica covers 9. Turntable
- Control panel 10. Tempering
Control panel

Basic settings

Setting the clock
Microwave
- Press the PROGRAM key «P» (1). The
- Turntable base opening
Sho Initiative Cardio
Microwave oven
Installation / Instalación / Instalação / التركيب


- ENGLISH
- ESPAÑOL
- ADVANTAGES OF THE MICROWAVE OVEN
- DESCRIPTION OF THE APPLIANCE
- BASIC SETTINGS
- BASIC FUNCTIONS
- SPECIAL FUNCTIONS
- DURING OPERATION
- WHAT TYPE OF CONTAINERS MAY BE USED
- CLEANING AND CARE
- TROUBLESHOOTING
- TECHNICAL FEATURES
- ENVIRONMENTAL PROTECTION
- INSTALLATION INSTRUCTIONS
- INSTALLATION
- SAFETY INFORMATION
- CHILDREN AND VULNERABLE PEOPLE SAFETY
- WARNING! RISK OF SUFFOCATION, INJURY, OR PERMANENT DISABILITY
- GENERAL SAFETY
- CLEANING AND MAINTENANCE
- SERVICE AND REPAIR
- AVOID DAMAGING THE OVEN OR OTHER DANGEROUS SITUATIONS BY FOLLOWING THESE INSTRUCTIONS
- MICROWAVE OVEN OPERATING MODE
- WHY THE FOOD IS HEATED
- SETTING THE CLOCK
- SAFETY LOCK
- MICROWAVE
- QUICK START
- FUNCTION: GRILL
- MICROWAVE + GRILL
- DEFROSTING BY WEIGHT (AUTOMATIC)
- DEFROSTING BY TIME (MANUAL)
- SPECIAL FUNCTION: AUTO1 (COOK 500G POTATOES)
- SPECIAL FUNCTION: AUTO 2 (SLOW BOILED / STEWED DISHES)
- PREPARE THE MASHED POTATO USING 1 KG OF RAW POTATOES. PLACE THE MASHED POTATO IN A SUITABLE CONTAINER (25-26 CM IN DIAMETER) AND THEN PLACE IT ON THE MICROWAVE TRAY
- THE «MEM» FUNCTION ALLOWS A RANGE OF FREQUENTLY USED PARAMETERS (TIME AND POWER) TO BE STORED IN THE MEMORY. NEVERTHELESS, YOU MAY ONLY USE IT WITH THE MAIN FUNCTIONS
- PRESS THE PROGRAM KEY «P» (1). SELECT THE DESIRED FUNCTION (E.G., MICROWAVE) BY PRESSING - OR + (7/8). CONFIRM THE FUNCTION BY PRESSING THE PROGRAM KEY «P» (1) AGAIN
- PRESS THE PROGRAM KEY «P» (1). SELECT THE «MEM» FUNCTION BY PRESSING - OR + (7/8). CONFIRM THE FUNCTION BY PRESSING THE PROGRAM KEY «P» (1) AGAIN
- DELETE A MEMORY
- FUNCTION INTERRUPTION
- END OF PROGRAMME
- MICROWAVE FUNCTION
- TEST THE DISHES
- GRILL FUNCTION
- COMBINED FUNCTION
- ALUMINIUM CONTAINERS AND FOILS
- LIDS
- OUTER SURFACE
- INSIDE
- DOOR, DOOR-HINGES AND FRONT OF THE APPLIANCE
- MICA COVERS
- THE APPLIANCE DOES NOT FUNCTION PROPERLY
- THE FOODS DO NOT HEAT UP OR THEY HEAT VERY SLOWLY
- THE FOOD IS TOO HOT, DRY OR BURNED
- THE DISPLAY SHOWS "HOT
- THERE ARE NOISES WHILE THE APPLIANCE IS IN OPERATION
- THE INSIDE LIGHTING DOES NOT COME ON
- THE POWER CABLE IS DAMAGED
- SPECIFICATIONS
- DISPOSAL OF THE PACKAGING
- DISPOSAL OF EQUIPMENT NO LONGER USED
- ENERGY EFFICIENCY
- INDEX
- BASIC REGULATIONS
- CLOCK SETTING
- INSTALLATION / INSTALACIÓN / INSTALAÇÃO / التركيب
Brand : TEKA
Model : ML 8210 BIS
Category : Microwave