RCPM-7 1A - Food Processor Royal Catering - Free user manual and instructions
Find the device manual for free RCPM-7 1A Royal Catering in PDF.


| Product type | Professional food processor |
| Brand | Royal Catering |
| Model | RCPM-7 1A |
| Bowl capacity | 7 liters |
| Bowl material | Stainless steel |
| Rated power | 1500 W |
| Supply voltage | 220-240 V, 50 Hz |
| Dimensions (W x D x H) | 510 x 410 x 600 mm |
| Net weight | 35 kg |
| Number of speeds | 3 speeds + pulse |
| Main functions | Kneading, mixing, whipping |
| Included accessories | Dough hook, whisk, flat beater |
| Safety devices | Automatic stop in case of overload, thermal protection, safety bowl lock |
| Maintenance and cleaning | Bowl and accessories dishwasher safe; housing cleanable with a damp cloth |
| Spare parts | Available on request from the manufacturer |
| Repairability | Repairability index not provided, but parts available |
| Intended use | Professional use in catering |
Frequently Asked Questions - RCPM-7 1A Royal Catering
User questions about RCPM-7 1A Royal Catering
0 question about this device. Answer the ones you know or ask your own.
Ask a new question about this device
Download the instructions for your Food Processor in PDF format for free! Find your manual RCPM-7 1A - Royal Catering and take your electronic device back in hand. On this page are published all the documents necessary for the use of your device. RCPM-7 1A by Royal Catering.
USER MANUAL RCPM-7 1A Royal Catering
| DE | Produktname: | PLANETENRÜHRWERK |
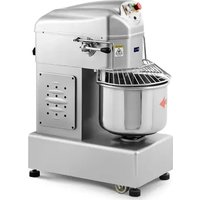
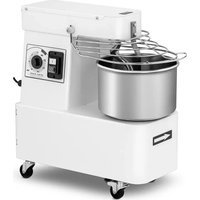
| EN | Product name: | PLANETARY MIXER |
| PL | Nazwa produktu: | MIKSER PLANETARNY |
| CZ | Název výrobku | PLANETÁRNÍ MIXER |
| FR | Nom du produit: | ROBOT PATISSIER AVEC SYSTEME D'AGITATION A PLANETAIRE |
| IT | Nome del prodotto: | IMPASTATRICE PLANETARIA |
| ES | Nombre del producto: | MEZCLADOR PLANETARIO |
| HU | Termék neve | BOLYGÓKEVERŐ |
| DA | Produktnavn | PLANETBLANDER |
| DE | Modell: | RCPM-7,1DRCPM-7,1CRCPM-7,1A |
| EN | Product model: | |
| PL | Model produktu: | |
| CZ | Model výrobku | |
| FR | Modèle: | |
| IT | Modello: | |
| ES | Modelo: | |
| HU | Modell | |
| DA | Model | |
| DE | Hersteller | expondo Polska sp. z o.o. sp. k. |
| EN | Manufacturer | |
| PL | Producent | |
| CZ | Výrobce | |
| FR | Fabricant | |
| IT | Produttore | |
| ES | Fabricante | |
| HU | Termelő | |
| DA | Producent | |
| DE | Anschrift des Herstellers | ul. Nowy Kisielin – Innowacyjna 7, 66-002 Zielona Góra | Poland, EU |
| EN | Manufacturer Address | |
| PL | Adres producenta | |
| CZ | Adresa výrobce | |
| FR | Adresse du fabricant | |
| IT | Indirizzo del produttore | |
| ES | Dirección del fabricante | |
| HU | A gyártó címe | |
| DA | Producentens adresse |
Technical data


1. General Description
The instruction manual is intended to assist in safe and reliable use. The product is designed and manufactured strictly according to technical specifications using the latest technology and components and maintaining the highest quality standards.
PLEASE CAREFULLY READ AND UNDERSTAND THIS INSTRUCTION MANUAL BEFORE OPERATION.
To ensure long and reliable operation of the appliance, make sure to operate and maintain it properly in accordance with the guidelines in this instruction manual. The technical data and specifications contained in this instruction manual are up to date. The manufacturer reserves the right to make changes in order to improve the quality. Taking the technical progress and the possibility of reducing noise into account, the appliance is designed and built in such a way so that risks resulting from noise emissions are reduced to the lowest possible level.
Explanation of symbols
CE | The product complies with applicable safety standards.Please read the instructions before use. |
 | Recyclable product. |
 | CAUTION! or WARNING! or REMINDER! describing a situation.(general warning sign). |
 | Use the safety cover. |
 | CAUTION! Warning of electric shock! |
 | CAUTION! Spinning elements! |
 | CAUTION! Danger of crushing your hand!! |
 | Emergency stop! |
 | For indoor use only. |

CAUTION!
The illustrations in this instruction manual are for reference only and may differ from the actual product in some details.
The original instruction manual is in the German language version. Other language versions are translations from German.
2. Safety of use
CAUTION! Read all safety warnings and all instructions. Failure to follow the warnings and instructions may result in electric shock, fire and/or severe personal injury or death.
The term "appliance" or "product" in the warnings and in the description of the instructions refers to the PLANETARY MIXER.
2.1. Electrical safety
a) The plug of this appliance must fit into the outlet. Do not modify the plug in any way. Original plugs and matching outlets reduce the risk of electric shock. b) Avoid touching grounded parts, such as pipes, heaters, ovens, and refrigerators. There is an increased risk of electric shock if your body is grounded and touches the appliance exposed to direct rain, wet pavement, and operation in a humid environment. If water enters the appliance, there is an increased risk of damage to the appliance and electric shock. c) Do not touch the appliance with wet or damp hands. d) Do not use the cord in an unintended manner. Never use it to carry the appliance or to pull the plug out of the socket. Keep the cord away from heat sources, oil, sharp edges or moving parts. Damaged or tangled cords increase the risk of electric shock. e) If you cannot avoid using the appliance in a wet environment, use a residual device (RCD). Using an RCD reduces the risk of electric shock. f) Do not use the appliance if the power cord is damaged or shows signs of wear. A damaged power cord should be replaced by a qualified electrician or the manufacturer's service department. g) CAUTION - THREAT TO LIFE! When cleaning or using the appliance, never immerse it in water or other liquids. h) Do not use the appliance in rooms with very high humidity / in the immediate vicinity of water tanks!
2.2. Safety in the workplace
a) Keep the work area tidy and well lit. Disorder or poor lighting can lead to accidents. Be foresighted, watch what you are doing and use common sense when using the appliance. b) Do not use the appliance in an explosive area, for example in the presence of flammable liquids, gases or dust. The appliance produces sparks that can ignite dust or fumes. c) If you find any damage or irregularities in the operation of the appliance, immediately turn it off and report it to an authorized person.
d) If you have any doubts as to whether the product is working properly or if it is damaged, contact the manufacturer's service department. e) Only the manufacturer's service department can repair the appliance. Do not carry out repairs yourself! f) In case of open flames or fire, use only dry powder or snow (CO2) fire extinguishers to extinguish the live equipment. g) No children or unauthorized persons are allowed in the work area. (Inattention may result in loss of control of the appliance.) h) Use the appliance in a well-ventilated area. i) In the event of danger to life or limb, accident or breakdown, stop the unit with the EMERGENCY STOP button! j) Check the condition of the safety stickers regularly. Replace them if they are illegible. k) Keep these instructions for use for future reference. If the appliance is to be passed on to a third party, the operating instructions must also be handed over together with the appliance. l) Keep the packaging and small assembly parts out of the reach of children. m) Keep the appliance away from children and animals. n) When using this machine together with other machines, also follow the other instructions for use.
Please note! Keep children and other bystanders safe while operating the appliance.
2.3. Personal safety
a) Do not operate this product if you are tired, ill or under the influence of alcohol, drugs or medication that could impair your ability to operate the product. b) The appliance may be operated by persons who are physically fit, capable of operating it and appropriately trained, and who have read this instruction manual and have been trained in occupational safety and health. c) The machine is not intended to be used by persons (including children) with reduced mental, sensory or intellectual functions or persons who lack experience and/or knowledge unless they are supervised or have been instructed by a person responsible for their safety on how to operate the machine. d) Use caution and common sense when operating this appliance. A moment's inattention during operation may result in serious personal injury. e) To prevent accidental start-up, make sure the switch is in the off position before connecting to a power source.
f) Do not wear loose clothing or jewelry. Keep hair, clothing, and gloves away from moving parts. Loose clothing, jewelry, or long hair can be caught in moving parts. g) Before switching the appliance on, remove any adjusting tools or keys. Any tools or keys left in the rotating part of the appliance may cause injury. h) The appliance is not a toy. Children should be supervised to ensure that they do not play with the appliance. i) Do not place your hands or any objects inside the running appliance!
2.4. Safe use of the appliance
a) Do not overload the appliance. Use tools that are suitable for the application. A correctly selected appliance will do a better and safer job for which it was designed. b) Do not use the appliance if the ON/OFF switch does not function properly (does not turn on and off). Devices that cannot be controlled by the switch are unsafe, cannot operate, and must be repaired. c) Disconnect the unit from the power supply before adjusting, cleaning, or servicing. This precaution reduces the risk of accidental start-up. d) Keep unused equipment out of the reach of children and out of the reach of anyone unfamiliar with the appliance or this instruction manual. These appliances are dangerous in the hands of inexperienced users. e) Keep the appliance in good working condition. Check before each use for general damage or damage to moving parts (cracks in parts and components or any other condition that may affect the safe operation of the appliance). If damaged, have the appliance repaired before use. f) Keep the appliance out of the reach of children. g) Repairs and maintenance should be carried out by qualified personnel using only original spare parts. This will ensure the safety of use. h) To ensure the designed operational integrity of the appliance, do not remove factory-installed covers or loosen screws. i) When transporting or moving the appliance from storage to the place of use, observe the health and safety rules for manual handling applicable in the country where the appliance is used. j) Avoid situations in which the machine stops under heavy loads during operation. This can cause overheating of the drive elements and consequent damage to the equipment. k) Do not touch any moving parts or accessories unless the appliance is unplugged. l) Do not move, shift, or rotate the machine while in operation. m) Do not leave the appliance switched on unattended. n) Clean the appliance regularly to prevent permanent dirt build-up. o) The appliance is not a toy. Cleaning and maintenance must not be performed by children without adult supervision.
p) Do not tamper with the appliance to alter its performance or design. q) Keep the appliance away from sources of fire and heat. r) Do not overload the appliance. s) Do not block the ventilation openings of the appliance! t) Before starting the appliance, make sure that all moving parts are securely fastened in their bases. u) The appliance is intended for food processing only. v) Do not use the machine without the bowl cover in place. w) Do not mix hard and deep frozen products as this may damage the machine.

CAUTION! Although the product has been designed to be safe, with adequate safeguards, and despite the additional safety features provided to the user, there is still a slight risk of accident or injury when handling the appliance. You are advised to use caution and common sense when using this product.
3. Rules of use
The machine is designed for mixing, whisking and kneading food products of different consistencies.
The user is responsible for any damage resulting from misuse.
3.1. Description

- Flange with cap
- Bowl safety guard
- Bowl
- Control panel
- Bowl lifting/lowering lever
- Bowl support arms
- Bowl retaining clamp
- Base
- Flat agitator
- Hook
- Spinning rod
- Meat grinder (for product RCPM-7,1C)
- Spaghetti cutter (for product RCPM-7,1C)
- Fettuccine cutter (for product RCPM-7,1C)
- Pasta roller (for product RCPM-7,1C)
- Base (for product RCPM-7,1C)
Accessories 12, 13, 14, 15, 16 are part of the RCPM-7,1C model. These items are included in the set.
Other models do not have these accessories.

- STOP button
- START/PAUSE button
- 5-step speed adjustment
• Speed 1 - For slow whisking, mashing and kneading of yeast dough. • Speed 2 - For mixing cookies and dough. • Speed 3 - For whisking, creaming and medium speed whisking. • Speed 4 - For whipping heavy cream, egg whites and cooked frosting. • Speed 5 - For whipping small amounts of cream and egg whites.
- Timer setting buttons
- Timer display
3.2. Preparing for use
POSITIONING THE APPLIANCE
The ambient temperature must not exceed 40°C and ambient humidity should not exceed 85%. Position the appliance in a way that ensures good air circulation.
Maintain a minimum clearance of 10 cm from any wall of the unit. Keep the appliance away from any hot surfaces. Always operate the appliance on a level, stable, clean, fireproof and dry surface and out of the reach of children and persons of impaired mental, sensory and intellectual functions. Place the appliance in such a way that the mains plug can be reached at any time. Ensure that the power supply to the appliance corresponds to that specified on the identification plate!
Before using the appliance for the first time, disassemble all parts and wash them as well as the entire appliance.
3.3. Working with the appliance
SELECT AGITATOR AND SPEED:
- Spinning rod
Intended use: for kneading light doughs, mixing eggs, whipping egg whites/cream.
Optimal speed: high (4, 5)
- Flat agitator
Intended use: for kneading flaky pastry dough, pasta and stuffing.
Optimum speed: low (2) or medium (3)
- Hook
Intended use: for kneading sticky doughs, for kneading bread doughs with up to 50-60% water content and maximum volume of 1500g.
Optimum speed: low (1)

CAUTION! Do not knead bread dough at medium or high speed!
MIXER INSTALLATION:
Before installing the mixer, install the bowl:
- Lower the bowl support arms as low as possible.
- Position the bowl so that the positioning piece is in the bowl holder and that the holes on the sides of the bowl match the centering pins (located on the bowl support arms).
- Lock the bowl with the retaining clamp.
INSTALLING THE AGITATOR:
To install the agitator:
- Install and fully lower the bowl.
- Place the selected agitator in the bowl, then lift up and slide into the agitator slot.
- Turn clockwise to seat the agitator correctly.
CHANGING THE SPEED:
To change the speed of the appliance, do the following:
- Stop the appliance with the START/PAUSE button.
- Press the button corresponding to the desired speed.
- Switch the machine on by pressing the START/PAUSE button.
SWITCHING ON THE APPLIANCE
- Place the bowl on the support arms.
- Attach the agitator of your choice (paddle, flat agitator, hook) and check that it is properly attached (the stop on the agitator shaft should sit tightly on the fork of the agitator to prevent it from falling out).
- Insert the previously prepared food ingredients.
- Using the lifting lever, lift the bowl up.
- Close the safety guard.
- Press the button corresponding to the desired speed.
- If necessary, set a timer.
- Start the equipment by pressing the START/PAUSE button.
When work is finished, switch off the mixer using the STOP button. Remove the mixed ingredients. Thoroughly clean the bowl, mixer, safety guard after each use.

CAUTION! The mixer will not turn on if the bowl is not properly raised.

CAUTION! Check that the agitator is properly installed before each use!
RCPM-7.1C MODEL EQUIPMENT:


- Pasta roller
- Spaghetti cutter
- Fettuccine cutter
- Meat grinder with base
The above accessories (for making pasta and grinding meat), should only be used at low (1, 2) or medium (3) speed.
All of the above accessories should be installed in the flange located on the front of the appliance. To install the selected item:
- Remove the flange cap.
- Loosen the knob that secures the component's stem.
- Insert the stem of the selected component into the hole.
- Tighten the knob so that the element is securely fastened.

CAUTION! Disconnect the appliance from the power supply before installing
accessories.
3.4. Cleaning and maintenance
a) Pull the mains plug and let the appliance cool down completely before cleaning, adjusting or replacing accessories and when the appliance is not in use. - Wait until the rotating parts stop. b) Pull out the mains plug before each cleaning and when the appliance is not in use. c) Use only non-corrosive cleaning agents for cleaning the surfaces. d) Only mild detergents designed for cleaning food contact surfaces may be used to clean the appliance. e) After each cleaning, all the parts should be dried well before the appliance is used again. f) Store the appliance in a dry and cool place protected from moisture and direct sunlight. g) Do not spray the appliance with a stream of water or immerse it in water. h) Make sure that no water enters through the ventilation openings in the housing. i) Clean the ventilation openings with a brush and compressed air. j) Perform regular inspections of the appliance checking technical fitness and any damages. k) Do not use sharp and/or metal objects (e.g. a wire brush or metal spatula) for cleaning, as these may damage the surface of the material from which the appliance is made. I) Do not clean the appliance with acidic substances, medical products, diluent, fuel, oil or other chemicals as this may cause damage to the appliance.

ATTENTION! It is forbidden to clean the machine accessories in the dishwasher. All parts that come into contact with food must be washed by hand!
DISPOSAL OF USED APPLIANCES.
At the end of its useful life, this product should not be disposed of with normal household waste but should be taken to a collection point for the recycling of electrical and electronic equipment. This is indicated by the symbol on the product, operating instructions or packaging. The materials used in this appliance are recyclable according to their marking. You will be making an important contribution to protecting our environment by reusing, recycling or otherwise disposing of used appliances.
Your local administration will provide you with information about the appropriate disposal point for used appliances.
Assembly drawings:
| Part name | Description | Quantity |
| 1. | Screw M5*50 | 1 |
| 2. | Oil cover | 1 |
| 3. | Thrust ring 32*1.2 | 1 |
| 4. | Screw M5*20 | 6 |
| 5. | Spring ring 5 | 6 |
| 6. | Bearing cover | 1 |
| 7. | Microswitch | 1 |
| 8. | Contactor | 1 |
| 9. | Flange with cap | 1 |
| 10. | Controller box | 1 |
| 11. | Inner gear wheel | 1 |
| 12. | Safety guard | 1 |
| 13. | Bowl support arms | 2 |
| 14. | Boar 6*18 | 1 |
| 15. | Base | 1 |
| 16. | Rubber washer | 1 |
| 17. | Top cover | 1 |
| 18. | Motor | 1 |
| 19. | Spring ring 6 | 11 |
| 20. | Screw M6*20 | 3 |
| 21. | Oil cover | 1 |
| 22. | Thrust ring 26*1.2 | 1 |
| 23. | Oil bore cover | 1 |
| 24. | Screw M6*25 | 4 |
| 25. | Carbon brush cover | 2 |
| 26. | Casing | 1 |
| 27. | Safety lock | 1 |
| 28. | Trim strip | 1 |
| 29. | Casing | 1 |
| 30. | Screw M4*6 | 5 |
| 31. | Screw M5*12 | 2 |
| 32. | Controller | 1 |
| 33. | Screw M5*20 | 1 |
| 34. | Cable connector | 1 |
| 35. | Cable | 1 |
| 36. | Nut M5 | 2 |
| 37. | Grounding | 1 |
| 38. | Handle | 2 |
| 39. | Lever | 1 |
| 40. | Contactor | 1 |
| 41. | Plate | 1 |
| 42. | Screw M4*6 | 4 |
| 43. | Screw M6*20 | 4 |
| 44. | Gasket | 4 |

| Part name | Description | Quantity |
| 1. | Ball bearing 6201 | 1 |
| 2. | Thrust ring 16 | 1 |
| 3. | Large bevel gear wheel | 1 |
| 4. | Key 4*10 | 1 |
| 5. | Center axis | 1 |
| 6. | Key 4*14 | 1 |
| 7. | Key 4*28 | 1 |
| 8. | Large gear wheel | 1 |
| 9. | Ball bearing 6003 | 1 |
| 10. | O-ring 16*1 | 1 |
| 11. | Oil seal | 1 |
| 12. | Center-axle bushing | 1 |

| Part name | Description | Quantity |
| 1. | Ball bearing 6201 | 2 |
| 2. | Thrust ring 16 | 1 |
| 3. | Gear wheel | 1 |
| 4. | Worm gear | 1 |
| 5. | Key 4*12 | 2 |
| 6. | Gear wheel | 1 |
| 7. | Thrust ring 13 | 1 |
| 8. | Oil bore cover | 1 |

| Part name | Description | Quantity |
| 1. | Flange gland | 1 |
| 2. | Flange cover | 1 |
| 3. | Screw M5*16 | 3 |
| 4. | Spring ring 5 | 3 |
| 5. | Flange | 1 |
| 6. | Lock nut | 1 |
| 7. | O-ring 28*2 | 1 |
| 8. | Gasket | 1 |
| 9. | O-ring 19*2 | 1 |
| 10. | Key 4*10 | 1 |
| 11. | Nylon spacer | 1 |
| 12. | Small bevel gear | 1 |
| 13. | Thrust ring 12 | 1 |

| Part name | Description | Quantity |
| 1. | Plate | |
| 2. | Bowl bolt | |
| 3. | Gasket | |
| 4. | Shockproof rubber | |
| 5. | Screw M5*10 | |
| 6. | Positioning element | |
| 7. | Screw M6*30 | |
| 8. | Nut M6 | |
| 9. | Spring ring 6 | |
| 10. | Screw M4*6 | |
| 11. | Arm |
12.
Bumper

| Part name | Description | Quantity |
| 1. | Stem | 1 |
| 2. | Crankshaft sprocket | 1 |
| 3. | Spring ring 6 | 4 |
| 4. | Screw M6*10 | 1 |
| 5. | Rod | 1 |
| 6. | DIP switch board | 1 |
| 7. | Screw M4*6 | 2 |
| 8. | Microswitch | 1 |
| 9. | Screw M3*12 | 2 |
| 10. | Screw M6*14 | 2 |
| 11. | Plate for pulling arm | 1 |
| 12. | Flat washer 10 | 1 |
| 13. | Flat washer 12 | 2 |
| 14. | Bushing | 1 |
| 15. | Lever | 1 |
| 16. | Screw M8*16 | 1 |
| 17. | Flexible cylinder pin 3*18 | 1 |
| 18. | Flat washer 8 | 3 |
| 19. | Spring | 1 |
| 20. | Nut M8 | 1 |

| Part name | Description | Quantity |
| 1. | Safety switch | 1 |
| 2. | Microswitch | 1 |
| 3. | Thrust ring 4 | 1 |
| 4. | Flat washer5 | 1 |
| 5. | Spring 8*1*40 | 1 |
| 6. | Turning mandrel | 1 |
| 7. | Screw M3*16 | 2 |
| 8. | Screw M4*8 | 2 |
| 9. | Nut M3 | 2 |

| Part name | Description | Quantity |
| 1. | Inner gear | |
| 2. | Spring ring | |
| 3. | Screw M6*16 | |
| 4. | Thrust ring 12 | |
| 5. | Planetary gear | |
| 6. | Rotating plate | |
| 7. | Gasket 10 | |
| 8. | Nut 10 | |
| 9. | Ball bearing 6002 | |
| 10. | Oil seal 17*32*5 | |
| 11. | Key 4*10 | |
| 12. | Mixing shaft | |
| 13. | Ring |
Technical data


| Nombre del elemento | Descripción | Cantidad |
| 1. | Tornillo M5*50 | 1 |
| 2. | Tapa de aceite | 1 |
| 3. | Anillo de tope 32*1.2 | 1 |
| 4. | Tornillo M5*20 | 6 |
| 5. | Anillo elástico 5 | 6 |
| 6. | Tapa del cojinete | 1 |
| 7. | Microinterruptor | 1 |
| 8. | Contactor | 1 |
| 9. | Brida con obturador | 1 |
| 10. | Caja del controlador | 1 |
| 11. | Engranaje interior | 1 |
| 12. | Tapa de seguridad | 1 |
| 13. | Brazos de sujeción del tazón | 2 |
| 14. | Perno 6*18 | 1 |
| 15. | Soporte | 1 |
| 16. | Arandela de goma | 1 |
| 17. | Tapa superior | 1 |
| 18. | Motor | 1 |
| 19. | Anillo elástico 6 | 11 |
| 20. | Tornillo M6*20 | 3 |
| 21. | Tapa de aceite | 1 |
| 22. | Anillo de tope 26*1.2 | 1 |
| 23. | Tapa del agujero de aceite | 1 |
| 24. | Tornillo M6*25 | 4 |
| 25. | Cubierta de la escobilla de carbón | 2 |
| 26. | Carcasa | 1 |
| 27. | Bloqueo de seguridad | 1 |
| 28. | Listón de acabado | 1 |
| 29. | Carcasa | 1 |
| 30. | Tornillo M4*6 | 5 |
| 31. | Tornillo M5*12 | 2 |
| 32. | Controlador | 1 |
| 33. | Tornillo M5*20 | 1 |
| 34. | Empalme de cable | 1 |
| 35. | Cable | 1 |
| 36. | Tuerca M5 | 2 |
| 37. | Toma de tierra | 1 |
| 38. | Empuñadura | 2 |
| 39. | Palanca | 1 |
| 40. | Contactor | 1 |
| 41. | Placa | 1 |
| 42. | Tornillo M4*6 | 4 |
| 43. | Tornillo M6*20 | 4 |
| 44. | Junta | 4 |

| Nombre del elemento | Descripción | Cantidad |
| 1. | Mandril | 1 |
| 2. | Rueda del cigueñal | 1 |
| 3. | Anillo elástico 6 | 4 |
| 4. | Tornillo M6*10 | 1 |
| 5. | Varilla | 1 |
| 6. | Placa del microinterruptor | 1 |
| 7. | Tornillo M4*6 | 2 |
| 8. | Microinterruptor | 1 |
| 9. | Tornillo M3*12 | 2 |
| 10. | Tornillo M6*14 | 2 |
| 11. | Placa de tirar el brazo | 1 |
| 12. | Arandela plana 10 | 1 |
| 13. | Arandela plana 12 | 2 |
| 14. | Manguito | 1 |
| 15. | Palanca | 1 |
| 16. | Tornillo M8*16 | 1 |
| 17. | Pasador cilíndrico elástico 3*18 | 1 |
| 18. | Arandela plana 8 | 3 |
| 19. | Muelle | 1 |
| 20. | Tuerca M8 | 1 |

| Nombre del elemento | Descripción | Cantidad |
| 1. | Interruptor de seguridad | 1 |
| 2. | Microinterruptor | 1 |
| 3. | Anillo de tope 4 | 1 |
| 4. | Arandela plana 5 | 1 |
| 5. | Muelle 8*1*40 | 1 |
| 6. | Mandril del torno | 1 |
| 7. | Tornillo M3*16 | 2 |
| 8. | Tornillo M4*8 | 2 |
| 9. | Tuerca M3 | 2 |


PLACEMENT OF THE DEVICE
TURNING ON THE DEVICE


| Delnavn | Parameter | Antal |
| 1. | Flangedrossel | 1 |
| 2. | Flangedæksel | 1 |
| 3. | Skrue M5*16 | 3 |
| 4. | Fjederring 5 | 3 |
| 5. | Flange | 1 |
| 6. | Låsemøtrik | 1 |
| 7. | O-ring 28*2 | 1 |
| 8. | Møtrik | 1 |
| 9. | O-ring 19*2 | 1 |
| 10. | Nøgle 4*10 | 1 |
| 11. | Nylon afstandsstykke | 1 |
| 12. | Lille konisk gear | 1 |
| 13. | Støttering 12 | 1 |

For the disposal of the device please consider and act according to the national and local rules and regulations.
CONTACT
expondo Polska sp. z o.o. sp. k.
- TECHNICAL DATA
- GENERAL DESCRIPTION
- PLEASE CAREFULLY READ AND UNDERSTAND THIS INSTRUCTION MANUAL BEFORE OPERATION
- EXPLANATION OF SYMBOLS
- CAUTION
- SAFETY OF USE
- ELECTRICAL SAFETY
- SAFETY IN THE WORKPLACE
- PERSONAL SAFETY
- SAFE USE OF THE APPLIANCE
- RULES OF USE
- DESCRIPTION
- PREPARING FOR USE
- POSITIONING THE APPLIANCE
- WORKING WITH THE APPLIANCE
- SELECT AGITATOR AND SPEED
- MIXER INSTALLATION
- INSTALLING THE AGITATOR
- SWITCHING ON THE APPLIANCE
- CLEANING AND MAINTENANCE
- DISPOSAL OF USED APPLIANCES
- PLACEMENT OF THE DEVICE
- TURNING ON THE DEVICE
- CONTACT
Brand : Royal Catering
Model : RCPM-7 1A
Category : Food Processor