
MX-AC400 - Food Processor PANASONIC - Free user manual and instructions
Find the device manual for free MX-AC400 PANASONIC in PDF.


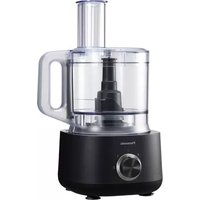
| Product Type | Food Processor |
| Brand | Panasonic |
| Model | MX-AC400 |
| Dimensions (W x D x H) | Approx. 30 cm x 25 cm x 40 cm |
| Weight | Approx. 4.5 kg |
| Power Supply | 220-240 V, 50/60 Hz |
| Power Consumption | 800 W |
| Bowl Capacity | 3.0 L |
| Functions | Chopping, Slicing, Shredding, Kneading, Blending |
| Speed Settings | 2 speeds + Pulse |
| Safety Lock | Bowl and lid locking mechanism |
| Material | Plastic body, Stainless steel blades |
| Dishwasher Safe Parts | Bowl, lid, blades, discs (top rack) |
| Cord Length | 1.2 m |
| Accessories Included | S-blade, slicing disc, shredding disc, dough hook, spatula |
| Warranty | 2 years |
Frequently Asked Questions - MX-AC400 PANASONIC
User questions about MX-AC400 PANASONIC
0 question about this device. Answer the ones you know or ask your own.
Ask a new question about this device
Download the instructions for your Food Processor in PDF format for free! Find your manual MX-AC400 - PANASONIC and take your electronic device back in hand. On this page are published all the documents necessary for the use of your device. MX-AC400 by PANASONIC.
USER MANUAL MX-AC400 PANASONIC
Operating Instructions
Operation Manual
Thank you for purchasing Panasonic product.
This product is intended for household use only. Please read these instructions carefully and follow safety precautions when using this product. Before using this product, please give your special attention to "Safety Precautions". (Page 3-5)
Safety Precautions 3
Parts Identification 10
Safety Lock 12
Circuit Breaker Protection 12
How to Assemble / Disassemble 13
How to Use Plastic Jar with Filter unit 14
How to Use 16
Guide to Functions 18
How to Clean 22
Troubleshooting 24
Specifications 25
McIntosh table
Please observe these precautions fully.
For your safety and in order to prevent property damage and danger to users and others, please read the following instructions strictly.
■ The symbols indicate harm and damage when the product is used wrongly.
| WARNING | Indicating “it may cause severe injuries and death.” |

CAUTION
Indicating “the user may get injured or the product may cause property damage.”
■ The symbols indicate specified items that must be followed.
 This symbol indicates prohibition. This symbol indicates prohibition. |  This symbol indicates mandatory. This symbol indicates mandatory. |

WARNING

Never touch food in the Jar by hand. Always use the Spatula.
To prevent electrical shock, do not let the Motor Housing come in contact with water or any other liquid.
Never leave the appliance running unattended.
Do not bend or put excessive pressure on the Power cord or let the Power cord hang over the edge of the table/slab or touch any hot surface. Do not run the appliance with a damaged Power cord.
Do not use any attachment other than those provided or recommended by the manufacturer. It may cause hazards.
Do not operate the appliance in any manner if it malfunctions or is damaged.
- Never attempt to repair the appliance by yourself or allow any unauthorized person to do so.
- If the supply cord is damaged, it must be replaced by the manufacturer, its service agent or similarly qualified persons in order to avoid a hazard.
Make sure that the voltage and the plug type of the appliance are the same as your supply.
- Keep hands and utensils away from the moving parts while the appliance is in operation to prevent the possibility of severe personal injury or damage to the appliance. The spatula may be used to stir the ingredients only when the machine is switched "OFF".
Keep the appliance away from sources of heat such as gas or electric stoves.
- Be careful if hot liquid is poured into the jar as it can be ejected out of the appliance due to sudden steaming.
- This appliance is not intended for use by persons (including children) with reduced physical, sensory or mental capabilities or lack of experience and knowledge unless they have been given supervision or instruction concerning use of the appliance by a person responsible for their safety. Children should be supervised to ensure they do not play with the appliance.


CAUTION

- Do not place the appliance on an unstable surface.
- Do not run the appliance without assembling the jar unit.
- The chutney jar is fixed with a chutney blade permanently. Do not attempt to remove it. • Do not run the appliance with the empty jar.
- Never load the jar with ingredients beyond the maximum level (See "Guide to Functions" on P.16 for maximum capacity details).
- Do not move the appliance during operation.
- Do not use the power cord if the power plug does not fit in the socket.
- Do not overload the appliance with ingredients (See "Guide to Functions" on P.18).
- Do not put hot ingredients (over 60°C) in the jar.
- Do not open the lid until the rotation of the blade stops completely.

- Ensure that the Blades are assembled on the Jar (See "Parts Identification" on P.8-9).
- Care shall be taken when handling the sharp cutting Blades, emptying Jars and cleaning them.
- Before plugging in/out, make sure that the switch is off and each part is securely set in place.
- Be sure to switch off the appliance and unplug after every use.
- To disconnect the power supply, switch off, grip the plug and pull it from the wall outlet. Never pull the cord.
- Switch off the appliance and disconnect from supply before changing attachment or approaching parts that move in use.
Parts Identification
Parts Identification
Parts Identification
Pre-wash all the parts and accessories (except Motor Housing) before the first use.
Ensure that the Jars and Lids are clean before using.
![graph TD A["Plastic Jar UNIT WITH FILTER"] --> B["Lid Cover"] B --> C["Juice Cap"] C --> D["Lid-Gasket"] D --> E["Filter"] E --> F["Filter Mesh"] F --> G["Filter Gasket"] G --> H["Plastic Jar"] A --> I["Lid Gasket"] I --> J["Top"] J --> K["Bottom"] A --> L["Lid Cover with Filter (FOR JUICER)"] L -->…](/content/2026/06/1379096/images/c9f07eb5a1b0fe68f7b21ac5124df76c06b69c92349b9ffa22ef32e050aab783.jpg)

- Do not use turmeric with the Jar for blending.
- Do not interchange Blades with other Jar. (Assembling a wrong Blade will cause overflow or leak.)

- The Chutney Blade is fixed permanently.
- Do not attempt to remove the Chutney Blade.

To use for assembling and disassembling the Blades or Whipping Plate.
To use for removing contents from the Jar.
To Use for Pushing the fruit contents towards the blade
The Safety Lock has been designed to prevent the appliance from switching on when the Jar is not properly in place. Do not push the Safety Lock with any implement, stick etc.
Keep clean to avoid foreign particle deposits on the Safety Lock.
Safety Lock
Safety Lock
Safety Lock

When Circuit Breaker automatically stops Motor due to overload, press the "OFF" Button.
2 Remove the Jar and reduce its contents to half.
3 After 2 or 3 minutes, tilt the Motor Housing and push the Circuit Breaker Button at the bottom surface. The appliance is now ready for resume.

Circuit Breaker Button
Circuit Breaker Button
Circuit Breaker Button
How to Assemble / Disassemble
How to Assemble / Disassemble
1 Put the Blade or the Whipping Plate inside the Jar.


- To disassemble, reverse the assembly instructions.
2 Hold the Jar coupler at the bottom.
3 Tighten the Blade knob (black) with the Spatula (anti-clockwise direction).
The Chutney Blade is fixed permanently. Do not attempt to remove the Blade.
- Attach the lid Gasket to the Lid with grooved slide down.
- Set the Hook on and make sure the Lid is locked.
- In case the Lid is forced to open without pushing the Button, the Hook may break.
How to Use Plastic Jar with Filter Unit
1. Filter Gasket fixing.
Fix the Filter Gasket at the bottom of the Filter.
2. Put the Filter in the Plastic Jar.
Please ensure, the rib of the Filter is placed properly on the Plastic Jar Flow Breaker lines.
These Grooves are located at the top of Plastic Jar Flow Breaker Lines.
These Grooves are located at the bottom of Plastic Jar Flow Breaker Lines.
Plastic Jar Flow Breaker Lines
Cut the ingredients into small enough pieces to fit into the feeder hole with proper water capacity. Make sure the buttons are not pressed down on the Motor Housing.
4. Put the Lid-J on the Plastic Jar first.
Turn the Lid Cover until it stops.
Set the hook of Lid-J onto the Plastic Jar. Make sure the Lid cover is closed over the Lid-J.
5. Then set it on the Motor Housing.
- Line up the triangles.
Align the triangles.
Never open or close the Lid-J when the Plastic Jar is placed on the Motor Housing as the Blade is still moving for a while after switching off.
- Turn the Jar until it stops.
6. Plug in and press the switch button. While operating, hold the Lid-J down.
When adding extra ingredients, turn off the Switch. Remove the Plastic Jar from the Motor Housing and repeat steps 3-5.
If any fruit ingredients get stuck inside the Filter unit above the Blade without getting crushed, use the Fruit Pusher by following the directions below:
Step-1: If fruit gets stuck inside the Filter unit without grinding, first open the Lid Cover with the Mixer in running condition.
Step-2: Insert the Fruit Pusher into the Filter unit in the direction as illustrated in the image.
Step-3: Stir down the un-crushed fruits by Fruit Pusher towards the Blade.
Step-4: Ensure all the fruit pieces are crushed well. Then remove the Fruit Pusher from the Filter unit.
Step-5: Replace the Lid Cover over Lid-J after removing the Fruit pusher and run Mixer until complete.
8. To Transfer the Juice
Pour the juice.
To transfer the juice.
After extracting Juice, press the "OFF" button and remove the Plastic Jar from the Motor Housing. Open the Juice Cap and transfer the juice to the containers.
How to Use
How to use
How to use
Use the recommended Jar only for the recommended functions like blending and Whipping, etc. (See to "Guide to Functions" on page 18).
Make sure the Buttons are not pressed down on the Motor Housing.
Place the ingredients.
Do not use turmeric with the Jar for blending.
2 Put the Lid on the Jar first, then set it on the Motor Housing.
1 Line up the triangles.
2 Turn the Jar until it stops.
3 Plug in and press the Switch Button. While operating, hold the Lid down.

Please run the appliance for short duration. Pause for 3 minutes and then resume.

4 Press the "OFF" Button and remove the Jar. Then take out the contents.


Unplug after every use.

Blades are very sharp. Handle them carefully.

Never open or close the Lid when the Jar is placed on the Motor Housing as the Blade is still moving for a while after switching off.
- Use the FUS when whipping cream and ensure that it is well chilled.
• Take extra care not to overwhip cream or drinks containing cream, which causes cream to separate into butter and whey.
- A maximum of 5-6 egg whites are needed to whip up to a stiff consistency. Ensure that the Jar and Blade are totally dry and free of greases or fat. Even a tiny of yolk prevents whites from whipping up stiffly.
- Avoid over blending fruits like grapes to prevent the seeds from getting crushed.
• Running Time duration: 30 seconds
- Avoid over blending fruits like grapes and sweet lime to prevent the seeds from getting crushed. For apple, orange, and sweet lime, use 250g of ingredients and 375g of water, and blend for 30 seconds. For carrot, use 250g of ingredients and 375g of water, and blend for 45 seconds.
- The ingredients should be free from moisture. Dry them in sunlight or roast before grinding.
- Add harder ingredients like turmeric and dals first to grind masala to a uniform blend.
- For tough grinding, rest the mixer for short intervals while operating.
- Break turmeric into pieces smaller than 1 cm before grinding. Always grind turmeric with other ingredients.
• Running Time duration: 90 seconds
- Use the Pulse or Speed 1 first to crush the ingredients. Add water as required and grind at Speed 2. Stop the mixer and scrape the paste with a spatula in between grinding. Replace the lid and grind till done.
• Running Time duration: 90 seconds
*The Chutney Jar is used for dry and wet grinding such as small quantities of masala powders, pastes, and chutneys. When grinding very small quantities, use Speed 1 and rest the mixer at short intervals.
Remarks
Notes
Heater
- All ingredients must be dry and free from moisture.
• Running Time duration: 90 seconds
- When grinding a masala paste which contains dry and moist ingredients (cumin, coriander seeds, dal, ginger, garlic, and green chillies), add the dry ingredients in the Chutney Jar first and powder them. Then add moist ingredients like green chillies, ginger, garlic, and a small quantity of water and grind to a paste.
- Slice the ginger and peel the garlic. Place them in the Chutney Jar. Use the PULSE to crush them, then add a small amount of water and grind to a paste.
● Lightly roast the poppy seeds and grind them to powder. Then add a little water and grind them to paste.
- Roast the poppy seeds lightly. Place them in the Chutney Jar and grind them to powder. Then add a little water and grind to paste.
- Place the ingredients in the Chutney Jar. Use the PULSE to crush them. Then add a little water and grind to paste.
- If the recipe does not contain any thick ingredients like coconut or roasted grams, it is not necessary to add water. Place the ingredients with salt to taste in the Chutney Jar (The salt brings out the moisture in the leaves and promotes smooth grinding of the chutney). Use the Pulse to crush and grind to paste.
- Running Time duration: 90 seconds
- Unplug and handle the Blades with care.
• Use the liquid soap mixed with water and soft sponge.
Do not use benzines, thinners, cleansers, scouring pads, etc.. (Damaging the surface)
- Do not use hot water over 60°C or dishwasher.
Wash with soft sponge.
To Pre-wash before and after using Jar
(Prewashing does not apply to the Mill Jar and Chutney Jar.)
our 250 mL lukewarm water in the Jar.
2 Press Button and operate the appliance for about 10 seconds.
3 switch off and unplug.
4 Disassemble and throw away water.
To clean Blades
Wash by a brush with handle.
Handle them carefully to avoid cutting hand or fingers.
Wipe the Motor Housing with well wrung damp cloth.
Lid-J Cleaning
Lid-J Cleaning
| Model No. | MX-AC400 | ||
| Power Supply 220 - 240 V | 50 - 60 Hz ~ | ||
| Power Supply | 240 V ~50 Hz* | ||
| Power Consumption 340 - 360 W | |||
| Power Consumption 360 W* | |||
| Protection Circuit Breaker | |||
| Material | Motor Housing Plastic (ABS) | ||
| Jar Stainless Steel (SS 304) | |||
| Plastic Jar Plastic (Polycarbonate) | |||
| Lid-J Plastic (Polycarbonate) | |||
| Lid Cover Plastic (Polycarbonate) | |||
| Lid Gasket Rubber (EPR) | |||
| Mill Jar Stainless Steel (SS 304) | |||
| Chutney Jar Stainless Steel (SS 304) | |||
| Lid Plastic (Polycarbonate) | |||
| Blade Stainless Steel Hard Type (SS 304) | |||
| Filter Plastic (ABS) | |||
| Filter Mesh Stainless Steel (SS 304) | |||
| Filter Gasket | Rubber (Silicone Rubber) | ||
| Speed Control | 3 Speed with 1 Pulse and 1 Off Button (Piano Type Buttons) | ||
| Capacity | Plastic Jar with Filter | Max | 0.65 L (Wet only-With Filter)1.0 L (Wet only-Without Filter) |
| Stainless Steel Jar | 1.0 L (Wet only) | ||
| Mill Jar | 0.5 L (Dry) / 0.3 L (Wet) | ||
| Chutney Jar | 0.2 L | ||
| Weight | 6.6 kg | ||
| Accessories | Whipping Plate, Spatula and Fruit Pusher | ||
* Only available in QATAR
Specifications
© Panasonic Corporation 2013
Printed in India VZ50Y2242

- OPERATING INSTRUCTIONS
- MCINTOSH TABLE
- CAUTION
- WARNING
- PARTS IDENTIFICATION
- HOW TO ASSEMBLE / DISASSEMBLE
- HOW TO USE PLASTIC JAR WITH FILTER UNIT
- FILTER GASKET FIXING
- PUT THE FILTER IN THE PLASTIC JAR
- PUT THE LID-J ON THE PLASTIC JAR FIRST
- THEN SET IT ON THE MOTOR HOUSING
- PLUG IN AND PRESS THE SWITCH BUTTON. WHILE OPERATING, HOLD THE LID-J DOWN
- TO TRANSFER THE JUICE
- HOW TO USE
- PUT THE LID ON THE JAR FIRST, THEN SET IT ON THE MOTOR HOUSING
- REMARKS
- NOTES
- HEATER
- LID-J CLEANING
Brand : PANASONIC
Model : MX-AC400
Category : Food Processor