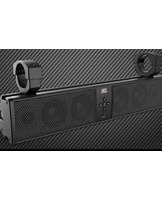
MUD6SPBT - Car speaker MTX Audio - Free user manual and instructions
Find the device manual for free MUD6SPBT MTX Audio in PDF.


| Product Type | Car Audio Speaker |
| Brand | MTX Audio |
| Model | MUD6SPBT |
| Speaker Size | 6.5 inches |
| Type | Coaxial Marine Bluetooth Speaker |
| Impedance | 4 ohms |
| Power Handling (RMS) | 100 Watts |
| Peak Power | 200 Watts |
| Sensitivity | 90 dB |
| Frequency Response | 50 Hz - 20 kHz |
| Bluetooth | Yes, Version 5.0 |
| LED Lighting | RGB (optional) |
| Marine Rating | IPX6 (water resistant) |
| Mounting Depth | 3.0 inches |
| Cutout Diameter | 5.8 inches |
| Weight (each) | 1.5 lbs |
| Power Supply | 12V DC (from vehicle) |
| Recommended Amplifier | Not required (built-in amplification) |
| Material | Polypropylene cone, rubber surround |
| Tweeter | 1-inch PEI dome |
| Cleaning | Use a soft, damp cloth; avoid harsh chemicals. |
| Safety | Disconnect battery before installation; secure mounting to avoid loose panels. |
| Spare Parts | Not available; contact MTX for service. |
| Reparability | Non-user-serviceable; seek professional repair. |
Frequently Asked Questions - MUD6SPBT MTX Audio
User questions about MUD6SPBT MTX Audio
0 question about this device. Answer the ones you know or ask your own.
Ask a new question about this device
Download the instructions for your Car speaker in PDF format for free! Find your manual MUD6SPBT - MTX Audio and take your electronic device back in hand. On this page are published all the documents necessary for the use of your device. MUD6SPBT by MTX Audio.
USER MANUAL MUD6SPBT MTX Audio
natural_image
Technical line drawing of a multi-tiered audio amplifier with four speakers and control buttons (no text or symbols)
OWNER'S MANUAL
MUD6SPBT
UNIVERSAL BLUETOOTH SOUND BAR

Bluetooth™

Near Field Communication
IMPORTANT NOTICE
If you have any questions regarding wire routing in a vehicle, please contact MTX Technical Support at 1-800-225-5689.
When connecting power and ground wires ensure that the red power wire is fused at the point where it is connected to the vehicle's battery. Failure to do so can result in damage to the vehicle if a short circuit develops between the vehicle connection point and the product.
PRODUCT INFORMATION
Model # ____
Serial #
Dealer's Name ____
Date of Purchase ____
IN THE BOX
• Universal Bluetooth Sound Bar
• Installation Cables (Power/Ground/Accessory)
• Universal Mounting Clamps
INTRODUCTION
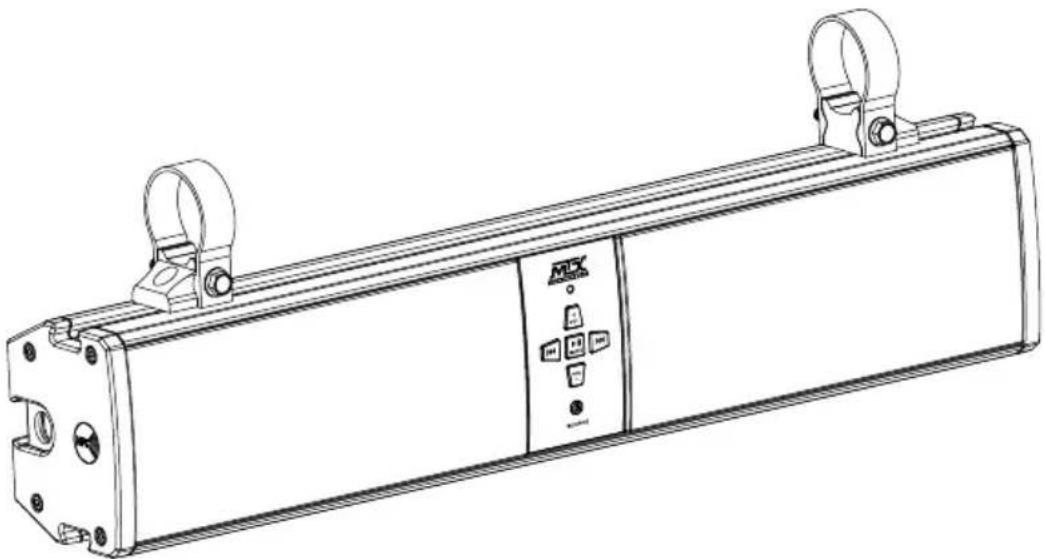
Thank you for purchasing this MTX Audio Universal Bluetooth Sound Bar that is designed to work with most Bluetooth enabled devices including iPhone® and Android® smartphones and tablets.
This easy to install and use all in one unit is capable of transforming your Bluetooth enabled mobile device into the center of your vehicle's audio system. Designed to mount a variety of bars including roll cages, towers, and handlebars, it can be used on motorcycles, side-by-sides, boats, or trucks.
Congratulations and enjoy the ultimate audio experience with MTX!
FEATURES
- Four 3" Full Range Speakers and Two 1" High Frequency Tweeters
- All-Weather Construction for Use In Almost Any Environment
- Integrated Bluetooth Receiver
- Auxiliary Input for Connecting Devices Via 3.5mm Cable
- Auxiliary Output for Connecting An External Amplifier or Additional Sound Bar
- Patent Pending Low Clearance Mounting Clamps Fit 1.75" and 2" Bars
• Power, Ground, and Accessory Wire Included For Easy Installation - Automated Bluetooth Pairing via NFC
natural_image
Technical line drawing of a mechanical device with mounting brackets and control panel (no text or symbols)- Tap the Power button to turn the unit on. (Power, Ground, and ACC wire need to be connected to a 12V power source.)
- Tap the Power button to switch modes between Bluetooth and AUX.
- Hold the Power button for 2 seconds to turn the unit Off. Note: The buttons will stay illuminated as long as the ACC wire has 12V applied to it.
- The included fuse loop, ring terminals, and butt connector allow for easy wire connection to a 12V power source.
Note: The indicator light will illuminate Blue when in Bluetooth mode and Green when in AUX mode.
OPERATION
Follow these steps to utilize the Bluetooth functionality using a Bluetooth enabled device:
- Power the unit On by tapping the Power button once.
- Select Bluetooth by tapping the Power button until it blinks Blue.
- Select "MTX Sound Bar" from the menu on your Bluetooth enabled device. The unit will power on in Bluetooth mode first when it is turned on by tapping. If the accessory wire is disconnected, (vehicle is turned off and then turned on) the unit will revert back to the previous Bluetooth or AUX setting.
- Choose "Pair" when prompted.
- Once "Paired" the unit will be able to play audio from your Bluetooth device.
The front panel control buttons will control track forward/back and volume up/down in this mode. The Play/Pause button will mute the output and the LED indicator will blink Blue when in Mute mode.
Follow these steps to utilize Bluetooth in a NFC (Near Field Communication) enabled device:
- Power the unit On by tapping the Power button once.
- Select Bluetooth by tapping the Power button until it blinks Blue.
- Tap the NFC enabled device on the left side of the enclosure (marked by NFC label).
- Choose "Pair" when prompted.
- Once "Paired" the unit will be able to play audio from your NFC device.
Follow these steps to utilize an Auxiliary input device:
- Power the unit On by tapping the Power button once.
- Select Auxiliary by tapping the Power button until it blinks Green.
- Connect an audio device to the AUX input using the "Green" 3.5mm input on the side of the unit. The LED will illuminate Green, and will blink Green when in mute mode.
The front panel control buttons will adjust the Volume up/down in this mode. The Play/Pause button will mute the audio output and the LED indicator will blink Green when in Mute mode.
Using the auxiliary output (black connector).
- Auxiliary out is a variable output that allows connection to a secondary audio device, whether it is an external amplifier connected to speakers or subwoofer.
- The MUD6SPBT can be used with a second MUD6SPBT unit. For the best audio performance, the second unit connected via Auxiliary should have the volume set to the max.
Controlling the Volume
The LED indicator light will blink in both Bluetooth and AUX modes at max volume.
INSTALLATION
The MUD6SPBT can be used with any 12-volt battery and can be mounted to a variety of bars using the included hardware. The unit has three wires in its wiring pigtail. The red wire, hot, should be directly connected to the vehicles positive battery terminal, the black wire, ground, should be connected directly to the vehicle's chassis where paint has been removed or the negative terminal on the battery, and the blue wire, accessory, should be connected to the ignition wire on the vehicle.
The unit includes two patent pending low clearance brackets that fit 1.75" and 2" bars. The clamps can be used on either the top channel, rear channel, or bottom channel and each channel can be adjusted to fit multiple types of bars including vertical, horizontal, or angled bars allowing for multiple installation options.
Mounting
- Via Pipe Clamp (Bracket)
- Via Hex Bolt through Dove Tail Piece
Mounting via Pipe Clamp (Bracket)
- Take 14 mm bolt with lock washer and place it through bottom of clamp and slightly thread into Dove tailed piece.
- Slide assembly and lock washer into one of the three dove tail recessed areas placing the unit at angle/mounting location to dial in bracket angle and placement.
- Tighten bolt down 95in.lbs. / 8ft.lbs. max to securely hold bracket in place.
- Do this for both brackets as two are included with each speaker bar. NO less that two should be used during installation.
- Place bracket strap over the bar the unit will be mounted to. Note: Placing the included plastic bag between the strap clamp and bar will reduce the possibility of scratching the bar during installation.
- Place the flange end bolt through the bracket strap and base. Tighten down with the included serrated flange nut until the bar is securely locked in place.
- Connect wires to power, ground, and ignition.
Mounting Via Hex Bolt through Dove Tail Piece
- Included are two hex bolts that fit into the dove tails.
- Slide dove tails with bolts in to one of the three recessed areas.
- Place bolts in location where the unit is to be tightened down.
- Use included lock washer and nuts to secure into place.
- Tighten nut 95in.lbs. / 8ft.lbs. max so unit is secure.
- Connect wires to power, ground, and ignition
NOTES:
NOTES:
NOTES:
This equipment has been tested and found to comply with the limits for a Class B digital device, pursuant to Part 15 of the FCC rules. These limits are designed to provide reasonable protection against harmful interference in a residential installation. This equipment generates, uses, and can radiate radio frequency energy and, if not installed and used in accordance with the instructions, may cause harmful interference to radio communications. However, this is no guarantee that interference will not occur in a particular installation. If this equipment does cause harmful interference to radio or television reception, which can be determined by turning the equipment off and on, you are encouraged to try to correct the interference by one or more of the following measures:
- Reorient or relocate the receiving antenna.
- Increase the separation between the equipment and receiver.
- Connect the equipment to an outlet on a different circuit than the one to which the receiver is connected.
- Consult the dealer or an experienced radio/TV technician for help.
Changes or modifications not expressly approved by Mitek Corporation could void the user's authority to operate this equipment. This device complies with part 15 of the FCC Rules. Operation is subject to the following two conditions: (1) This device may not cause harmful interference, and (2) this device must accept any interference received, including interference that may cause undesired operation
© 2015 Mitek Corporation. All rights reserved. MTX is a trademark of Mitek Corporation. Designed and Engineered in the U.S.A.
Due to continual product development, all specifications are subject to change without notice.
MTX Audio, 4545 East Baseline Rd. Phoenix, AZ 85042 U.S.A. 1-800-225-5689
MTX005086 RevC 10/15 • 21A10460 • AW0015206

Brand : MTX Audio
Model : MUD6SPBT
Category : Car speaker