
SFSM 850 A1 - Grill SILVERCREST - Free user manual and instructions
Find the device manual for free SFSM 850 A1 SILVERCREST in PDF.


| Product Type | Electric Grill |
| Brand | SilverCrest |
| Model | SFSM 850 A1 |
| Power Consumption | 850 W |
| Power Supply | 220-240 V ~ 50/60 Hz |
| Dimensions (approx.) | 40 x 20 x 10 cm |
| Weight (approx.) | 2 kg |
| Cooking Surface | Non-stick coated |
| Temperature Control | Adjustable thermostat |
| Indicator Light | Power and ready light |
| Cool-Touch Handle | Yes |
| Drip Tray | Removable, dishwasher safe |
| Non-Slip Feet | Yes |
| Cleaning | Wipe with damp cloth; do not immerse in water |
| Safety Features | Overheat protection, automatic shut-off |
| Spare Parts Availability | Replacement parts available via manufacturer |
| Repairability | Repairable by qualified personnel; spare parts for 10 years |
| Included Accessories | Instruction manual |
Frequently Asked Questions - SFSM 850 A1 SILVERCREST
User questions about SFSM 850 A1 SILVERCREST
0 question about this device. Answer the ones you know or ask your own.
Ask a new question about this device
Download the instructions for your Grill in PDF format for free! Find your manual SFSM 850 A1 - SILVERCREST and take your electronic device back in hand. On this page are published all the documents necessary for the use of your device. SFSM 850 A1 by SILVERCREST.
USER MANUAL SFSM 850 A1 SILVERCREST
TOSTIERA SFSM 850 A1
IT MT
TOSTIERA
Operating instructions
IAN 285921
IT MT
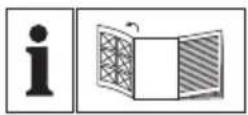
Before reading, unfold the page containing the illustrations and familiarise yourself with all functions of the device.
DE AT CH
GB/MT Operating instructions Page 19

Indice
Introduzione 2
Diritto d'autore 2


KOMPERNASS HANDELS GMBH
BURGSTRASSE 21
DE-44867 BOCHUM
GERMANIA
www.kompernass.com
Contents
Introduction 20
Copyright 20
Limitation of liability 20
Intended use 20
Package contents 21
Disposal of the packaging 21
Appliance description 22
Technical data 22
Safety information 23
First use 25
Preparing food 26
Assembling the appliance 26
Adding foods to the appliance 27
Removing food 28
Cleaning 29
Storage 30
Troubleshooting 30
Recipes 30
Cucumber salad with salmon for 2 sandwiches 30
Guacamole with salsa for 2-3 sandwiches 31
Hawaiian toast with egg for 2 sandwiches....3 2
Tuna and tomato for 2-3 sandwiches 33
Disposal 34
Kompernass Handels GmbH warranty 34
Service 35
Importer 35
Introduction
Congratulations on the purchase of your new appliance!
You have chosen a modern, high-quality product. These operating instructions are part of the product. They contain important information about safety, usage and disposal. Before using the product, please familiarise yourself with all operating and safety instructions. This appliance may only be used as described and for the purposes indicated. Please also pass these operating instructions on to any future owner.
Copyright
This documentation is protected by copyright.
Any copying or reproduction, including in the form of extracts, or any reproduction of images (even in a modified state), is permitted only with the written authorisation of the manufacturer.
Limitation of liability
All the technical information, data and instructions regarding installation, connection and operation contained in these operating instructions correspond to the latest information available to us at the time of printing and takes our previous experience and know-how into account.
No claims can be derived from the details, illustrations and descriptions in these instructions.
The manufacturer assumes no responsibility for damage caused by failure to observe these instructions, improper use, incompetent repairs, unauthorised modifications or for the use of non-approved replacement parts.
Intended use
This appliance is only intended for the roasting/cooking/frying of food.
This appliance is intended solely for use in private households. Not for commercial use!
Package contents
The appliance is supplied with the following components as standard:
● Breakfast Sandwich Maker (basic appliance, 2 rings, 1 cooking plate)
- Operating instructions
1) Remove the appliance and the operating instructions from the carton.
2) Remove all packaging material.
NOTE
▶ Check the package for completeness and signs of visible damage.
▶ If the delivery is incomplete or damage has occurred as a result of defective packaging or during transport, contact the Service hotline (see section Service).
Disposal of the packaging
The packaging protects the appliance from damage during transport. The packaging materials have been selected for their environmental friendliness and ease of disposal, and are therefore recyclable.

Returning the packaging to the material cycle conserves raw materials and reduces the amount of waste that is generated. Dispose of packaging materials that are no longer needed in accordance with applicable local regulations.
NOTE
▶ If possible, keep the original appliance packaging for the entire duration of the warranty period so that the appliance can be packed properly for return shipment in the event of a warranty claim.
Appliance description
Figure A:
① Lid handle
② Green READY control lamp
③ Red POWER control lamp
Figure B:
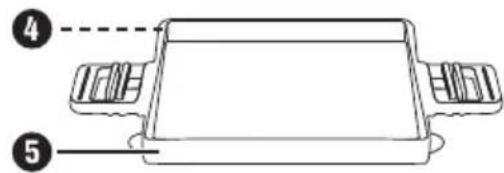
④ Fixing holes (upper ring)
⑤ Upper ring
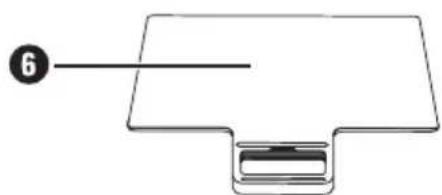
6 Cooking plate
⑦ Fixing holes (lower ring)
8 Lower ring
9 Hotplate (bottom)
10 Holding pins
⑪ Hotplate (top)
Technical data
| Voltage 220 - 240 V ~, 50/60 Hz | |
| Power consumption 850 W | |
| All of the parts of this appliance that come into contact with food are food-safe. |
Safety information

WARNING! RISK OF ELECTRIC SHOCK!
- Arrange for defective power plugs and/or cables to be replaced as soon as possible by a qualified technician or by our Customer Service Department to avoid the risk of injury.
▶ Use the appliance only in dry indoor areas, not outdoors.

Never immerse the appliance in water or other liquids! Otherwise there is a risk of an electric shock.
▶ During cleaning, make sure that no water gets into the appliance. Never clean the appliance under running water.
▶ Ensure that the appliance can never come into contact with water. Never use the appliance adjacent to water or close to vessels containing liquids.
▶ Ensure that the power cable never gets wet or damp when the appliance is in use. Route the cable so that it cannot be trapped or damaged in any way.
▶ After use, disconnect the power cable from the mains power socket to turn off the unit.
▶ Never open the housing of the appliance.

WARNING! RISK OF INJURY!
This appliance may be used by children of the age of 8 years or more and by persons with reduced physical, sensory or mental capabilities or lack of experience and/or knowledge if they are being supervised or have been instructed with regard to the safe use of the appliance and have understood the potential risks.
▶ Children must not play with the appliance.
- Cleaning and user maintenance must not be performed by children unless they are older than 8 years of age and are supervised. Children younger than 8 years must be kept away from the appliance and the power cable.
The appliance components can get hot during operation. Therefore, only touch the handles.
- Allow the appliance to cool down completely before cleaning or storing it.
▶ Take care when removing the cooked food! Both the appliance and the food will be extremely hot.
▶ Use the appliance only on a stable, non-slippery and level surface.
- Do not use an external timer switch or a separate remote control system to operate the appliance.

gution! Hot surface!
CAUTION - RISK OF FIRE!
- This appliance may not be used in close vicinity to flammable material.
▶ Do not leave the appliance unattended at any time when it is in use.
▶ Operate the appliance only on a heat resistant surface.
The appliance must always be supervised during use.
CAUTION - PROPERTY DAMAGE!
▶ To avoid damaging the non-stick coating on the appliance, remove your cooked foods only with a plastic or wooden spatula or some other suitable, non-metallic implement.
▶ Do not use abrasive cleansers or sharp objects for cleaning.
First use
NOTE
▶ Place the appliance on a stable, level and heat-resistant surface.
- Stack the two rings ⑤/⑧ on the hotplate ⑨ and push the cooking plate ⑥ between the two rings ⑤/⑧ (see section "Assembling the appliance").
■ Insert the plug into a mains power socket.
■ Allow the appliance to heat up for about 10 minutes.
NOTE
▶ During first use, you may notice a slight smell (there may also be minimal smoke). This is normal and dissipates after a short time. Ensure sufficient ventilation. For example, open a window.
■ Disconnect the plug and allow the appliance to cool down.
■ Clean the appliance as described in the section "Cleaning".
The appliance is now ready for use.
Preparing food
Assembling the appliance
1) Place the appliance on a level, stable and heat-resistant surface. Ensure that the mains socket is within easy reach.
2) Open the appliance using the lid handle ①.
3) Place the lower ring ⑧ on the hotplate ⑨. Ensure the holding pins ⑩ are pushed through the fixing holes ⑦ on the lower ring ⑧ and that this is held firmly in place.
4) Place the upper ring ⑤ on the lower ring ⑧. When doing so, ensure that this is sitting correctly with the fixing holes ④ on the holding pins ⑩ and that ring catches grip into the recesses on the lower ring ⑧.
5) Push the cooking plate ⑥ from the front into the slit which is formed between the two rings ⑤/⑧.

6) Now close the lid.
7) Insert the plug into a mains power socket. The red POWER control lamp lights up.
Adding foods to the appliance
Wait until the green READY control lamp ② lights up. The appliance has now heated up.

WARNING! RISK OF INJURY!
The rings 5/8, the cooking plate 6 and the hotplates 9/11 are very hot! Touch only the handles!
1) Pull the cooking plate ⑥ carefully out of the slit and place it to the side on a heat-resistant surface. When doing so, touch only the handle of the cooking plate ⑥.
2) Carefully remove the upper ring ⑤ and place this also on a heat-resistant surface.
3) Place a slice of bread in the lower ring ⑧ on the hotplate ⑨.
NOTE
▶ Due to the size of the rings, we recommend using sliced bread that is suitable for toasting.
If you like, you can put a little ham, vegetables or cheese on the bread before you place it in the appliance. However, make sure that the height of the ingredients does not exceed the upper edge of the ring ⑧, as otherwise the cooking plate ⑥ cannot be pushed in.
4) Place the upper ring ⑤ back on the lower ring ⑧.
5) Push the cooking plate ⑥ from the front into the slit.
6) Now break an egg onto the cooking plate ⑥. You can add a whole egg to the cooking plate ⑥ or whisk the egg beforehand to make scrambled egg.
7) Place another slice of bread over the egg.
8) Now close the lid.
Wait for around 4-5 minutes.
NOTE
The green READY control lamp ② may come on and go out several times during this process. This means that the appliance is maintaining the temperature and is reheating itself. This is not an appliance malfunction!
Removing food

WARNING! RISK OF INJURY!
The rings ⑤/⑧, the cooking plate ⑥ and the hotplates ⑨/⑪ are very hot! Touch only the handles!
CAUTION - PROPERTY DAMAGE!
▶ To avoid damaging the non-stick coating on the appliance, remove the toast slices only with a plastic or wooden spatula or some other suitable, non-metallic implement.
1) Remove the plug from the mains power socket. The red POWER control lamp ③ goes out.
2) Open the lid.
3) Grasp the handle of the cooking plate ⑥ and give it a slight shake to loosen the egg a little.
4) Remove the cooking plate ⑥ from the appliance.
5) Take hold of both rings ⑤/⑧ at the same time and lift them off the appliance.
6) Remove the toast from the hotplate ⑨.
Cleaning

WARNING! RISK OF ELECTRIC SHOCK
▶ Disconnect the plug from the mains power socket before cleaning the appliance.

Never immerse the appliance in water or other liquids! Otherwise there is a risk of an electric shock.

WARNING! RISK OF INJURY!
▶ Allow the appliance to cool sufficiently before cleaning it. Risk of burns!
CAUTION - PROPERTY DAMAGE!
▶ Do not use aggressive or abrasive cleaning agents. These can damage the surfaces of the appliance.
NOTE
▶ Do not wait too long to start with the cleaning. Wait until the appliance has cooled down sufficiently that you can touch it without the risk of being burnt. Then the food residue can be removed more easily.
■ Clean the outside of the appliance using a dry or a slightly moistened cloth.
Wipe the hotplates 9/11 with a damp cloth. For stubborn soiling use a mild detergent on the cloth. Afterwards, wipe off with a cloth moistened only with water to ensure that no detergent remains on the appliance.
For cooked-on residues, lay the damp cloth on the affected area for a while to soften the residues. After a short time the residues can be removed.
- Clean the two rings ⑤/⑧ and the cooking plate ⑥ in warm water with a little mild detergent. Rinse all the parts off using clean water.
■ Ensure that all components and the appliance itself are completely dry before the next use.
NOTE
The two rings ⑤/⑧ and the cooking plate ⑥ are dishwasher-safe.
Storage
■ Clean the appliance as described in the section "Cleaning".
■ Assemble everything as described in the chapter "Assembling the appliance".
■ Store the appliance in a clean, dry location.
Troubleshooting
| Malfunction Cause Remedy | ||
| The appliance is not working. | The plug is not inserted into a mains power socket. | Connect the plug to the power supply. |
| The appliance is defective. | Contact the Customer Service department. | |
| The ingredients are not cooked. | Cooking times can vary depending on the type and quantity of the ingredients. | Increase the cooking time until you are happy with result. |
Recipes
Cucumber salad with salmon for 2 sandwiches
Ingredients:
◆ 4 slices of sandwich bread
◆ 2 eggs, size L
♦ ½ salad cucumber
◆ 2 slices of smoked salmon
◆ 1 tbsp. balsamic vinegar
♦ Cream cheese (of your preference, e.g. goat cream cheese)
◆ A little cress
Salt
- Pepper
◆ Sugar
1) Pre-heat the appliance.
2) Peel the cucumber with a potato peeler and slice it into fine strips. Scrape out the middle with the seeds. Mix the strips with 1/4 tsp. of salt and allow them to steep. Squeeze out the cucumber pieces and place them in a bowl. Mix the strips with balsamic vinegar, salt, pepper and a pinch of sugar.
3) Spread cream cheese on the bread and add a little of the cucumber salad. Lay a slice of smoked salmon on the top and garnish with a little cress.
4) Wait until the green READY control lamp ② lights up. Open the lid. Remove the upper ring ⑤ and the cooking plate ⑥.
5) Place the prepared piece of bread in the lower ring ⑧. Place the upper ring ⑤ and the cooking plate ⑥ back in the appliance.
6) Add the egg to the upper ring ⑤. Season with a little salt and pepper. Place the second slice of bread on the egg and close the lid. Let the sandwich toast/cook for about 4–5 minutes.
7) Grasp the handle of the cooking plate ⑥ and give it a shake to loosen the egg a little. Open the lid and remove the cooking plate ⑥ from the appliance. This causes the egg and the upper slice to fall onto the lower slice with the topping.
8) Pull the rings 5/8 out of the appliance and then the finished sandwich.
Guacamole with salsa for 2–3 sandwiches Ingredients:
◆ 4 slices of sandwich bread
◆ 2 eggs, size L
◆ 2 slices of cheese
◆ 1 avocado
◆ 1 tomato
◆ A splash of lemon juice
◆ 1 clove of garlic (crushed)
◆ 1 tsp. plain yoghurt
◆ 1 tsp. salsa
Salt
- Pepper
1) Pre-heat the appliance.
2) Halve the avocado and remove the stone. Use a spoon to scrape out the fruit pulp. Mash it into a fine puree.
3) Core the tomatoes and chop them finely. Mix them with the lemon juice, garlic and yoghurt. Add the avocado puree and stir. Season with salt and pepper.
4) Spread one slice of bread with guacamole and salsa. Cover this with a slice of cheese.
5) Wait until the green READY control lamp ② lights up. Open the lid. Remove the upper ring ⑤ and the cooking plate ⑥.
6) Place the prepared piece of bread in the lower ring ⑧. Place the upper ring ⑤ and the cooking plate ⑥ back in the appliance.
7) Add the egg to the upper ring ⑤. Season with a little salt and pepper. Place the second slice of bread on the egg and close the lid. Let the sandwich toast/cook for about 4-5 minutes.
8) Grasp the handle of the cooking plate ⑥ and give it a shake to loosen the egg a little. Open the lid and remove the cooking plate ⑥ from the appliance. This causes the egg and the upper slice to fall onto the lower slice with the topping.
9) Pull the rings ⑤/⑧ out of the appliance and then the finished sandwich.
Hawaiian toast with egg for 2 sandwiches Ingredients:
◆ 4 slices of sandwich bread
◆ 2 eggs, size L
◆ 2 slices of cheese
◆ Pineapple (fresh or tinned)
◆ 2 slices of cooked ham
◆ 4 tsp. cranberries from a jar
1) Pre-heat the appliance. 2) Add a slice of ham to one slice of bread. Add 2 tsp. of cranberries to the ham.
3) Chop the pineapple (drain tinned pineapple thoroughly beforehand) and spread the pieces onto the cranberries. Lay another slice of cheese over the top.
4) Wait until the green READY control lamp ② lights up. Open the lid. Remove the upper ring ⑤ and the cooking plate ⑥.
5) Place the prepared piece of bread in the lower ring ⑧. Place the upper ring ⑤ and the cooking plate ⑥ back in the appliance.
6) Add the egg to the upper ring ⑤. Season with a little salt and pepper. Place the second slice of bread on the egg and close the lid. Let the sandwich toast/cook for about 4-5 minutes.
7) Grasp the handle of the cooking plate ⑥ and give it a shake to loosen the egg a little. Open the lid and remove the cooking plate ⑥ from the appliance. This causes the egg and the upper slice to fall onto the lower slice with the topping.
8) Pull the rings ⑤/⑧ out of the appliance and then the finished sandwich.
Tuna and tomato for 2-3 sandwiches
Ingredients:
◆ 4 slices of sandwich bread
◆ 2 eggs, size L
◆ 1 tin of tuna in brine
◆ 3-4 tbsp. of crème fraîche
◆ 1 shallot
◆ A splash of lemon juice
◆ Frozen parsley as required
Salt
♦ Pepper
◆ 9 cherry tomatoes
1) Pre-heat the appliance.
2) Drain the tuna well and mash it with a fork.
3) Finely dice the shallot and stir it together with the crème fraîche and parsley into the tuna. Season the tuna mix with salt and pepper. Add a dash of lemon juice to the tuna mix and allow it to steep a little.
4) Wash and halve the cherry tomatoes. Spread the tuna dip onto a slice of bread and place the tomatoes onto this with the cut surface facing downwards.
5) Wait until the green READY control lamp ② lights up. Open the lid. Remove the upper ring ⑤ and the cooking plate ⑥.
6) Place the prepared piece of bread in the lower ring ⑧. Place the upper ring ⑤ and the cooking plate ⑥ back in the appliance.
7) Add the egg to the upper ring ⑤. Season with a little salt and pepper. Place the second slice of bread on the egg and close the lid. Let the sandwich toast/cook for about 4-5 minutes.
8) Grasp the handle of the cooking plate ⑥ and give it a shake to loosen the egg a little. Open the lid and remove the cooking plate ⑥ from the appliance. This causes the egg and the upper slice to fall onto the lower slice with the topping.
9) Pull the rings ⑤/⑧ out of the appliance and then the finished sandwich.
Disposal

Never dispose of the appliance in your normal domestic waste. This product is subject to the provisions of European Directive 2012/19/EU. (Waste Electrical and Electronic Equipment).
Dispose of the appliance via an approved waste disposal company or your municipal waste disposal facility. Please observe the currently applicable regulations. Please contact your waste disposal facility if you are in any doubt.
This appliance has a 3-year warranty valid from the date of purchase. If this product has any faults, you, the buyer, have certain statutory rights. Your statutory rights are not restricted in any way by the warranty described below.
Warranty conditions
The validity period of the warranty starts from the date of purchase. Please keep your original receipt in a safe place. This document will be required as proof of purchase.
If any material or production fault occurs within three years of the date of purchase of the product, we will either repair or replace the product for you at our discretion. This warranty service is dependent on you presenting the defective appliance and the proof of purchase (receipt) and a short written description of the fault and its time of occurrence.
If the defect is covered by the warranty, your product will either be repaired or replaced by us. The repair or replacement of a product does not signify the beginning of a new warranty period.
Warranty period and statutory claims for defects
The warranty period is not prolonged by repairs effected under the warranty. This also applies to replaced and repaired components. Any damage and defects present at the time of purchase must be reported immediately after unpacking. Repairs carried out after expiry of the warranty period shall be subject to a fee.
Scope of the warranty
This appliance has been manufactured in accordance with strict quality guidelines and inspected meticulously prior to delivery.
The warranty covers material faults or production faults. The warranty does not extend to product parts subject to normal wear and tear or fragile parts such as switches, batteries, baking moulds or parts made of glass.
The warranty does not apply if the product has been damaged, improperly used or improperly maintained. The directions in the operating instructions for the product regarding proper use of the product are to be strictly followed. Uses and actions that are discouraged in the operating instructions or which are warned against must be avoided.
This product is intended solely for private use and not for commercial purposes. The warranty shall be deemed void in cases of misuse or improper handling, use of force and modifications / repairs which have not been carried out by one of our authorised Service centres.
Warranty claim procedure
To ensure quick processing of your case, please observe the following instructions:
■ Please have the till receipt and the item number (e.g. IAN 12345) available as proof of purchase.
■ You will find the item number on the type plate, an engraving on the front page of the instructions (bottom left), or as a sticker on the rear or bottom of the appliance.
If functional or other defects occur, please contact the service department listed either by telephone or by e-mail.
■ You can return a defective product to us free of charge to the service address that will be provided to you. Ensure that you enclose the proof of purchase (till receipt) and information about what the defect is and when it occurred.

You can download these instructions along with many other manuals, product videos and software on www.lidl-service.com.
Service
GB Service Great Britain
Tel.: 0871 5000 720 (£ 0.10/Min.)
E-Mail: kompernass@lidl.co.uk
MT Service Malta
Tel.: 80062230
E-Mail: kompernass@lidl.com.mt
IAN 285921
Importer
Please note that the following address is not the service address. Please use the service address provided in the operating instructions.
KOMPERNASS HANDELS GMBH
BURGSTRASSE 21
DE-44867 BOCHUM
GERMANY
www.kompernass.com
Inhaltsverzeichnis
Einführung 38
Urheberrecht 38


KOMPERNASS HANDELS GMBH
BURGSTRASSE 21
DE-44867 BOCHUM
DEUTSCHLAND
www.kompernass.com
KOMPERNASS HANDELS GMBH
BURGSTRASSE 21
DE-44867 BOCHUM
GERMANY
www.kompernass.com


- TOSTIERA SFSM 850 A1
- IT MT
- DE AT CH
- INDICE
- INTRODUZIONE 2
- CONTENTS
- INTRODUCTION 20
- PACKAGE CONTENTS 21
- APPLIANCE DESCRIPTION 22
- TECHNICAL DATA 22
- SAFETY INFORMATION 23
- FIRST USE 25
- PREPARING FOOD 26
- CLEANING 29
- STORAGE 30
- TROUBLESHOOTING 30
- RECIPES 30
- DISPOSAL 34
- KOMPERNASS HANDELS GMBH WARRANTY 34
- INTRODUCTION
- COPYRIGHT
- LIMITATION OF LIABILITY
- INTENDED USE
- PACKAGE CONTENTS
- NOTE
- DISPOSAL OF THE PACKAGING
- APPLIANCE DESCRIPTION
- FIGURE A
- FIGURE B
- TECHNICAL DATA
- SAFETY INFORMATION
- WARNING! RISK OF ELECTRIC SHOCK
- WARNING! RISK OF INJURY
- CAUTION - RISK OF FIRE
- CAUTION - PROPERTY DAMAGE
- FIRST USE
- PREPARING FOOD
- ASSEMBLING THE APPLIANCE
- ADDING FOODS TO THE APPLIANCE
- REMOVING FOOD
- CLEANING
- STORAGE
- TROUBLESHOOTING
- RECIPES
- CUCUMBER SALAD WITH SALMON FOR 2 SANDWICHES
- INGREDIENTS
- GUACAMOLE WITH SALSA FOR 2–3 SANDWICHES INGREDIENTS
- HAWAIIAN TOAST WITH EGG FOR 2 SANDWICHES INGREDIENTS
- TUNA AND TOMATO FOR 2-3 SANDWICHES
- DISPOSAL
- WARRANTY CONDITIONS
- WARRANTY PERIOD AND STATUTORY CLAIMS FOR DEFECTS
- SCOPE OF THE WARRANTY
- WARRANTY CLAIM PROCEDURE
- SERVICE
- IMPORTER
- INHALTSVERZEICHNIS
- EINFÜHRUNG 38
Brand : SILVERCREST
Model : SFSM 850 A1
Category : Grill